Outhouse
I built this outhouse for beside our barn. My first large project and I’m really pleased with how it turned out!
Followed the original plan except below changes:
- Only one seat to make it more spacious
- Made 2 groups of 3 planks each and connected both using hinges so it can cover the end without seat
- Stapled Hardware Cloth with landscape fabric
Cedar wood was the most expensive thing in this project, since I would want it to last long.
Liked the Griffen Reclaimed look Media console, but not the $1099 price tag that came with it! LOL
So with $100 and 3 hours of work, BAM!
70L x 15W x 30H
Thu, 12/08/2016 - 11:46
Great work! I used your piece as inspiration for a similair project that I added a fire place to!
http://www.rachovation.com/single-post/2016/12/01/Fire-Place-Console
Used Minwax stain in Dark Walnut and Coastal Gray chalk paint from Rustoleum
I built this based on the apothecary console plans but with the modifications that VLilly made for the Altered Apothecary Media Console. Very happy with how it turned out! Thank you Ana for sharing the plans!
I used redwood lumber, 2x4s and 1x6s only. I wanted the bench to be a little taller so I used 2x4x10s for the legs to make work surface 38” high and total height 66”. To get the most out of the 8’ 1x6s I made the bench 48” wide. I also had to adjust the depth since I did not use 1x4s. And finally, I sanded the 1x6s because they were rough sawn.
Very fun project! Once I figured out the adjusted cut list the whole project came together in a matter of a few hours.
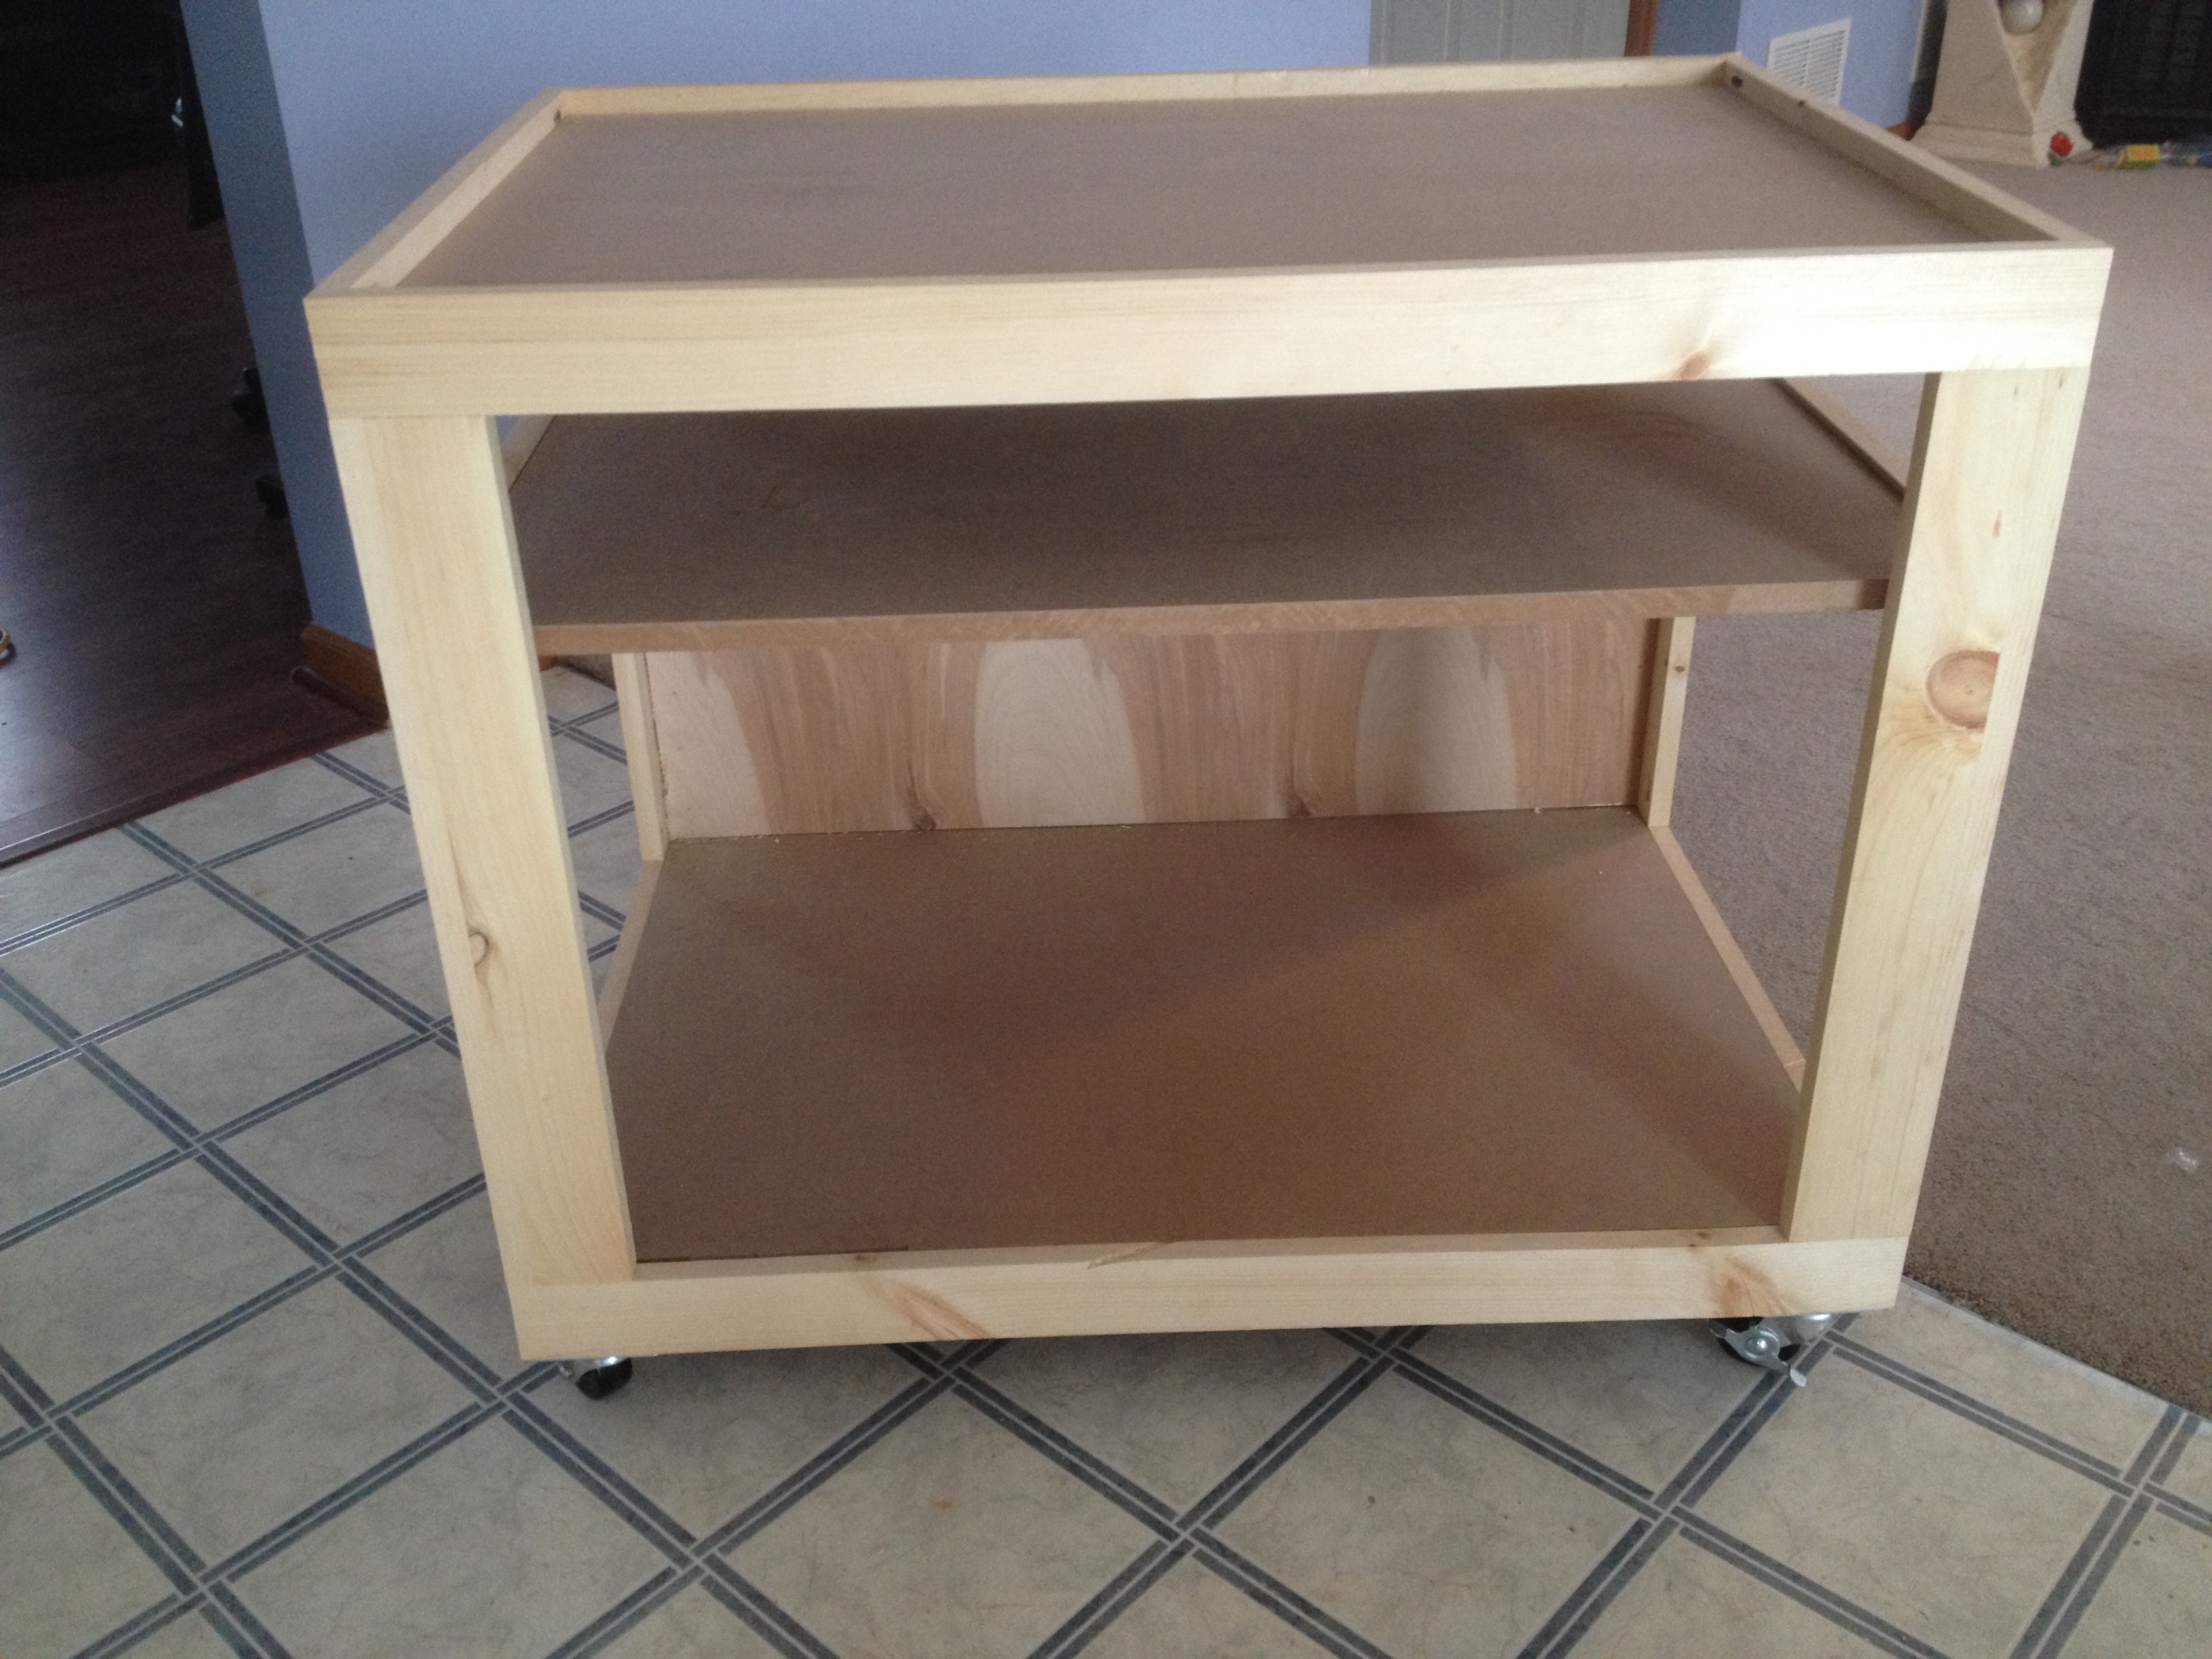
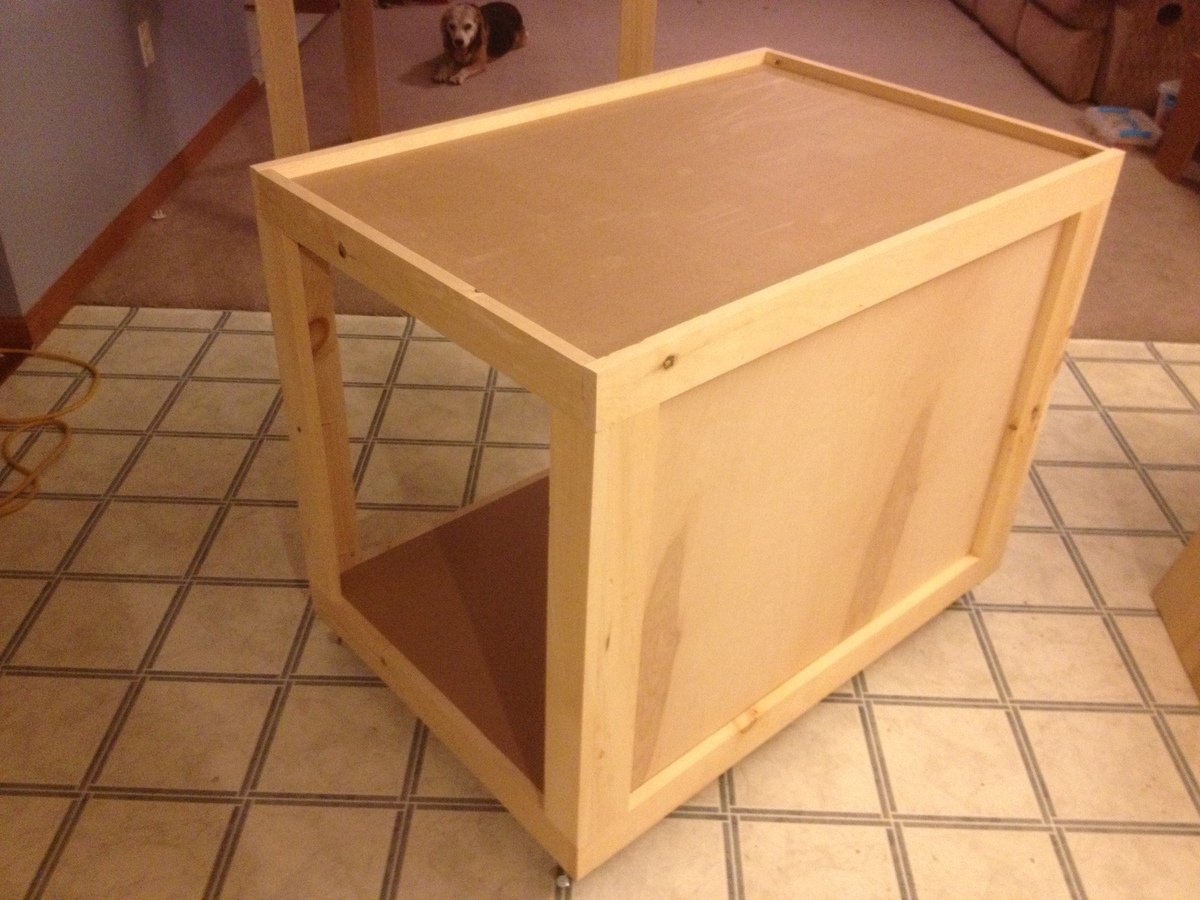
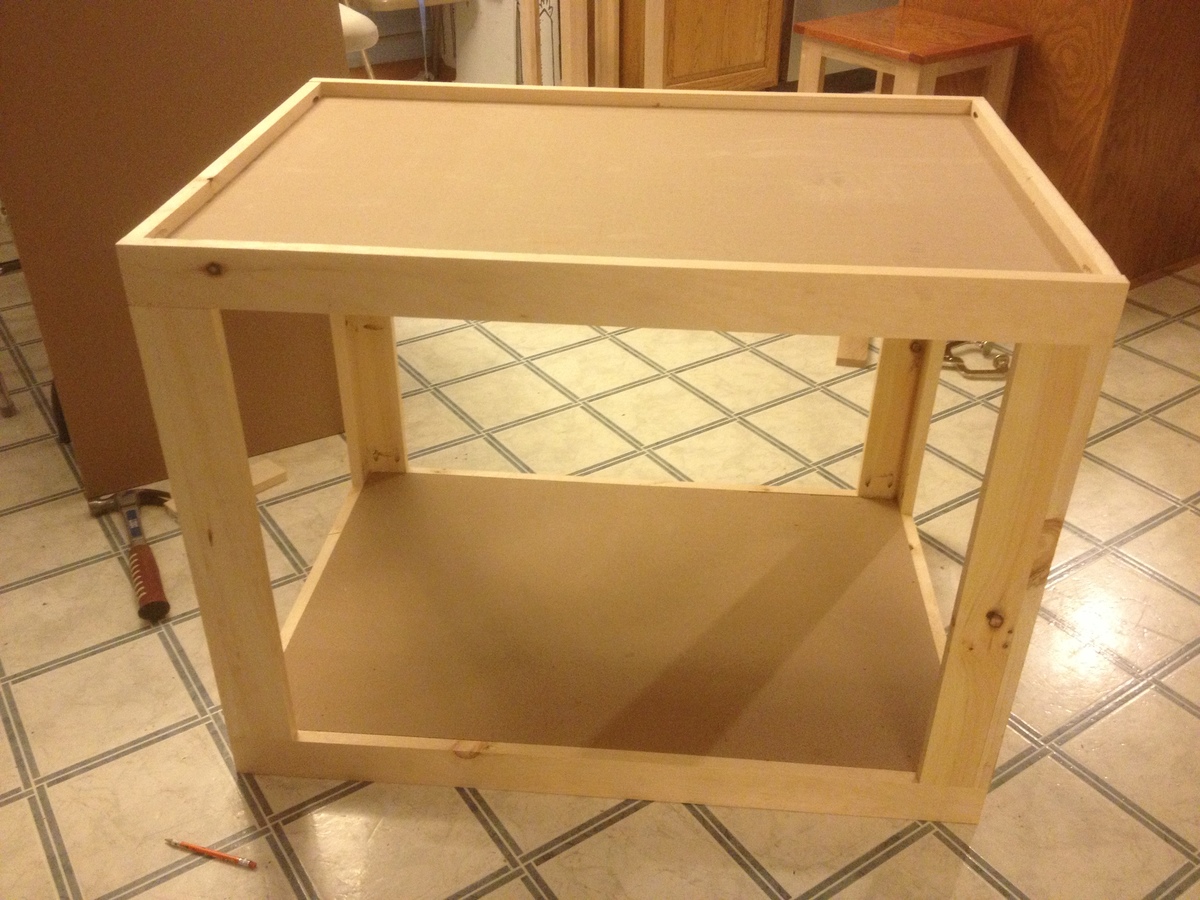
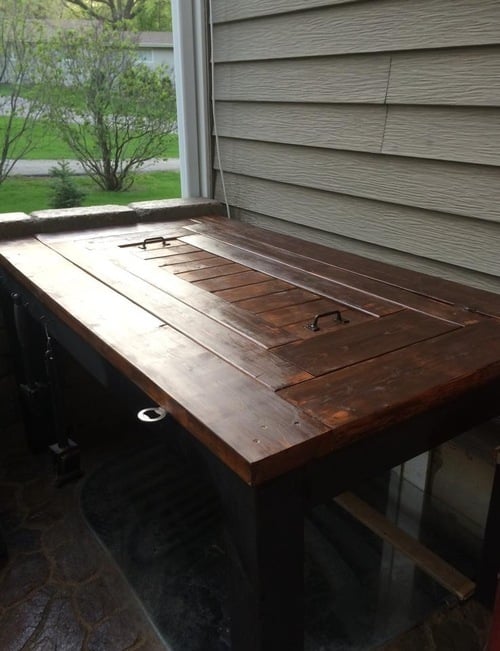
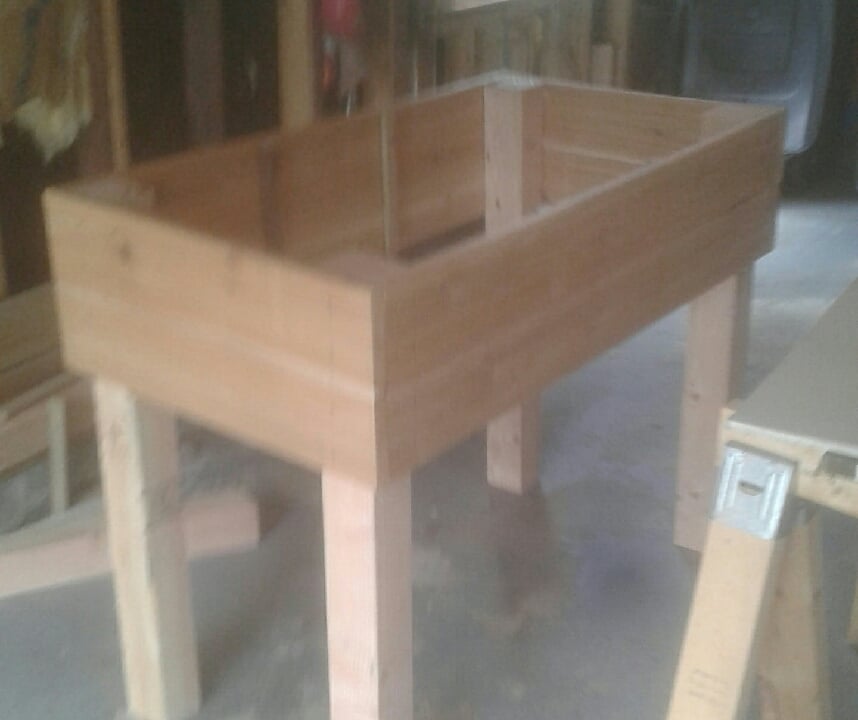
After browsing through forums I came up with this idea...a versatile shop cart that I can insert my kreg jig and miter saw into...a stable base at a great working height.
I created this design in sketchup as well and will work on posting it as a plan if people are interested.
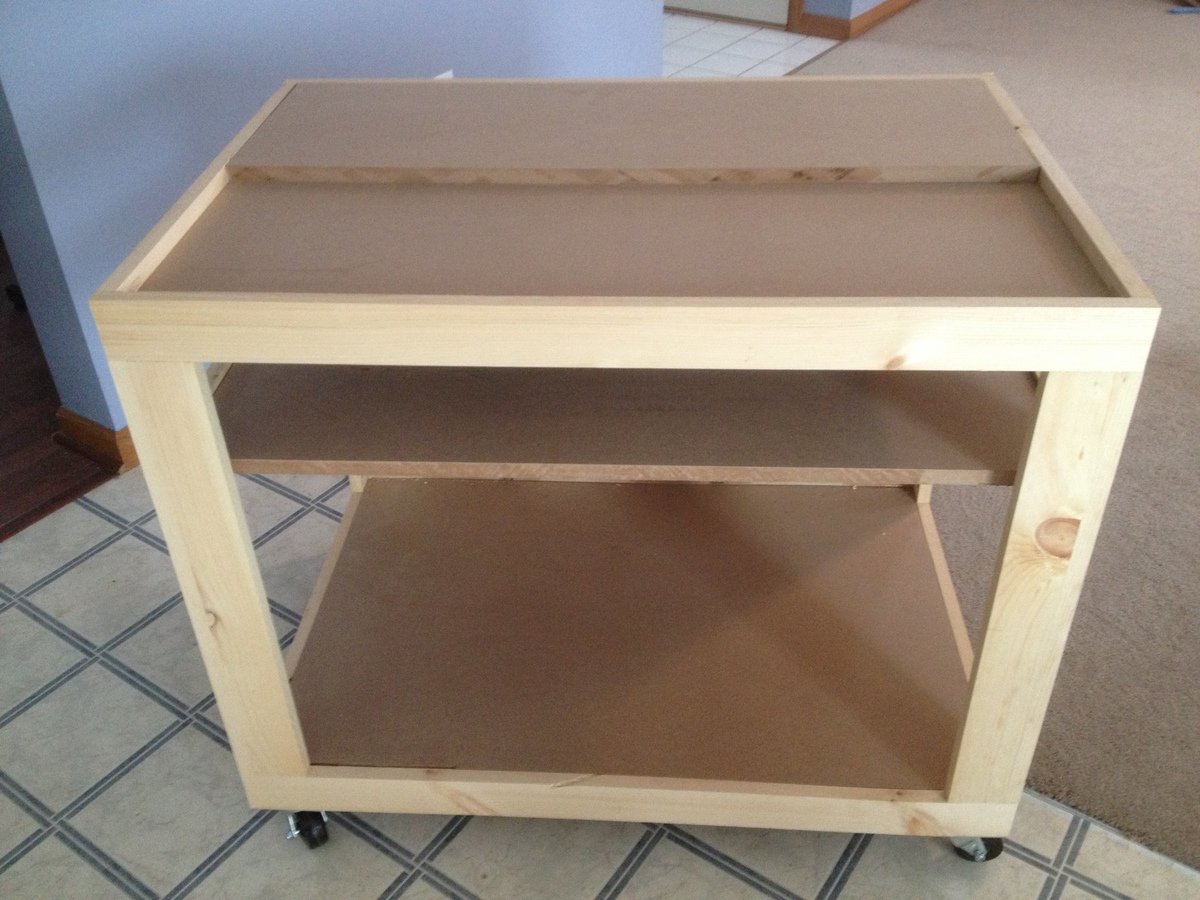
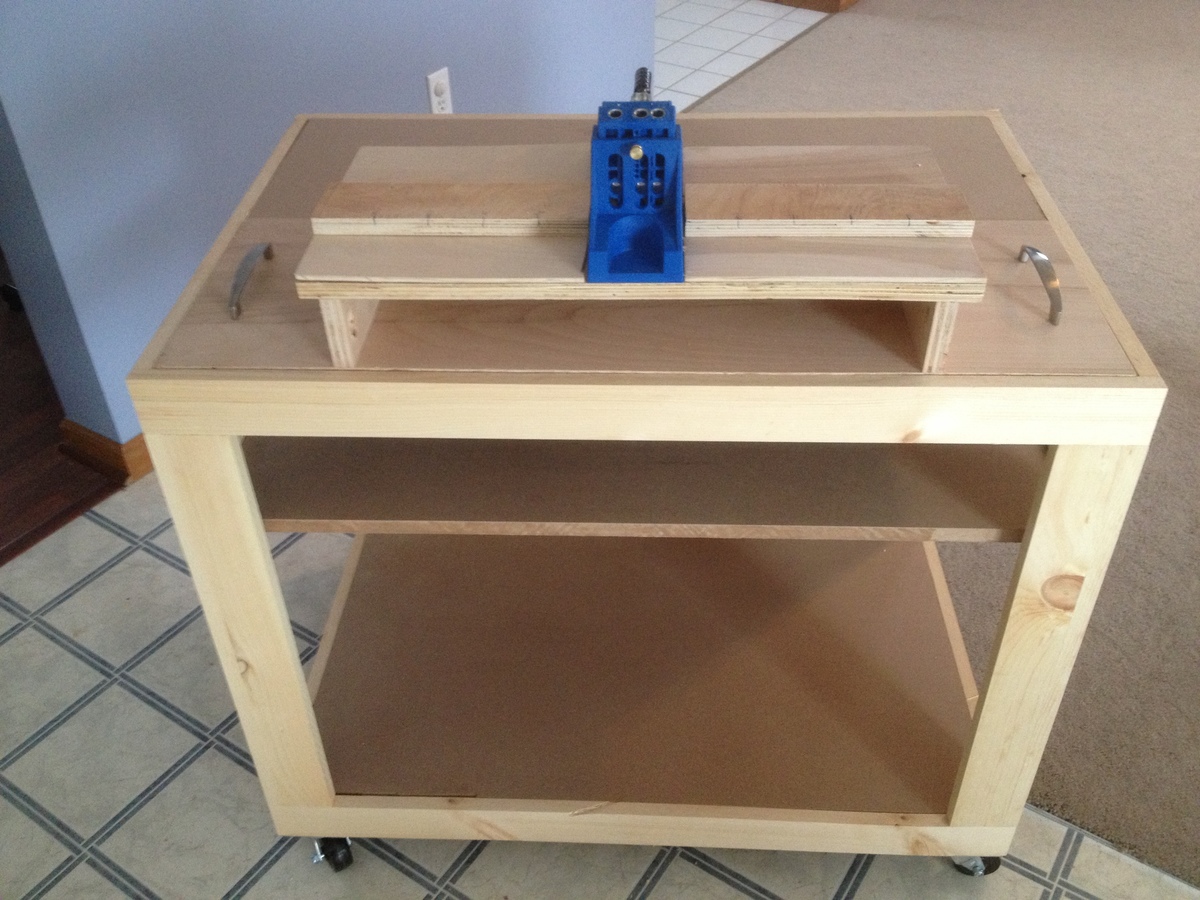
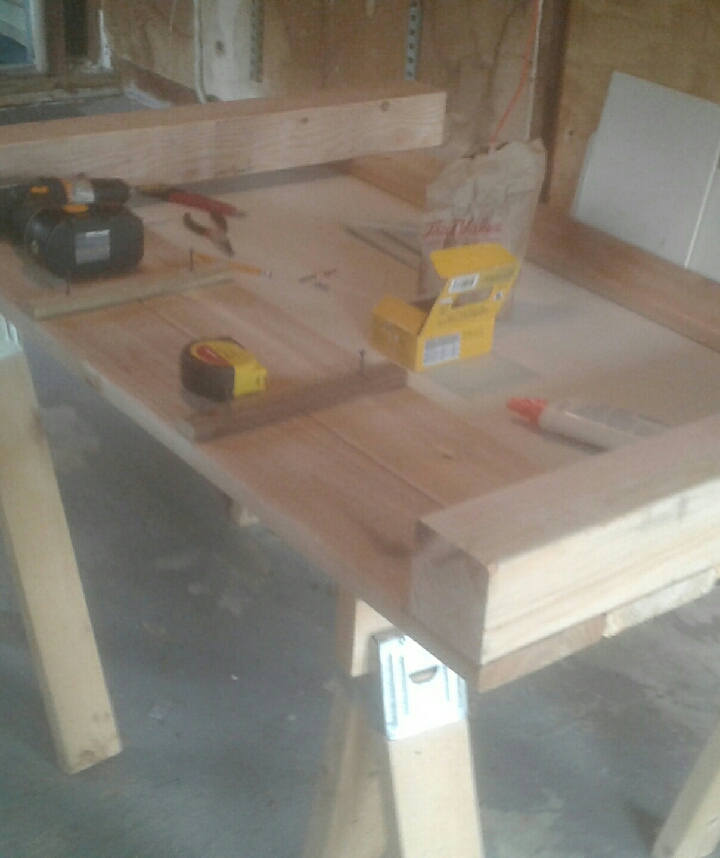
basically, the top is inset 3/4" to make room for the inserts. I created a work table insert (well two I split in half, so the kreg insert can take up the front half if I wanted to insert that.
Then I made the kreg jig insert
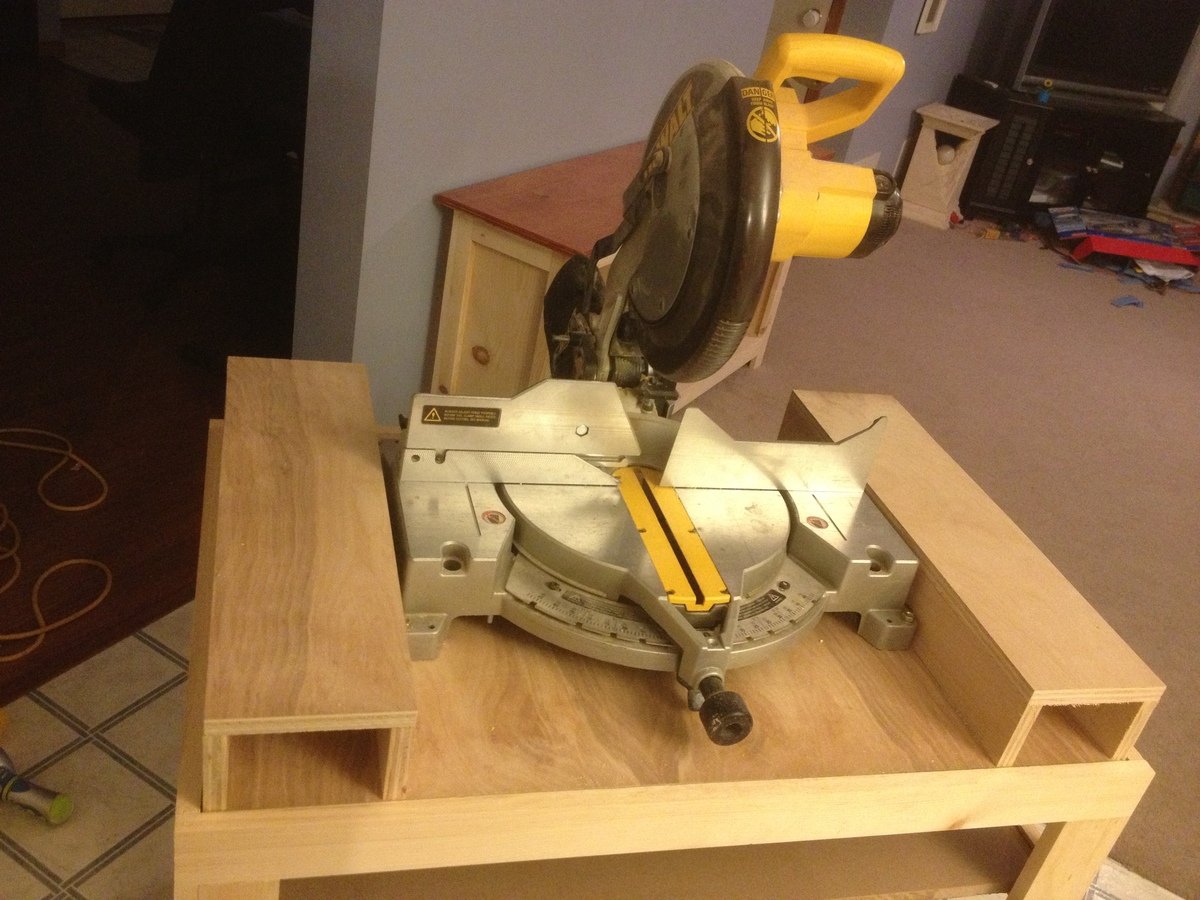
and the Miter saw insert
let me tell you...this came in handy right away as each of those inserts I made can be used without the cart as well and both inserts work tremendously!
I am really really happy with this and it is so useful. Started making the loft bed playhouse last night and the miter say and kreg jig were extremely useful at a good working height.
Mon, 02/25/2013 - 08:07
My intention for the top shelf is to hold small tools that I am working with while using the cart and the bottom is to store the cut pieces of lumber I am using for the project
Mon, 02/25/2013 - 10:33
Please post the plans. This thing would make a great shop cart or miter saw stand.
I have one other suggestion: you could also use it as a small assembly table. You have a 3/4" inset. Stick a piece of plywood inside the exactly fits inside. Then screw a larger piece of plywood to that one. (DON"T screw it into the top of the cart.) The larger sheet of plywood would overhand the shop cart edges by maybe a foot on each size, so you'd have a "small" mobile assembly table that might 3x4 feet or 3x5 feet across at the top.
Mon, 02/25/2013 - 11:20
I would also like to see the plans for this cart. It looks nice and compact and versatile.
Mon, 02/25/2013 - 12:10
@ david...I did make a workbench type top for it as well, just didn't post a pic of that.
I will get the plans together for this then and post it for everyone...I enjoy sharing with everyone so we all can learn and make quality things. I'll start working on that tonight.
Tue, 02/26/2013 - 10:55
here is the link to the plans
http://ana-white.com/2013/02/plans/versatile-shop-cart-workbench-inserts
Thanks for the inspiration! This was my first full blown creation and my wife loves it. Cannot wait to do more!
A few weeks ago I was getting ready for work and was excavating my shoe collection in search of my brown wingtips. Although I had managed to curate a pretty respectable collection of dress shirts, slacks, suits, and shoes, I still relied on a cheap coated wire shoe rack that could likely double as a grilling grate for my bbq. This was amplified by the fact that is was meant for about half the number of shoes I was using it for. I know, first world problems. It’s tough out there. So, I decided to build a two piece unit that I could stack atop one another or use it side by side in the future.
Tue, 03/05/2013 - 09:12
That looks great! I need something like this in my front entry closet. I could probably use some in the master closet too. Thanks for posting!
Hello There!
This was my attempt at the Family Tree Nesting Birds sign that Ana made. I ended up painting everything instead of doing the foam for the leaves, but I just love how it turned out! I used old pallet wood instead of new lumber and gave it a really good sanding before staining and painting.
Gave it to my brother and sister-in-law for Christmas, and it was a huge hit!
Thanks Ana!
I changed the plans a little bit to add on the extra shelf on top as well as making the shelves an inch narrower than the plans. The project was actually pretty easy and really only took me about a days worth of work.
Here’s another fun game to play for all ages, especially for kids. It’s called a Kerplunk Game. The original Kerplunk game is small, made from plastic, and is mainly for indoor use. But to make it more interesting and to encourage kids to spend more time outdoors, I’ve built a Giant DIY Kerplunk Game with a wire mesh screen. This is a great backyard game for any occasion or a party.
See my website for additional pictures and how I've built it, TheDIYPlan.com
I made this in a weekend to add seating to our back patio area -- I AM IN LOVE WITH IT!
The whole family hangs out here, it has given us a great place to spend outdoors during lockdown.
I picked up the cushions on craigslist, so the cost of the entire project was kept super low.
I will be staining and sealing it soon, I am so happy with how it turned out! Thanks Ana :D
I slightly modified the project to suit my wife's request. One key note: Make sure the main frame pieces mirror each other. I missed that and had two identical pieces outlined in Step 1, versus where the inside aprons actually face each other to allow for the top and bottom rails to be secured to the frame.
Thompson's Clear stain protects the wood; one coat after cutting the pieces and a second one for good measure after assembly.
Well...this was pretty much all done by me.
I am really not liking how many bad boards there are at the store. It takes forever to find a decent board. I had some of my x12s measuring closer to 11 (yes I know they aren't 12 inches).
The door is a little wonky but if it bothers me too much I will just replace it with a curtain on a tension rod.
I love the yellow and I am very proud of myself :)
I didn't have a Kreg jig (too expensive for us right now) but it would definitely have been helpful...
Sun, 03/31/2013 - 07:44
I run into that problem as well!!! And with two kiddos at my hip it gets more annoying to sift thru 5 boards before a good one comes up. But it's all worth it. I made this as well and and the magnetic closure made all the difference. This is really nice by the way. The color is fab!
I used the Ana's Cedar Planter plans and flipped it, placed a bucket with cement inside to support umbrella and made a simple table top for drinks. Hope you like it ✌🏾
My husband wanted a table next to the grill and he wasn't going to build one after working on our deck for 2 weeks. I thought to myself maybe I could build one that had a built-in cooler. Of course, my source of inspiration came from Ana White. I had to detour a little from her exact plan to accommodate our need. We had a basement egress window coming right at that corner near the grill so we would need a table that cover that area perfectly to make a good use of space, hence the measurements and plan had to be altered a bit. Ana White’s plan has 2 built-ins, ours has only 1. It turned out great and we enjoyed it ever since. Now if only the weather just got warmer!
Used 36 inch legs instead of 32".
Also used two 6x1 inch boards for each side of the box.
I have build several of these rustic desks. I left the "X" off of this one as I had trouble getting it to fit properly. My last desk I had no issues but not this time. I use MinWax "Provincial" stain followed by three coats of Varathan 3X glossy finish on the top and two everywhere else. I also added a cross piece between the two end sections to better secure the top to.
I have a small booth at a local Outdoor Market & a client asked if I had any outdoor tables - she needed some for an upcoming party. I tried convincing her that a potting bench would be perfect (since Ana already had plans for that), but she wanted something a little different. She shared a picture of a "Faraday" console table by Pottery Barn, so I used that as my inspiration. I opted for a counter-height table vs. a table height, but both can be easily achieved using the same size balusters, just cut accordingly. I did have a hard time finding "chunky" balusters with a "flat" section on both the top and bottom. I didn't want to use pre-made legs because they are too pricey. At both Orange and Blue they had "skinny" balusters, but at the Orange near my home I found 1 thicker baluster. I had to go to another store to find more in stock, so supplies may vary in your area. The balusters were less than $3 each. Ana was so kind to create plans and I hope you enjoy your table as much as my client enjoyed hers!
The plans were very easy to follow for non avid woodworkers. We decided to upholster the seat on the bench.
Tue, 10/05/2021 - 10:43
Looks professionally done and well built, the upholstered bench is a beautiful addition!
Comments
Ana White Admin
Sat, 10/17/2020 - 17:17
Nice work!
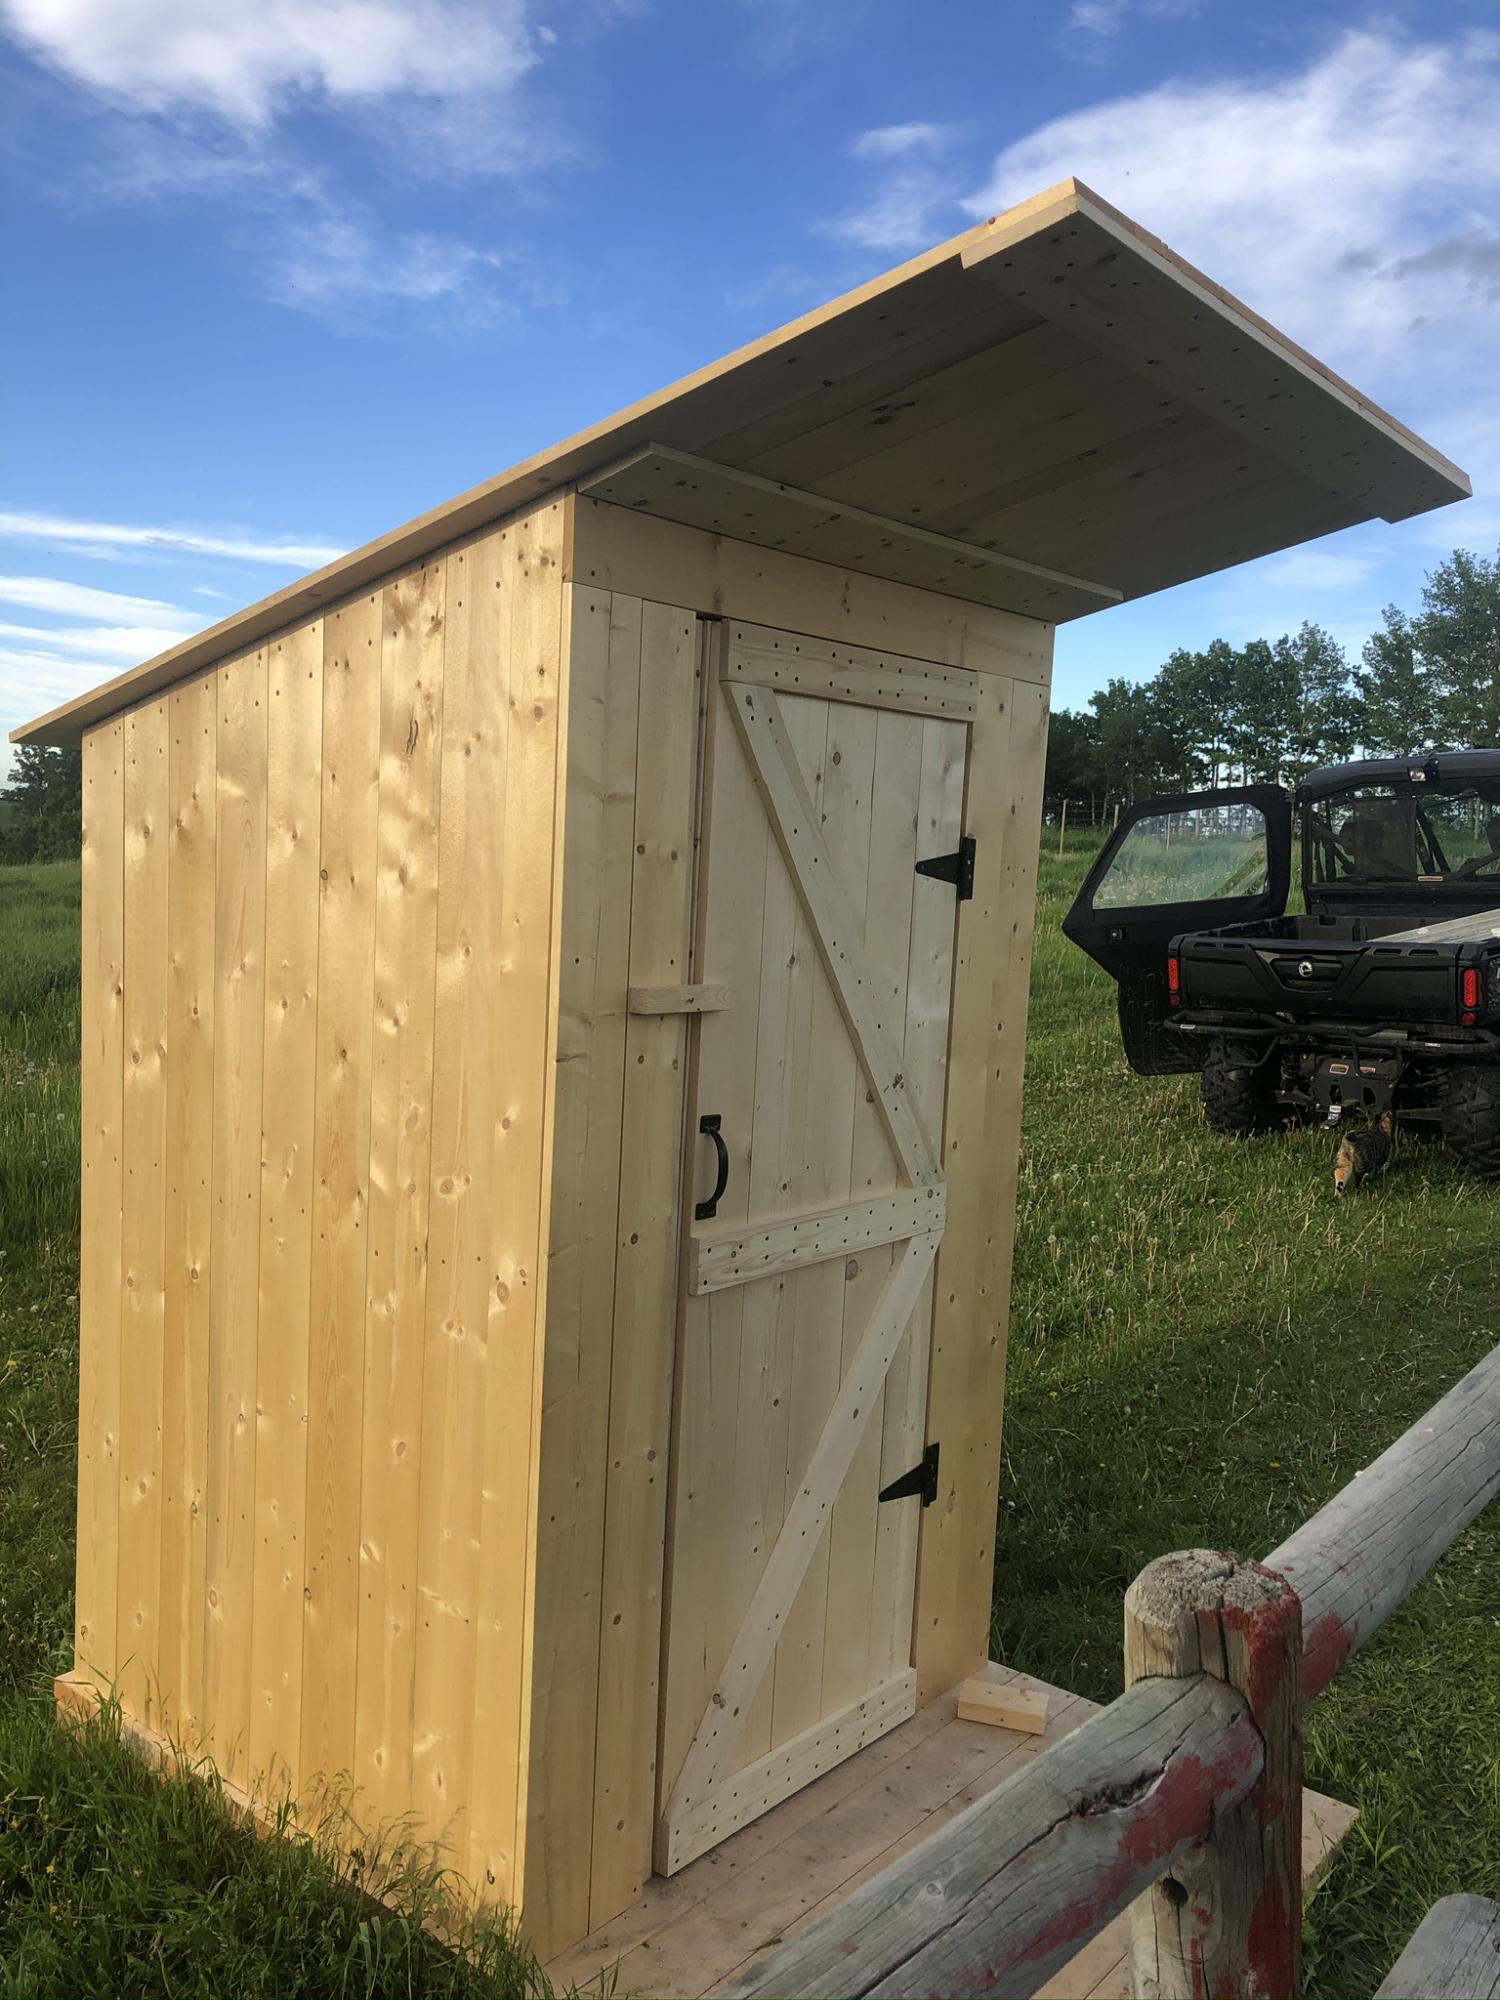
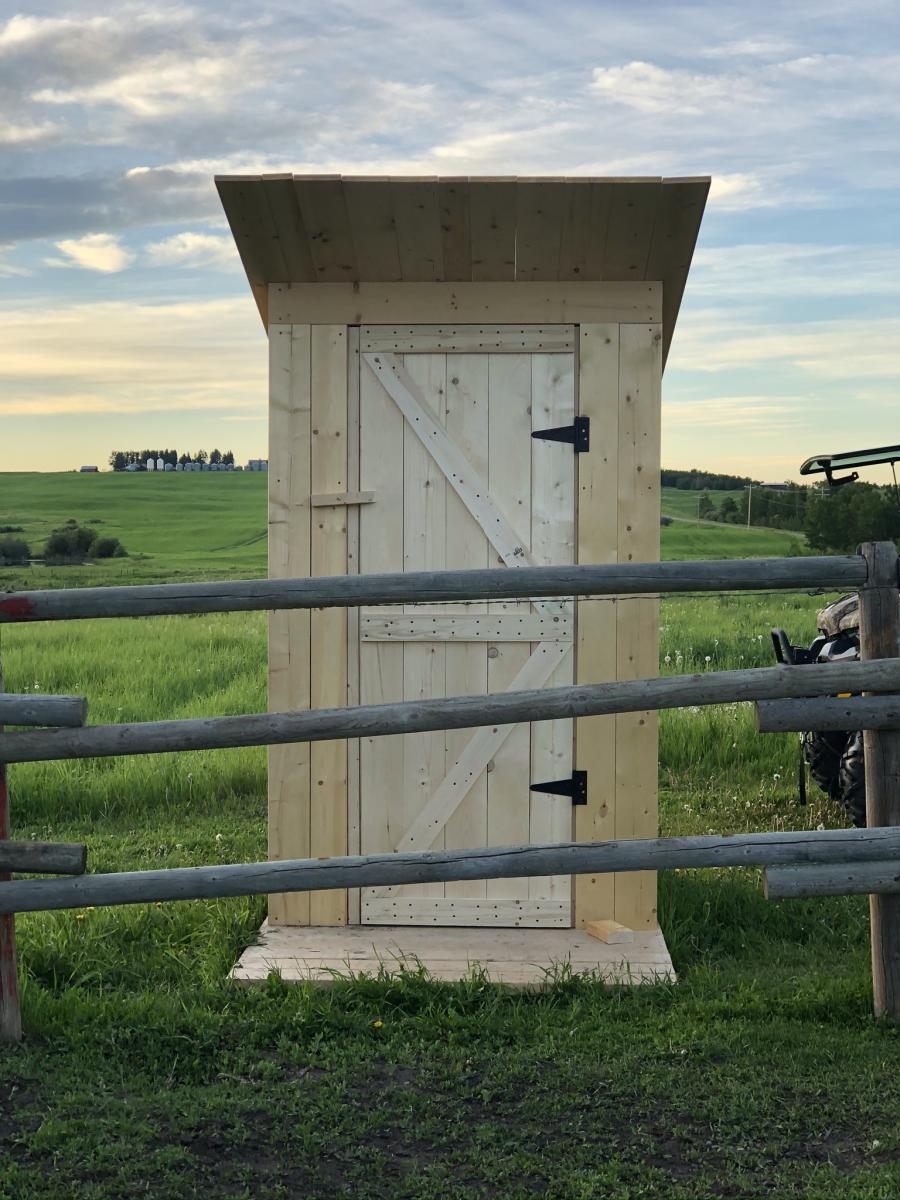
Yes, outhouses can be pretty too!