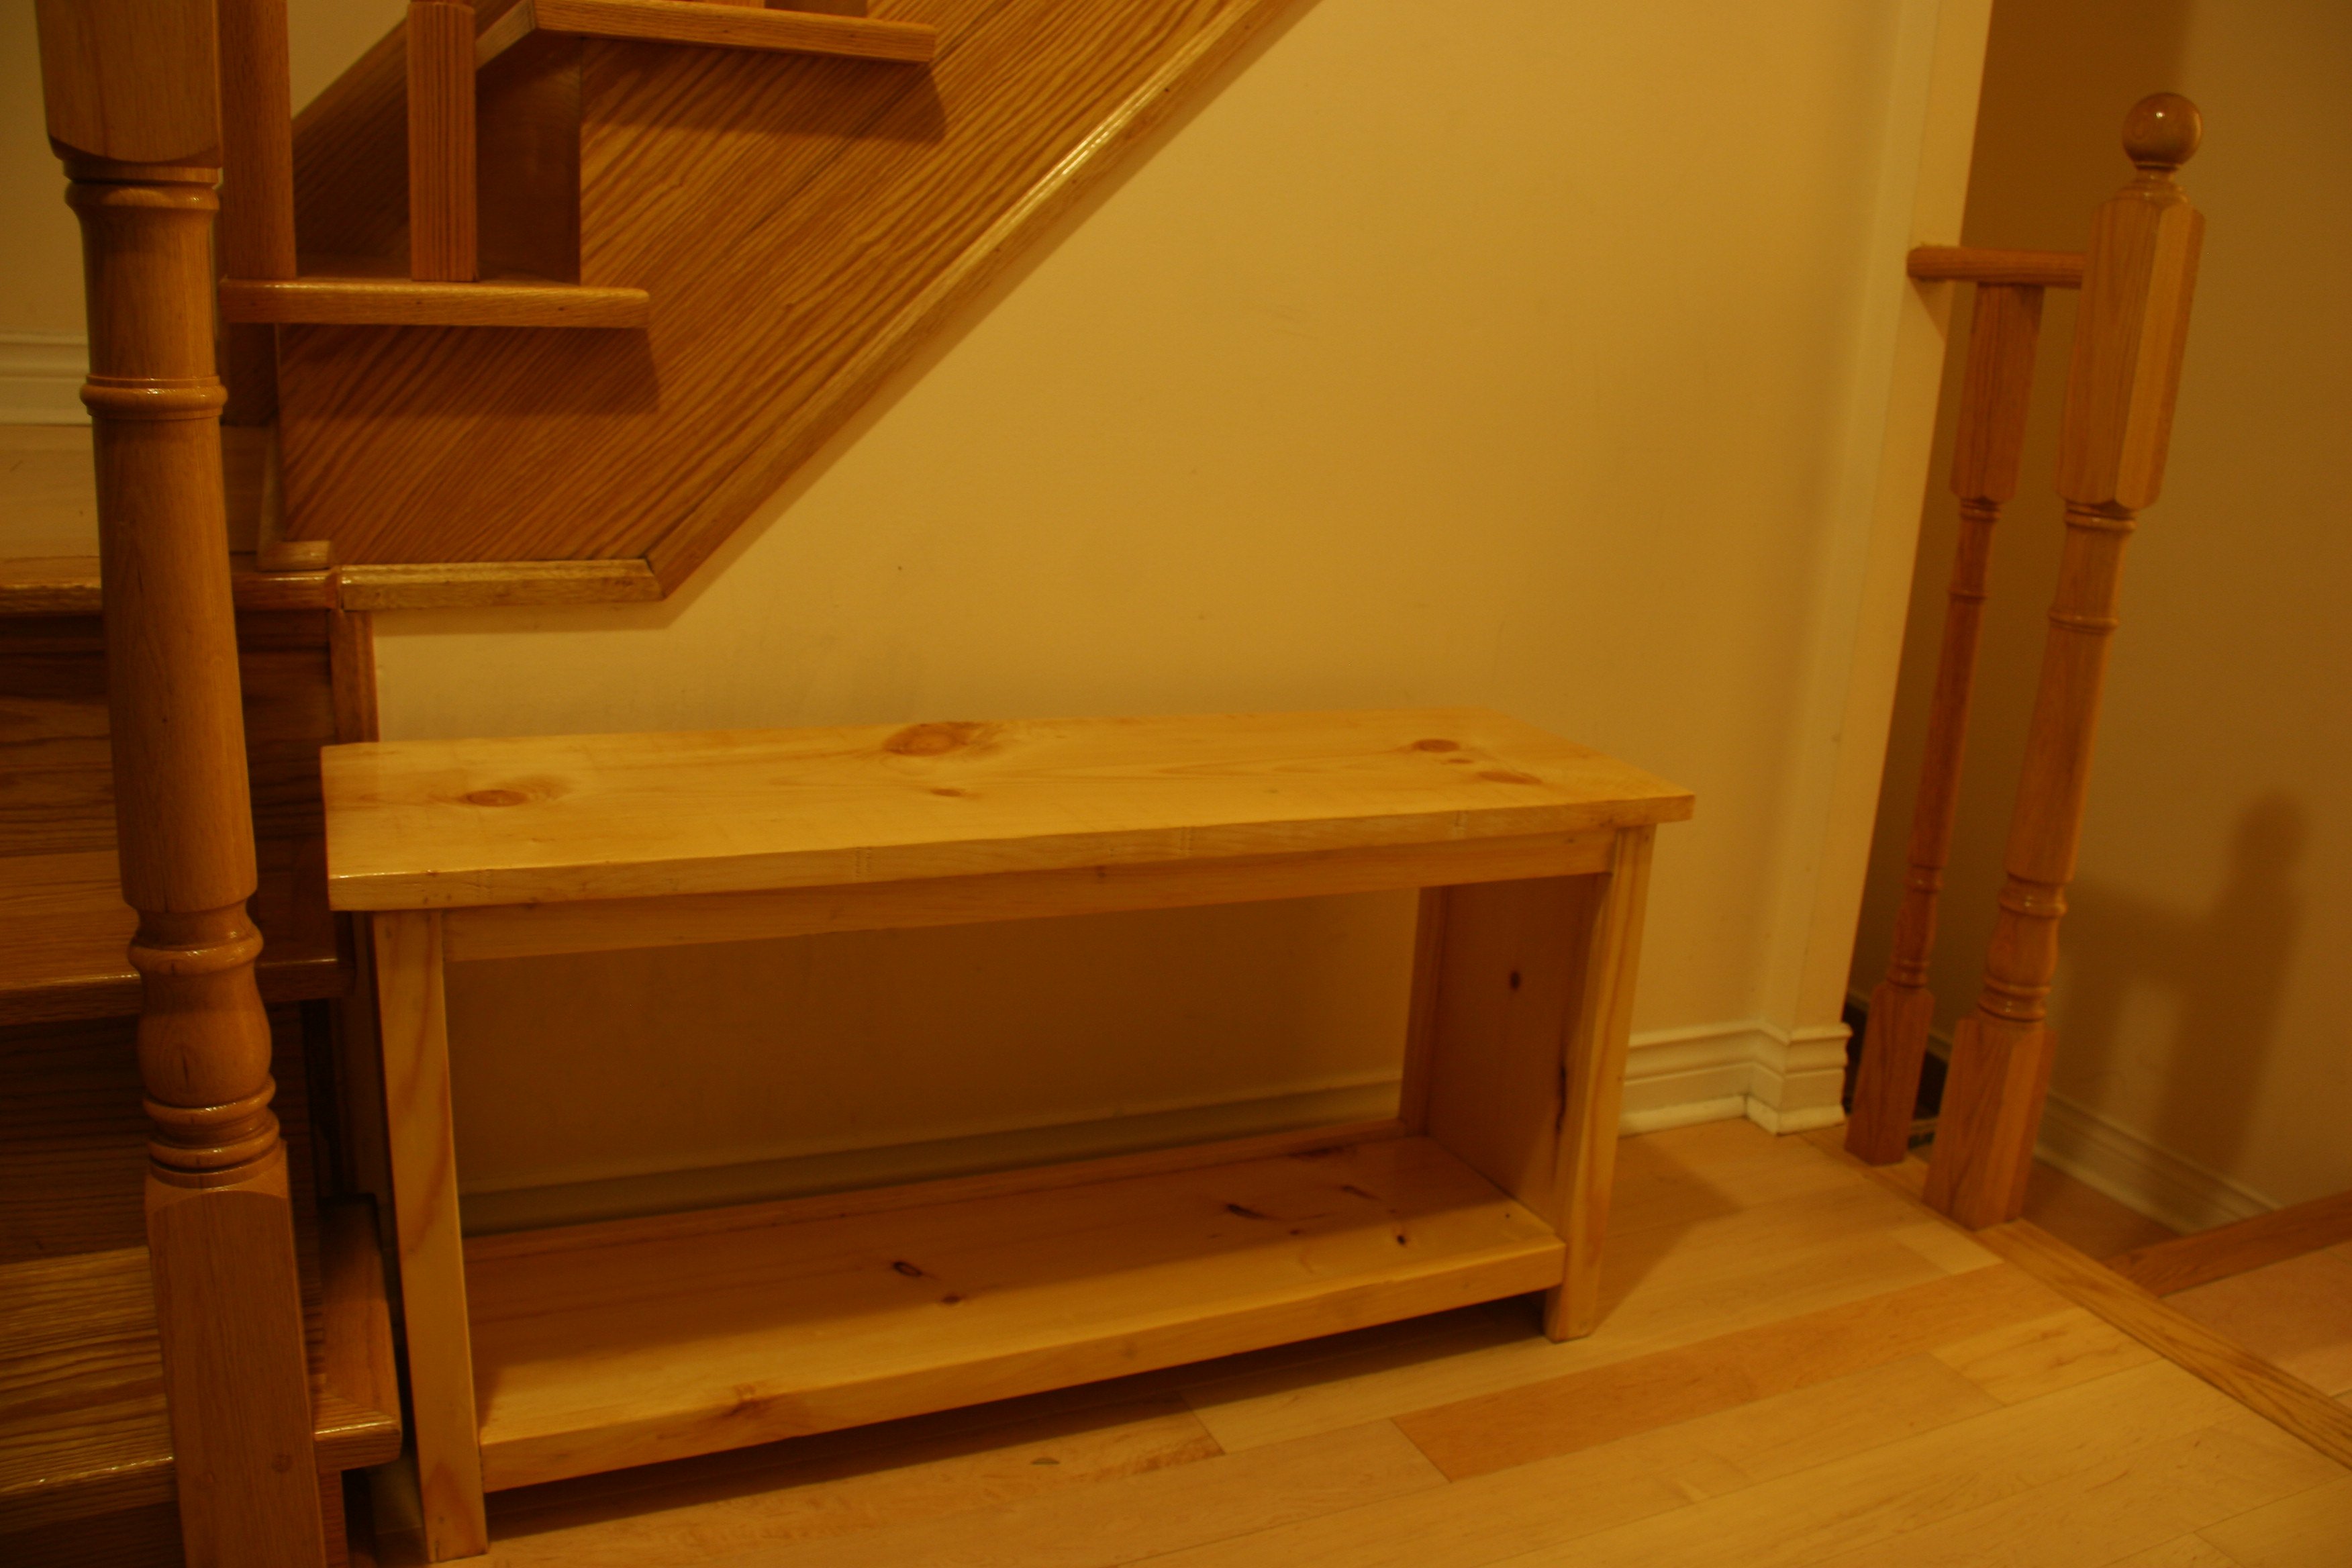
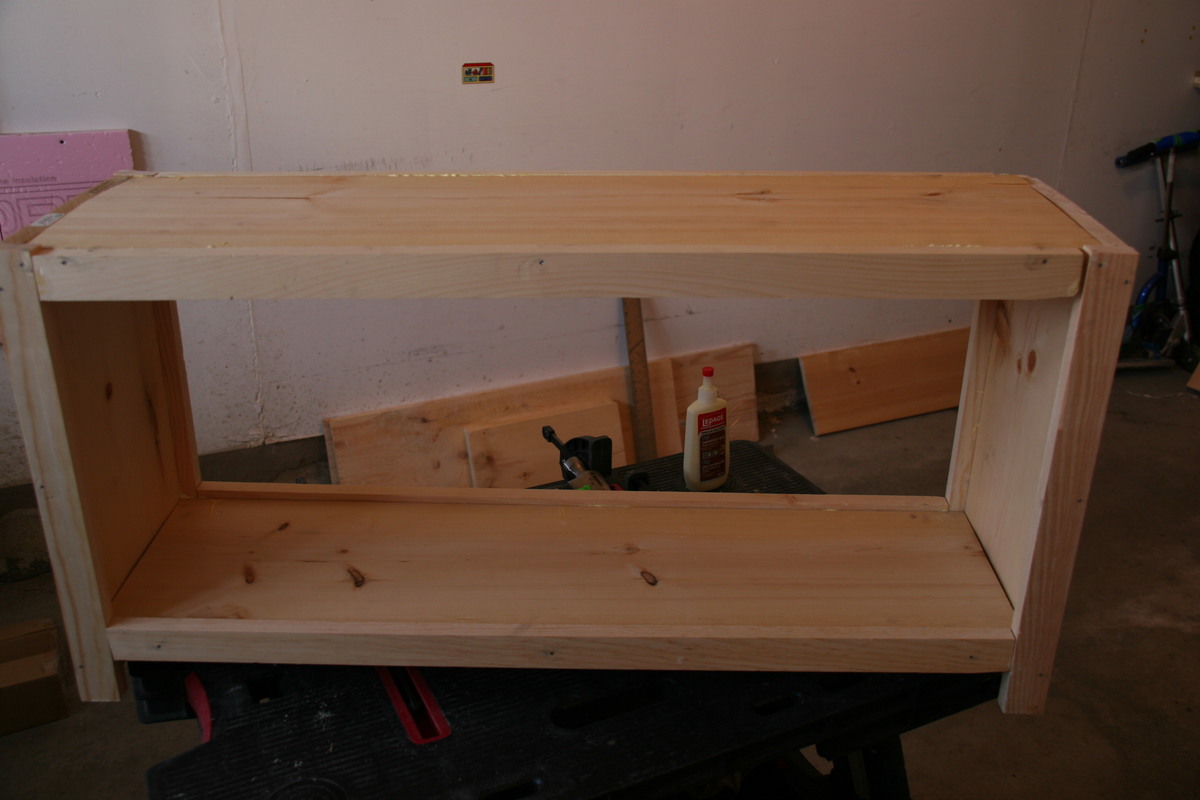
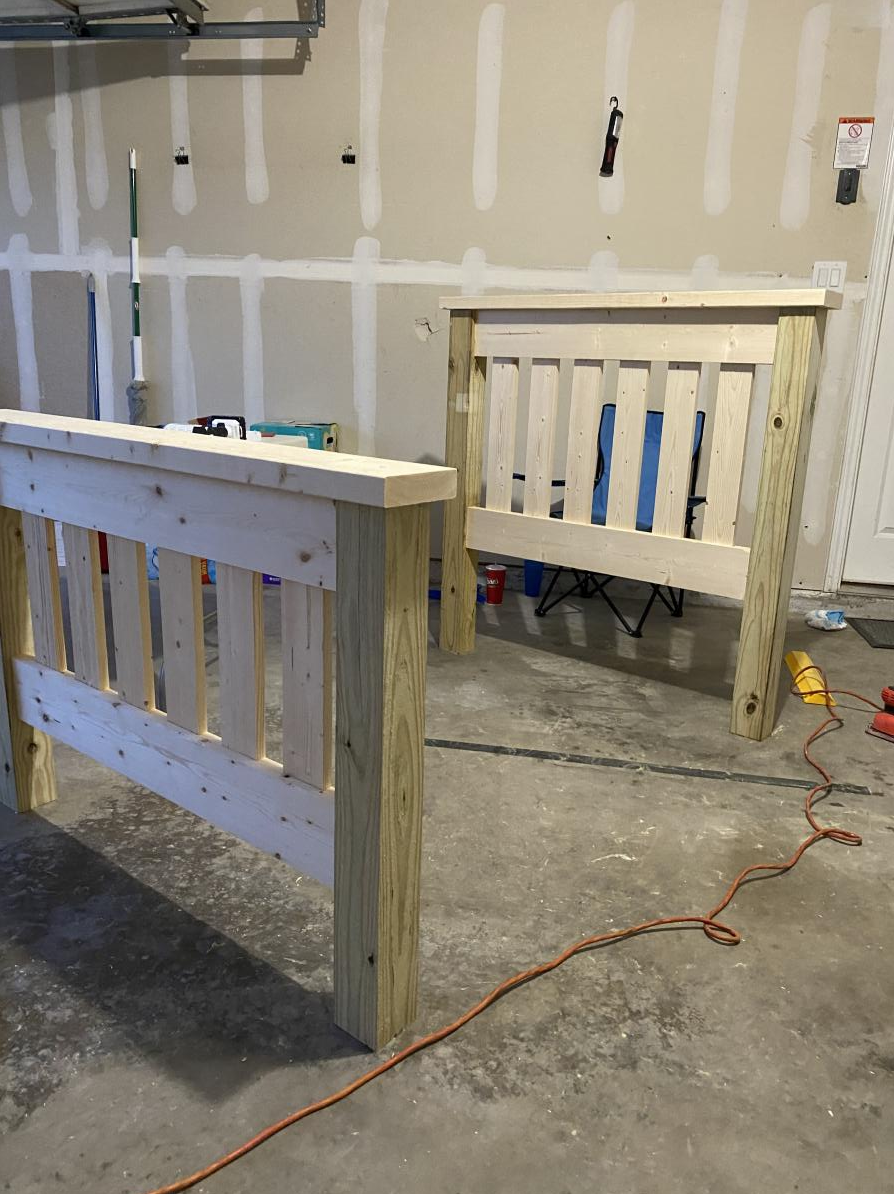
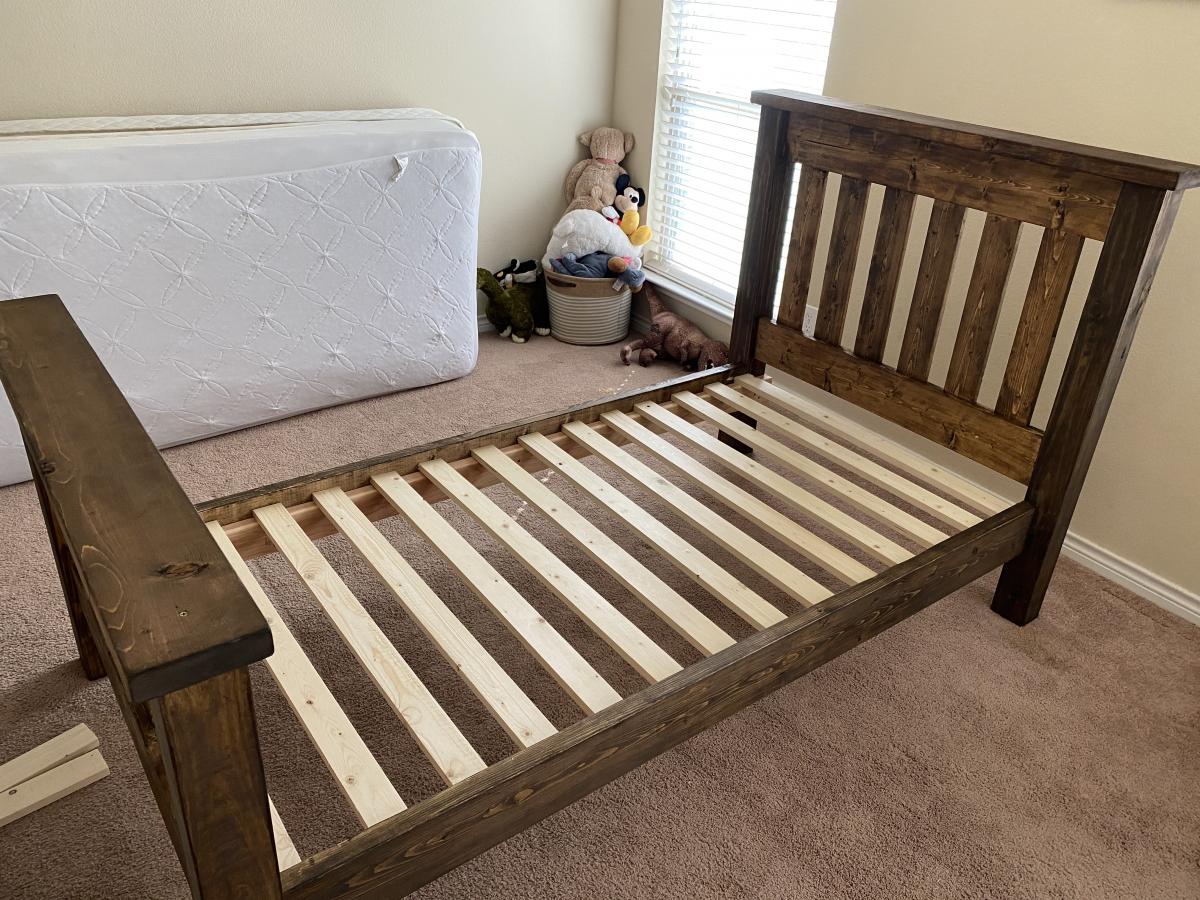
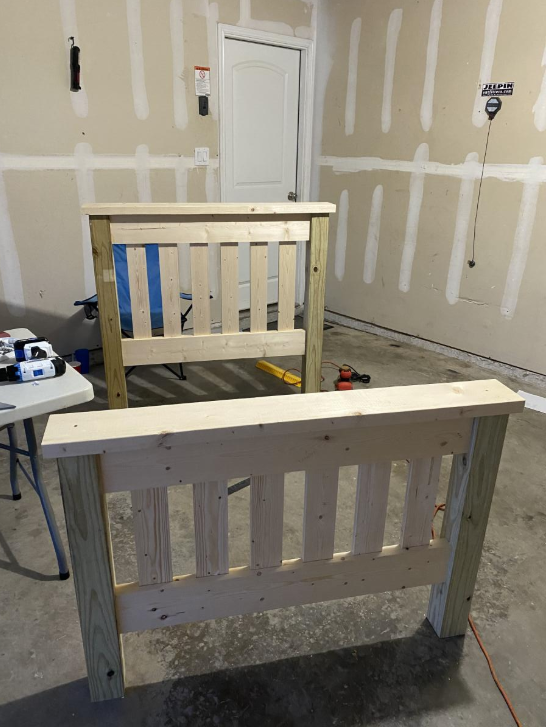
Community Brag Posts

Tall Planters

Submitted by np78s on Mon, 05/25/2020 - 20:01

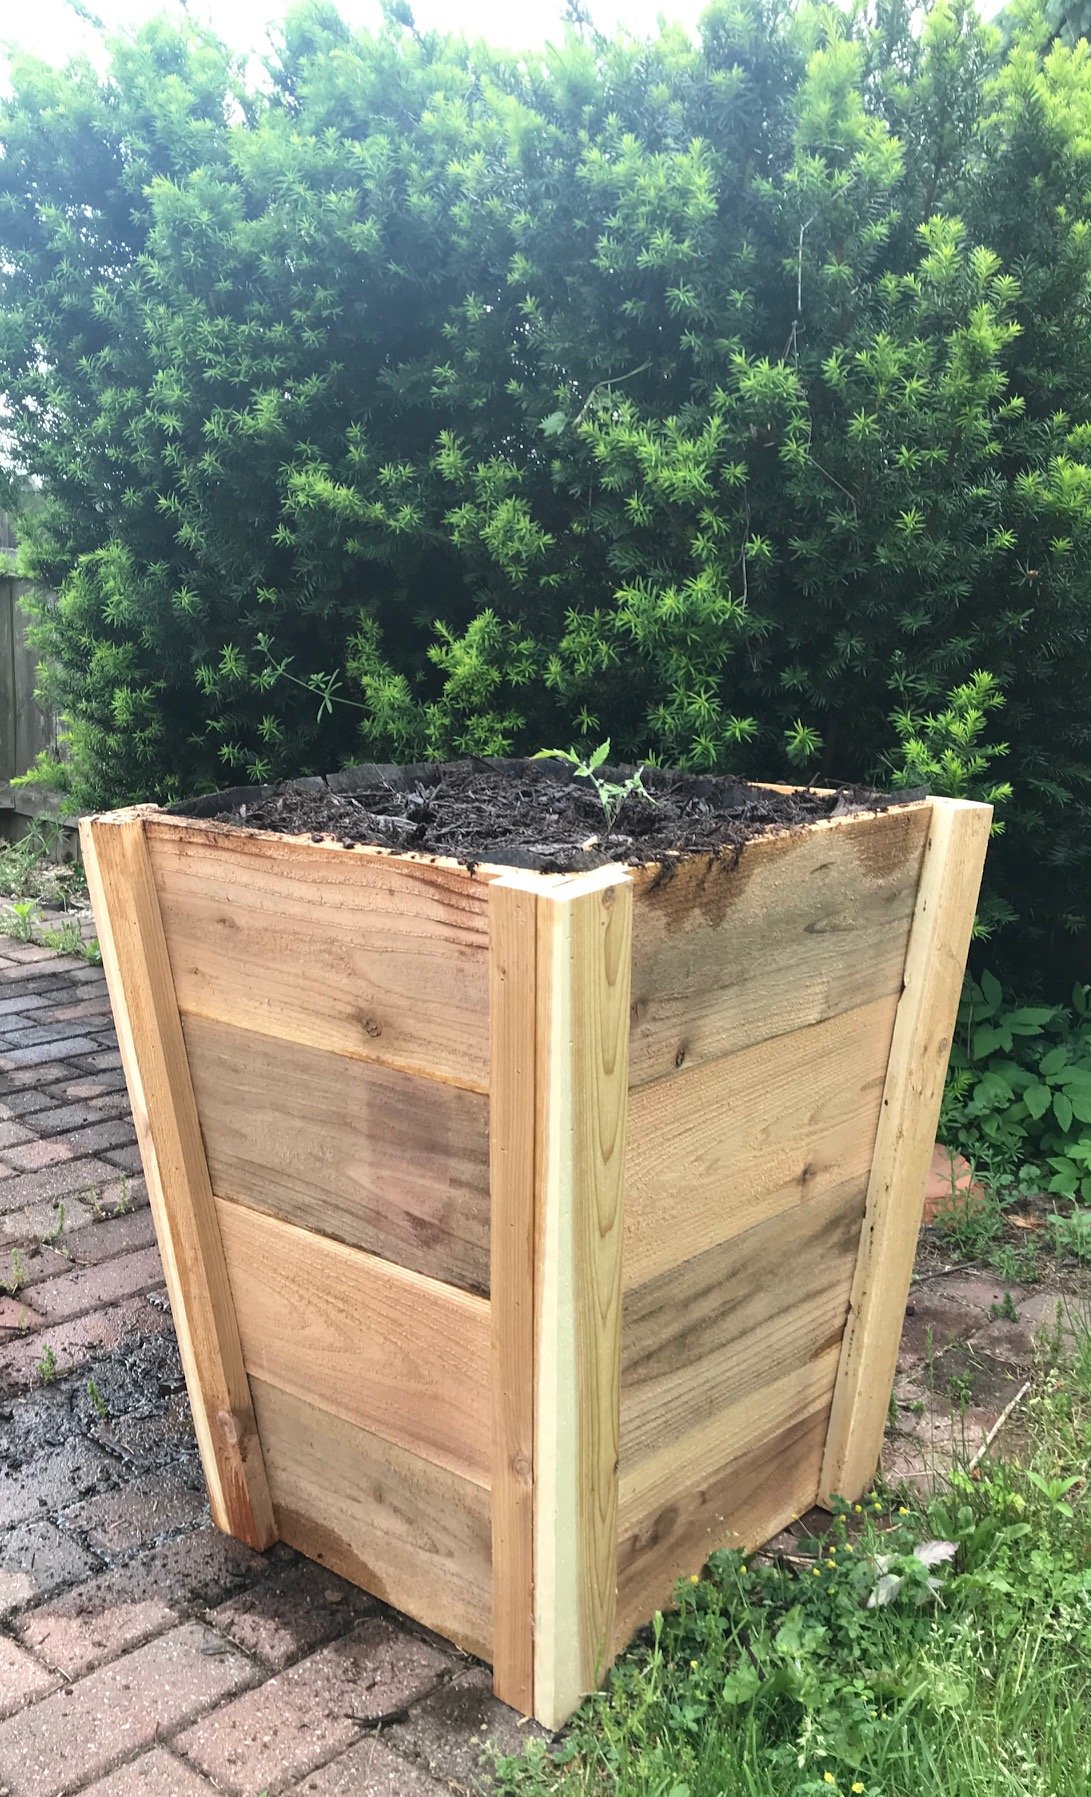
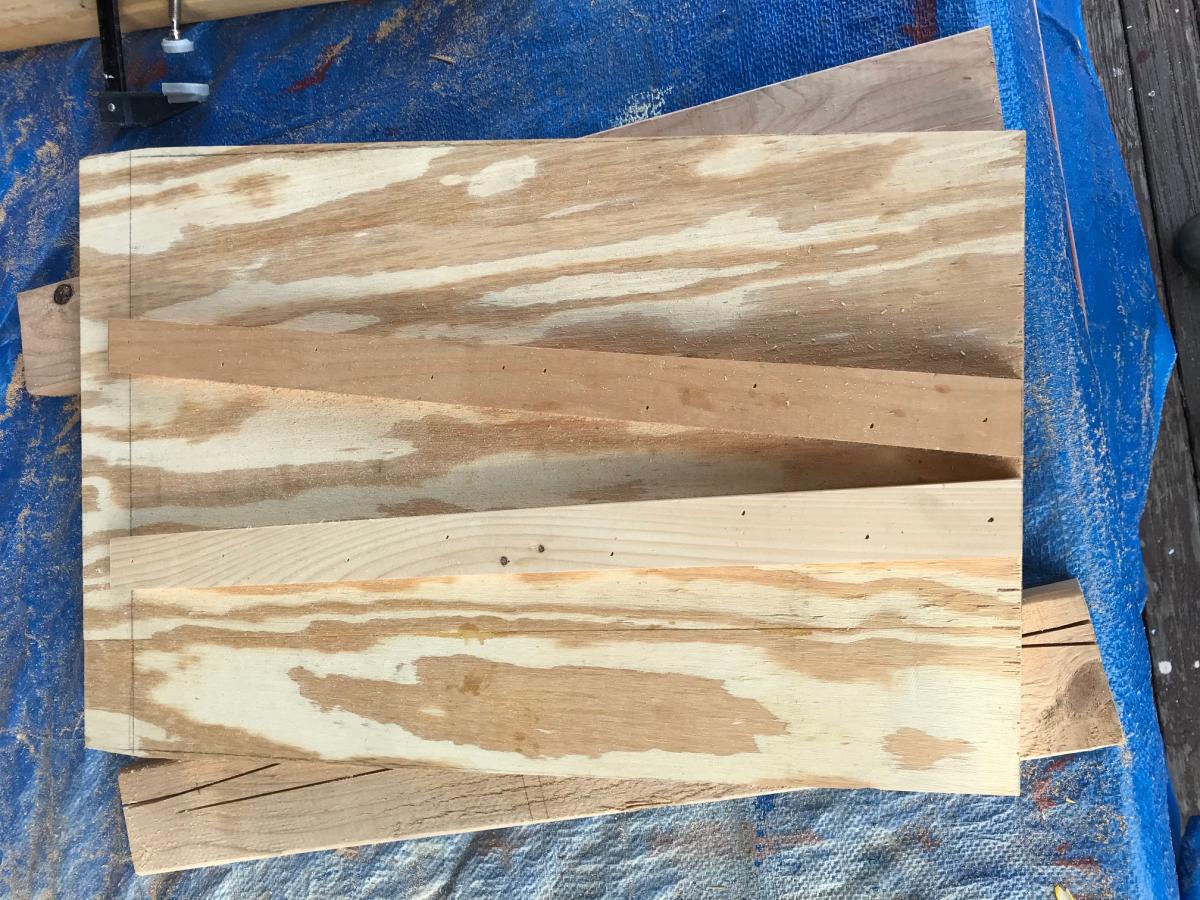
I love the way these planters look and knew I wanted to make them. My freehand circular skills aren't great, so I attached the pickets together with a furring strip and used a template (second picture) to make the cuts. I used screws to attach the furring strips so that once the trim pieces are attached, the furring strips can be removed - or not. This method takes a little longer but it allowed me to make uniform parts. It's also easier to align the sides of the planters since the pickets are already attached to one another - i.e. one unit. I've made two, have a third, shorter one in progress and plan to make more!

Built from Plan(s)
Estimated Time Investment
Afternoon Project (3-6 Hours)
Finish Used
No finish used. these are for vegetables and I didn't want to use a finish.
Recommended Skill Level
Beginner

Comments

Night Tables

Submitted by Aisha on Fri, 07/20/2012 - 09:40

I used the plans for the Reclaimed Wood bedside tables but I didn't want to make all those drawers (being a beginner) so I settled on one. It took me fairly long to complete but really it should have been only a weekend project. I love the way they turned out.

Estimated Time Investment
Week Long Project (20 Hours or More)
Finish Used
One coat each of Varathane's Early American followed by Red Mahogony. Two coats of poly.
Recommended Skill Level
Beginner

Comments

Debi_G (not verified)

Fri, 07/20/2012 - 20:16

I too fear drawers.
Your bedside tables have turned out beautifully!

Simple Entryway Bench

Submitted by eulysses on Sun, 05/11/2014 - 19:46

This is my second project. I based it on the "simple easy storage bench". I made this for my wife, she requested an entryway bench as you enter the house from the garage. I'm glad I was able to finish it just in time for Mother's Day :).

I learned a lot by doing this project (e.g. hiding nails, wood fillers, warped wood, sanding, to name a few). There's still a lot of things to learn, I'm hoping to be able to practice more.

Estimated Cost
$35
Estimated Time Investment
Day Project (6-9 Hours)
Finish Used
Clear Gloss Polyurethane (minwax)
Recommended Skill Level
Beginner

Alden's Computer desk

Submitted by veiglcc on Sun, 08/14/2016 - 08:20

Small computer desk built for mom. Was not built from a plan.

Estimated Cost
Estimated cost $60.
Estimated Time Investment
Weekend Project (10-20 Hours)
Finish Used
Bombay Mahogany stain (gloss).
Recommended Skill Level
Intermediate

Kids Twin Beds

Submitted by amichener on Wed, 05/27/2020 - 08:29

This is my first wood building project and I love the way they turned out. Took my about a week of work here and there on the first one and the second one I built from start to finish in two days. This is called the Simple Twin Bed and it's a great plan, very sturdy. Pocket holes work GREAT on this build. I added pocket holes to the side rails in to the posts for extra support.

Built from Plan(s)
Estimated Cost
$135
Estimated Time Investment
Week Long Project (20 Hours or More)
Recommended Skill Level
Beginner

$2.00 Scrap Lap Desk

This was a really quick and easy build. I built it with two bucks and two hours with some scrap wood I had laying around. The only thing I bought was a package of 2 standard hinges ($2). Also, I deviated from the plan a little by not including the lower storage compartments (didn't want it to get too heavy), making the legs 4" shorter (so it's more comfortable to use in bed), and not building the storage dividers under the flip-top lid. Check out more info by clicking my blog link!

Built from Plan(s)
Estimated Cost
$2.00
Estimated Time Investment
An Hour or Two (0-2 Hours)
Finish Used
A quick sanding and a coat of Rustoleum Ultimate Wood Stain in Dark Walnut.
Recommended Skill Level
Beginner

Comments

Farmhouse Table

This was my first woodworking project. Thank you Ana for providing the plan and making it easier for me.

Estimated Cost
60
Estimated Time Investment
Afternoon Project (3-6 Hours)
Finish Used
Minwax oak and fast drying poly.
Recommended Skill Level
Beginner

Comments

Double Desk

Submitted by mtroutman on Wed, 07/25/2012 - 09:28

This was our first project! We built it exactly like the plans. We finished it with a clear satin poly and we are thrilled with the results. Next we plan to paint the room.

Estimated Time Investment
Week Long Project (20 Hours or More)
Recommended Skill Level
Intermediate

Husky Farmhouse Dining Table

I love building my own wood furniture so that I can have beautiful pieces of furniture in my home while saving money! And while this project definitely cost more than the others I have done, I am so glad I splurged on the table legs. They ran me about $260 after tax and shipping costs, but I really think they give the table that extra OOMF! So a total of about $300 is nothing compared to a price tag at Pottery Barn or Restoration Hardware!

I chose this stain because I really wanted something to contrast with our dark leather couch and white dining chairs and this stain was even more perfect than what I expected it to be.

Built from Plan(s)
Estimated Cost
$300
Estimated Time Investment
Weekend Project (10-20 Hours)
Finish Used
Varathane Early American with Helmsman protective coating
Recommended Skill Level
Beginner

Pallet outdoor sectional!

Submitted by Anonymous (not verified) on Fri, 08/19/2016 - 17:49

I made the sectional from pallet wood

Needed extra wood for legs to be stable. I made these under the house, and unfortunately had to take apart to get out! luckily  i used screws.

I made to measure after getting the outdoor cushions first.

Taught me heaps

Estimated Cost
Cost of cushions $60nzd and paint $25nzd
Estimated Time Investment
Week Long Project (20 Hours or More)
Finish Used
paint
Recommended Skill Level
Beginner

Cottage Hall Tree

Submitted by Anonymous (not verified) on Mon, 02/26/2024 - 10:45

Great plan, I used knotty pine boards for the entire build, including glue up for 2x4 pieces. And the hooks came from a recent visit to England. The wood was reclaimed from a tear down of our family cottage. Using the material gives our new home a sense of history.

Built from Plan(s)

King Farmhouse Bed

Submitted by jhavinga on Thu, 05/22/2014 - 16:31

Second project ive completed from Ana White, and I am very happy with how this bed turned out! The only thing I would fix would be the finish, I wanted it a bit whiter. not so creamy. Otherwise very quick and easy fun project to do. =)

Estimated Cost
$300
Estimated Time Investment
Day Project (6-9 Hours)
Finish Used
1 coat of a basic latex white paint.
Then I sanded down just so raised grains would become exposed.
1 coat of dark walnut stain (wipe on with cloth)
Done.
Recommended Skill Level
Starter Project

Comments

jhavinga

Thu, 05/22/2014 - 16:34

Thank you for sharing all of these awesome projects. I was always hesitant when it came to wood, but now I cant seem to stop!

jhavinga

Wed, 06/11/2014 - 13:43

(You can do all this before or after your project is put together or not.)
Be sure to do a test piece before hand so you can see exactly what your getting :)

The first step I did once the head board and foot board were put together, was to sand any sharp edges or corners. I liked mine rounded and worn looking. I did not sand anything else.

Second step is to paint 1 even coat of a basic white latex paint.

Third step is to sand away some white paint. because we didnt sand it before hand the grains in the wood will be very bumpy. so the paint on the grains will sand off while the paint lower than the grain will remain. makes sense? hopefully i explained that right!

Fourth step is to now wipe on the stain of your choice. I went with Dark walnut. It stains the paint a bit bringing the white to a gray/brown tone. and stains the wood dark walnut so the grain patterns show up dark.

Let me know if you have any other questions and good luck!

jbogan15

Thu, 01/29/2015 - 07:49

What grit of sand paper did you use to sand off the white paint? and did you sand it by hand? Also, for the dark walnut stain, did you wipe off immediately or leave it on for a bit before wiping? Beautiful bed, I want to achieve this look!

In reply to by jbogan15

jhavinga

Fri, 02/06/2015 - 09:15

Hi jbogan15, thank you!
For sanding I used a palm sander with 120 grit to get the job done a bit quicker, than went over lightly with 220. When staining I actually just dipped a rag in the stain and would wipe the stain on. =)

Good luck!
Justin

kosborn

Fri, 01/27/2017 - 11:05

Love this look! Exactly what I am trying to achieve...A few questions about the side rails. How high did you connect them to the 4x4 posts and exactly how did you connect them? Did you use brackets or screw right into the posts? Thank You!

barkleyl

Thu, 09/05/2019 - 15:07

I have seen several beds from Anna White. I was wondering if the frame require a box spring mattress or not. If not, are the beds lower than what a traditional mattress and box springs are. Thanks ! 

Emily's playroom chairs

Submitted by Anonymous (not verified) on Mon, 08/22/2016 - 12:20

So we had our grandchild Emily needing a play table and chairs, a limited budget, an old play table but no chairs! Ana White to the rescue! We made 4 chairs and painted them and the table to match. As you can see Emily has made lots of new friends over tea! 

Estimated Cost
$30
Estimated Time Investment
Weekend Project (10-20 Hours)
Finish Used
Enamel paint and clearcoat
Recommended Skill Level
Beginner

Modern Adirondacks UK

Submitted by Anonymous (not verified) on Thu, 06/04/2020 - 11:16

Hi Ana

Just wanted to say thanks for the plans. Here's how ours came out!

Ben.

Estimated Cost
£50
Estimated Time Investment
An Hour or Two (0-2 Hours)
Finish Used
Tanalised pressure treated timber.
Recommended Skill Level
Intermediate

Small Upholstered Stool

We just purchased a rolling island to replace our old kitchen table. We wanted to make stools to fit under it properly at the right height. We used all recycled wood and it’s painted with and exterior black semi-gloss paint that I had on hand that I use for my outdoor barn quilts. I covered it with 1” foam, a layer of Dacron and some off white(to match our kitchen cupboards) heavy vinyl. We really like our new look❤️Thank you Ana for sharing all of your plans. We are going to be using more in the future. I just know it.

Mississippi Lakeside Creations.


Built from Plan(s)

Washer and Dryer Pedestal

Submitted by katie0910 on Mon, 07/30/2012 - 13:10

Our very first project! We absolutely love how it looks and that there's an easy way for our kids to sort their laundry. Can't wait to start more projects! You can see how we built it here http://addicted2diy.com/2014/01/14/diy-laundry-pedestal/

Estimated Cost
$125
Estimated Time Investment
Weekend Project (10-20 Hours)
Recommended Skill Level
Beginner

School Library Cart

Submitted by dmfinet on Sun, 05/25/2014 - 19:11

My 11 year old son made this library cart for our homeschool books. He followed Ana's plans with a few changes on dimensions. I love how it turned out, and it is a perfect addition to our school room. We kept the cost low by using some wood and paint that we already had.

Built from Plan(s)
Estimated Cost
$23.00
Estimated Time Investment
Day Project (6-9 Hours)
Recommended Skill Level
Beginner

Toy Box

Submitted by Sgeisinger on Sun, 06/07/2020 - 08:16

This design turned out to be perfect! It was super simple and easy to build! Easy to follow plans! Great beginner project!

Estimated Cost
Around $40 in lumber
Estimated Time Investment
Day Project (6-9 Hours)
Finish Used
Varathane Premium Wood Stain in Red Mahogany
Recommended Skill Level
Beginner

Comments

Back