Community Brag Posts

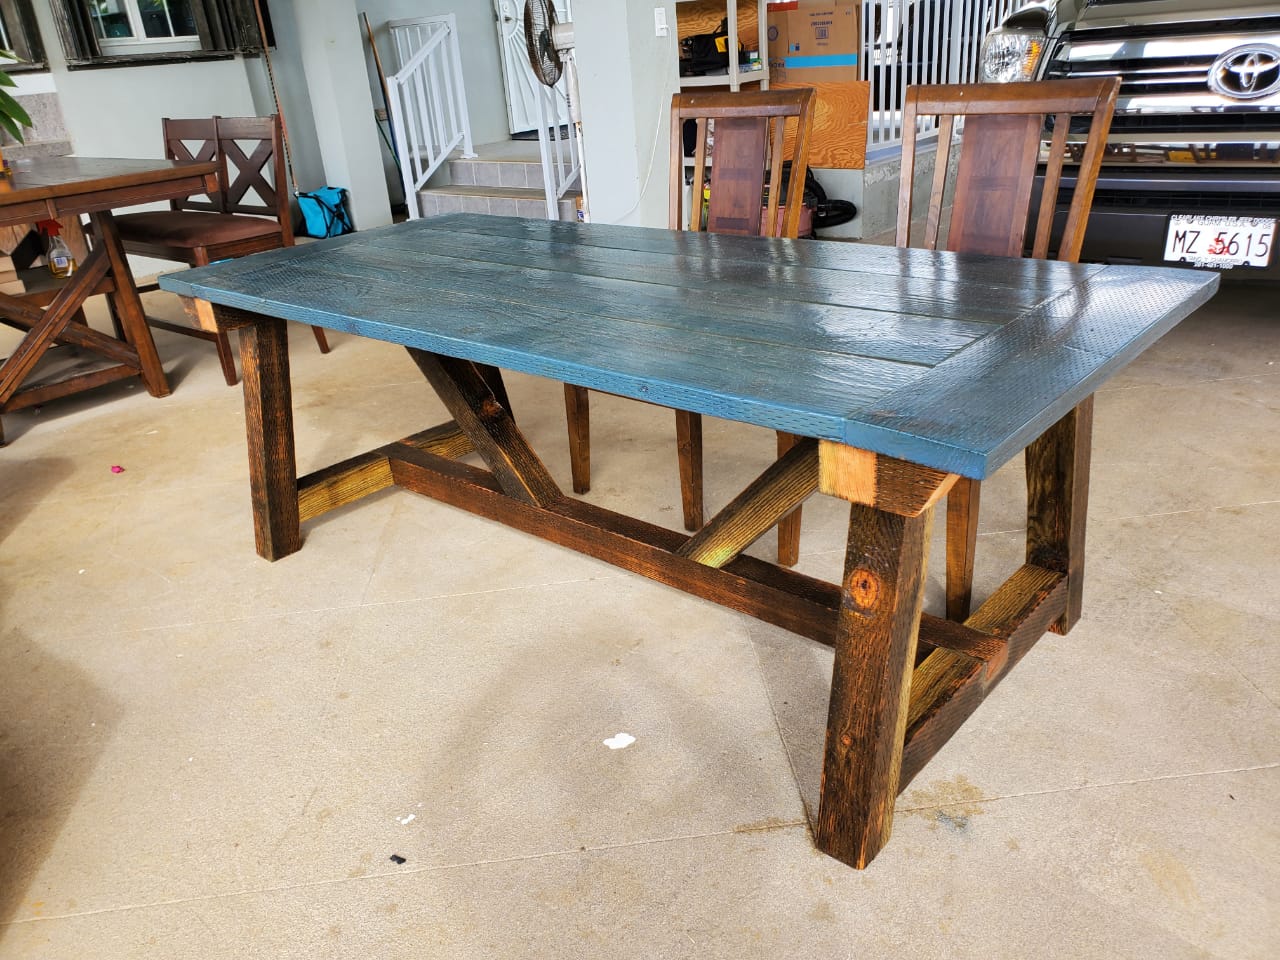
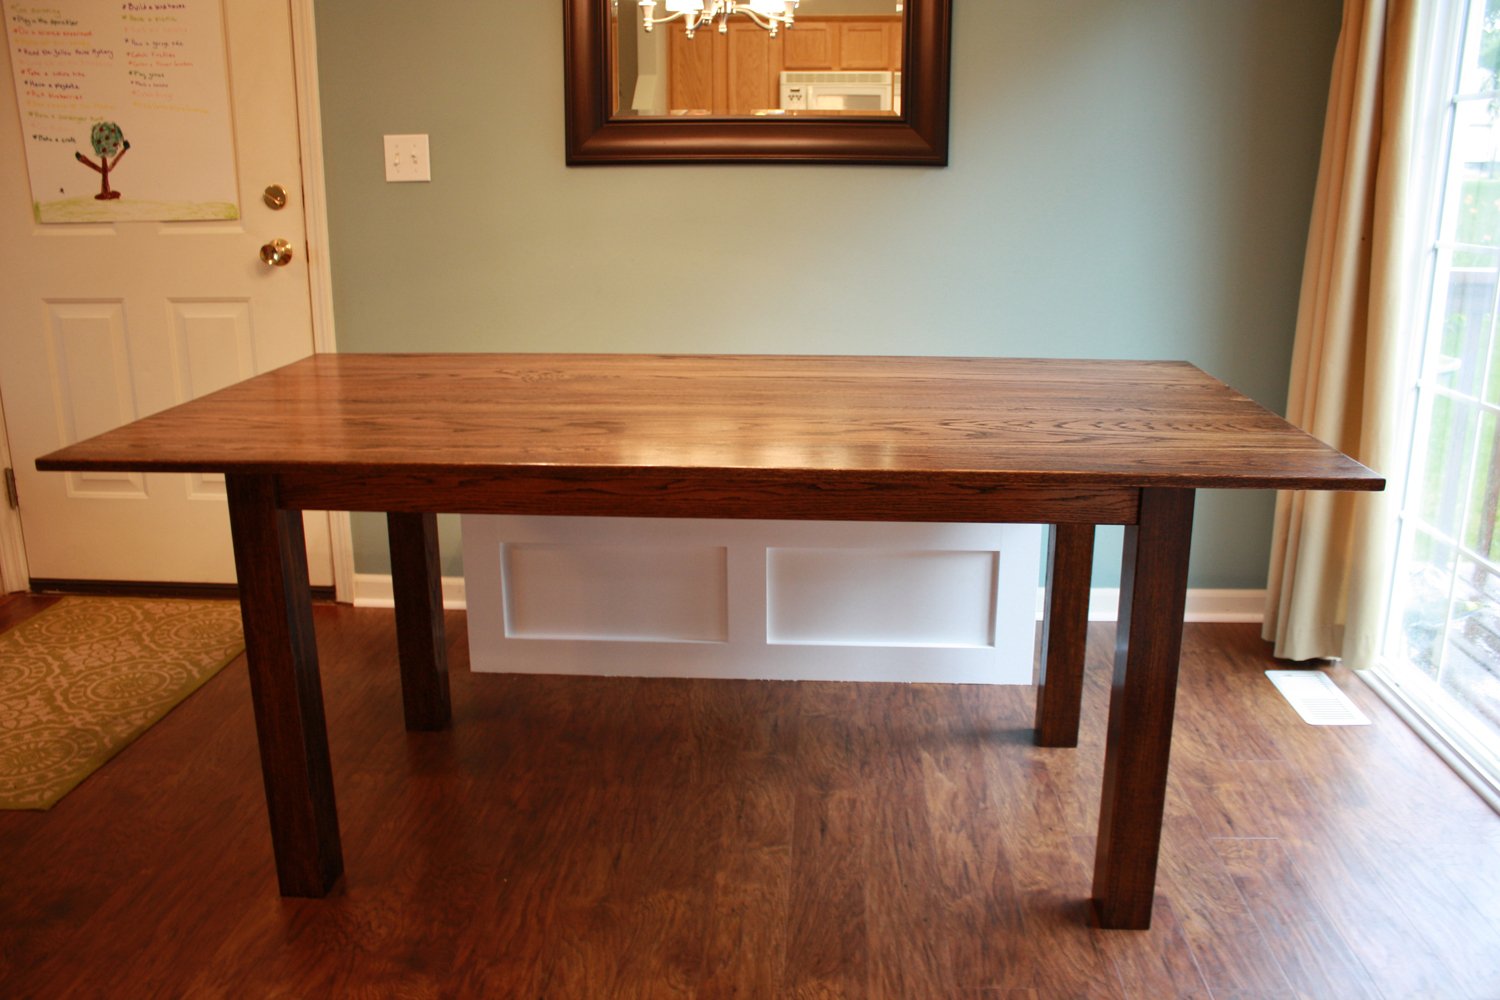
First project Nicest thing in my house

Submitted by chomuth on Fri, 04/11/2014 - 17:33

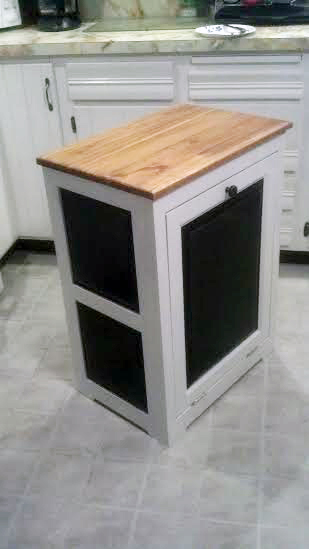
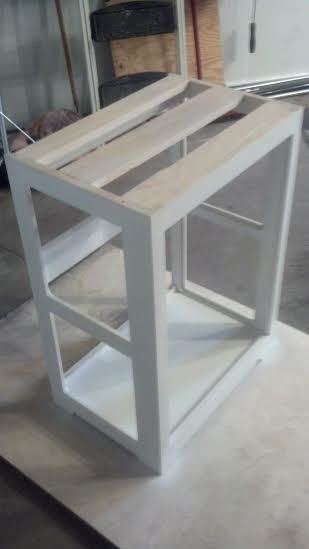
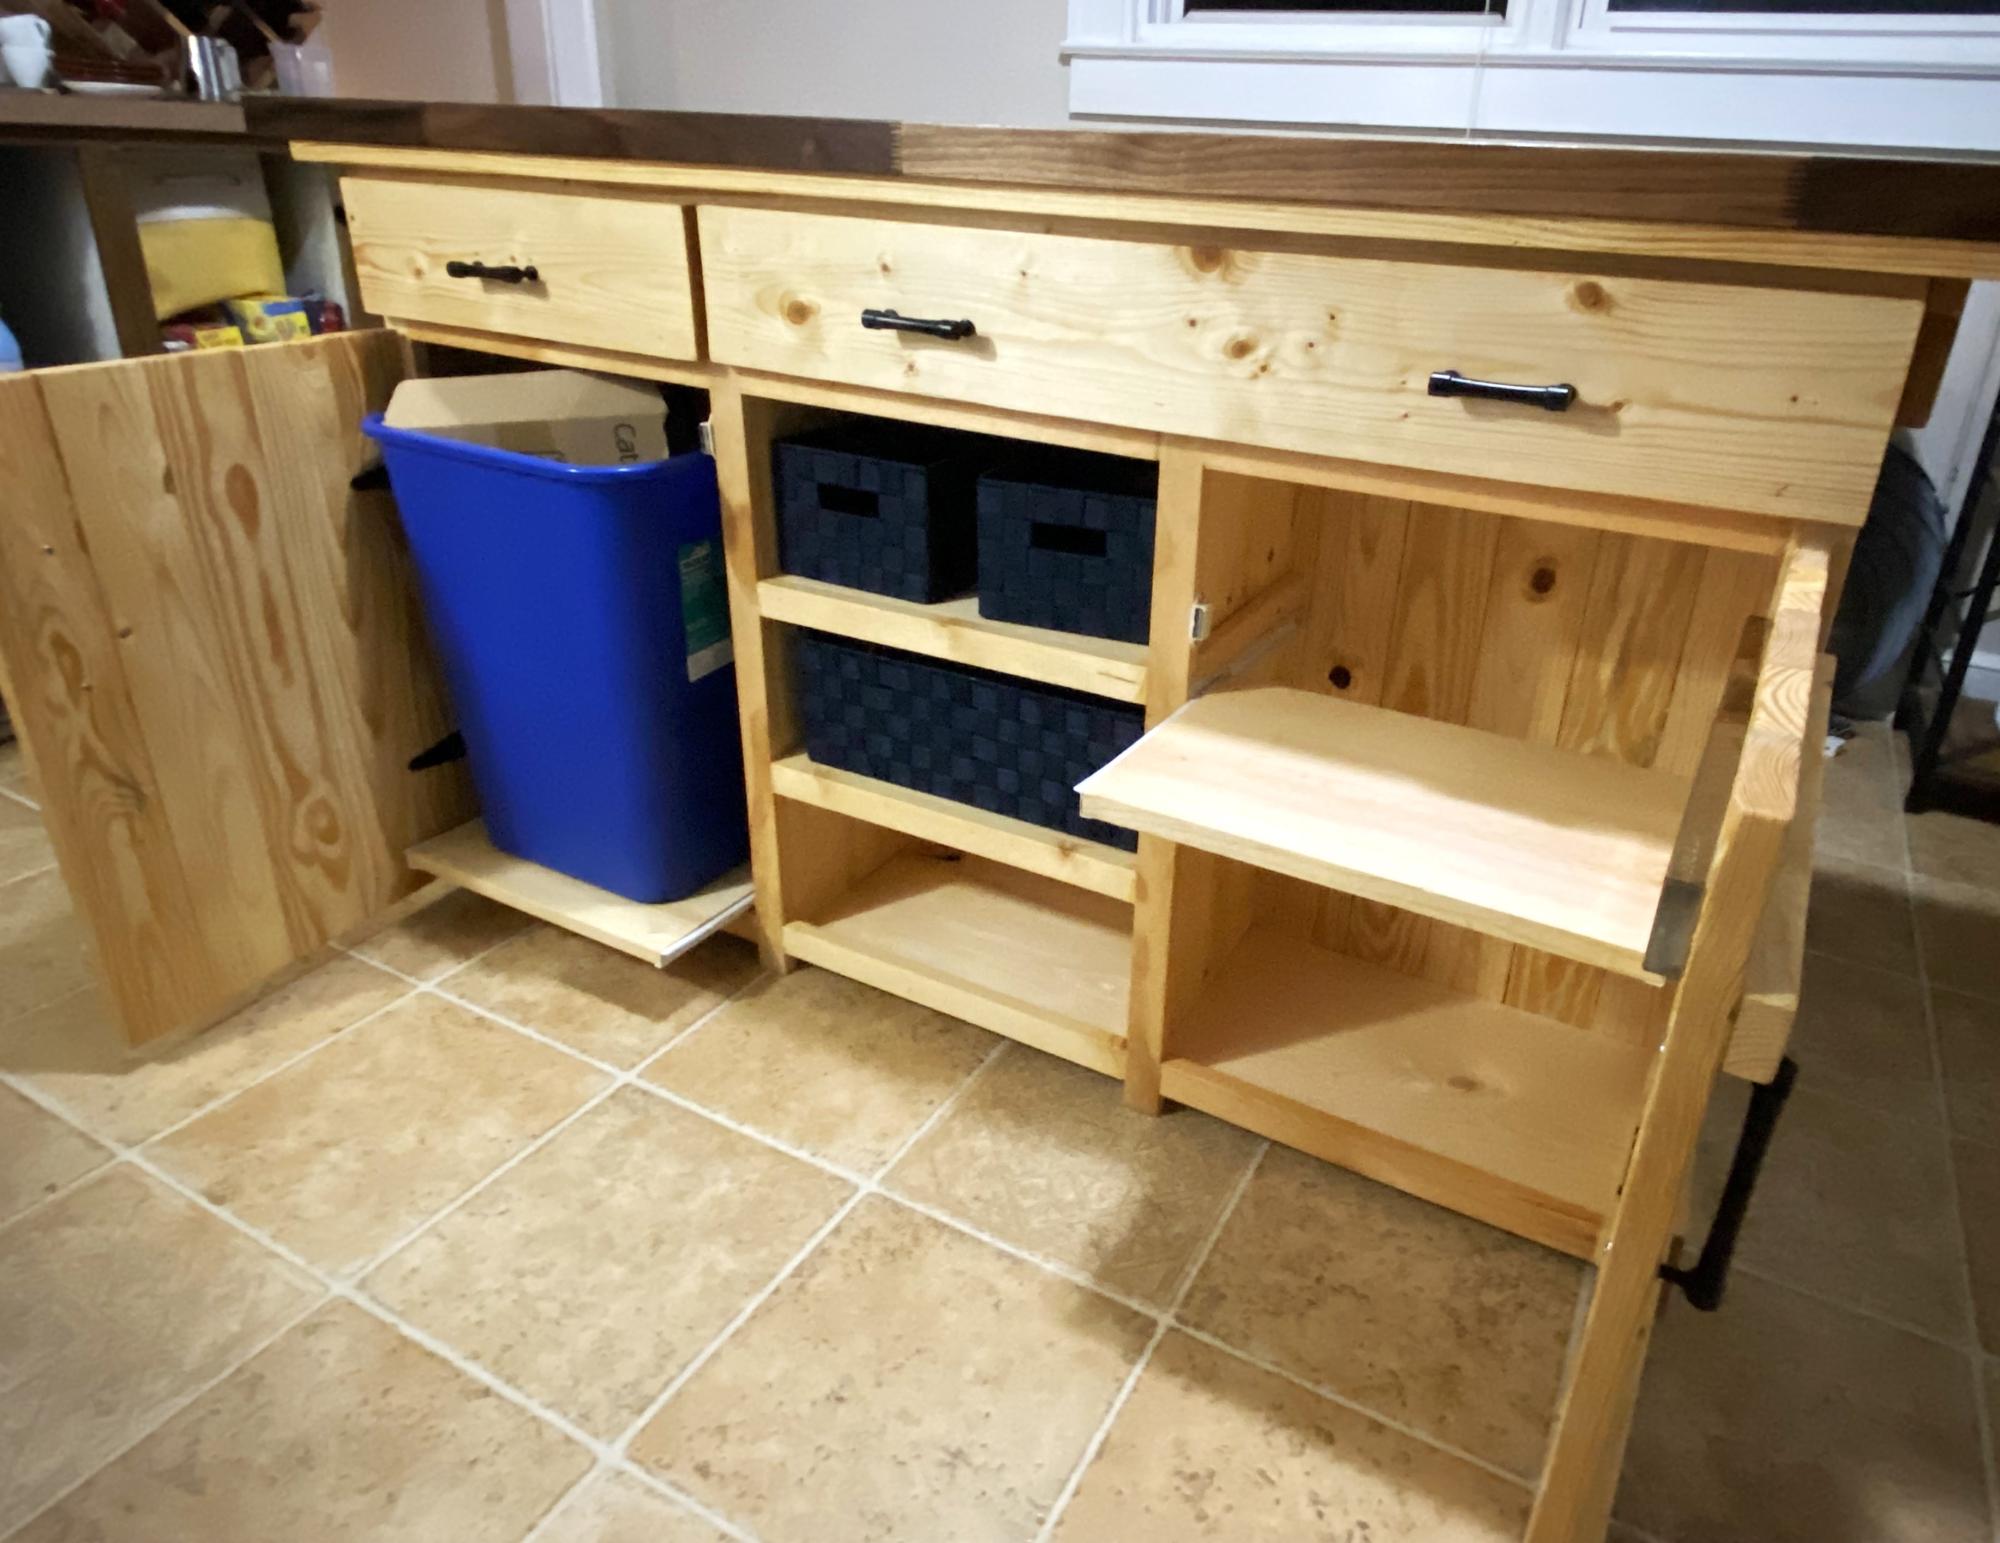
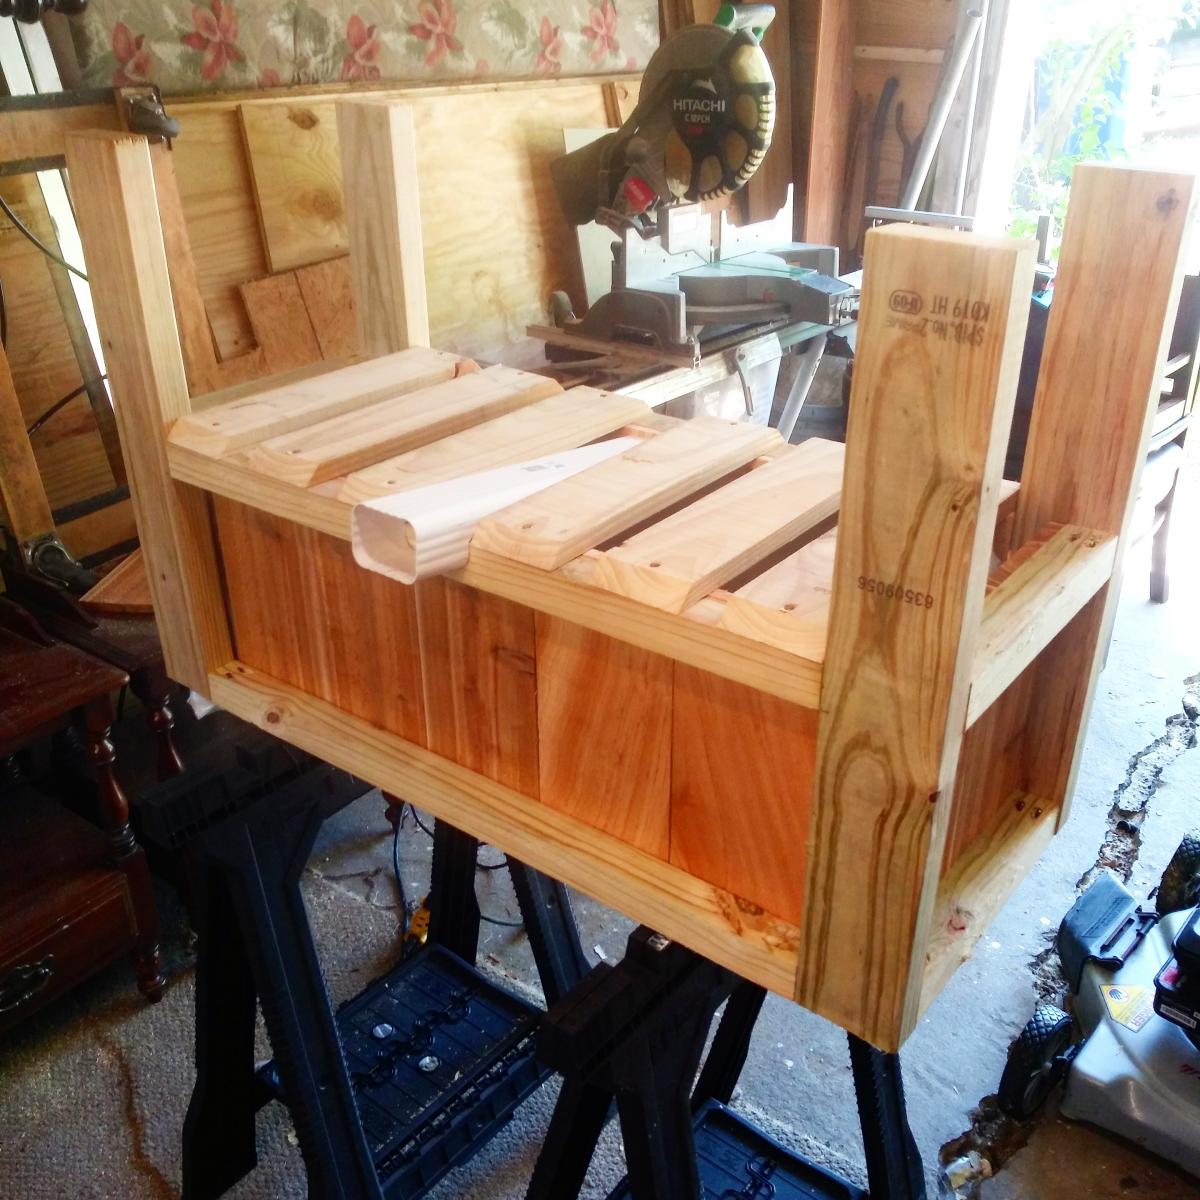
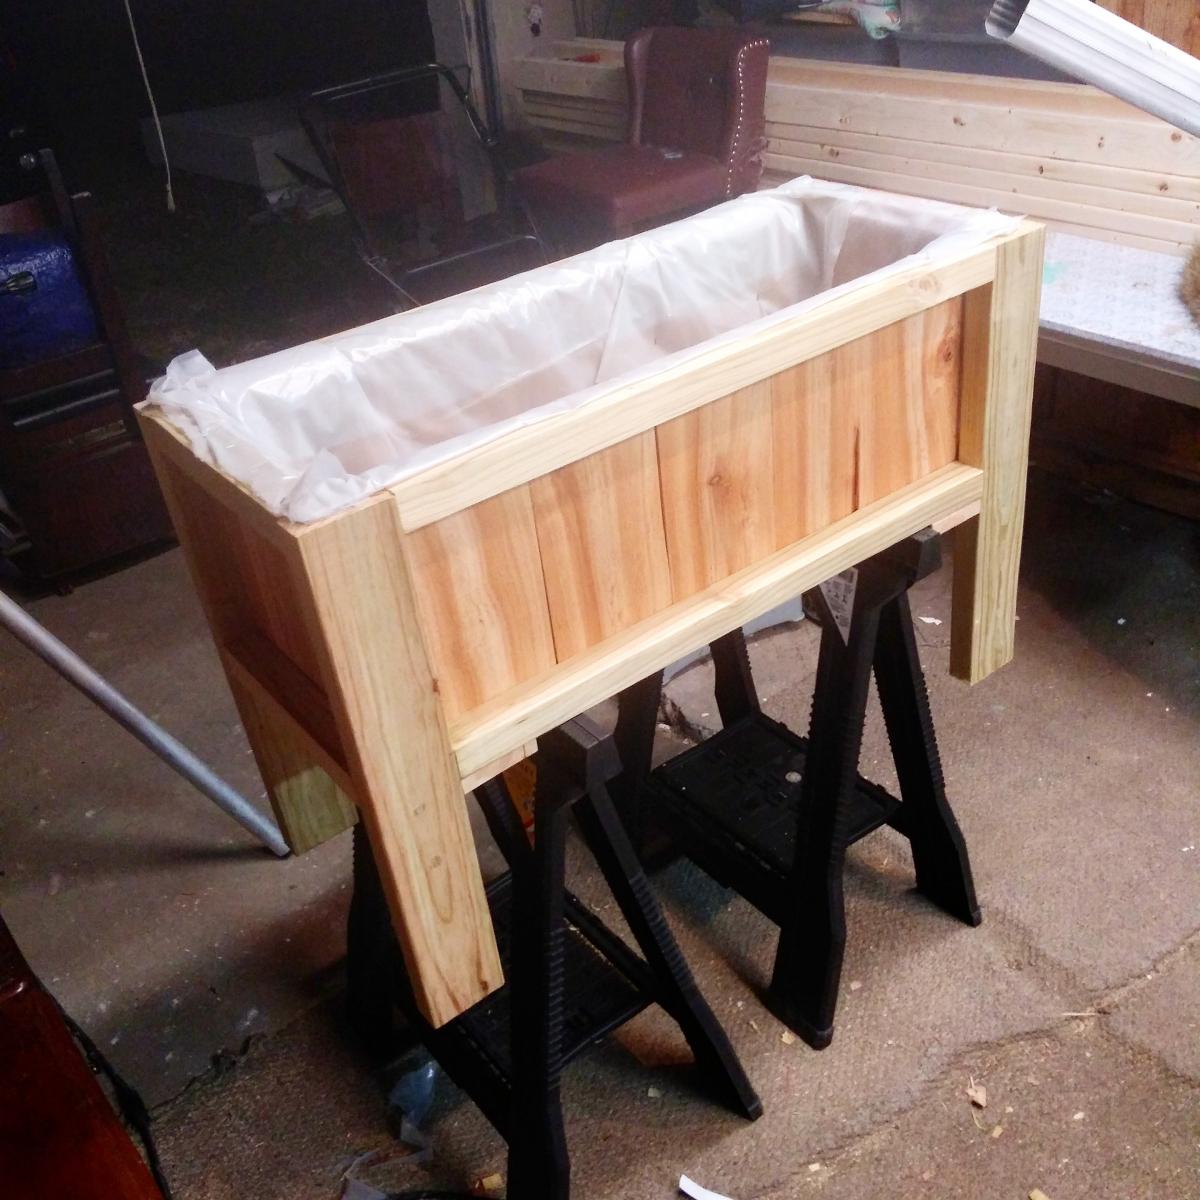
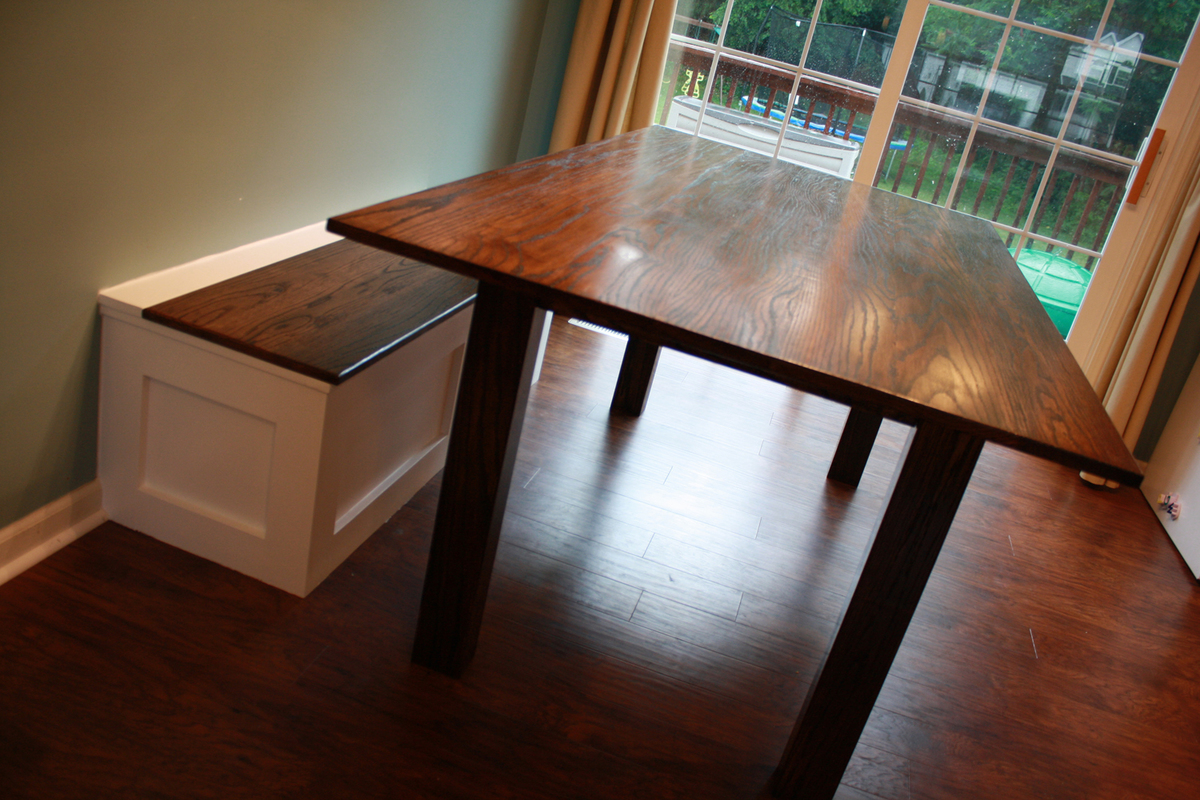
Well this is my first project and it took me a long time. I have to think way to long before I actually do something. I redrew the drawings to fit my garbage can but it still didn't fit.
Oh well, it was a good idea at the time.
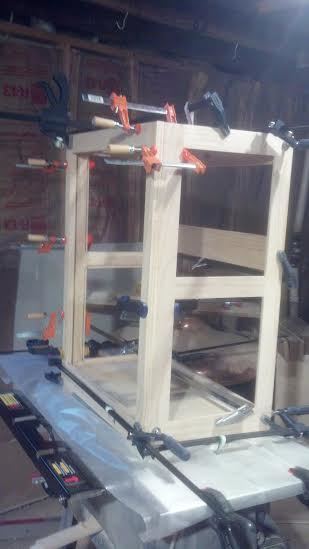
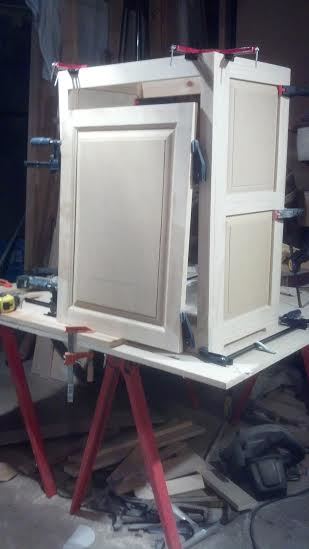
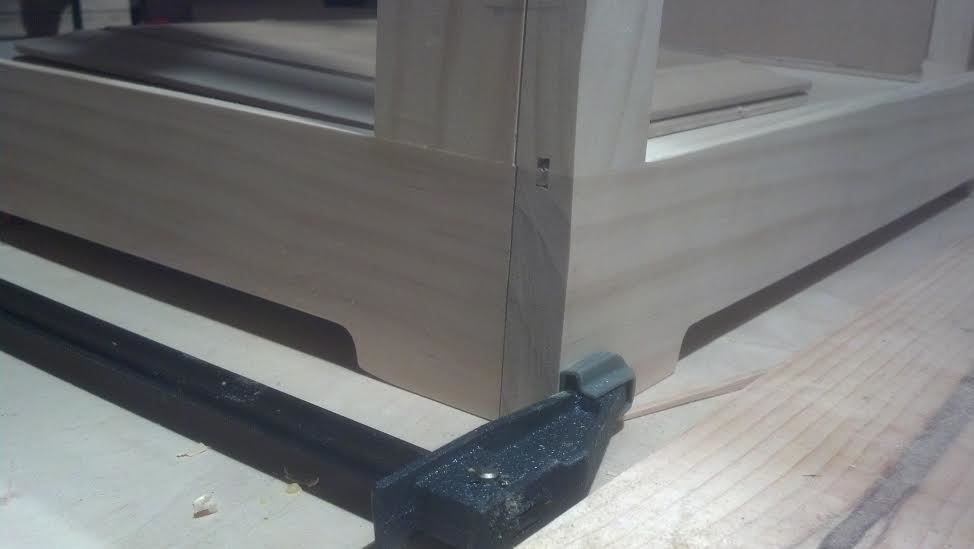
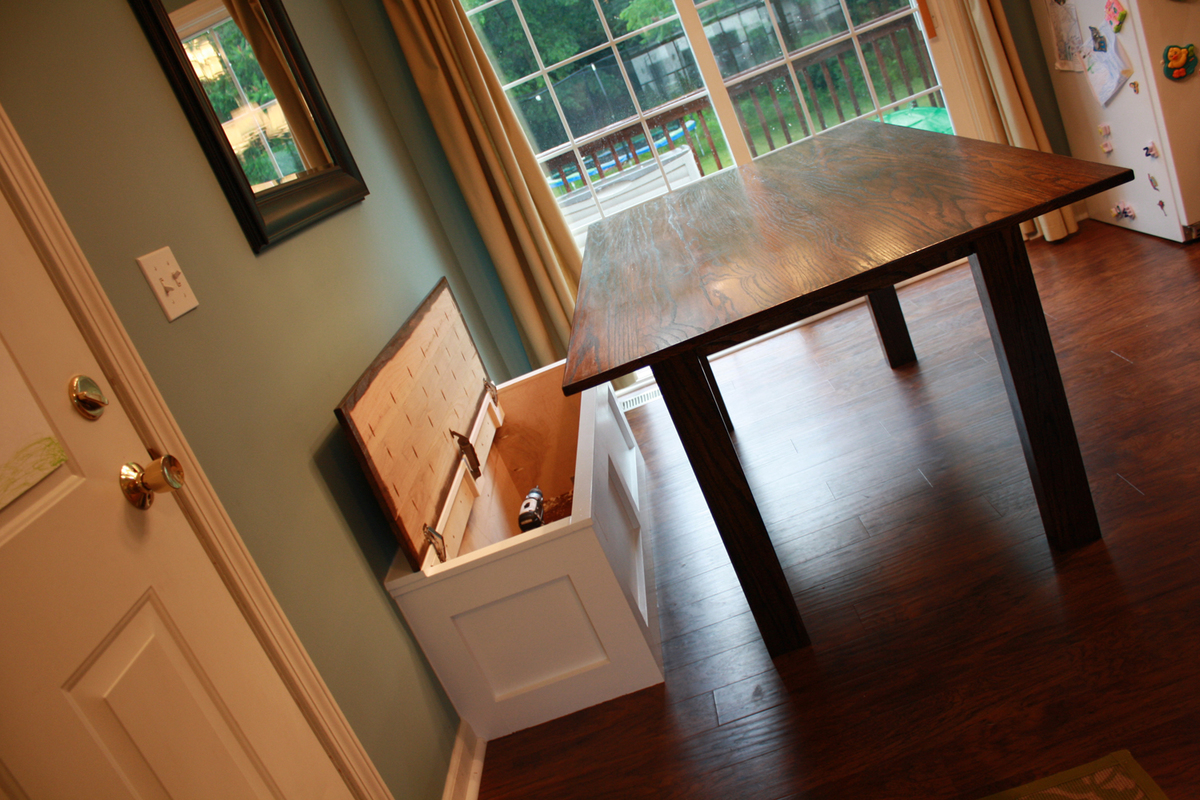
I used a biscuit joiner and glue to put everything together. For the door I used rail and stile bits. The panels are made of MDF, I used a bit made just for raised panel doors on the router table to make them, Oh by the way MDF makes a very big dusty mess, Please wear a mask it has to be really bad to breath.
I also added a slow close piece that is mainly used on kitchen cabinets, I just had to do that and it works very well.
Thanks Ana for such a helpful website

Chuck

Estimated Cost
$100 or so
Estimated Time Investment
Week Long Project (20 Hours or More)
Finish Used
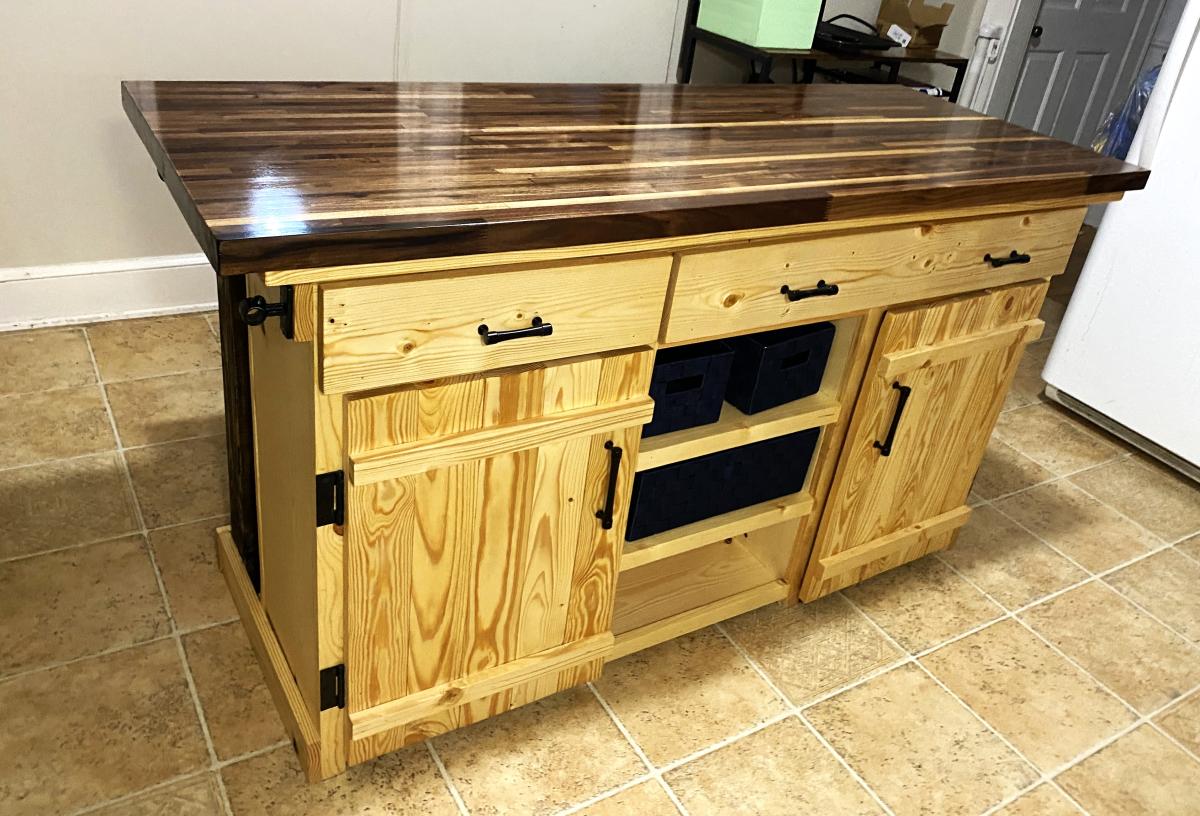
Primed and spray painted all the pieces. I also sanded between the coats of paint
Some pieces needed to be painted before assembly. The top is pine that was stained and varnished.
Spray painting in a basement really make the house smell bad, Ok Ok I am not always the smartest person.
Recommended Skill Level
Starter Project

Comments

JoanneS

Sat, 04/12/2014 - 07:01

You did a beautiful job on this! The finishing is lovely, and those raised panels are impressive!

chomuth

Thu, 04/17/2014 - 15:51

Thank You JoanneS
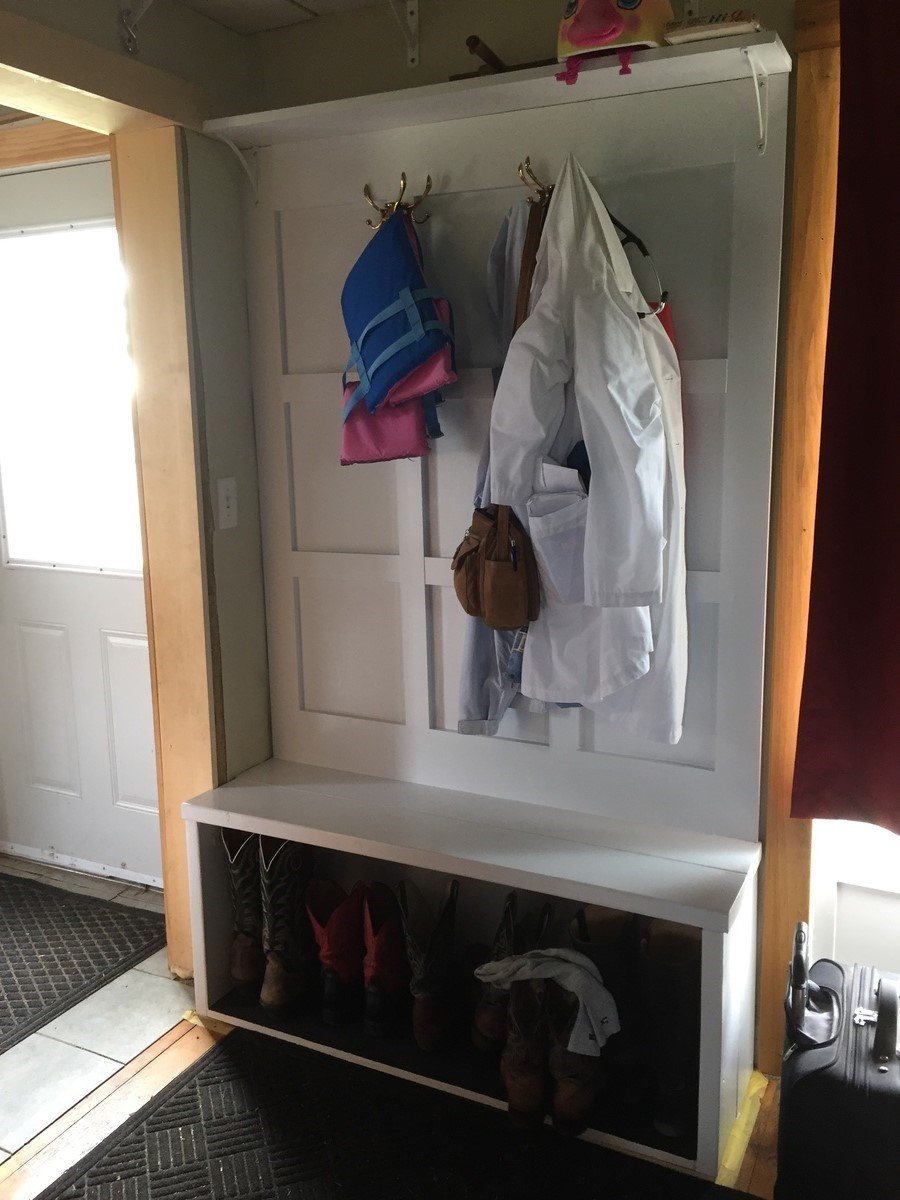
I am on my next project now. I need a place to hang my coats and not see all of the shoes, lost almost everything in a divorce including almost all my tools.
LOL
A small price to pay for serenity.

Kitchen table and bench

Submitted by Corky2321 on Mon, 05/04/2020 - 14:55

Super fun and easy project! I had to cut down the length of the table to 6 ft to fit the space in the house. I also did 2x8 tops on the bench for more surface area. I will def be building an ana white project again!

Estimated Cost
$100 for all supplies for table and bench
Estimated Time Investment
Day Project (6-9 Hours)
Recommended Skill Level
Beginner

Slat Bench

Cost: $45
Made this bench smaller than the plan so it measures 48" X 18". Using it in a spare bedroom so it will eventually get stained to match the wood furniture.

Estimated Cost
45
Estimated Time Investment
Afternoon Project (3-6 Hours)
Finish Used
Haven't stained the wood, can't decide on a color.
Recommended Skill Level
Starter Project

Comments

Rapturee

Mon, 12/04/2017 - 09:17

That was my idea as well, to shorten it. My wife just asked me if we could part with a few chairs on the back side of our dining room table and if i would make a bench or two across the back wall. Well "of course" i said hahah!!  Nice job on yours!!   :{)

Dining room plate racks

Submitted by Anonymous (not verified) on Mon, 07/11/2016 - 15:21

We took the plans and customized them to fit the area around our windows in the dining room.  We also added a 1x6 to the top so we could fit larger items and added a trim piece.  We made the shelves different heights to accommodate our plates and added a shorter shelf on the bottom 

Built from Plan(s)
Estimated Time Investment
Weekend Project (10-20 Hours)
Finish Used
Benjamin Moore Advance Dove White
Recommended Skill Level
Beginner

Providence Benches

After making the Providence Table, I whipped up these benches to match! They were super easy to make in one day. I love the sturdiness of these (and the look too). 

Estimated Cost
$50.00
Estimated Time Investment
Afternoon Project (3-6 Hours)
Finish Used
Benjamin Moore Arborcoat Teak stain and low VOC clear coat
Recommended Skill Level
Beginner

DIY Patio Table & Bench

Submitted by madore07 on Wed, 04/16/2014 - 18:47

Great projects for any beginner. Make sure you're working on a level surface for the table. I purchased simple planter boxes from a local hardware store, and worked around those. For the bench, my only suggestion is to verify you are square at each step- other than that it's pretty straightforward.

Estimated Cost
350
Estimated Time Investment
Weekend Project (10-20 Hours)
Finish Used
Teak Oil
Recommended Skill Level
Beginner

western boot storage

Submitted by Anonymous (not verified) on Thu, 07/14/2016 - 19:26

Altered plan somewhat to make it heavy duty seating when needed. 18" inside height is necessary for hubby's boots especially. Room for my lab coat too! It suits our 100 year old, nearly closet-less farmhouse well.

Built from Plan(s)
Estimated Cost
since I used mostly scraps/leftovers I spent as much for the hooks as the rest. Not even $30 in the wood but scrap collection is now depleted. Bench is 2X8s joined together on all sides, except bottom is 1X8s joined (love my kreg!)
Estimated Time Investment
Weekend Project (10-20 Hours)
Finish Used
white enamel
Recommended Skill Level
Beginner

My First Project: Farmhouse Table

Submitted by jtundra05 on Fri, 05/08/2020 - 20:51

Hafa Adai everyone. This is my first real woodworking project. I followed the plans for the Truss Farmhouse Table almost exactly as written. One thing I felt it needed was more support for the 10" breadboard ends. I added spare pieces of 4x4 cut to 5" with an 80 degree angle at one end to each corner of the tabletop base. This made the breadboard ends feel very secure and well supported.

Since I didn't have a table saw to rip the tabletop panels for clean edges, I used wood putty (not wood filler) to fill in the gaps from the 2x10 panels after I secured them together. Tip: I saw someone use ratchet straps to hold the table top tightly together when securing with screws in the absence of long clamps. Worked great.

The only thing I would do different is choose a wood without the treated staple marks for the table top. But since its an outdoor table its not too bad a look. Overall, it was a great learning experience and a very fun project to build.

Built from Plan(s)
Estimated Time Investment
Week Long Project (20 Hours or More)
Finish Used
I used Varathane Worn Navy stain for the table top; 2 coats, then used Varathane oil based (semi-gloss) spar urethane to clear coat both tabletop and base. Also 2 coats.
Recommended Skill Level
Intermediate

DIY Small Manger

Submitted by Anonymous (not verified) on Wed, 01/03/2024 - 08:34

Seen a picture somewhere and I liked it . It was on my mind so I made this Nativity Manger, no plans just went for it by memory.

Mike

2x4 out door couch

Submitted by Anonymous (not verified) on Sun, 07/17/2016 - 16:28

Was made using 2x4 plans from Ann-white web page. Thanks for the idea

Built from Plan(s)
Estimated Cost
120
Estimated Time Investment
Day Project (6-9 Hours)
Finish Used
Decking paint
Recommended Skill Level
Beginner

2+ Cubic Foot Raised Planter Box

Submitted by B.W.Martin on Mon, 05/11/2020 - 09:29

This is a cedar and treated lumber raised planter that holds over two cubic foot of potting soil and has a built-in drain out the back so your feet do not get wet. The treated lumber is used only for the frame, no dirt or water touch any wood.

The inner dimensions are 12"x12"x32", and it stands 24" tall. There is a seamless double layer of 4 mil plastic that opens into the drain only and is siliconed. There is also a seamless black mesh inside to keep the soil and nutrients from washing away.

Estimated Cost
$30
Estimated Time Investment
Afternoon Project (3-6 Hours)
Finish Used
No finish used, left cedar rough.
Recommended Skill Level
Intermediate

Surface Mount Fireplace Accent Wall

Submitted by Anonymous (not verified) on Mon, 01/08/2024 - 09:44

My wife and I wanted to do something with our surface mounted . Then came up with this design.

Bob Cousineau

Comments

Craftsman Style/Farmhouse Table Hybrid

A few months ago we decided to build ourselves a new table based on the Farmhouse Table plans. We knew we wanted to make the table out of some red oak that I had gotten for free, so we would deviate from the plans a bit. Long story short, I deviated from the plans _quite_ a bit. We had planned to make the table essentially with free materials, but that changed when I spent several days squaring up the rough stock I had been given. I also joined a crowned plank in the center of the table-top...big mistake. After glueing, screwing, and sanding, I realized there would be no way to get the crown out of the top. So...the first table-top became the bench cover and the other half is going to be used for a computer desk in another room. After a trip to the local lumber yard, I had about $220 worth of red oak: 4 1x4x14ft planks for the legs and 7 1x6x6ft planks for the table top.

I began by cutting the 14 ft. 1x4's to length and then joining them with lots of glue and clamps to form the legs. Next I set up the table saw to notch out the tops of the legs to receive the box. I prefer this method over using a circular saw or jig-saw. Picked up my wood-chisel to clean things up and then sanded, scraped using a card scraper (I would highly recommend a scraper for the smooth finish and handcrafted feel the tool provides), applied two coats of stain, and finished with two coats of wipe on poly.

I followed Ana's plans to construct the 2x4 base, modifying it to fit the size of my table and the specific overhang I sought. I also simply used 2x4 scraps to span the width of the box, and then Kreg jigged them to the box and table-top for support.

I joined the table-top planks using a Kreg Jig and glue. Lots of sanding and scraping again, and then I flipped the top, attached the box, and attached the legs. I used more of the 1x4's for the skirts to hide the 2x4 box.

We decided that we wanted to build a built-in bench for storage instead of a free standing one to accompany the table. I followed the plan at the following site, modifying it as necessary to match the length of our table. I also only built the bench and not the wall unit (http://www.thisoldhouse.com/toh/how-to/intro/0,,20301255,00.html). My mistake with the first table-top ended up being a blessing of sorts when we were looking for a sturdy bench-top.

All in all, we love it! It took a good deal of time to finish the table—in part because I'm a horrible perfectionist. The bench, on the other hand, was finished in a day's work.

The table is constructed entirely out of red oak. The bench-top is also red oak. The bench is birch plywood and pine.

Total cost for table: $220 for wood; we already had all other supplies
Bench: $25; again, we already had most of the materials needed.

Estimated Cost
220
Estimated Time Investment
Week Long Project (20 Hours or More)
Finish Used
Minwax Jacobean 2750; Minwax Wipe on Poly
Recommended Skill Level
Intermediate

Comments

Arts and Crafts

Fri, 07/06/2012 - 17:04

The table was a very rewarding project. We've only been using it for two days now, but it already feels like it's been there for years. The straight, clean lines of the Craftsman style are by far most appealing to me among furniture and architectural style.

Good luck on your table!

Bailey Console Table

Submitted by Anonymous (not verified) on Thu, 07/21/2016 - 16:21
Built from Plan(s)
Estimated Cost
About $100, including reclaimed lumber (though I also used scraps I had on hand)
Estimated Time Investment
Weekend Project (10-20 Hours)
Finish Used
Annie Sloan chalk pain in French Linen, then topped with dark wax
Recommended Skill Level
Intermediate

First thing I’ve ever built

Submitted by Nick.Olson on Tue, 05/12/2020 - 10:27

I stumbled across your videos via YouTube and I saw the video to make this coffee table. I was just browsing for things to do to keep busy during this pandemic. This is my first project and I could of done a lot better but I learned a lot from doing it. Thank you for your videos. I have since went on a shopping spree at Home Depot and Lowe’s Lol. I’ve bought Kreg jig, Miter saw, Makita drill set and circular saw and a Makita sander. I was like a kid at a toy store. I’m going to build your narrow console table next. Thank you for sharing your inspirational work. Nick Olson

Estimated Cost
$40
Estimated Time Investment
Afternoon Project (3-6 Hours)

Comments

Fancy Farmhouse Bed

Submitted by aennali on Sat, 07/07/2012 - 00:08

This bed has been a true labour of love over the last few months!

I made all cuts with a hand saw, and mainly used a kreg jig to assemble the bed.

The 'insert' in the headboard is made from macrocarpa window trim and tongue-and-groove panelling, which was leftover from when my parents built their house. The rest I bought from a local supplier as rough sawn timber, which I got dressed by a woodworking guy who lives nearby. Had I bought all the timber I used, the cost would have been closer to $400.

I didn't add the moulding that is included in the plan - it's just my preference.

It took a bit of work to convert Ana's plans into metric measurements, but I got there in the end! I love my bed

Estimated Cost
NZD$300
Estimated Time Investment
Week Long Project (20 Hours or More)
Finish Used
I started with 2 coats of Danish Oil. After deciding I wanted a deeper colour, I applied one coat of Briwax furniture wax, in Rimu, with super-fine steel wool.
Recommended Skill Level
Intermediate

Comments

Debi_G (not verified)

Sat, 07/07/2012 - 05:36

Your bed is fantastic! Love everything from the clean style to the finish. Congrats!

Back