
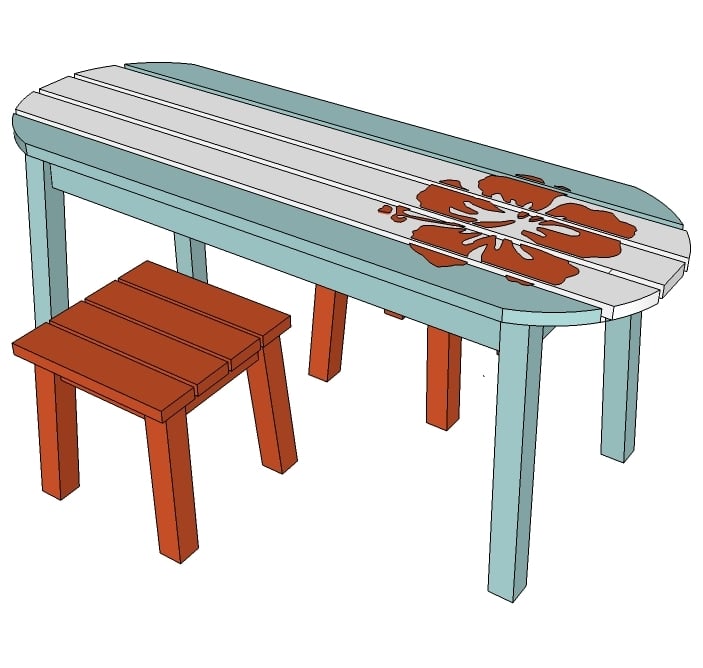

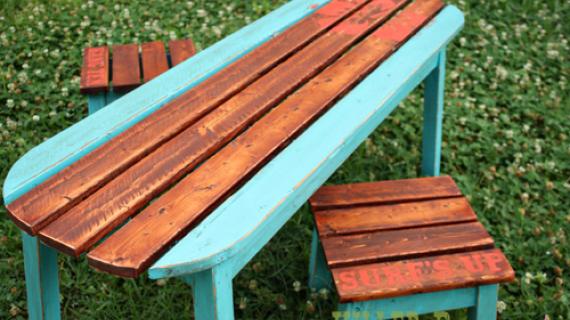
Add beach style to your space, or bring the vacation feel to your backyard with this surf board inspired bench, coffee table, or child's outdoor table. Featuring a sturdy design, this inexpensive cutie comes alive with fun painting. Pair the surf board table with stools for an outdoor table your child will love to eat and play at.
Use this DIY project plan as a coffee table - think adirondack chairs, or even a bench. Also included in this plan is help with adding a Hawaiian Flower to your Surfboard Coffee Table or Kids Table as shown in the diagrams.
Preparation
1 - 2x2 @ 8 feet long
4 - 1x3 @ 8 feet long
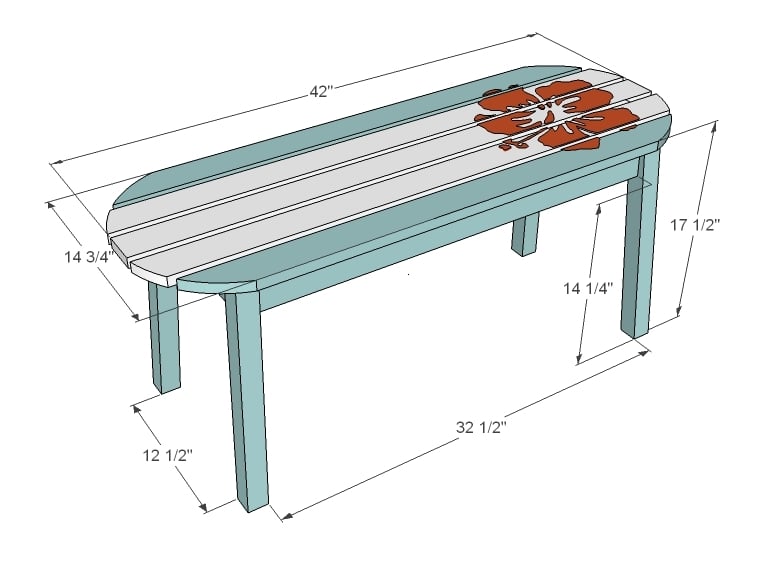
4 - 2x2 @ 16 3/4" (both ends cut 5 degrees off square with a 5 degree bevel, ends parallel to each other)
2 - 1x3 @ 10 1/2" (both ends cut at 5 degrees off square, NOT parallel to each other, short point to short point measurement)
2 - 1x3 @ 30 1/2" (both ends cut at 5 degrees off square, NOT parallel to each other, short point to short point measurement)
2 - 1x3 @ 11 1/4"
5 - 1x3 @ 42"
To cut the legs so the ends are parallel, adjust your saw to five degree bevel, at a five degree angle off square. Chop the end off of the 2x2. Then measure 16 3/4" along one edge (the top edge closest to you) and mark. Slide the 2x2 down and make the cut. Repeat for all four legs.


Please read through the entire plan and all comments before beginning this project. It is also advisable to review the Getting Started Section. Take all necessary precautions to build safely and smartly. Work on a clean level surface, free of imperfections or debris. Always use straight boards. Check for square after each step. Always predrill holes before attaching with screws. Use glue with finish nails for a stronger hold. Wipe excess glue off bare wood for stained projects, as dried glue will not take stain. Be safe, have fun, and ask for help if you need it. Good luck!
Instructions
Step 1

Since many of us have Kreg Jigs, and many of us don't, I try to make new plans adaptable for both. For Kreg Jig users, the diagram above shows all boards that you would need to drill pocket holes in.
Step 2

As you will find, it's going to be tough figuring out what end is what with a 5 degree double bevel, once you start working. I always take a second and mark the inside corners of the legs.
You can make this table without a double bevel, but it's much sturdier with a slight bevel and will last longer. Especially if you've got little surfers pretending to be big surfers on it :)
Step 3

Once your legs are cut, attach the aprons as shown above. You will need to carefully predrill holes and attach with glue and 2 1/2" screws. If you find your table has any wobble, add corner bracing.
Step 4

Center supports. Attach center supports as shown above.
Step 5

Step 6

Once your tabletop boards are nailed down, round the corners as shown above and cut of with a jigsaw. Sand the edges.
Step 7

You can print this diagram out and transfer it on your surf board table or bench or coffee table! Just draw the graph on your surf board table, and then draw the image located in each square of the graph onto the tabletop. Then paint with a contrasting color.
It is always recommended to apply a test coat on a hidden area or scrap piece to ensure color evenness and adhesion. Use primer or wood conditioner as needed.

Comments
AlohaMama
Mon, 05/16/2011 - 00:10
Absolutely brilliant!! This
Absolutely brilliant!! This surfboard table is PERFECT for my son!
Mahalo Ana for your fabulous plans! I love love love your site!
This is next on my list. (already made the Mason cal. King headboard, 2 Farmhouse Bedside Tables, the Tryde coffe table and your Harriet Higher Chair...all in 3 weeks!!)
Finally fab furniture in Hawaii without the prices!!!
Aloha Ana!!!!
Anonymous Coward (not verified)
Mon, 05/16/2011 - 04:55
Cowabunga! That's one gnarly
Cowabunga! That's one gnarly table!
I will point out that with a less beach-y paint scheme, maybe antiqued white or stained pine, it's just a cute oval table.