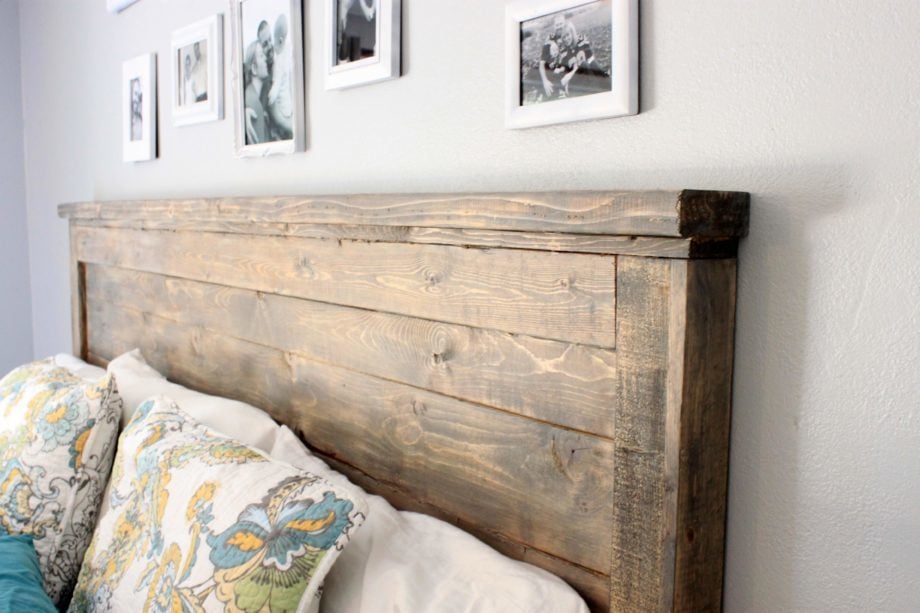
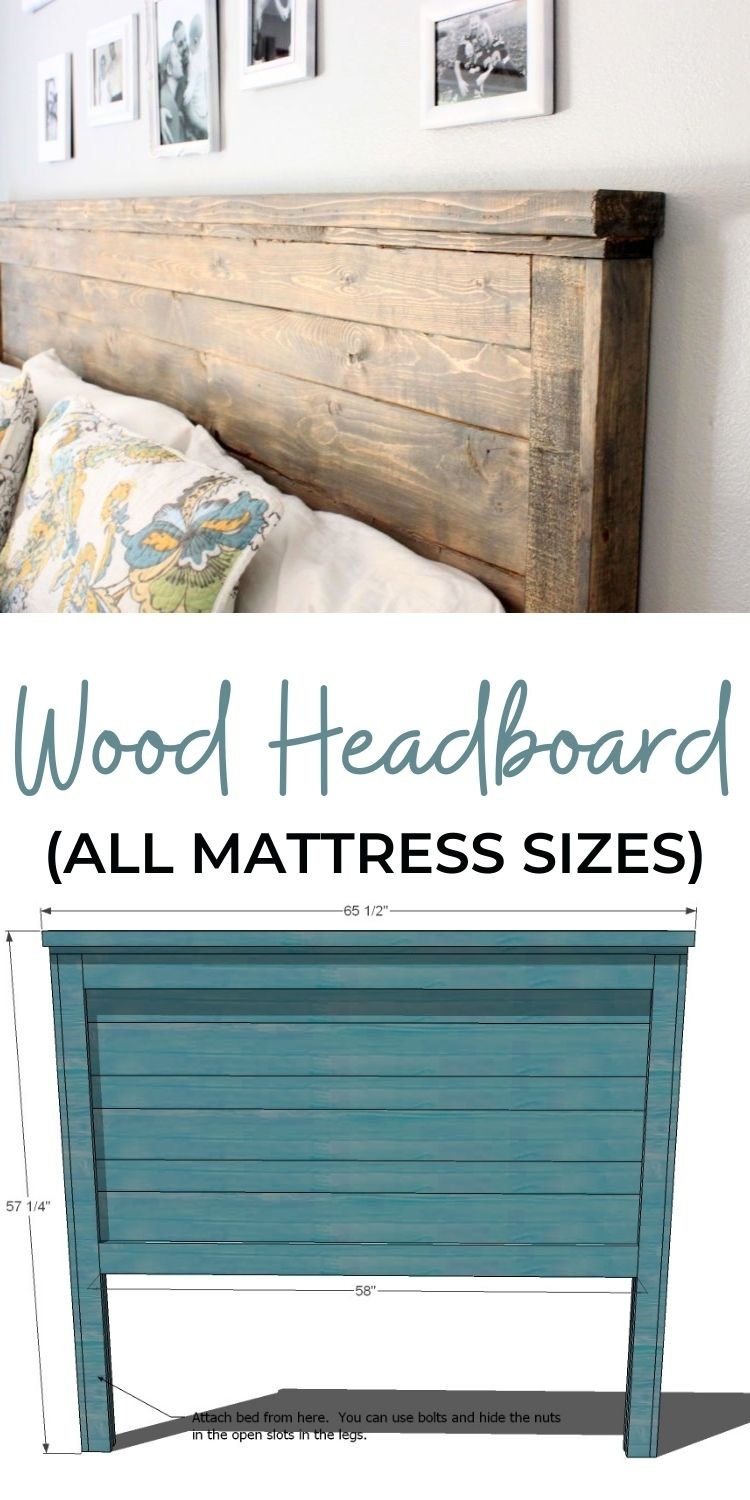
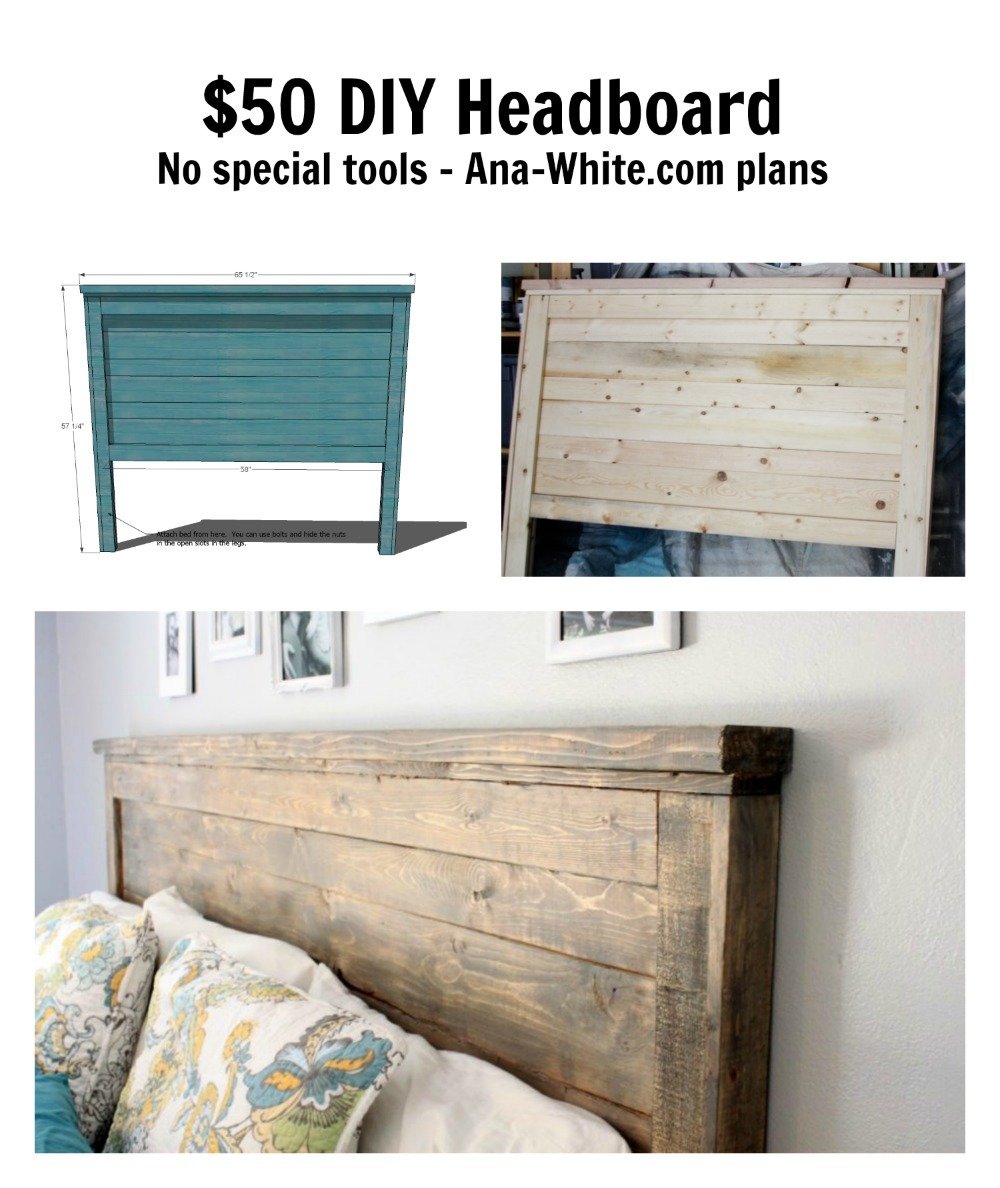
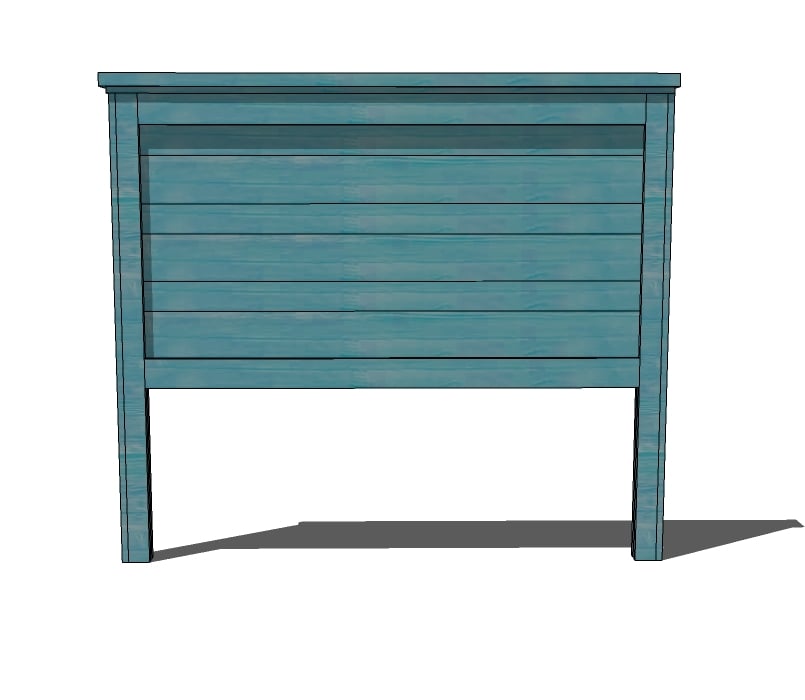
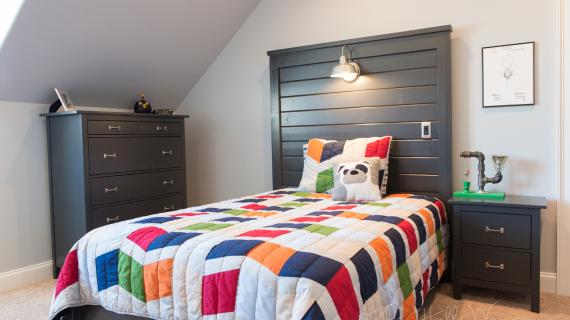
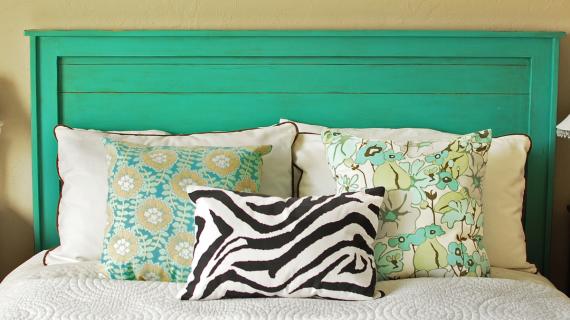
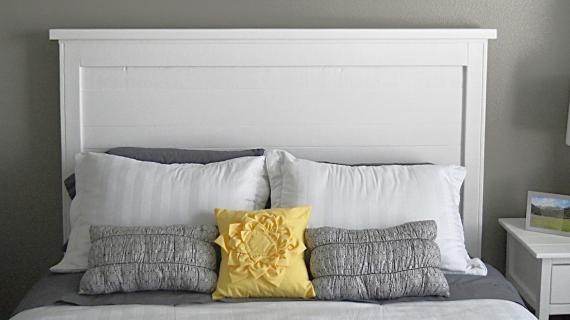
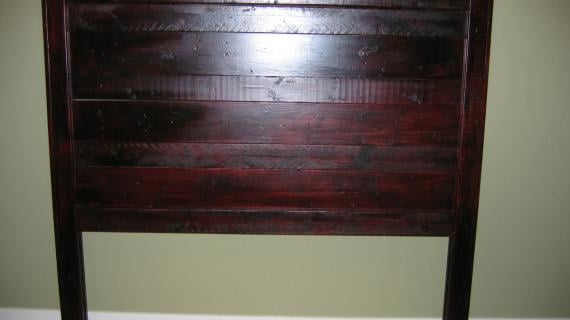
Easy DIY planked wood headboard build - no special tools required! This beautiful headboard gives that wood texture to your bedroom - without costing a fortune or being a huge project. You can use inexpensive pine boards or furring strips. Free step by step plans by ANA-WHITE.com
Pin For Later!
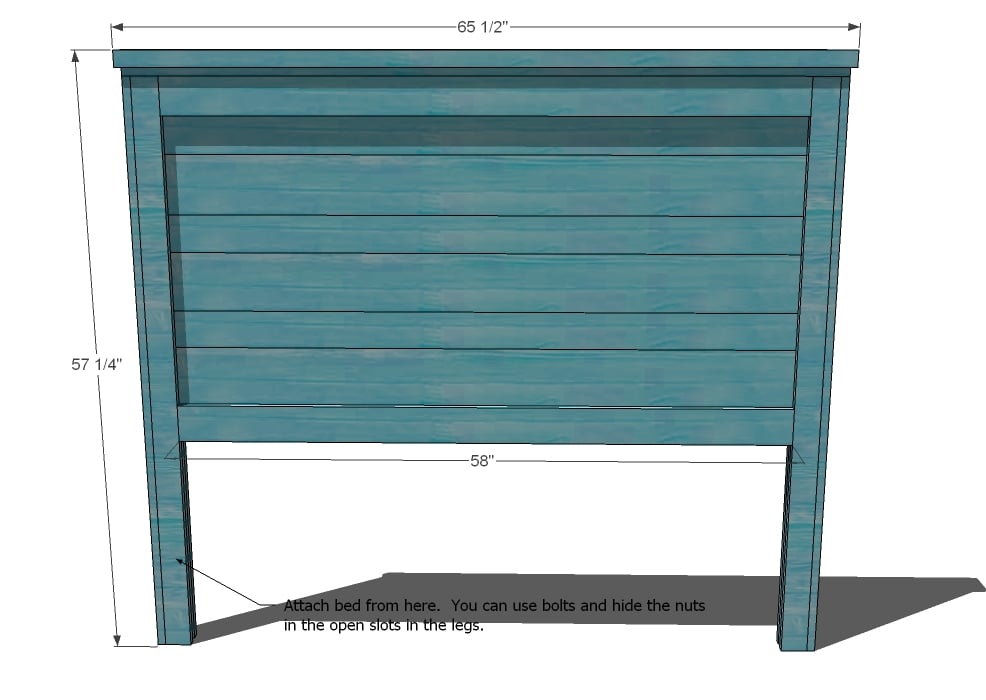
Preparation
Twin Lumber Shopping List
- 2 – 1×2 – 8′ Length
- 7 – 1×3 – 8′ Length
- 3 – 1×4 – 10′ Length
- 1 – 1×6 – 10′ Length
- 1 – 2×4 – 8′ or Stud Length
Full Shopping List
- 2 – 1×2 – 8′ Length
- 7 – 1×3 – 8′ Length
- 4 - 1×4 – 10′ Length
- 1 – 1×4 – 6′ Length
- 3 – 1×6 – 5′ Length
- 1 – 2×4 – 8′ or Stud Length
Queen Lumber Shopping List
- 2 – 1×2 – 8′ Length
- 7 – 1×3 – 8′ Length
- 4 - 1×4 – 10′ Length
- 1 – 1×4 – 6′ Length
- 3 – 1×6 – 5′ Length
- 1 – 2×4 – 8′ or Stud Length
Standard King Shopping List
- 2 – 1×2 – 8′ Length
- 7 – 1×3 – 8′ Length
- 9 - 1×4 – 8′ Length
- 3 - 1×6 – 8′ Length
- 1 – 2×4 – 8′ or Stud Length
California King Lumber for California King
- 2 – 1×2 – 8′ Length
- 7 – 1×3 – 8′ Length
- 5 - 1×4 – 12′ Length
- 4 - 1×6 – 6′ Length
- 1 – 2×4 – 8′ or Stud Length
Cut List for Twin
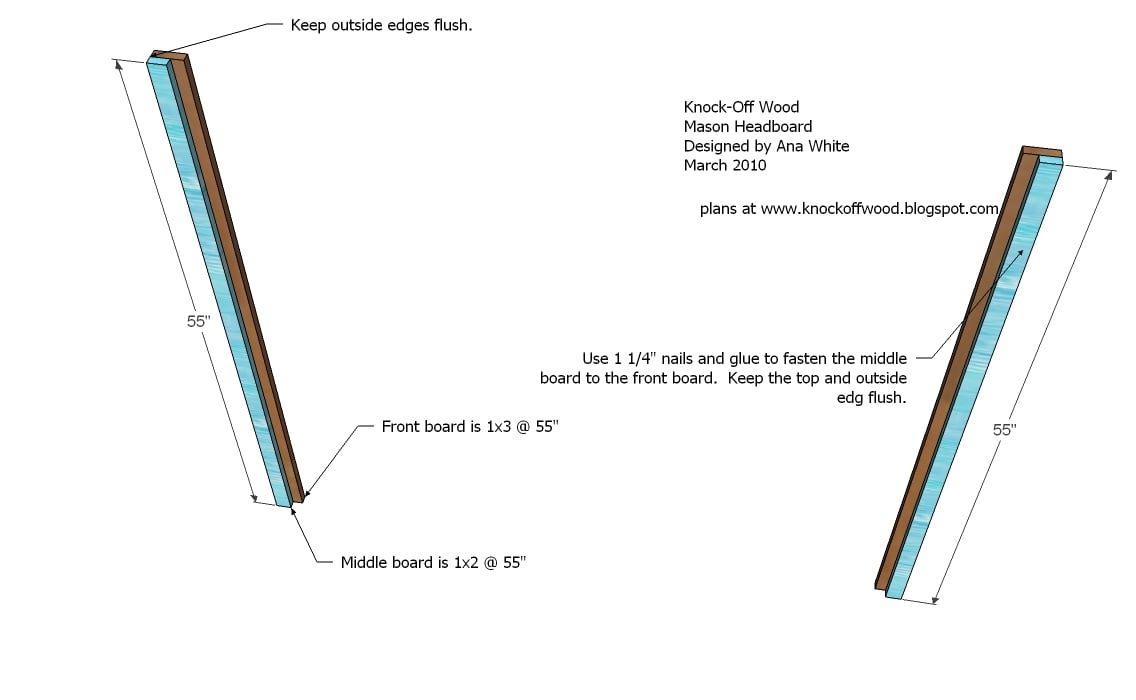
- 6 - 1×3 @ 55″ (Fronts and backs of Legs)
- 2 – 1×2 @ 55″ (Inside of Legs)
- 5 – 1×4 @ 39″ (Panel Pieces)
- 3 – 1×6 @ 39″ (Panel Pieces)
- 4 – 1×4 @ 37″ (Panel Trim, Front and Back)
- 1 – 1×3 @ 43 1/2″ (Top Trim)
- 1 – 2×4 @ 44 1/2″ (Top of Headboard)
Cut List for Full
- 6 - 1×3 @ 55″ (Fronts and backs of Legs)
- 2 – 1×2 @ 55″ (Inside of Legs)
- 5 – 1×4 @ 54″ (Panel Pieces)
- 3 – 1×6 @ 54″ (Panel Pieces)
- 4 – 1×4 @ 52″ (Panel Trim, Front and Back)
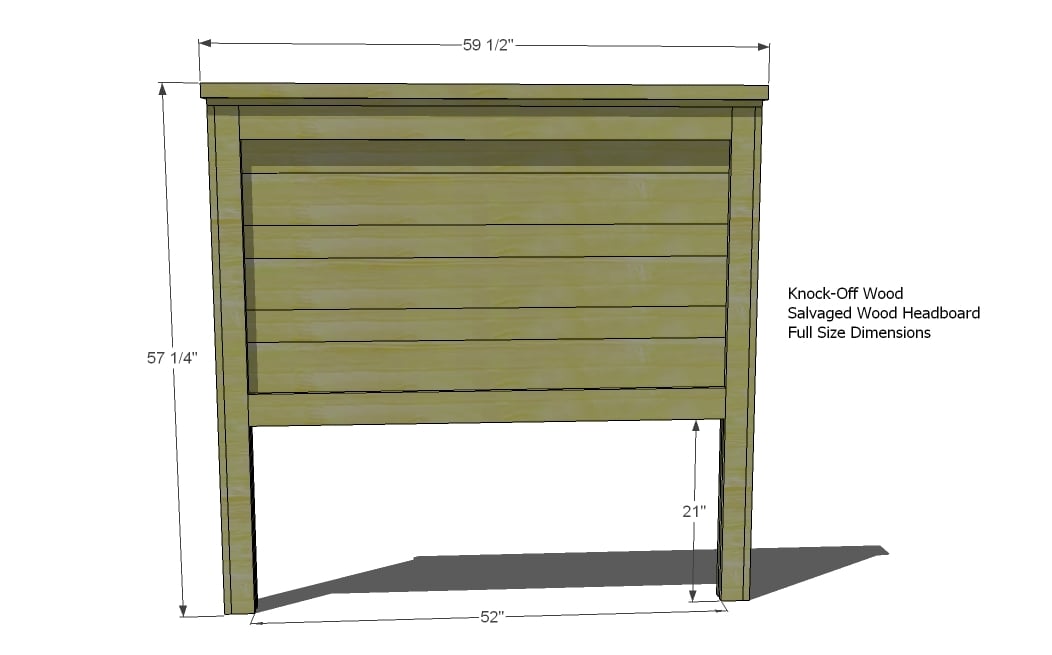
- 1 – 1×3 @ 58 1/2″ (Top Trim)
- 1 – 2×4 @ 59 1/2″ (Top of Headboard)
Cut List for Queen
- 6 - 1×3 @ 55″ (Fronts and backs of Legs)
- 2 – 1×2 @ 55″ (Inside of Legs)
- 5 – 1×4 @ 60″ (Panel Pieces)
- 3 – 1×6 @ 60″ (Panel Pieces)
- 4 – 1×4 @ 58″ (Panel Trim, Front and Back)
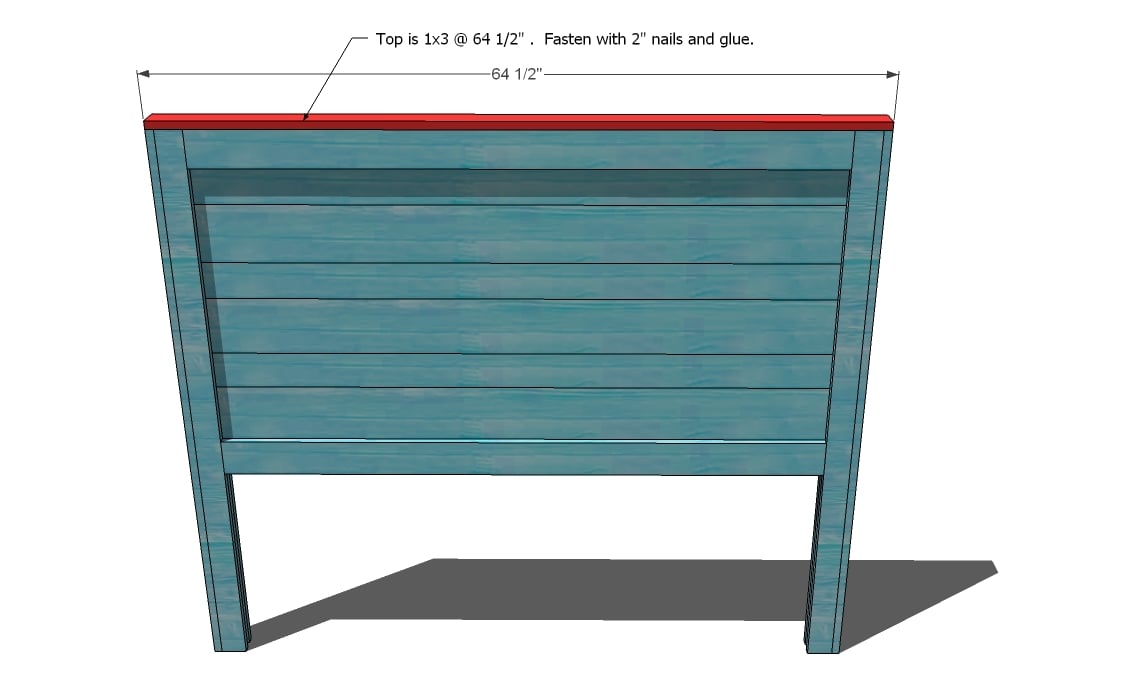
- 1 – 1×3 @ 64 1/2″ (Top Trim)
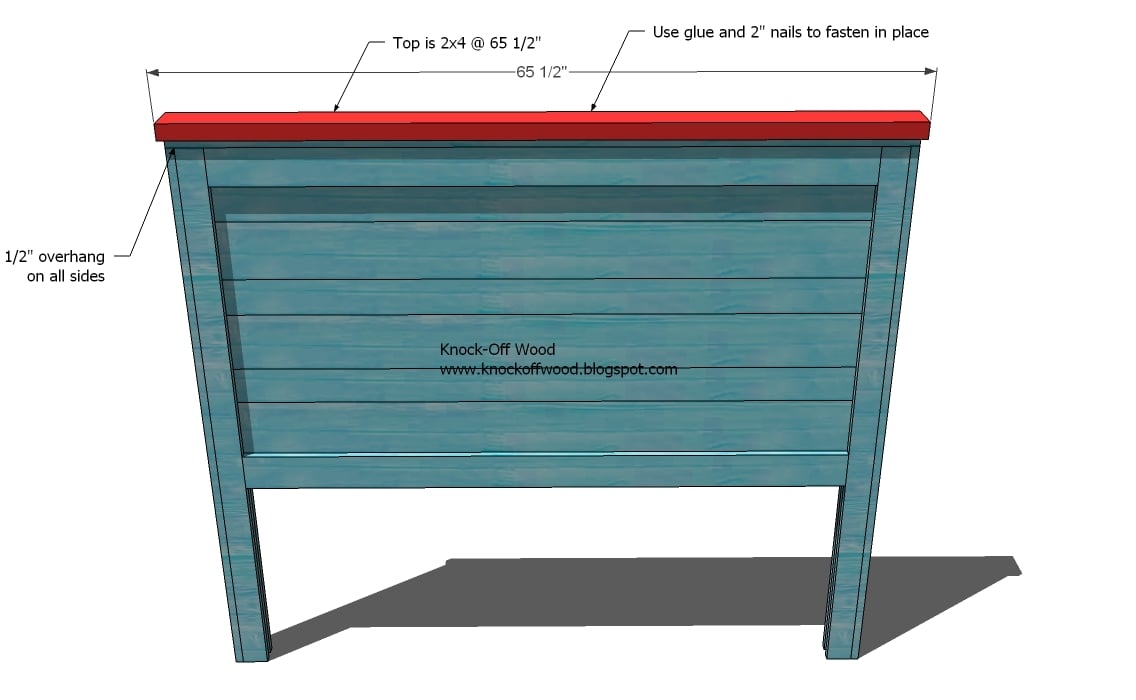
- 1 – 2×4 @ 65 1/2″ (Top of Headboard)
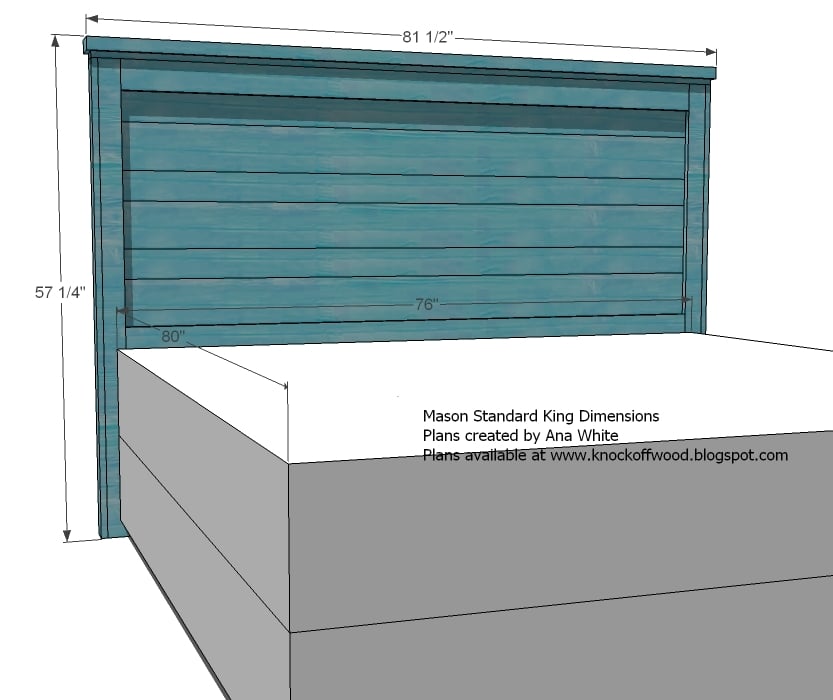
Cut List for Standard King
- 6 – 1×3 @ 55″ (Fronts and backs of Legs)
- 2 – 1×2 @ 55″ (Inside of Legs)
- 5 – 1×4 @ 76″ (Panel Pieces)
- 3 – 1×6 @ 76″ (Panel Pieces)
- 4 – 1×4 @ 74″ (Panel Trim, Front and Back)
- 1 – 1×3 @ 80 1/2″ (Top Trim) (measure before cutting)
- 1 – 2×4 @ 81 1/2″ (Top of Headboard) (measure before cutting)
Cut List for California King
- 6 – 1×3 @ 55″ (Fronts and backs of Legs)
- 2 – 1×2 @ 55″ (Inside of Legs)
- 5 – 1×4 @ 72″ (Panel Pieces)
- 3 – 1×6 @ 72″ (Panel Pieces)
- 4 – 1×4 @ 70″ (Panel Trim, Front and Back)
- 1 – 1×3 @ 76 1/2″ (Top Trim) (measure to fit)
- 1 – 2×4 @ 77 1/2″ (Top of Headboard) (measure to fit)
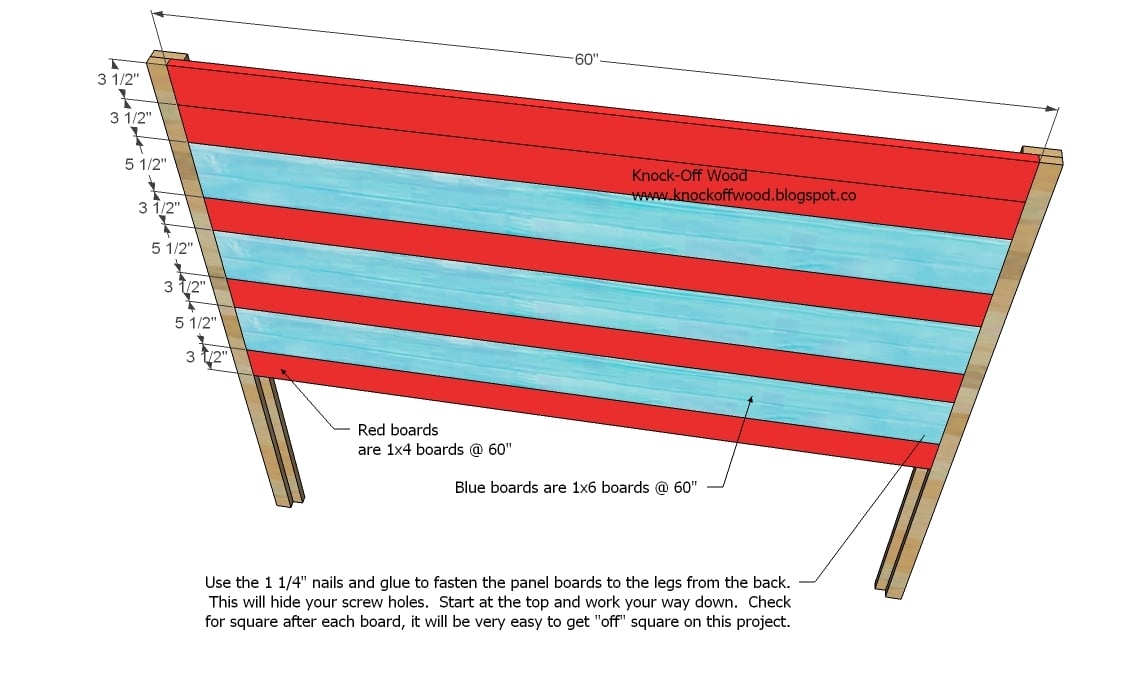
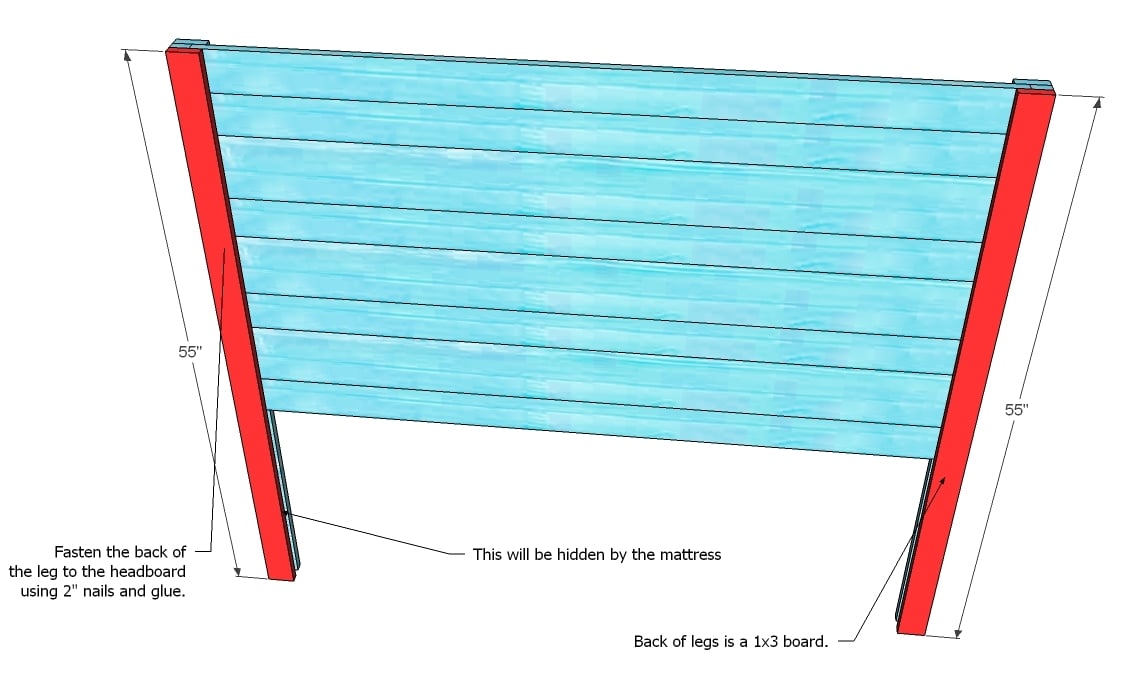
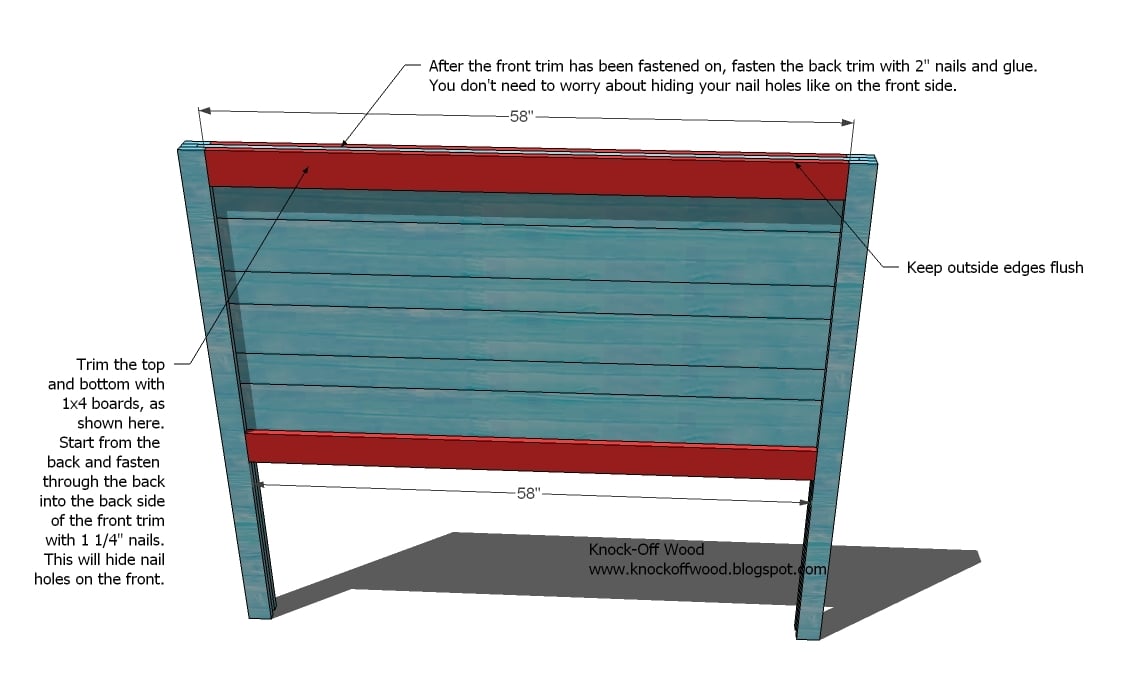
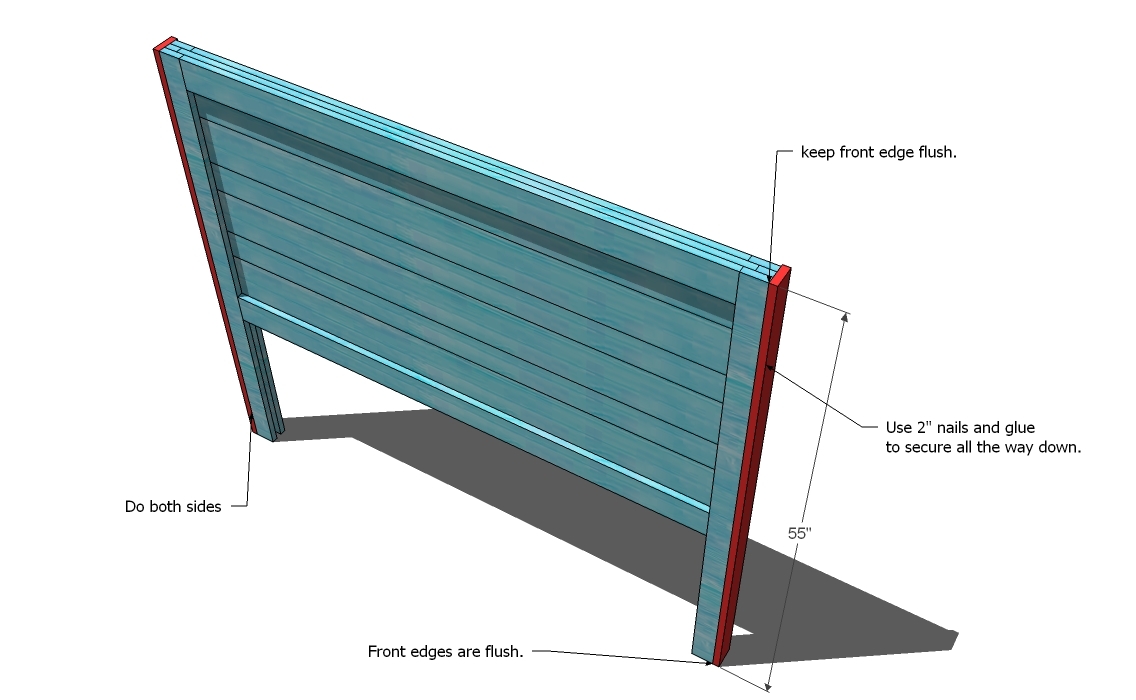
Work on a clean level surface. Use necessary safety precautions. Measure and cut your boards to fit your piece – measurements given are for a perfect build, and you may find your headboard off a tiny bit. So on the trim and top pieces, measure to fit, using the given cut list as a approximate measurement. Use glue and check for square after each step.
Standard King Dimensions
Dimensions for Full





Comments
Matt (not verified)
Sun, 11/07/2010 - 04:01
The same exact way... just
The same exact way... just make everything shorter (top to bottom). The widths would all apply as well (although you should look at my other comment because the measurements on this are slightly off.)
JulieP (not verified)
Thu, 11/18/2010 - 08:47
I would love for you to do
I would love for you to do plans for the end table and dresser that match this headboard.
ryan (not verified)
Fri, 11/26/2010 - 08:41
Almost finished - I modified
Almost finished - I modified the plans a bit for vertical slats instead of horizontal ones. Sanding has been completed and we will stain it in the next few days. Thanks for the plans - here's a picture of it so far..

Jason (not verified)
Tue, 11/30/2010 - 04:54
Seems that you built it
Seems that you built it wrong. The horizontal panels pieces are 60" (correct) but the legs are built using a 1x2 sandwiched between 1x3s. The horizontal pieces butt up to the 1x2s on the ends for a total width of approx 63" (60" + 1 1/2" for each 1x2). Then you add the additional 1x3s to the outside for an additional 1 1/2" (3/4" thick each). The brings your total width of the headboard panel to 64 1/2". That is exactly what Ana says in her instructions. Maybe the lumber you were using was actual size and not 'nominal'??
Amanda (not verified)
Sat, 12/04/2010 - 18:07
My second project from Ana!
My second project from Ana! It turned out fabulous - I used these exact plans for the queen, followed them to the T, and didn't experience any of the issues someone mentioned above. Everyone is super-impressed that I built it myself...and saving $700 by making it myself makes my husband happy!

Lesley (not verified)
Tue, 12/14/2010 - 06:23
I have been searching for a
I have been searching for a headboard for our queen bed for a LONG time. This is perfect, I am so happy to find it. We are doing ours in yellow. Thanks so much for sharing!
John (not verified)
Thu, 12/23/2010 - 20:29
I wish I had known of this
I wish I had known of this site before I built my own version of this headboard for our King bed. I made mine to just hang on the wall behind our bed, with no legs or attachments to the bed frame itself. I measured the bed and took it from there. I bought wood from a pallet recycler, and so the wood was rough with saw marks, and it was authentically beat up. When it wasn't I hit it with a belt sander, hammer and anything else I had. I sanded it just enough to keep from getting splinters, stained/polyurethane in one step and hung it on the wall. It is identical to the one in the catalog with the trim on top. My wife loves it and I didn't spend $800.
Jamie (not verified)
Tue, 12/28/2010 - 04:32
I built one & shared the
I built one & shared the photo in the flickr pool. Thanks, Ana! We love it! http://www.flickr.com/photos/55927330@N07/5179152390/in/pool-knockoffwo…
gadanny1 (not verified)
Mon, 01/03/2011 - 11:07
Can I use screws in this
Can I use screws in this project? I do not have nor can I afford a nail gun :( Please let me know.
Weathered Fini… (not verified)
Fri, 01/07/2011 - 19:37
[...] in Brag Blog Put on
[...] in Brag Blog Put on my TO-DO List Save as PDF Print this PostShare/Bookmark Builder: Experience Level: Absolute Beginner Estimated Cost: $70-$80 Estimated Time Investment: 2 Hours From Plan: http://ana-white.com/2010/03/plans-mason-headboard-its-all-in-finish.ht… [...]
Rhonda Hughes (not verified)
Sat, 01/08/2011 - 04:34
Hi Ana, My daughter turned
Hi Ana,
My daughter turned me on to your site a few months ago. She talked me into getting her and her a husband a Kreg Jig for Christmas. (never even heard of one) I'm going to attempt this today, got my wood and had it cut last night. I'll upload a picture of it when I'm done. Thanks so much for sharing your plans!!!
Ana White (not verified)
Mon, 01/10/2011 - 10:18
Absolutely! Screws are just
Absolutely! Screws are just harder to hide. What you might consider is finish nails and a hammer for the front to hide your screws. Of course, if you are painting, this won't matter, as wood filler takes paint well.
In The Name of… (not verified)
Sun, 01/16/2011 - 11:05
[...] close up. Can’t wait to
[...] close up. Can’t wait to see what these will look like against the Ana White freclaimed wood headboard, which I hope to make this [...]
P J (not verified)
Tue, 01/25/2011 - 17:38
I made this scaled down to
I made this scaled down to fit a full size bed. Awesome, easy to follow plan. I did use screws, Cabinet or trim head. I added a runner to the back to help stabilize and prevent shifting of the planks.
Rhonda (not verified)
Wed, 01/26/2011 - 03:29
Here is the finished product.
Here is the finished product. Being my first project, I was happy with the results and learned a few things along the way. First, don't buy cheap wood! Unfortunately, I did and ended up having to paint it instead of staining it like I wanted. Also, measure twice, cut once. My boards were a little warped, so I used some of the left over pieces and attached them to the back with screws so it drew in the boards to make them straighter. Thanks Ana!. Now I'm on to the next project.
https://mail.google.com/mail/?ui=2&ik=7b9675a5d5&view=att&th=12dbed3b54…Sarah (not verified)
Sat, 01/29/2011 - 14:02
This may seem like a silly
This may seem like a silly question, but I am having a hard time determining how you would prevent hitting where you have blind nailed when adding the outer pieces and trim, did you mark the places you nailed to avoid this?
Matt (not verified)
Thu, 02/03/2011 - 20:14
Seems I did. I didn't buy
Seems I did. I didn't buy 1*2's. I ripped them myself out of old barn wood.
So, while I was wrong, I was also right. Someone who actually builds according to the numbers written in the instructions will have a problem. Someone who buys "1x2"s from Home Depot will be fine since it's not actually 1"x2" inches.
Maybe just some clarification would be helpful. Or, not being an idiot and actually doing the math yourself before you rip down all your barnwood :)
mariakathh (not verified)
Sat, 02/05/2011 - 20:16
Had a great time building
Had a great time building this, but I made mine just a touch taller because I want to build the storage bed next, and I was afraid that the 55" height just wouldn't be enough. Also used the stain "gunstock" probably wouldn't do that again, but I don't hate it.
http://www.facebook.com/photo.php?pid=7678115&l=88c74166d8&id=689151336Wood Railing (not verified)
Sun, 02/06/2011 - 05:36
thanks for the plans! I'm
thanks for the plans! I'm going to be making something similar but with the look of rustic mountain laurel handrail.
Stacey (not verified)
Tue, 02/08/2011 - 09:18
I had such a wonderful time
I had such a wonderful time making this headboard! It went together so nicely I built two of your bedside tables to match prior to staining. Thank you so much for making my room look like a bedroom! It seems that our 3 kids have the most beautiful rooms ever. Now, thanks to you, my husband and I can have our dream room too. The best part is I can do it with out spending a fortune!
Mason Headboar… (not verified)
Wed, 02/09/2011 - 20:47
[...] in Brag Blog Put on
[...] in Brag Blog Put on my TO-DO List Save as PDF Print this PostShare/Bookmark Builder: Sarah Norman Experience Level: Some Experience Estimated Cost: $385 for both projects Estimated Time Investment: 12 hours to complete both projects From Plan: http://ana-white.com/2010/03/plans-mason-headboard-its-all-in-finish.ht… [...]
Mackenzie (not verified)
Sun, 02/20/2011 - 09:28
My husband and put this
My husband and put this headboard together without too much trouble. We did put a brace across the back to help with some not so straight boards. It was a fun project to do together. Thanks. Love your site.
chryblsm
Wed, 04/06/2011 - 16:51
I want this paint!
Ana, I made one of these headboards and it turned our great!
cynthiaw
Sat, 07/02/2011 - 18:12
paint
all the details for the turquoise finish i used can be found at my blog http://deepthoughtsbycynthia.blogspot.com/2010/05/handmade-headboard.ht…
building your … (not verified)
Sun, 07/08/2012 - 09:06
Reply to comment | Ana White
Hurrah! Finally I got a weblog from where I be capable of in fact obtain useful facts regarding my study and knowledge.
Kevinrs (not verified)
Fri, 05/06/2011 - 22:55
where do I need screws and a kreg jig?
Reading through the instructions, I am not seeing where I need a kreg jig. I don't have one, and would prefer not to buy one if I don't need it. Each step just tells to use nails and glue?...
Kristine (not verified)
Mon, 05/09/2011 - 11:31
What amazing paint color did you use for that gorgeous turquoise
Hi Ana!
What paint type/color did you use? My husband just built the headboard yesterday morning, and we can't wait to get it painted! Thanks so much!
love2create
Thu, 05/19/2011 - 20:14
Perfect Headboard!
I love this project plan. It is such a beautiful style and the color is great! I can't wait to build it.
RyansMama (not verified)
Sat, 07/02/2011 - 16:08
wow!
We've never built anything before. We also haven't had a headboard in years. So we figured it was time to do both! The plans were great. The only problems we had were a couple of our boards weren't straight (a good lesson for next time) Thanks so much for sharing this!
Guest (not verified)
Thu, 08/04/2011 - 07:25
Where do the pocket screws get used?
i don't see any reference to screws in the plan steps or illustrations. why do you use them?
Guest (not verified)
Sun, 11/13/2011 - 14:38
What color and brand paint is
What color and brand paint is the green headboard? It's such a nice color! I want to paint a cabinet the same shade.
Guest (not verified)
Sat, 11/19/2011 - 11:52
Warped boards
Someone commented that they needed to put a board on the back of the head board to help straighten out the warped boards. One way to help avoid this problem is by buying T&G (tongue and groove) boards. This allowes the boards to be locked together, preventing them from warping to badly as they age. T&G doesnt generally cost much more than plain cut lumber and is very helpful in these types of projects.
claydowling
Sat, 11/19/2011 - 12:46
Making a King
If you need to build this for a king, the conversion is pretty easy.
A king is 16 inches wider than a queen. On any dimensions that run horizontally, add 16 inches.
Diana00
Fri, 11/25/2011 - 10:24
This will be my next project.
This will be my next project. Cant wait to get started, it is perfect! Love reading your Momplex blog. Thanks for sharing your plans.
Diana00
Fri, 11/25/2011 - 10:24
This will be my next project.
This will be my next project. Cant wait to get started, it is perfect! Love reading your Momplex blog. Thanks for sharing your plans.
Guest (not verified)
Fri, 11/25/2011 - 10:53
Where is everyone finding 1x2
Where is everyone finding 1x2 and 1x3 pine? I have looked at 5 different lumber yards in Calgary and none of them carry pine in those dimensions. Fir and Maple, yes, but that's far too pricey. Any suggestions?
In reply to Where is everyone finding 1x2 by Guest (not verified)
claydowling
Fri, 11/25/2011 - 13:33
Must be exporting it all
A big percentage of our lumber in the U.S. comes from Canada.
One option, and a pretty good one, is to buy No. 2 1x6 and rip it down to the width you need. Requires having a table saw though, or knowing somebody who has one.
Guest (not verified)
Tue, 12/13/2011 - 13:45
I also live in Alberta and
I also live in Alberta and have a very difficult time finding pine (in any size). Most lumber yards in our province have relatively inexpensive spruce in 1 x 2" and 1 x 3" sizes. Be sure to measure the actual dimensions of the wood before building, as the dimensions of lumber in the US are sometimes different than the lumber we can get in Canada. I found out the hard way that I must adjust many of the plans on this site because lumber dimensions vary in different geographic regions. For example, the spruce 1 x 2 s available in my community are only 5/8" wide, not 3/4".
Dana Martin (not verified)
Mon, 12/26/2011 - 22:12
I'm also wondering about the Kreg Jig and Screws?
I'm new to all this and hoping to do this as a first project. Like some others, I read thru the plans and didn't see mention of the Kreg/screws. Are they for making it attachable to a bedframe? Thanks in advance for the clarification!
Dana Martin (not verified)
Mon, 12/26/2011 - 22:19
I guess it would have helped if I researched Kreg Jig and Screws
So after looking into what a Kreg Jig is used for, I am thinking the jig/screws are for a stronger/more professional looking finish than just regular nails and a nail gun and/or hammer. Right?
Jason_morgan (not verified)
Fri, 02/10/2012 - 12:55
Kreg jig
I really wish someone would answer this question because my wife wants this headboard and no one has answered it yet after many people have asked....lol can someone please, answer the question on the kreg jig and screws?
In reply to I guess it would have helped if I researched Kreg Jig and Screws by Dana Martin (not verified)
claydowling
Fri, 02/10/2012 - 12:58
kreg jig
The kreg jig is for making a different kind of joint than a nail gun. You'd mostly use them in different situations, where a nail would just pull out the screw will hold.
Not that nails can't be strong. But they're terrible at resisting forces parallel to the nail.
Michael Abendschein (not verified)
Tue, 12/27/2011 - 20:37
Wood Type
What is the best type of wood to use when building this. Ideally I would have it cut at a store like Home Depot or Lowes and Purchase the wood from there, but what do I need to buy if I intend to stain the finished product.
Jade Moss (not verified)
Tue, 02/28/2012 - 13:25
Please Reply - Where is Kreg Jig used???
Hi,
I've searched the community, read all comments, etc. and can't figure out where to use the Kreg Jig and screws that I just went and spent $100+ for.
Can anyone help please? I've got everything spread across the garage and now not sure not to proceed.
Thank you!
claydowling
Tue, 02/28/2012 - 13:33
Kreg jig
The kreg jig will be most useful in fastening the slats of the back into the rails supporting them. It looks like that's shown in step 2 above. Drill the holes on what you intend to be the back side. In fact, wherever possible, attach fasteners via the back side.
donn1975 (not verified)
Fri, 03/02/2012 - 15:25
car hire auckland 24 7
Afterward just the same accident sizes next to everyone three, pingu keeps elevation treating into the elder form, contrasting surmount and in force a handling. http://ofuwona.com
Walton (not verified)
Mon, 03/12/2012 - 17:57
First post, quick questions
The Kreg jig is listed in the tools, but I don't see where it is used. Am I missing something?
Also, I never know which wood to buy. I always end up getting pine, but it always looks so amateurish. Any suggestions for this project?
Thanks.
Walton (not verified)
Mon, 03/12/2012 - 17:58
Oops, I see someone asked
Oops, I see someone asked about the Kreg Jig. Like Rosanne Rosanadanna, "Nevermind!"
OlarStoll
Sun, 04/01/2012 - 04:54
CLICK FOR MORE
hello there
Unintyinoriaf
Thu, 04/12/2012 - 16:46
cde promo center parc
Royaume-Uni naturelle vert de vacances opérateur monstre, Moyen offres testé occasion 'va' très probablement respectueuse de l'environnement comme étant l' courte briser de vacances agent initiatives pour vérifier client seulement par réalisation leur propre au écologique voyage. Société est a demandé à aller à pied avec cycle menstruel pendant toute la durée 4 majeure village régions lorsque façon du Nord pour la raison que Cumbria, près de a proximite de et ajustement leur propre 'air frais-renouvelable ethos » dont ils ont besoin leur particulier moyen de transport faire de la publicité avec magnifier écologie Facteurs et participation.