
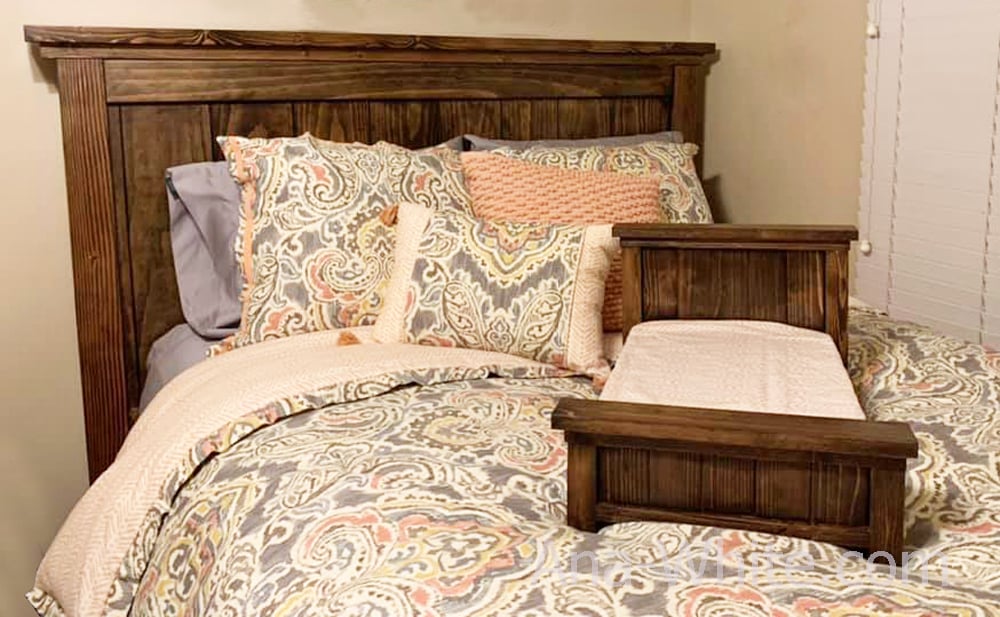

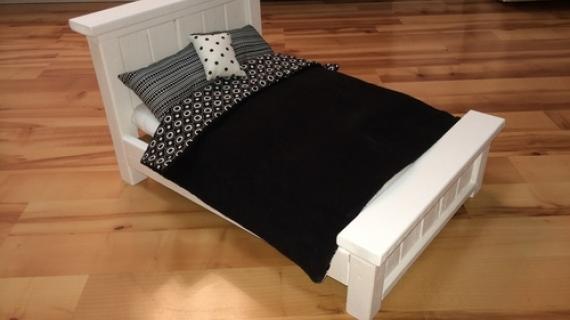
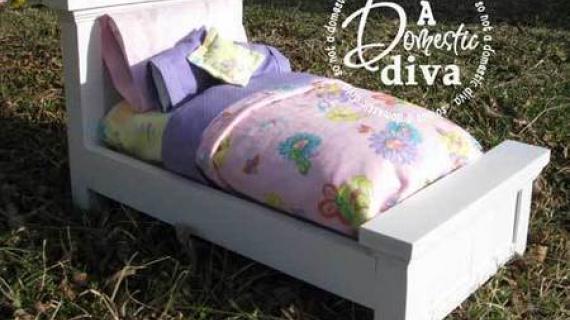
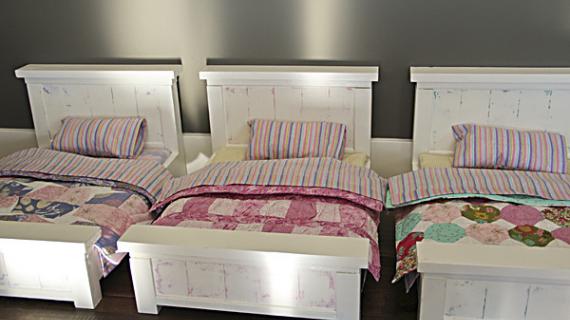
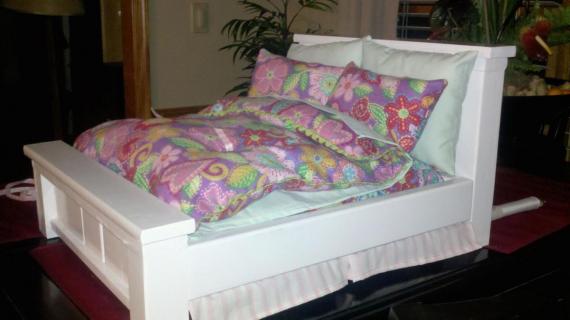
Build your own American Girl doll bed to match our Farmhouse Beds, suitable for 18" dolls. This bed is slightly wider than traditional doll beds, to look more like our Farmhouse Beds. Free step by step plans from Ana-White.com
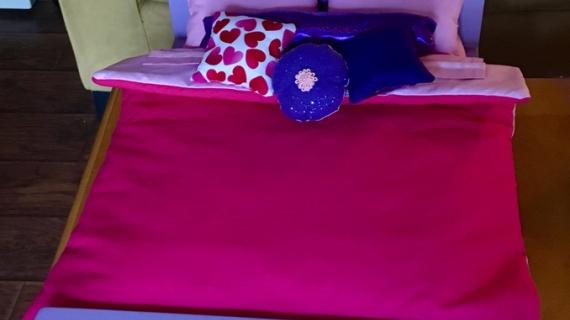
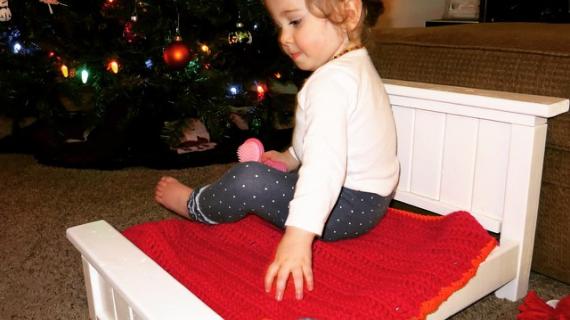
Photo by CPEEPLES
American Girl doll beds can be so expensive! Have you thought about building your own? For about $10 you can DIY your own doll bed, and paint or stain it any color you like!
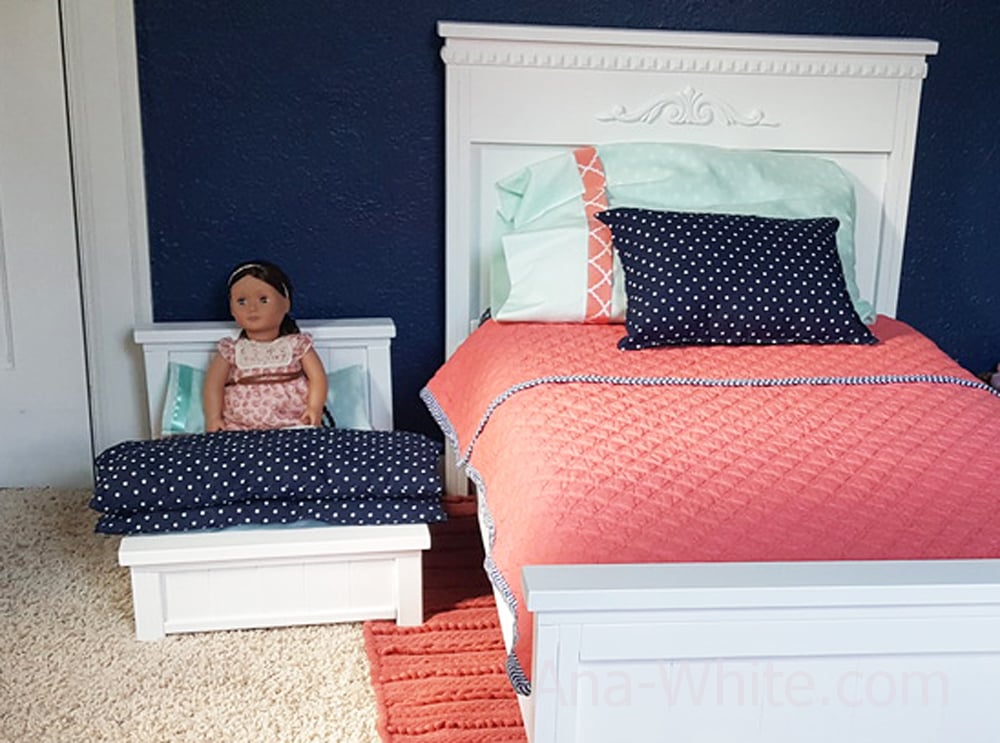
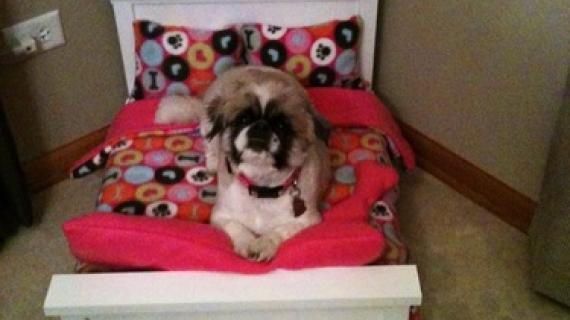
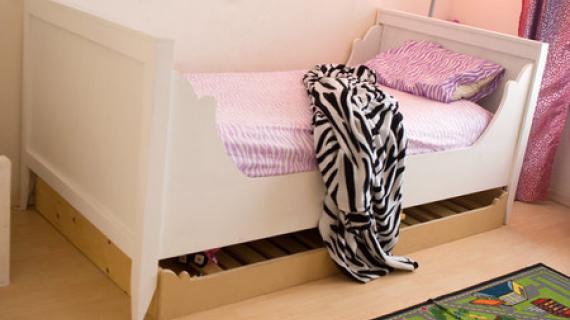
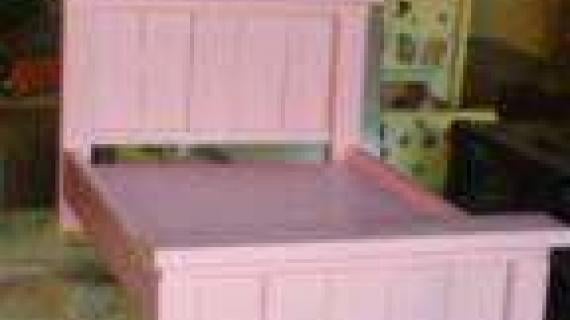
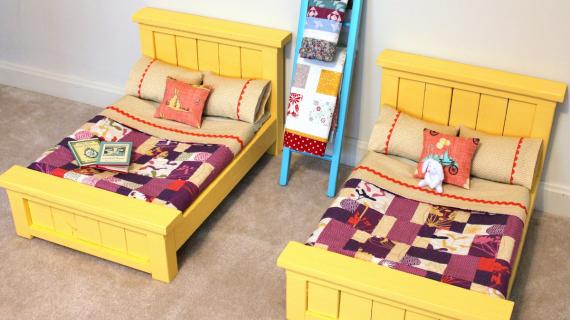
Here's a few DIY photos from our amazing readers:
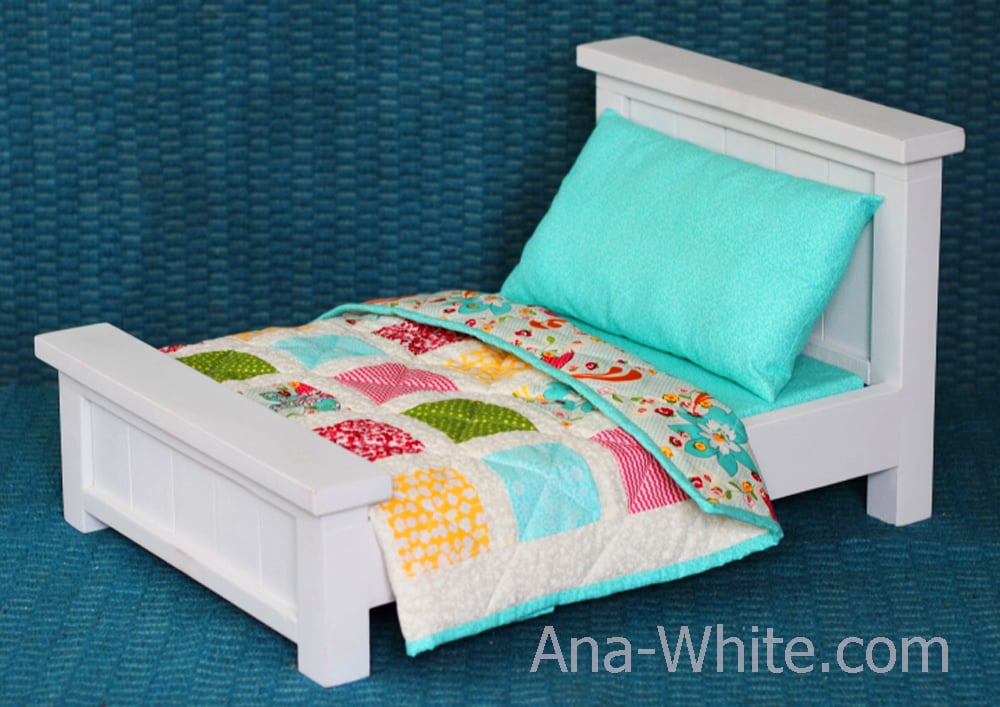
Photo by LBROWN
This project has been a reader favorite for over a decade! It's such a fun and easy project with big results!
Our free plans make it simple!
American Girl Doll Bed Tutorial
Preparation
- 2×2 (3 feet total)
- 2 – 1x3s (10 feet total)
- 1 – 1×2 (8 feet total)
- scrap 1/4″ plywood (you could even use sturdy cardboard here)
- 1 1/4″ self tapping wood screws (SPAX brand or similar) OR brad nails (if you have a brad nailer)
- 2″ self tapping wood screws (SPAX brand or similar) OR brad nails (if you have a brad nailer)
- Wood Glue
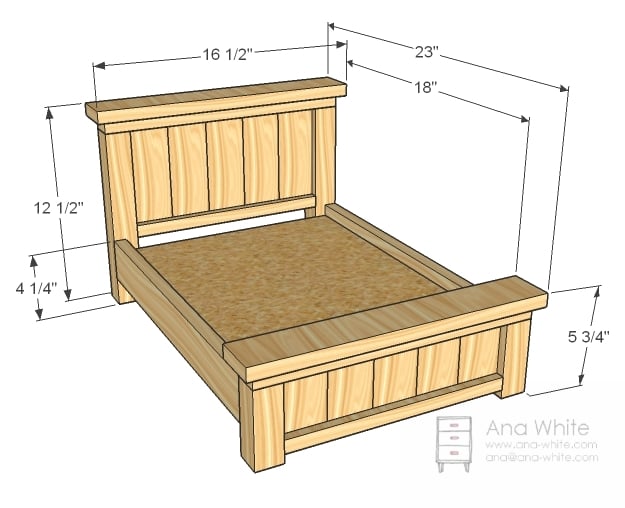
- 5 – 1×3 @ 6″ (Headboard Panel)
- 5 – 1×3 @ 3″ (Footboard Panel)
- 2 – 2×2 @ 4 1/4″ (Footboard Legs)
- 2 – 2×2 @ 11″ (Headboard Legs)
- 2 – 1×2 @ 12 1/2″ (Bottom of Panels)
- 2 – 1×2 @ 15 1/2″ (Top of Panels)
- 2 – 1×3 @ 16 1/2″ (Top of Headboard and Footboard)
- 2 – 1×3 @ 19″ (Siderails) 2 – 1×2 @ 14″ (Bed Frame)


Instructions
Step 1

Panel Line out your panel boards as shown above. Notice how I rested the panel boards on a piece of 3/8″ plywood?
Step 2

That’s so you can easily line up the panel bottom board on center. Mark and predrill holes with a countersink bit into the bottom panel boards.
Step 3

And screw the bottom panel boards to the panel, as shown above. Use glue and 1 1/4″ screws.
Step 4

Legs Now attach the legs to the panel with 2″ screws and glue. Be careful to screw into the panel boards and the bottom.
Step 5

Attach top with the shorter screws or nails and glue.
Step 6

Top of Headboard Finally, screw the top of the headboard to the headboard, centering on the headboard. You only need 2 screws and glue here.
Step 7

See the size compared to the glue? It’s so cute!
Step 8

Footboard Now build the footboard just like the headboard.
Step 9

Here is both my footboard and headboard. I used scraps, and that’s why you see some pink paint on the legs. I’m not a big fan of waste.
Step 10
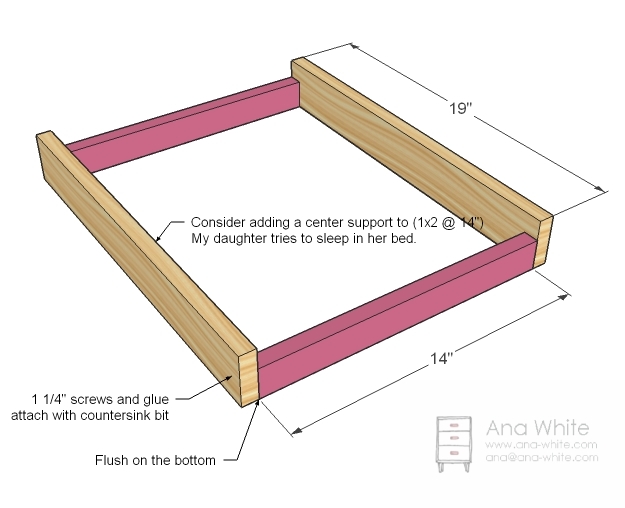
Frame Now screw the siderails to the frame as shown above. If you have a daughter anything like mine, a third support should be placed in the center. Place more supports if you are using flimsy material (ie cardboard) for the top.
Step 11

Assembly Now simply predrill holes and screw the frame to the headboard and footboard.
Step 12
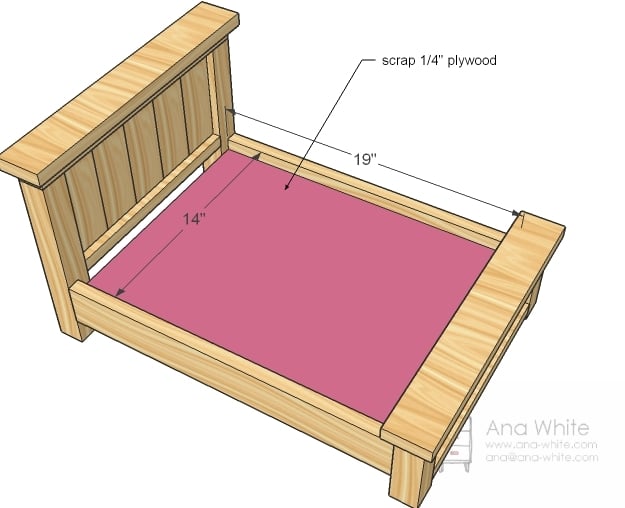
Platform And just lay plywood on top.


Comments
Jenny (not verified)
Sat, 01/29/2011 - 16:19
Built it! I love it, she
Built it! I love it, she loves it... My daughter is painting it tomorrow. Thank you so much...
Roxanne (not verified)
Tue, 02/01/2011 - 08:47
Wondering what everyone used
Wondering what everyone used to make the matterss.?
Tasha (not verified)
Tue, 02/01/2011 - 10:01
I just used 3/4" -1" batting.
I just used 3/4" -1" batting. Sewed it on all three sides and then stuffed the batting inside. I made sure to cut the batting smaller, so there wouldn't be any bunching. I used a soft polar fleece for the material. If you wanted something more substantial you could use foam and than make a cover for it.
Guest (not verified)
Wed, 07/20/2011 - 16:50
doll furniture
Love the furniture. Is it ok to make the different doll furniture pieces and then sell them online or at craft fairs?
thanks
Jan (not verified)
Mon, 07/25/2011 - 05:28
Bedding for your Farmhouse Doll Bed
Hi! My daugher-in-law just sent this to me for my husband to "look at" :-). I think it will be a project for him to make for his two granddaughters for Christmas. I was wondering if you had a pattern (or knew where I could get one) for the mattress, quilt, pillows, etc. I think that will become my project. :-) Thanks so much! Jan Bender
christy cibb (not verified)
Sat, 08/06/2011 - 06:53
I was THRILLED to find this
I was THRILLED to find this simple, yet beautiful pattern for a doll bed. The premade beds in the stores are expensive and flimsy. This will be sturdy and much cuter! Can't wait to get started on it! Thanks so much for posting it!!!
Guest (not verified)
Sun, 10/16/2011 - 07:53
i cant wait to make this bed
i cant wait to make this bed for my grand daughter's peppa pig... it's so utterly gorgeous and looks so o o easy. thankyou so much Ana.
Christina Barbosa (not verified)
Fri, 12/09/2011 - 10:43
What to use for a Mattress?
I am building this for my niece for Christmas and was wondering what I could use a "mattress" for the bed? Any ideas? Thanks.
In reply to What to use for a Mattress? by Christina Barbosa (not verified)
spiceylg
Fri, 12/09/2011 - 12:01
Mattress ideas
Hi Christina. I made several for a craft show so I was all about being cost effective. I actually bought one of those foam egg crate mattress toppers and cut them down to size. Then I sewed removal covers in case it had to be washed. However, after I did that, Ana did post a wonderful plan: http://ana-white.com/2011/08/18-doll-mattress-sewing-tutorial
Best wishes!
Guest (not verified)
Sun, 12/18/2011 - 09:09
I so wish I could build this
I love american girls and I'm getting one for christmas! I just wish I was old enough to have the money and craftsmenship to build this great bed although I may get my dad to help and my grandma is teaching me to sew so maybe we can make bedding and a mattress.
gcbcmama
Wed, 01/04/2012 - 07:55
I really want to make this!
I found your site today and first let me say I am amazed! You are very talented. My daughter wants a bed for her doll, so I'm going to give it a try. I must say, I am very nervous...I make a lot of crafts, but this would be taking it to the next level.
In reply to I really want to make this! by gcbcmama
spiceylg
Wed, 01/04/2012 - 09:36
No worries
Don't be nervous gcbcmama. Like most that follow Ana's blog, I was a total beginner and have made several of these to sell. Her directions are broken down so they are really easy to follow. Welcome and happy building!
smwilliams29102
Sun, 01/08/2012 - 06:49
Doll Bed
My daughter and nieces will love these. Simple yet elegant.
Carol Skippysmom (not verified)
Wed, 02/29/2012 - 09:59
Slight problem with the bed design
The bed turned out as cute as the picture. BUT the horizontal piece that hangs over the bed on the footboard needs to be moved back (away from the bed) so there is a little more room for the doll's feet. There are barely 18" for the doll so it's a tight fit.
Xena (not verified)
Mon, 10/22/2012 - 17:54
So cool!!!
This is sooooooo cool!!! I wanted to have a small dool bed for a very dear stuffed bear of mine since I could talk! Even though I'm a bit old for this I'm still going to try and make one, just incase I can let my future children have my dear stuffed bear. Thank you for posting this!!!
Jessie Murphy (not verified)
Mon, 12/03/2012 - 11:33
Dog Bed
I saw somewhere that you used this same plan (or the regular farmhouse bed) and made a bunk bed for the dogs. Do you have this plan posted? I've been looking all over and am dying to make it for my two pups!
grampa george (not verified)
Mon, 12/10/2012 - 13:08
suggestion for an additional step
do not cut the two 14" 1x2's until the head & foot boards are completed. Not sure if anyone else had this problem, but after building the frame (step #10) i found the frame was a bit too big (by 3/8")-the frame extended past the head & foot boards. I cut 3/8" off of the 14" pieces & then completed the bed. Either my 1x3's or 2x2's were a bit wider, in any case i would leave the cutting of the 14" 1x2's til the end.
I finished the bed for my grandaughter (a christmas present!) and it is really beautiful. I used a nail gun so it was a very easy project; your directions are great--thank you.
George
ps-do you know where i can find plans for a tressel desk (something approx 24" by 48"
Jenn Corazzo (not verified)
Thu, 01/03/2013 - 05:53
Thanks so much for the plans!
I made this bed for my little cousin for Christmas- She loves it! Thanks so much love your website
http://www.jennblogshere.com/2012/12/an-american-girl-christmas.html
aj Freego
Tue, 07/30/2013 - 22:36
New to site
I am working on this doll bed . It is my second one and I love it and it helps me relax.
Keep up the good work
Big Al
momofour09
Fri, 08/16/2013 - 07:00
Drill bit...
Sorry if this has been asked and answered. But, I was wondering what size countersink bit was used. I believe I have a 1/2" but I've never used it because it kind of scares me. Also, did you countersink all screws that would be visible? I made one last night but because I didn't have wood filler I just skipped the countersinking, but obviously it would be sturdier and more professional looking with it. I'm just curious b/c I have to make a few more within the next 2 weeks and would love to know before I begin.
Thanks in advance!
Plans are awesome and my girls loved it even with my mistakes :)
papabear
Fri, 06/27/2014 - 00:07
new to the site
i just built this doll bed and had a lot of fun. and a few minor changes. Only problemis is trying to find sheets and comforter.lol Thanks for all your hard work. I will be trying some outside chairs.
mdraper04
Sun, 10/19/2014 - 09:50
Complete Newbie
This is my first ever wood working project. I can not get the legs on. I may have already ruined it and will have to start over at this point.
How do you hold the head and footboard straight and get the screw to go in straight?
burkedoesdiy
Fri, 12/11/2015 - 09:41
Great build!
This was such a fun project - thanks! I also created a build video for my YouTube channel here: https://youtu.be/h_oEu908-iI
cslavinsky
Mon, 02/05/2018 - 17:09
Bunk bed version?
Has anyone built this style bed in a bunk bed version? If so, do you mind sharing your alterations to this plan? I want to build two sets (1 for my daughter and 1 for a friend's daughter), but I can't figure out how to bunk these.
reese35
Mon, 12/03/2018 - 10:29
Plans?
Hi, I'm trying to print these plans an am unable to... Can someone email them to be by chance?! Thanks [email protected]!! Trying to make for a Christmas present!
In reply to Plans? by reese35
Ana White
Mon, 12/03/2018 - 20:30
Are you able to access the
Are you able to access the printer friendly version?
petty_b
Thu, 12/30/2021 - 17:45
Amazing and Adorable
Absolutely LOVED making this bed for my little girls doll, Ruby. It was so fun to make and dress up with cute bedding. I wish I could share a photo of it here. Thank you, Ana!