


DIY industrial style adjustable height bar stools - plans by Ana-White.com
Hi everyone!!!
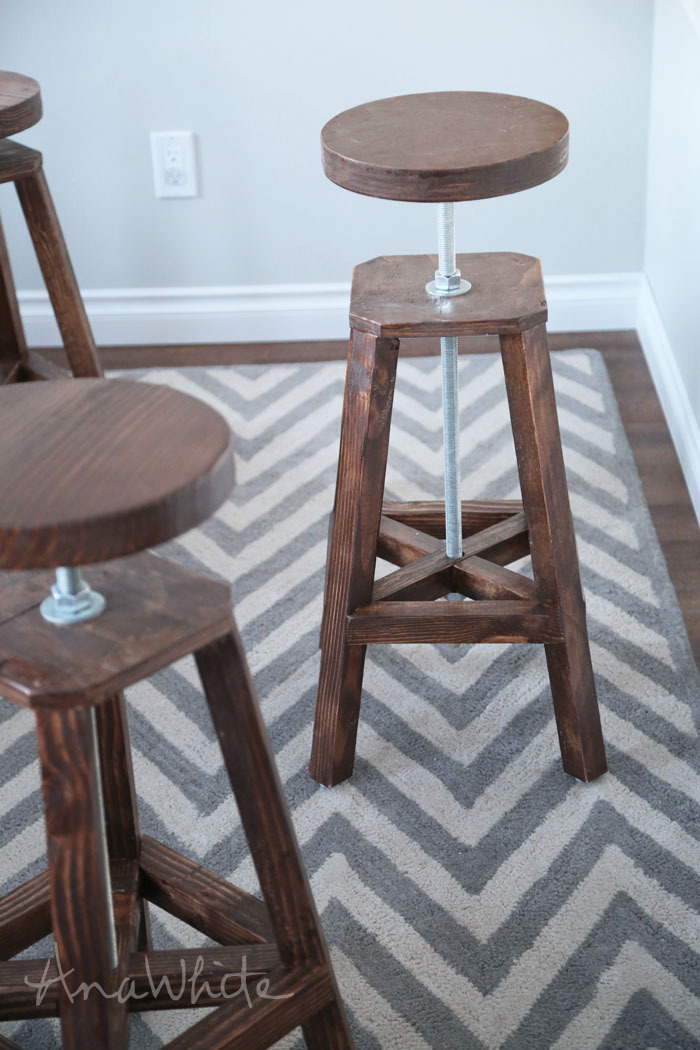
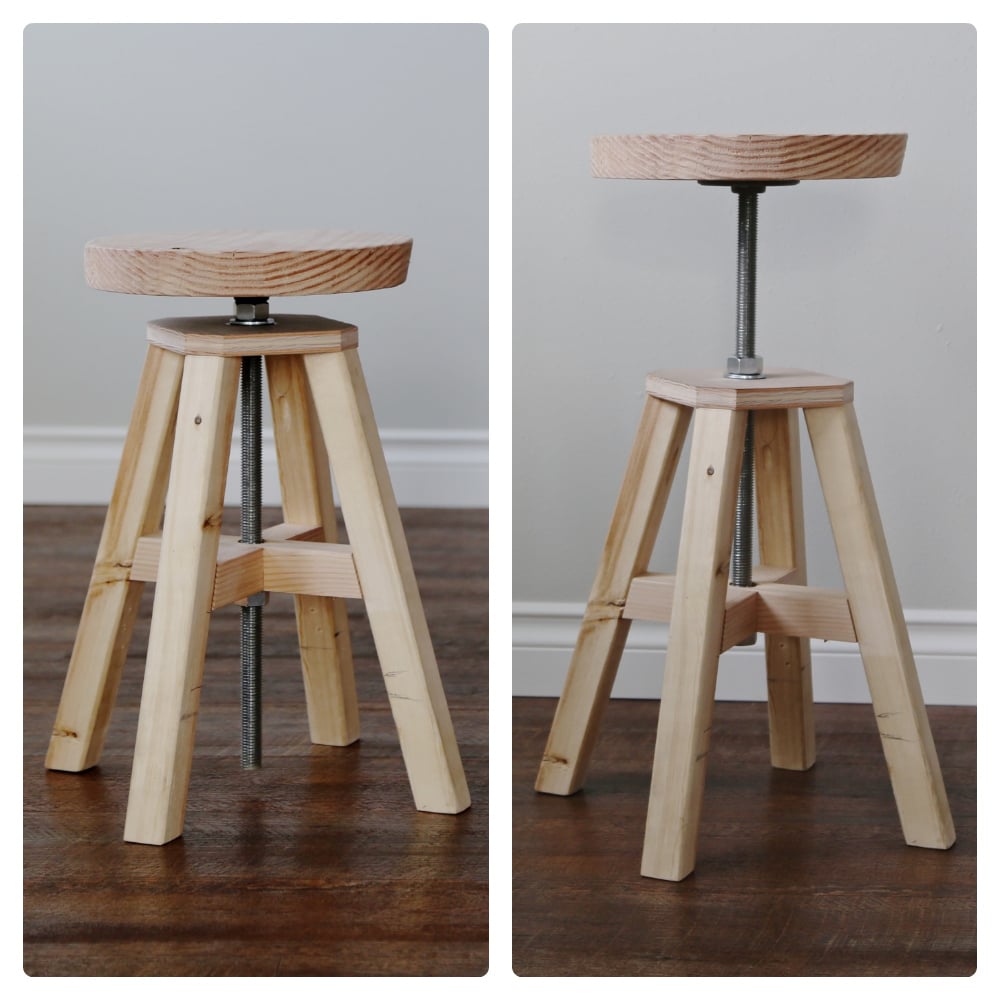
Last summer, Toliy (our favorite design college student) worked with me to create this super cool little adjustable height stool -
We were pretty bummed when Toliy had to head back to college in the fall, never getting enough time to make matching bar stools.
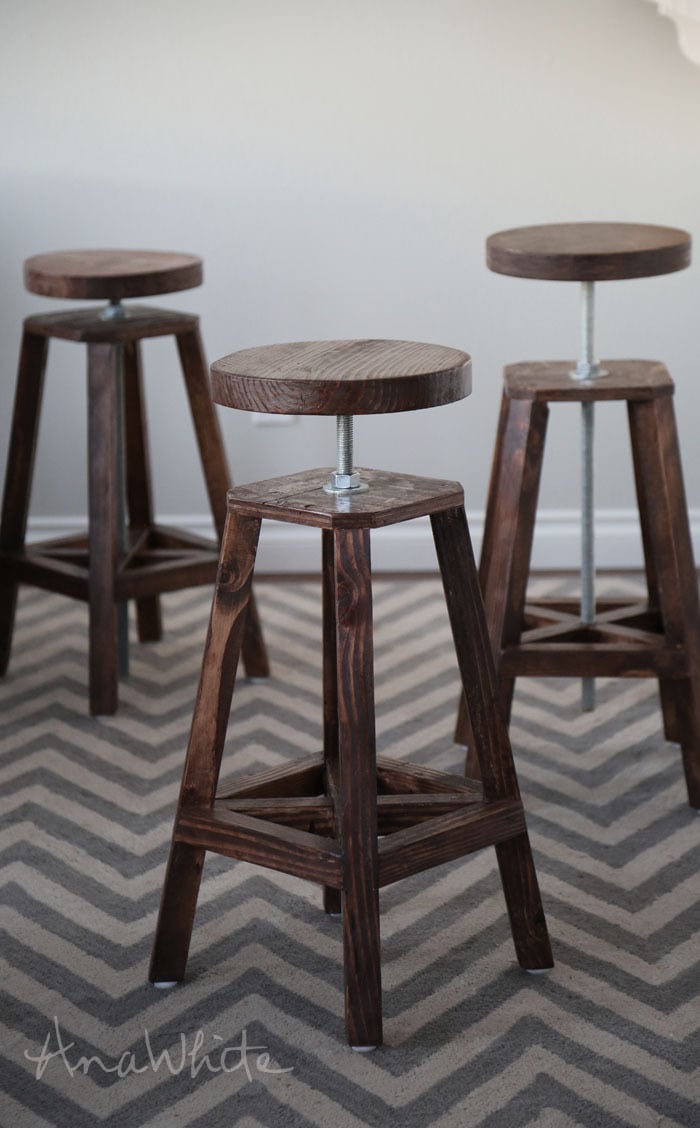
So when Toliy texted this Christmas break, saying he was back home for a few days and wanted to work on those stools, I said, uh, I'll take three!!!

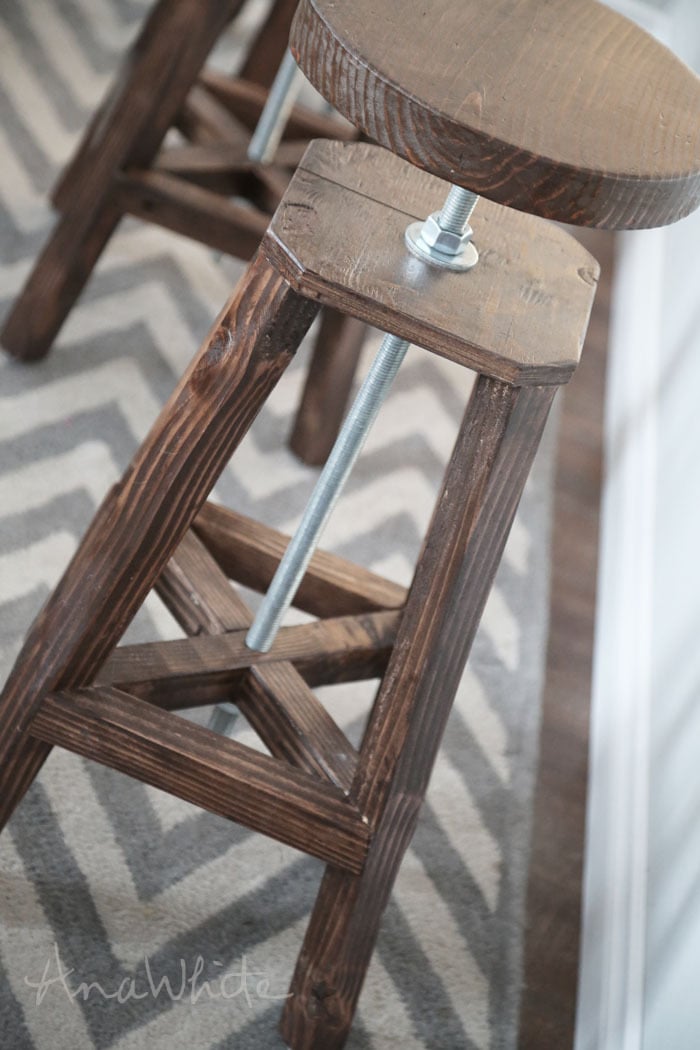
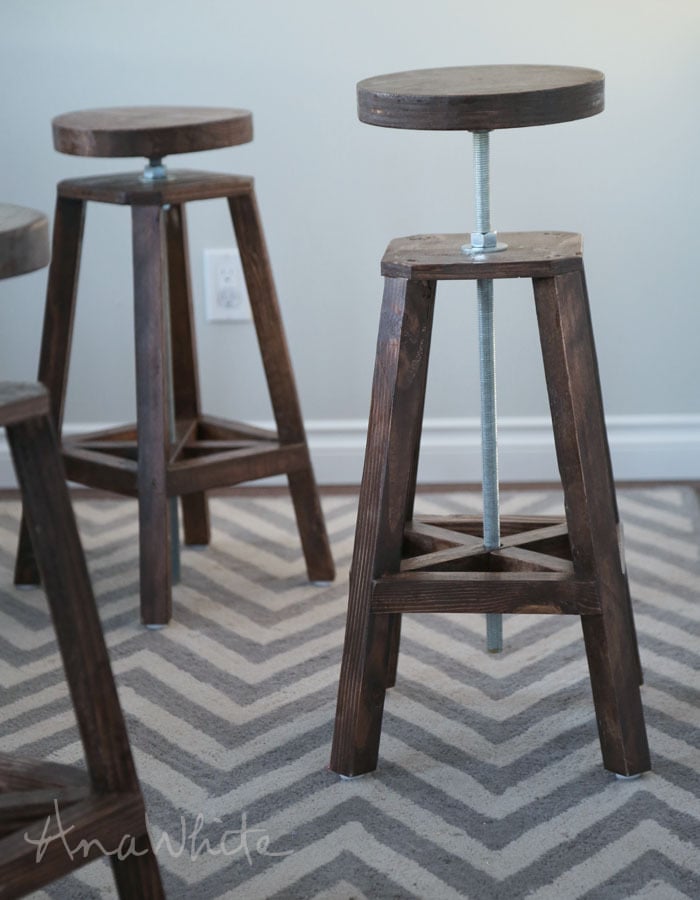
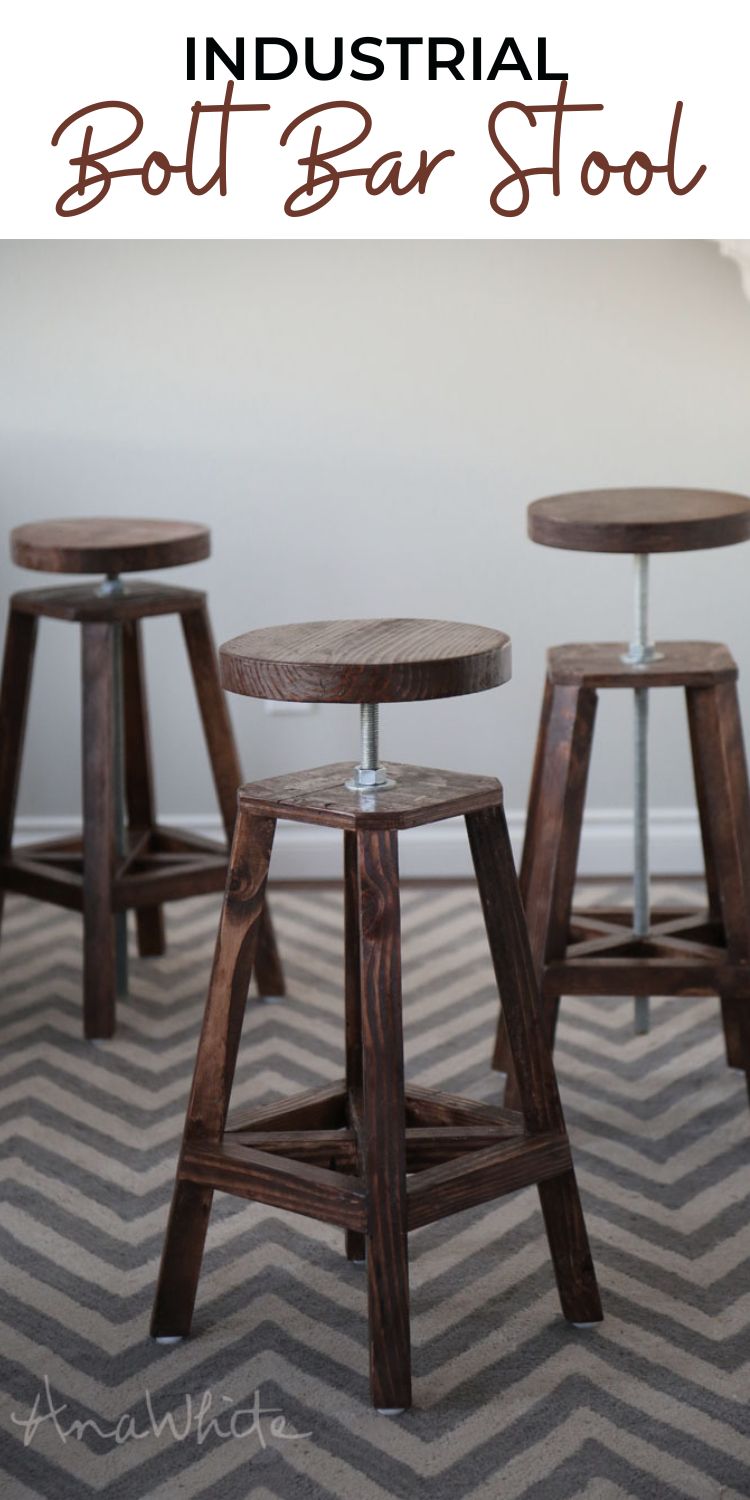
We ended up adding the bottom side pieces to act as a foot rest -

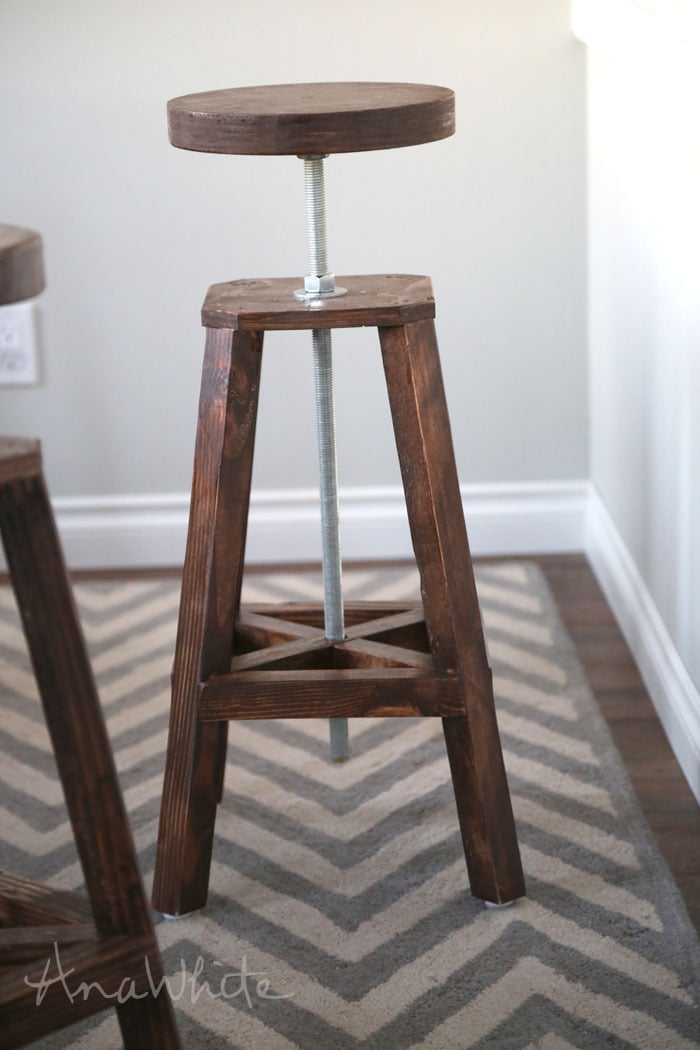
I love how they turned out!

We used scrap wood (including 3/4" construction grade plywood) and 2x2s ripped from 2x4 scraps (you can use off the shelf 2x2s) to make these stools.
We stained the stools using Rustoleum Dark Walnut -

Really love the color!
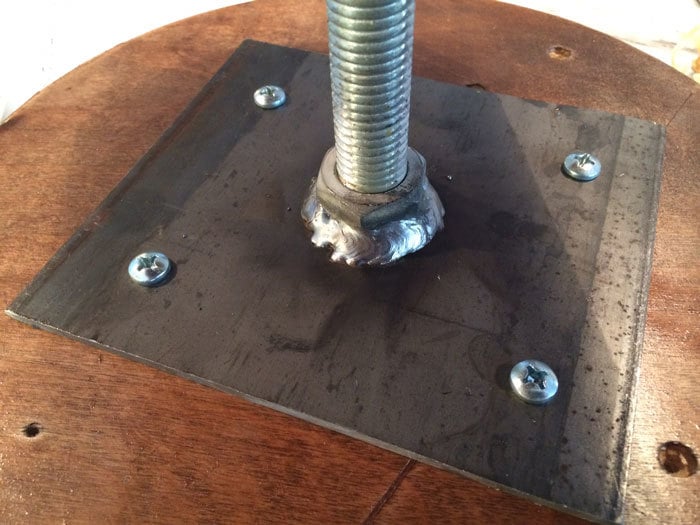
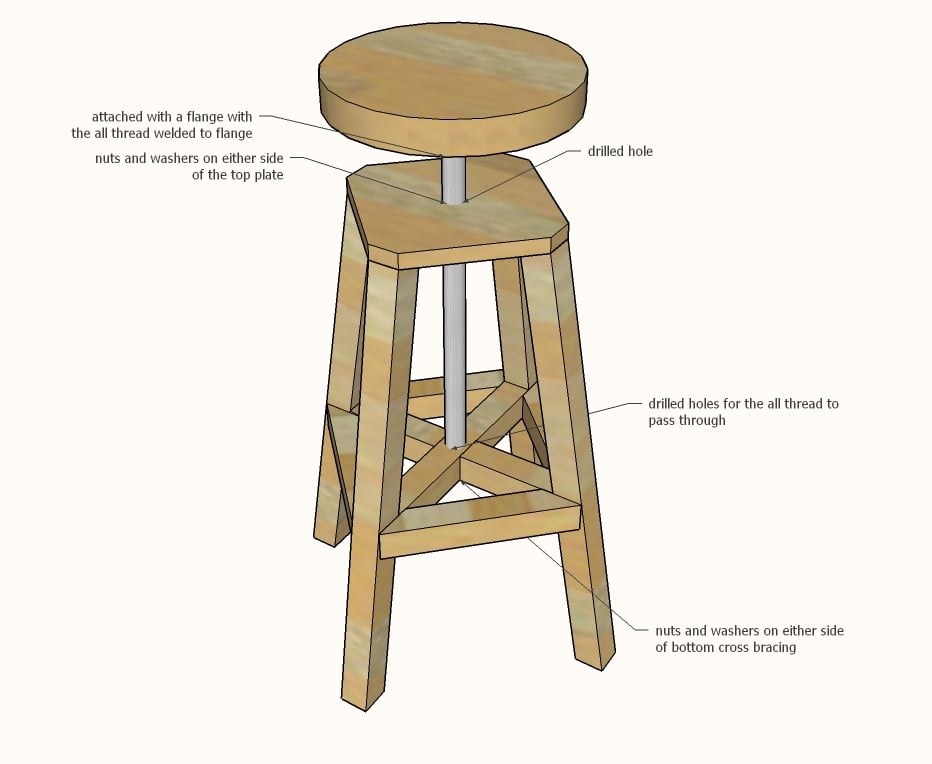
One thing that complicated this build was we knew these stools would get a ton of use, and since they are significantly higher than the original stools, didn't want to just use a floor flange. So we welded 3/4" nuts to 1/8" thick metal plates. If you don't have a welder, call your welding shop and drop a few nuts off and have them weld to scrap metal plates - it will probably be cheaper than buying flanges anyways (those can get expensive).

We love these stools and how they turned out, but they are not a beginner project. Please don't attempt as a first project.
Plans follow - enjoy!
XO Ana + Crew
Pin For Later!
Preparation
2 - 2x2 @ 8 feet long 3/4" plywood scraps for the top plate
12" round or 2x12 for the seat
18" - 5/8" all thread
5/8" flange or top plate (we diyed ours with scrap metal and nuts welded together)
4 - 5/8" nuts and washers
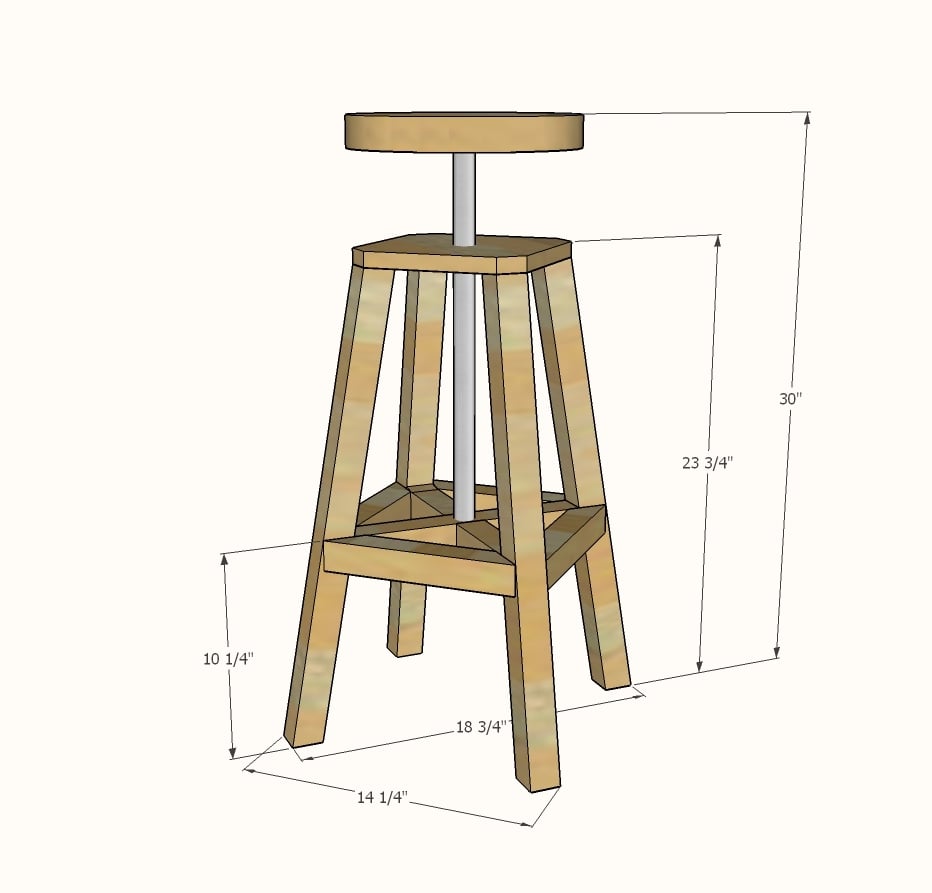
2 - 2x2 @ 12-1/2" - both ends are cut at 10 degrees off square, ends NOT parallel, longest point to longest point measurement 1 - 3/4" plywood @ 8-1/2" x 8-1/2" 4 - 2x2 @ 23-1/2" - both ends cut at 10 degrees off square, long point to short point measurement, ends ARE parallel 4 - 2x2 @ 9-5/8" - both ends cut at 45 degrees, ends NOT parallel, longest point to longest point measurement 1 - 12" round (we cut ours from 1x12s and 3/4" plywood scraps glued together to get the 1-1/2" thickness - these are also available off the shelf


Please read through the entire plan and all comments before beginning this project. It is also advisable to review the Getting Started Section. Take all necessary precautions to build safely and smartly. Work on a clean level surface, free of imperfections or debris. Always use straight boards. Check for square after each step. Always predrill holes before attaching with screws. Use glue with finish nails for a stronger hold. Wipe excess glue off bare wood for stained projects, as dried glue will not take stain. Be safe, have fun, and ask for help if you need it. Good luck!
Instructions
Step 1

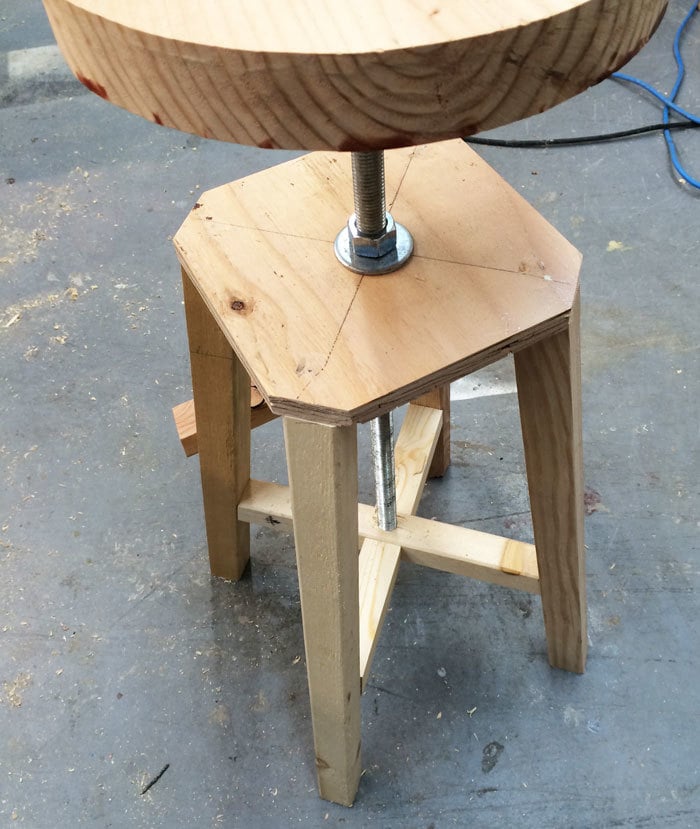
Cut the 3/4" plywood to an 8-1/2" x 8-1/2" square, then cut corners off at 45 degrees.
Step 2
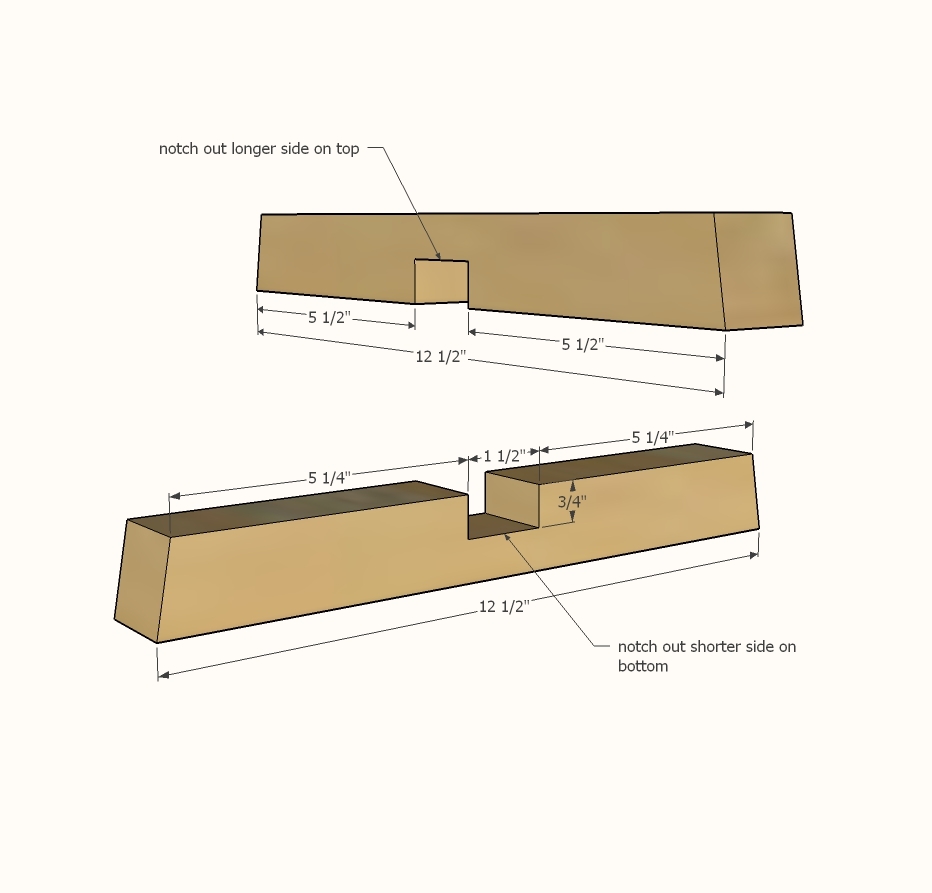
Set a circular saw blade to 3/4" depth and notch out the 2x2 cross supports as shown above, cutting the long side on one and the short side on the other. Glue (don't screw or nail) the two pieces together.
Step 3
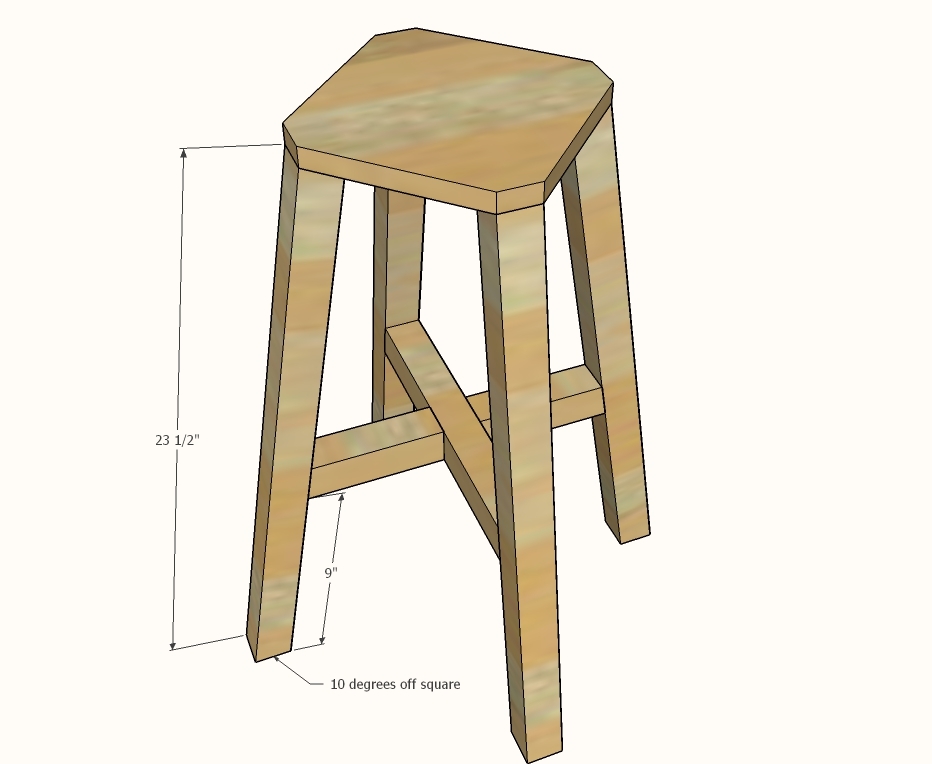
Build the stool using either 1-1/2" pocket holes and 2-1/2" pocket hole screws or countersinking wood screws (2-1/2" long would work).
Step 4

Attach the outer foot rest with 2-1/2" screws countersunk from outside. You'll only need one screw per joint. Use glue.
Step 5
It is always recommended to apply a test coat on a hidden area or scrap piece to ensure color evenness and adhesion. Use primer or wood conditioner as needed.

Comments
brookifer86
Wed, 01/28/2015 - 12:06
Clever plan!
This base would also be fantastic with some tractor seats instead of the round seat.
adm317
Thu, 02/25/2016 - 08:17
wood and screws
Did you cut your 2x4's down to 1.5x1.5 or 1.5x2? I just built these and used 2x2's and after staining realized the wood does not match the top which i cut from a 2x12. hoping extra coats of stain on legs will darken them. Also, did you use any lock washers? how does adjustment of height work without loosening all the nuts?
rickmc
Wed, 03/30/2016 - 07:23
Some pictures aren't loading on site and the pdf
It seems some of the photos (the most important ones) are only partially viewable in both the PDF and on the site. The last photo that shows the flange connection. Can you please double check those and see if they can be replaced with fully viewable photos?
odile
Mon, 08/29/2016 - 08:30
Industrialized farmhouse stool designed by Tolly
Hi Ana and Tolly,
I have a 9' soapstone slab bar height counter that is 48" in height. Would these stool seats be able to reach 38" or 40" in height? Would there be any building accommodations that would need to be made?
Thank you for your time.
Odile Kerester
oneinamillion
Thu, 01/05/2017 - 09:02
Nothing from step 6 on
I really like this design but I'm not seeing any information after step 5 on both the site and the pdf. Any info would be great!
In reply to Nothing from step 6 on by oneinamillion
Ana White
Thu, 01/05/2017 - 15:00
That is the entire plan. The
That is the entire plan. The extra steps are just fields for other plans
that require more steps