

Free build plans for this wood Christmas Tree Shelf.
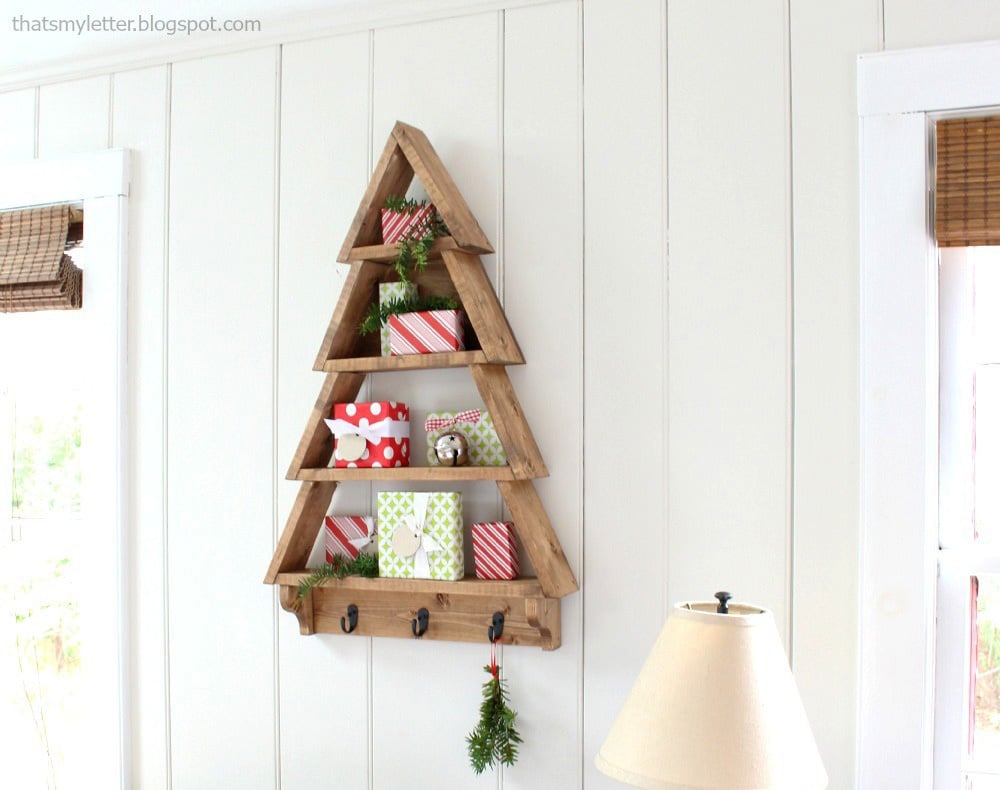
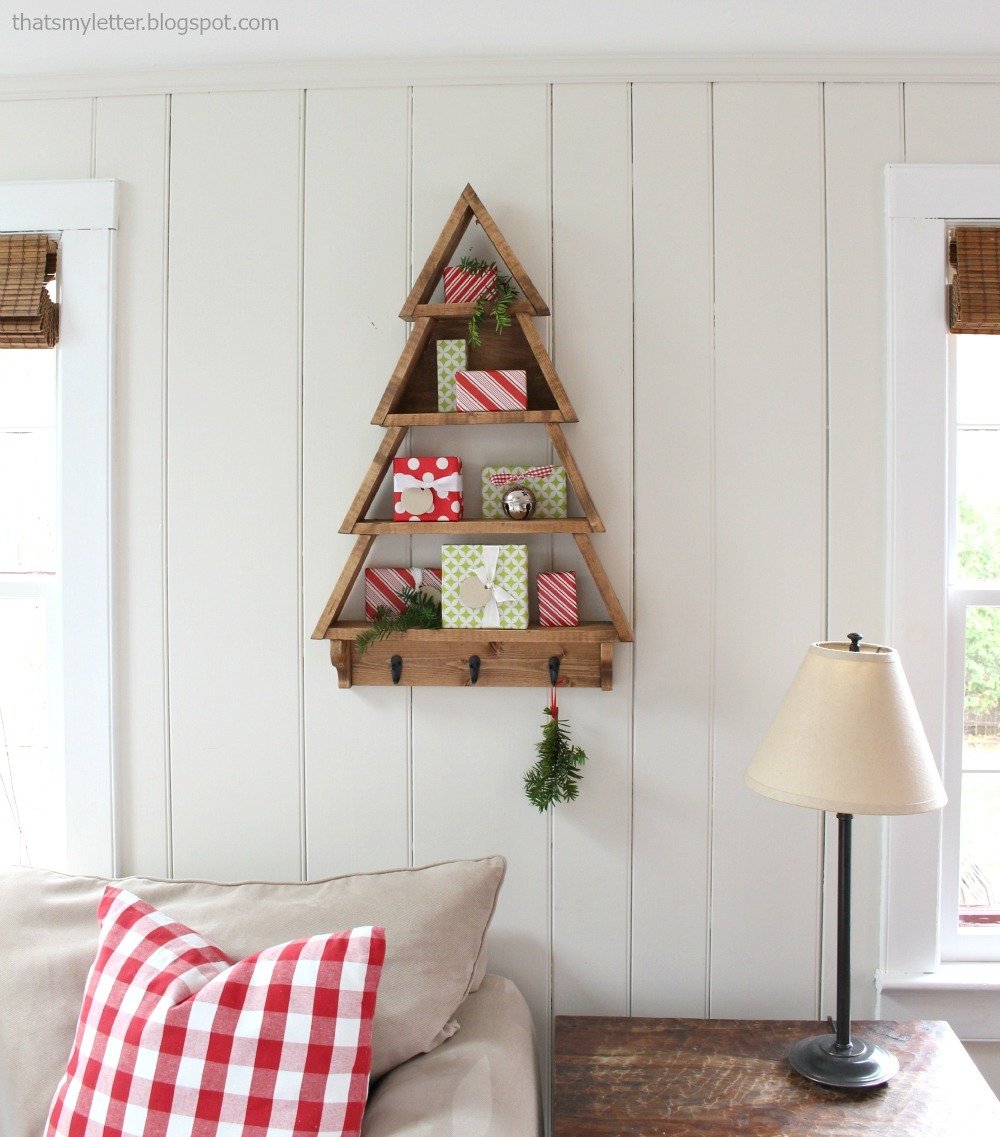
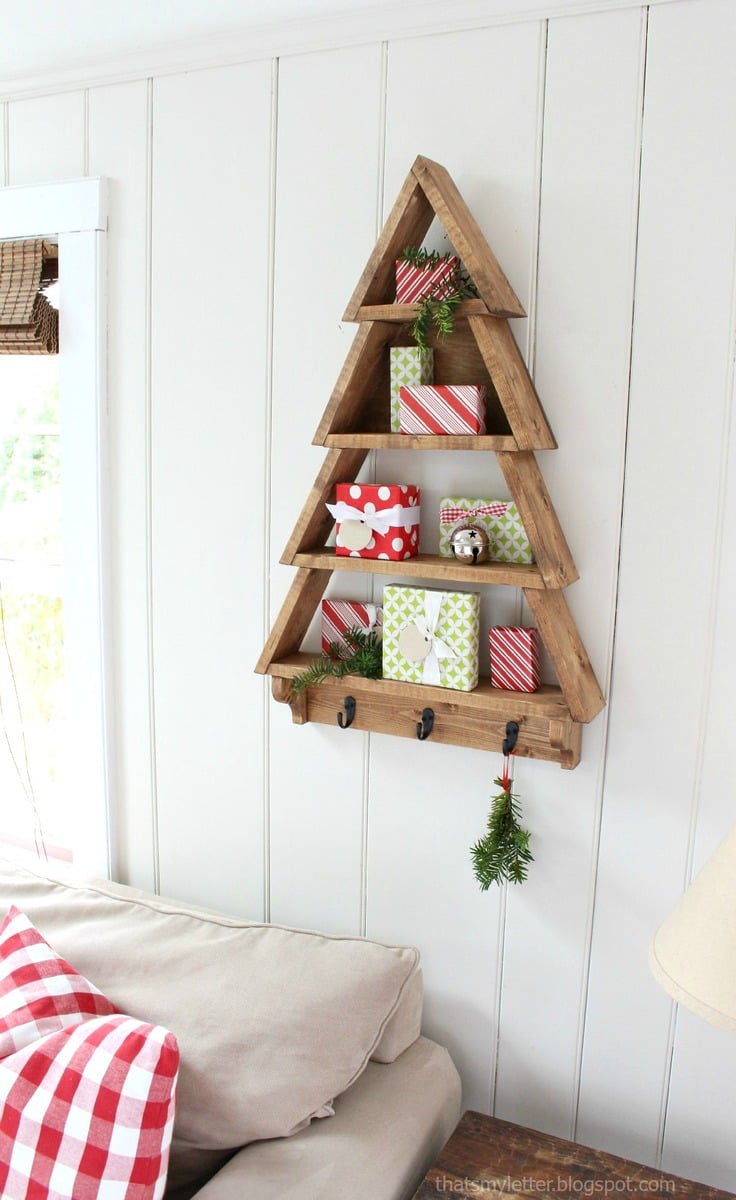
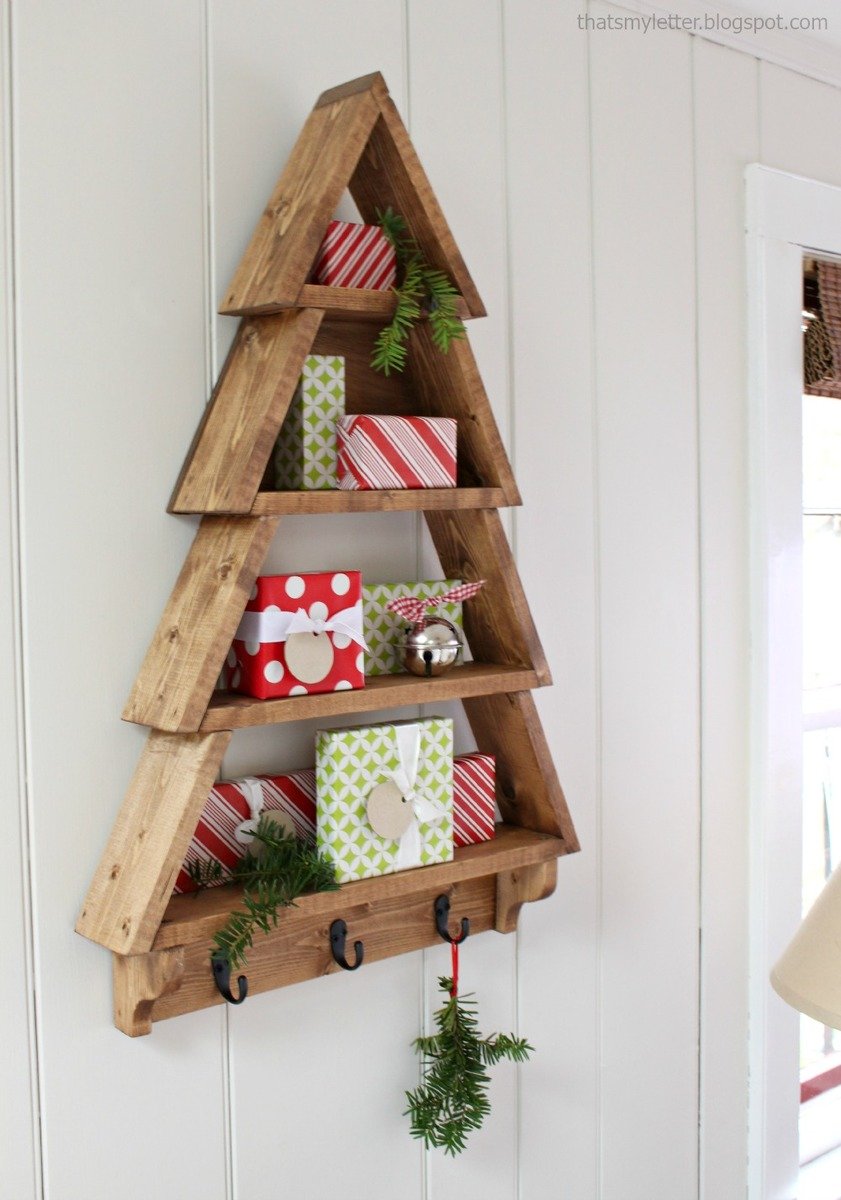
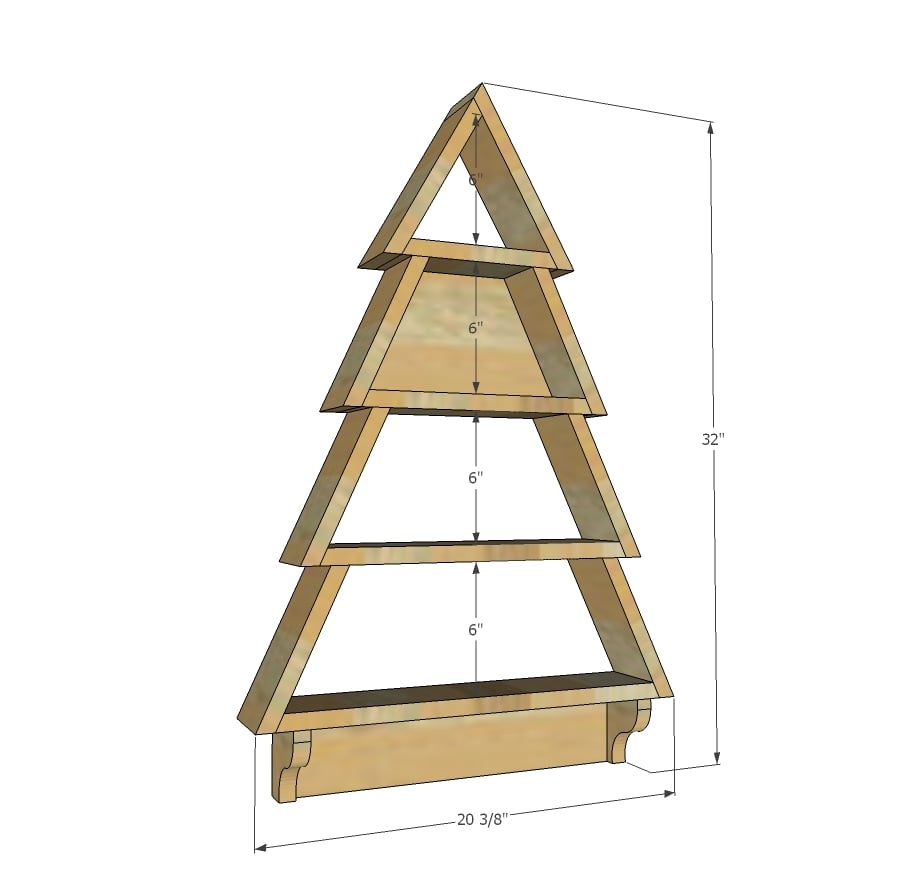
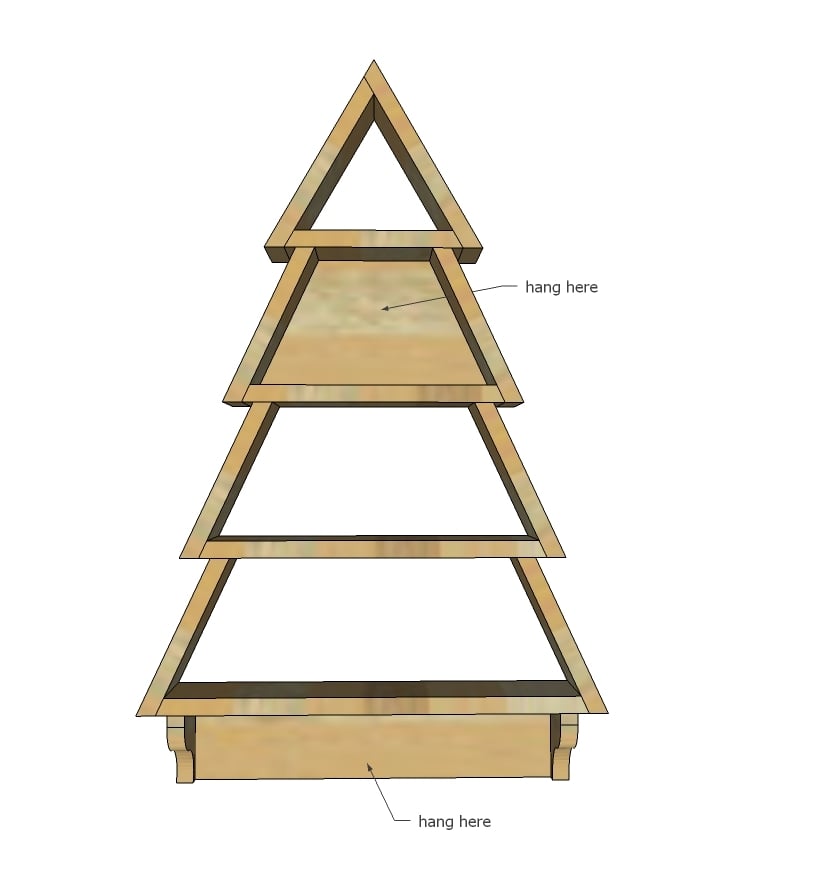
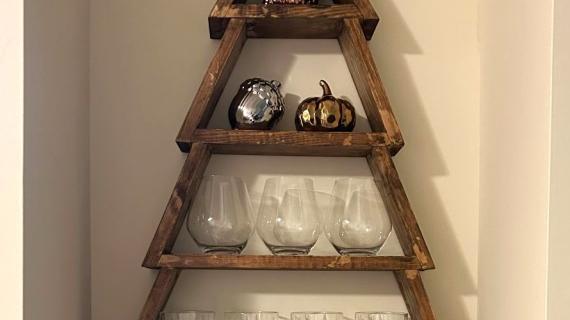
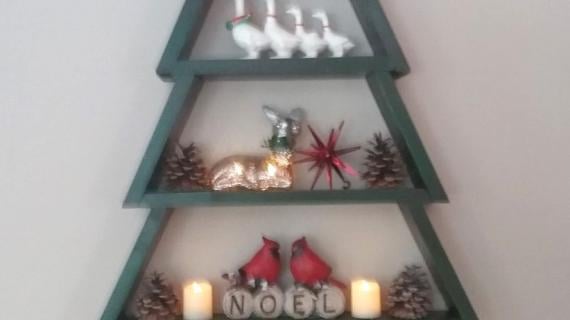
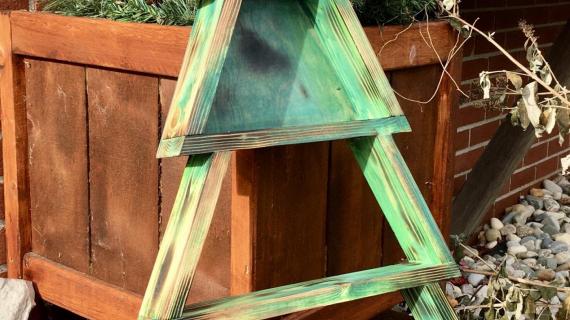
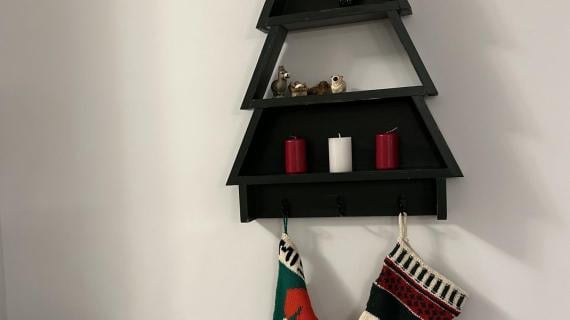
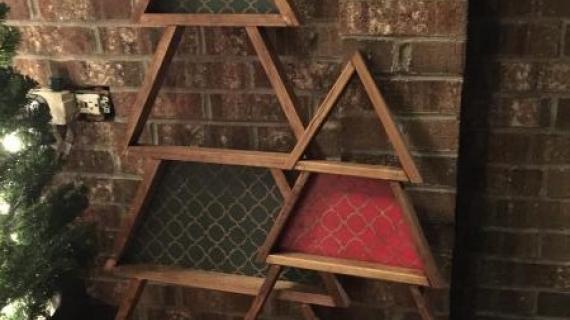
Decorate and display with a Christmas Tree Shelf! Perfect for Advent Calendar, displaying Christmas Cards, or hanging stockings. Our tree shelf features four shelves and hooks. Built by Jaime Costiglio, free step by step plans from Ana-White.com

Christmas Tree Shelf Features
- Under $10 to build (for 1x3s)
- Easy to build with basic building tools
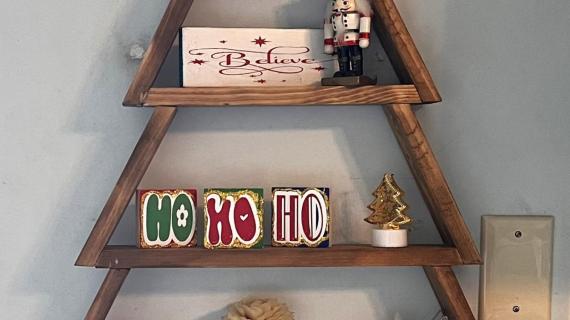
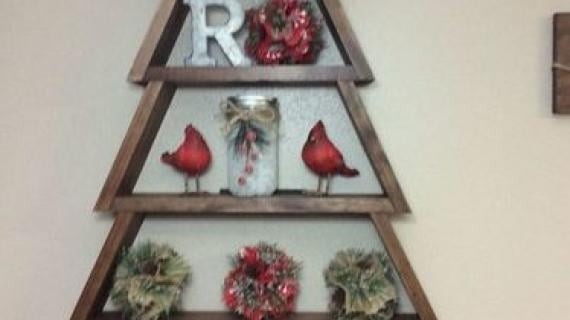
- Four shelves perfect for advent calendar, Holiday cards, or displaying ornaments
- Hooks at bottom for hanging stockings, or extra coats from Holiday visitors
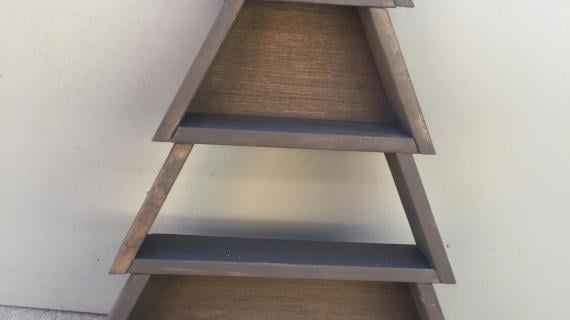
- Easy 1x4 construction
- Easy to hang
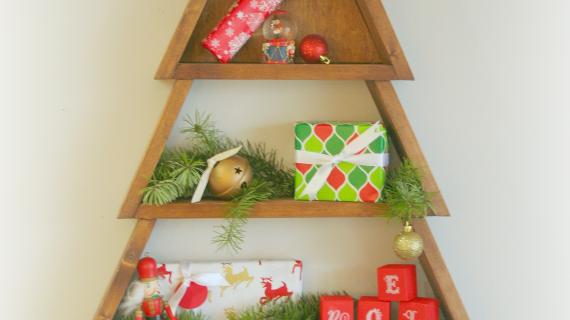
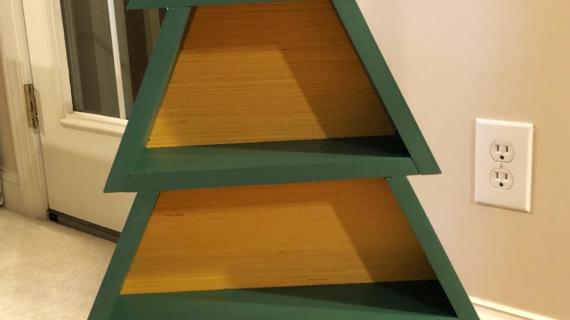
- Solid wood - so accepts stain beautifully
- Perfectly sized to fit most any home
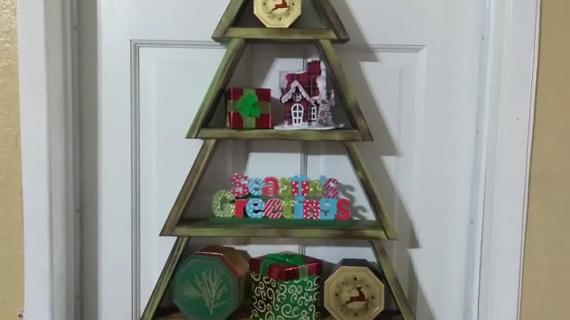
- Use this tree shelf as a Christmas tree for smaller homes, apartments and lofts or even dorm rooms! Just fill with greenery and ornaments.

We love it for displaying and hanging stockings.

It's just 1x4 boards, stacked to create a tree shelf. You could fill with decor, as Jaime has done, or with Christmas cards, or candles, or family photos. How about using as and advent calendar shelf, and hanging stockings off the hooks? So many ways!
But here's the catch - Christmas is right around the corner. So you've gotta make this project now to enjoy it this year!
More Photos and Build Steps
This Christmas tree shelf was built by Jaime Costiglio for our Handbuilt Holiday series. For more construction photos and details, please hop over and read Jaime's build post.
CLICK HERE TO READ THAT'S MY LETTER'S BUILD POST
Christmas Tree Shelf Video Tutorial
I had to get in on the fun too! In this video, I show you how to build the Christmas tree shelf.
This is a very FUN build and a very FUNCTIONAL project. I promise, you are going to love it!
And if you just can't get this project built for this year, make sure you pin for next year!

Can I Make it Bigger?
Yes! Here's what to do:
- Hold off on cutting the base part where the hooks are, and don't assemble anything, just cut and layout.
- Working from the top down, keep adding more sides, and then measuring how long the next lower longer shelf needs to be and cutting it. Repeat for as many shelves as you'd like.
- 1x boards can't span more than about 3 feet without starting to sag, so keep that in mind. You can strengthen up the 1x boards by gluing and nailing 1/4" plywood to the back sections.
- Once you have all your shelves cut, figure the size of the trunk and cut.
- Then start assembling, working from the trunk upward, just nailing and gluing.
Preparation
- 12 feet of 1x4 or 1x3 boards (I used 1x3s in the video, Jaime used 1x4s)
- 1/4" plywood 6" x 15" or larger (for just one portion, will need more plywood for covering multiple portions)
- 1-1/4"and 3/4" brad nails
- 3 hooks
- Hanging kit or screws for hanging to studs in wall
You can directly substitute 1x3s for 1x4s in the below cut listTRUNK
- 1 - 1x4 @ 16-1/4"
- 2 - 1x4 @ 3-1/2" or 1x3 @ 2-1/2"
MAIN TREE - SAW BEVEL IS 25 DEGREES
- 1 - 1x4 @ 18-3/4" longest point to longest point both ends cut at 25 degrees bevel
- 6 - 1x4 @ 7-1/2" long point to short point, both ends cut at 25 degrees bevel
- 1 - 1x4 @ 15-1/8" longest point to longest point both ends cut at 25 degrees bevel
- 1 - 1x4 @ 11-3/8" longest point to longest point both ends cut at 25 degrees bevel
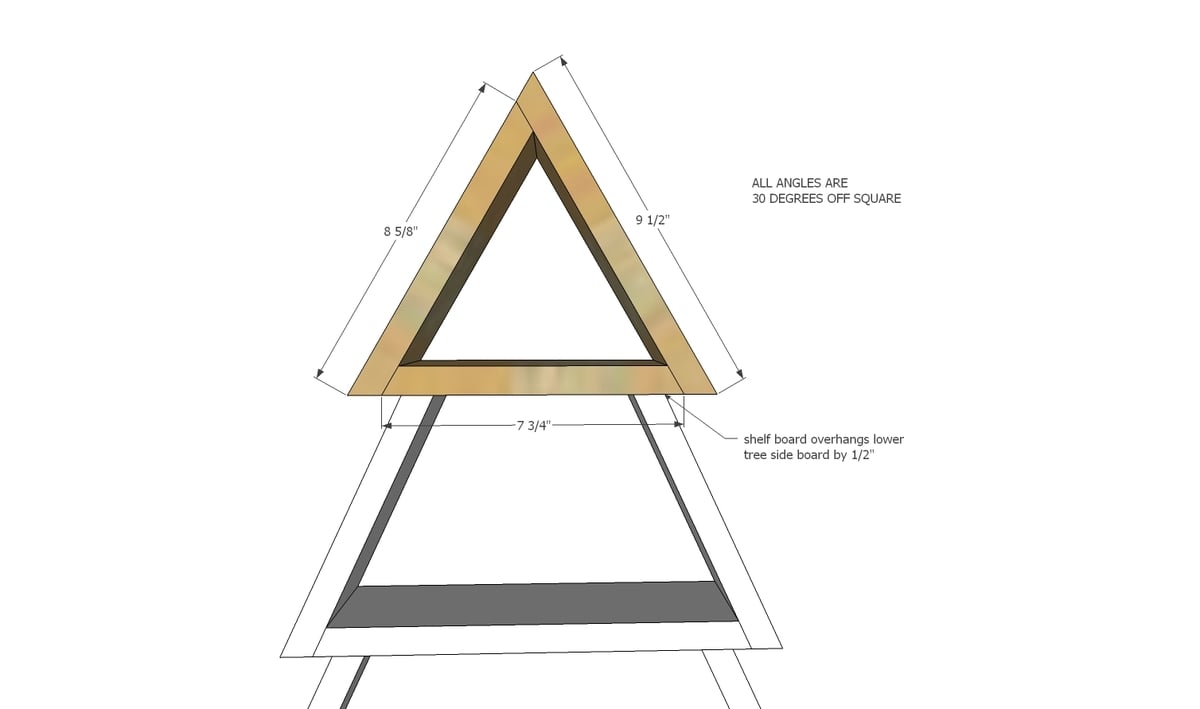
TREETOP - CHANGE SAW BEVEL TO 30 DEGREES
- 1 - 1x4 @ 7-3/4" long point to long point, both ends cut at 30 degrees bevel
- 1 - 1x4 @ 8-5/8" long point to long point, both ends cut at 30 degrees bevel
- 1 - 1x4 @ 9-1/2" long point to long point, both ends cut at 30 degrees bevel
- Scrap 1/4" plywood for filling in second shelf approximately 6" x 15"


Use proper safety and read all power tool manuals and follow safety guidelines while using power tools.
Instructions
Step 1
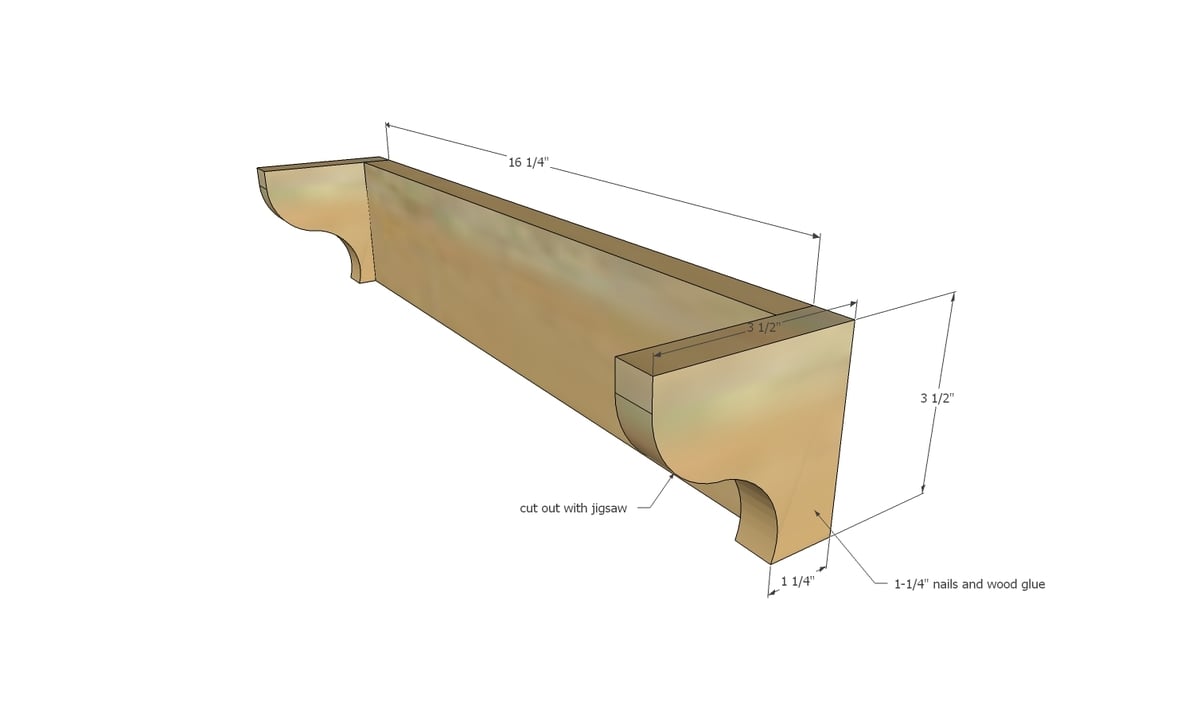
Use a jigsaw to cut out the side support pieces in a decorative shape before cutting - once you cut into the small piece, it's hard to clamp down and make the decorative cuts. Attach to back piece. You can use 1-1/4" nails and glue or screws to attach.
Step 2

Use 1-1/4" brad nails and glue to attach bottom shelf to supports and back.
Step 3
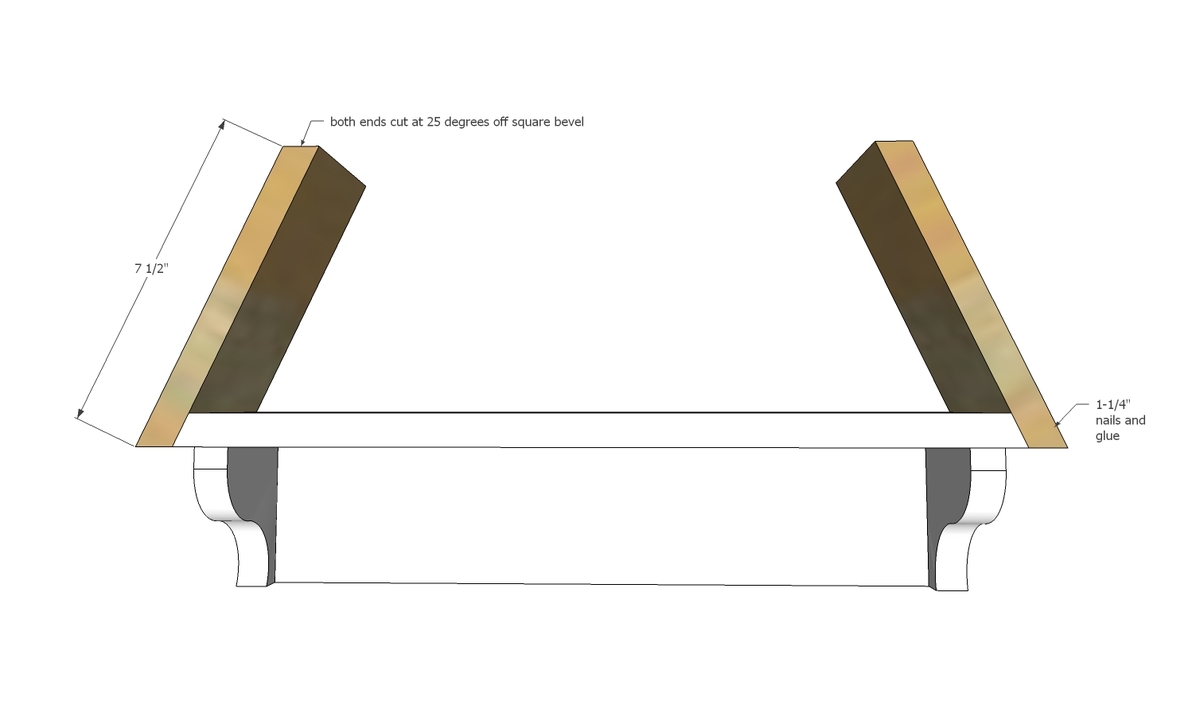
Use 1-1/4" brad nails and glue to attach a pair of sides to the bottom shelf.
Step 4

Continue working upward, attaching the shelves and sides, with 1-1/4" brad nails and glue.
Step 5
First, attach the bottom board to the rest of the project as you did all other shelves.
Then attach the sides to the bottom board to complete the tree.
Use 1-1/4" brad nails and glue.
Step 6

Trace out the second to top shelf on to 1/4" thick plywood. Cut out with circular saw. Glue and nail in place with 3/4" brad nails.
Step 7
Attach project to wall, preferably through bottom and back plywood pieces.
It is always recommended to apply a test coat on a hidden area or scrap piece to ensure color evenness and adhesion. Use primer or wood conditioner as needed.


Comments
buckey91
Wed, 11/25/2015 - 11:02
This is so beautiful, and
This is so beautiful, and great for someone without a mantel! I'm terrible with angles, would anyone know if I would have to change the angles if I made it larger?
Franco61
Fri, 10/23/2020 - 09:39
I don't believe you have to,…
I don't believe you have to, as long a you keep the tree top at 30 degrees and the rest at 25 degrees.
Lucy2222
Thu, 09/20/2018 - 10:19
Why is such a big piece of
Why is such a big piece of plywood needed when only a very small piece is used
Tsu Dho Nimh
Thu, 09/27/2018 - 16:47
It doesn't have to be that big
She's just showing you that you lay the tree on top of the scrap of plywood to do the marking.
As long as you have a bit showing around the edges you will be fine.
tizlad
Tue, 09/29/2020 - 05:20
How would you work out the…
How would you work out the measurements if your mitre saw only tilts left, so hence the short point is on top not right as in the video with the long point on top
Backwoods Builds
Wed, 10/07/2020 - 17:16
Put your material on the…
Put your material on the right> Side of the mitre, then after you have made your first cut you can spin your board and still achieve the same results. This will give you the ability to make your long to long measurements with out having to flip your mitre.
In reply to How would you work out the… by tizlad
Cheryl and Rich
Thu, 10/22/2020 - 09:10
Angle cuts from long point to long point.
You need to turn the wood over. I draw a pencil line on the sides to make sure I get the angles the way I want them before cutting.
In reply to How would you work out the… by tizlad
Cheryl and Rich
Thu, 10/22/2020 - 09:10
Angle cuts from long point to long point.
You need to turn the wood over. I draw a pencil line on the sides to make sure I get the angles the way I want them before cutting.
JillyMel
Sun, 11/15/2020 - 16:07
How do you hang this up??
How do you hang this up??
jabweese
Sun, 12/06/2020 - 22:59
How to hang this tree??
What’s the best way to hang this? My husband built me this for my birthday and surprised me today but I’m trying to figure out the best way to hang. What type of hanger?? Love this project!
RecoveringEngineer
Sun, 11/14/2021 - 17:32
Not stable enough
May be a dumb question but do you have to use a brad nailer and not just a hammer? I have no problems through Step 3 and I've got wood glue plus 2 brad nails holding the angled pieces on. But when I go to step 4 it isn't stable enough. When I try to hammer in the nails to secure the horizontal piece the force and angle starts to pull the bottom of the vertical boards out that I attached in the previous step.
[email protected]
Sat, 12/18/2021 - 13:28
You'll definitely need a…
You'll definitely need a brad nailer for this project because of what you describe. One of my brads didn't go on all the way and I attempted to use a hammer to drive it the rest of the way in, but felt like it was too much for the project to handle. Instead I used a Dremel to grind the part of the nail sticking out