
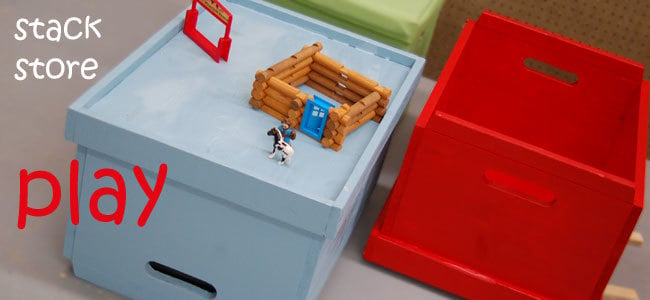

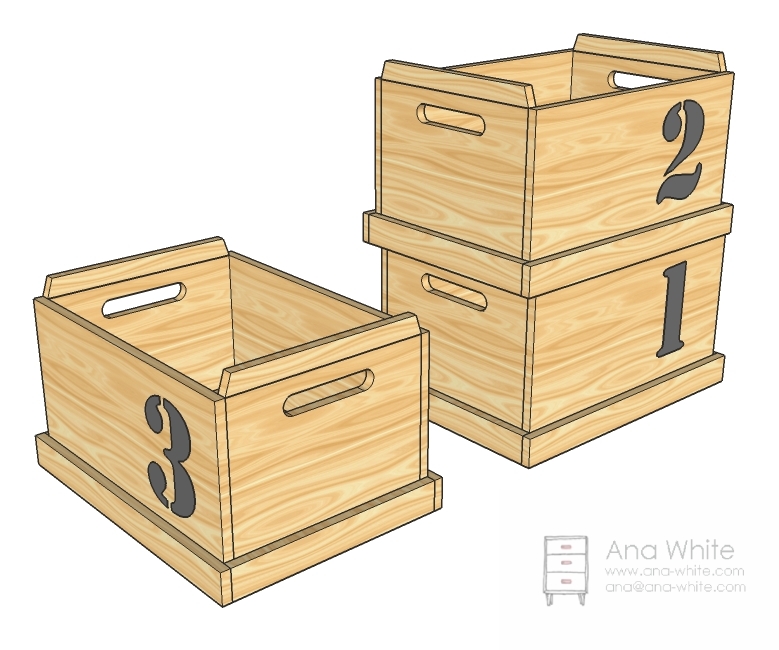
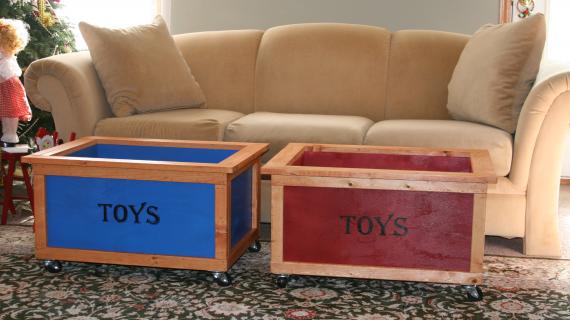
Toy boxes that stack and store, and can be turned over to be used as a play table. Free woodworking plans from Ana-White.com
Preparation
- 1 - 1×12, 8 feet long
- 1 – 1×3, 8 feet long
- 1 – 1×2, 8 feet long or scraps 16″ long
- 1 – 1/4″ plywood 16″ x 24″
- 2″ screws
- 1 1 /4″ screws
- wood glue, filler, and finishing supplies
2 – 1×12 @ 16″
2 – 1×12 @ 24″
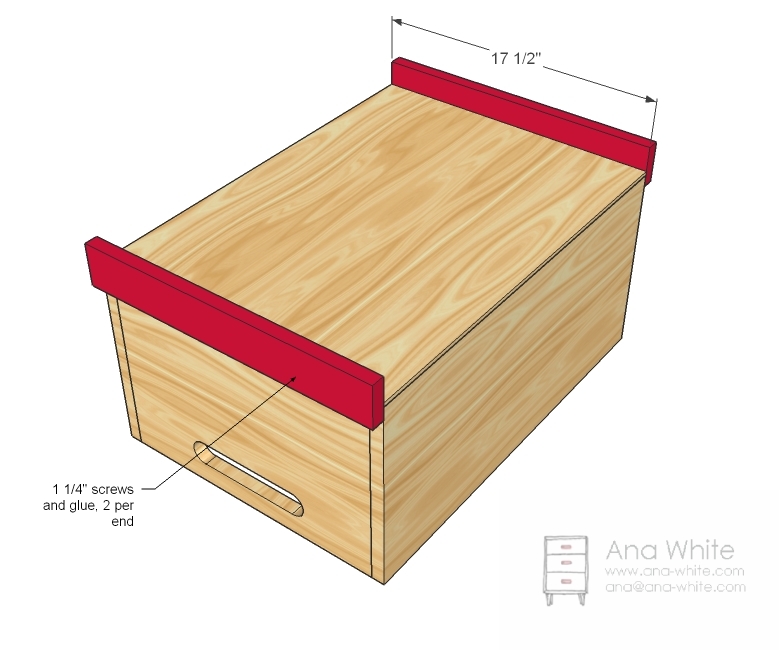
2 – 1×3 @ 17 1/2″
2 – 1×3 @ 25 1/2″
2 – 1×2 @ 16″
1 – 1/4″ plywood @ 24″ x 17 1/2″


Instructions
Step 1
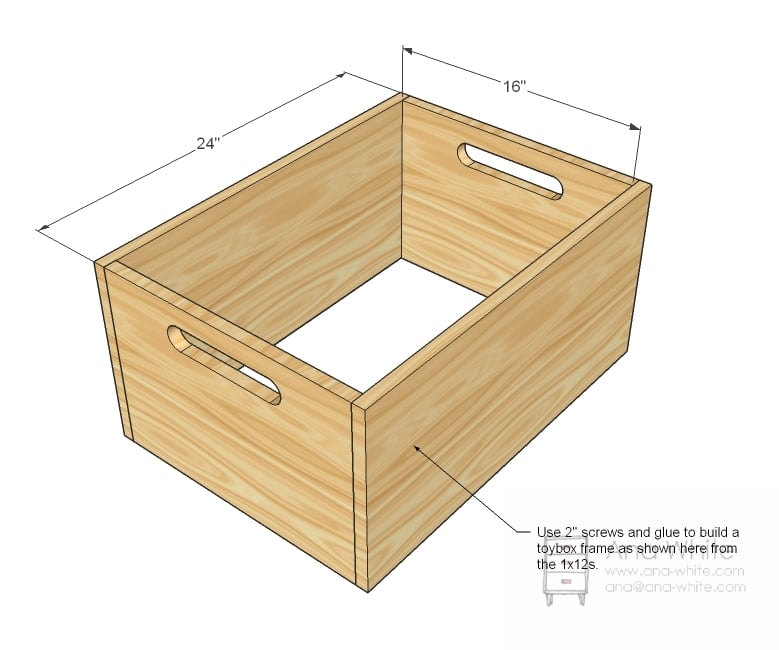
Build the Box
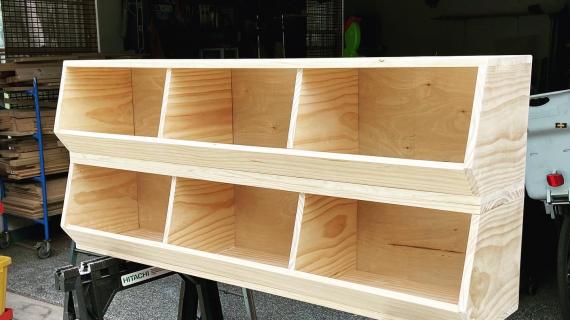
As with most storage that we do, start by build a simple box out of 1x12s. Predrill your holes and use glue. Adjust for square – especially if you are stacking. Off square boxes won’t stack right.
Step 2
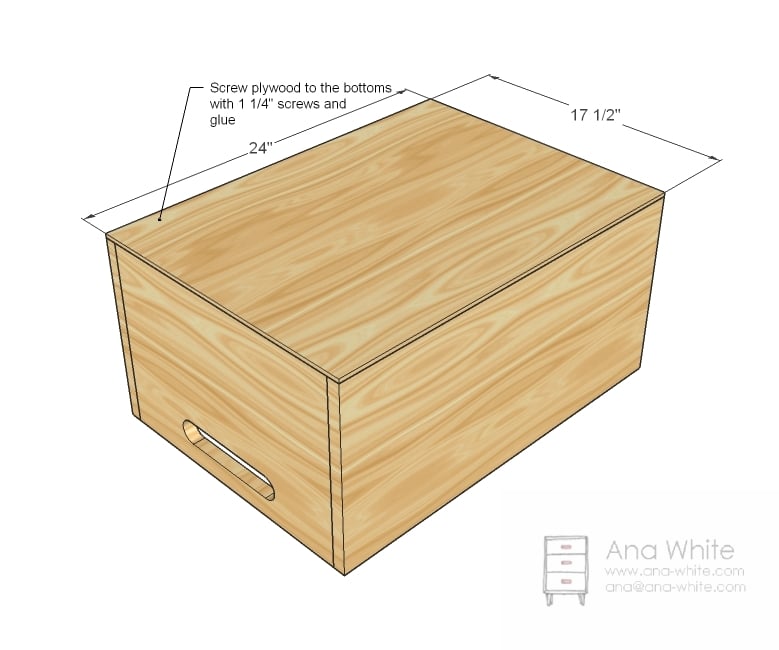
Bottom
Use 1/4″ plywood screwed and glued to the bottom as shown above.
Step 3
Footer Ends
Now screw the 1×3 end footers on. I overlapped the footer and the box by 1″.
Step 4
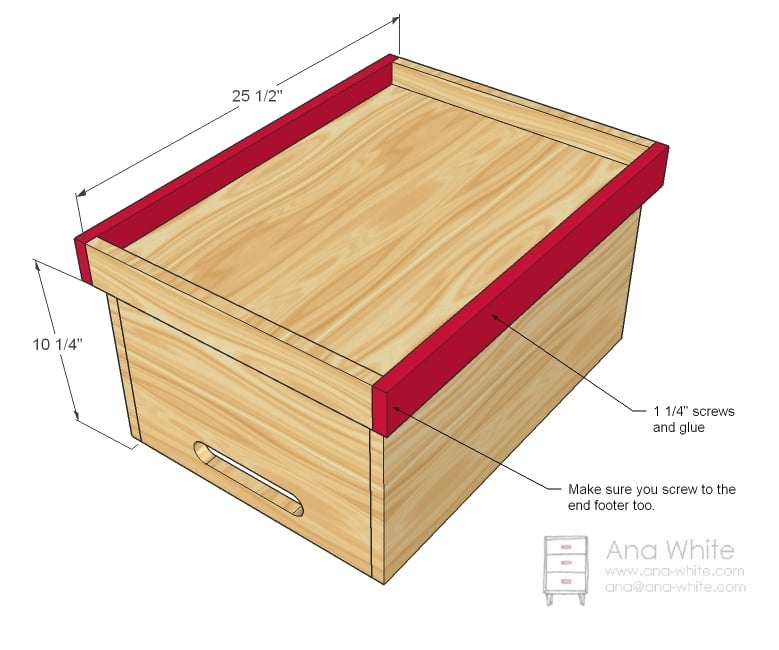
Side Footer
Glue and screw and the footer is done
Step 5
Step 6

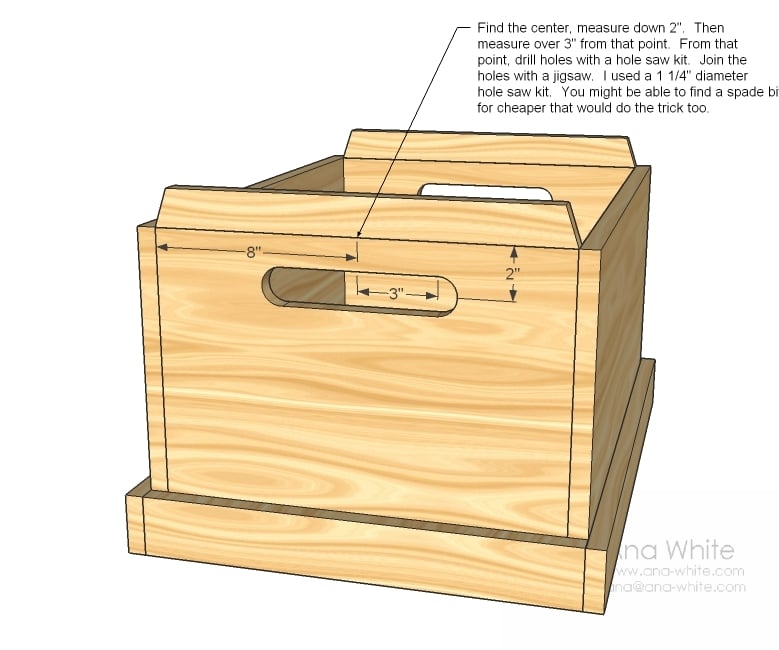
Handles
Handles are real simple, just find the centers of your holes, drill holes, and connect the dots – literally

Comments
Becca Martin (not verified)
Mon, 11/29/2010 - 22:34
Love these!! They would go
Love these!! They would go perfect with the murphy beds were getting ready to build. Love Your Stuff ANA you inspire!!
Tsu Dho Nimh (not verified)
Tue, 11/30/2010 - 01:53
With a slight change of
With a slight change of dimension, and these:
http://www.amazon.com/Pendaflex-Letter-Plastic-Snap-Together-Hanging/dp…
You have stacking file boxes for your office :)
I would use thicker plywood for the bottom and screw and glue, because files are heavy.
Rachelle (not verified)
Tue, 11/30/2010 - 02:42
Thank you. Friends are
Thank you. Friends are definitely the silver lining. Thanks for dedicating so much time to us.
Carolyn (not verified)
Tue, 11/30/2010 - 03:28
Hi - I have subscribed to
Hi - I have subscribed to your feed for some time now and wanted to write and thank you for providing such great plans and providing us with a great sense of empowerment - that we can do this. I will be sure to send pictures of what I make. Thanks, again.
kerry davis (not verified)
Tue, 11/30/2010 - 05:50
Ana - Thanks for not only
Ana - Thanks for not only sharing these plans, but the story of your friend, Jen. It's easy to let your friends become the ones that always do the calling, and keeping up the friendship... I will certainly be reaching out to my friends this season...
Kelli (not verified)
Tue, 11/30/2010 - 06:25
I was just going to go buy
I was just going to go buy plastic totes to organize the toys. Not anymore! These are so cute AND functional. The perfect thing for our toy room! Thanks Ana for another wonderful plan. You really are the best.
Leslie R. (not verified)
Tue, 11/30/2010 - 08:09
I really love this post- not
I really love this post- not just because of the sweet toyboxes, but because of the point of what you wrote!
I too have had wonderful friends who have walked with me and stood by me when I was not able to be the best friend back to them. It is absolutely wonderful to be able to give something back and to reflect on what great friends they are!
Thanks Ana- you are not only a wonderful craftswoman you are a great encourager!
salsamama68 (not verified)
Tue, 11/30/2010 - 14:54
Ana, I loved the story about
Ana, I loved the story about your friend as much as I love the plan for these toy boxes.
I'm a transplant -- I live in Burbank, CA, but I grew up in Seattle, WA. If not for the friends I've made here in Burbank (all of them also transplants), I would not survive being a mother of three with a husband who travels extensively for work. If you're lucky, you find friends who get you through all the times you're feeling lonely, tired, frustrated, sad, dejected, incompetent, unattractive, and hormonal. Thank God for the "Jens" of the world. What would we do without them. :-)
Amy (not verified)
Tue, 11/30/2010 - 16:21
Do you think these would be
Do you think these would be alright stacked three high? Is that too high for kids?
Thanks!
Andrea | Homag… (not verified)
Tue, 11/30/2010 - 17:05
Thanks for such a beautiful
Thanks for such a beautiful post, Ana. I came by to see the cute toy boxes and came away thinking about the people who are important to me!
Victoria (not verified)
Tue, 11/30/2010 - 20:03
I love love love these boxes
I love love love these boxes and am tempted to adjust the size and add casters so that they will fit under my nieces' beds and then when my sister moves next year we can remove the casters and stack them. Thanks again for your wonderful plans, my sister and I will be building the laundry dressers next week and i'll be building two more sets of the $10 ledges for christmas gifts, so great. I just picked up my copy of freshHOME and saw your interview in the back and loved it, congrats :)
Shannon (not verified)
Thu, 12/02/2010 - 14:03
Thank you for this idea!
Thank you for this idea! They make cute toy boxes, but I'm sure they'd be great for other storage too. I think I'll make a few for storing craft materials and out of season decorations in my closet.
Lorilyn (not verified)
Fri, 12/03/2010 - 07:20
Hey Ana, just an idea for
Hey Ana, just an idea for stencils (which you may already do, who knows) but Freezer Paper works amazing. What I do is print out whatever word, number, ect. I want, then put it under my piece of freezer paper (A couple dollars for hundreds of feet at the grocery store) and trace it. Then I get out my exacto knife ($3 at a craft store) and cut out the stencil. Then you can IRON (turn it as hot as it will go) the freezer paper onto the wood, paint your stencil, let dry, then peel off the freezer paper. I do this a lot with fabric and there is NEVER any bleeding. Additionally, since you only traced the image off the computer paper, you can use the computer paper image again and again. I have a whole folder full of ones I have used just in case I want to do something again in that same size.
It's kind of like magic. Except better.
Ana White (not verified)
Sun, 12/05/2010 - 20:45
Lorilyn, I'm so much smarter
Lorilyn, I'm so much smarter because I know smart people like you! Thanks for the tip, had not done that before, and will definitely be testing it out! Thanks so much, Ana
Kelly @ diy my home (not verified)
Sat, 12/18/2010 - 17:13
CUT LIST NOTE: 1/4" plywood
CUT LIST NOTE: 1/4" plywood on cut list should read 24" x 17 1/2" (rather than 16"). We fixed this by just cutting it to 22 1/2" x 16" and insetting into the toybox which worked just fine :)
Can't wait to get this painted for my little man for Christmas!
hanahlai (not verified)
Mon, 12/27/2010 - 11:59
How heavy are these? I.E. How
How heavy are these? I.E. How heavy would it be for a 5 year old to lift off an on if they were to be stackable. Thanks!
Ana White (not verified)
Mon, 12/27/2010 - 15:40
These are bigger than they
These are bigger than they look, probably too big for a five year old to lift :(
mickeyaaaa (not verified)
Mon, 10/29/2012 - 17:36
nice
slightly smaller version will be perfect for my mobile repair business - i need stacking boxes that will work well with a hand truck - as i need to haul quite a few tools quickly into repair jobs at office buildings & recreation centers, gyms etc...
i'll put the 1x3's at the top of each crate though, which will provide a lip for grabbing - eliminating the need to cut out handles (i hope).
I tried finding durable plastic stacking boxes from the industrial supply companies, but either they were too expensive ($400 for 10 boxes) or likely would break in our cold canadian climate when being moved in winter...seems like wood may be the best solution for me in this case.