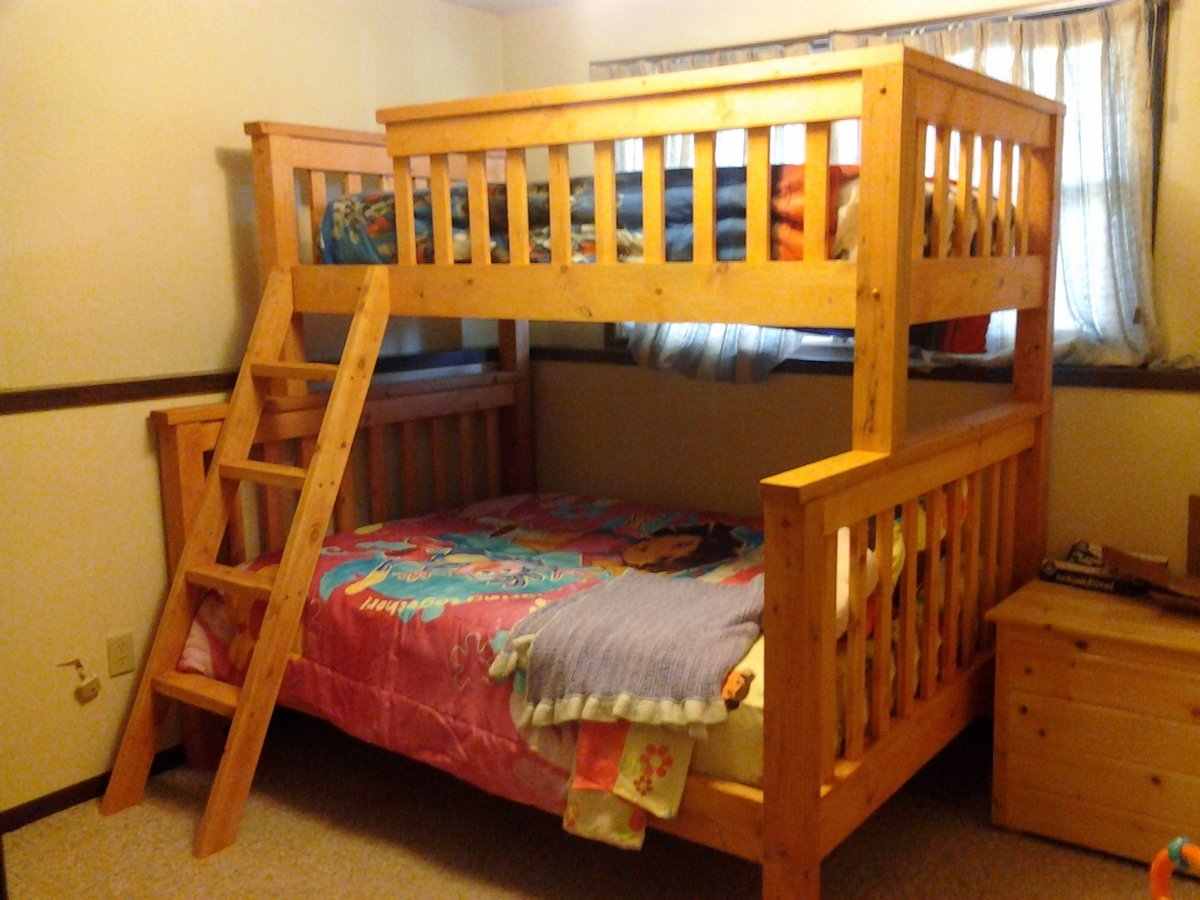
I wanted my kids to have more space in their shared room, but I did not want to pay a ton of money for a new bunk bed. My husband and I found a plan for this bunk on Ana-White and fell in love with the design. It turned out so great that we will still be using it in our next home whether it's needed or not. We did change a couple of things on the plan that we didn't care for. The first is that we added a side rail for safety. Secondly we also traded the 1x6 boards on the head and foot boards for 1x4s on the top but kept the 1x6s on the bottom.
Built from Plan(s)
Estimated Time Investment
Weekend Project (10-20 Hours)
Finish Used
Stain: Colonial Maple and polyurethane.
Used a sponge brush to apply stain and dry cloth to wipe off. Used a brush to apply poly.
Used a sponge brush to apply stain and dry cloth to wipe off. Used a brush to apply poly.
Recommended Skill Level
Intermediate
Comments
Tony (not verified)
Mon, 01/09/2012 - 06:31
Guardrail
The guardrail looks great. How did you attach it to the corner post?
bohman825
Mon, 01/09/2012 - 17:39
Repyl: Guardrail
With pocket screws on the bottom and then one screw through the 1x4s into the post before the 2x4 on the top goes on. And then the 2x4 is screwed onto the 1x4 and post with trim screws.
NicoleS (not verified)
Fri, 03/23/2012 - 04:36
price
How much did it cost you to build this bunk bed? I'm wondering if we can build this one as it turned out great looking!
NicoleS (not verified)
Fri, 03/23/2012 - 04:37
price
About how much did it cost to build this bunk bed? I'm wondering if we can build it since it turned out great looking!
Jillian (not verified)
Wed, 03/28/2012 - 13:02
Re: price
Cost us about $300 and over an entire weekend of time spent on this project.
It's not for beginners. My husband has had many many years of experience in carpentry and woodmaking.
Good luck to you.
Also, he changed a few things in the plans we found in order to make it look better.
Thank you
Jillian
Jillian (not verified)
Wed, 03/28/2012 - 12:59
price
Cost us $300.00 to make and almost non-stop making it for the whole weekend. And then stained for hours.
This is with many years of experience in construction and woodmaking.
This is not a beginners project and then expect it to look amazing.
My husband changed these plans a bit to make it look better than the other ppls that we've seen on here.
But, good luck to you and make sure to have plenty of room and time.
Also, we had to make this bed in 10-15 different pieces and put together in the bedroom we wanted it in. There is absolutely no way it will fit otherwise.
Jillian
Guest (not verified)
Wed, 03/28/2012 - 16:33
Would this plan work for a
Would this plan work for a twin over a queen?
bohman825
Sun, 04/08/2012 - 15:26
re:
Yes you'd just have to change measurements for queen instead of a full.
rdaneel
Sat, 10/25/2014 - 22:25
Full/Twin over Queen?
I don't see how you could put the fill/twin over a queen since the queen is longer. Obviously you could spin the queen around and make it an L-shape but then you are looking at a different build.
Karli (not verified)
Wed, 12/05/2012 - 17:20
Change size
Do you think a full over full would work?
Jesse and Jillian (not verified)
Thu, 12/06/2012 - 09:53
Bunk Beds
Yes any size would work as long as you have the room and the extra materials.
rdaneel
Sat, 10/25/2014 - 22:28
Love the modifications you made!
I really like the look of this ... I'm going to try to replicate!
What does the bottom of the guard-rail look like? Did you space out your slats a little more than the original design? I like the 2x4 topper instead of the 1x6.
hmagnani
Sat, 02/28/2015 - 16:46
Not Impressed with Design of this Bed
We made this bed over the course of a week, both of us have extensive experience in woodworking and building. Ours is very wobbly on the long axis. We had a friend who is a structural engineer come in and take a look. He offered suggestions to shore it up and nothing really worked. The 3/4" overlap is not enough to secure the side rails, imo, and we used a variety of brackets to make it not wobble, to no avail.
This bed is coming apart in a few weeks and will be stored. If it is ever used again, it will be as two separate beds. I spent about $400 on this. My son never felt safe sleeping on the top bunk and has slept on the bottom exclusively.
Just my $0.02.
moncibrv
Fri, 04/24/2015 - 04:30
Queen bed-simple
Do you have plans for twin bunk over queen bed?