Swing and arbor
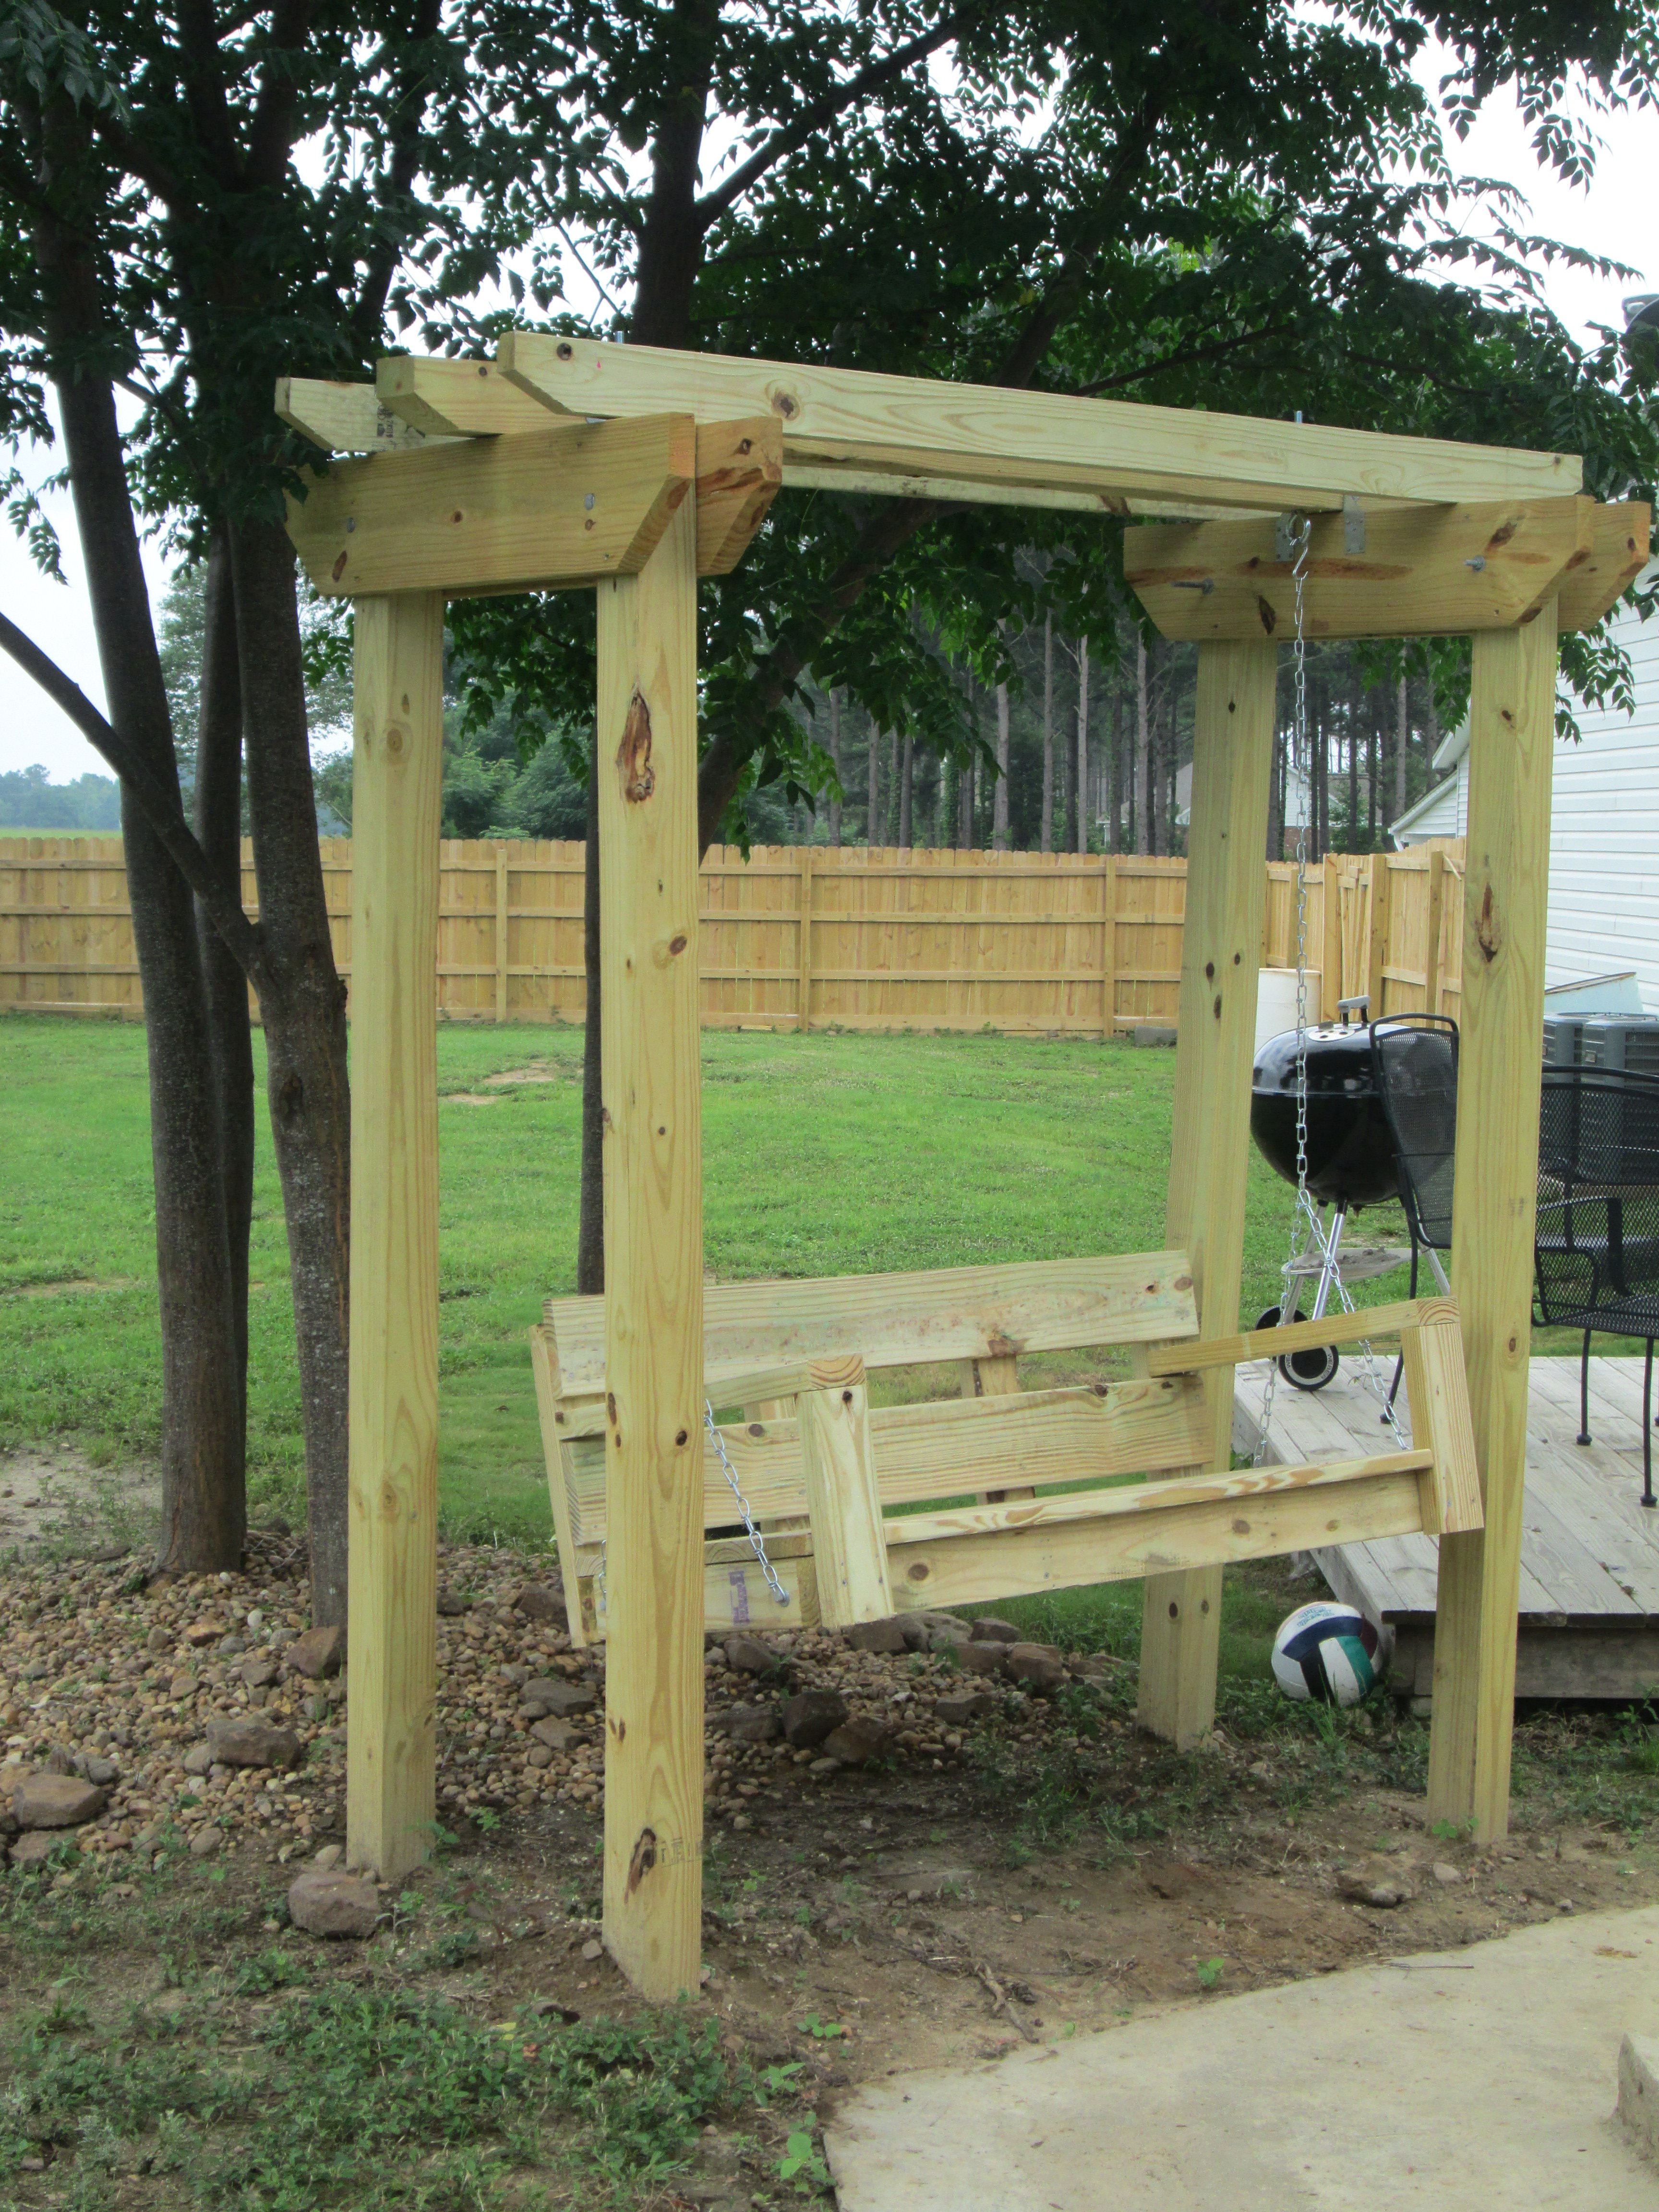
Weekend swing project
Built from Plan(s)
Recommended Skill Level
Beginner
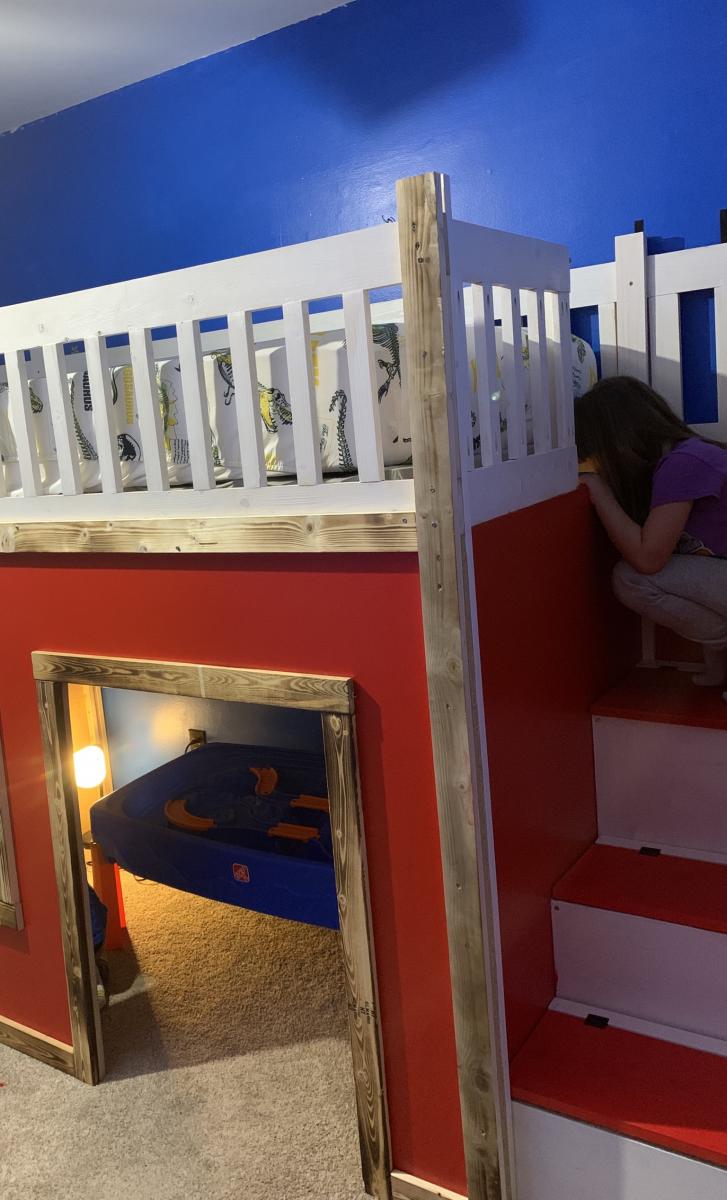
Weekend swing project

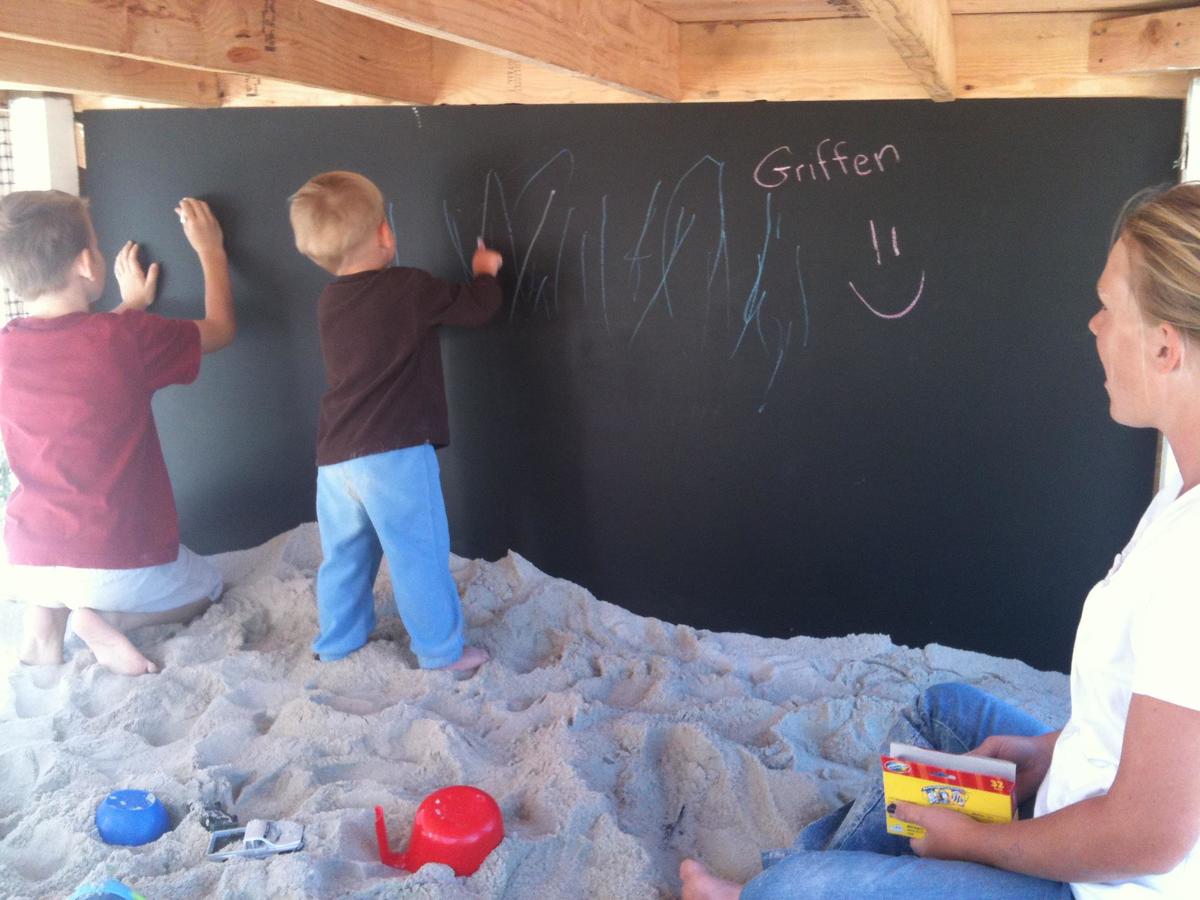
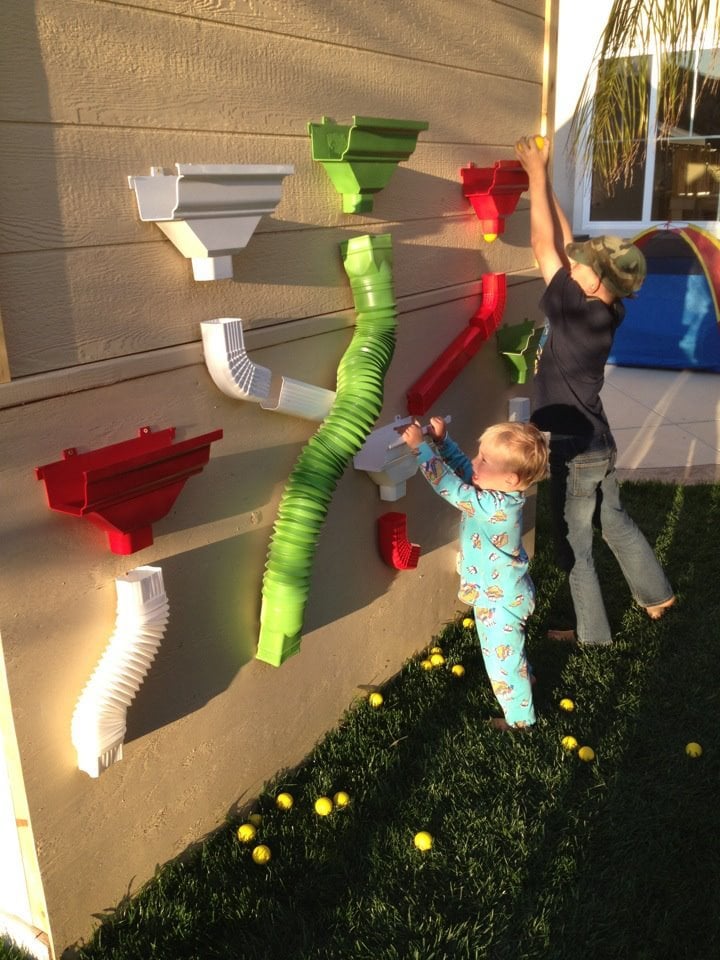
This was so much fun to do! Very easy and I added some personal touches. I made the lower level an enclosed sandbox area with a chalk board on the back wall. On the outside of the back wall, I added a "ball wall" that my kids love. I enclosed the bottom sandbox with plastic "chicken wire" to keep the cats out. :)
Thu, 11/22/2012 - 13:05
This is an awesome build. love the colours too, could you share them with us, including the roof colour. Thanku
Thu, 11/22/2012 - 15:34
Thanks! Glad you like it!
The paint was from Dunn Edwards: Roof was "Louisiana Mud", playhouse walls were "Drifting" and then the white was a snow white from Lowe's.
The slide and accessories were also from Lowe's.
Tue, 04/15/2014 - 09:35
I LOVE this! This is exactly what I'd like to build. Do you have plans you can share with us? I think I'd also like to add a couple of swings on one of the sides too. Thanks so much!
In reply to Love this! by m7hennen
Sun, 04/27/2014 - 08:39
I know I messed with the dimensions a bit but I don't remember exactly. I made the playhouse larger (deeper and taller than original plans) . I also cut the roof line on the deck side for more room. I put aluminum over the wood on the roof and then painted. The Ball Wall was made out of plastic gutter pieces that I painted and we used practice rubber golf balls to throw into them. I hope that helps! We sold that house, so I can't go out and measure it :)

In reply to Plans for Playhouse by Dawnybb
Thu, 05/28/2020 - 15:32
You may not get this as this is an old post. Did you dig post holes? I have older kids and I am thinking about building a plan like this but at a 6ft height. Wondered how much it moves around when there are a bunch of kids on there. The house I will build is also 6 ft heigh.
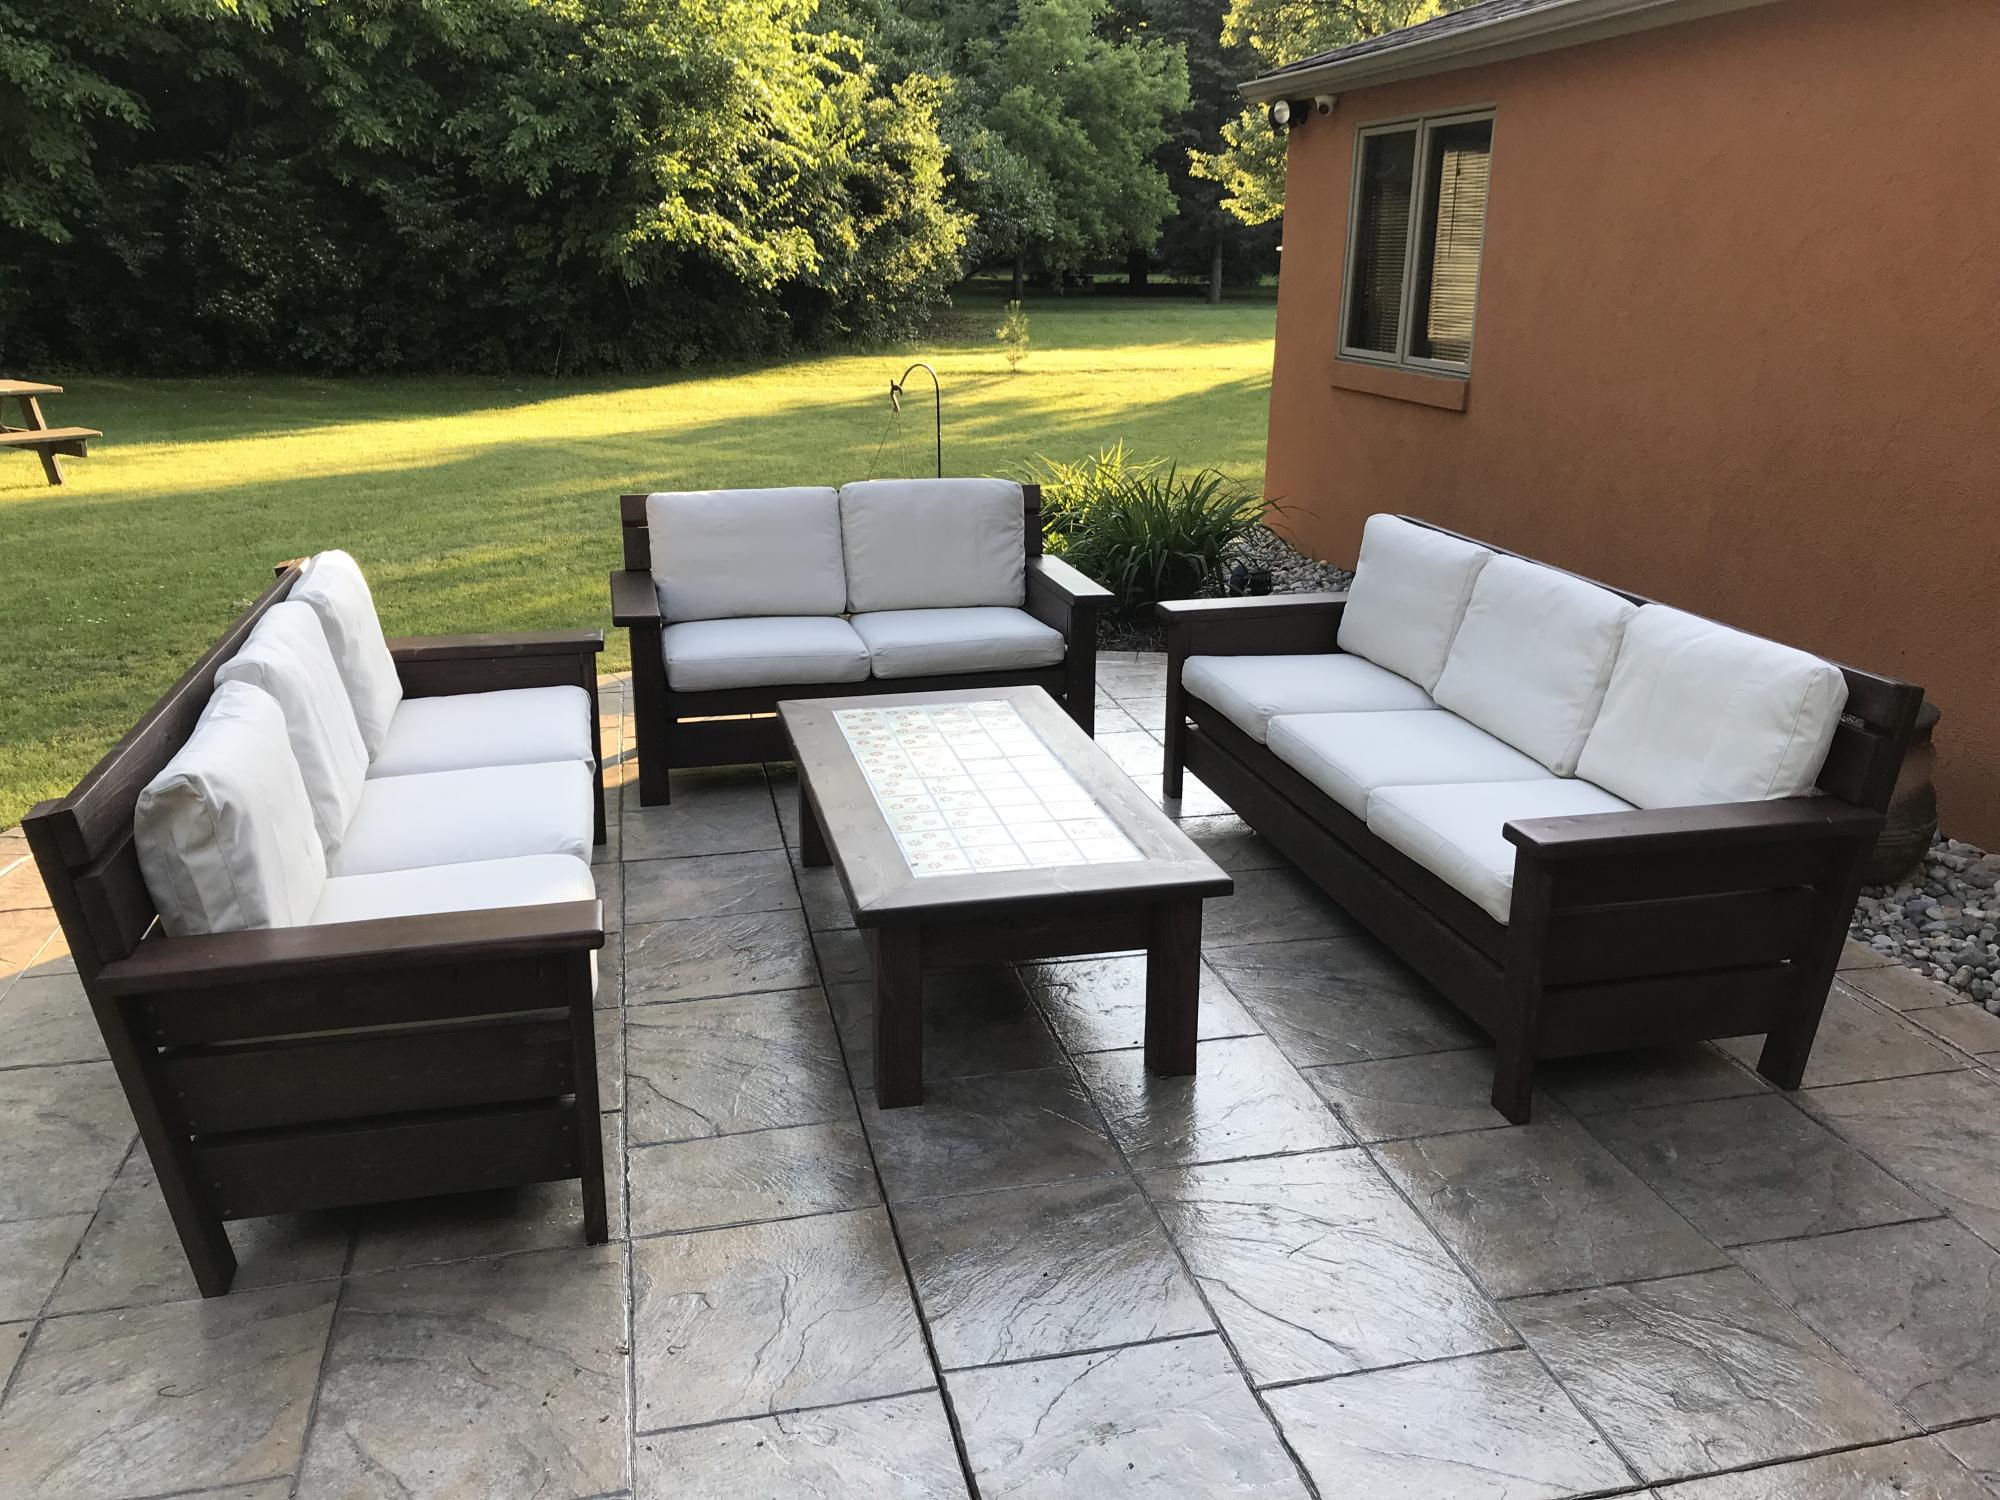
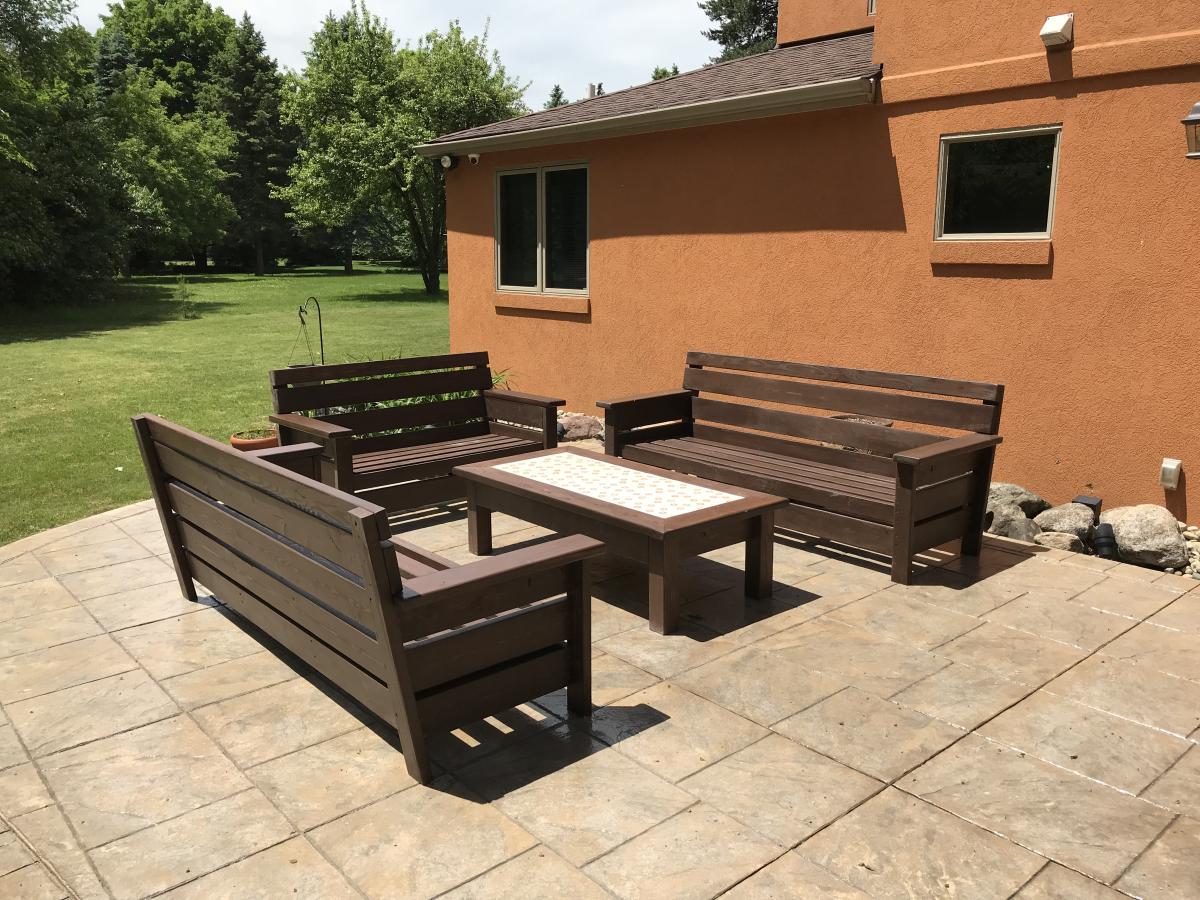
I created two sofas, a love seat and a table by modifying the modern chair. I added a back extension, tipped the back back 10 degrees, and angled the seat platform down a few degrees. Considered doing Adirondack arms, but my wife preferred the rectangular shape. The table is a variation of the 2x4 patio table (base construction similar), but we substituted pine 4x4 legs for the 2x4s, and implemented a 2x6 "picture frame" around Mexican tile on top.
I used pocket screws to attach the arms to the sides, and also to hide screws on the table "picture frame".
All-in-all, I would say this is an elegant-looking patio set that should last quite a while. Very solid, very heavy to move around (my only complaint).
We plan to add some colorful throw pillows.

Wed, 05/13/2020 - 06:38
Like the changes!
What is the angle of the chair/sofa back 110 degrees?
Thanks
In reply to Angle of back? by KeithMatthews
Wed, 05/13/2020 - 06:39
Oops just saw it at the top, sorry.

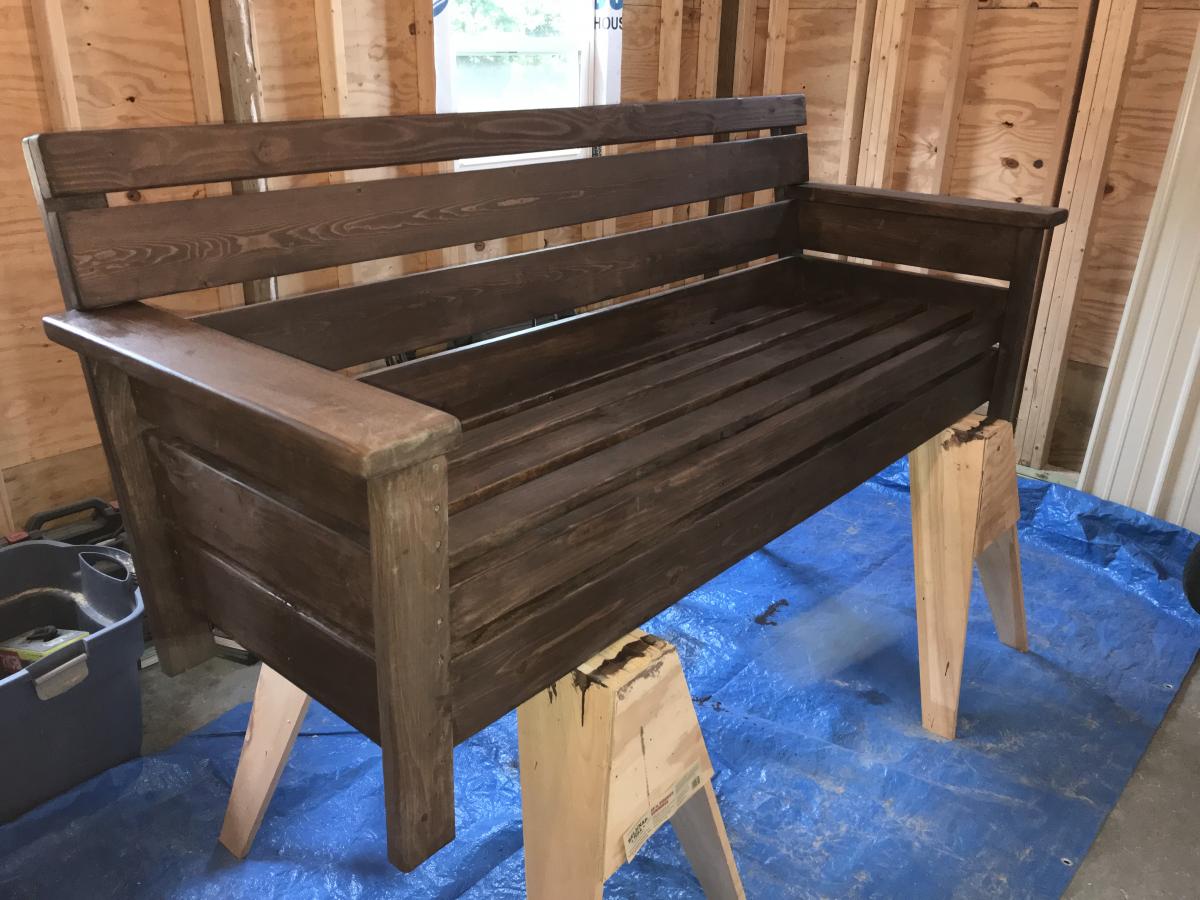
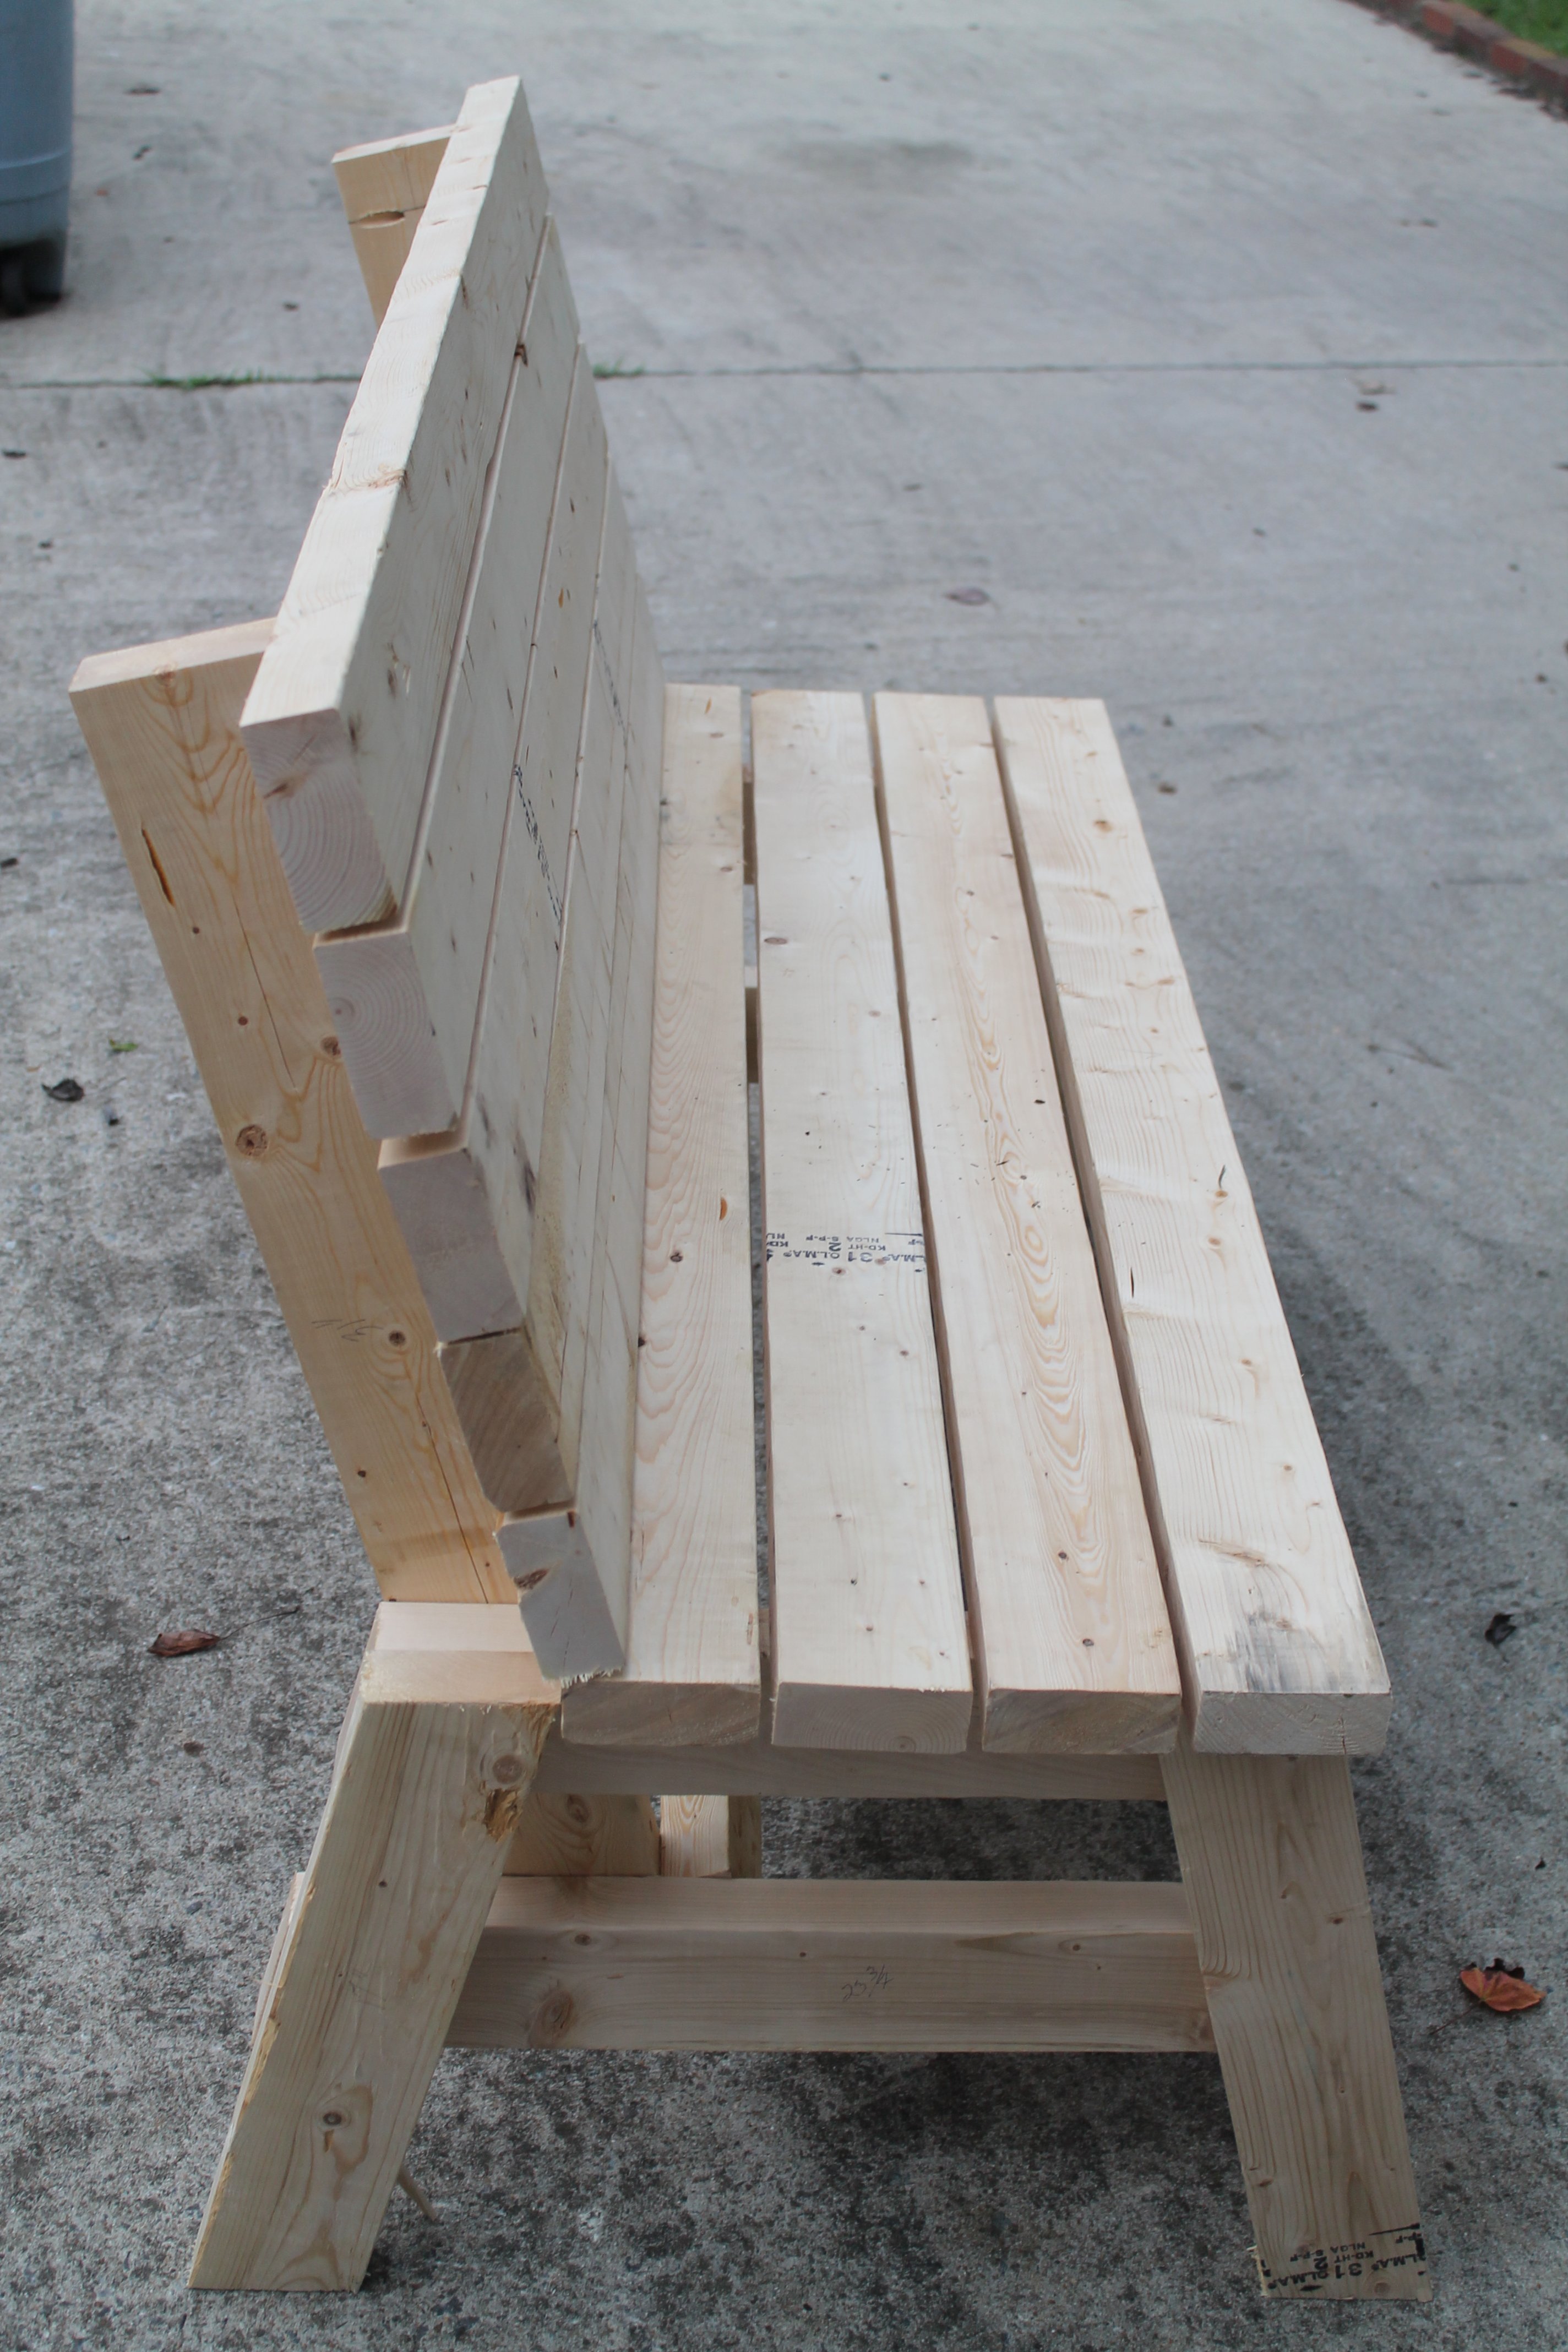
I made this in an afternoon. Loved this project. It is made with 2x4's using a Kregs Jig and mitre saw (plus additional tools like a drill and square). This was my frist time using the Kregs Jig and I am sold!!
The free plans were taken from another website. They are very detailed and there is even a video (I recommend it as he gives a great tip for making sure the back stays equal/level to each other before putting the back on). Even though you can build this by yourself, I did have help for the heavier sides once they were assembled. I plan to build the additional side table soon and finish them both with sanding and staining when the weather seems less iffy for rain.
If you are looking for a good beginner project that doesn't take forever or have complicated steps, this is your project.
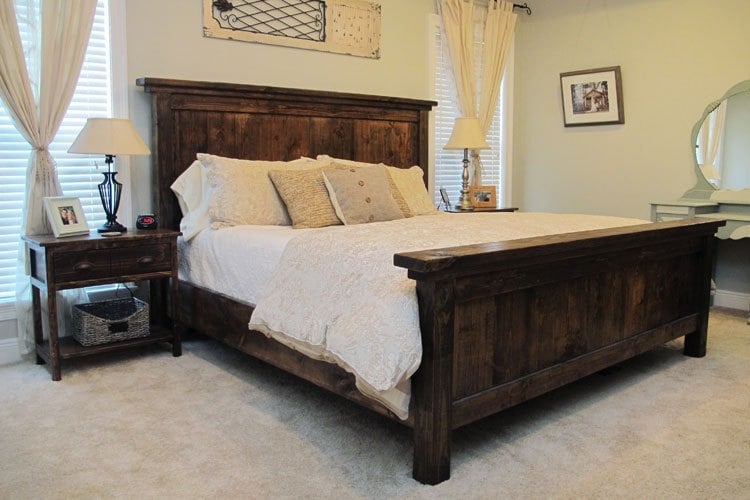
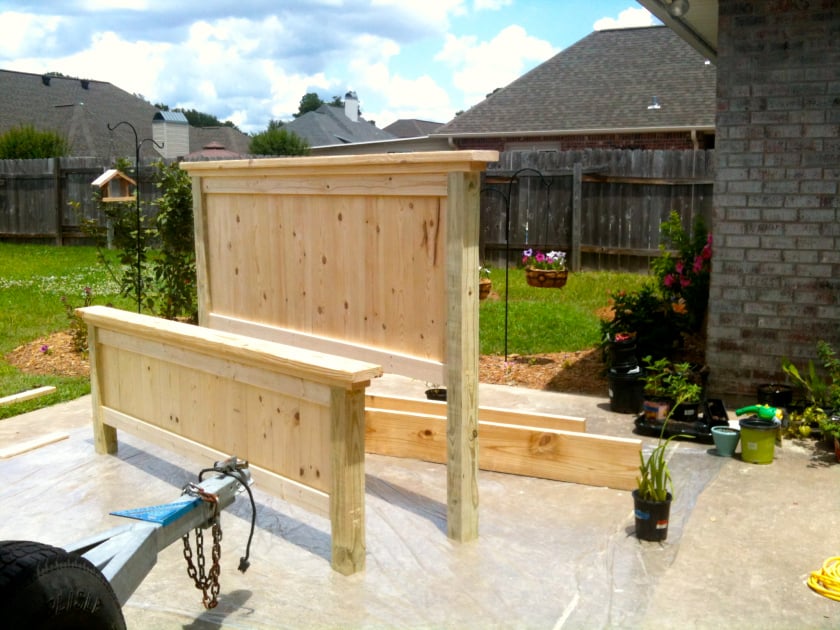
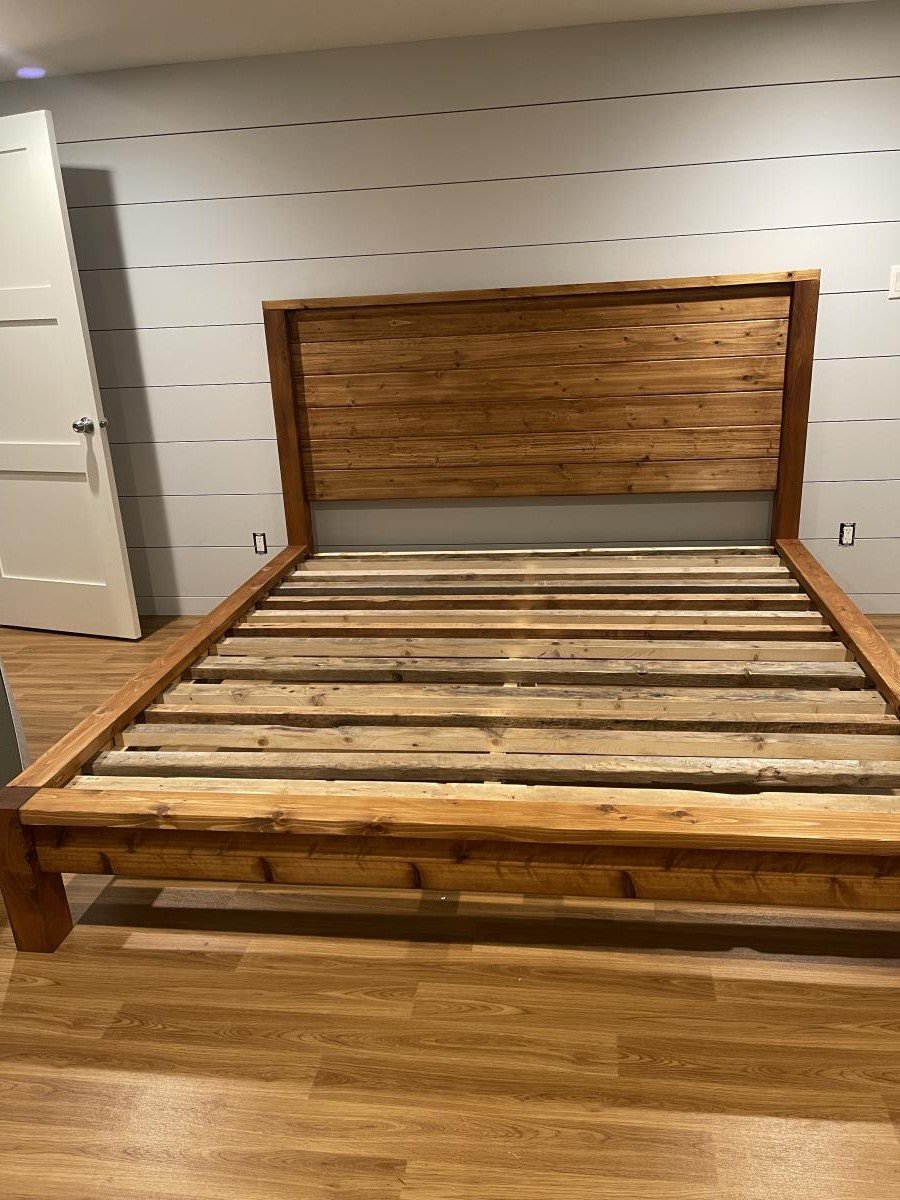
We built this Farmhouse Bed in 1 weekend for less than $200!
Fri, 02/20/2015 - 19:26
Beautiful! Both the bed and bedside table turned out great!
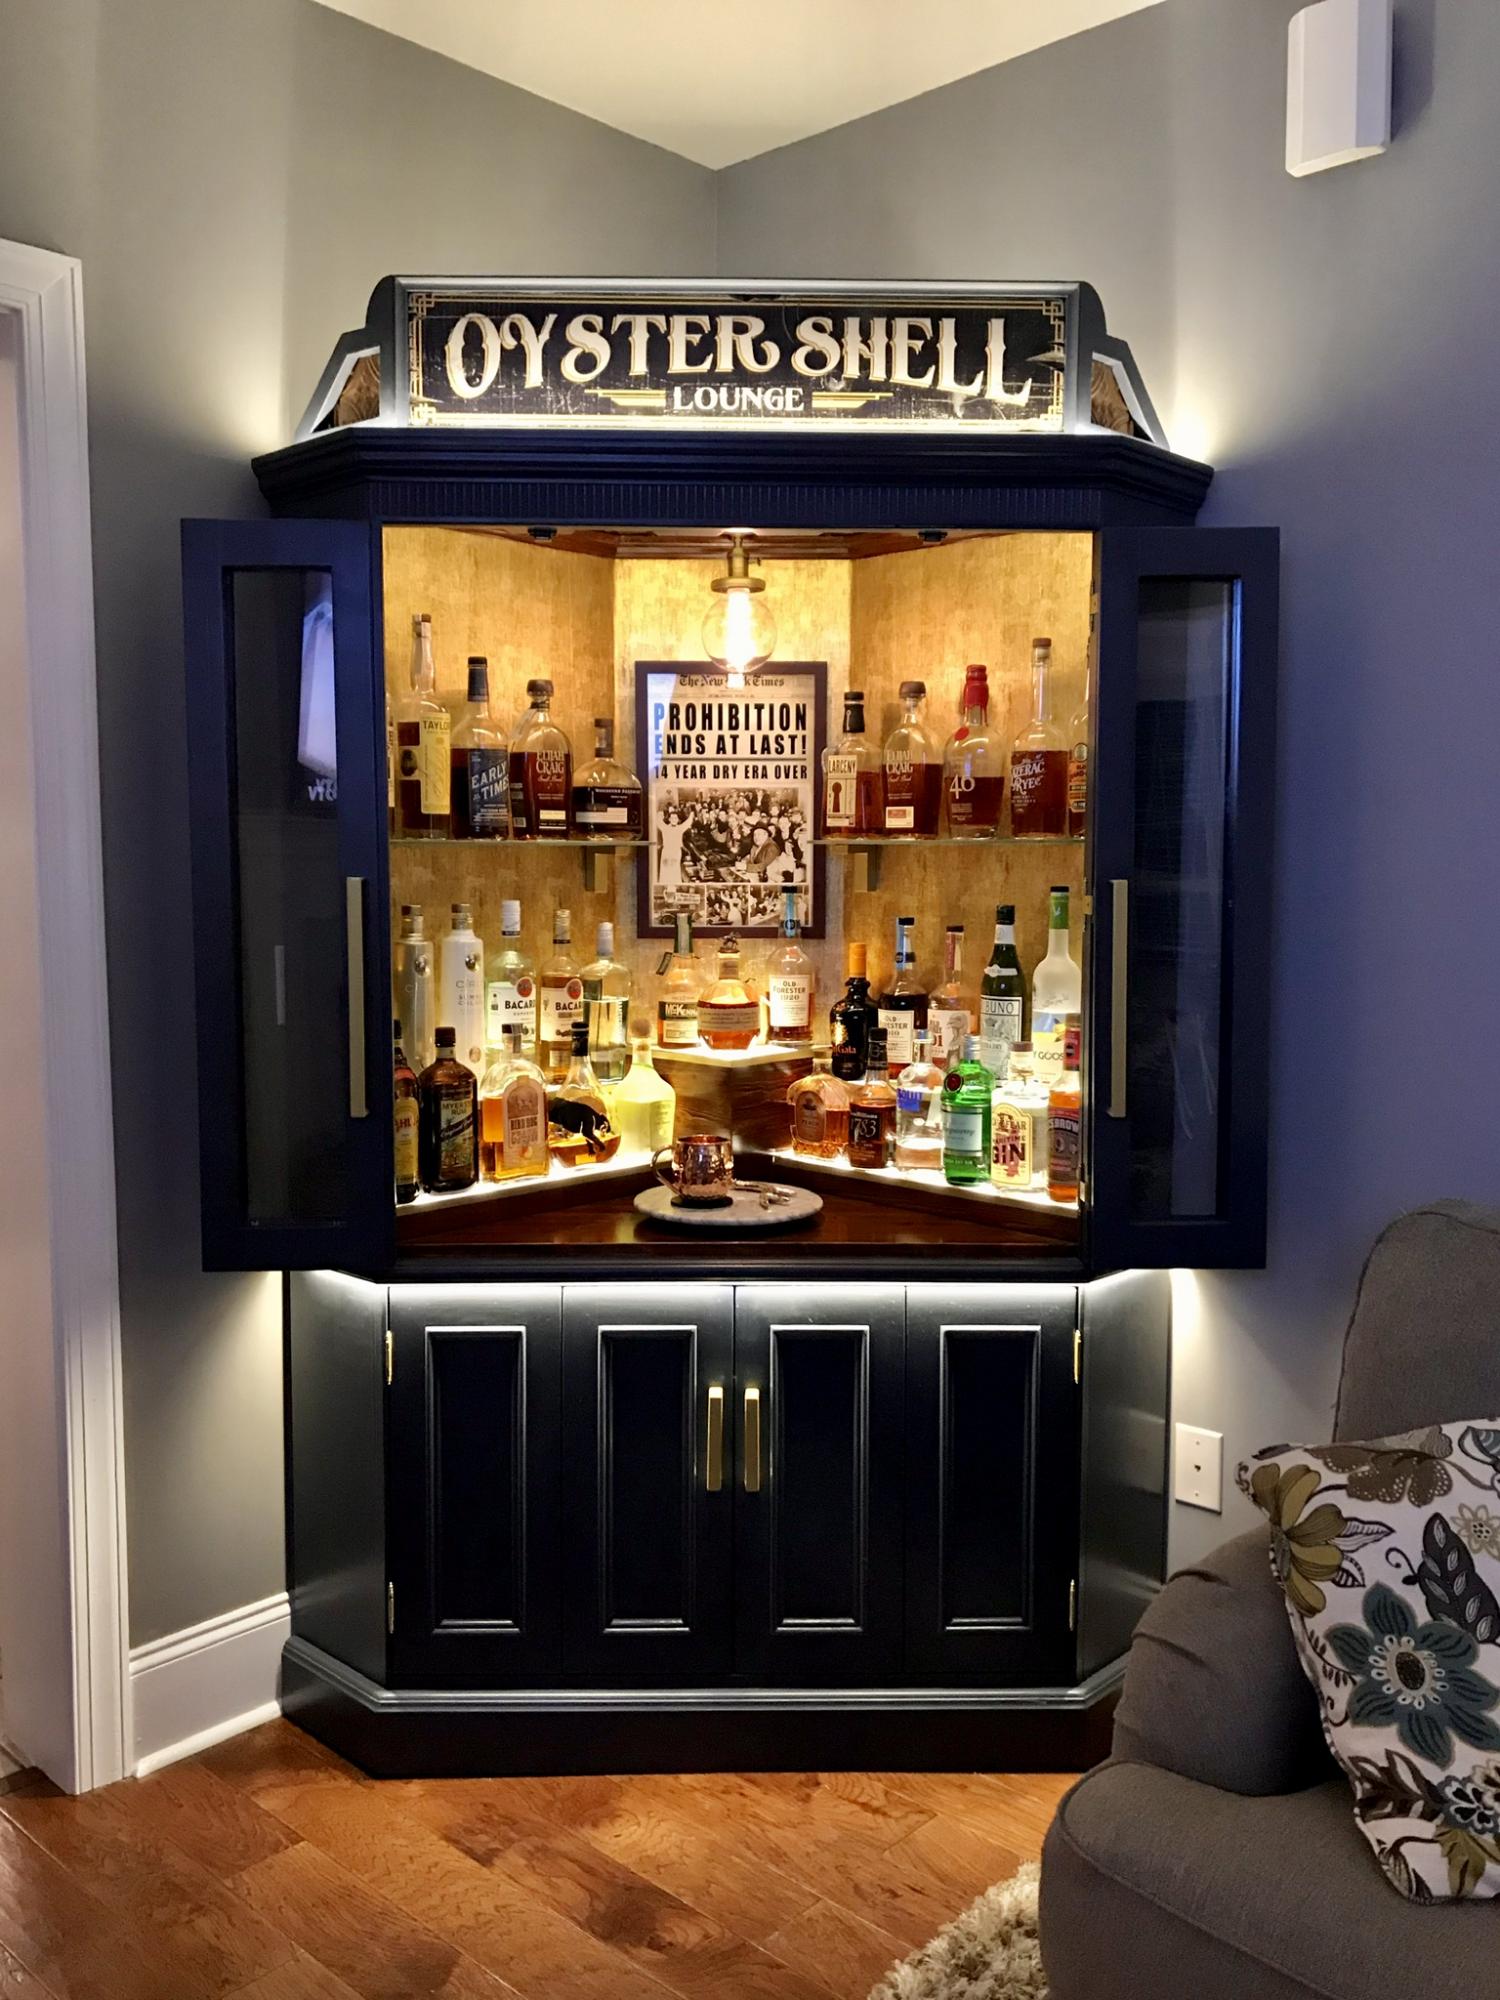
I bought this tv corner cabinet for $40. I spent many hours turning into my perfect bar cabinet. I built a custom lighted liquor display. I have posted photos of the transformation.
Thu, 03/18/2021 - 00:07
Wow that beautiful do you have directions on what you did?
Tue, 07/06/2021 - 19:04
So this is not your project? Because there isn't much information or a before and after picture. This gave me an idea for our home.
Sun, 08/15/2021 - 18:34
Yes, this is my project. What would you like to know?
Wed, 12/29/2021 - 06:41
This looks beautiful and authentic at the same time. Love how it gives me a theatre vibe! cabinet makers mornington
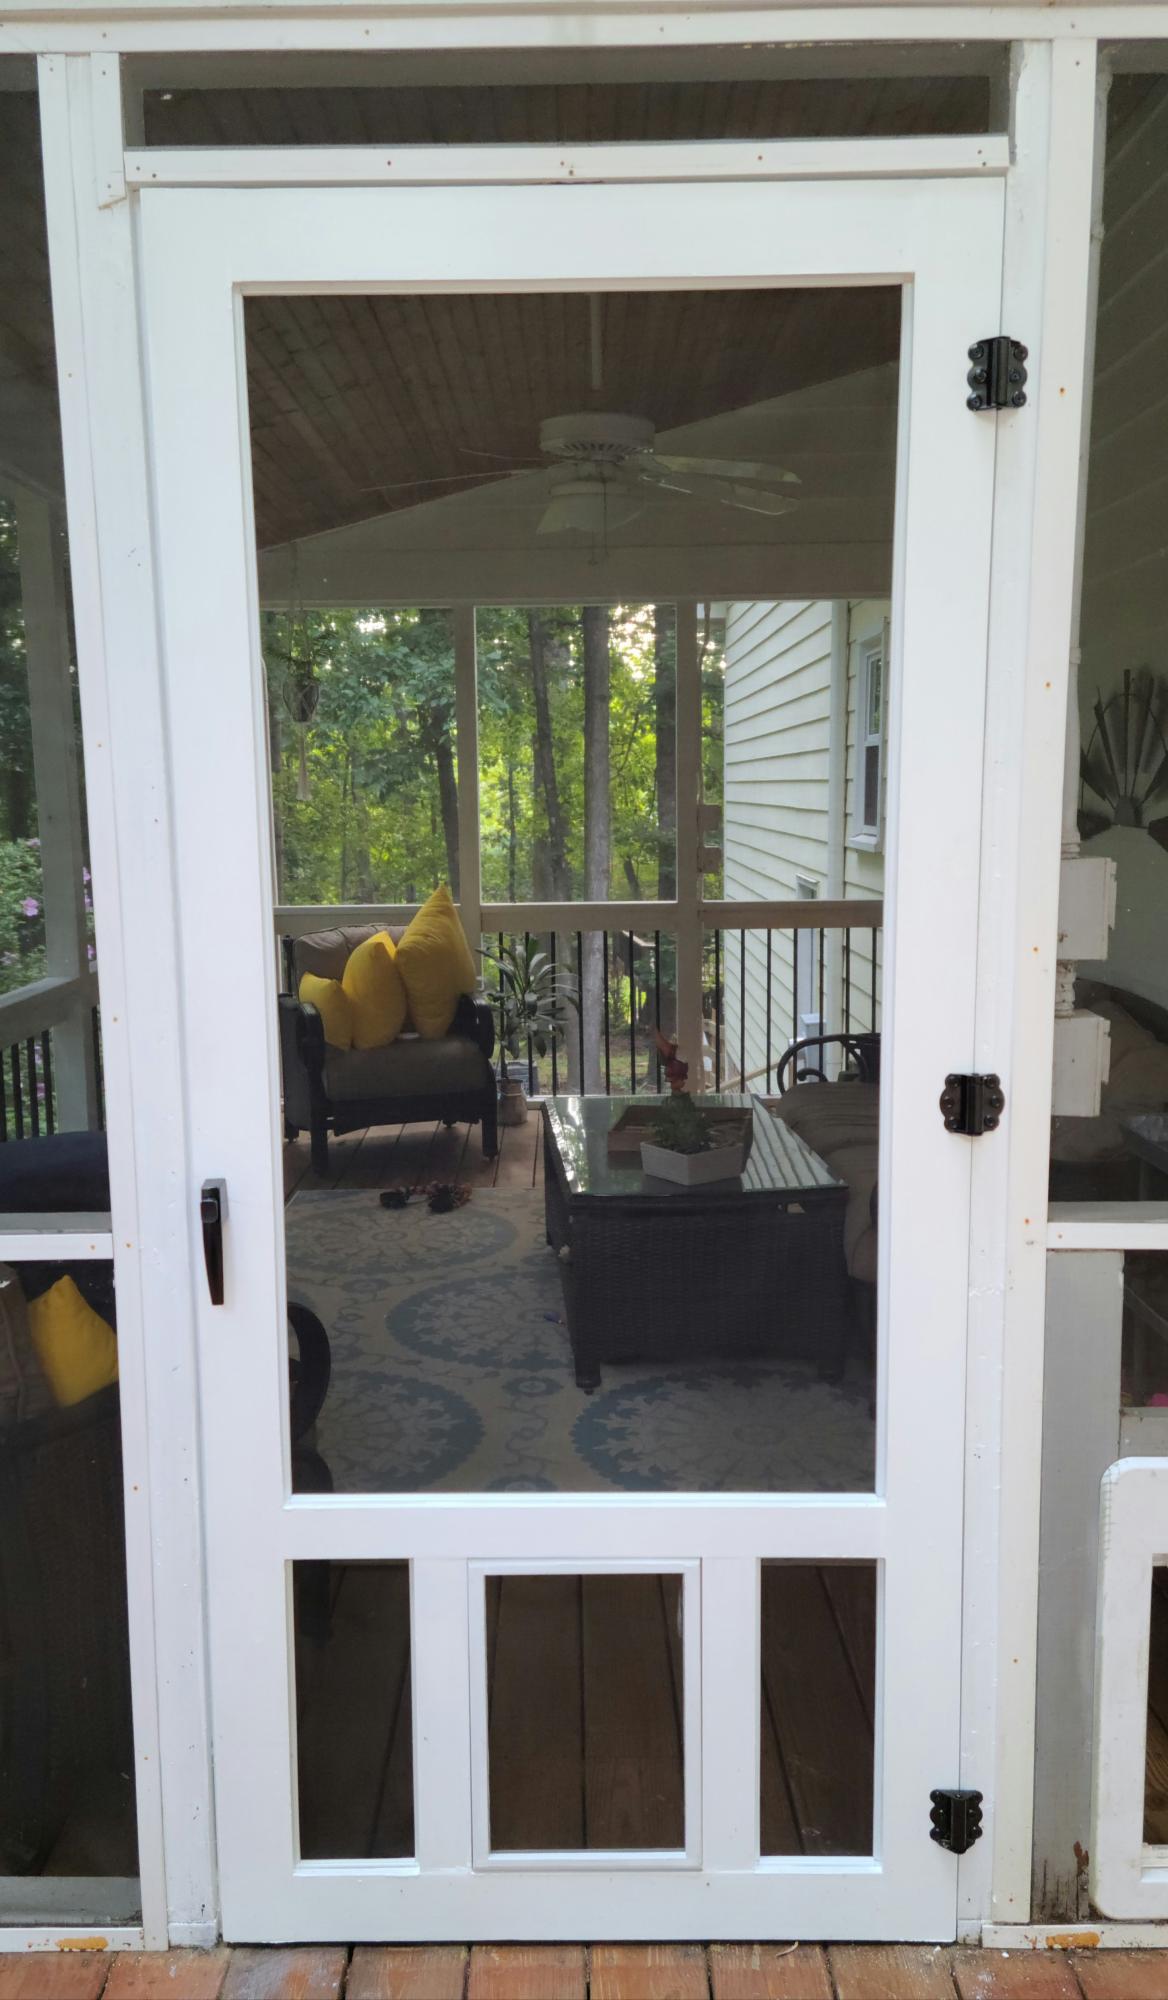
Our old screen door wasn't cutting it anymore, so I built a new one, and to kill two birds with one stone, I included a built-in dog door. Now I just need to find the motivation to close off the old dog door.
I have the plans to build this screen door with a built-in dog door posted via the blog link below for anyone interested.
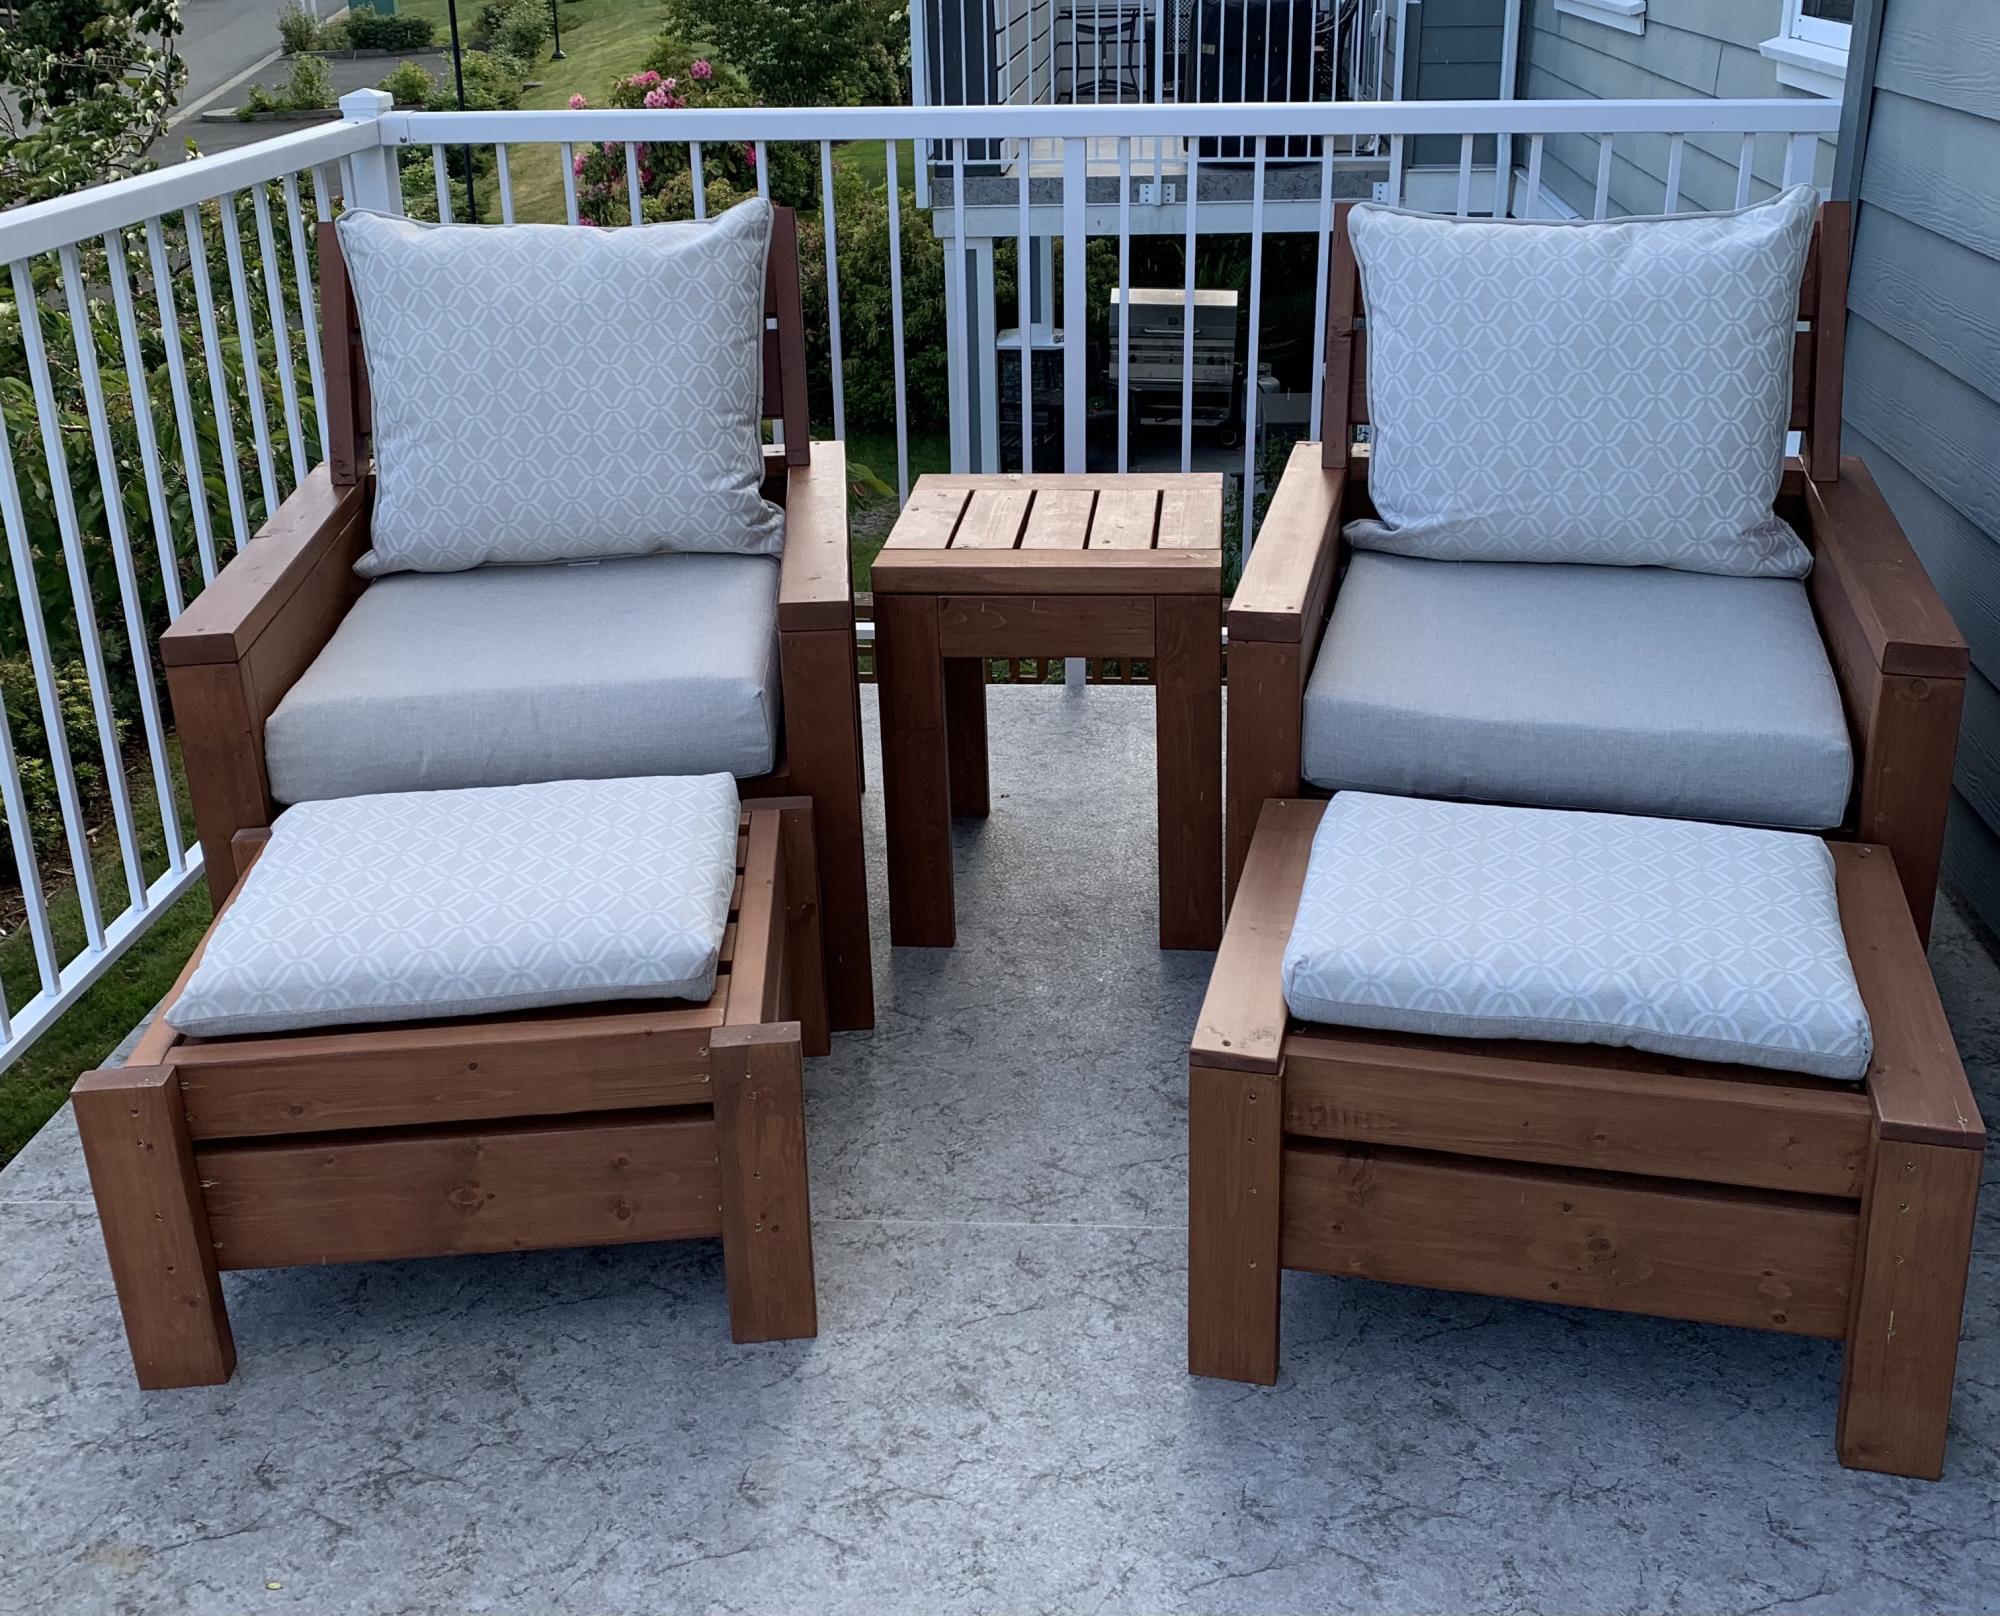
Love these plans! Made a modification and added backs to the chairs. Also, built ottomans to match the chairs which can also be used as additional seating.
Many compliments on the set. Thanks Ana!
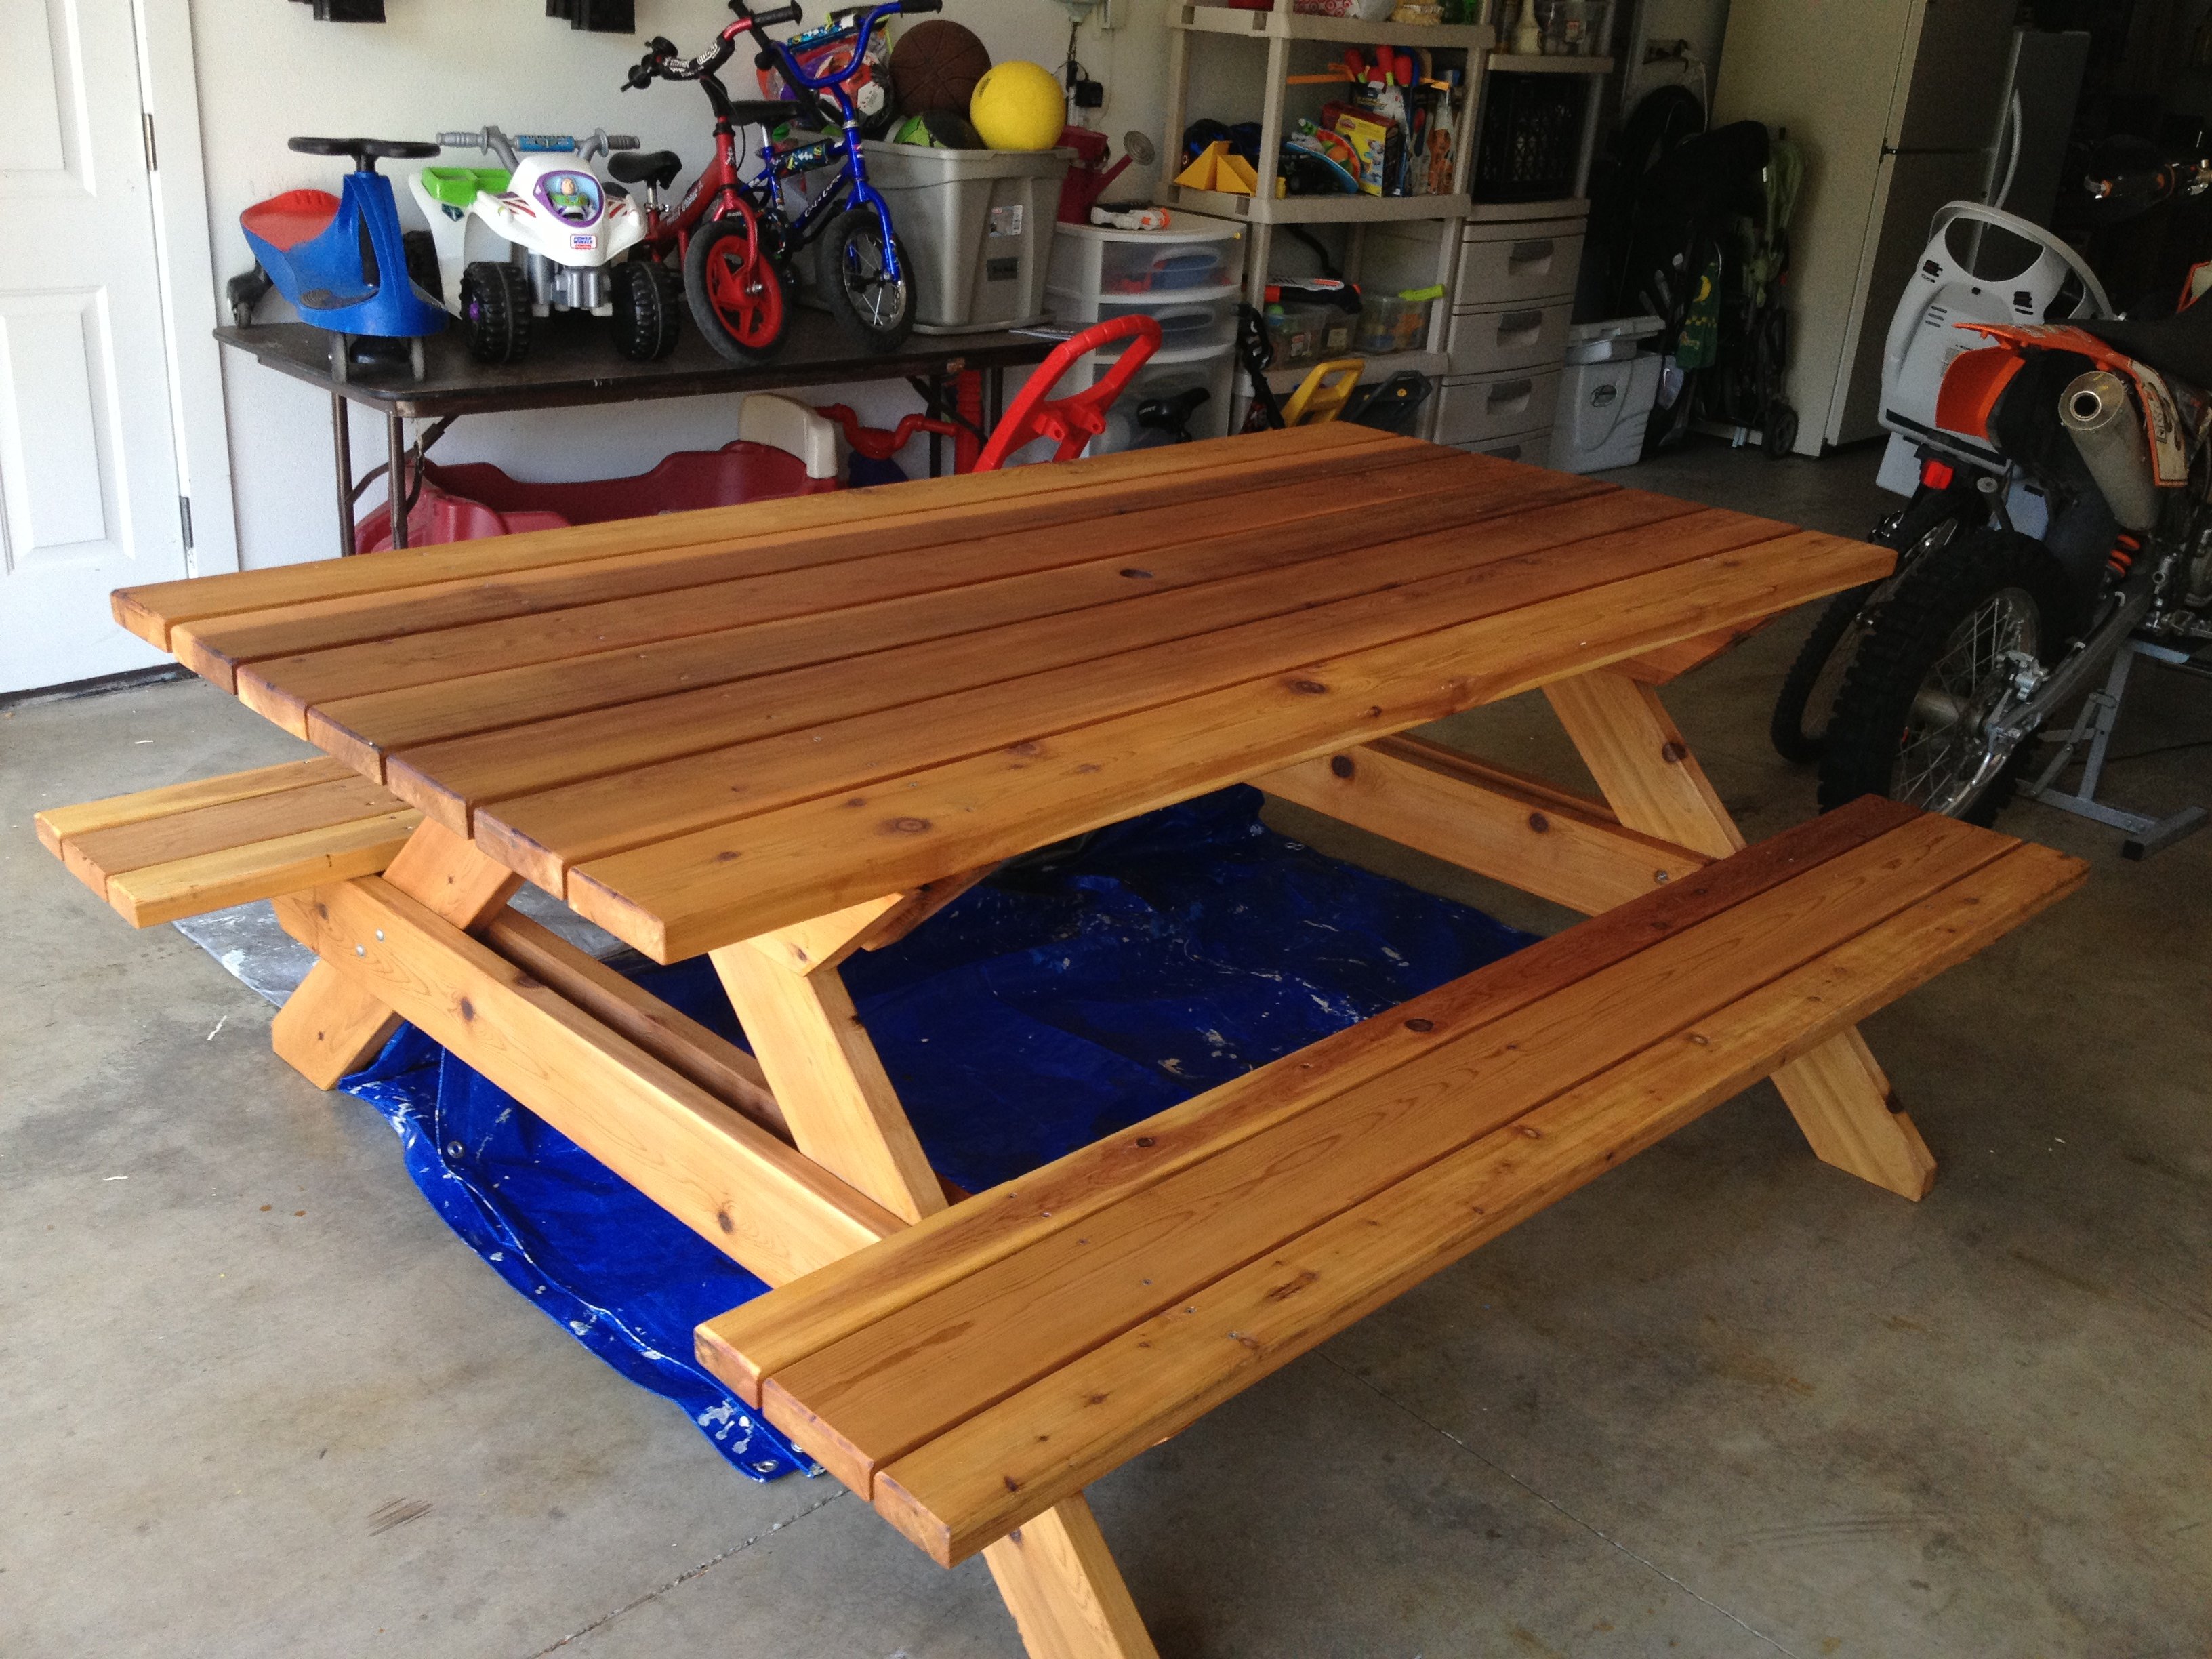
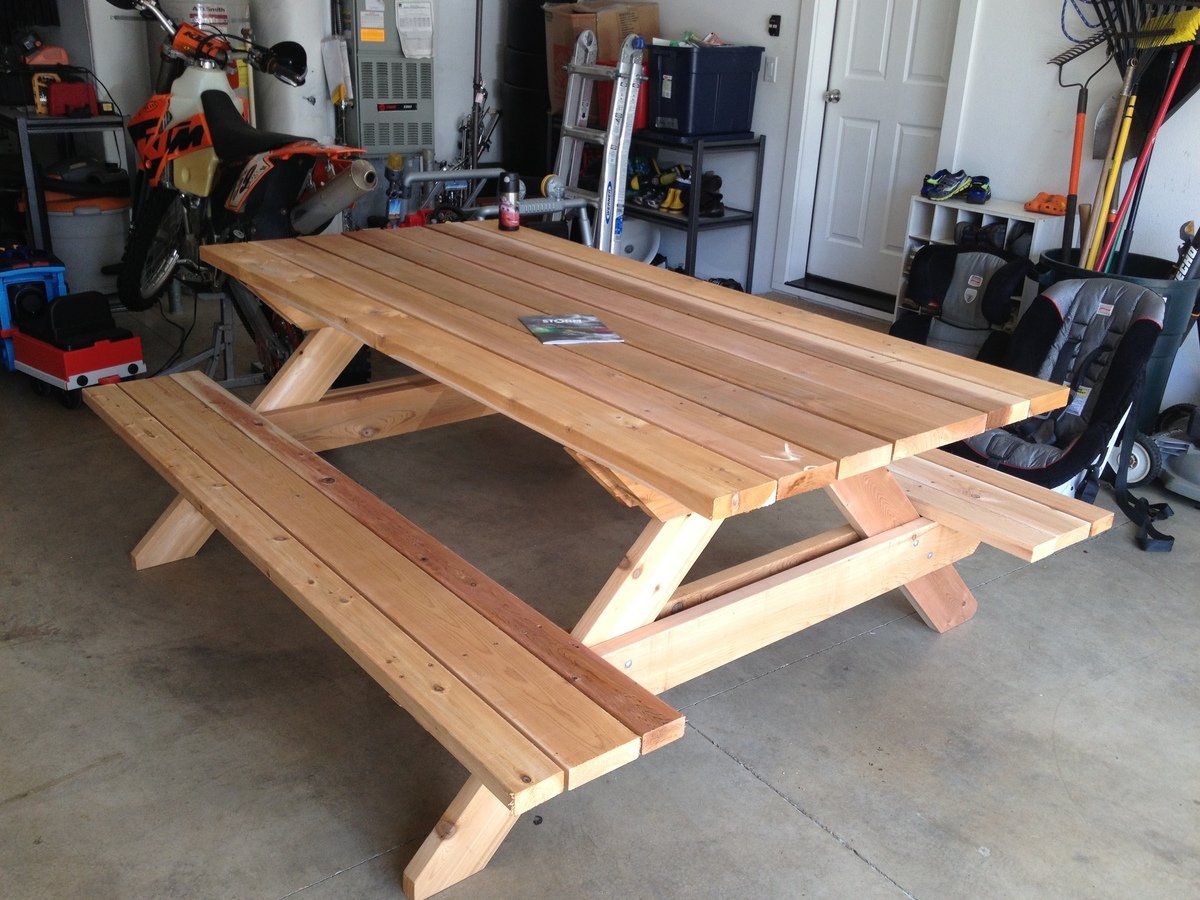
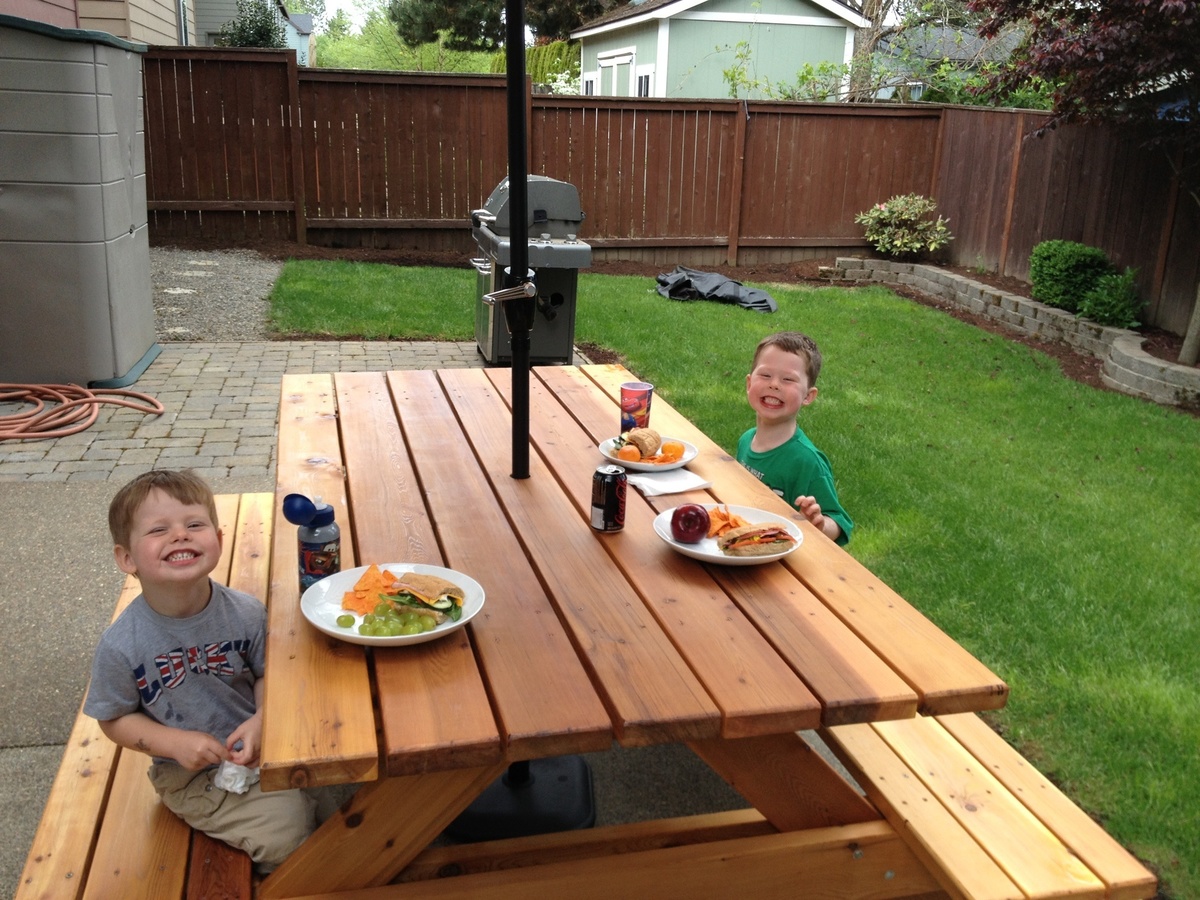
My wife started looking at expensive patio sets, which I thought were not worth the price, so I decided to build a picnic table. This is not the cheapest table out there, but it's built to last for years!! I used a high quality cedar as I got a price cut from a friend. I also used deck screws, so there would be no rusty screws!! The table top measures 7' long and looks like one you would see at a state park, notHome Depot!

Thu, 08/25/2016 - 09:48
Really like the picnic table - do you have plans for this? (I'm new to this site so apologies if they are here but I just could not see where?).
best wishes
Gerry

Easy to build, easy to customize, perfect for totes

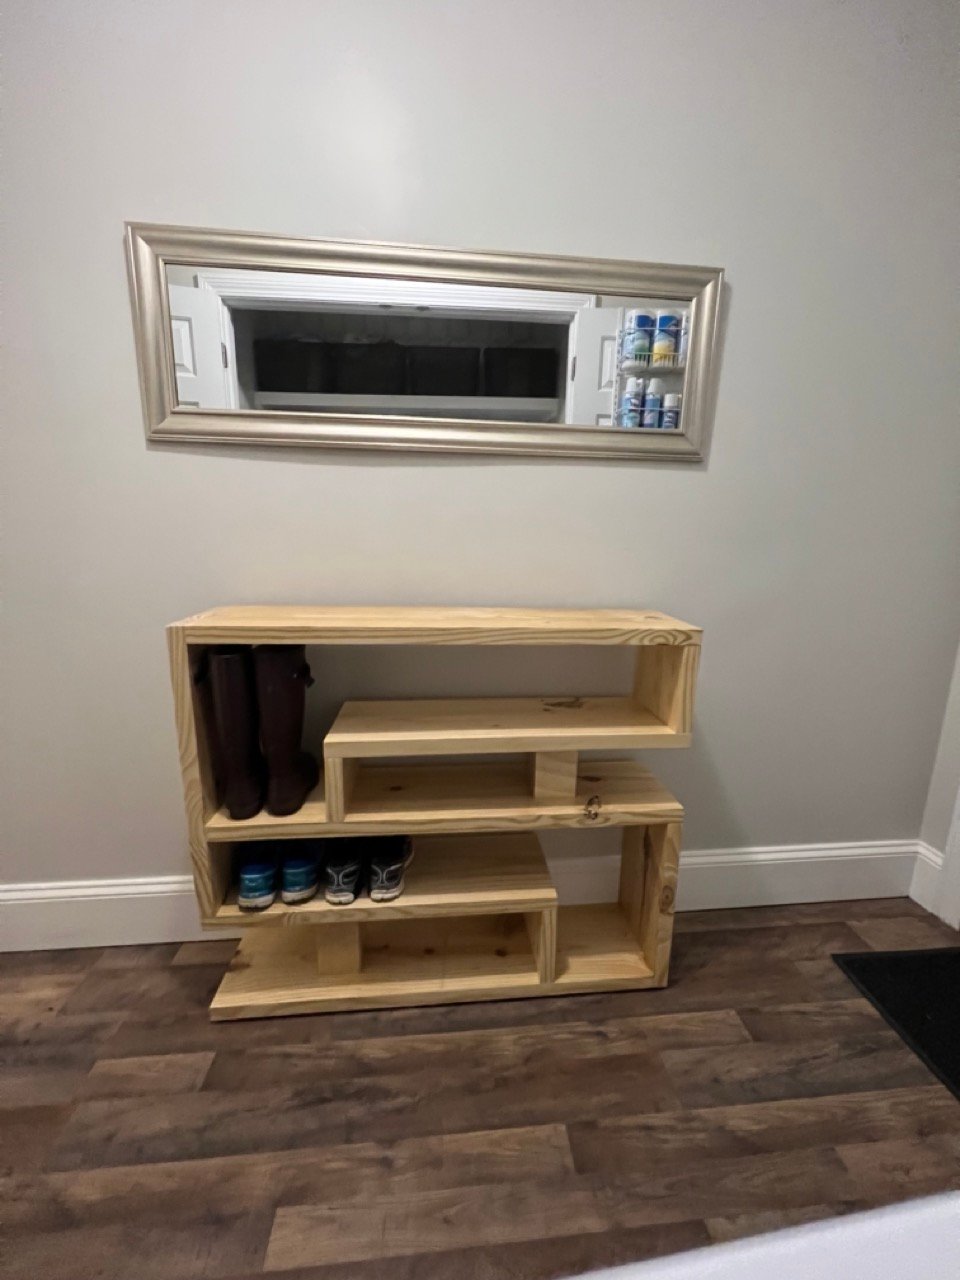
I adapted the plan for the Shoe Rack Bench to give it multiple levels and allow it to serve as an entryway table in addition to a shoe rack. I used 2 x 10's for the project.
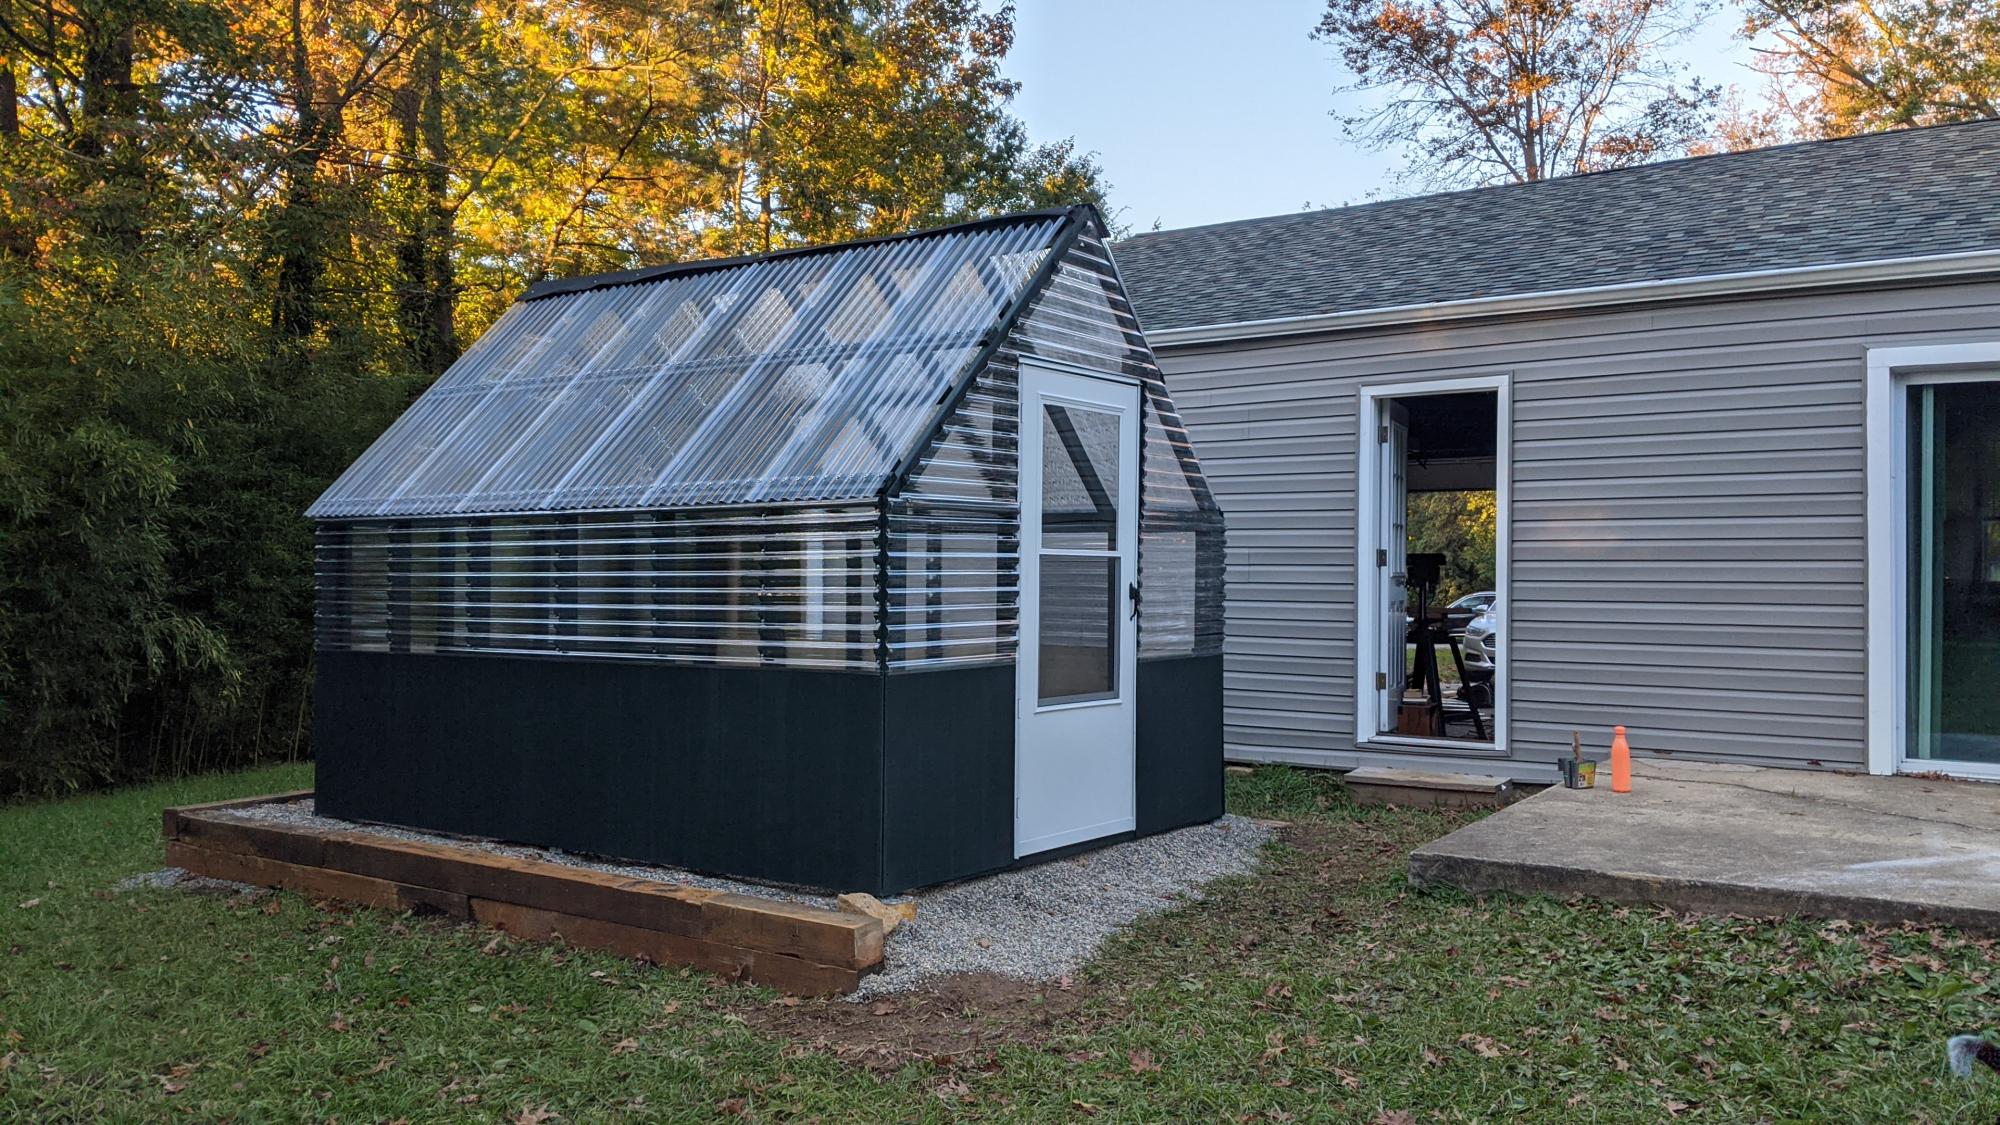
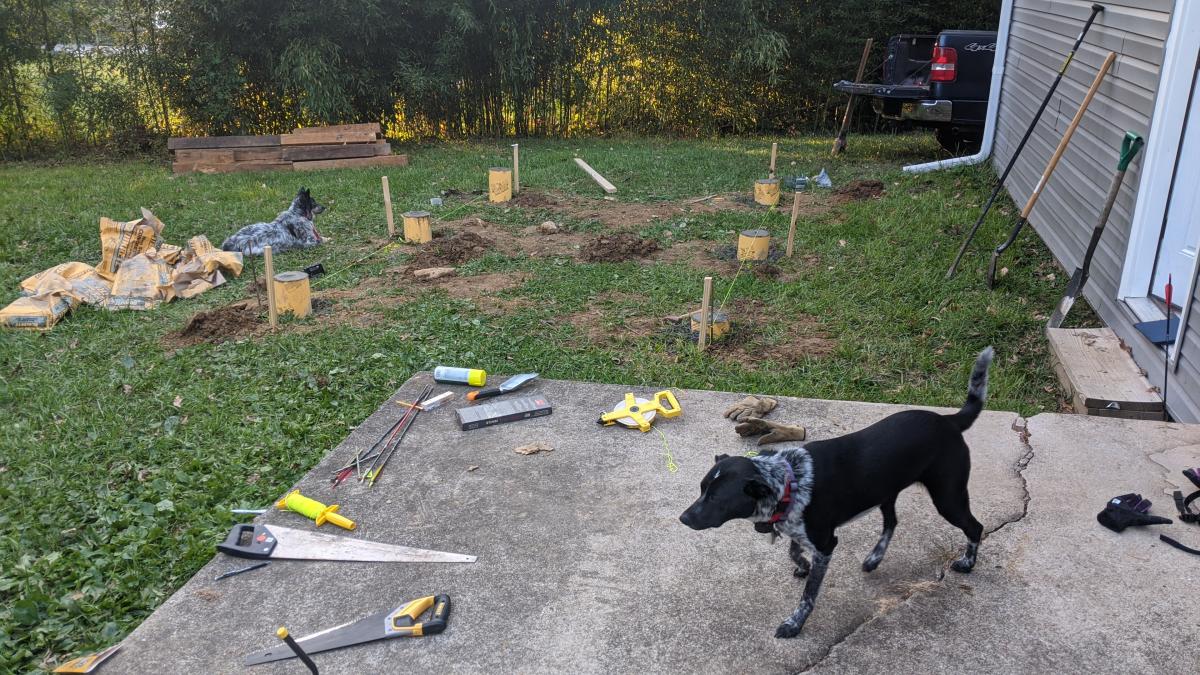
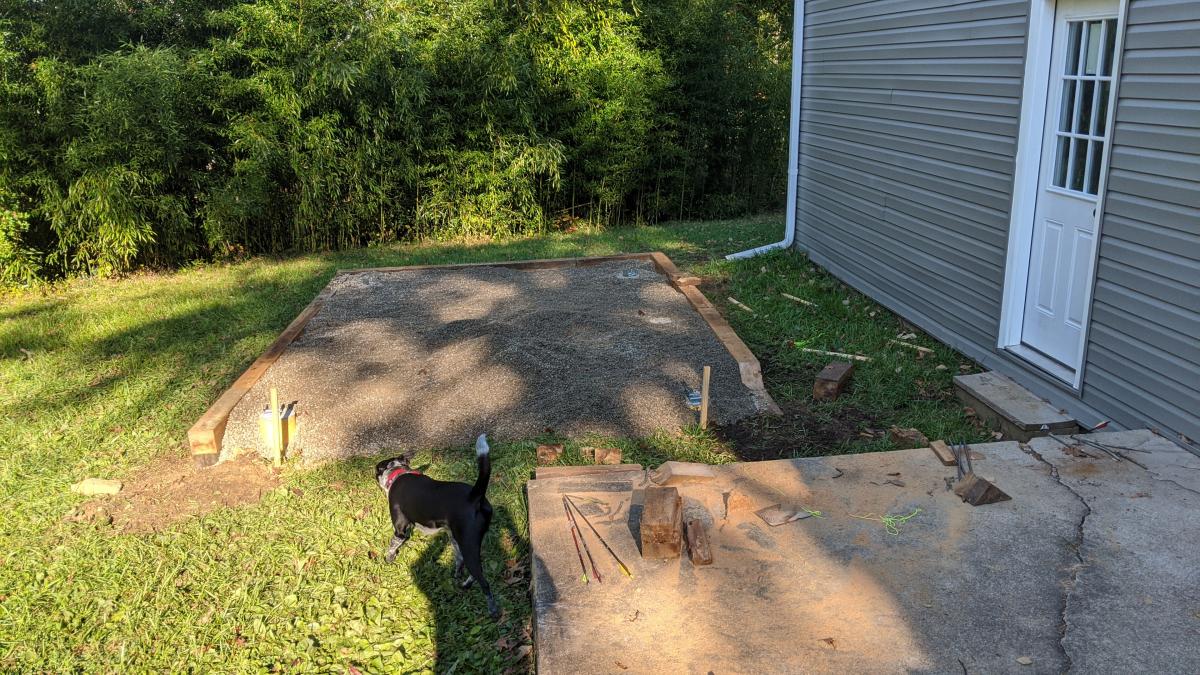
With the help of friends and family, we managed to build this greenhouse rather easily. We had to start with the foundation since the spot we chose was not an even grade. We did this by filling sono tubes with cement and leveling each off so the greenhouse would have a solid place to sit. We then built out a frame around the outside of the cement tubes with some reclaimed 6x6's. After that, we filled the space with 5 tons of river rock and then got to work! After the foundation was ready putting the rest of the house together was a piece of cake. The frame was so easy to put together. We had a few minor kinks to work out here and there, I won't say this house came out 100% perfectly, BUT I am so happy with the end results. We chose to paint it a deep green color as a final touch. So far we just moved a few potted plants from our deck to the greenhouse for the winter. It has been working very well to keep the plants cozy during the colder days we've had. Eventually, I plan to build a potting station, shelving, and most likely a garden bed for winter harvests.


Mon, 11/09/2020 - 09:52
The foundation looks great the greenhouse looks amazing! I'm sure fun was had building it too:) Thanks for sharing.
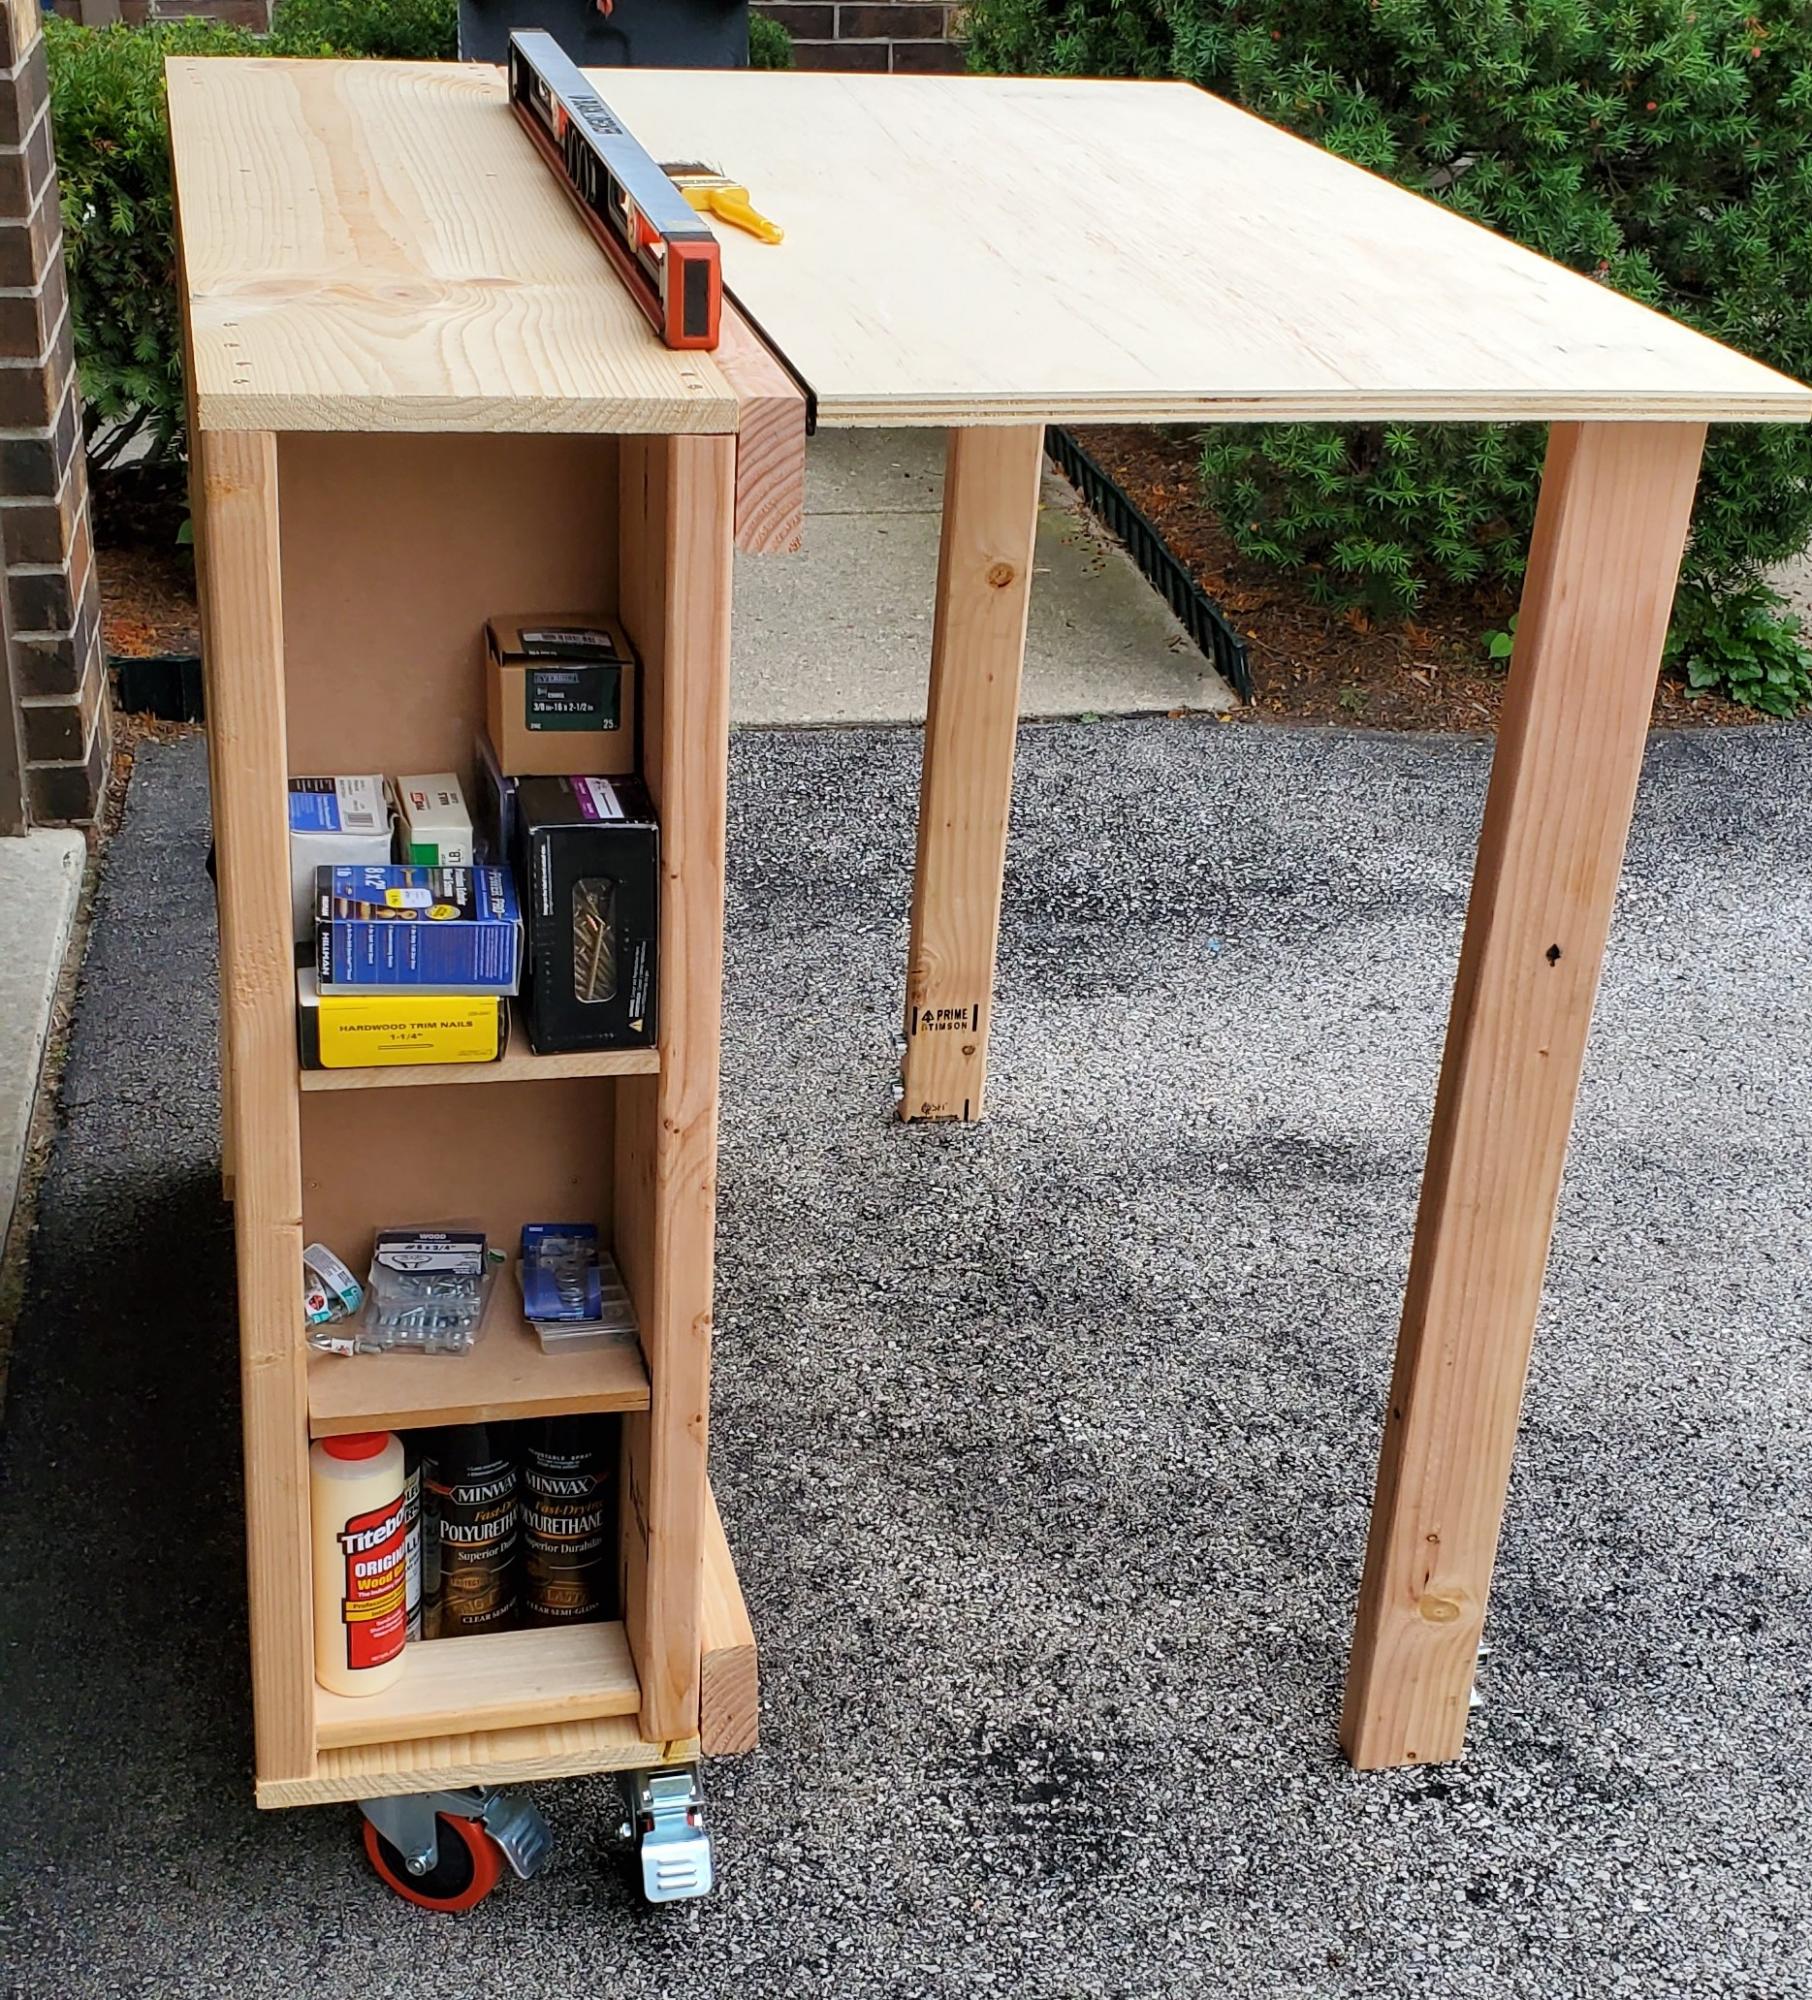
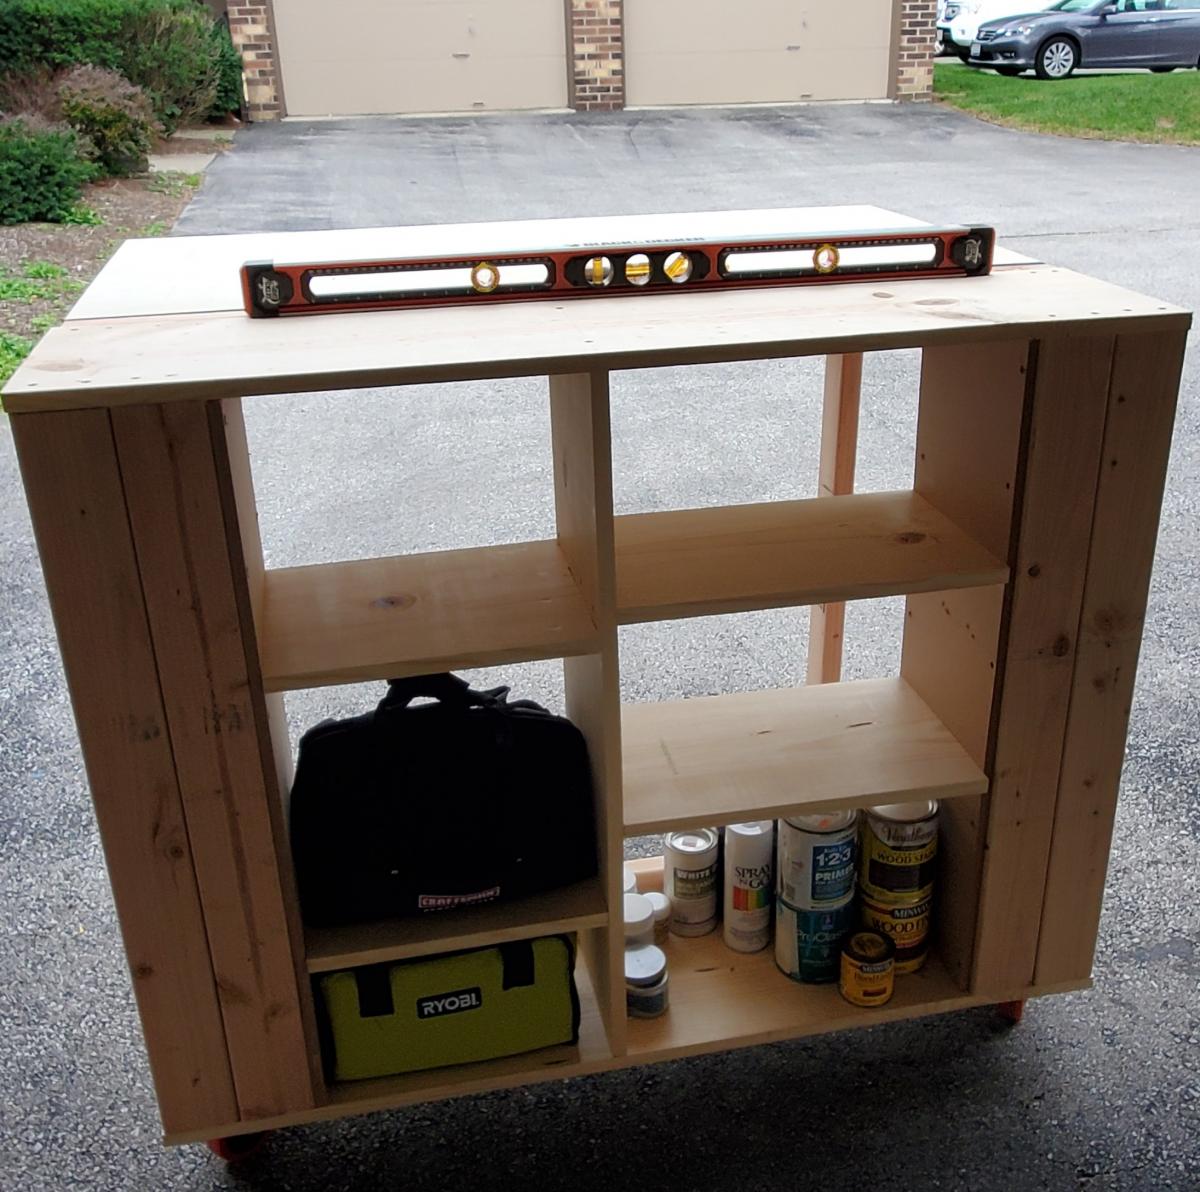
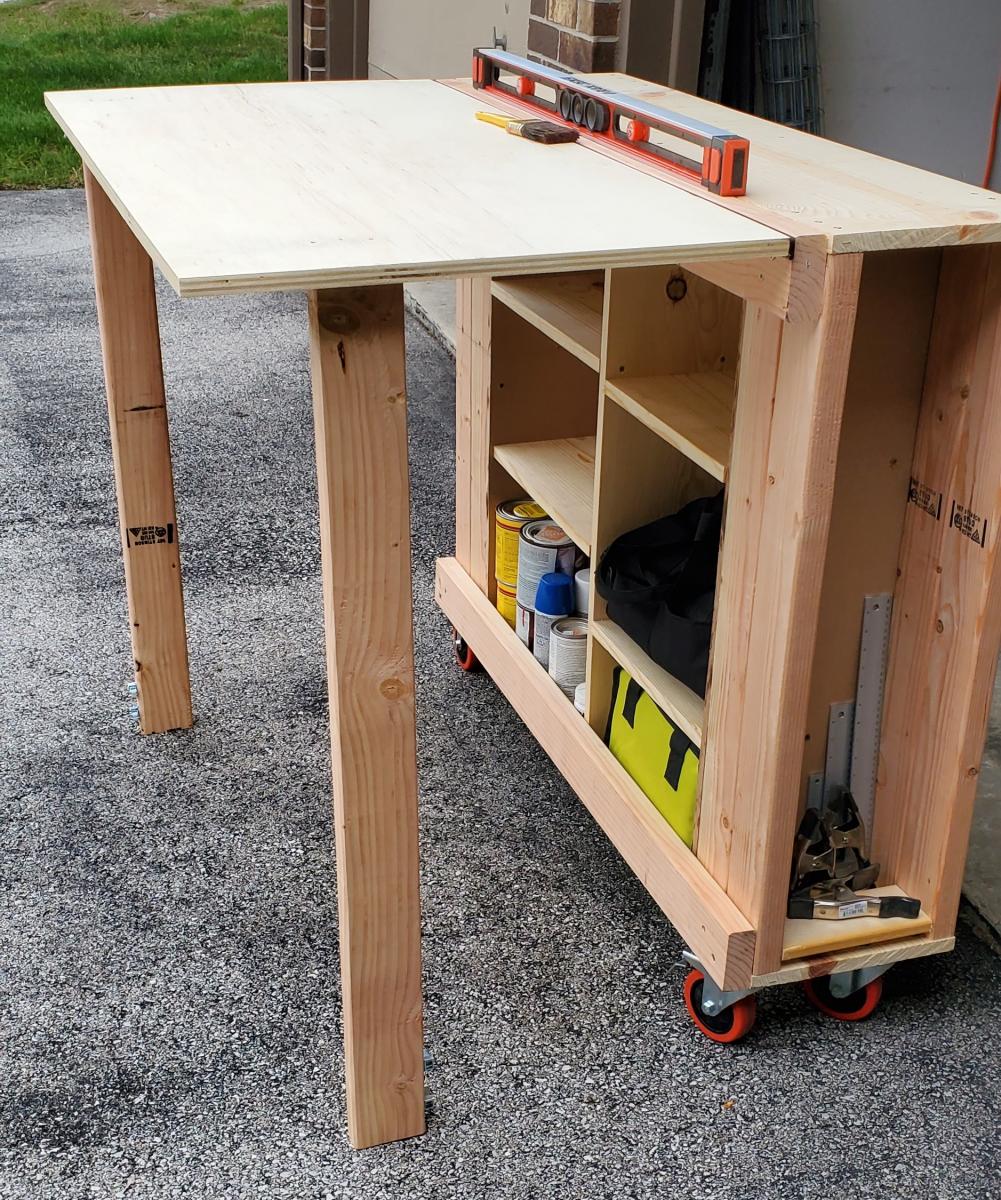
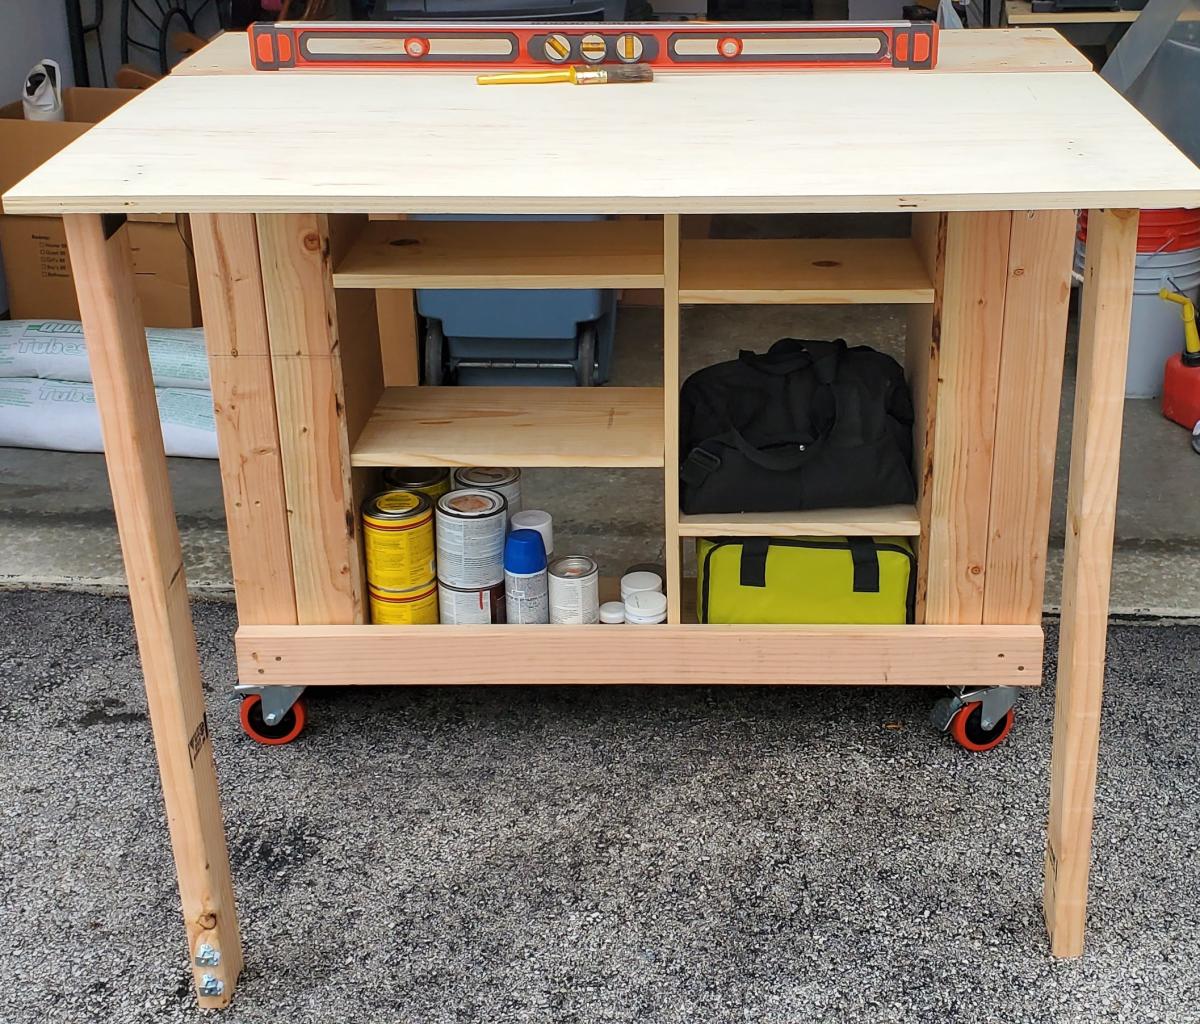
We chose this project because we have a small garage and space is at a premium. The dimensions of this build fit well in our limited space and allowed us to organize items such as paint, stain, screws and nails into one central location. I chose 2x4's on the sides to give it a more stable feel. Our garage and parking lot are all sloped and with the 2x4's this prevented the twisting. It feels solid and the wheels are smooth. We picked everything up at Home Depot. The screws that came with the hinges are to long and my husband used the Dremel to grind them down. You could just buy shorter screws. This is one of my firsts builds and I've definitely learned a lot of lessons along the way. Measure, measure, then measure again before you cut a piece and use a level surface to make level pieces. Overall, everyone in my family played a part in helping me build this piece and so I love it and will cherish this piece and the memories always. Thanks Ana for all your fun videos, sharing your life with your family, and providing resources like this plan to us for free. I'm thankful for my son who bought me a compound miter saw for Mother's Day and other family for buying me a Ryobi circular saw. I'm truly blessed and loved. Thanks
Mon, 08/31/2020 - 11:19
I love how you used the 2x4 on the sides. great idea
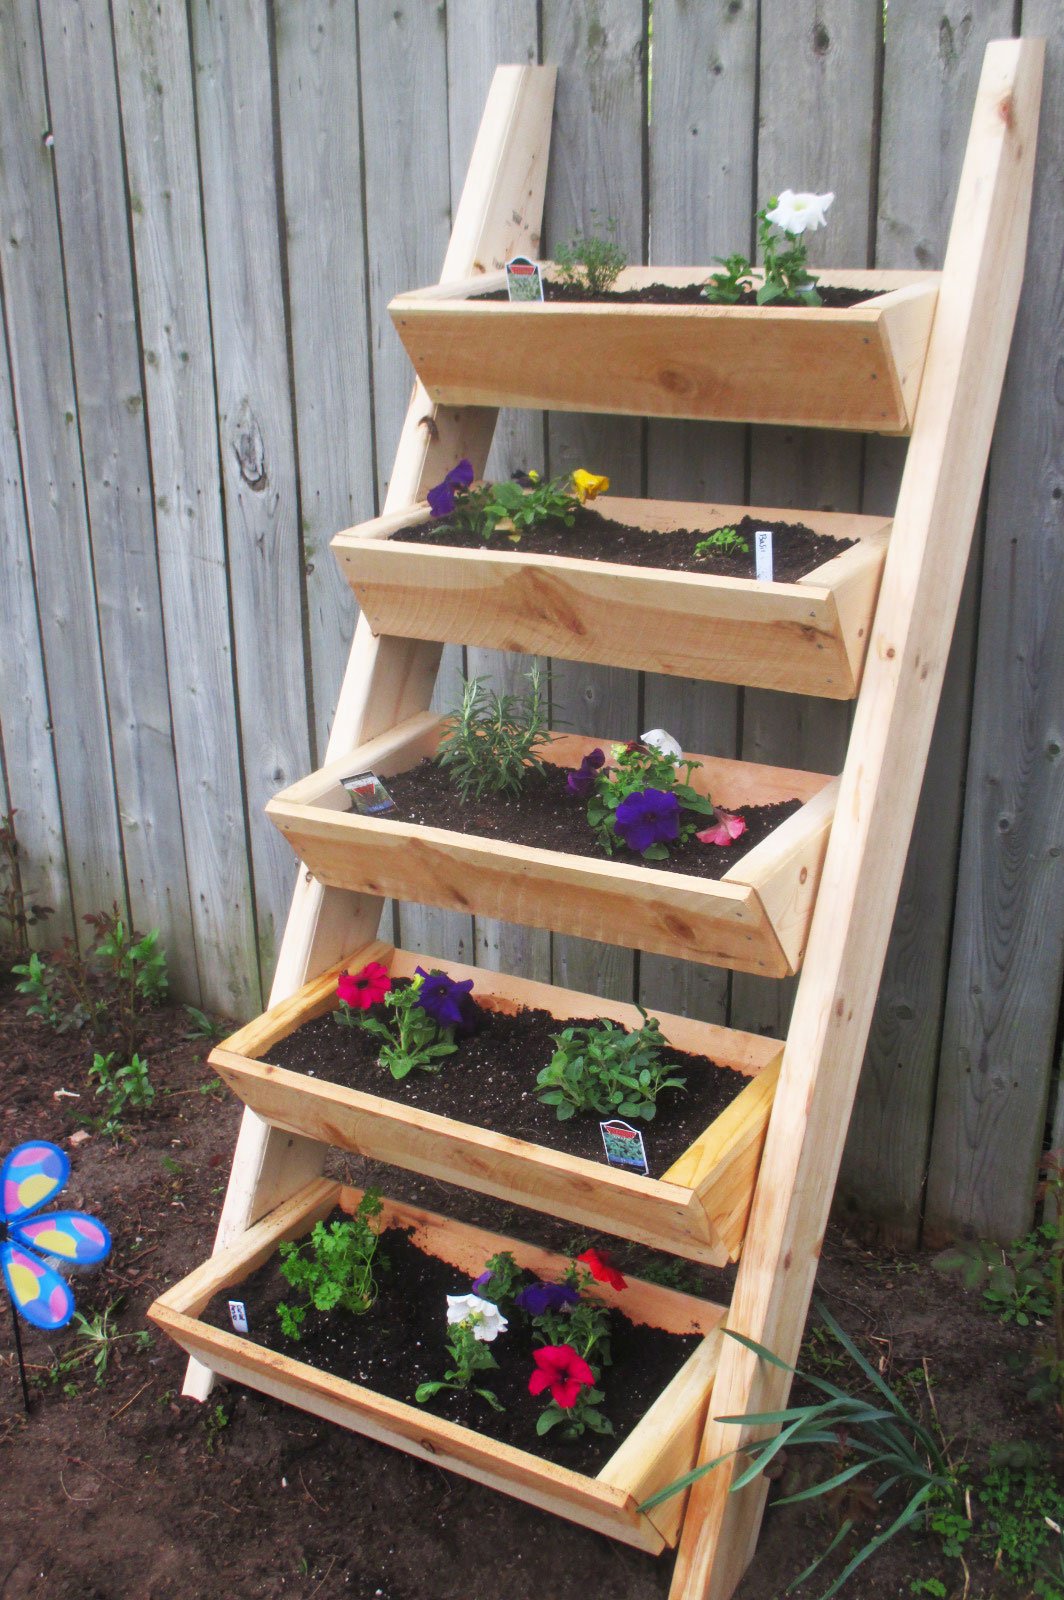
Living on a small city plot, this vertical ladder planter was just what I was looking for to grow my herbs and flowers. I am not an experienced builder but the plans were easy to follow. It didn't take me much time at all to complete this project. Now I am looking forward to fresh herbs and flowers all summer.

A frame chicken coop with a few modifications- metal roof, insulation and slightly larger second floor.
By Chrystal

My 1st coffee table and I'm in love with how this came out. Really proud of myself for this one!
Mon, 01/18/2021 - 11:09
Gorgeous, thank you for sharing your first coffee table, it turned out amazing!
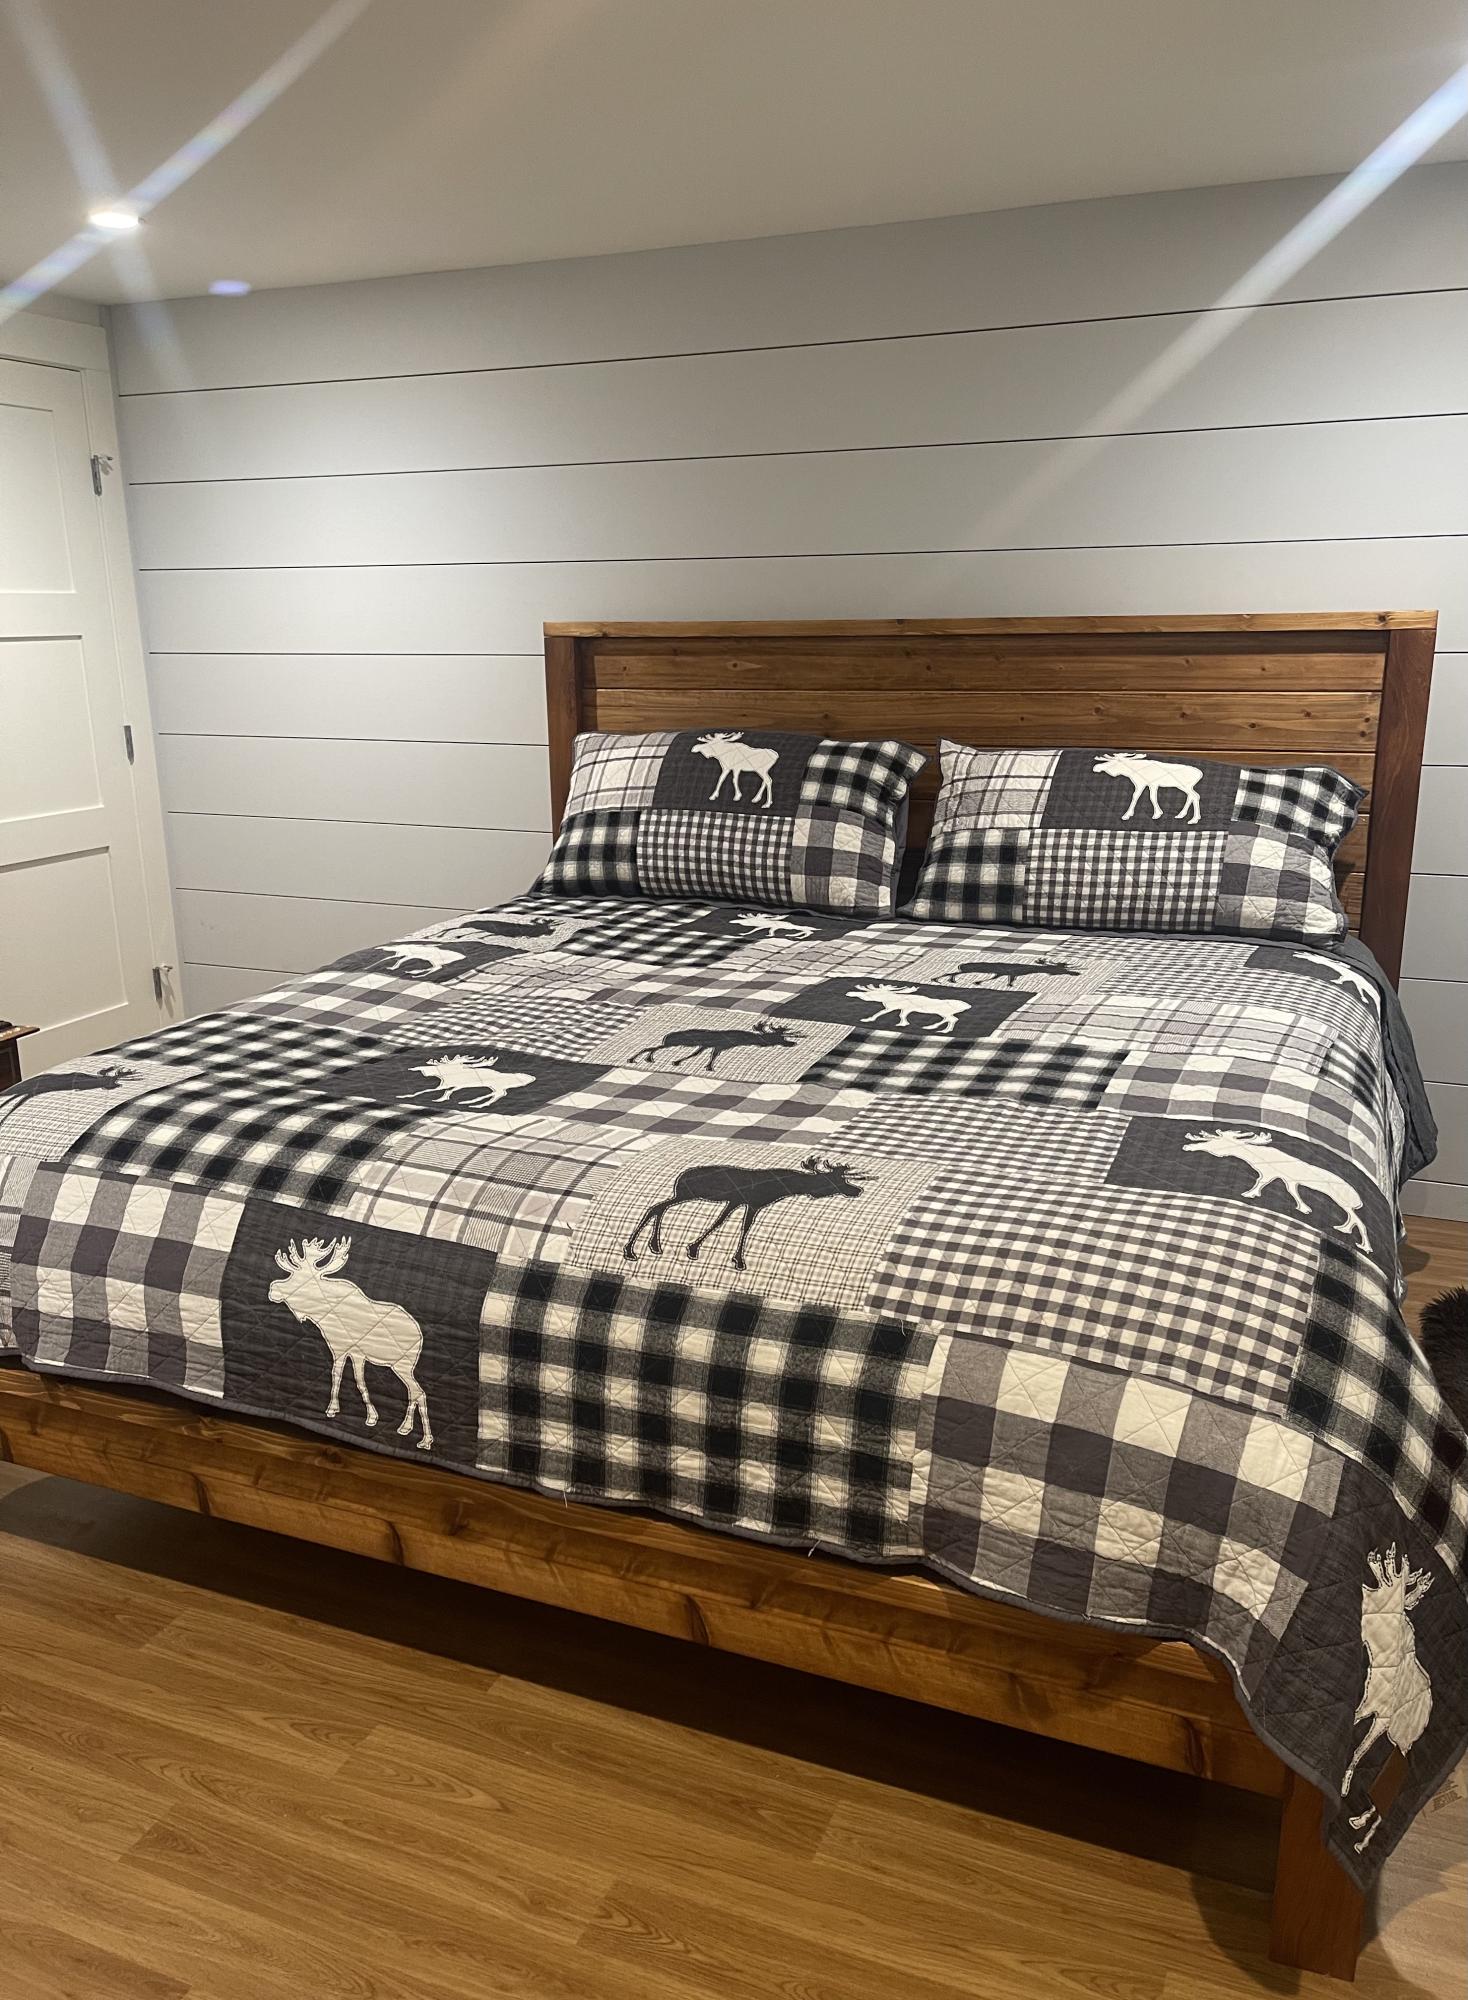
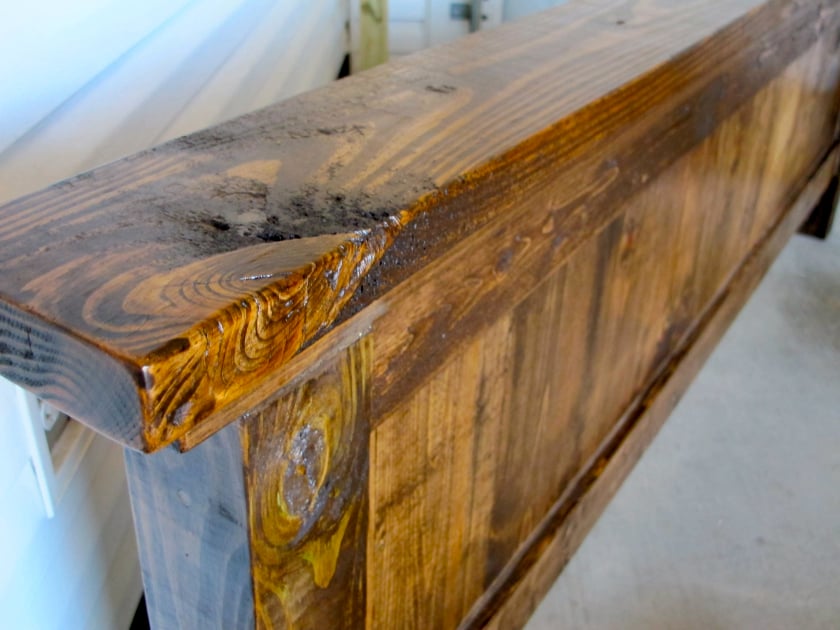
I love how this bed frame turned out! Everywhere that has stain is cedar and the rest is all scrap spruce. Thanks for another great plan Ana!
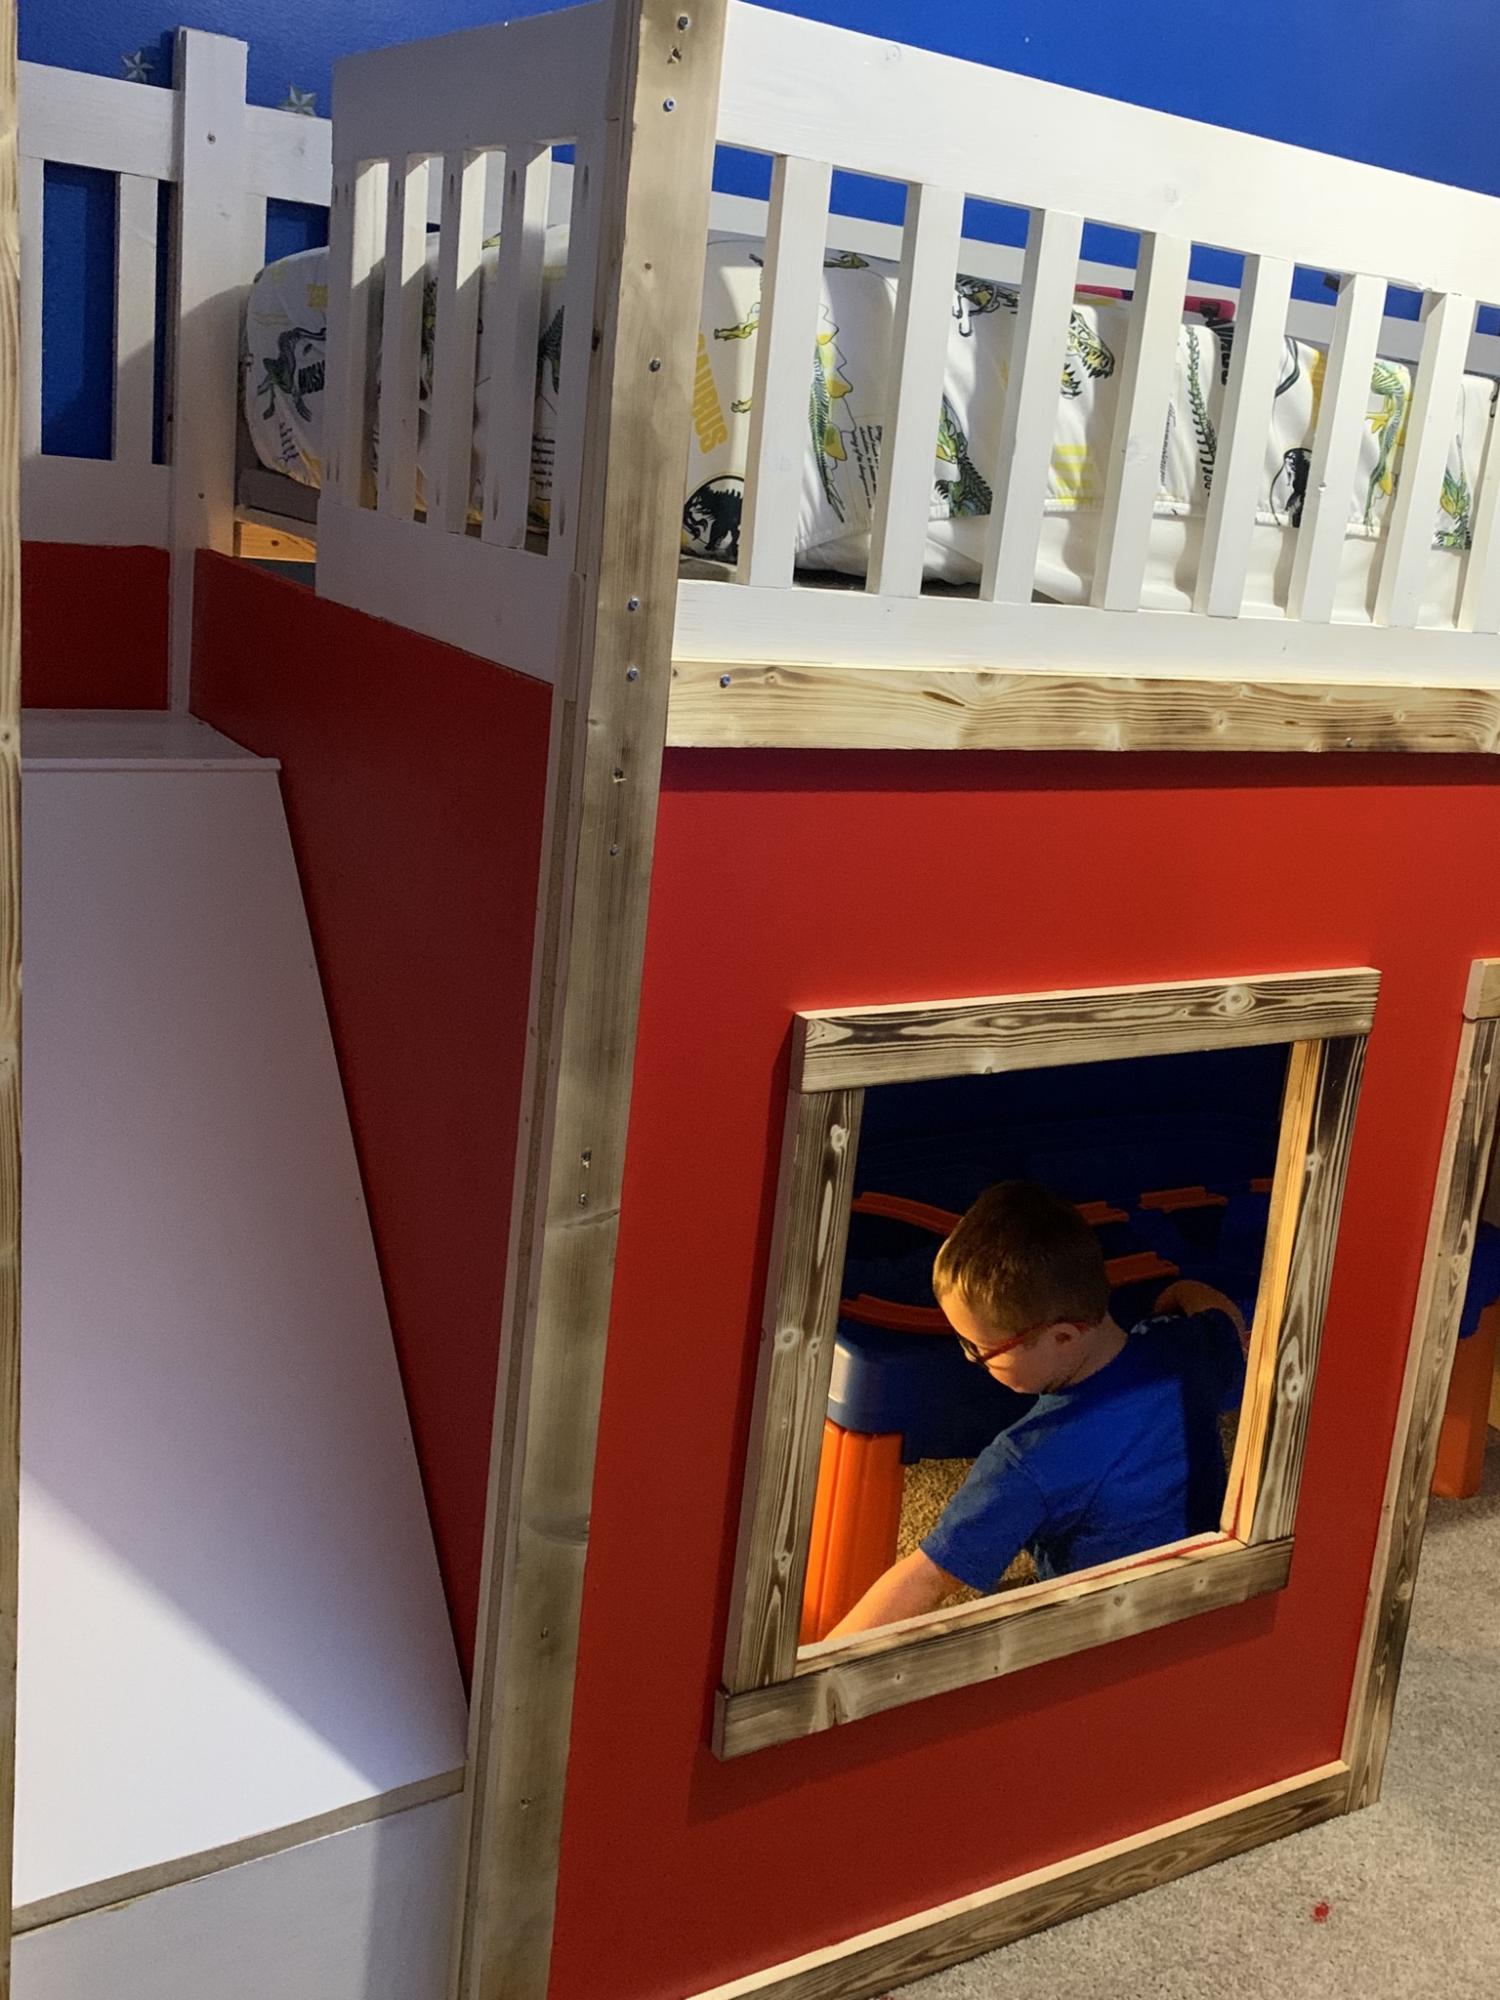
This was a 3 weekend project that I hope my son loves.
I used both plans and made adjustments as needed. Read everyone’s post to see what works best for what you are trying to accomplish. I know that my slide is steep and I would of made it more gradual If I did think my kiddos could not handle it. I would say this bed is perfect for my 5 year old and my 7 year old has been in the room playing on it also all day.
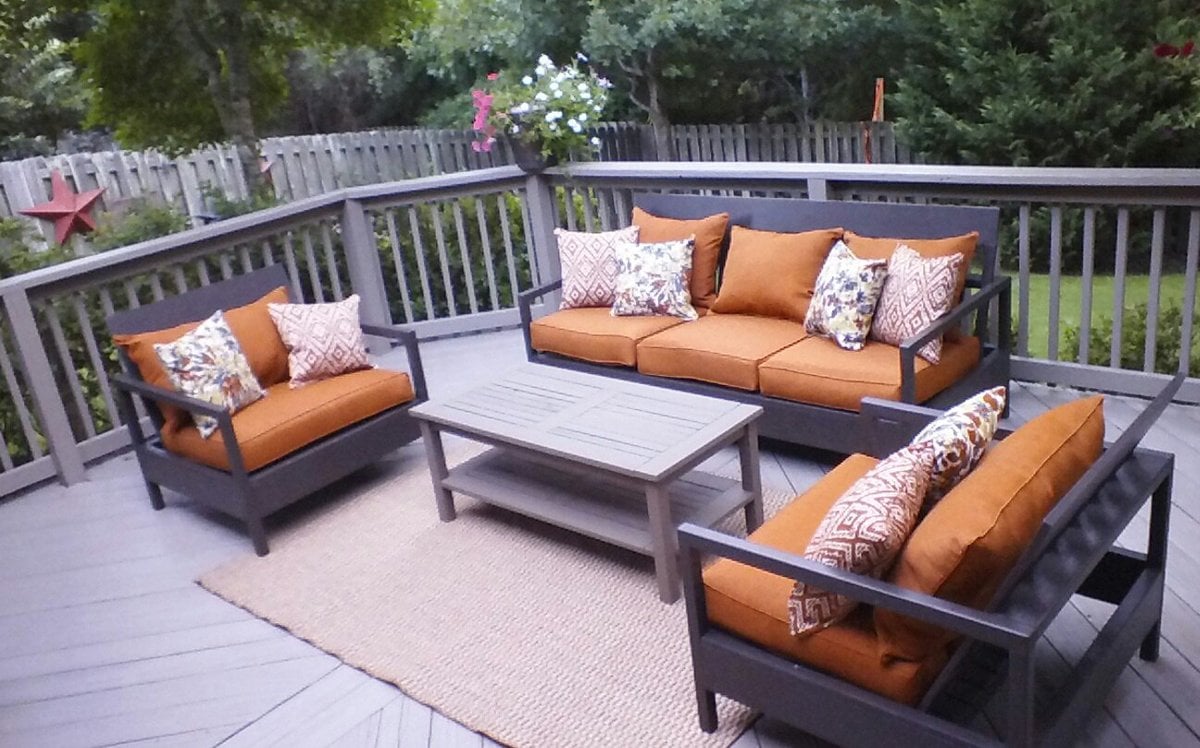
Well this was first project my hubby and I tackled together. He actually let me use the power tools. The plans were great! Loved having a shopping list! I made the cushion s myself. I have to say, I wish I had made the couch and chairs the size of cushions available at Lowes . AFt e r you buy foam batting fabric and chording I found set at lowes for a lot less but I am so happy how it all turned out . Thks for providing plNz!
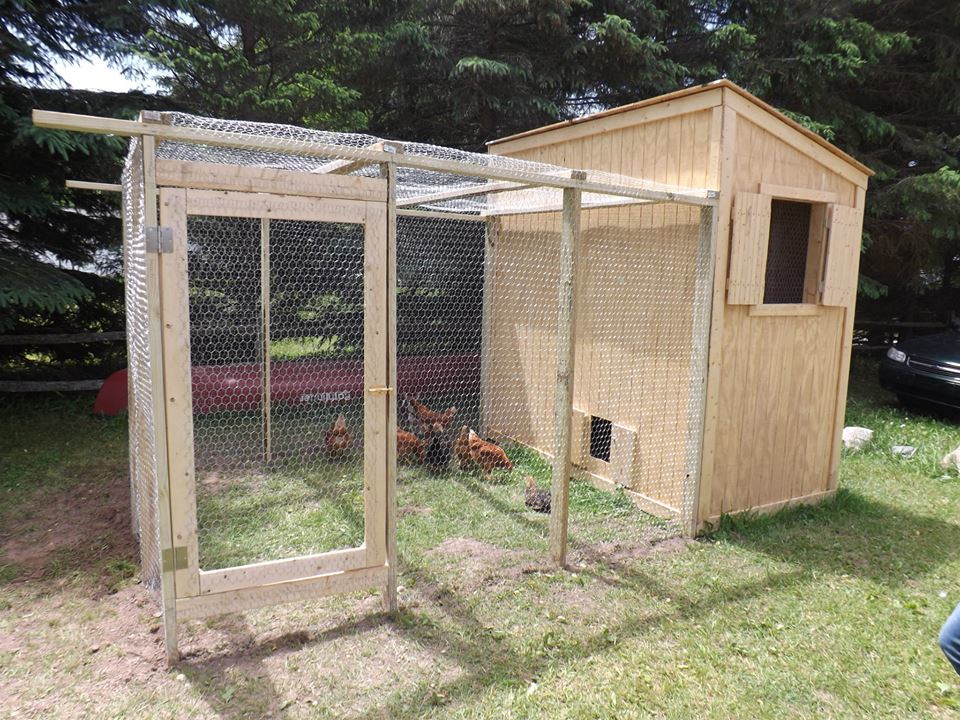
This was my first attempt at building anything....ever. It was so incredibly fun and I certainly learned a lot. My 8 little chickens are loving their new home and I can't wait to build my next project!
Wed, 06/19/2013 - 11:51
Hello! Could you repost the picture / info on your chicken run? I keep getting "page not available" and I've been trying for days :O) I think I want to build that chicken shed (too big for 3 hens?? It's just so cute!) and a run like that to go with it! Thanks! Have a great day!
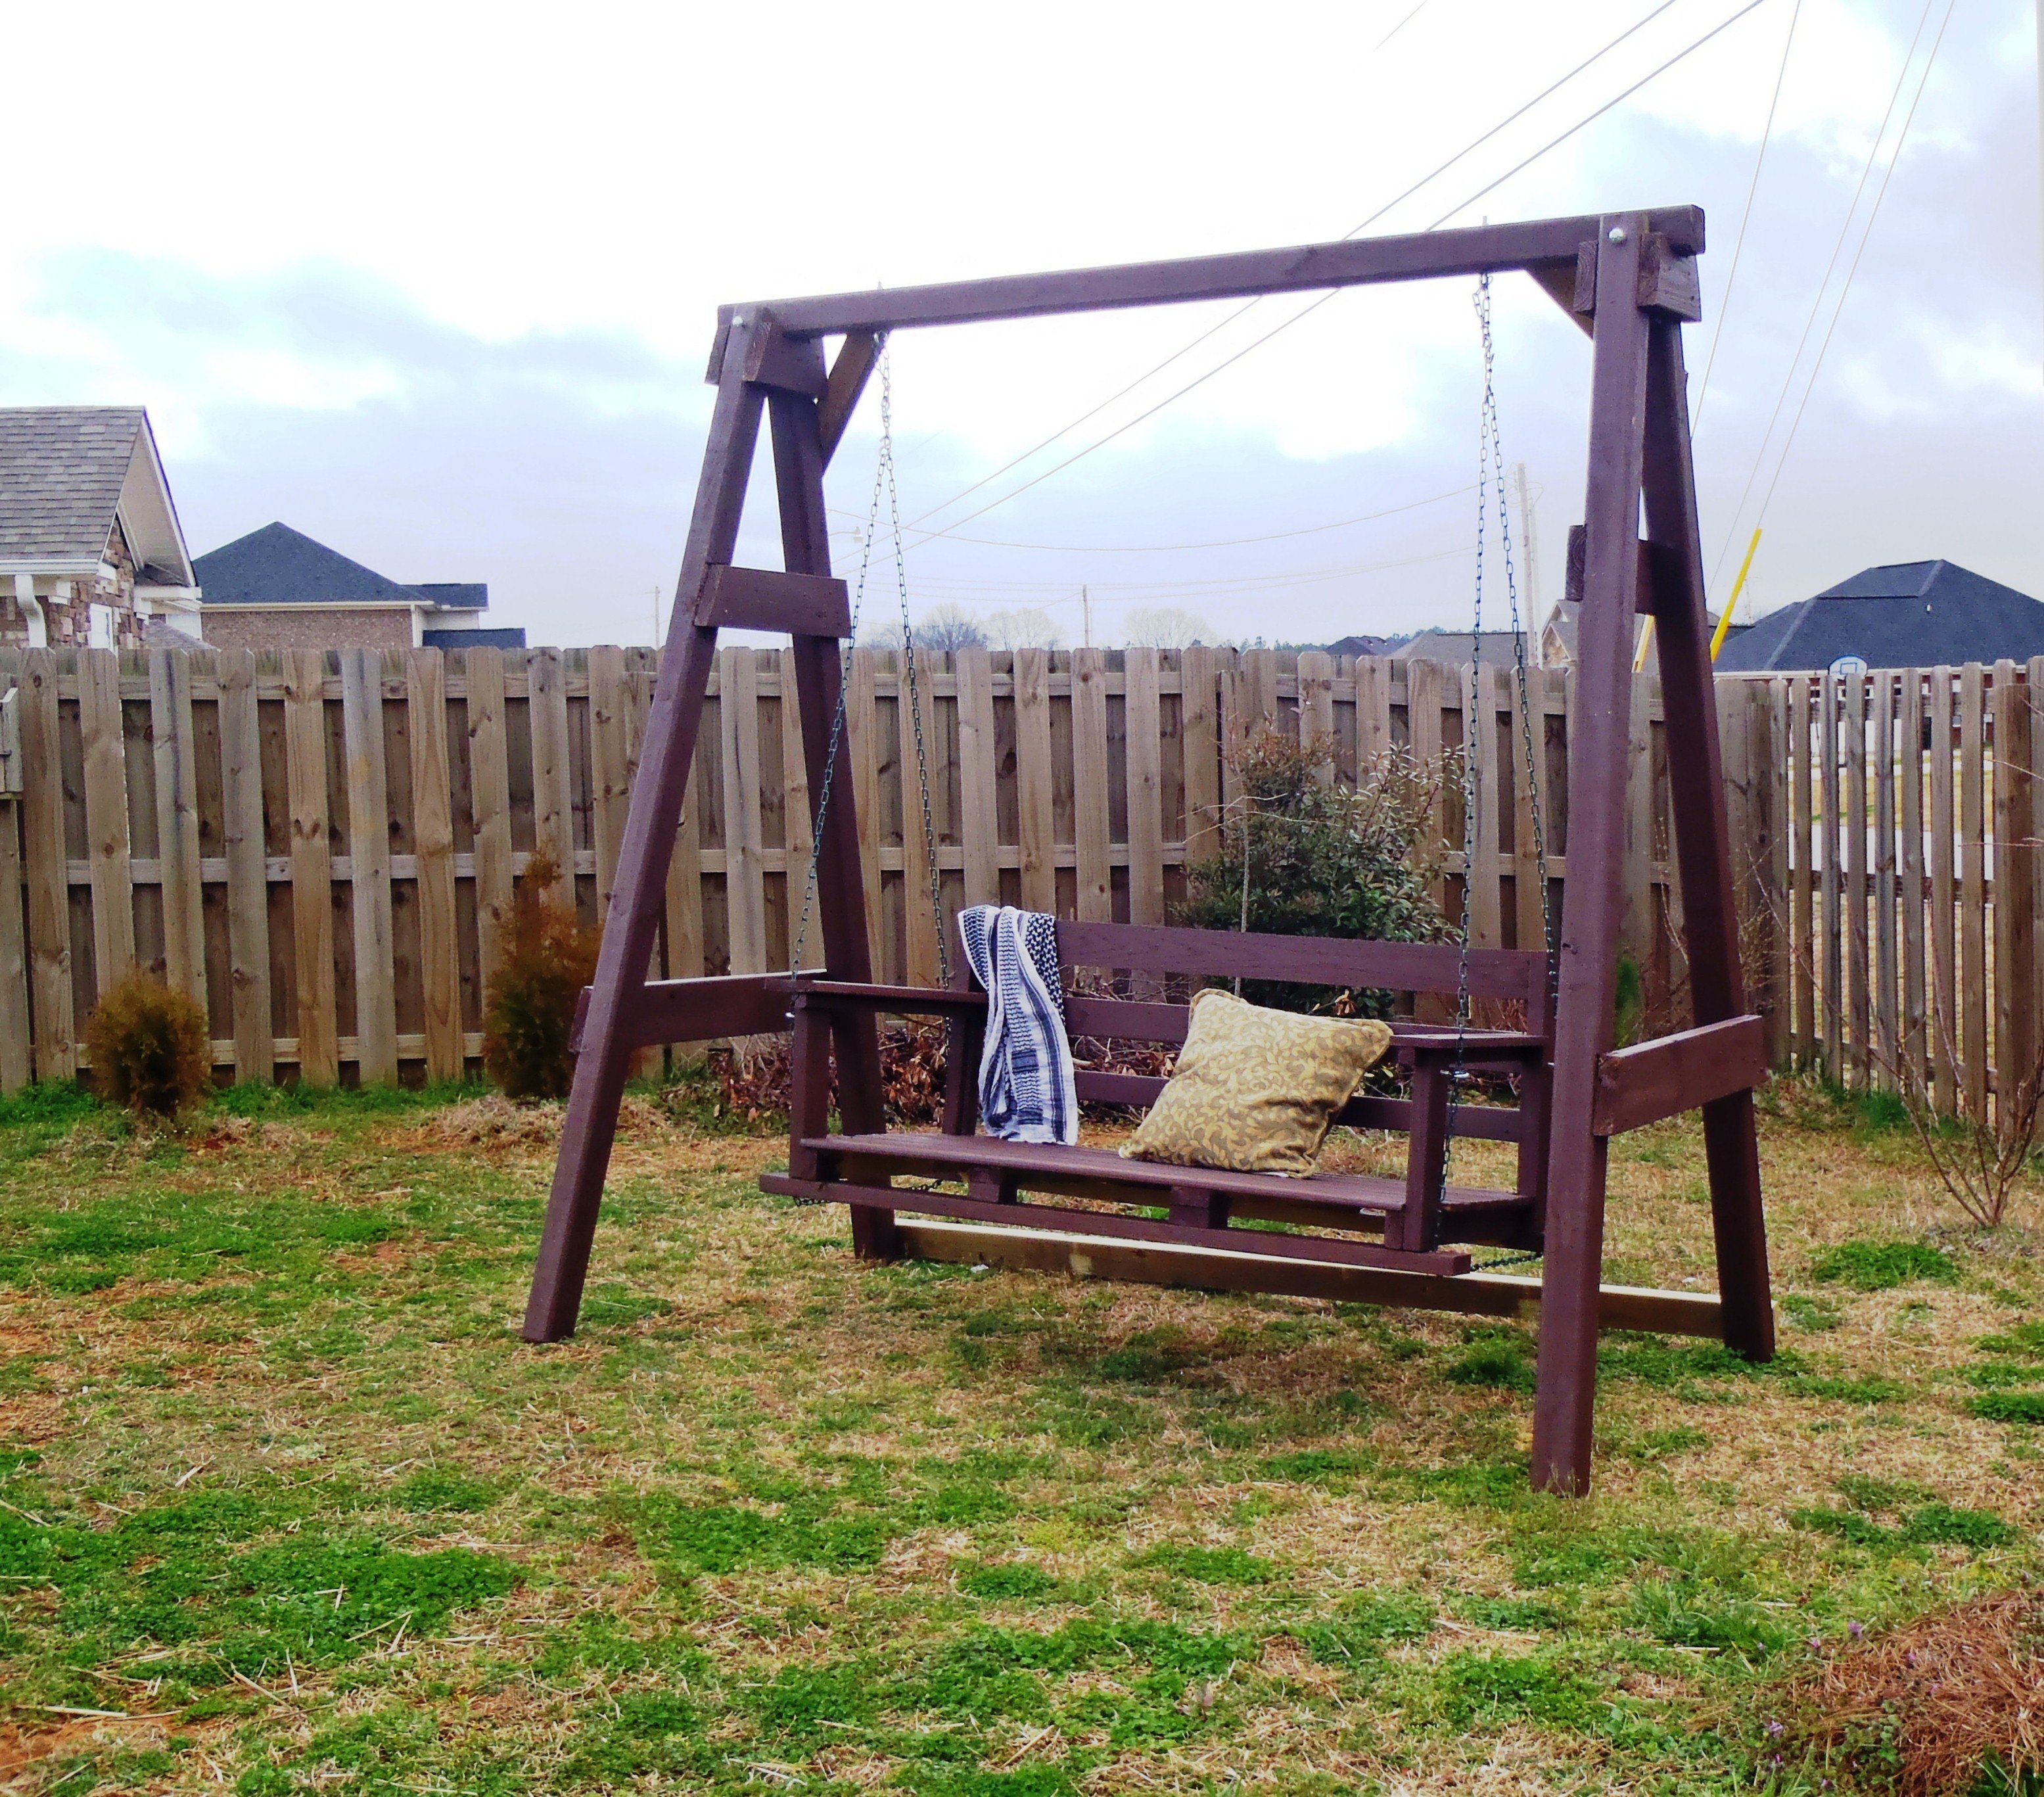
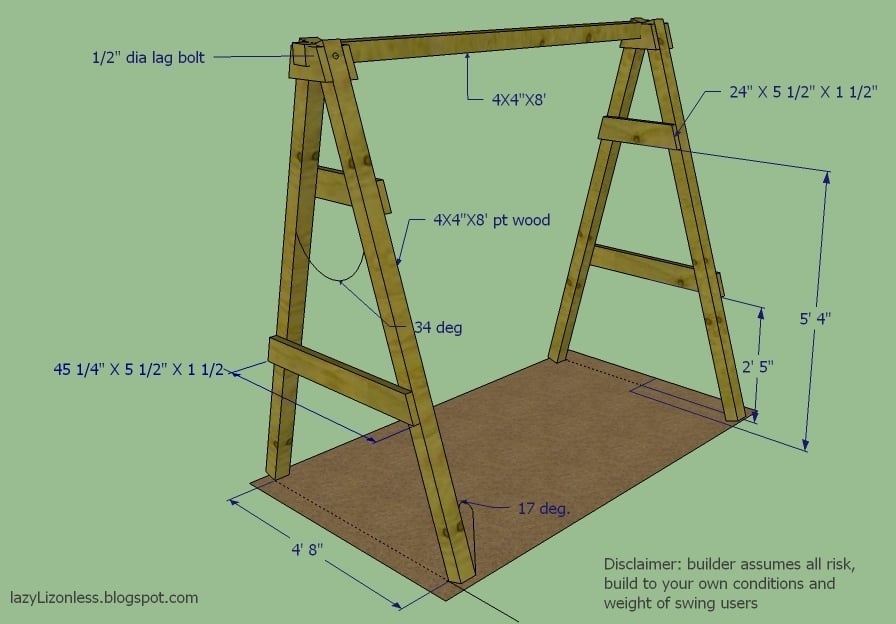
I've finished my swing but my porch don't have enough clearance so I built A frame stand for it.
Fri, 03/02/2012 - 07:09
You did such a great job on your swing! I hope I can build up to making one someday.

In reply to I love this swing! by beachmama79
Thu, 05/10/2012 - 14:02
Thanks and you will. I just added the dimensions in case
Fri, 04/19/2013 - 15:37
I love the idea of adding the A-frame considering that where i live there are no real trees to hang it on and building a porch where one doesn't already exist is a pain in the butt! Lol. How wide do you think we could go before it starts compromising the frames integrity? And how much weight can it hold?


Comments
dan.abbatacola…
Wed, 07/01/2015 - 11:26
Plans?!
Where can we find the plans for this Swing and Arbor project?
Thekellers68
Mon, 04/11/2016 - 18:19
Arbor
Where can I get the plans for the swing and arbor?
Ana White
Tue, 05/07/2019 - 10:42
We don't currently have this…
We don't currently have this plan available, although I'd be happy to draw it with the author's permission.
I have linked a few plans above that could be used to create this plan. Just make sure you bury the arbor uprights underground on concrete pier posts or similar (like building a fence)