Community Brag Posts

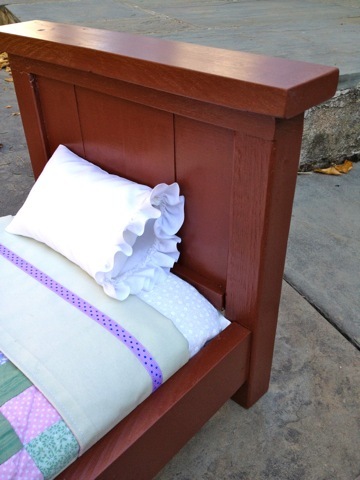
Doll Bed and Wardrobe

Submitted by Robinwood on Mon, 11/21/2011 - 21:49

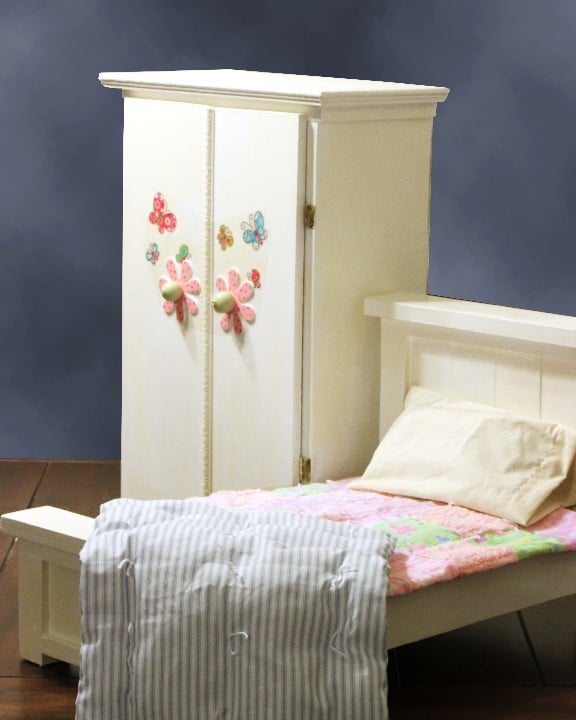
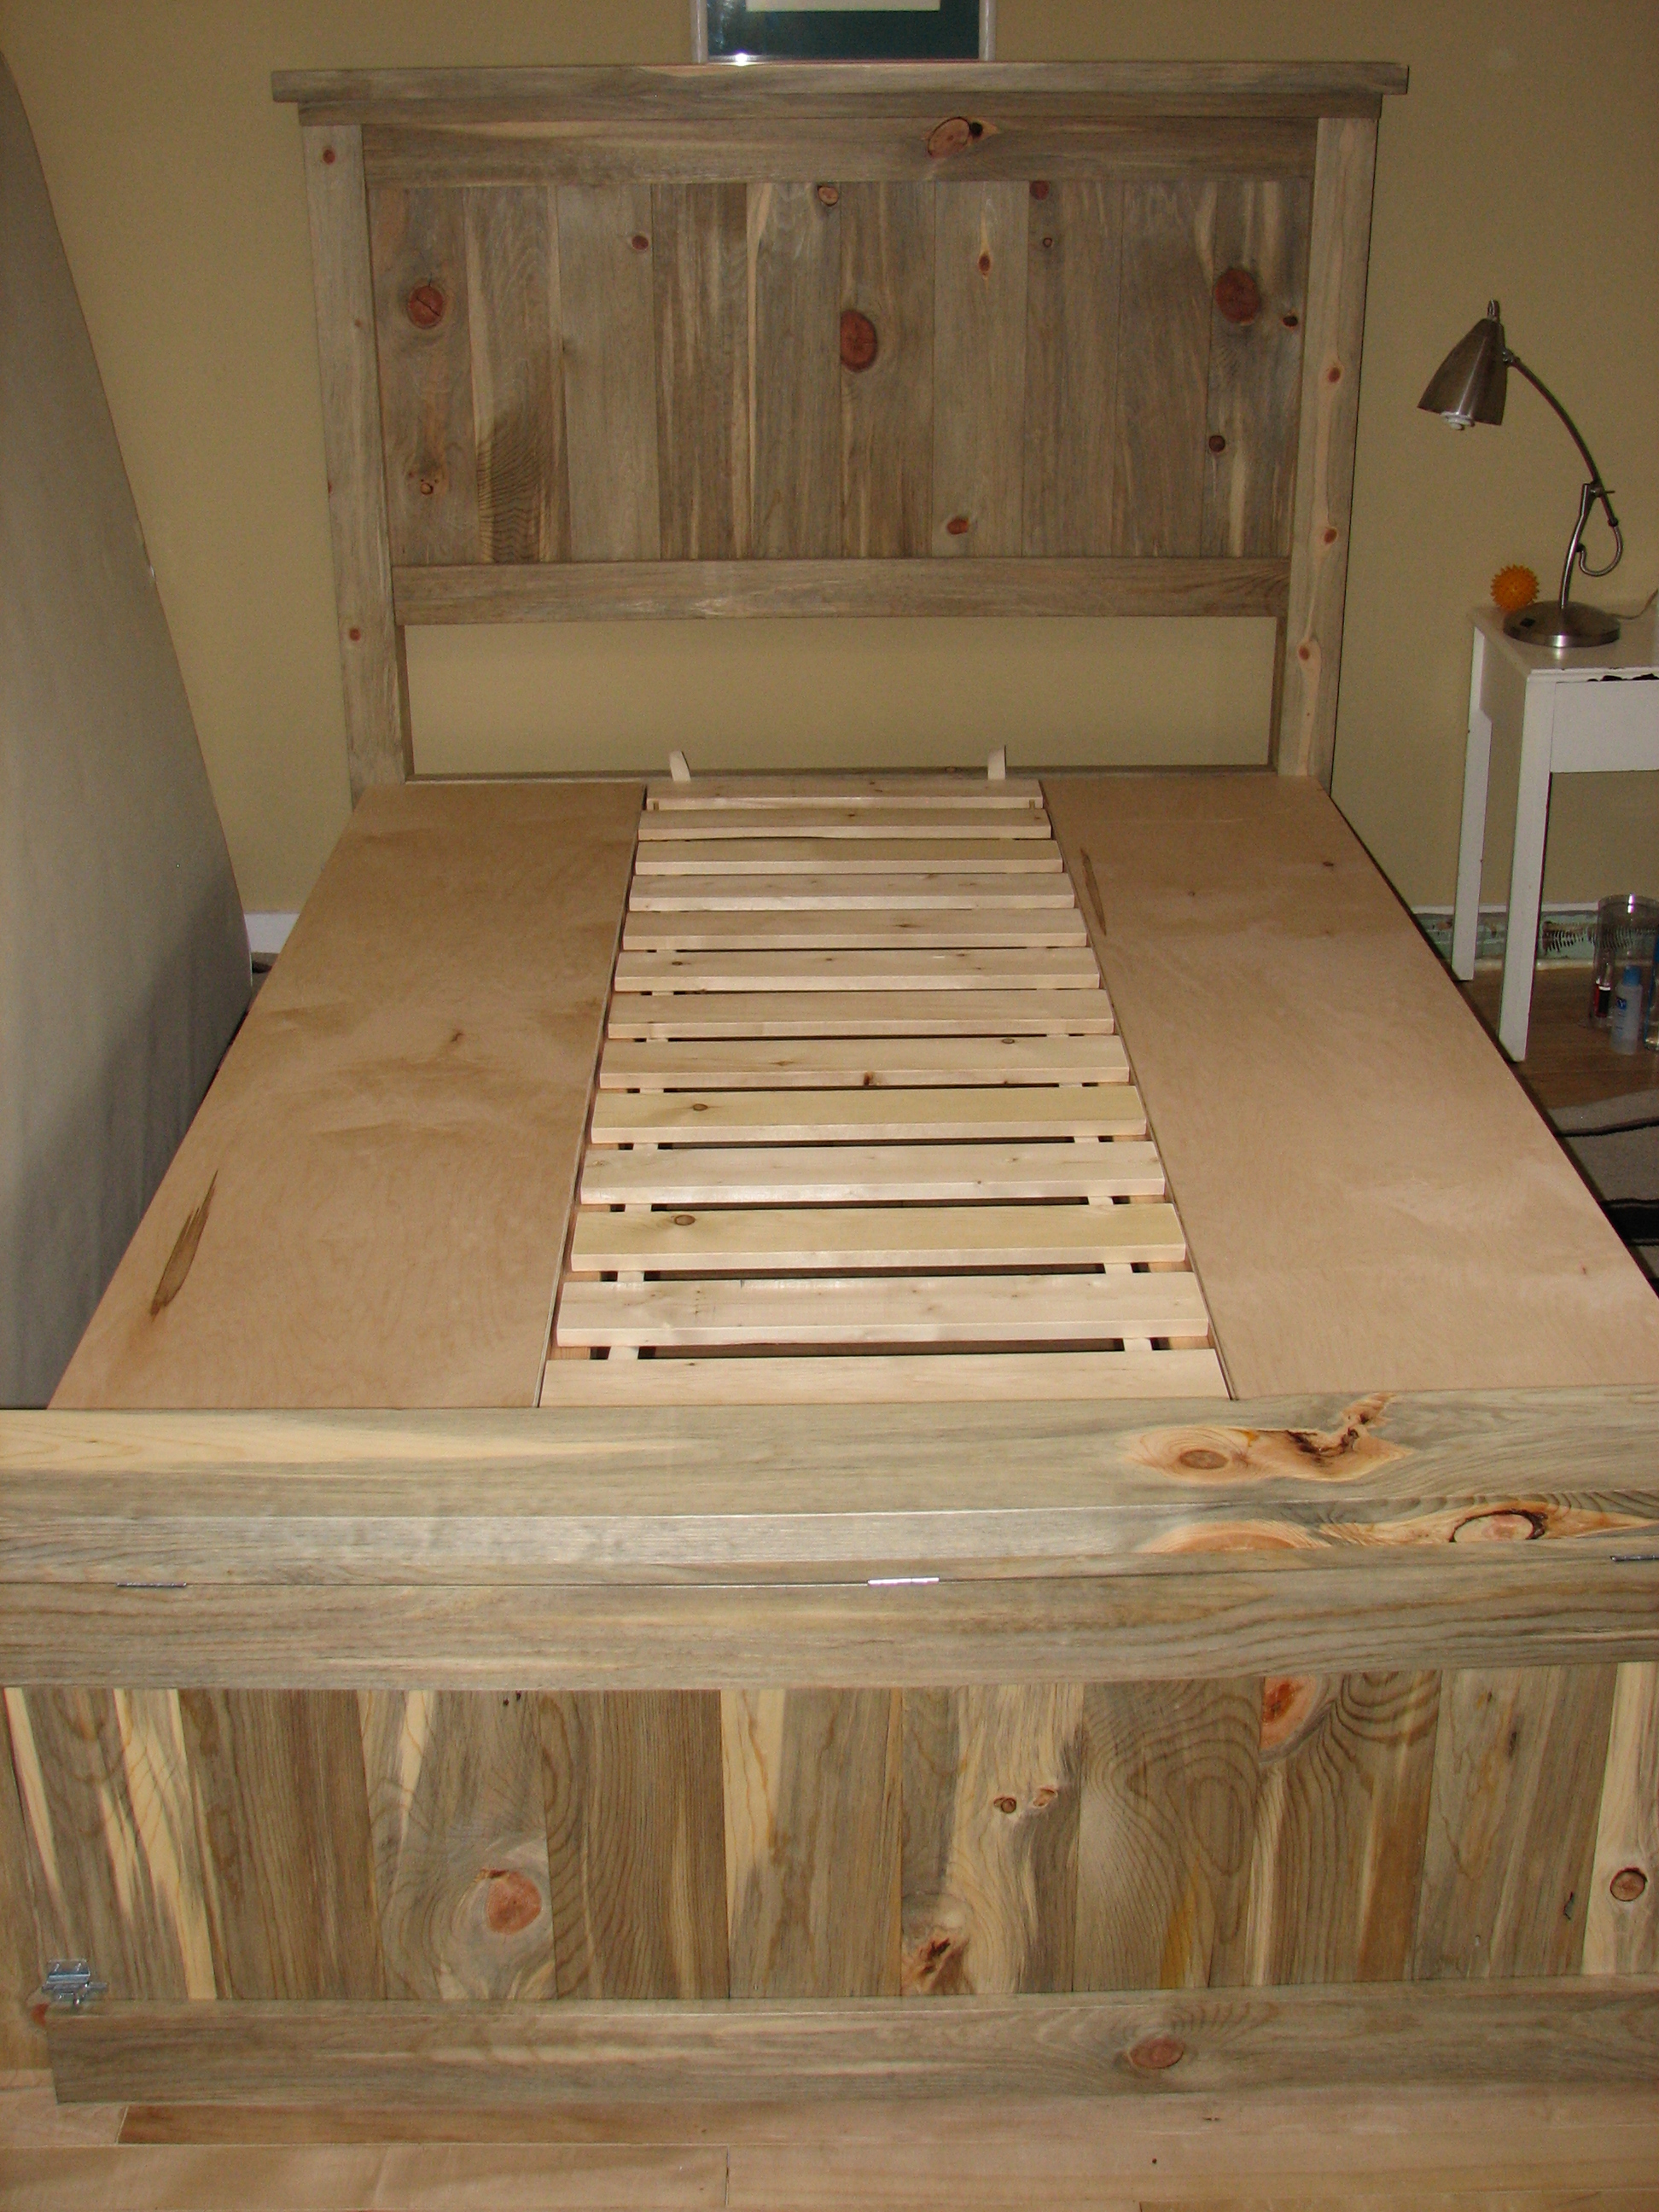
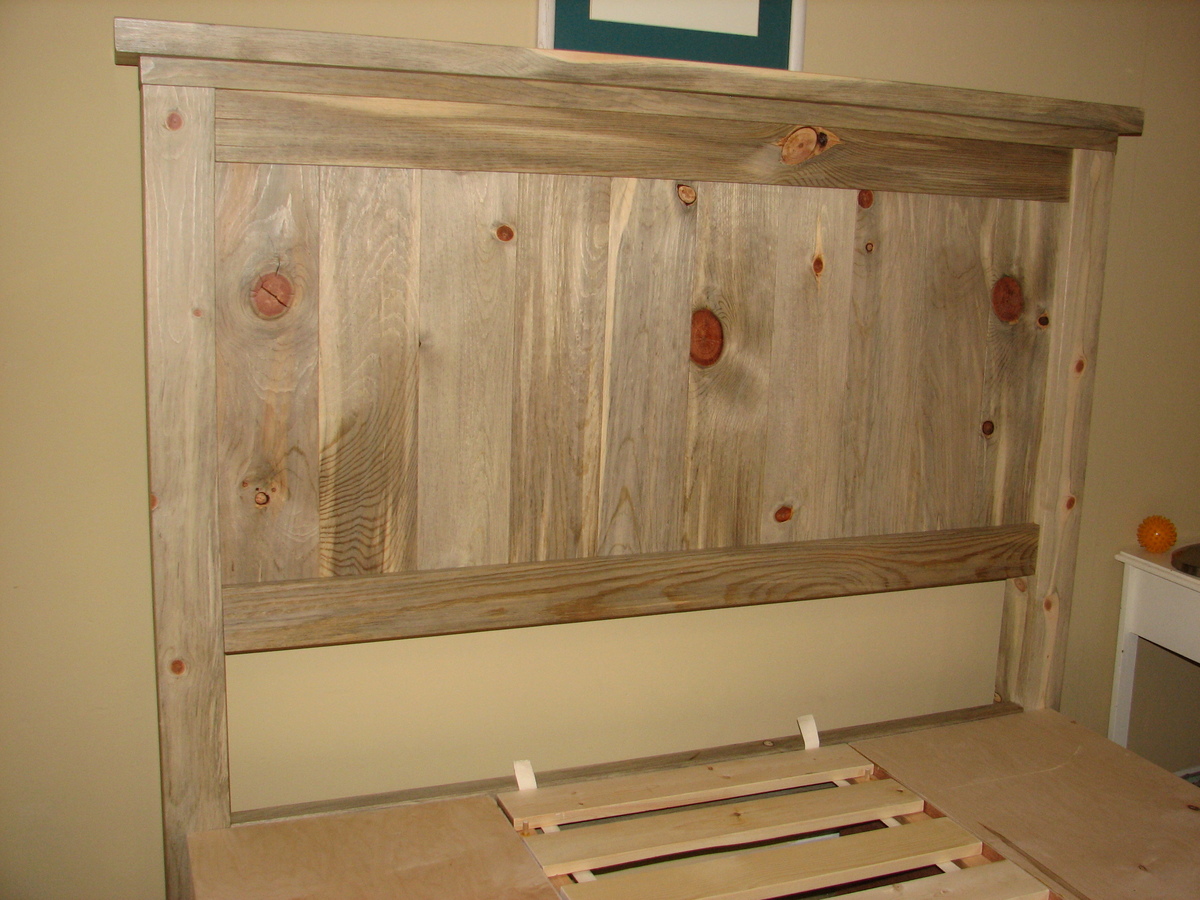
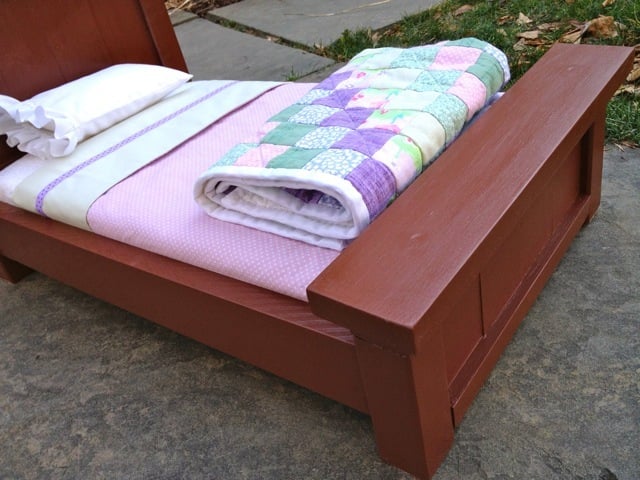
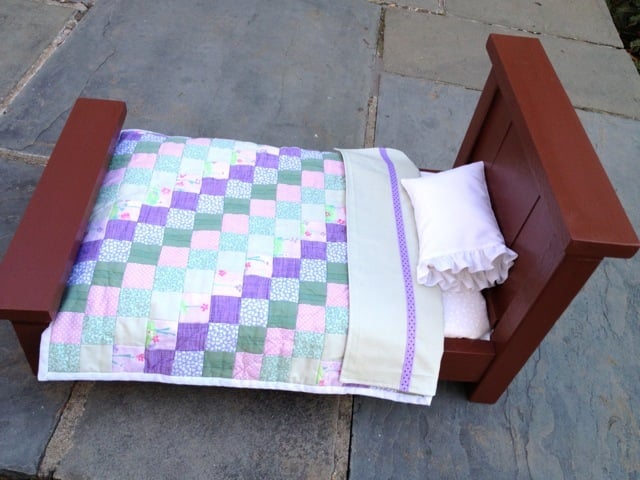
I love the Farmhouse Doll Bed, but because we bought a lot of doll clothes, I built a wardrobe to go with it.

The wardrobe is 21 1/2" tall X 14" wide X 7" deep. The inside shelf is 4" from the top. I'm having trouble uploading a photo of the inside, but will keep trying...

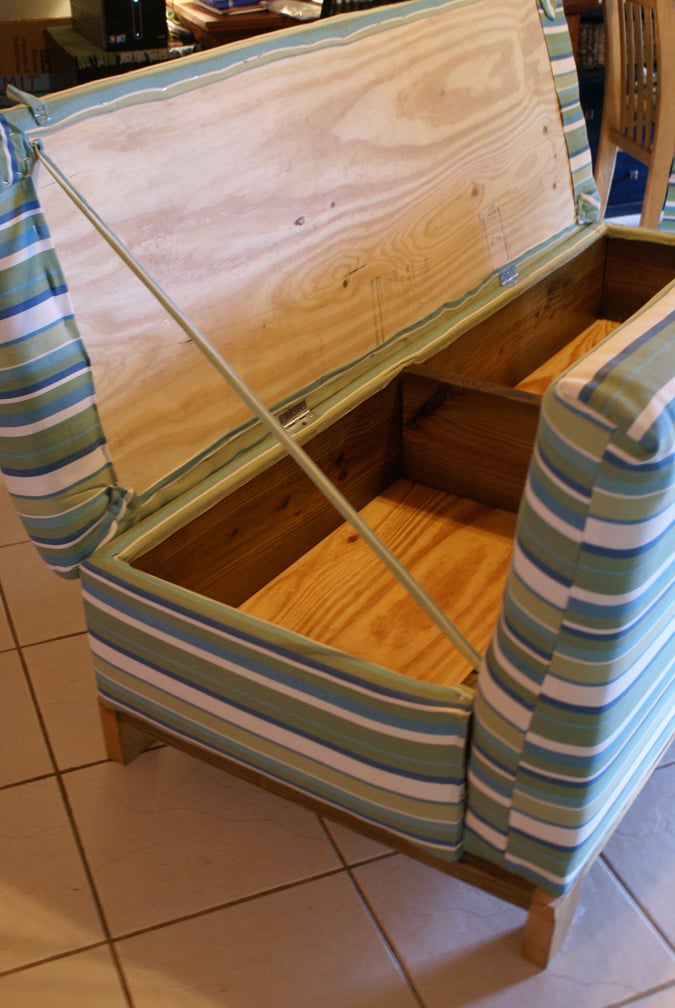
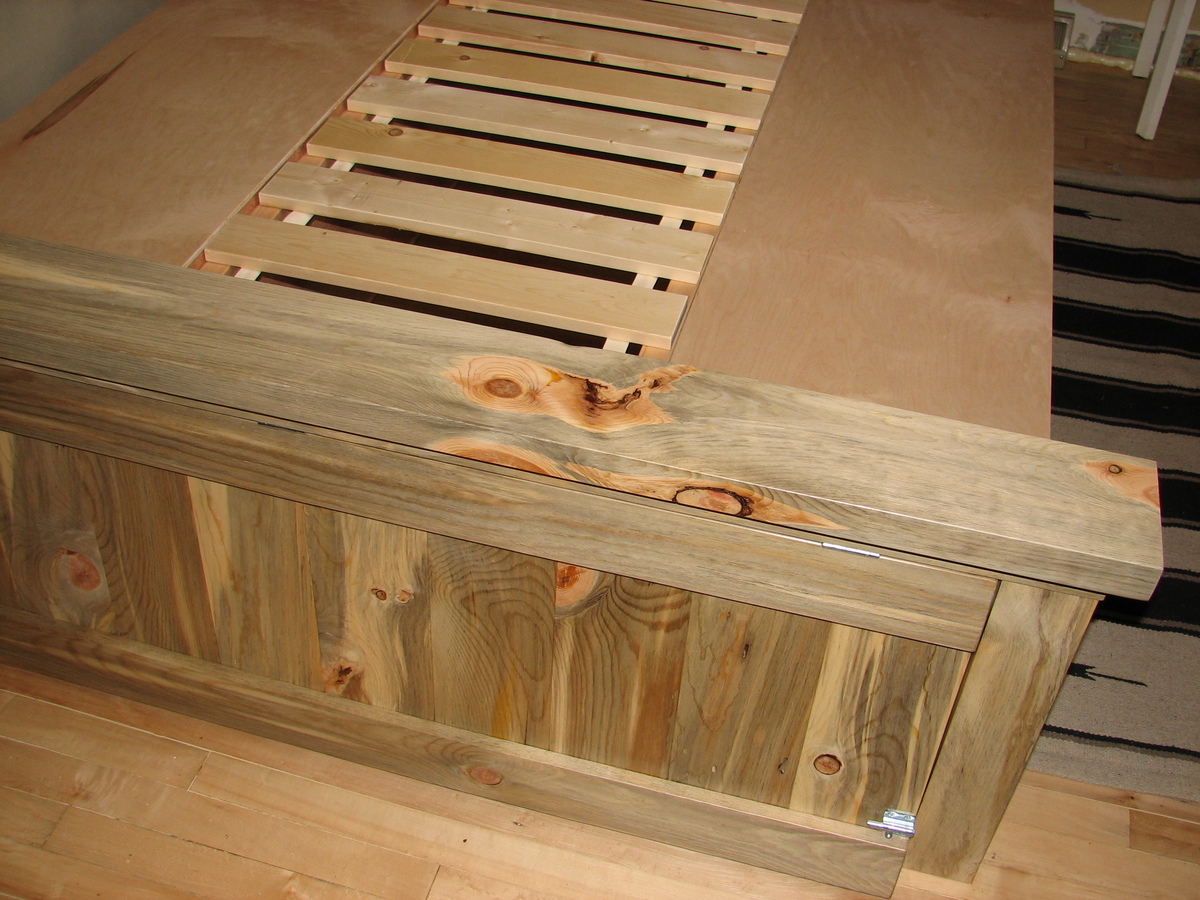
I made a mattress to look like the older striped "ticking" style. I still need to do a little more with the bedding because I'm not happy with the (muslin) pillowcase and want to do something brighter.

Cost was minimal because I'm still using up scraps from other wood projects and I used material for the mattress and bedding that I already had. That is what I love about some of the plans - they help me to use my leftover materials and still have something nice to give as gifts.

Thank you so much Anna for this plan - I also followed your suggestion and made a second one to donate. I love your site...

Estimated Time Investment
Day Project (6-9 Hours)
Recommended Skill Level
Beginner

Comments

Cherie Heltne (not verified)

Tue, 11/22/2011 - 07:25

Beautiful! I am trying to do a wardrobe right now, too! I am making my second of this bed today. Great job!

Guest (not verified)

Sat, 12/03/2011 - 11:29

Where and how do I find the plans for the doll wardrobe?? I made the Farmhouse bed and love it. Thank you

Guest (not verified)

Sun, 02/26/2012 - 15:22

I'll trade you picture and info for a great doll closet for you plans for the Farmhouse bed. Our granddaughter loves the closet, so now I need to build the bed.
Thanks,

Robinwood

Sat, 12/03/2011 - 14:12

Thanks for your interest - I'm sorry, I tend to work by the seat of my pants and develop an idea as I go; so I don't really have plans. The best I can do is give somewhat of a cut list; which is:

Sides: 2@7"X19.5"
Bottom: 1@7"X13.5"
1st Top Board:1@7"X14" (hangs over 1/4in on sides)
2nd Top Board:[email protected]"X15"(hangs over 1/2in on sides and in front- it's even at back)
Doors: [email protected]"
Inside Shelf 1@7"X12" (Top of shelf is 4" below top of inside cabinet.

I just measured enough below to allow for doll hangers and drilled for dowel, but it came out just right for the longer dresses.

The front trim overlaps the left door, so that I only had to put one door catch at the bottom.

I hope this helps - I really need to learn the Sketchup program.

I used 3/4" plywood because that is what I had, but used 1/2" playwood for doors to make them lighter.

Stephanie (not verified)

Fri, 12/09/2011 - 14:41

What size dowel rod did you use? I have a niece who I've made a bunch of clothes for, and I'd love to make her a wardrobe to house new clothes!

Robinwood

Fri, 12/09/2011 - 21:14

I believe it was 3/8 or 1/2 inch - I took one of the hangers with me and just put it on dowels until I got the right size.

sgilly02 (not verified)

Wed, 03/14/2012 - 20:25

Just a suggestion for a quick way to "brighten up" the pillow case. Just find some ribbon to coordinate with the bedding and sew (or use iron on adhesive - really easy then!) around the hem line of the opening.

The wardrobe is darling. I love the flower knobs!

Rustic X coffee table

I love this site. We needed new furniture in are house and didn't want to spend a bunch of money. Finding the Rustic x plans was a life saver.

Estimated Cost
$100
Estimated Time Investment
Weekend Project (10-20 Hours)
Finish Used
White paint and kona stain.
Recommended Skill Level
Beginner

Play Kitchen

Submitted by Anonymous (not verified) on Wed, 01/13/2016 - 13:35

I made this set for my grandchild!  Love the plans!  I modified the stove to include a range-top microwave, and included doors for the kitchen sink.

Estimated Time Investment
Week Long Project (20 Hours or More)
Finish Used
Dark gray, black, and white paint.
Recommended Skill Level
Beginner

My First DIY Farmhouse Table

Submitted by gablack83 on Fri, 05/24/2019 - 06:36

This is my first (but not last) large DIY project. My wife wanted a farmhouse style table but not the price that went with it. So while she took the LO out of town, I surprised her with this and she loved it. It's not as hard as it seem, but as a beginner, a lesson that I learned was to always cut the boards yourself to make sure the measurements are correct. Don't let a big brand named store cut your wood because, well, just because. I had to recut a few boards myself because of their lack of correct measuring. Other than that, this was fun.

Estimated Cost
$70 for wood
$100 for tools
$30 for paint and polyurethane
Estimated Time Investment
Weekend Project (10-20 Hours)
Recommended Skill Level
Beginner

I can’t believe I did this! Thanks Ana!

Submitted by Anonymous (not verified) on Fri, 03/17/2023 - 11:21

My first “real” build! I’m thrilled with how it turned out! Thanks Anna for giving me the confidence to give it a try.

Comments

Beachy Storage Sofa

I love my new sofa! It is ten times more comfy than our old one. We live on an island and it was definitely cheaper to build my own sofa than to ship one in and pay duty on it. Thank you Ana for making this possible! Never thought I'd be building my own sofa, but we are so thankful for it. We even threw together our own little ottoman/toy box to go along with it from scraps...added bonus!


Built from Plan(s)
Estimated Cost
Total for everything probably about $500 ( a little higher costs for the wood here on the island, in addition to the other materials)
Estimated Time Investment
Weekend Project (10-20 Hours)
Finish Used
Clear Satin Poly finish on the parts of the wood that are still visible after the fabric goes on.
Recommended Skill Level
Intermediate

Comments

Jan (not verified)

Sat, 07/21/2012 - 09:56

this is so amazing! We go through so many sofas, mainly because we buy used, and you never know if they are going to last. This one looks really sturdy, and it could be recovered if the fabric got old, or you just wanted to update. Definitely considering this before we buy another one. And the storage hidden inside makes it even more desirable!! Love the fabric you chose as well.

Blue Stain Pine Farmhouse Storage Bed

Submitted by martint on Thu, 10/31/2013 - 13:11

This project was inspired and guided by the plans for the

Farmhouse Storage Bed with Hinged Footboard by birdsandsoap.

The most visible parts, head and foot board, are made of beetle-killed blue stain Lodgepole pine, locally sourced and milled.

The boxes are made of 3/4" maple plywood and rest on a frame of 1 by 2's. I am still working on the 6 drawers, which will have blue stain pine fronts as well.

The bed slats between the boxes are stapled to webbing and the first and last slat are held by dowels drilled into the supporting rails to prevent the slats from sliding around.

Knock-down design - by removing the few (non-loadbearing) screws that fasten the head/foot boards to the boxes, the bed can be disassembled into manageable/movable components.

Estimated Time Investment
Week Long Project (20 Hours or More)
Finish Used
AFM Safecoat PolyureSeal BP - Satin
Recommended Skill Level
Intermediate

Comments

Plant Stand or Side Table

Submitted by mtairymd on Sun, 01/17/2016 - 11:08

This project was made with two 2x4s and two solid wood round discs. Although it’s hard to see in the photos, the pillar has a unique shape due to the v-notched 2x4s. This design is very sturdy and should hold about anything you would like to place on it.  See Link for full build Instructions:

http://www.instructables.com/id/Side-Table-or-Plant-Stand-Made-From-2x4…

Estimated Cost
$20
Estimated Time Investment
Afternoon Project (3-6 Hours)
Finish Used
Stain
Recommended Skill Level
Beginner

Awesome Adirondack chairs!

Submitted by Naboo on Mon, 06/03/2019 - 07:45

Thanks for sharing. Added a smal table to match!

Estimated Cost
$125 a chair for cedar
Estimated Time Investment
Afternoon Project (3-6 Hours)
Finish Used
Deck sealer
Recommended Skill Level
Beginner

Comments

Tryde Counter-height Kitchen Table

Submitted by ferbit on Wed, 12/07/2011 - 12:14

We badly needed a new kitchen table since ours has been completely destroyed over the years. Not a bad table, but too "smooth and perfect" for our lifestyle. I wanted something darker a lot more rustic that would not HIGHLIGHT nicks and scratches so badly.

I fell in love with a table at World Market, but it was the wrong size. It's called the Napa Gathering Collection.  It comes in either a counter-height 3' x 3' table or a standard height 3' x 5' table.  Shorter table is too long for the kitchen and the counter-height one was too small.  *sigh*  Here's a photo of the set.  LOVE this!!!!  So upset it's so small.  World Market photo below makes it appear a lot more red than it is.

World Market Napa Gathering Collection


Anyway, it's made out of Acacia wood, so it was massively heavy and strong. I loved it so much that I bought the four gathering chairs and spent over a month trying to get Acacia wood without spending a fortune. No luck. So I decided the most similar table here on Ana's site was the Tryde coffee table.

I researched different hardwoods, but was so nervous to spend that much  money that I decided my first kitchen table would be a rough draft with super cheap wood.  LOL  If I love it then I didn't spend a lot.  If I don't love it, I will learn from it and can build it again someday with more expensive hardwood like maple. 

I used the 2x8 hemlock for the tabletop, hemlock 4x4 legs and finished hemlock 1x4's everywhere else.  I used cheap 2x2 studs for the support structure underneath.  This table was almost exclusively built using Kreg joins, with only a few exceptions where necessary.  No visible screw holes to fill ANYWHERE!  Yay!  LOVE my Kreg Jig!

Lots of sanding, Benite wood conditioner, red-ish dye, dark chestnut stain and three coats of poly later... and I moved it into my kitchen this morning!  So excited!!!  I love how it turned out! 

Built from Plan(s)
Estimated Cost
$200
Estimated Time Investment
Weekend Project (10-20 Hours)
Finish Used
Benite wood conditioner, Daly's red-ish toned dye, Daly's chestnut-ish brown, Crystal-fin poly finish in satin.
Recommended Skill Level
Beginner

Comments

hiddenhalo360

Wed, 12/07/2011 - 18:24

I am in the exact same boat as you. We badly need a new kitchen table, but I have not been able to find what I want in my price range. Therefore I am prepping to build a new kitchen table this weekend!

snickersmom

Sun, 12/11/2011 - 18:25

What are your demensions on the table? I'm looking for something on the smaller side. Thanks

Guest (not verified)

Tue, 01/10/2012 - 06:48

Wow, I love the table! I very impressed. You captured that robust rustic look that I have always liked. Its one of those tables that makes you wonder what stories have played out on and around it. You did awesome and thanks so much for sharing it. I am certain that I am not the only one truly inspired by your creative and can do spirit. You go girl! Can't wait to copy this and whatever you do next. Please don't stop and please keep sharing. You are just awesome. Wonder what might happen if someone gave you a welder too? Take care and thanks again!

Guest 713 (not verified)

Wed, 06/13/2012 - 16:32

I love it! Could you add your dimensions for the table also?

TiffanyNic (not verified)

Wed, 10/31/2012 - 10:52

Tryde Counter-height Kitchen Table is exactly what I need - want - gotta have it - can anyone help me out with the how to plans? diminsions?! Something?!

Sb1212

Thu, 10/27/2016 - 12:11

I love this!! Did you build your chairs also? If so did you use plans. I would love to build those exact chairs. 

King size farmhouse bed

Submitted by Jeepers on Sun, 11/03/2013 - 19:25

Used cedar for the planks in the headboard and footboard

Added some common trim pieces like the rope

Built the frame as described in the Queen plans - found that a standard metal ammo can on its side is the perfect height to set up the side panels at the corners.
Used 2x4 studs for the cross slats, but set them on their side to give some added height.

Used minwax Walnut stain - really looks nice on the cedar - just one coat for the cedar

Waxed top of the footboard

Stained a small footstool using Walnut.

Kingsize version is a monster - very solid, no movement or creaking

Estimated Cost
$400
Estimated Time Investment
Week Long Project (20 Hours or More)
Finish Used
Minwax Wipes - Walnut
Recommended Skill Level
Beginner

Comments

Grandy Sliding Door Console

This was my favorite project I have made so far! And was a challenge to get the hardware just so. But I highly recommended giving it a try!

Built from Plan(s)
Estimated Time Investment
Weekend Project (10-20 Hours)
Finish Used
Custom blue paint, with early american stain to age paint.
Recommended Skill Level
Intermediate

Dresser with changing table top for nursery

Submitted by mjolgren on Thu, 06/13/2019 - 06:44

I used the Kendal extra wide dresser plans which were super easy to follow for this project. I wanted to add some of my own touches so I made the drawers with box joints, my first attempt at this. I also changed the drawer fronts and added my own scalloping at the bottom. The changing table frame on the top of the dresser was also added which is removable once we are out of diaper changing! I am using half moon aged brass pulls for the drawers once delivered. Overall I am happy with the way this turned out.

Built from Plan(s)
Estimated Cost
$400-500
Estimated Time Investment
Week Long Project (20 Hours or More)
Finish Used
Flat white furniture paint, sanded and coated with water based poly.
Recommended Skill Level
Intermediate

Farmhouse Mirror

Submitted by Anonymous (not verified) on Mon, 03/27/2023 - 09:26

This is a simple project that requires very few tools and a beginners level took about a hour to make:)

Comments

Mail bin

Submitted by Brad Wills on Tue, 11/05/2013 - 19:47

I liked the pb mail bin, but wanted to build the entire piece. Learning experience, measure twice. File folders will not fit, as the inside measurement is to small. Still turned out cool.

Estimated Cost
25.00
Estimated Time Investment
Afternoon Project (3-6 Hours)
Finish Used
Varathane ash stain and light blue flat behr paint. Varathane poly to finish 2 coats
Recommended Skill Level
Beginner

Comments

A Work in progress

Submitted by 914934 on Thu, 01/21/2016 - 10:10

We haven't had a chance to hang the first bed but had to make it functional asap. So, we gave it temporary legs on the front and attached it to the wall in the back. We are thinking of replacing the desk and making a smaller toddler sized version there for one of our little guys as well.

Estimated Time Investment
Afternoon Project (3-6 Hours)
Finish Used
Primed with kilz, painted with Wet Sand (leftover paint from walls)
We've got a lot of little ones with crayons around here. We've got to have something washable!
Recommended Skill Level
Beginner

Modern Outdoor Chair & Love Seat

Submitted by Wilsjac1 on Wed, 06/26/2019 - 13:59

After building the first chair I decided I did not like the sizing, it felt like the arms were to low and the back cushion really did not have any support so I modified the chairs a bit and rebuilt the chair and also made a matching loveseat. 

I also decided to reverse the arms so the 2×6’s are on the outside instead of the inside, Originally I did this by mistake but I decided to keep it that way because it helped hold my cushion in place and I like it better that way. But most people I have asked say they prefer the arms the original way that Ana-White had them though.

I ended up making the legs 3" inches longer to raise the height. 

I made the side slats and the armrests 3" shorter to reduce the depth to make my cushions fit better

For the love seat the only thing I had to change was I made the back slats the front slats and the seat slats 48" and I added in a 2x4 for support under the seat slats that attached from the front slat to the back slats.

Overall I love the way they came out very sturdy and we use them everyday! 

Estimated Cost
$75
Estimated Time Investment
Afternoon Project (3-6 Hours)
Finish Used
I sanded all of the 2x4's and 2x6's with 80 grit & 220 grit, I then used minwax primer before applying the stain, I used the color "Honey"
Recommended Skill Level
Beginner

Outdoors couch

Submitted by Anonymous (not verified) on Tue, 04/04/2023 - 18:12

After thinking about it for 2 weeks, going over and over in my head of the sizes to cut and remembering the video of what went where, I put it to action. Took me about 2.5 hrs to build and modify where I needed to.

Comments