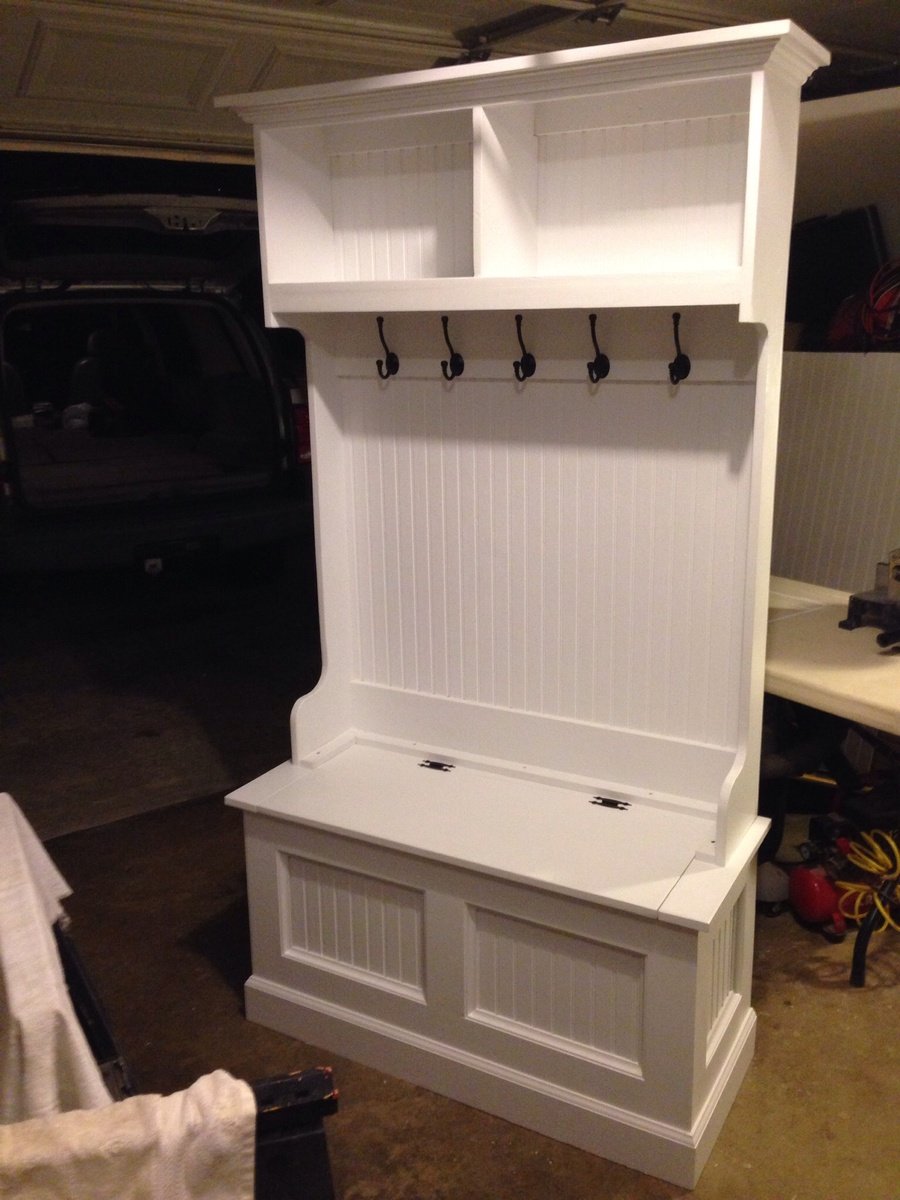
Community Brag Posts

Firewood holder

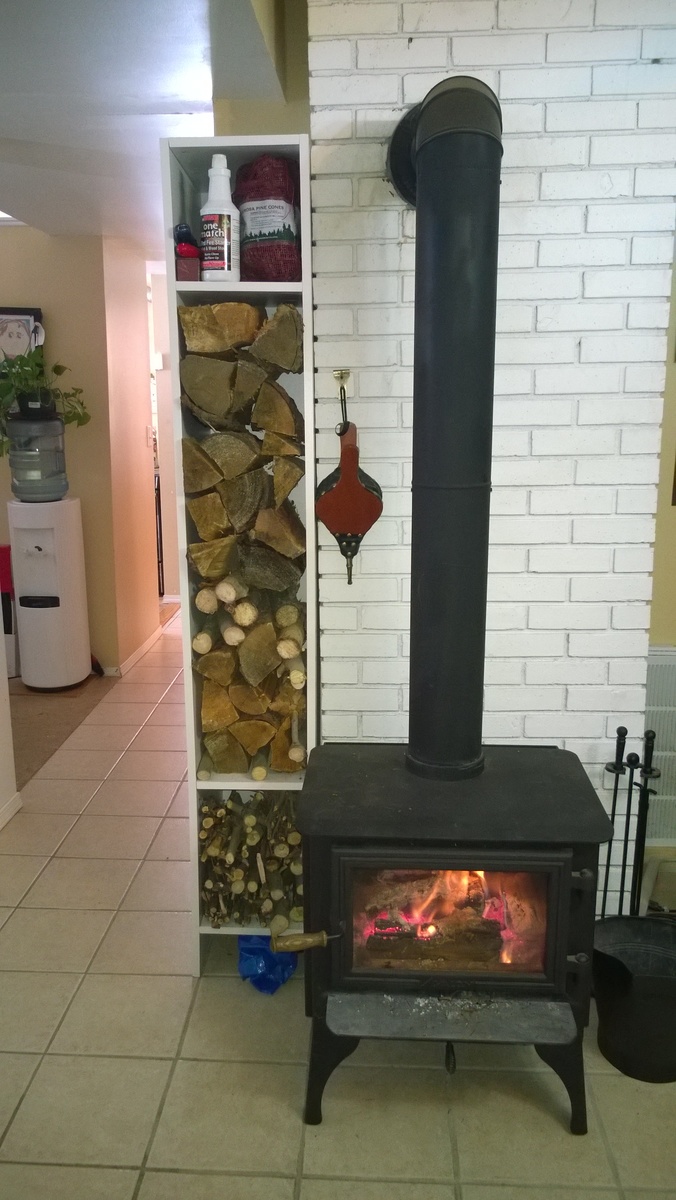
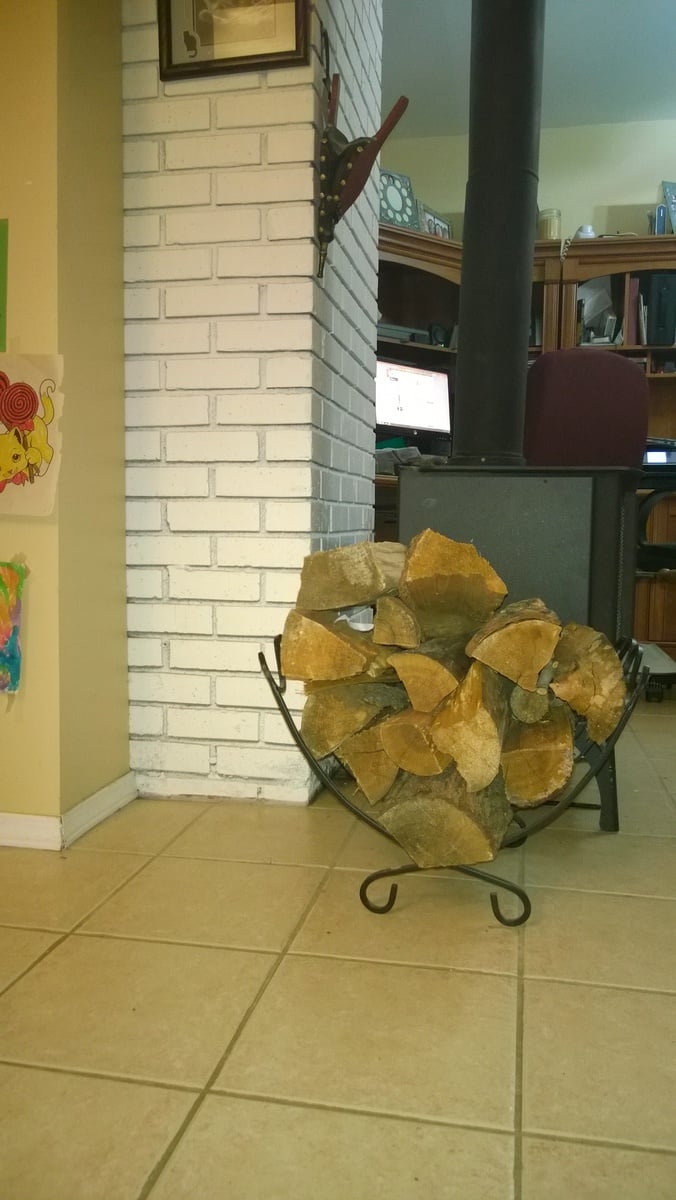
I needed a better way to store my fire wood. The rack that we had only held enough wood for to load the fire place and add 2 or 3 as needed before the wood was gone. I wanted something that I could hold more wood.

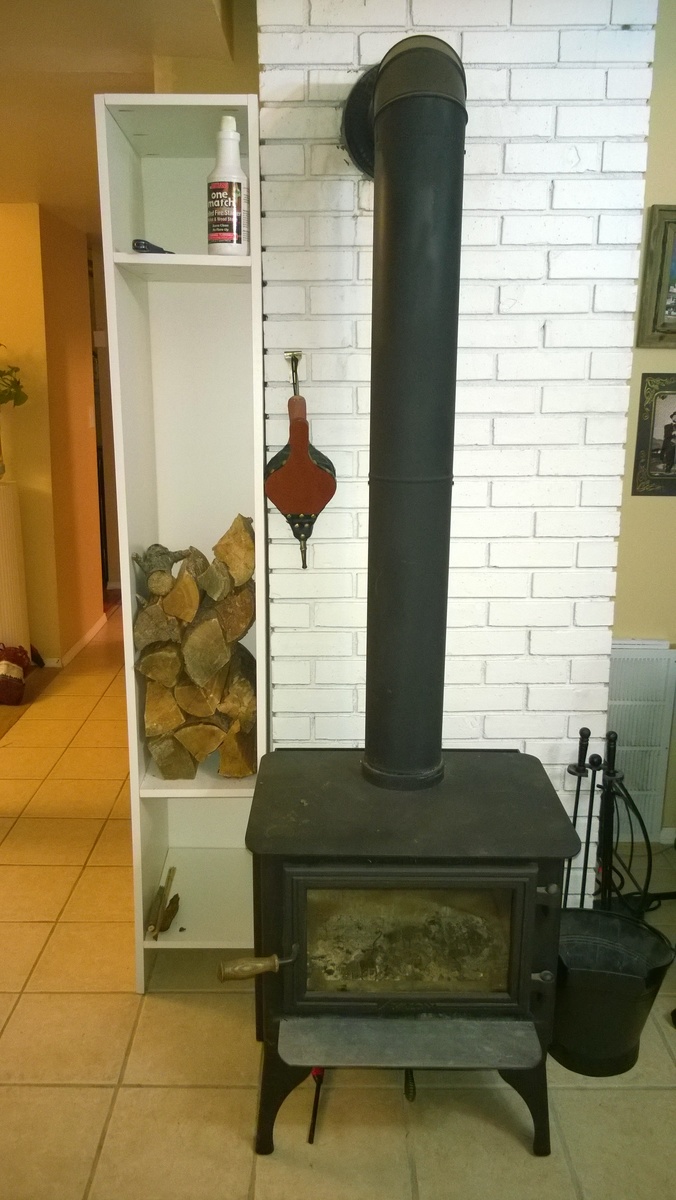
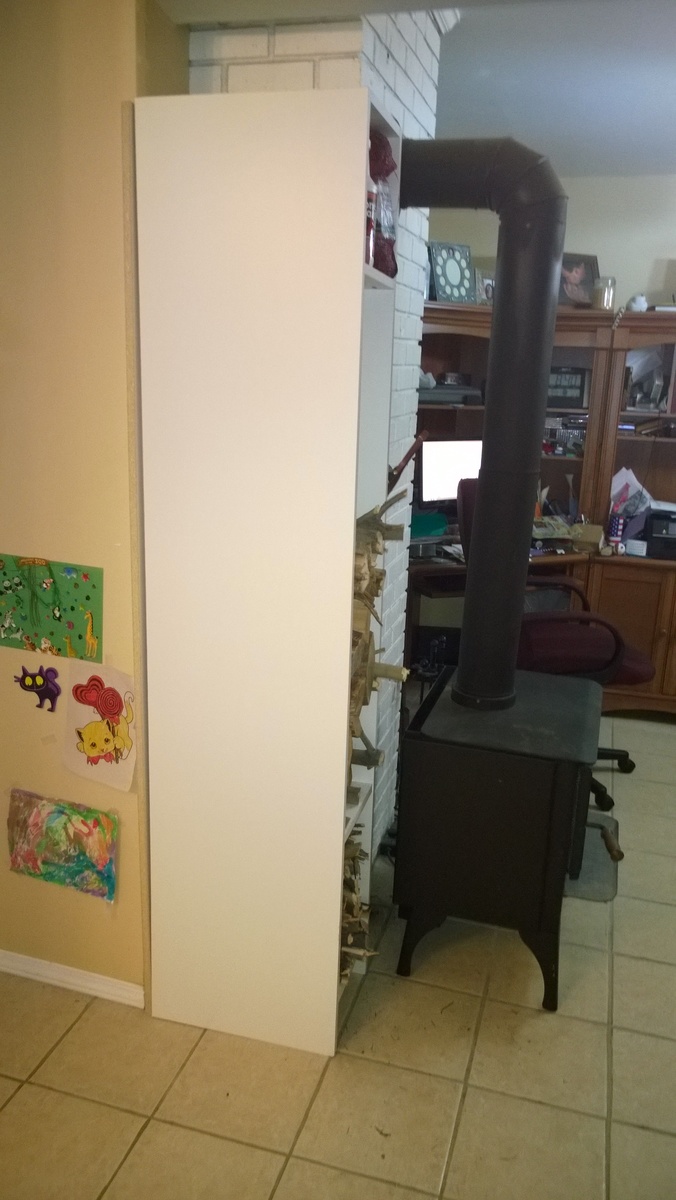
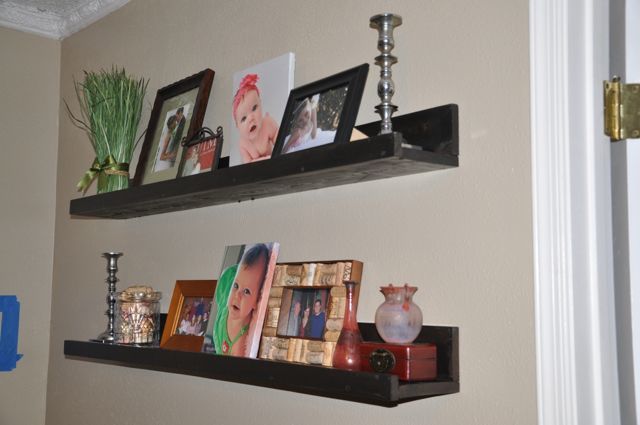
I was looking online at different racks and came across something that looked like a bookcase with no shelves filled with wood. I then looked at where I had my wood and saw that I had a nook to put something like that in. The photo of the shelves with only a little wood is all the wood that was in the metal holder. I had a lot of space left.

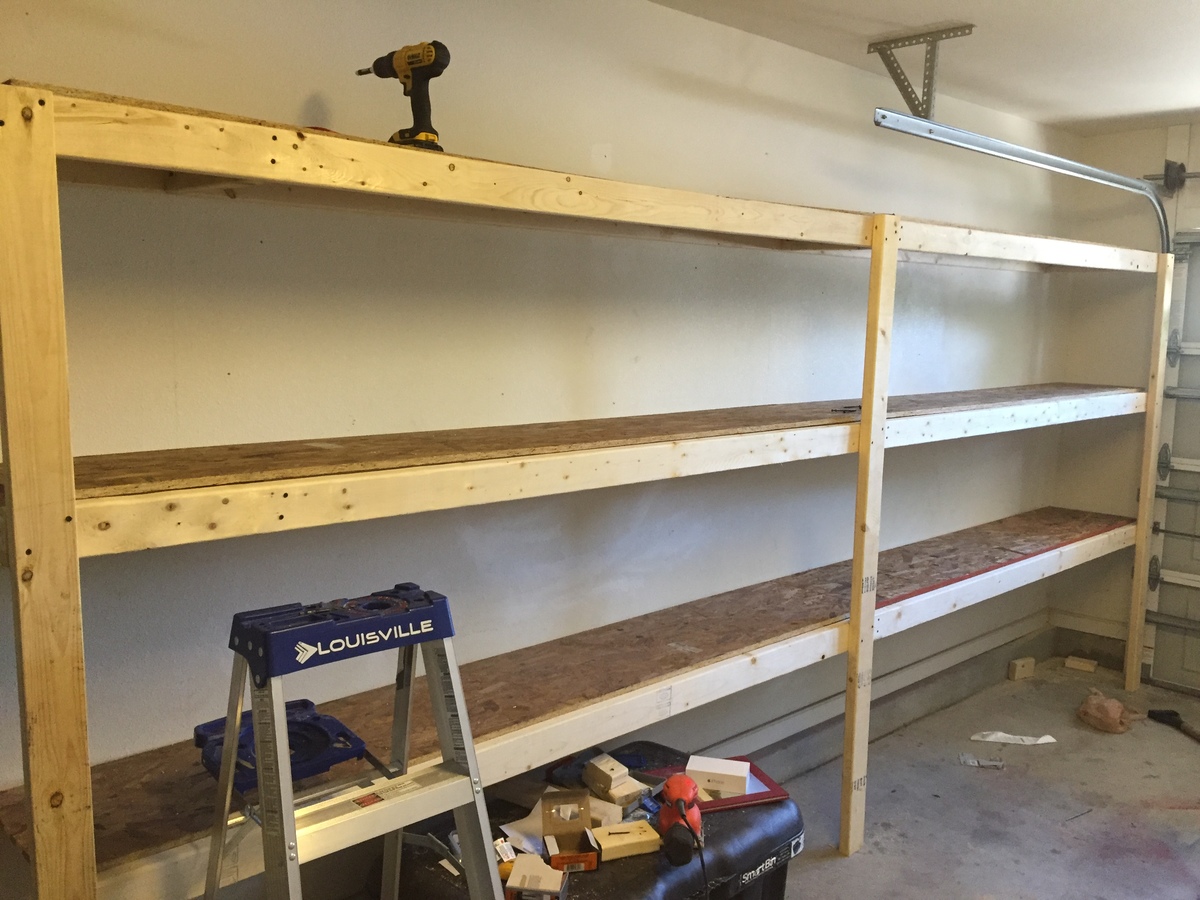
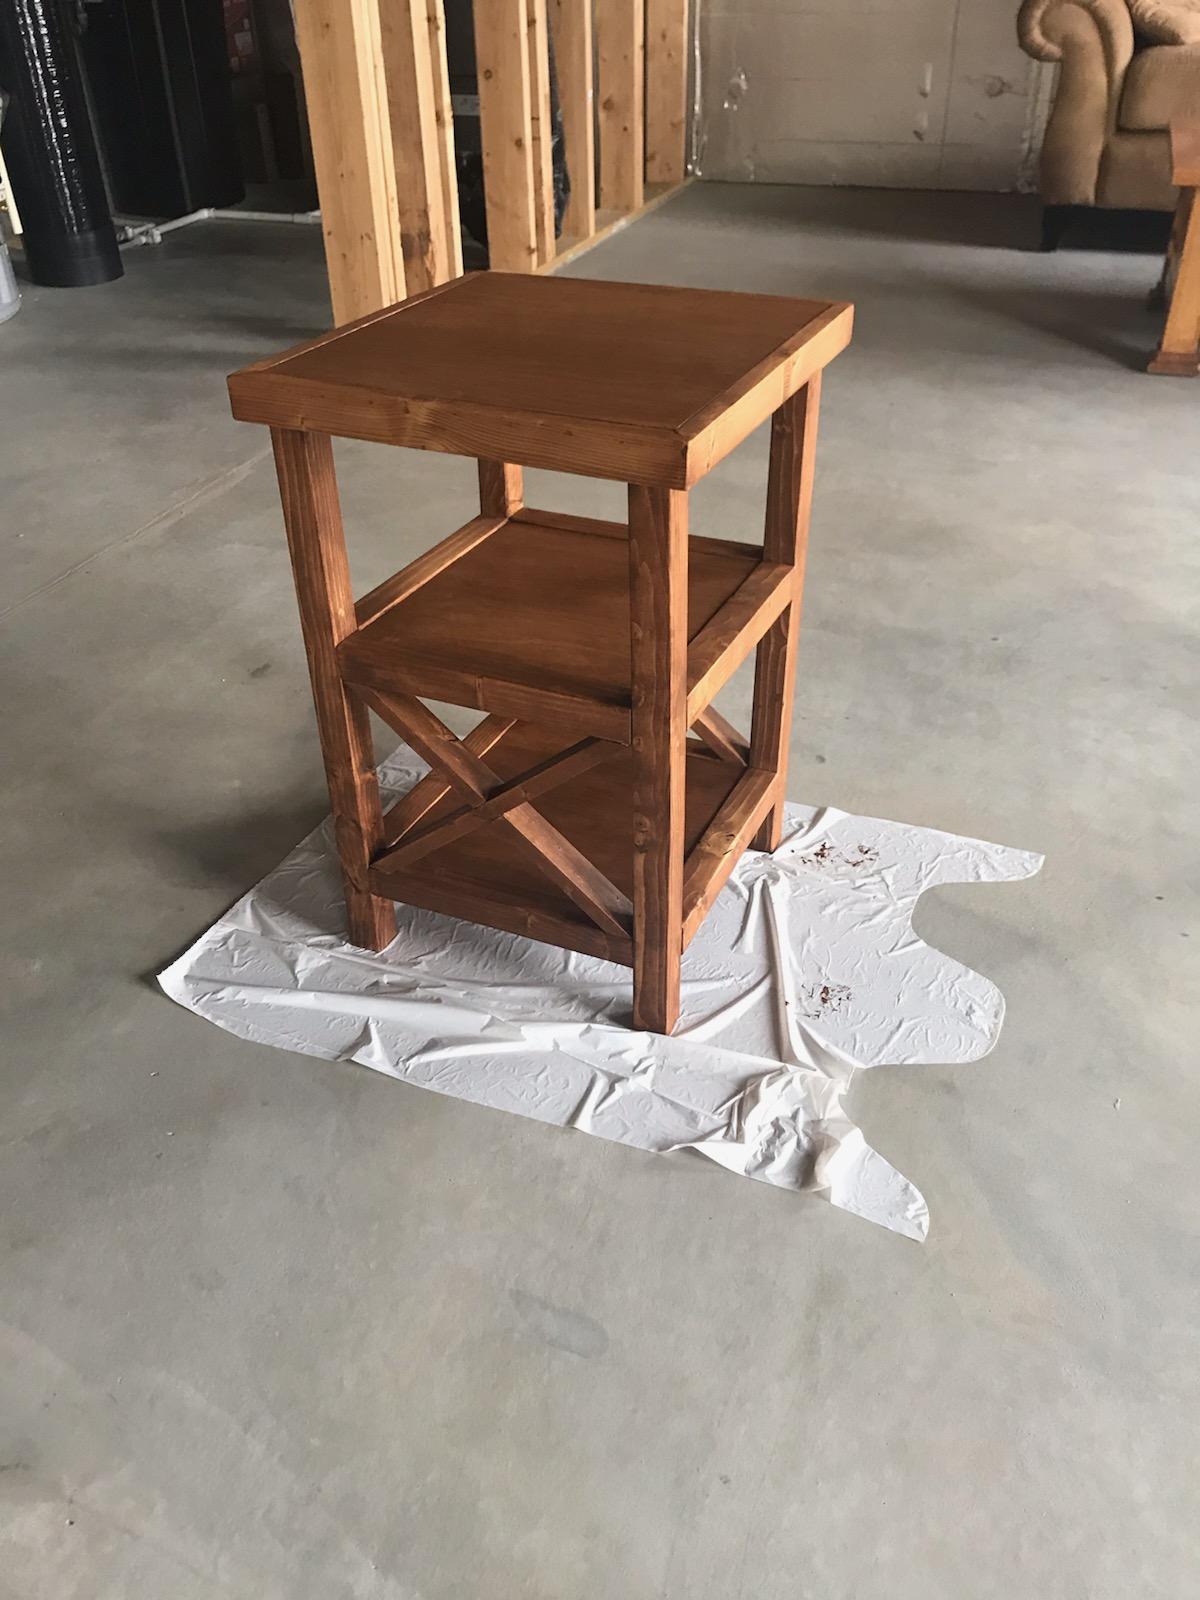
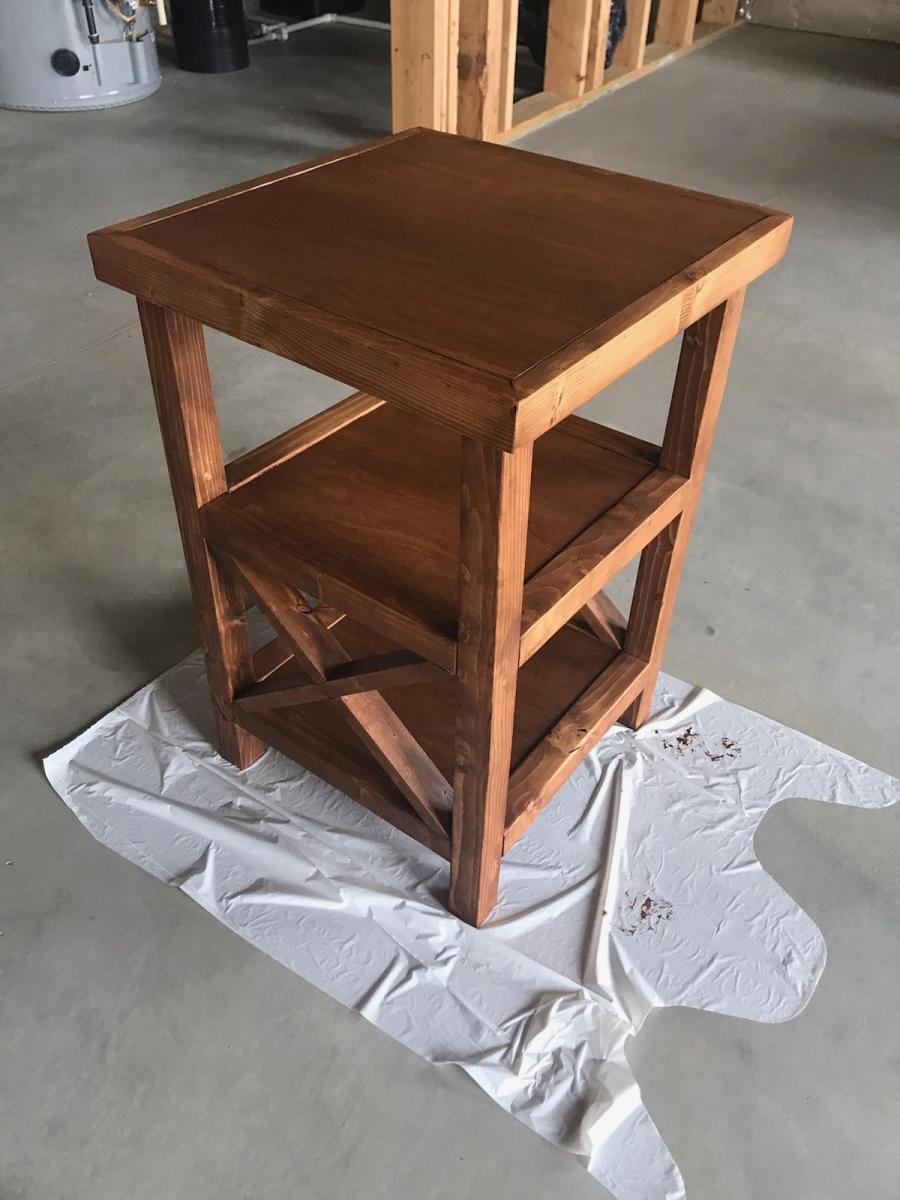
After looking at various store for bookcases and shelving, hoping in vain that I could find something cheep that would fit the size I needed, I came to see what plans I could use from Ana's site. I looked at the cube tower and the locker cabinet and finally used the pdf from the locker cab resized to fit my needs.

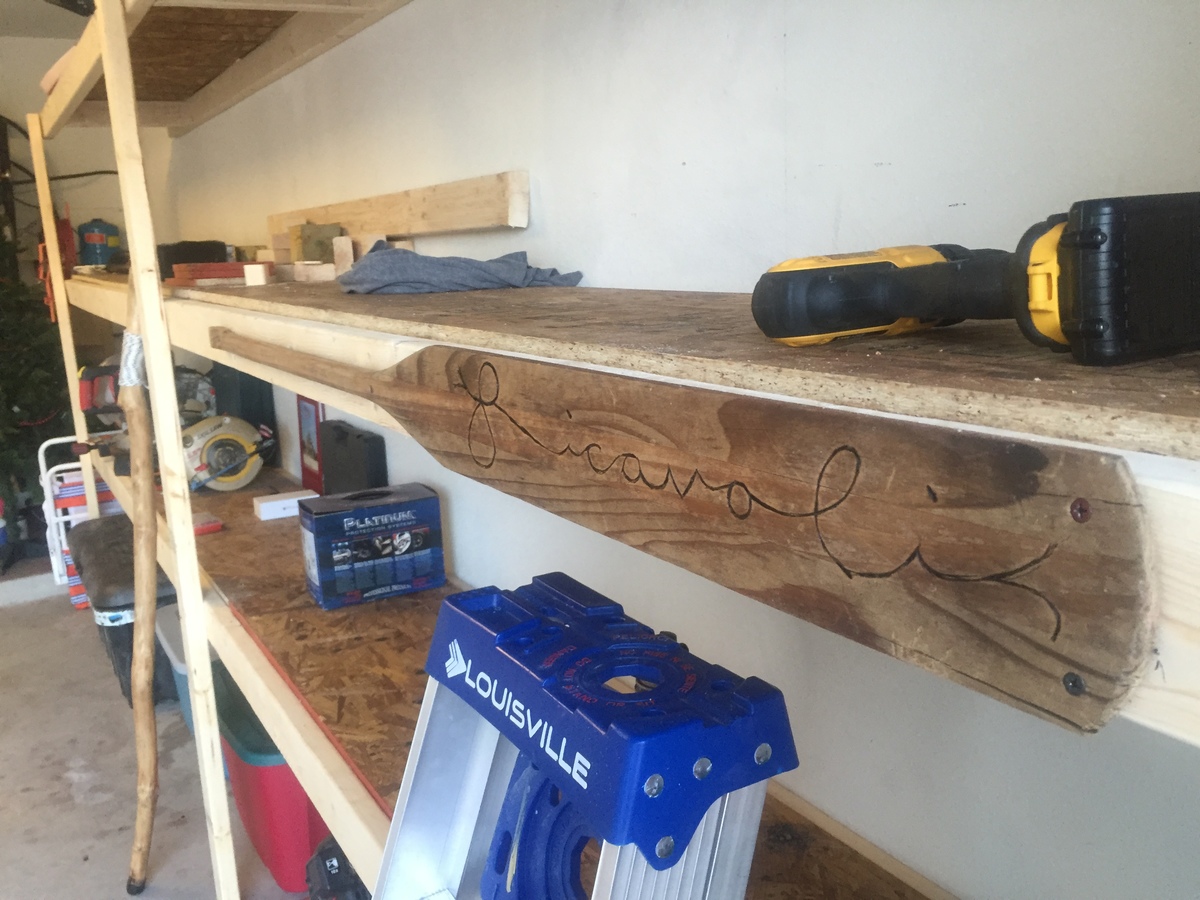
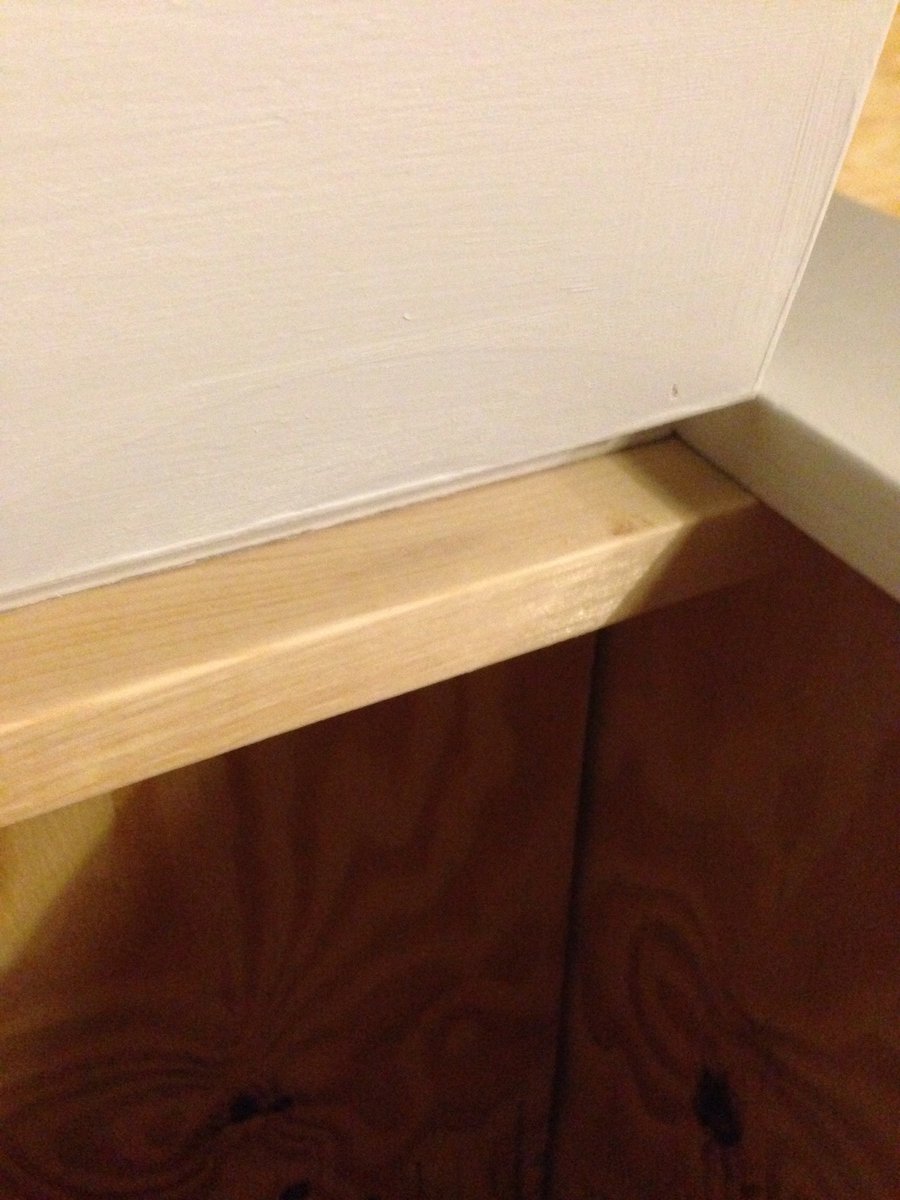
My wife remembered seeing something about banding on here,( http://ana-white.com/2013/11/momplex/finishing-plywood-edges-edge-bandi… ) So we found some white to match the wood. I think the banding turned out good.

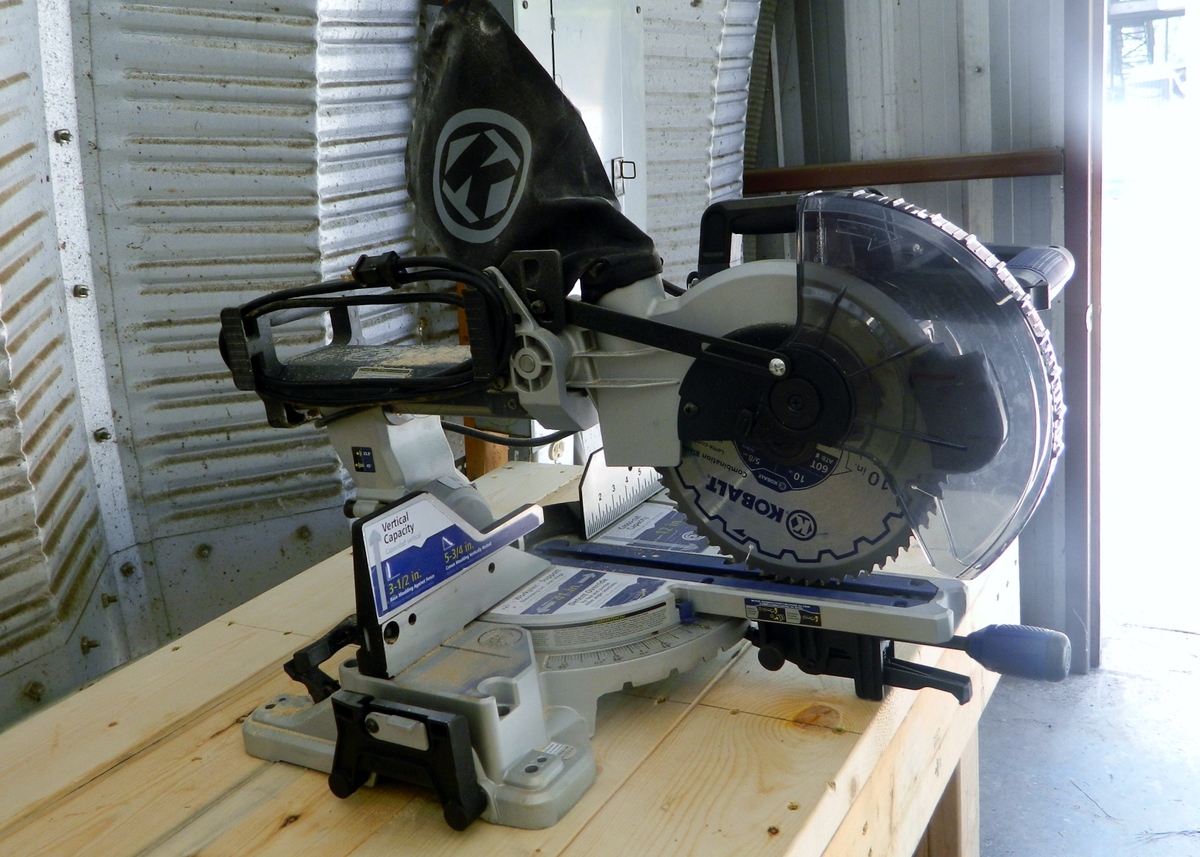
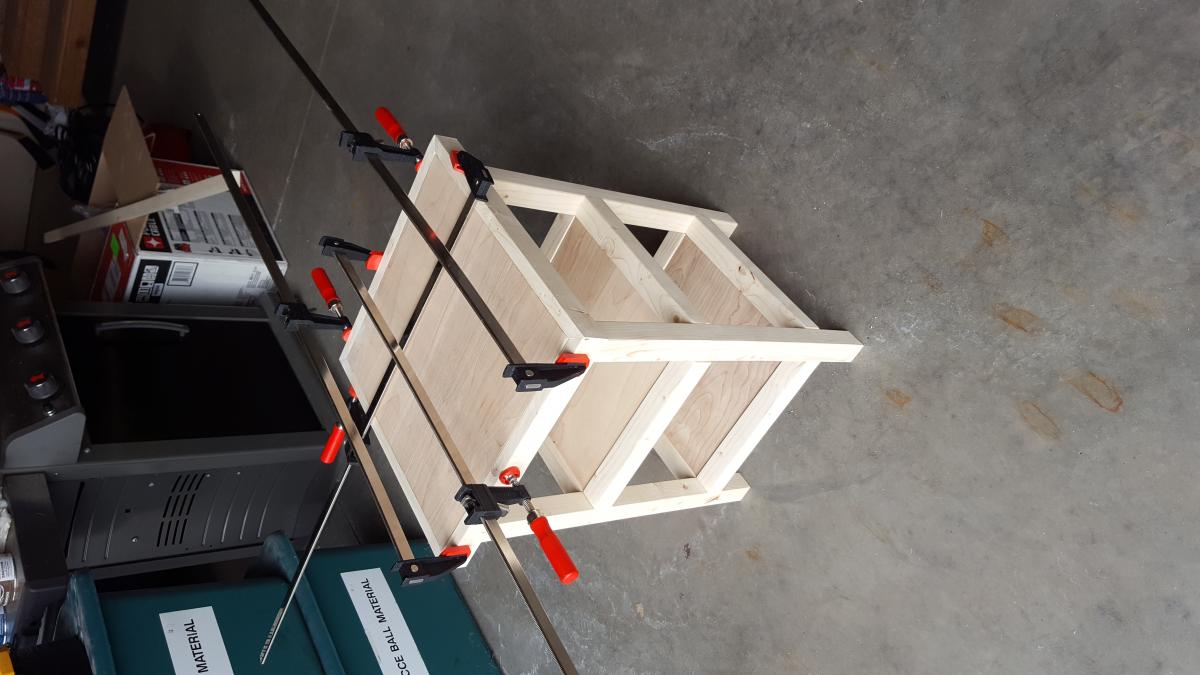
I did have a hard time getting the drill in to the pocket holes for the second side of shelf. I started to look on line and found 3" bits at Lowes and HD, but it was 10:30 at night. After looking some more I found a great post on Kreg's site for using a ratchet with a 1/4" socket to hold the bit. http://kregjig.ning.com/photo/ratchetasrtangledriver-1?context=user

My wife also said I should add one more shelf for keeping the wood stable. I told her that I would be fine. Now that I have filled it up all the way I think another shelf would be good to keep the wood rotated. Have one stack of room temp wood, and one of just from outside trying to warm up. So she was right that I should put in another shelf. ;)

I think it has opened the space by the fire place and should help my daughter not to stub her toes like she did with the rack.

The wood was $30 and HD cut if for no charge. It only took one sheet. The banding was around $5 and I had to buy some more Kreg screws.

The Size is 12 1/2"W 18"D and 79" high.

The blue bag under the shelving is an Ikea bag. It is just the right size and strength to carry the wood in.
Mike

Estimated Cost
$45
Estimated Time Investment
Day Project (6-9 Hours)
Finish Used
White MDF with White banding
Recommended Skill Level
Starter Project

Woven back bench

Submitted by Anonymous (not verified) on Sun, 06/12/2016 - 09:55

Built for my parents 50th anniversary 

Built from Plan(s)
Estimated Cost
£60
Estimated Time Investment
Week Long Project (20 Hours or More)
Finish Used
Cupronel outdoor furniture stain (teak)
Recommended Skill Level
Intermediate
Seasonal And Holiday

Coffee Table with Drawers

Submitted by Anonymous (not verified) on Sat, 11/18/2023 - 12:14

This was inspired by a Potter Barn table that looked similar. It was one of my first projects. I couldn’t afford the 2000 plus from there so built it. Sanded very fine and used Dark Walnut stain. Sealed four times with polyurethane sanding between each. Rubbed last coat of polyurethane on with cloth and used 0000 steel wool to give it a very soft and smooth finish.

Lynn

Modified Hailey Platform Bed

Submitted by Jake on Wed, 05/30/2012 - 16:15

I took the Hailey Platform Bed plan and cut to a twin bed size. I used some old wood I found in the garage for the head and foot boards and the legs. Notice the legs are 4x4s. The grandkids had some old bed springs under their mattresses so I incorporated the spring into the build. That required that I lower the cleat a couple of inches and it meant I had a very complicated leg geometry in order to get it deep enough to support the bed. I built the frame with Kreg Jig pocket joints and they made the work very easy with such large and heavy timbers. Notice I attached the legs to the frame with 5/16" lag screws which allows easy removal of the legs if you need to make it easier to move. Came out very good but I think I will build the second bed without the springs and go for the slat method as shown in the plans.The result is beautiful. My neighbor commented that it looked very Pottery Barnish!

The second bed I finished yesterday is made with slats. A very smart move. The legs are so much easier to attach to the frame. Both beds are beautiful and sturdy. One grandkid told me that when the hurricane comes he is going to get under his bed because it is so strong. He may be right but I will be in Laredo or San Antonio.

Built from Plan(s)
Estimated Cost
$70 for two beds and I also got free wood from the garage.
Estimated Time Investment
Weekend Project (10-20 Hours)
Finish Used
Red Oak stain on the legs and head and foot boards. The rest was primed then given two coats of a good satin paint called Benjamin Moore Impervo. It is expensive but I used it on repainting the kitchen cabinets and it was worth the cost. Best advice is good primer, sand with 150 grit, then two coats of final paint but light sanding with 320 grit between coats.
Recommended Skill Level
Beginner

Farmhouse King Bed

Submitted by rccostner on Sun, 03/16/2014 - 15:14

This is my first project and I've spent a couple of months preparing for it. My wife loved the plans for this bed and I loved the challenge. I reviewed the plans for both the king and queen size beds and read through all of the comments before starting. The comments were especially helpful, so thanks to everyone for contributing. I took my time with project hoping to minimize beginner mistakes. We recently upgraded to a king sized mattress and already had a bed frame (we highly recommend this one)


So I adjusted the plans for making just the headboard and footboard along with the runners. I omitted the 1x3 boards to account for orienting our king bed so that it is 76" wide and 80" long. Initially, I made the mistake of thinking that 1x6 boards would be adequate for runners. But that wouldn't withstand the constant onslaught of our kids climbing into our bed, so I switched to 2x6 boards and it's much sturdier. I cut the runners 3" longer than the bed frame to allow for room for the bedding and to account for the 1" overlap from the 2x6 cap on the footboard. L brackets were perfect for attaching them to the headboard and footboard. Now that this is under my belt I'm looking forward to my next project.

Estimated Cost
300
Estimated Time Investment
Week Long Project (20 Hours or More)
Finish Used
primer, Valspar paint - Honey Milk
Recommended Skill Level
Beginner

I Love These Shelves

Wanted to make something for the house and seen these plans and though I would give it a shot. didn't think I would love them as much as I do! My wife loves them even more I think. Also added my own little touch with an old paddle that I burned our last name into. I think it makes a nice little touch. 

Estimated Cost
$100
Estimated Time Investment
Day Project (6-9 Hours)
Finish Used
Natural
Recommended Skill Level
Beginner

Workbench

This morning my dad decided to help my build the workbench I've been wanting since we moved to our new house. I would usually do it myself but being 37 weeks pregnant I wasn't wanting to get out there on my own and lift a bunch of 10 ft boards. So we got a bunch of 2x4s and some 2x6s and threw one together... it ended up being 10 ft long and around 28 inches wide and a good 36 inches tall. Now I have a nice place to put my new saw I got for Mother's Day

Estimated Time Investment
An Hour or Two (0-2 Hours)
Recommended Skill Level
Beginner

Hall Tree

Submitted by tbonia on Wed, 03/19/2014 - 13:50

This was my first attempt at building actual furniture. It went pretty well I think. I followed the plan pretty much. I made the bench longer and taller. I also added a few inches to the height if the hutch.
A couple other changes I made that I thought it needed was 2x2 bracing on the bottom if the bench for stability. I also added a band of 1x2 to the bottom of the hutch so I could screw the hutch to the bench without having to go inside of the bench and try to line it up .
I then added another board to the top band of the hutch, because with the one small board there it want wide enough to mount a decent size hook to.
That's pretty much it. If you have any questions, let me know.

Built from Plan(s)
Estimated Cost
$200
Estimated Time Investment
Week Long Project (20 Hours or More)
Finish Used
Painted White
Recommended Skill Level
Intermediate

Farm style night stand

Submitted by Decross on Tue, 06/21/2016 - 15:11

Very easy farm style night stands. Made from pine and leftover butcher block top from another project. Went exactly by the linked plan with the exception of the top. 

Estimated Cost
$70 each
Estimated Time Investment
Day Project (6-9 Hours)
Recommended Skill Level
Intermediate

Nursery Dresser

Submitted by Anonymous (not verified) on Sun, 11/26/2023 - 12:18

My first attempt at a dresser before my first grandson arrives.

Rick White

Comments

Changing Table

Submitted by Eves on Fri, 06/24/2016 - 15:15

Changing Table

Estimated Time Investment
Week Long Project (20 Hours or More)
Recommended Skill Level
Beginner

10 Dollar Ledges in Espresso

Submitted by Kimiemich on Thu, 06/07/2012 - 15:17

I made these ledges with pine and white wood, 4' long. I wish I had used pocket hole screws to connect them, but instead I just counter-sank the screw holes and butt jointed the boards with wood screws. I filled the screw holes with 5/16" wood plugs and sanded them down flat. Then I sanded, stained, varnished, and sanded again.

Please see my process below on my blog.

Thanks, Ana!

Estimated Cost
$30
Estimated Time Investment
Afternoon Project (3-6 Hours)
Finish Used
A mix of "ebony" and "walnut" oil-based stains, then 2 coats of varnish and a light sanding with 600 grit paper.
Recommended Skill Level
Starter Project

Rhyan Coffee Table

Submitted by dbwalk on Wed, 04/02/2014 - 19:15

I loved this coffee table plan. I found it on www.morelikehome.net and also linked on Ana White's page. My wife and I loved the size and also the number of drawers for storage. I would say that the plans were great and I had to only make minor adjustments due to my own errors.

It took me about four days to complete. I used the Kreg jig to complete most of the joining. I put it all together by the end of the second day. It is solid as a rock. The last two days were mostly staining all pieces and then restaining to get the right finish. It also took a couple more weeks to find pulls and get them installed. But now it's all done and we love it already!

Built from Plan(s)
Estimated Cost
140
Estimated Time Investment
Week Long Project (20 Hours or More)
Finish Used
Black satin polyurethane
Recommended Skill Level
Beginner

Outdoor chairs

Submitted by Big J on Mon, 06/27/2016 - 17:10

I built two chairs for my wife and I and a little table (for beer or wine). I made the table out of scrap that I had left over. My favorite part is the paint color I chose. Thank you Anna!

Built from Plan(s)
Finish Used
Behr paint and primer in one
Recommended Skill Level
Beginner

Small X End Table

This was a fun project spread out over 3 weeks to enjoy working on while quarantined at home. It was the first project I worked on featuring mitered corners. It took some practice and many "polishing" cuts to get everything to line up right, but in the end they looked great! I went with a Birch interior plywood instead of you typical (pine?) plywood because it looked a lot more furniture esque. I trick when using a circular saw to cut the plywood is to keep the desired side up when cutting in the direction with the grain and the desired side down when cutting across the grain. When cutting across the grain, the blade can fray the edge of the top ply. I also added braces attached to all 4 legs flush with the top of the legs using 1x2's. This allowed me to glue and screw (1" screws) the table top to the base from underneath so it was hidden rather than nail from the top. I didn't want to have nail holes on the table top because, even with wood filler, they would stand out from the rest of the wood.

I chose to go with the cheap pine that home depot sells instead of the Select Pine because the cheap pine has a lot more character and offers a more rustic look. The pine can be pretty beat up so it takes a while of digging to find the straight boards without any major defects or cracks. I just figure it's part of the experience. Once I have my straight boards I sand everything down so the boards are completely smooth and have softened edges. Clamps are a must and a HUGE help with getting everything lined up during the assembly. I neglected clamps in some of my first builds because I didn't have them and didn't want to invest. I had a real hard time getting things level and straight. Never again.

Other pieces I've build from Ana's plan include (in order of build):
Ana's Adirondack Chair (4x)
Reclaimed-Wood Look Headboard, King Size
Modern Outdoor Chair from 2x4s and 2x6s (2x)
Simple White Outdoor End Table
Rustic X End Table

Estimated Time Investment
Weekend Project (10-20 Hours)
Finish Used
One application of Varathane Early American Premium Wood Stain
Three applications of Varathane Crystal Clear Matte Water Based Ultimate Polyurethane

Play Horse Barn

Submitted by Anonymous (not verified) on Fri, 12/08/2023 - 08:35

Hello from Australia! I had to change the dimensions a little to convert this to a metric friendly build. I also added a roof line beam to neaten up the top. Great project and the barn looks a treat.

Chella

Built from Plan(s)

Workbench Console and Rustic Hutch

Submitted by mebohn on Mon, 06/11/2012 - 18:13

I love this antique workbench console b/c it's the perfect mix between my desire for beautiful and my husband's desire for rustic hunting lodge. (Southern girl meets Minnesota hunter - LOL). It's just a gorgeous antique look, but for far less money. I have haven't put the towel bar on the front yet b/c I keep forgetting to buy it (it's amazing how shopping with toddlers can do that to you). And in my area, mounted bottle openers are only available online, so we need to order one. I used standard stud grade 2x4's for the console, and 1x6's for the planked backing of the hutch. I also dropped the bottom shelf to the natural resting place at the bottom of the legs/top of the feet. It was so much easier for me that way as a beginner, and I really think it still looks great. This was my first Kreg Jig project - and it was so so easy. Ana is totally telling you the truth when she says it's completely worth the money to buy one. My father-in-law is a very well seasoned carpenter and wanted one after he saw some of the furniture I've built with it as a beginner! (We bought him one, of course, b/c he's awesome.)

Estimated Cost
Less than $100
Estimated Time Investment
Weekend Project (10-20 Hours)
Finish Used
2 Coats Minwax English Chestnut, 3 coats Minwax Polyeurethane sanding lightly in between coats
Recommended Skill Level
Intermediate

Comments

Back