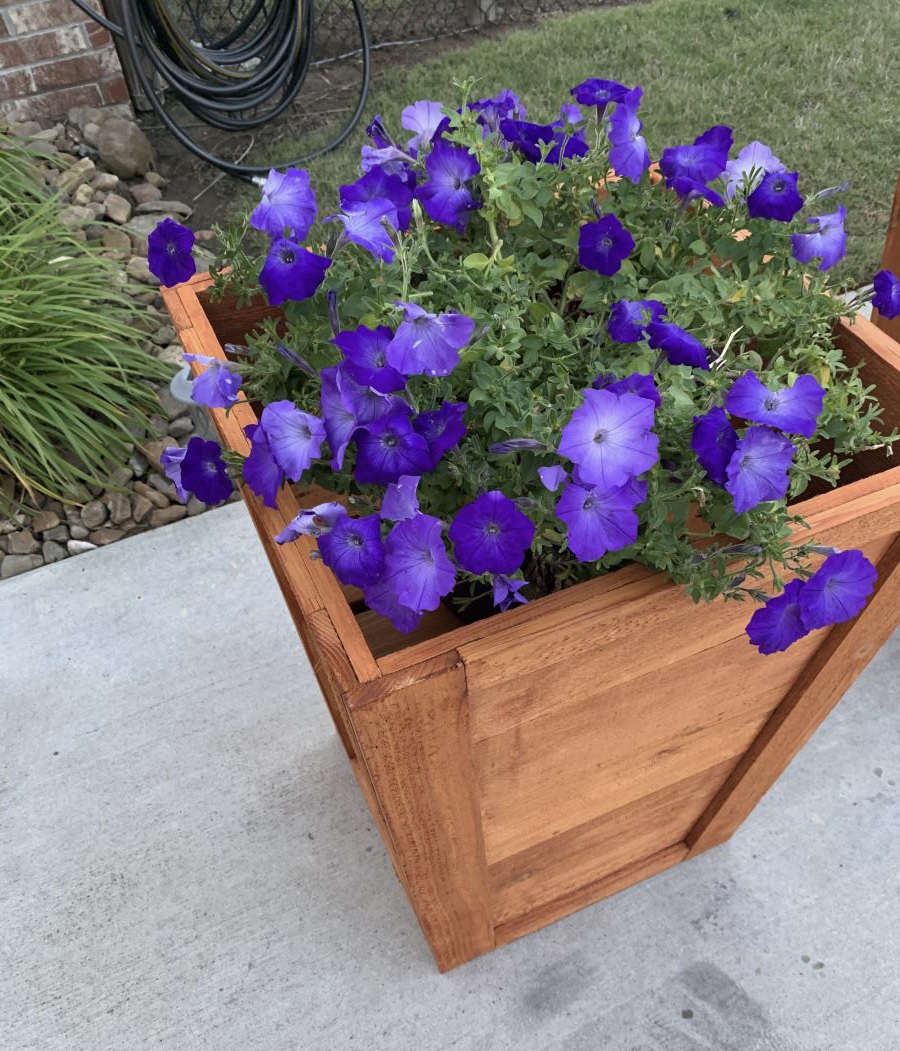
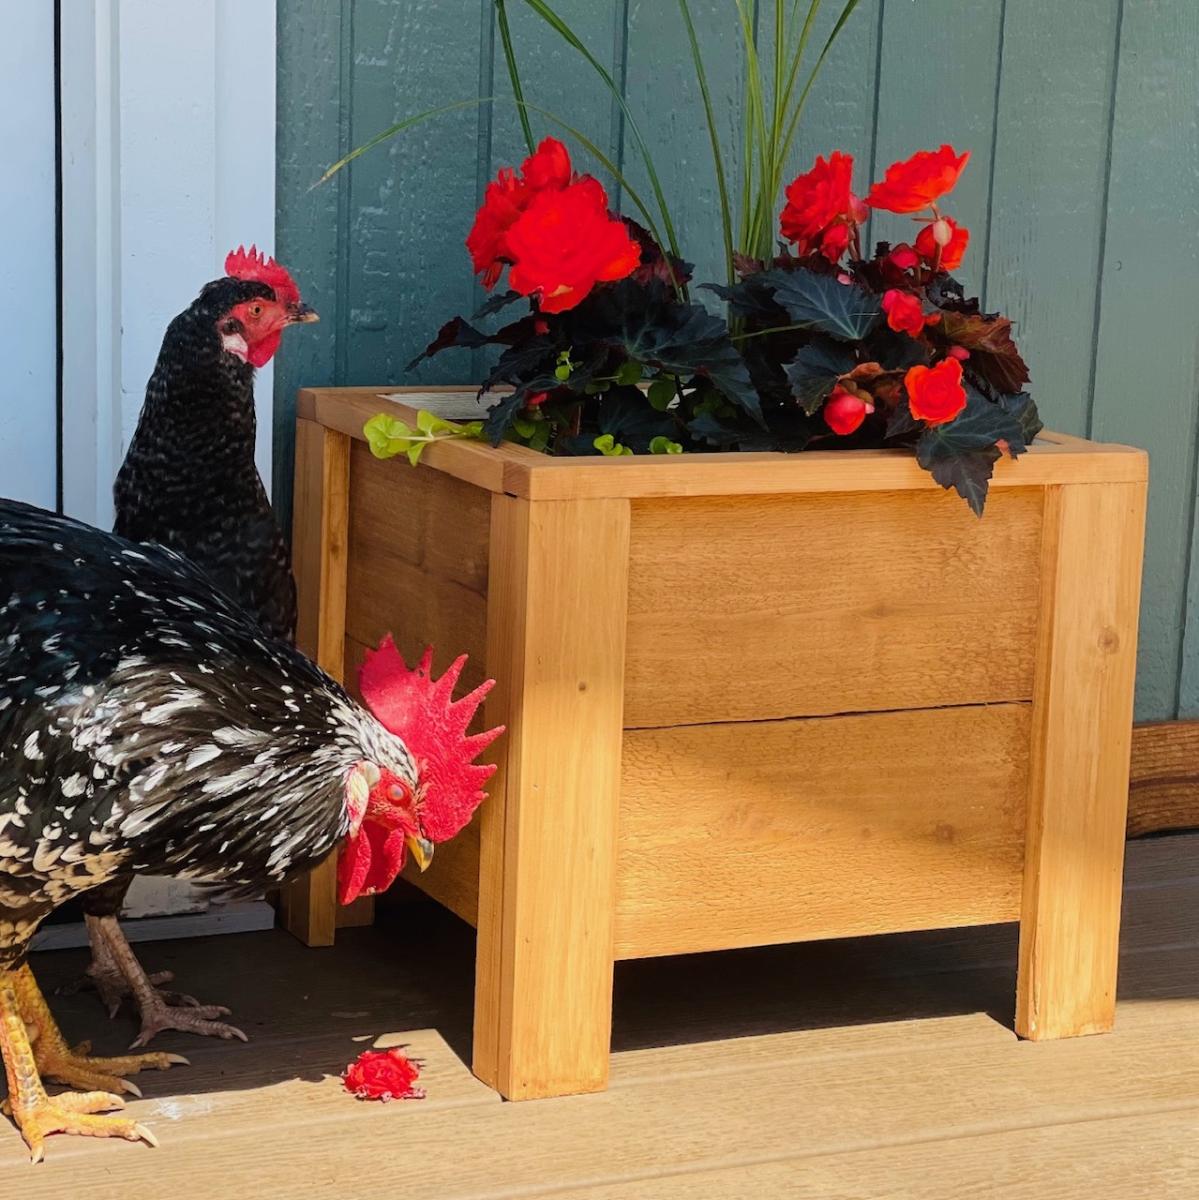
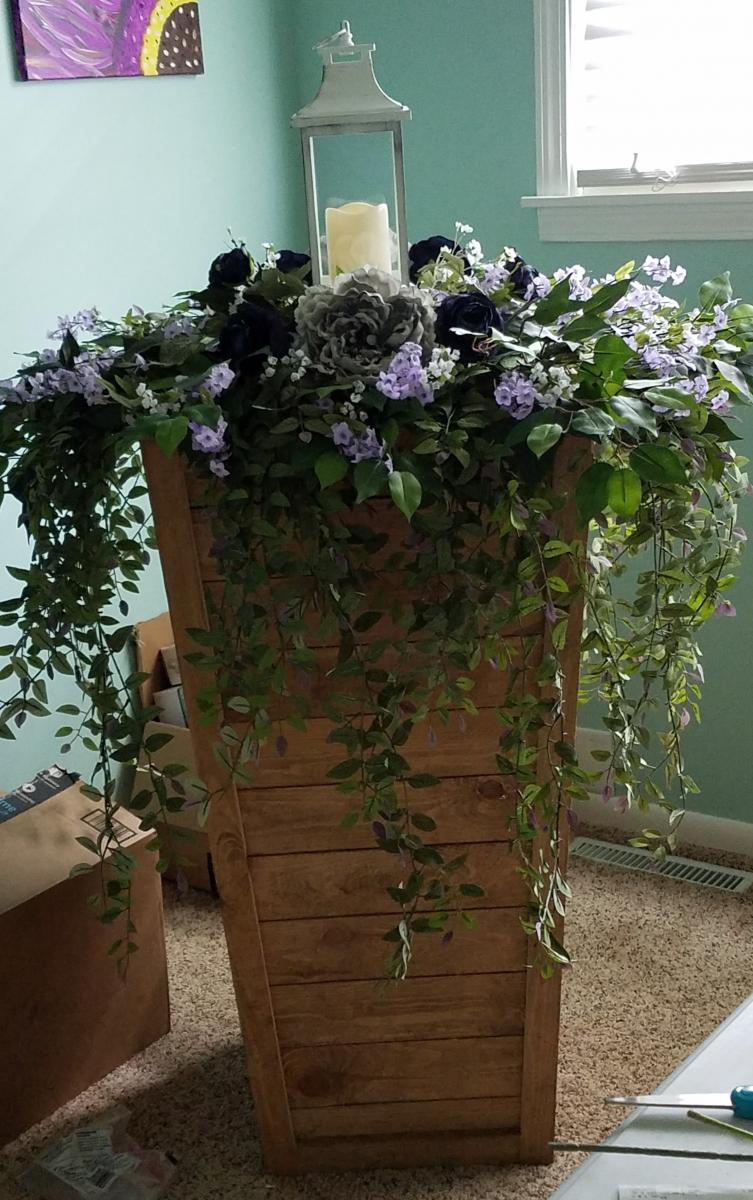
Tall Wood Planters
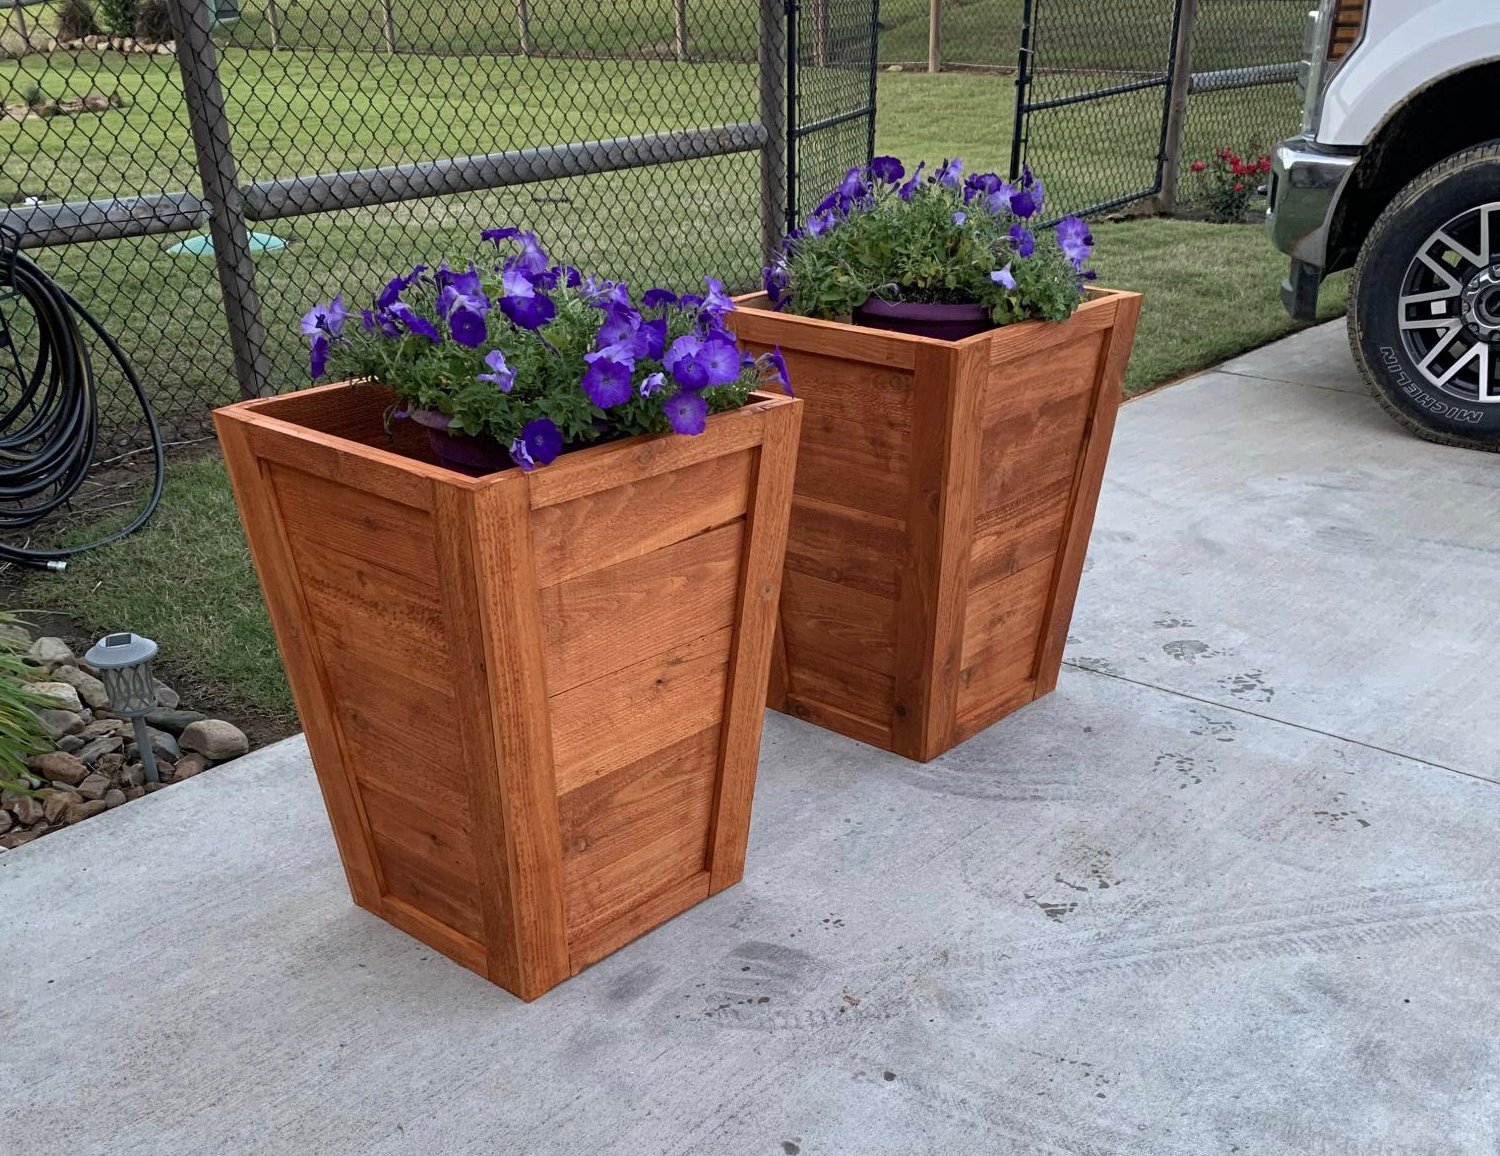
Added some extra trim pieces to finish it out. turned out really nice!!
Built from Plan(s)
Added some extra trim pieces to finish it out. turned out really nice!!
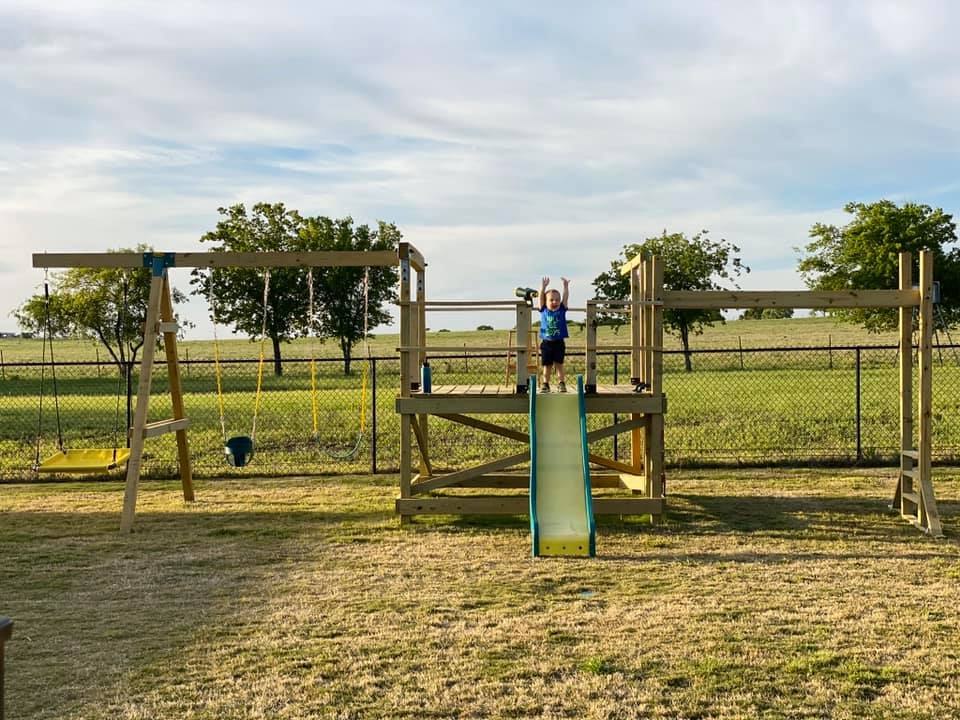
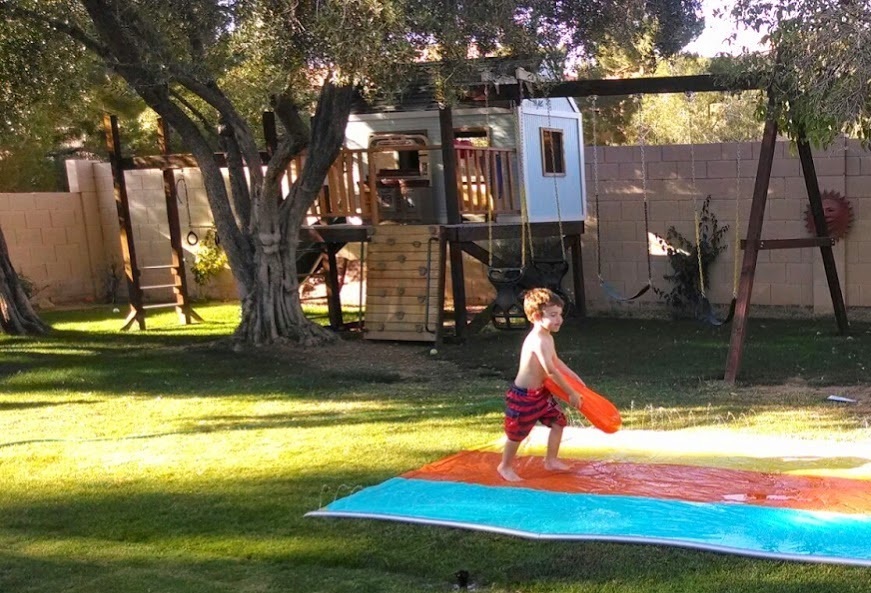
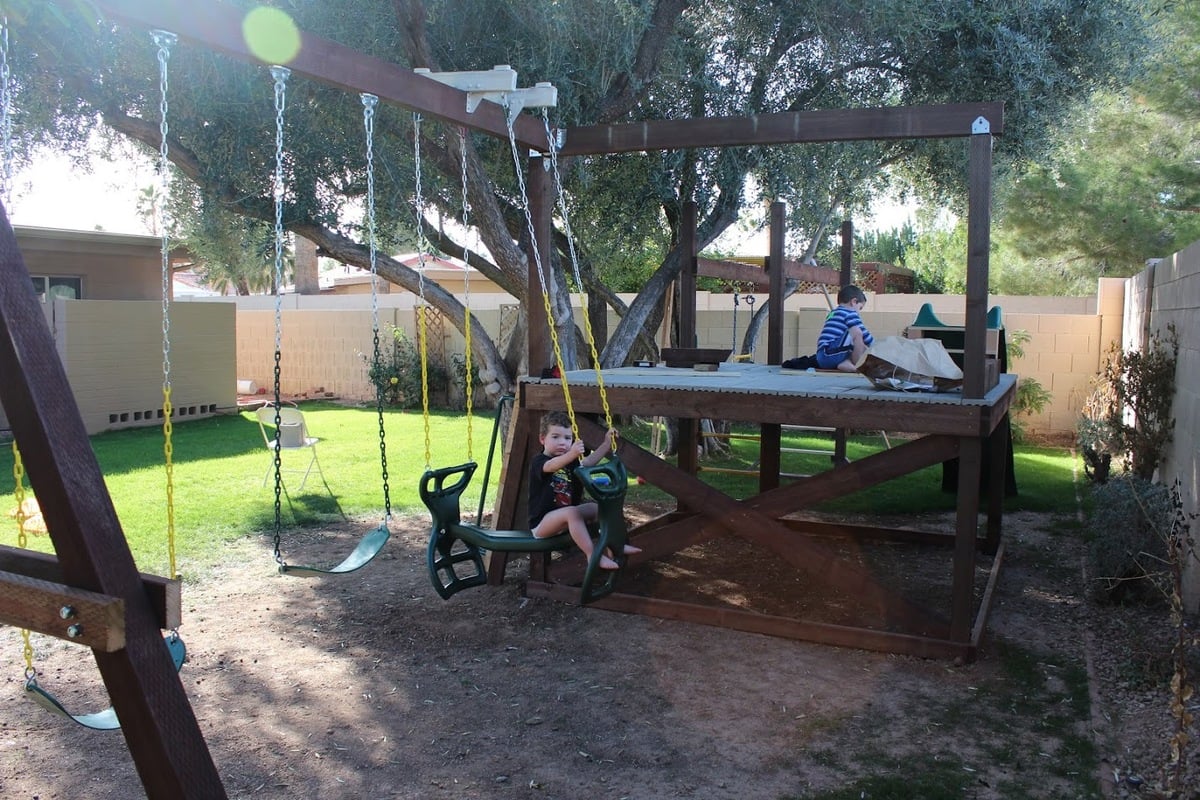
We are used to seeing our grandson every weekend but during the 2020 COVID quarantine we were unable to do so. Instead, we filled our time building him a swing set for our backyard. He loved it!! We are going to add more to the swing side but the hardware I want isn't available right now (apparently there is a lot of swing set building going on during this time). I look forward to many years of playing on this with our grandson and hopefully additional grandkids in the future... Our cost was pretty high mainly because our first round of lumber came from a local lumberyard that was willing to deliver within a few days (big box was going to take several weeks) and they had what is supposed to be higher end lumber (not sure I am convinced of that)....also, i chose some pretty expensive hardware (brackets) just for the added security.....


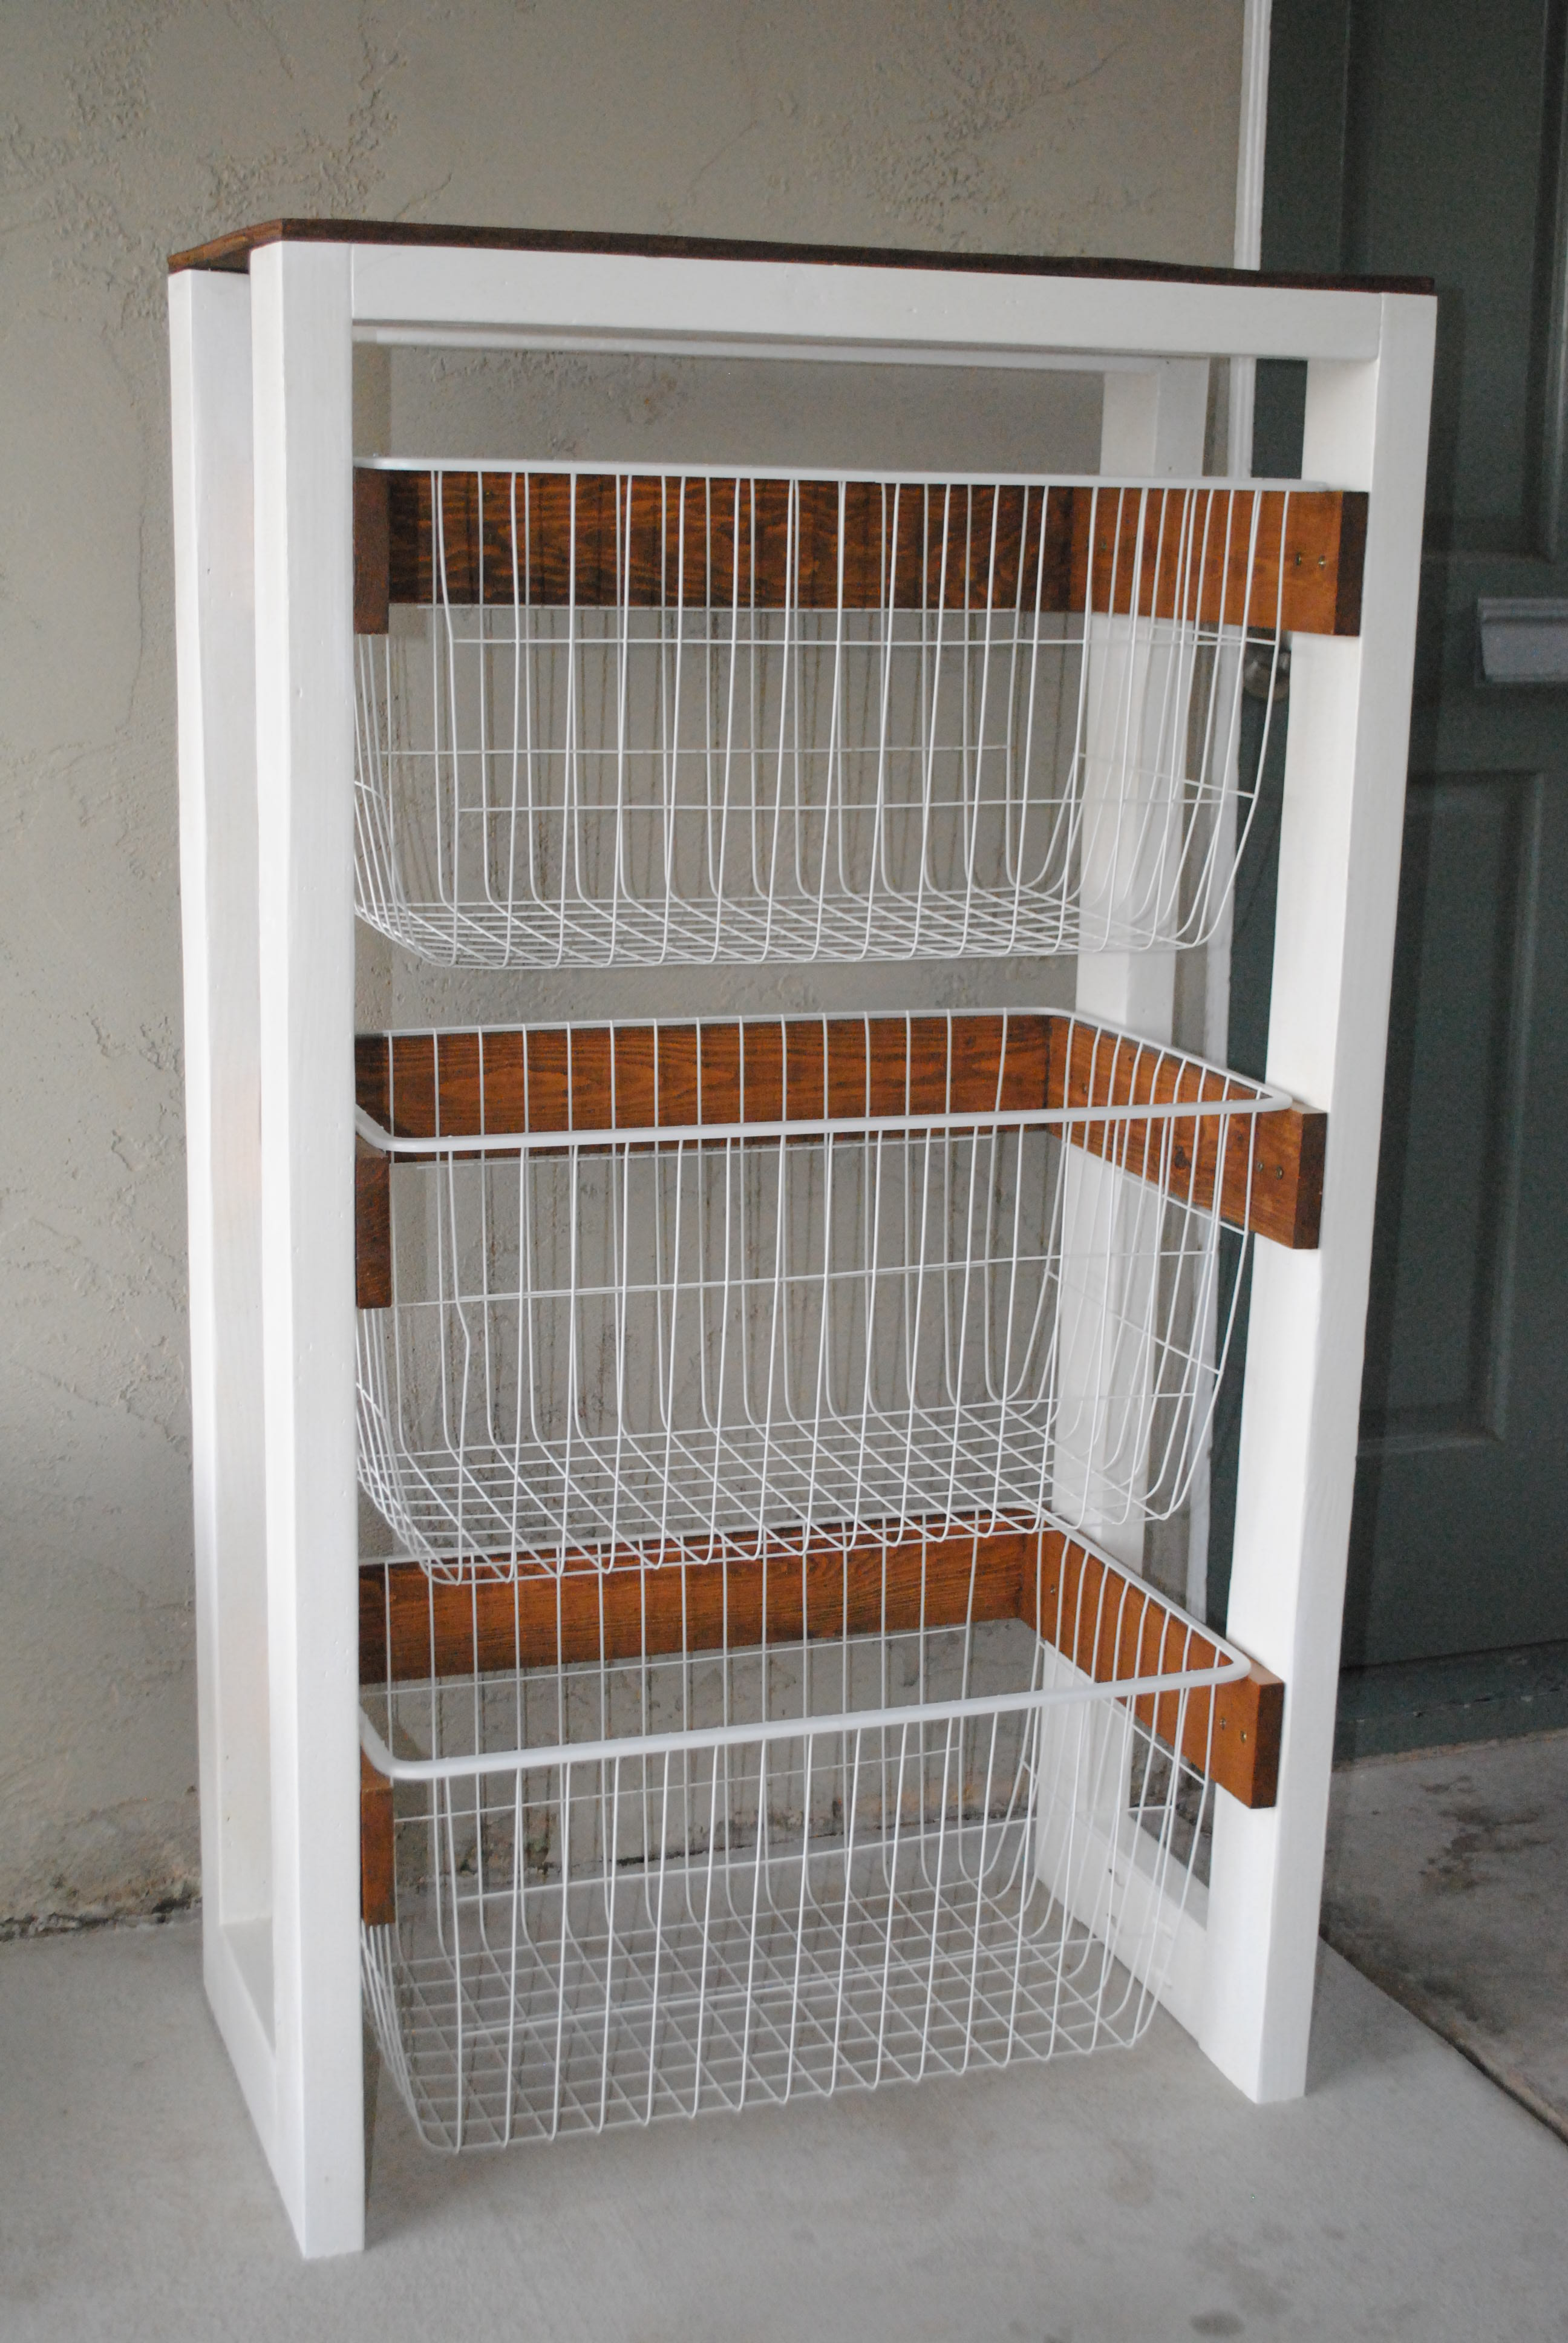
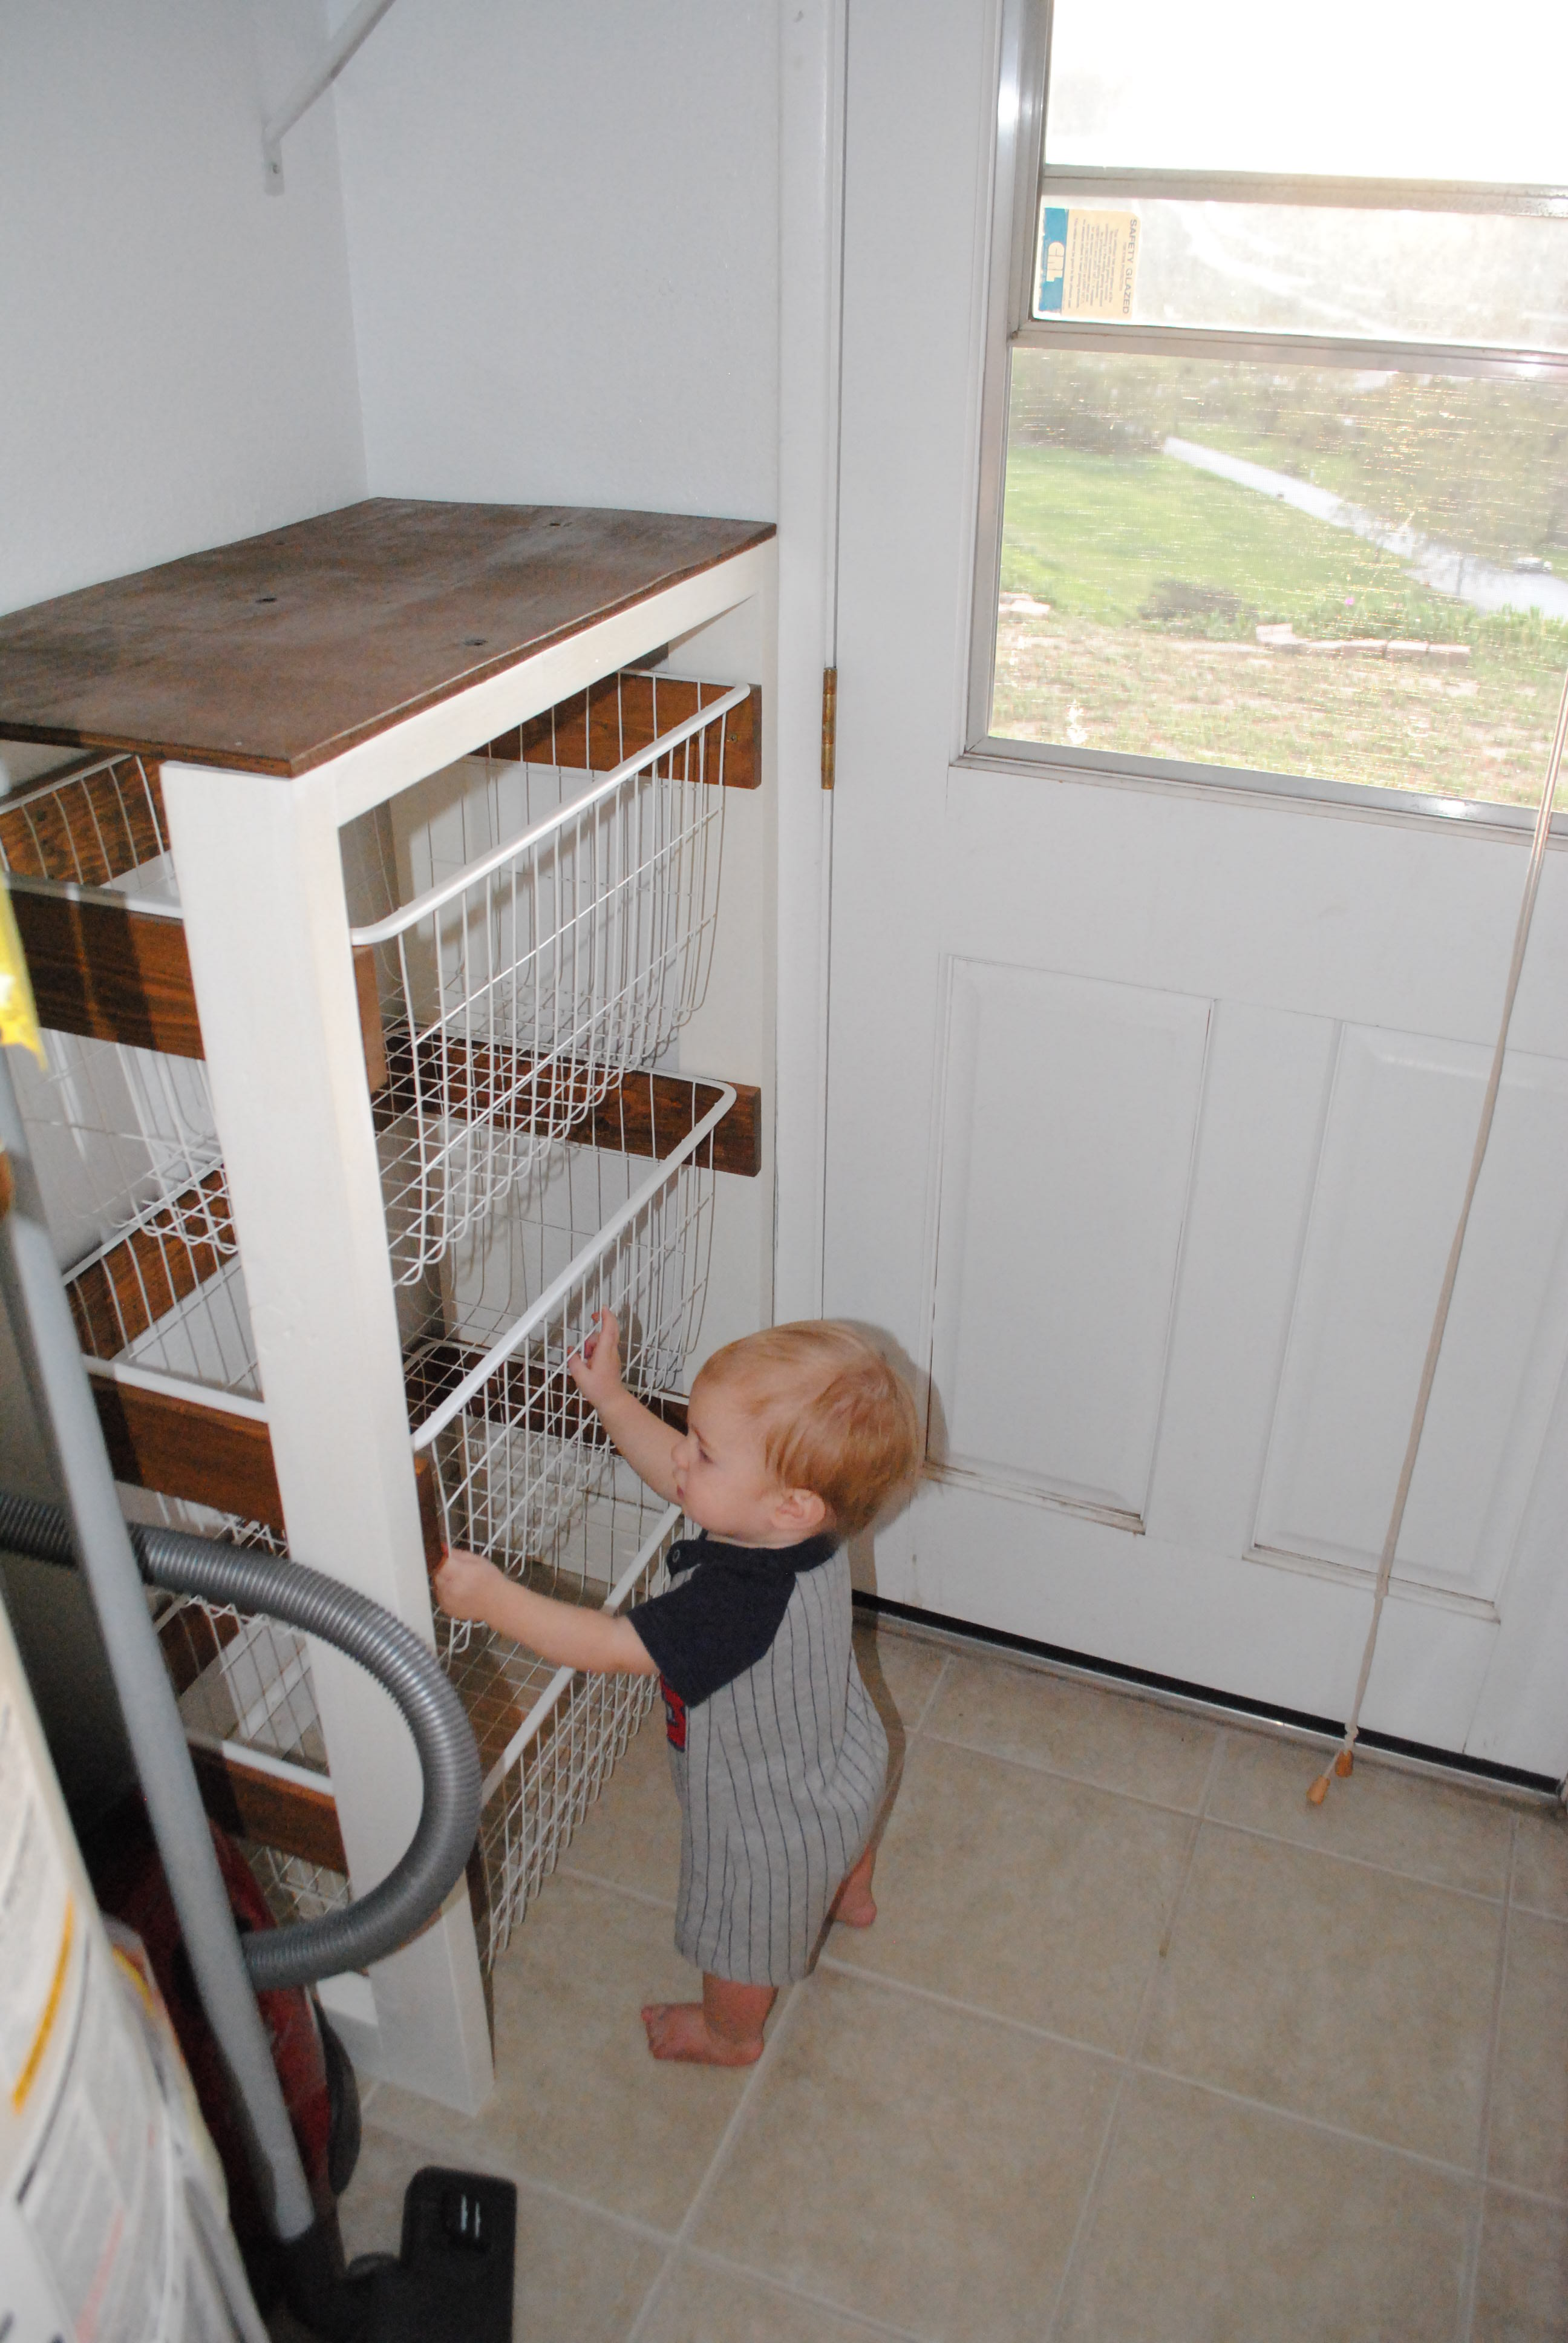
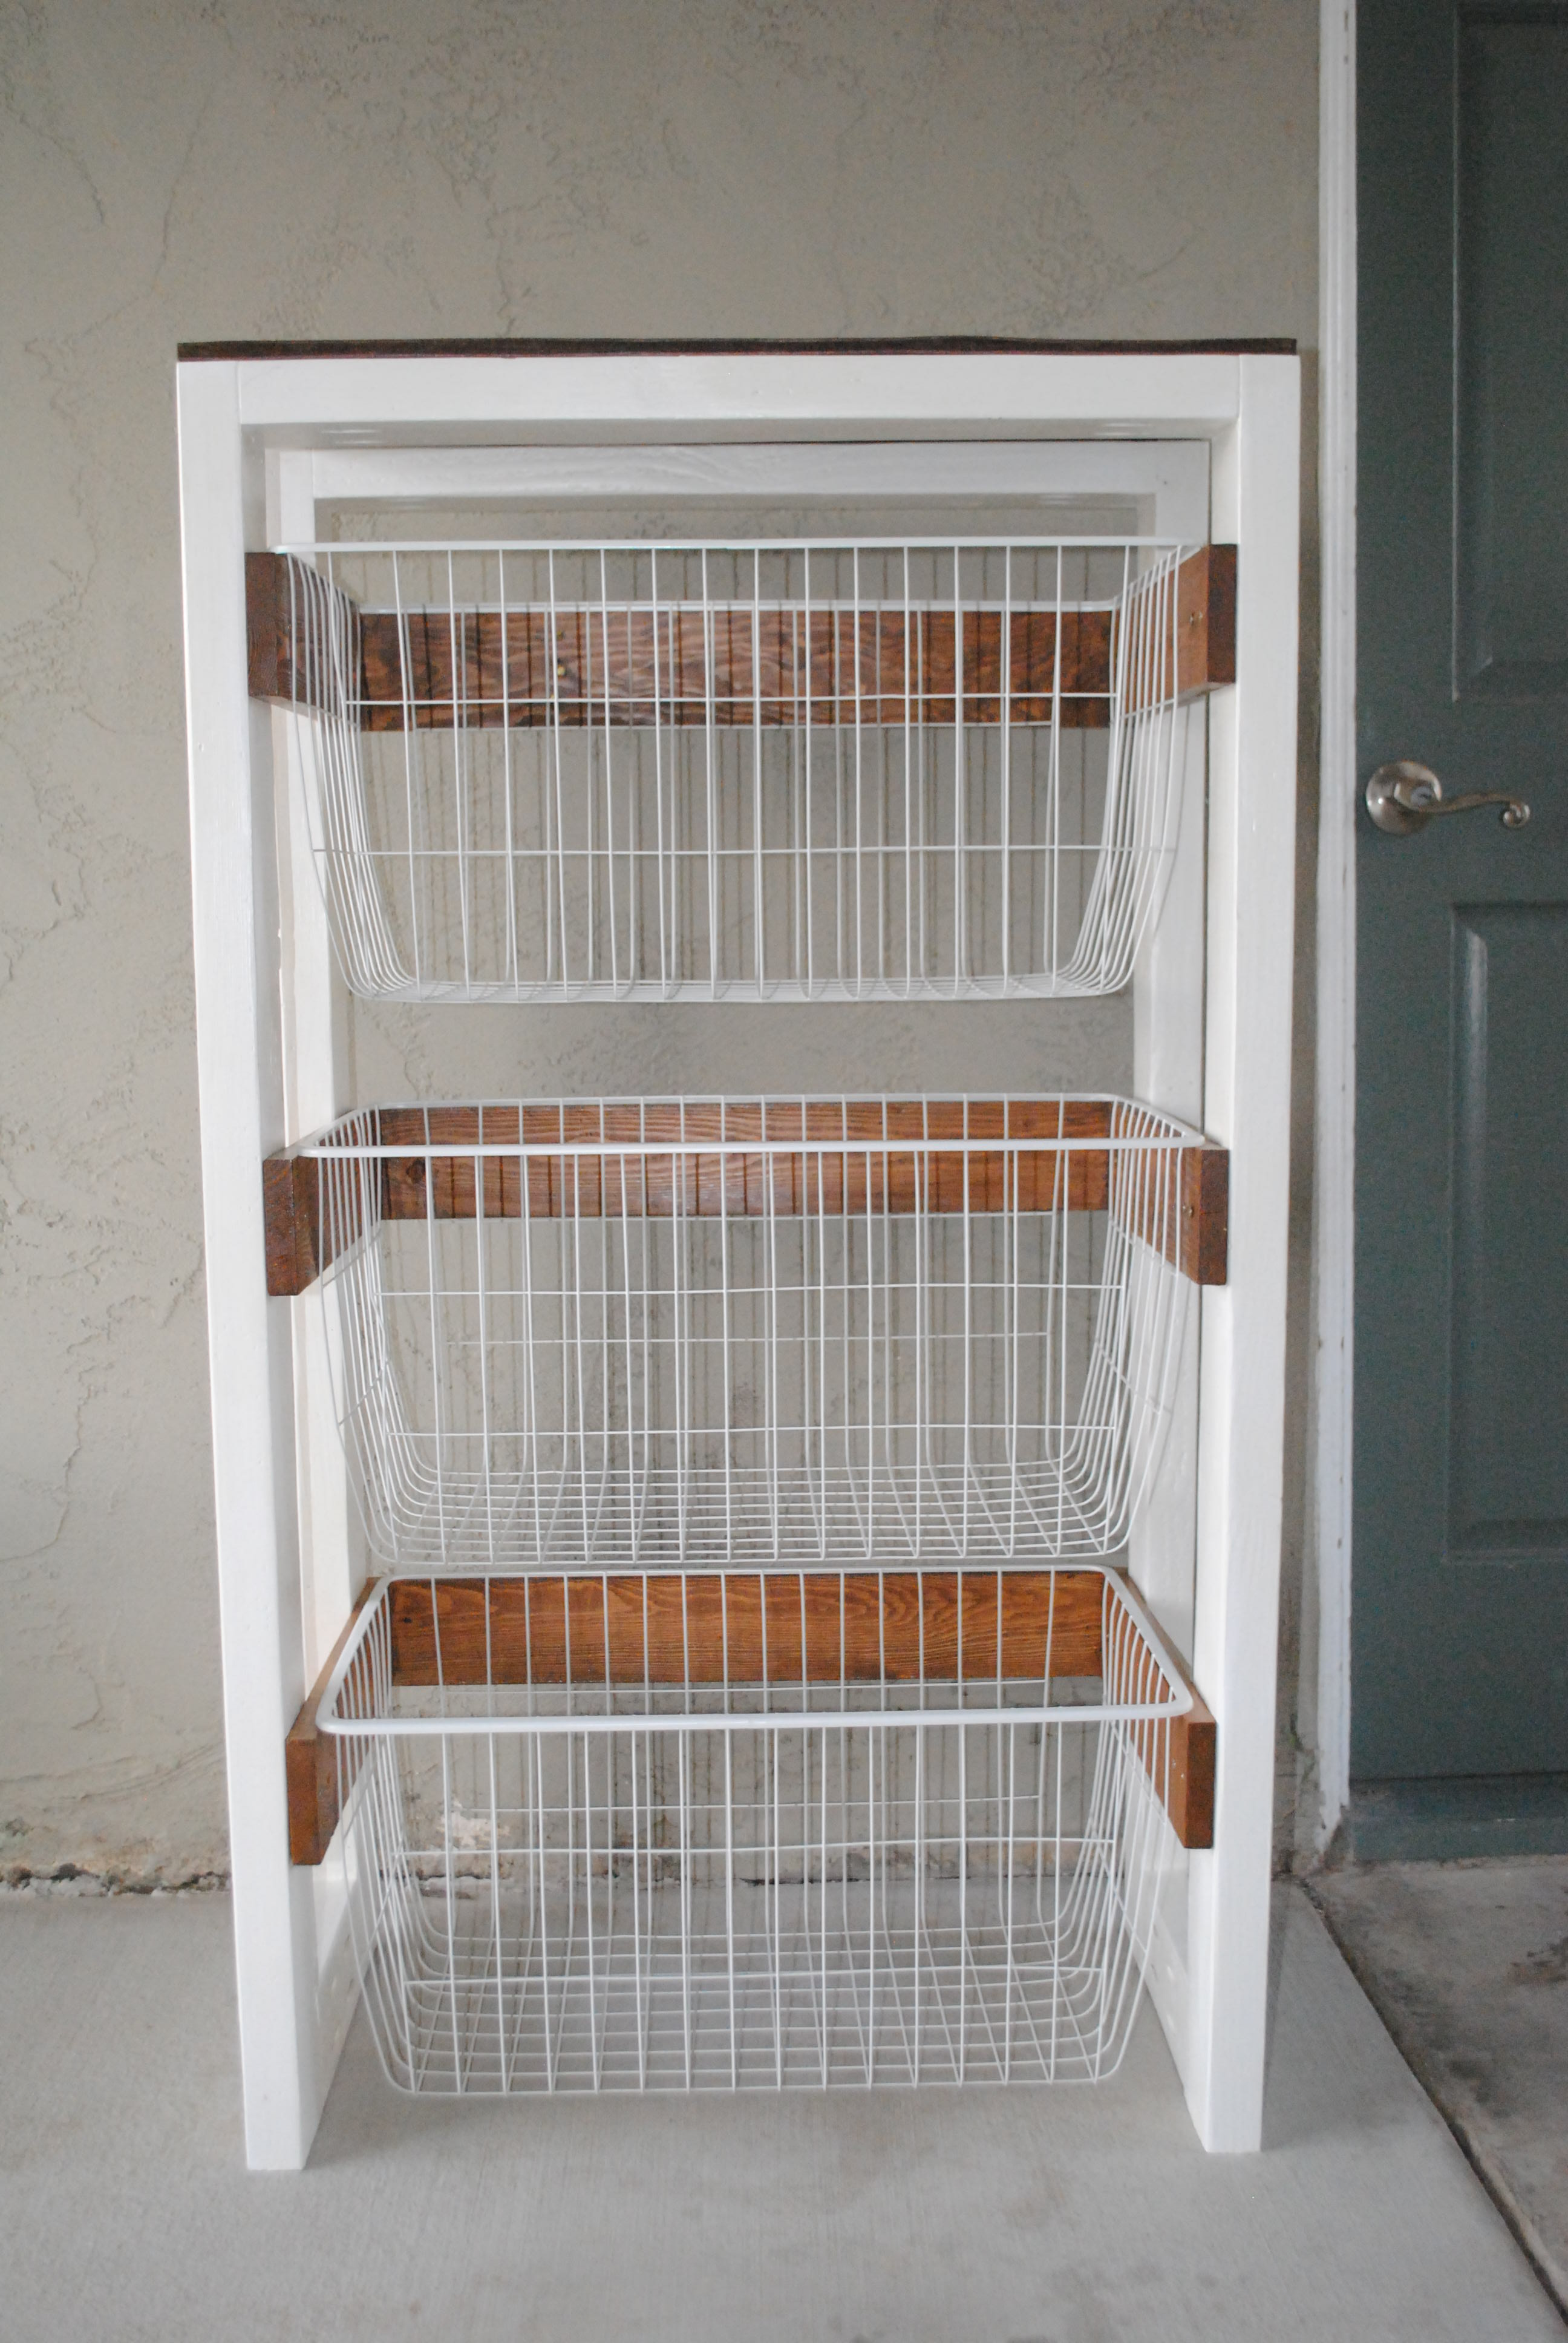
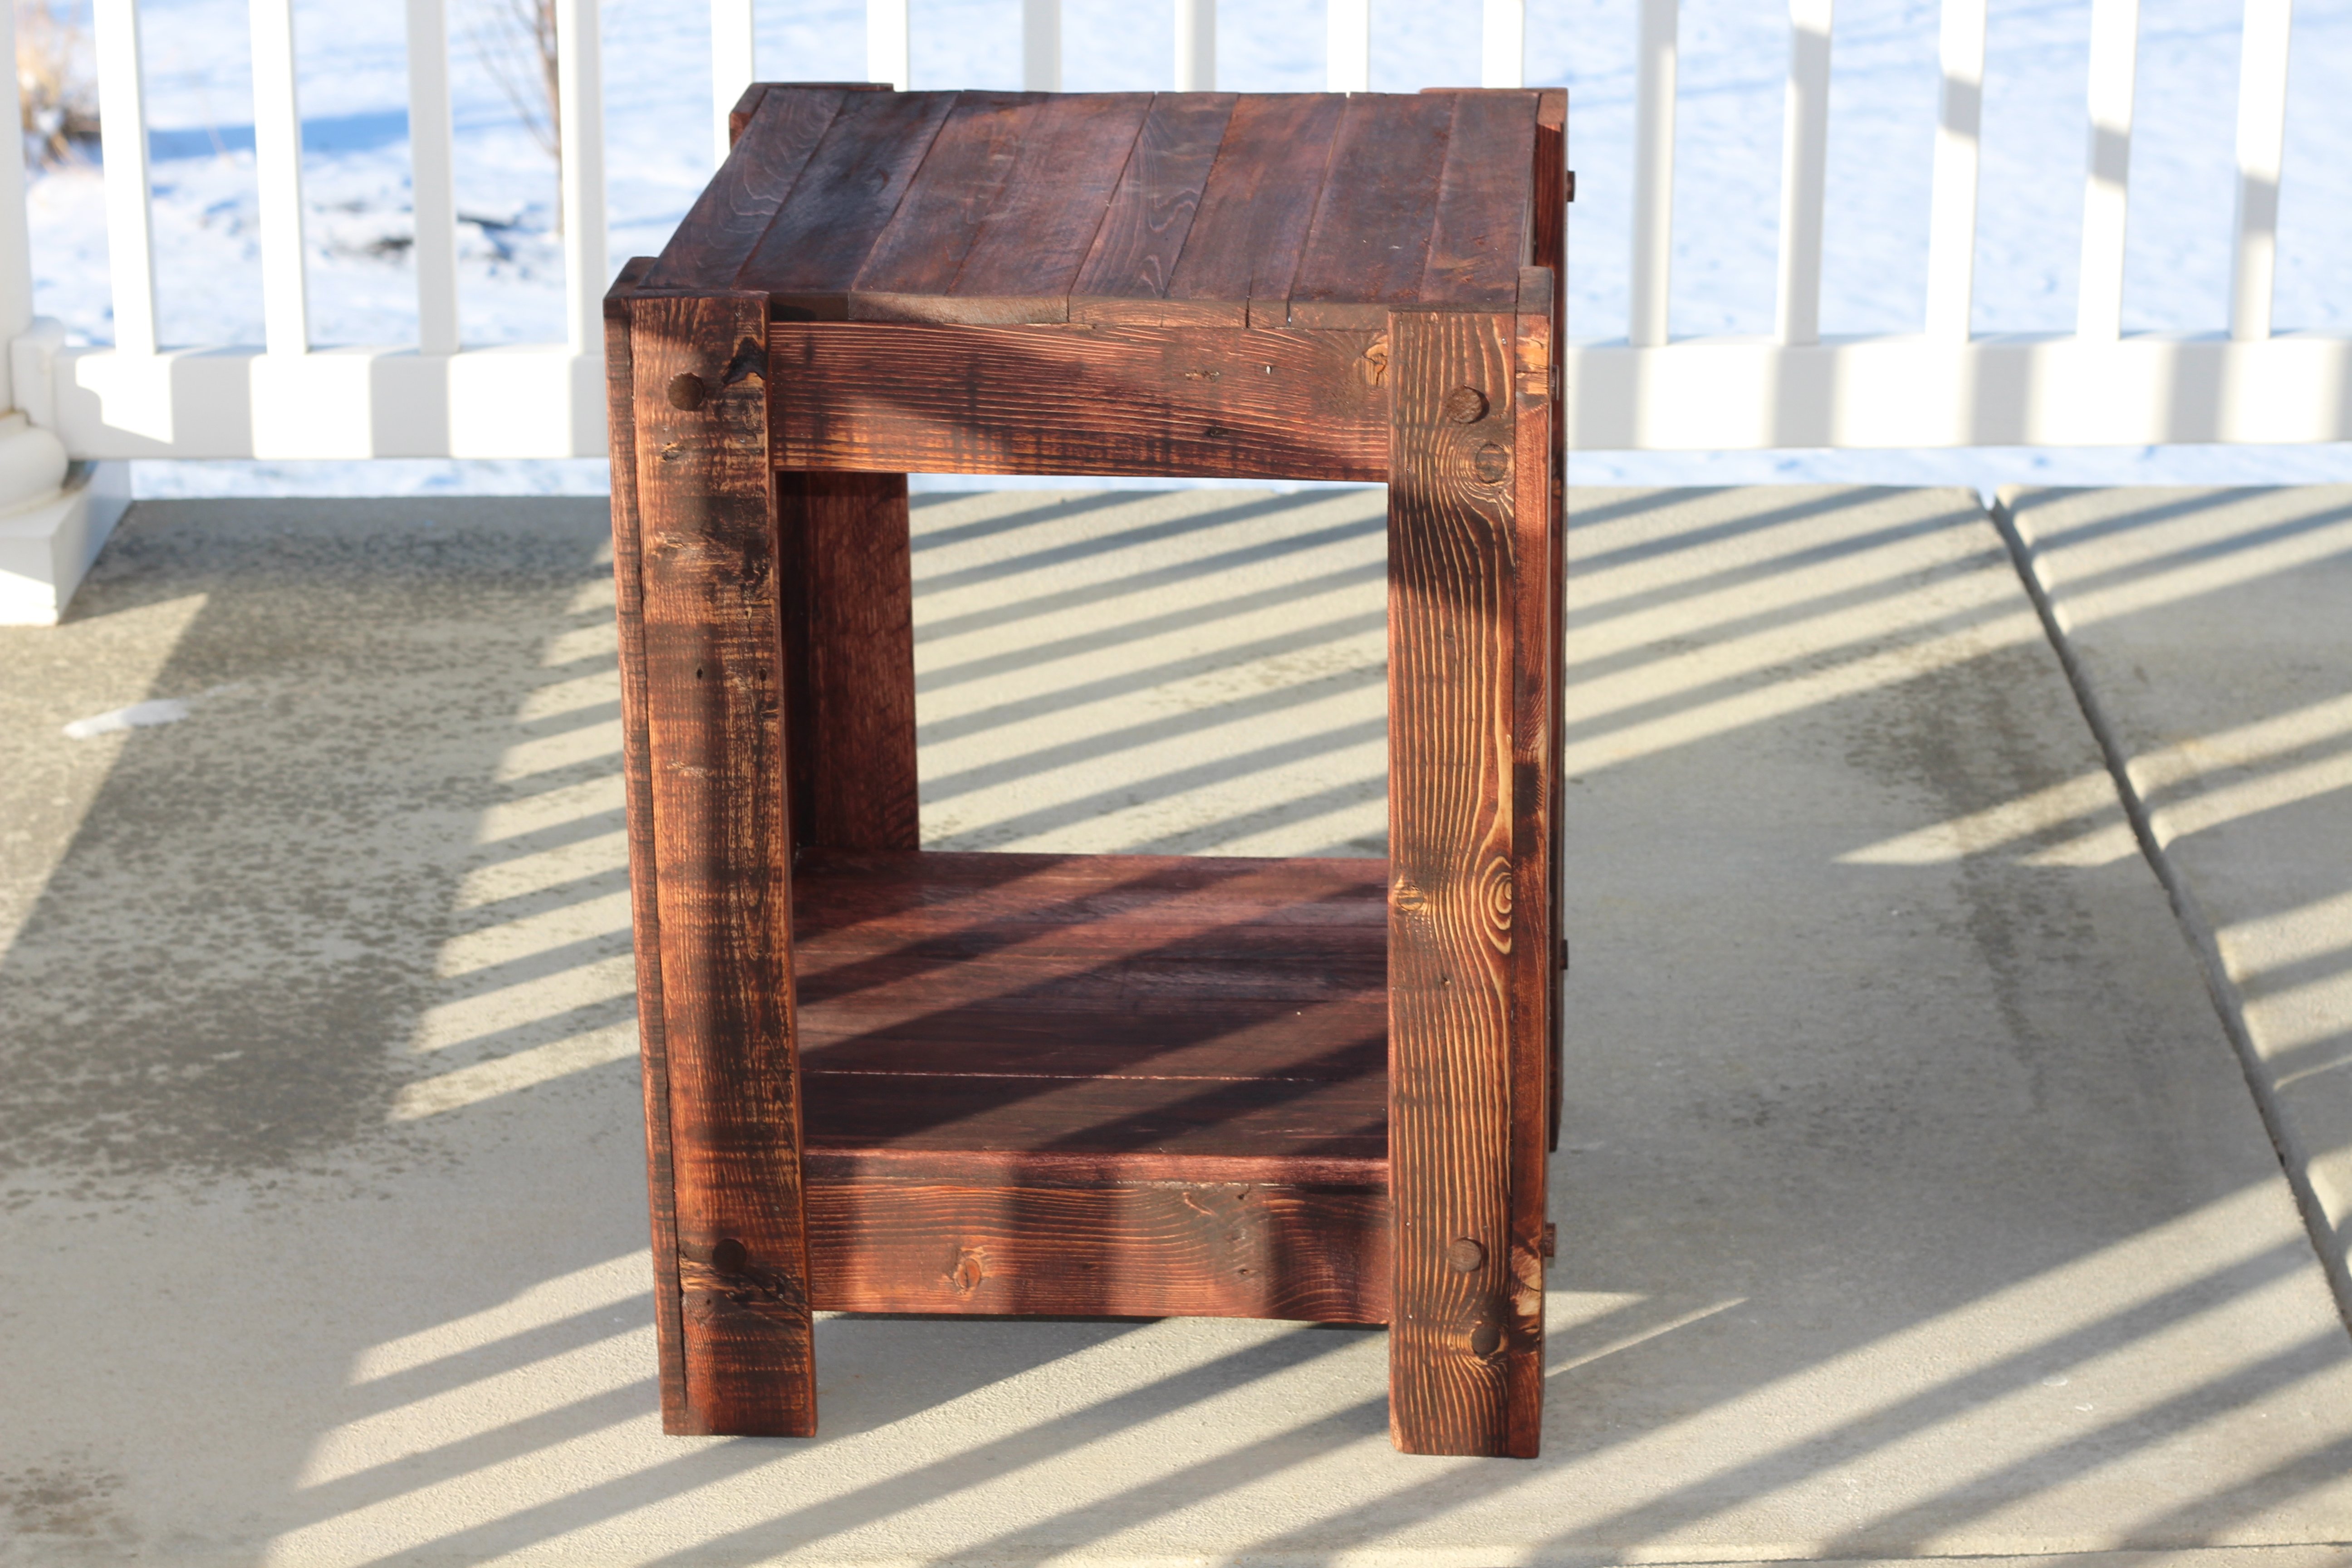
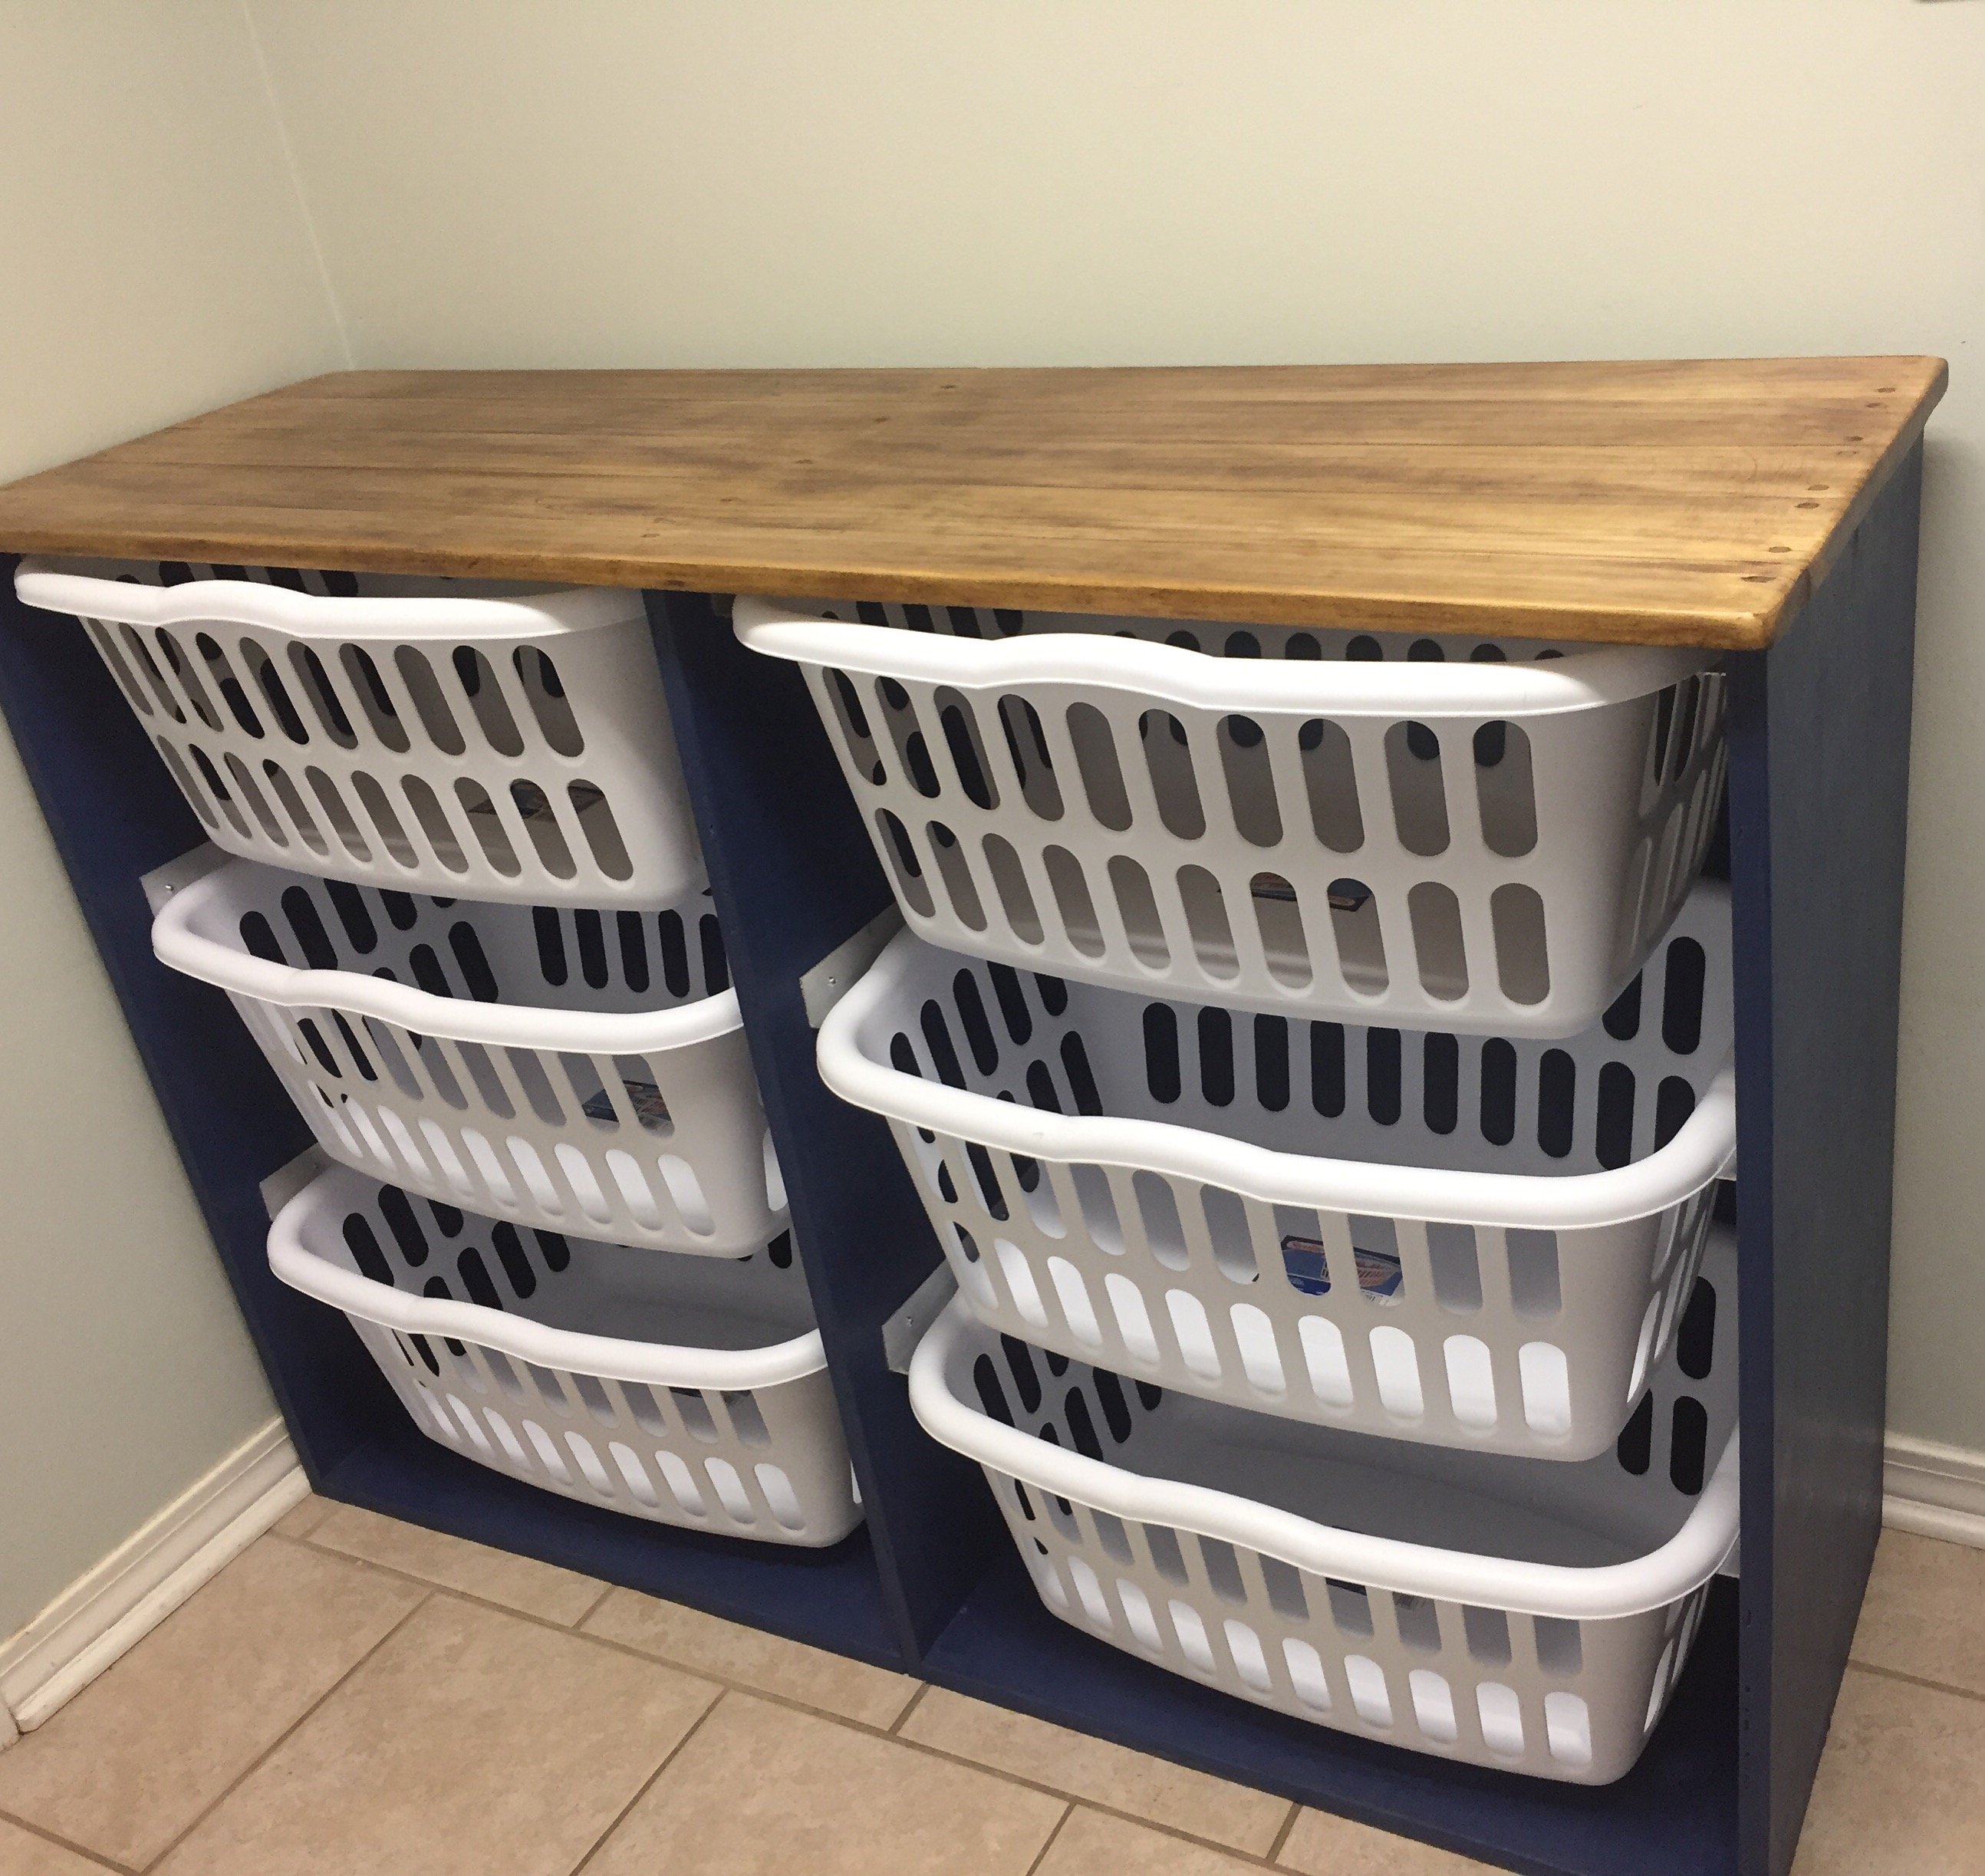
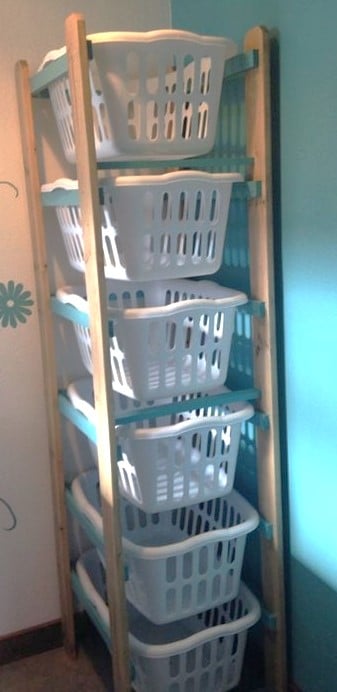
I built this project totally from pallet wood and leftover 2x4's. I already had the paint and stain from other projects, so the only cost was for the baskets, which were $6 a piece at Ikea. This project turned out even better than I expected and I couldn't be happier.
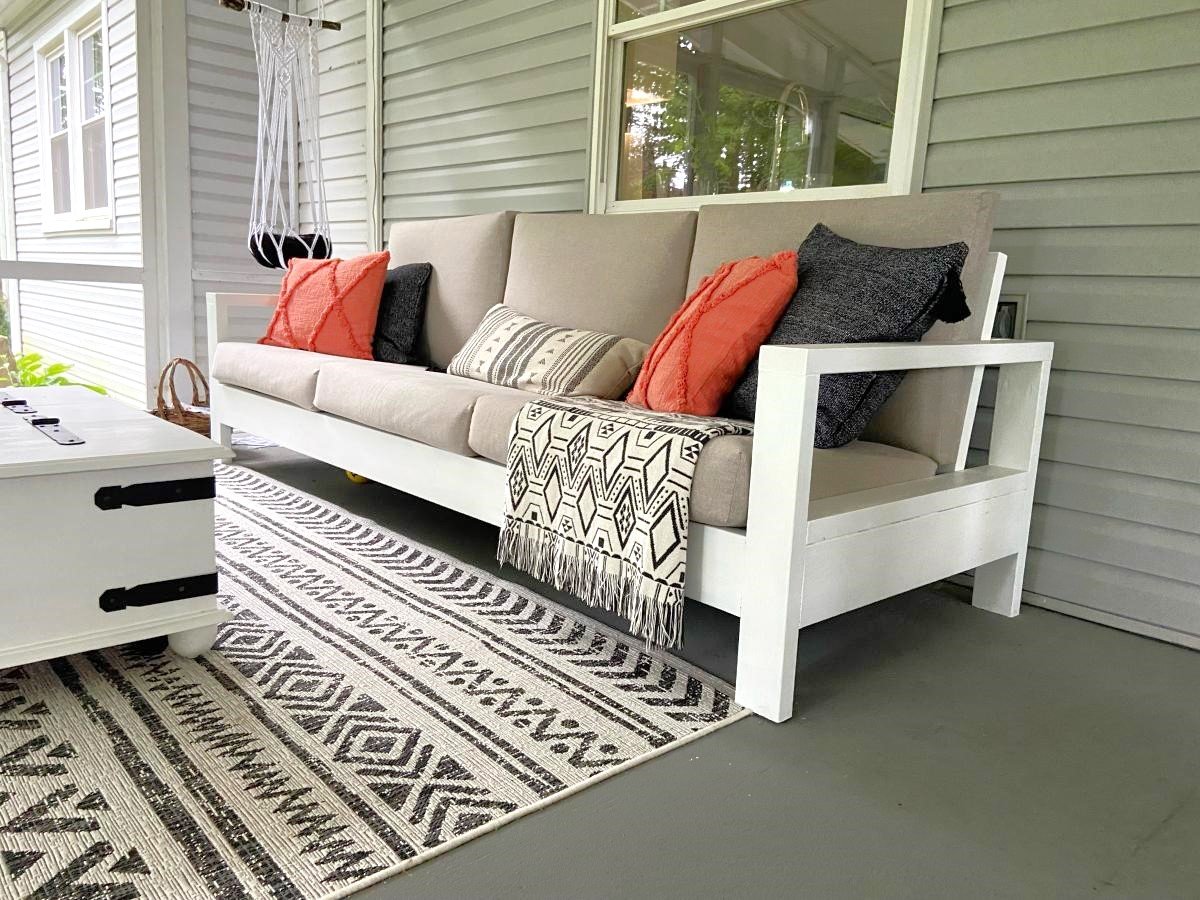
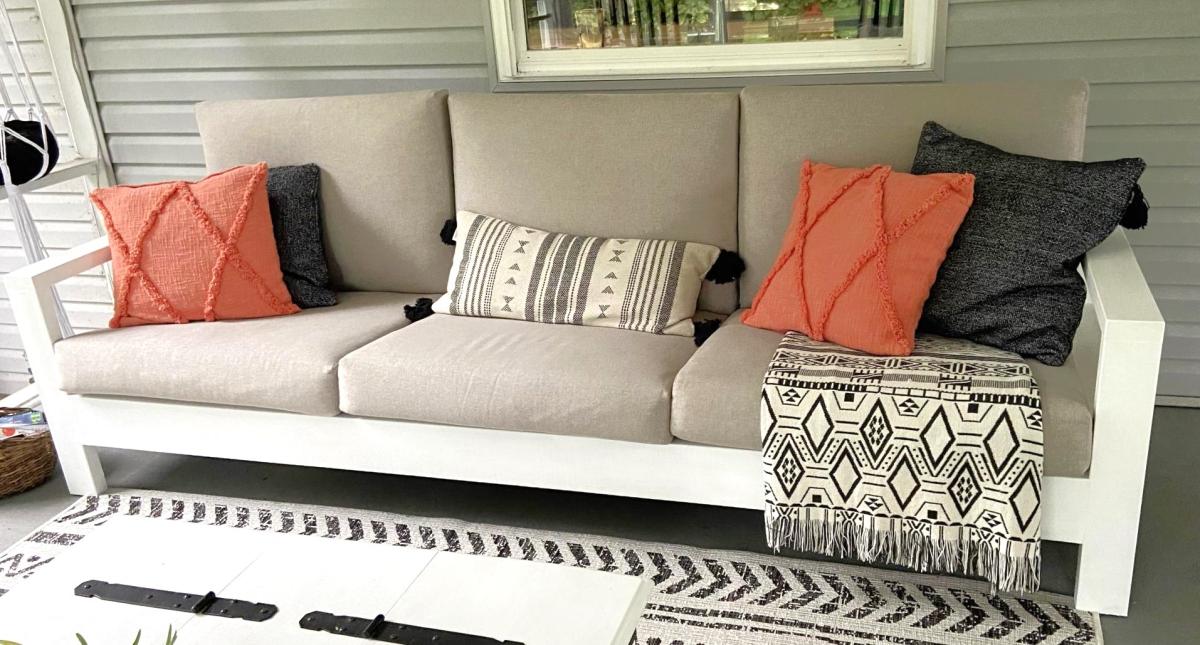
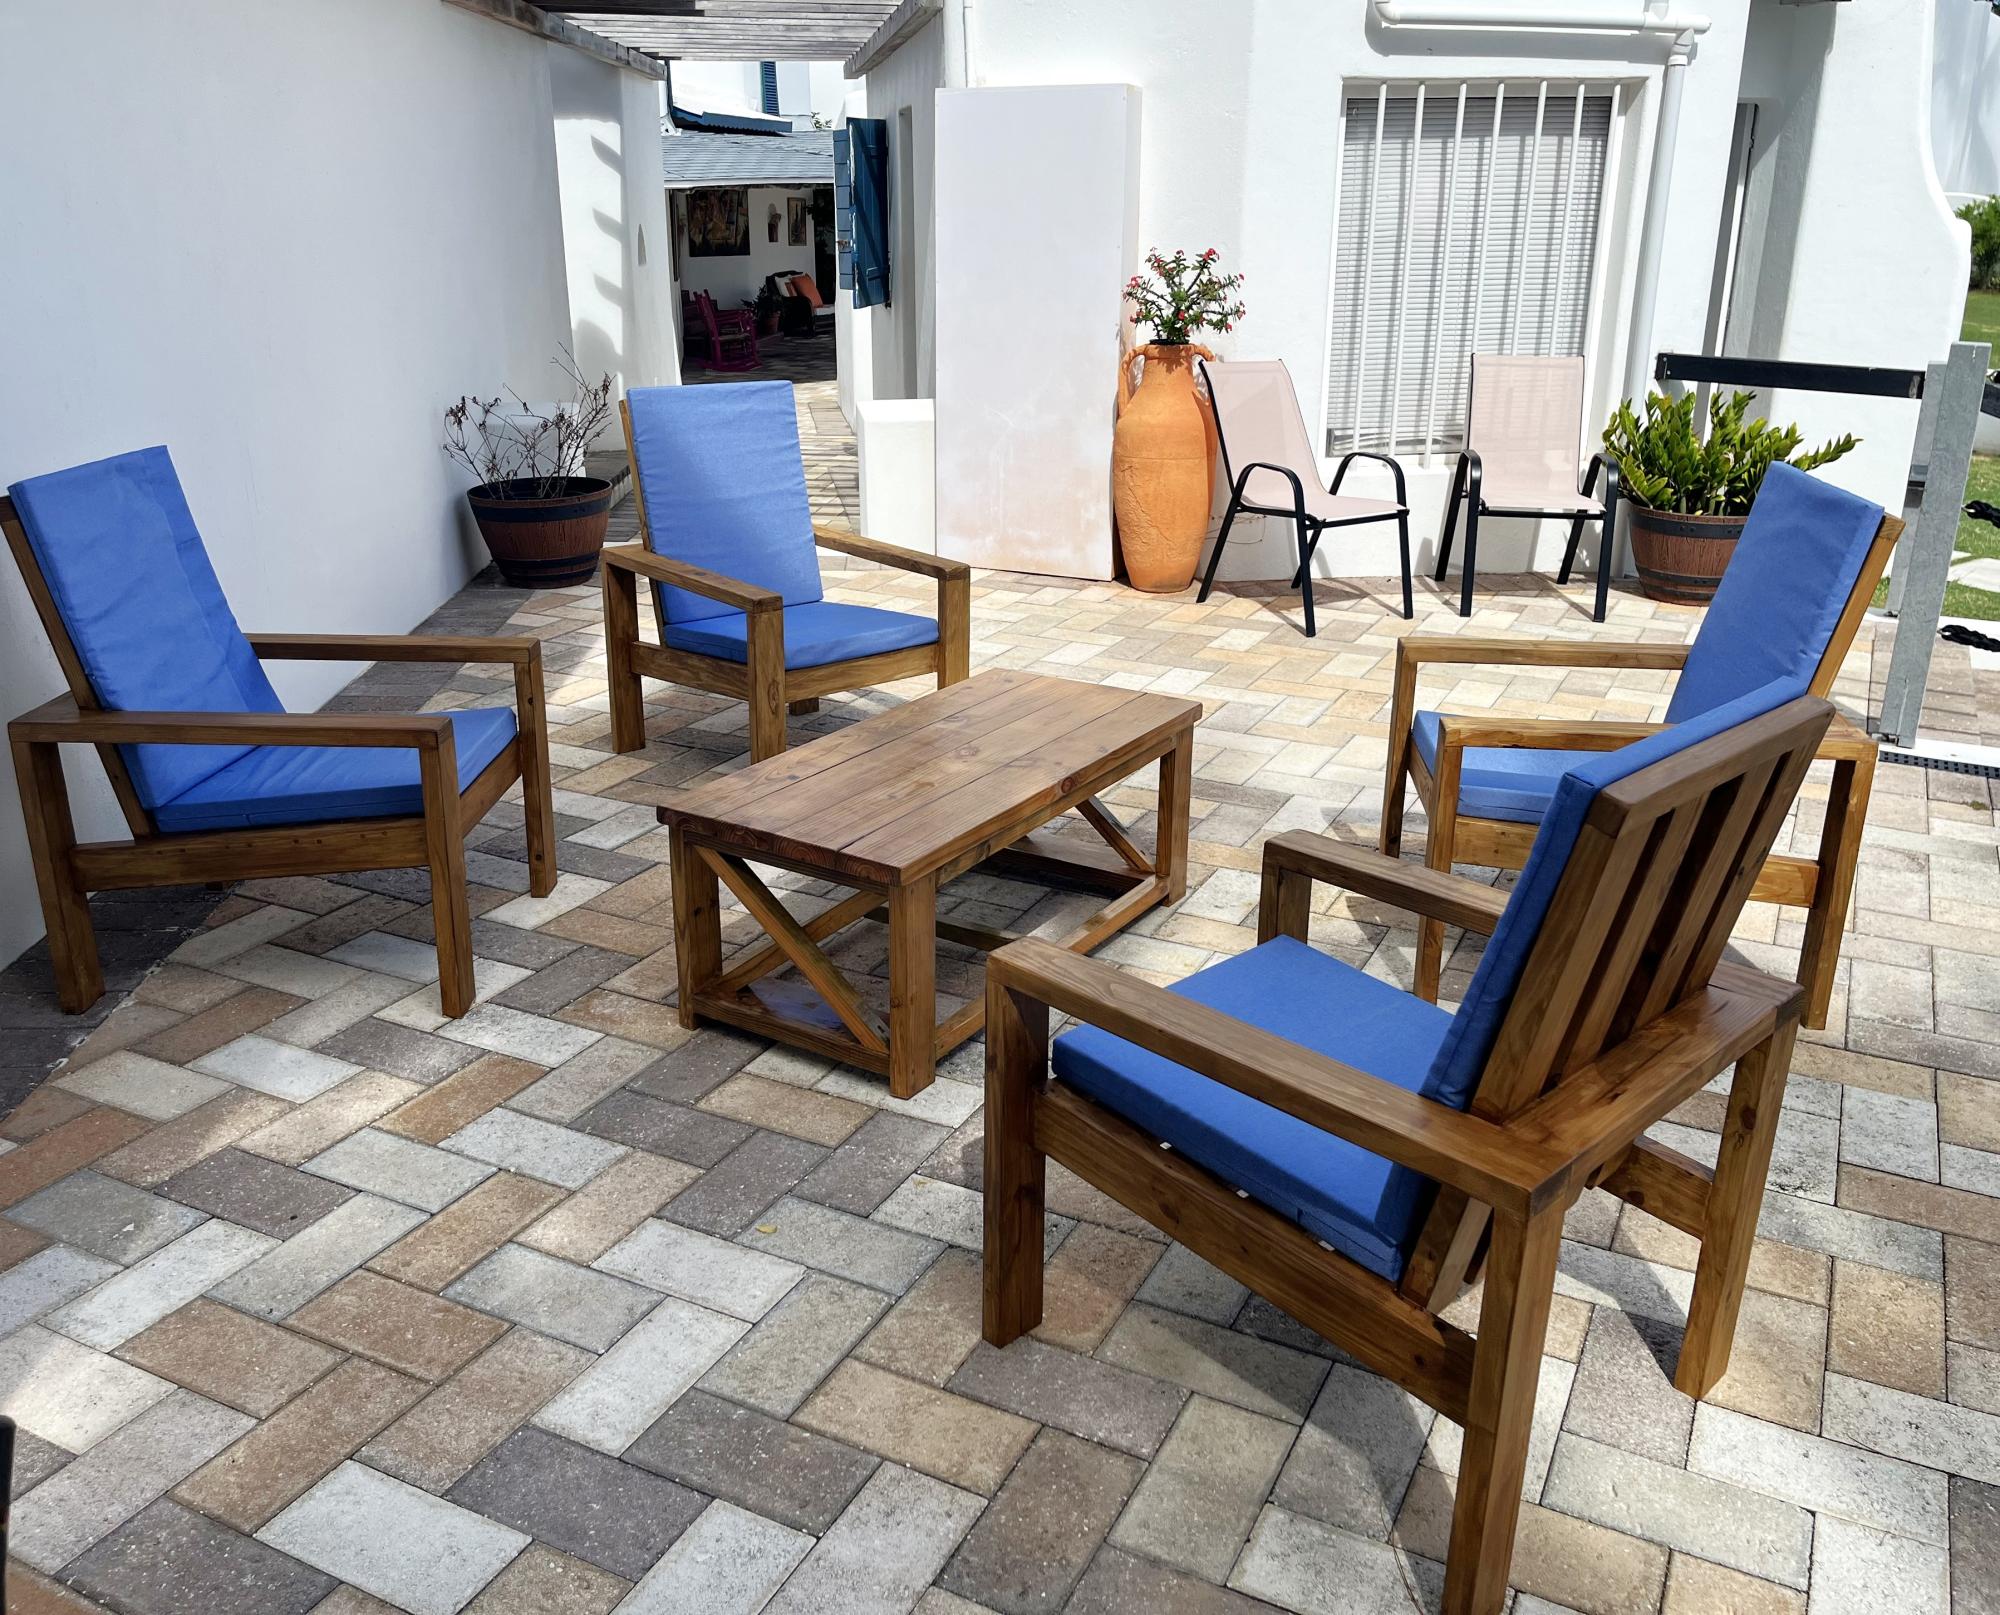
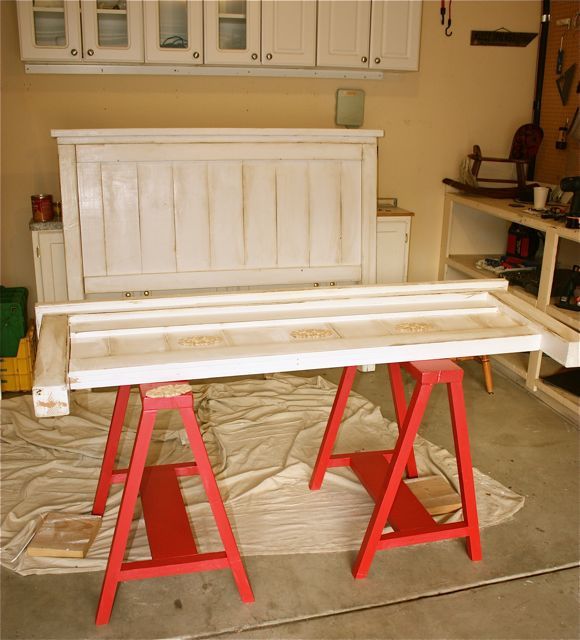
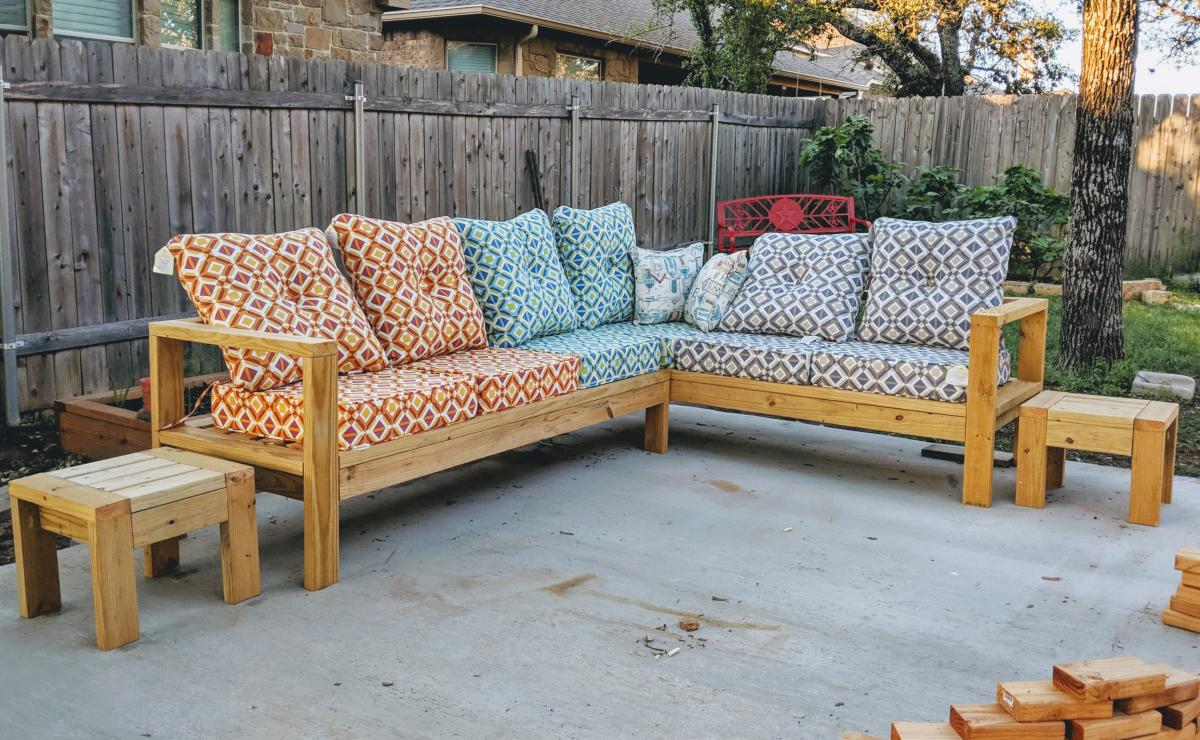
This was our first big project with our Kreg Jig. We adapted the plans to make the sofa 8' long. On Friday night, my husband did all the cuts and I pre-painted everything. With the help of our son, we had the whole sofa built in a few hours on Saturday morning. I puttied the visible holes, did a second coat of paint, and made custom cushions. The plans were very easy to follow. I followed the others' advice about pre-painting and assembling the back on a perfectly level surface. It came out better than I expected and it's super comfortable!
Sun, 04/10/2022 - 10:33
Thank you for sharing, it looks amazing! Would love to hear how you made the cushions.:)
Mon, 04/11/2022 - 07:44
I want the plans for this one! I like this style a lot better. I really like how the bottom cushions are at a slant. I suck at modifying plans.
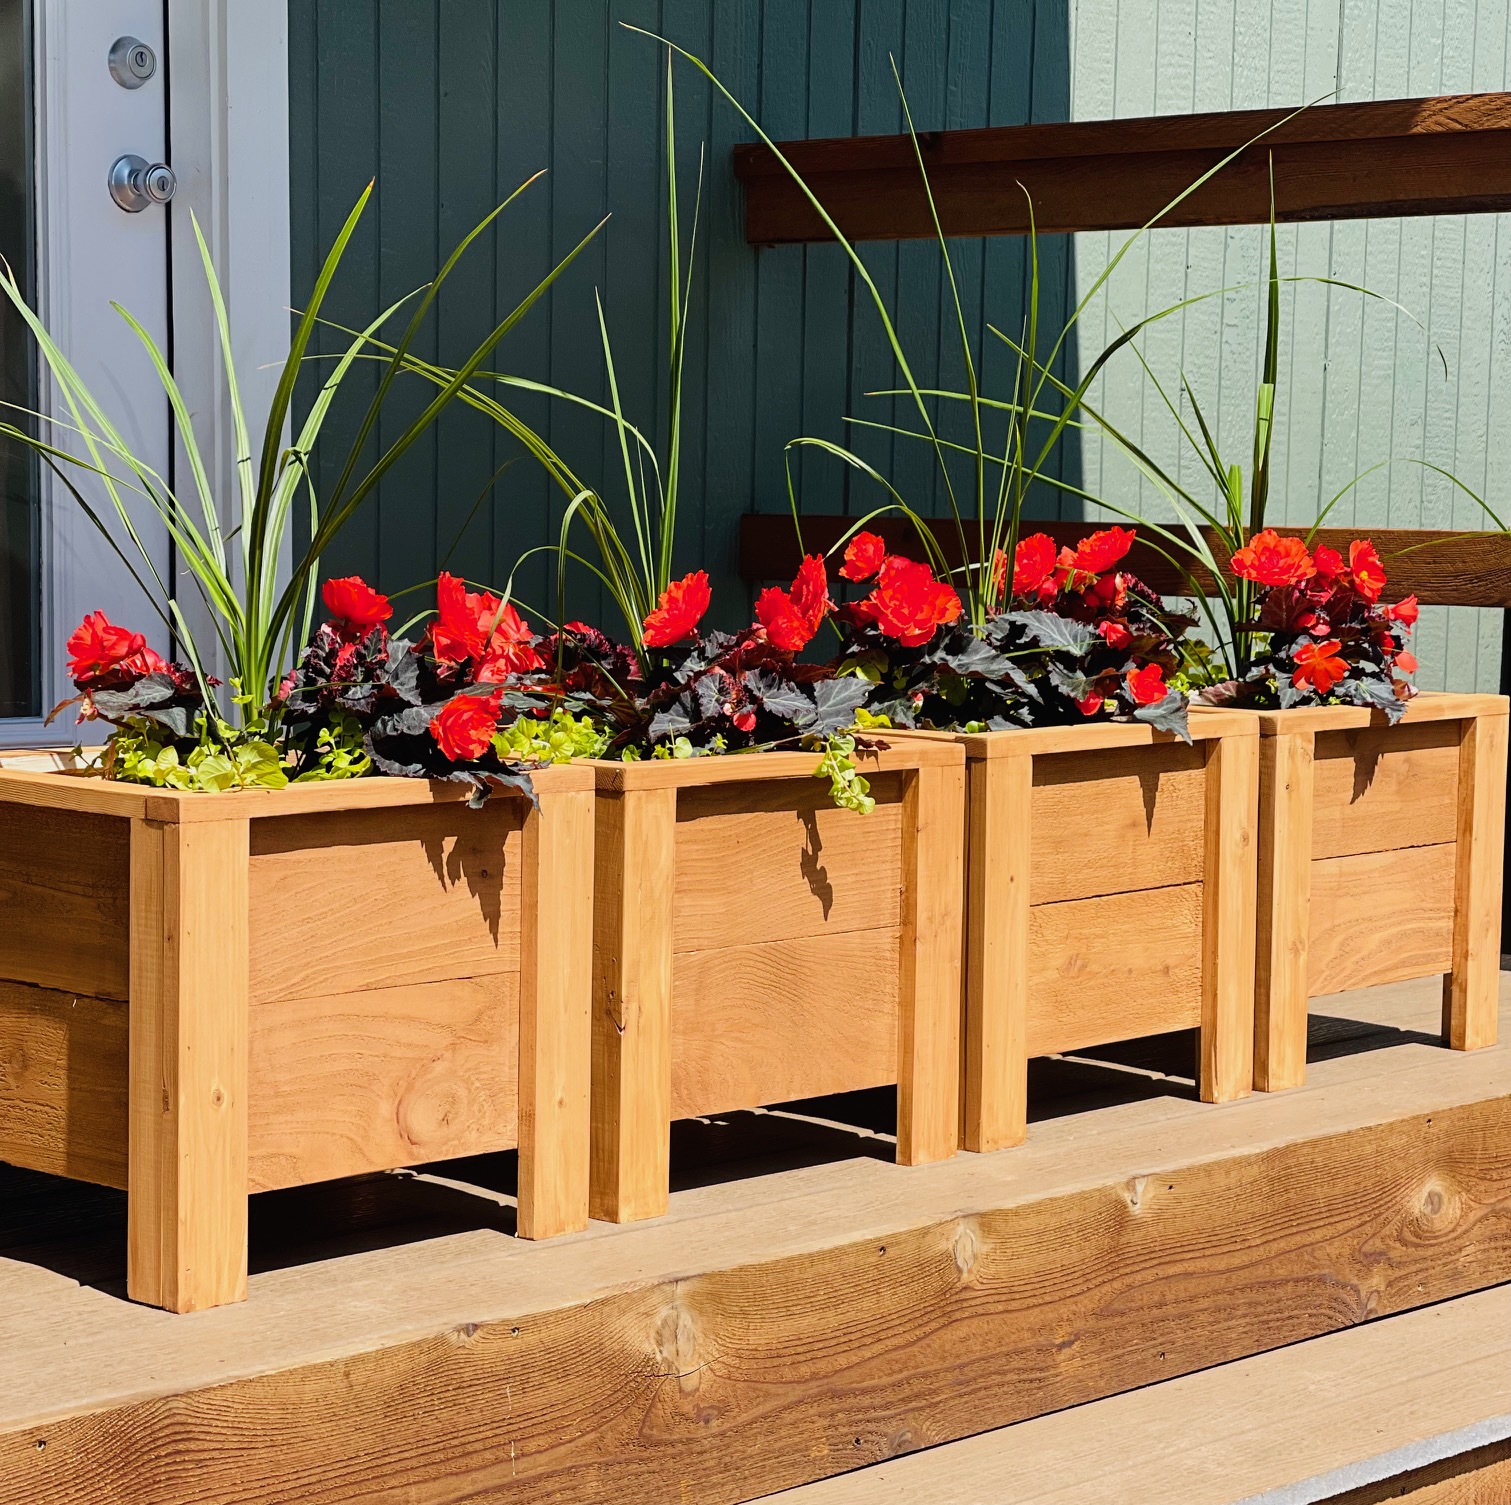
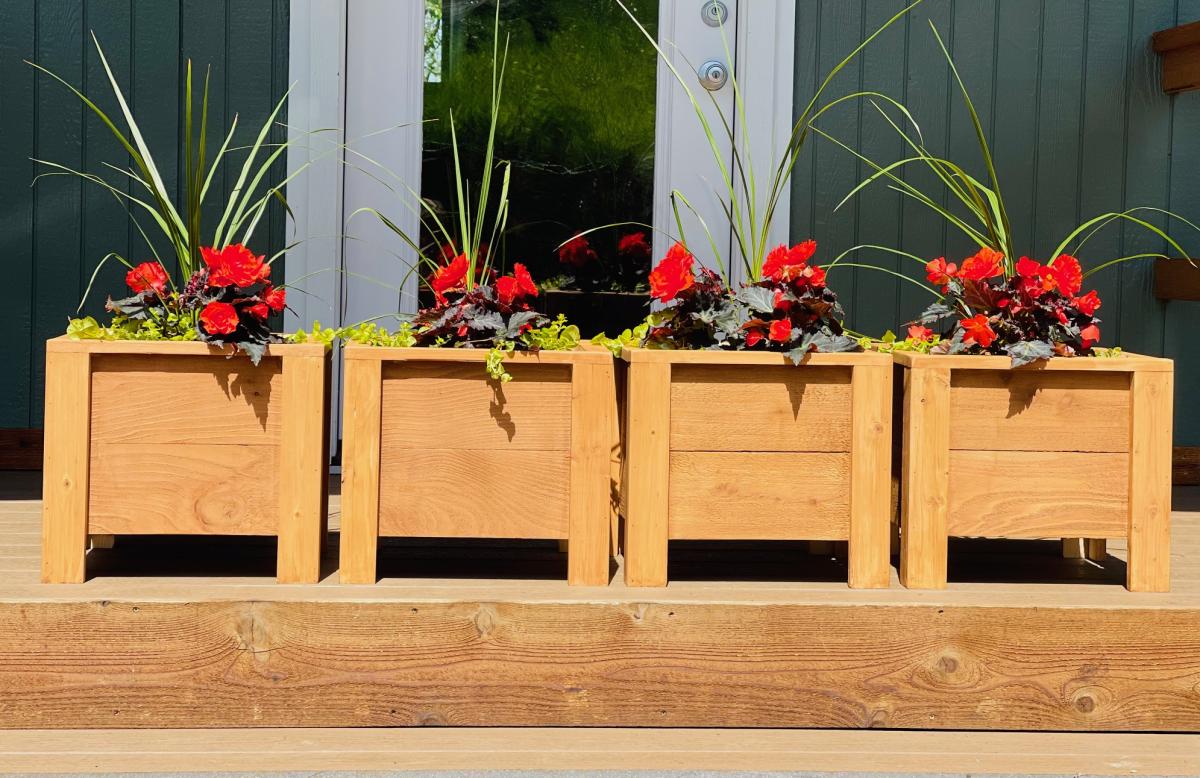
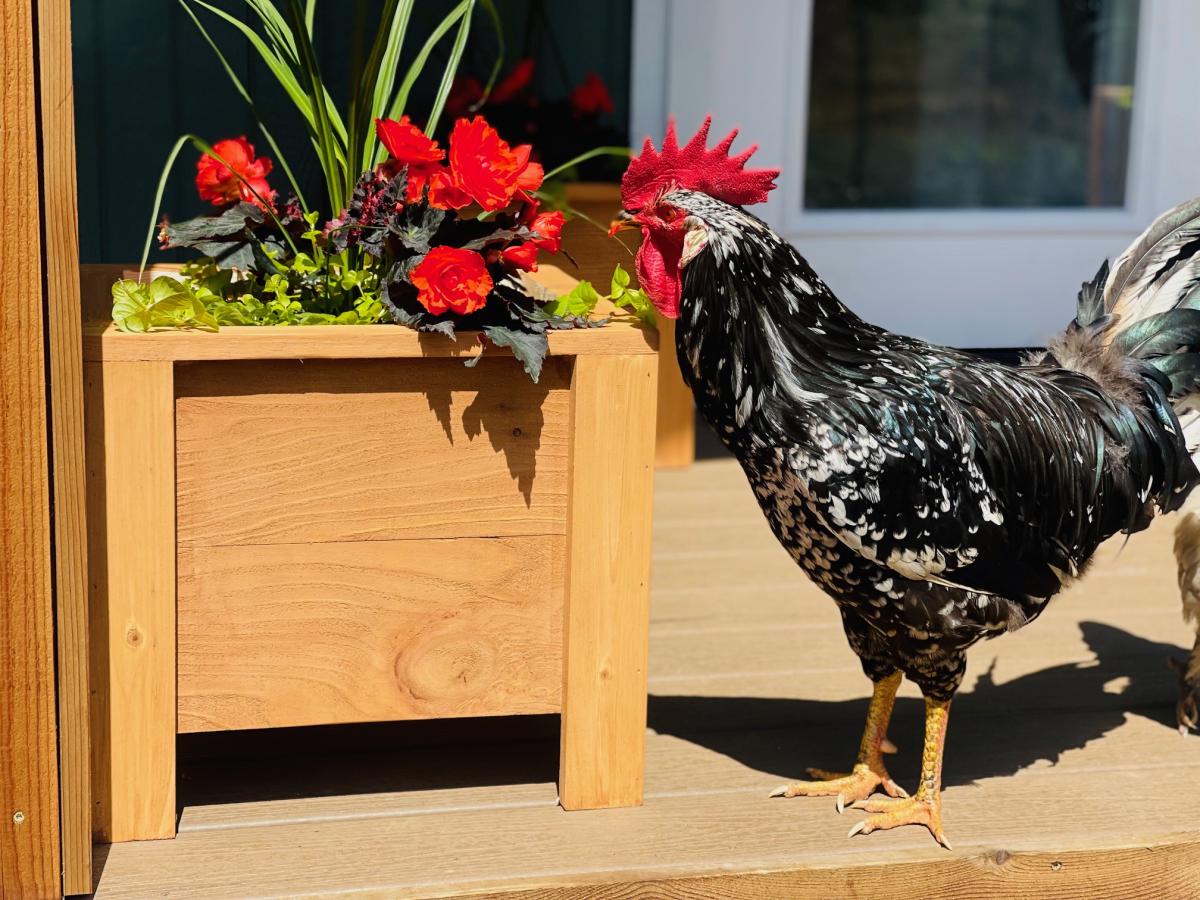
I've been wanting to build this plan for quite some time! Took me about 2 hours to build and 1 hour to finish. Giving these as gifts for Mother's Day! Total cost was about $15 per planter. I scaled down the design after I found the plants I wanted to put in them. Ana has the best and easiest plans!

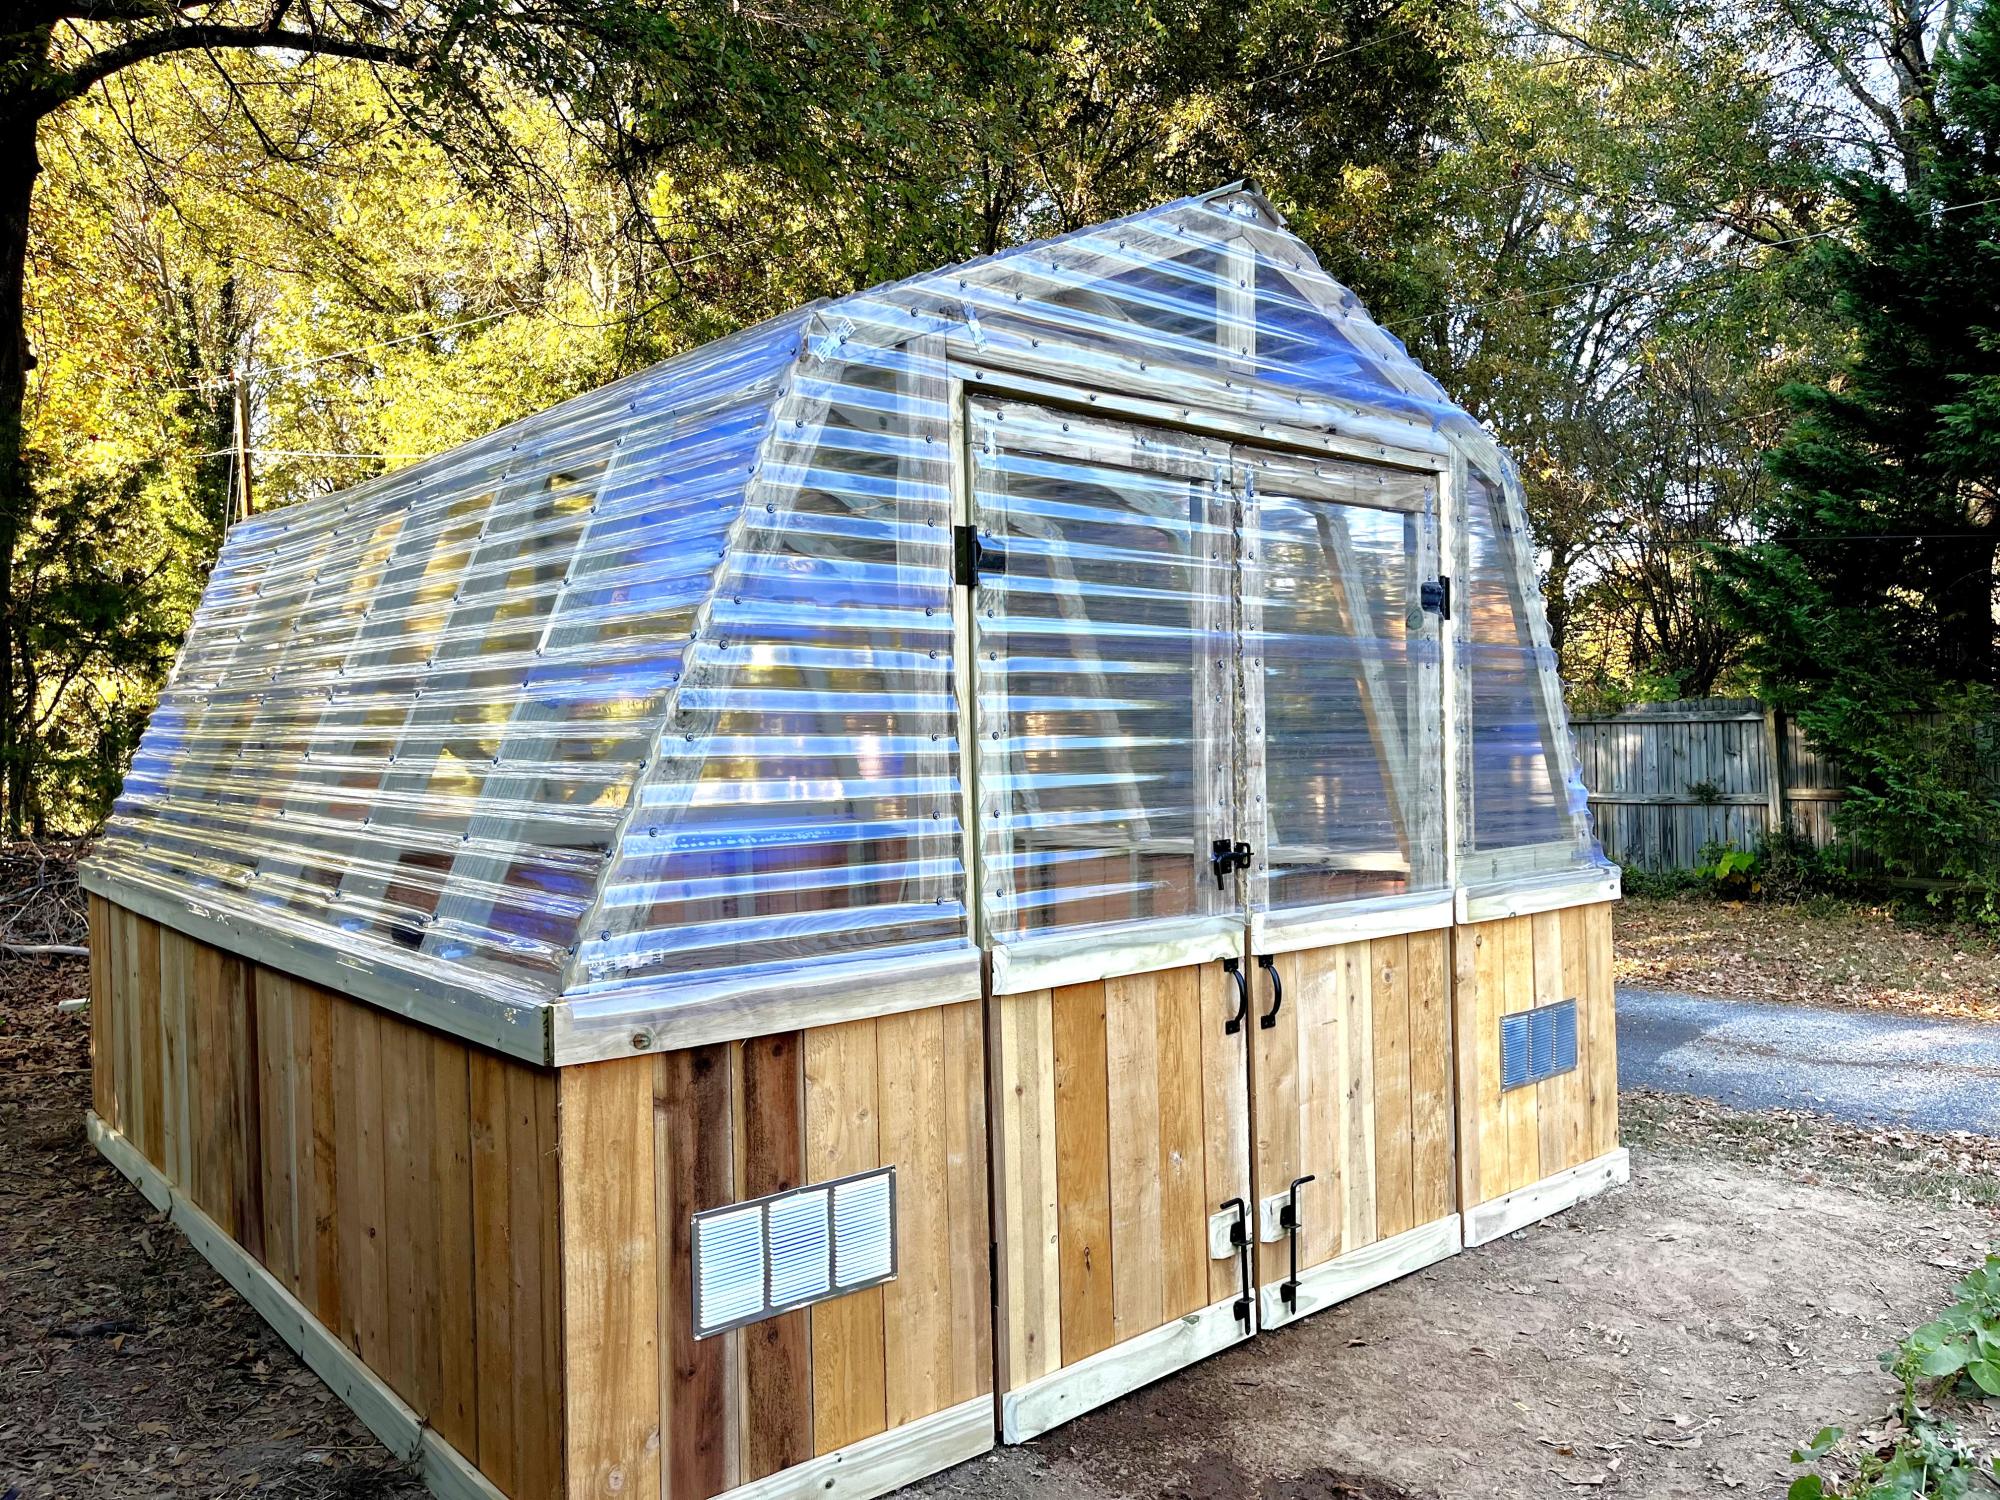
I loved this plan so much but I really wanted double doors so we made a few modifications to fit them. Can’t wait to build out the interior and start growing! Thank you for the amazing plans!
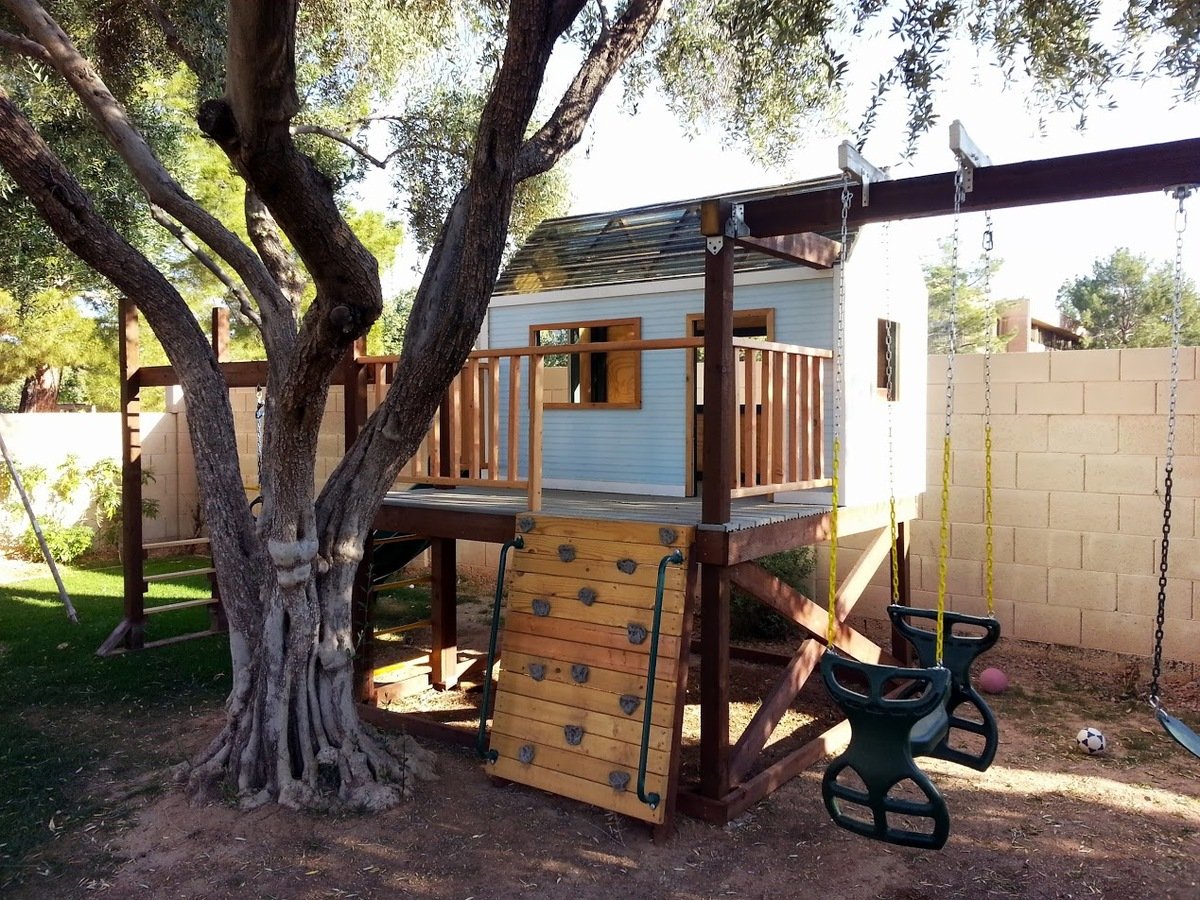
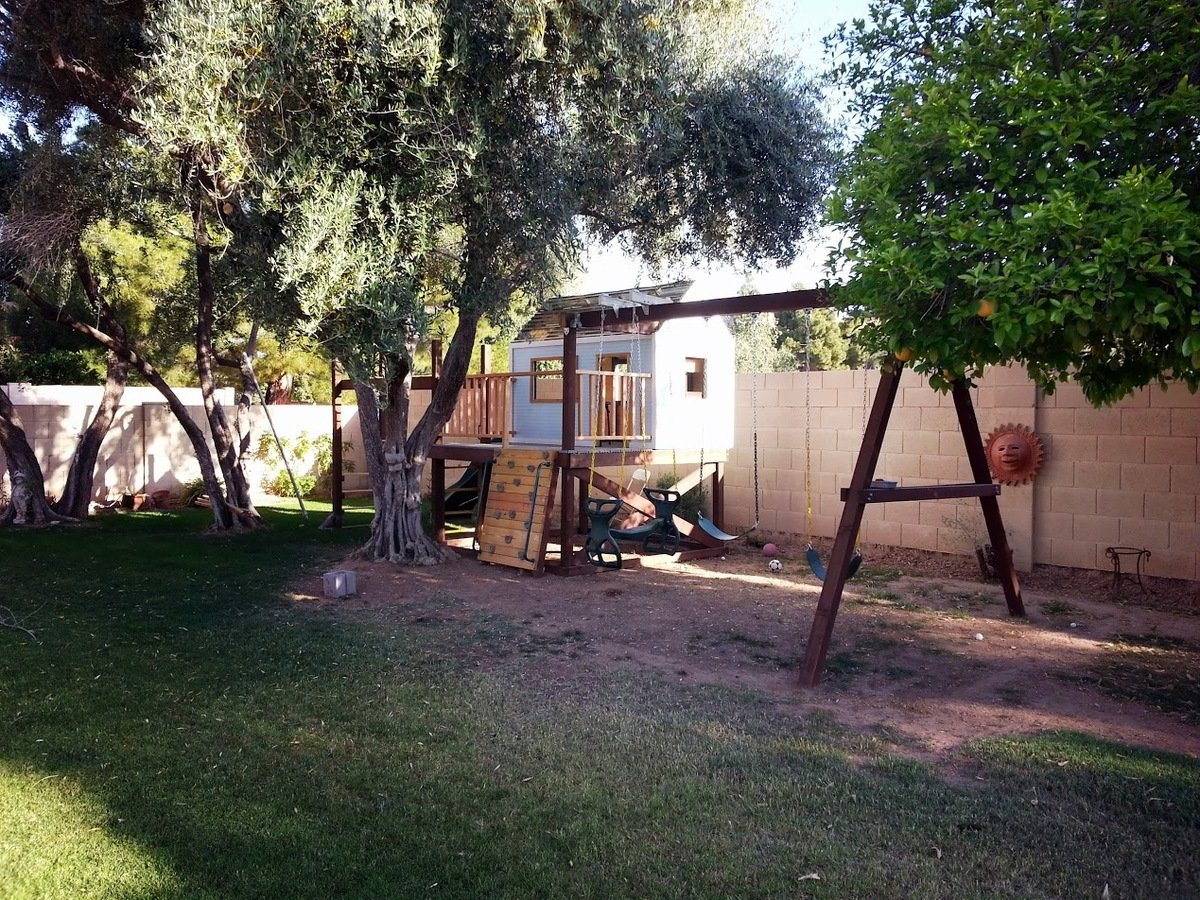
My second building project... this one took quite a while, building in the evenings after the kids went to bed.
The playhouse is based off of Ana's Playhouse Building series, with some modifications to fit the space in my backyard and accommodate climbing wall, monkey bars, and slide.
To put the main deck structure into the ground for sturdiness while protecting from moisture, I dug out 5 holes to fit single hole cinder blocks (4 corners plus an extra 4x4 for the monkey bars; you can see an leftover block on the ground in one of the pictures). I placed some brick in the holes, then the cinder blocks on top. I then partially filled the cinder blocks with sand, put the pre-built deck in the cinder block holes (with help - it's heavy!), and then filled the rest of the cinder block holes with sand. It's worked remarkably well - the deck has been up for about a year now. I also sprayed some clear waterproof sealant on the bottom part of each beam near the ground for extra protection (deck, monkey bars, climbing walls, and swingset A-frame). This has allowed me to still run sprinklers near/around the playset and even grow grass underneath the swings!
Materials used:
* Playhouse: pine, plywood, Suntuf solar grey polycarbonate corrugated roofing panels (I live in Arizona, so little rain to worry about but lots of heat - the sheeting lets light in but blocks most of the UV rays, corrugated shape also provides venting at top when placed sideways)
* Deck/Swingset/Monkey bars: treated lumber, composite decking, pine for railings, monkey bars purchased from Amazon
* Climbing wall: pine, treated lumber, handholds/railing bought off ebay/Amazon
* Swings/slide/bongos/wheel, telescope: purchased from Amazon
Modifications:
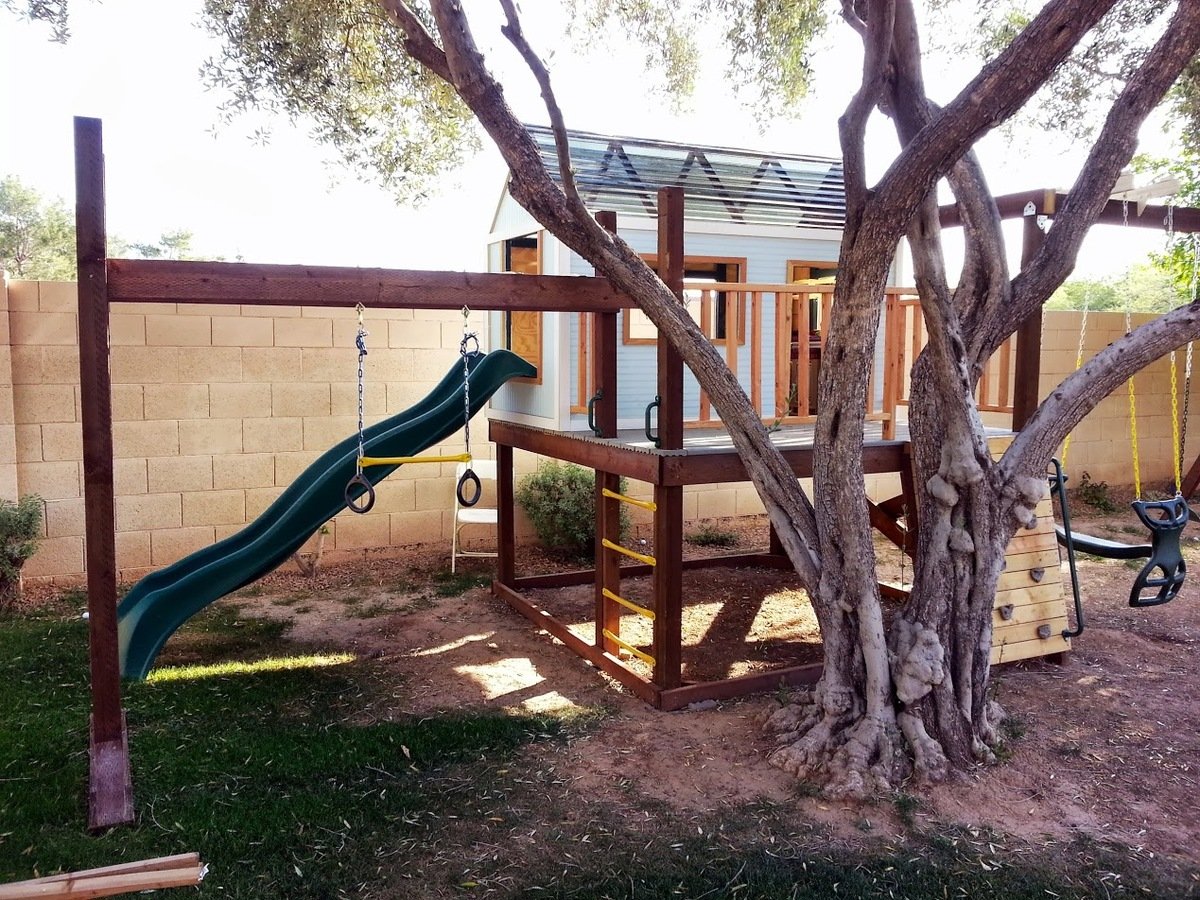
* Turned playhouse 90 degrees to be in back of the deck, with swingset coming off the side. This meant the support beam for the swingset had to pass through the playhouse - modified the frame for that wall slightly and created a notch for the beam to pass through.
* Slide comes out one end of playhouse - made the "window" on that end larger than the plans called for in order to give room for the slide.
* Monkey bars come off one side of the deck - used extra 4x4 here to create support for the bars, and used extra bars to make a ladder on this side
* Climbing wall instead of ladder for main entrance
* Put large window in back wall of the playhouse
* Added cross bracing to side of decking on swingset end to make it more solid/cut down on sway when swinging

Tue, 04/29/2014 - 20:41
This is phenomenal - just the plan & design we've been looking for. Can you upload a few more pictures? Any sketches you can provide? Shopping list? Really great job - I hope your kids love it. It looks awesome.
Wed, 09/10/2014 - 14:03
Thanks! It's certainly nestled in right behind that tree - I originally was going to place it in between that tree and another one but then decided to just place it behind them in order to take better advantage of shade (critical in AZ) and fit in everything I wanted to put on it (monkey bars, swings, slide, climbing wall)

Mon, 07/08/2019 - 00:48
We've been looking at these type of players for our son, and good grief! Prices are astronomical for playsets that are NOTHING like this. This absolutely an amazing place for those boys to make memories. You're amazing! Do you mind if I ask what it cost once it was finished? I never imagined that it would cause a tic in my eye to look at the kids from Lowe's or anywhere else for that matter.
Tue, 08/20/2019 - 10:14
I don't remember how much it cost in the end... but probably around $900? That may include getting some tools that I needed but didn't have at the time. The slide was the most expensive single piece I bought - I think I got it from Amazon.
When it was all done, I remember thinking that what I got for my money was *way* beyond what I would have gotten by purchasing a kit or a pre-built play structure. Plus, by going my own way, I was able to build it to fit my space and the needs/abilities of my kids.
While the whole thing is big and looks like an intimidating build, it really isn't bad - the platform is a fairly blank base to design everything else off of, and is incredibly sturdy. Everything else is a discrete part that branches off of the platform and can be planned out as you need. Adding the monkey bars required putting in a 5th upright (the first 4 are the corners), but that was an easy modification since I knew I wanted it before building the platform. The playhouse just sat on top of the platform (screwed down, of course).
Sat, 08/01/2020 - 20:40
Hello. This is pretty cool, probably the best modification that I am looking for from Ana's default plans. Could you please add some more detail on the right side wall, and how you incorporated the support beam through the playhouse? (with maybe a picture from inside of that wall). And secondly, if you can add the dimensions for the monkey bar setup on the left side of the deck? Thanks, much appreciated
Great outdoor builds!
by Dennis
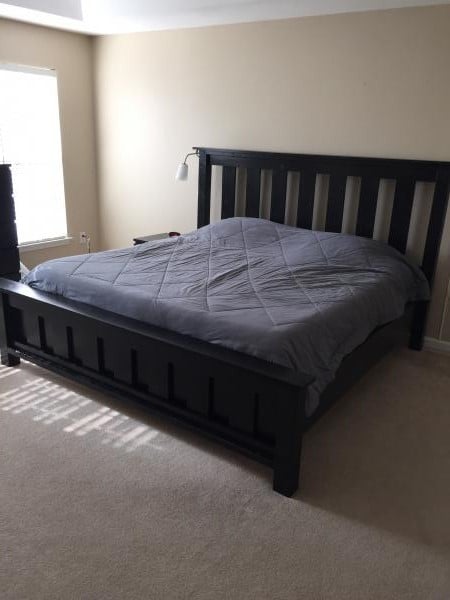
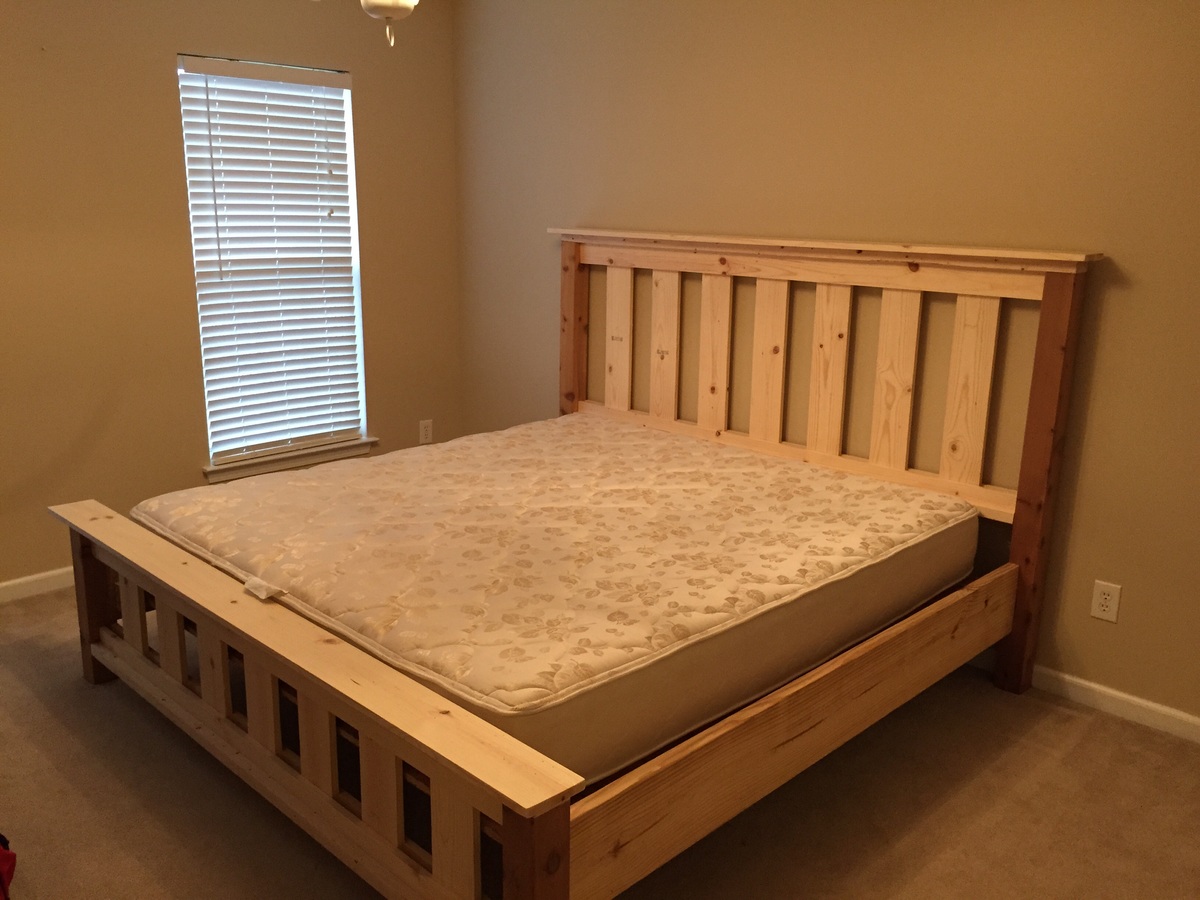
The project went relatively well. Had to readjust in order to fit our king. I used 2x4s and 2x4 joist hangers to support the mattres.

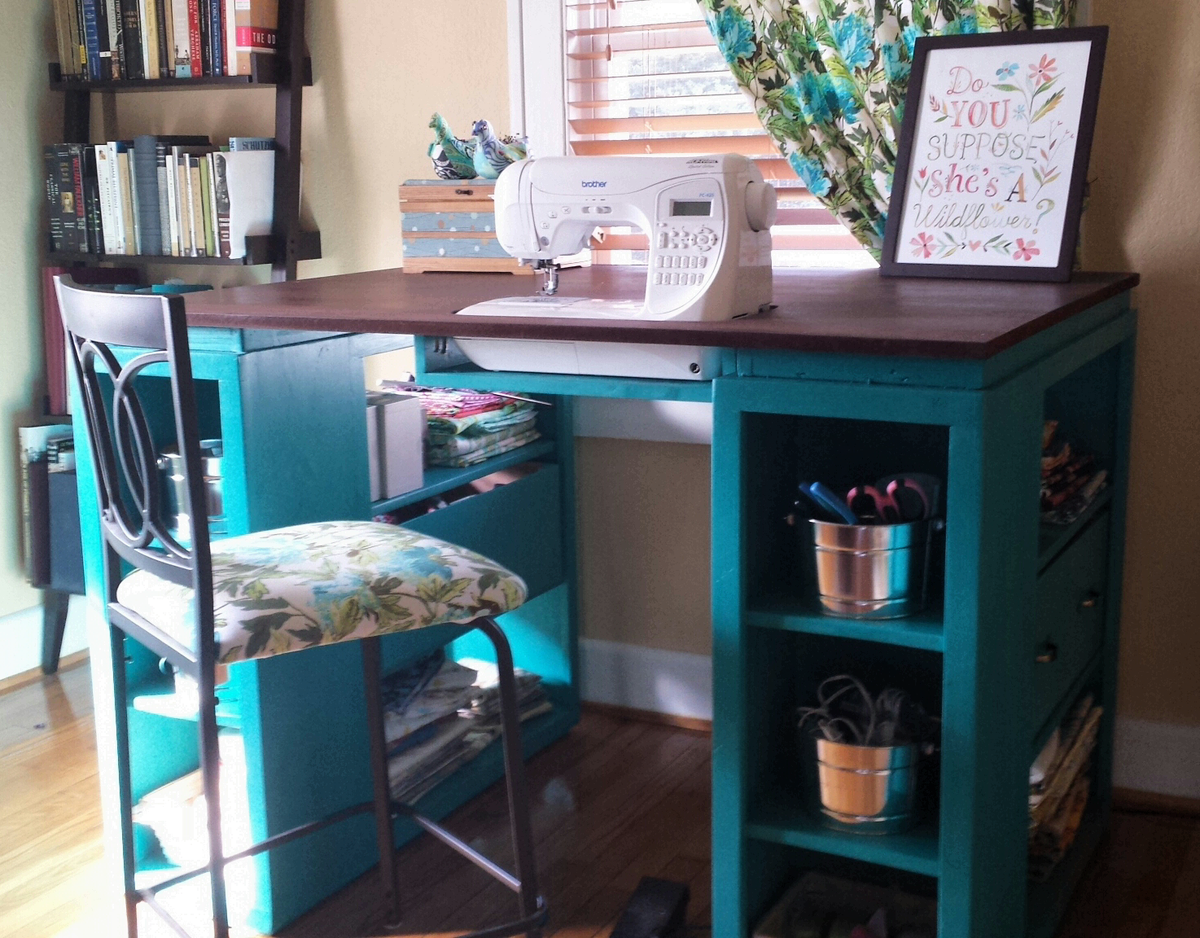
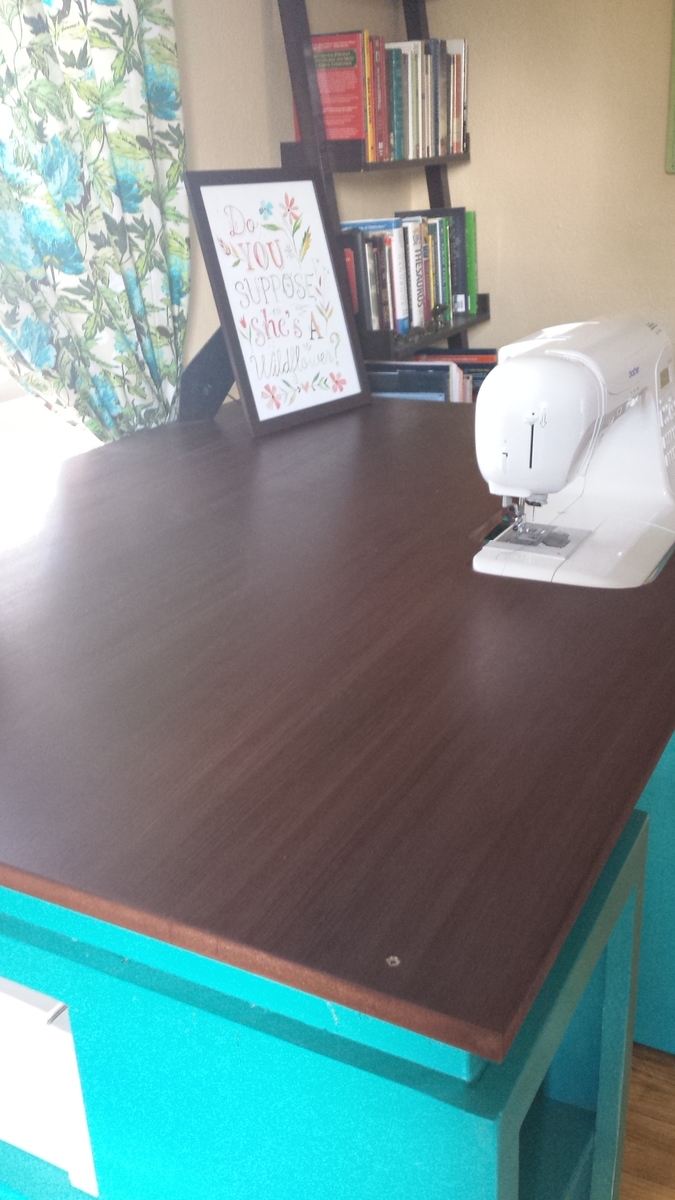
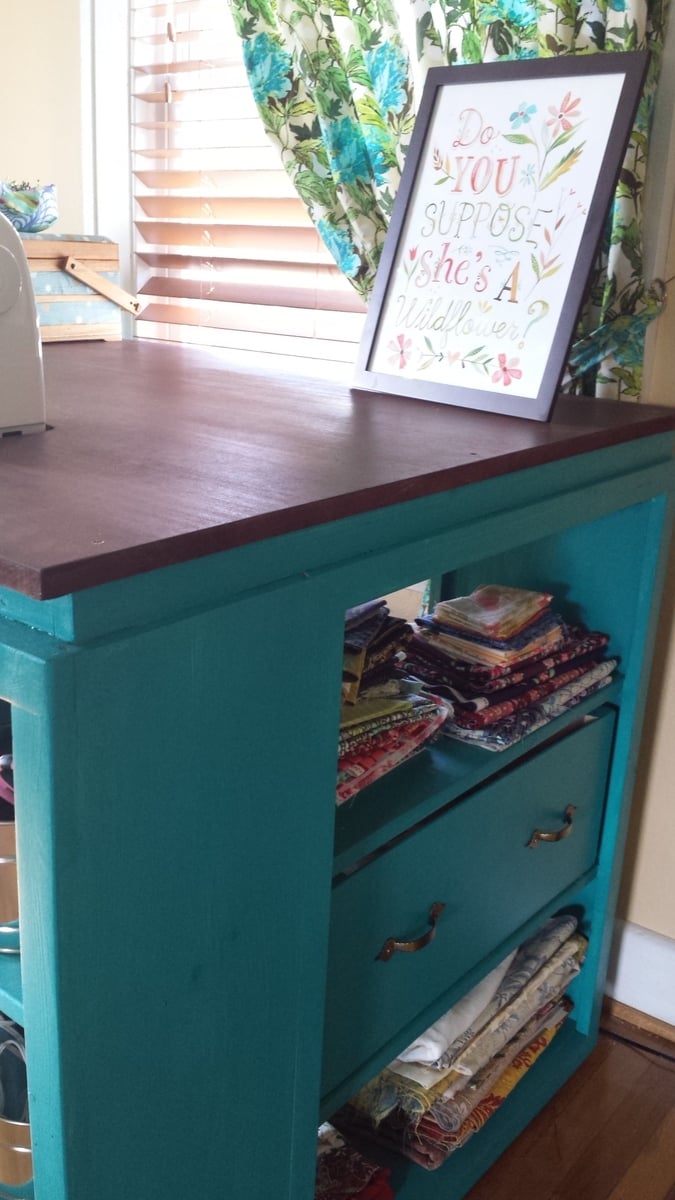
I have been looking at sewing furniture for years, but the prices always made my jaw drop. I have a small craft room, so I needed a table that could also triple as a cutting table and fabric storage. Thank you so much to Ana White for this plan! I built exactly to the plan in The Handbuilt Home, and it's the PERFECT size.
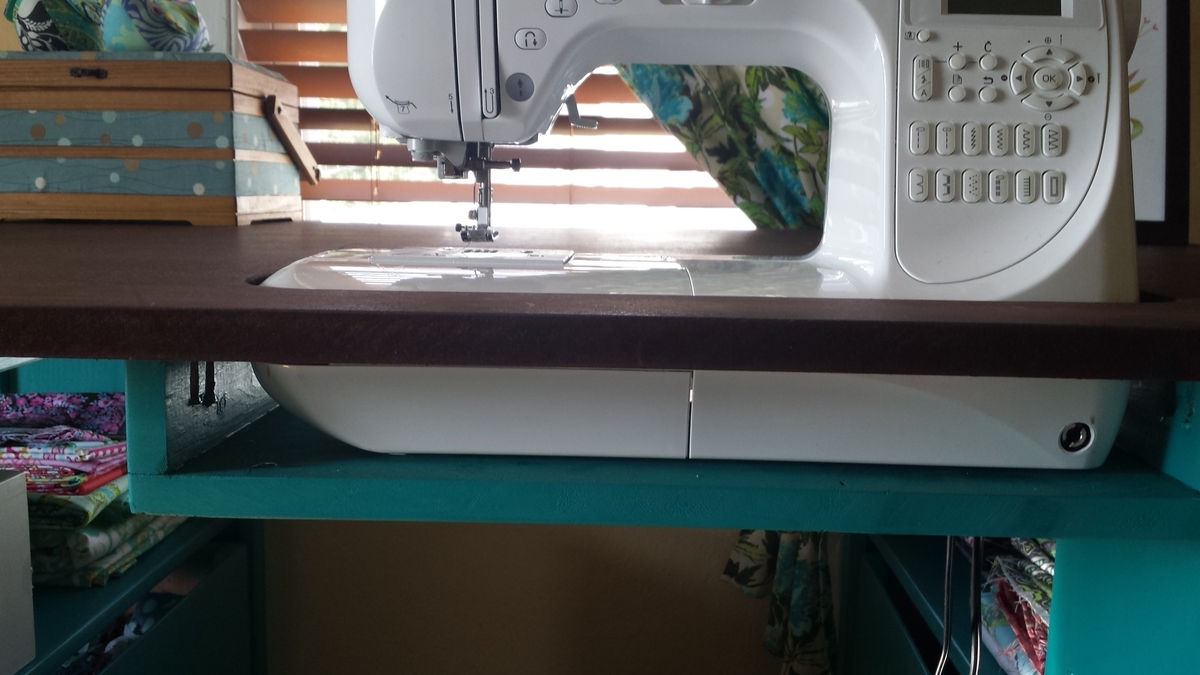
So the sewing machine can sit flush with the top, making working on big sewing projects way easier, I traced the outline of my machine on the MDF and cut it out with a jig saw. Then I built a small shelf using a 1x12 scrap and 2 1x3 scraps. Putting the 1x3s on top of the 1x12 made the shelf 3.75 inches deep, which is exactly the depth I needed. I attached it to the underside of the tabetop using a pockethole jig and screws.
I built 2 boxes using 1/4 inch plywood, and installed drawer pulls on them, giving the illusion that the table has 2 drawers built in. This is where I keep my ugly stuff--interfacing and fabric scraps.
I got the color scheme for the table from the entryway console plan in The Handbuilt Home. In order to make the MDF top look like it had a wood grain, I applied mahogany gel stain with an old washcloth in very thick strokes that spanned the length of the tabletop. It soaked in and lost the "grain" look in some places, but the majority still looks like wood. I did have to apply several coats of polyurathane over the stain; the MDF has a prickly texture that grabs fabric and makes it hard to feed through the sewing machine.
My only complaint is that I didn't quite think through the fact that seating is bar height and I'm 5'7". It's a little difficult to reach my sewing machine pedal. I may build a small stool for the pedal to sit on so I don't have to half sit/stand to sew.
This is the first woodworking project I've done alone from start to finish: from going to Lowe's and picking out the wood, to cutting the wood with a circular saw, assembly, and finishing. (My fiance did carry it up the stairs for me. :) )
I'm so in love with this table! And now to finish the quilt I started 6 months ago....

Mon, 09/23/2013 - 07:40
I really like your colors! And that drawer idea is so clever! Nice work!
Val
artsybuildinglady
Mon, 09/23/2013 - 15:22
I love this idea!! I too have wanted a sewing table for a long time but the prices of them take my breath away. I may have to make myself one! Thanks for the inspiration!!
Building an outside side table out of scrap pallets.
Video of the build:
https://www.youtube.com/watch?v=kVAYXVGiL_8
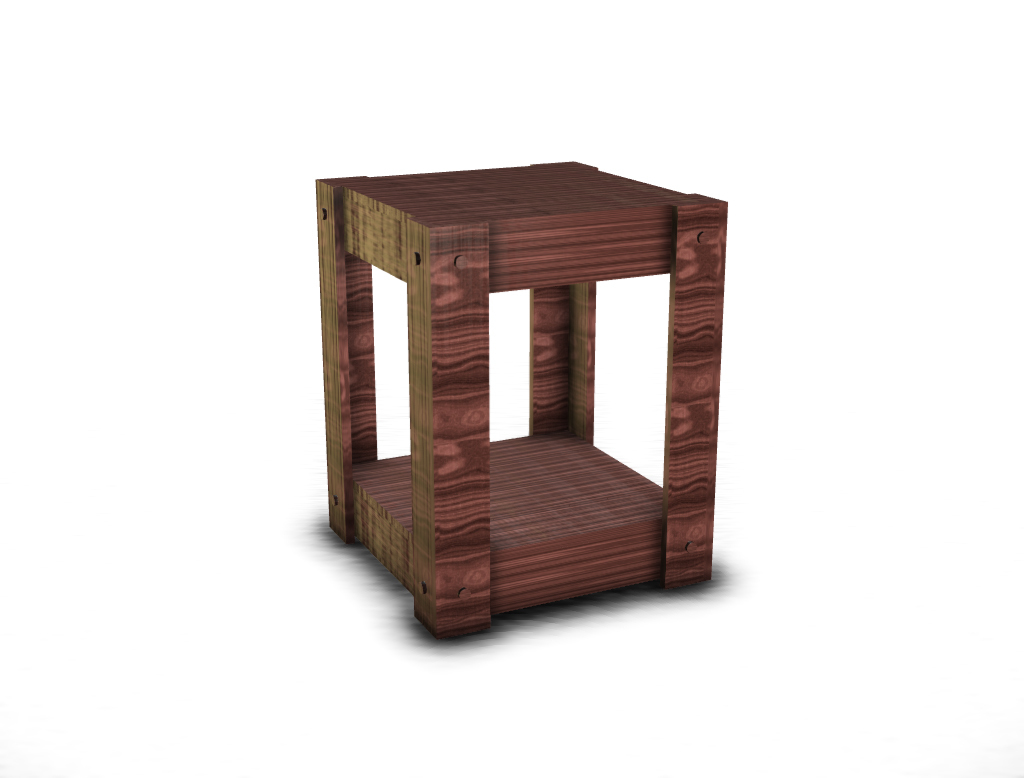
Drawing File
https://googledrive.com/host/0B21TbB8gGNQbX2dlNGdxR0NuOE0/end_table.pdf
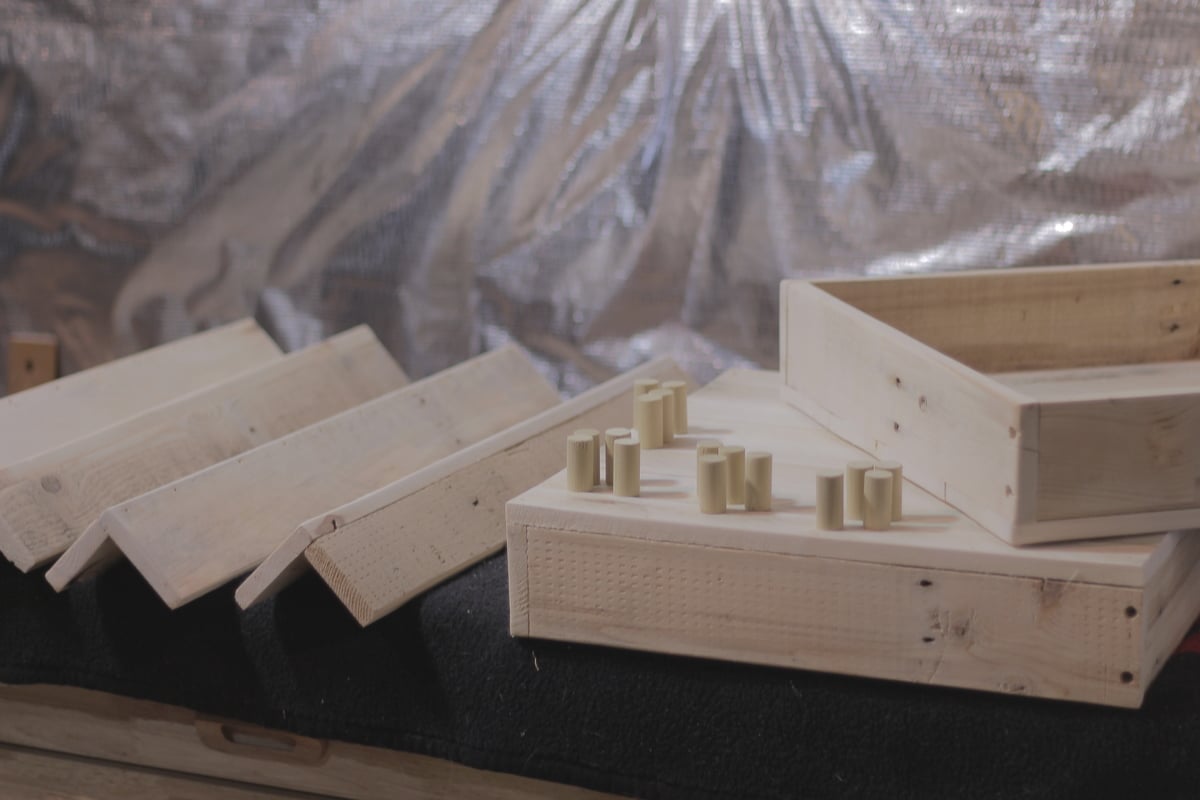
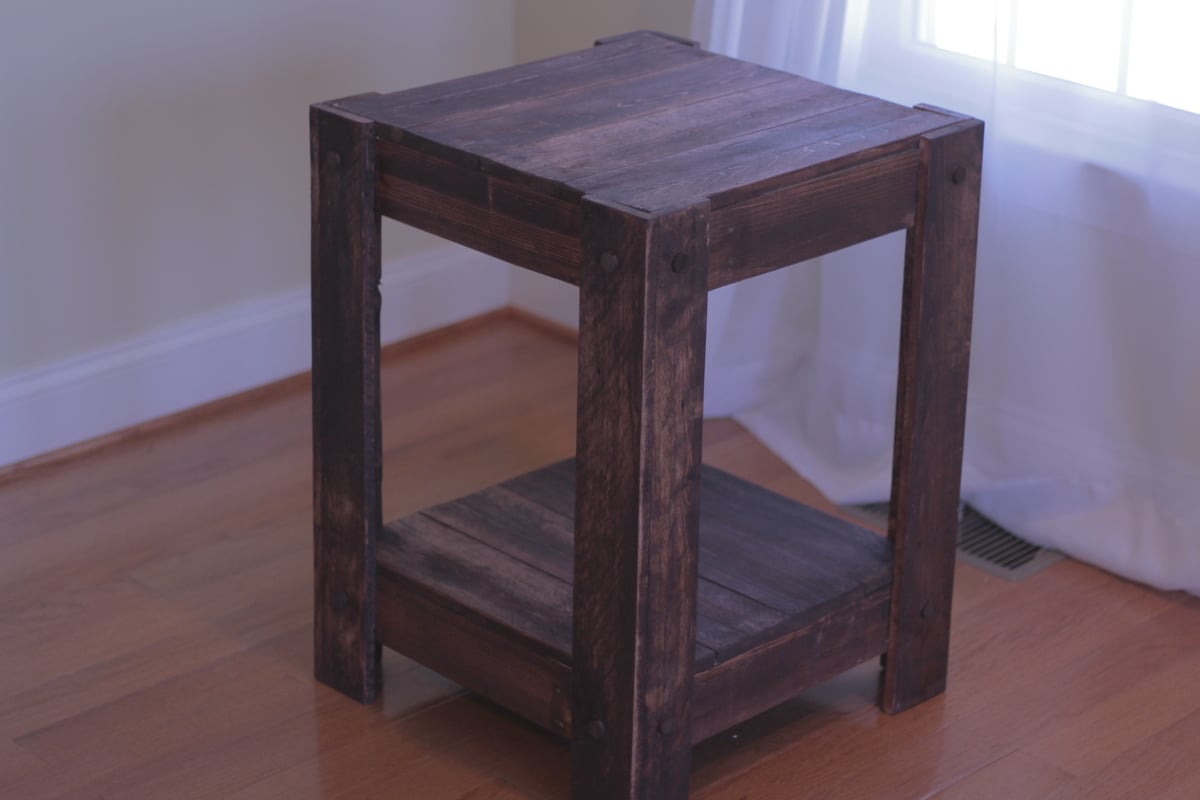
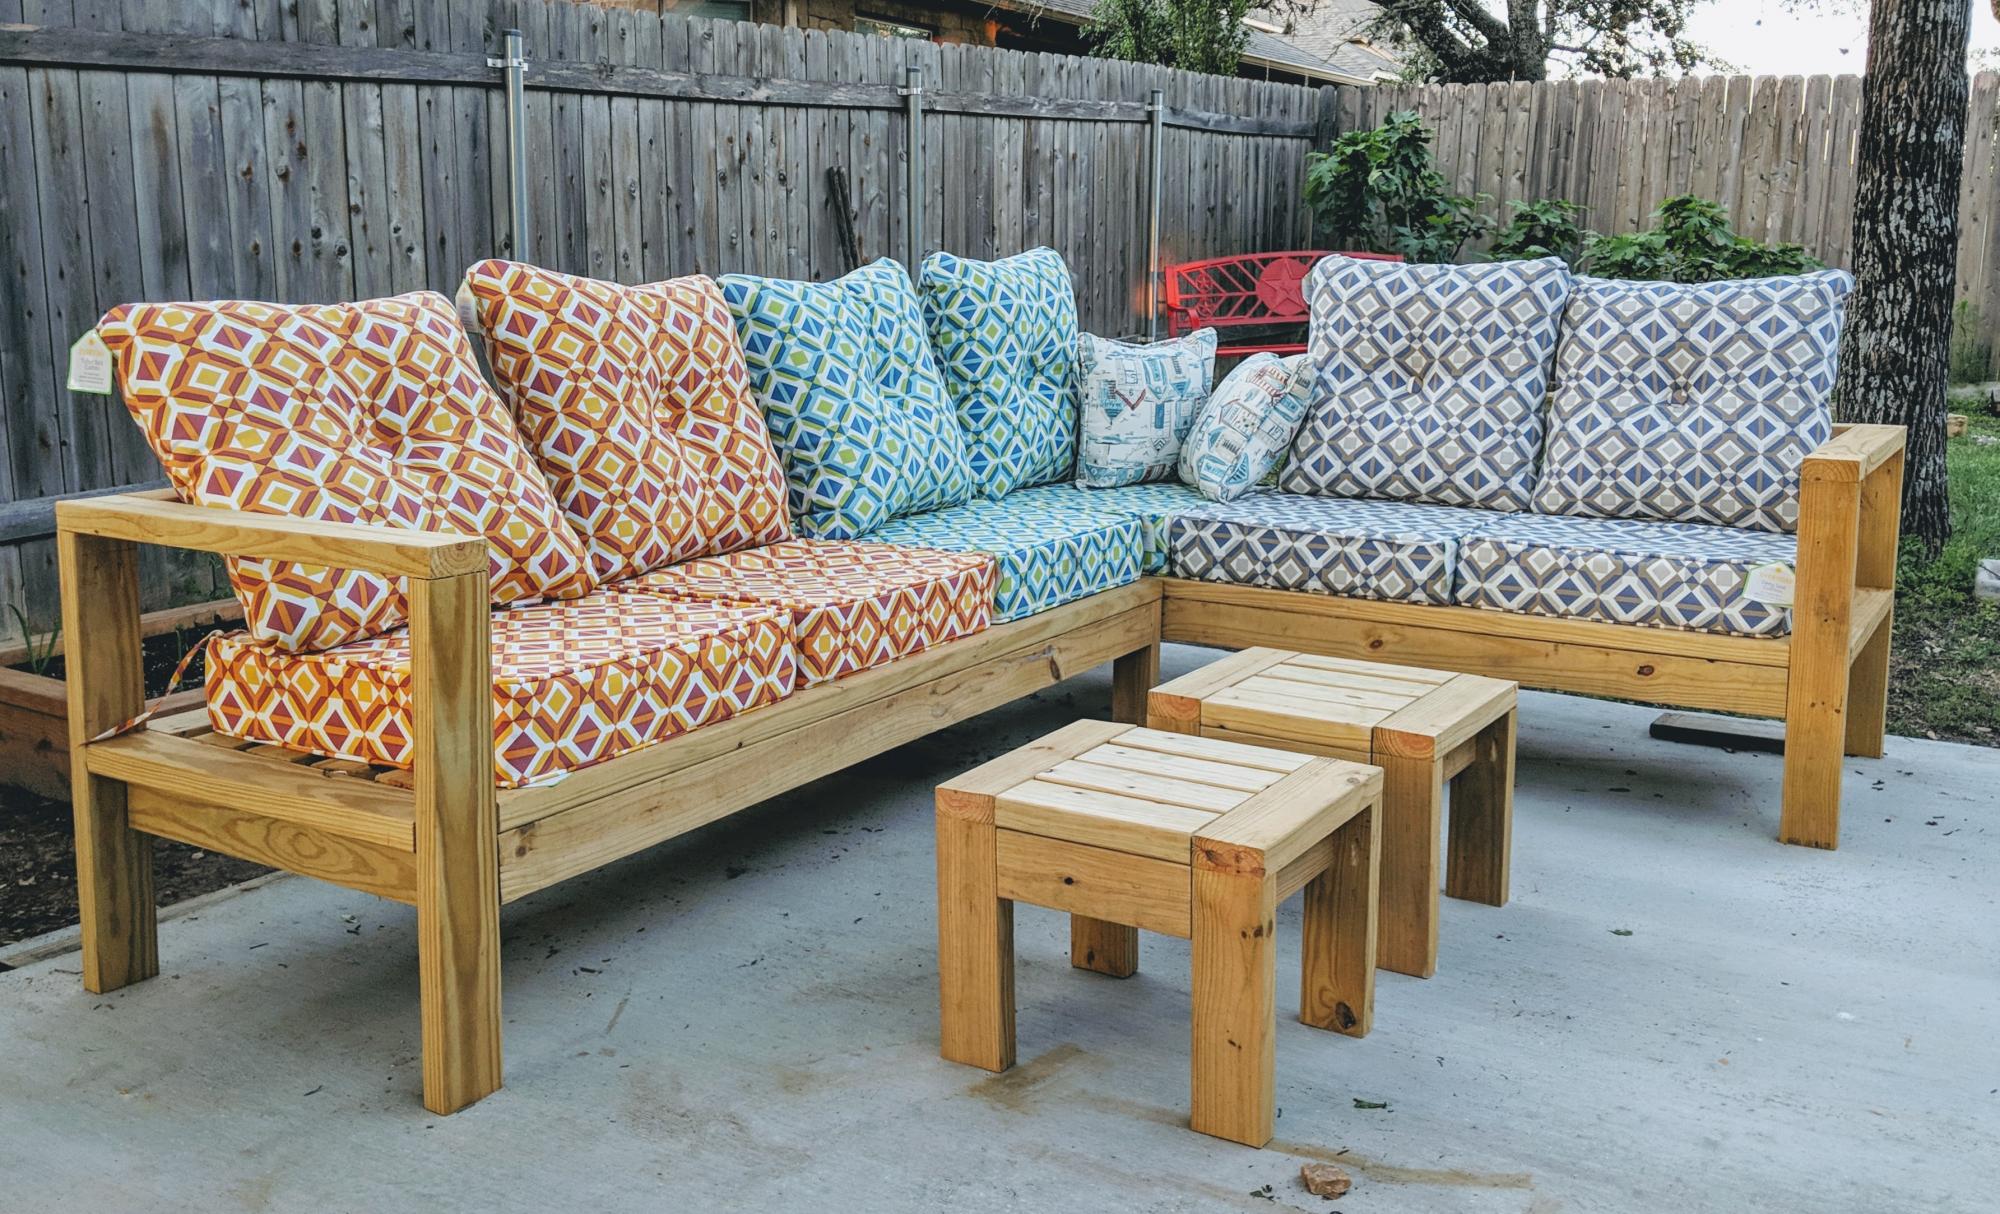
I reduced the size of the 2x4 coffee table to make 2 end tables. They can be used as additional seating when needed.
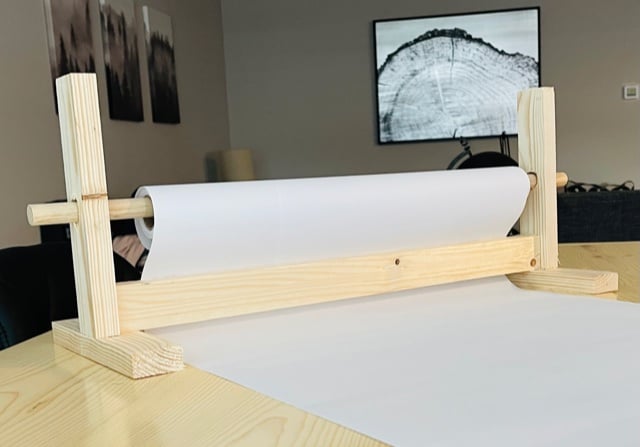
This took me about 20 minutes! I love the look of it and that it can just be left out when the kids aren't doing art. A great little item to add to keep the kids busy and inspired. I made a couple of mods from the plan. I used glue and nails instead of pocket holes and I did that bottom board flat instead of on it's side. I also used a little bigger dowel, and bought two rolls of paper on Amazon for $14.I'm giving this to my daughter for her birthday with some fun art supplies, so I think it's a great gift idea for any occasion for those crafty people out there!

Tue, 04/02/2024 - 06:09
Sometimes, when working with papers, you might need to convert file formats, right? So, I recently came across this website https://pdfflex.com/webp-to-png It's super handy for converting. It's been a real time-saver for me, especially when I need to tweak documents for printing or sharing. I'd desided to share in case it helps someone else out there too!
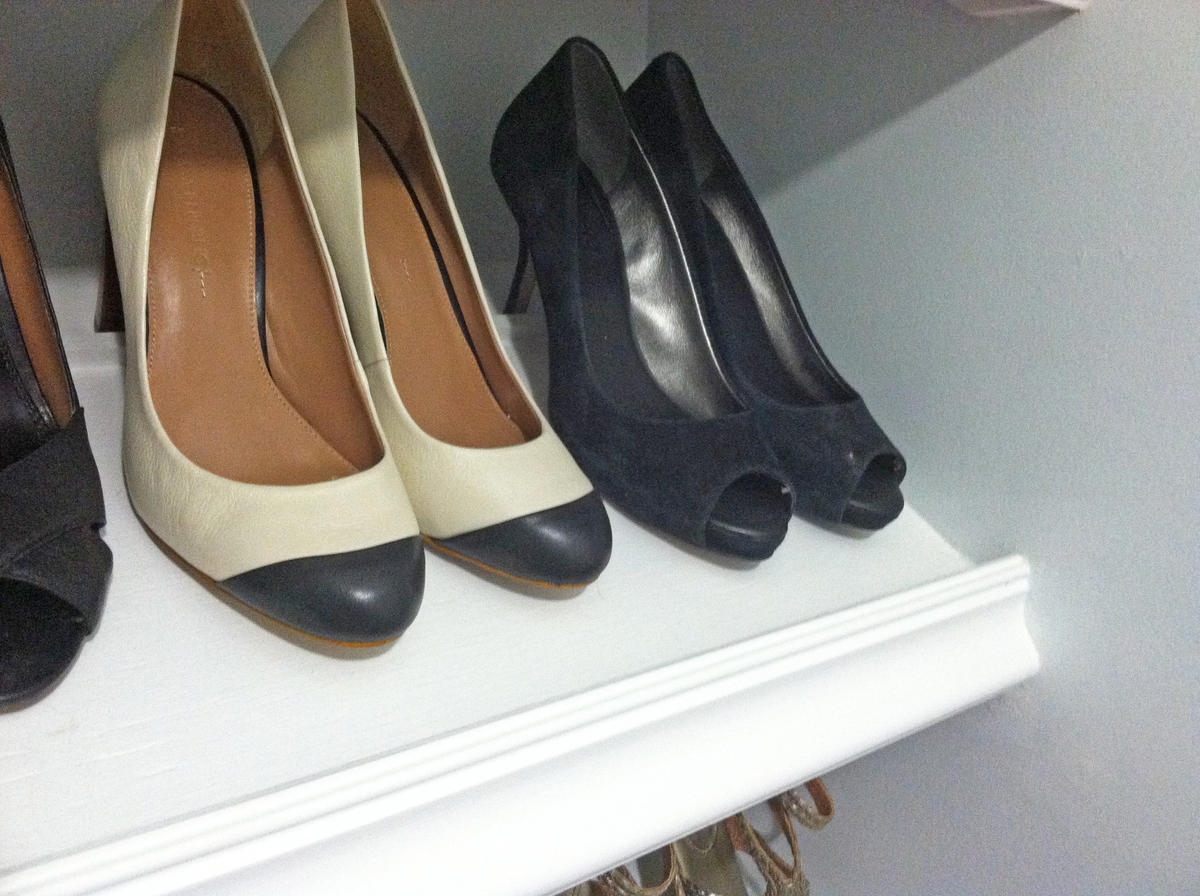
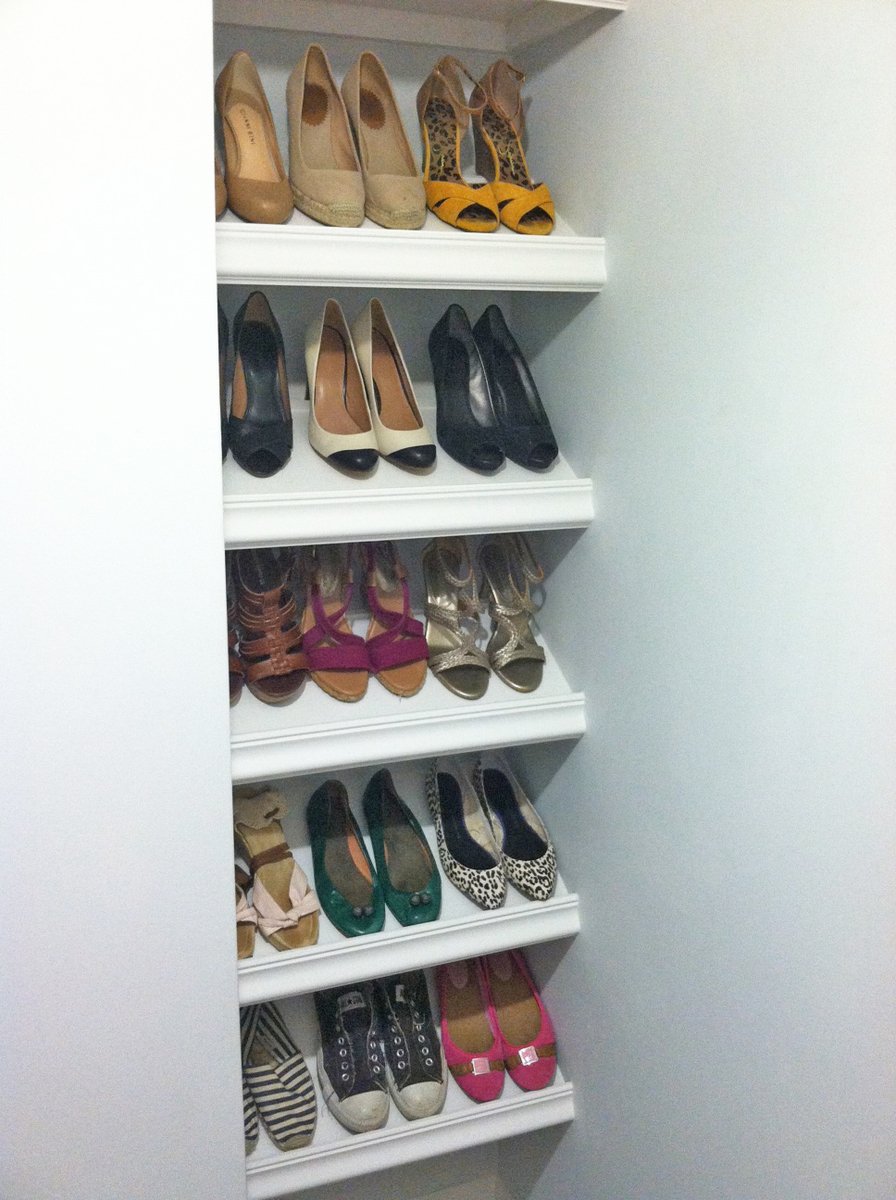
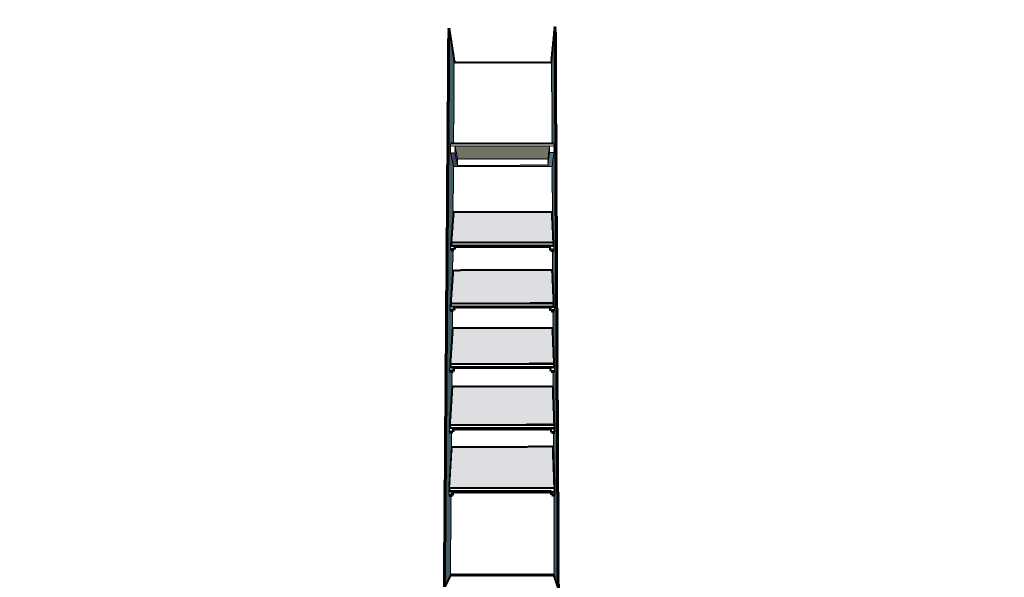
When we first bought our house, one of the things that appealed to me was the walk in closet off the upstairs foyer. A walk in closet in a house from the 20′s? That’s unheard of! I know I could have designed this in a way that fit more, but I switch out my shoes seasonally, and I personally wanted slanted shelves. Come on, they’re so much prettier! Shopping List 1 – sheet of 1/2″ plywood (4 x 8′ sheet) 2- Primed 1×2′s @ 8′ 1 – 1/2″ Square Wood Dowel (like this) 2- Chair Rail @ 8′ (like this) Kilz Paint Primer Behr Semi Gloss White Paint Indoor Caulk Wood Putty 2″ Screws 2″ Nails Cuts Plywood- 5 pieces at 23″ wide and 12″ deep. Cut either of the 23″ end at a 45 degree angle. Plywood- 1 piece at 23″ wide and 12″ deep 1×2′s- 10 pieces at 12″ with ends cut at 45 degree angle. Then measure 1″ down from the top of the front piece, and cut it straight across. 1×2′s- 2 pieces at 12″ 1×2′s- 1 piece at 21.5″ Wooden Square Dowel- 3pcs at 23″ Chair Rail- 6 pieces at 23″ How To Build 1. I first figured out how far apart I wanted my shelves to be. I don’t have particularly tall shoes, so I had the first shelf 17″ off the ground in the front, and then they were set approximately 12″ apart after that. I located the studs, and screwed in the 1×2′s on the walls directly into the studs. 2. I then added the wooden dowels to the tops of 3 of the shelves. I didn’t even nail these down, just used wood glue and caulk. I set the wooden dowel 2.5″ from the back of the shelf. 3. After that I dry fit the actual shelf on top of the 1×2′s. This was probably the hardest part because of course this house doesn’t have even walls. Why would anyone ever need even walls? What a silly concept. I ended up having to sand a lot of the edges to make them fit. Caulking will help fill in those gaps! I then nailed in the shelves to the 1×2′s from above. 4. I slowly worked my way up the wall. When I got to the top shelf, I knew that I wanted a flat shelf to store boxes of shoes. I also added an extra 1×2″ to the back wall just in case I really decided to stack those shoes high. I followed the same process as I did for other 1×2′s, and screwed this into the stud. Closet 1x2 All Shelves 5. Then I used the chair rail and aligned it at the bottom of the 1×2″ and nailed it to the front of the shelf. It sticks up higher than the front of the shelf, which is great for catching shoes that tend to slip down. 6. After this I, I ended up using wood putty and caulk to fill any gaps. They work miracles on wood. 7. Finally I just painted everything and viola! Budget 1 – sheet of 1/2″ plywood (4 x 8′ sheet) – $28.97 2- Primed 1×2′s @ 8′- $5.98 1 – 1/2″ Square Wood Dowel - $1.75 Chair Rail - $16.00 Kilz Paint Primer- already owned Behr Semi Gloss White Paint- already owned Indoor Caulk- already owned Wood Putty- already owned Screws- already owned Nails- already owned TOTAL: $52.70

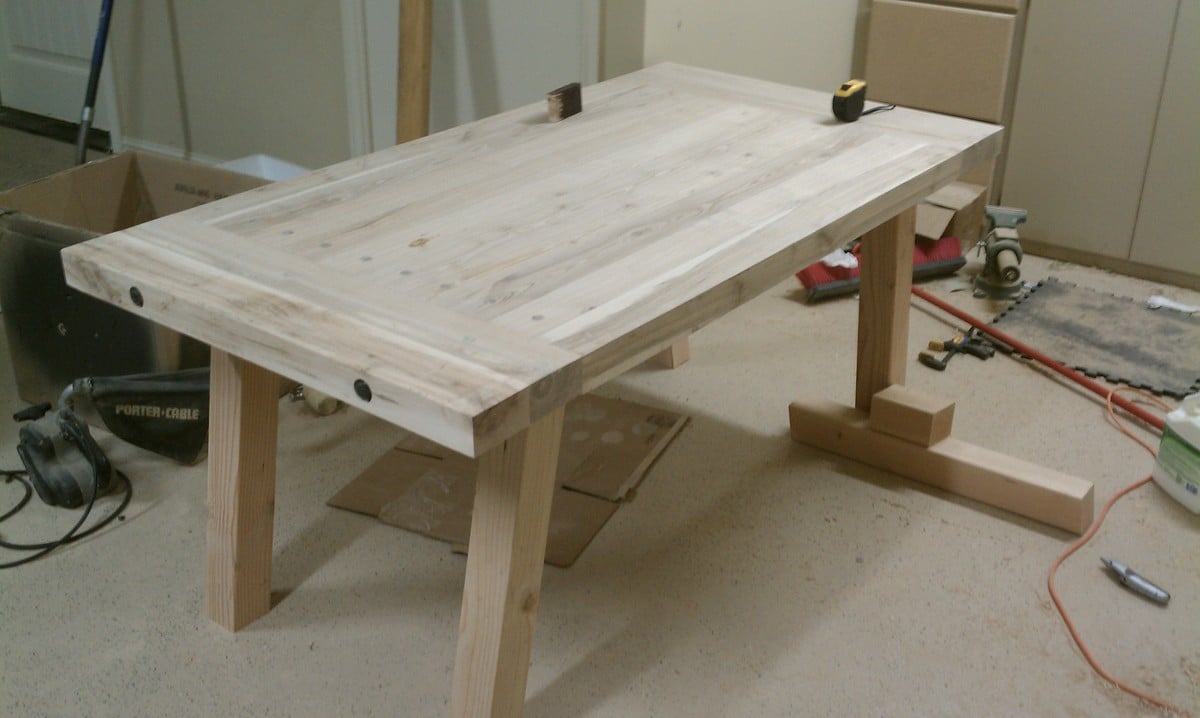
UPDATE: For everyone that was asking to see additional photos, I have uploaded them all to flickr. Here is the link: HERE Since doing this table I have built probably 15 more just like this one and developed a much better process then in the pictures above. If you have any questions or want to chat about it further shoot me a comment or email at [email protected].
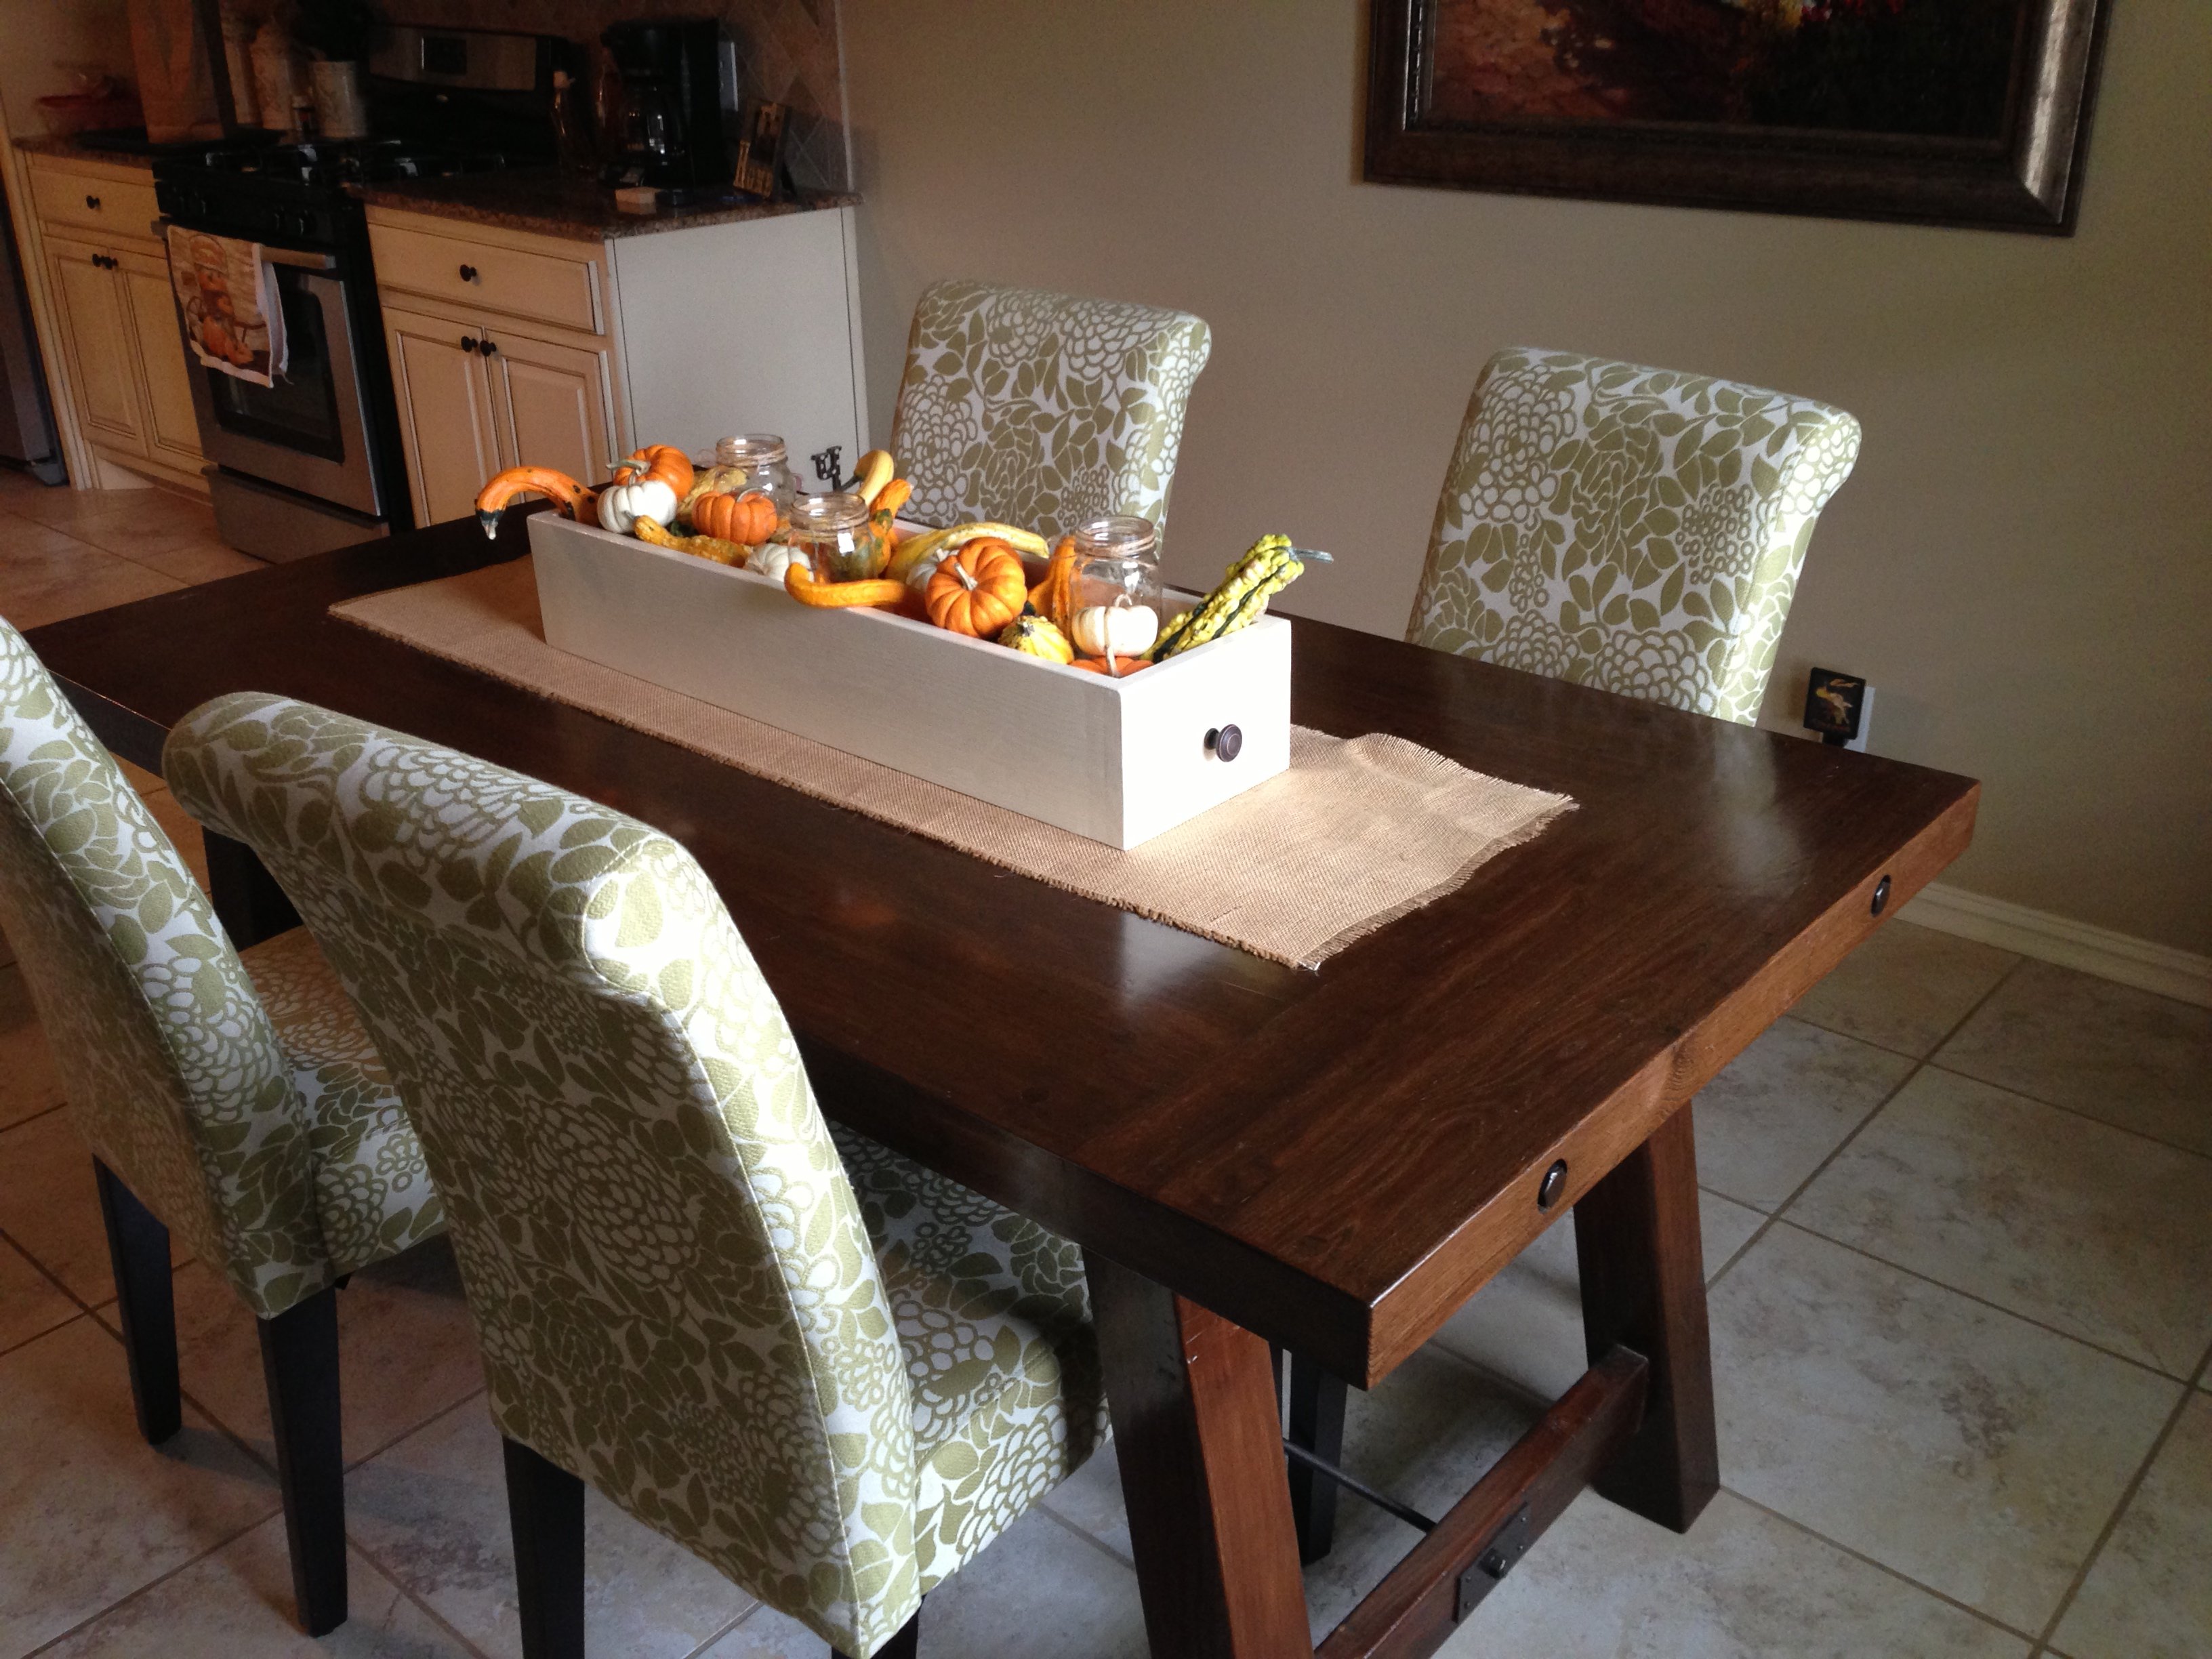
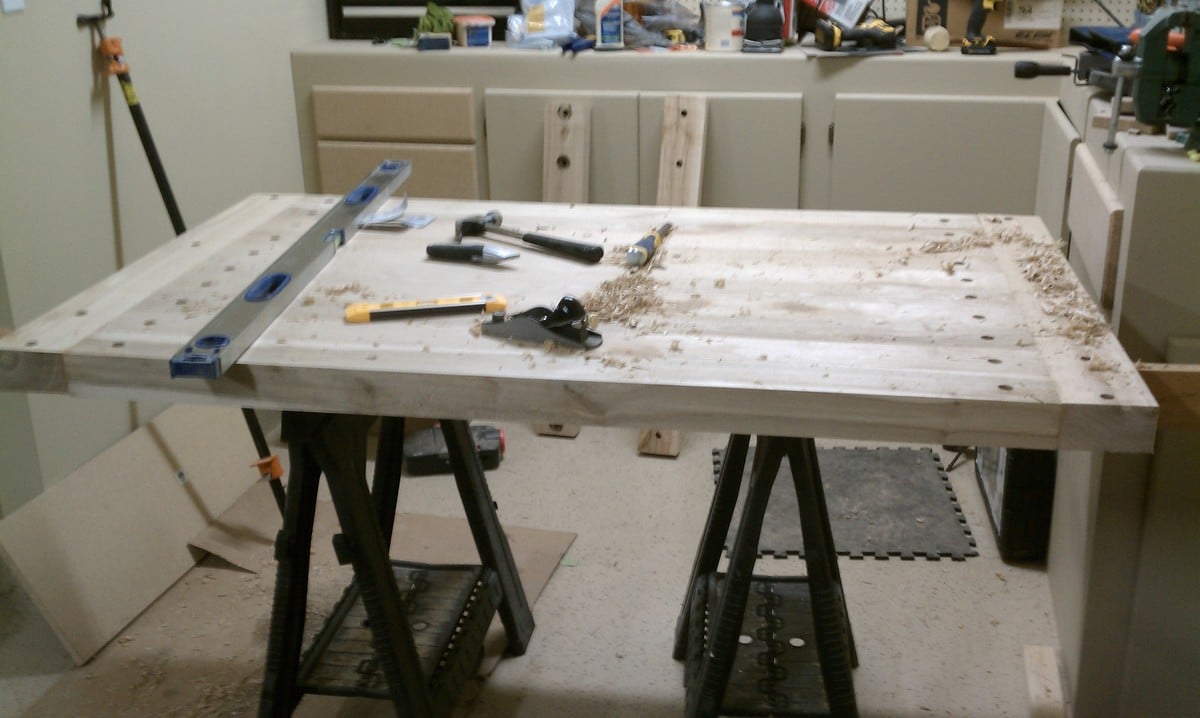
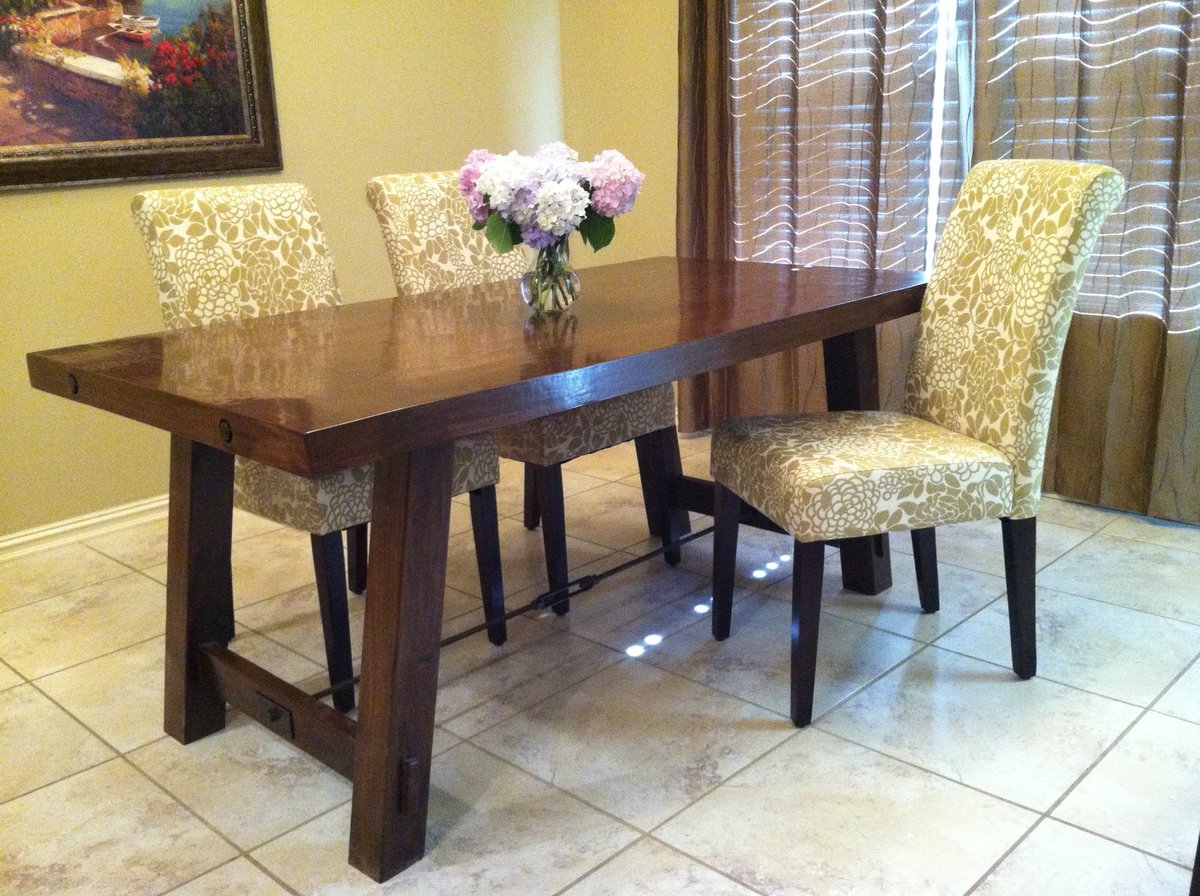
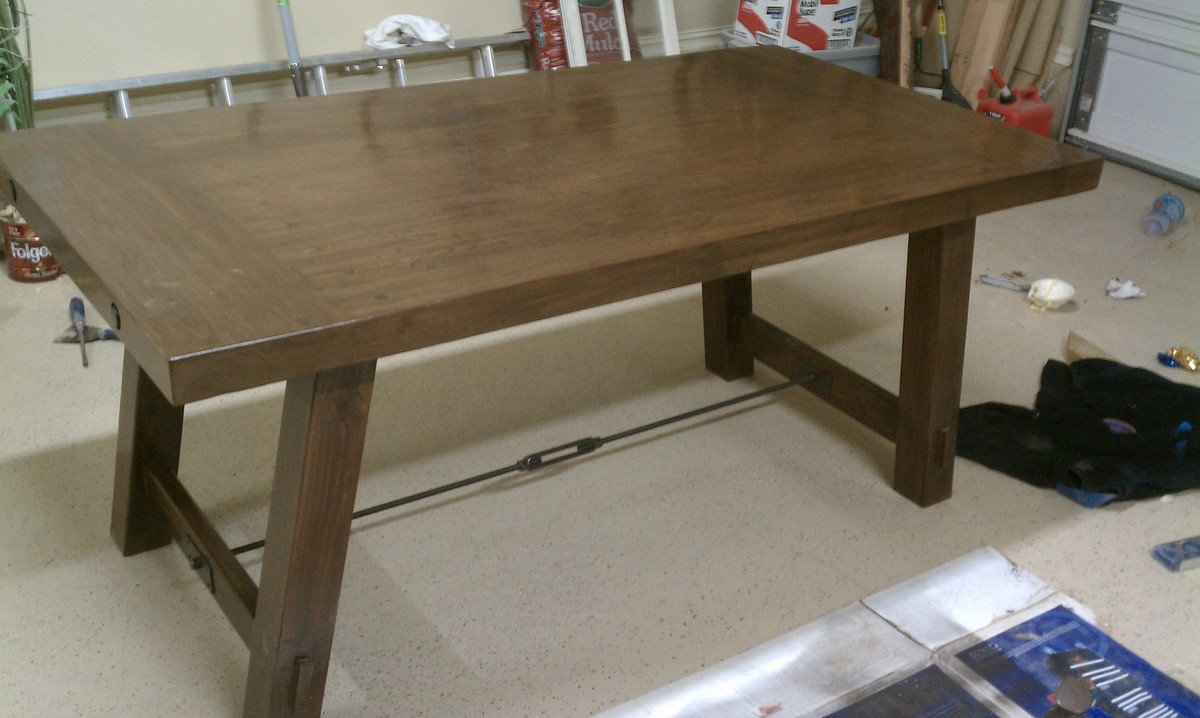
I had originally seen this table on the Pottery Barn website. My wife and I really liked it but couldn't afford to pay the $1200 bucks after tax and shipping. it didn't look to difficult to build so I decided to give it a shot. The wood for the top of the table was almost 3in thick 4.5in wide and 51in long. It was wood from an old pallet that was used to transport a very large air handler. Very heavy dense wood. Since the lengths were only 51 inches I opted to put 2 horizontal pieces on either side to extend the total length to approx 70in. I was inspired by the plans for the benchwright table that I saw on this site but chose to deviate from the plans on here to make it as close to the real thing as possible. I also happen to have access to very thick pieces of hardwood. The only thing I had to buy at lowes were the legs. The legs are 4x4 Douglas fir posts. The top pieces were all glued and screwed together. The ends were also done this way but had a very large lag bolt that held them together to match the pottery barn table. This was originally very rough wood so anything to help get the warp out was used. The legs are set at a 10 degree angle and the table stand 30 in tall. The hardest part of this table was finding the turnbuckle and the threaded rods so it could officially be 99% like the pottery barn table. I also had no idea how hard it was to find left hand threaded anything. I ended up finding everything I need at McMaster.com and my local Fastenal store. To make the brackets that went on either side of the rods i simply bought a piece of 1/8 sheet metal at my local Home depot and cut it to size. They also sold hammered brown paint which gave the metal a worked old look. Once this was all constructed I used two heavy coats of wood conditioner to seal the wood. This was the key to getting the color I wanted. It tells you on the can not to let the wood conditioner dry on the wood but if it does, when you apply the stain you get a 100% consistent color. Worked wonders. It almost felt like I was cheating. I used a water based condition and stained it with rustoleums "dark walnut" stain. Finished it with 5 coats of minwax semi gloss. I only did 5 coats because I was brushing it on and had trouble getting the bubbles out of it. In the final picture it looks much shinier then it is in person. The last picture of when it was still in my garage is a better indication of the final finish. I have a boat load of additional picture, so if you have any questions or want to see more pictures of how it was constructed, shoot me a message. Thanks!
Sat, 05/19/2012 - 22:40
This is incredible. I mean really, really incredible. I cant wait to see what you build next!
Sun, 05/20/2012 - 08:16
I've had trouble with bubbles too... I have two pieces of advice for your next bubble-free project...
1. Get a sprayer. Seriously.
2. If you don't get a sprayer, use the foam pad-brushes for your final layer of poly. Put the last layer on thick and use the largest side of the brush (the side) and lay it down over the wood and drag it slowly accross with the whole large surface on the wood. If it is soaked in poly it will lay it down smooth with little if any bubbles, keep the surface you're working on flat, and after you've finished that, just make sure you clean up any edges where the poly may have dripped down. Last step, when it's almost dry, use 600 grit sandpaper to VERY lightly smooth out any little bumbs, which will come off more like paste than dust. But really, you should just get a sprayer. :)

In reply to Bubbles... by Bunnie1978
Sun, 05/20/2012 - 17:42
Hey Bunnie,
Thanks for the tips! I completely agree with you about the sprayer. I do actually have a sprayer but didn't want to get the garage covered in over spray. Maybe one of these days I will get ambitious and apply another coat. :)

Sun, 05/20/2012 - 09:35
This is awesome! Can you give more direction as to which specific items you got at mcmaster.com and Fastenal?
Also, how did you attach the sheet metal pieces? If you have any more pictures of the underside (frame) of the table, I'd love to see them!
Thank you very much, and again, this is spectacular. We want to try to build this, too.
Great job!
In reply to This is awesome! Can you give by SawgrassHomeGirl
Mon, 05/21/2012 - 09:23
See my comments below...
Sun, 05/20/2012 - 10:38
Love it! This project turned out great and I love how you tracked down the hardware - that finishes it off perfectly!
Like SawgrassHomeGirl, I'm wondering what the actual names of the items are that you tracked down. I went and paged through the McMaster and Fastenal sites, but since I'm completely unfamiliar with mechanical doodads I'm not even sure which categories to look under.
Fantastic job! Thanks for posting this!
Sun, 05/20/2012 - 18:13
Thank you for the nice comments. This was my first official project so I am happy that it turned out well!
Sure! I'd be happy to know the names of the hardware items. At Mcmaster.com the turnbuckle I purchased was Item number 30045T44 . It is about 6in long and seemed to fit nicely with the length of the table. the rods were just simply threaded rods which I purchased at fastenal since we have a few of their stores in town. The rods come in 6 ft pieces so I didn't want to have to pay the shipping. If you don't have a Fastenal near by here are the item numbers for the rods; 90322A220 -right hand threaded rod and 95625A160 - left hand threads. They are a bit more expensive at mcmaster though.
The biggest thing I was worried about was that the entire rod had threads on it so I was worried that it would look odd. But after getting it painted you don't even notice that it isn't just a solid pipe.
Sawgrass: shoot me your email address and I'll send you some more pictures. This site only allows me to post 5 additional photos. But to elaborate on the frame and the metal pieces, I didn't' really build a frame for it. You can essentially break it down into two pieces: Top and the legs. Instead of building a frame and screwing the pieces down on it, I opted to screw each of the pieces together using a Kreg tool and also glue them. the wood was heavy enough to support everything without an elaborate internal structure. The two end pieces help keep things from warping. The only reinforcement I did for the top was to take 3 2x4's and screw them horizontally on the underside. You will be able to see all of this in the pictures. As for the metal pieces, i drilled 5 holes in each piece. 4 holes for the screws that hold it to the leg region and one half inch hole in the middle for the rod to go through. I have a bunch of close ups of this process so you should be able to get a very good idea of how things work. Overall I tried to keep everything as simple as possible.
Thanks for all the interest and if anyone has anymore questions please don't hesitate to ask!
Tue, 05/22/2012 - 09:01
Thank you so much for taking the time to answer our questions! You did a fantastic job on this table and I am adding it to my ever-growing list of projects to do!
Now I'm off to find that hardware. :-)
Thanks, again!
Fri, 11/08/2013 - 06:33
My e-mail is [email protected]
My husband is making this table for Thanksgiving dinner. We are expecting 14 people so he is making the table a total of 12 feet long! Any input or pictures will be greatly appreciated!
Lisa and Gary Peters
Angola, IN
In reply to More information please! by lillylamp
Fri, 11/08/2013 - 08:13
Hey Lisa,
Check your email. 12ft long! I think you'll have to edit the build a little from my design but if you have any questions about the pictures please let me know and i'll be happy to help you out!
Thanks!
Tue, 05/22/2012 - 16:58
So i wanna build this table this summer, could you shoot me some more pictures of the designs and actual steps for building it. i absolutely love it, and i hope mine comes out as good as yours!
In reply to Love this table by Destiny (not verified)
Thu, 05/24/2012 - 10:59
Sure will, what is your email address?
Thu, 02/28/2013 - 18:35
Hey Nathan can you send more the steps also of how you build the table and any difference between the Ana White steps.
In reply to Pottery Barn Table by Jay Daniel
Wed, 04/10/2013 - 13:54
Hey Jay,
I didn't really follow the plans listed, I just kind of built things as I went. So i don't have anything that I can send you. However, I'd be happy to answer any questions you might have about any part of it.
Thanks Jay
Thu, 02/28/2013 - 18:35
Hey Nathan can you send me the steps also of how you built the table and any difference between the Ana White steps.
Sat, 05/26/2012 - 13:13
This has been on my to do list for a while now, but I haven't been able to work out the hardware details like you did. I would love to get some more pictures especially of the underside and of your rod to stretcher connection. Thanks again and you did an amazing job!
In reply to Awesome table! by Robert (not verified)
Mon, 11/04/2013 - 13:30
Hey Robert,
Here is a link to the rest of the pictures:
Sat, 05/26/2012 - 17:54
I love this table! I am new to this site and to building, but I want this to be my first project. Could you possibly email me the detailed pics and plans also so I can get started? :) Thanks so much!
Sat, 05/26/2012 - 18:07
Sorry, I forgot to sign in before I submitted my post. I posted the above post as Aubrey but this is my username so you can contact me.
Thanks Again.
In reply to Love the table!! by Aubrey (not verified)
Mon, 11/04/2013 - 13:30
Thanks! If you have any question please ask away!
Tue, 05/29/2012 - 18:41
I am really inspired by the table you built. It looks like you built your legs with 4x4s. Did you drill through them to get the notch on the outside or did you do something else just to get the look? Great work!
In reply to Amazing Table by ajmccallister
Tue, 05/29/2012 - 20:58
Hi Aj,
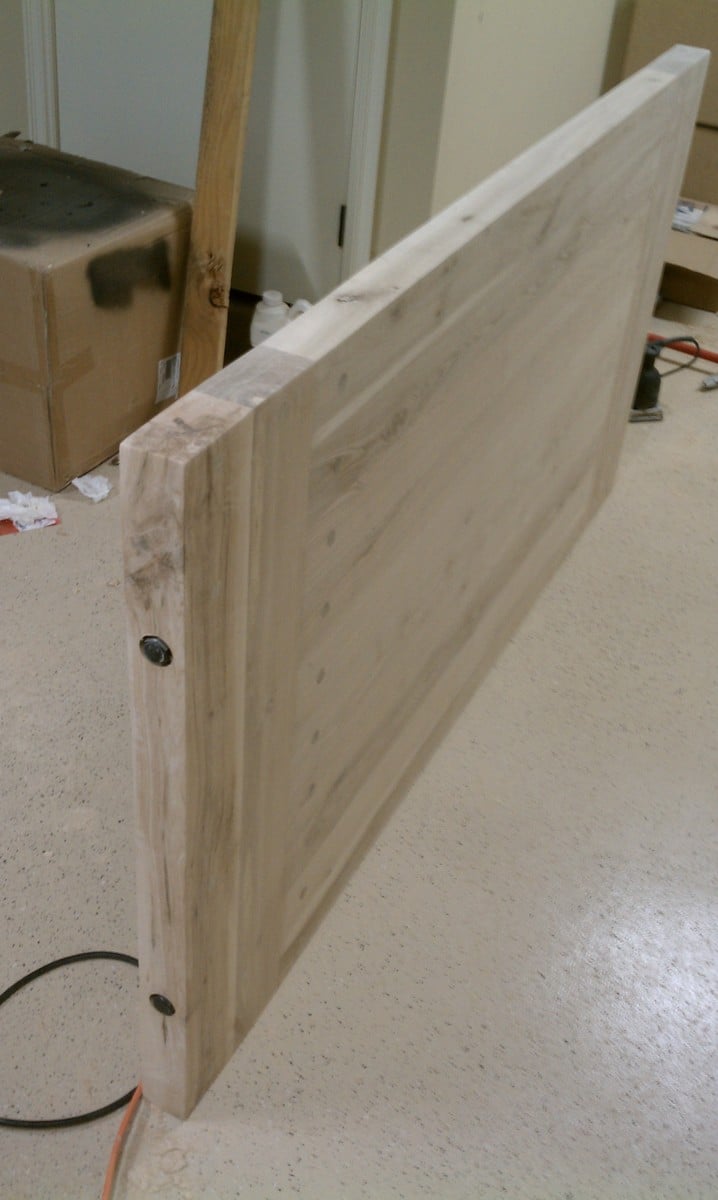
Yes, I did use 4x4's for the legs. It was much easier this way, did a great job achieving the heavy look I was interested in and was the closest I could come to the pottery barn table. To answer you question, no I did not drill through. I attached the 2x4 cross member with 2 leg screws from the outside of the 4x4 leg. I then cut a small piece of the 2x4 and nailed it over the lag screw holes to simulate the 2x4 cross member coming through. It looks just like I cut a hole and the whole thing is coming through. I get asked how I did it by people that see it in person because it doesn't look like a separate piece is just nailed on.
If you look at IMAG0306 and IMAG0308 on flickr you can see what it looks like without them on and if you look at the bottom left hand corner of the picture you can see the pieces that have been cut and not put on yet.
In reply to Cost? by Sara (not verified)
Mon, 06/11/2012 - 11:01
The Lower portion was probably about $200. The biggest expense was the threaded rods and the turnbuckle. The rods were about $30 each and the turnbuckle after shippping was about $20. The wood for the lefts and cross members were purchased at my local lowes so they were pretty cheap. As for the top, its hard to say since wood prices vary quite a bit between types and thickness. If you were to buy wood like I used you would probably have to visit a sawmill and see if you could get rough cut wood that is at least 2.5 inches thick. I would estimate $300 give or take. If you follow the plans that ana has setup for the top you don't necessarily need to get wood that is that thick. You can achieve close to the same look but just using 3/4 in pieces. I think if you look very closely at the pottery barn pictures, they do not use 100% solid wood either. But I wanted the heavy look and the solid appearance. So total you are probably looking at $500-$600. Hope this helps!
Wed, 06/20/2012 - 11:28
Great job Nathan - I appreciate your workmanship on the table. You've answered one of my questions regarding the look of the cross member protuding thru the leg - slick idea. My other question - why all the large round holes in the bottom of the table? By the way, the dowel effect that you accomplished really pops. I too like the looks of the thicker boards. Thanks for posting an interesting and comprehensive article. Curt
In reply to Benchright Farmhouse Table by Curt (not verified)
Thu, 06/21/2012 - 13:06
Those holes in the bottom of the table were there when the wood was salvaged. This was a pallet so they had it bolted together with large lag bolts. The bolts had large washers inset into the wood. The bolts were secured on the underside of the wood and went through every piece. Luckily, they were consistent and only bolted from one side.
Thanks!
Tue, 07/10/2012 - 06:36
Thank you, Nathan, that really helps! Did I mention your table is beautiful?
Fri, 08/03/2012 - 12:53
Hi Nathan,
Awesome table. I just hope I can find some 3" thick lumber without breaking the bank! It looks like you attached the legs by putting 2 bolts through the legs into the small apron on the short ends of the table. It also looks like you might have also put in some pocket holes on the inside of the legs, going straight down into the underneath of the table boards. Is that right? I am just wondering how sturdy it is, since it's such a heavy table.
Thanks!
Lea
In reply to Attaching Legs by leabea28
Mon, 08/06/2012 - 11:43
Yes, you are correct. I attached the legs with 2, 6inch lag bolts. I pre-drilled them at the correct angle (which I eye balled) and ratcheted them in. I was a little worried about them being sturdy enough so I went ahead and made a few pocket holes and secured it that was also. The legs overall are very sturdy. The table probably weights 150-200lbs and I was able to pick up one side of it only holding onto one leg. Table doesn't wobble at all. The cross member holding the legs together also helped pull everything together.
Thanks for the question! Feel free to ask any others!
Nathan
Sun, 08/12/2012 - 18:17
Fantastic table! Thanks for posting all the instructions and places to buy hardware. My husband and I can't wait to try this!
Sun, 08/12/2012 - 18:19
Fantastic table! Thanks for posting all the instructions and places to buy hardware. My husband and I can't wait to try this!
Fri, 08/24/2012 - 09:33
Nice work! I made bench seats in this style - maybe I'll post pics sometime too! I saw in your description that you used thick wood to be more like the original... just wanted to let you know that I have seen the "original" and yours is much better! Pottery barn does NOT use solid 3" wood for the top. If you look closely at the pics in their online catalog you can even tell... they use thin planks with a side piece to make them look thick. The only hefty piece is on the very end .
Also, I wanted to mention that I have had great luck with wipe-on polyurethane... never any bubbles. Just be sure to use lint free cloths and lots of thin layers.
Again, nice work!
In reply to Better than the "real" PB Benchwright by 3RaysofSunshine
Fri, 08/24/2012 - 09:54
Thanks for the nice comments!
Did you apply the poly with a brush or with a cloth?
Fri, 08/24/2012 - 10:05
I apply with a cloth. It takes many coats but they are so thin they dry fast. In between coats, I wet sand with 1000 grit wet/dry sandpaper. After towel drying, I run my hand across the surface. You'll feel any spots you missed. Then use a tack cloth to pick up any dust (there's always some...) I get a perfect finish using this method. I'm sure spraying is great too... I just like not having another piece of equipment to clean!
My last project (a patio table) I had run out of the wipe-on poly and decided to use something else - whatever I had on hand. Grr! Not nearly as nice looking so I'm doing it over. I'll post pictures of a few projects as soon as I can figure out how.
Sun, 11/18/2012 - 21:15
Why cant my husband make stuff......booooooooo! Wonderful table I am so jealous lol.
Fri, 01/04/2013 - 07:37
This is a great Table! I'd love to build something like this. Good Job!
In reply to Amazed by Shannan with an A
Tue, 04/23/2013 - 10:23
Thanks for the comment! Glad you like it :)
Thu, 05/02/2013 - 10:52
Hi! Just wondering what tool(s) you used to cut the sheet metal and drill the holes in it.
Thanks.
Lea
In reply to sheet metal cutting by leabea28
Thu, 05/02/2013 - 15:04
Hey Lea,
It was only 1/8 in thick metal so a simple jig saw with a metal bit worked great. Wear eye protection though. It shoots off all sorts of hot metal bits. To drill the holes I just used a power drill with a metal bit. Make sure you drill 100% straight or the bit will bind and jerk the drill right out of your hand. Ideally, a drillpress would work much better since I nearly broke my wrist on the second large hole.
Let me know if you have any other questions!
Thanks,
Sat, 06/01/2013 - 20:36
The table looks awesome man! Love it. I just got done building the benchright table to Ana Whites plan, see mine here http://ana-white.com/2013/05/farmhouse-benchright-table-build-0
I just ordered the left hand threaded rod, right hand threaded rod and turnbuckle from McMaster.com...total cost for all 3 was 22 bucks. Here are the McMaster part numbers:
90036A033- left hand rod
98841A033- right hand rod
30045T44- galvanized turnbuckle
I'll hopefully get the rods and turnbuckle this week so I can totally complete this project.
Again, awesome job nathan!!!

In reply to Very nice job, nathan!! by tcoche
Fri, 11/14/2014 - 05:06
I saw your listing for the parts number, thank you. I was wondering, these are galvanized parts....how are they being made dark for the finished product?
Fri, 06/28/2013 - 10:52
Please, PLEASE send me the plans on how to build this table. Yours turned out great!
Thu, 07/11/2013 - 12:55
I'd love to if I had plans. I kind of just built this as I went. Feel free to ask any questions though if you aren't sure where to start or your stuck somewhere.
Thanks!

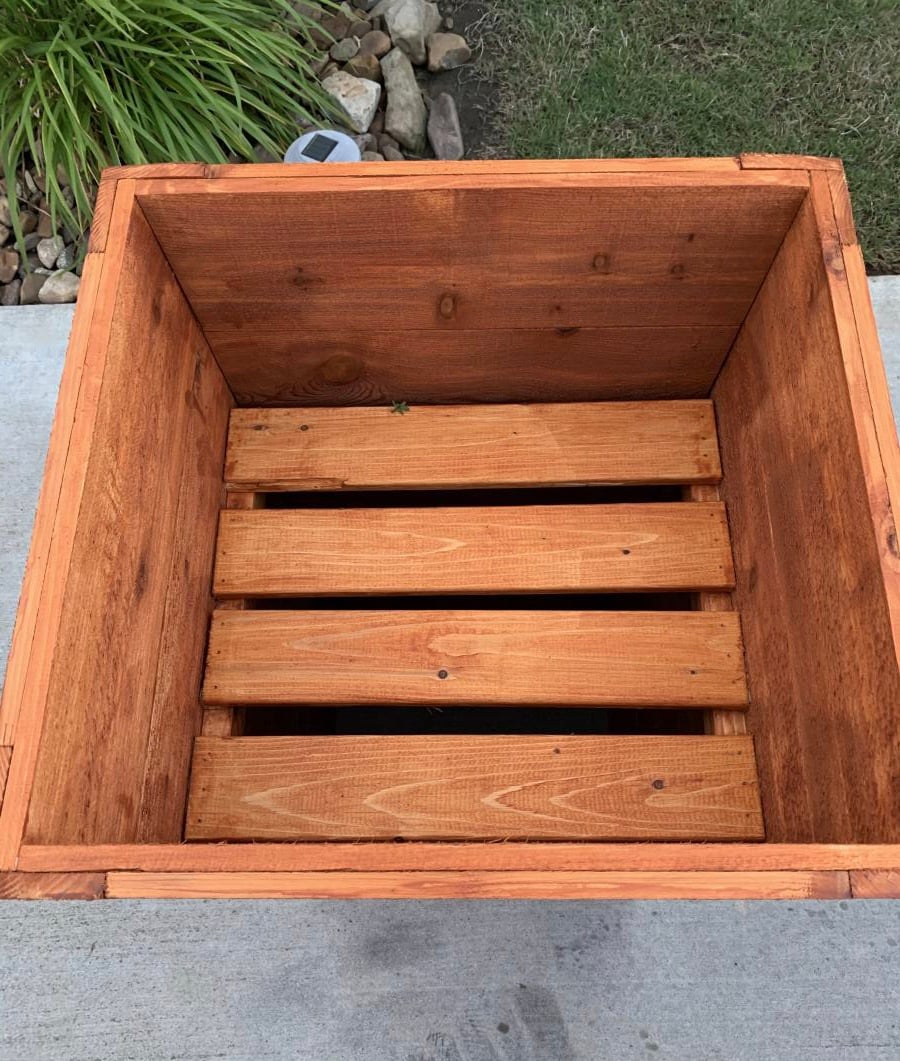
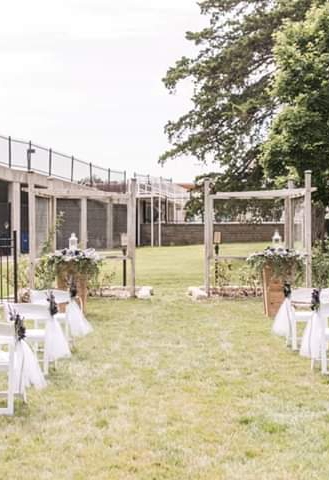
Made the planters to hold flowers for a small garden wedding. Used 3-1/2" wide fence boards as my HD was out of standard 5-1/2" boards. Used 11 boards for finished height of 38" top was 18" wide, bottom 12-1/2" using a 4° angle. Ripped fence boards to size to use in place of 1x2/1x3 boards. Added center trim as on another brag post, as well as, framed the top to finish off the planter.
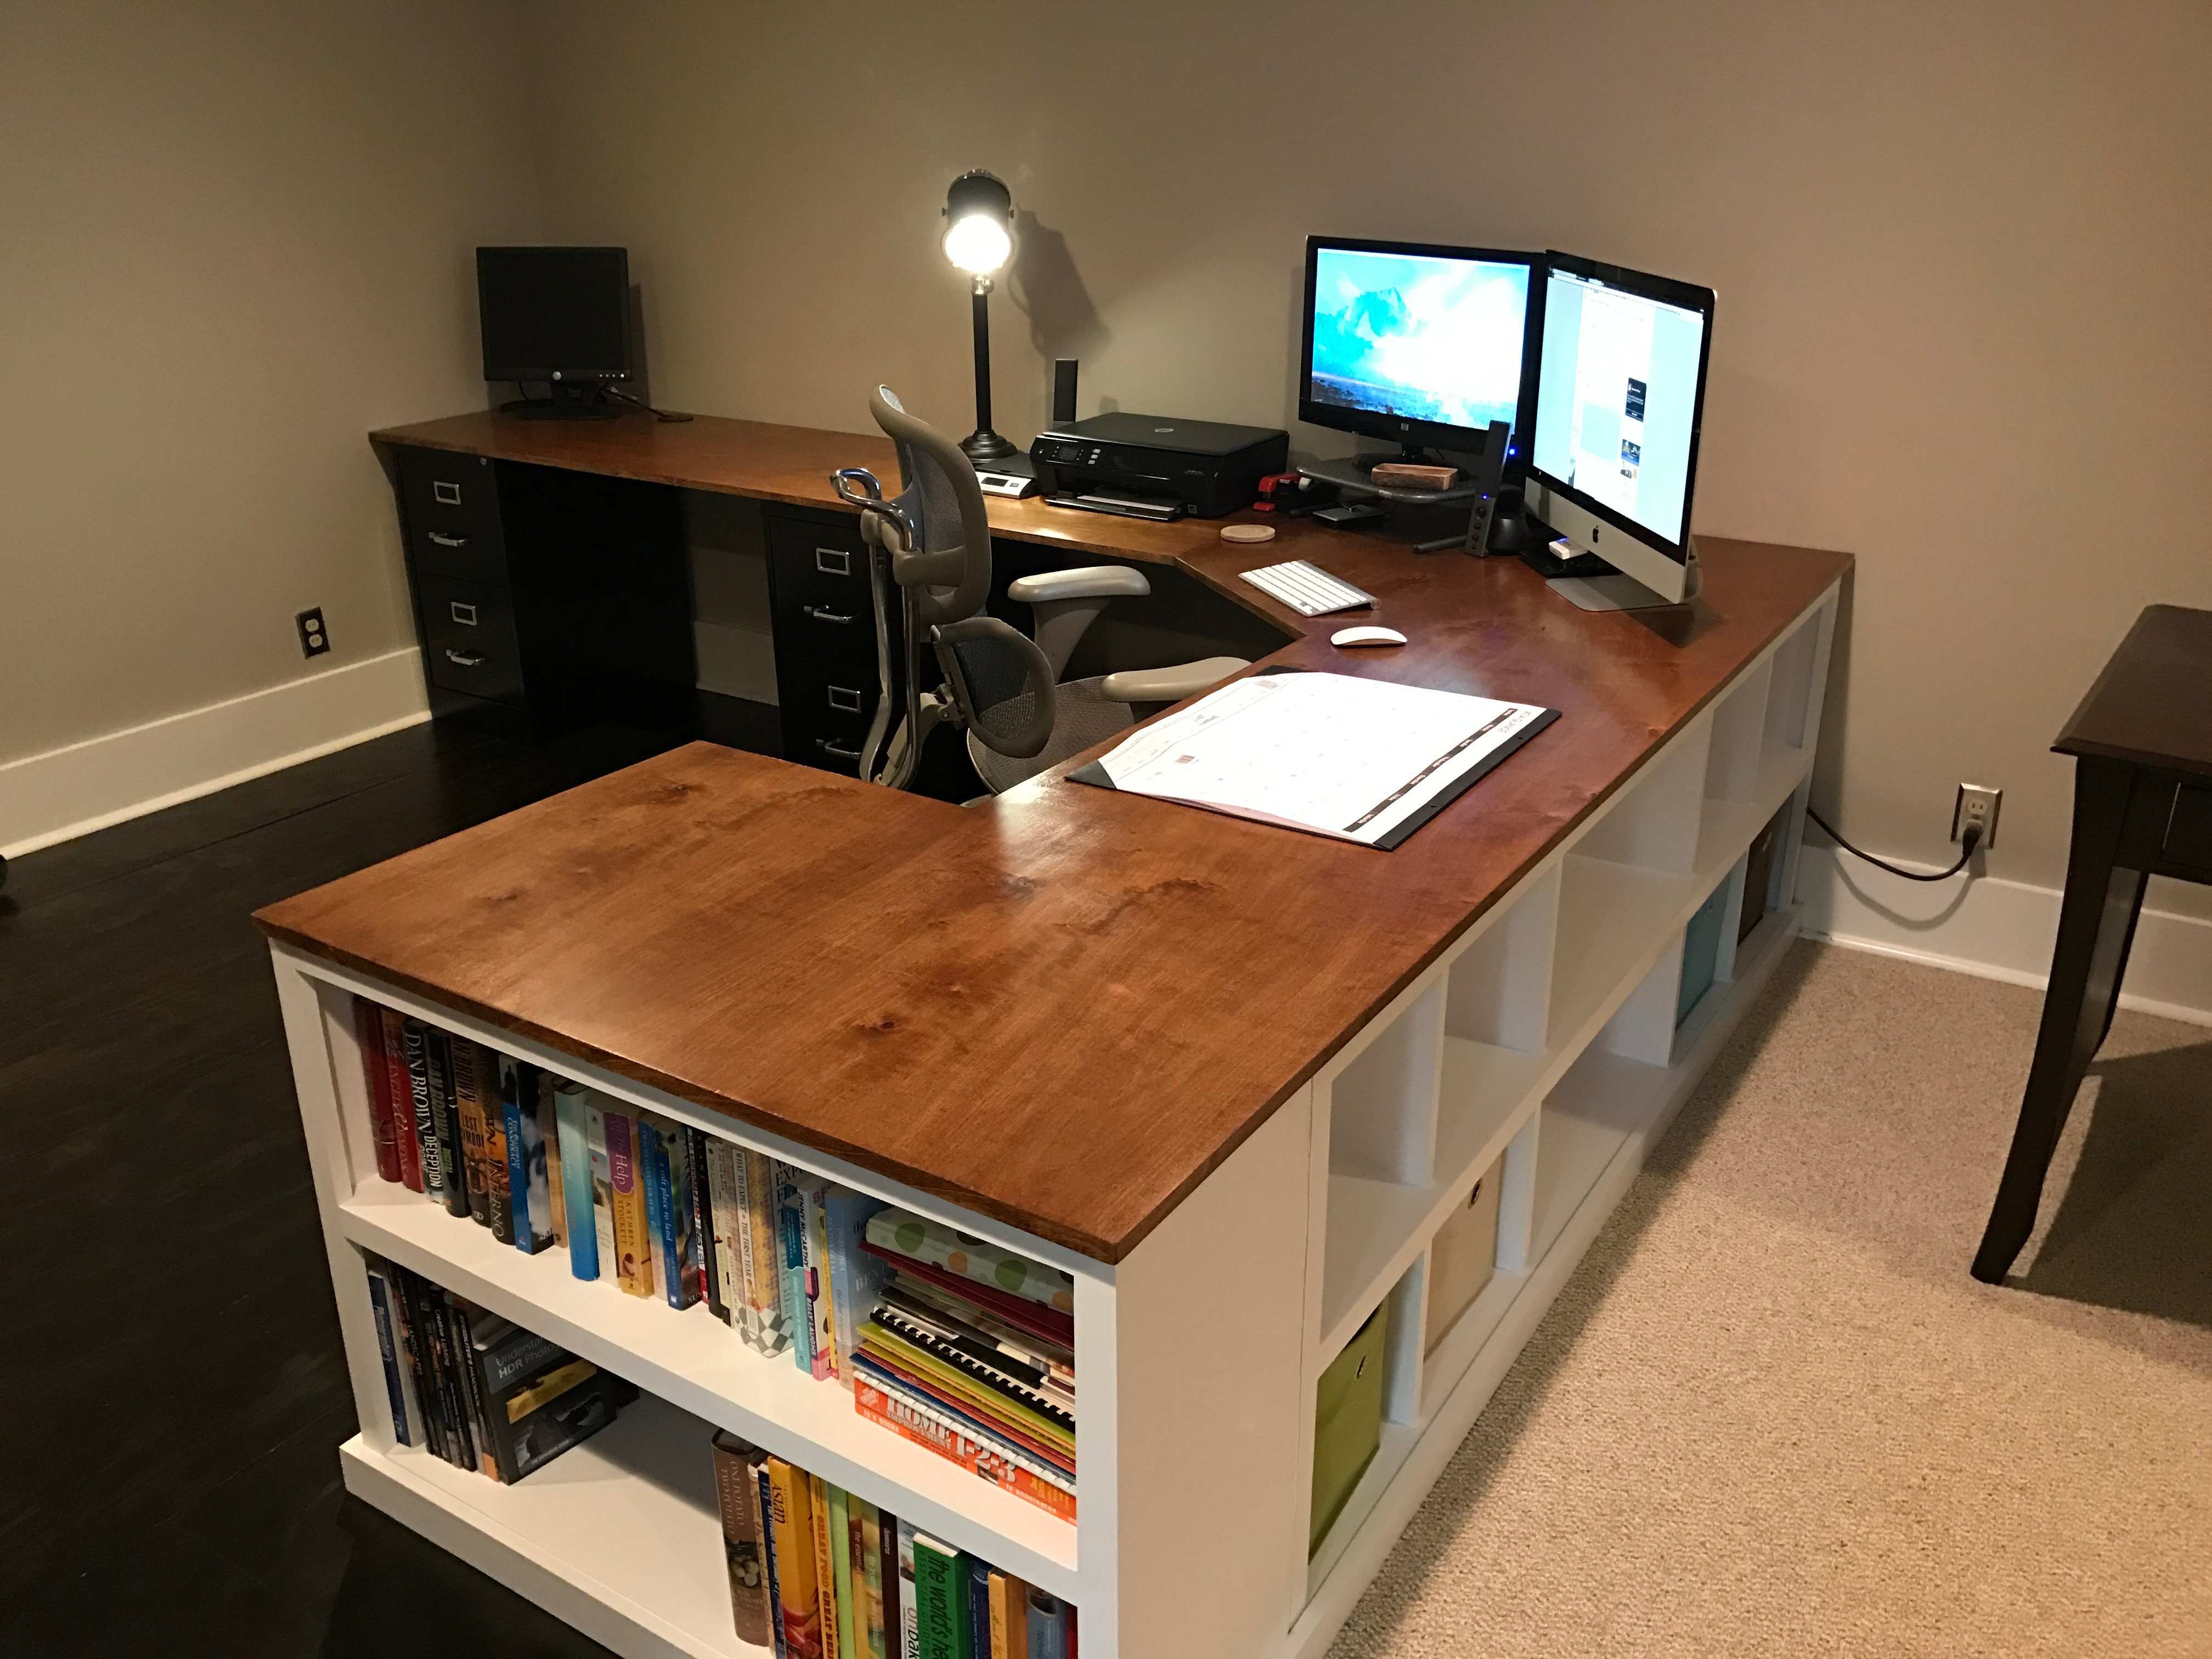
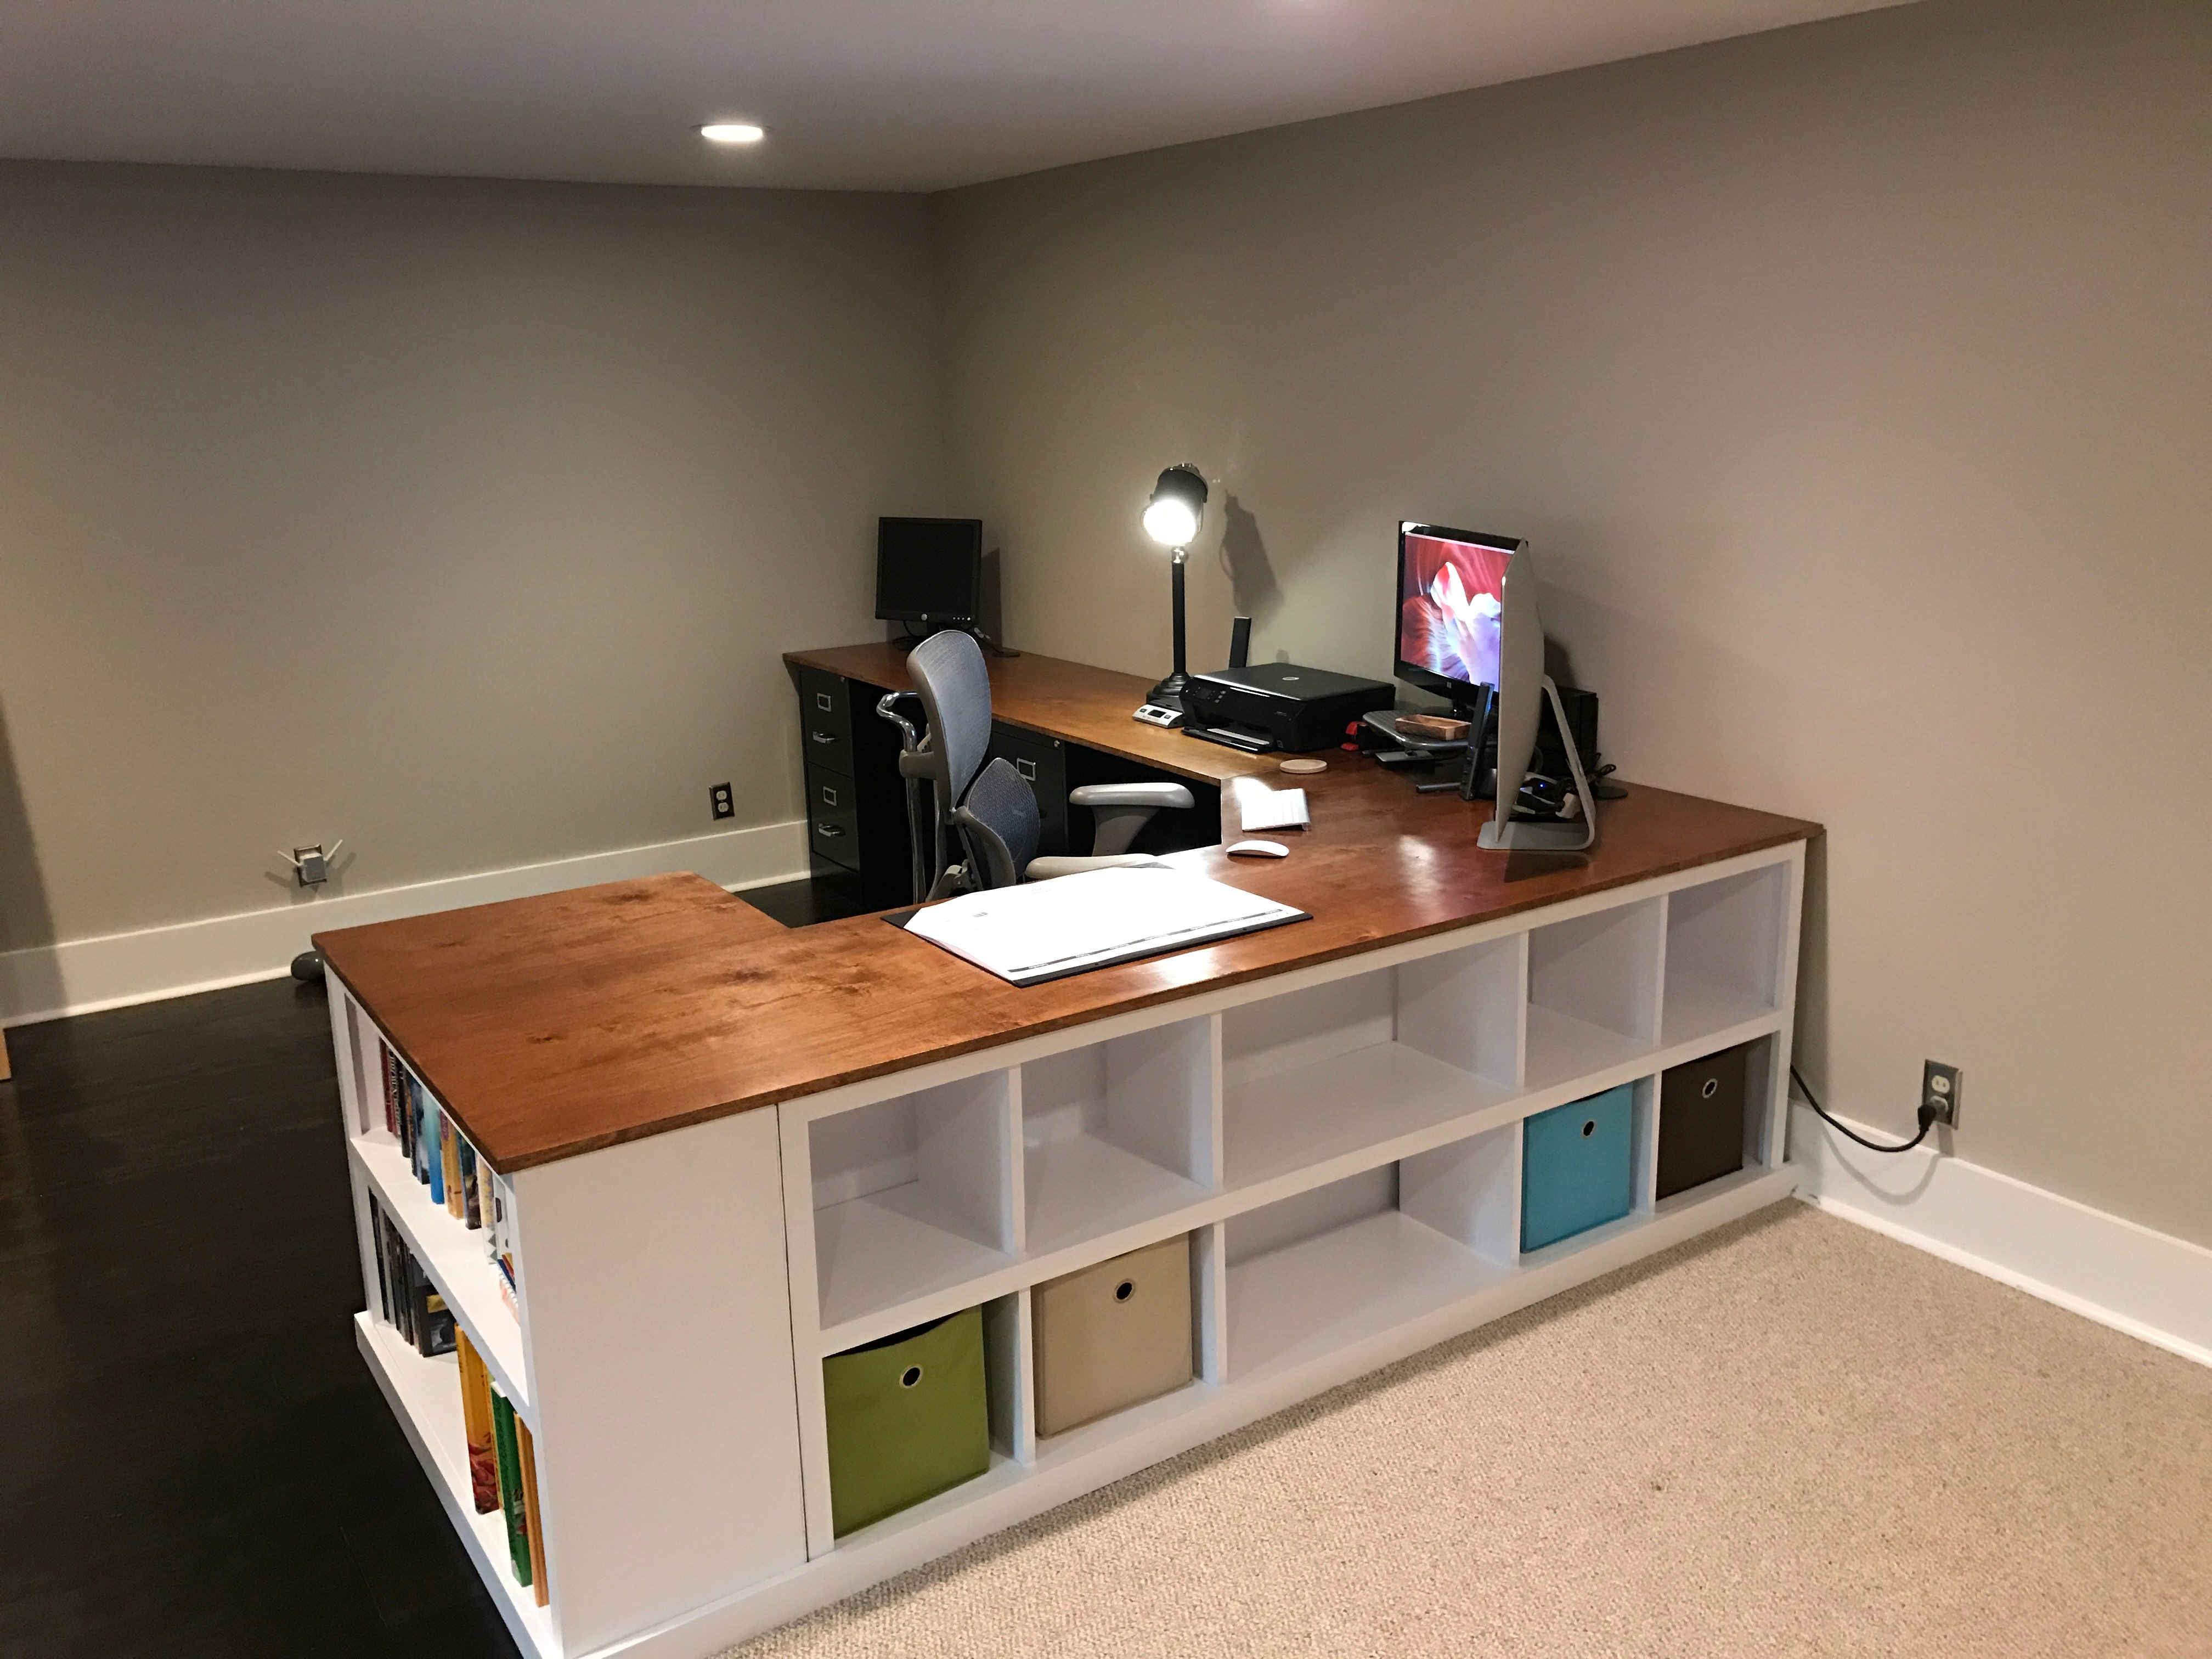
This is a mashup of several plans, combined into one big, bad ass, office desk. I've had a little experience years ago in high school woodworking classes, but haven't really built much since. This reminded me how much I enjoy working with wood. So rewarding to be typing this message at my new office desk!
Wed, 08/19/2020 - 06:25
This is amazing! So amazing could I ask you to share with me what prices from the collection of plans you used and how? I’m looking at your pic trying to figure out how to incorporate the plans you used. I want to build one for myself lol fantastic job!!!!

Modified the design to allow me to roll lawnmower directly in the end. Fun project.
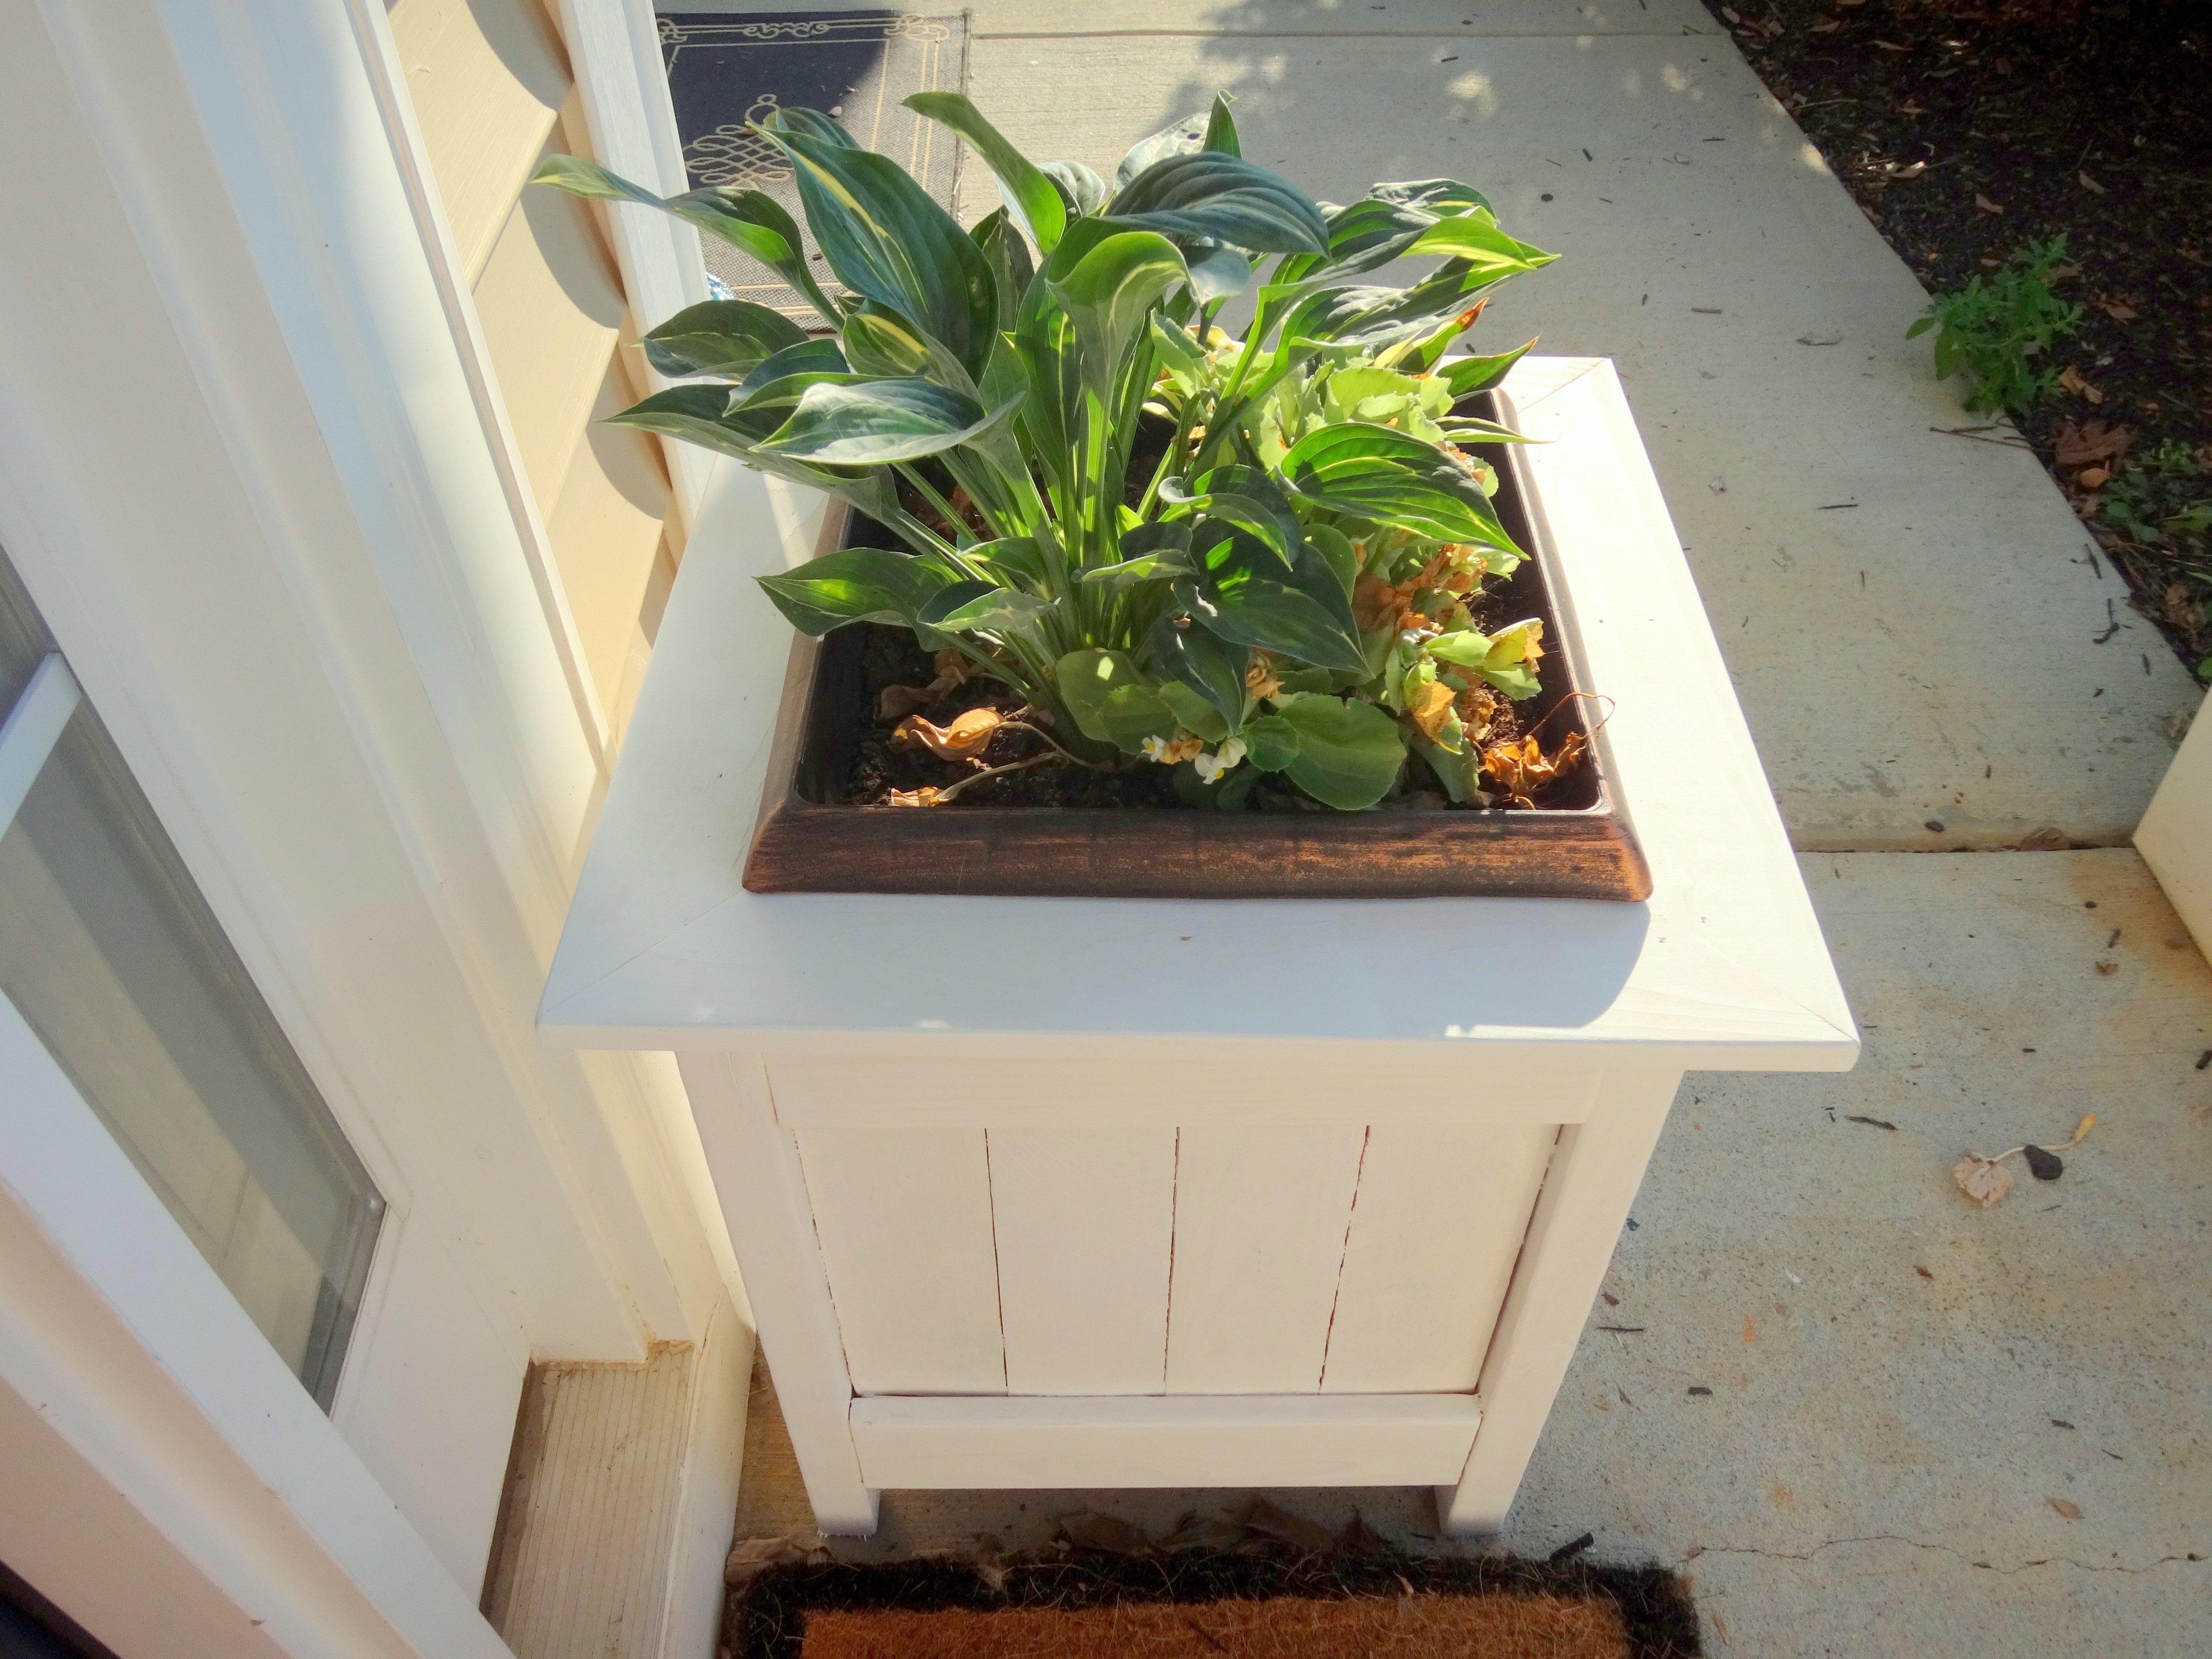
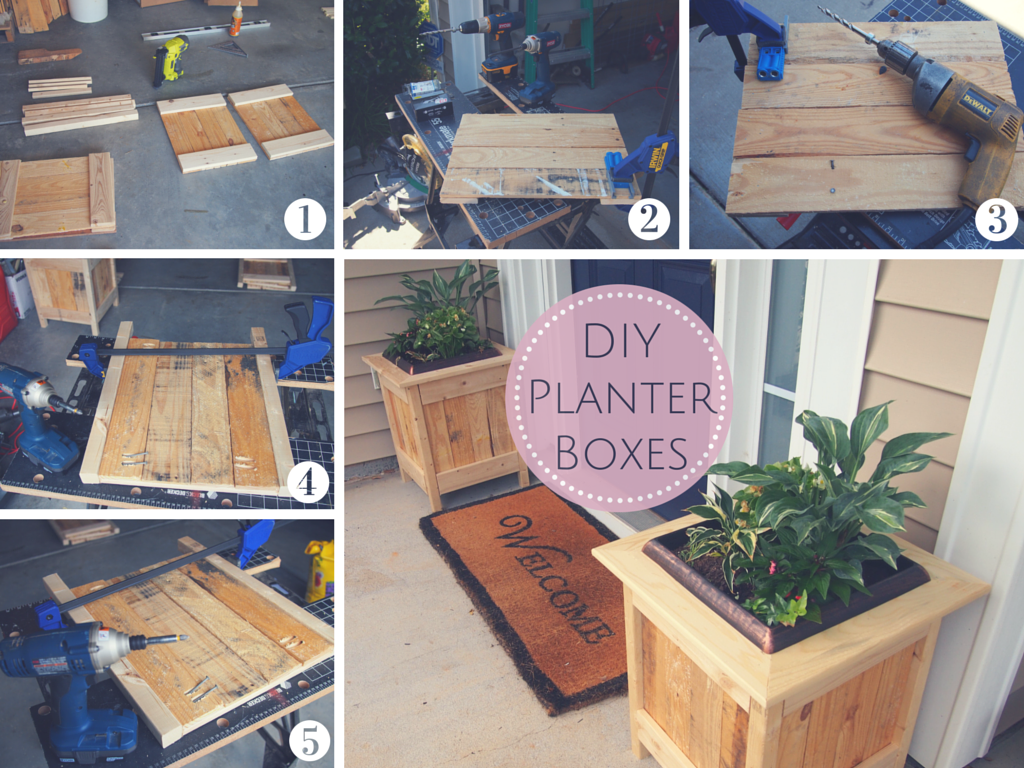
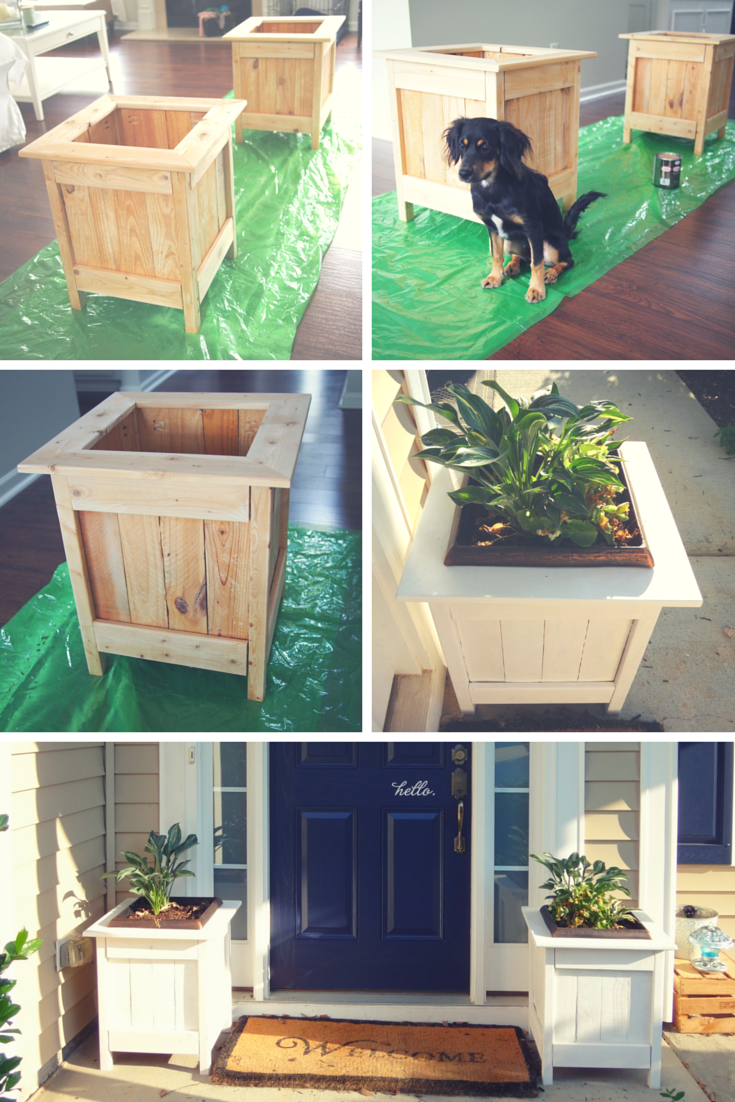
We picked up a couple 14.9" square plastic garden planters from Home Depot and ended up creating some wood planter boxes from pallet wood for them to sit in.
I didn't add up the cost of these boxes, because we had most of the wood and only needed a few pieces, but I'd say they were definitely less than $10 a box.
We altered our dimensions to fit our HD planters so they would slip in for a snug fit and made the legs flush with the top of our sides. We build a simple frame for the top, which allowed the lip of our HD planters to sit firmly on top.
Something I didn't do, but wish I did: fill in the cracks with wood filler. There were a couple places that really could have used it, but I was in a rush and decided to skip it. They turned out great, but could have been even better had I taken an extra 30 minutes. On an off weekend, we are going to use wood filler in the seams, sand them down, and do a second coat of white paint.
Can't wait to plant these with some mums for Fall! :)
Reader submitted photo

Comments
mholguin29
Mon, 05/18/2020 - 17:25
These look great! Did you…
These look great! Did you use the cedar tone water proofing?