Octagon picnic table
I love our new table.
I love our new table.
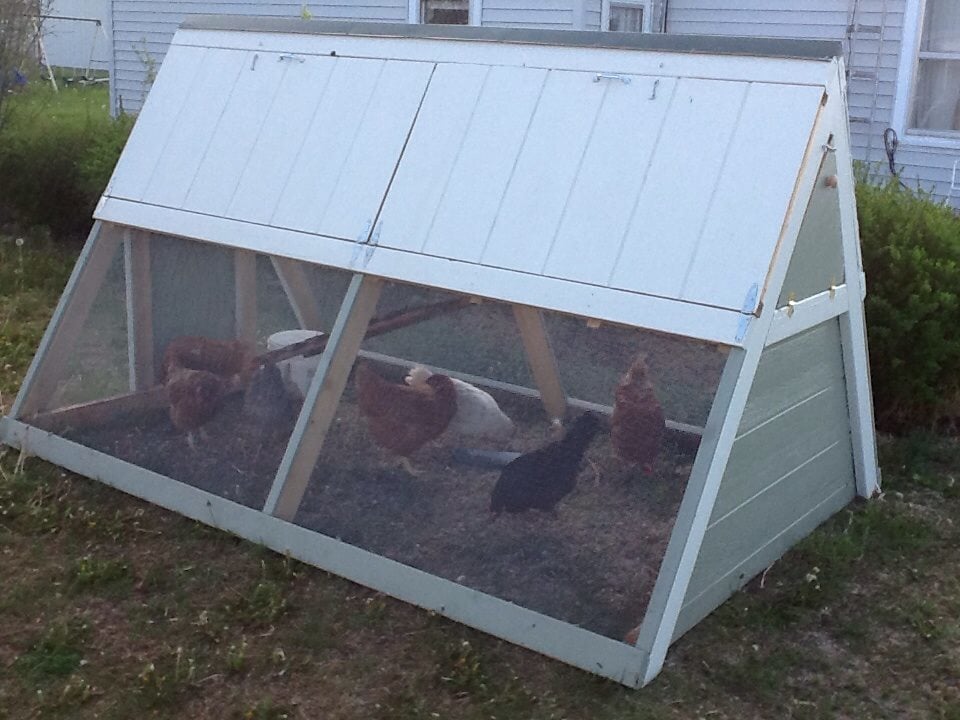
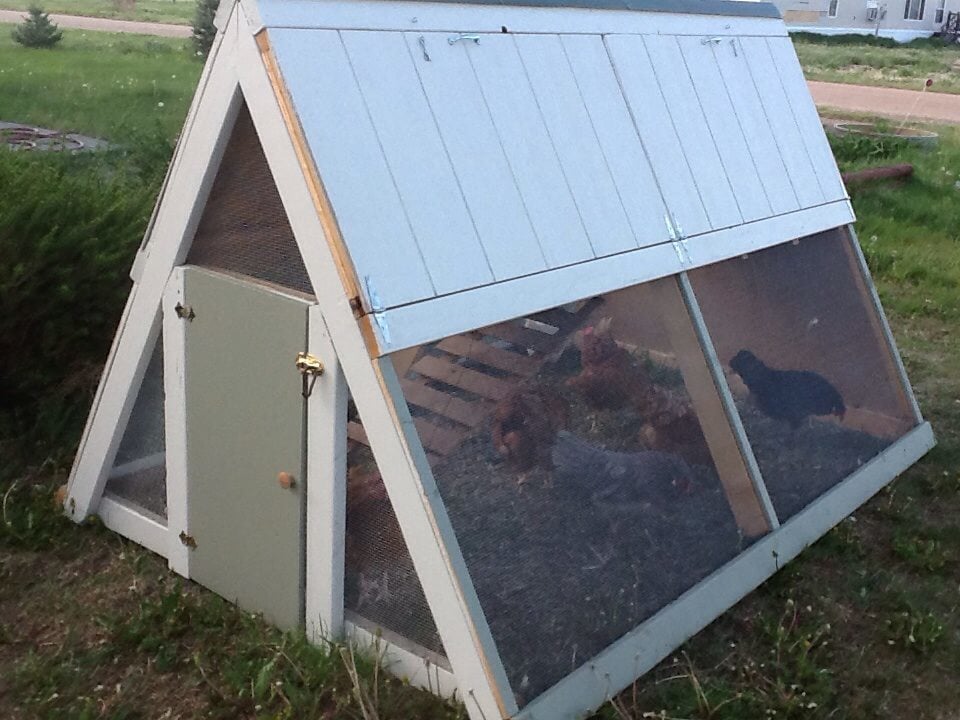
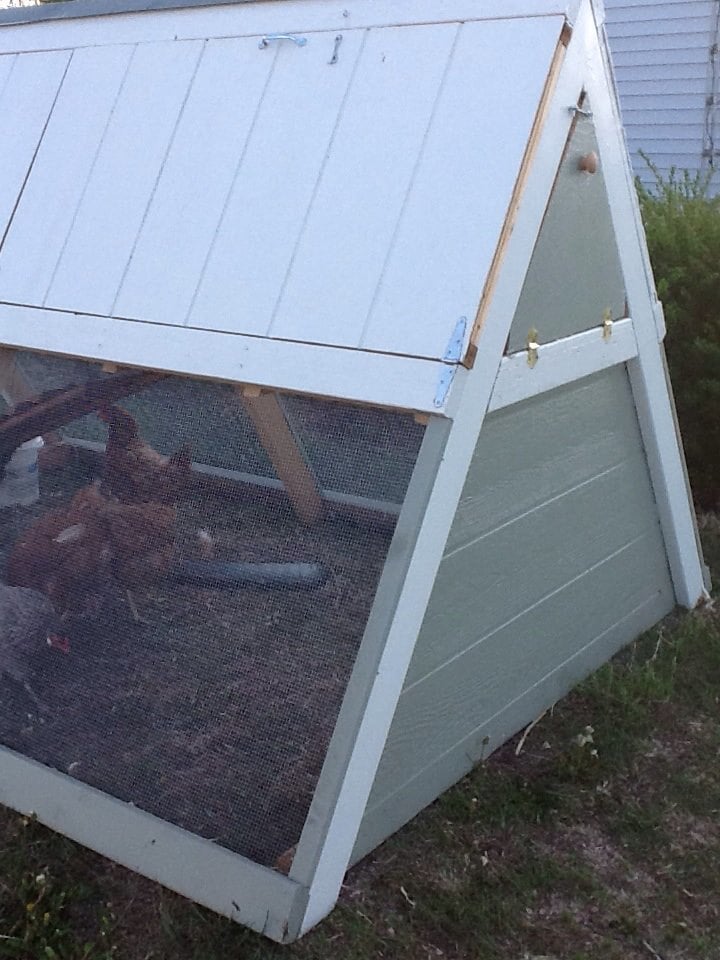
I built this A-Frame Chicken Coop using the Ana White plans. It turned out adorable, strong, and I am very pleased. Final cost was $250, and it took me 4 days (in real time, as a mom of 3). One Saturday at Lowes shopping, one Sunday afternoon cutting, and two days of assembly. Then a 5th for painting. Give or take a dozen extra runs to the hardware store! My brother-in-law helped cut the angles on his miter saw, and my uncle helped with assembly. I kinda doubt this could be done for $100 - maybe if you have a bunch of scrap materials and spare paint. We even have 7 or 8 hens in there! I only intended 3 to live in it, but my uncle added the extras and they all get along happily. I found the roof cap at Home Depot (didn't find at Lowes).
I would also like to point out that I was very afraid to do carpentry - I was afraid to even buy the lumber. But I asked for a lot of help from a lot of Lowe's and Home Depot people, and resisted the naysayers, and just got brave and did it. And it came out beautifully! If you are new to using power tools, get someone to assist, and you would need help anyway with holding things up while another drills.
Wed, 05/22/2013 - 11:59
As an extra note, I used Hardware cloth, not chicken wire. Wire will not keep dogs or predators out (and my dog immediately tried but failed to claw his way in). I bought I believe 36 inch tall rolls - the standard size that I could tell (not 30 inches like in the plans). But it fit perfectly, so I think maybe the plans had a typo? Lay out the lumber according to the plans and it will fit perfectly.
Wed, 05/22/2013 - 21:33
Very nice! Hardware cloth is definitely the way to go.
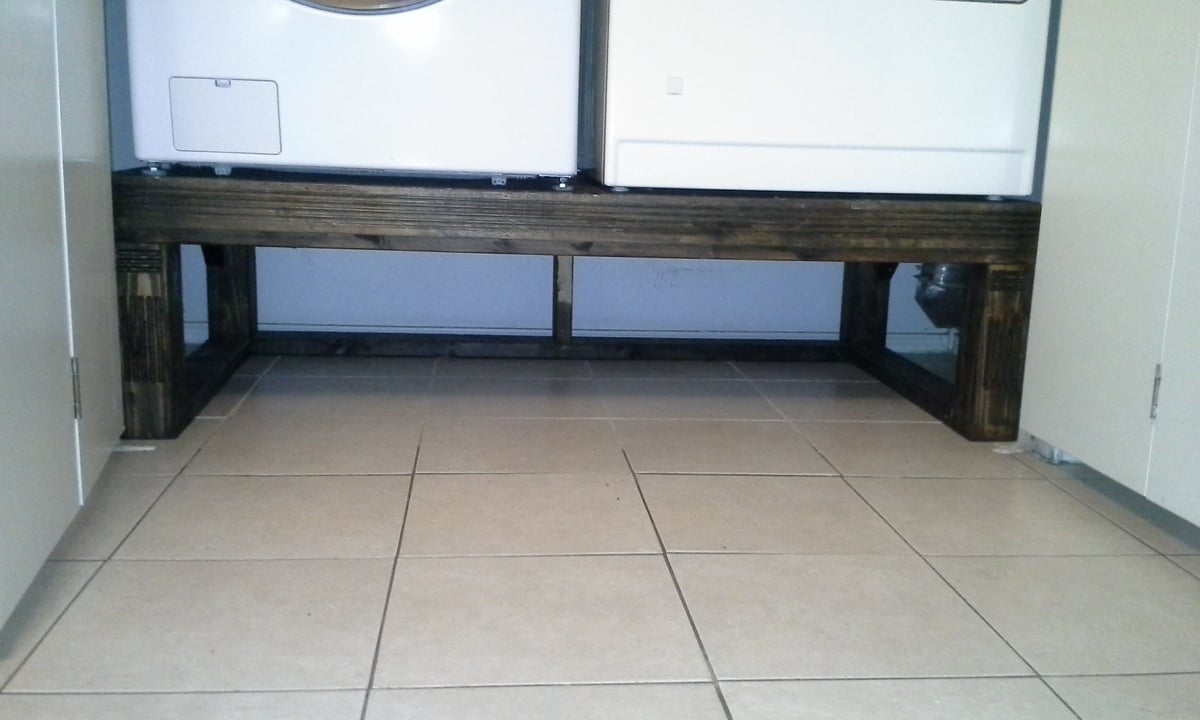
I had worked on this project a while ago, but did not had time to add my brag post. I actually modified the dimensions to fit my needs. I enjoyed making this pedestal along with my son.
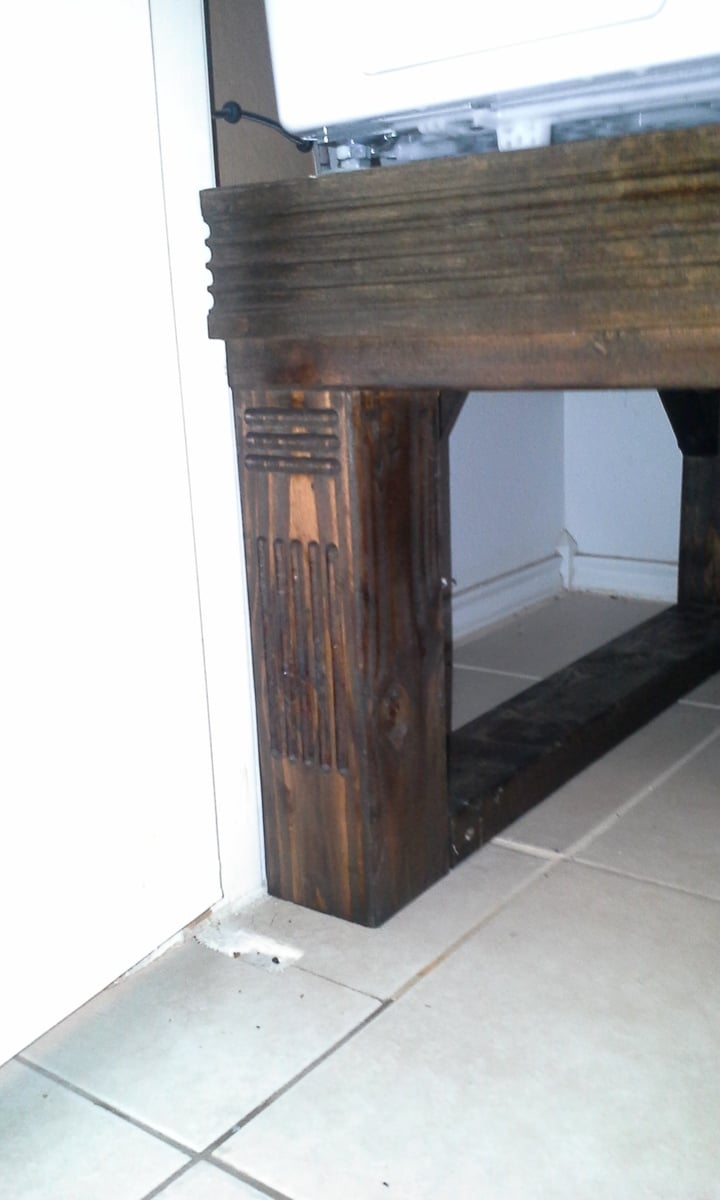
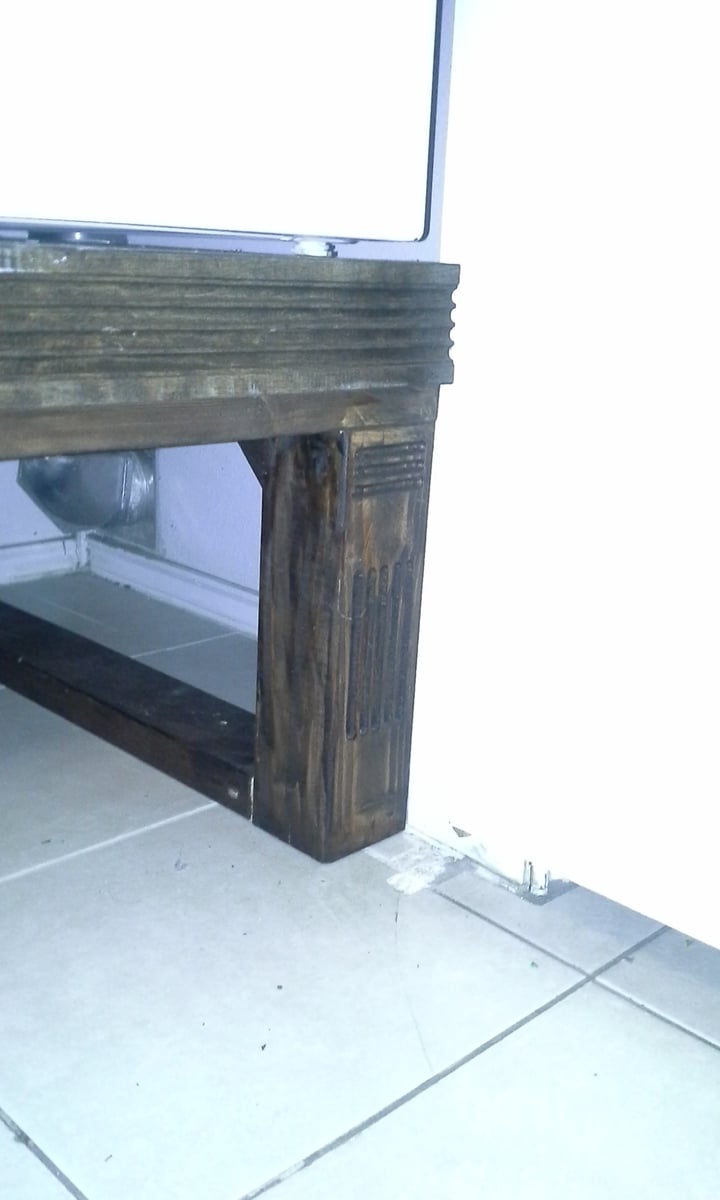
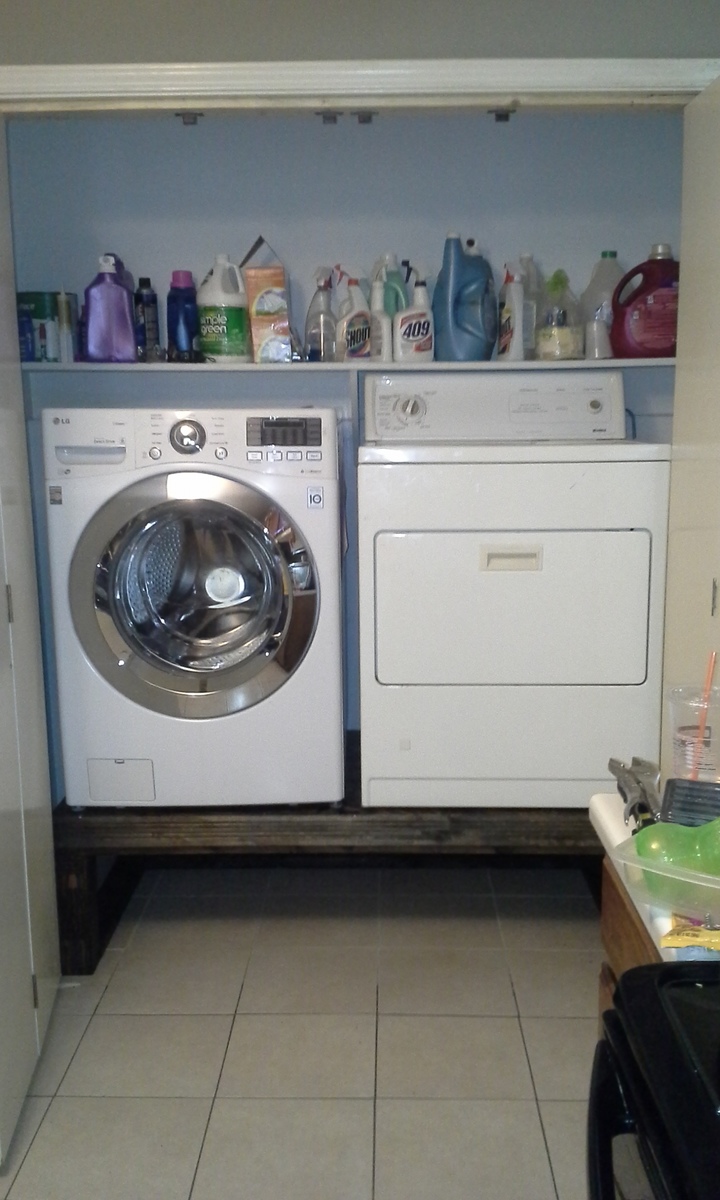
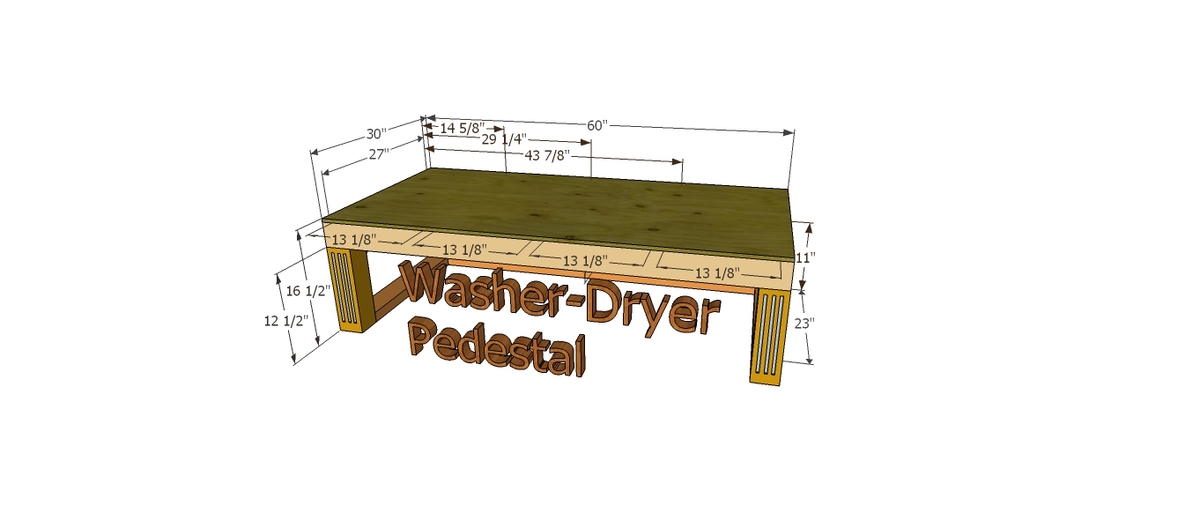
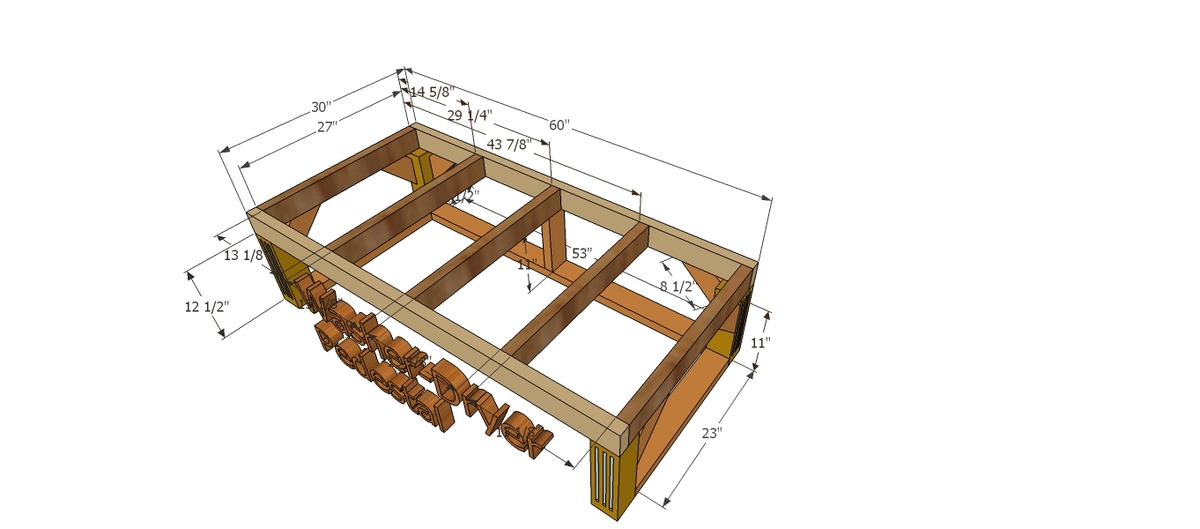
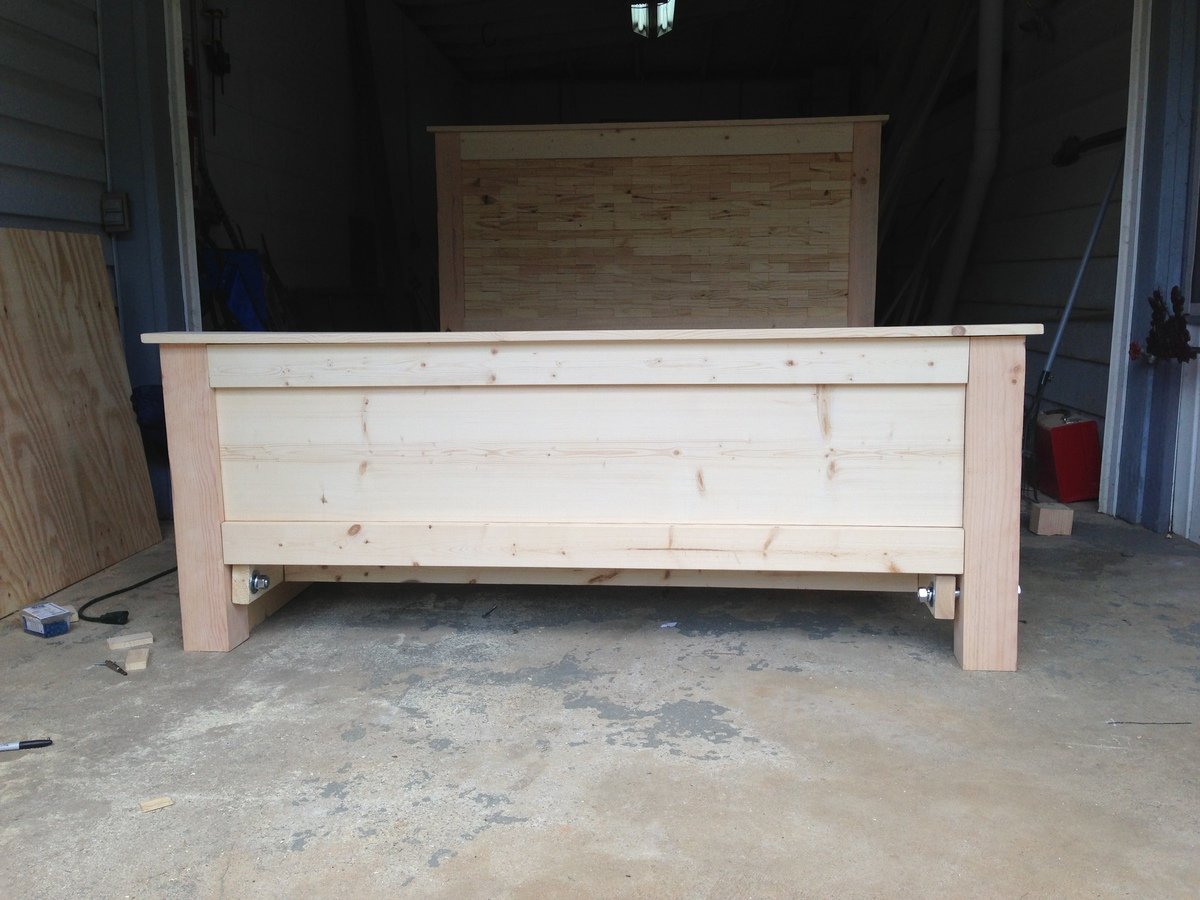
This Project was my second build. I had a few issues finding the materials required to even build it. Everything was found easily except the 4x4s. Everything here in my part of NC is either already pressure treated or cedar. Since everything else is Pine that really didn't float my boat. Plus for 1 4x4x8 of cedar cost $29 and for a color i didn't even want it wasn't even considerable. After calling around to a few places and no success i finally though of calling a lumber mill.
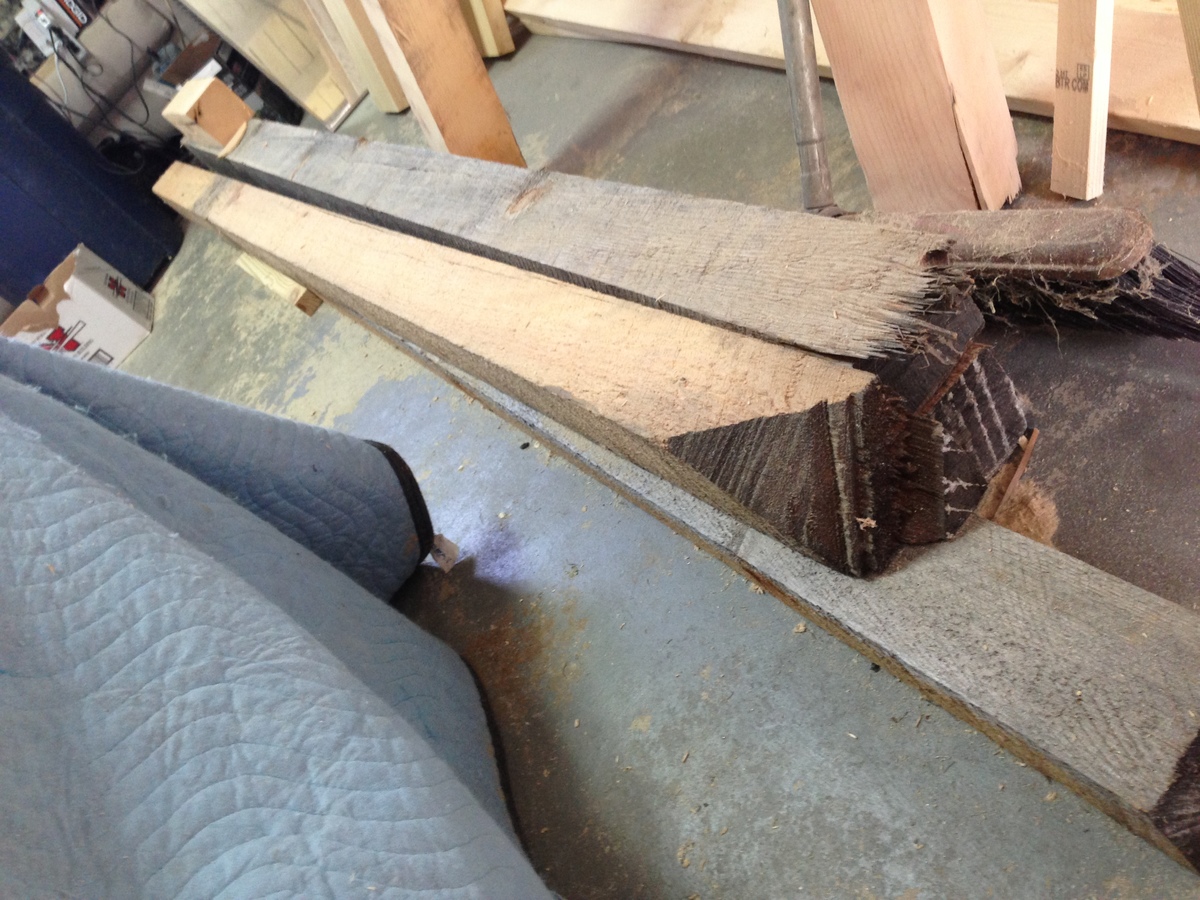
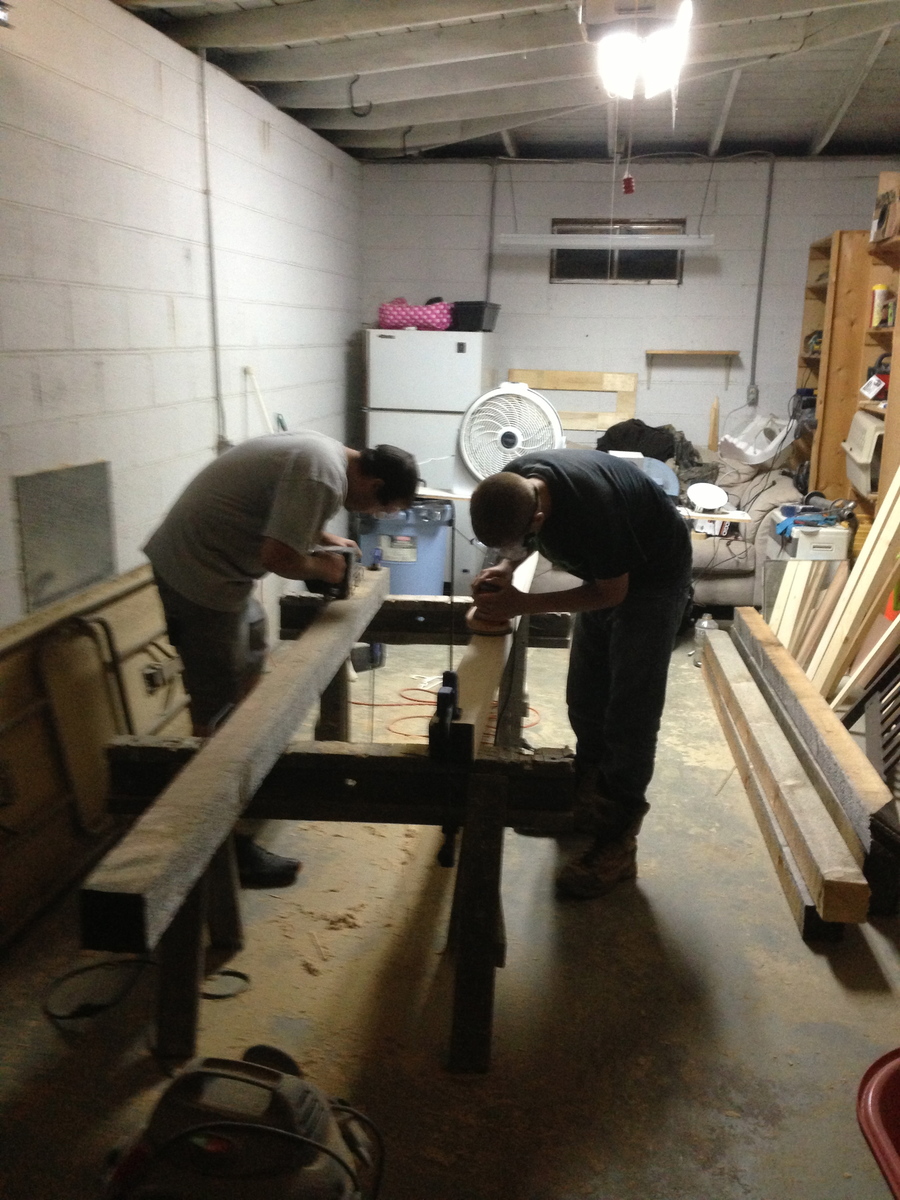
The Lumber mill had what i wanted for really cheap 4x4x8 for $5 but they were in rough condition. I had to do a lot of sanding to get them into workable condition. oh and by the way these are really 4x4s none of that 3.5in stuff here and man are they heavy.
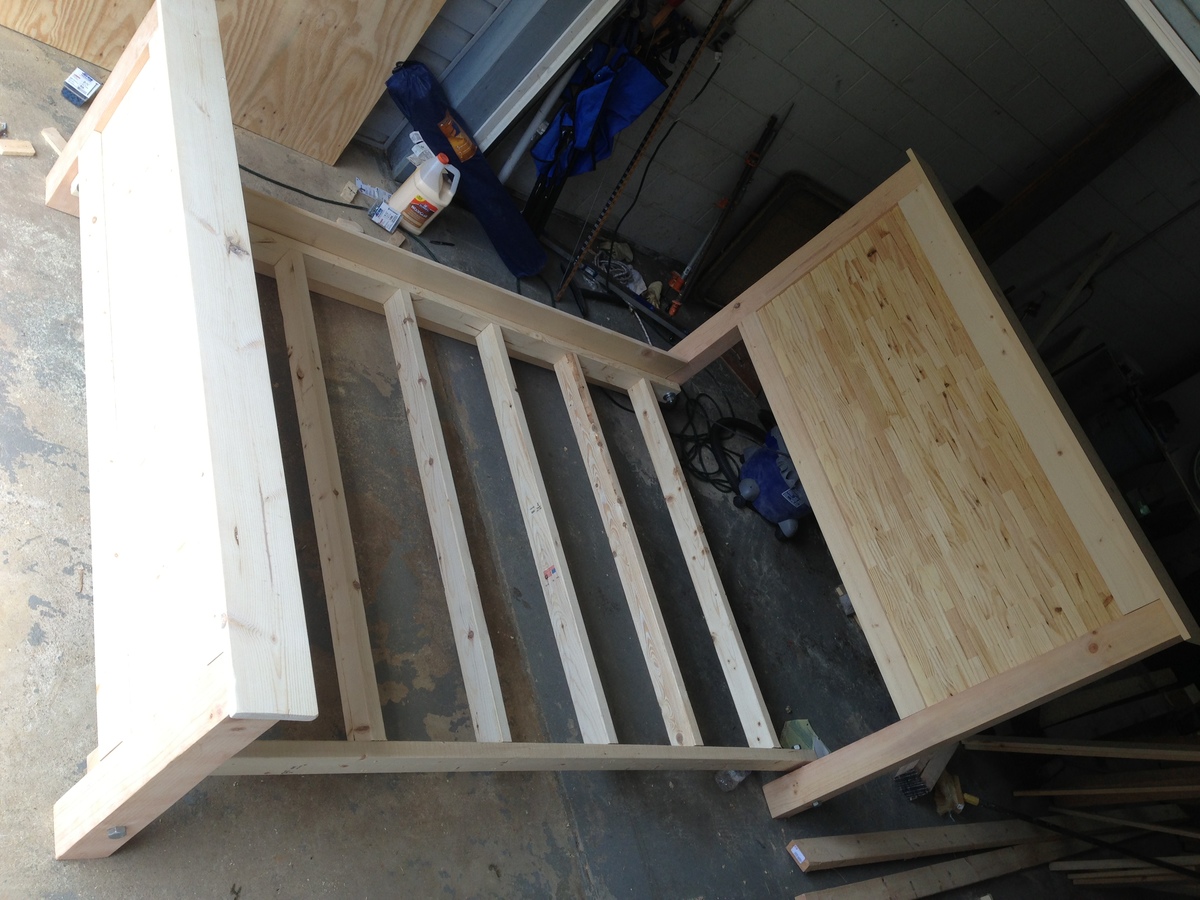
Once i Started building my girlfriend decided she wanted the footboard to be higher and she didn't want to see any plywood for 1 we were going with a light finish and didn't think it would look to good. Instead of the footboard being at 20in high we raised it to 26. This allowed me to use some existing wood i already had to fill in the holes of exposed plywood. I used a 1x12 and 4 1x4s, i really only required 2 1x4 but to continue with the raised look of the footboard i used 4.
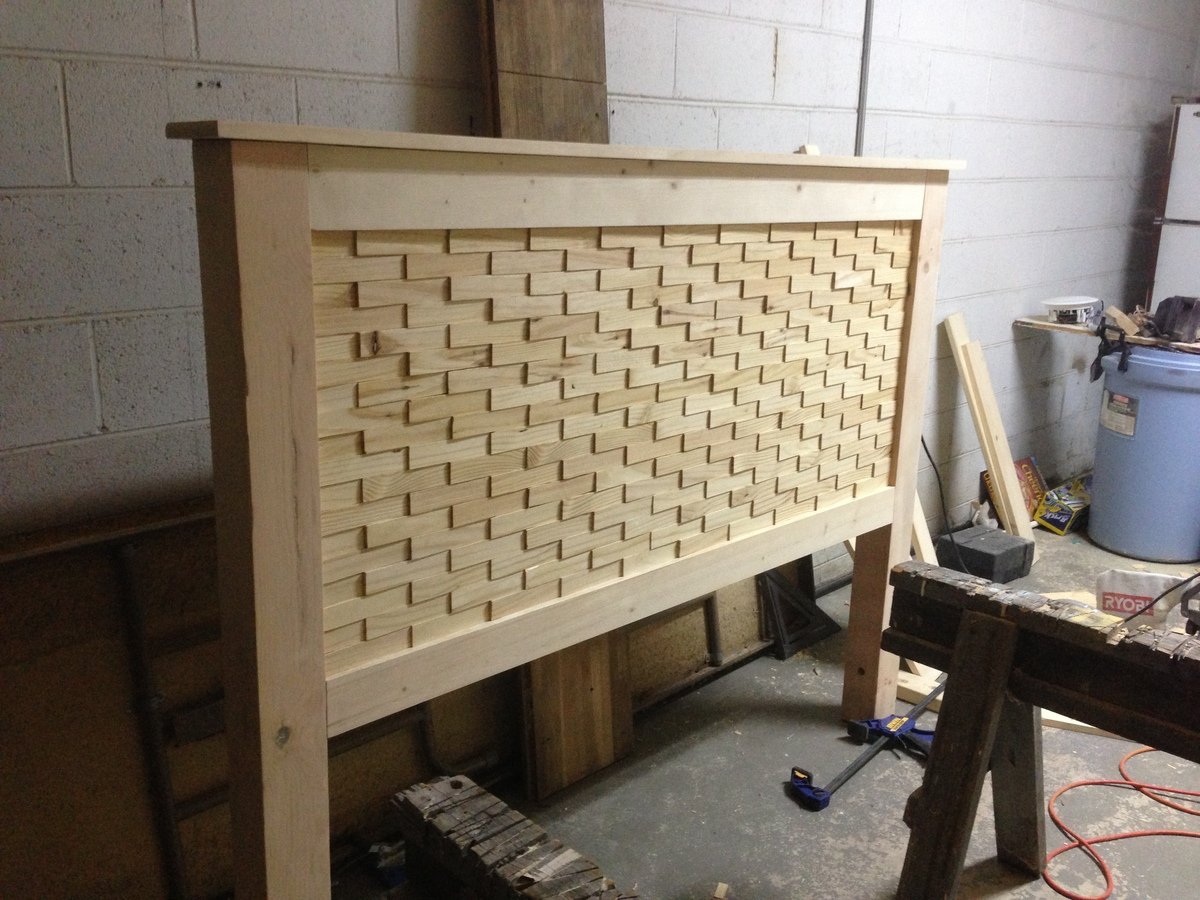
As far as the headboard goes i had to change that up a little bit as well. Im not sure if it was just because of the queen size or the fact that the lumber place i used to buy the 1x3s only had round edges so i opted to go with the 1x4s. Well because of that when i got to the last row of shims it was less than 1/2 the size. So resolve this issue again i used a existing 1x6 and replaced the top 1x4 with it. i made a line on the 1x6 which was taller then the headboard and cut it off with my circle saw so its now like a 1x5. Also on a side note when it came to the shims i cut them all 6in long due to the fact the center of the head board was 60in. it gave me an easy 10 shims per row. i used wood glue to hold them in place.
When it came to hooking the headboard and footboard to the bed frame i used 3/4s in-7in Lag bolts. this allows for easy on and off plus theres no way im breaking through them.
I loved this build but man those shim took forever. Sanding the 4x4s took me about 2 days. This job took me about 1 week to complete it working on it a few hours a night. But it was well worth it. I loved the way it turned out. its bigger than i though it would be but its workable.
Sun, 01/05/2014 - 18:13
You've really done a beautiful job! And I don't even like light-stained wood typically. Beautiful shim work.
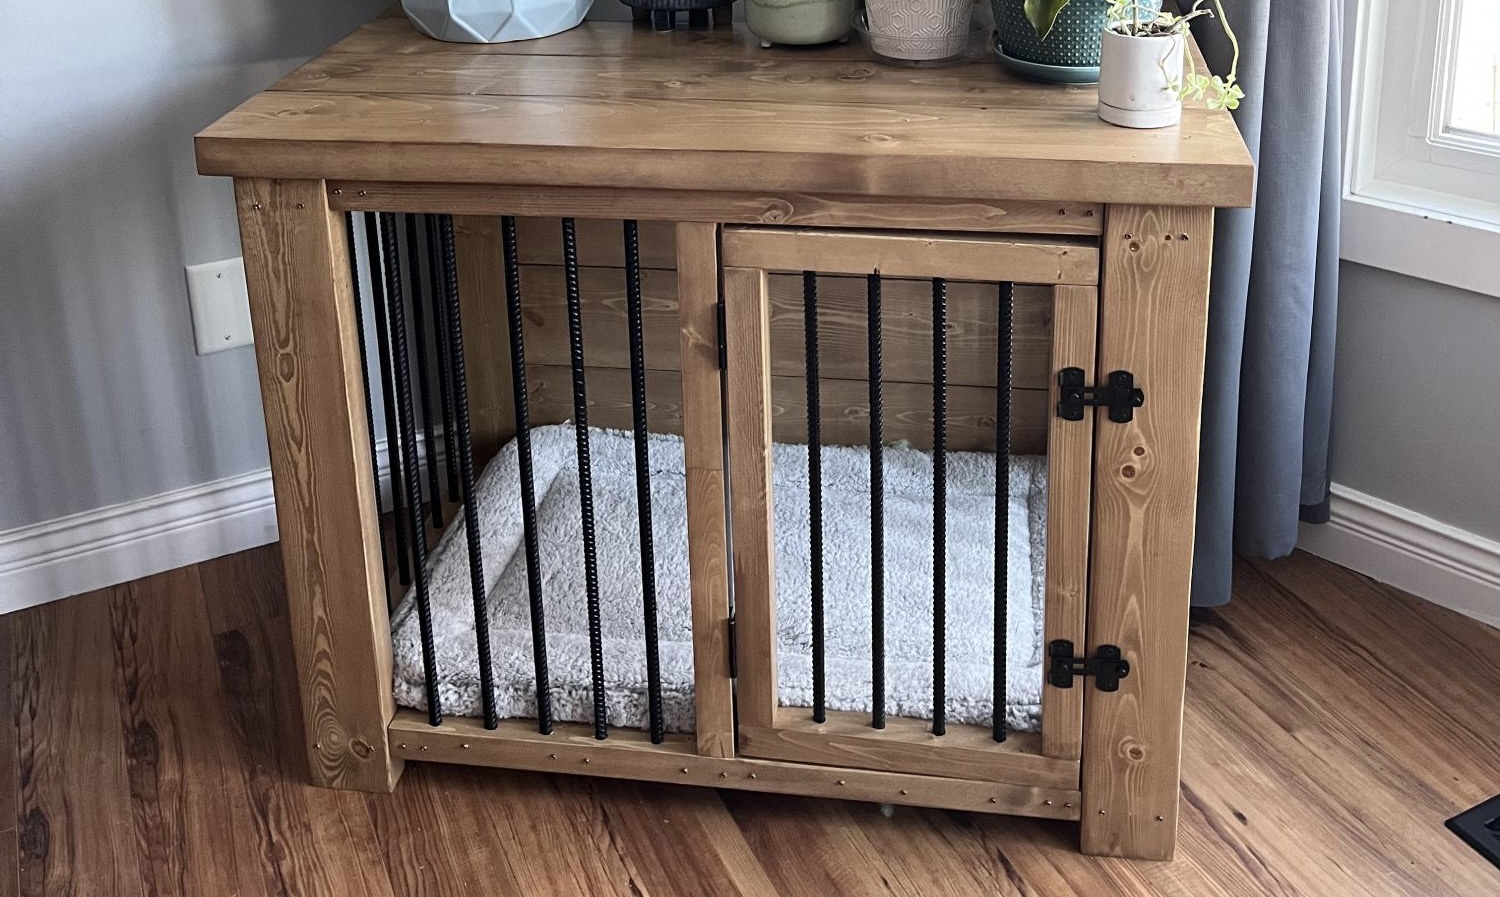
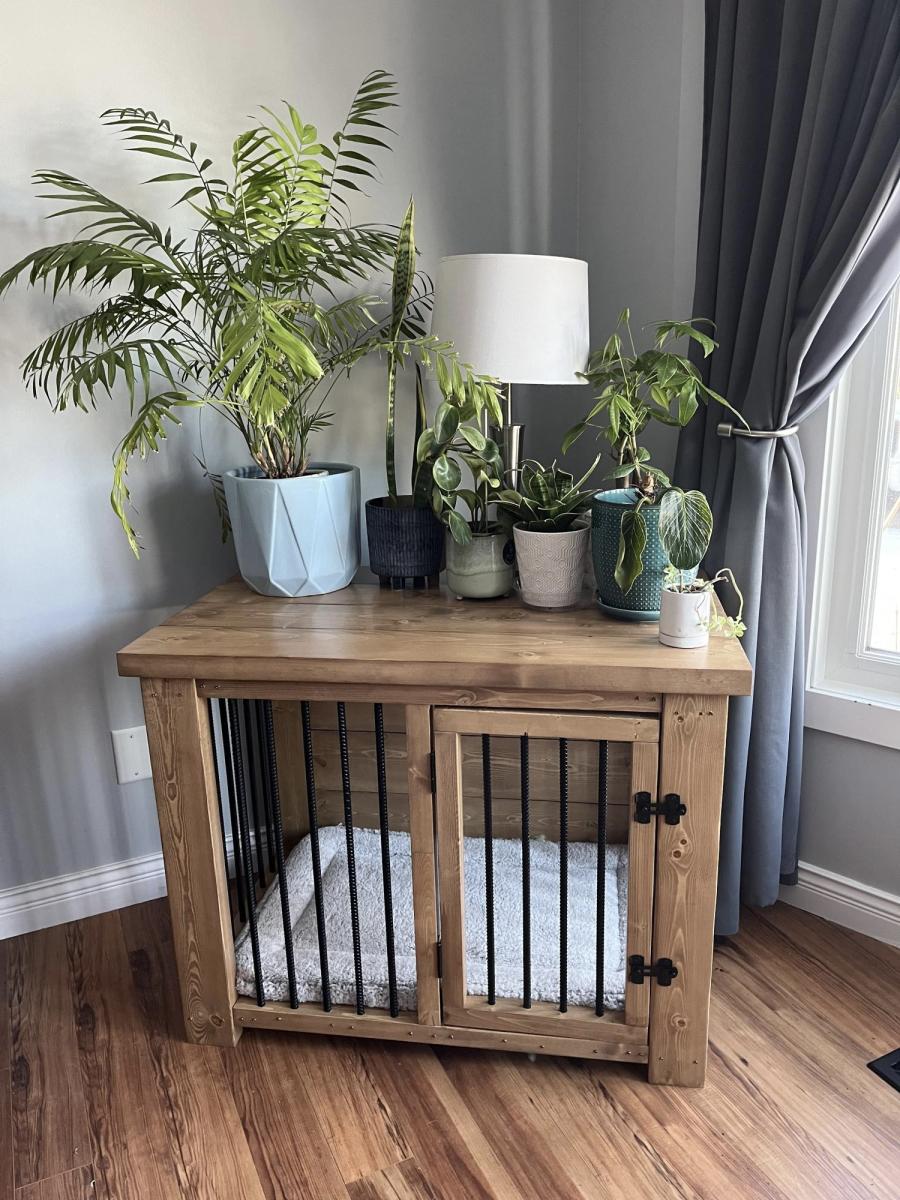
In January, I came across your plans for the farmhouse, coffee table. I made it, and loved it! I had been wanting a new spin on kennels for our dogs. And thought your coffee table transformed into a dog kennel would be perfect, and they are!!
Fri, 03/03/2023 - 11:53
Love the look, thank you so much for sharing!
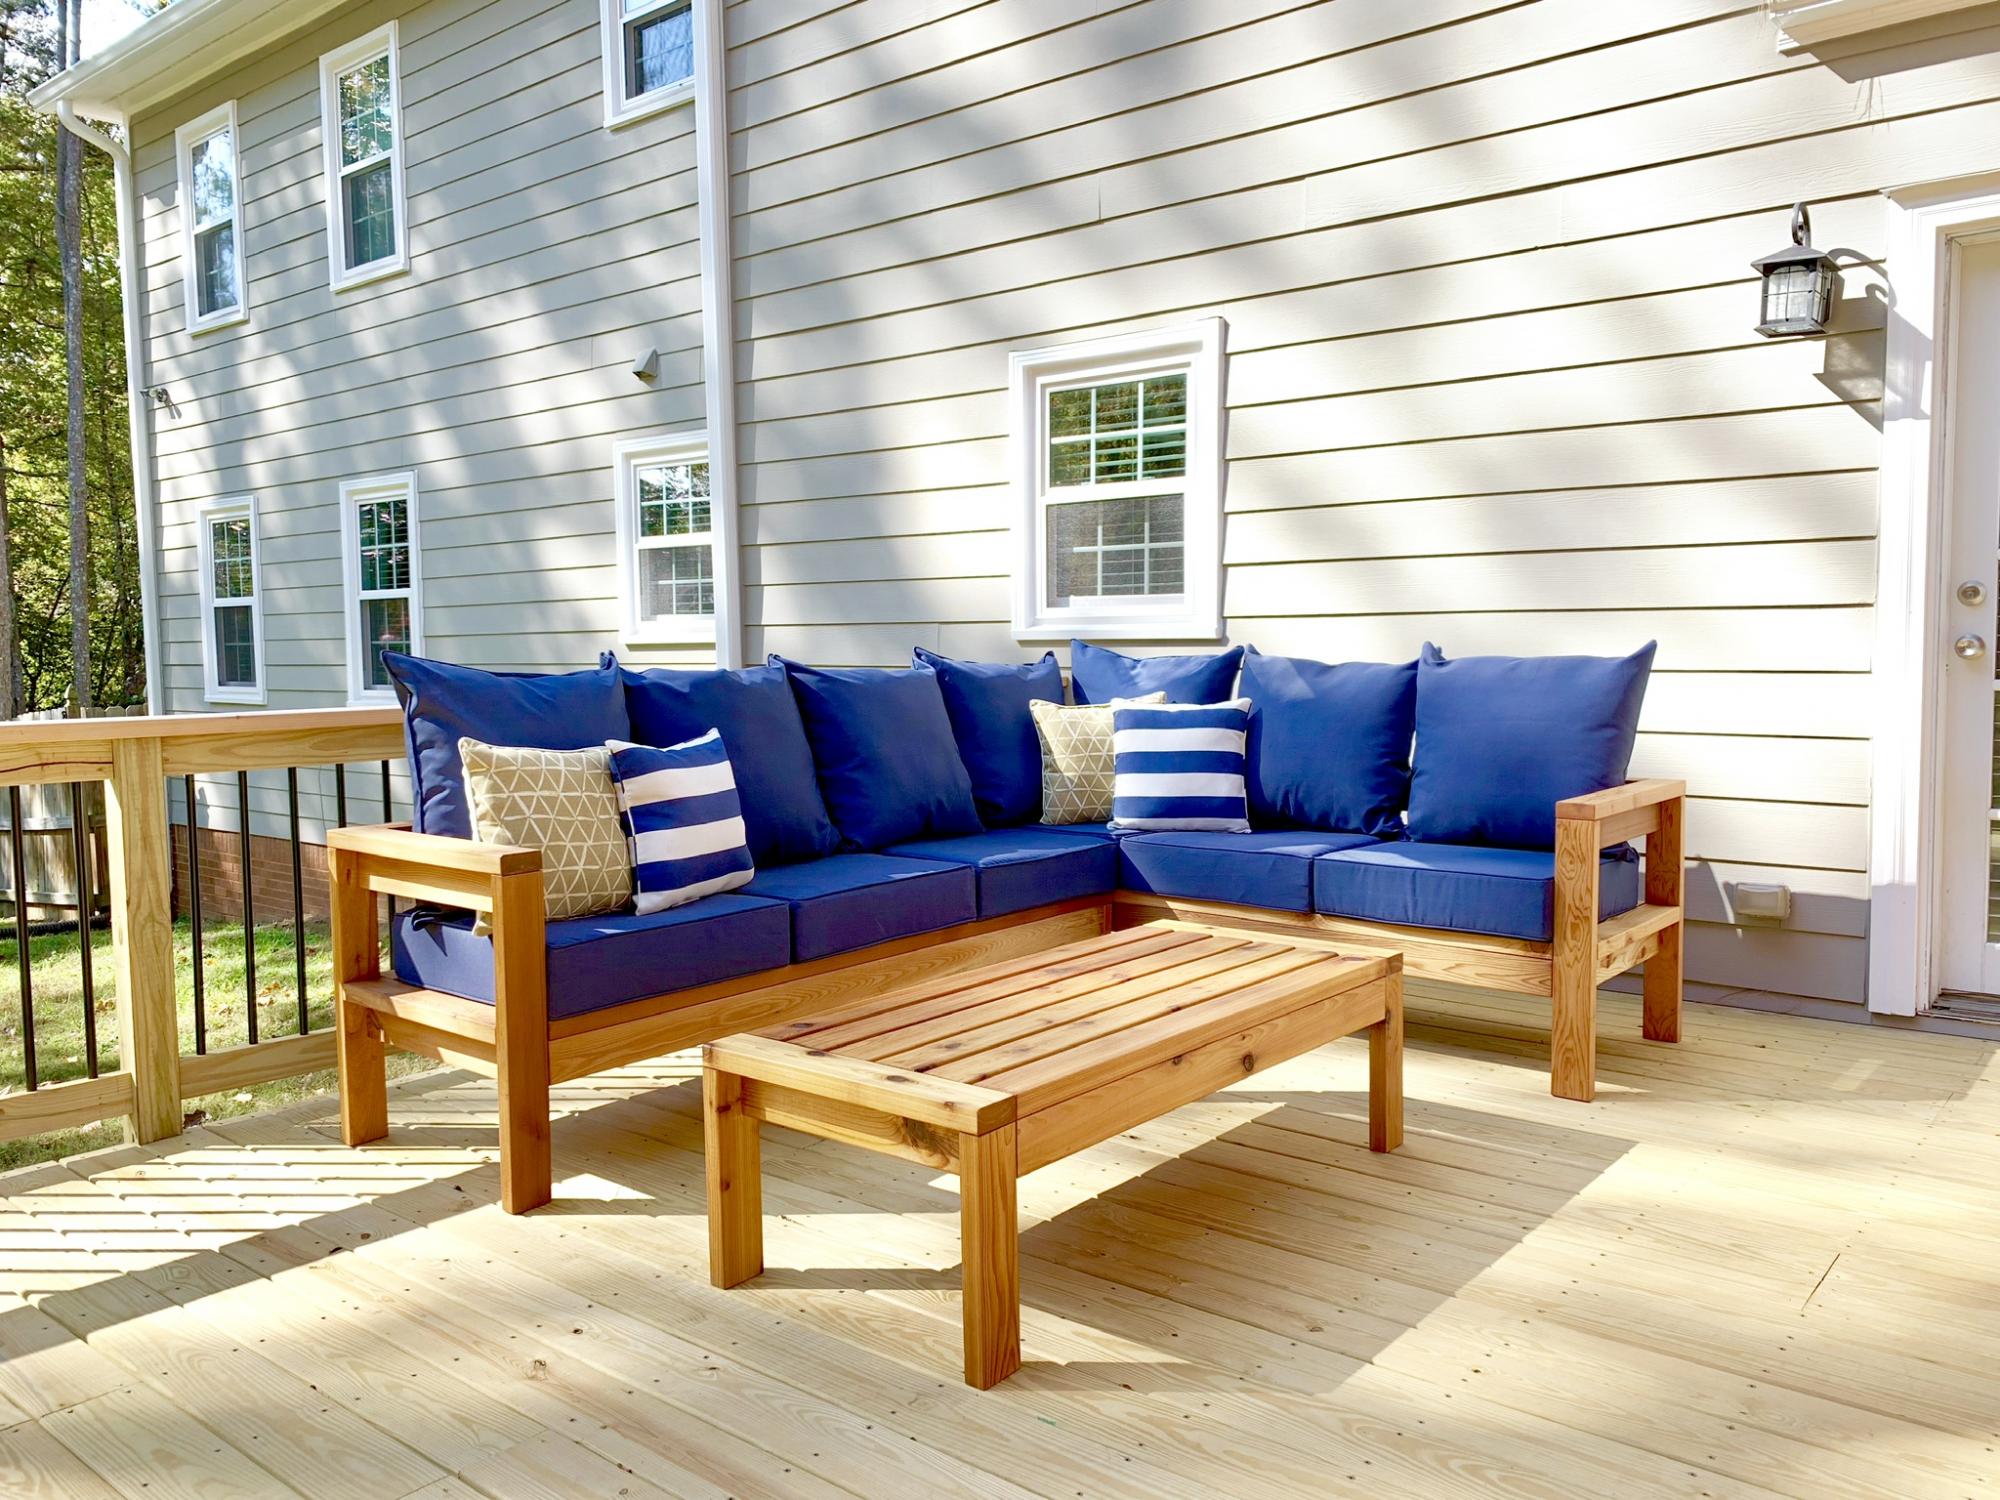
I followed the instructions on the Ana White website, and followed a few of the commenters ideas to reduce the size slightly to minimize the wood costs. I used pocket holes wherever I could to try and reduce the amount of visible screw heads. The cushions were purchased at Big Lots and the cedar was purchased at the big home improvement store. My 5 year old and I worked on this and are so proud of how it turned out.
My mom was looking for a new outdoor table, and asked me to come up with something. I found the link for these plans (http://www.thedesignconfidential.com/2011/04/free-diy-furniture-plans-t…) to knock off Restoration Hardware's $4000 Provence Beam outdoor table. Overall I liked the plan, with the chunkier look of the 4x4's. But there were a lot of errors in the diagrams, and the finished height is 34" which is ridiculously tall for a table. So we took it apart and cut the legs back down to change the finished height to 30". We chose rough-cut cedar for it's look and outdoor properties, not wanting to use treated lumber for a dining table. We couldn't find 2x10's like the plan, so we substituted seven 2x6's just like Ana's plan, but left a 1/2" gap in between so water can drain and not pool on top and rot the wood. Also, since we were working with 4x4's for the legs, we chose heavy duty lag bolts instead of screws to join them together. I love the finished look they give. Overall it's a sturdy, yet lightweight table that my mom loves and has already used for entertaining!


Wed, 04/25/2012 - 10:02
Thanks Brook! It was so much fun to build. I put my dad and husband to work while I was the "project manager" ;)
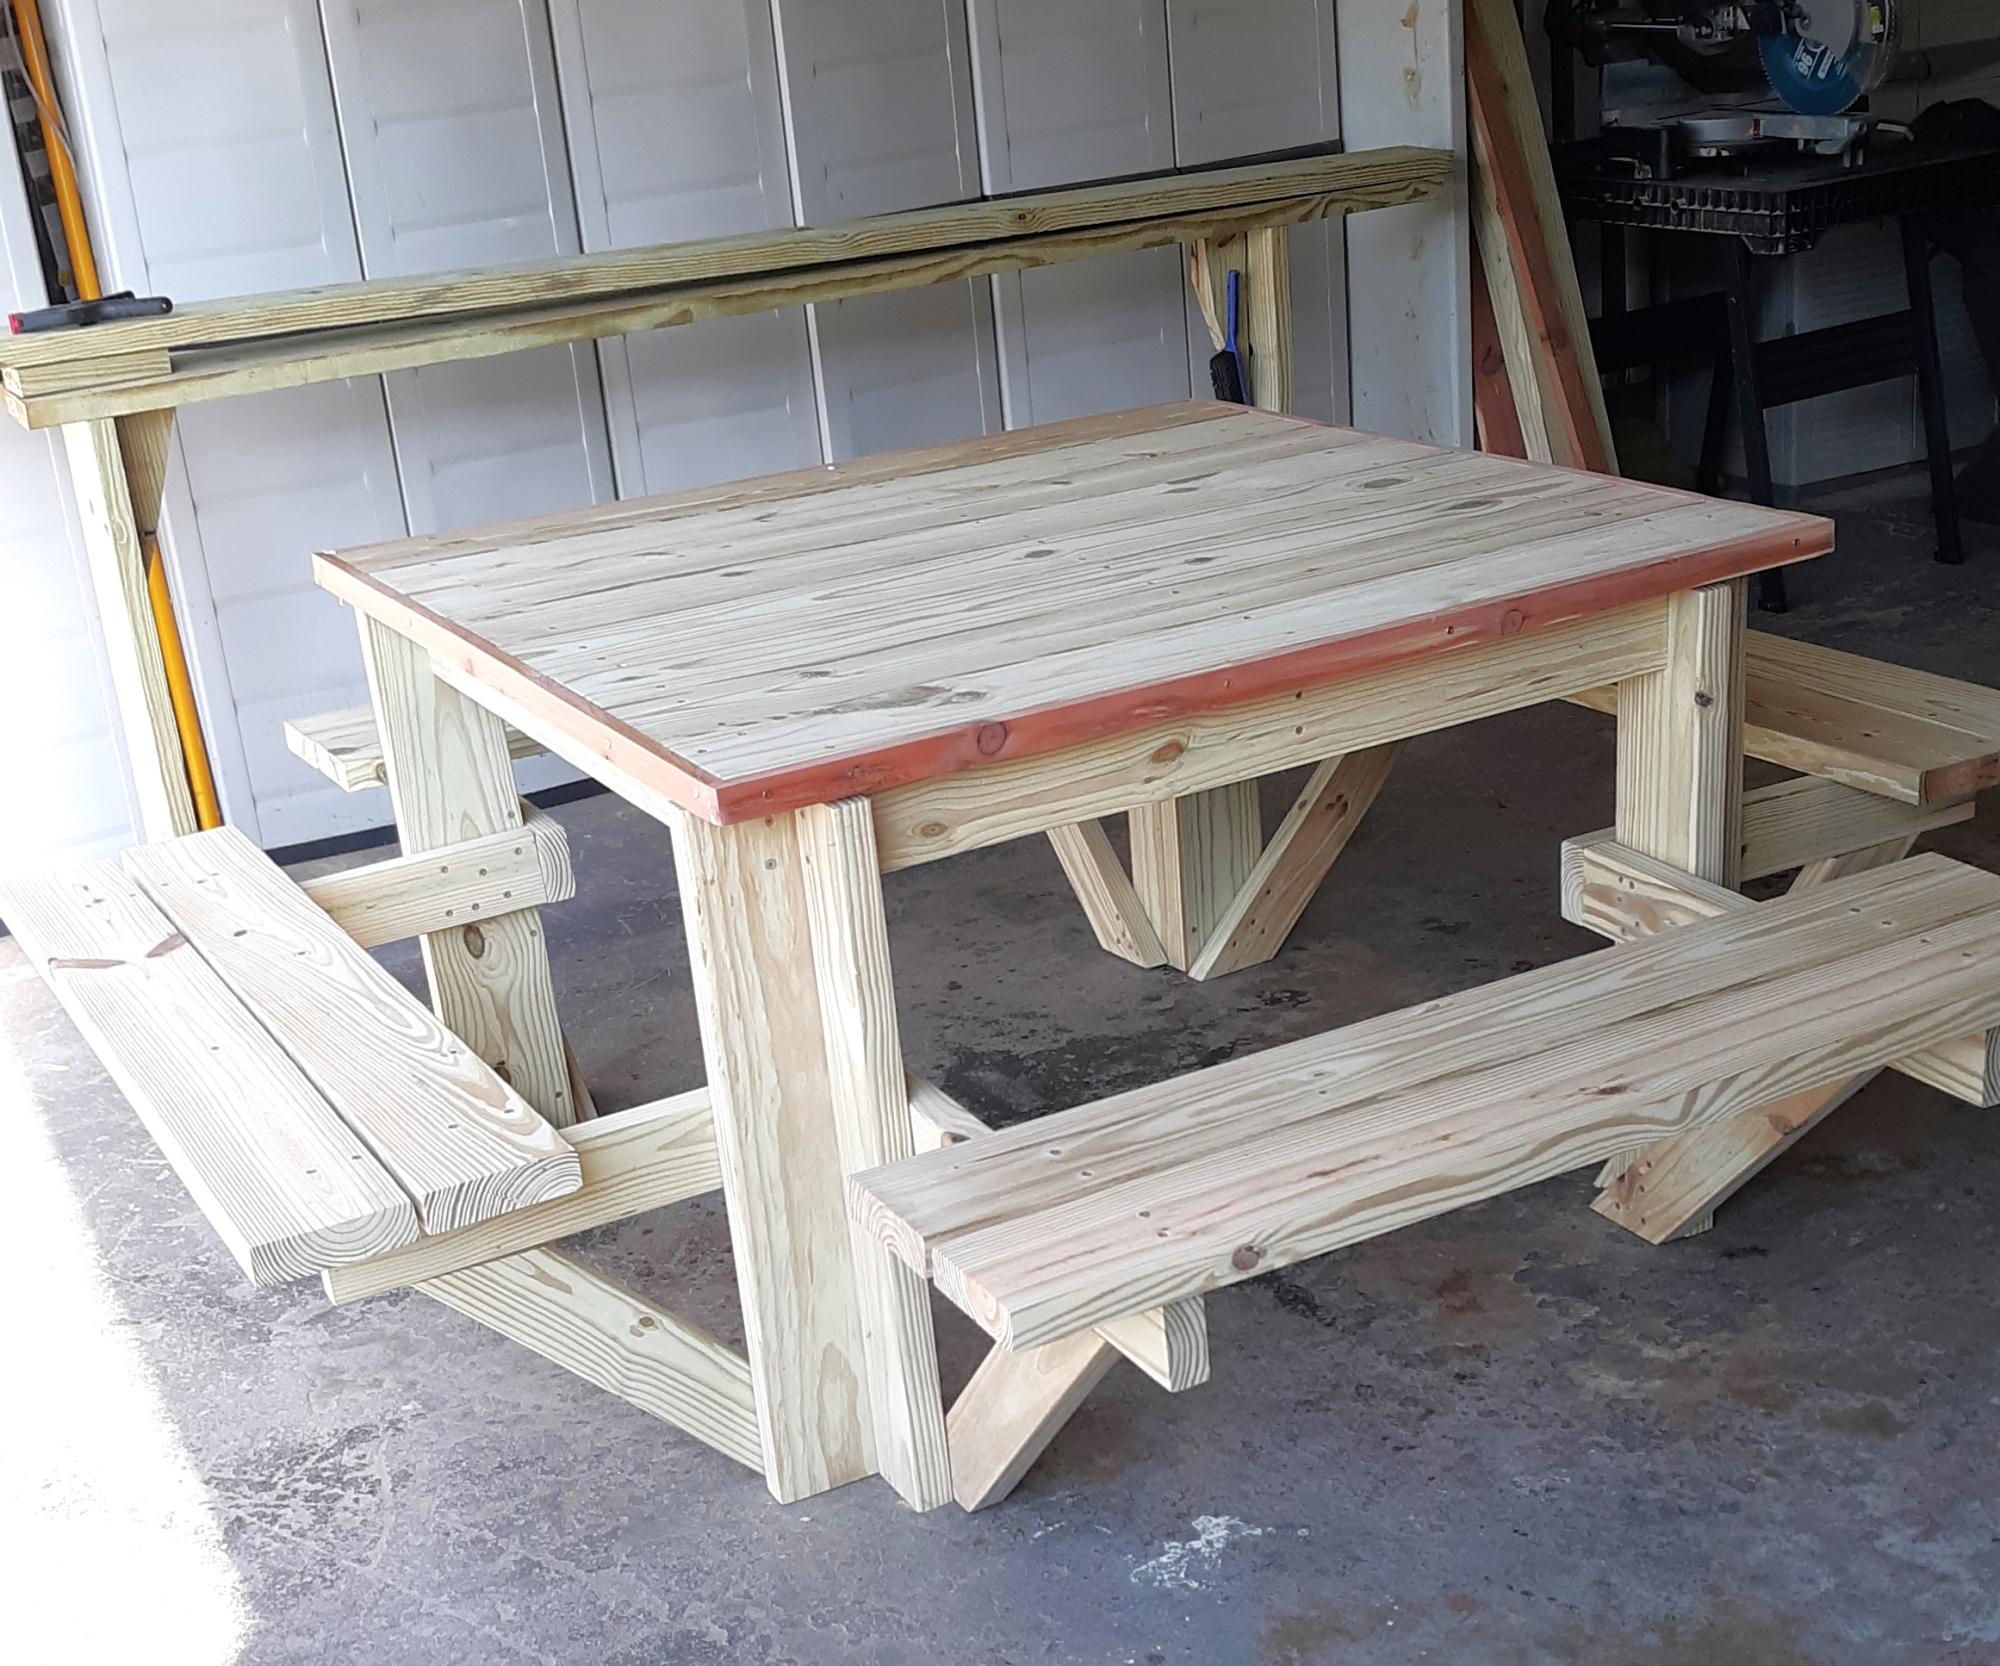
Great picnic table by Steve White
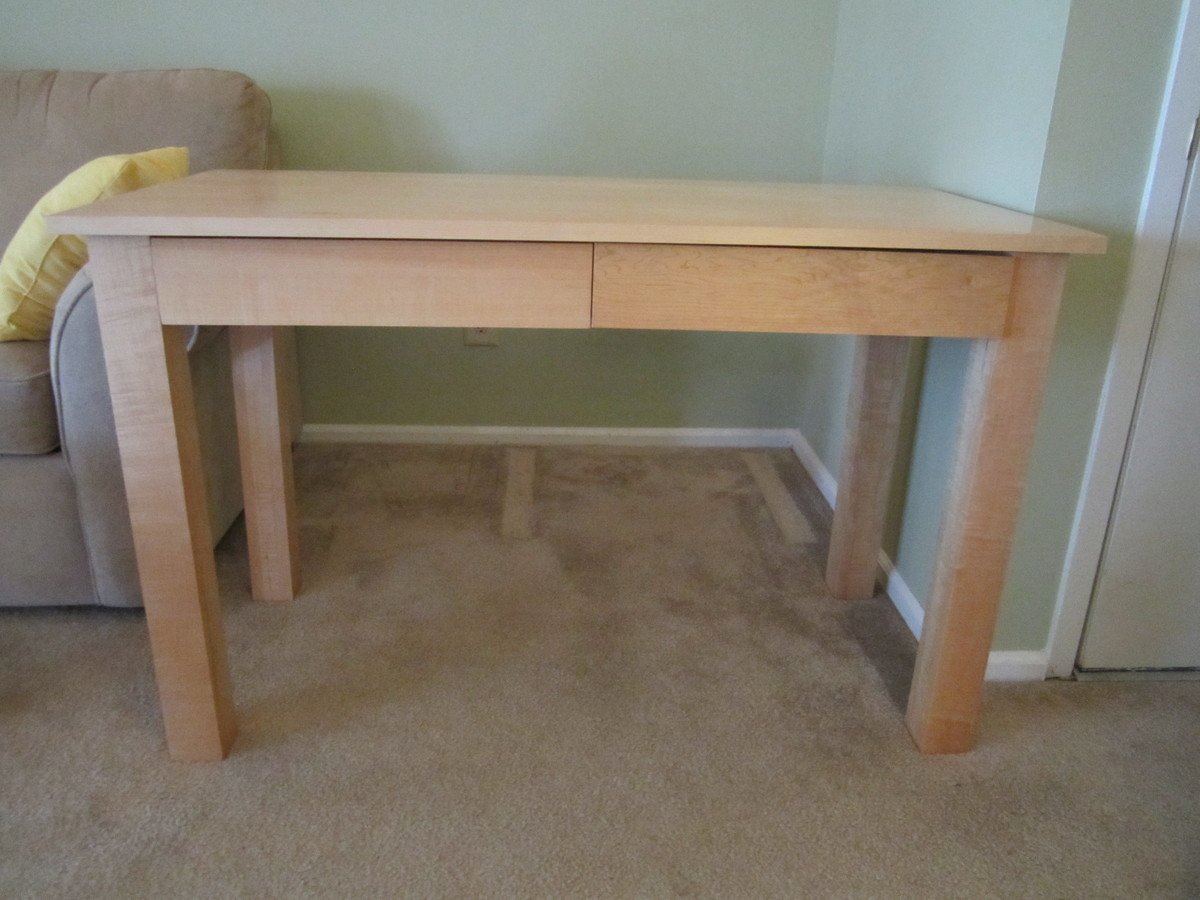
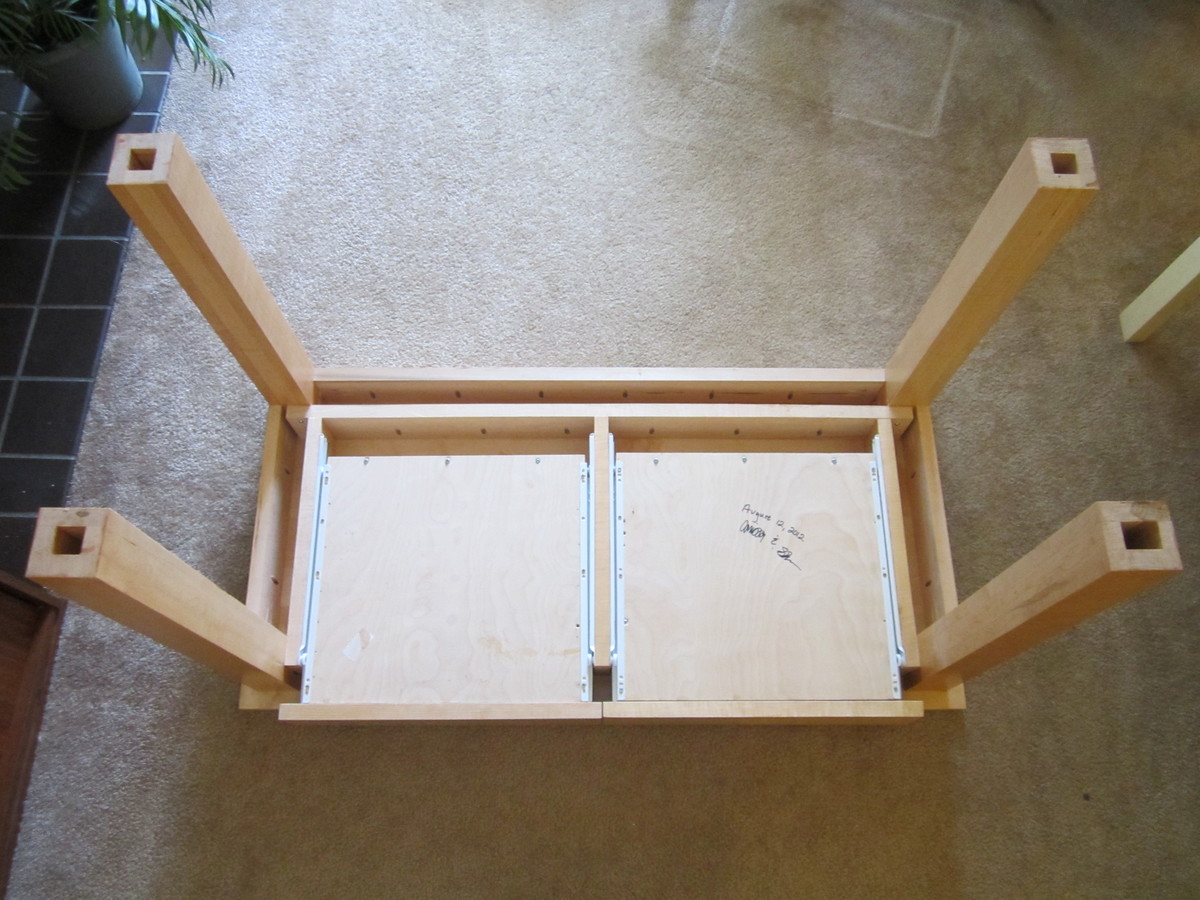
This is a solid maple desk with two drawers finished with shellac and paste wax. I altered the plan by giving the desk and overhang, as well as changing the way the legs were built.
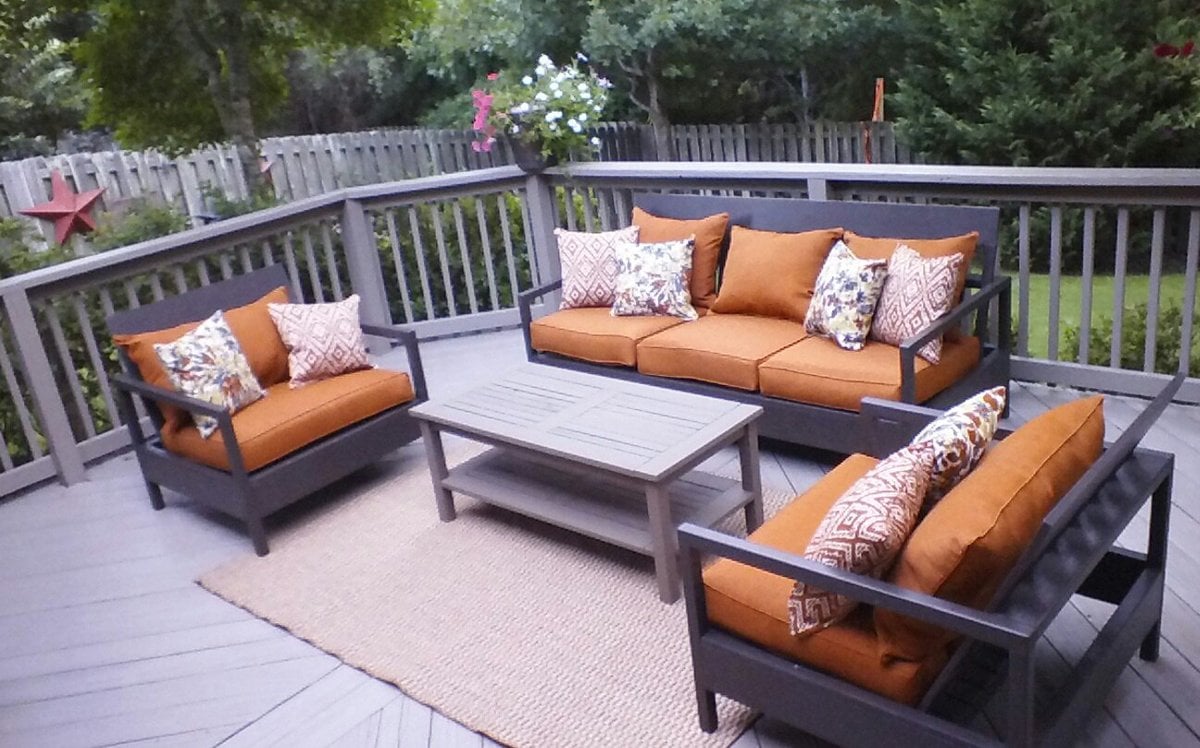
Well this was first project my hubby and I tackled together. He actually let me use the power tools. The plans were great! Loved having a shopping list! I made the cushion s myself. I have to say, I wish I had made the couch and chairs the size of cushions available at Lowes . AFt e r you buy foam batting fabric and chording I found set at lowes for a lot less but I am so happy how it all turned out . Thks for providing plNz!
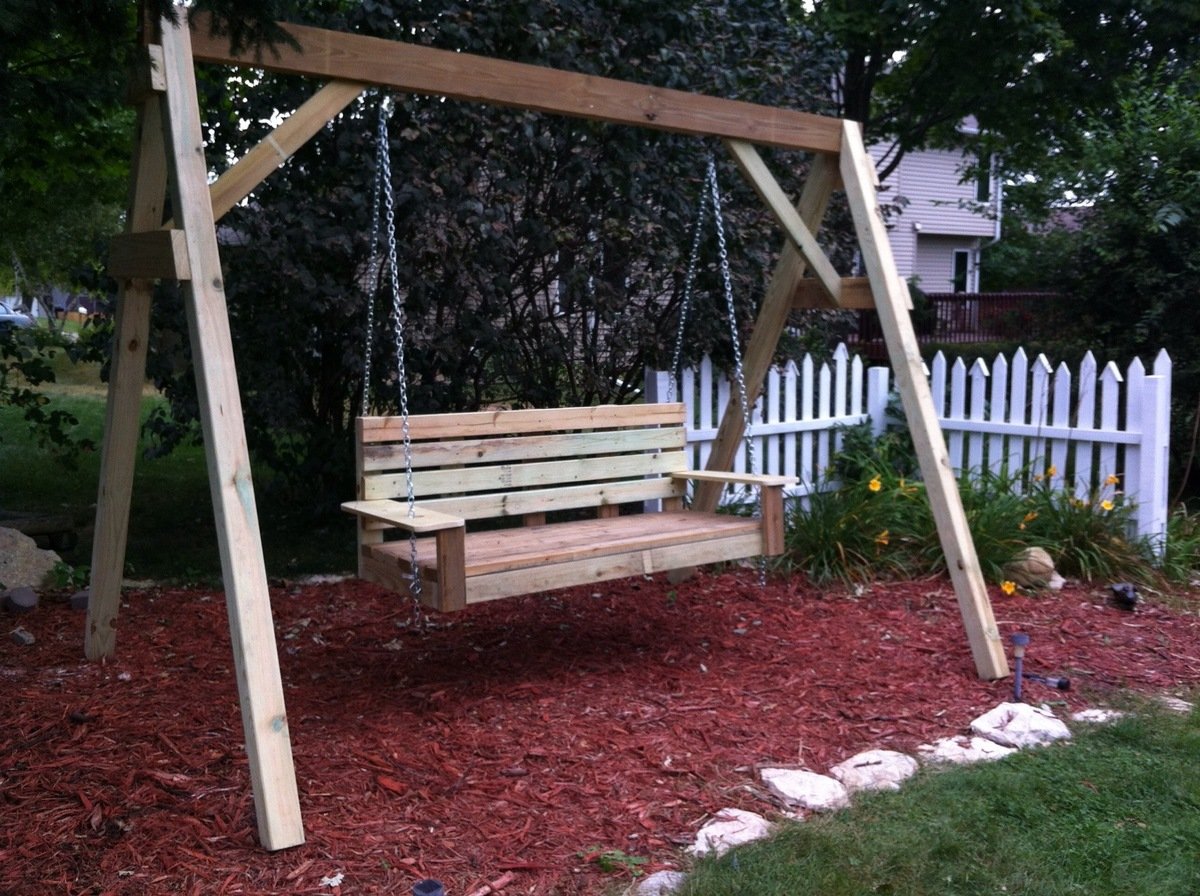
I wanted to make this porch swing ever since seeing it in the plan catalog (Large Modern Porch Swing). Just a matter of setting aside a weekend to get it done and then to find A frame to support it. I made the A-frame from a combination of this post:
http://www.buildeazy.com/newserve/swing_seat_support_dec07_1.html
and this one:
http://www.hgtv.com/home-improvement/custom-a-frame-childrens-swing-set…
I made the back a bit higher on our swing... and not quite as wide.
Reading several other blogs on this- I chose to attach the chains to the top back of the swing to keep it from tipping backwards...
Now just get to enjoy it!!
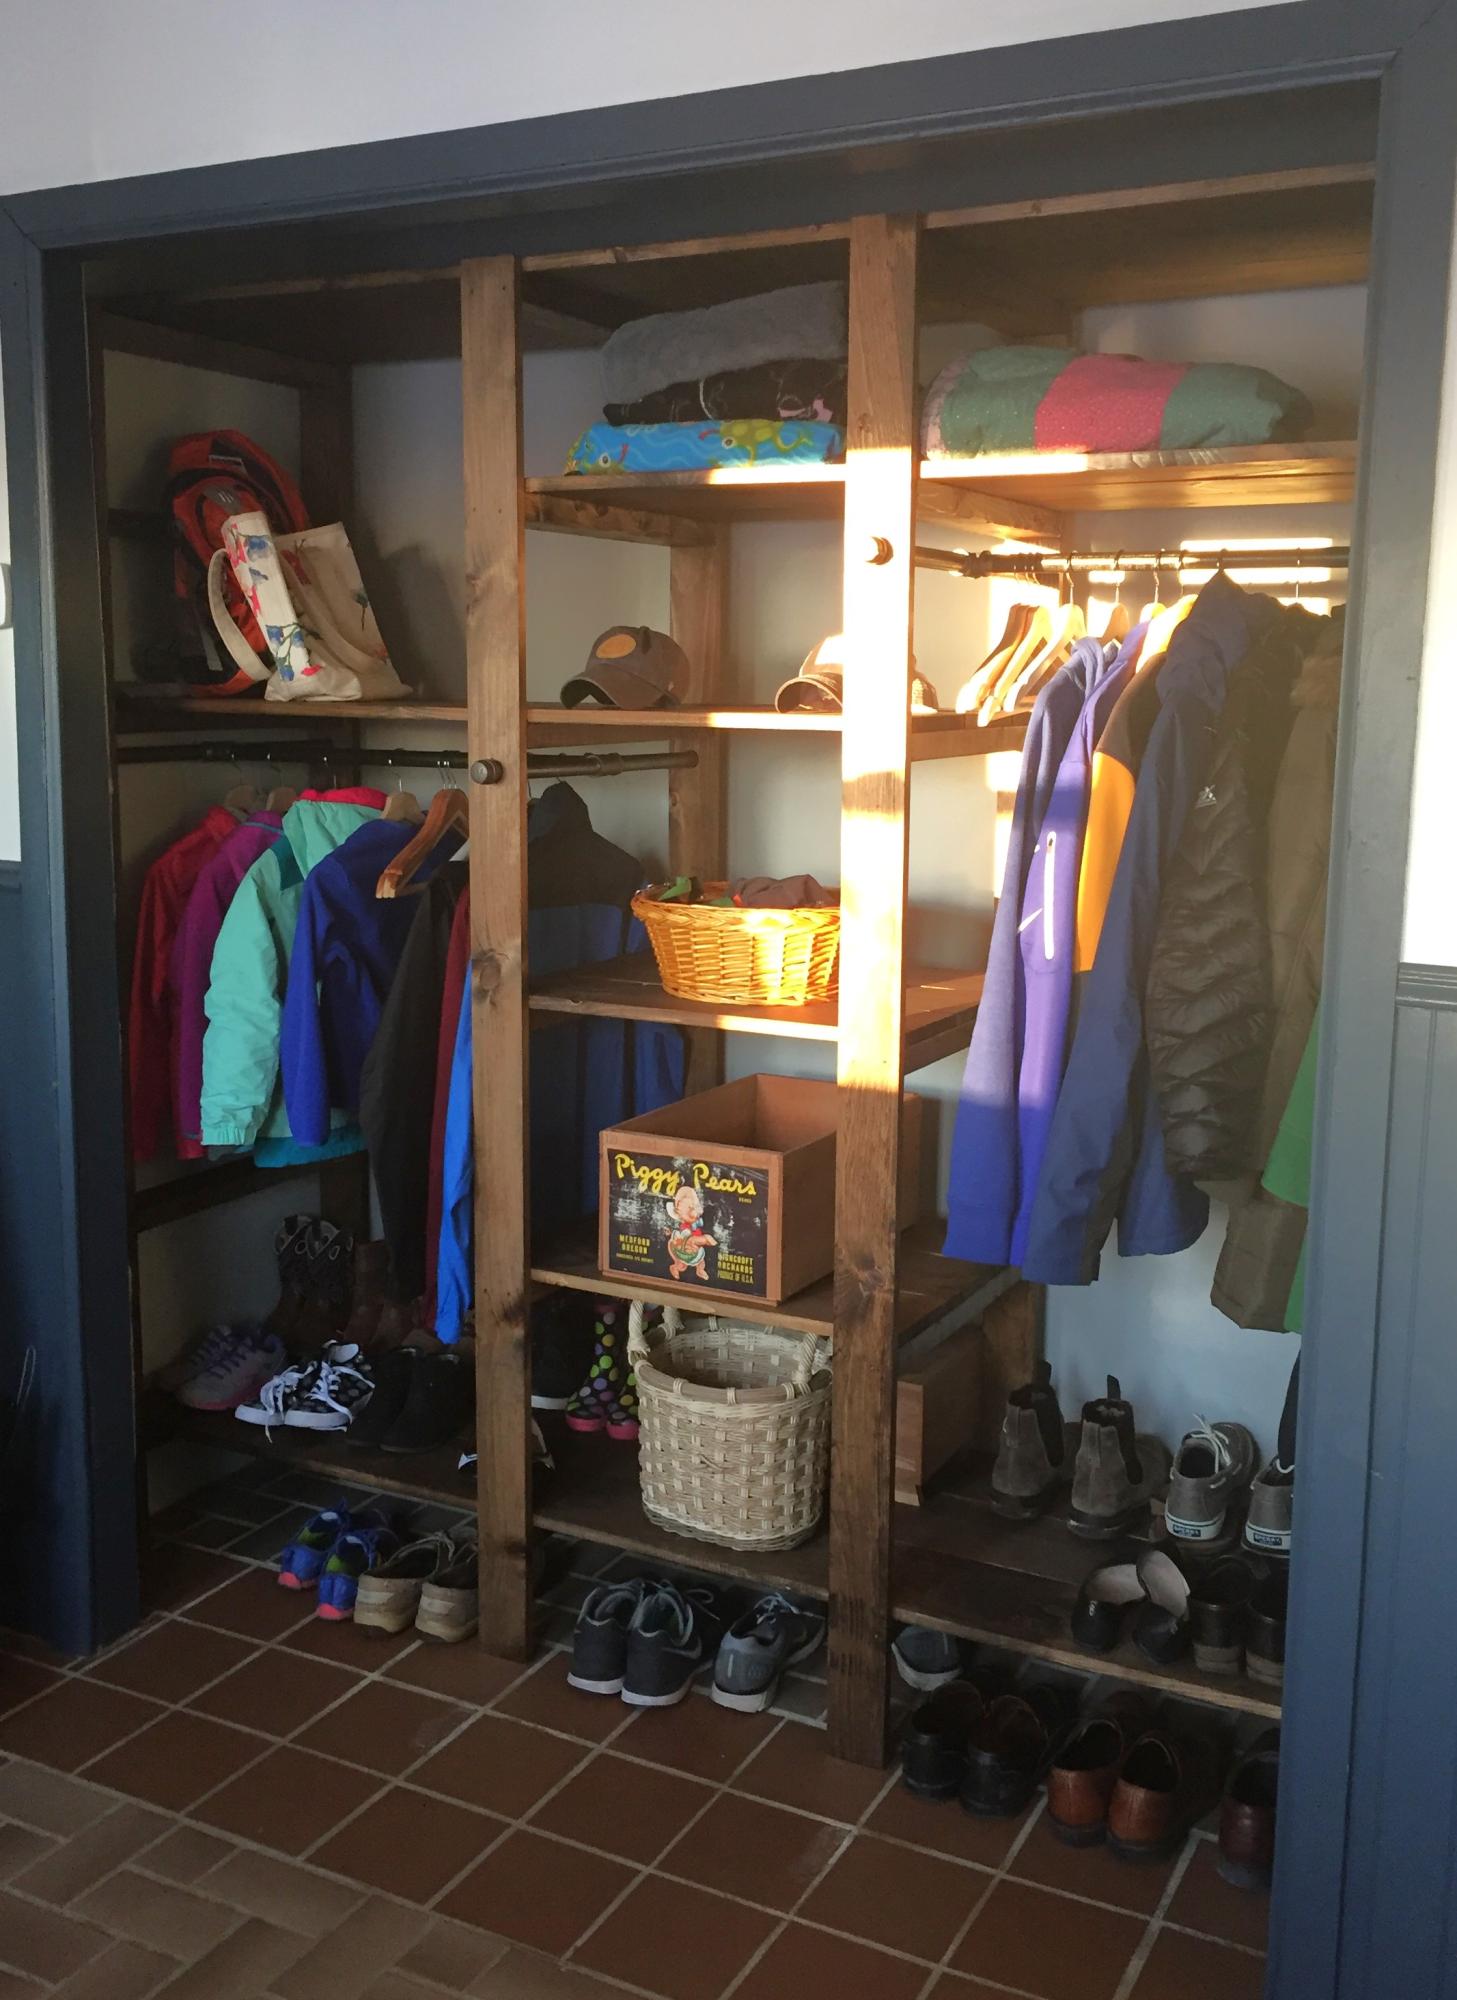
I had so much trouble deciding what to do with this HUGE closet in my breezeway. Previously it had just one bar across the top and ugly sliding doors. I loved Ana's design, but made several changes. Since my closet was super deep (32") I extended the depth of her design to about 25". I also staggered the rods for longer coats, and one that my 8 year old can actually reach to hang her stuff up! I changed the shelf design up a little bit too! Her instructions are super easy to change to your specifications. I did end up spending about $350 on this project, but keep in mind I was using 3 - 1x8's for each shelf instead of 1x4s.
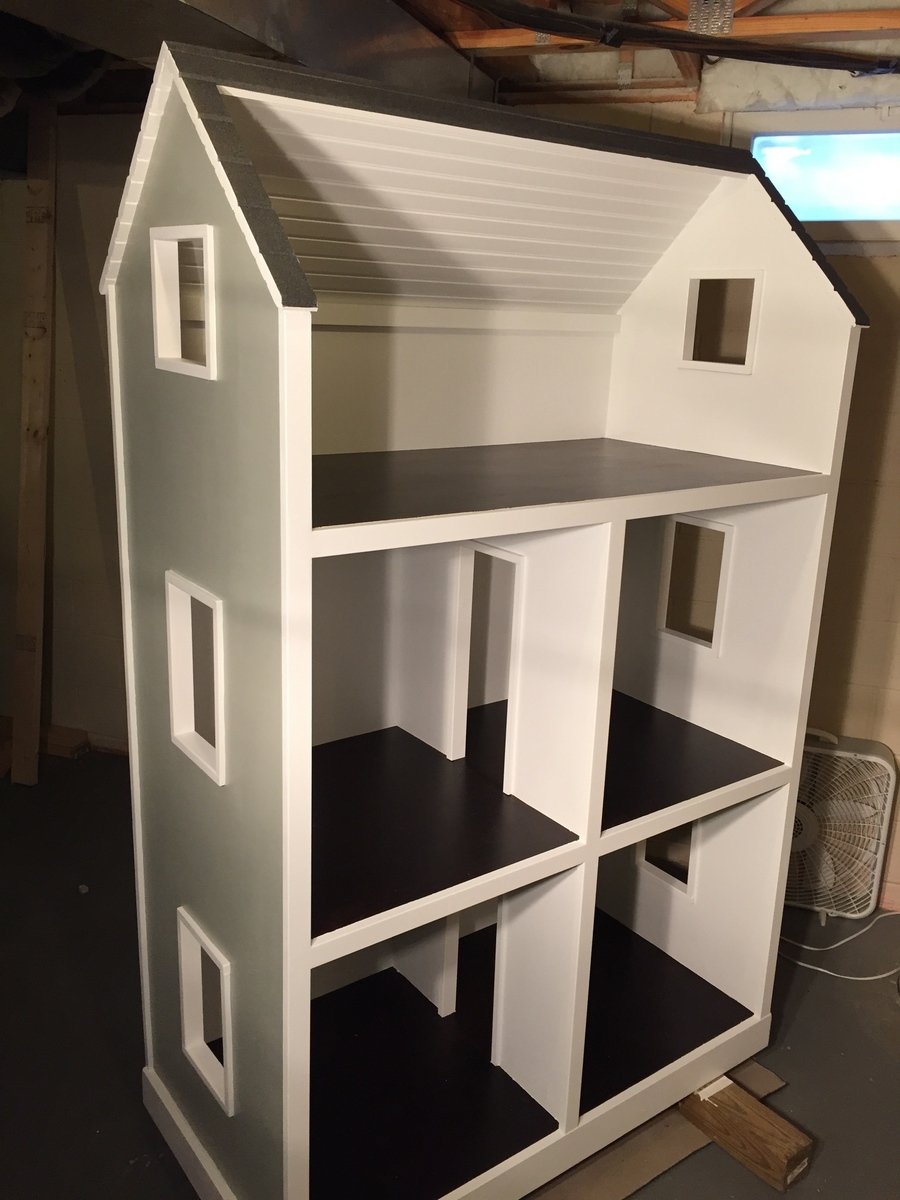
I made a few changes from the plans but the size remained the same ( which is huge!!).I used birch plywood for the frame and MDF 1x2 for the faceframe and window and door trim. I would reccommend cutting the windows and doors 1/8"-1/4" smaller and using a router with a flush trim bit with a top of bottom bearing. Clamp a straight edge along the window and door openings to trace with the bearing of the router bit. For the roof I used tougue and groove 4" beadboard made of pine. I used 10' lengths because of the 49" width. They were actually a better price than the regular 1x4 pine. The beadboard adds a little detail the the ceiling of the 3rd floor. It also gives a shingle-like appearance on the flipside with the textured spraypaint. The pieces on the front are 2.5" wide. I also filled the ends with wood putty to hide the exposed groove.
Sat, 12/27/2014 - 11:55
Hi, this dollhouse is amazing!!! Love all the mods and the building tips - the extra work really pays off big!!! Thanks for sharing, it's beautiful!
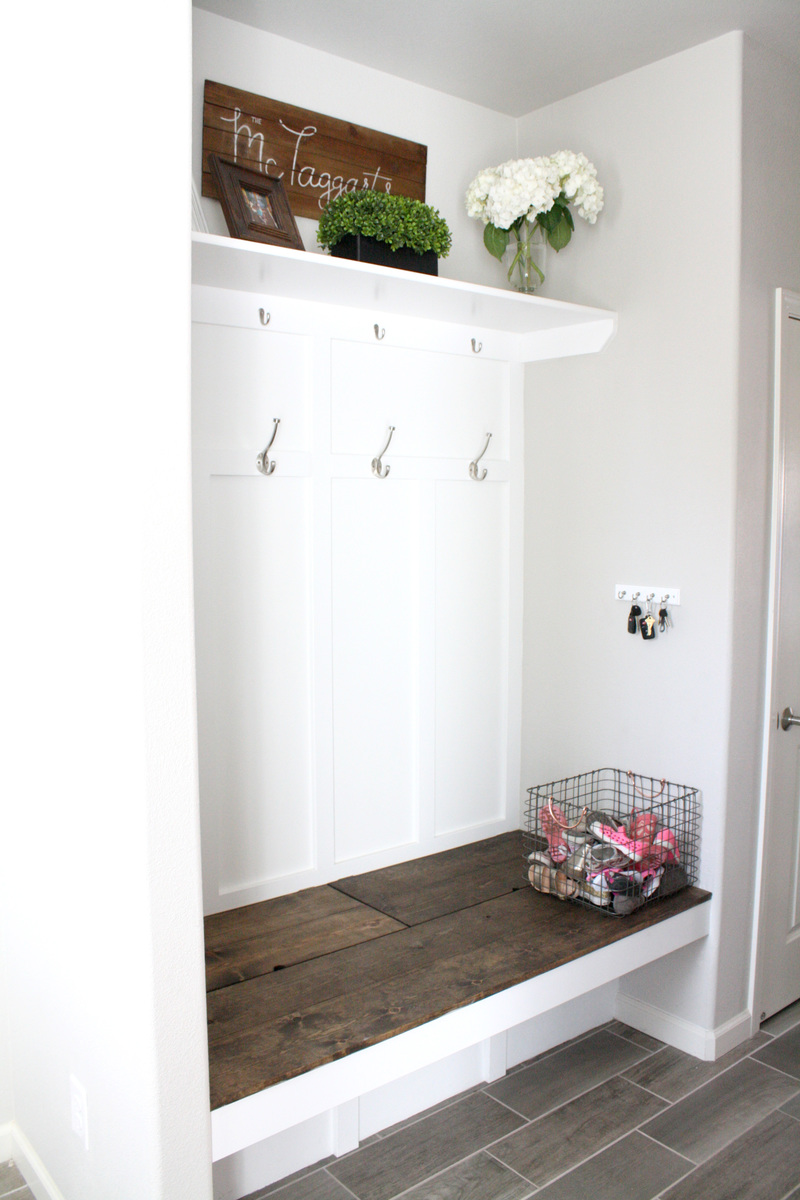
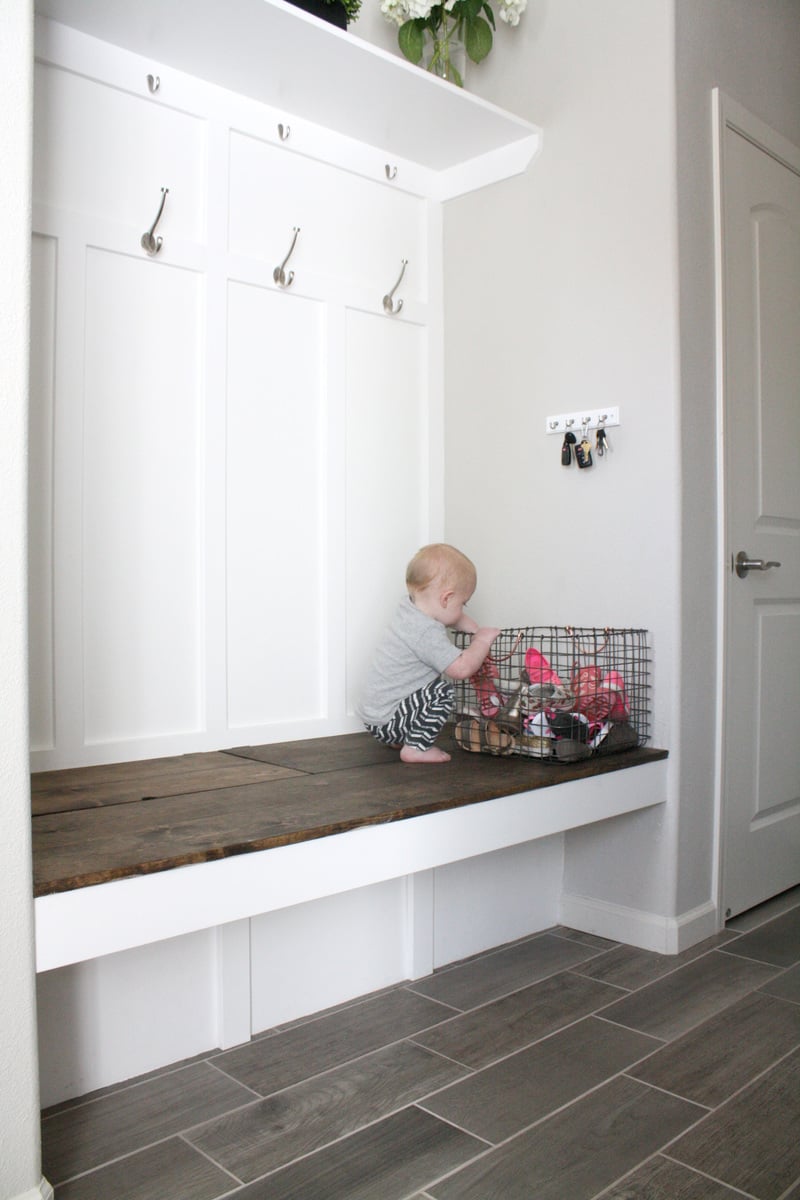
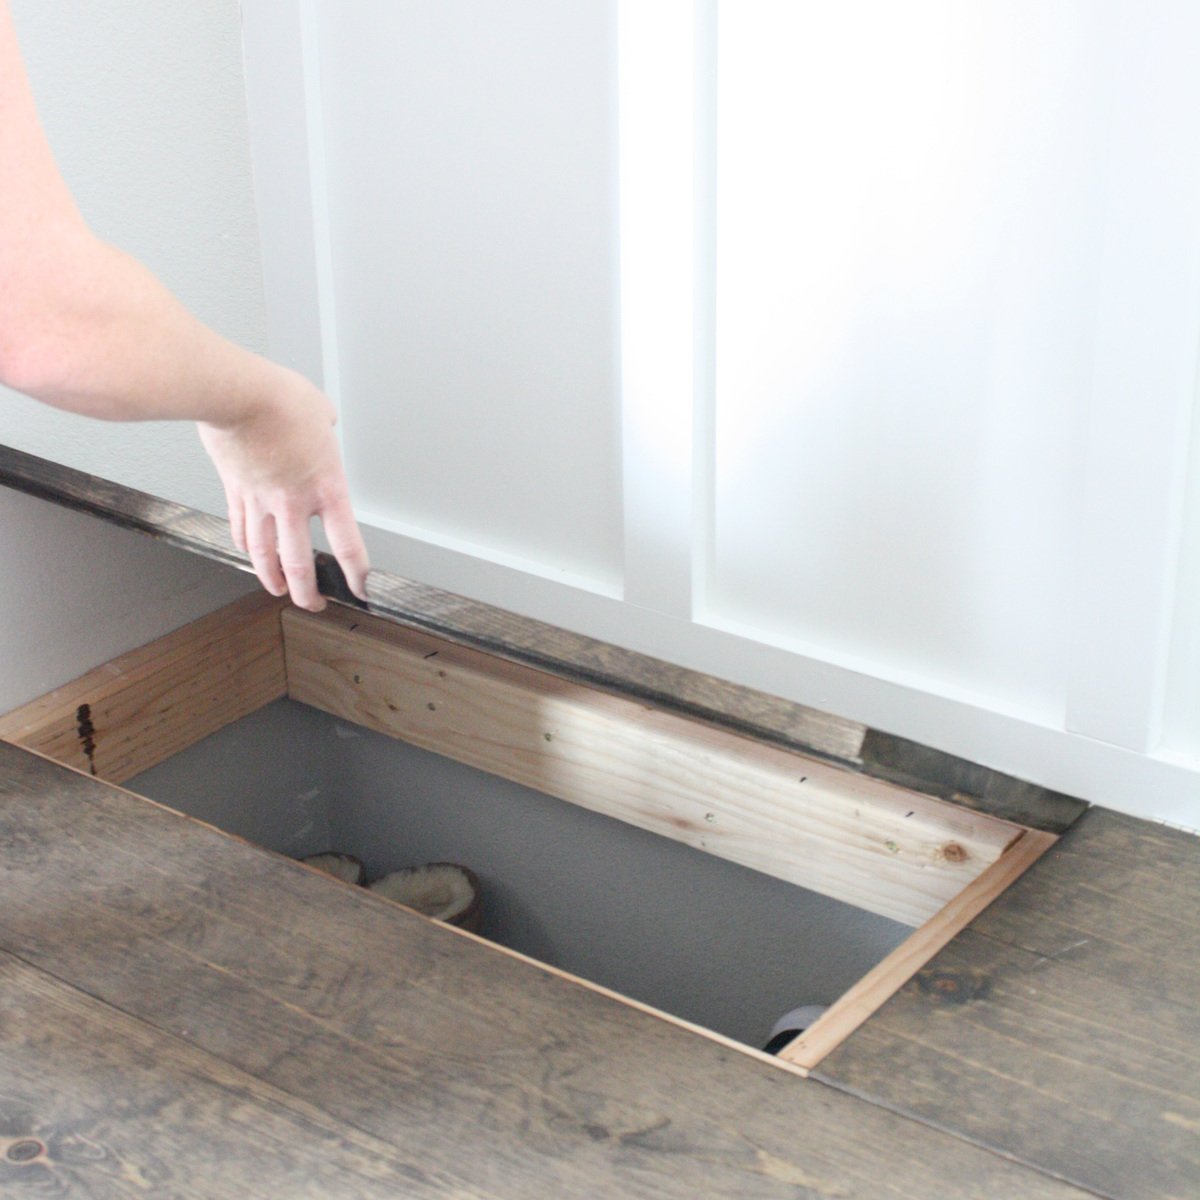
We combined several ideas to create this built in mud room bench. I searched high and low for the design I wanted and loved Ana's hidden storage. It's perfect for off season stuff that would otherwise take up space in a closet. It's such a pretty, functional space that gets so much use.
We had these spices in a cabinet, which were impossible to see stuff in the back. This was a perfect solution.
Now, we also had more spices then we know what to do with, so we added a second rack at the bottom of the door as well. I just adapted the plans to be 30 inches tall to accommodate the size of the lower portion of the door. This was accomplished by removing the 1st and 3rd measurements for shelves, and using the remaining for an extra tall shelf.
I also only used a finish nailer (and wood glue),to assemble, in combination with a brad nailer to hold the back plywood on.
I also chose not to include the dowel buttons on the end, and did not cut the dowels to length; they were inserted all the way through and trimmed off with a Japanese pull saw (get one, you will LOVE it), then fastened through the front with the finish nailer, then sanded flush.
I also elected not to paint to finish the piece and leave the natural wood.
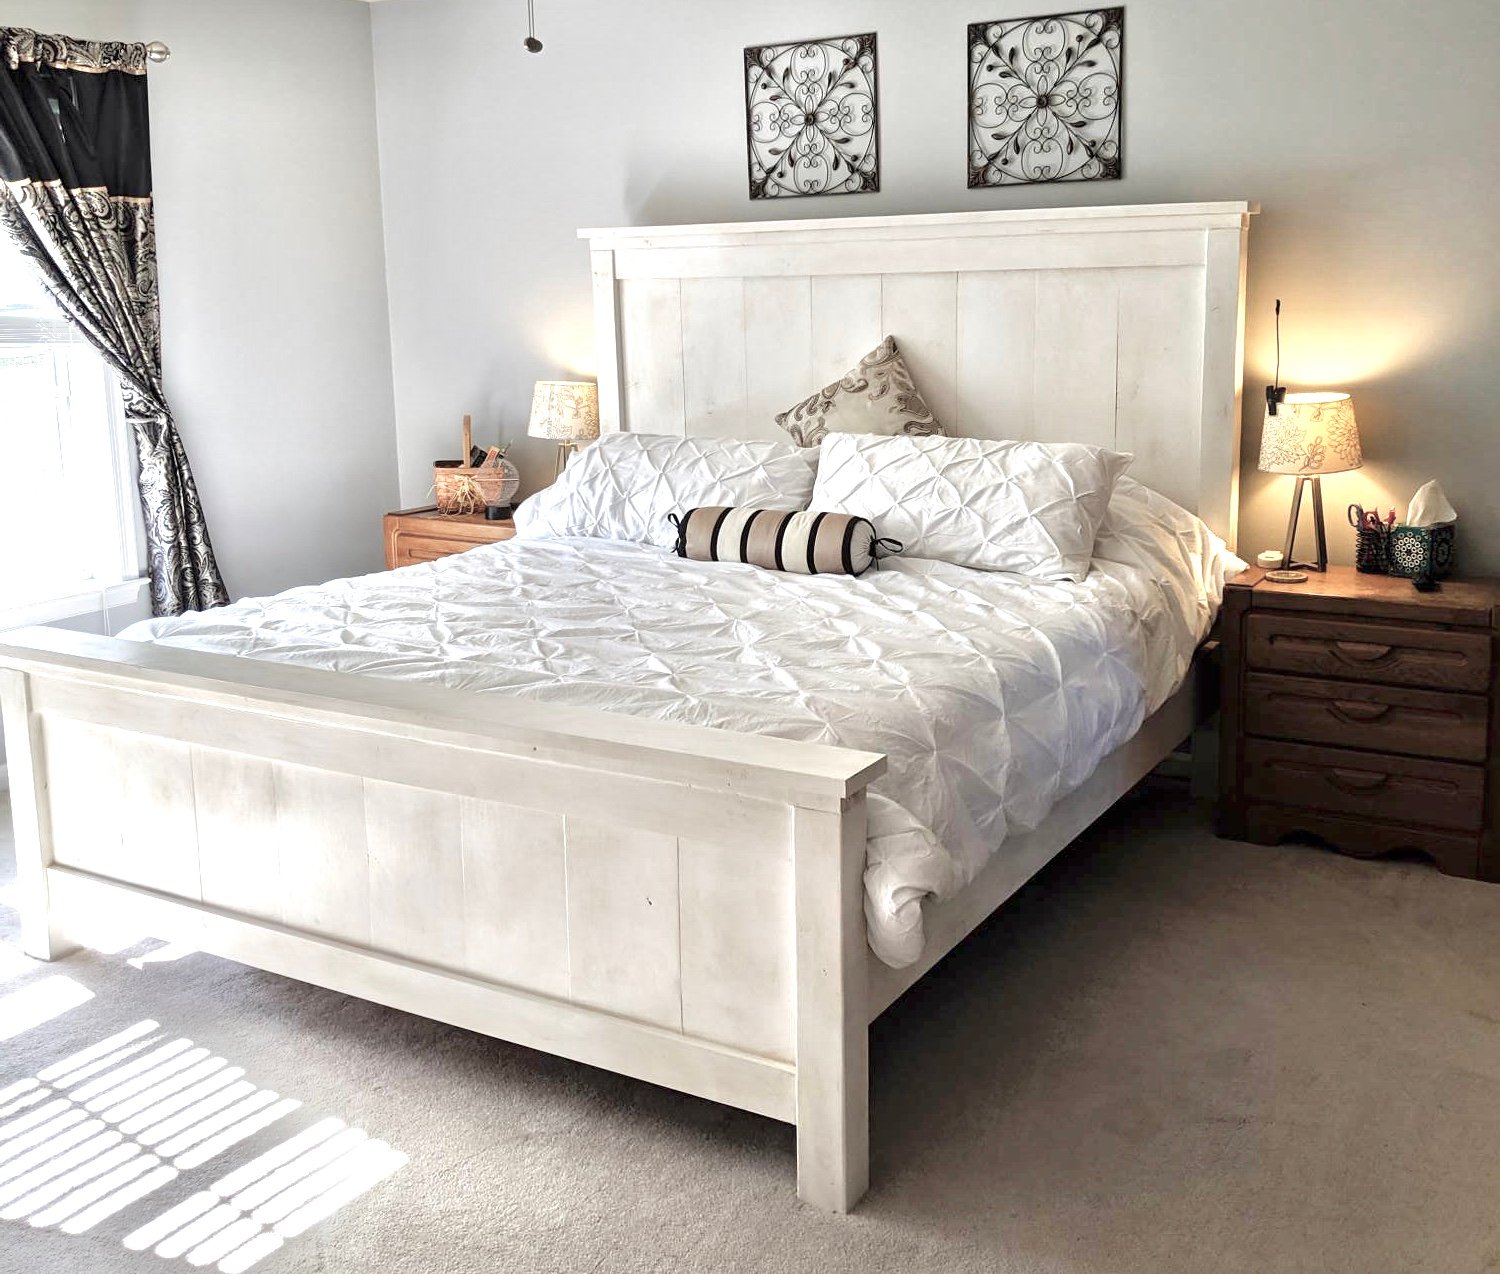
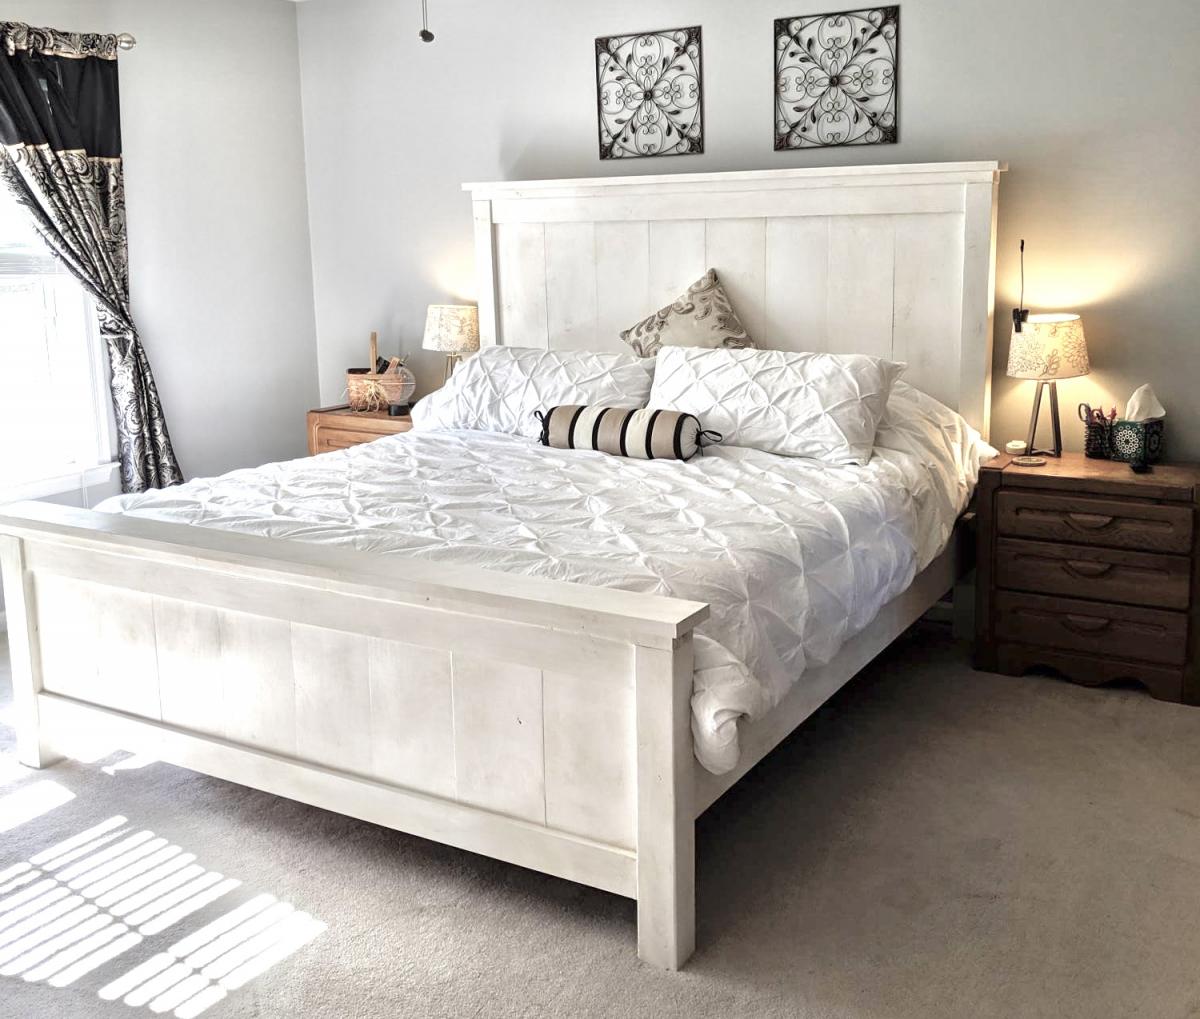
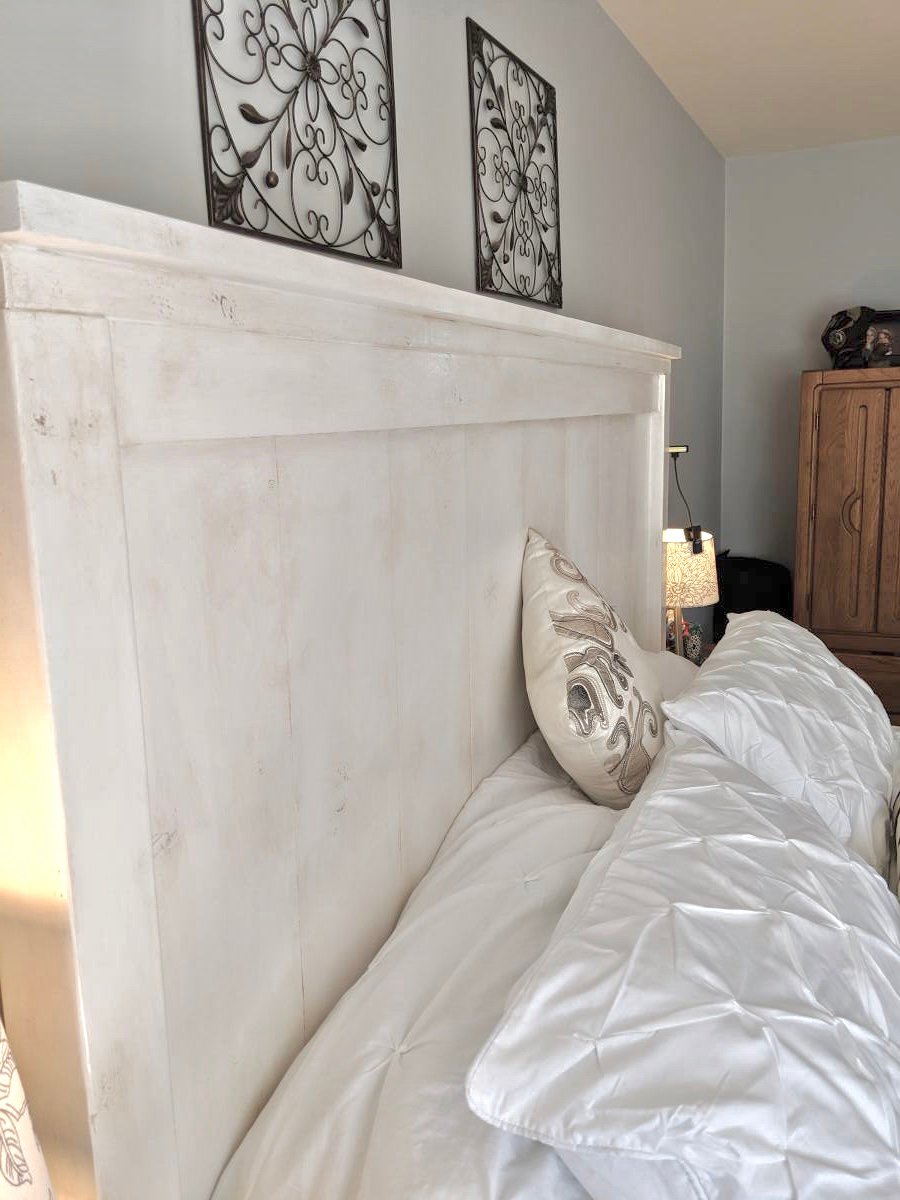
I could not find a frame which would accommodate my new adjustable king base. Modified Anna's plans by increasing the height of the headboard and footboard. Finished with chalk paint and antique finish for a rustic look. Side rails attached with mortises to allow for moving bed in 4 pieces if needed. Love my new bed

Sat, 11/30/2019 - 03:31
Hi! We are making this headboard this weekend. We want to increase the headboard height and footboard as well. Do you happen to know the cut measurements or how you adjusted the height of the 1x6 (or 1x8 as others used) to make it work? Yours looks perfect! Thank you in advance for any feedback!
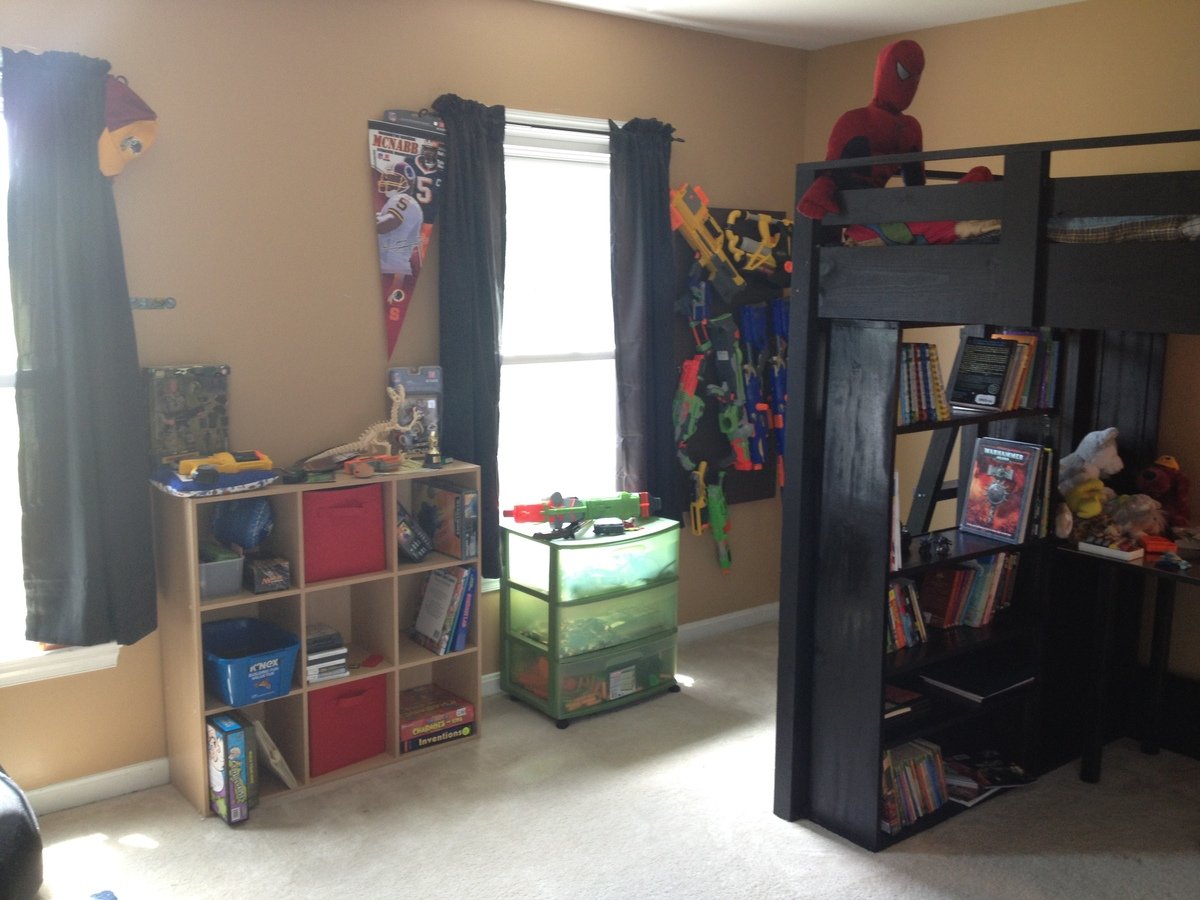
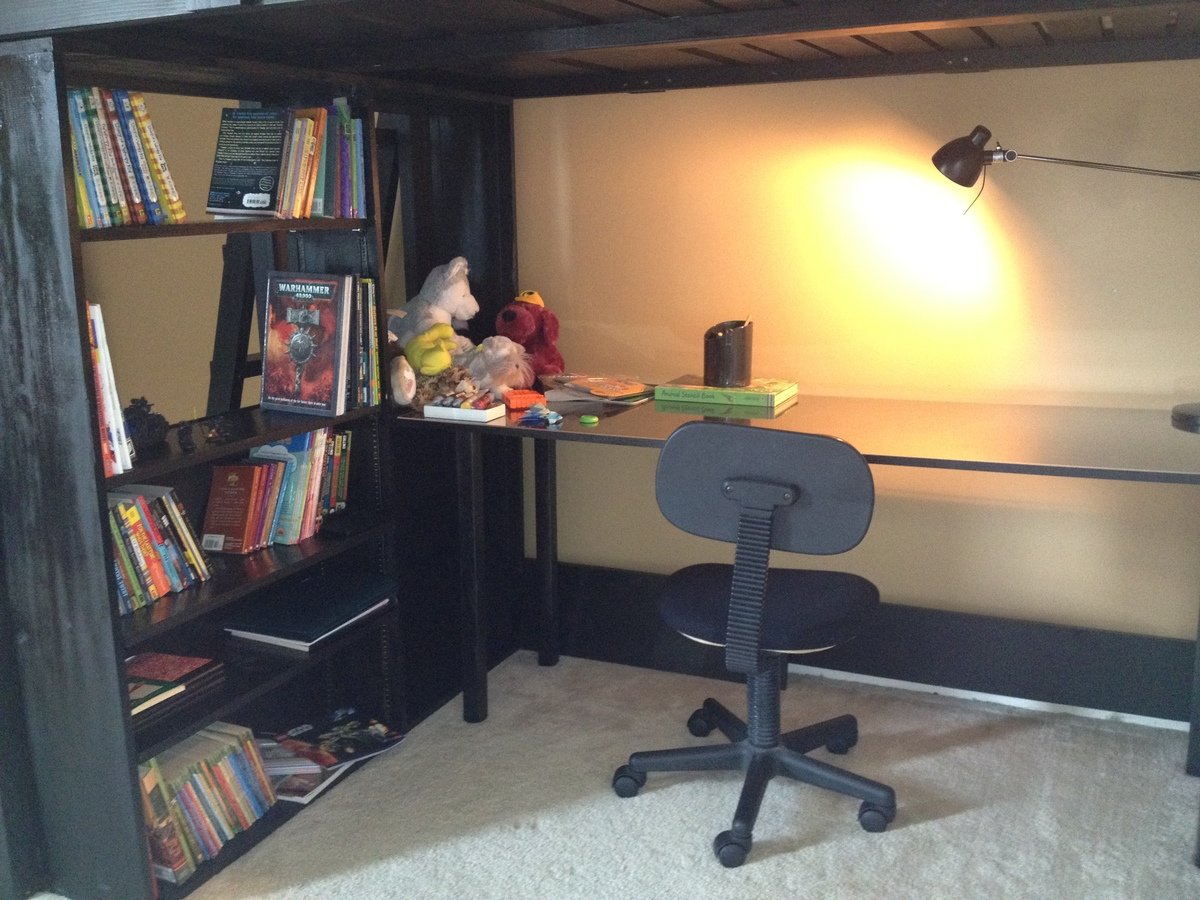
My son needed more room in his bedroom...and to be rid of the very girly furniture he inherited when he moved into his "big boy-ish" bedroom. At 10 yrs old, it was high time he got a bed that wasn't pink-tinged, white washed pine with 4 posters and enough curlicues to choke a forest. He also needed a desk which I couldn't really fit in his room with the armoire and chest of drawers that came with the Queen sized bed.
So off to Ikea we went and I saw a black loft bed for $300, but it was really, really high which meant I would have to cut it down and it was not sturdy at all. I looked at PB and saw the $1800 bed. Um, no - that wasn't happening. So, off to Ana-White I went and I'm so happy I did!
I built the full sized version of these plans and, to keep costs down, used wood I had on hand. This meant I had to work a bit at the cuts, but it all worked out.
Mods:
1) I modified the railings to have the ladder at the end of the bed to keep away from the ceiling fan.
2) Because I put the ladder at the end of the bed, I got very nervous about having a soon-to-be teen climbing on to a ladder secured to a 1x10 that was only connected to the side railings with glue and screws. So I sandwiched extra 1x3s over the bottom rails and attached them to the top railing.
3) I was very nervous about making sure that the bed was adequately supported so I put a 2x4 down the center instead of the 1x2.
4) I went a wee-bit overboard screwing things together to the point where it's a bit embarrassing and now I have to paint over the screw heads.
5) I made the ladder treads with 2x4's, modifying the inside spacer board cut lengths.
Because I had quite a bit of lumber on hand, the bed only ended up costing me about $90.
For the bookcase, I did end up buying the 1x12s and the adjustable shelf railings. I made the book shelf the entire width of of the bed and split the two sections based on width of the 1x24 board I bought for the desk. I only put the backer board up half way so that the daylight could get underneath the bed and make it not so cave-like.
The book case cost me about $70.
The desk was the easiest...but most costly item. A 1x6x24, 4 table legs and the table leg mounts ran me about $80. The plexiglass top that I had cut for the top cost me about $80.
Time wise, this would have taken me a lot less time than the 4 months it took - but I worked on it as I could and when I could, by myself. I got some friends to help me bring it upstairs and put it back together, but it was mostly done when I could fit in some time.
My son LOVES this and it really does give him so much room!!! Thanks Ana - I really appreciate it!


Thu, 01/17/2013 - 08:42
Hello,
Where might I find the modified loft bed plans that allow for a full-sized mattress and the under desk-shelves?
Thank you!
Fri, 01/18/2013 - 07:38
Hi!
To modify this to be full sized, I just added 15" to the width of the bed. Ana said this in the plans:
Cutting Instructions:
Converting to Full Size This bed can easily be converted to full size. You will simply need to add 15″ to all boards that run parallel to the ends. This includes the planks, end top pieces and the slats. Shopping list will need to be adjusted as well.
So I modified the cuts to the head and foot board parts and the full size mattress fits perfectly.
For the shelving underneath, I just looked at some of Ana's other plans for shelves and winged it.
easy
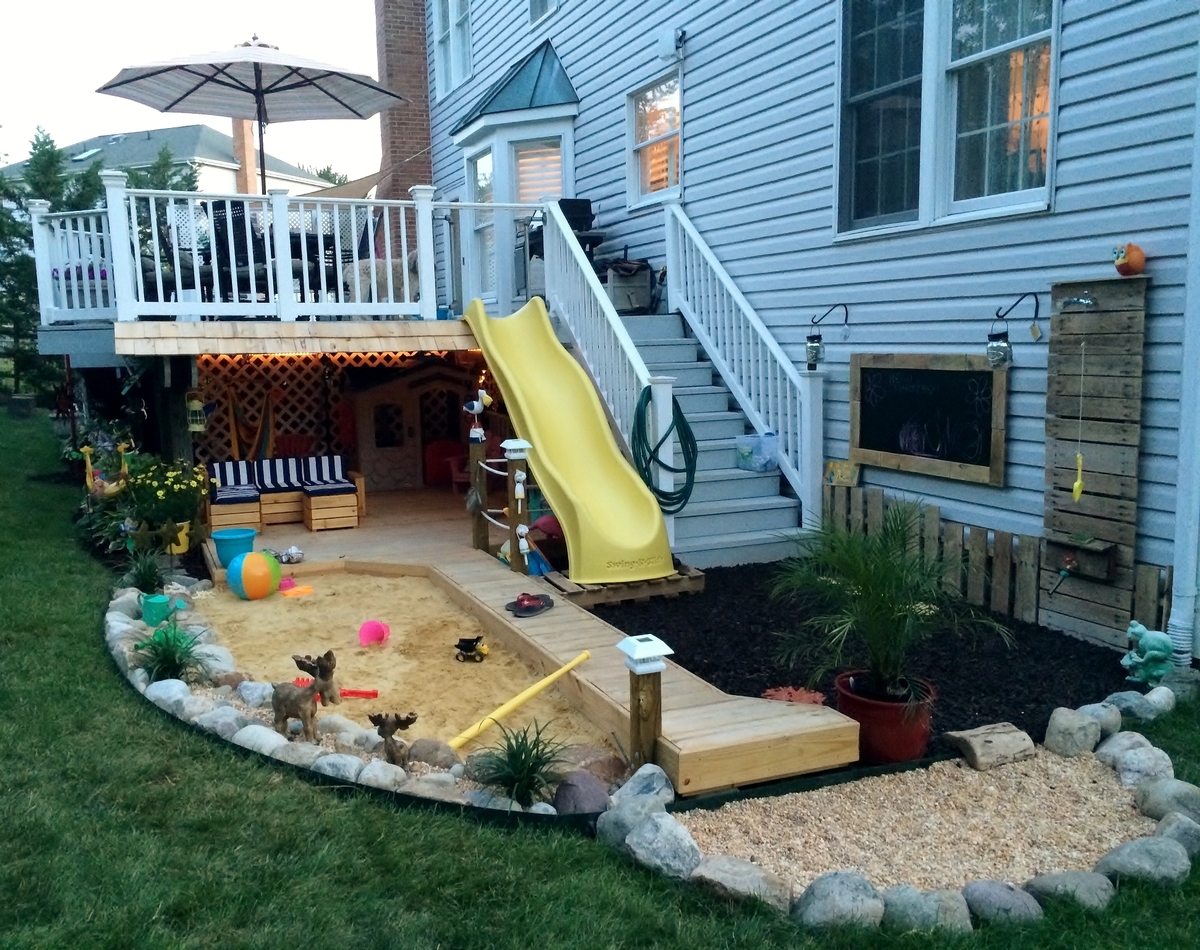
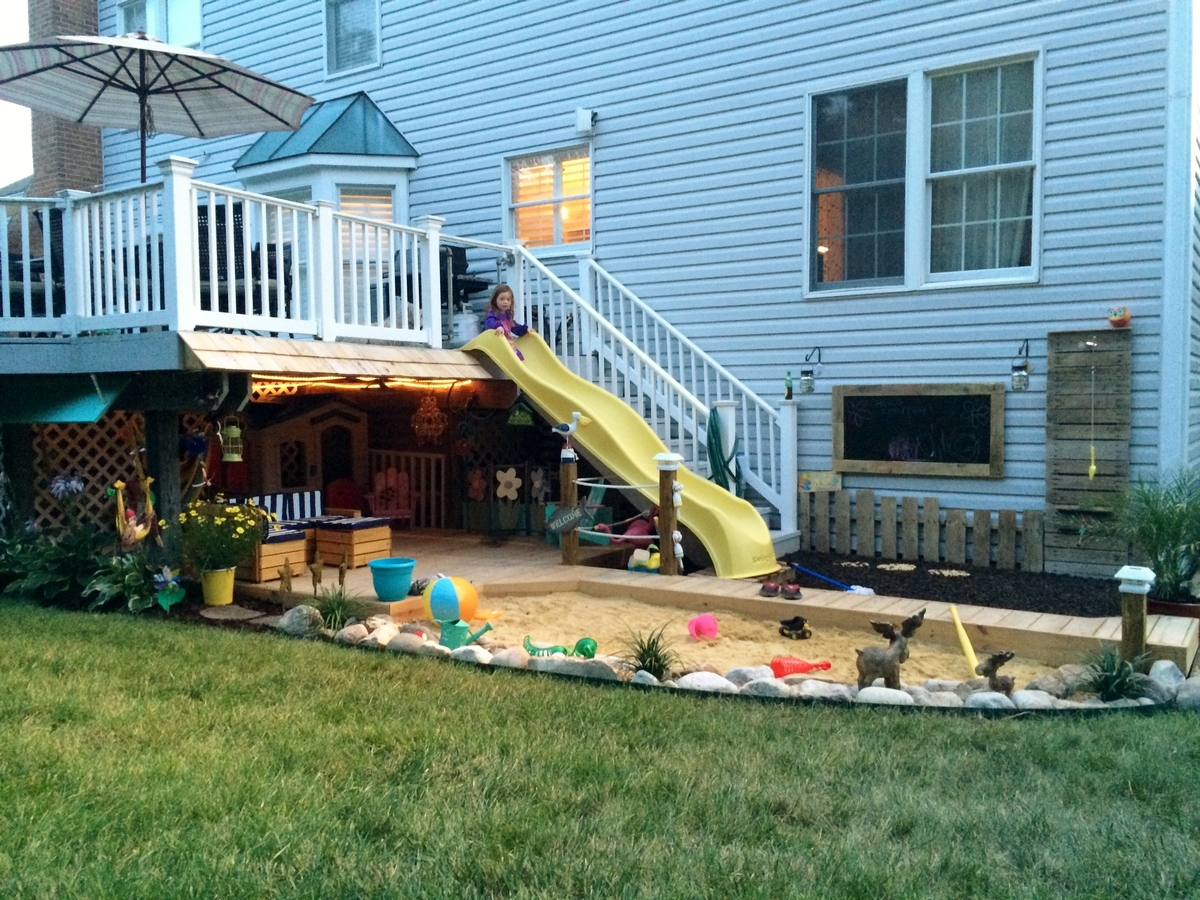
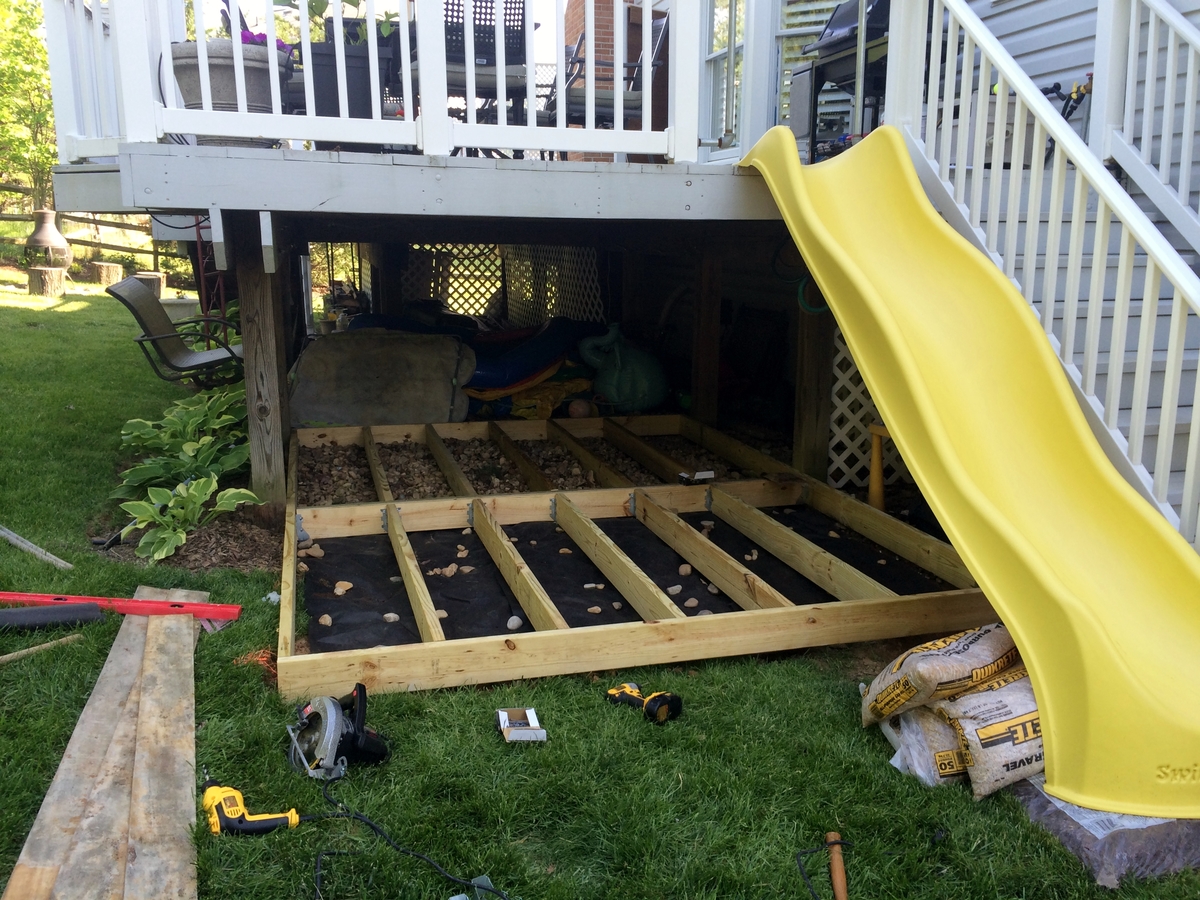
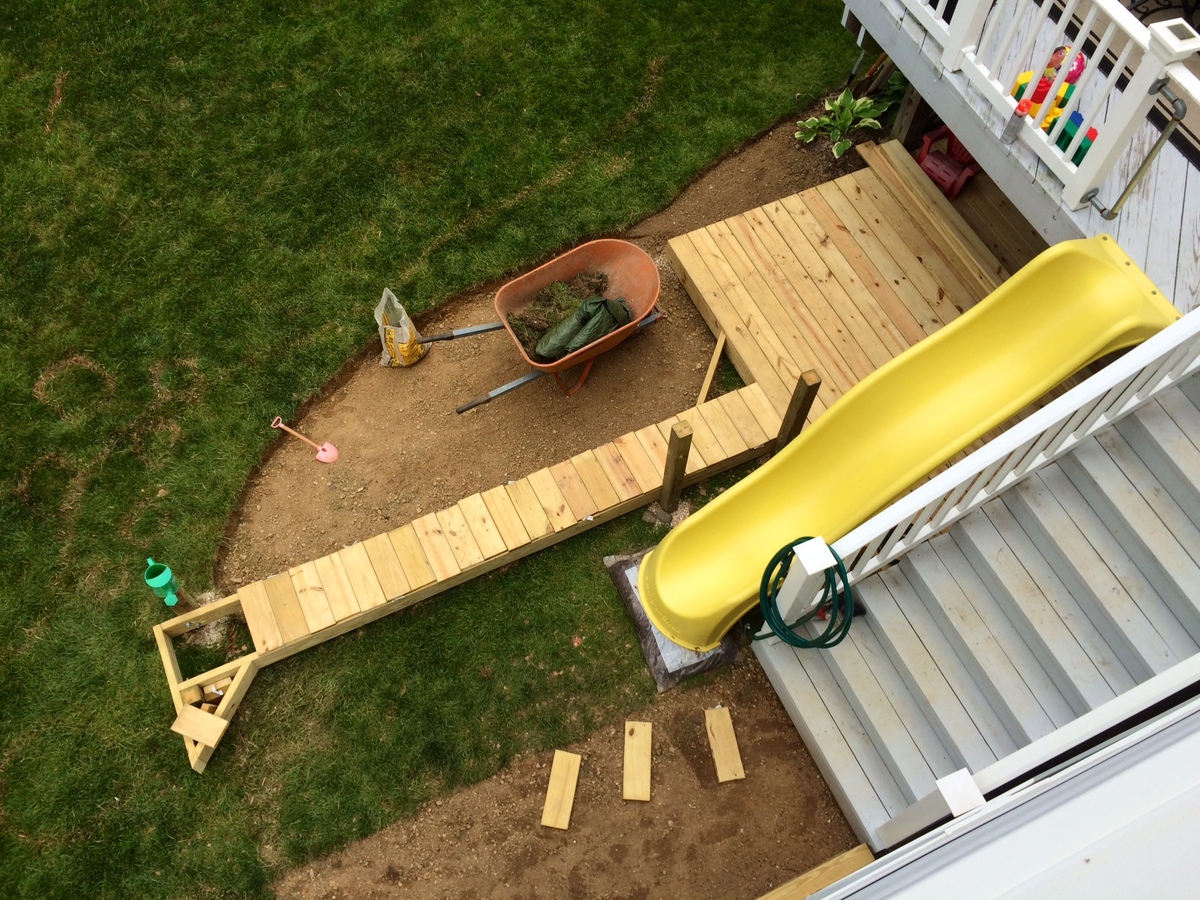
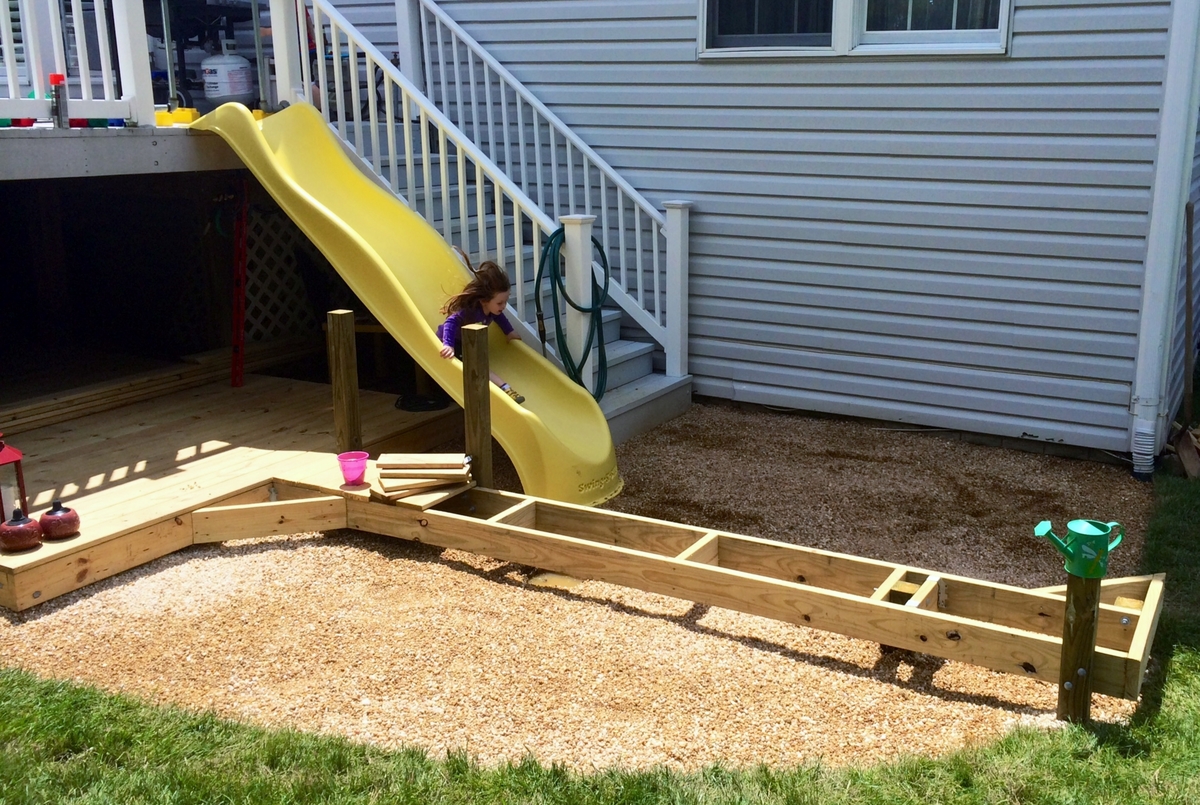
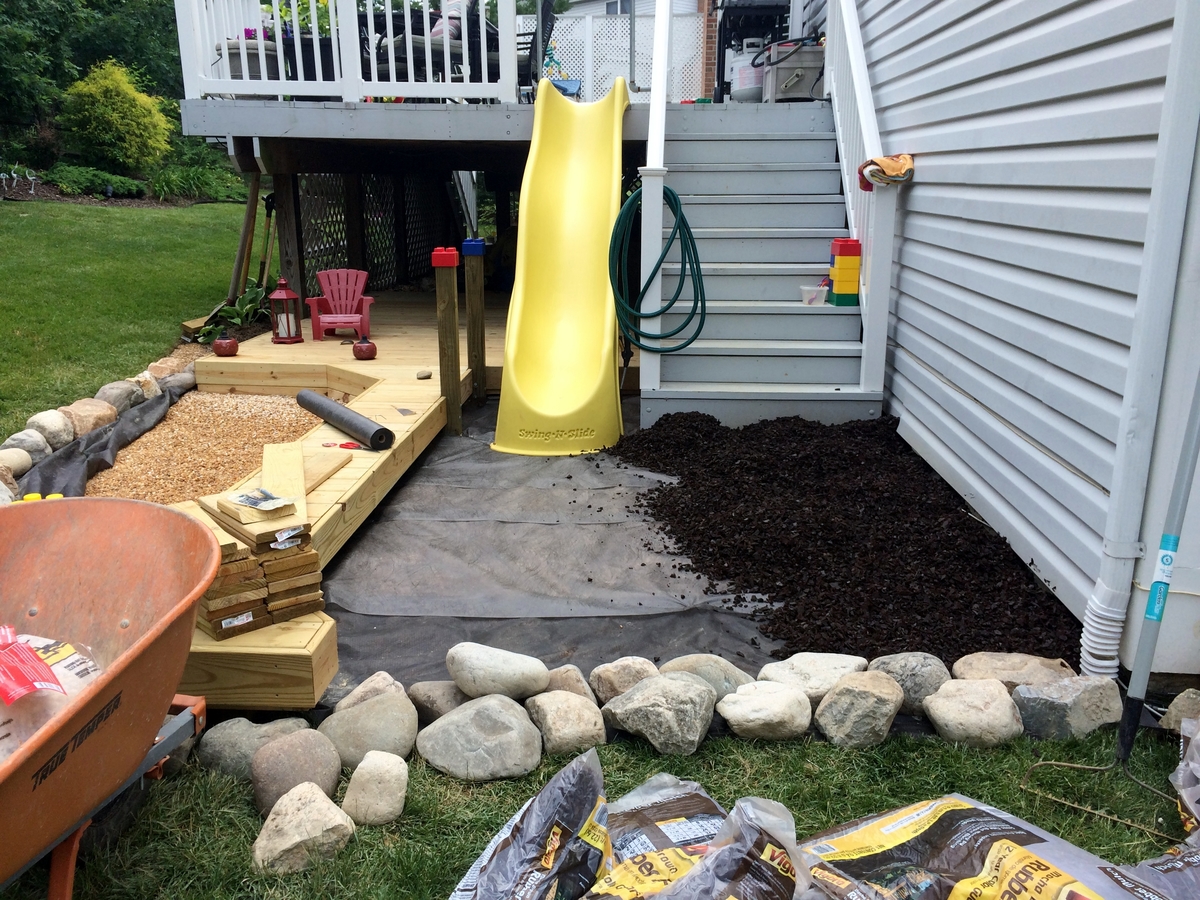
I built this outdoor play area for my kids this past summer. The area under that portion of the deck was always messy and muddy and so I wanted to make use of it. I built the deck and anchored it with lag bolts to the deck supports. On the one side I used rubber mulch and on the other there is play sand. I dug holes in various locations and filled with gravel to allow for drainage under the sand and mulch. For the awning I used plain cedar shingles. I added a shower that is just regular 1/2" metal pipe with a hose adaptor. The shower wall and fence are just old pallets that I had for a while, cut to size, which was pretty much random but they came out great. I added a misting system under the awning that works great, the kids love the cool mist on the hot days. Overall, a heavy job ripping up the grass, moving the wood, gravel, stones, sand and mulch, but a fun deck build and even better experience doing this with my kids by my side!
Tue, 01/13/2015 - 09:37
What an amazing use for a weird outdoor space ! You are genius !
Wed, 01/14/2015 - 06:21
I love it! I'm now trying to convince my husband to let me add a slide to the deck. Who wouldn't love that?!
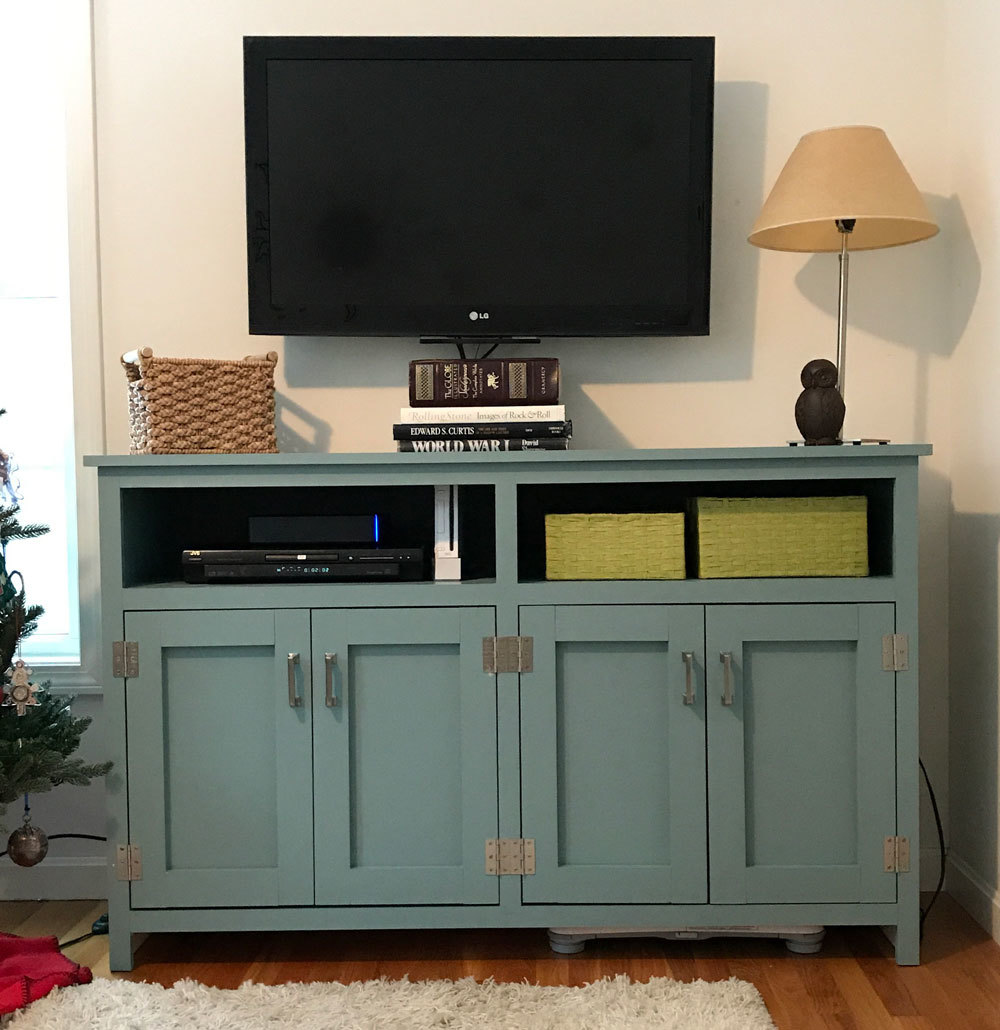
This was my third project, and the first one with doors (boy do I have some great opportunity for growth there!). I left off the bottom trim because I wanted a slightly more contemporary look. Thanks for this plan, Ana. It was the perfect size for this space. Things I learned doing this project: next time cut an extra 1x4 to tack in to do the doors, hinges require math, be sure to get the kind of wood filler that dries—not wood putty (sigh), I need a workbench.
Fri, 12/22/2017 - 09:52
Looks great, love the open bottom! Can't wait to see the workbench!