Community Brag Posts

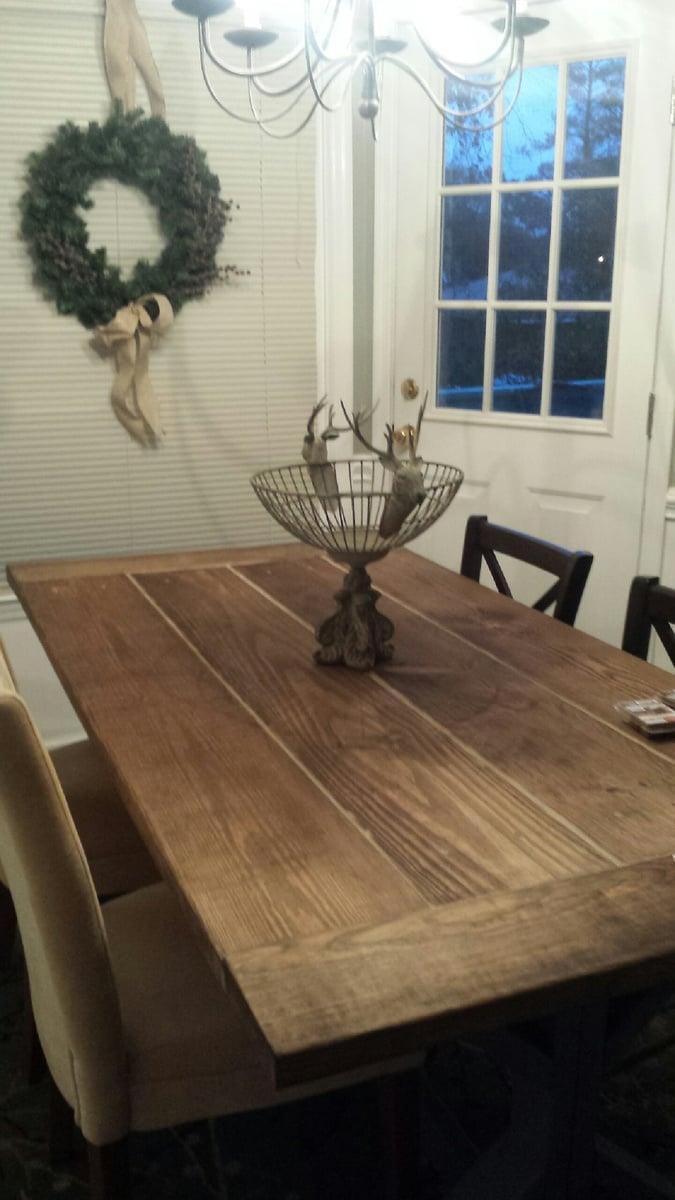
X - Farm House Table

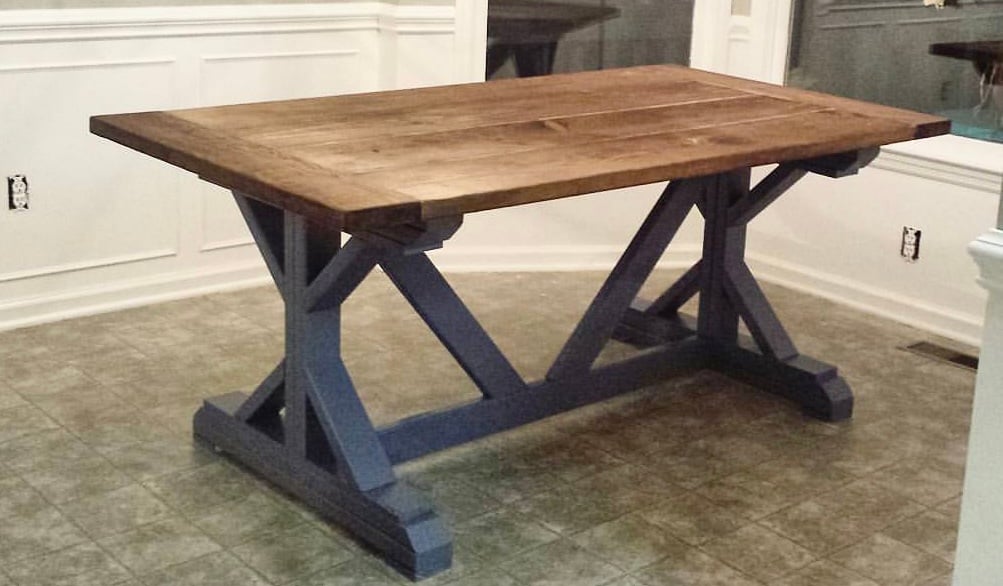
I modified this plan just a little on the ends, and I can not tell you how pleased I am with it! I did run into some issues with lining the boards up properly due to imperfections (and not laying the boards out ahead of time in the store because I was rushing at closing time), but in the end, I decided to add a wood filler in between the boards and everyone just raves over it. I could not imagine it having come out better. I would not do it any other way. 

Thank you Ana!! 

PS... I have a wonderful idea for a loft bed, but the plans are not provided. I know you would do it justice.. how do I submit the photo????

Built from Plan(s)
Estimated Time Investment
Day Project (6-9 Hours)
Finish Used
Satin, Custom mixed stain, stainable wood filler, sander.

Recommended Skill Level
Intermediate

Comments

jeffross

Sun, 01/07/2018 - 07:22

My appologies if I'm missing it but are there build plans for this table.  I would really like to build this for a friend but I'm not sure my skills will enable me to free style this. Thanks in Advance.  Jeff

cjtrunk21

Fri, 05/29/2020 - 11:50

Did plans over get posted for this table? Love the design. Thanks.

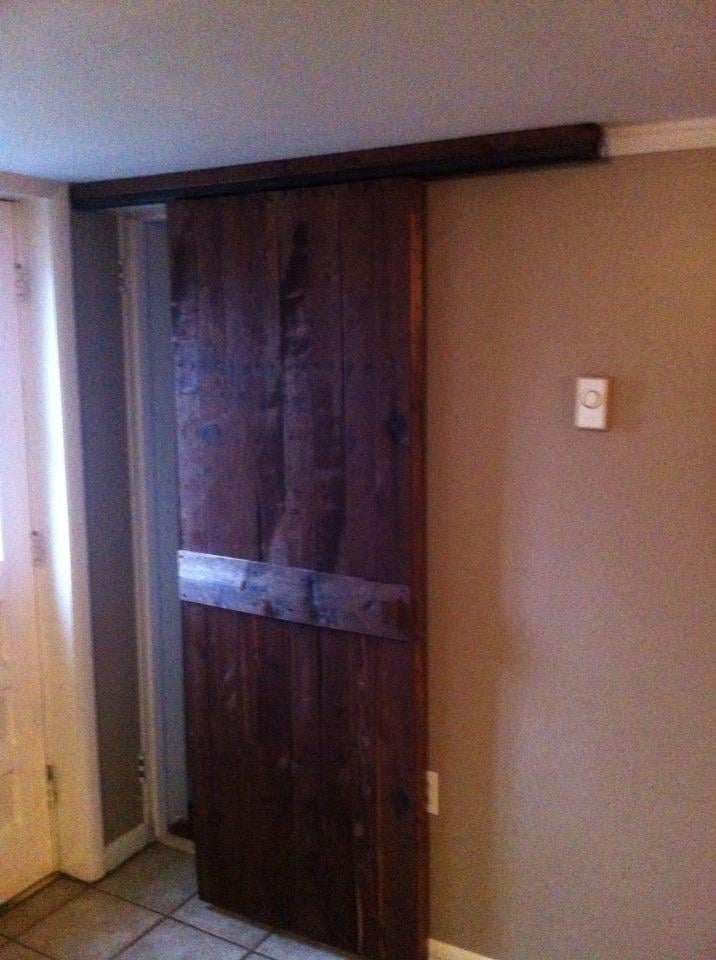
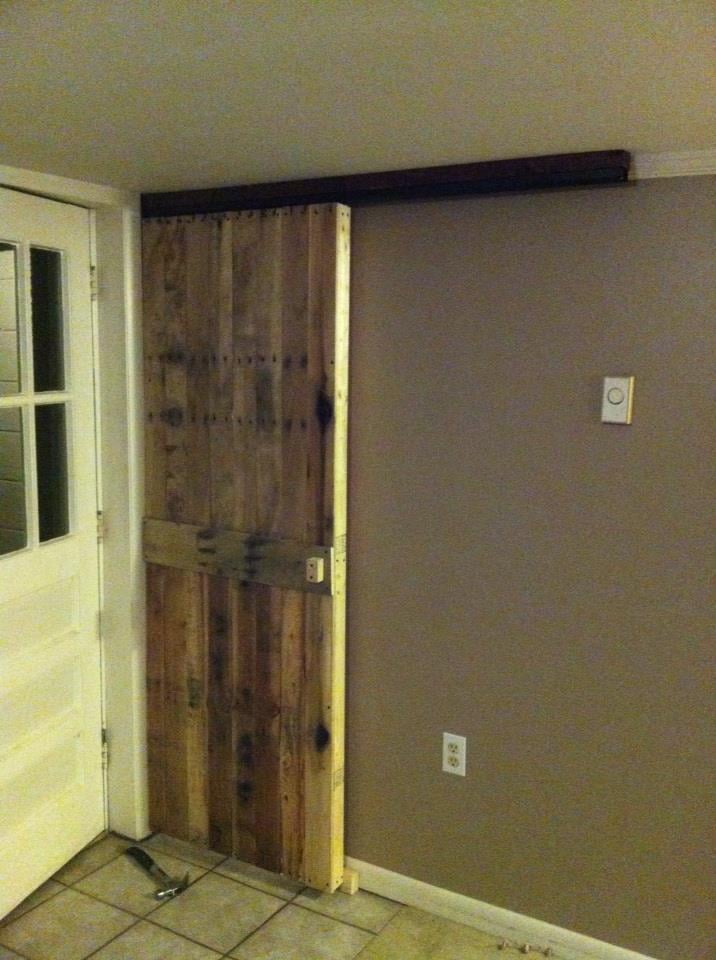
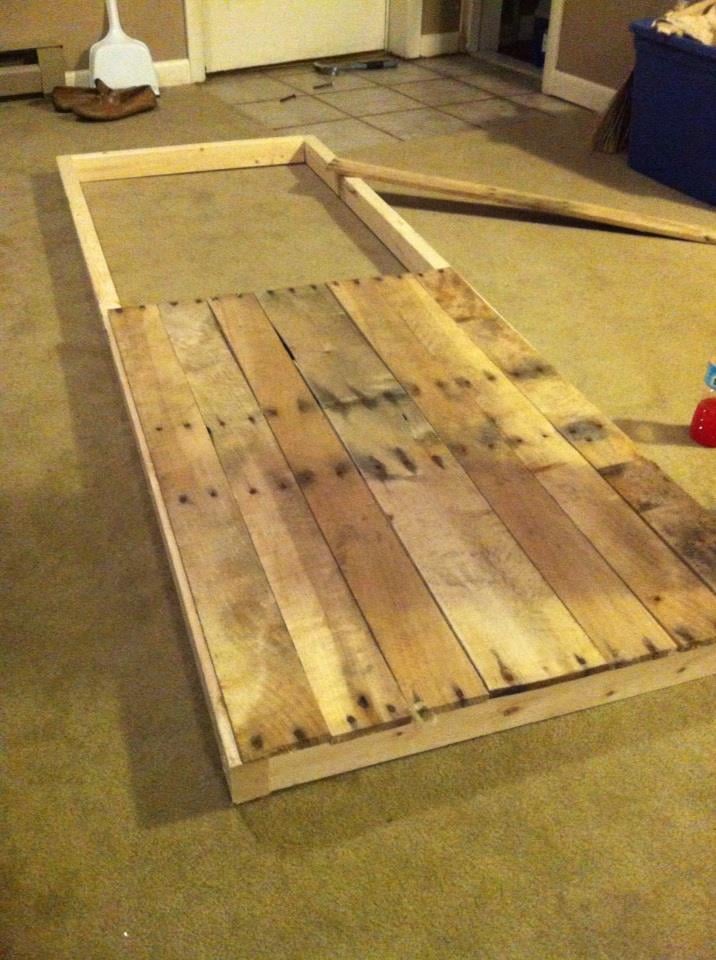
Sliding "barn" door from reclaimed pallet wood

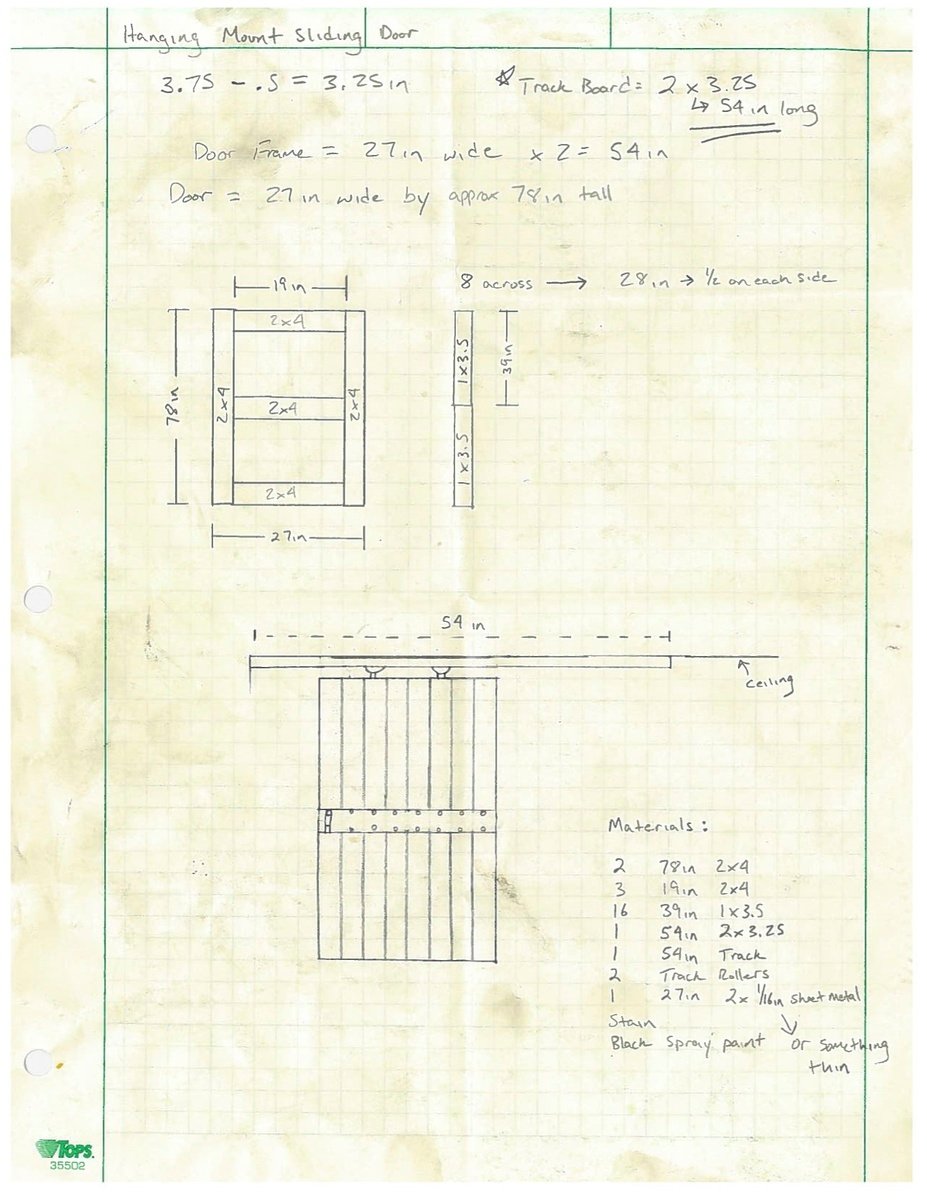
I saw many different sliding door projects online, so I did my own spin on one. I was able to get several old pallets for free (pine and oak). I went to Lowes and bought a few 2x3s which I used as the frame, and the track hardware which was only $13! Most doors I see are mounted from the wall, but since I have 7' ceilings downstairs I mounted mine from the ceiling. This project only took about 4 hours total and cost about $40 when you figure in costs for screws, stain, etc. The most difficult part was taking apart the pallets. Using a reciprocating saw with a 12'' demolition blade is the best way to take them apart. Thanks for the idea Ana.

Estimated Cost
$40
Estimated Time Investment
Afternoon Project (3-6 Hours)
Finish Used
Minwax Dark Walnut
Recommended Skill Level
Beginner

Comments

BREATHESMILEBE

Mon, 05/13/2013 - 20:00

Hi!!
This looks so awesome! I came across this and was hoping to repeat it. You mention that you found the door hanging hardware at Lowes for $13. I can't seem to find it. Do you happen to remember the name of it? I'm entering "hanging door hardware" into Lowes and Home Depot and can't seem to find any hanging door hardware at all. I'd appreciate the help. Thanks!
Tina

Storage Captains Bed

Submitted by Anonymous (not verified) on Fri, 09/16/2022 - 05:03

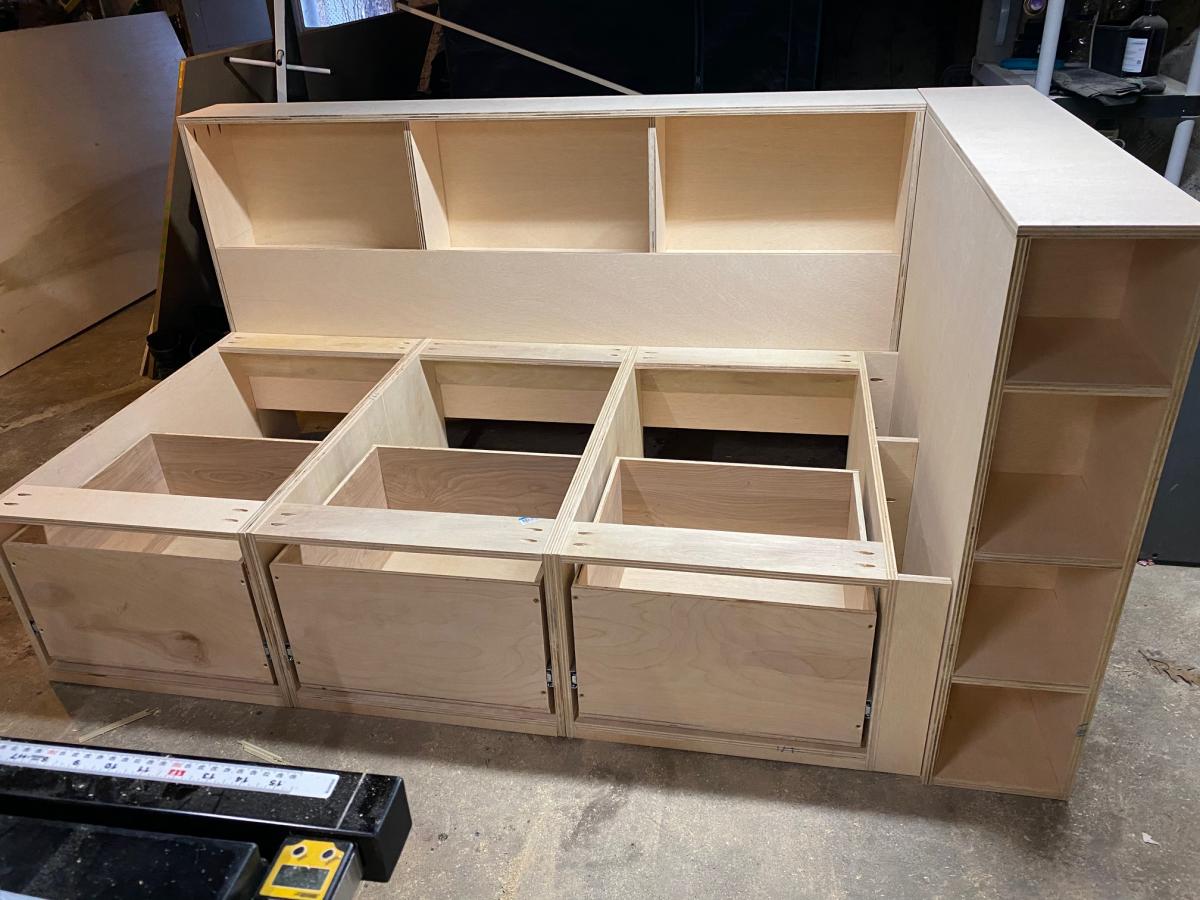
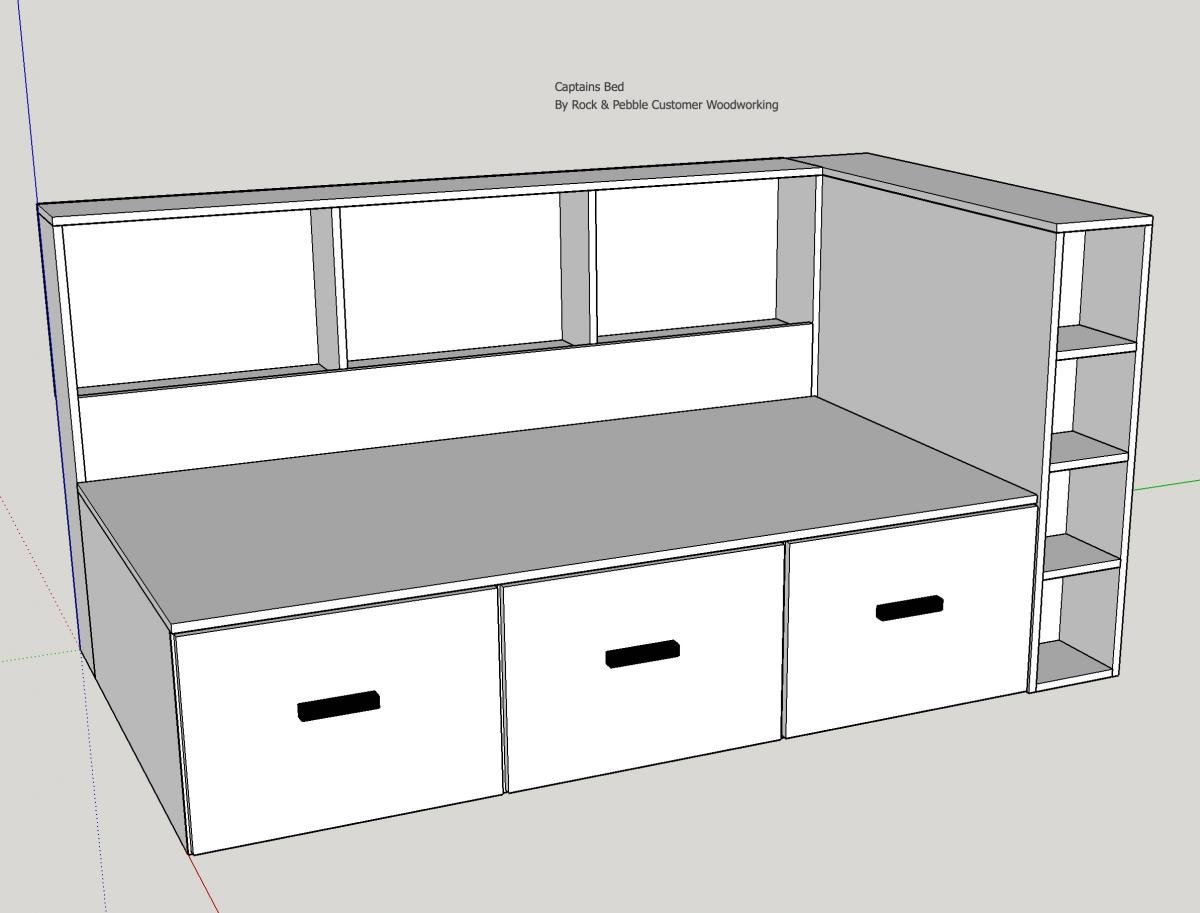
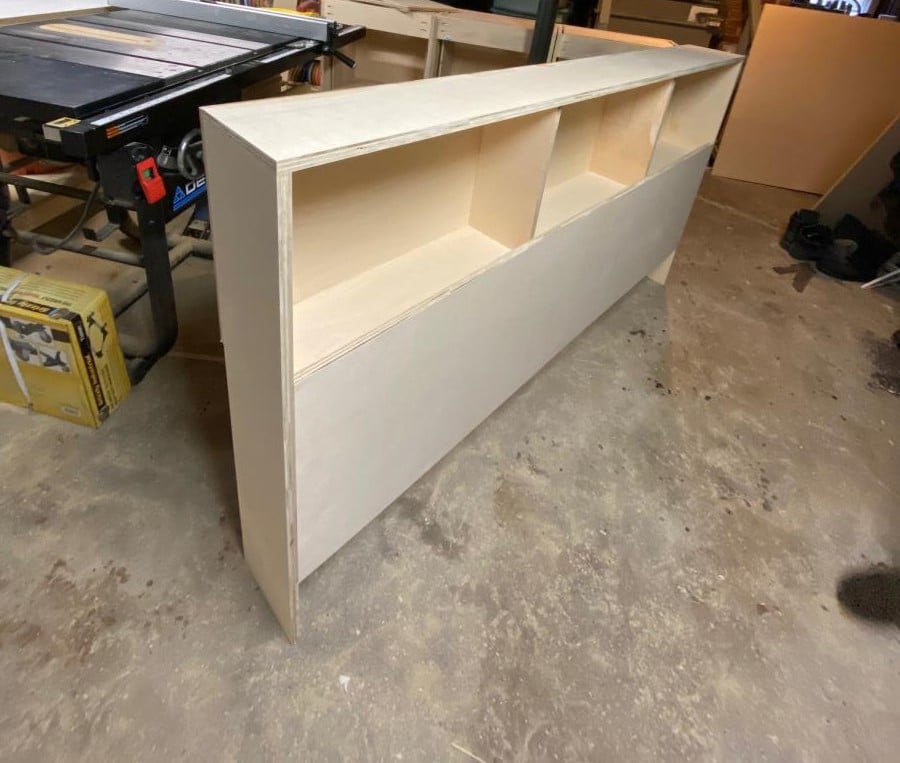
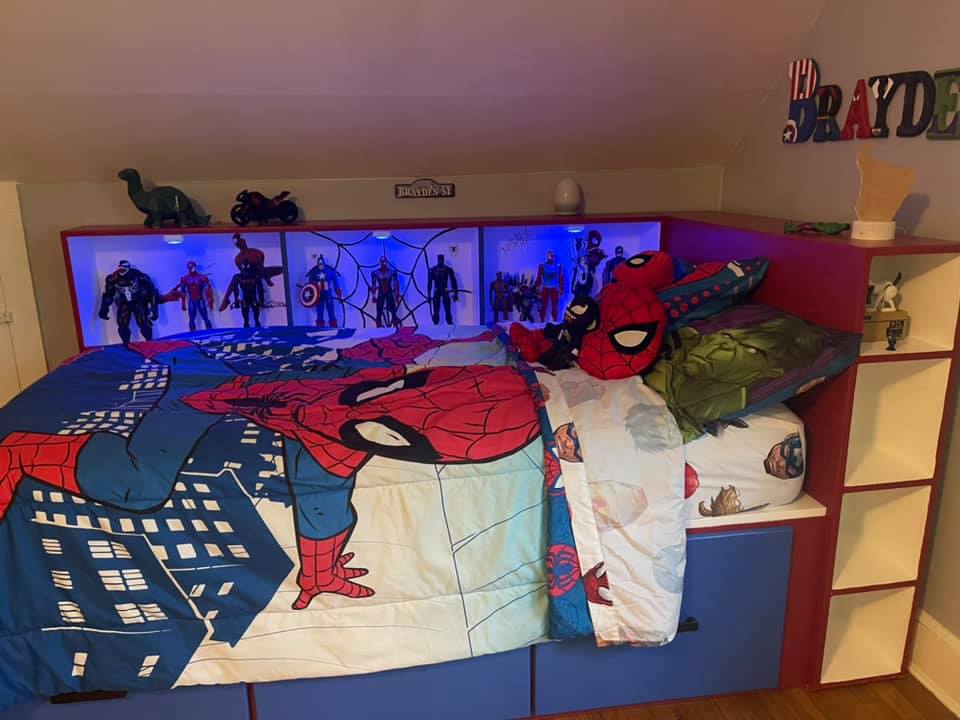
So this was a really fun project from start to finish, I wanted a storage bed with a place for my son to showcase his Super Hero collection!

Estimated Cost
300
Estimated Time Investment
Week Long Project (20 Hours or More)
Finish Used
Paint
Recommended Skill Level
Intermediate

Comments

Second Project: table saw/ miter saw work bench

Submitted by jamesjill on Sat, 01/30/2021 - 20:34

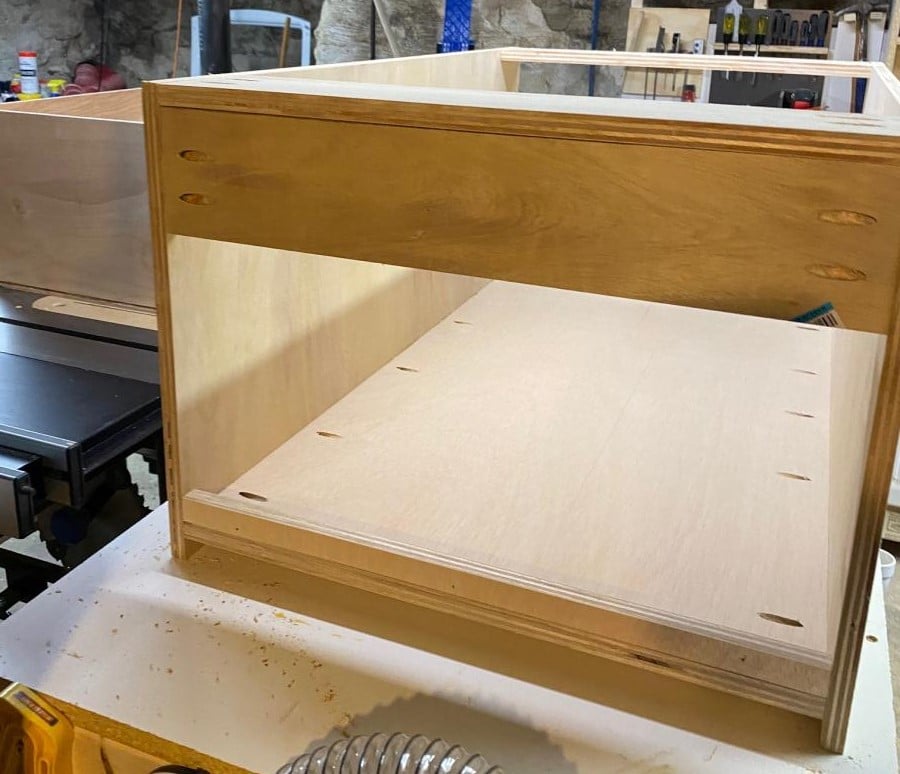
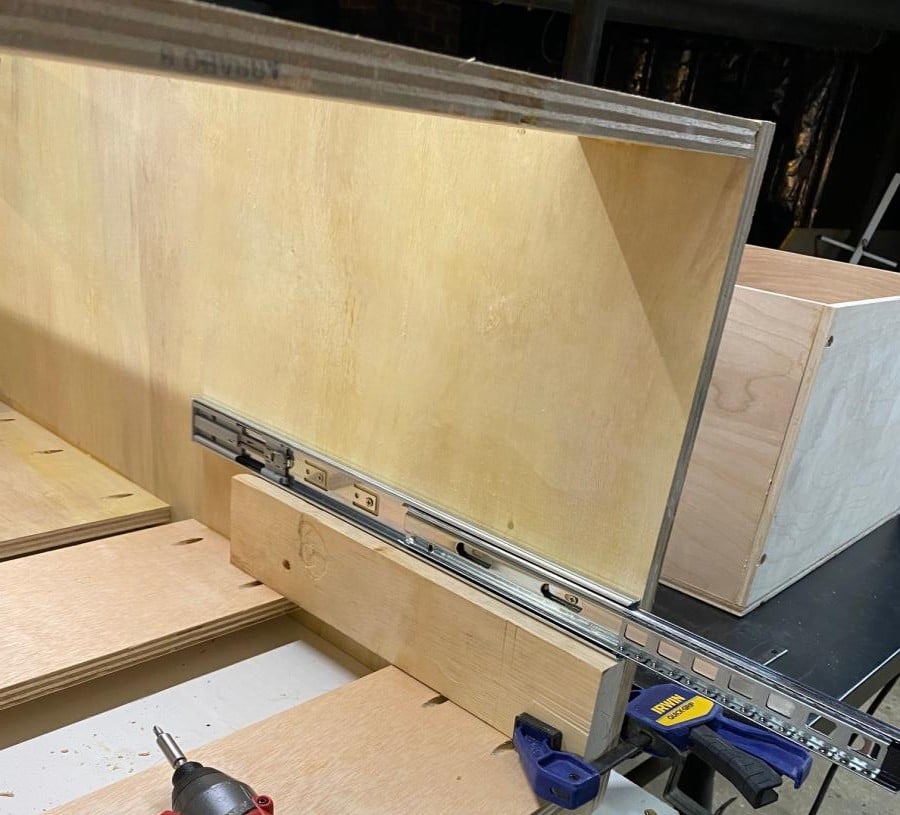
Used part of the Ultimate Roll Away Workbench with Miter Saw Stand to just build one of the roll-away workbenches to work with my miter saw and table saw. I'm very happy with how it turned out.

Recommended Skill Level
Beginner

Comments

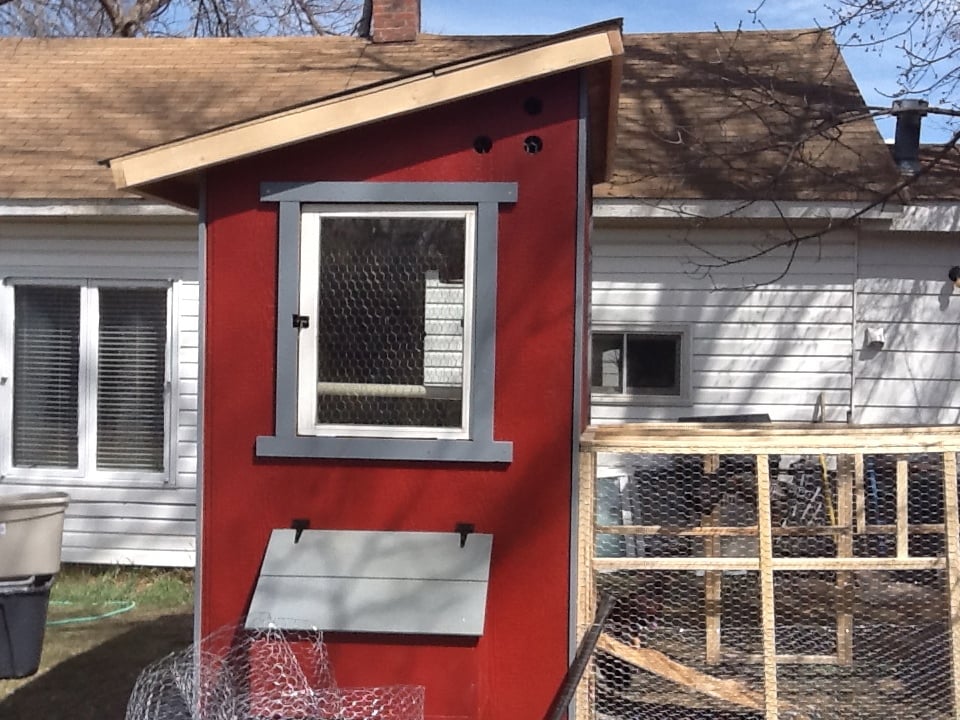
Chicken Shed

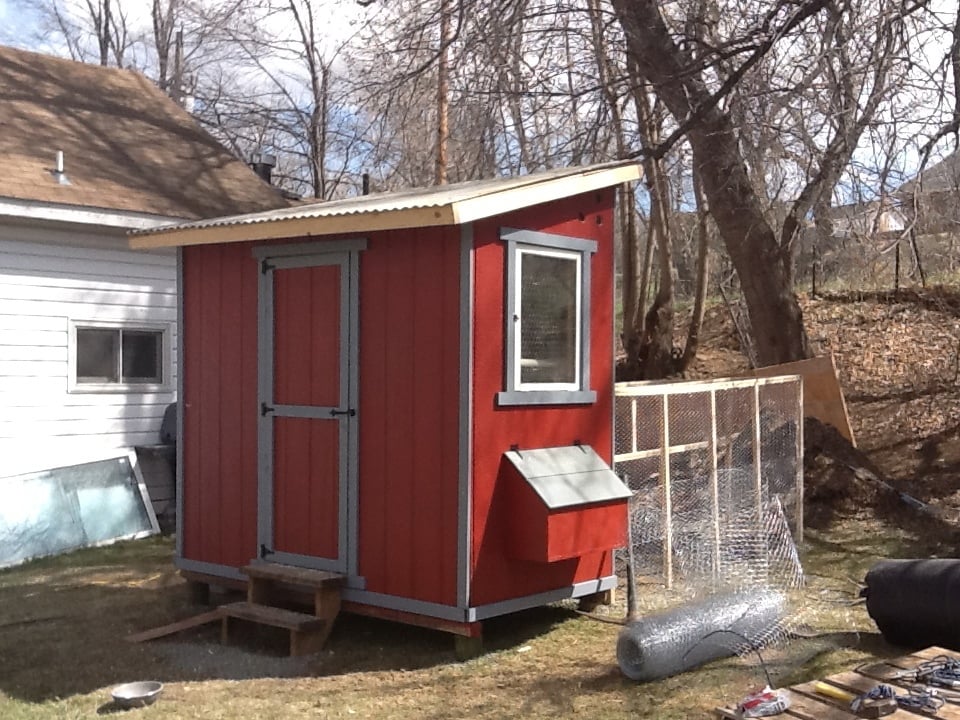
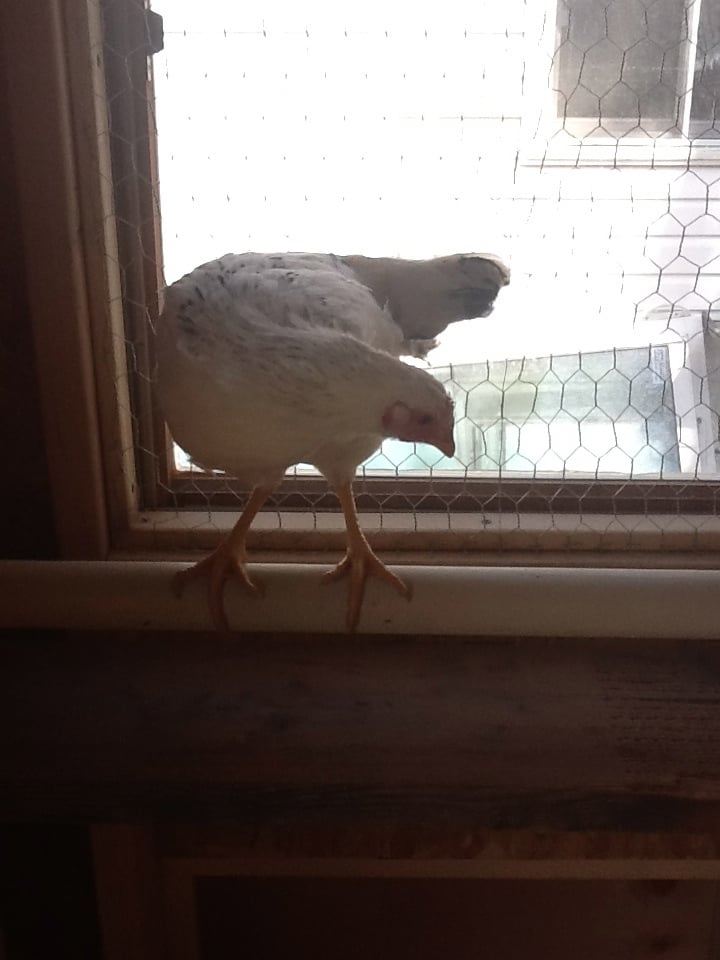
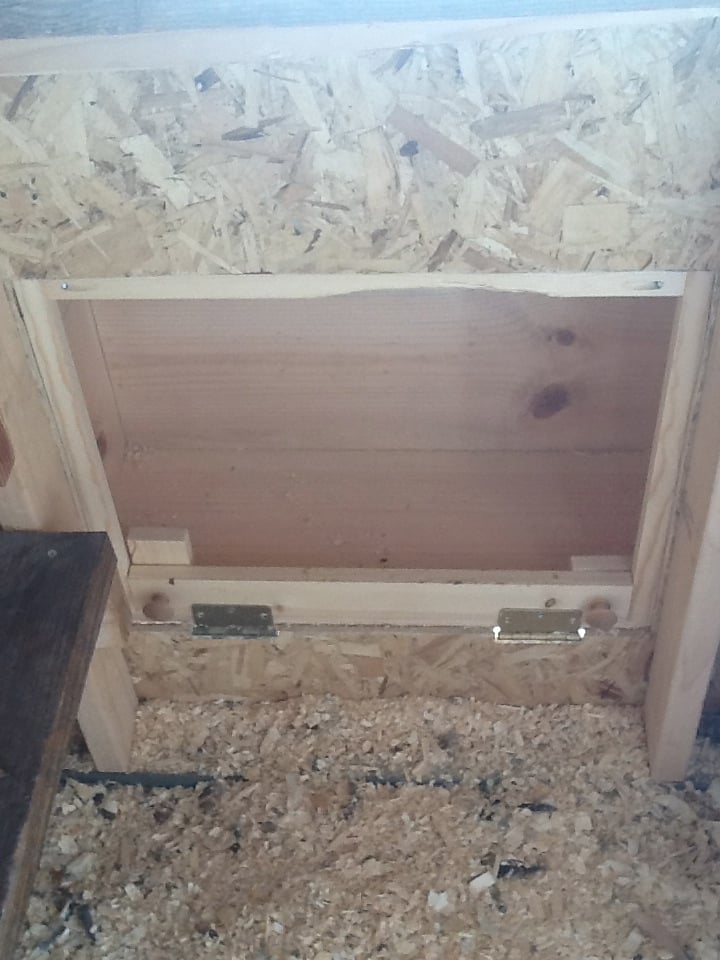
I used the chicken shed plans to create the coop, with a modification to include two nesting boxes, one on each side.

I slightly modified the nesting boxes, using a U shaped frame and added hinges for the front to swing down and the pine shavings to be swept out.

For the siding, we found it easiest to do the tack and trace method. We tacked each full sheet of siding in place and traced the cuts for the window, roof line, doors, and nesting boxes. We then took them down, darkened the lines, cut 'em, and re-hung them. It made it a million times easier, IMHO.

For the inside, I designed several roosting bars with poop platforms. The water is a gravity fed chicken nipple/pvc setup, which I found online.

The food stations, also gravity fed, are (new) sewer pipes with wye connectors.

I used the roof and siding scraps to make shelves for storage inside.

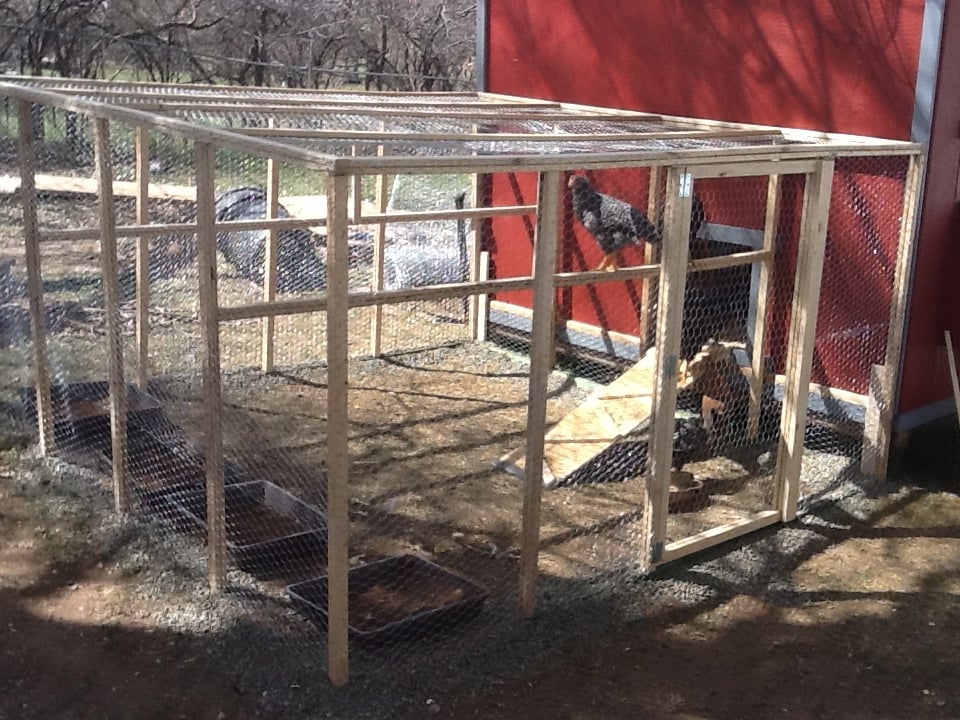
By sourcing reclaimed materials, I built the coop, run, interior, feeding stations (5), and waterer for $550. I only bought 27 pieces of new lumber (15 2x4's and the 12 8 foot long 1x3's)

Even the paint was free! (We have a drop and swap at the haz mat recycling center run by the county. We have gotten 100's of dollars of free paint, stain, and varnish there. I even used a can of free spar varnish to seal the inside of the coop)

There are still a few pieces of trim to be cut and painted, but the girls are inside eating, drinking, and merry!

I did find that at the Home Depot, if you buy chicken wire, it costs way more then 150 feet x 36 inch "stucco netting". The stucco netting was $54 for 150 feet, and chicken wire is $76 for the same amount. It is the exact same wire.

I built the run out of resourced 1x2 furring strips. They were a pain to work with, very prone to breaking when not supported, but with the entire run costing $25 for wood and $54 (with half a roll left over) for chicken wire, I can handle some extra time and effort.

If anyone has any questions for me, feel free to contact me! I'd love to help!
Built from Plan(s)
Estimated Cost
550
Estimated Time Investment
Week Long Project (20 Hours or More)
Finish Used
Free paint !
I know several counties in CO have drop and swap places. Maybe your county does, too!

We got three cans of exterior rust colored paint and mixed them all together to make one color. This only works if the colors are pretty similar. It prevents one side from looking different then another.

The trim was a full gallon of blue-grey. Free and never even used.
Recommended Skill Level
Intermediate

Comments

xman1x

Mon, 02/06/2023 - 08:12

Hi! Do you still have this coop? It's been about a decade now and wondering how it has held up, if you have any suggestions, or additional pictures of the inside. Thank you!

Entryway Bench

Submitted by jjunge08 on Mon, 01/01/2018 - 09:49

My wife wanted an entry way bench that would fit the baskets for a cube storage shelf units.  Each box is 11 1/2 square and accomidates a 10 in basket.  The bench is 50 inches long and and just shy of 19 inches tall.  The depth of the bench is approximately 12 1/2 inches.  My wife made the cushion for the top and we purchased the baskets from Lowes.  

Estimated Cost
Bench cost - $50-70


Estimated Time Investment
Weekend Project (10-20 Hours)
Finish Used
I only used white paint to match the trim in our house where the bench is placed.
Recommended Skill Level
Beginner

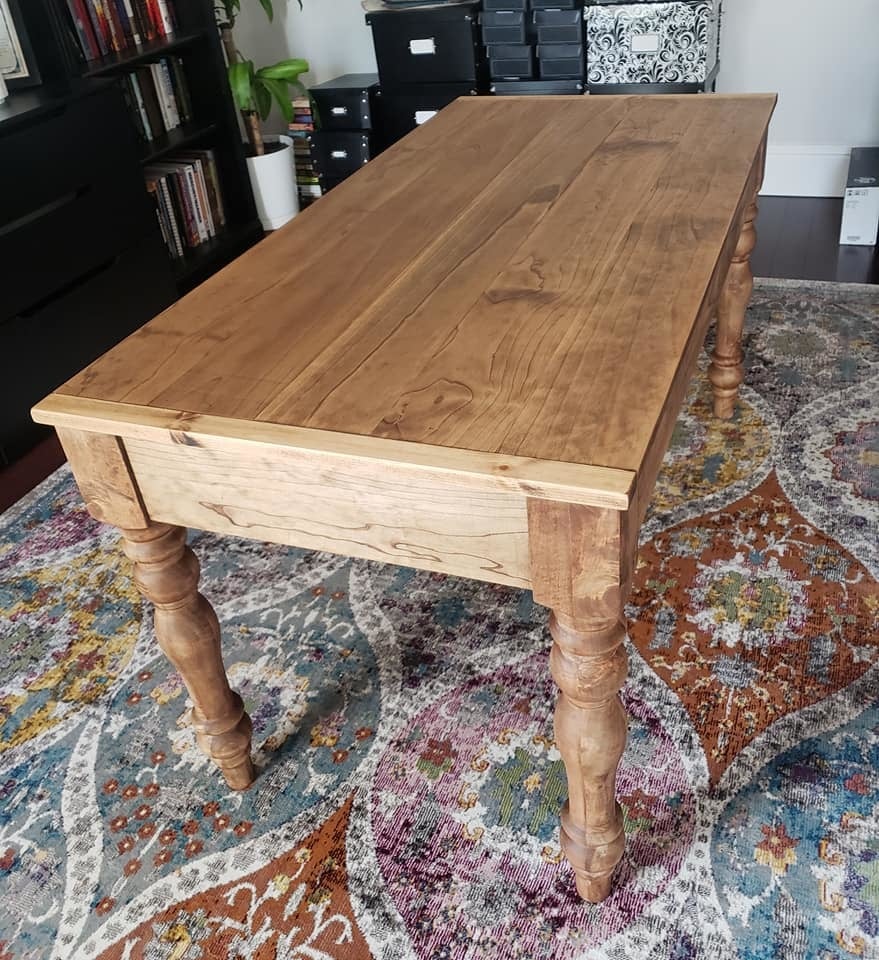
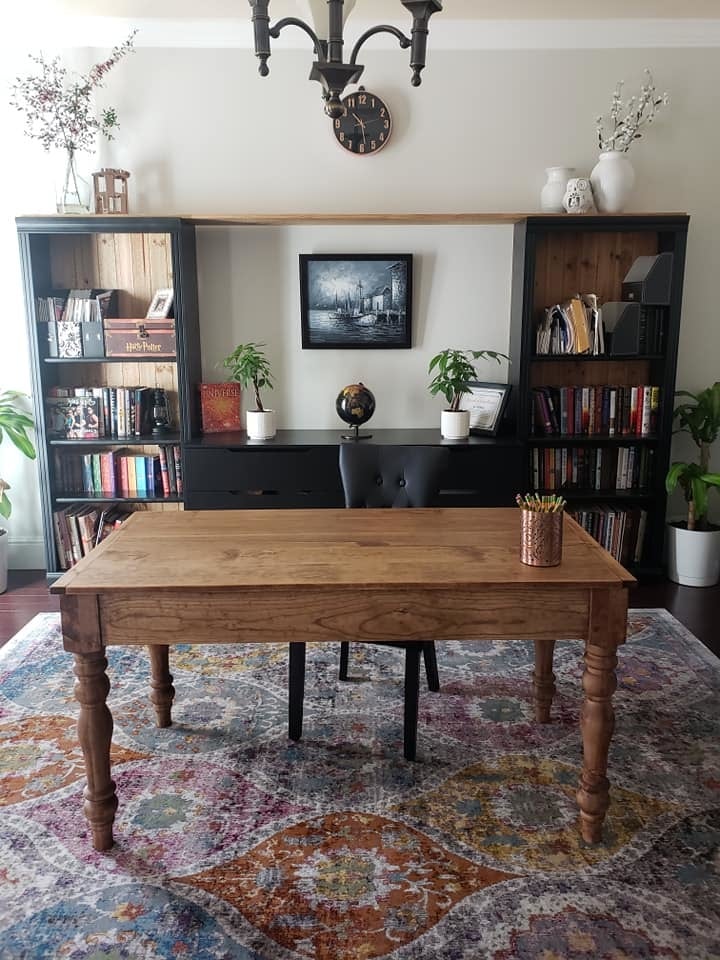
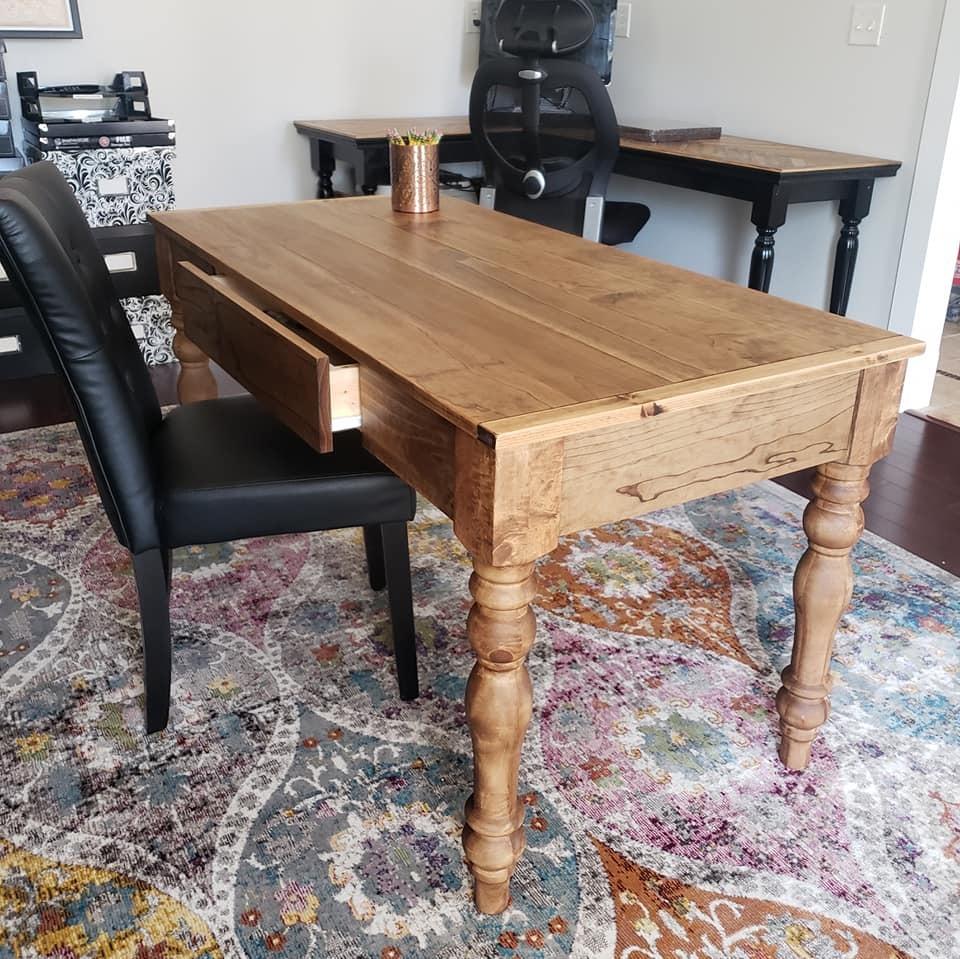
Farmhouse Writing Desk with Turned Legs

Submitted by kwildman on Mon, 01/07/2019 - 08:53

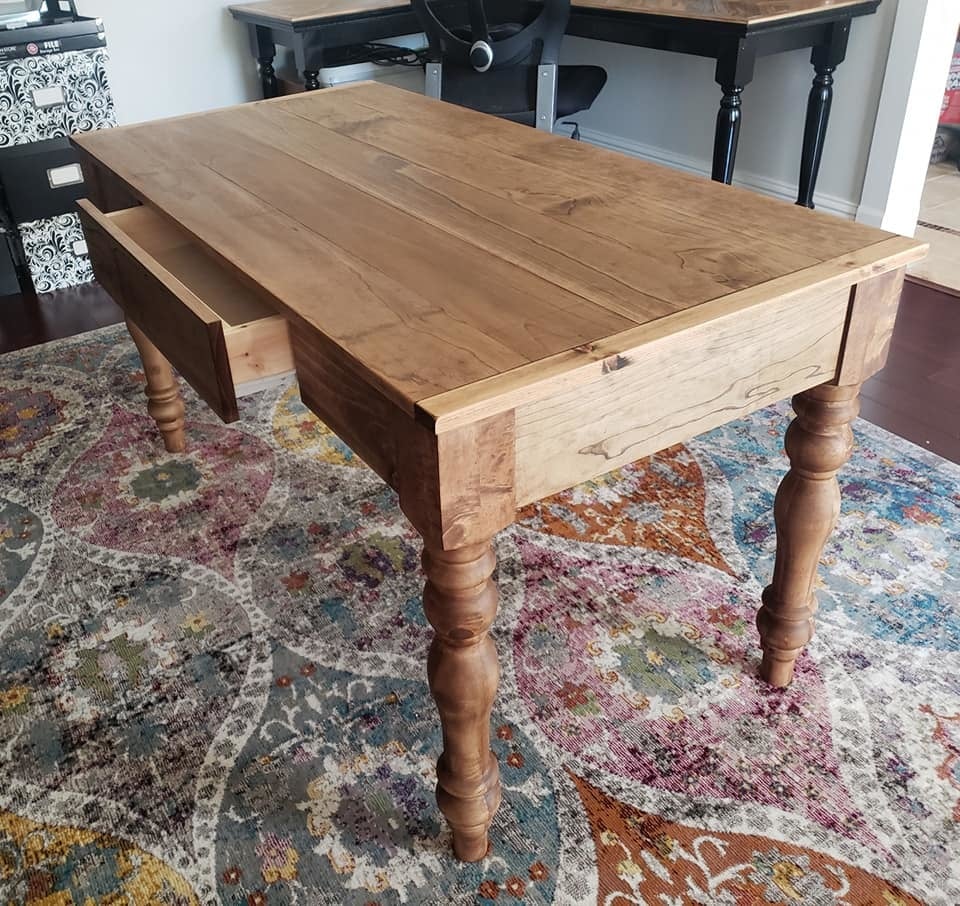
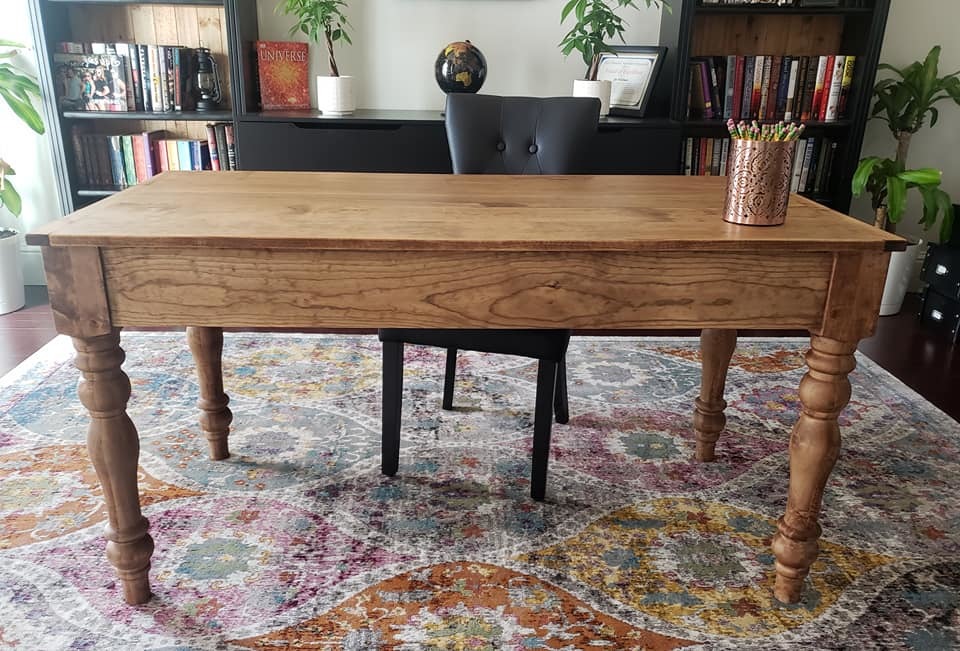
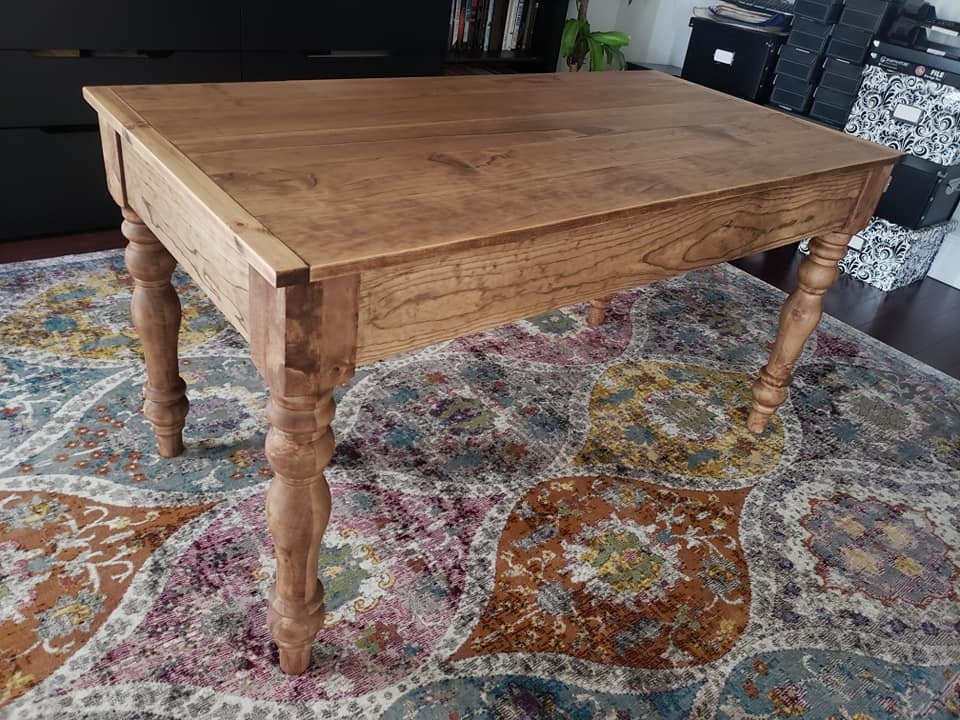
I modified the Small Old English Style Farmhouse Dining Table plan to build a writing desk.   I used five 1x6 boards for the top for a width of 27.5 inches.   I made my desk 56 inches in length.  I put the drawer on the long side like a pencil drawer.   I did use the legs that Ana recommended in the plan.   I love how it turned out.  I used dark walnut danish oil and dark wax for the finish.  

Estimated Cost
225
Estimated Time Investment
Day Project (6-9 Hours)
Finish Used
I used Watco dark walnut danish oil and Minwax dark paste wax.
Recommended Skill Level
Intermediate

Comments

kwildman

Fri, 10/04/2019 - 21:46

Thank you!  I used Watco Danish oil and I used Minwax dark wax.  I've tried alot of different wax brands and I always come back to Minwax.  It dries the hardest in my opinion.

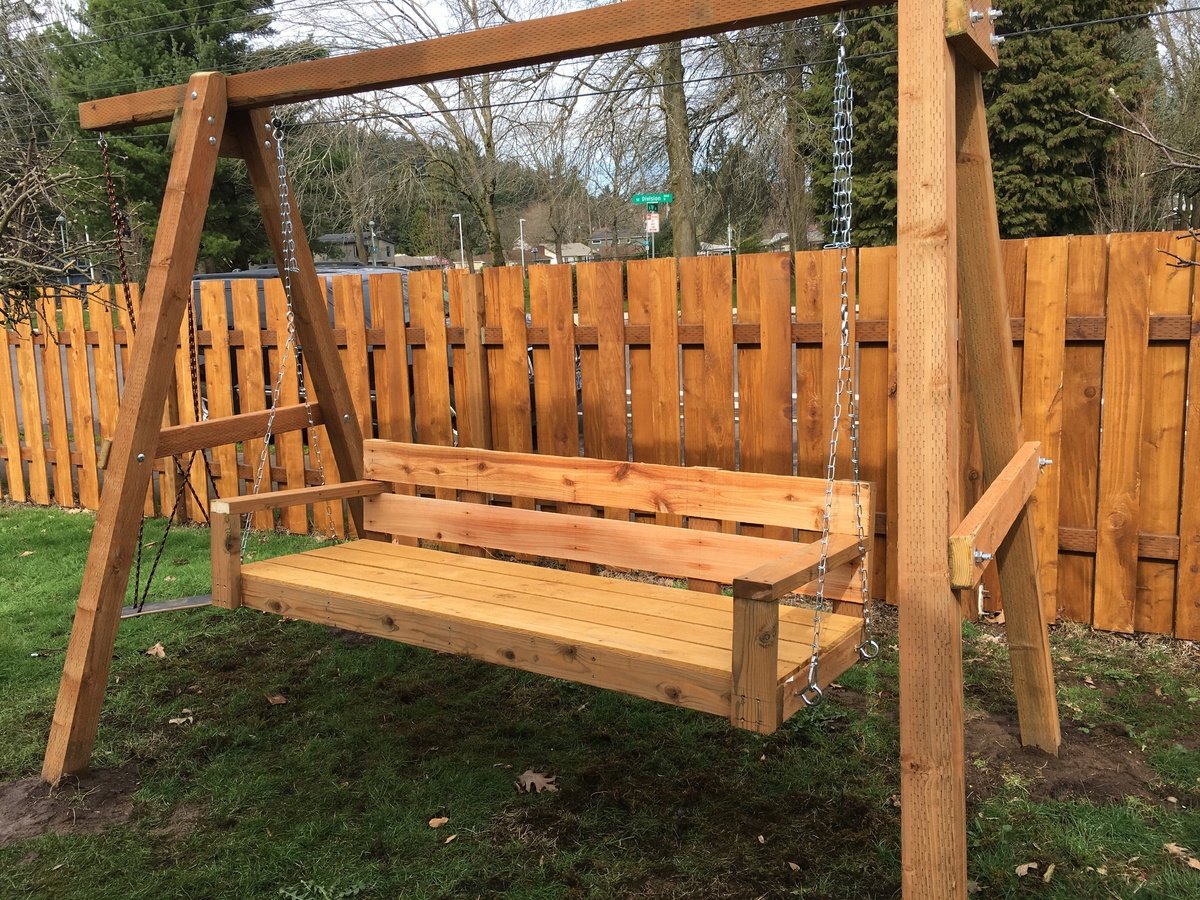
Patio Swing

Submitted by Anonymous (not verified) on Thu, 03/10/2016 - 11:41

Quick build for the garden swing.

Built from Plan(s)
Estimated Time Investment
Afternoon Project (3-6 Hours)
Finish Used
Unfinished, we are still waiting for some sun in Portland.
Recommended Skill Level
Beginner

Great plan - added to make it even bigger

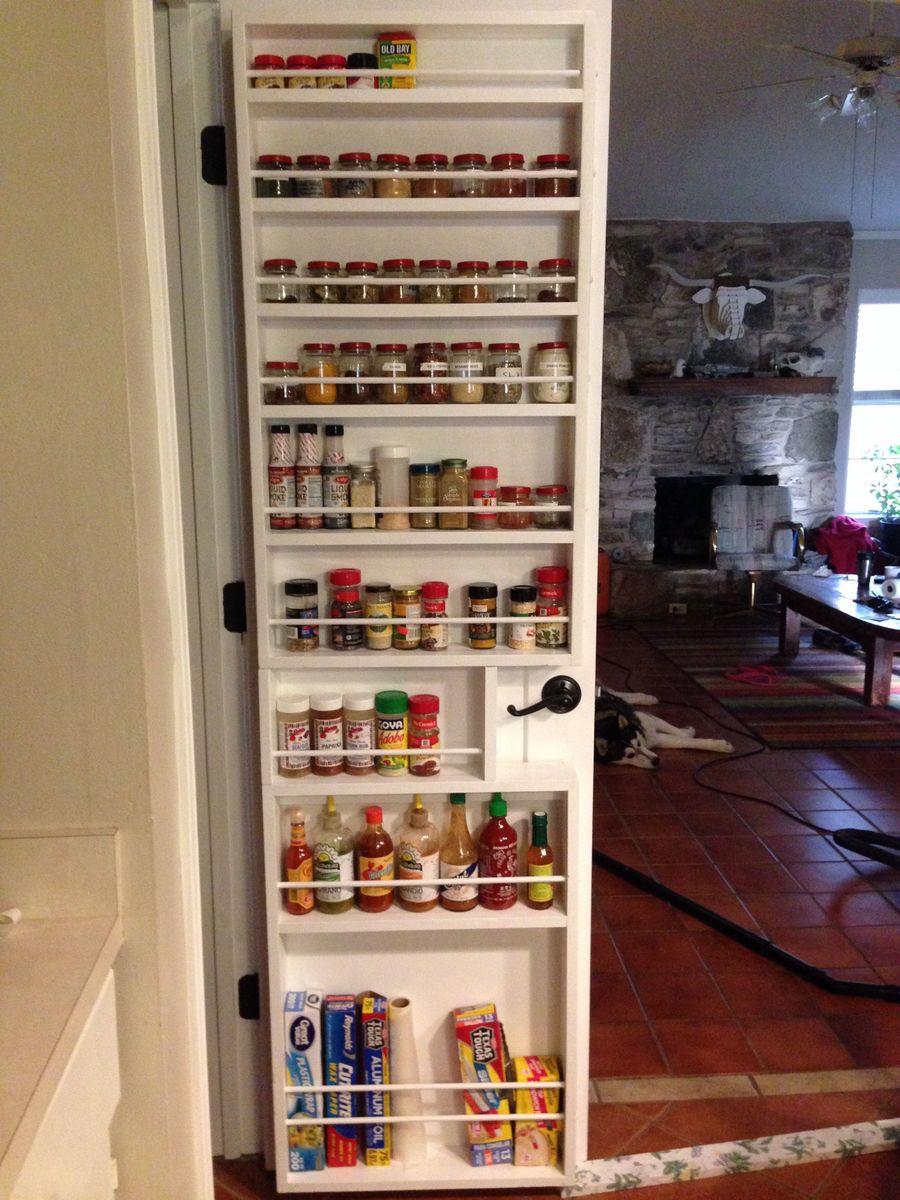
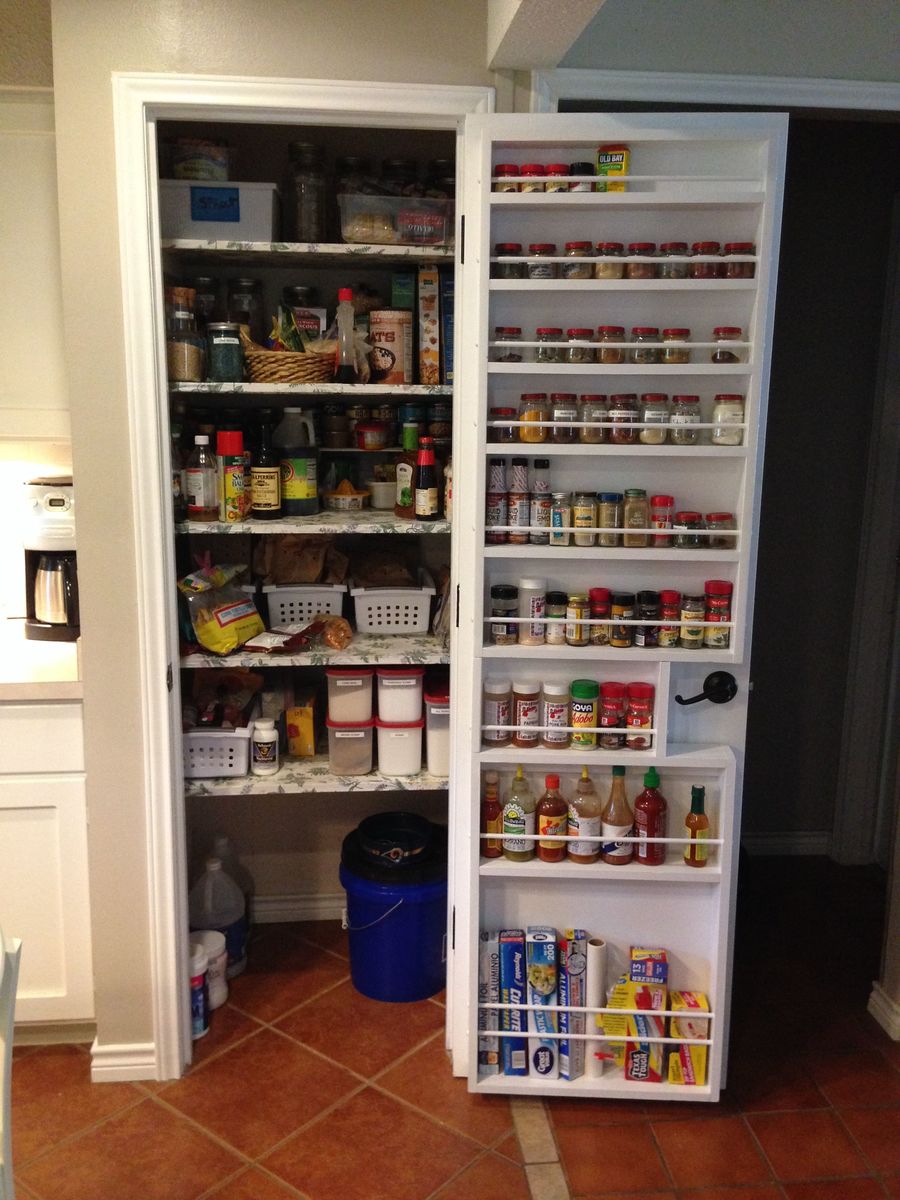
The plan is great, I followed the instructions exactly.  Then altered the plan to build a second rack that would fit the bottom of the door, with foil, saran and bag storage at the bottom.  Consequently it was heavy and I was very skeptical of the hollow core door anchors, but I installed 3 at the top and 2 at the bottom of both pieces.  It's very solid and secure....would probably have worked fine with even less. This door is only 32" wide but has plenty of room for this project.  Thank you, looking forward to trying more of your plans.

Built from Plan(s)
Estimated Time Investment
Day Project (6-9 Hours)
Finish Used
Primer and latex paint.
Recommended Skill Level
Intermediate

Comments

Rustic X Hall Bench

Submitted by Anonymous (not verified) on Thu, 01/02/2020 - 06:28

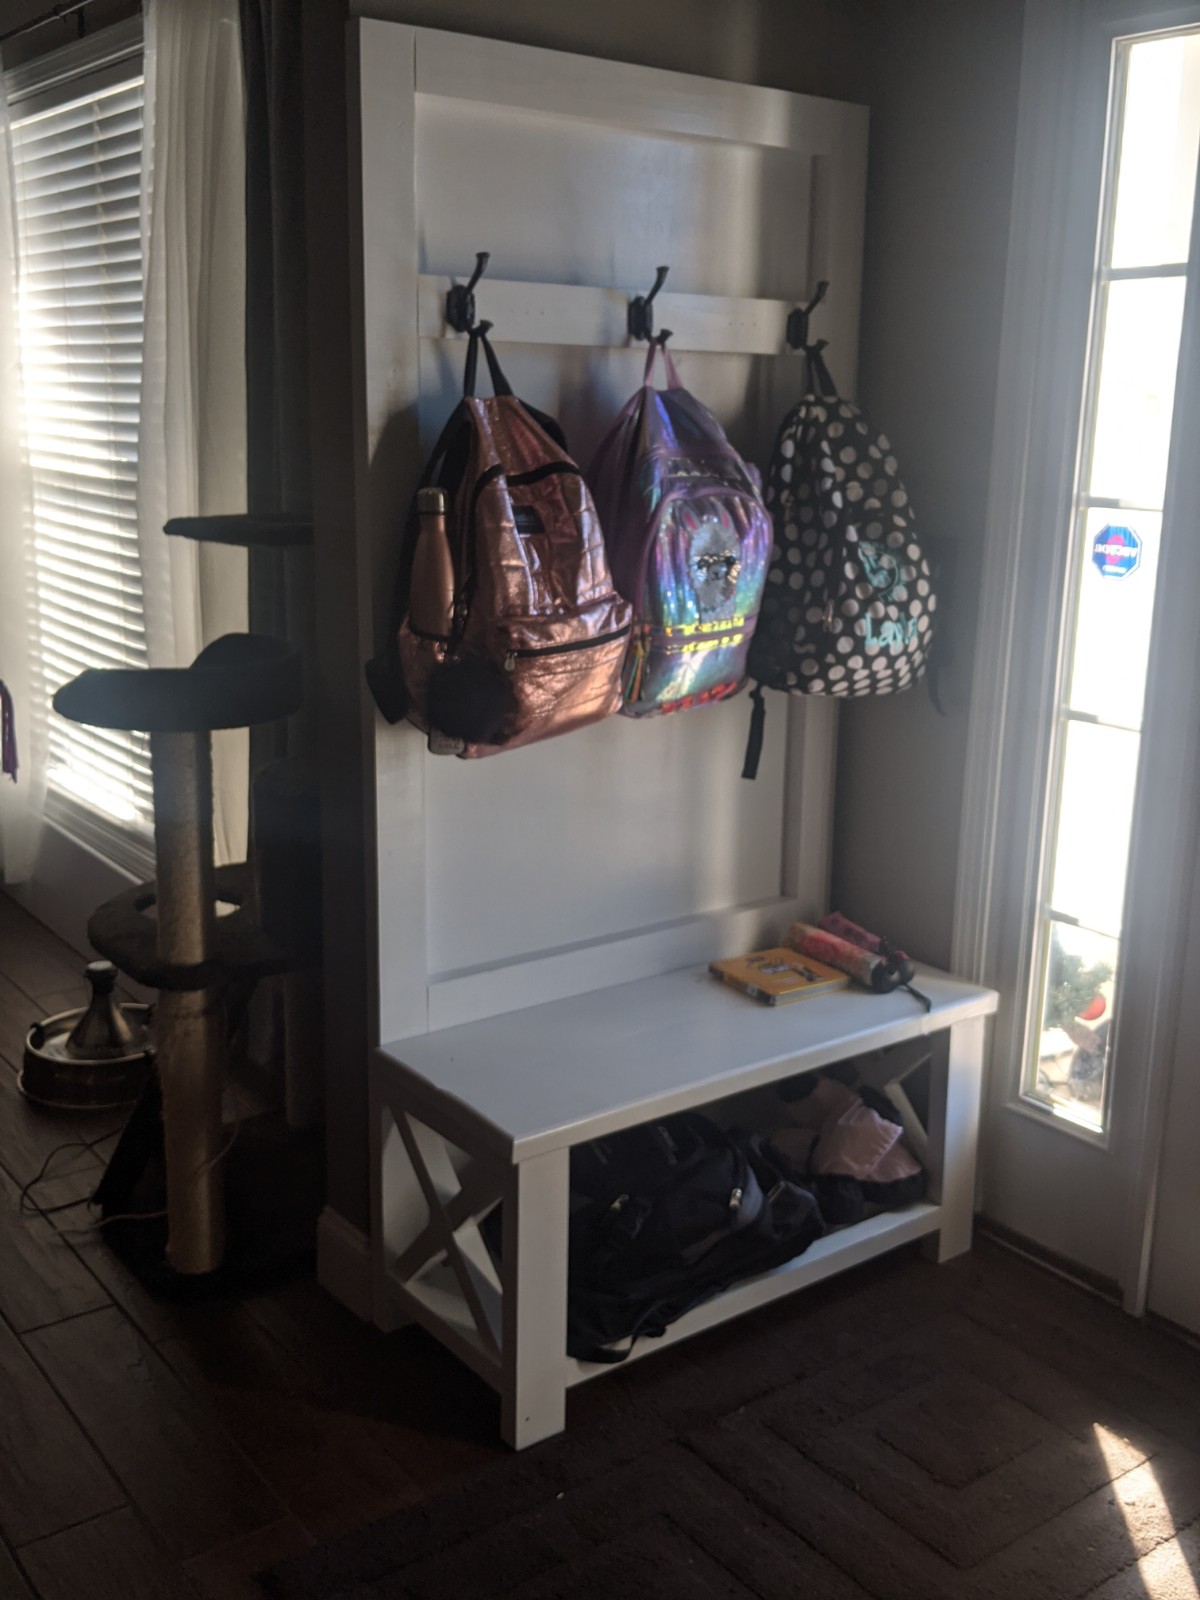
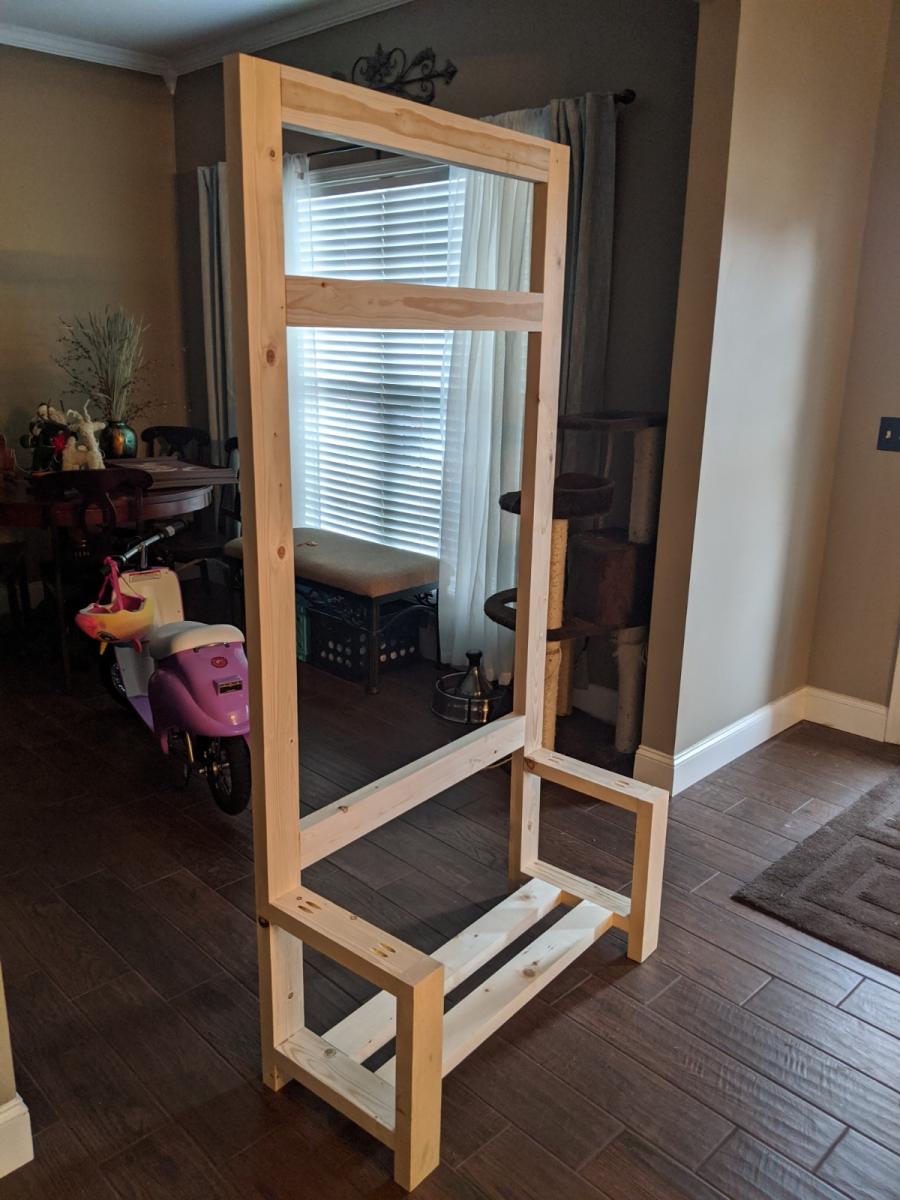
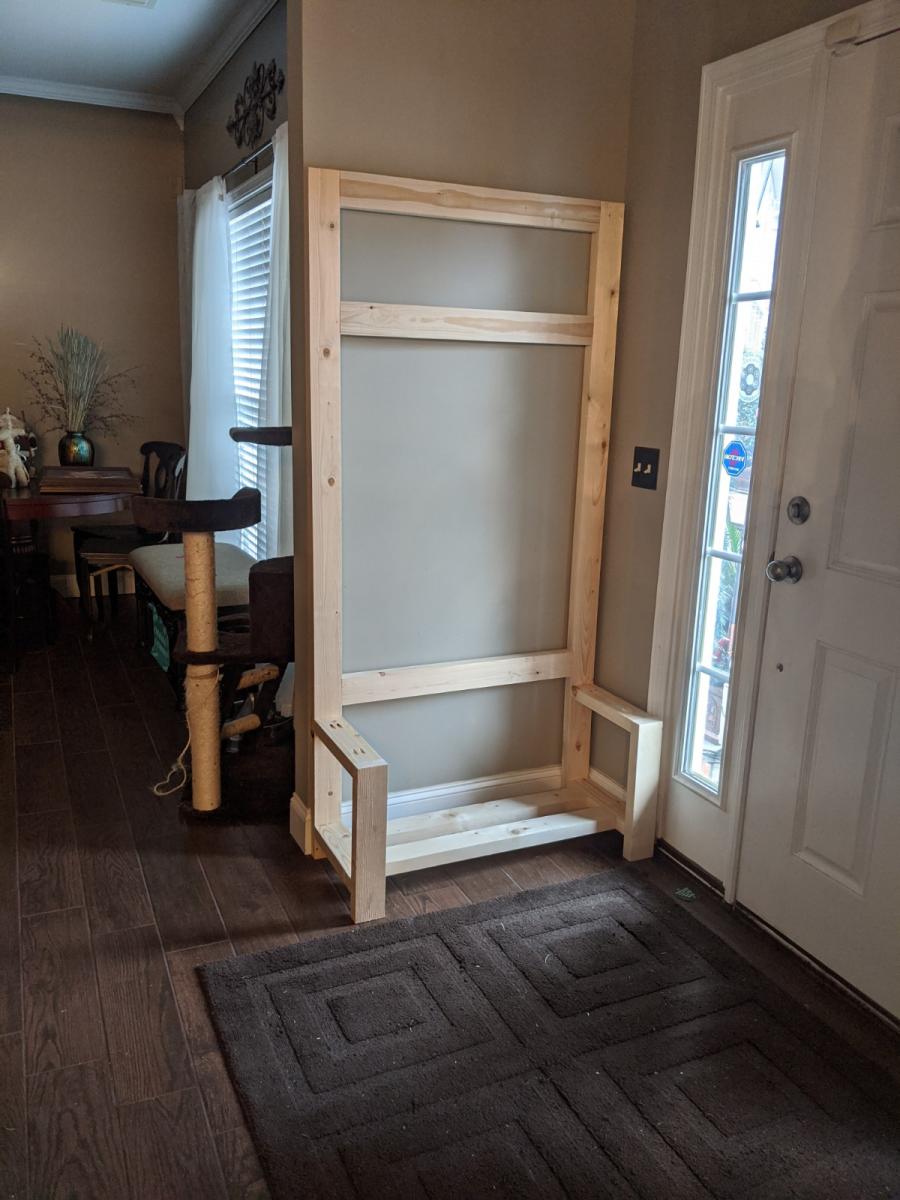
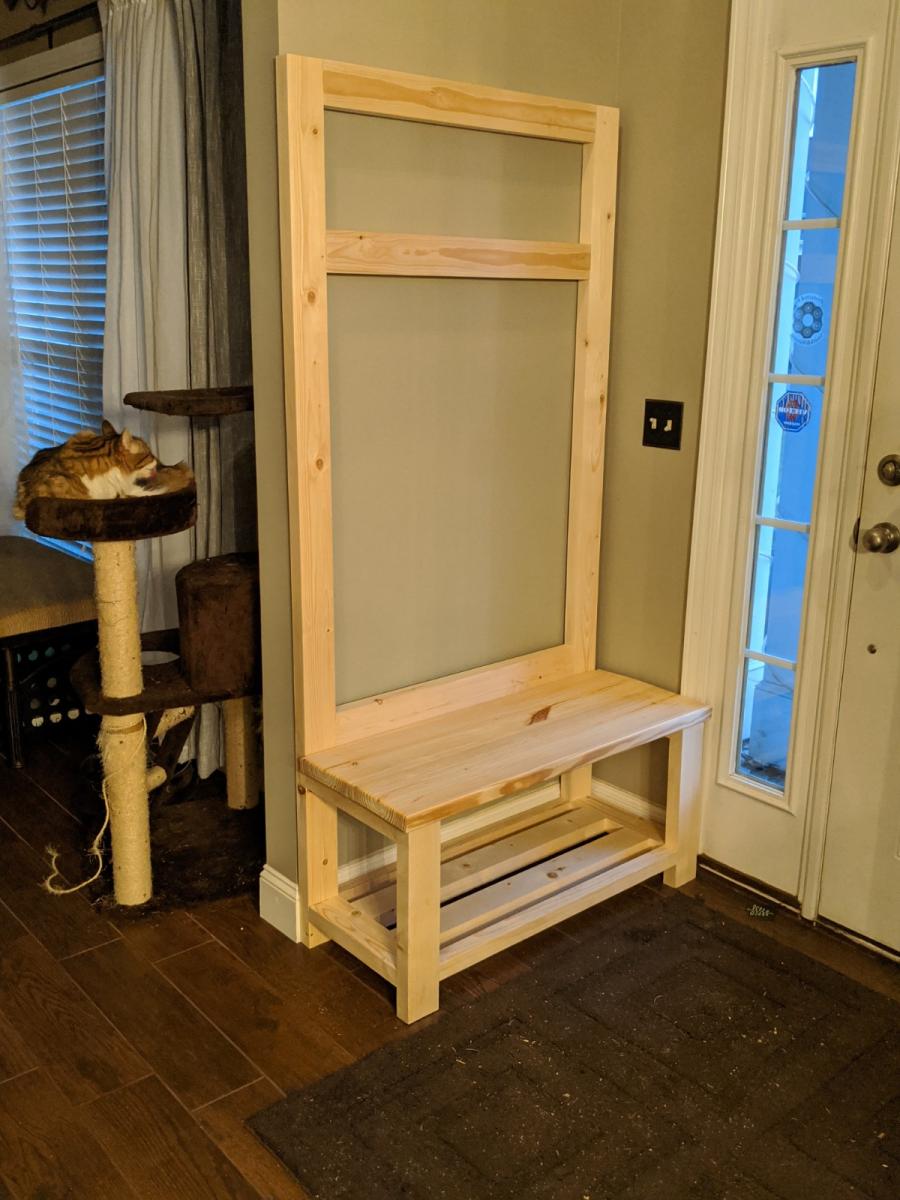
My wife got some gift cards for Christmas. Instead of going and buying stuff for herself, she handed them to me and said that she wanted a Hall Bench/Mudroom bench and she wanted me to build it. We've got several of the Rustic X furniture pieces in our home already and she wanted it to match, so this was the natural fit. This was a great project and addition to some of our home decor. I had to shrink it down to fit our space, but that was easy.

Built from Plan(s)
Estimated Cost
<$100
Estimated Time Investment
Day Project (6-9 Hours)
Finish Used
Sherwin Williams primer and paint

Modified Doll Bunk Bed

Submitted by dbwalk on Mon, 01/12/2015 - 20:19

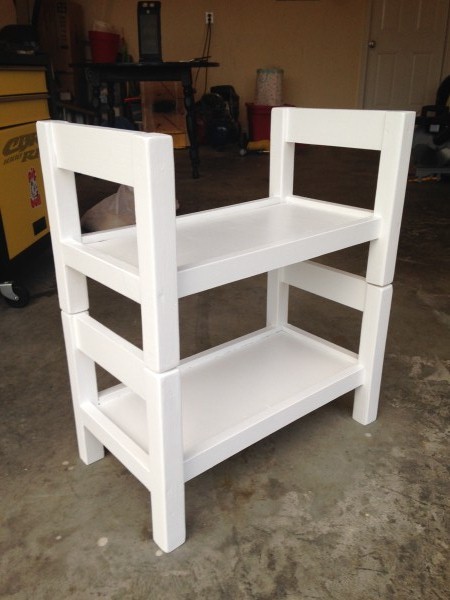
I made this bunk bed for a friend's daughters.  I modified the plans by using 2x2's for the bed posts instead of 1x2's.  It made it harder to hide the screws but in the end I think it looks better.  

Built from Plan(s)
Estimated Cost
About $20.
Finish Used
I painted the wood with white paint.
Recommended Skill Level
Starter Project

Dog Crate with a twist...

Submitted by AlexO on Mon, 05/08/2017 - 19:08

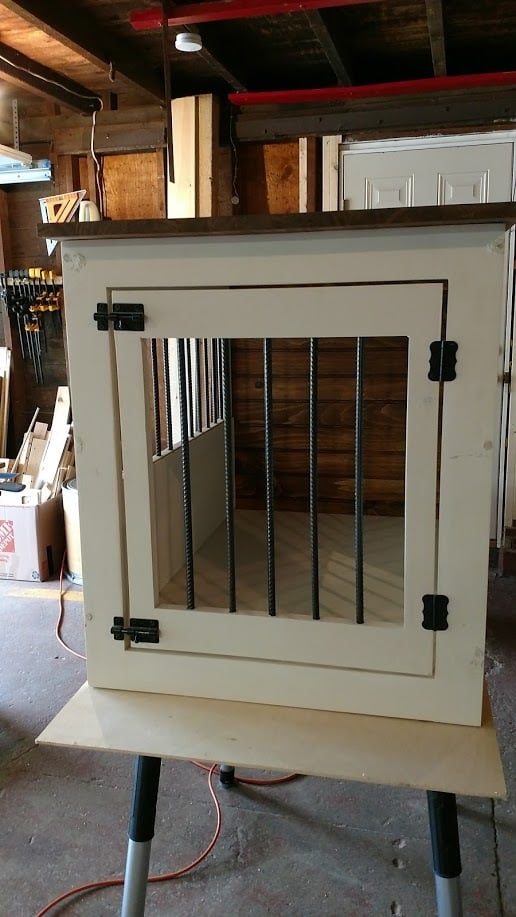
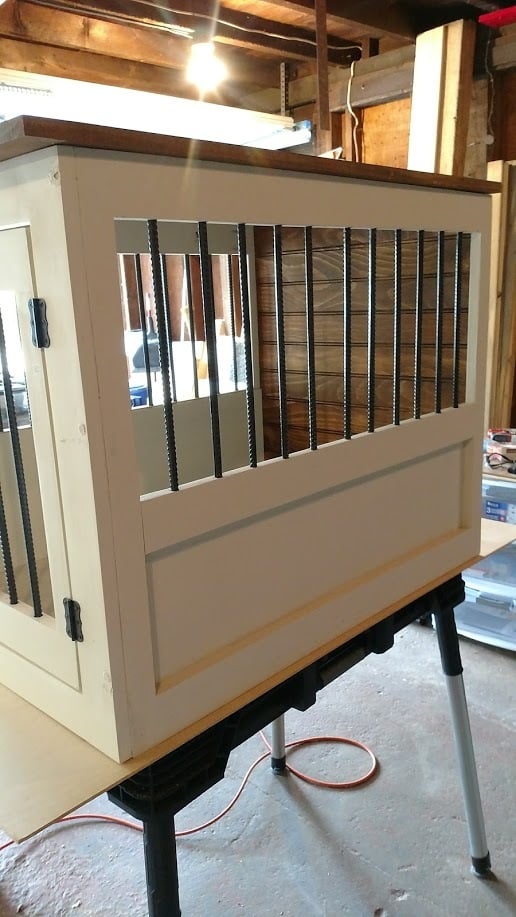
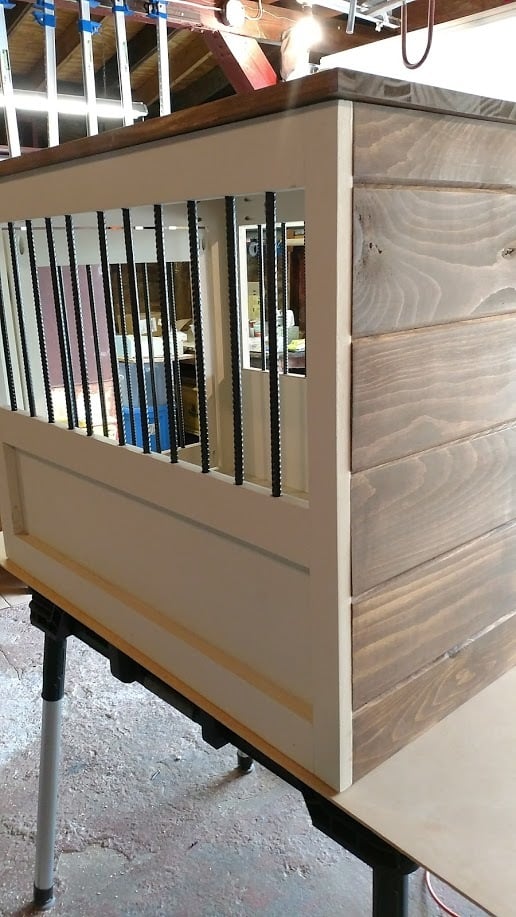
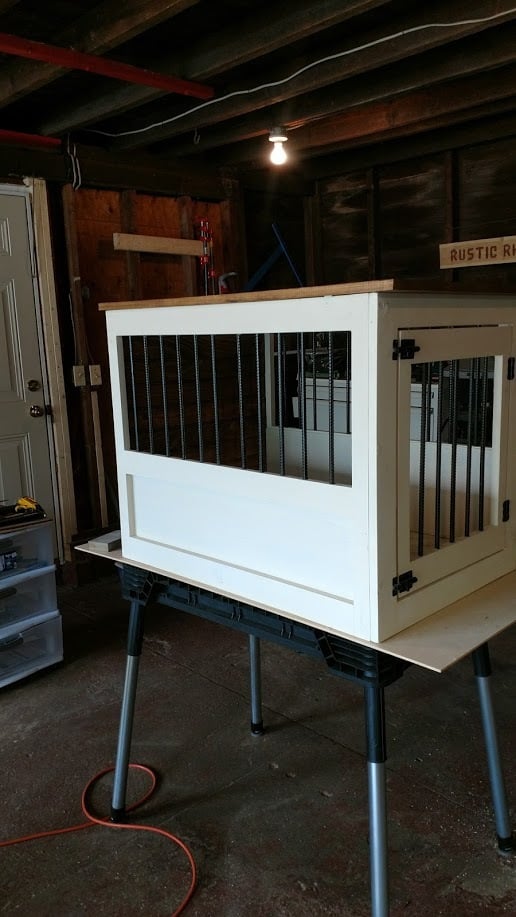
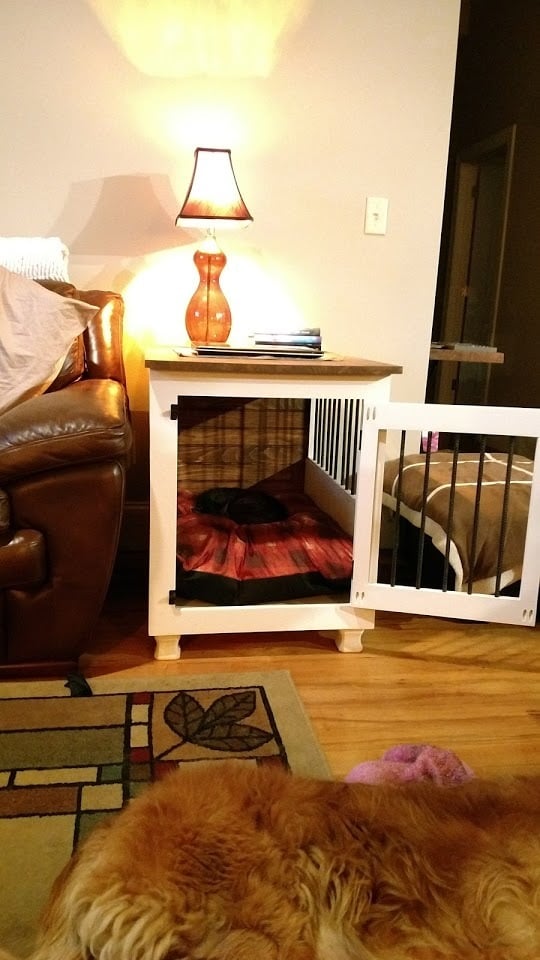
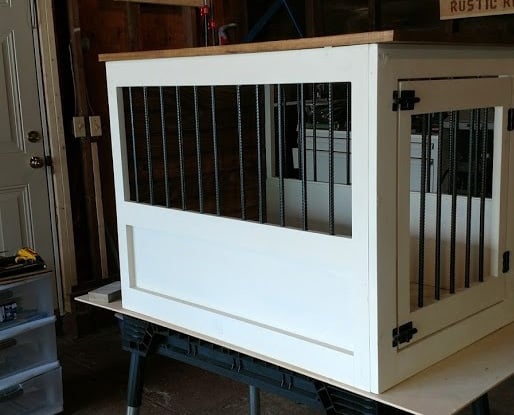
I really liked the Large Wooden Dog crate but wanted the sides to be lower and wanted to make sure there was no easy chew escape.  Not sure if you can see from the photo but the cats have taken over... Will need to make a larger one for the dog!

I followed the plan pretty much other than lowering the panel on the side and replacing the wooden bars with rebar.  The rebar was a bit of a learning curve getting the holes lined up perfectly but I figured it out and I think it came out pretty good!

Used all pine 1x3 and 1x2s.  Picked up a pine panel for the top and the bottom is a 3/4 plywood. Made our own chalk paint for the finish and sealed it with wax.

Oh, forgot, added tongue and groove pine for the back and finished it and the top with Antiguing wax.

Lots of fun and I think I will make a double one next!

Built from Plan(s)
Estimated Cost
Around $100 if you don't count all the practice pieces for the rebar!
Estimated Time Investment
Week Long Project (20 Hours or More)
Finish Used
Chalk paint and antiquing wax
Recommended Skill Level
Intermediate

Custom kids closet

Submitted by Jon Moore on Sun, 04/07/2013 - 19:36

I was inspired by the custom closets on this site and decided to have a go at it. My daughter is in high school, so I wanted something functional with a bit of teenage flair.

Of all the designs I researched, I loved Kristen's design (from Pink Toes & Power Tools here: http://ana-white.com/2012/02/closet-organizer) the most, but wanted to add a substantial shoe section and not lose any rod space in the process. I also needed one rod section to be longer than the other two to hang her dresses.

All in all a fun project where I used just about every tool I own:

Circular saw to rough out the plywood shelves and supports.

Table saw with a cross-cut sled (http://wnwoodworkingschool.com/5-cuts-to-a-perfect-cross-cut-sled/) to make the plywood pieces all perfectly square & an extra long rip fence.

Router (with jig) for the dovetail joints, detailing on the drawer fronts and rounding the leading edges of the shelves.

Power drill for mounting the drawers, drawer fronts and handles

Compound Miter saw for the various face framing pieces and the shoe moulding

Pipe cuter to cut the rods (also made a jig to both hold the rods in place while I mounted the supports and set it at the correct height and distance from the wall--used a planer in making this)

Orbital sander

Brad nailer during assembly (also made a jig here to set the plywood pieces on during the tower assembly to keep the back square while I used 90 deg clamps on the fronts).

Airless paint sprayer (I have learned that my wife does not like brush marks!)

Washers for spacing the drawer fronts (found this trick online and it works like a charm!)

Lots of clamps!!!

Estimated Time Investment
Week Long Project (20 Hours or More)
Finish Used
White paint
Recommended Skill Level
Intermediate

Comments

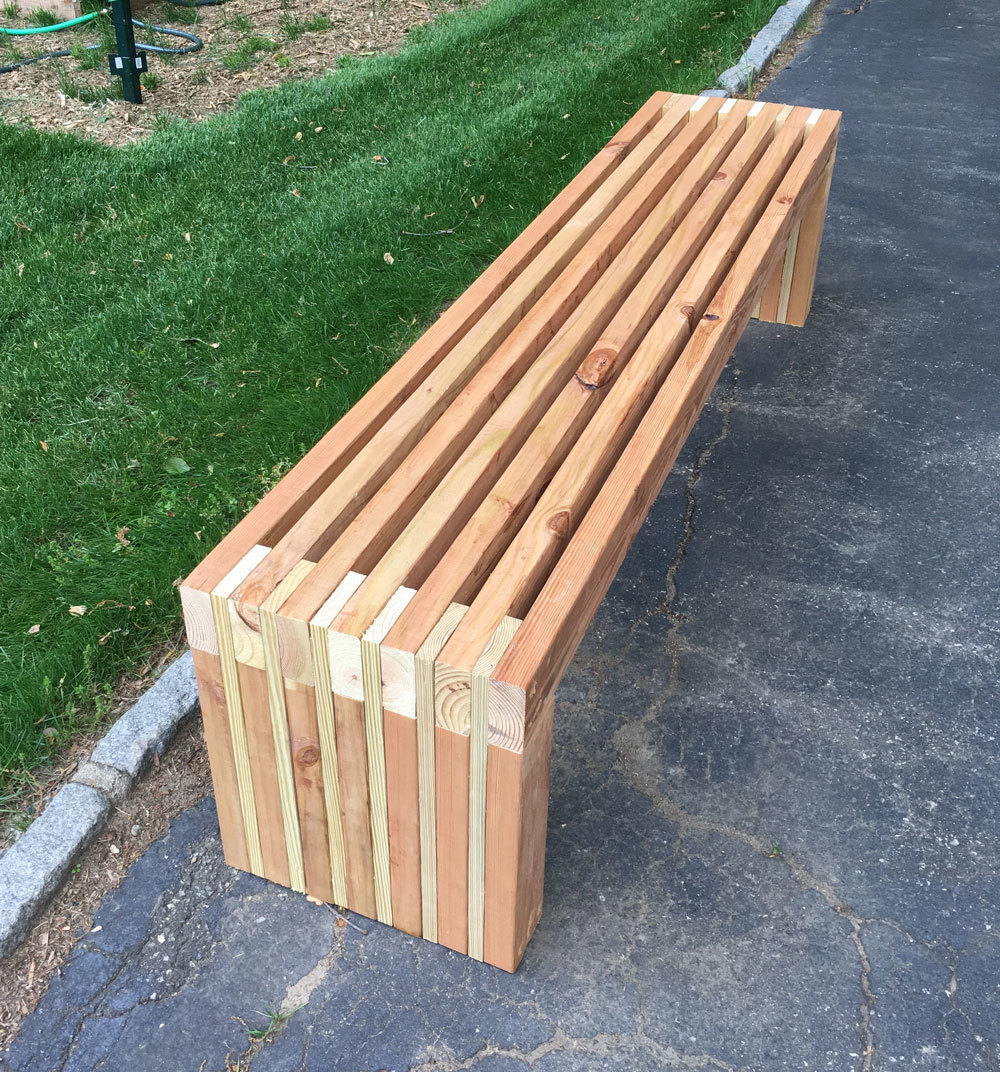
Bench

Submitted by Anonymous (not verified) on Mon, 06/05/2017 - 13:31

Great bench

Estimated Cost
$100
Estimated Time Investment
Day Project (6-9 Hours)
Recommended Skill Level
Beginner

Simple Square Outdoor Table

Submitted by hannant on Mon, 08/07/2017 - 15:10

Inspired by Finn's Dad's table, we decided to copy it since we wanted to build a table that would seat 8 comfortably. The most difficult part of this project was finding clear cedar for the top. It had to be ordered through our local lumber yard and we were not able to match boards. We built the frame out of treated pine and the 4 x 4 legs from average greade cedar found at Lowe's. We finished it with four coats of polyurethane. 

Built from Plan(s)
Estimated Cost
$300-$450
Estimated Time Investment
Week Long Project (20 Hours or More)
Finish Used
Zak Polyruethane marine satin
Recommended Skill Level
Beginner

Not quite the same

Submitted by cyfry77 on Sun, 04/10/2011 - 14:45

This was something I build a couple years ago, it's not the same as this plan, but very similar. When we moved in to the house, the slab was already poured, with 4x4s already in place, I just used what was there and my imagination for the rest.

Built from Plan(s)
Estimated Cost
$200
Estimated Time Investment
Weekend Project (10-20 Hours)
Finish Used
Purple outdoor deck stain. (Behr?)
Recommended Skill Level
Intermediate

Little Kids Picnic Table with Umbrella

Submitted by Handy Andy on Tue, 04/04/2023 - 11:35

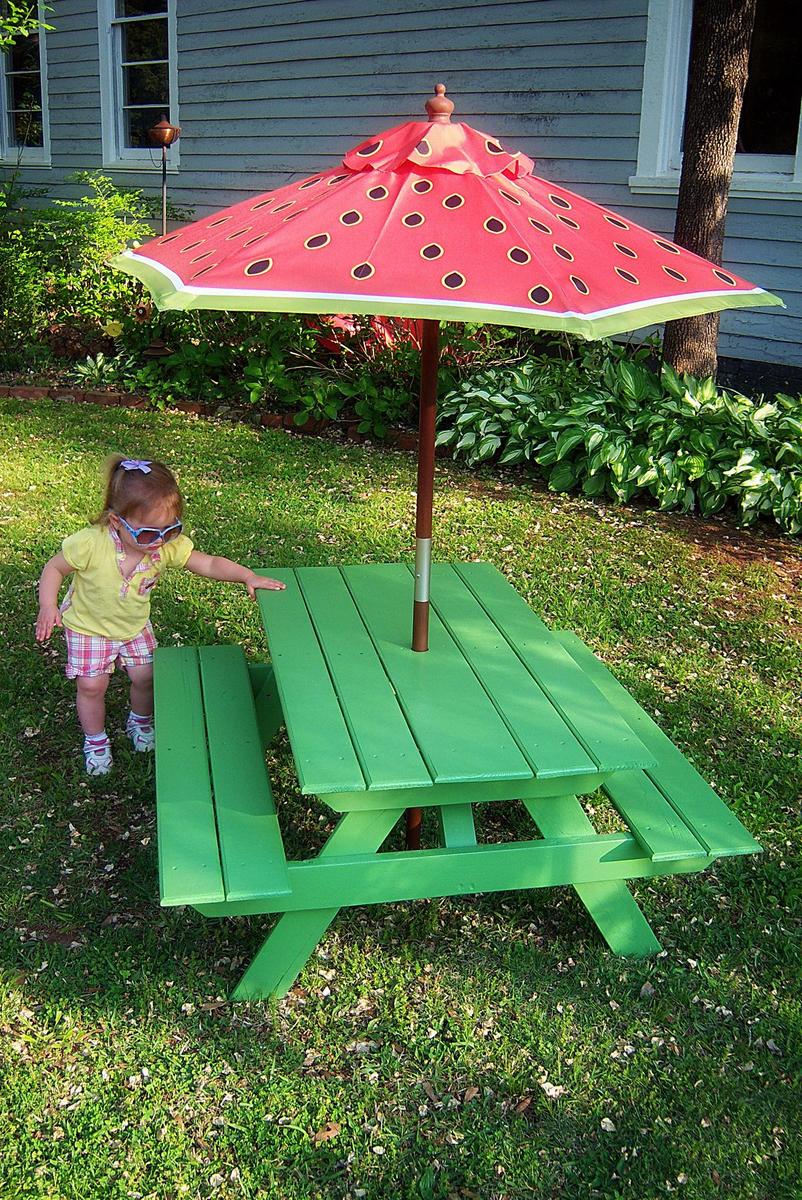
My daughter was given this umbrella at Christmas, but needed a table to go with it.  Ana's plans for the preschool sized picnic table worked perfectly.  I built it using one standard sized shipping pallet and even got to try out my new router!  Thanks Ana!

Built from Plan(s)

Comments

Hanging Beds Complete!

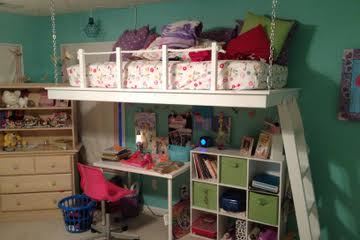
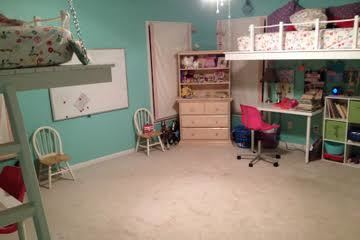
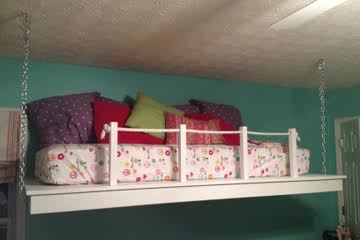
We decided to make loft beds for our girls room to offer them more space and also give them some individual room. The old room had daybeds that just took up so much of the room.

I saw the hanging beds on this site and thought they would be great. So I got to work.. I used 1x4 s for the platform to lighten the weight of the bed. I had to customize the sizes a bit but that wasn't a big deal. I used the Kreg jig to joint the 2x4s as well as on the rail posts. They are attached below the platform to the front 2x4. We also used chain rather than rope as chain doesn't give.The ladder I made from 2x4's and used the K Jeg to get tight joints underneath the rungs..at 6'2" and 185 lb they are pretty sturdy..

We are really pleased with the results. The girls love them. Each has their own desk space now, they shared one before, and their own storage space. And it has actually help keep their room clean.. ha....

Cost us with all wood, supplies, hardware, paint, about $150-175

Estimated Cost
$150-$175
Estimated Time Investment
Week Long Project (20 Hours or More)
Finish Used
Satin white primer-paint (All in one can)
Recommended Skill Level
Beginner

Truss Table

Submitted by Anonymous (not verified) on Mon, 01/08/2024 - 10:12

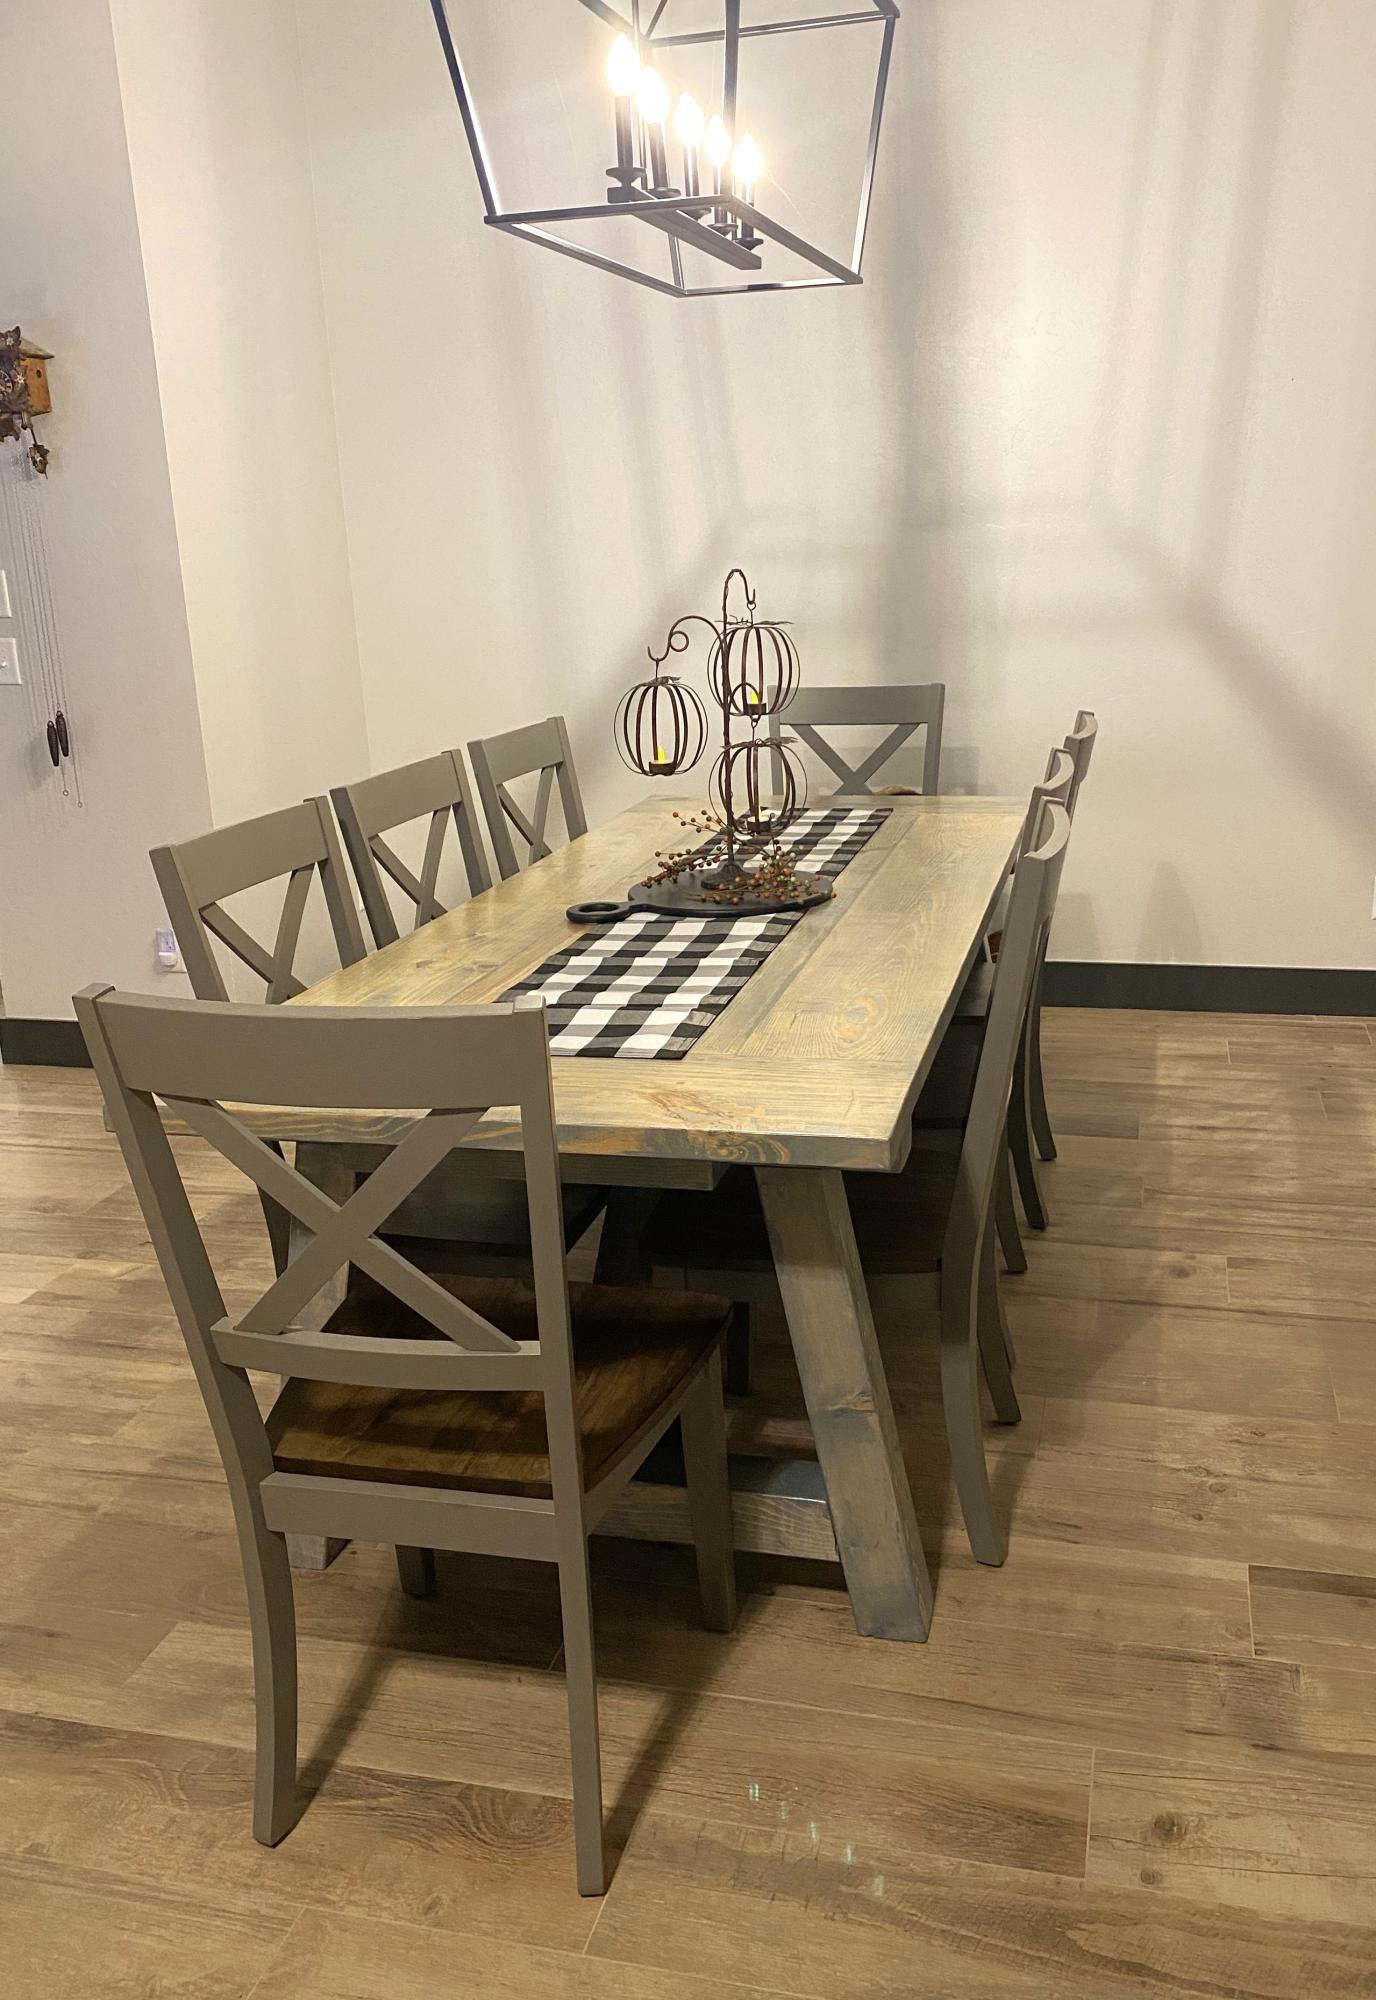
Our 4x4 Truss Beam Table made by my husband for our new house. Stain is Minwax slate gel stain.


Built from Plan(s)

Comments

Weathered Gray Fancy X Farmhouse Table With Extensions

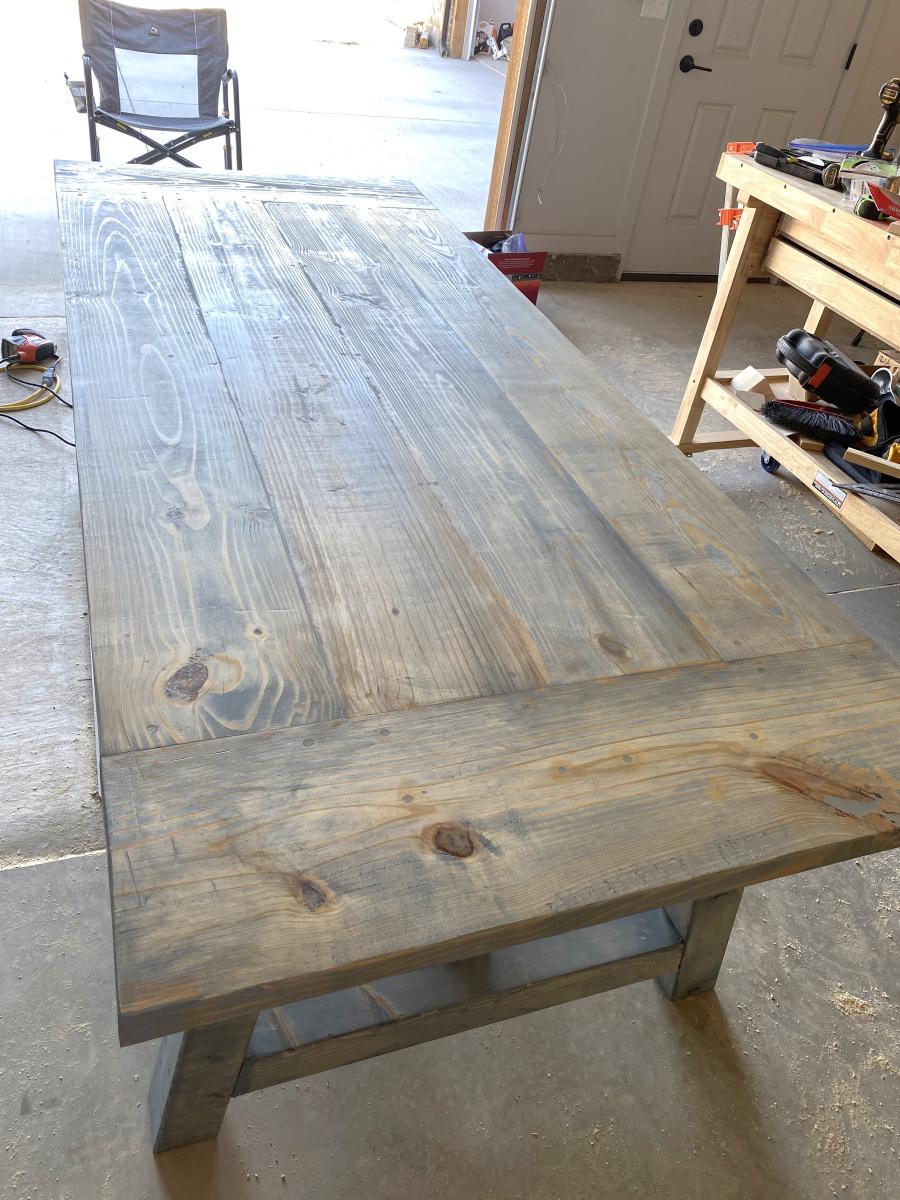
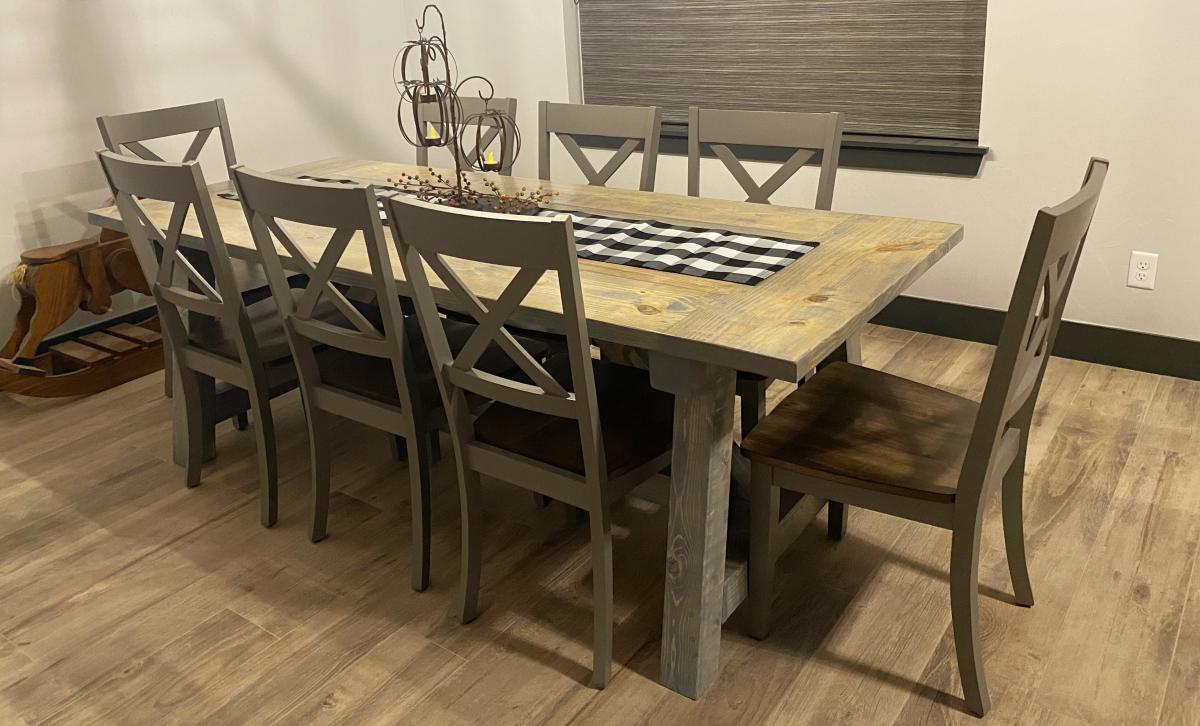
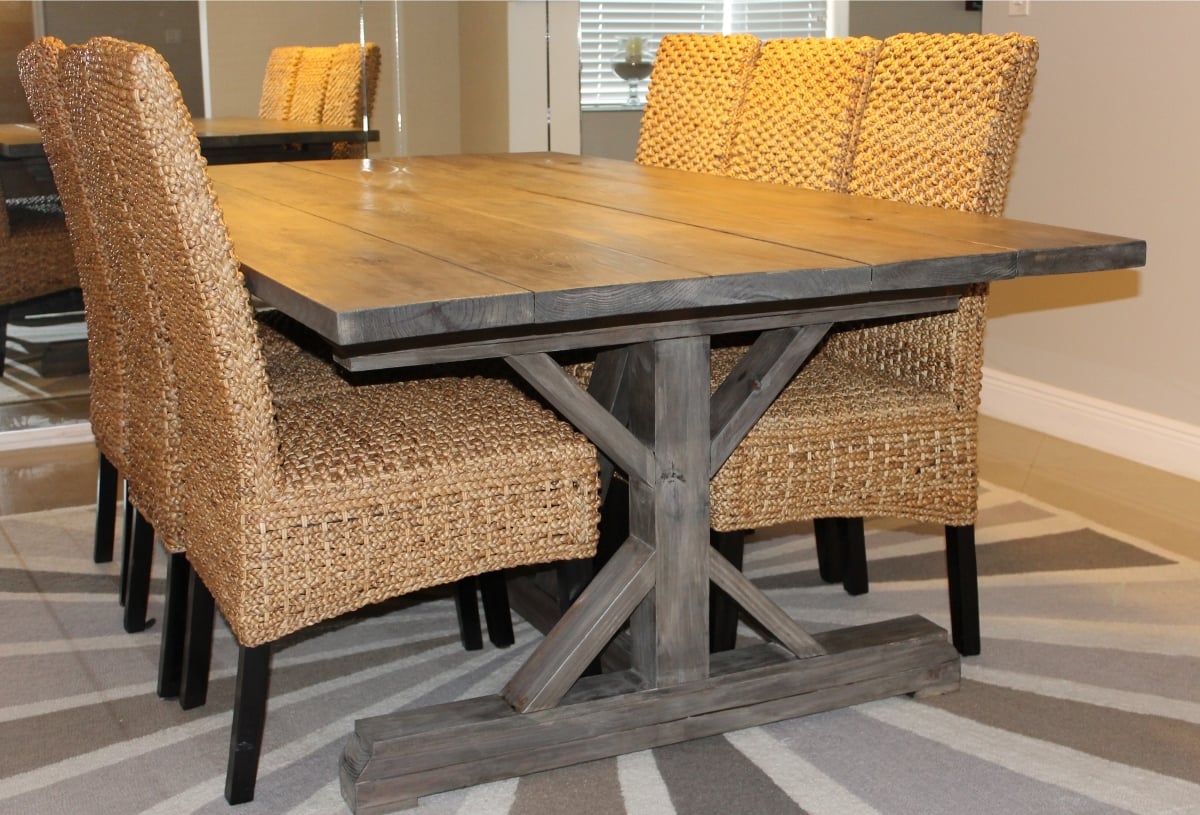
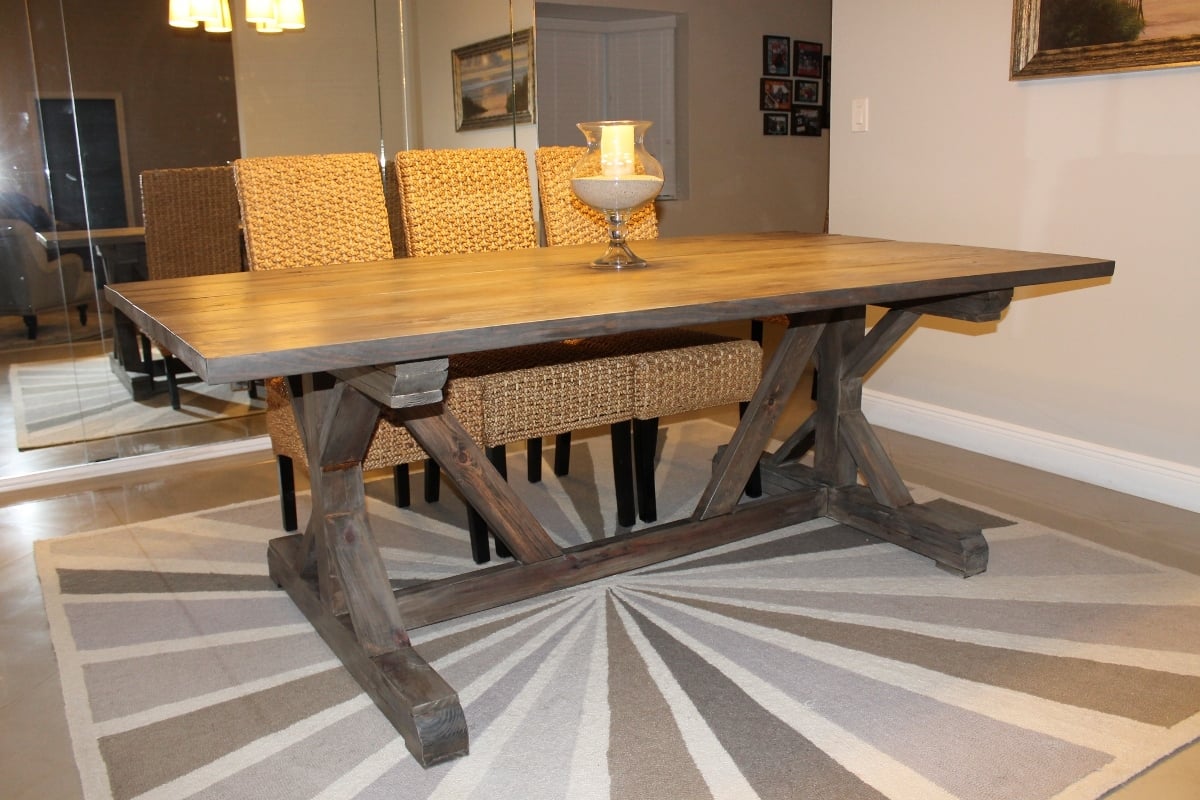
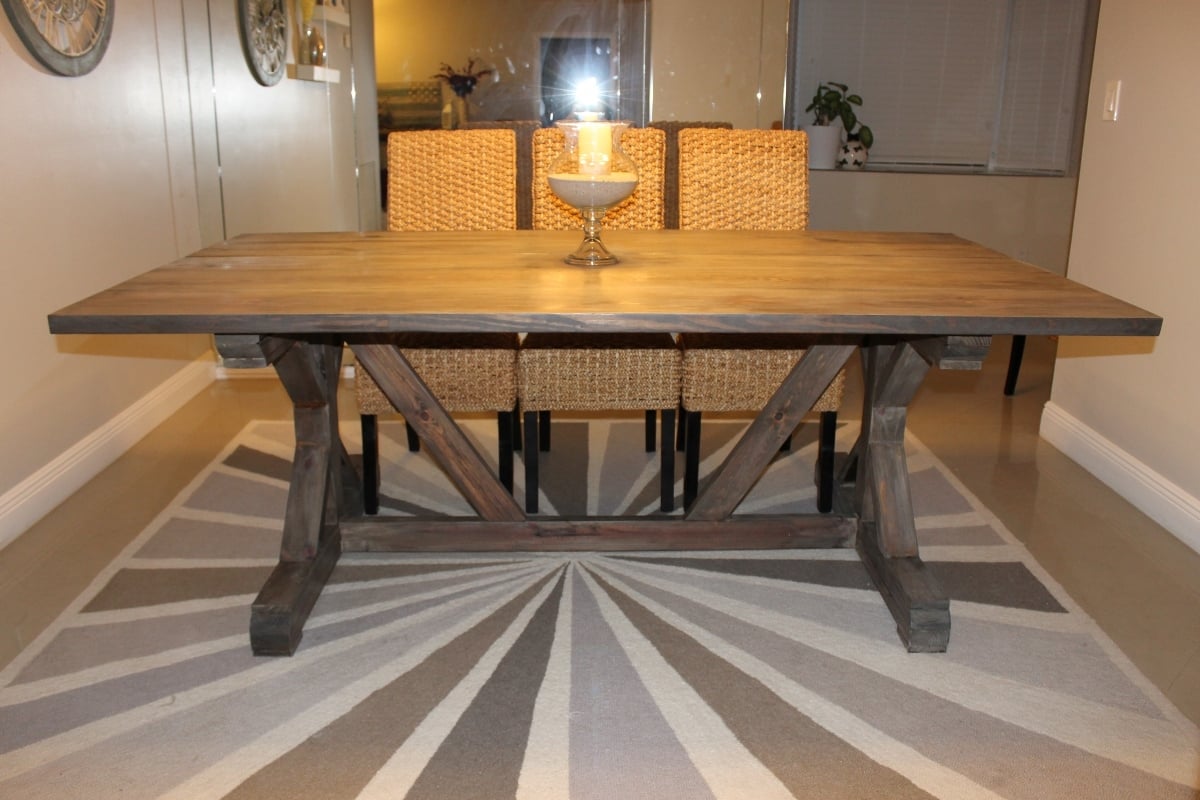
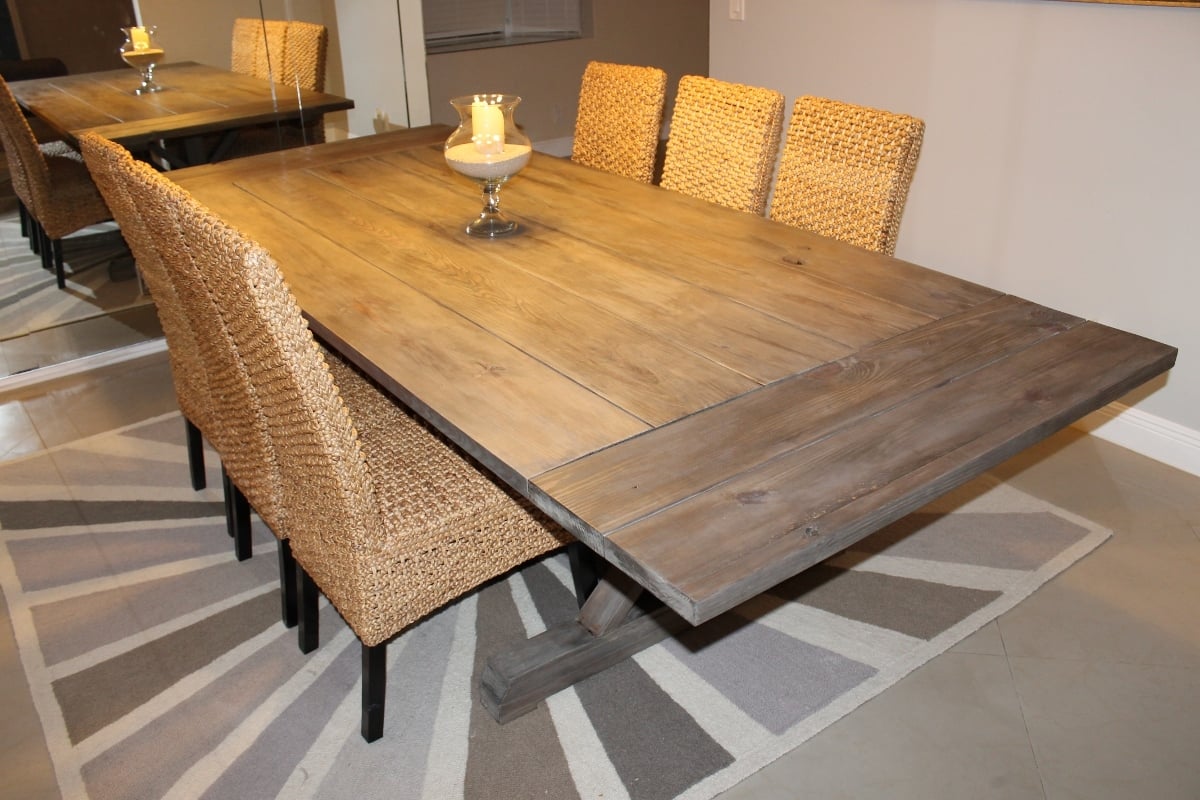
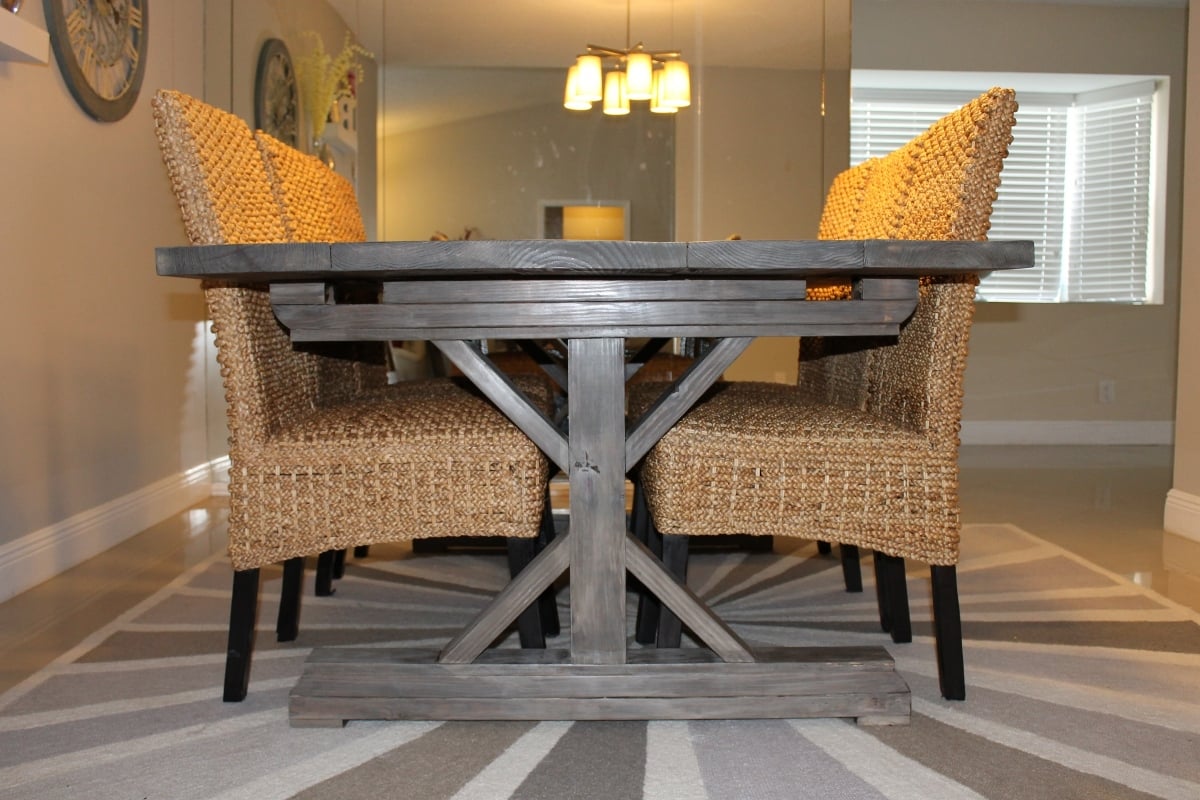
This is our attempt at the Fancy X Farmhouse Table. My husband and I built this over a weekend. We modified our table from the plans, making ours shorter and wider. We also added extensions and changed out a few boards for a bit of a different look from the exact plan. We created a custom finish with a few cheap and easy steps to get the look we wanted. Our table is 84" long by 46" wide. The original plans for the table called for it to be 96" long by 37" wide. We added a fifth board to our table top, thus making our tabletop 9.25" wider (since a 2x10 is actually 9.25" wide.) To account for this, we simply increased the width of the base boards by 9.25". As for the length, since our table was 12" shorter than the plan, we decreased the length of the two support boards running between the bases by 12" to account for that. We had to adjust the length of our decorative pieces somewhat, because of the wider base and shorter length. It was bit of trial and error but we were happy with what came out of it. For the center base post, instead of using 2x4's we used one 4x4 which was clean, square, and straight. We were happy with how things turned out for the base. Perhaps our biggest alteration was the fact that we added extensions to each end. To do this, we cut out 3.5" slots in the top of the base so a 2x4 could slide in. We then took two 2x8's and used pocket holes to bring them nice and tight. With the extensions in place, our table is nearly 10 feet long! As for the finish, we wanted a weathered gray color and were able to come up with it through a three step process. Its really beautiful in person! Thanks again for the plan

Built from Plan(s)
Estimated Cost
$80-$100
Estimated Time Investment
Weekend Project (10-20 Hours)
Finish Used
Custom!
Recommended Skill Level
Intermediate

Comments

Darcy Taylor (not verified)

Tue, 08/07/2012 - 03:10

Could you possibly give me a detailed explanation of how you finished this table? I love, love, love the color and want to replicate it.
Thanks!
Darcy

Jennifer Nealy (not verified)

Tue, 09/25/2012 - 09:06

Beautiful table, but I really want some information on the 3-step process you used to get the weathered gray look. Can you please provide that information? Thanks!

SawgrassHomeGirl

Sun, 04/07/2013 - 20:40

Thank you for your interest in the finish....we used regular pine from Orange and Blue. We used a mixture of steel wool and vinegar in a glass jar, let it sit for a night or two, then brushed it on evenly over each board. We then let that sit for a night or two and then proceed to whitewash the entire table (two parts water one part paint.) After that, we took Dark Walnut Stain and wiped it over each board, then quickly wiped/scrubbed it off after just a minute or two. That's how we did it!

Id suggest practicing first with some scrap , esp. with the steel wool mixture so you can see how the wood changes. :)

FLKS

Fri, 09/23/2016 - 15:24

Hi Emily! 


        I love your table. We are about to make one and love your stain. Would you be so kind to give me details of what you used to achieve the look? I read the above post, but could you give me brands and colors? I don't understand what is steel wash- is that the color? 

Thank you so much!


FLKS

ajdriscoll08

Mon, 09/09/2013 - 11:40

but when we brushed on the steel wool/vinegar mixture, the holes on the table top and base that we had filled in with putty didn't really stain...did you run across the problem? I don't see any areas on the top of your table where you can tell where the holes were??

rmf

Wed, 04/09/2014 - 09:05

I'm curious if you made the extensions permanent or if they can be removed and added as you need? I love this table!
Thanks,

Jenni2526

Wed, 08/13/2014 - 11:50

I am not understanding how you made the extensions from your description and then looking at the end pictures... Would you please explain this a little further and how they are stored and placed for use and how this works? Thank you!

Ren.K777

Tue, 10/07/2014 - 17:39

LOVE the finished product! I aim to get the hubby to make this one at some point!  But for now, we have just a bench in our kitchen that he made and I'd like to apply the same finish you did.  I've looked at a bunch of different tutorials but I like yours the best.  Here's the question...how long after I apply the paint/water mixture to I apply the walnut stain? Do I apply the water/paint and wipe off right away?  A few seconds later?  A minute later?  Do I allow the applied/wiped water/paint mixture to dry completely before adding the stain or do I want to apply the stain before it's throughly dry so that it mixes a bit for a softer look?  Thanks so much!