Community Brag Posts

Full length sliding mirror cabinet

Submitted by mltdblack on Tue, 10/16/2018 - 19:25

I built this for my daughter after building a ladder shelf for my kids bathroom. It took more time to install and adjust the drawer slides and paint the project.  

Estimated Cost
$65.00 - I used a slightly larger mirror.
Estimated Time Investment
Day Project (6-9 Hours)
Finish Used
Exterior - Valspar Black Flat Latex
Interior - Valspar Filtered Shade Flat Latex
Top Coat - Minwax Gloss Spray Polyurethane
Recommended Skill Level
Beginner

Comments

akagracegallag…

Sat, 09/07/2019 - 03:32

Hi mltdblack

Really nice finish on the cabinet.  

It looks like there’s molding on top of your mirror.  

Did you buy a mirror with a frame or buy molding and put it on over the mirror?  

What molding did you use an how did you secure it?  

What size mirror did you use?  Thanks

mltdblack

Fri, 01/07/2022 - 14:14

I am so sorry. This is the first I am seeing your question. The mirror came with a frame and I carefully nailed thru the frame to attach with my 18 gauge nailer. I bought the mirror at Lowe’s and I believe it was 15.5” x 50”. Also, I used full extension soft close drawer slides.

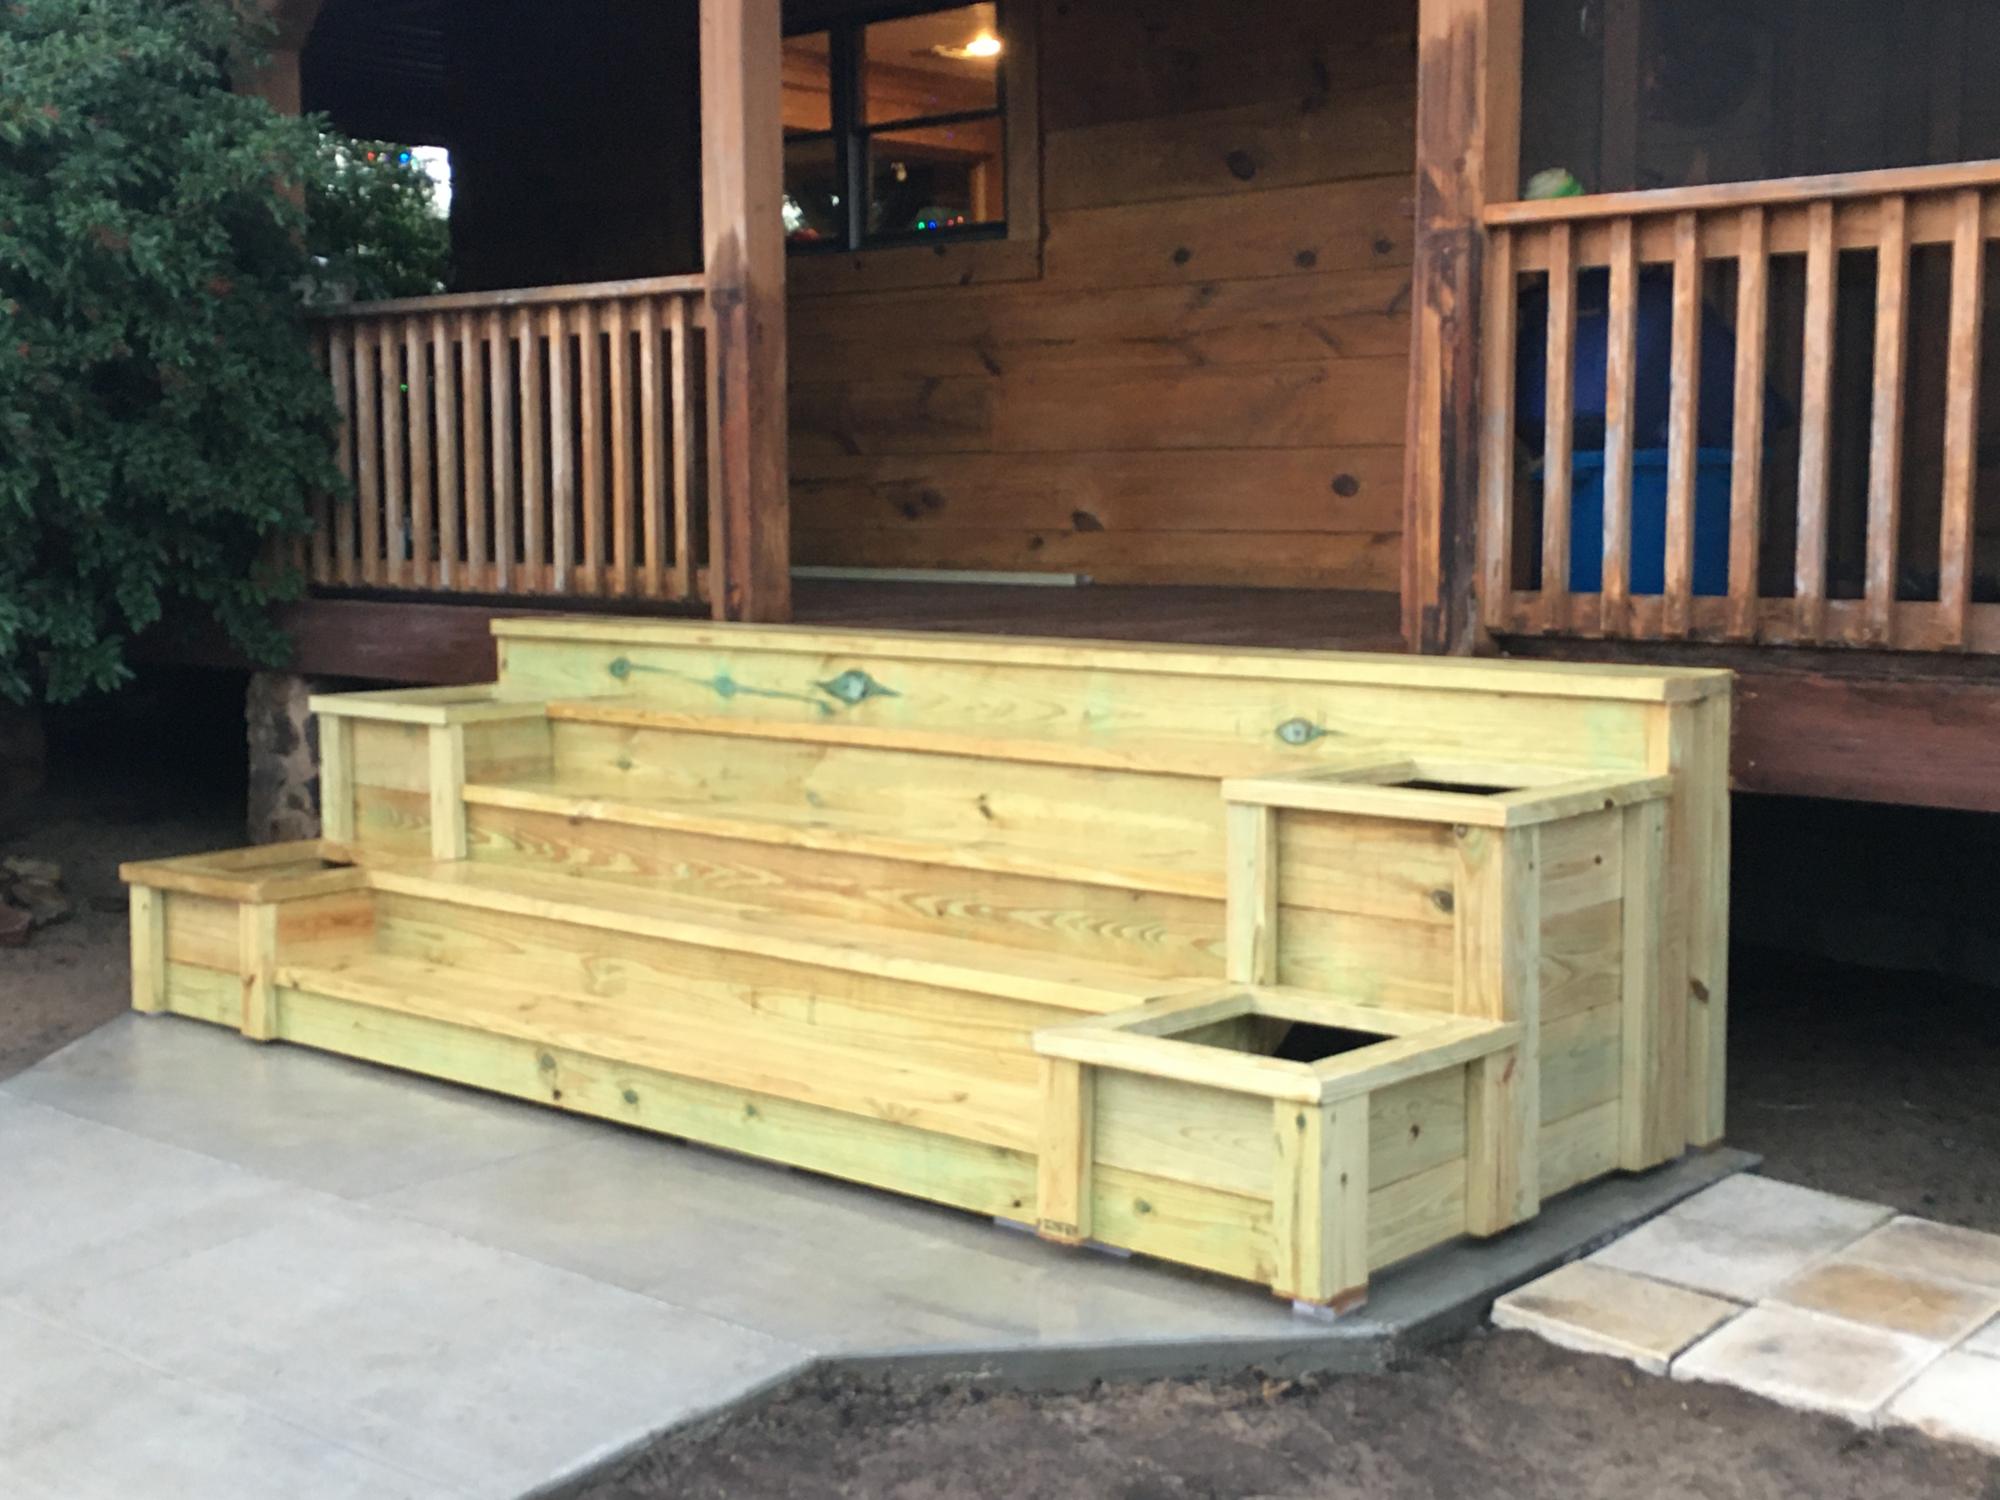
Planter Porch Steps

Submitted by kstarbird on Thu, 12/26/2019 - 15:06

Plan modified to be built on stringers due to hight. 

Finish Used
Pending

Comments

Seasonal And Holiday

Bench with soft-close drawers for Front Entry

Submitted by drickstan on Tue, 08/11/2020 - 10:43

We needed a bench to fill the space in our front entry and provide some storage for seasonal gear. We couldn't find anything to buy that would work for us, so when my wife found these plans, I had to try it! Couldn't be happier with the results. We widened the bench by a foot to 84" to fill the space. Basically, it just made each drawer 4" wider. Everything else was built to plan. The most expensive thing was the soft-close 24" drawer slides (~$100). As soon as you go above that 24" depth, they get pricier! It was also tricky to get the drawers to catch properly on the soft-close mechanisms, but I made sure to take the time to get it right before closing it all in. Now I just open and close the drawers for the pure satisfaction of it! I used premium pine plywood for the top and I find it still doesn't give that smooth finish I like, even after sanding. I think I'll create a new top out of joined knotty pine planks later and just attach it to the top.

Built from Plan(s)
Estimated Cost
$300 CAD
Estimated Time Investment
Week Long Project (20 Hours or More)
Finish Used
Primer and pearl finish paint.
Recommended Skill Level
Intermediate

Modern Farmhouse Bed Frame

Submitted by SofiaTaz on Thu, 01/06/2022 - 23:15

I love how this bed frame turned out! Everywhere that has stain is cedar and the rest is all scrap spruce. Thanks for another great plan Ana!

Built from Plan(s)

Comments

10 foot long Provence Table with 4x4's

My mom was looking for a new outdoor table, and asked me to come up with something. I found the link for these plans (http://www.thedesignconfidential.com/2011/04/free-diy-furniture-plans-t…) to knock off Restoration Hardware's $4000 Provence Beam outdoor table. Overall I liked the plan, with the chunkier look of the 4x4's. But there were a lot of errors in the diagrams, and the finished height is 34" which is ridiculously tall for a table. So we took it apart and cut the legs back down to change the finished height to 30". We chose rough-cut cedar for it's look and outdoor properties, not wanting to use treated lumber for a dining table. We couldn't find 2x10's like the plan, so we substituted seven 2x6's just like Ana's plan, but left a 1/2" gap in between so water can drain and not pool on top and rot the wood. Also, since we were working with 4x4's for the legs, we chose heavy duty lag bolts instead of screws to join them together. I love the finished look they give. Overall it's a sturdy, yet lightweight table that my mom loves and has already used for entertaining!

Built from Plan(s)
Estimated Cost
$230
Estimated Time Investment
Day Project (6-9 Hours)
Finish Used
outdoor sealer
Recommended Skill Level
Advanced

Comments

brookifer86

Wed, 04/25/2012 - 10:02

Thanks Brook! It was so much fun to build. I put my dad and husband to work while I was the "project manager" ;)

Gate-Leg Sewing Table

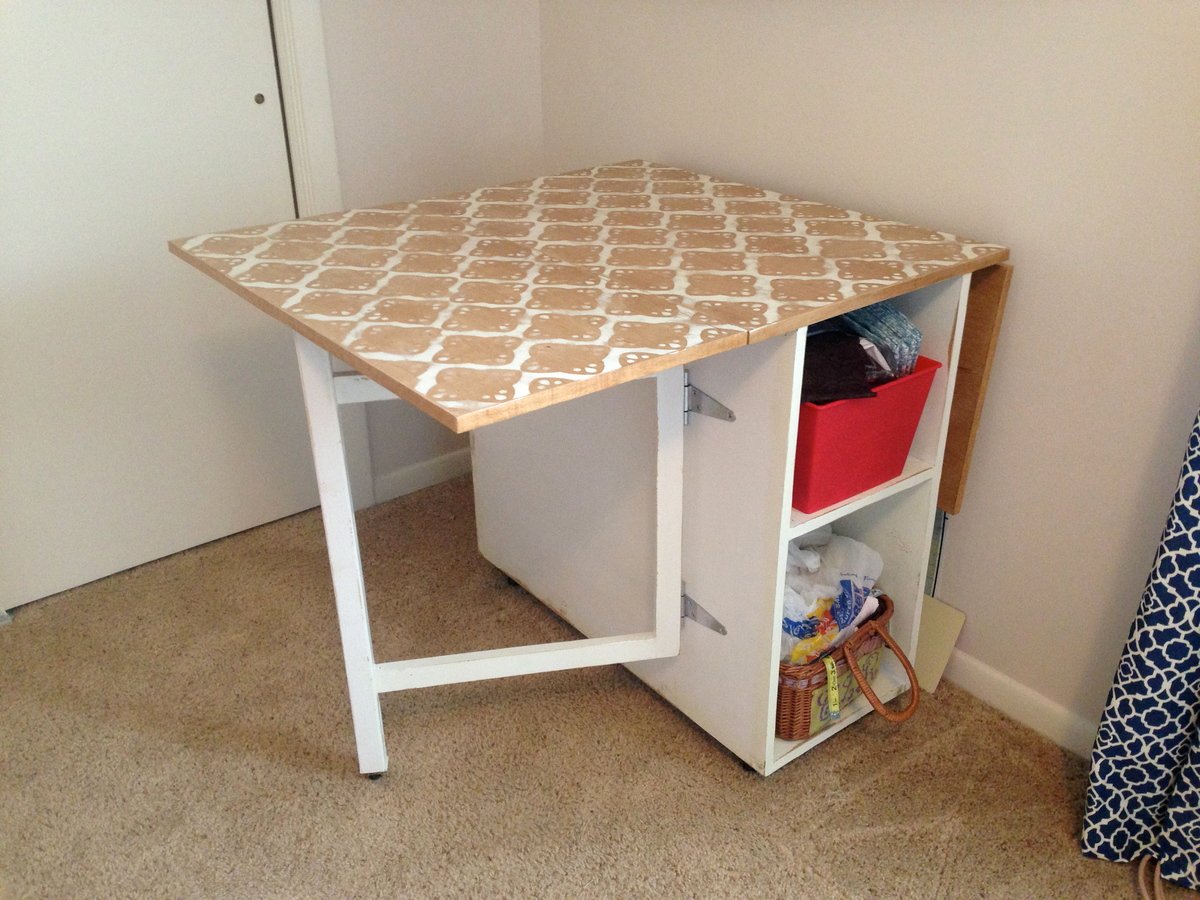
My husband and I built this table as our first project. We followed all of the dimensions from Ana's "Small Sewing Table" project here: http://ana-white.com/2010/10/plans/sewing-table-small-spaces?page=1 The only thing we changed was the size of the table top and the legs. We were worried about putting my heavy sewing machine on top of the leaf called for in the plan, so we created gate legs to support the leaves. Since the legs were going to be folded up in between the base and each leaf, we extended the center portion of the table top to accommodate the change. After it was assembled and stained, I decided that I didn't like the solid color, so I stenciled on a pattern with white latex enamel paint (what I had on hand) and continued to paint the base. After lightly scuffing it up with the sander, I layered 3 coats of poly on top. It has held up well, even after many large quilt projects! I just LOVE my sewing table!

Built from Plan(s)
Estimated Cost
$120
Estimated Time Investment
Weekend Project (10-20 Hours)
Finish Used
Golden Oak Minwax Stain
Polycrilic
Valspa Latex Enamel in Satin White
Recommended Skill Level
Beginner

Comments

TinyHouser

Fri, 08/05/2016 - 13:41

Hi there. Could you please tell me what the brackets are you used with the gateleg? Do you remember where you got them? Thank you!!!

2x4 and 2x6 Chairs and Couch

Submitted by clintusaf on Mon, 05/11/2020 - 16:43

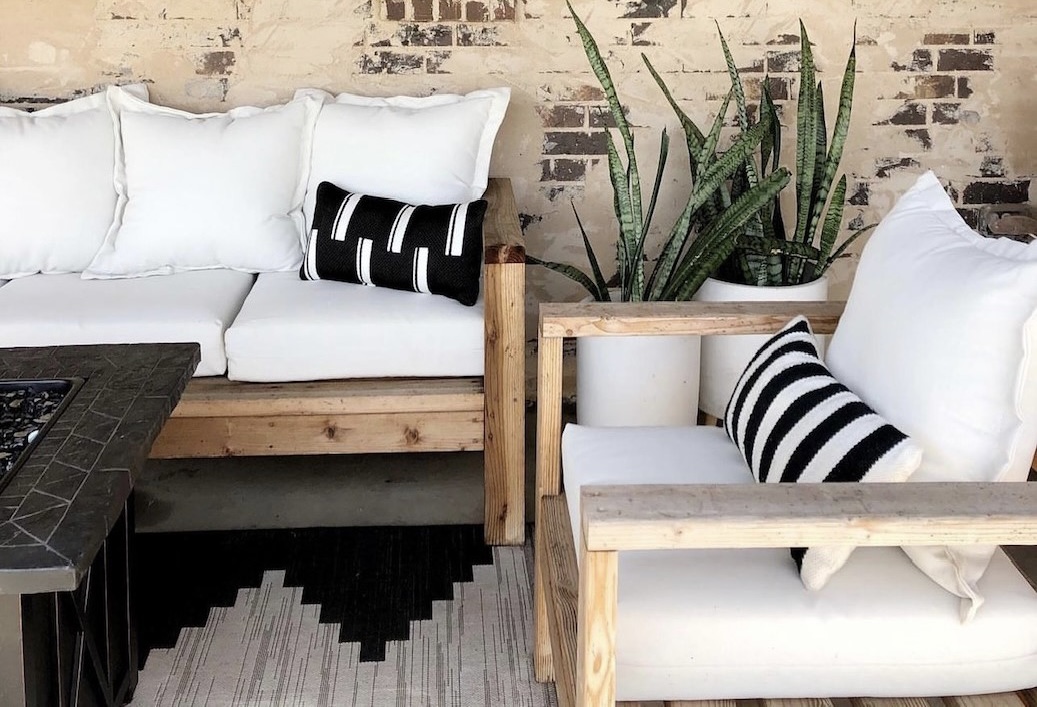
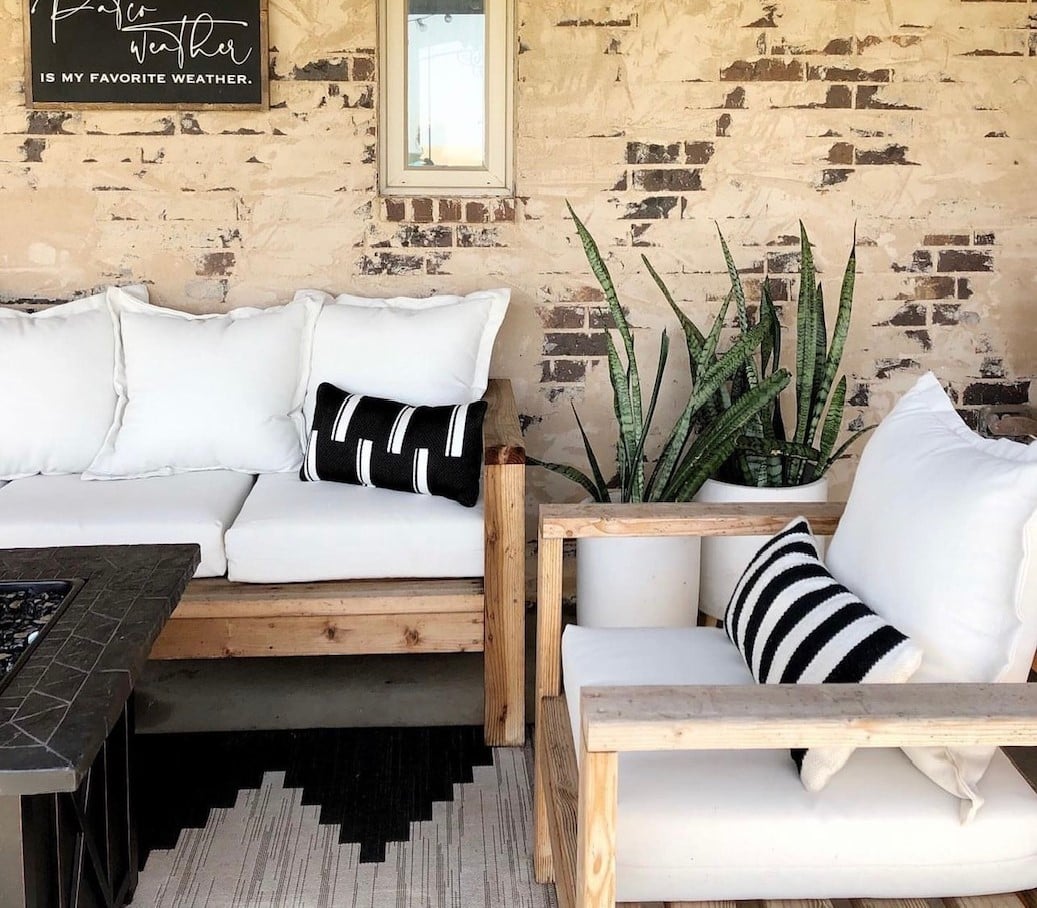
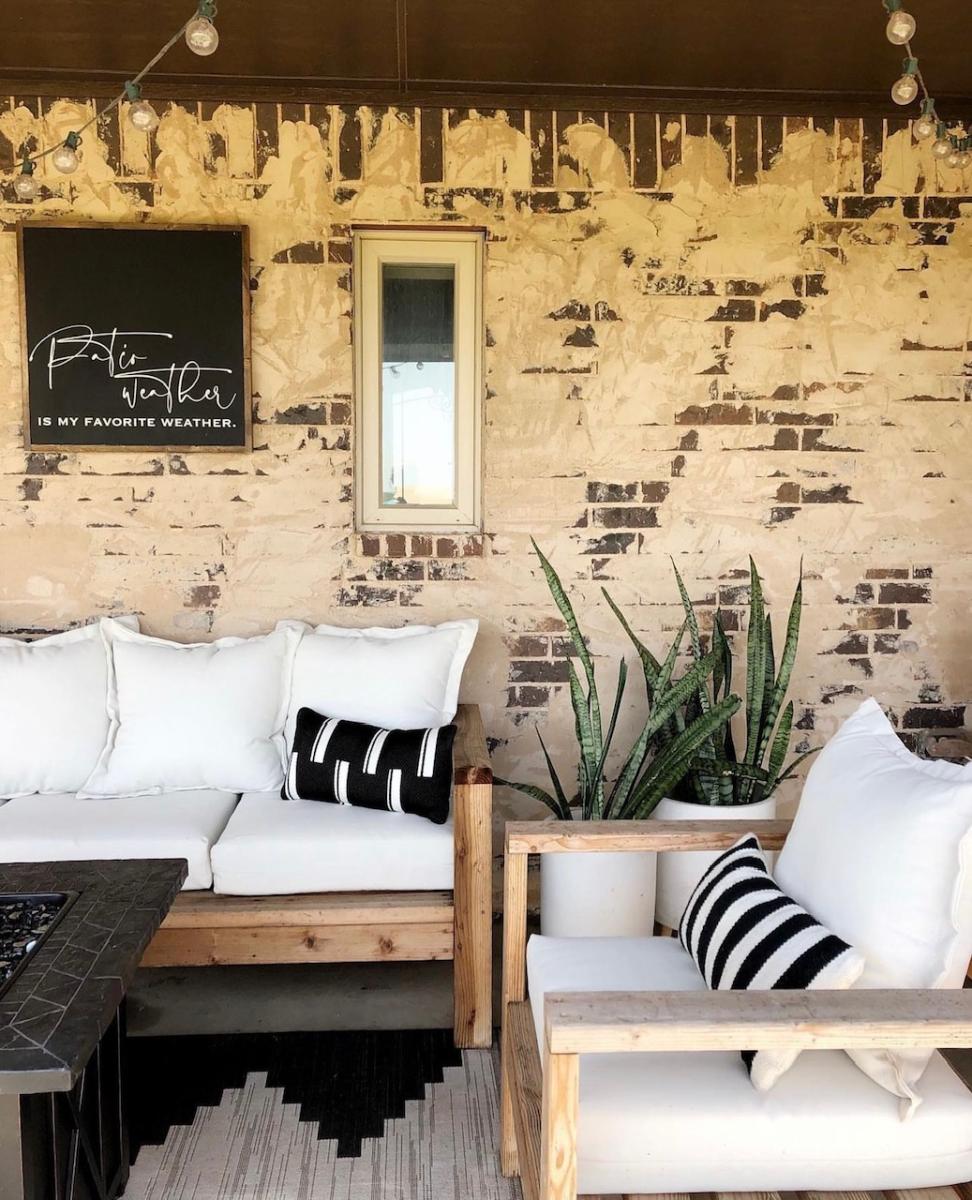
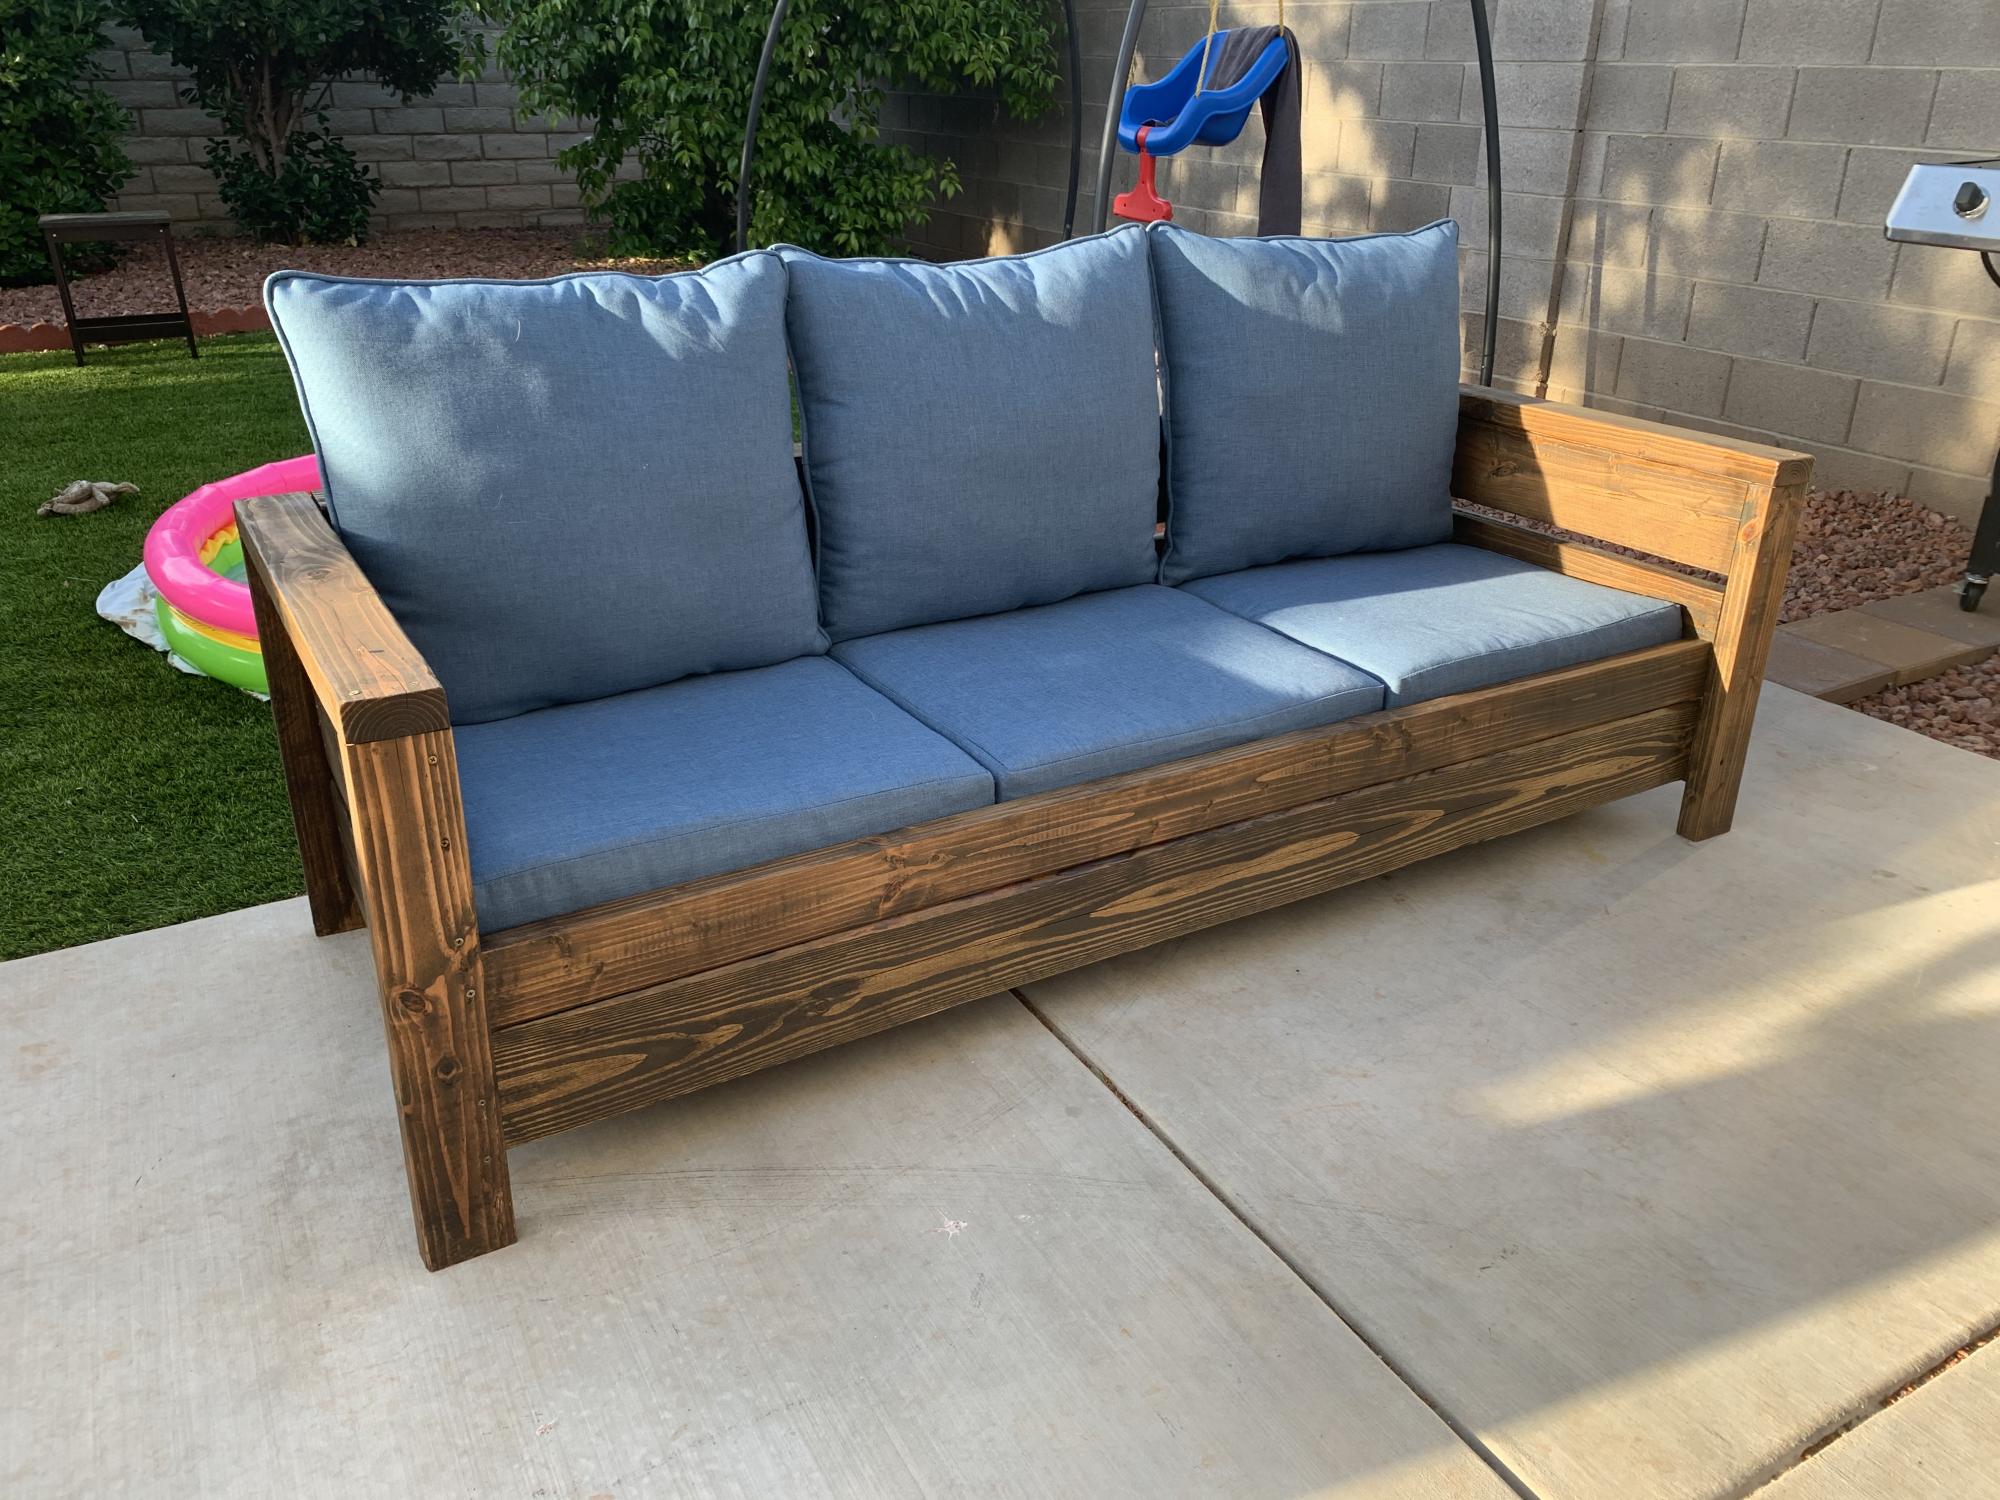
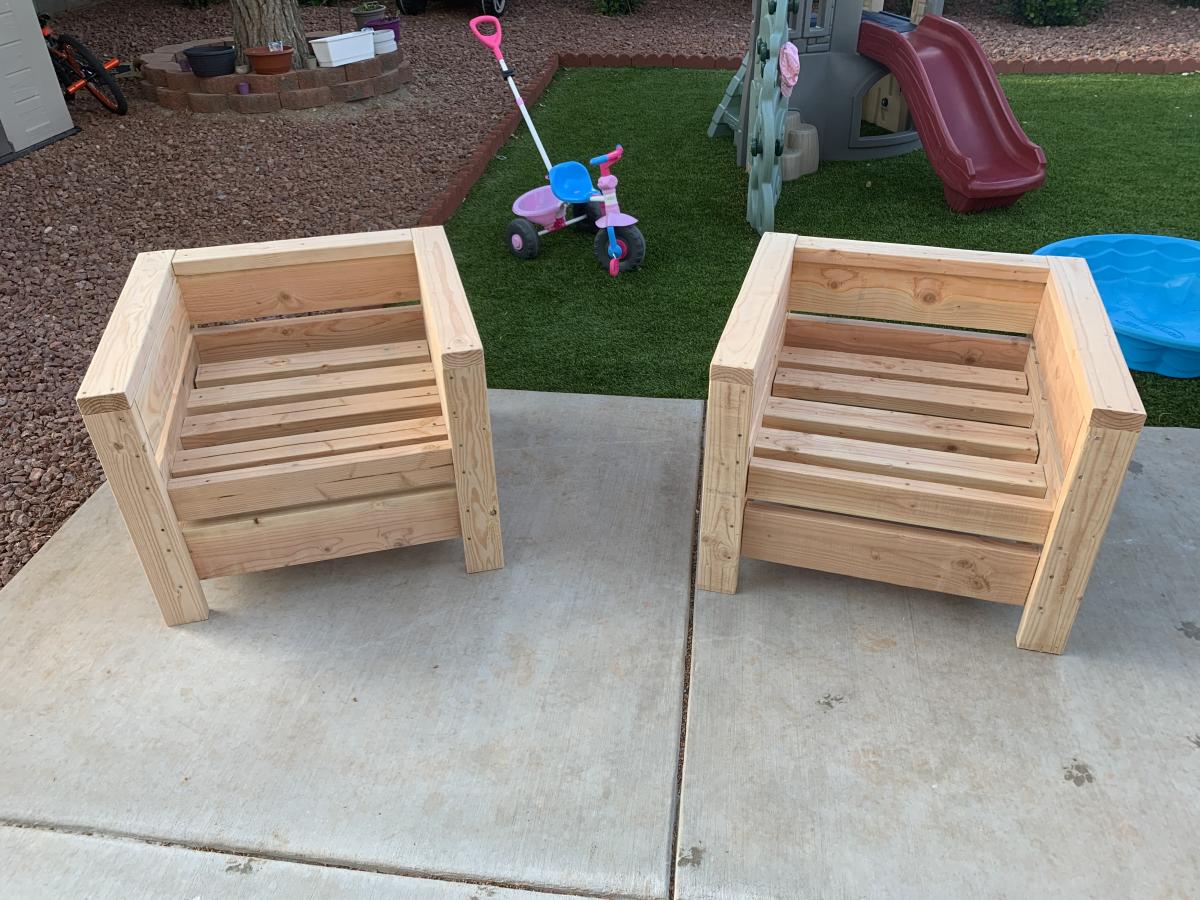
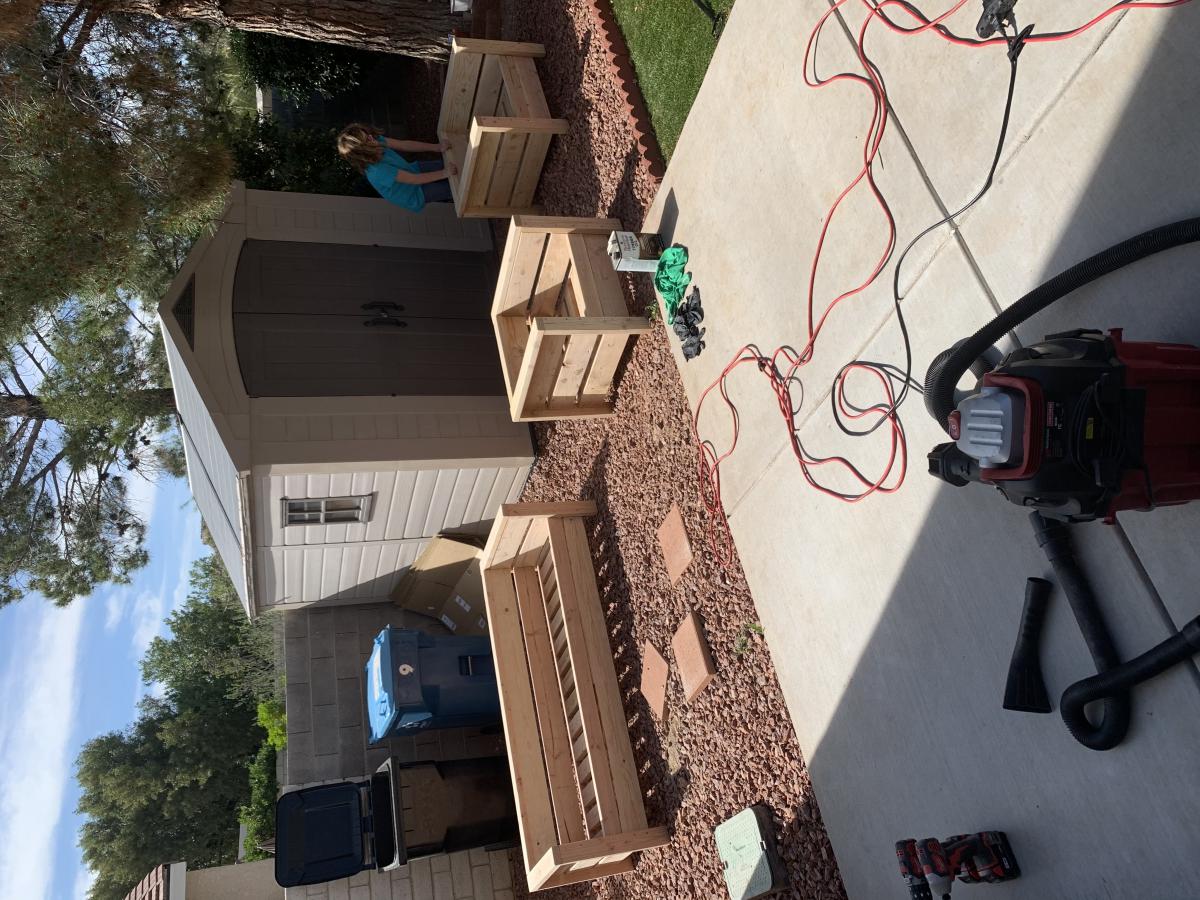
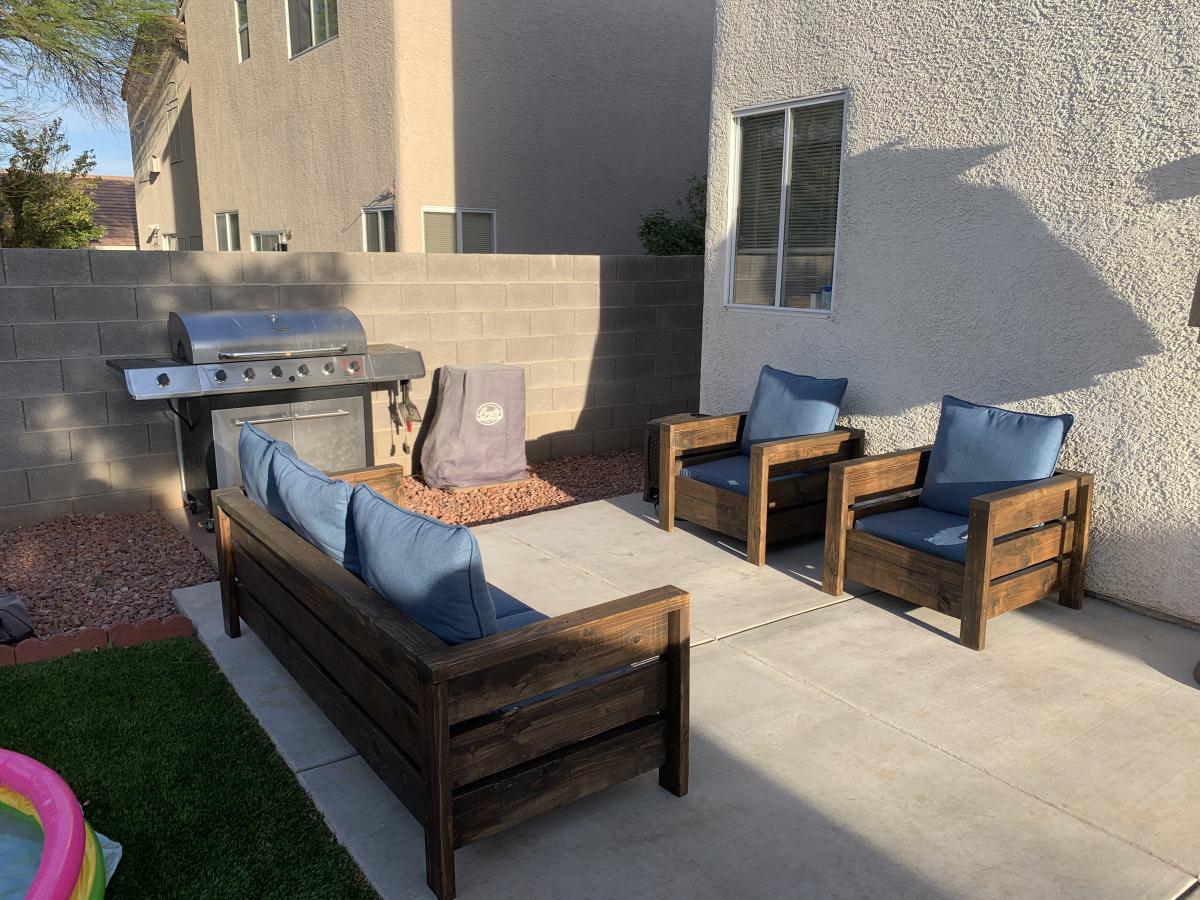
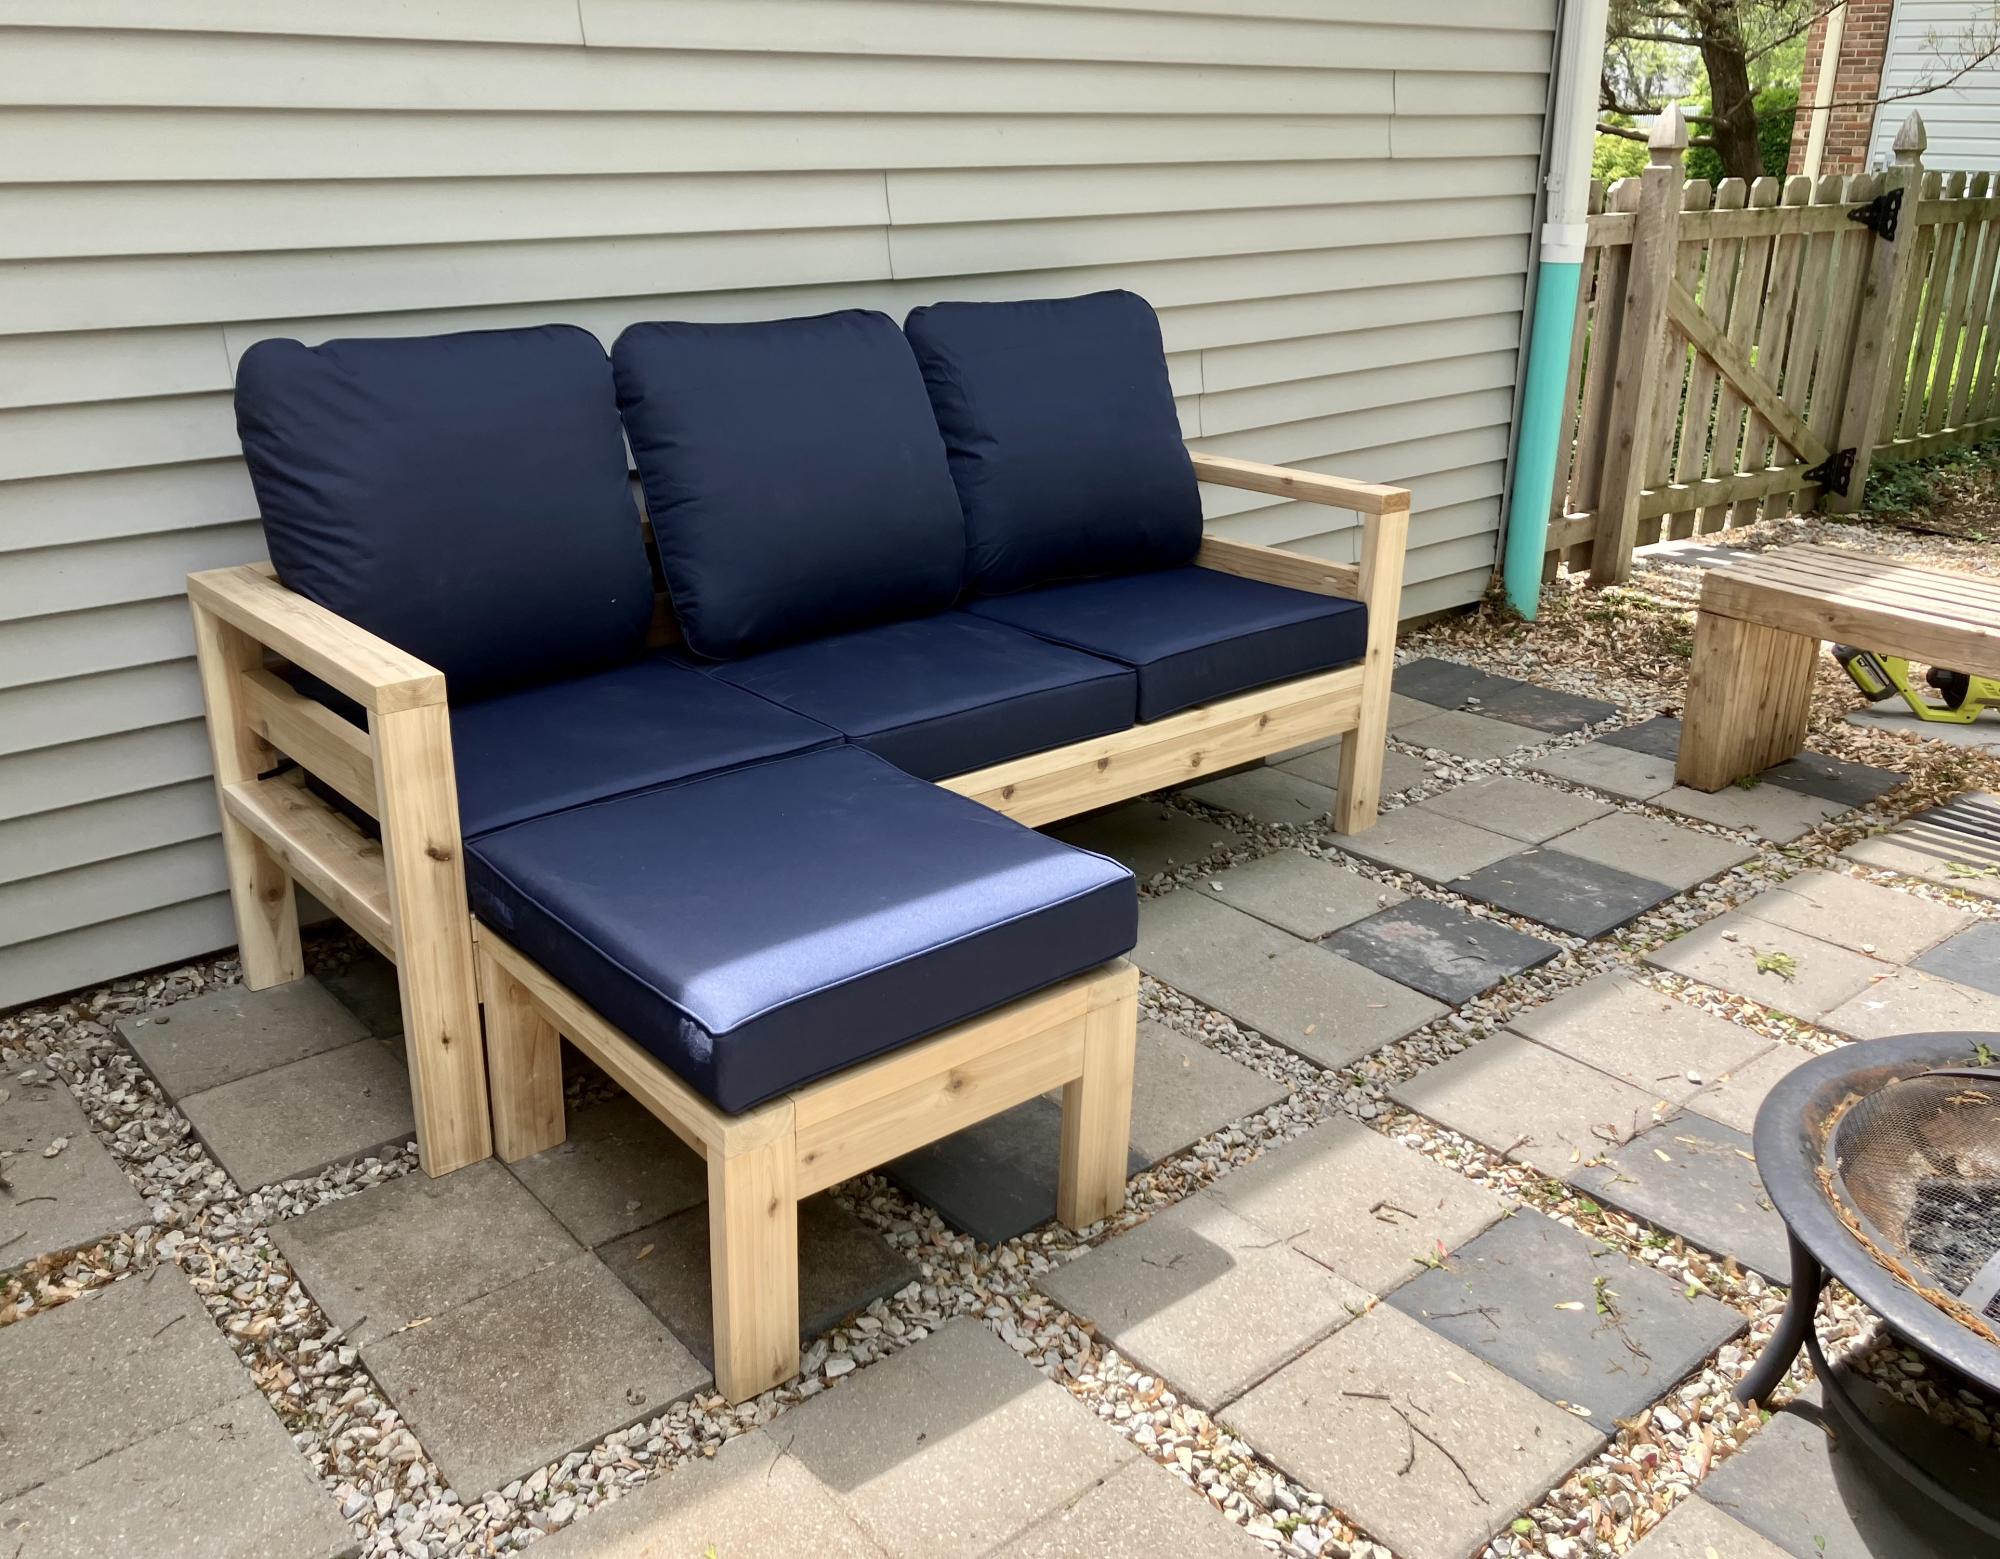
I used the Modern Outdoor Chair from 2x4s and 2x6s plans and slightly modified then to make a 3 seater couch. My cushions(most expensive part) were 24 in x 24 in and purchased from Lowes for $40 per seat. The couch is 79 inches in total length. I also dropped the seat down to the lower level to allow more room for my cushion backs to sit further down into the seat.

Estimated Cost
$400
Estimated Time Investment
Weekend Project (10-20 Hours)
Finish Used
Thompsons Waterseal Teak Oil Walnut Semi-Transparent
Recommended Skill Level
Beginner

Rustic X Farmhouse Coffee Table with Storage

Submitted by Anonymous (not verified) on Sun, 02/05/2023 - 08:54

This project was made from reclaimed wood from my office where they had built a temporary safety railing out of 2x4s and 2x6s. I added a compartment for storage. The top is stained in a classic grey. I painted the body in black followed by white. I then sanded the body to allow the black to bleed through for a distressed look.

Comments

Chicken Run with Turkey House

Submitted by vendo on Wed, 10/13/2021 - 10:03

My daughter helped me build this enclosure. We used Ana's chicken run plan, but just made it taller so we could walk in easily. We added an overhang to store food and pellets under, for the supports we used Ana's easy shelves angle support plan, and finally we used the playhouse base plan for the base of turkeys house. All plans used are linked below. We ran the chicken wire out under the structure and still need to bring in some large rocks or pavers, but so far no issues with predators. Turkey was getting too big to fit in the smaller coop, so we decided to have fun with his house and used cedar fence pickets and some treated 2x4's, built a box and jig sawed the shape of a turkey. As you can see in the first photo the ladder for turkey wasn't big enough, all the other chickens were in his house, lol. So I beefed up the ladder and he happily can put himself up at night now:) Overall a super successful project, I wasn't sure what to do with the top and just at that point, the neighbor walked over and offered the metal, talk about a huge win and the perfect solution! We attached the run to the previous smaller structure and now they have so much more room and are laying like crazy:) Finally, I think this would make a great dog kennel as well...

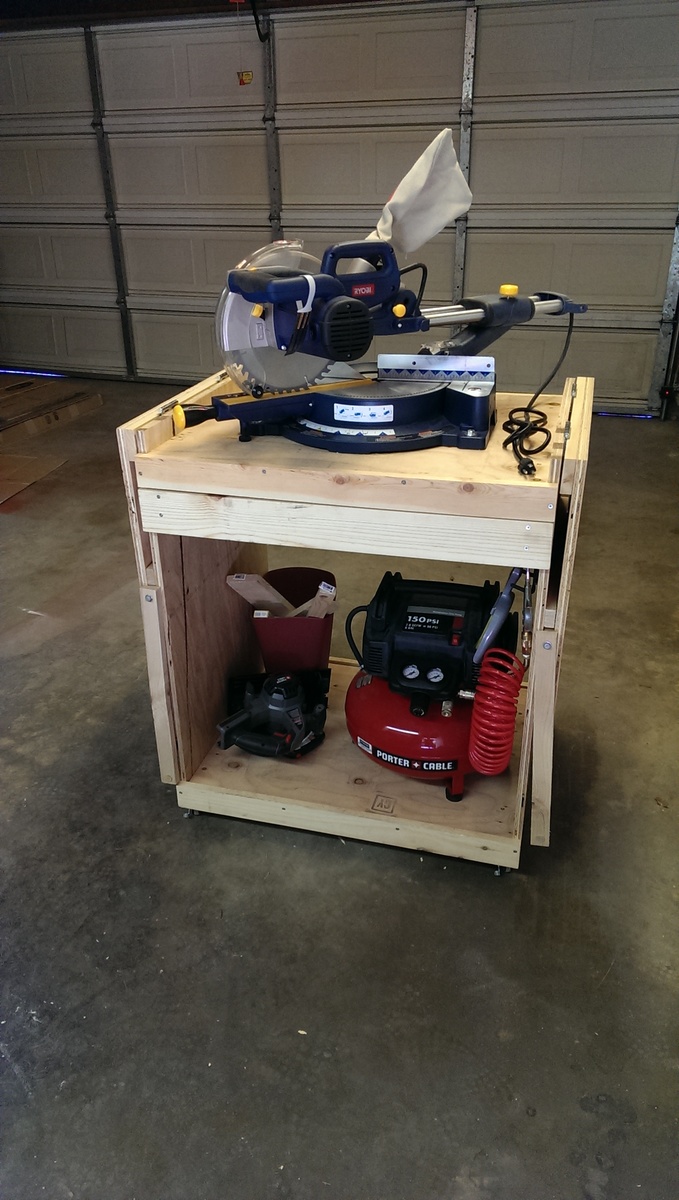
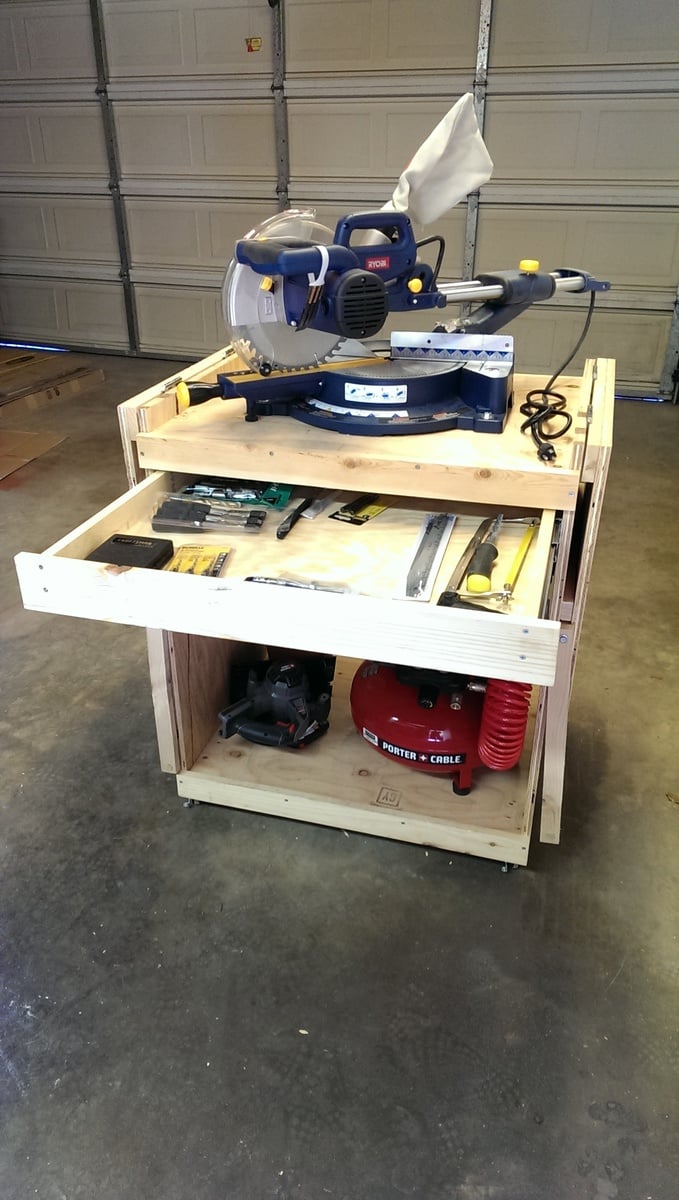
Miter Saw Cart

Submitted by Nermell on Wed, 07/31/2013 - 16:51

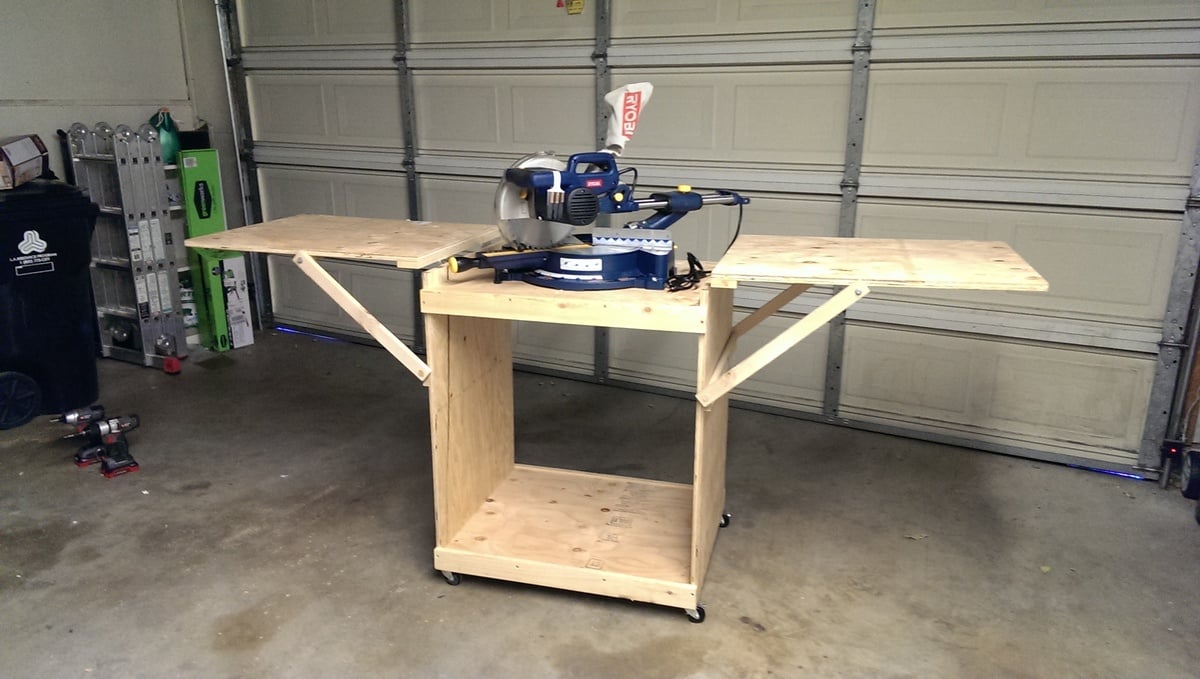
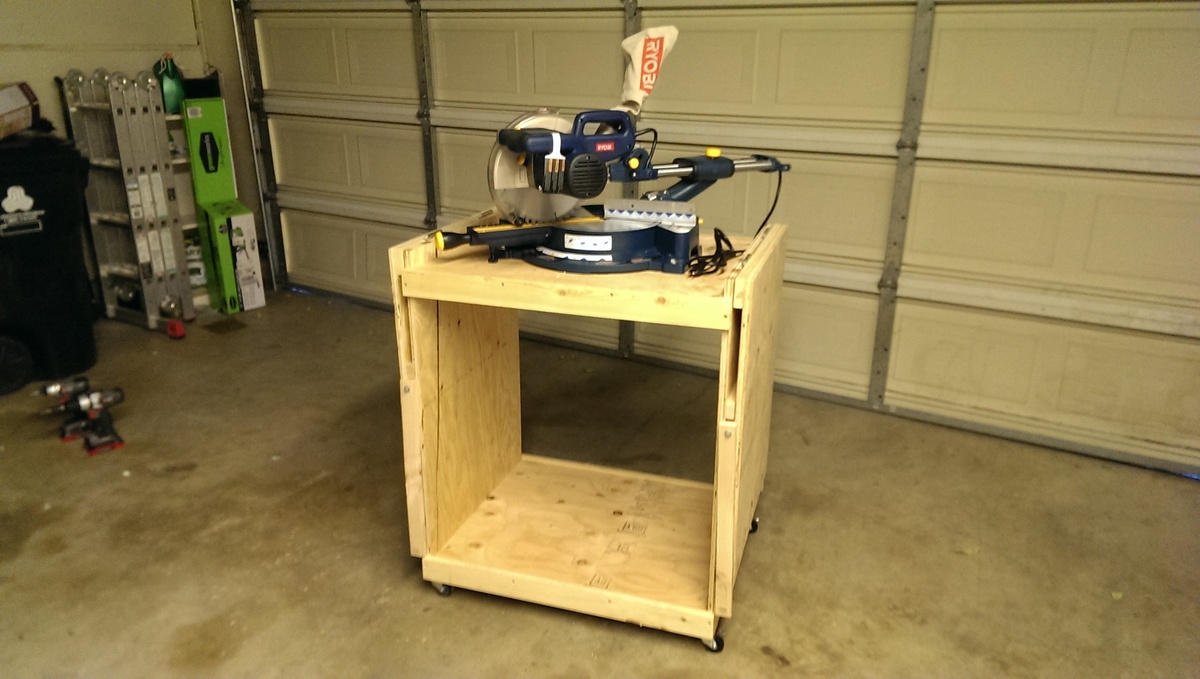
As a complete beginner in wood working (unless you count a year of woodshop over a decade ago), I decided that building a cart for the miter saw I just bought would be a great first project. So what did I do with that brand new miter saw? I left it in the box and made all of the cuts with a circular saw. Not sure what I was thinking there...

I mostly followed the excellent plan provided here but used wooden arms to prop up the wings in order to save on cost. I got the idea from the folding sling chair plan. It took quite a few screw ups and adjustments of the lower support bar before getting one of the wings level but I got it eventually.

Update 8/20/13: The miter saw has been a joy to use with the cart and the big flip up wings provide a ton of really convenient work space in addition to stabilizing 8 ft boards for cutting. I added a sliding drawer and some utility hooks for additional storage.

Built from Plan(s)
Estimated Cost
$70-80
Estimated Time Investment
Weekend Project (10-20 Hours)
Finish Used
none
Recommended Skill Level
Starter Project

Comments

davidmauer15

Thu, 08/01/2013 - 08:10

I originally just had a 2x2 and two blocks to hold up the wings on the cart. They kept falling out, so I replaced them with hinged arms, which were a pain to fit and install, but they work well. Your approach has the same advantage of hinging the support arms: the wood can't fall out and it looks way simpler to install than my system.

One hint if you try Nermell's approach: Flip the cart upside down when you fit and install the support arms. I did all kinds of complex sketches and measurements, then realized it was just faster to lean the support bracket at roughly 45 degrees, then I installed the two block (one on the side, one on the wing) to hold the bracket in place. Flip the cart over, and your wing will sit at a perfect 90 degrees to the sides of the miter saw cart.

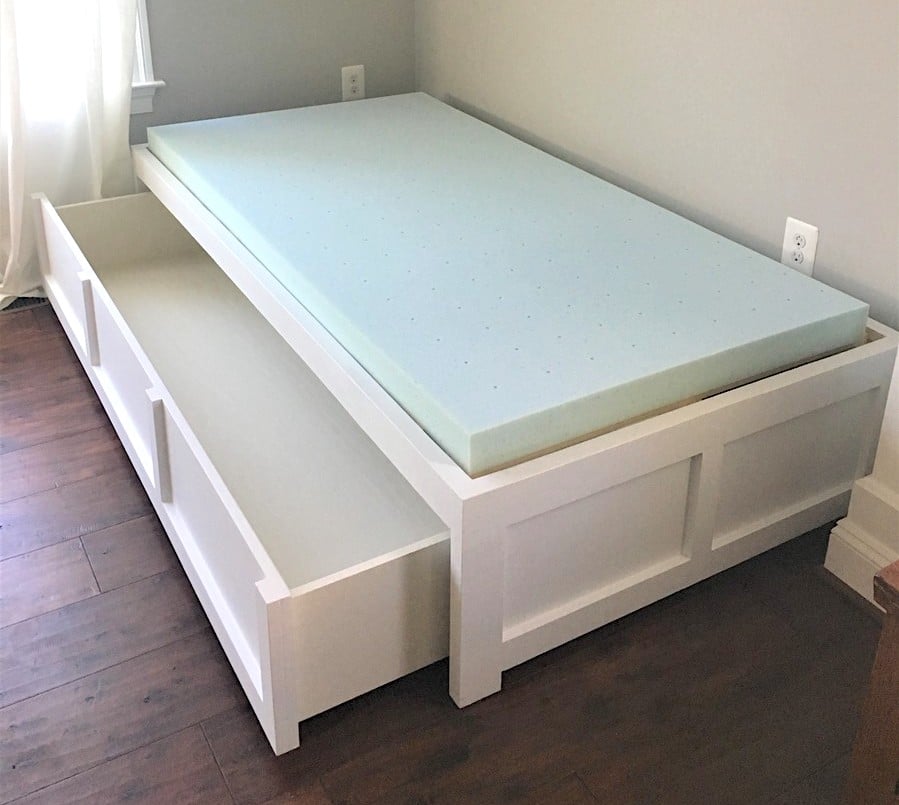
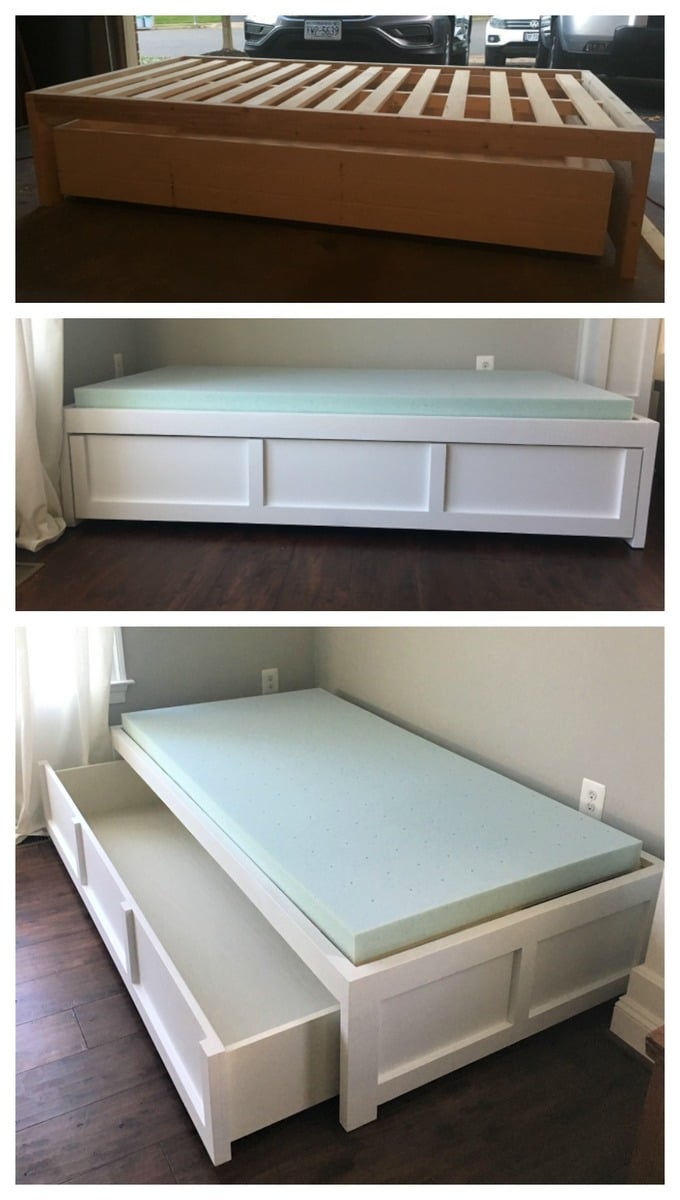
Daybed with Storage Trundle

Submitted by Crafty-Mom on Sat, 01/27/2018 - 10:38

This was my first project from Ana's website and I'm hooked! I'm a beginner, but thank goodness for my Dad's help because I have a lot of learning to do!

I wanted the drawer to be 1 drawer instead of 3. I feel like it looks cleaner (without having to adjust 3 drawers constantly to make it look good when you push them in). I was thinking the bed could actually be used as a trundle bed in the future too! I use this to store toys right now and it is Awesome!

I increased the bed size to fit a twin mattress and increased the height of the bed slightly so that the drawer would be a little bit deeper. We also added a back to the bed and carried around the trim to make all sides look the same. We added a bumper to the back and sides of the inside of the bed so the drawer is easy to push in and fits in snug. Finally we reinforced the bottom of the drawer with more 1x4 boards so that if a child does sleep in it, it would be more sturdy. I now have kids come over and jump into the drawer (literally) and I'm glad we reinforced it.

The changes we made did add to the cost and our time (as well as being newbies), but I think it's worth it and the bed turned out beautiful!

Estimated Cost
$180
Estimated Time Investment
Weekend Project (10-20 Hours)
Finish Used
Behr Marquee (I'll have to find the name of the white color we used). We almost went with chalk paint, but after talking to the HD guy, he talked me into this paint and I'm glad we used it! So much cheaper and turned out beautiful.
Recommended Skill Level
Beginner

Comments

Nisssc

Mon, 10/12/2020 - 07:51

This looks great! Any suggestion if I want cubbies instead of a trundle? Also, cubbies only on side as bed would be against the wall. Thanks for the inspiration!
Sandy

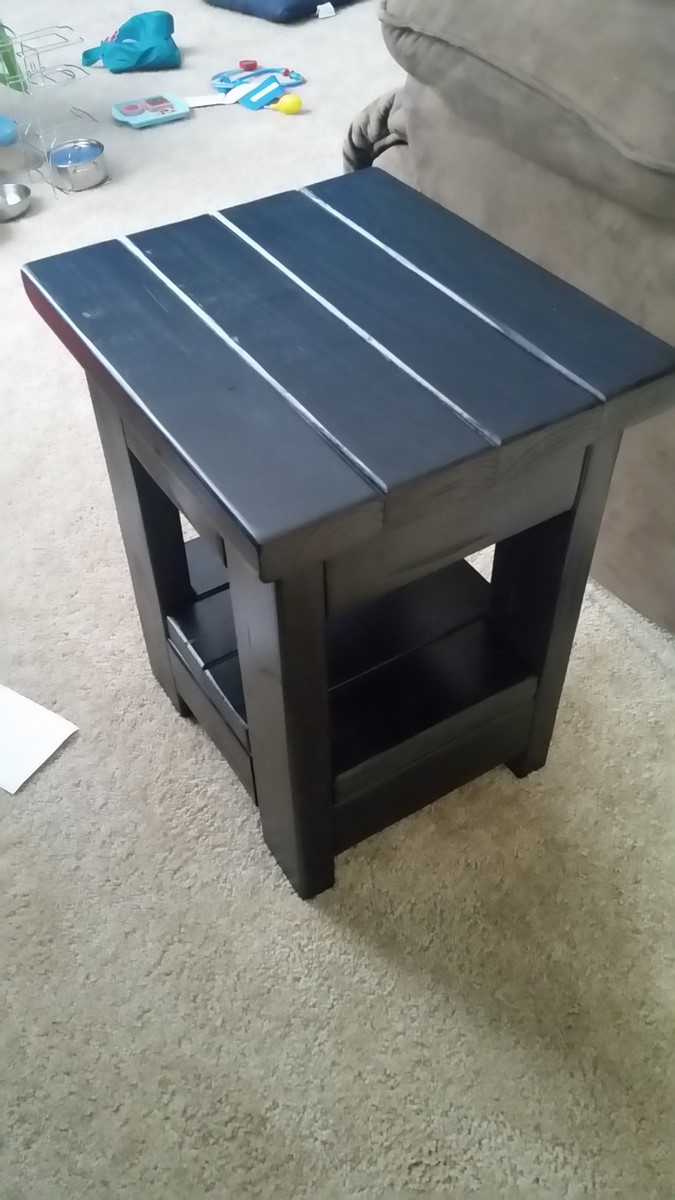
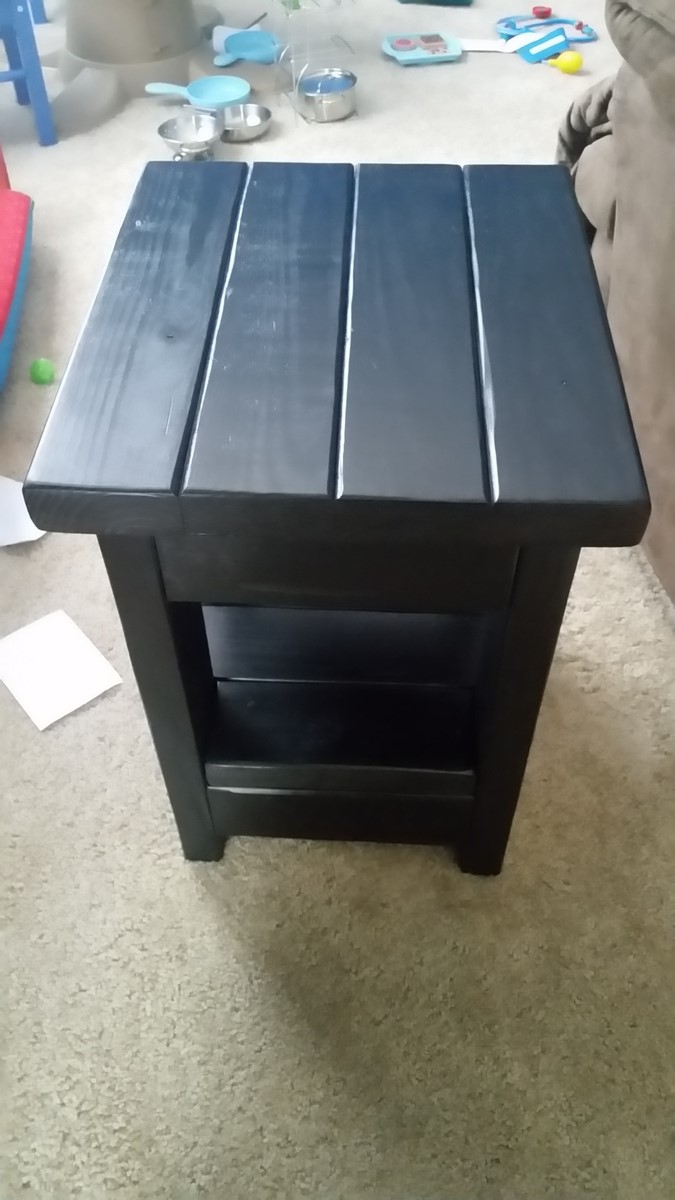
Small End Table from 2X4's

Submitted by jbknakal on Sun, 04/10/2016 - 11:55

I made a smaller version of the Tryde End Table with Shelf. I made 2 of them from 6 2X4's

Estimated Cost
$30
Estimated Time Investment
Afternoon Project (3-6 Hours)
Finish Used
Black Paint
Recommended Skill Level
Beginner

Comments

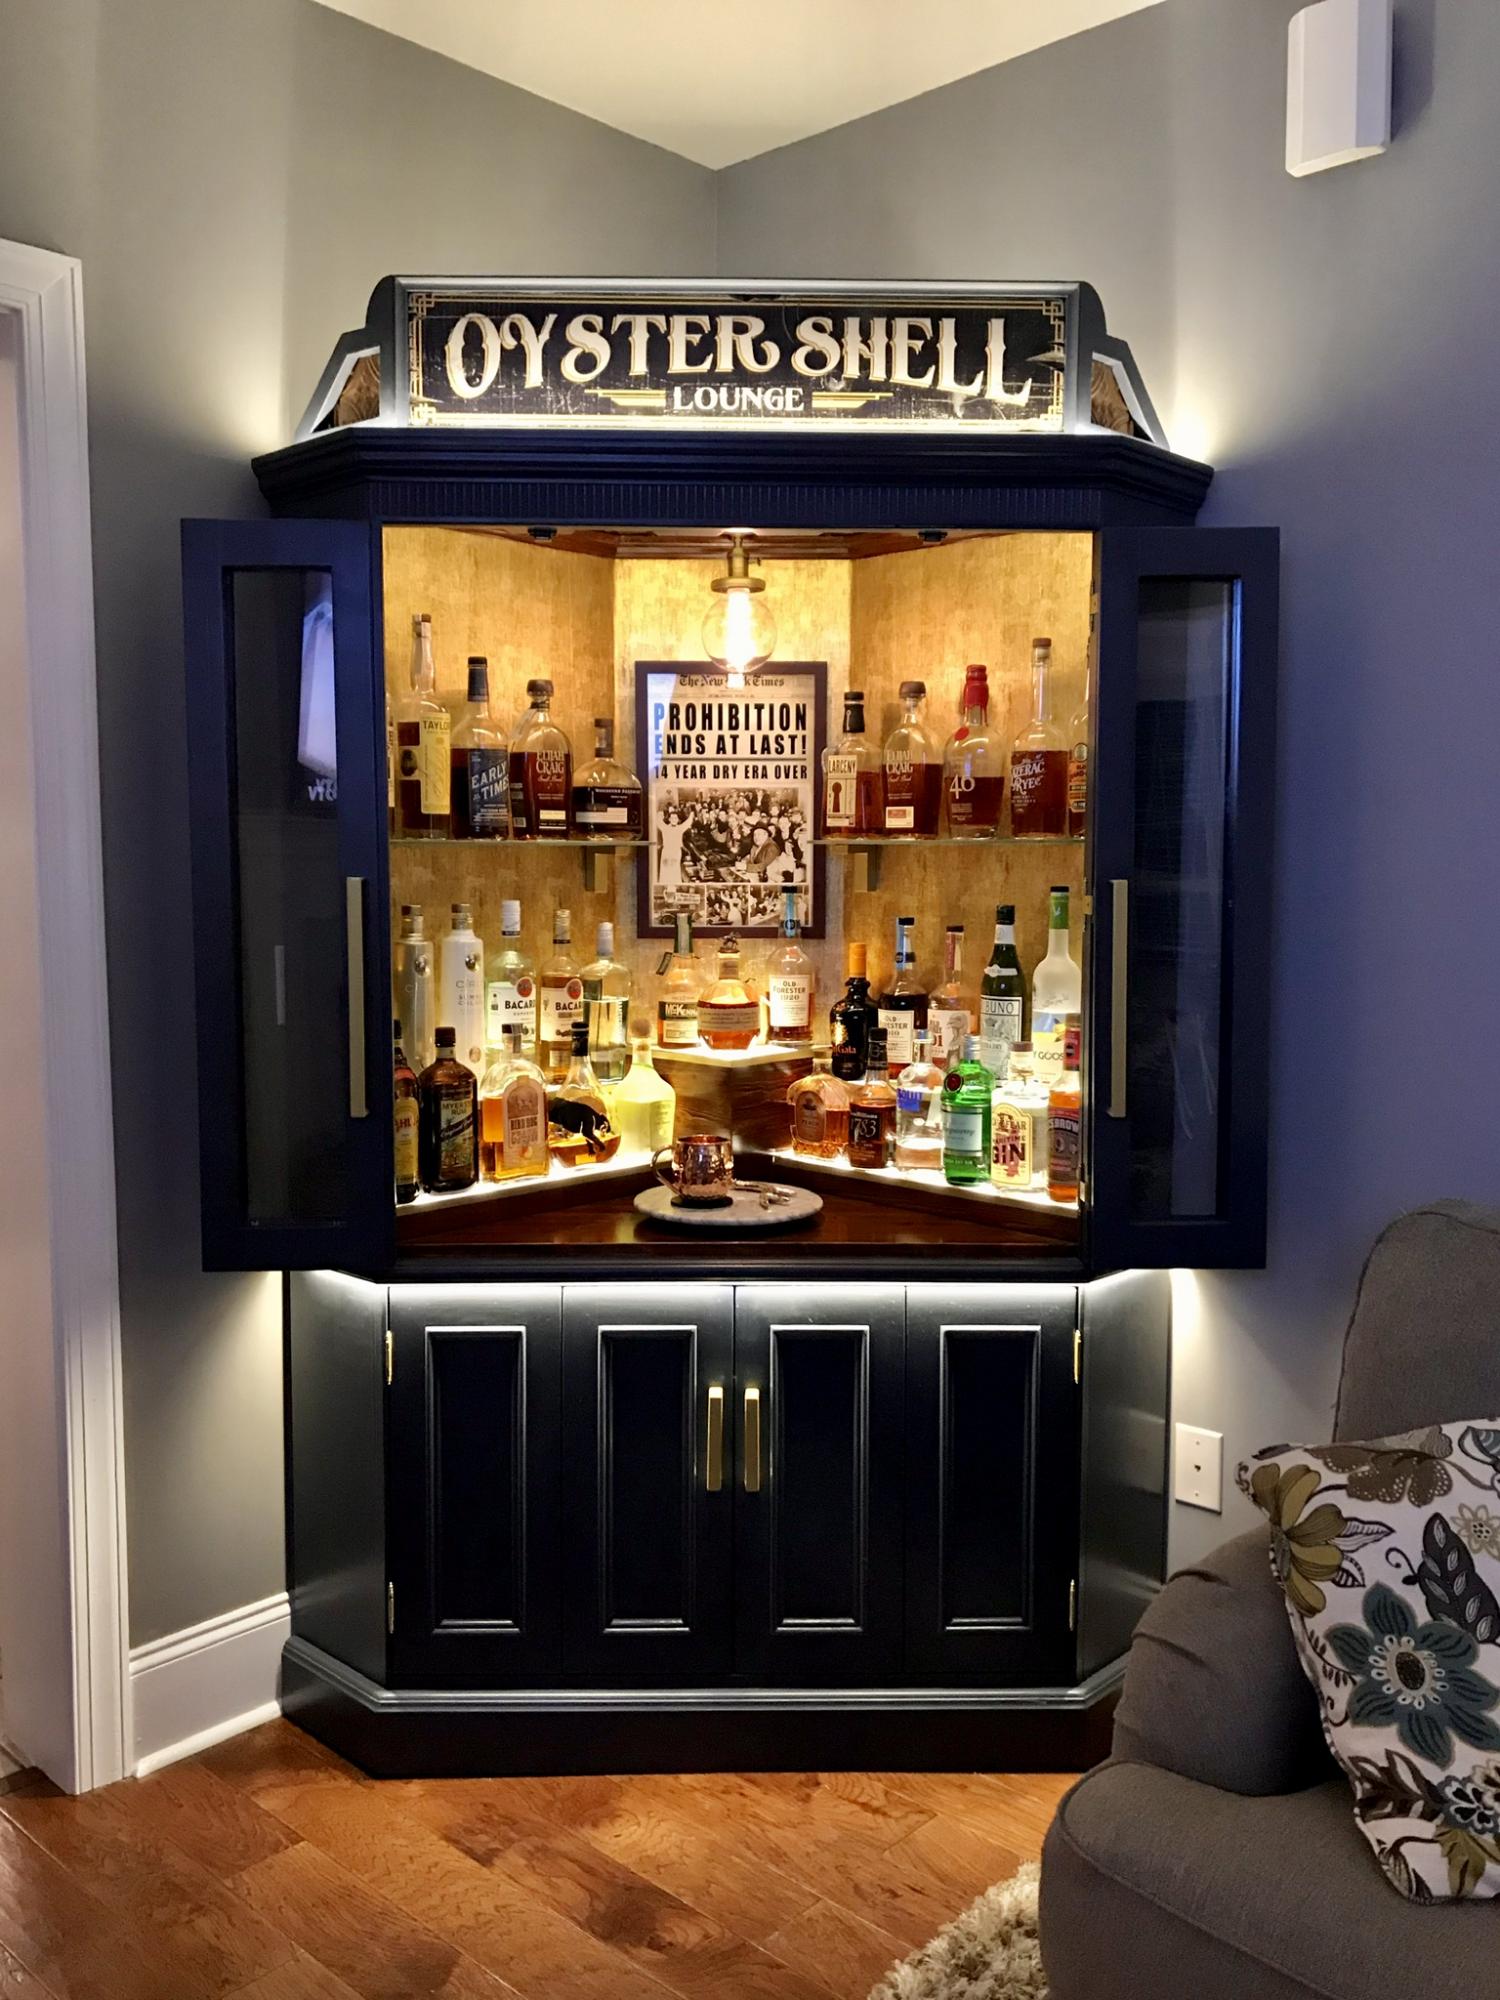
DIY Bar Cabinet

Submitted by Anonymous (not verified) on Mon, 02/24/2020 - 16:27

I bought this tv corner cabinet for $40. I spent many hours turning into my perfect bar cabinet. I built a custom lighted liquor display. I have posted photos of the transformation.

Estimated Cost
$1000
Estimated Time Investment
Week Long Project (20 Hours or More)
Finish Used
Benjamin Moore- hale navy
Recommended Skill Level
Intermediate

Comments

frendlygrl

Tue, 07/06/2021 - 19:04

So this is not your project? Because there isn't much information or a before and after picture. This gave me an idea for our home.

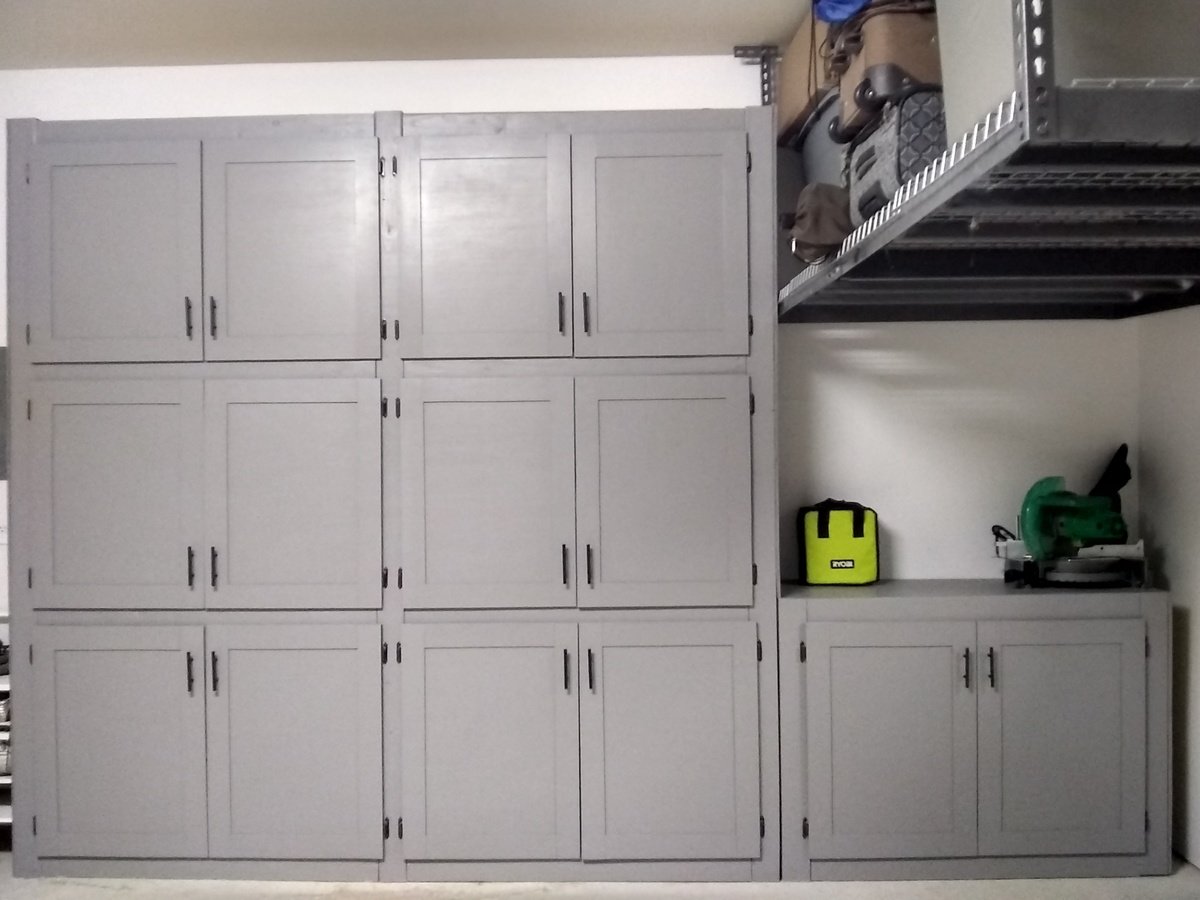
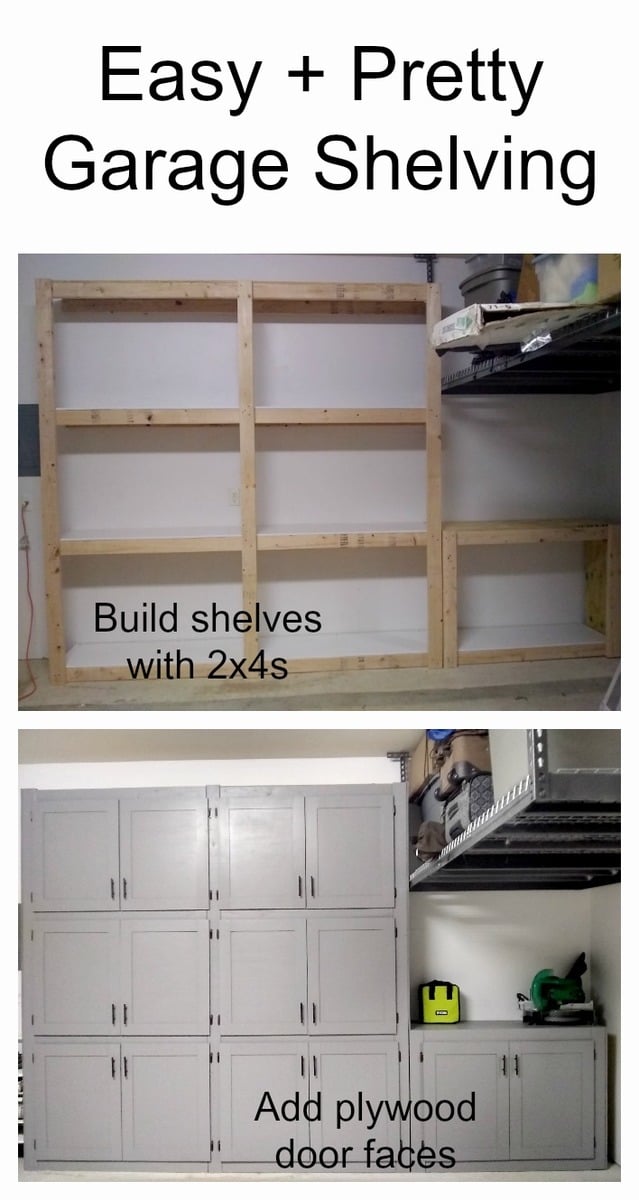
Garage shelves with doors

Submitted by CarolinaL on Thu, 01/11/2018 - 03:59

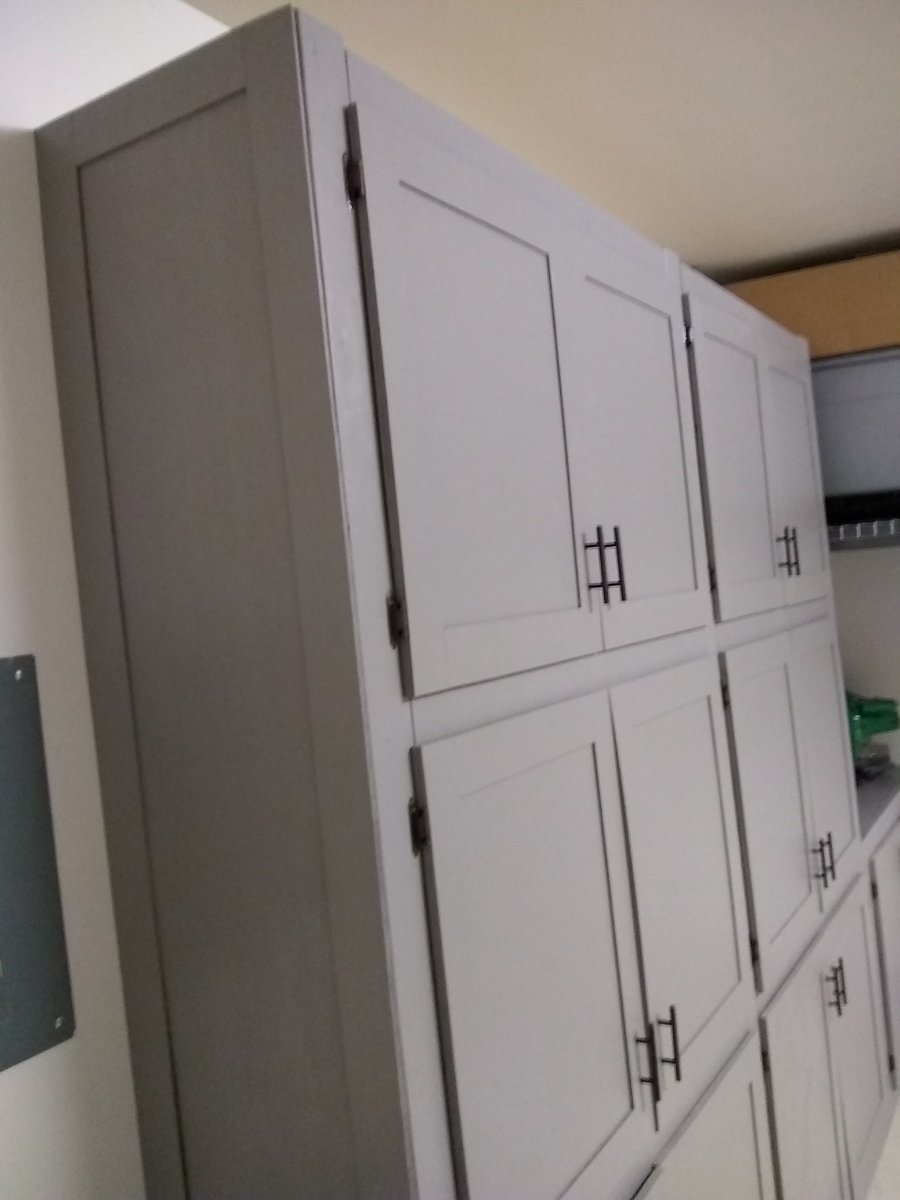
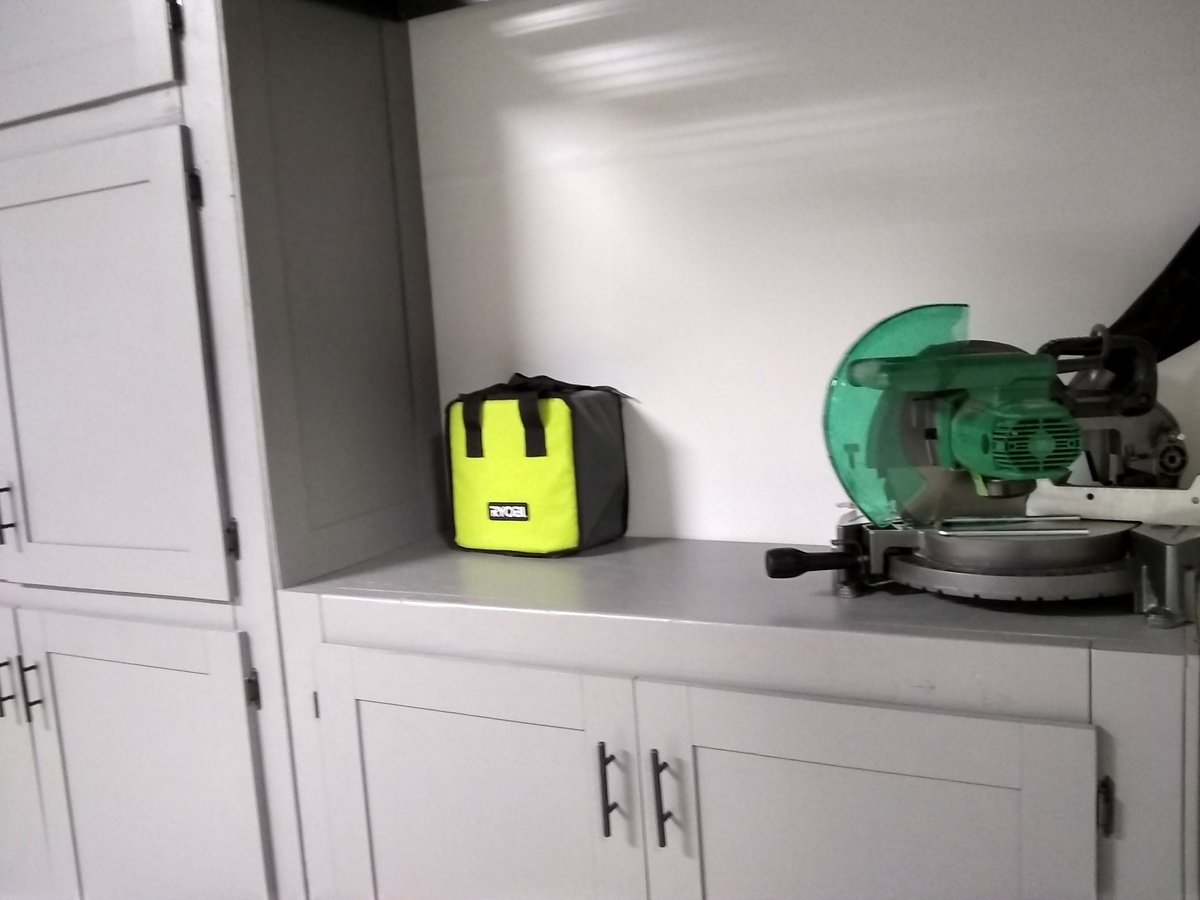
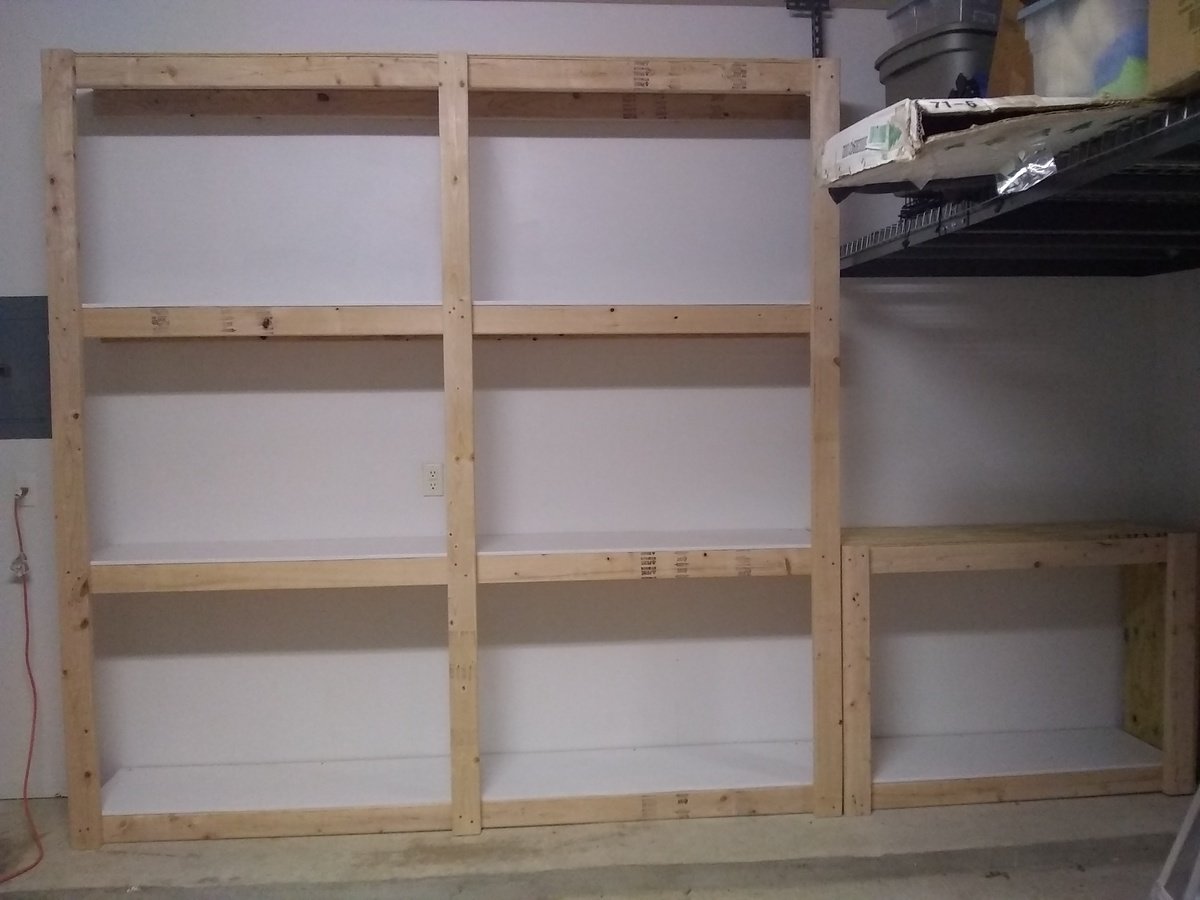
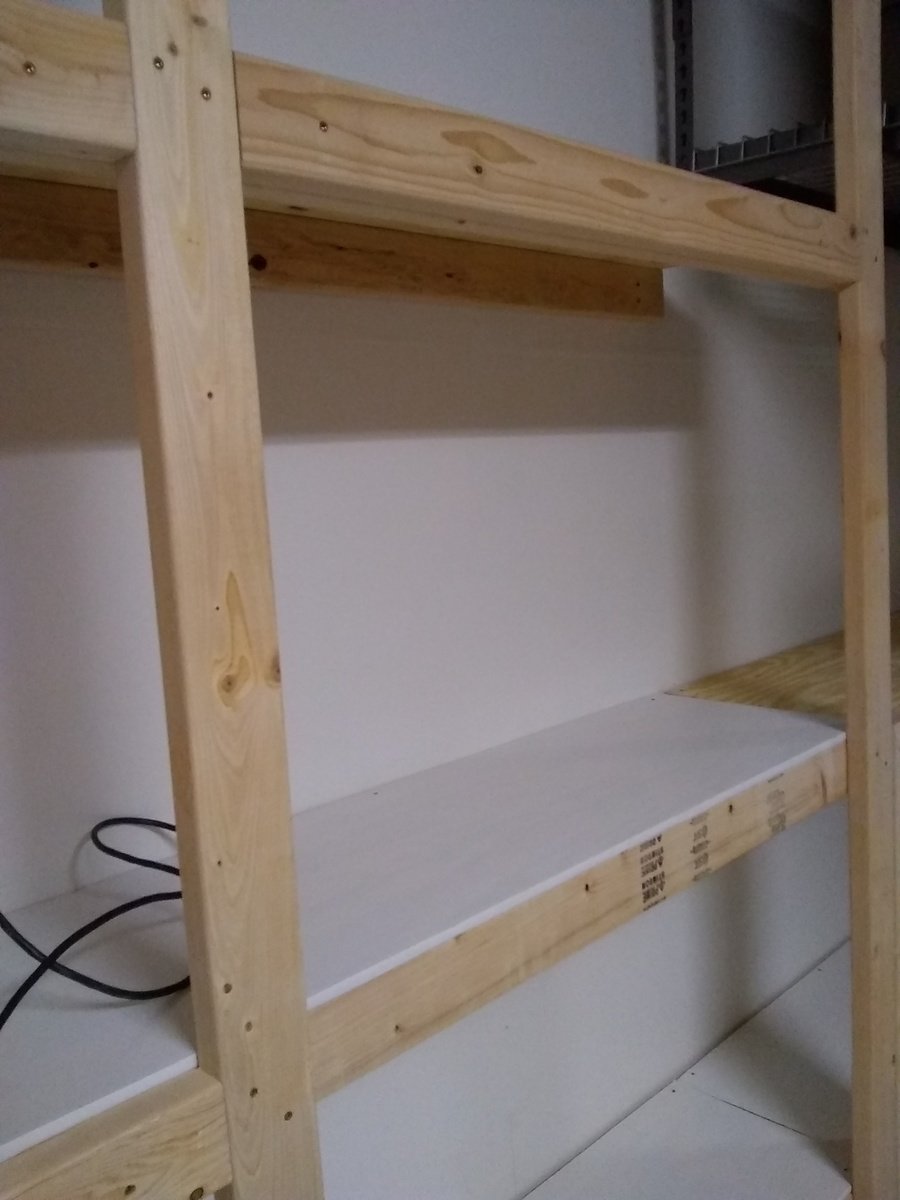
I have been wanting garage cabinets for a long time but couldn't afford them. When I saw these shelves I knew it would be easy to add side panels and create doors for the sections. The size is 8'x8' with the 4'x3' under the ceiling rack. I put a 2"x4" in the middle to divide each section, measured and cut doors from 5mm lauran plywood. I also cut the stiles and rails from the same material to give it interest but mainly to make it thicker to avoid warping as much as possible. I added 2"x4" to create a facing for the doors to rest on. Also used overlay hinges to simplify the hanging as much as possible. I was able to follow the design plan and the only thing I did was add a shelf at the bottom. The cleats were definitely not necessary, it's very sturdy. 

Making the doors

The first thing is to learn how to measure for cabinet doors. There are plenty of sites and YouTube videos showing how to correctly measure. If you are doing the same type of doors like I have, with no middle divider, then be sure to pay attention how to correctly measure for those instead of a single door.

The easiest way to make the doors will be getting 1/2 in sanded plywood and use a table saw to cut each door to size. Skip the shaker style trim and put the hardware on and be done. Make sure the hinges will be able to hold the weight of the door.

Unfortunately, I didn't have a table saw but I did have a router and a jig saw, and found a great video on YouTube on how to use a router to cut straight edges without a table saw. I measured out one door and used that outline to cut two identical doors. It turned out that each section was slightly a different width so I had to do two at a time. However, if you have a circular saw you can rig it to make a table saw and make a guide to rip the doors. It all depends on what tools you have available to you.  

I have a compact plunge saw and was able to cut the 3 inch strips for the shaker style with it. Honestly, that was the most tedious part and most time consuming by far. That also had to do with the fact that because the plywood is only 5mm thick I cut strips for both the front and the back to make it over 1/2 inch thick to help minimize warping and give the hinges something to grab.  

I used the miter saw to cut the stiles and rails to size and a 23 gauge nailer with 1/2 nails and glue to get them on the door. I glued and nailed the front and the back of each side at the same time because the nails are a bit longer than two pieces of plywood. I then turned it over and nailed the other side. The great thing about using a 23 gauge is that I didn't have to fill any holes because they are so small you can hardly see them at all. 

The last thing is to use your sander to ensure all of the pieces are even. I used a 60 grit and then followed it with a 220 where needed. 

If you want to avoid cutting the strips but still want to have the shaker style, Home Depot sells 1/4 thick Polystyrene flat moulding that will add vertially no weight to the door but the cost can easily add up if you have a lot of doors.

Lastly, if you are wondering why I got such thin plywood that ended up creating more work. The reason is because I wanted to save money on hardware and I didn't trust the inexpensive hinges I got off eBay would hold a heavy door for many years.
 

Estimated Cost
About $300 not including some tools I needed to buy anyway.
Estimated Time Investment
Week Long Project (20 Hours or More)
Finish Used
Interior satin
Recommended Skill Level
Beginner

Comments

Cedar Garden Shed

We needed a way to get all of the lawn & garden stuff out of our garage and organized. I found Ana's plans for the Small Cedar Shed & adjusted them to fit our space. We used 2x4s as our studs & added front walls on the sides. Our shed measures 9.5'x30". We had a concrete slab poured for our foundation. We are experienced DIYer's but had never taken on a project of this scale from scratch. This project was much easier than I was anticipating, and we were able to complete it in one weekend! Similar shed kits were way more expensive and not the size that we were looking for. Thank you so much for the inspiration!

Built from Plan(s)

Comments

Seasonal And Holiday

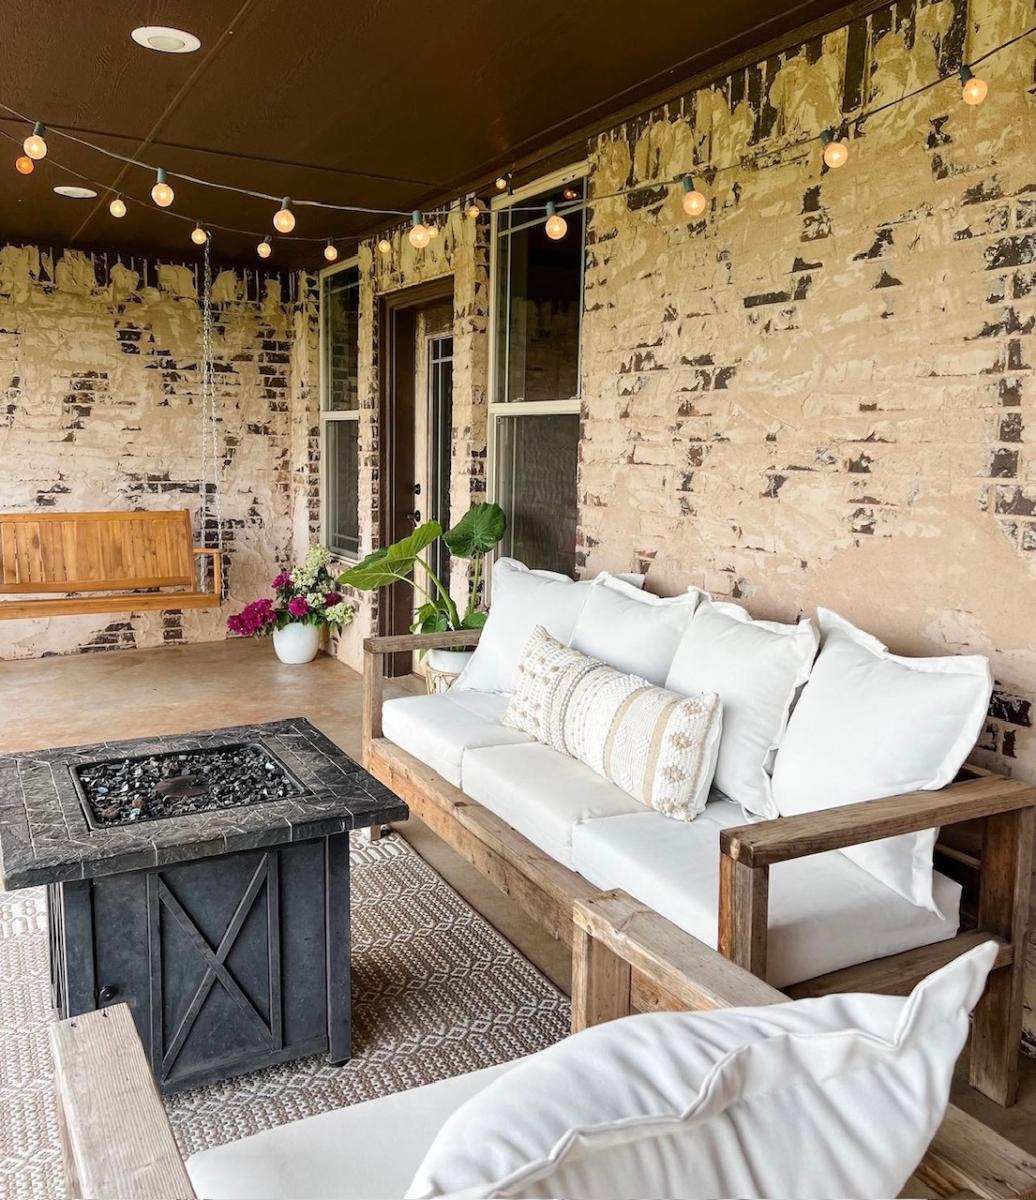
2x4 outdoor cedar couch with ottoman

Submitted by Anonymous (not verified) on Thu, 05/04/2023 - 11:51

I used pocket holes to hide the screws. I made an ottoman out of the outdoor coffee table plans to my dimensions that can be used as a coffee table when we need it.

Comments

Drop Leaf Mobile Kitchen Island

Submitted by jkjackson on Sun, 03/14/2021 - 11:19

This was born out of the need for more counter space in our galley kitchen. We don't have the space to add an island. Especially around the holidays, it would be great to have extra space for making cookies, serving big meals, etc. I used Ana's Small Kitchen Island Prep Cart plans for inspiration. I adapted the dimensions to fit at the end of our counters when not in use and added a drop leaf to give us almost 4 additional feet of butcher block counter top when we need it. I used scrap lumber that I had for the cabinet and had an extra drawer handle that matches our kitchen cabinets but bought the butcher block, locking casters, drawer slide and hardware for the legs. Also, the weight of the butcher block makes it want to tip when it's away from the cabinet with the drop leaf down so I added a lead counter weight inside the drawer.

Estimated Cost
$150-200
Estimated Time Investment
Weekend Project (10-20 Hours)
Finish Used
Behr paint for the cabinet, food grade mineral oil and cutting board wax for the butcher block
Recommended Skill Level
Advanced

Comments

jkjackson

Sat, 07/24/2021 - 16:59

Sure! I used a 4 foot butcher block and cut it down. The horizontal part is 13 1/2" and the drop leaf part is 32 1/8" attached with a piano hinge. The legs need to be cut and hinged to fit when folded up. This one is made so that the drop leaf fits right under the overhang of the kitchen countertop that it is next to so it's snug against the cabinet and not an issue but, if you want it to be freestanding, the weight of the butcher block will pull it over if you don't weight the cabinet down with something as well. I got a 5 pound lead bar from Amazon in case we need to use it somewhere else. I hope that helps! Let me know if you have any other questions.

Chicken Coop

Submitted by Anonymous (not verified) on Sun, 07/10/2022 - 12:26

Great for a small flock of 5 or less.  

Comments

Seasonal And Holiday

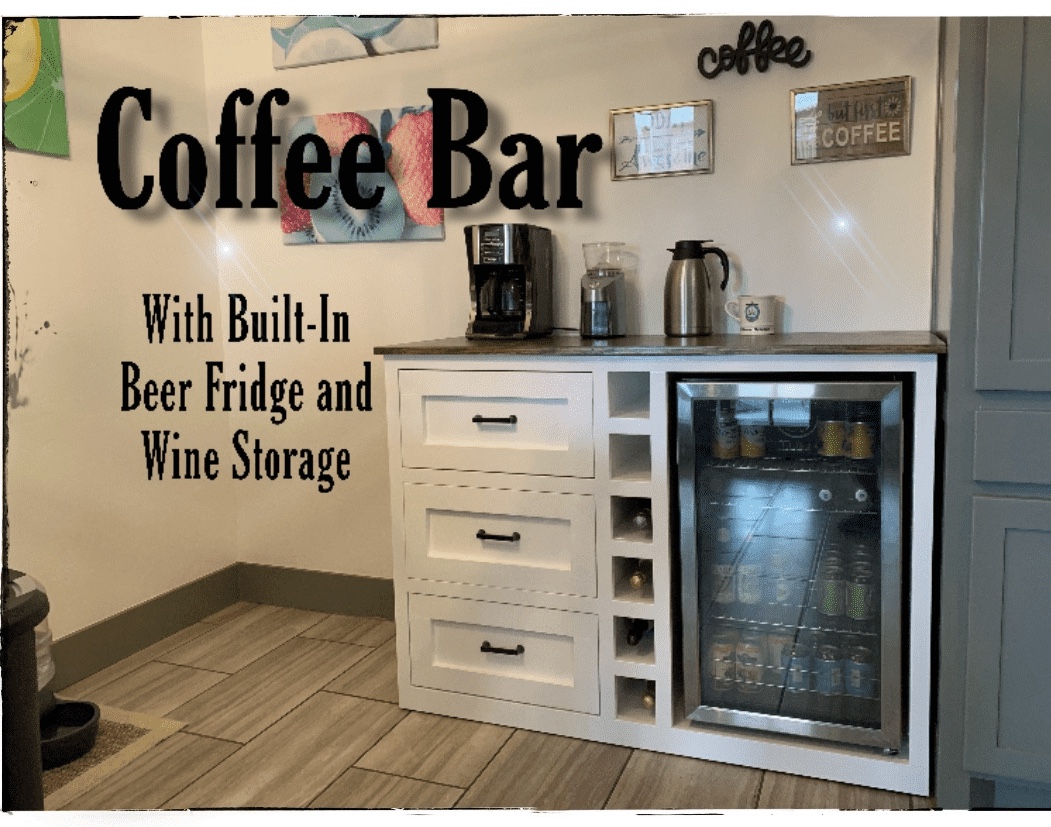
Coffee Bar with Built-In Beer Fridge and Wine Storage

Submitted by Chuck1979 on Mon, 07/08/2019 - 10:39

We made a beverage station for the corner of the kitchen!

Estimated Cost
$250
Estimated Time Investment
Day Project (6-9 Hours)
Finish Used
Semi-gloss white paint and Dark Walnut stain
Recommended Skill Level
Intermediate

Comments

gunnare57

Fri, 07/31/2020 - 09:43

Hello! Was looking to see if this is something you would be interested in building for us? We are in love with this project but don't have the tools or means to do it ourself..

Can talk about pricing / size etc.
Thanks!