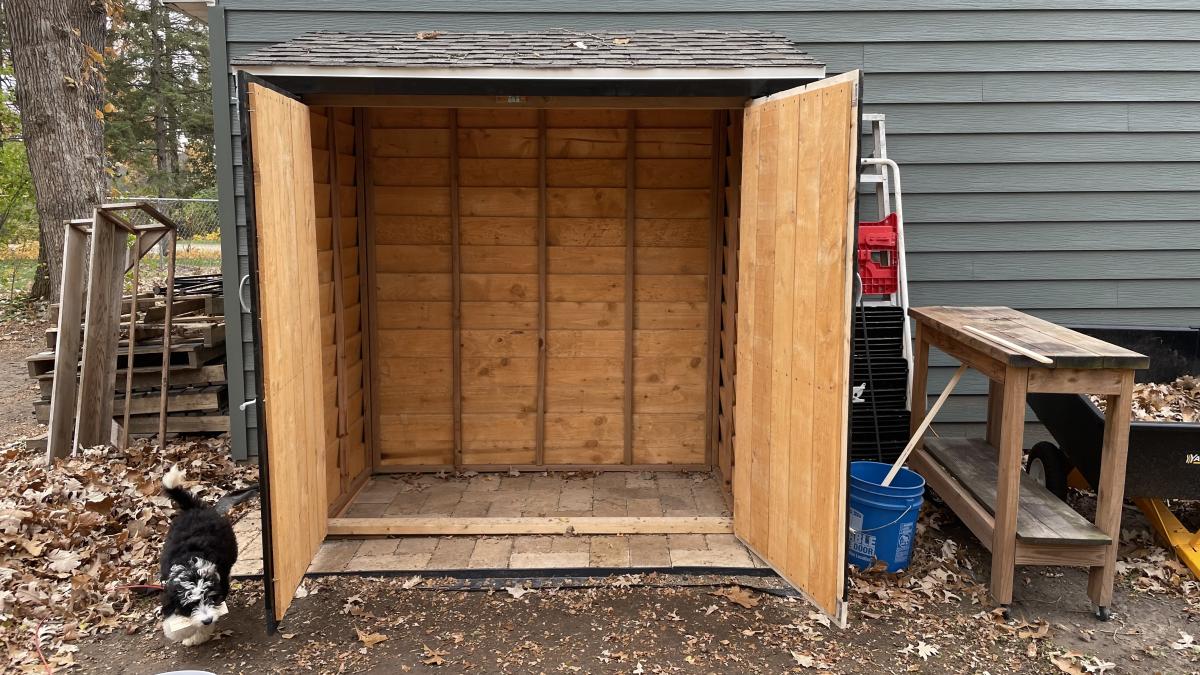
Cedar Shed
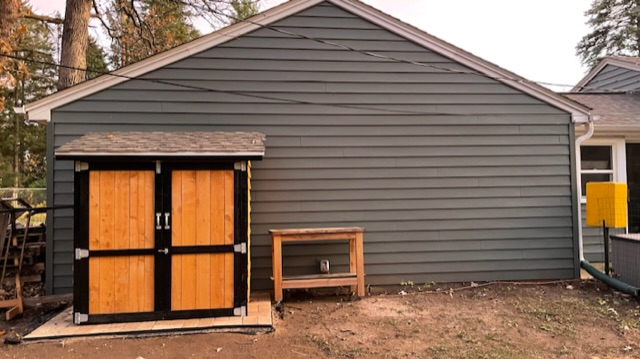
I needed a place for all my gardening pots and planter boxes and this was a perfect solution. So with my dads help we built this shed.
Built from Plan(s)
I needed a place for all my gardening pots and planter boxes and this was a perfect solution. So with my dads help we built this shed.
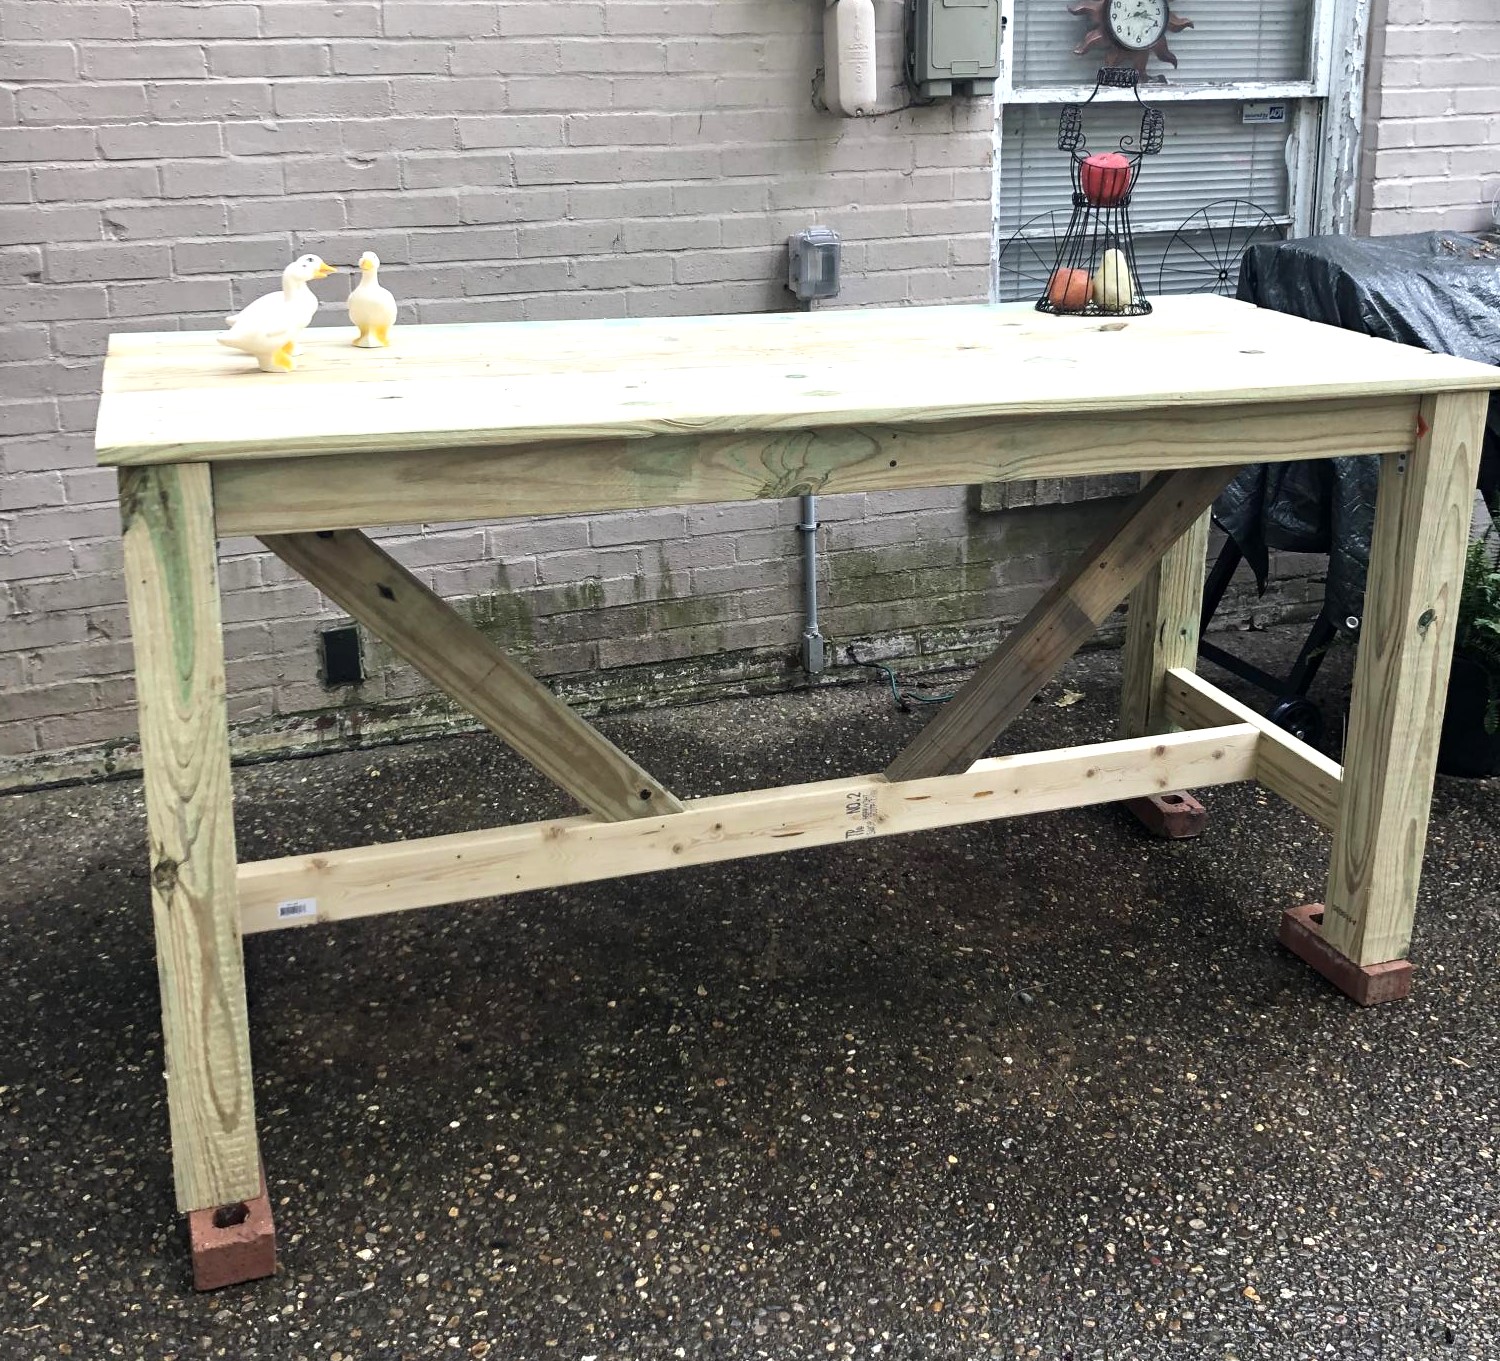
My first project using Ana White plans. Used pressure treated lumber and Kreg pocket hole jig. Cost: $126.
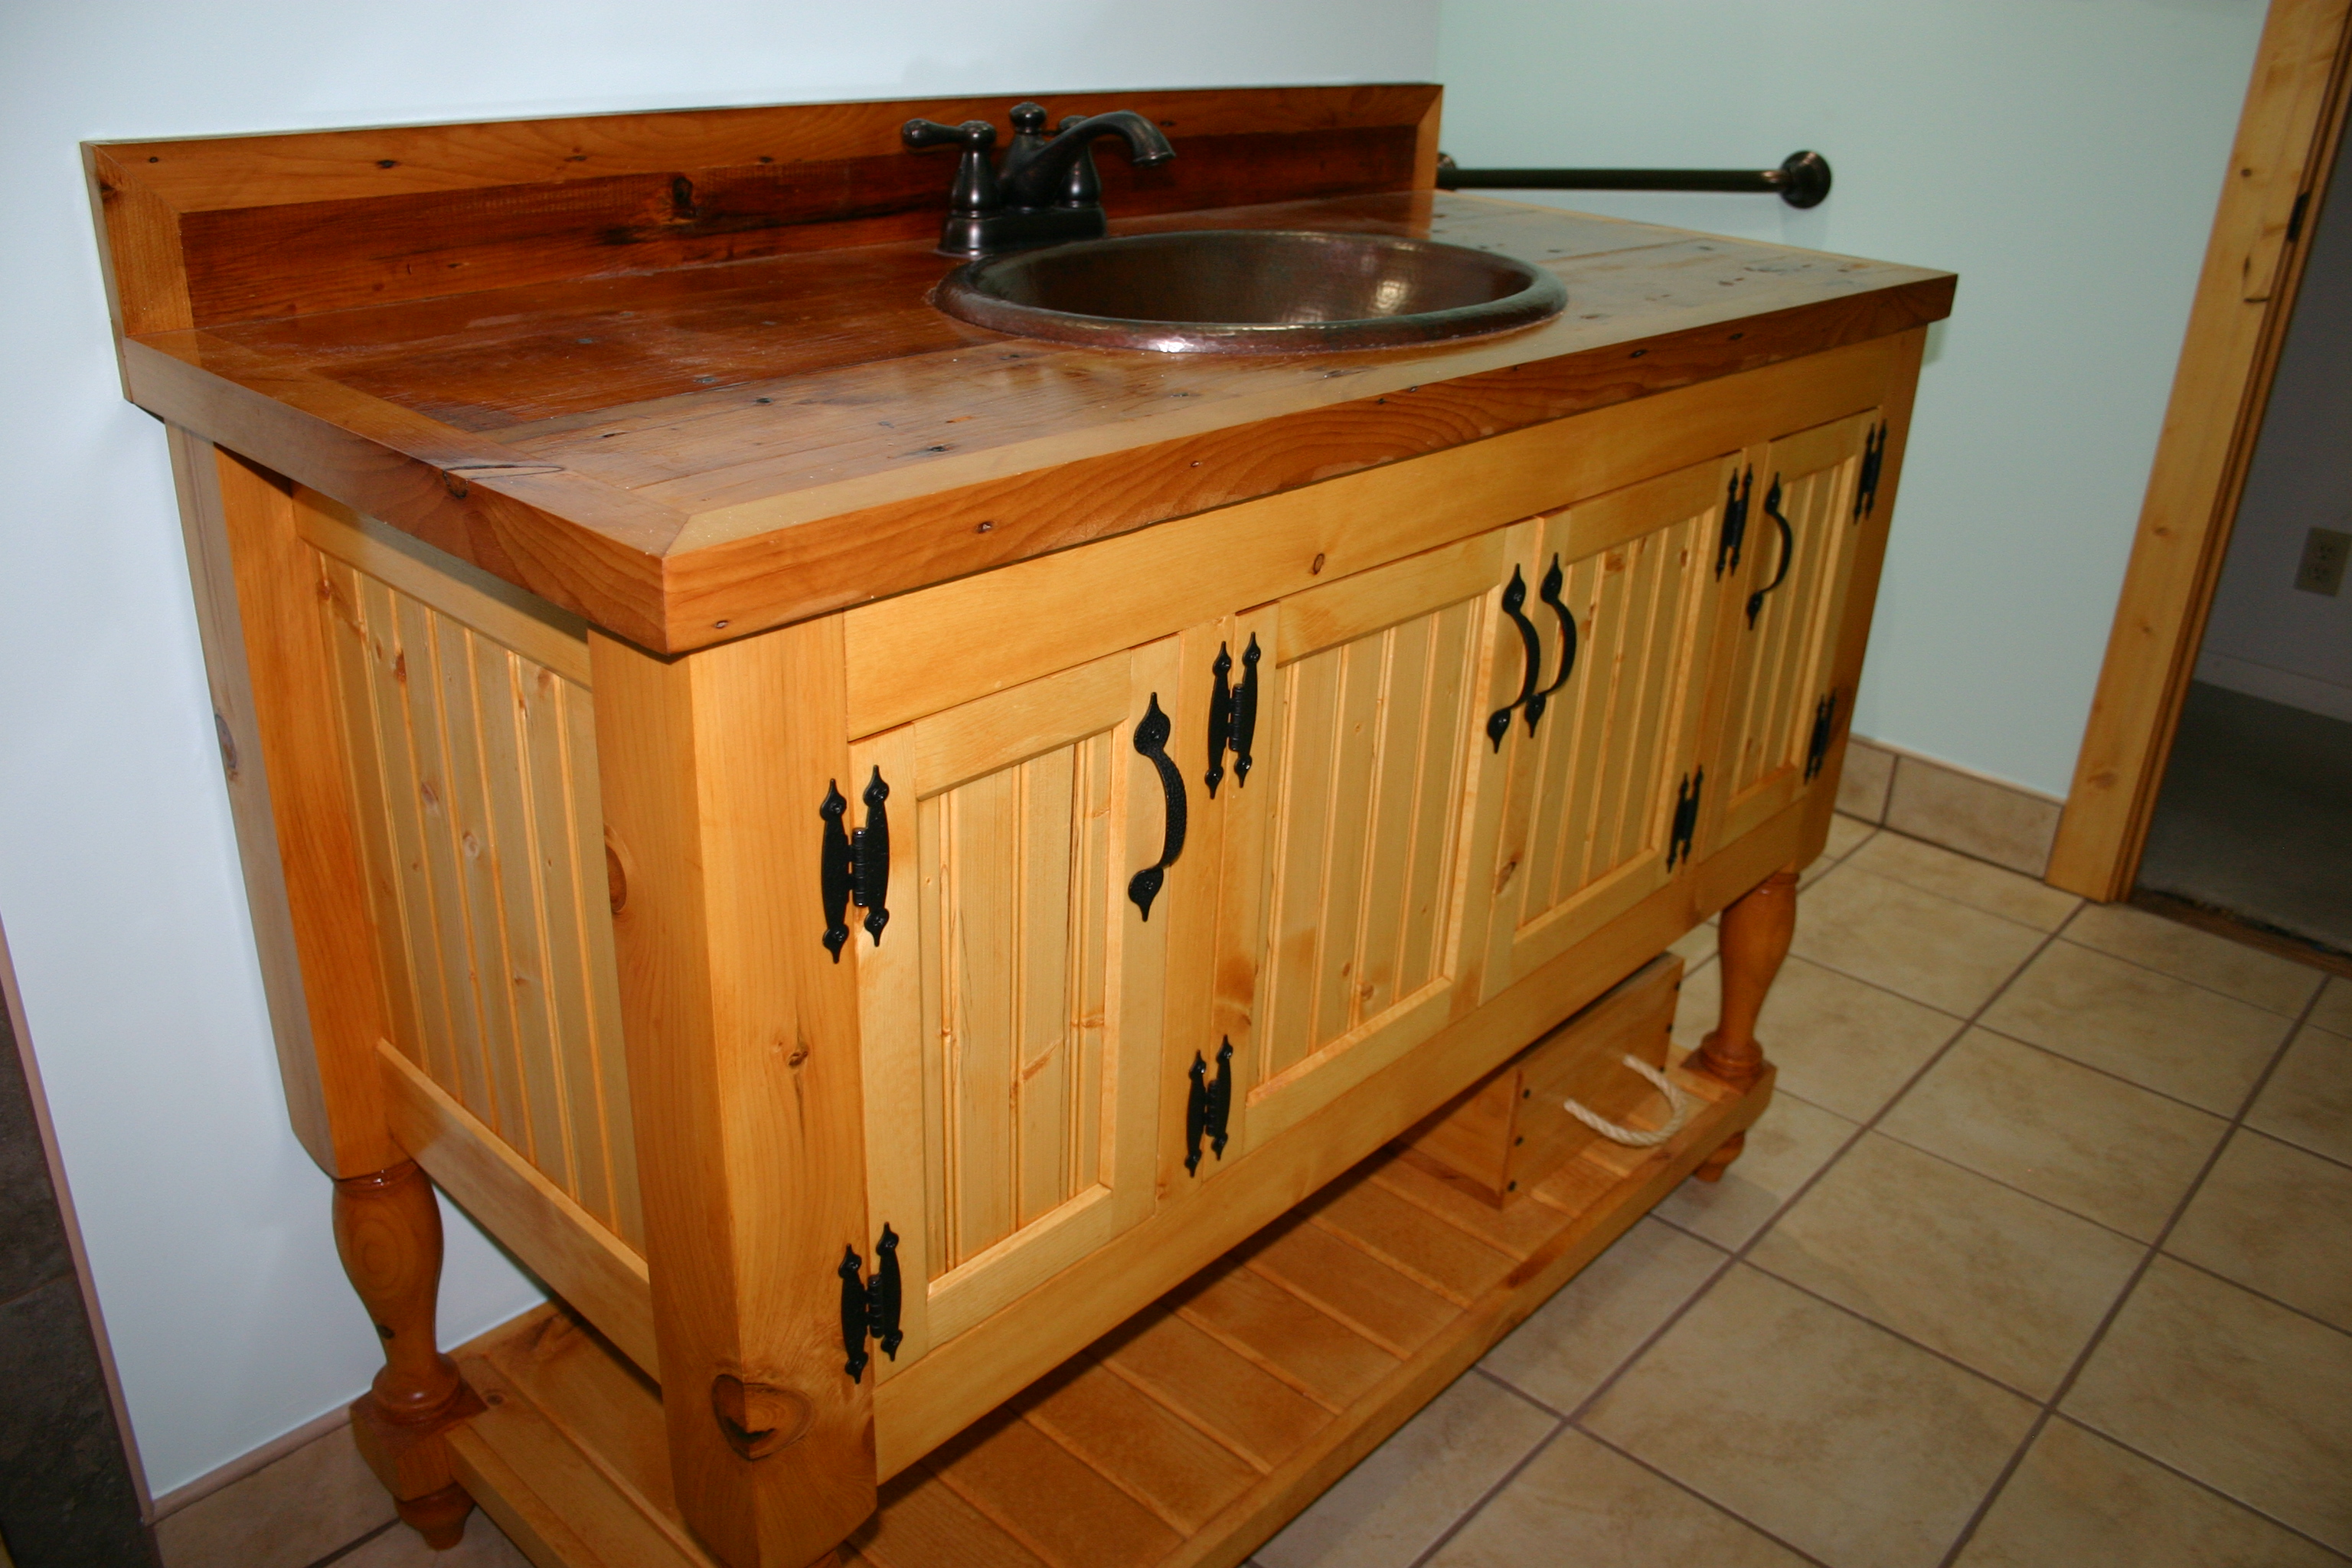
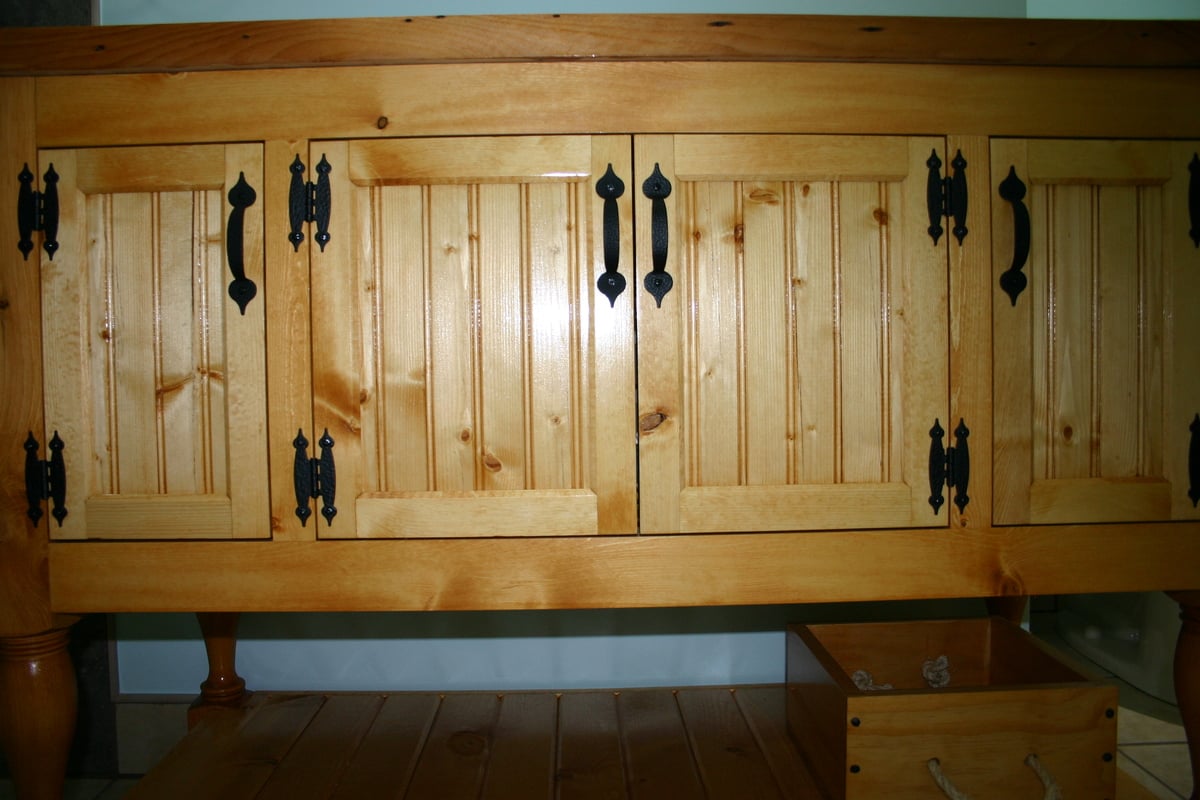
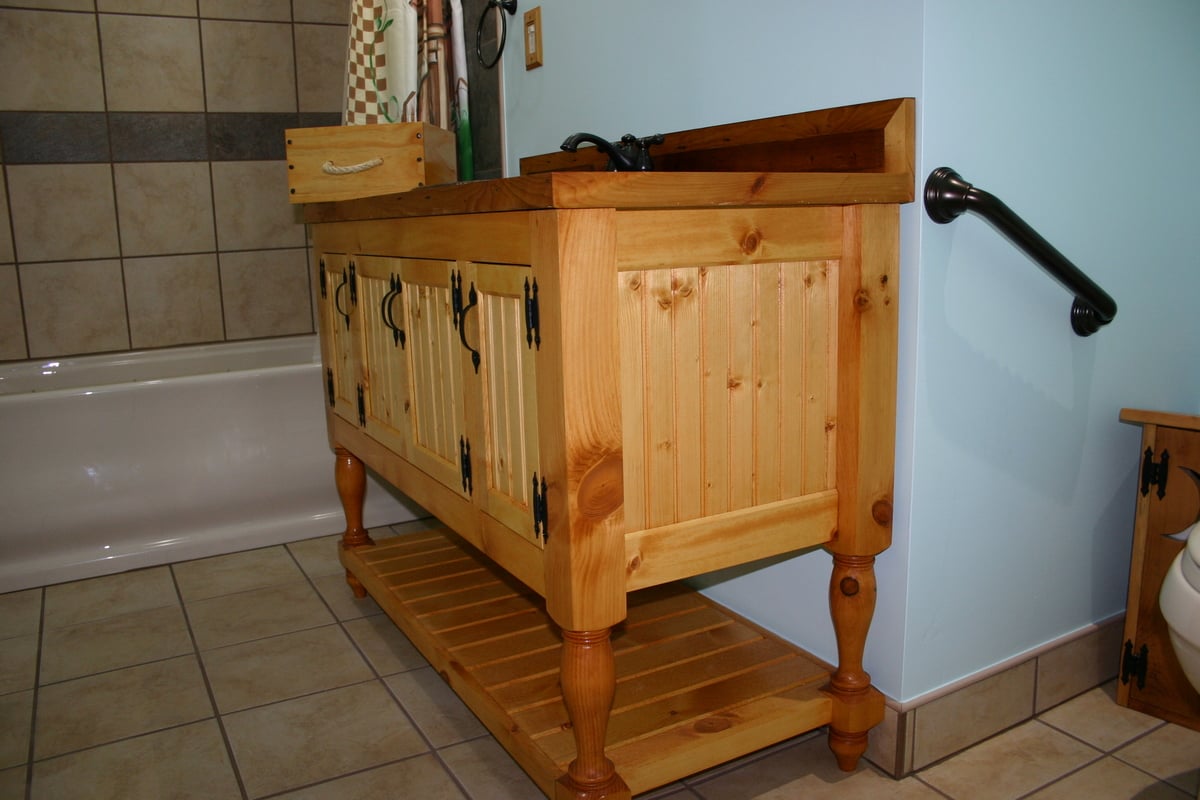
I remodeled the main floor bathroom for my parents. My mom had seen a vanity she like at a home center. Then she thought about doing an open vanity. Then I showed her the one Ana did for the Momplex (48" Turned Leg Vanity). and she loved it. This is what we came up with.
It has bead board panels on the ends and the doors. V-grove planks for the bottom shelf.
The top is made from 100 year old ship lap siding from my brother house. The sink is hand hammered copper with a venetian bronze faucet.
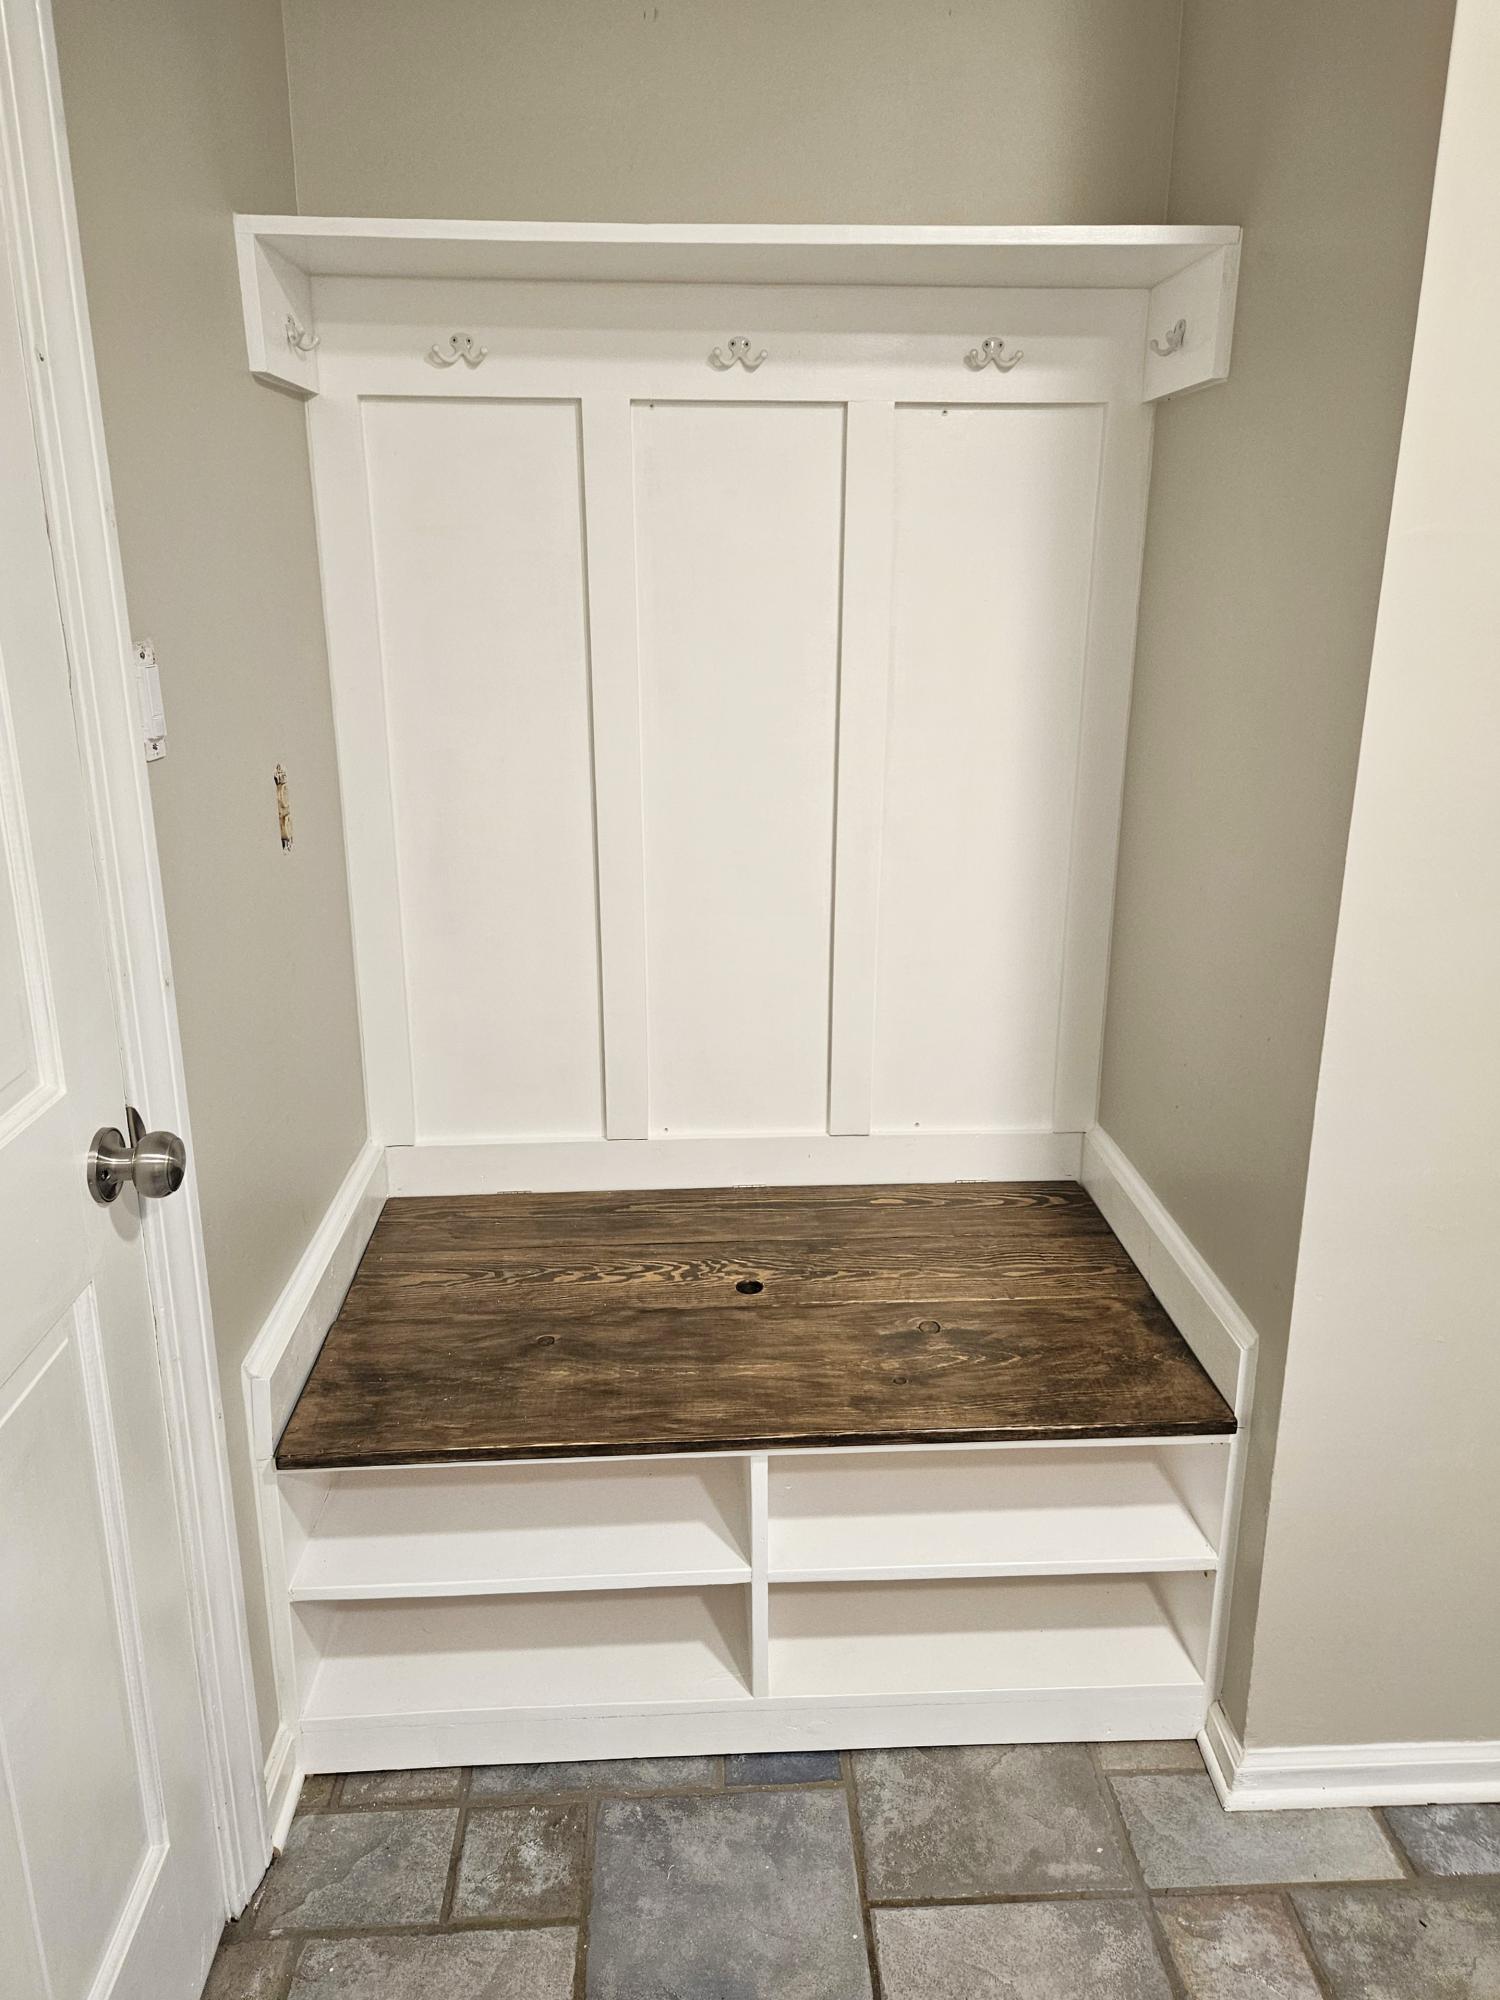
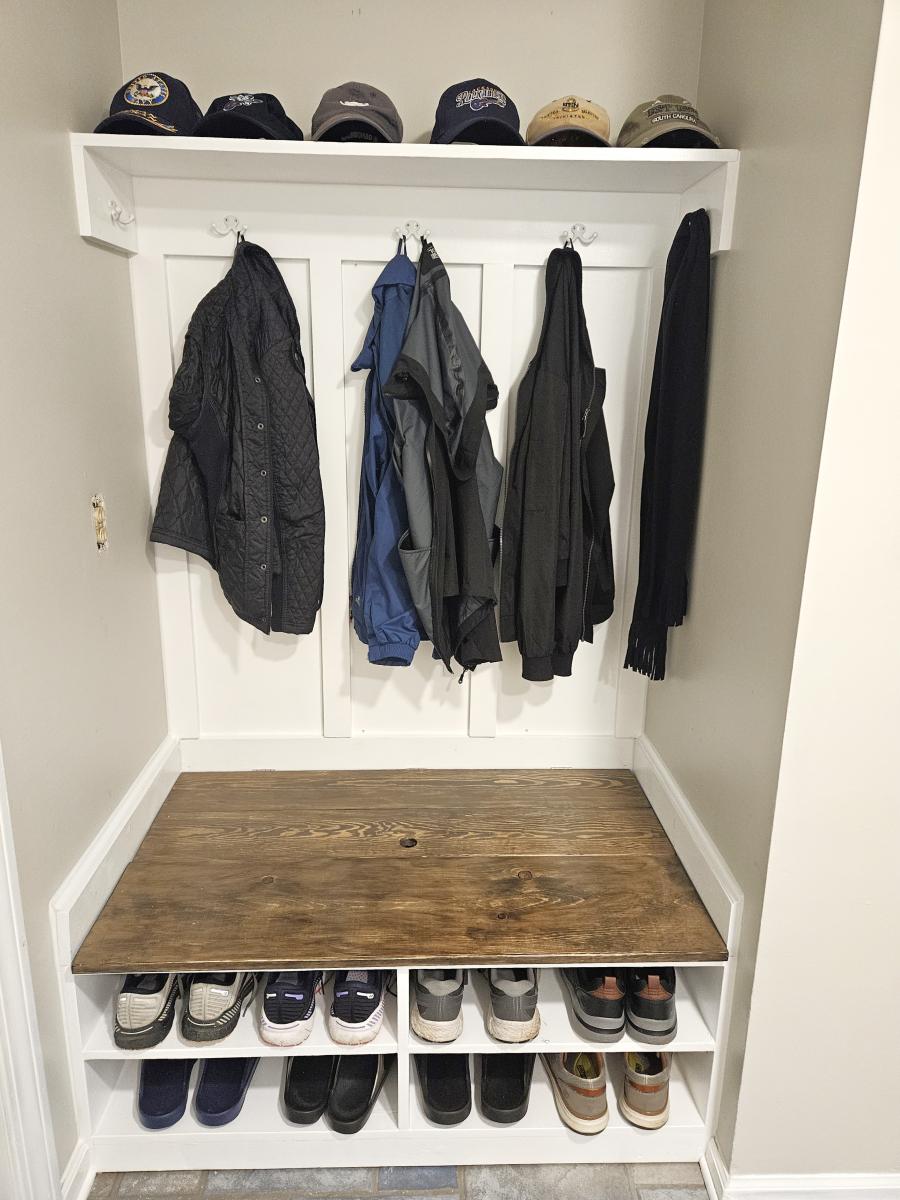
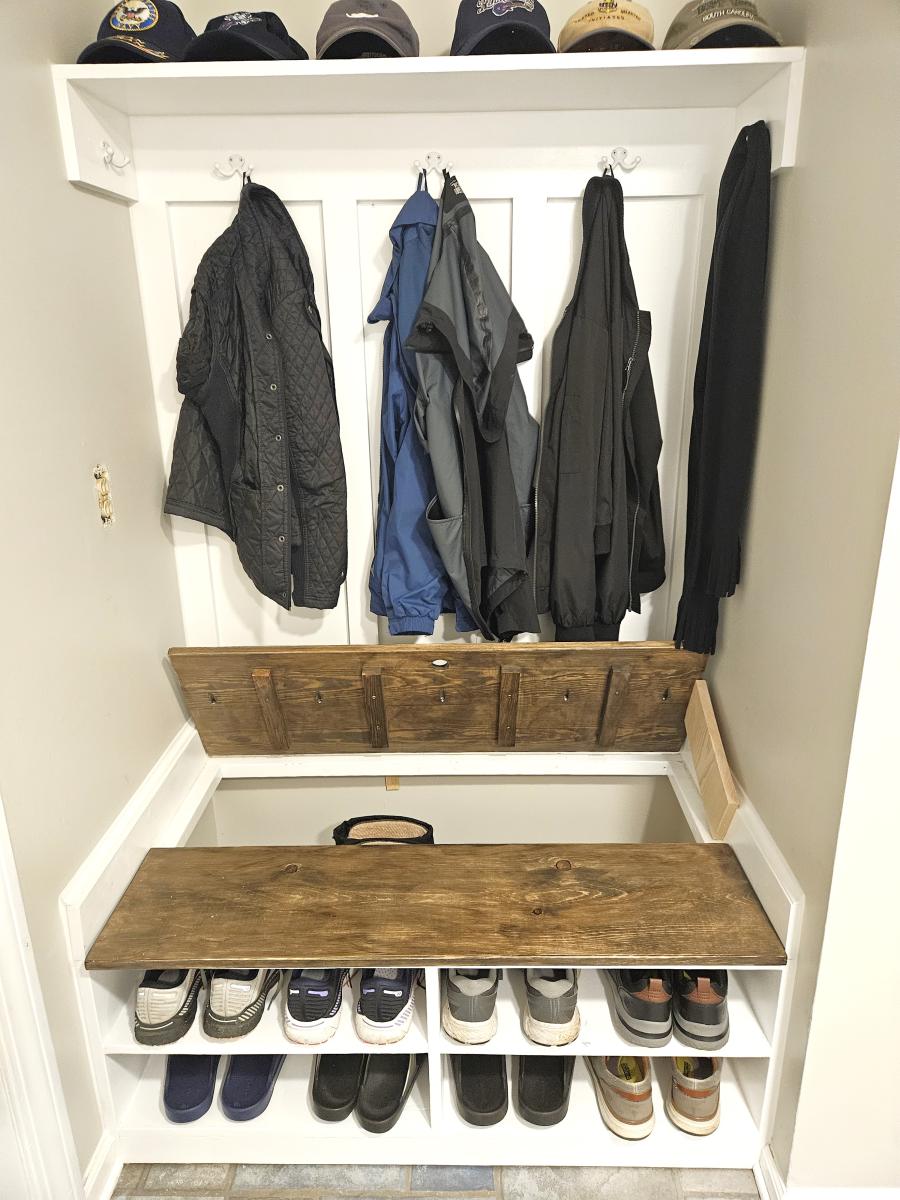
Built the drop zone bench with hidden storage in the laundry room. Modified to fit in 45 inch space where a built-in desk was. A fun and easy build. Thanks Ana for the great ideas and plans.
Don Toy
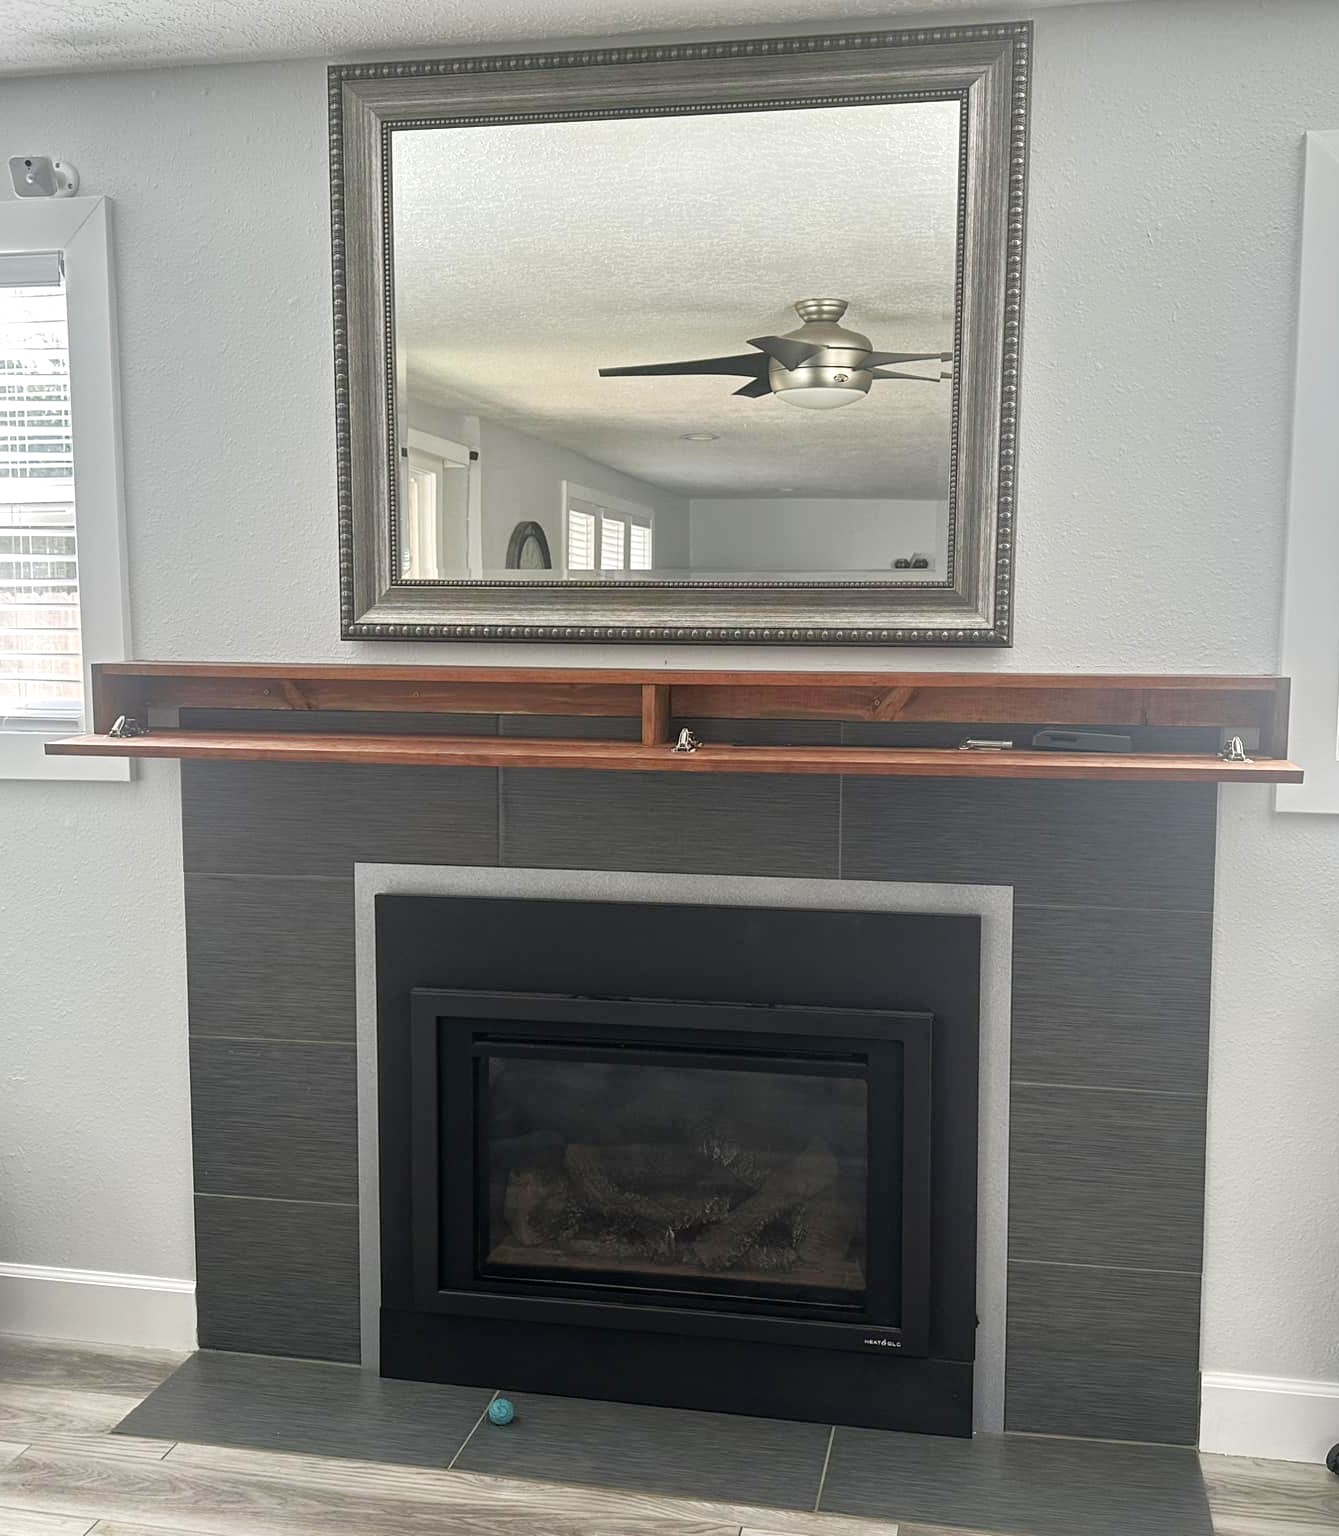
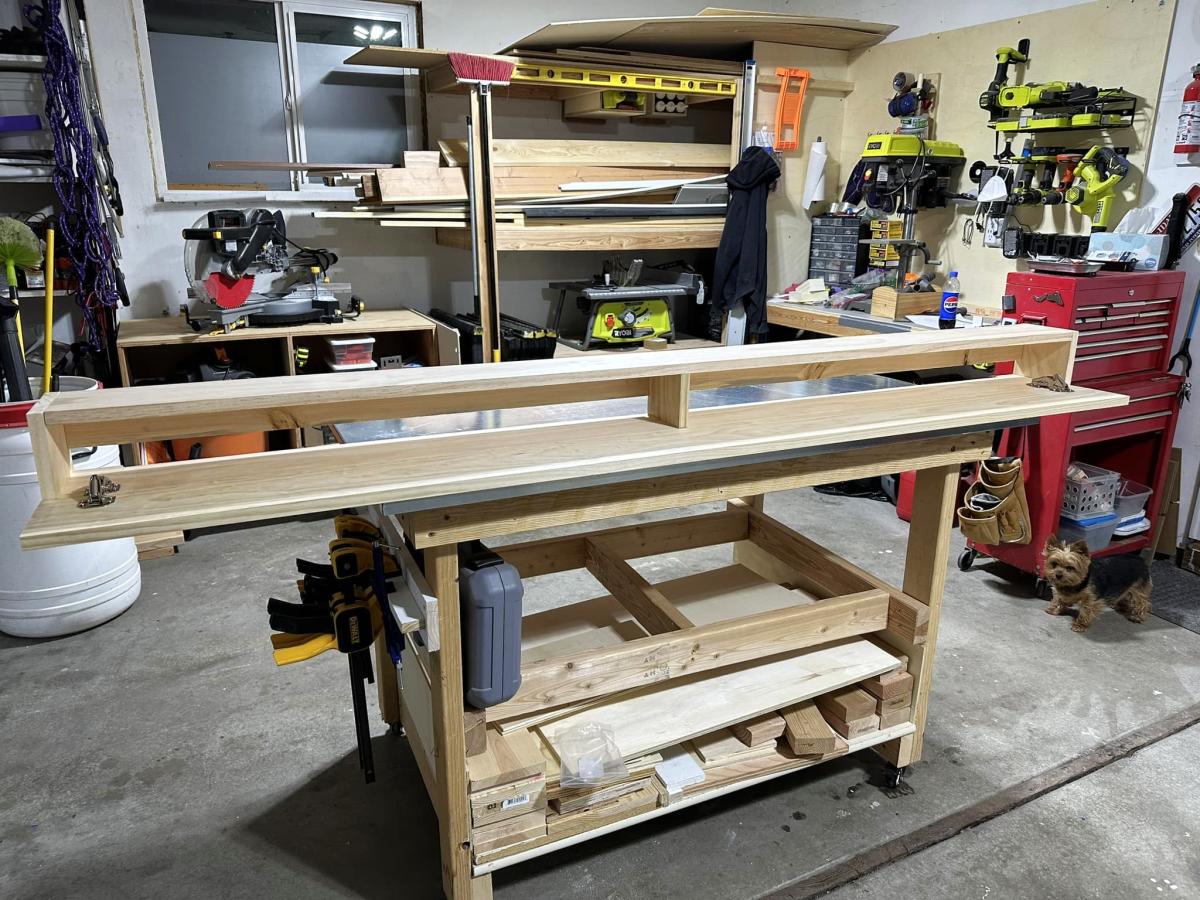
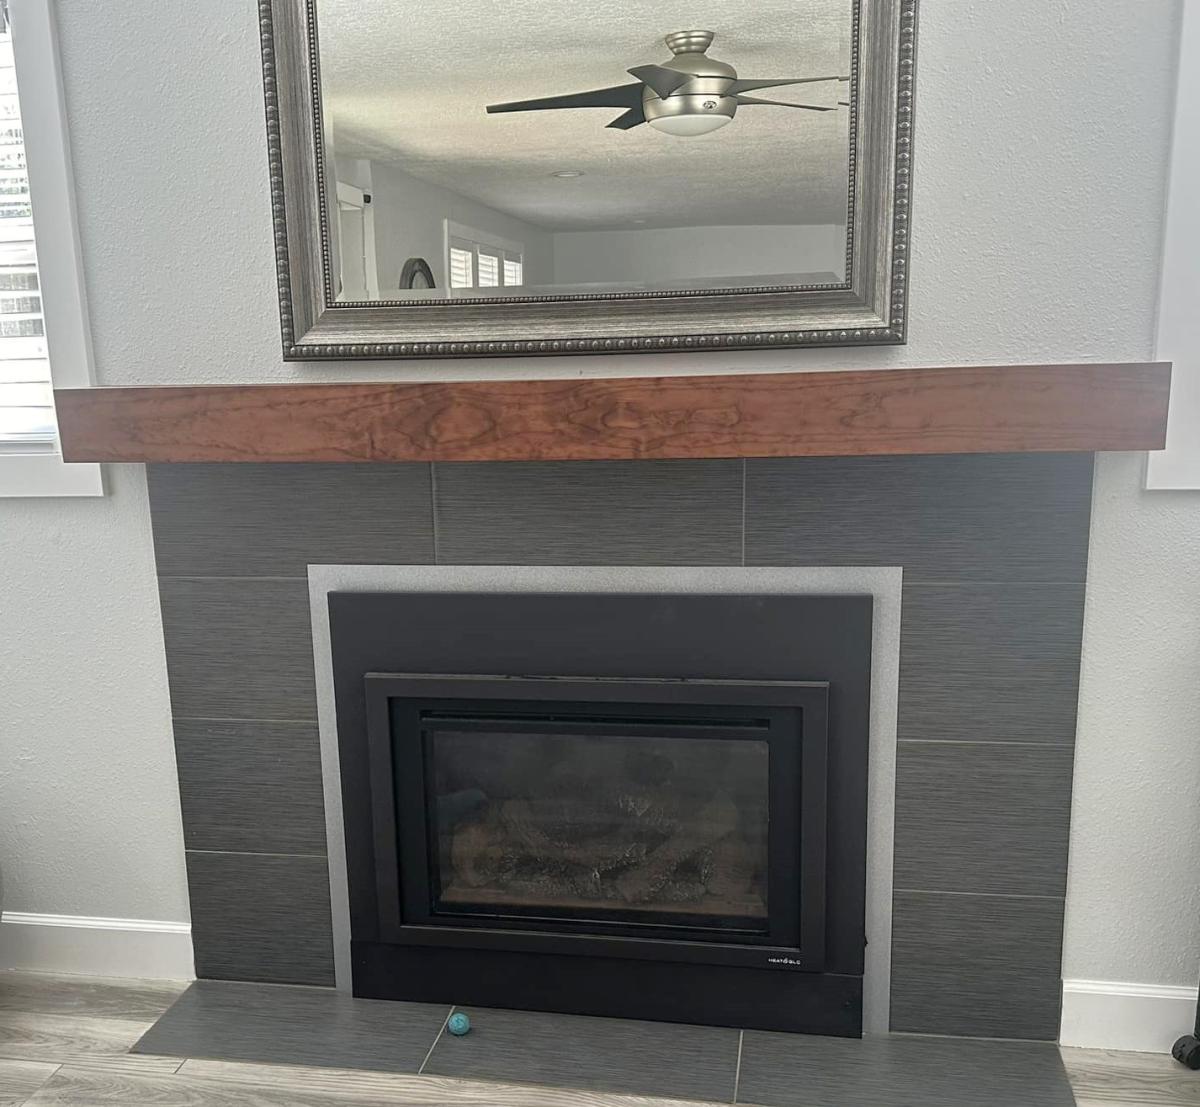
I had been wanting to build a mantle for quite a while but couldn't decide what I wanted it to look like, then I saw the wood mantle with hidden storage plans on Ana's website. I used a steel wool\vinegar mixture as a stain, 3 coats making sure it dried completely before applying the next coat. I finished it off with a beeswax & orange oil wood polish & conditioner. So far I'm storing the remote for the fireplace, the key to the gas for the fireplace and the tool that helps remove the front of the fireplace in there. I'm not sure what else will find it's way in there. I'm very happy with how it turned out.
Julie V.

I built a big kids see saw using 2x6's all around with a 2x8 seat. The center post is 30"h.


This project was fun! My kids help me! We still got to stain the table legs. Thank you Ana for everything! We got are cushions from home Depot $25 each 6x25x3
First project of my husband. He had no experience at all in making furniture but when he stumbled on this website he was inspired.
I wanted to contribute so I volunteered to stain both the table and benches.
Modification: used 2x4 for the legs of the table
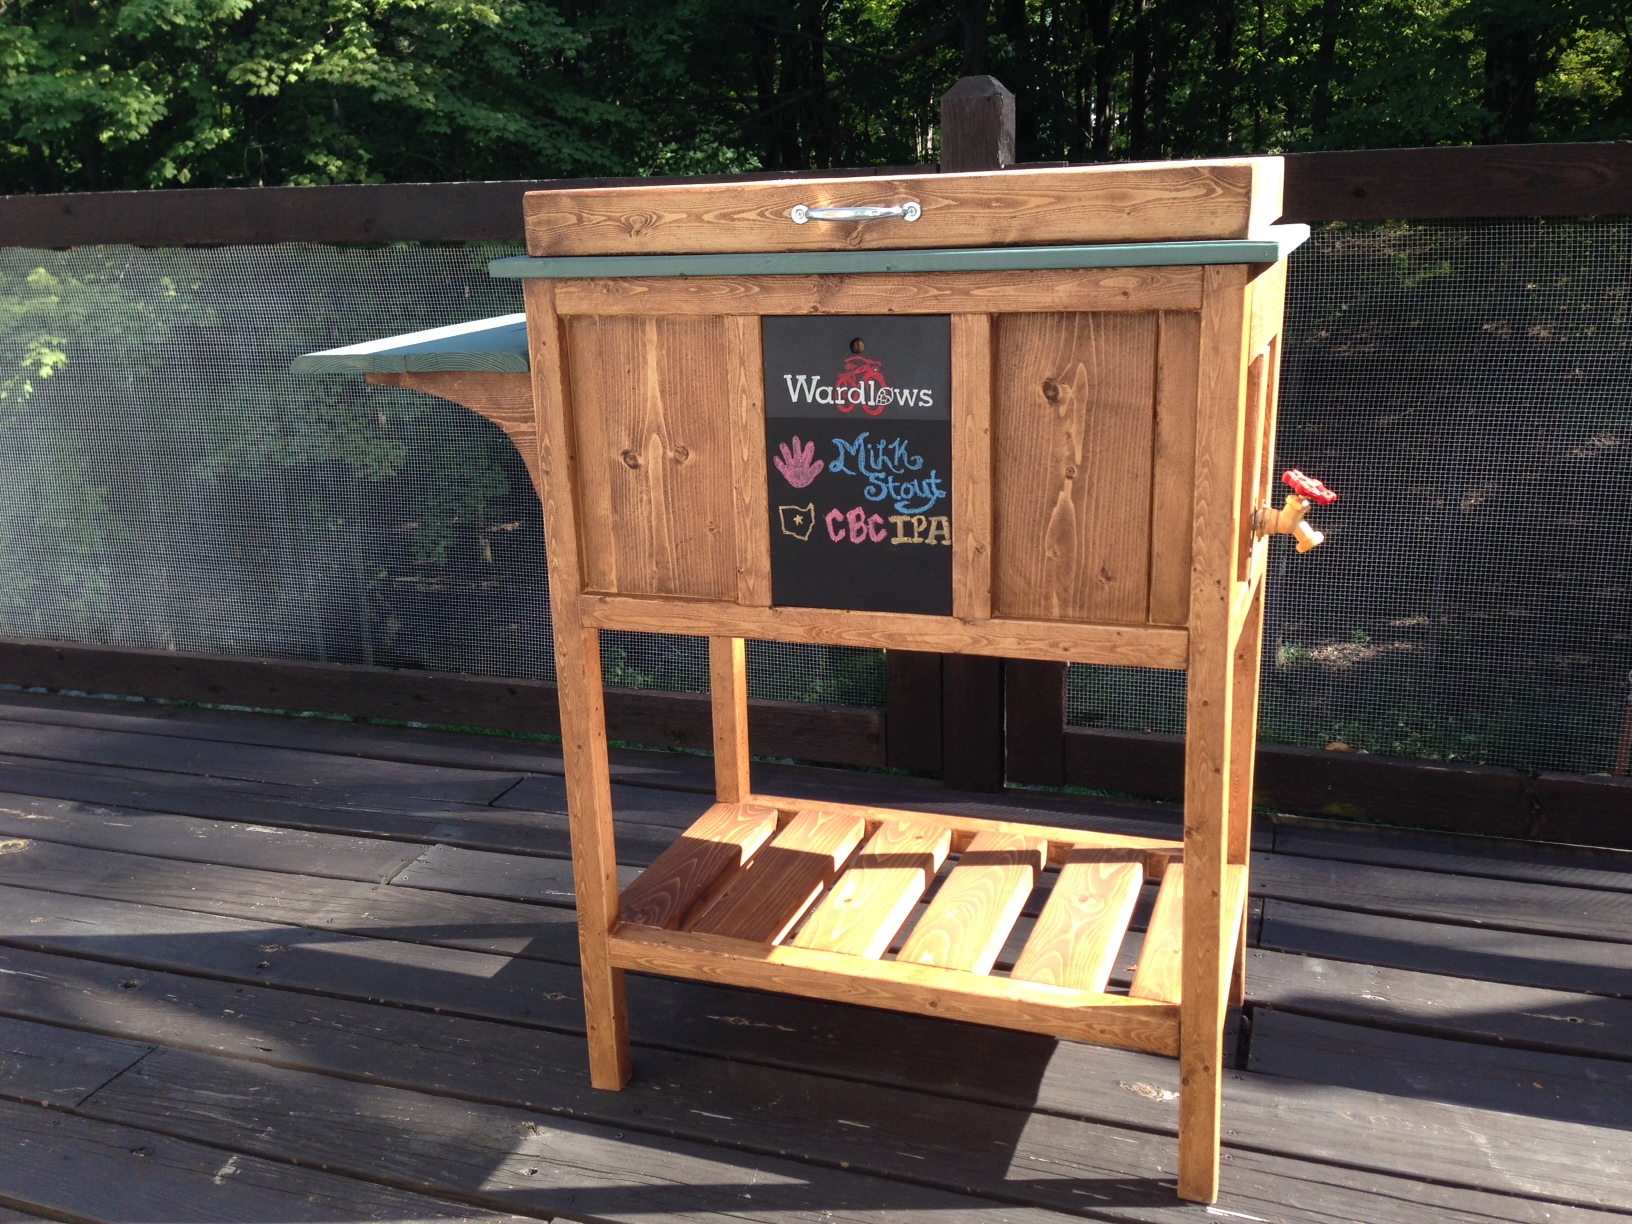
We built this as a birthday gift for family members and boy were they excited. We, though, were not excited to let it go. So happy with how it turned out. The plans are good for reference but make sure to make your own measurements when using milled lumber from a big box store. Some of the the changes we had to make on the fly were to the back and front panels having to use a different combination of board sizes to fill it in without massive gaps. Its recommended that you lay them out first before attaching them to the frames. Also the measurements on the cooler lid were smaller by 1/4" to 1/2" of what's listed in order to get a snug fit. The shelf on ours is two 1x6's cut to the width of the whole project (around 16.5") and then the shelf brackets were also 1x6's cut to a length of 10". Brackets are mounted inside the legs using wood glue and three 2.5" screws through the backside/inside of the cooler box to hide (obviously done before the cooler was inserted). For drainage we attached a 2" piece of 1/2" inside diameter clear tubing that was fed/jammed through the cooler drain and pulled through the other side and then a 1/2" push on adapter, threaded on the other end screwed unto a 1/2" faucet head. Drilled a 3/4" hole about 2.5" (center mass) from the 2x4 cooler base through the middle piece on the side. We placed the cooler in first and used a pair of pliers to grab the clear tube and line it up with the hole and then pushed a long screw driver through the tube from inside the cooler in order to guide the faucet head/adapter combo into the tube and stiffening the tube so it didn't collapse when pushing it on. We couldn't decide what do to with the center display piece and then remembered we had a can of chalkboard spray paint left over from another project. We spray painted the whole menu board and then painted the "logo" at the top before clear-coating it with a protective enamel. Its a snug fit so the pressure holds it in place but you could also use velcro strips on the back if that tickles your fancy. We took the snug fit route that way if they didn't want the menu board in. A 1/2' hole was drilled towards the top so they can use a finger to pull the board out.

After a lot of cutting, screwing, chiseling and sanding... oh and a lick of paint! My new little Saddle Seat Stools are complete. Time will only tell whether they will hold up to the abuse the boys give them especially Brodie! These new stools only cost me $48 to make the pair and I got all the timber from Bunnings
This project was a challenge because of the instructions regarding the "recommended" pocket holes for the aprons. I soon realized you can't put a 3/4 pocket hole on a 45 degree mitred edge, and when I adjusted the depth of the pocket hole, I could not for the life of me screw it into the legs without the apron getting sucked past the edge of the legs. I ended up putting the pocket screws on the outside which I know is a major faux pas for wood workers, but because I used Kreg wood plugs and painted it, you can't see the little ovals where the screws are.
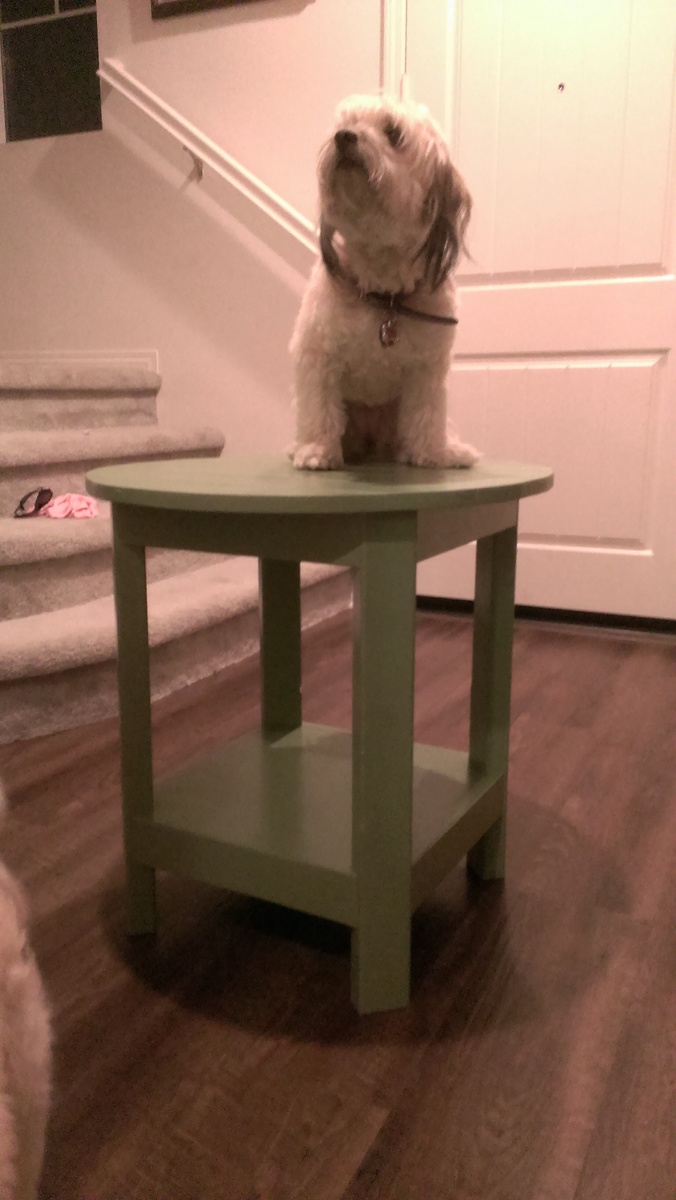
The photos are just for scale. The little girl is a big 2 1/2 year old, and the dog is not a St. Bernard.
We love the table and it works great for baby brother's room.
Thank you Ana for another great project!
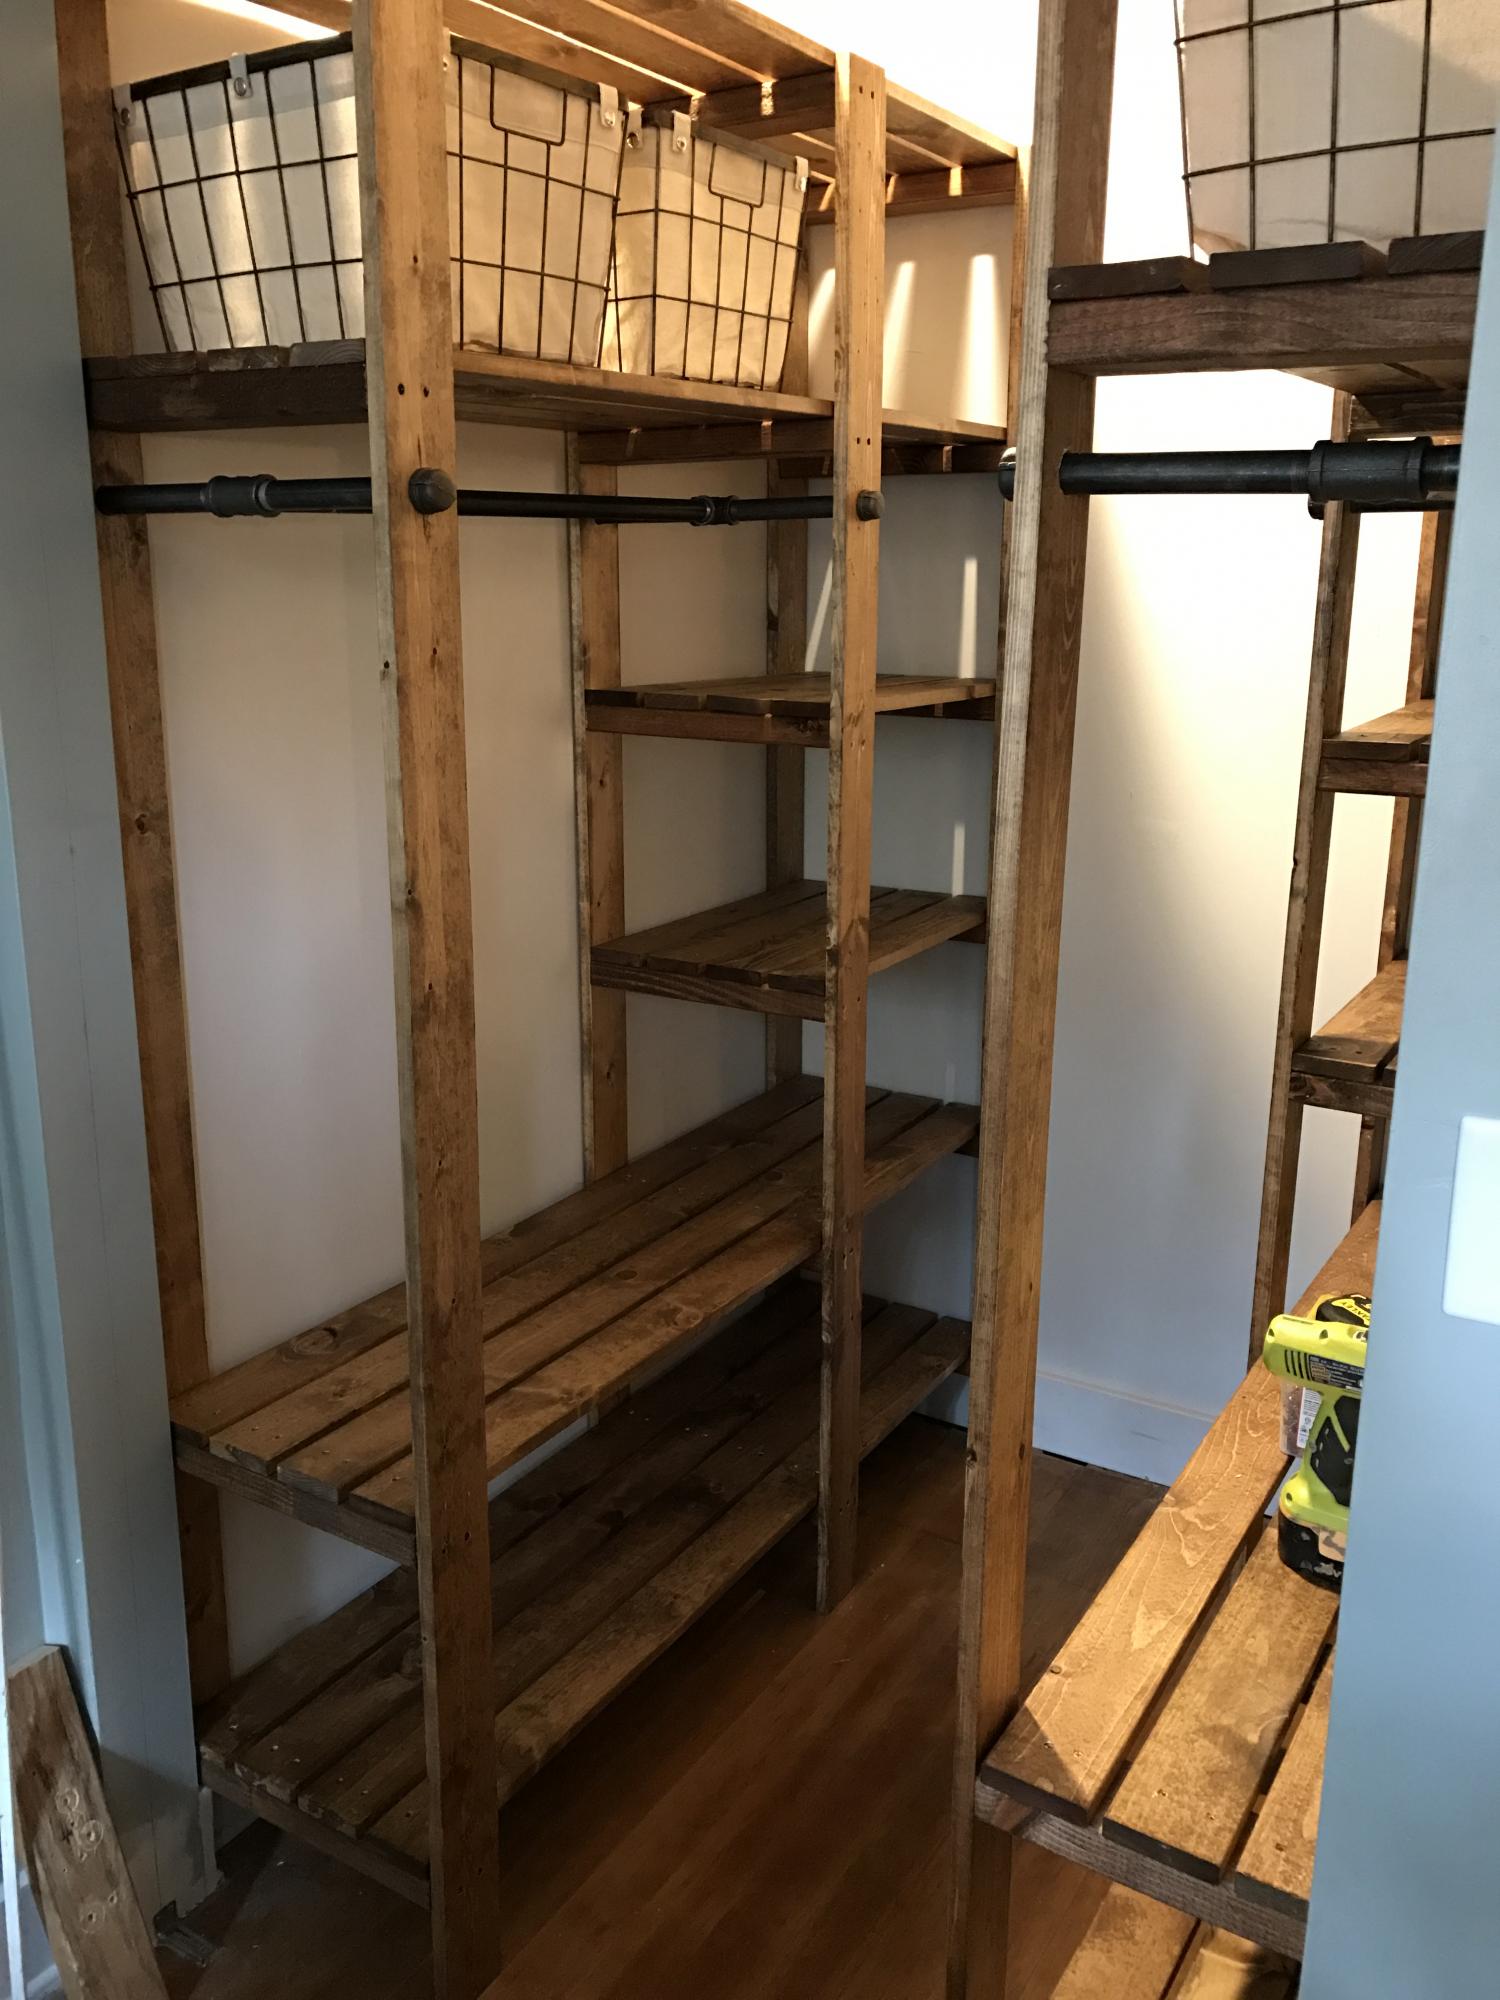
We made smaller ones for each side of the closet. Love it!
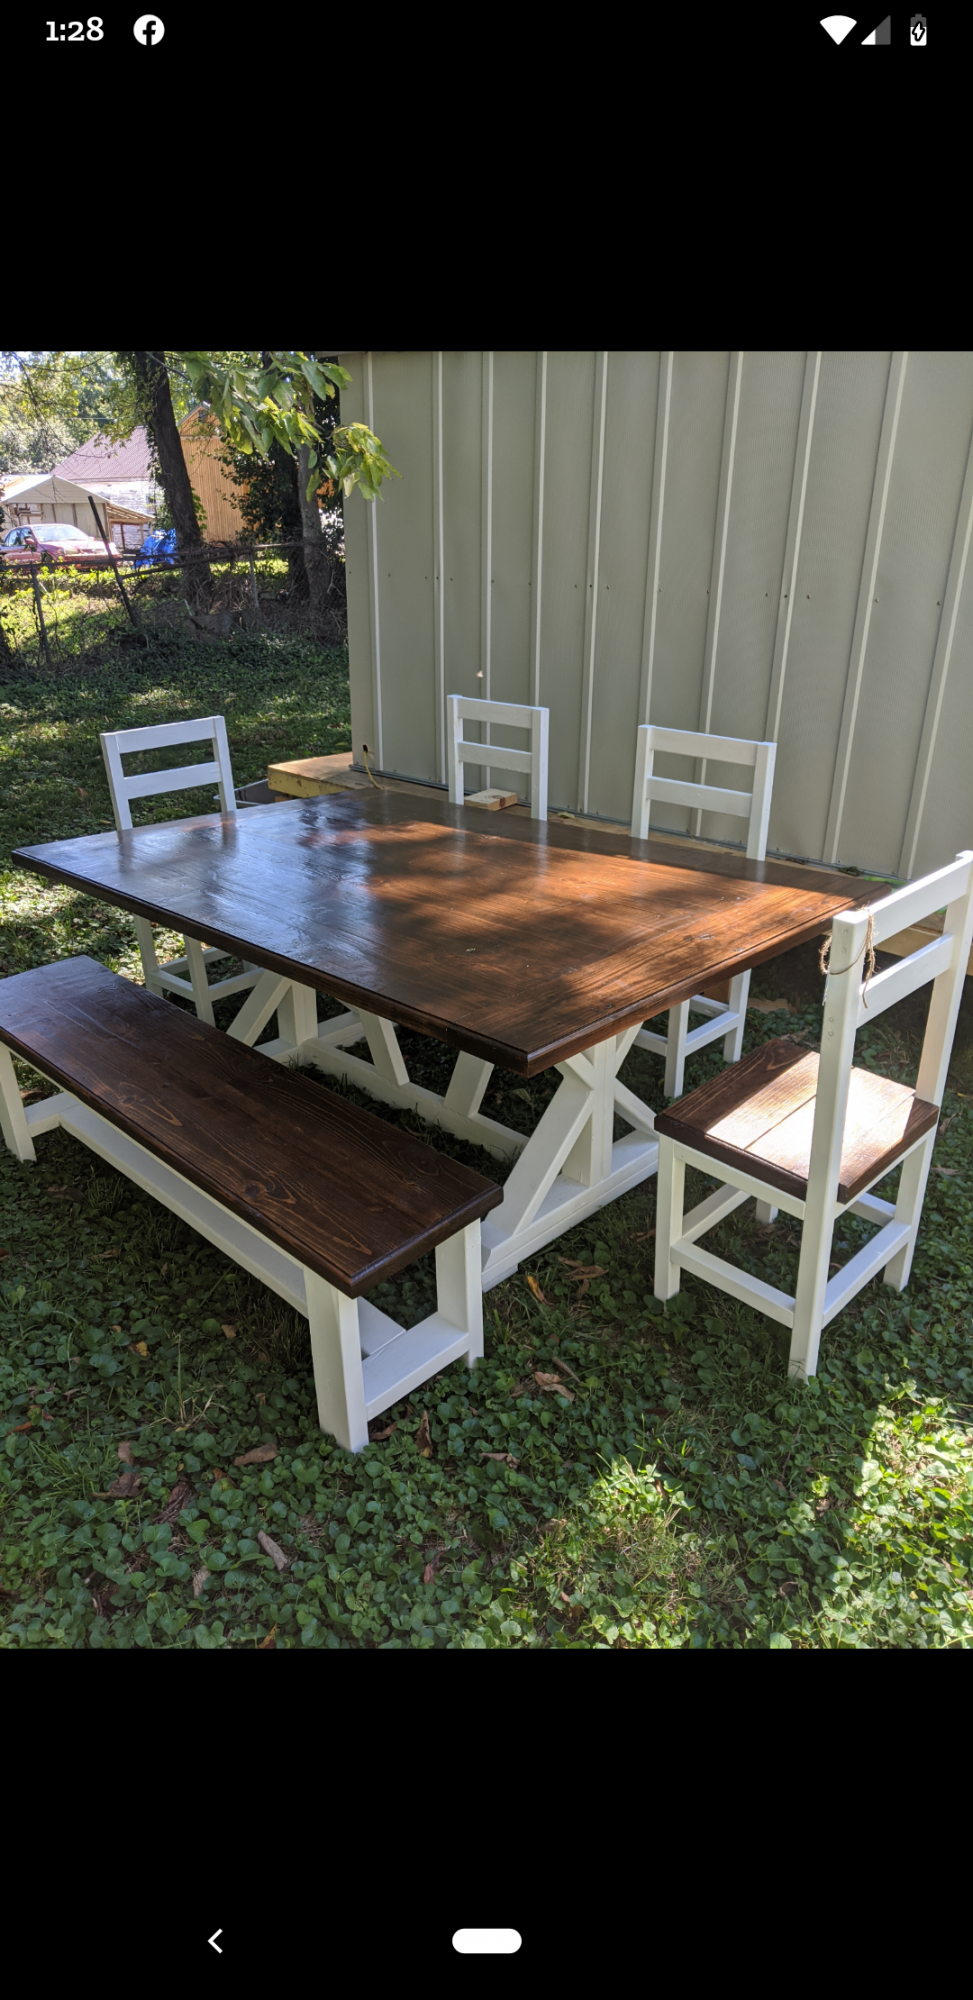
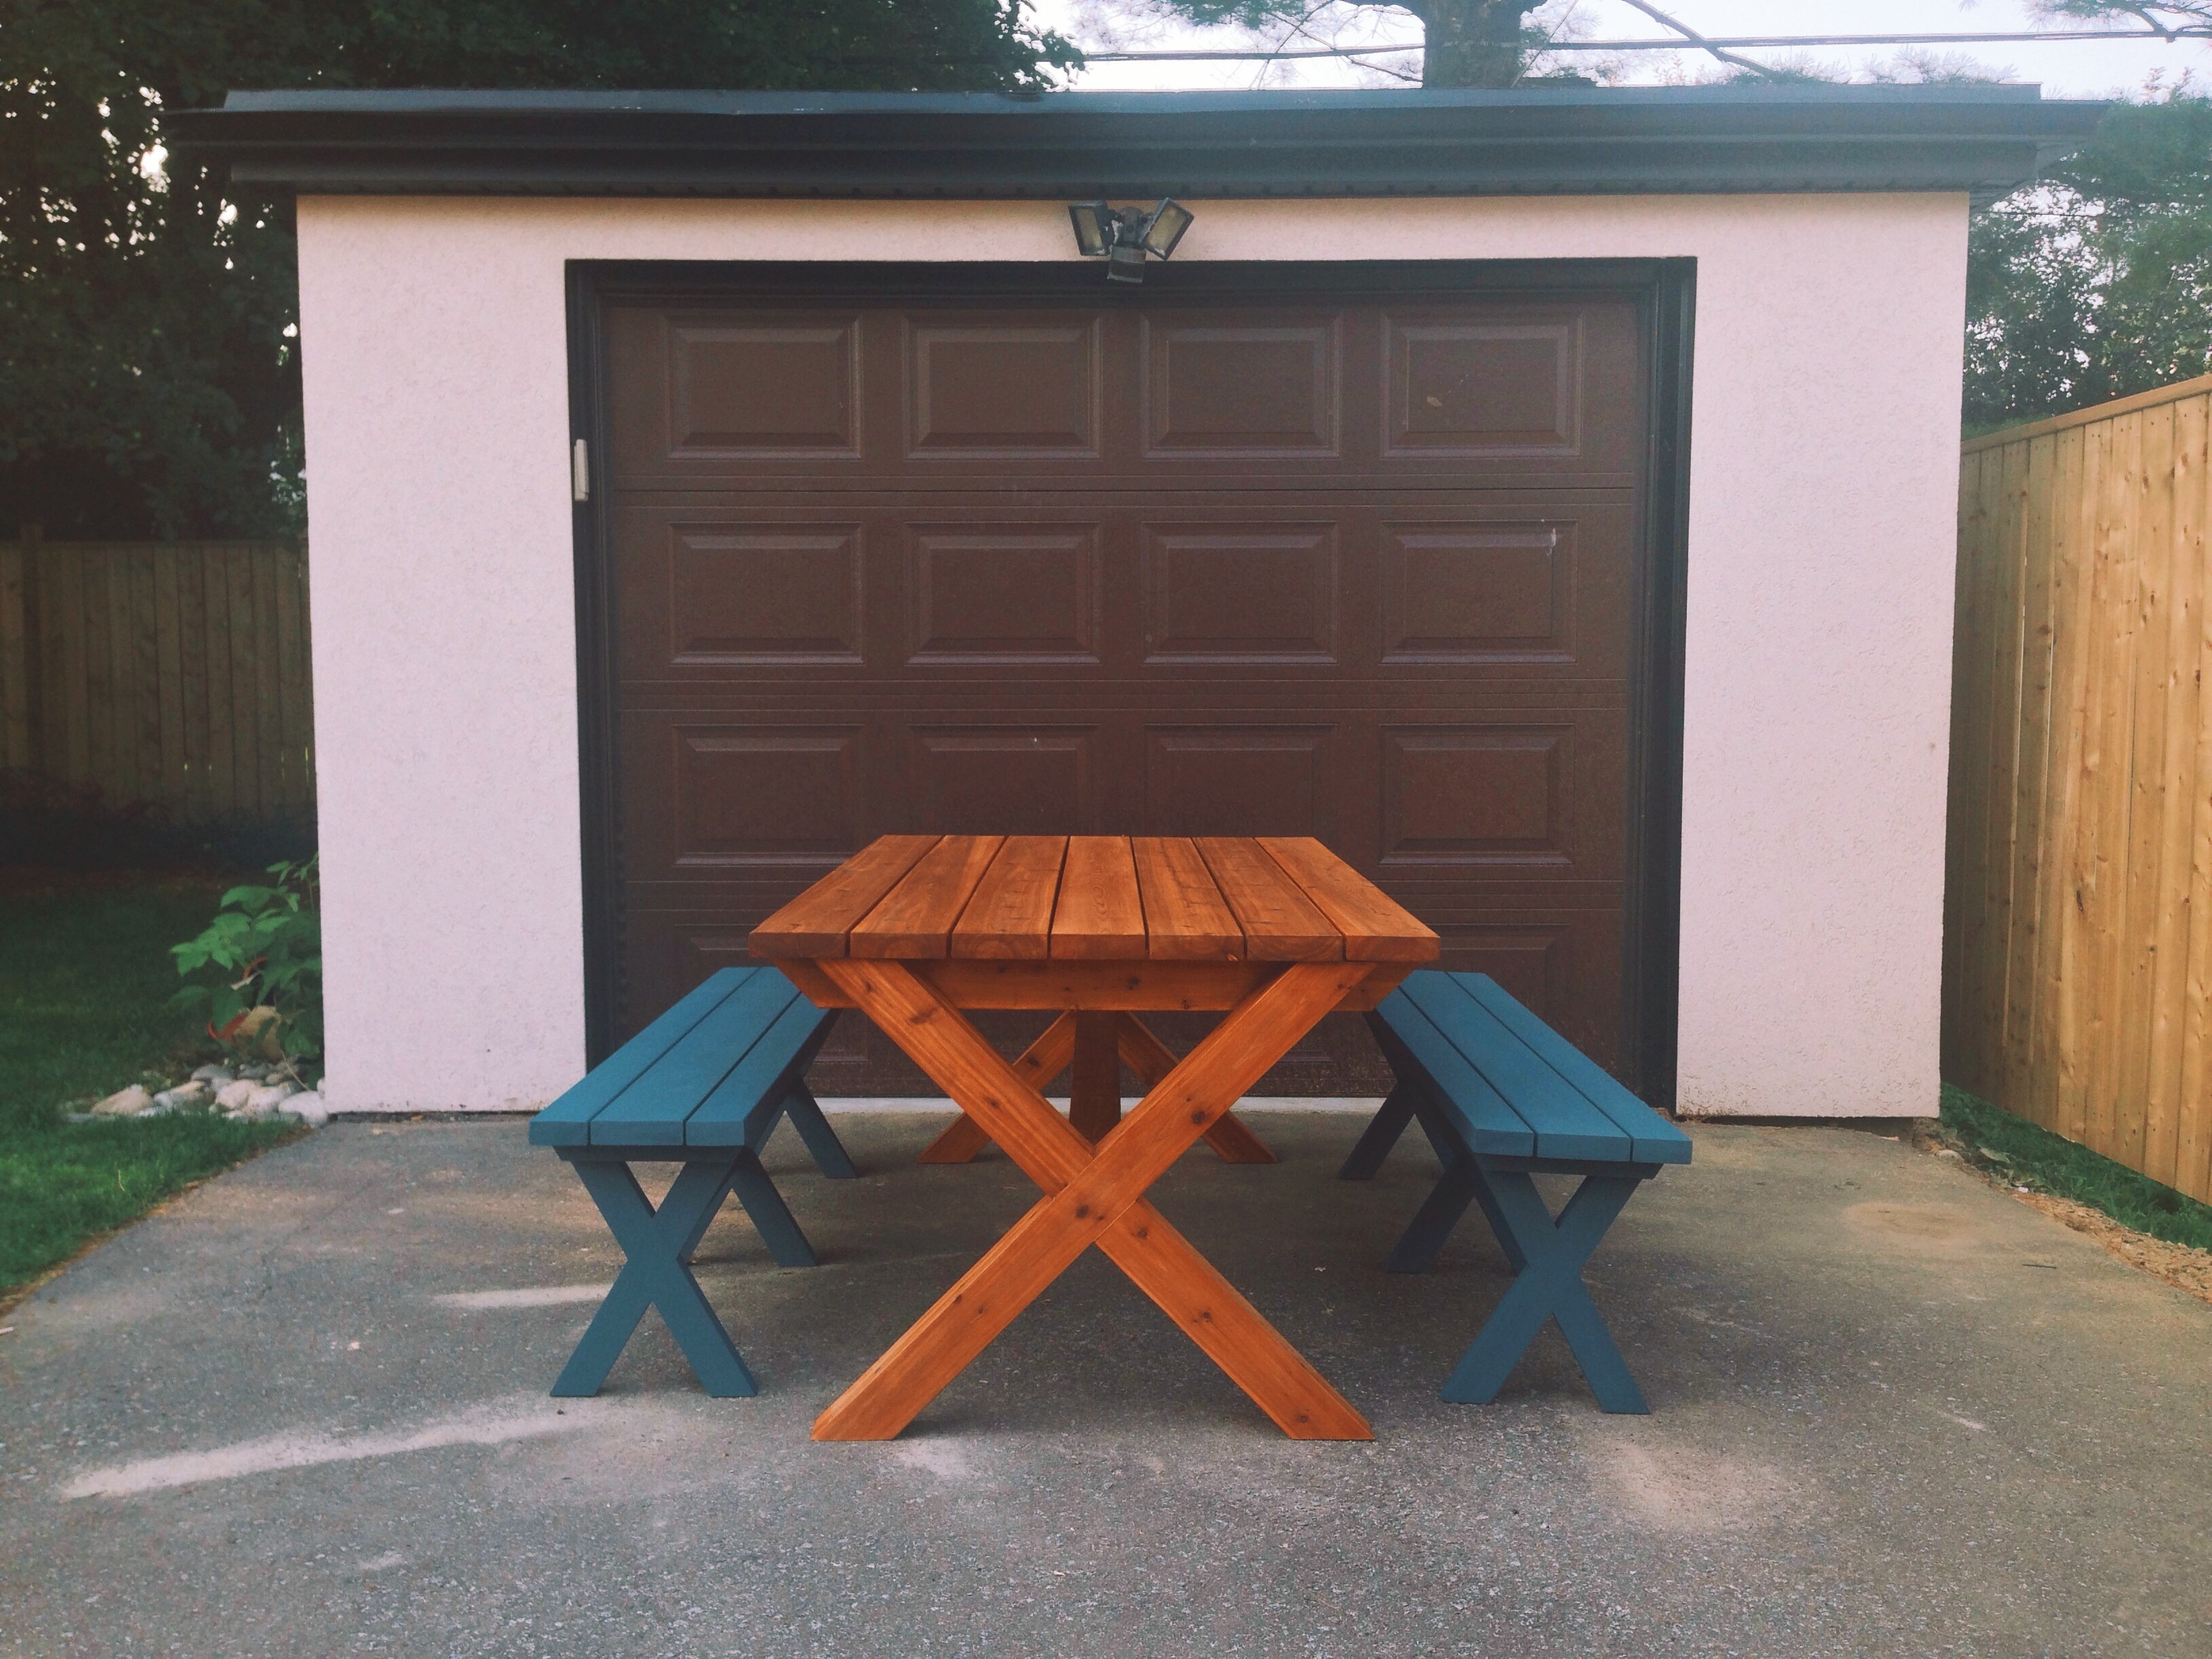
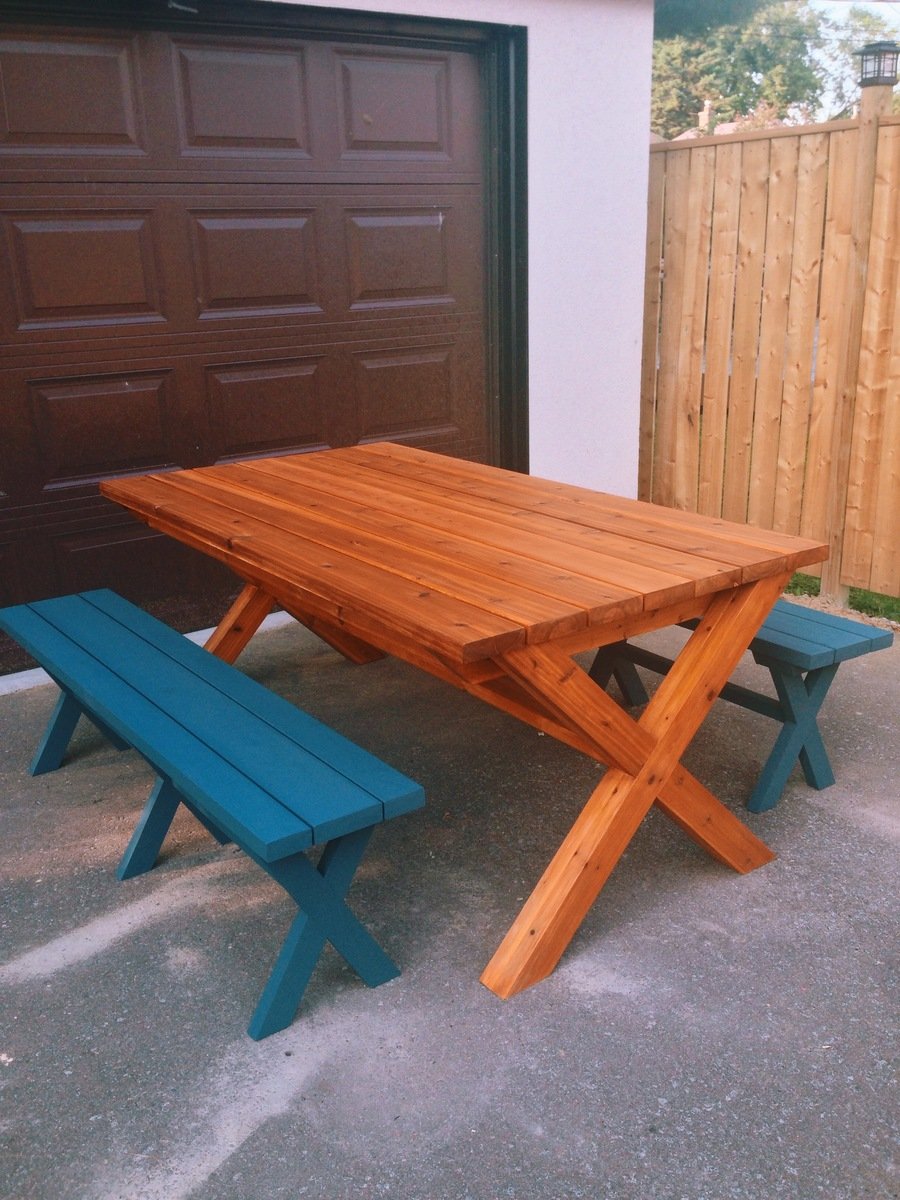
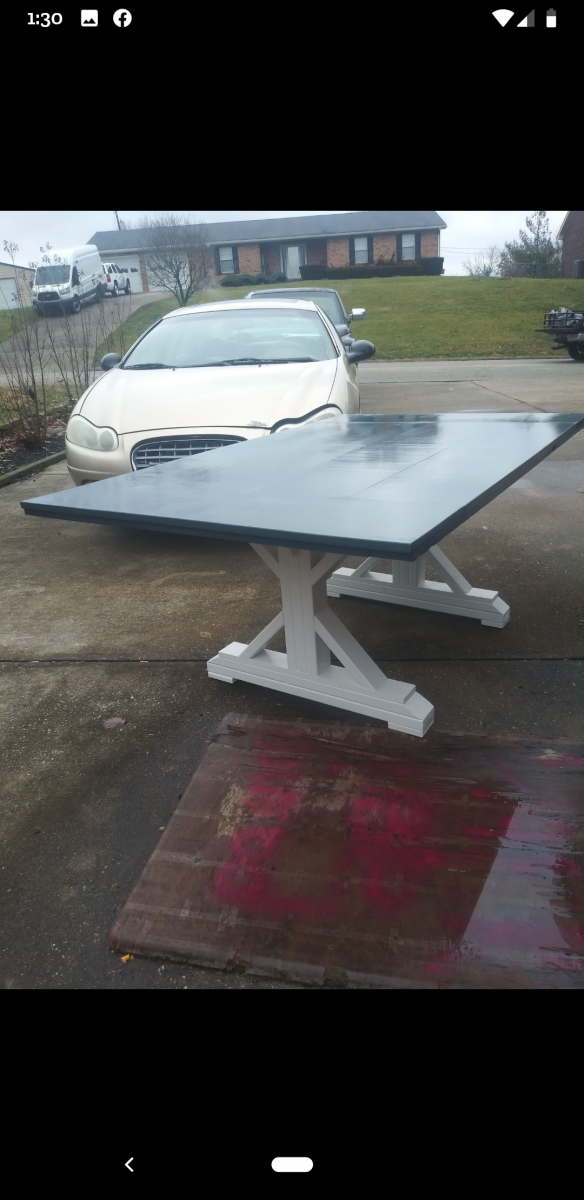
Just a few of our Fancy X farmhouse tables. Along the way, we where able to put our own spin on the original plans by Ana White.
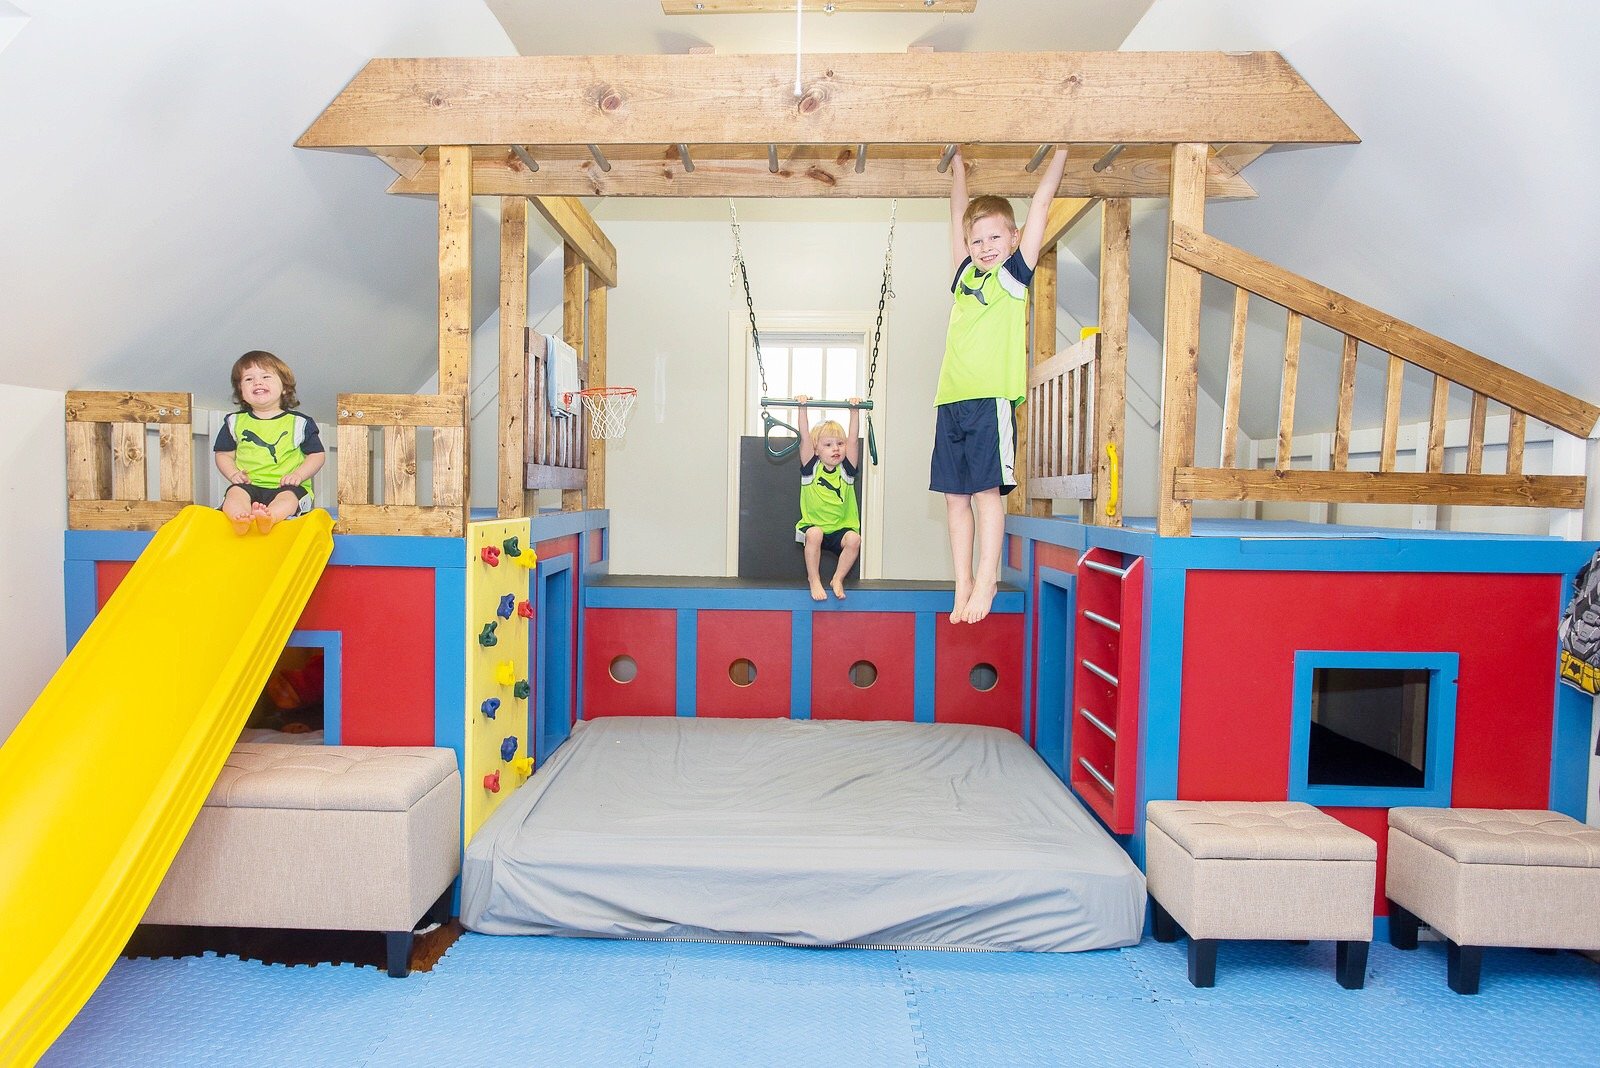
This playroom set was inspired by the plans you posted. I was forced to make some significant modifications due to the fact that our bonus/playroom has angled ceilings. We have a rock climbing wall, ladder, crawl tunnel with windows, trapeze bar, monkey bars, miniature baskeball goal and a slide. My boys are 6, 3 and 19 months and they love it! Thanks for the inspiration.
Jim and Caroline Sparrow
Sun, 01/05/2020 - 10:03
Hi -
Would you be able to share your modified plans with me , please ?
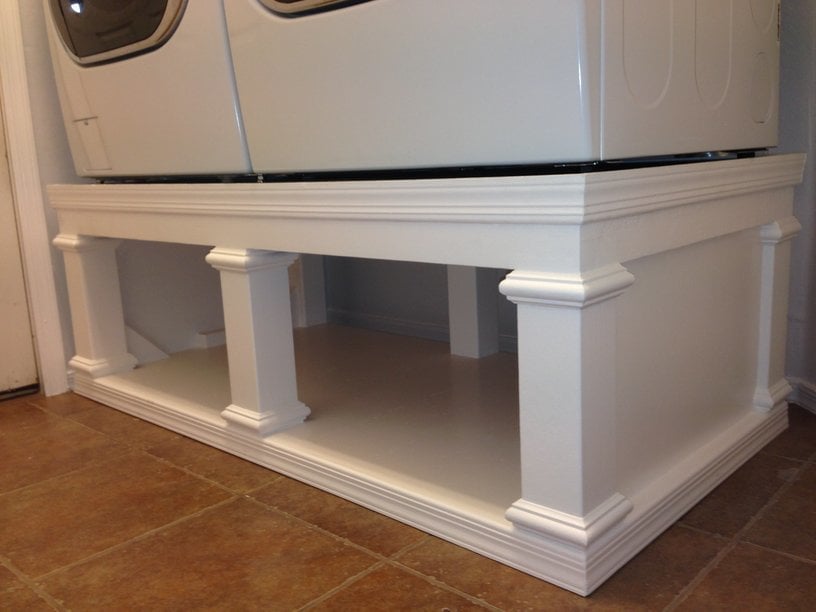
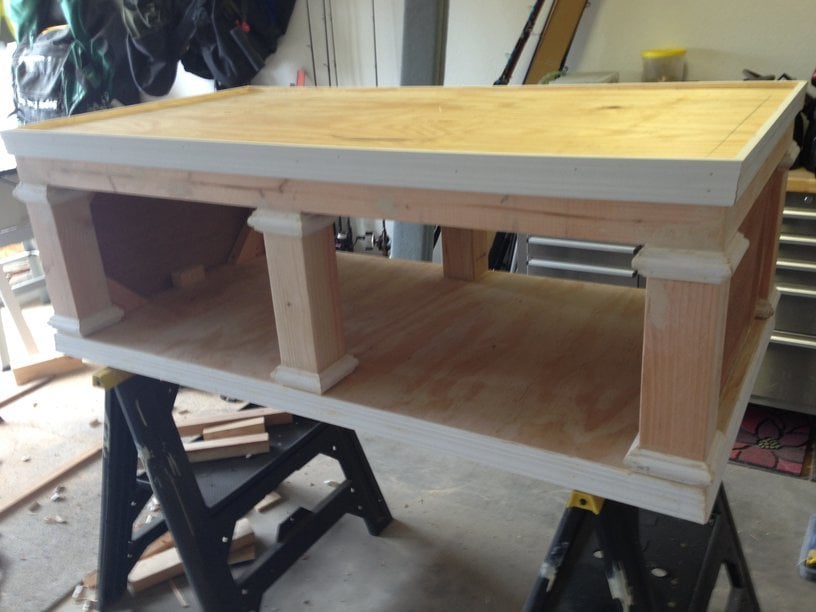
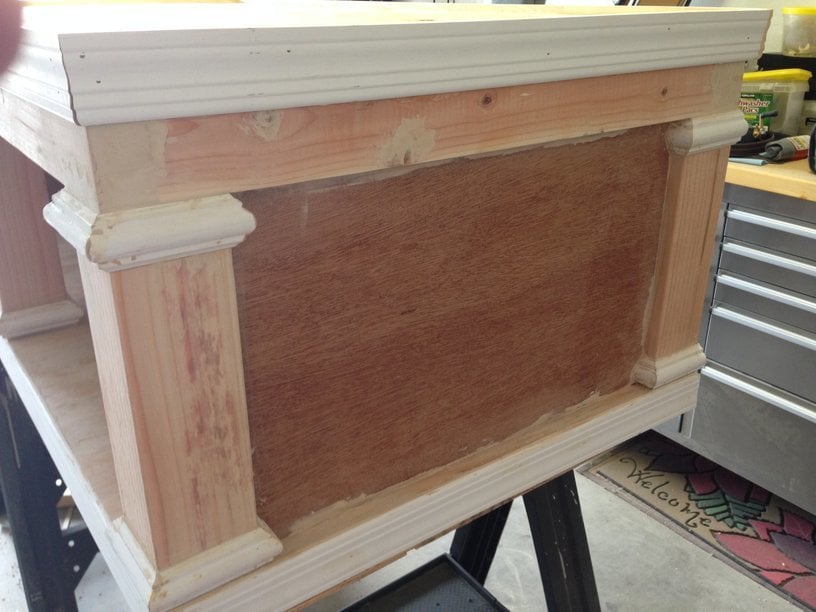
I loved this design. I couldn't believe that they wanted to charge me almost $600 for the pedestals for the washer/dryer set that I bought on black friday, so I decided to give this project a go. I basically used the same construction plans from Sausha's project, but I dressed mine up a bit. First, I chose a bit larger trim for the tops and bottoms of the posts. Then, I bought some 2" baseboards and did the top and bottom with baseboards. On the bottom, I had to use my tablesaw to trim off about 1/2" because I used 1x1" boards on the bottom so that I could have more space for baskets. Then, on the top, I inverted the baseboard and allowed it to overlap a bit so that if it were to vibrate, the washer/dryer could not fall off the edge. I also added some fabric on the top (stuff that I use to cover the bunk boards on my boat trailer...kind of like a very thick and durable felt material) to cut down on vibration and also keep the units in place. Finally, I added sides by using wedge trusses on the inside of my side posts and then I put a 1/8" piece of plywood over top and nailed/glued it to the trusses.
It turned out great. Thanks for the plans Sausha!

In reply to Nice Detail by earthbybike
Mon, 12/08/2014 - 11:42
Thanks. Yeah, I thought that it did really dress things up. I really like the way it turned out.
Mon, 12/21/2015 - 17:38
Did you use sanded plywood? Did you use any veneers for the exposed 2x4's to get a smooth finish or did you paint right on it?
lastly, what is the name of the trim you put on the 4x4s? I've hard a hard time finding it. Thank you!
Mon, 12/21/2015 - 17:44
Did you plane the 2x4s? Because they look really straight.
In reply to Question... by Zlk200
Wed, 06/29/2016 - 13:59
Sorry for the super delayed response. I didn't realize this question was here. I did not plane anything. I did sand the surfaces a bit, but I didn't get too crazy. I put 3 thick coats of paint on it which made it pretty smooth. If you look very closely in person, you can still see a bit of wood grain, but it is only noticable if you really get down and look. I did use a lot of wood putty to fill all of the gaps and crevaces and then I sanded those parts pretty well.
With regard to the trim, the top literally just standard baseboard material turned upside down, and then the little trim on the tops and bottoms of the 4x4s is just another standard strip of moulding that I got from Lowes. I think they call it "Chair Rail" moulding. Its the stuff that you put down if you are doing some sort of paint separation or wainscoting.
http://www.lowes.com/pd/1-625-in-x-12-ft-Mdf-Chair-Rail/3403018
I used woodglue on all of the moulding and tacked it on with a nail gun. Then I filled all of the nail holes with wood putty and also use the putty to fill gaps where the corners came together to make that look smooth.
I hope that helps...you are probably already done with your project by now, but I figured that I would answer anyway. :)
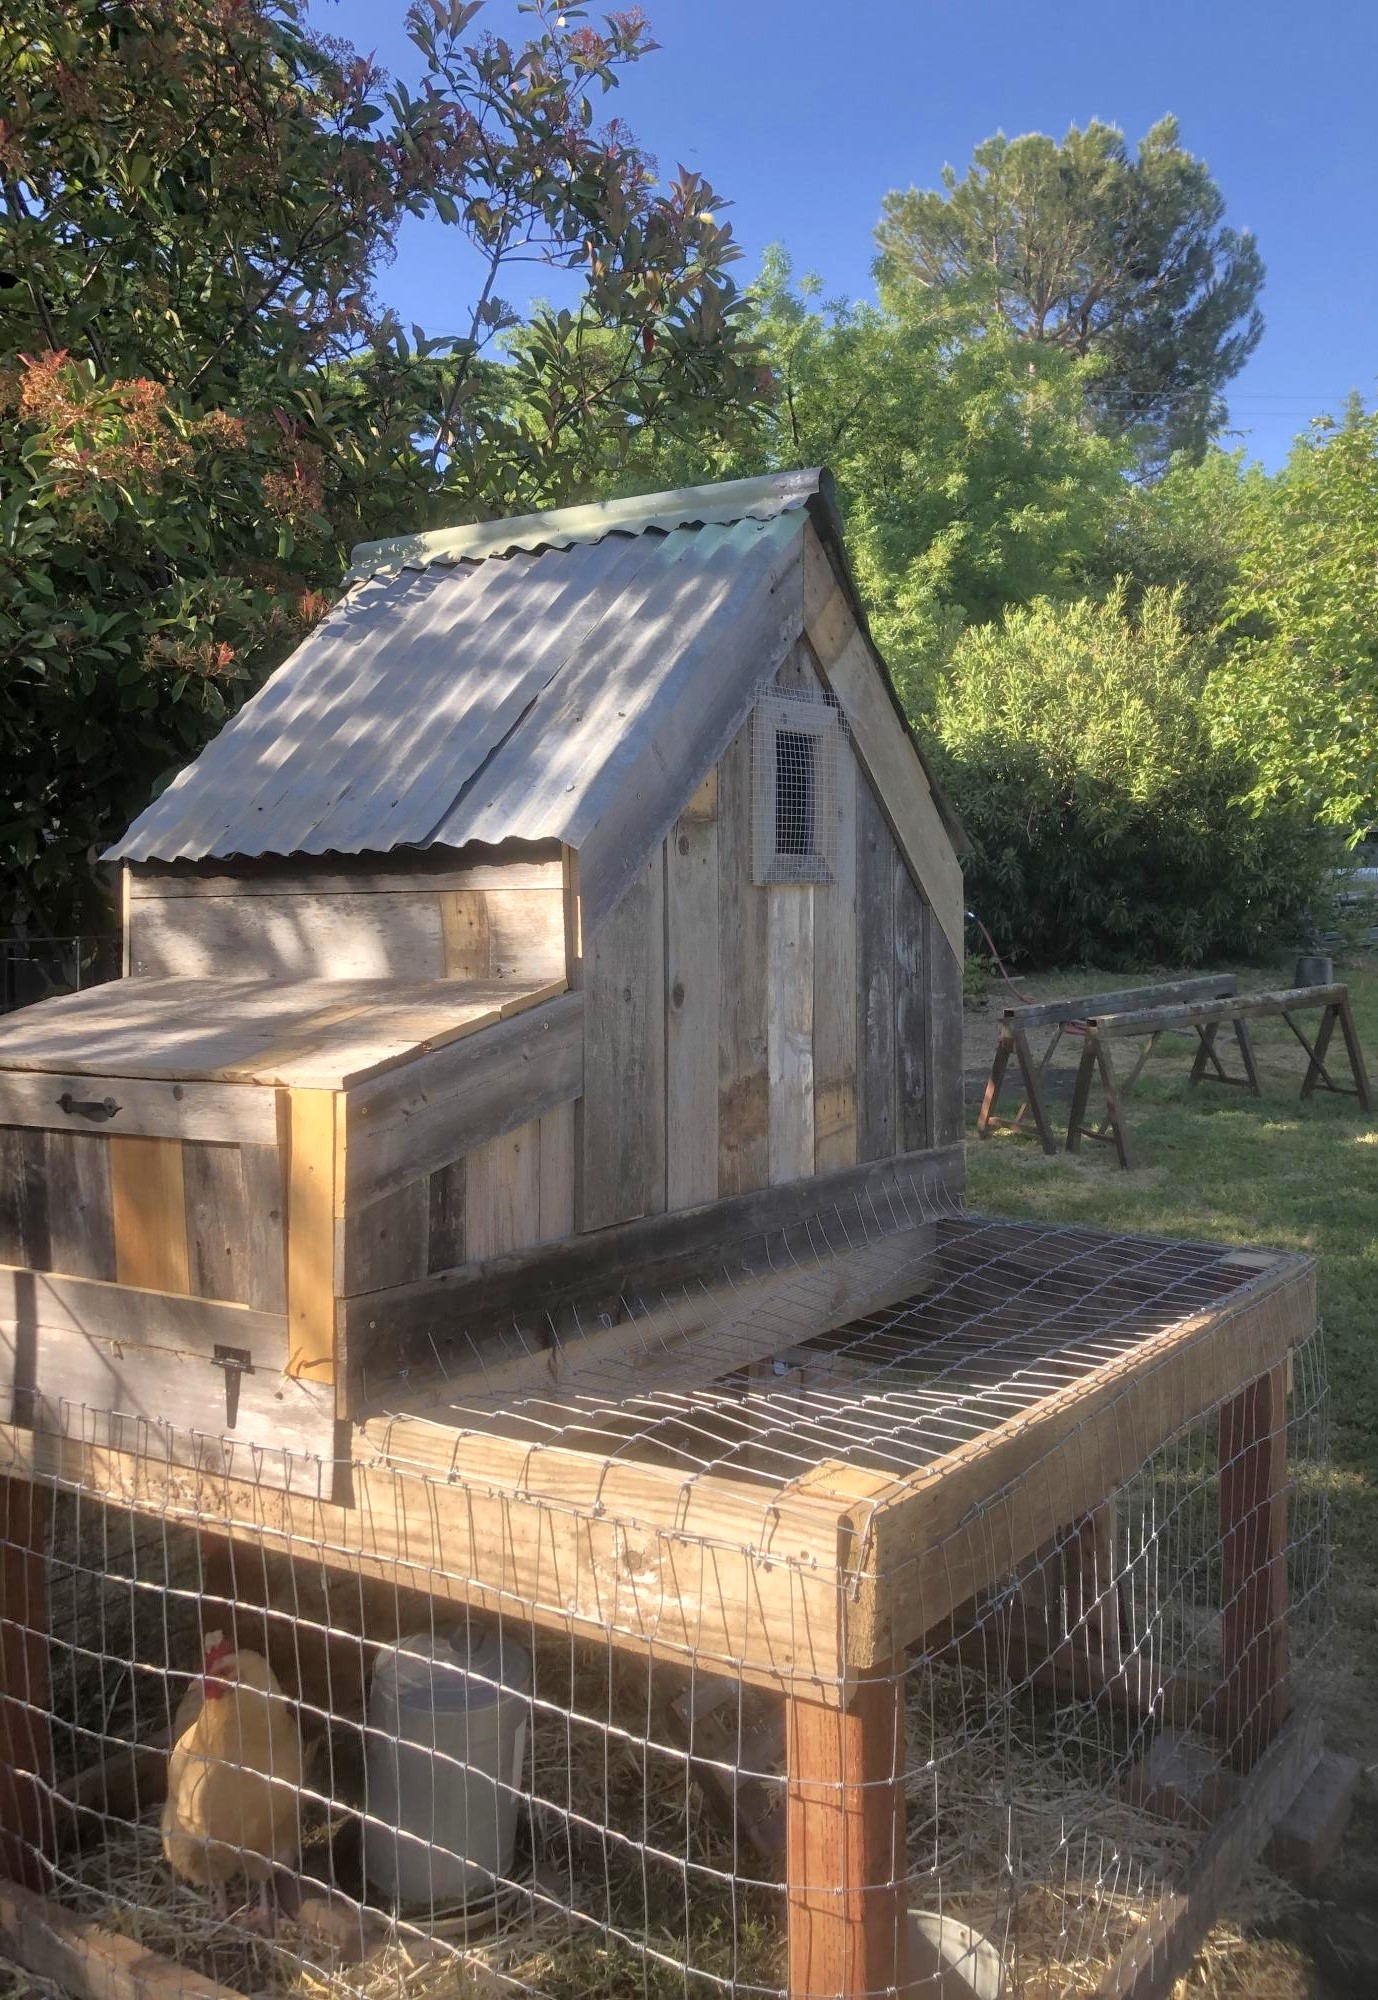
This is a coop I built from plans on the site. I modified by covering the ply with old cedar boards and used tin for a more rustic look. I opted not to add the planter just covered it with wire.
Love your plans! So easy to follow!
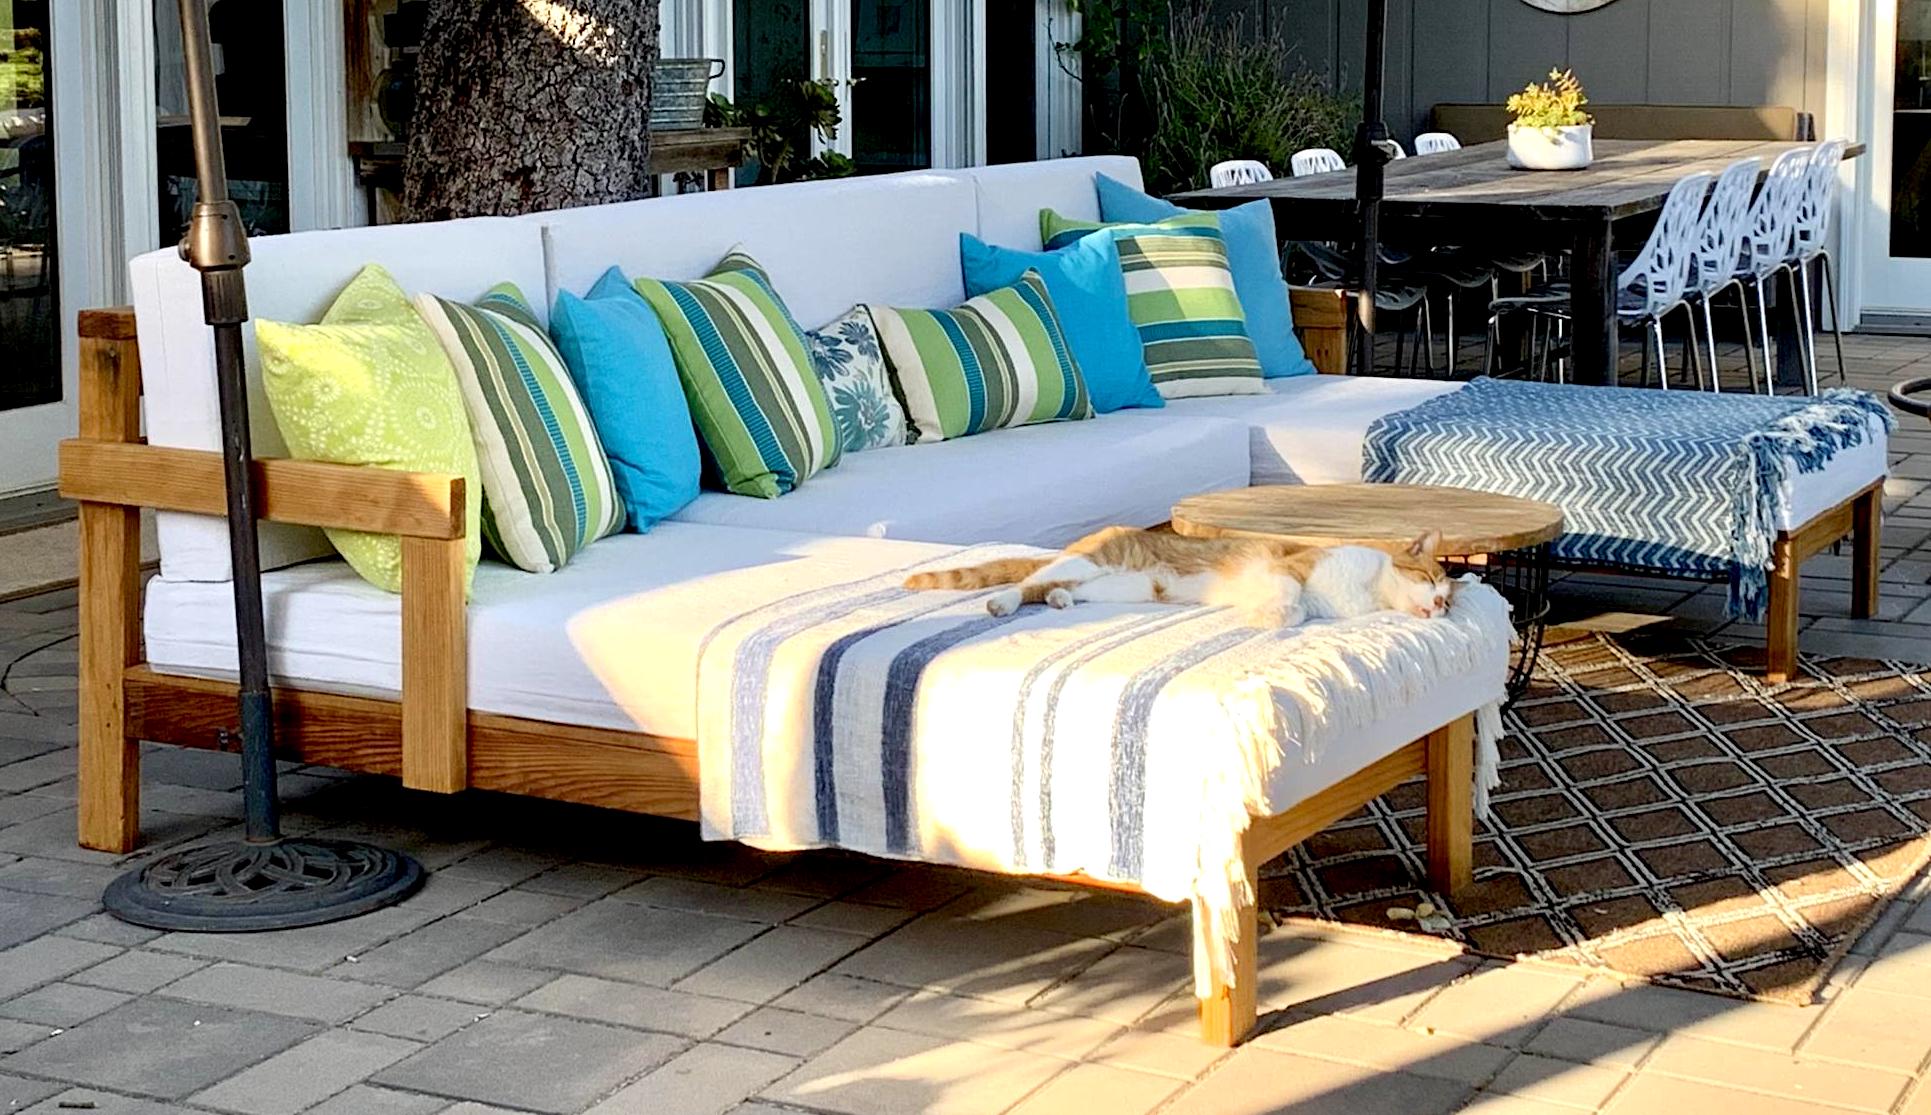
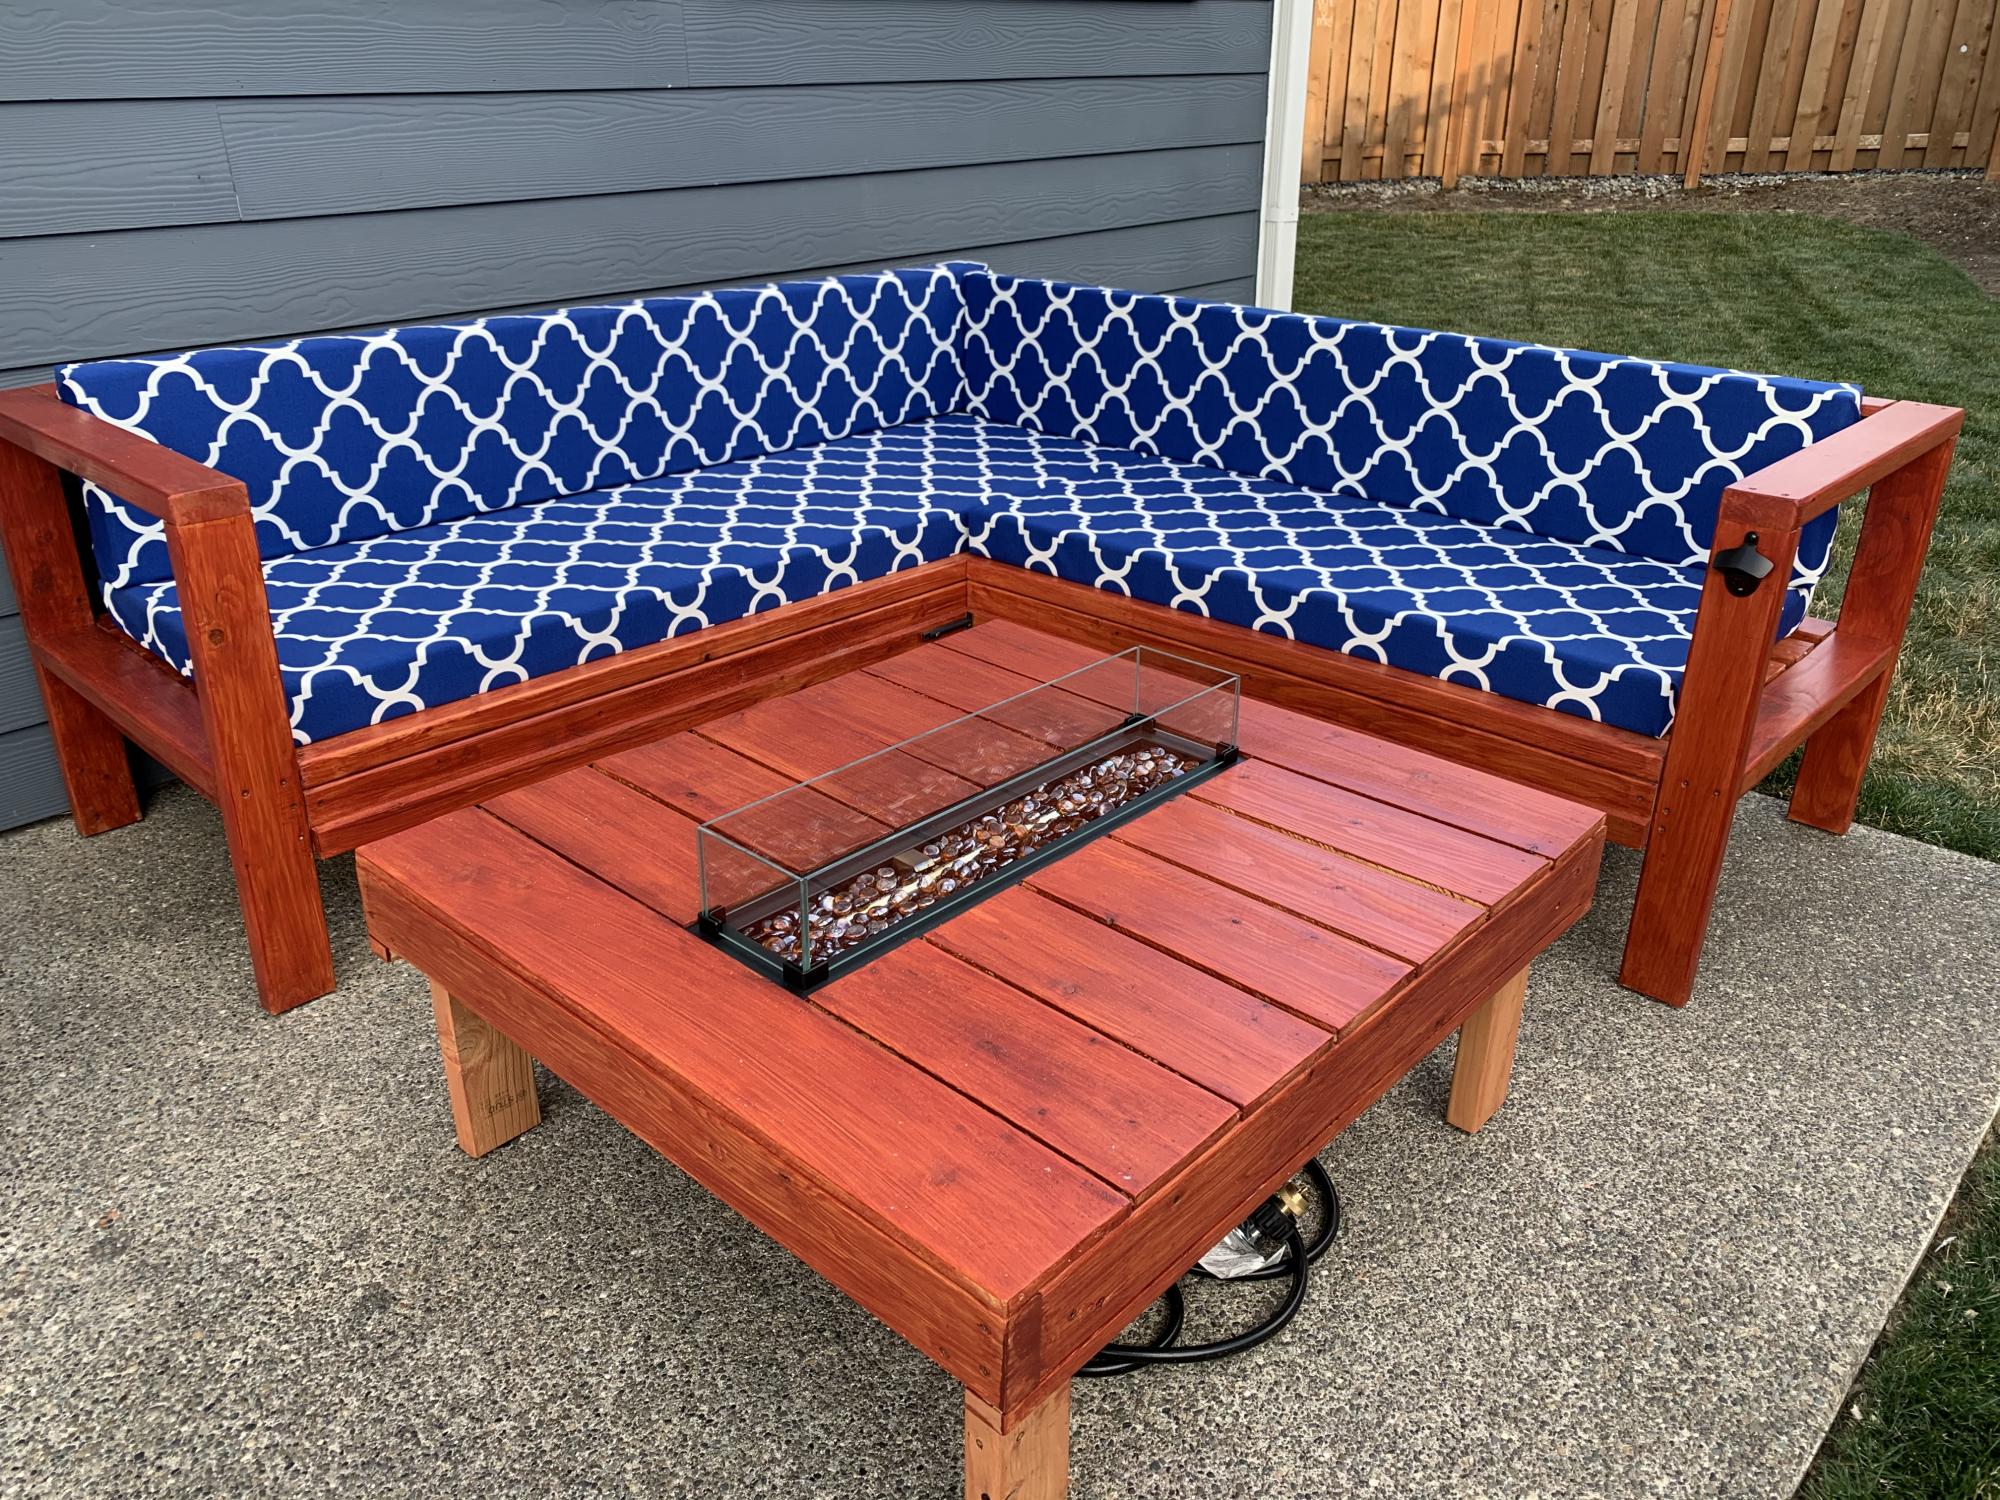
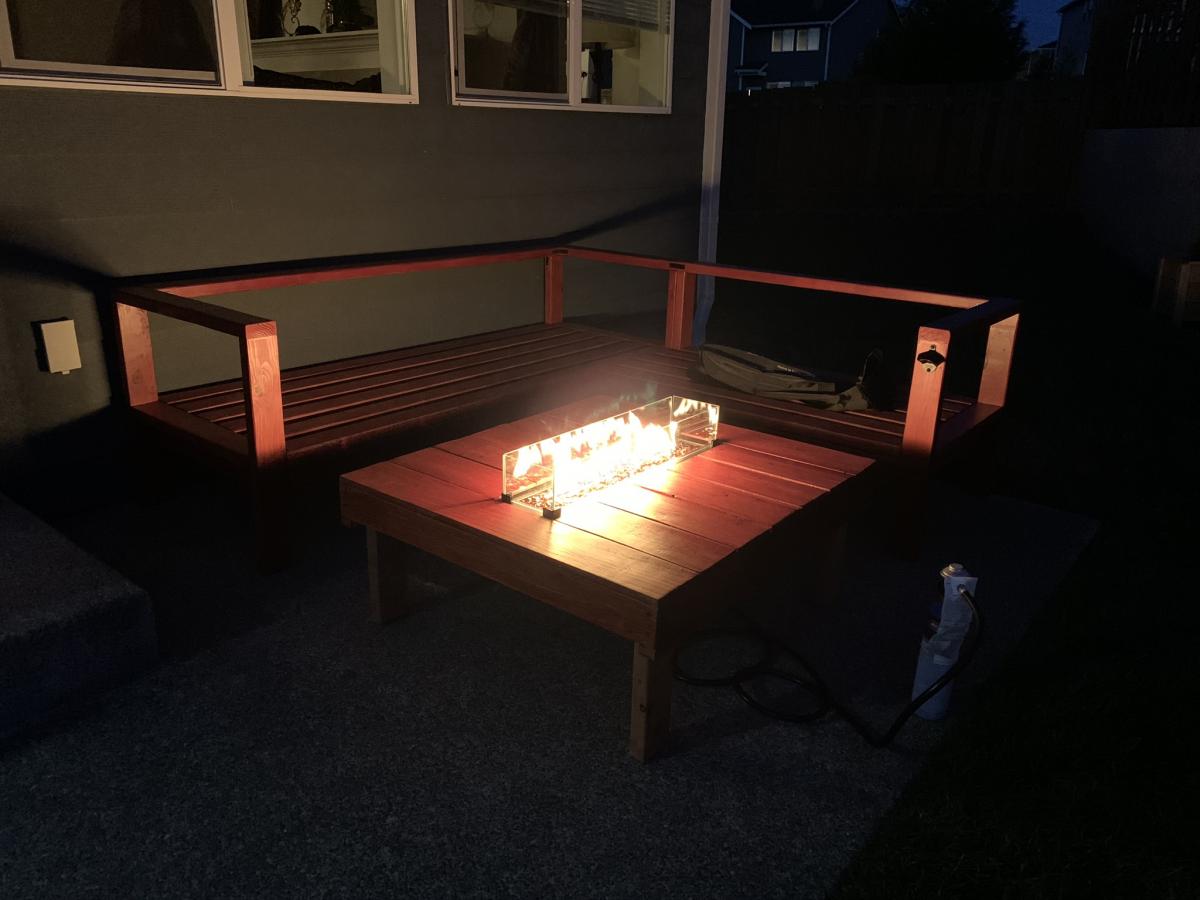
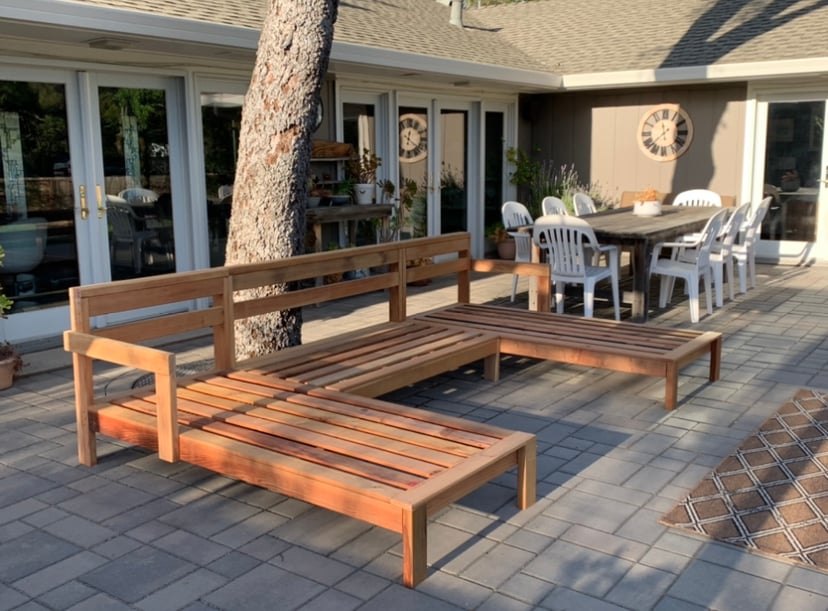
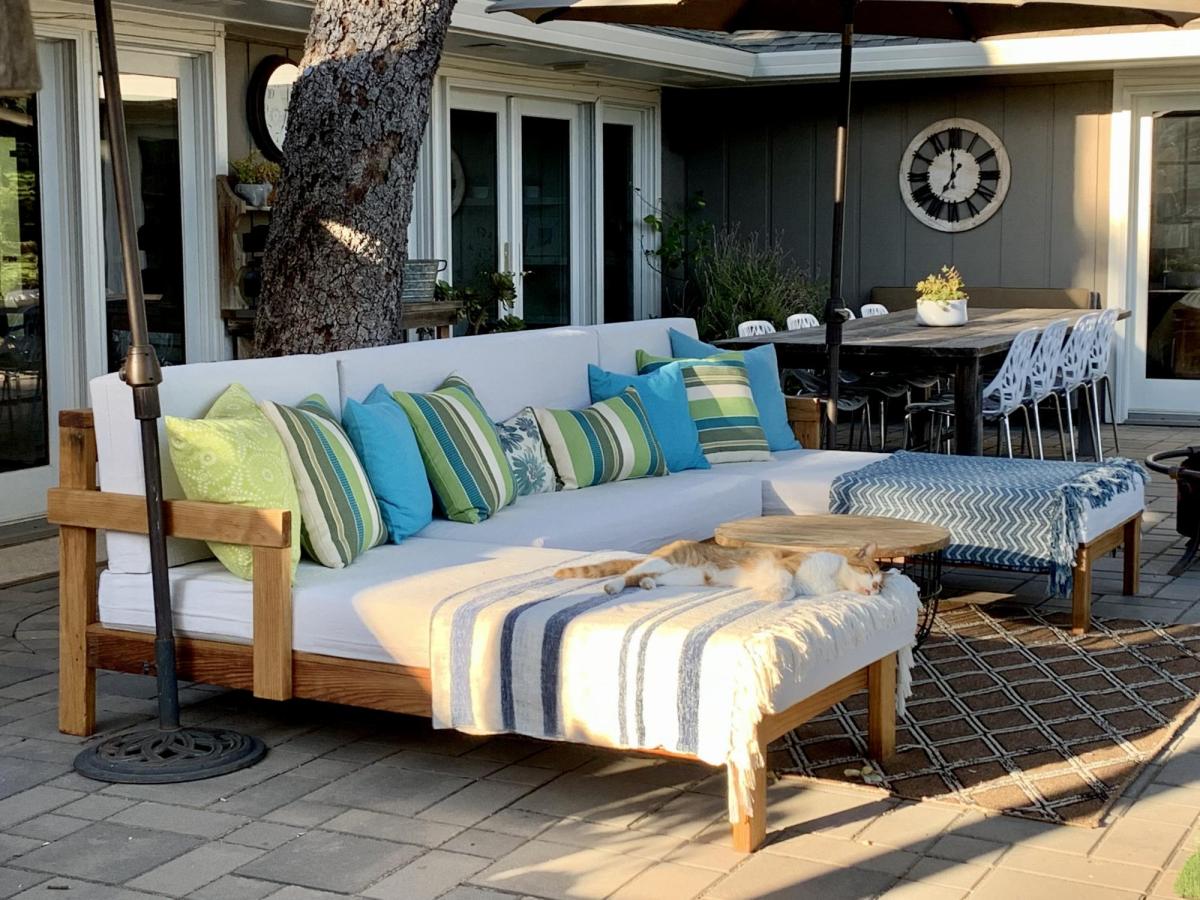
First wood project, thanks for the great plans Ana! I made the bottom cushions using 3" thick firm foam, 2" thick memory foam, and 1" thick batting (purchased in bulk and then cut to size), and covered them with outdoor fabric. The back cushions are 4" thick soft foam. I added easily removable/washable drop cloth covers on top of all the cushions. I don't have a finish on the clear redwood, but might add a clear coat to protect it. The memory foam makes this sofa very luxerious!

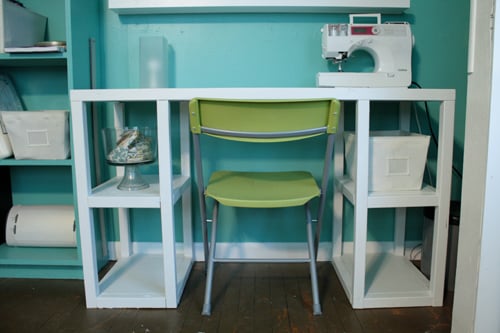
When I was given a stack of MDF sheets from a friend, I knew this was the desk I wanted to build with it first! We recently moved into my husband's grandmother's house, and have been making some improvements. We took out the dark old built in, and I replaced it with three 4' long gallery shelves, and the Parson's Desk modified to 4' long. It fits perfectly in my space, and looks so chic and modern against our teal walls. It's the perfect craft nook and workspace! I added a mason jar pendant light I DIY'd from the IKEA bulb kit, and also sewed a reversible runner to match my handmade duvet cover. The fabric is Deer Valley, from Free Spirit. I also had the glass top from the original desk cut down at Lowe's for free, and it's a perfect fit.


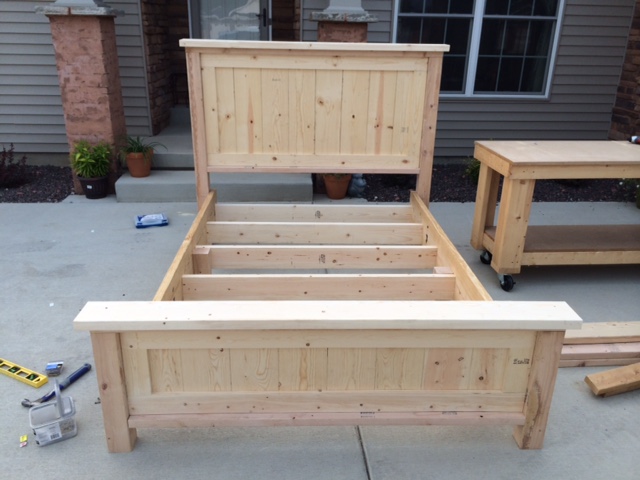
Thank You Ana-White for the amazing plans for this beautiful farmhouse queen bed! Not bad for the first try!
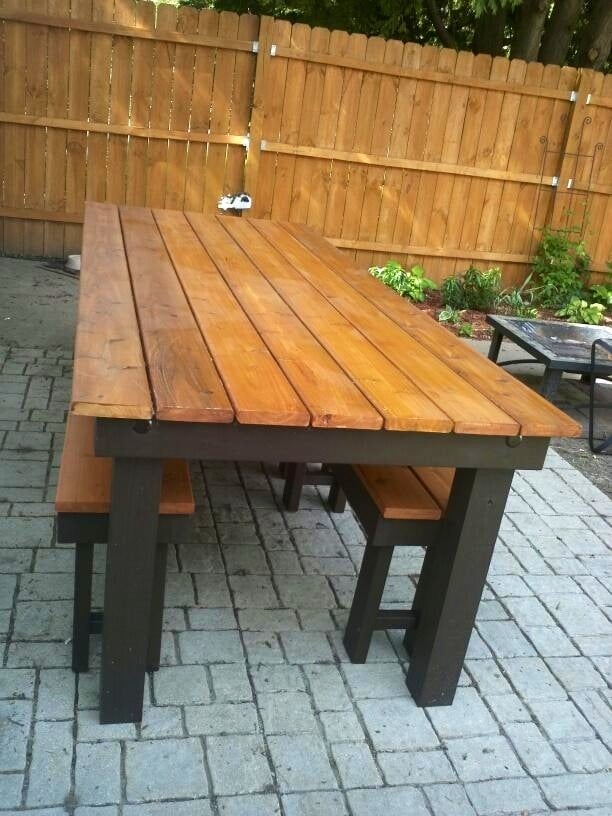
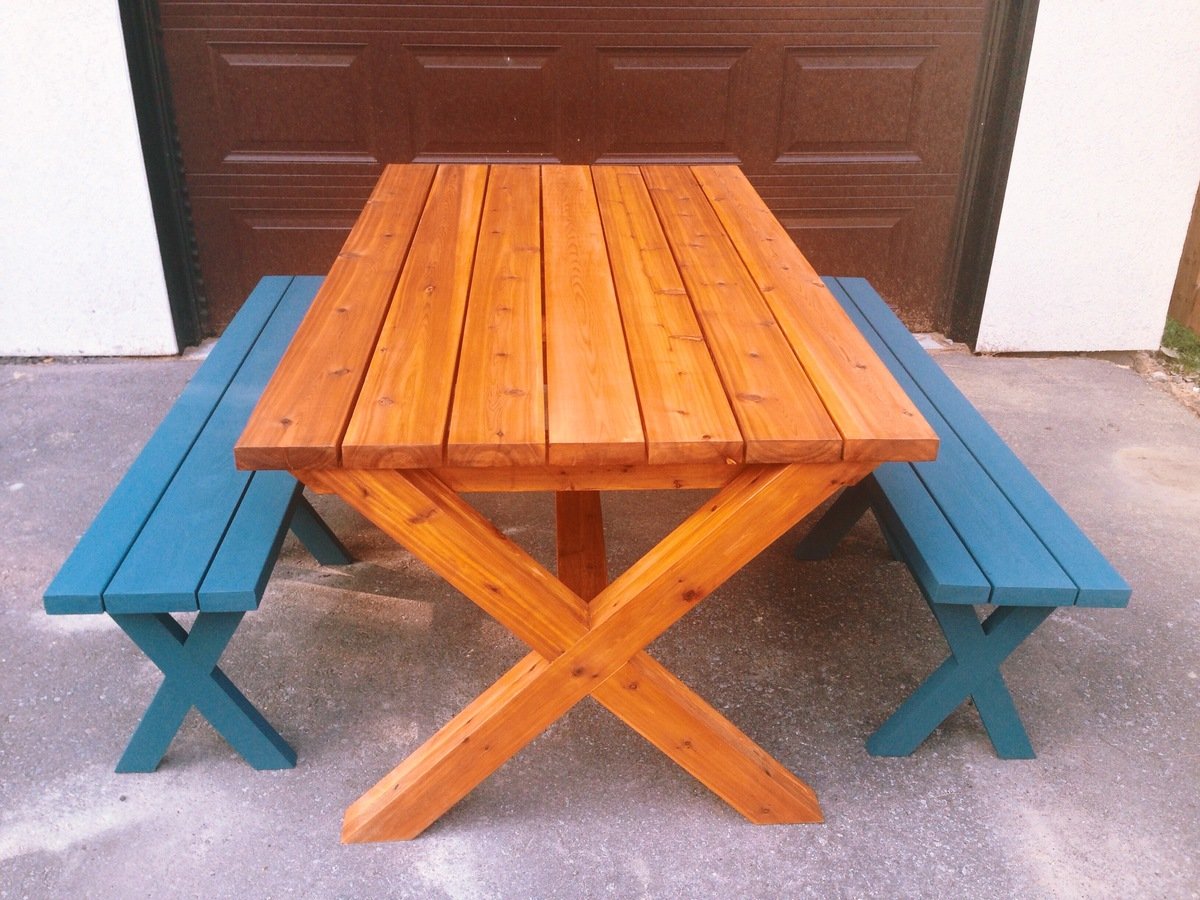
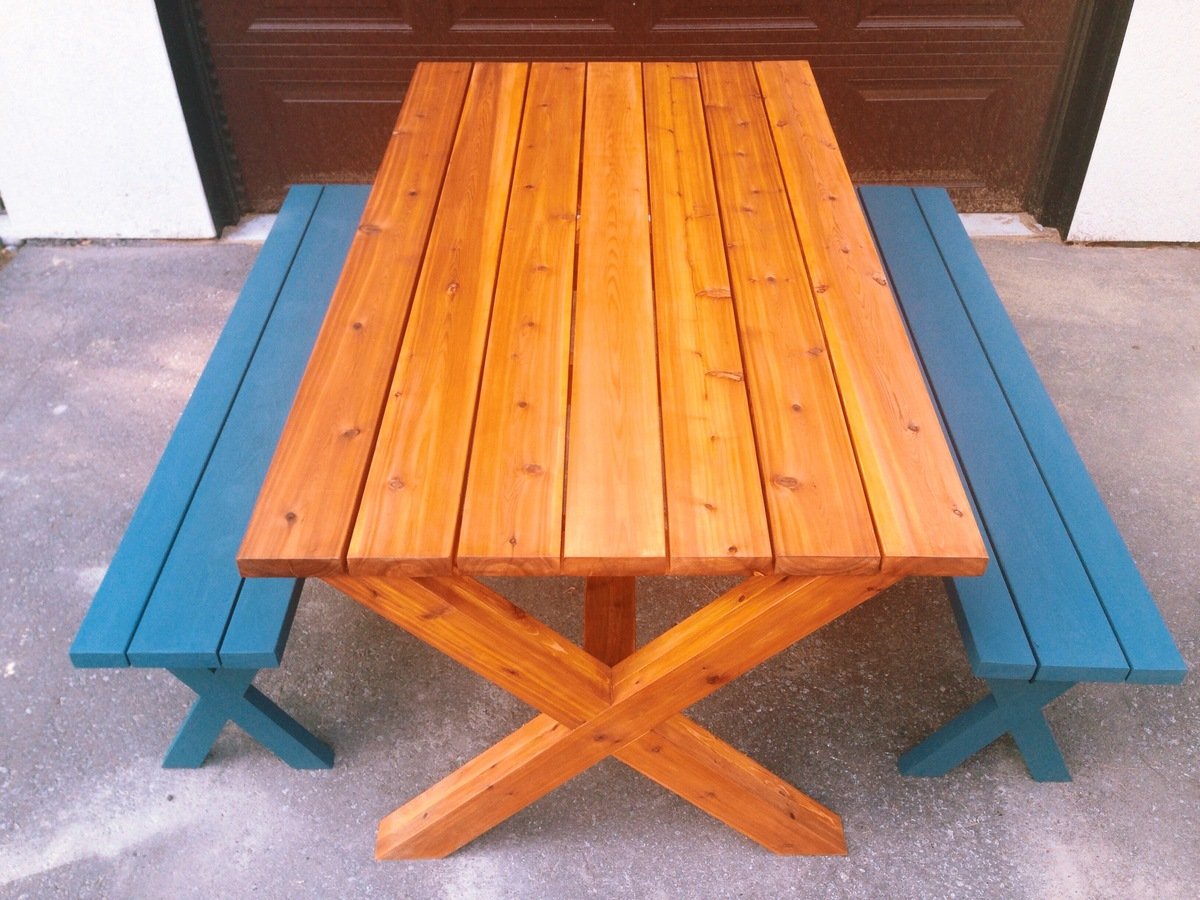
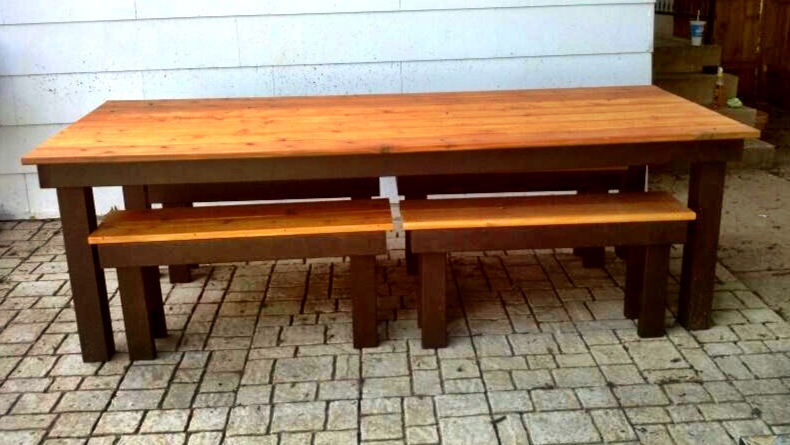
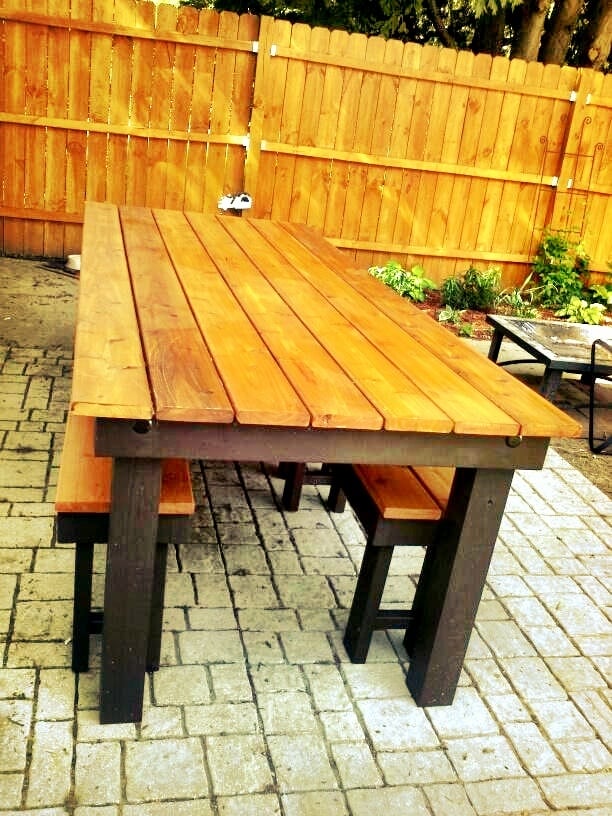
We built this table for my brother and new wife's wedding present. We modified it to use as an outdoor dining set. Instead of using the 1x10 for the tabletop we used 2x6's and for the legs we used 4x4's. We attached the top boards with a Camo fastening system we used last year on our deck (works great to conceal the screws). I stained the frame in Behr Cordovan Brown and the top boards in Behr Cedar Naturaltone. It was our first attempt at building a table and I think it turned out great, only problem was giving it away!
Mon, 06/17/2013 - 10:57
Very nice! I'd been considering this plan for my outdoor table, but my husband liked the modern farm table better. Same idea--I am leaving gaps to allow the water to drain. Love the two-tone finish! It's amazing what you can do with plain old 2 x 6s!

Comments
Ana White Admin
Fri, 03/31/2023 - 10:32
Great outdoor storage shed!
Looks awesome, thanks for sharing!