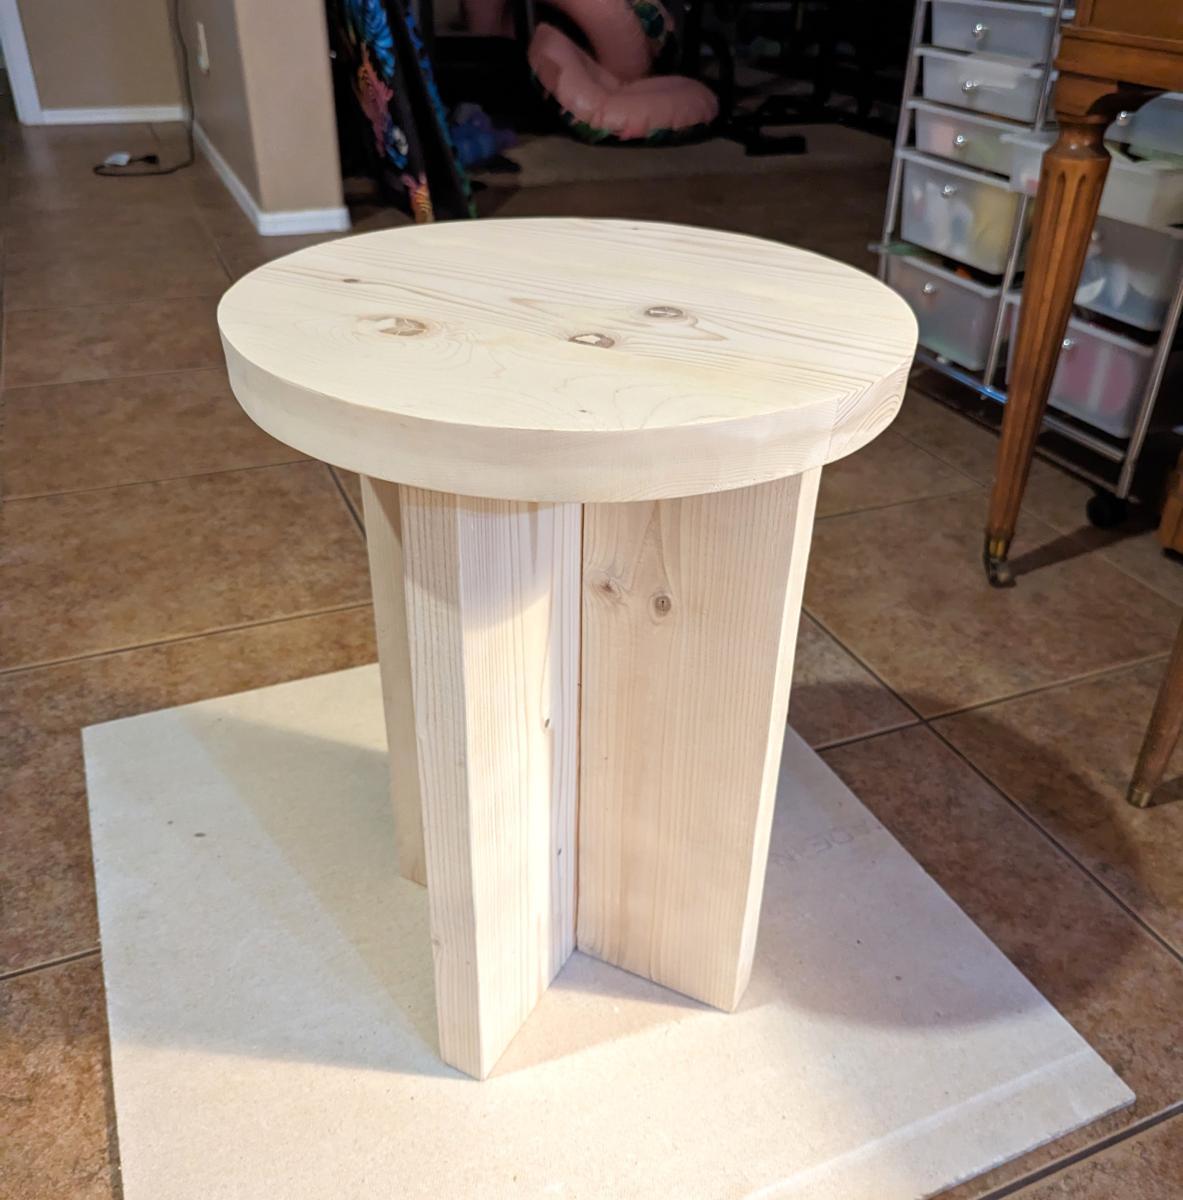
Mushroom Side Table
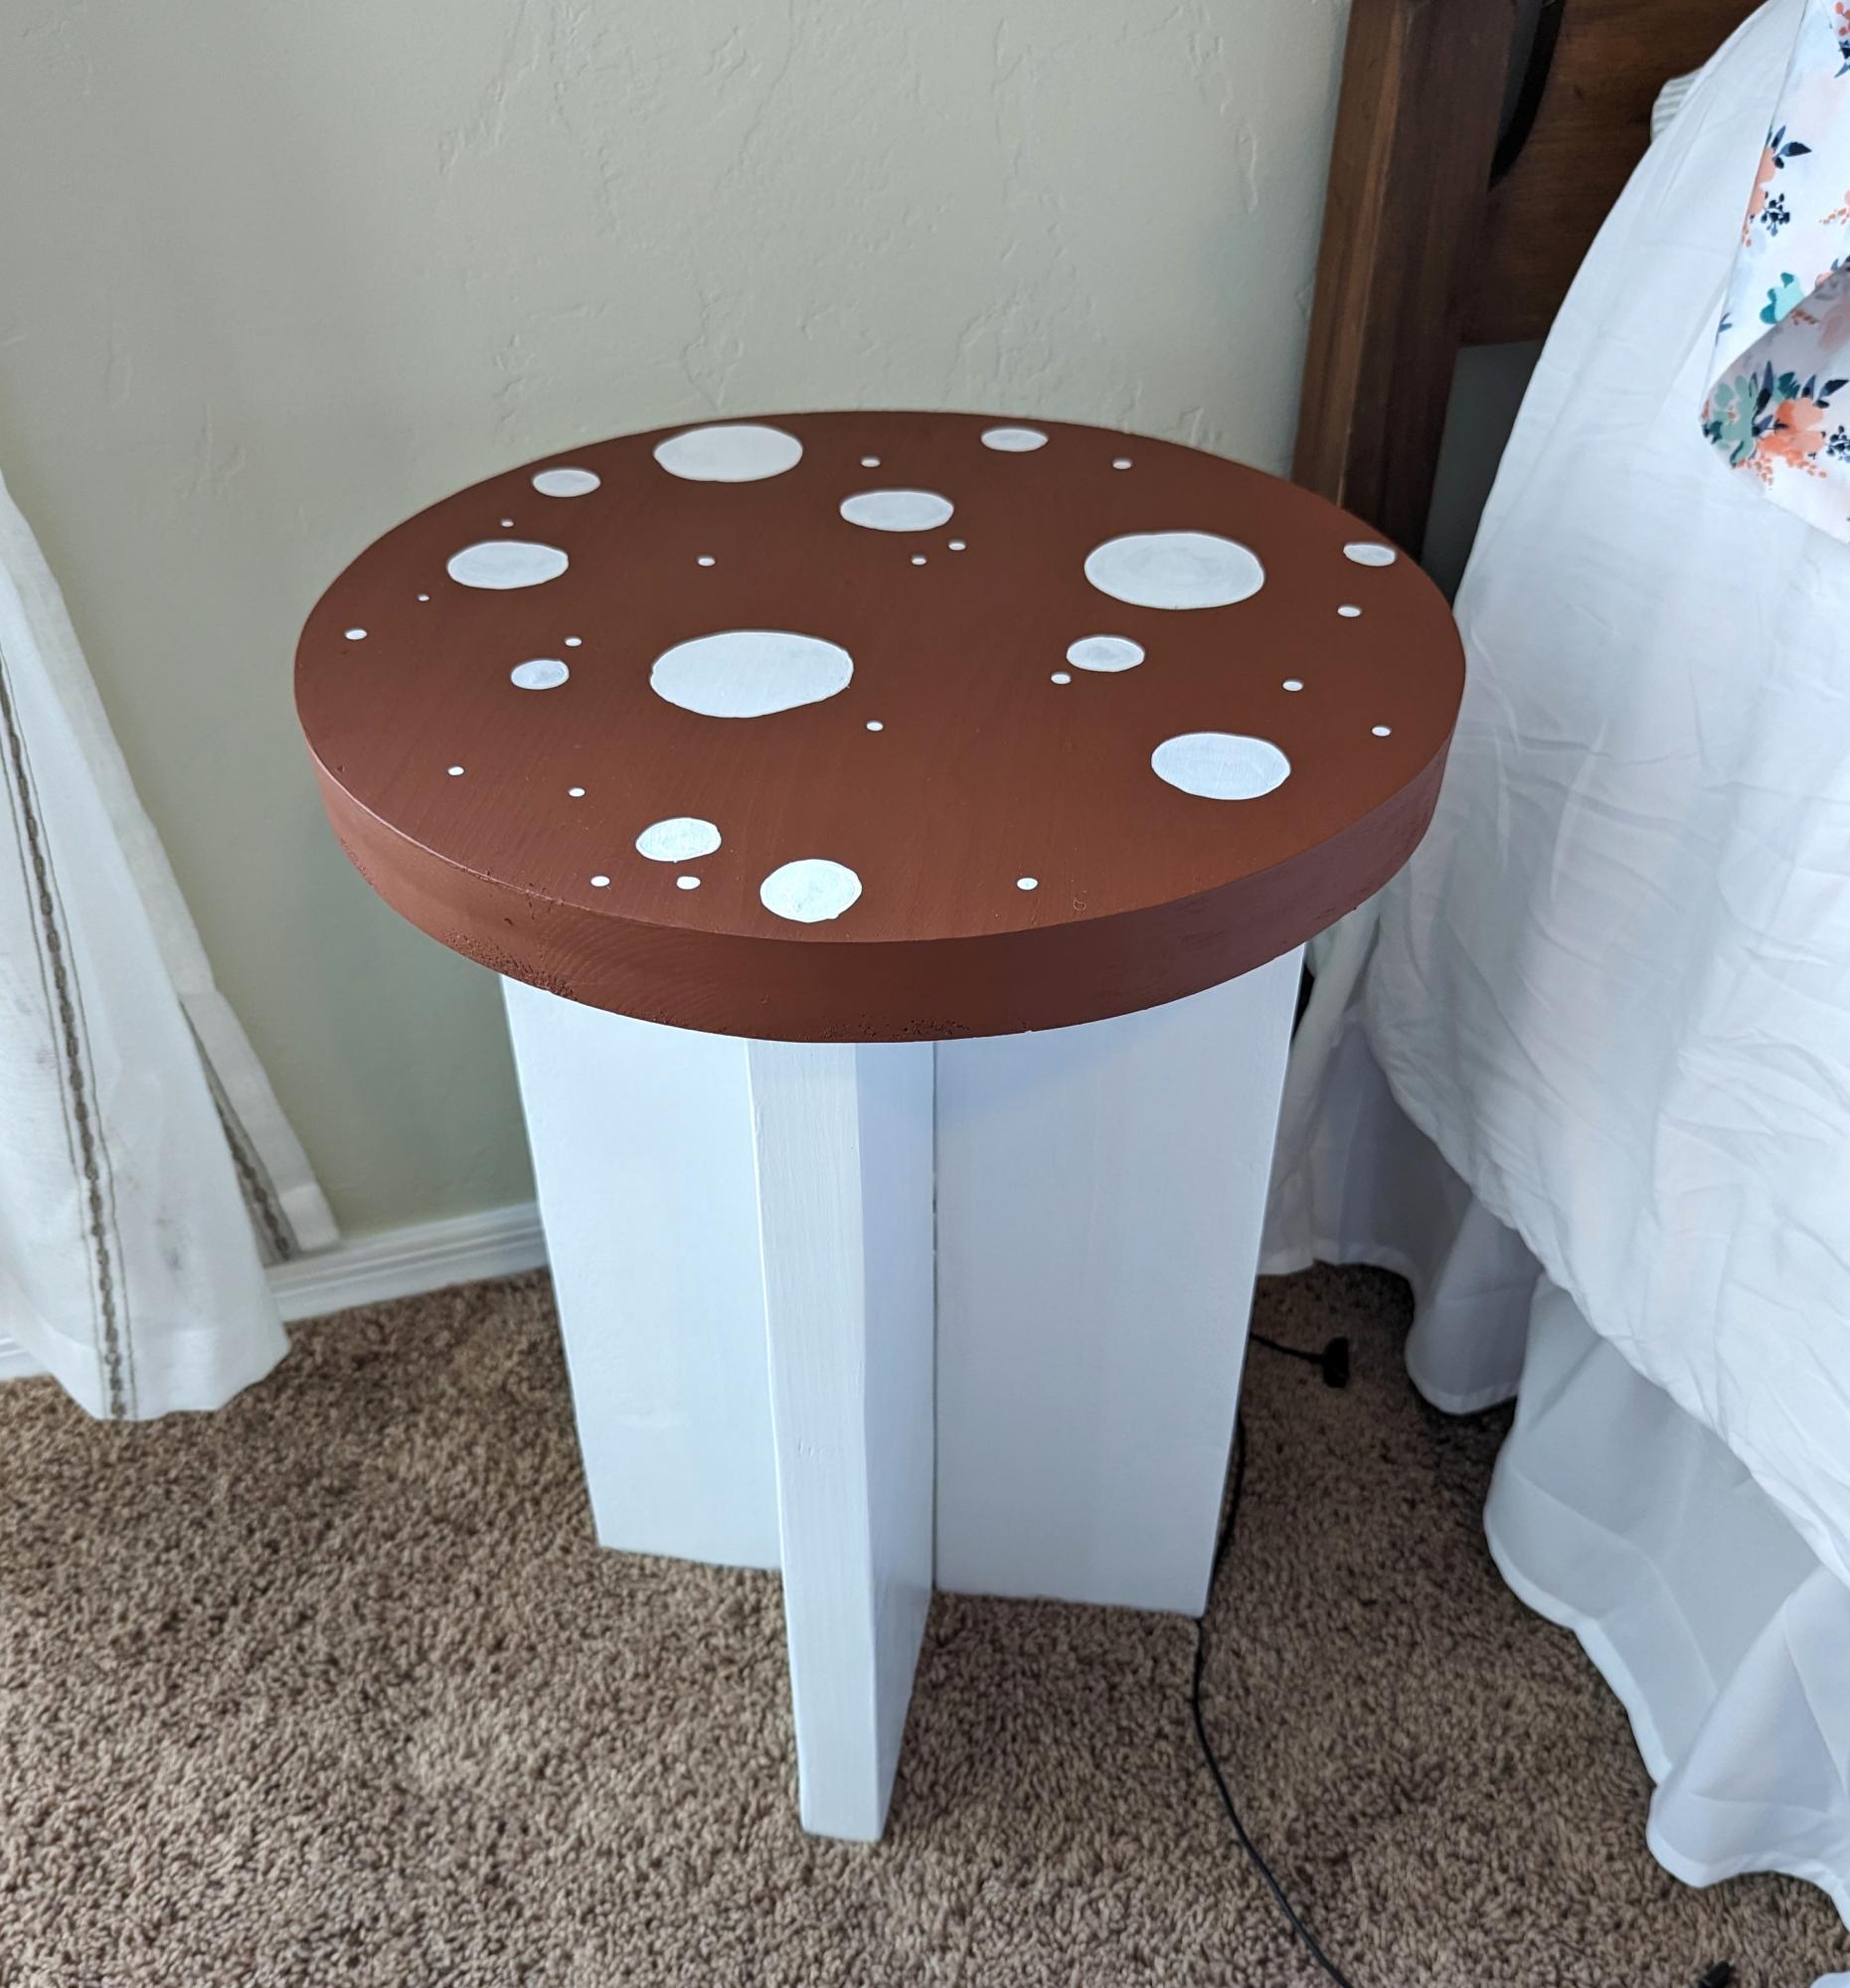
We made this for our daughter, and our other daughter wanted to paint it to look like a mushroom. We are very happy with how it turned out.
Built from Plan(s)
We made this for our daughter, and our other daughter wanted to paint it to look like a mushroom. We are very happy with how it turned out.
Thank you for the plan, this is the result.
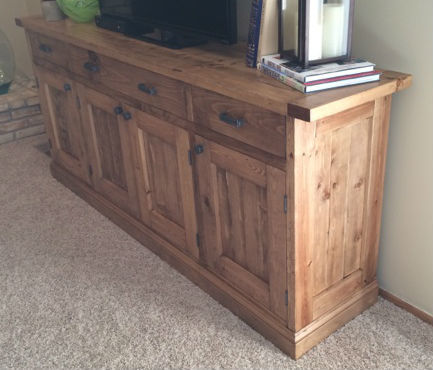
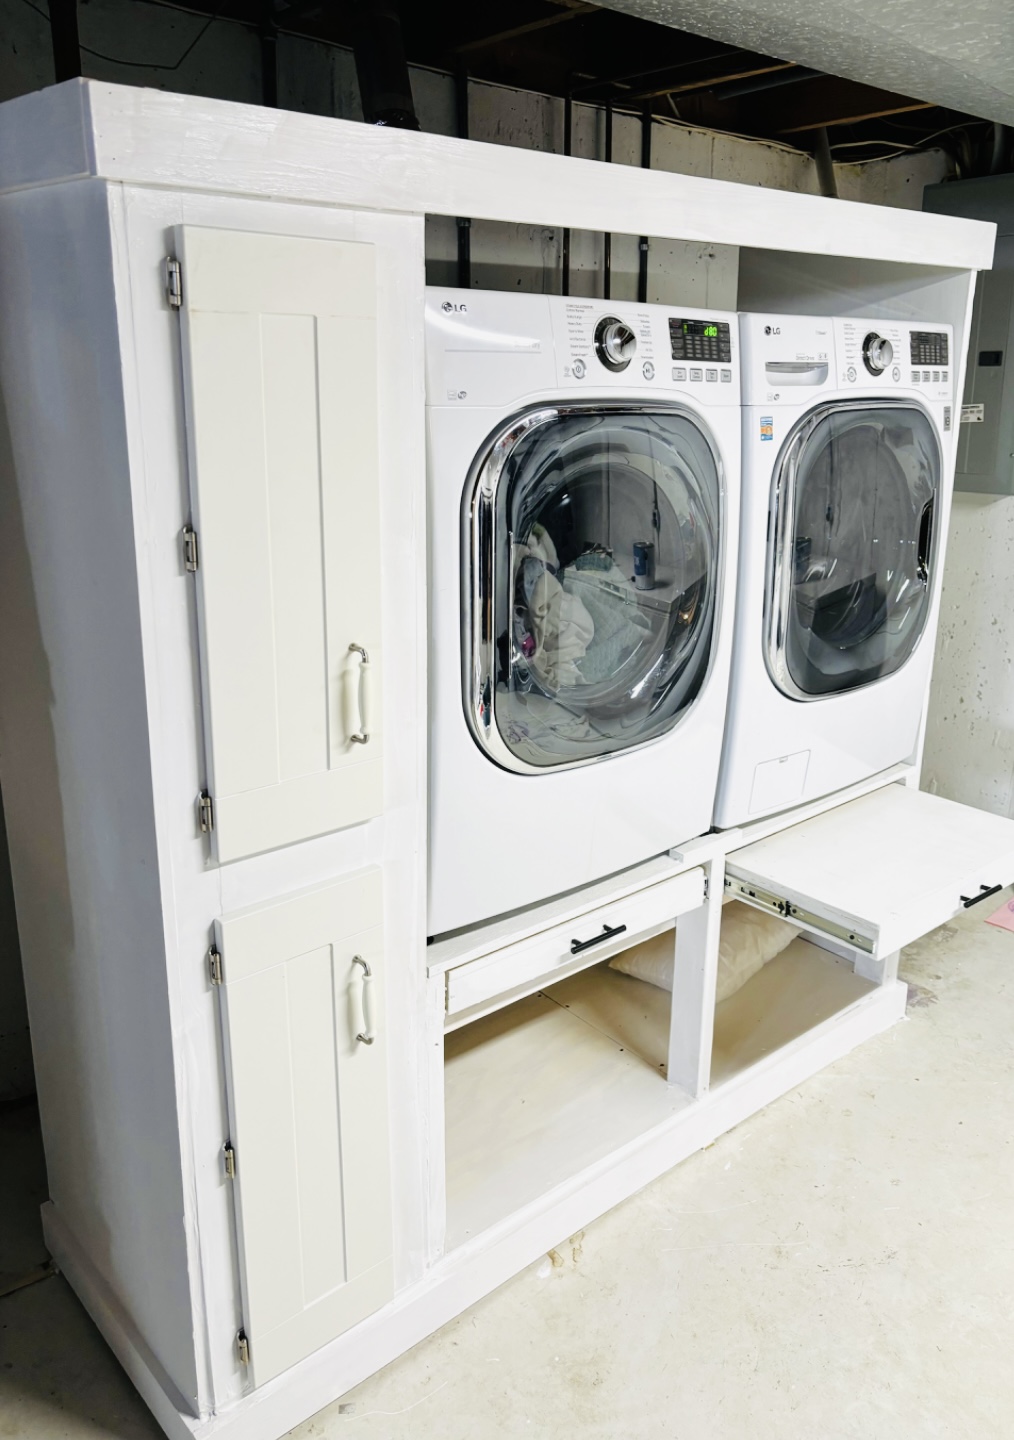
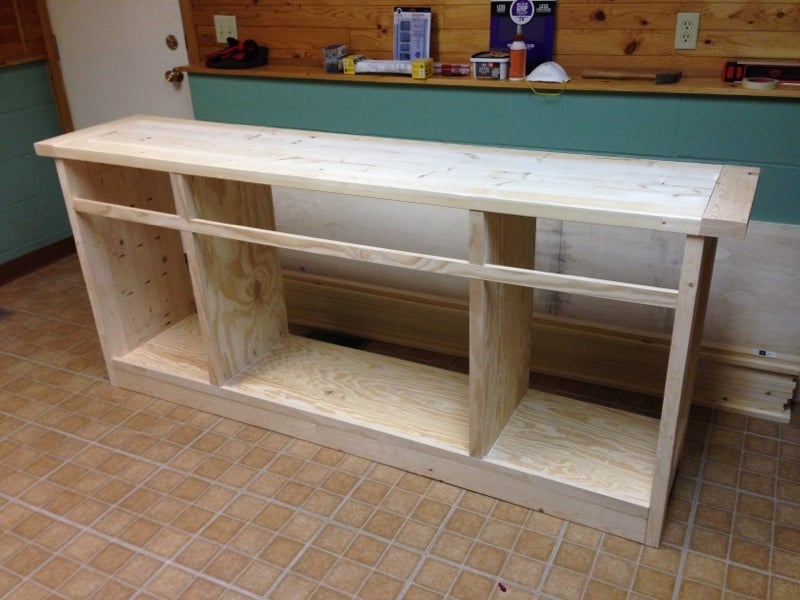
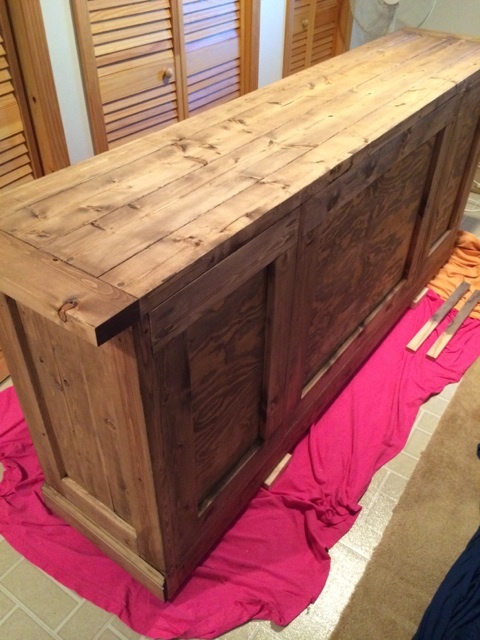
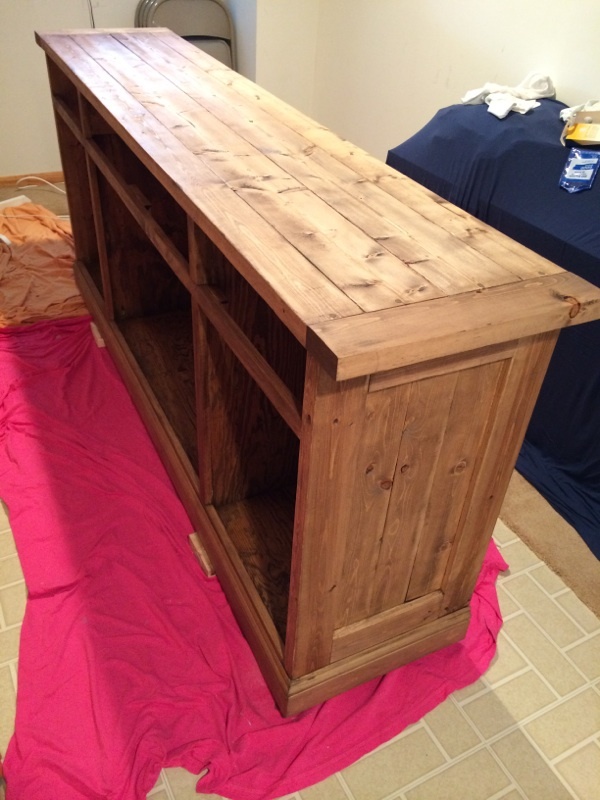
This was my first finished project using plans from Ana's site, and I am very pleased with the finished product. Every aspect of the finished sideboard is based on something from the site. I started with the plans for the Planked Wood Sideboard, and made no modifications as the dimensions were perfect for our basement family room. I decided to inset the back (http://www.friendly-home.net/2012/02/gigantic-rustic-sideboard.html) as Ana explained that Hillary had done, and love the final result. This will allow us to use this to potentially divide a room in an open concept space at some point in the future.
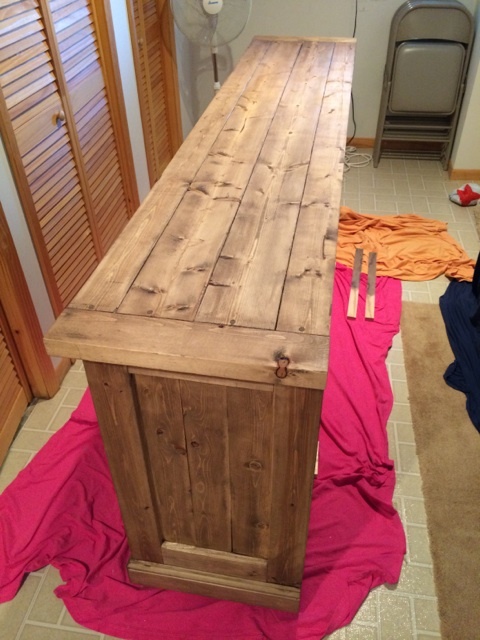
For the finishing process, I decided to follow the "Rustic Yet Refined" finish tutorial highlighted on both the Ana-White site (http://ana-white.com/2013/08/rustic-yet-refined-wood-finish) and Jen Woodhouse House of Wood (http://jenwoodhouse.com/blog/2013/06/07/diy-dining-table/). I fully intended to complete the 9 step process, but found that after we applied the Minwax pre-stain wood conditioner, followed by Minwax special walnut stain and wiped it off within 15-30 seconds, the finish mirrored the restoration hardware finish that we were going for. We decided not to proceed with layering on the weathered oak or applying the whitewash, and went straight to the spar urethane satin coats.
Overall, the project was a success, but was difficult to finish during the Minnesota winter as it was unbelievably cold and was forced to complete the finishing process in our basement/laundry room, which extended the length of the project. I am very excited to begin building other pieces from Ana's plans.

Mon, 03/03/2014 - 10:01
Absolutely beautiful! Thank you for all the details on how you did this!
In reply to Absolutely beautiful! Thank by moosmani
Thu, 03/13/2014 - 07:09
Thank you so much for your kind words. I am extremely impressed with your brag posts as well, and you may have been inspired to take on the picket storage shed project as soon as the snow melts.
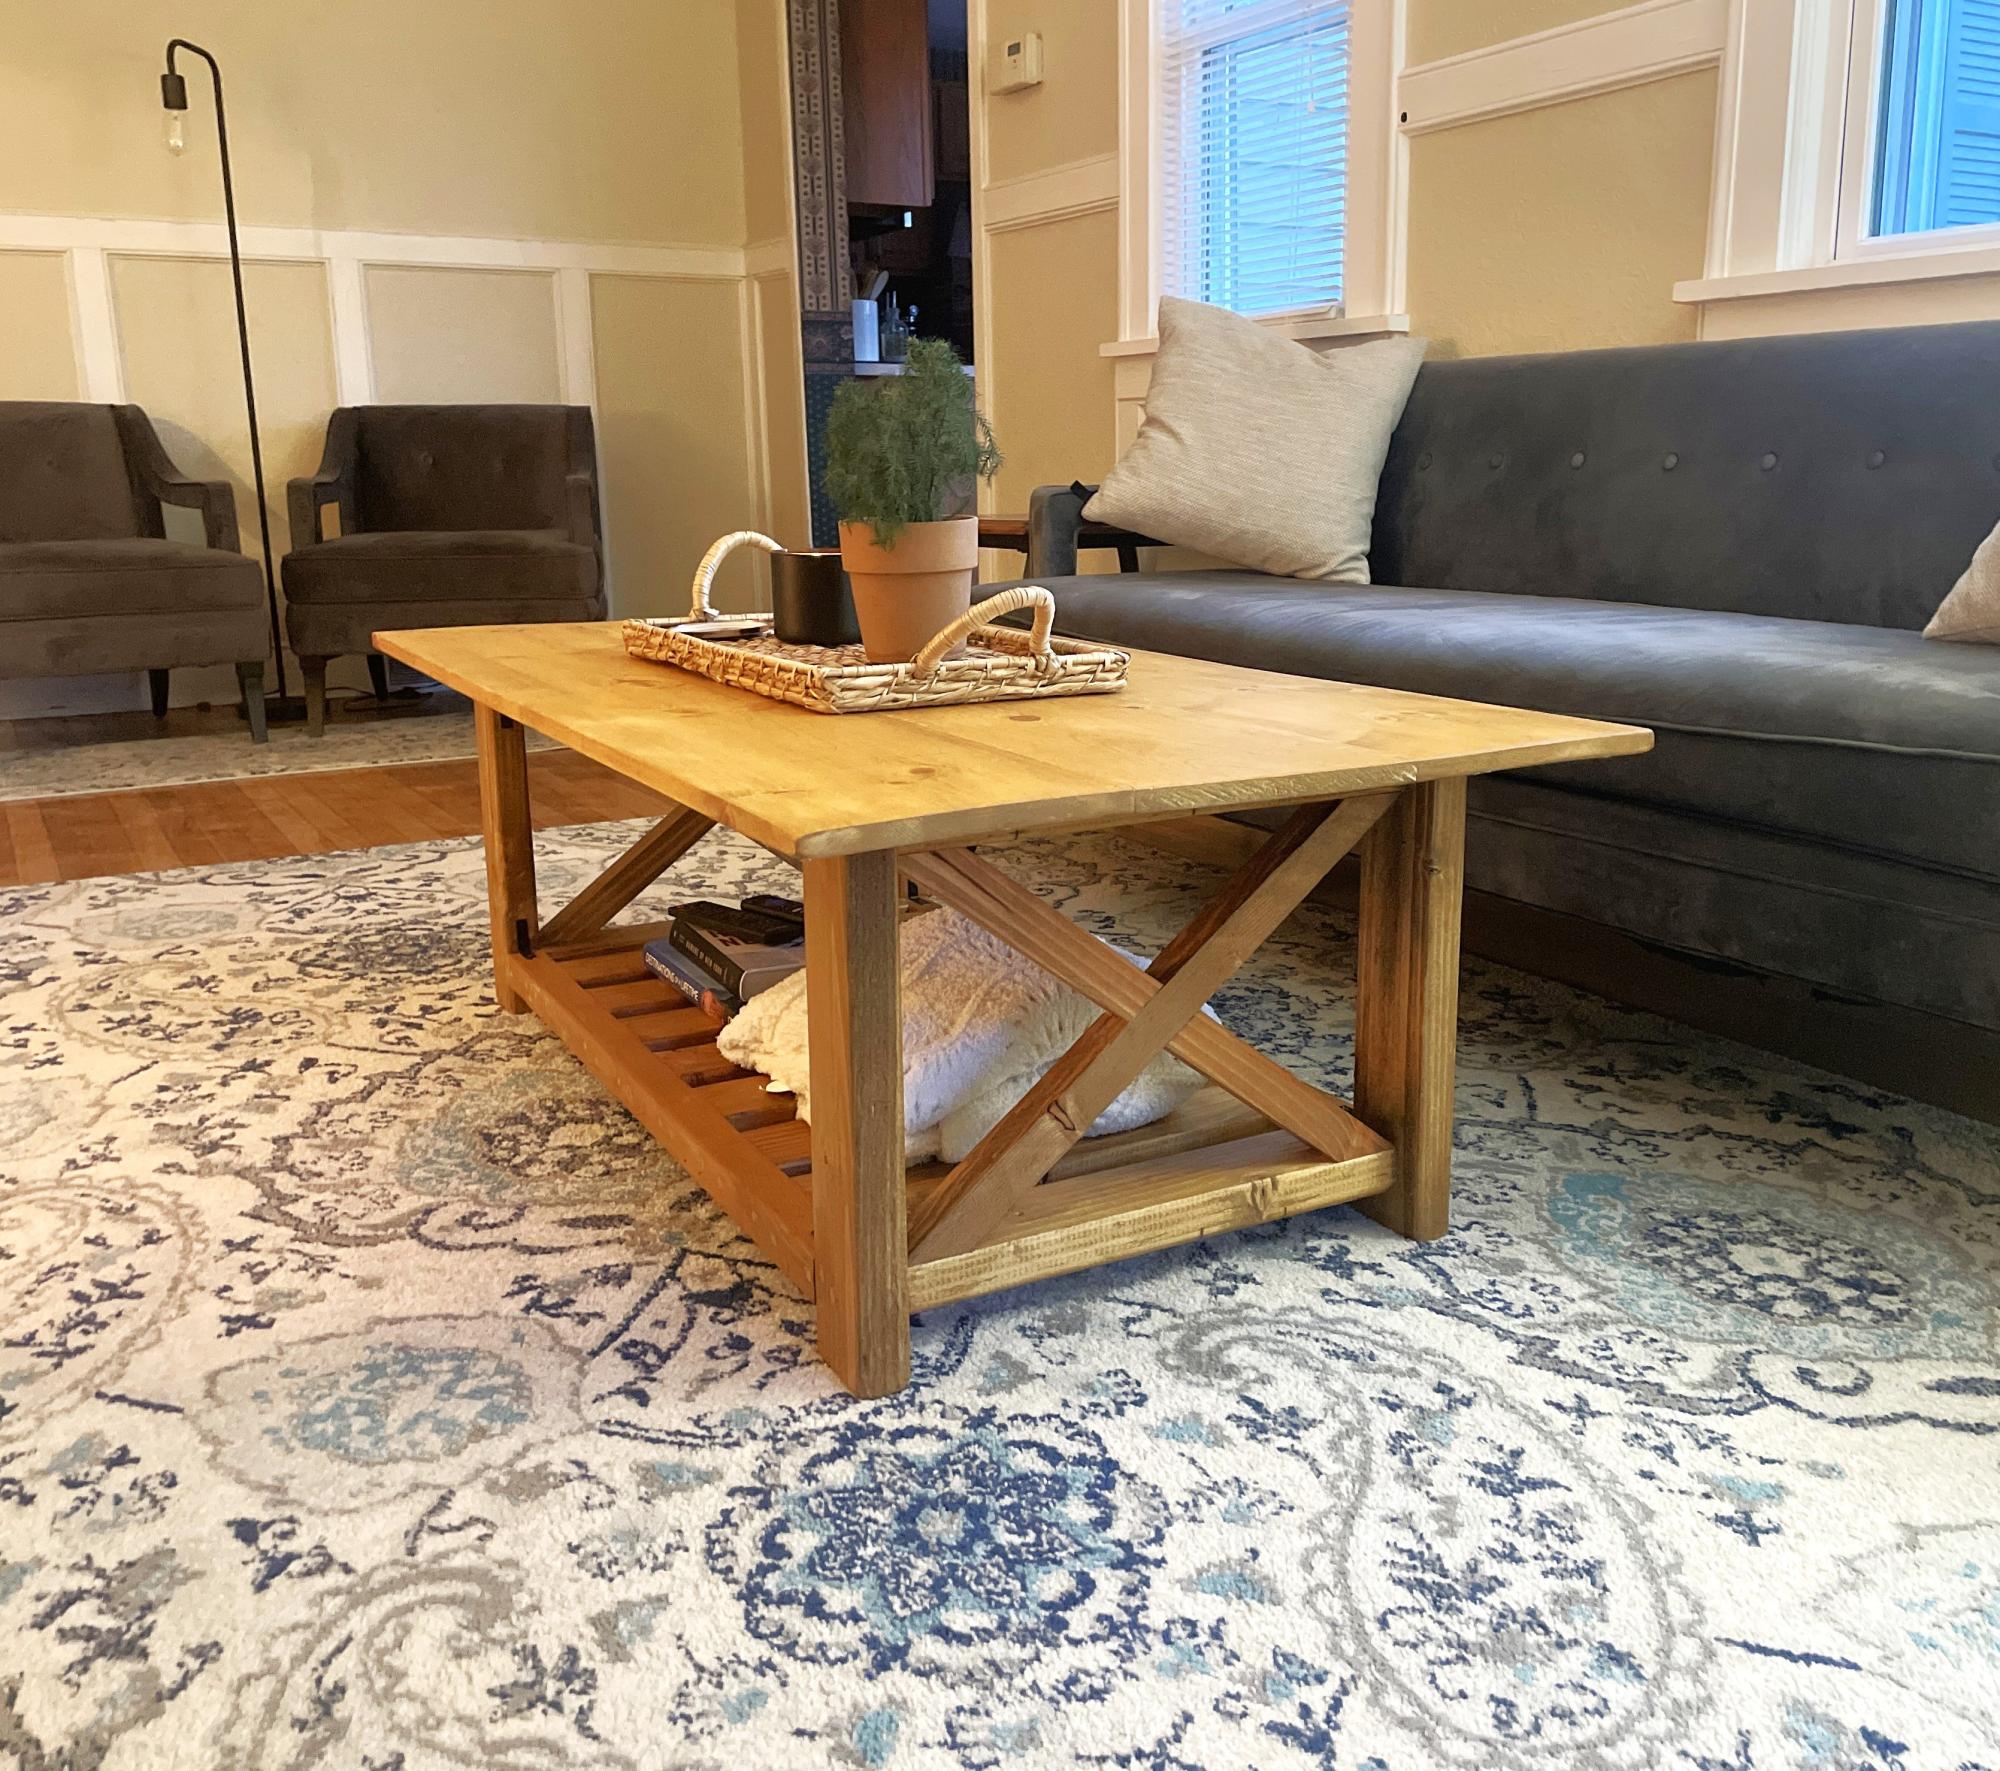
Coffee table! Golden oak stain on pine lumber.
Jack Hutchinson
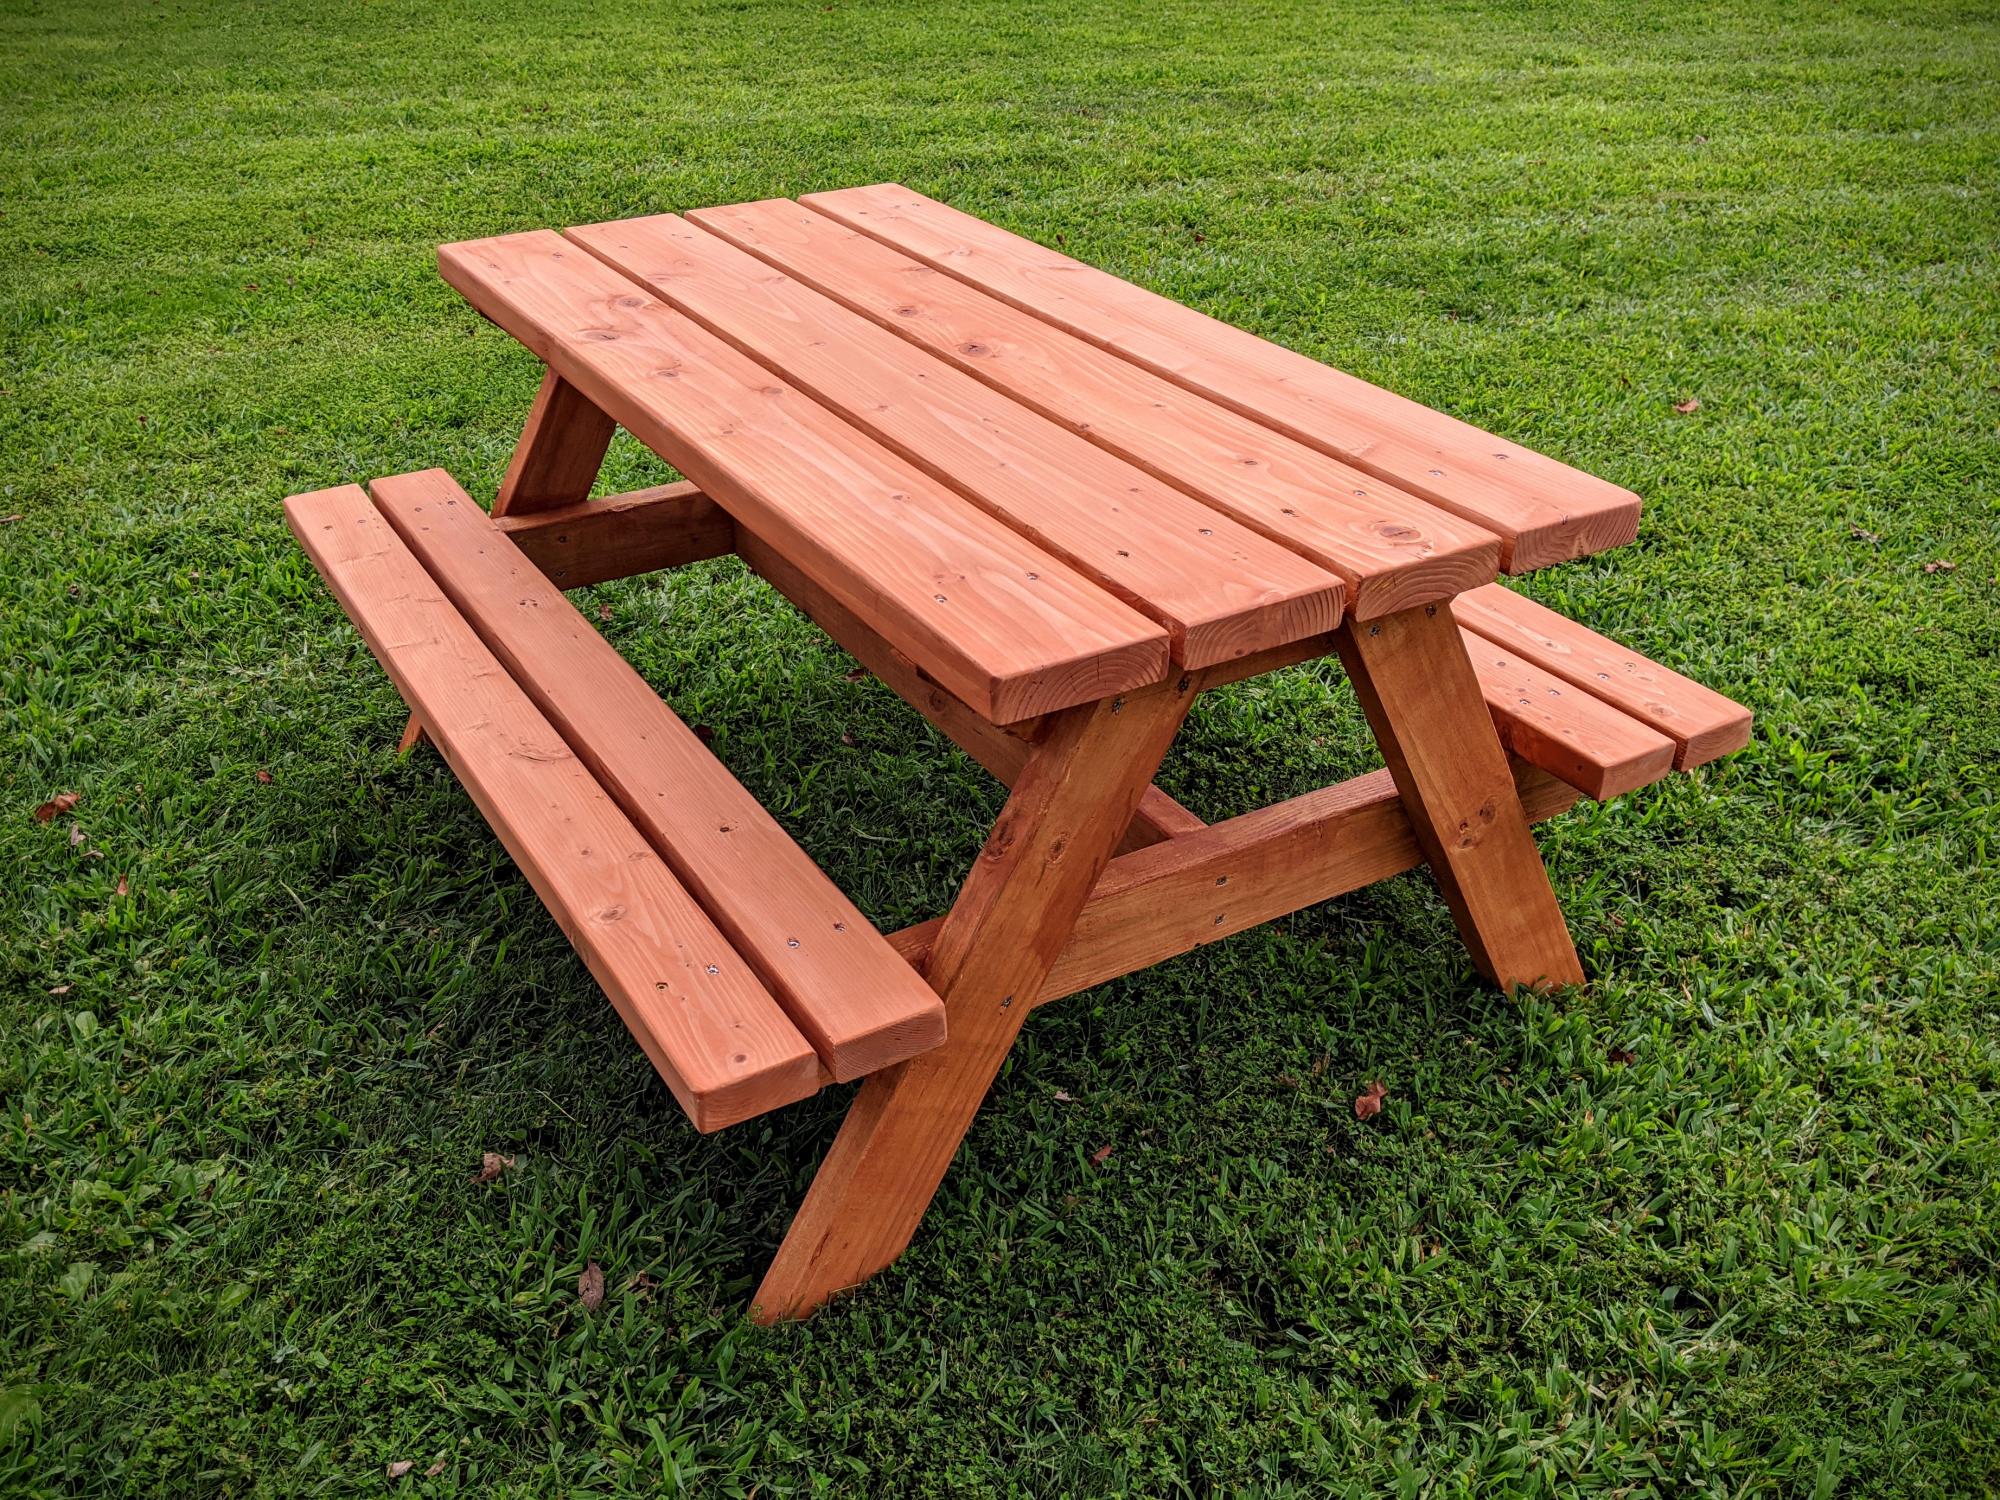
Built using Ana Whites plans for a Bigger Kids Picnic Table. Used pressure treated 2x4 for frame (legs and supports), 2x4 and 2x6 pine (fir) for table top and bench. Finished with Cabot's semi-transparent redwood stain and sealer.
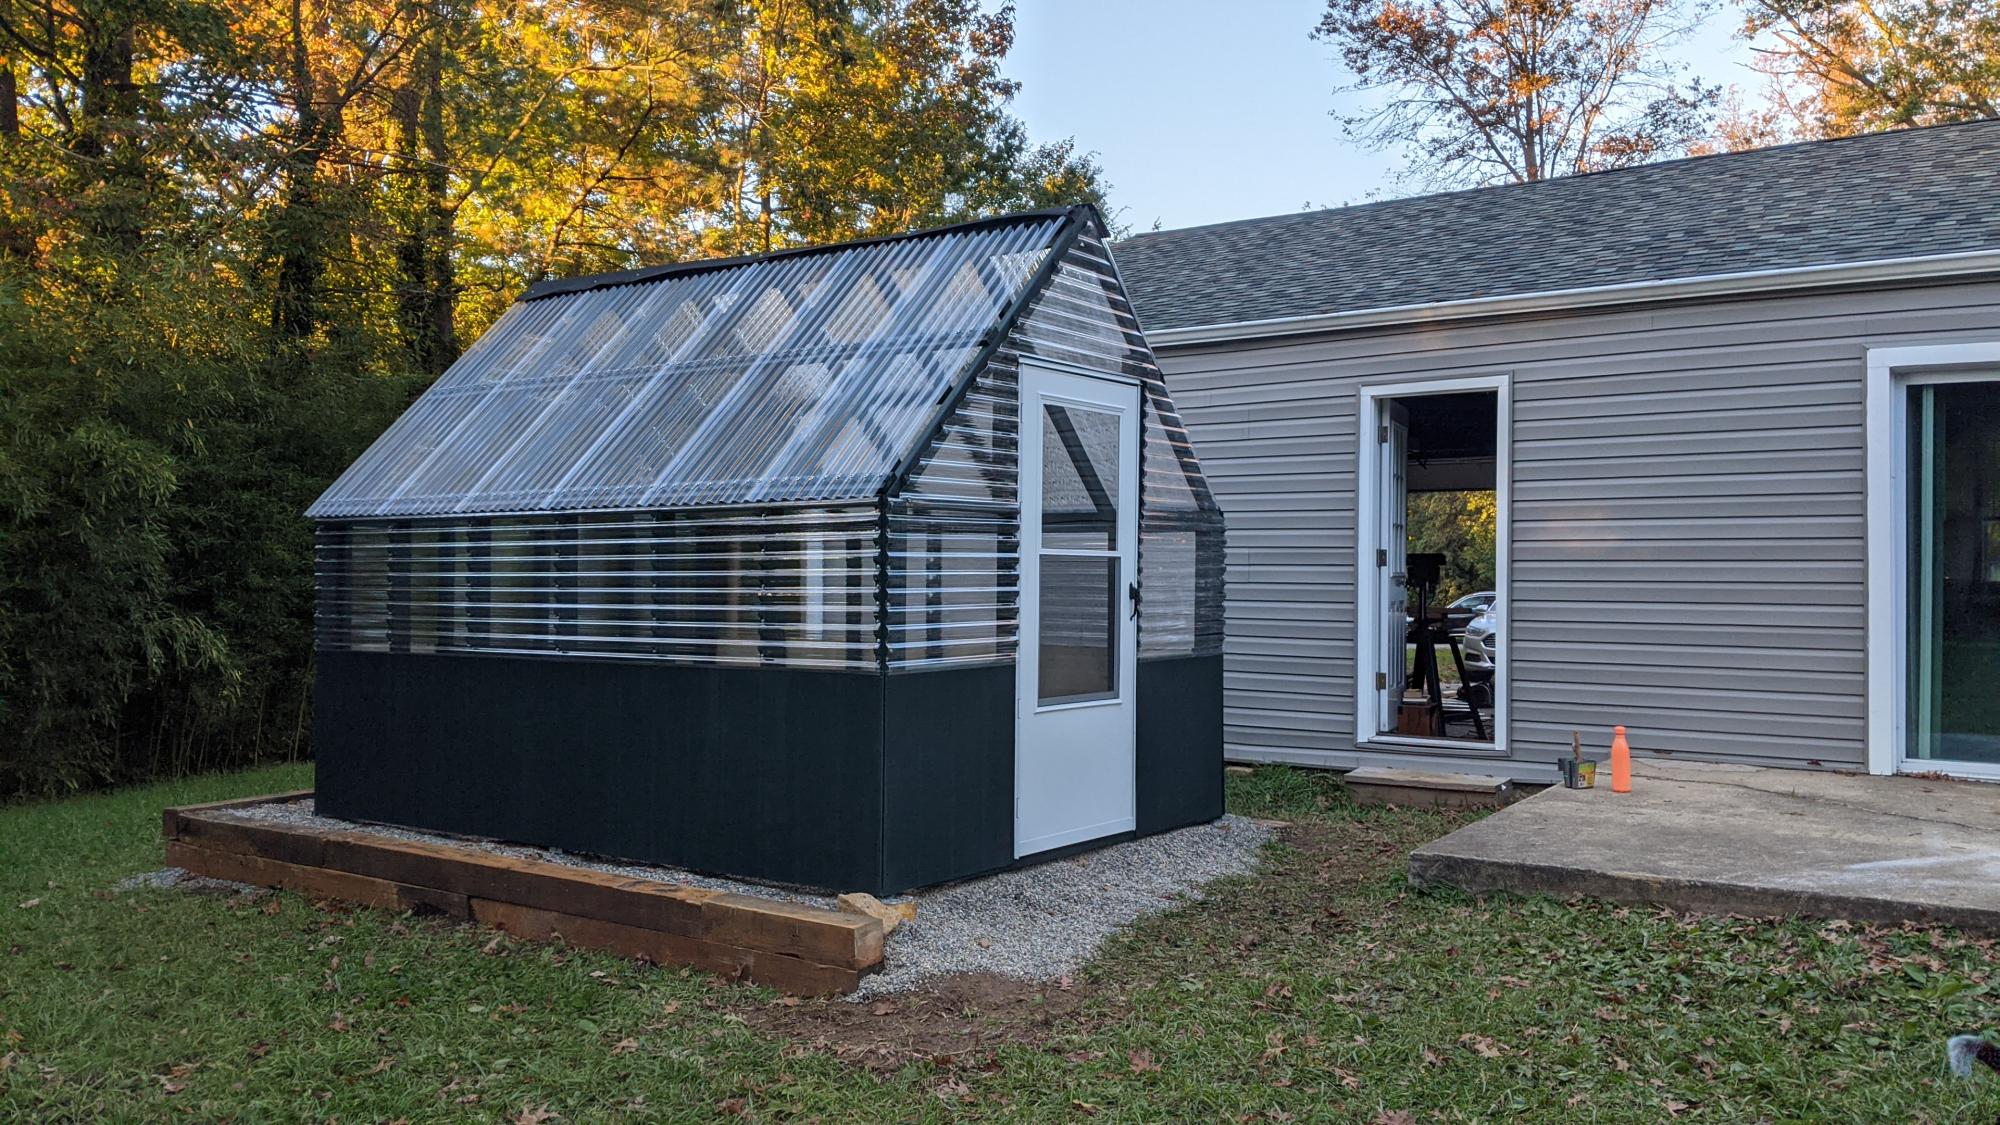
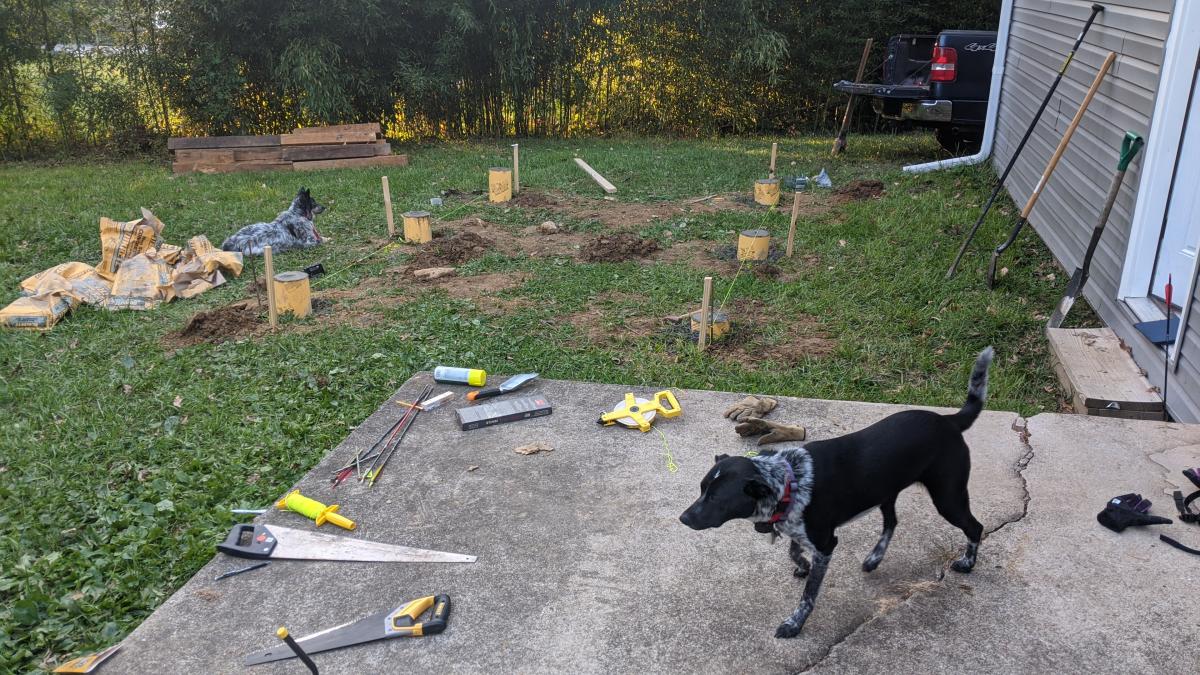
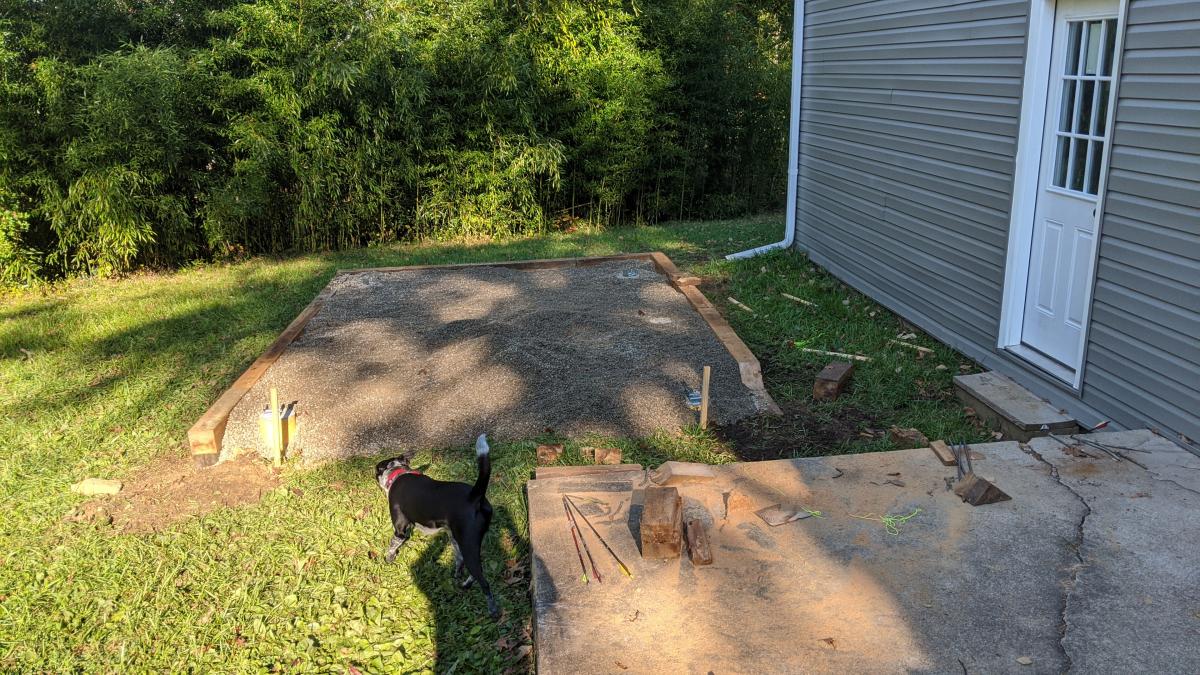
With the help of friends and family, we managed to build this greenhouse rather easily. We had to start with the foundation since the spot we chose was not an even grade. We did this by filling sono tubes with cement and leveling each off so the greenhouse would have a solid place to sit. We then built out a frame around the outside of the cement tubes with some reclaimed 6x6's. After that, we filled the space with 5 tons of river rock and then got to work! After the foundation was ready putting the rest of the house together was a piece of cake. The frame was so easy to put together. We had a few minor kinks to work out here and there, I won't say this house came out 100% perfectly, BUT I am so happy with the end results. We chose to paint it a deep green color as a final touch. So far we just moved a few potted plants from our deck to the greenhouse for the winter. It has been working very well to keep the plants cozy during the colder days we've had. Eventually, I plan to build a potting station, shelving, and most likely a garden bed for winter harvests.


Mon, 11/09/2020 - 09:52
The foundation looks great the greenhouse looks amazing! I'm sure fun was had building it too:) Thanks for sharing.
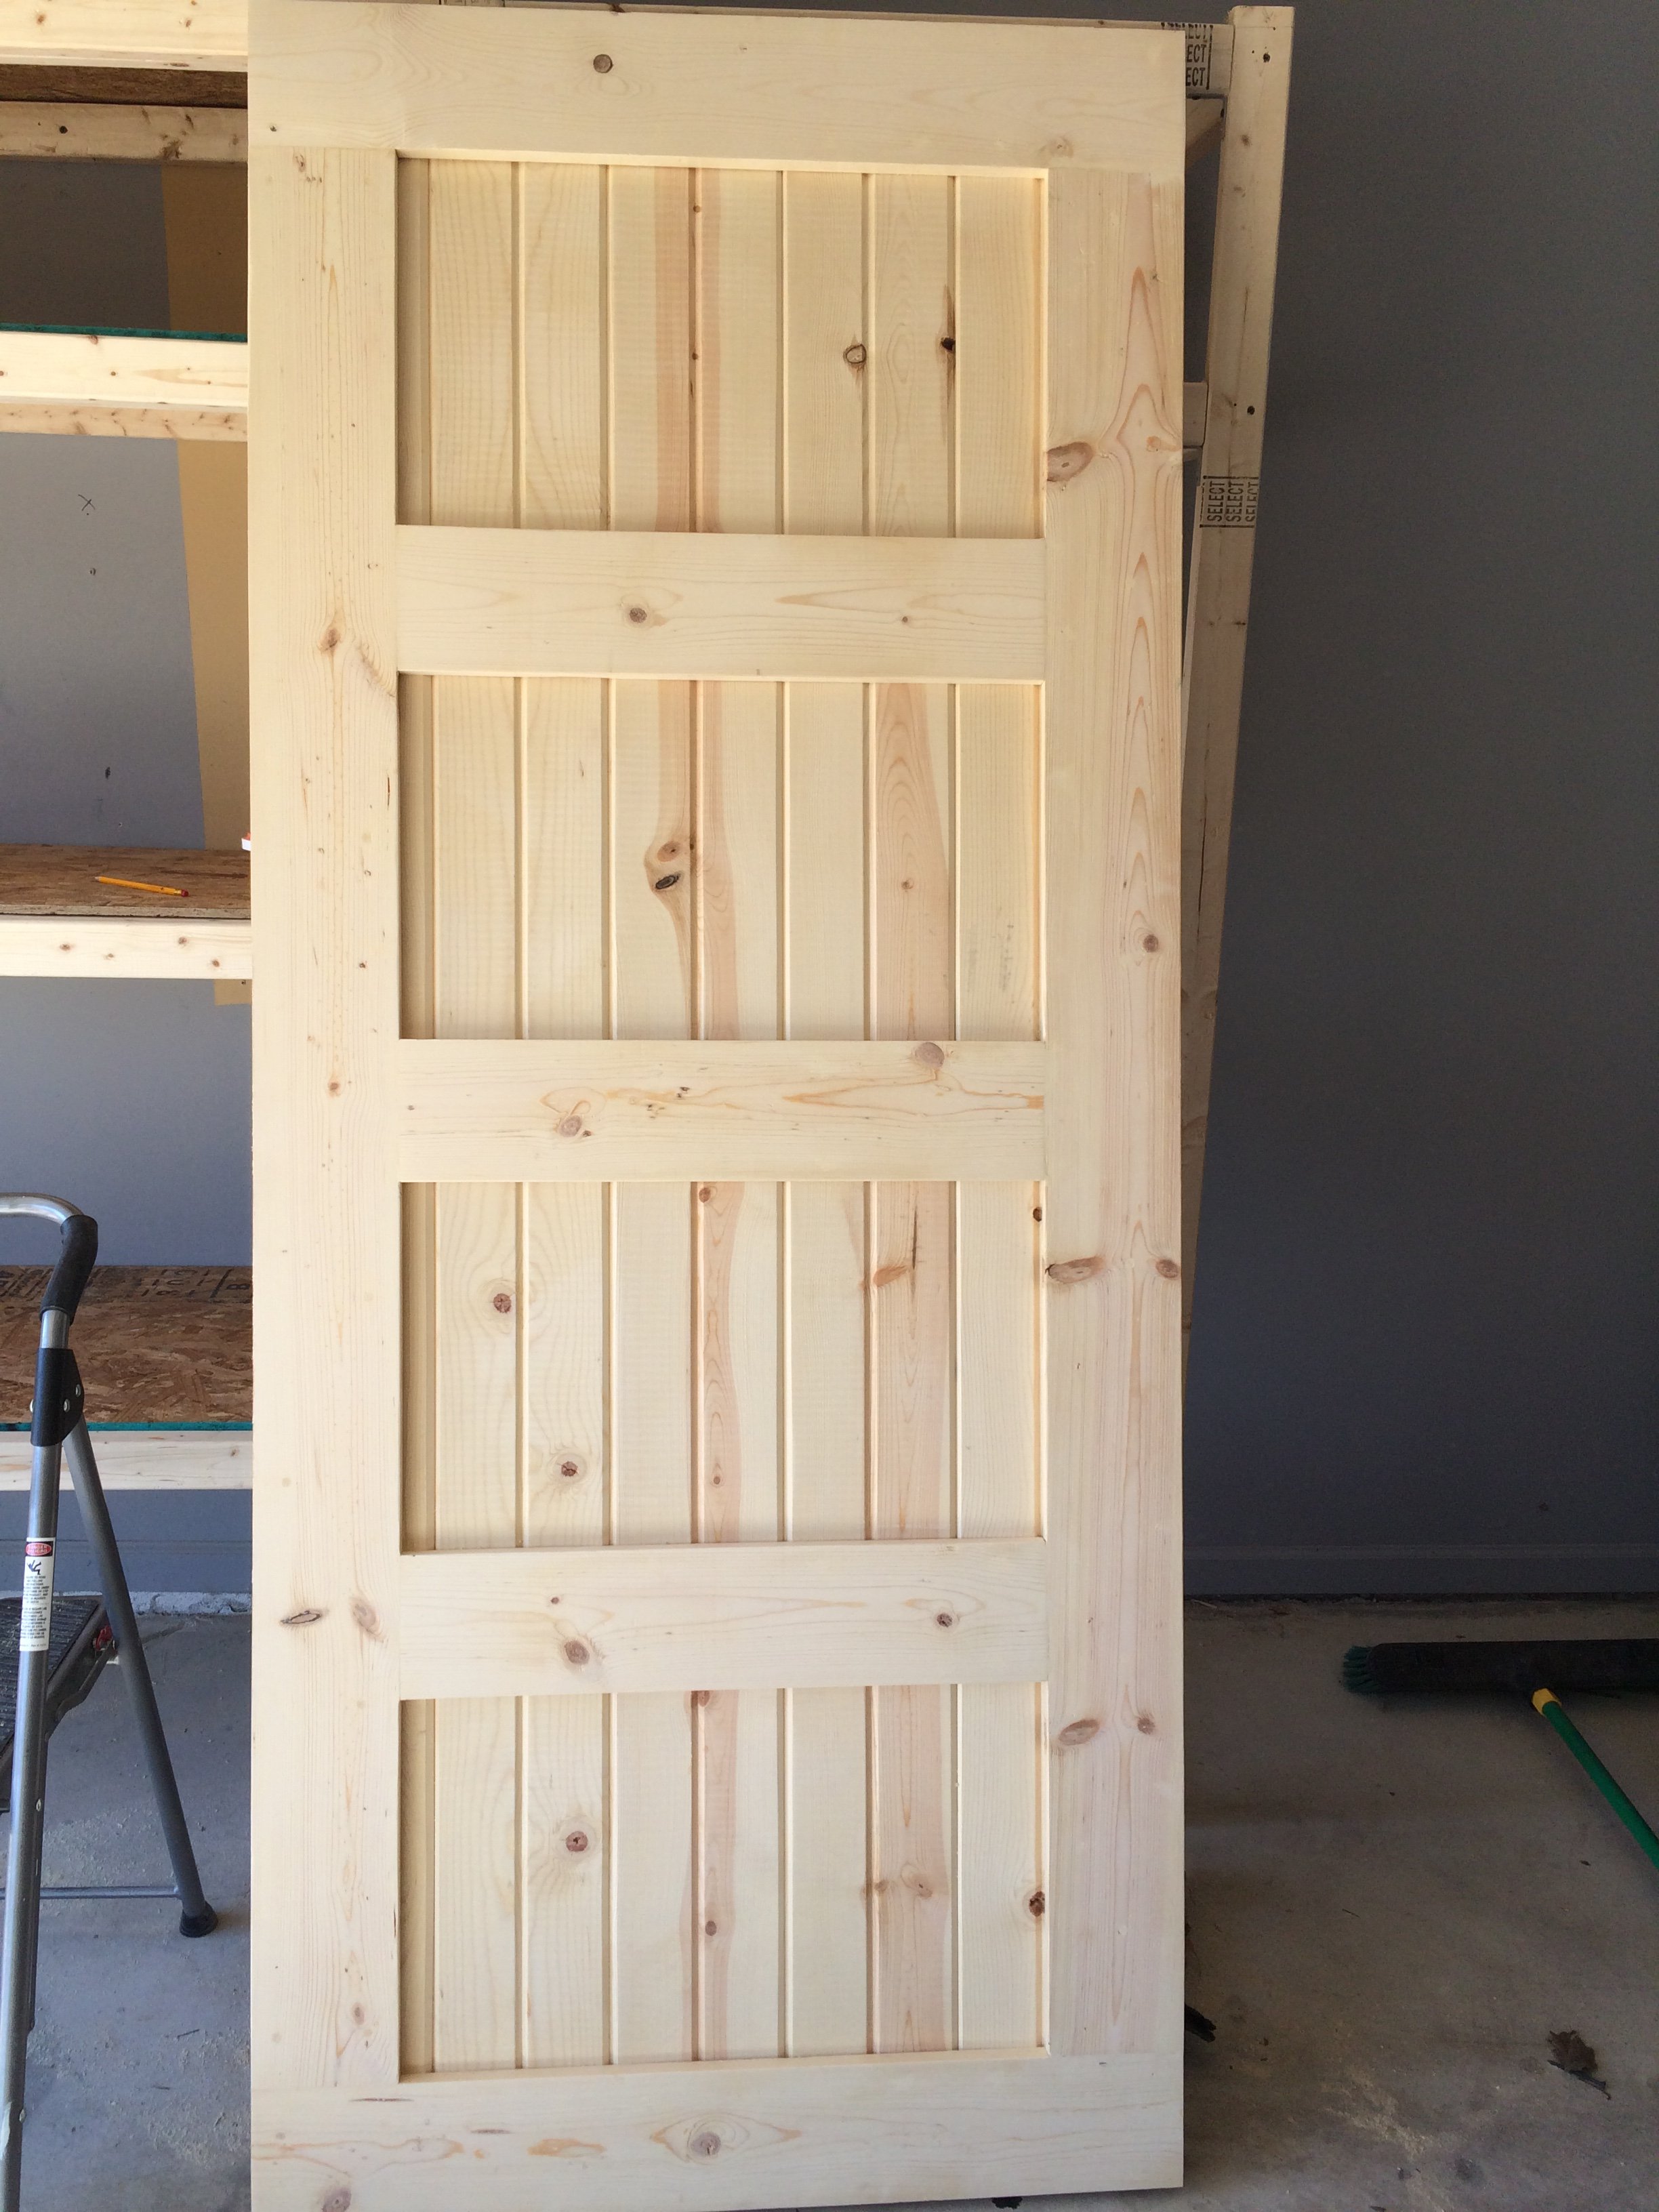
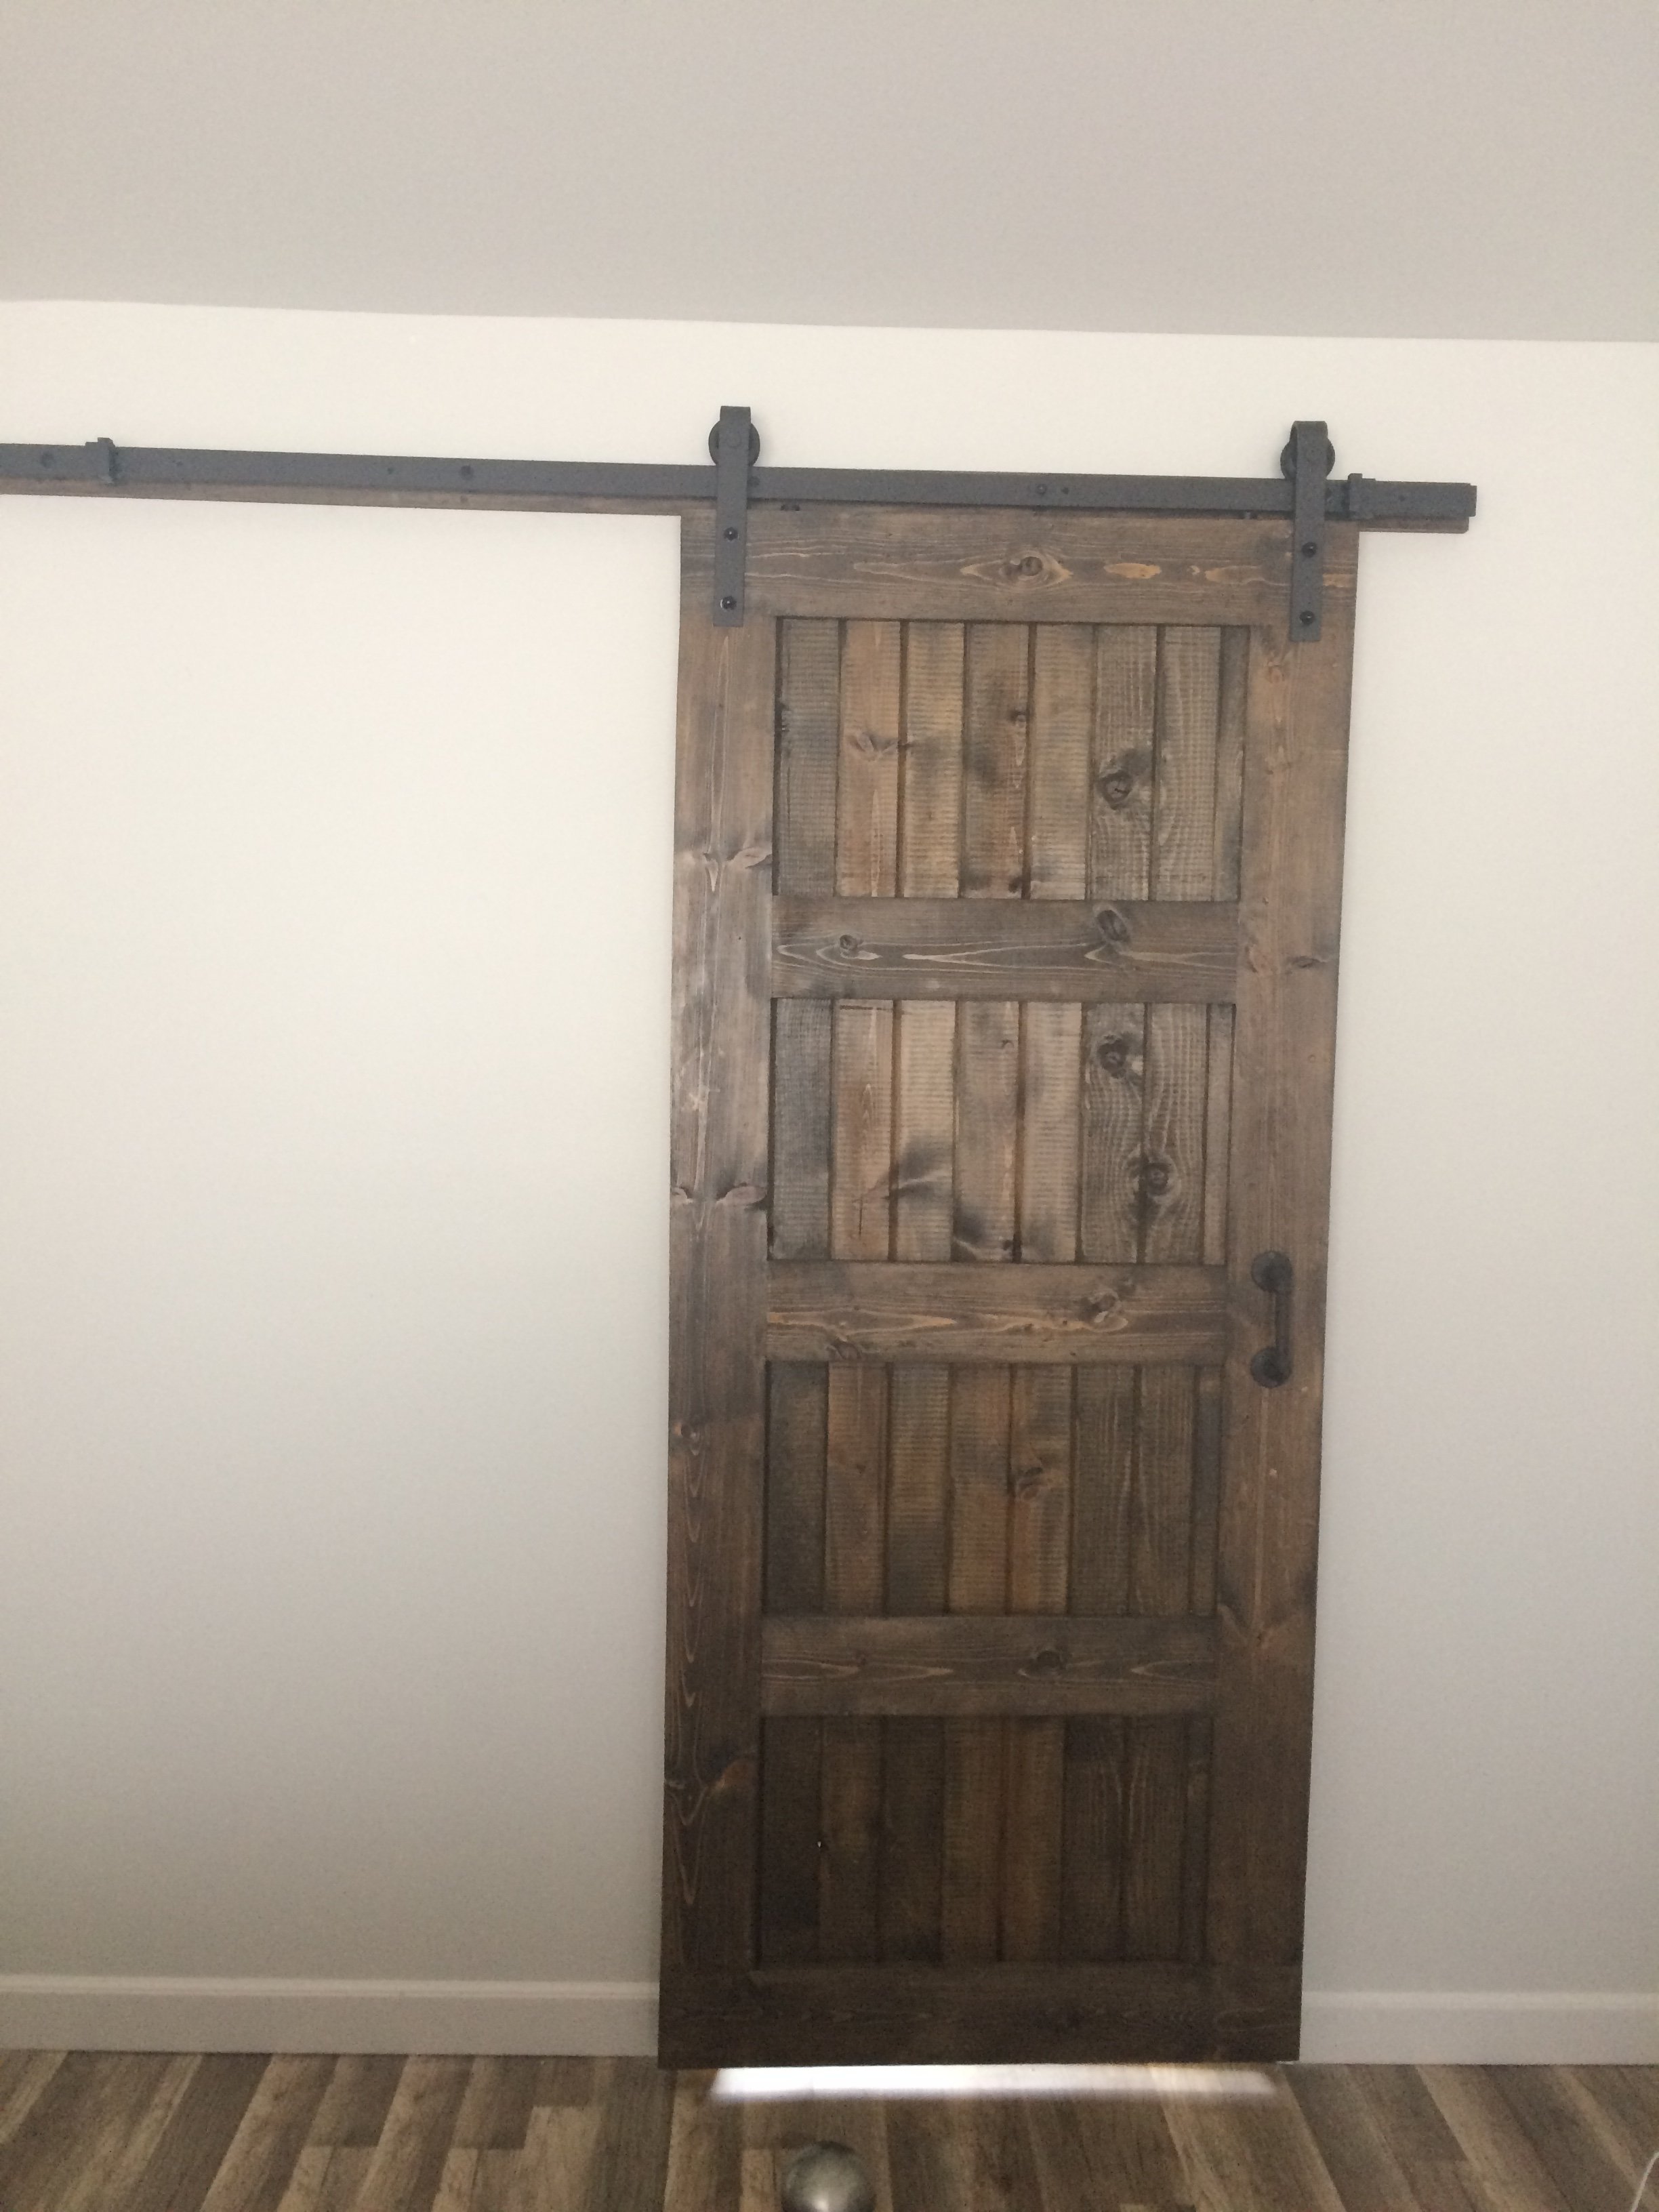
Created this door with pine wood tongue and groove lumber and pine wood planks. Purchase barn door hardware / track from Jet.com and door handles from Hobby Lobby.
This replaced my Master bath door and I think came out pretty good. Thank you for the ideas!!! Jeff M. Brownstown, Mi
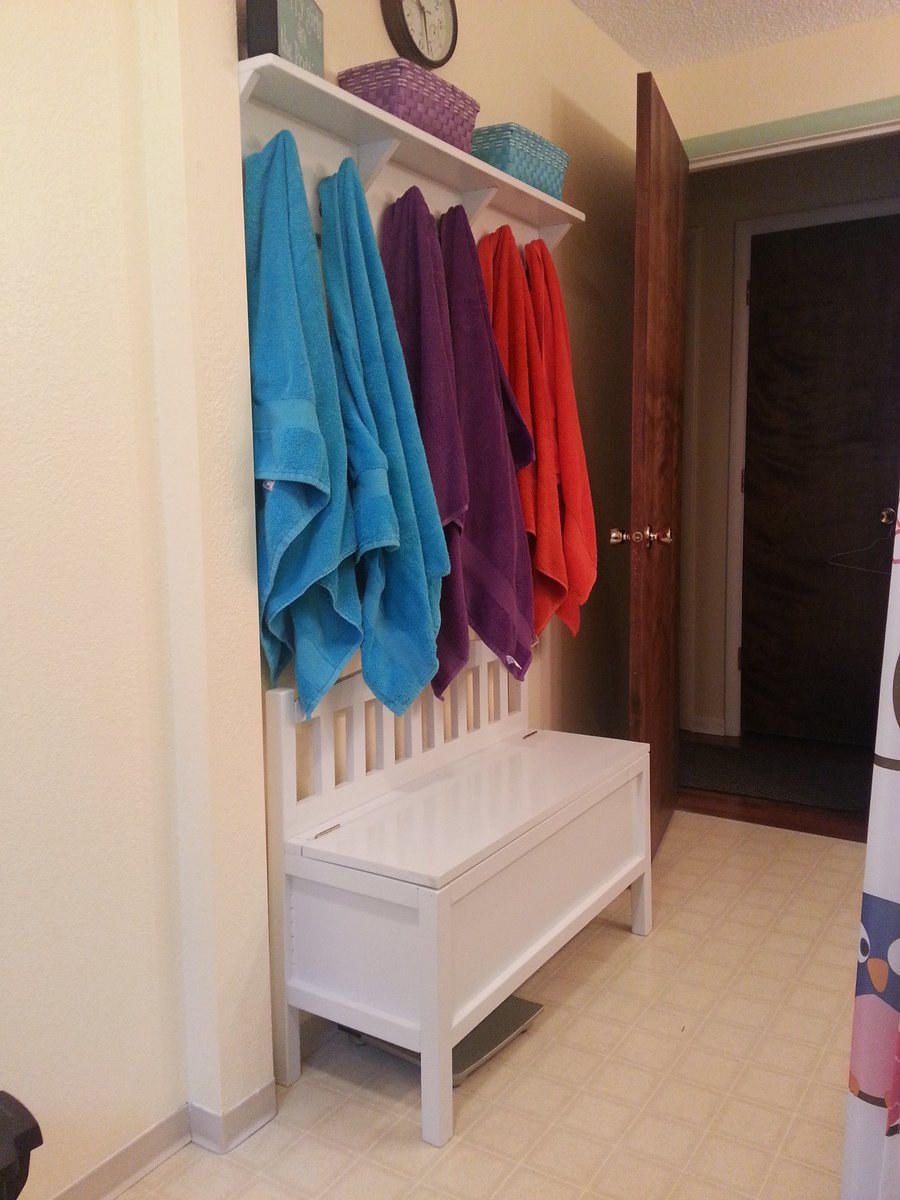
This bench was the perfect size for a long wall in our bathroom! My husband added a solid front panel and used peg board to create a vented back panel. Then he made the seat hinged. Now we have a great bench that doubles as a laundry hamper with two compartments. I absolutely love it!

Tue, 01/27/2015 - 15:27
Wow! I love how creative you are and the modifications! Fabulous!
My dog loves to people watch all day while I'm at work and she needed a new bed so I took the plans for the lower platform and modified them so it would stand alone. Took the platform and put it on the bottom so that her bed would sit inside instead of on top where she could more easily fall off.
I tried building without PH screws at first and all I ended up with was a lot of cracked and wasted lumber. Got the PH jig and finished the whole build myself in 2 hours. Sanding, staining, and sealing tomorrow but I'm just so excited about it I had to post now!
This is one of my first wood working projects I have accomplished and these two plans were some that I really enjoyed making.
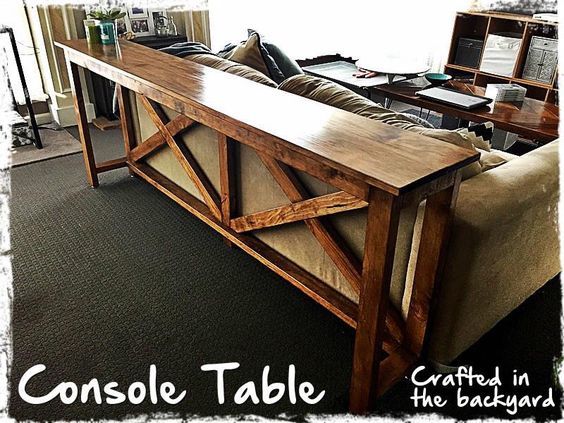
Made from the modified Ana White Rustic X-Console Table.
I made this console table to fit the length of my sons couch. It's about 6 foot long.
It was really easy to make. My only tip is to sand all your timber before assembling. Getting into the tight spots with a sander is quite difficult. I hae now made 4 of these tables and sanding first saves so much time and headaches. The other 3 I have made were painted white and had stained tops.
Wed, 09/09/2020 - 09:03
Plans
do you have the plans for this? i've been looking and looking for what i needed and this is it!!

My husband, step father and I built these Thanksgiving weekend (2010) and my mom got us a half bushel of oysters to snack on and made awesome steamed mussels with bread for dinner. This was a very fun family weekend.
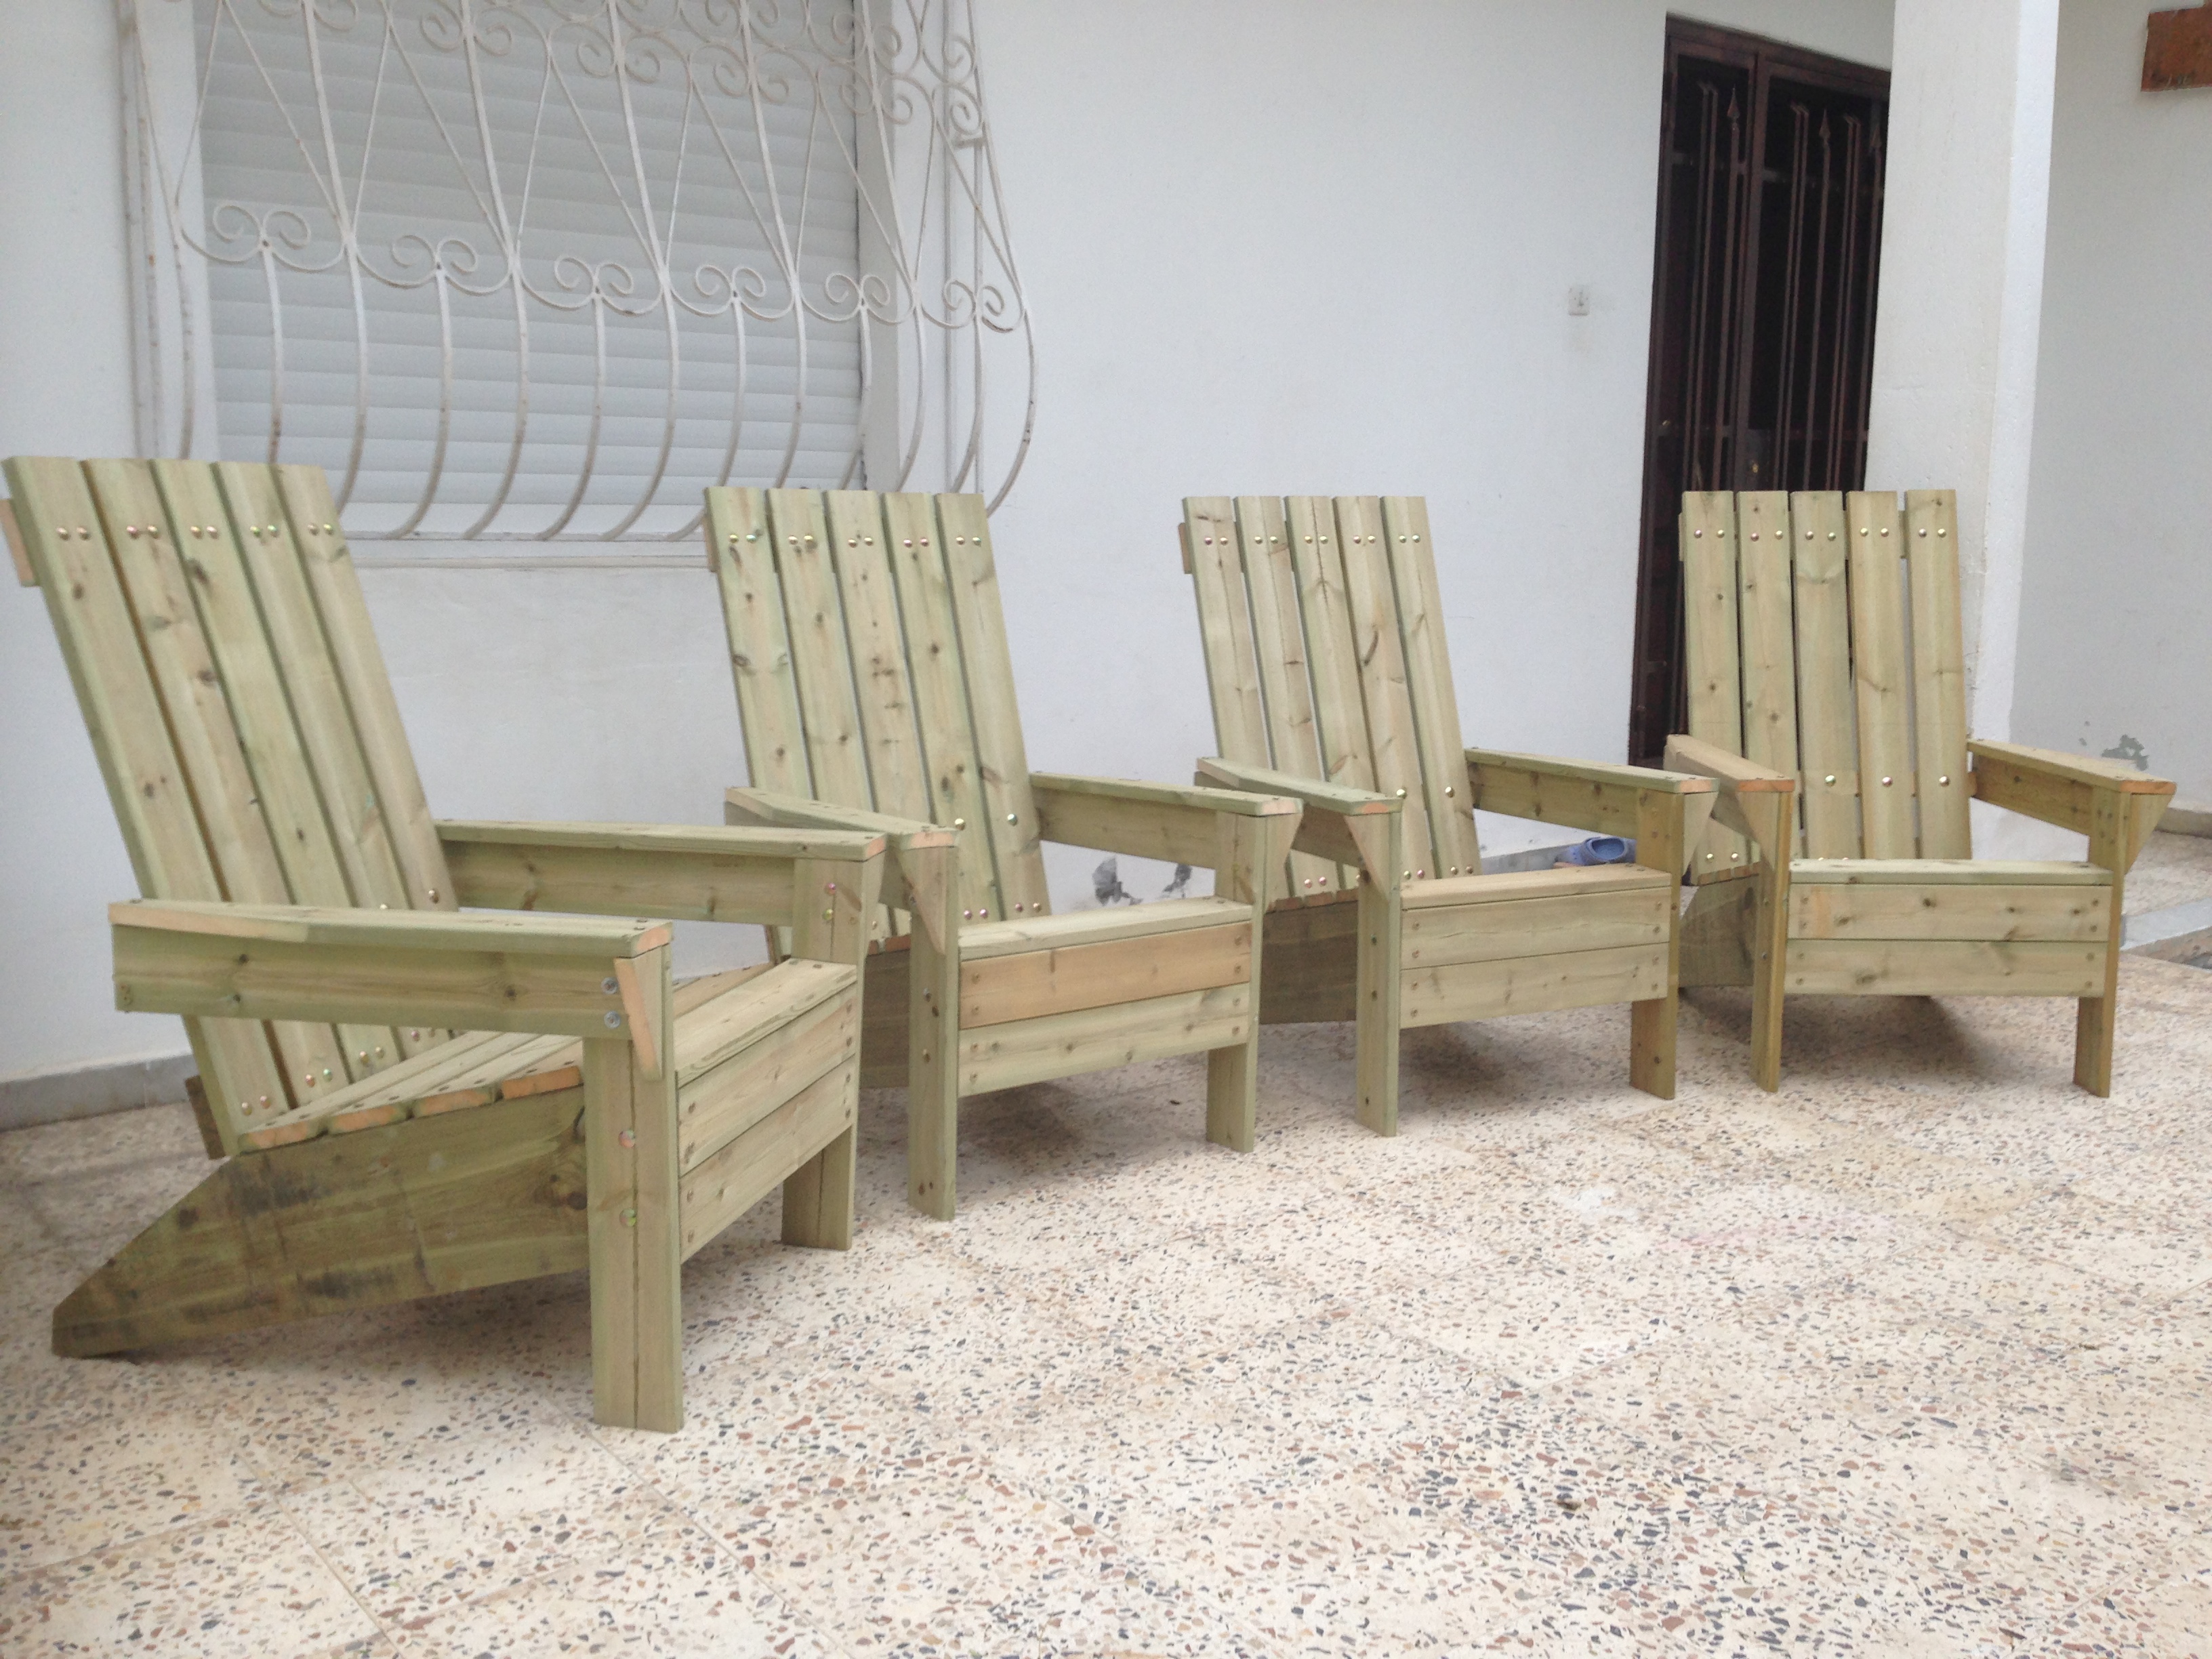
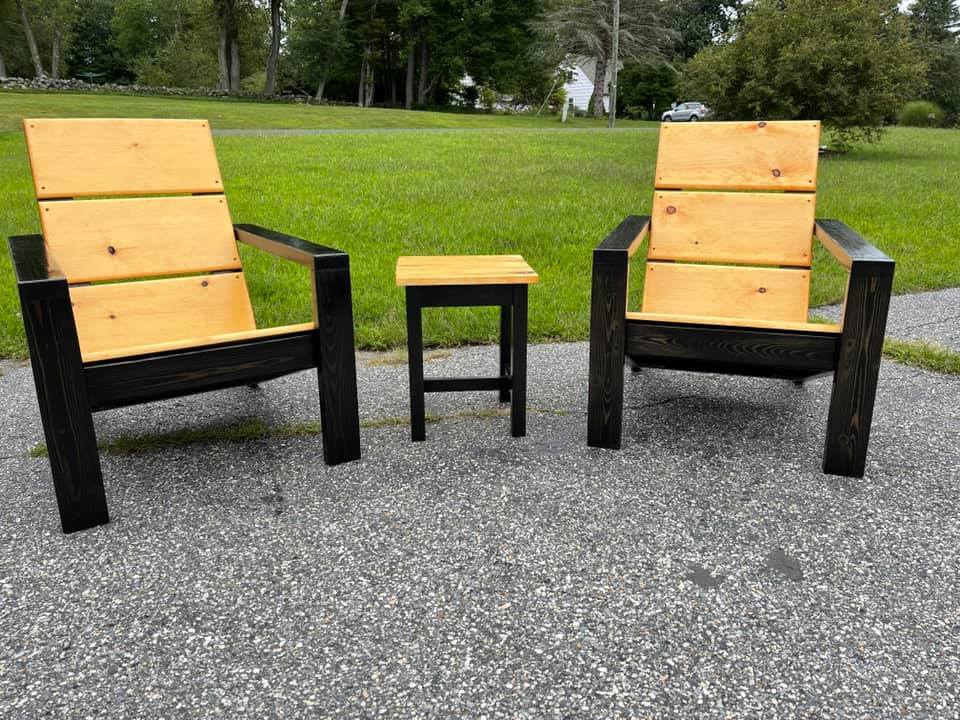
I modifyed the plans a little to make the arms angle in a bit instead of being straight boards and also created the curved front. Then after building the first chair, Pat decided to make the second chair's back rest taller and cut angles to match the arms.
I picked intermediate because of needing a miter saw for all the different angles needed for getting the front right.
Also, It took one day for each chair
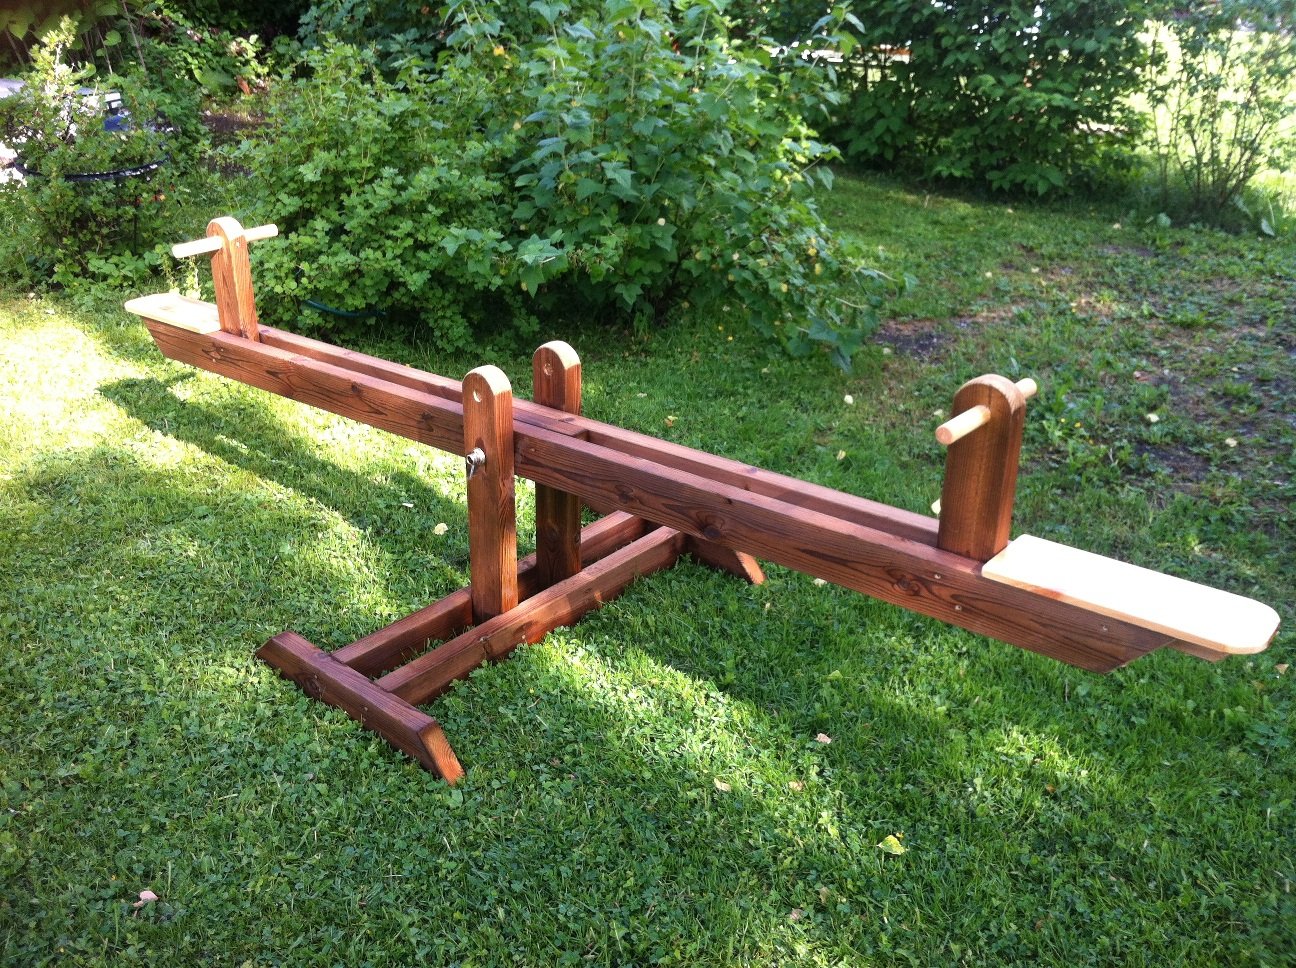
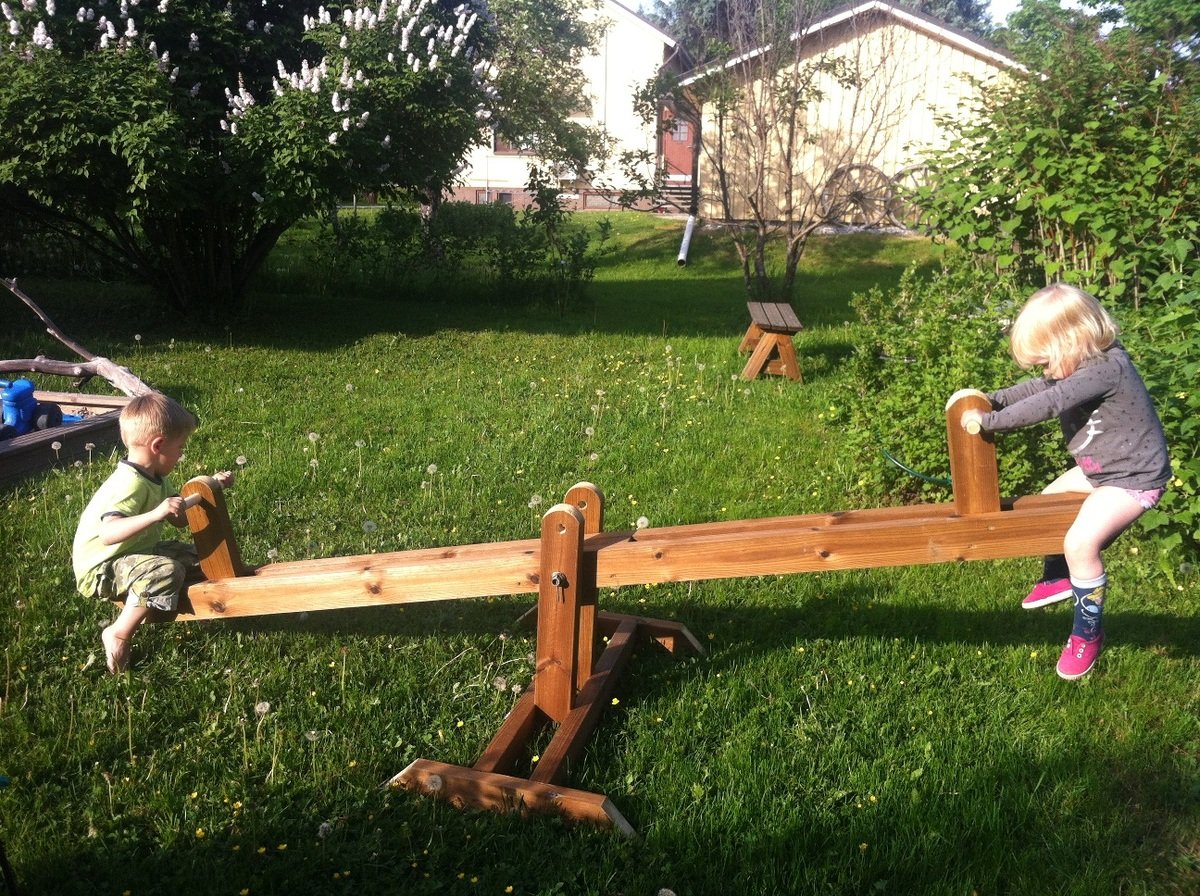
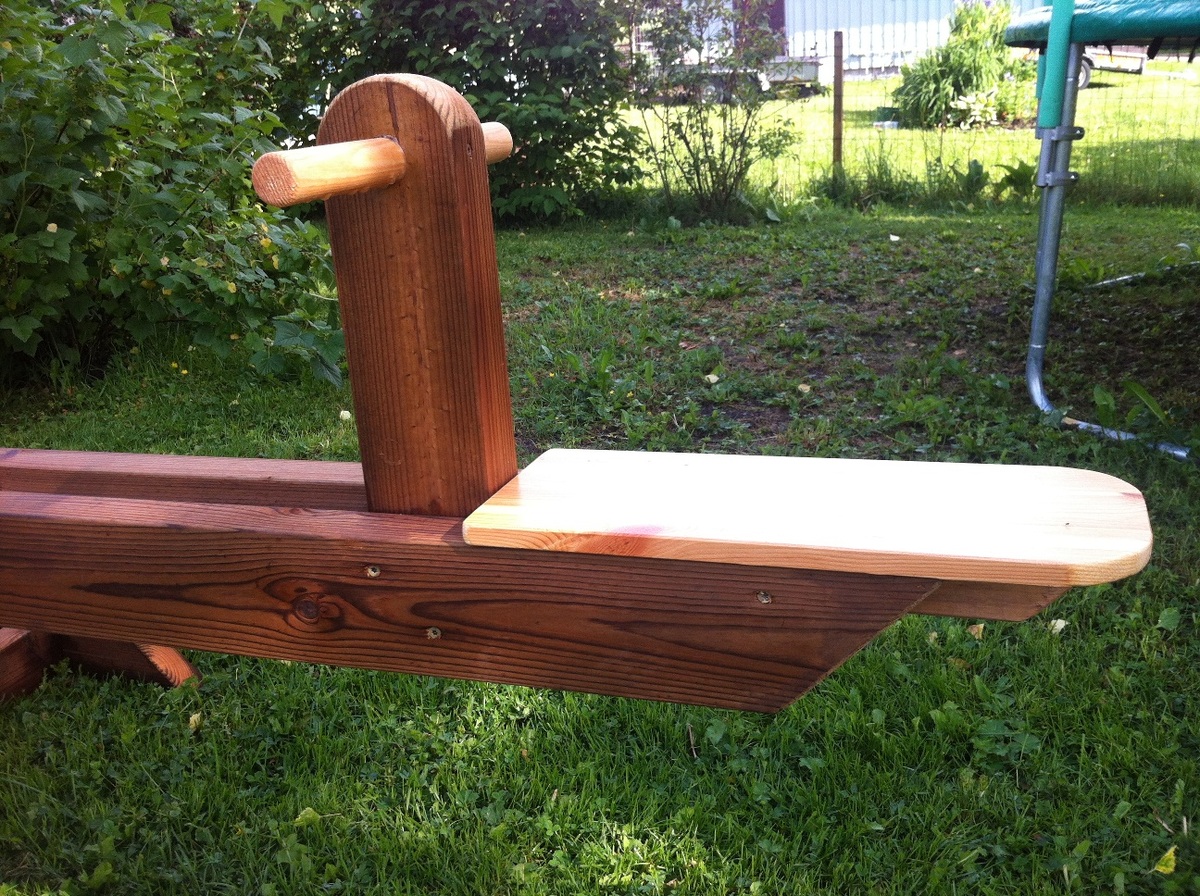
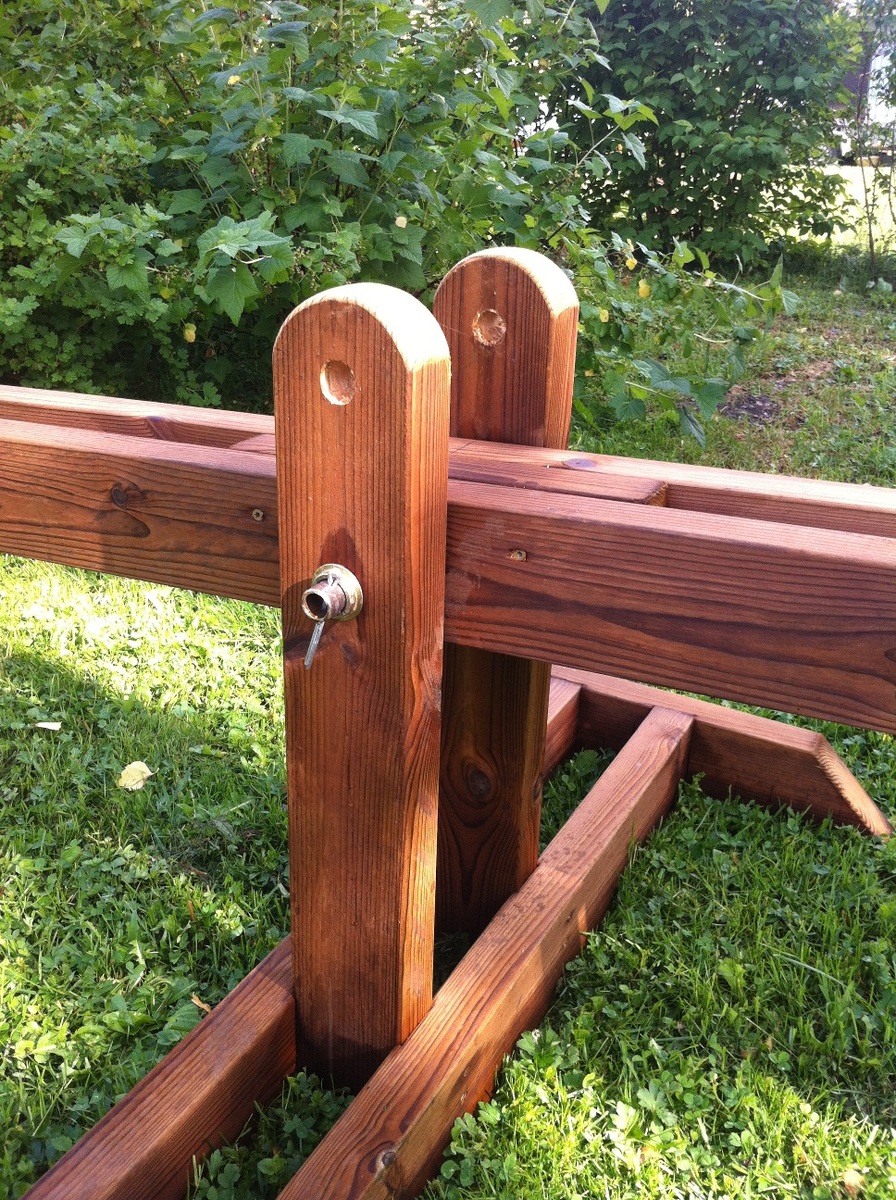
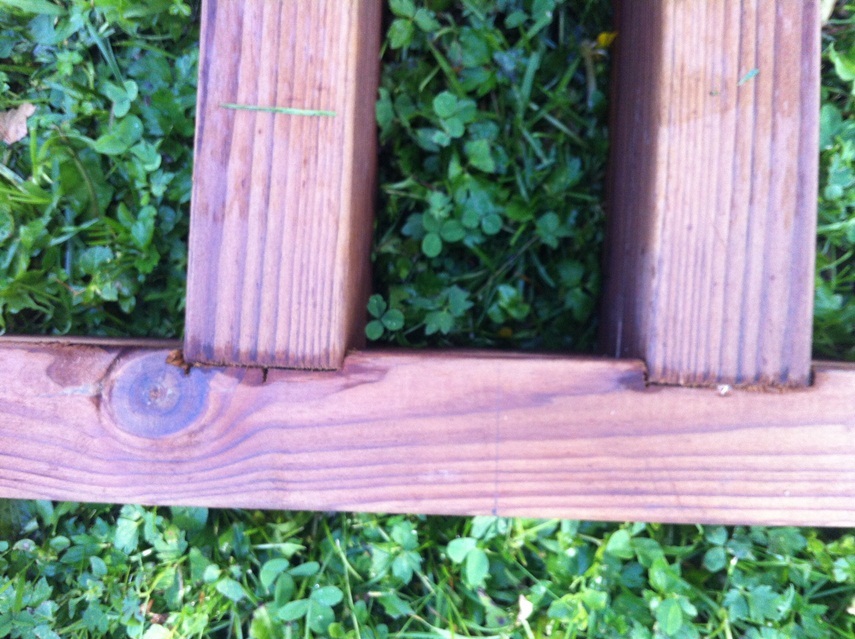
Greetings from Finland. I made teeter-totter from excellent plans Ana has donatet for all of us. I used treated wood, so I didn't need to paint the project (and never will :-) Handles and seats are made from raw wood. Gives also nice twin color look. To add some extra support I embed the beams at foot.

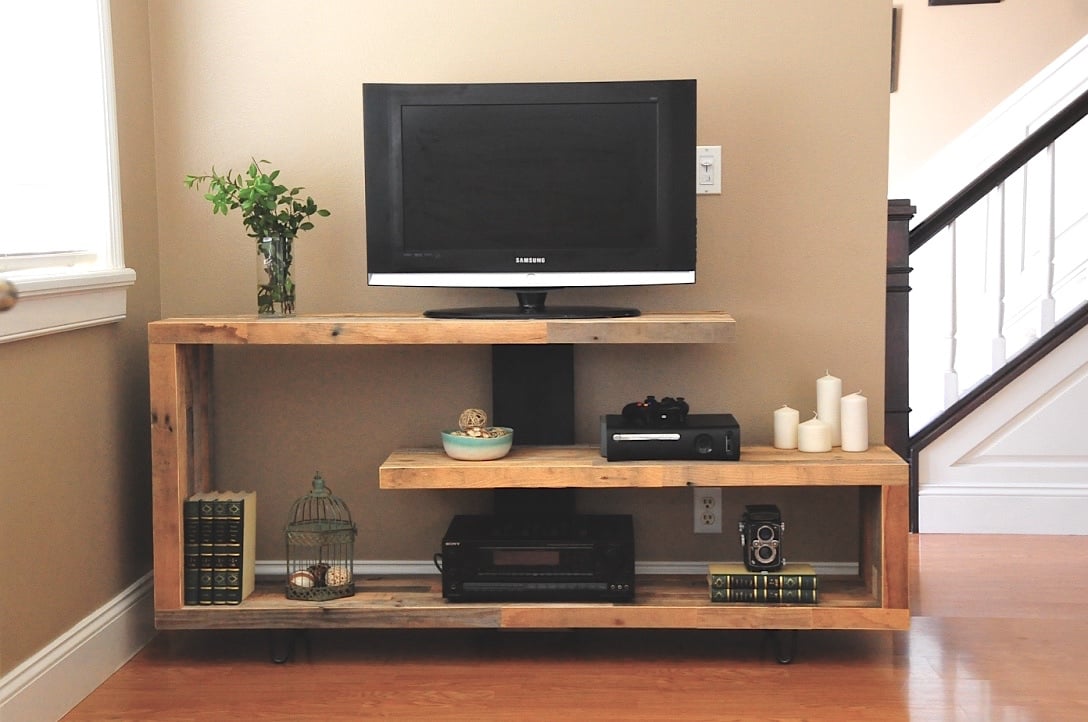
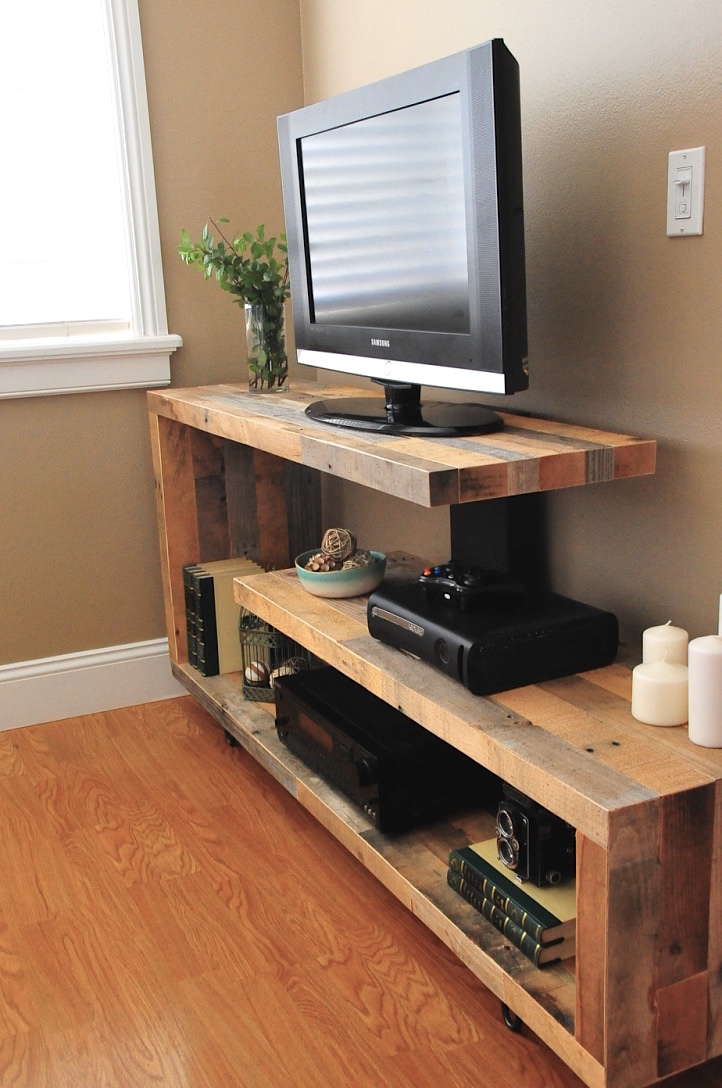
Just finished up this unique TV console. Built from reclaimed pallet wood.
Mon, 12/02/2019 - 22:10
Hi there Im new to site and also have the issue of not seeing the plans for this Rustic Modern TV Console. Are they available and Im doing something wrong or??
Sat, 06/27/2020 - 05:03
I am logged in and I do not see the plans for the "Rustic Modern TV Console"
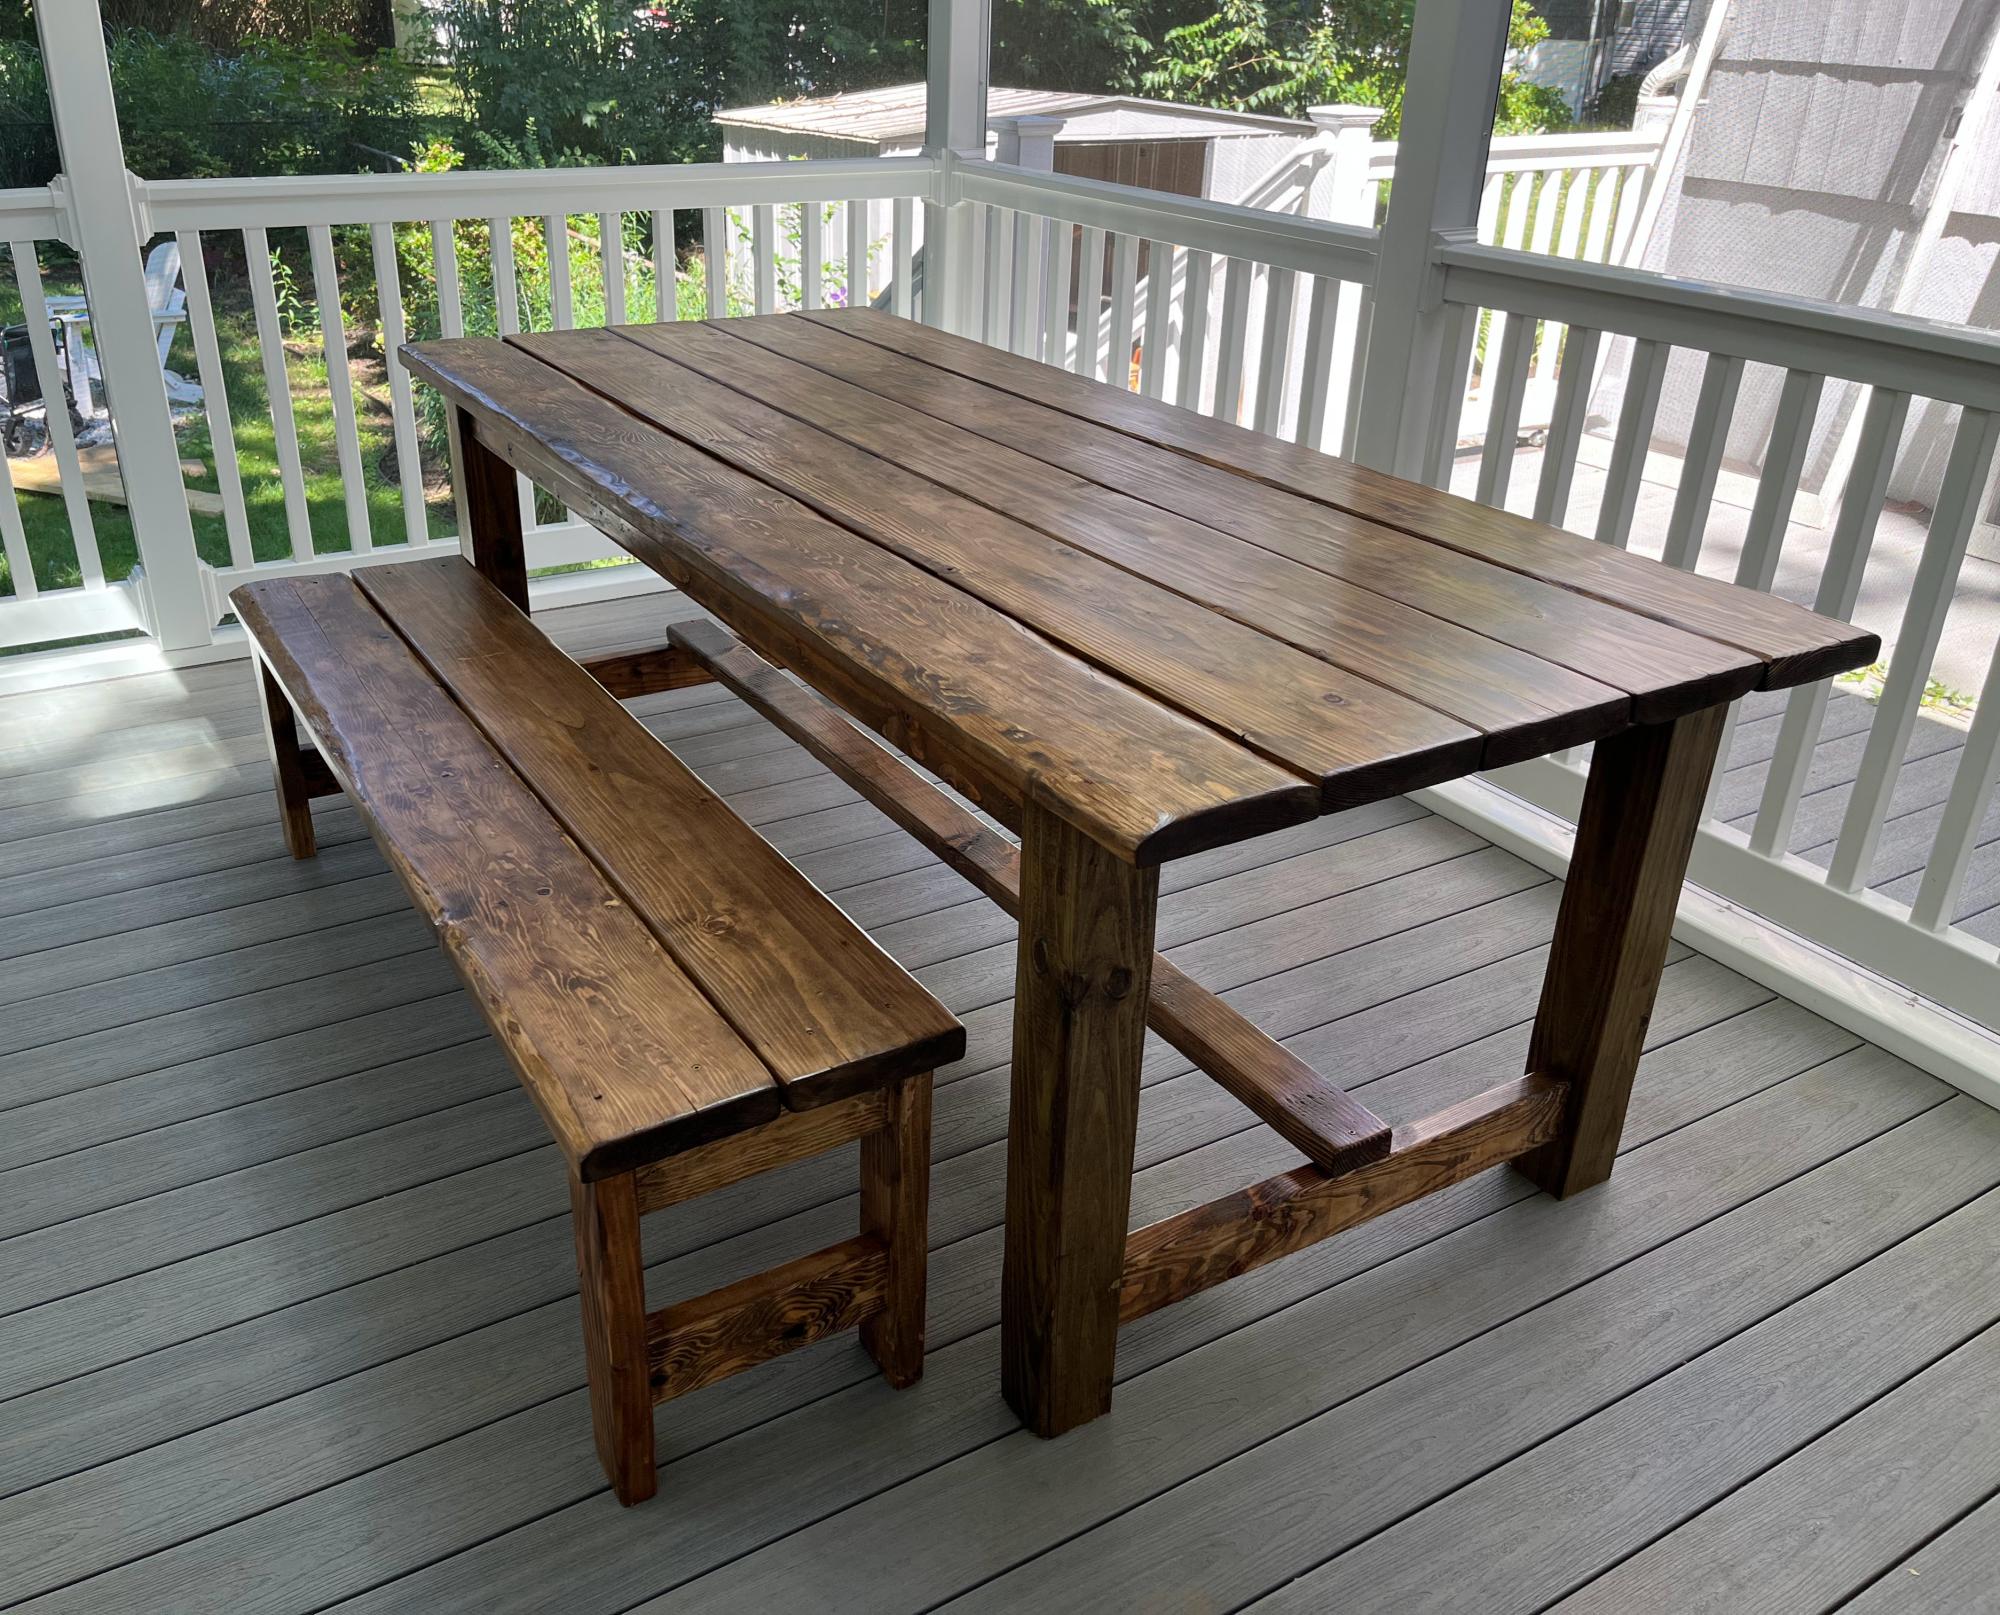
Altered the Beginner Farm Table plans to use 2x8s for the top and 4x4s for the legs. I used pocket holes for the table. I followed the bench plans almost exactly, adjusting slightly for the 2x8 tops. I am a beginner and I did it myself! The table and bench are beautiful and sturdy! Thanks Ana!
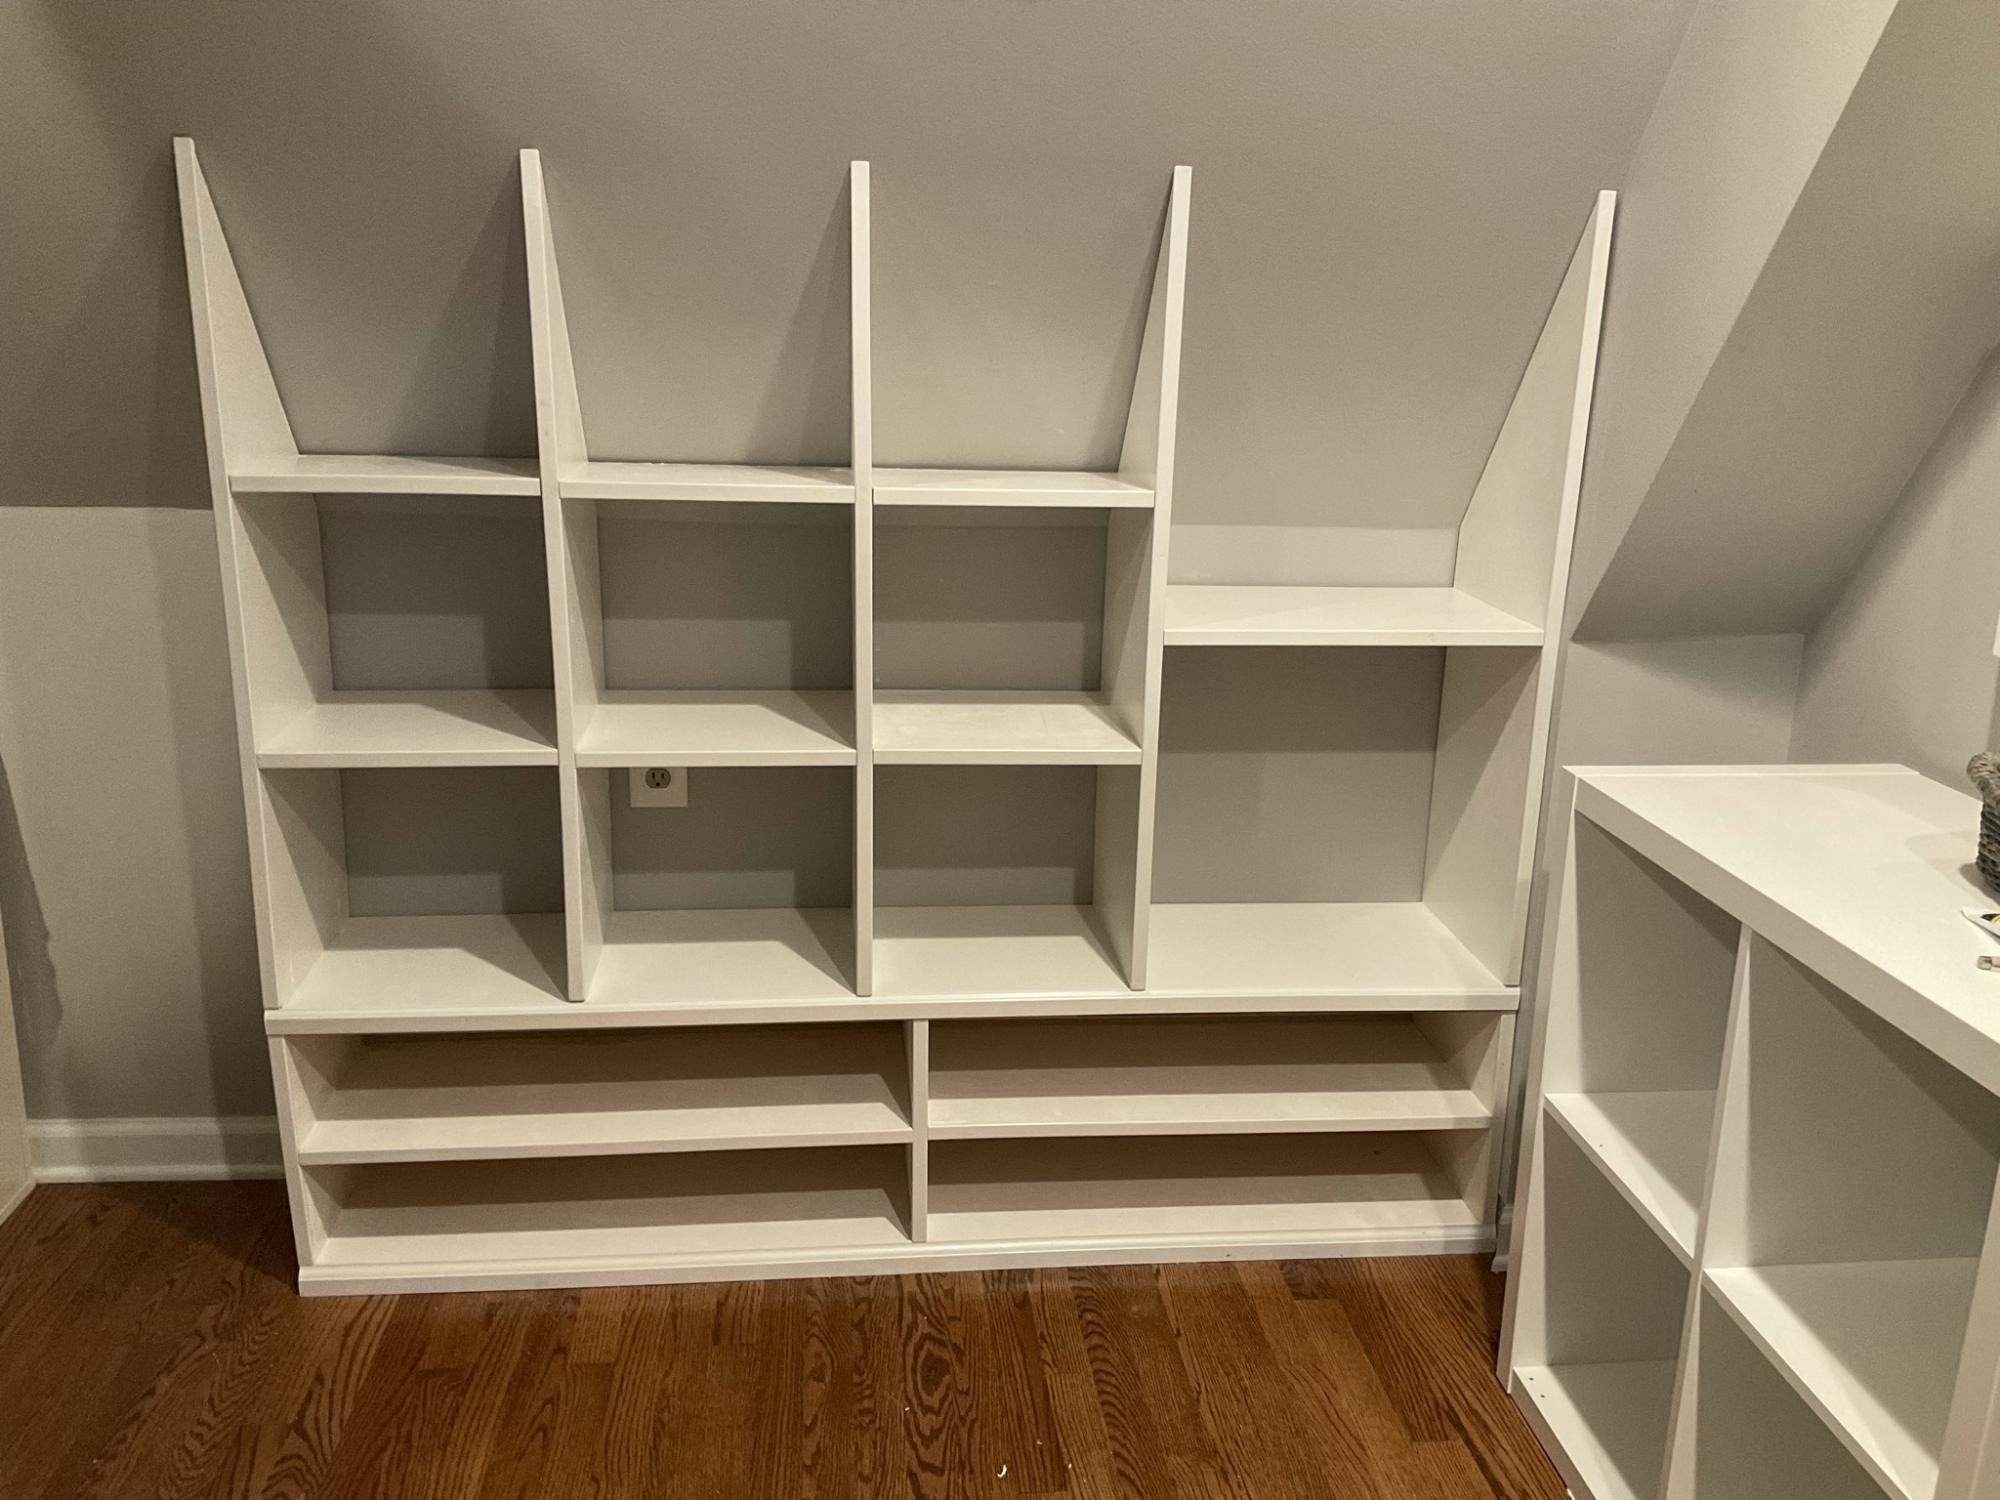
I used Ana’s Shelf Help Configurator to build these shelves for a deeply sloped ceiling. None of those well known Closet Organizer Companies could come up with a decent plan for this closet and they charge a small fortune.
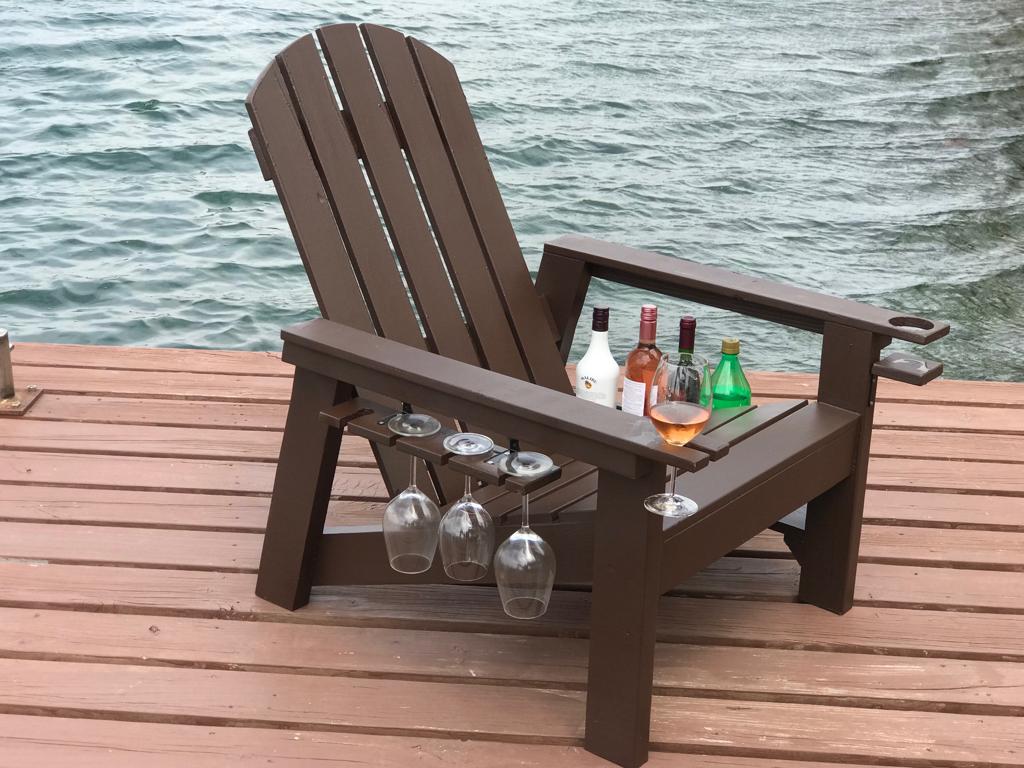
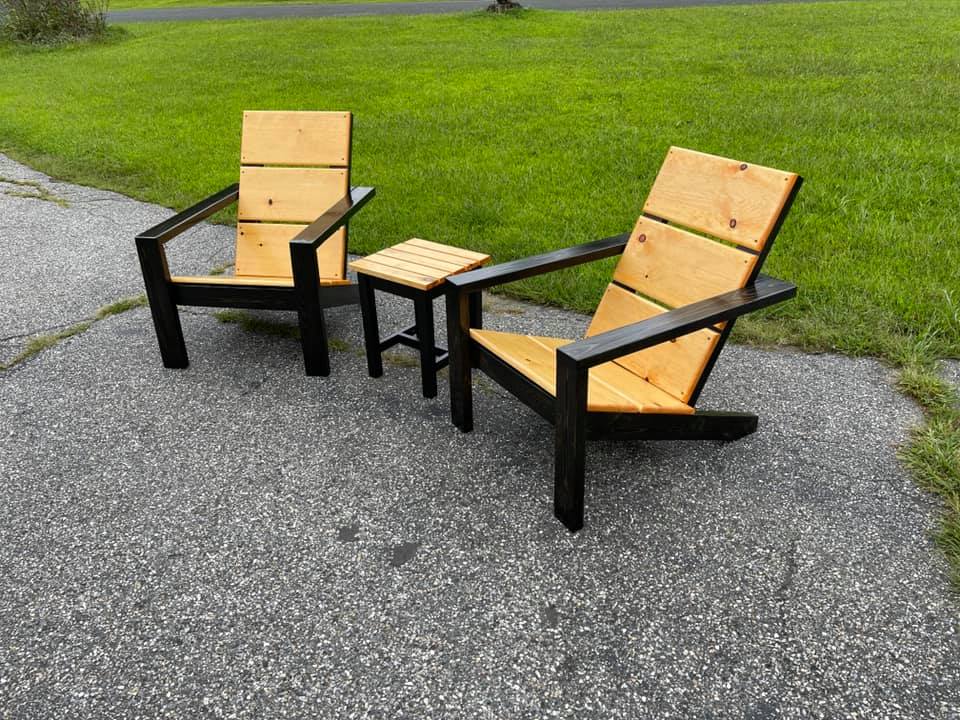
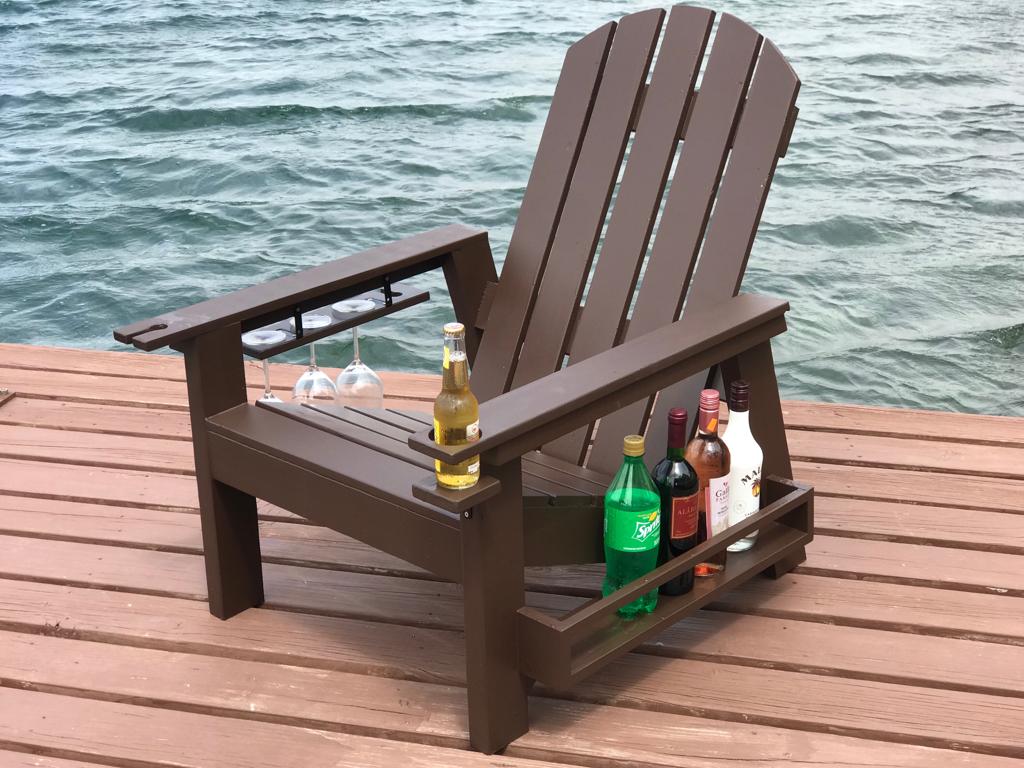
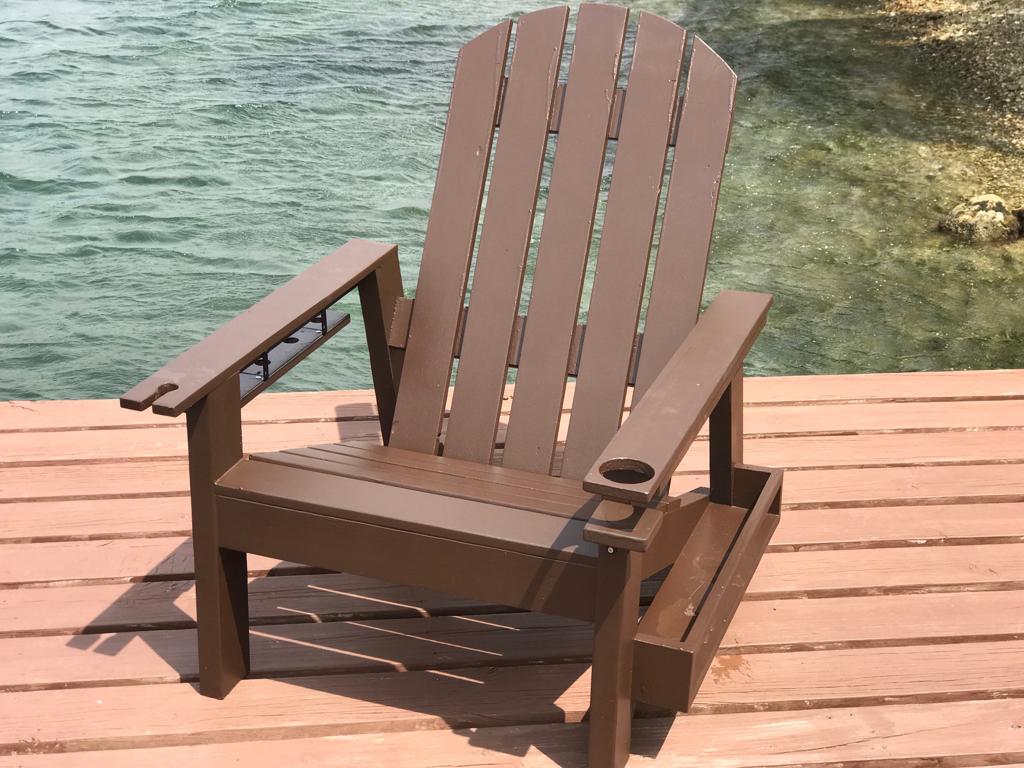
These are the adirondack chairs and I took the basic model and added a wine glass holder and also a bottle/snack bag holder.
Fri, 08/21/2020 - 20:10
Any chance on sharing your plan for what you added on? I’d love to make this as a gift for my MIL!
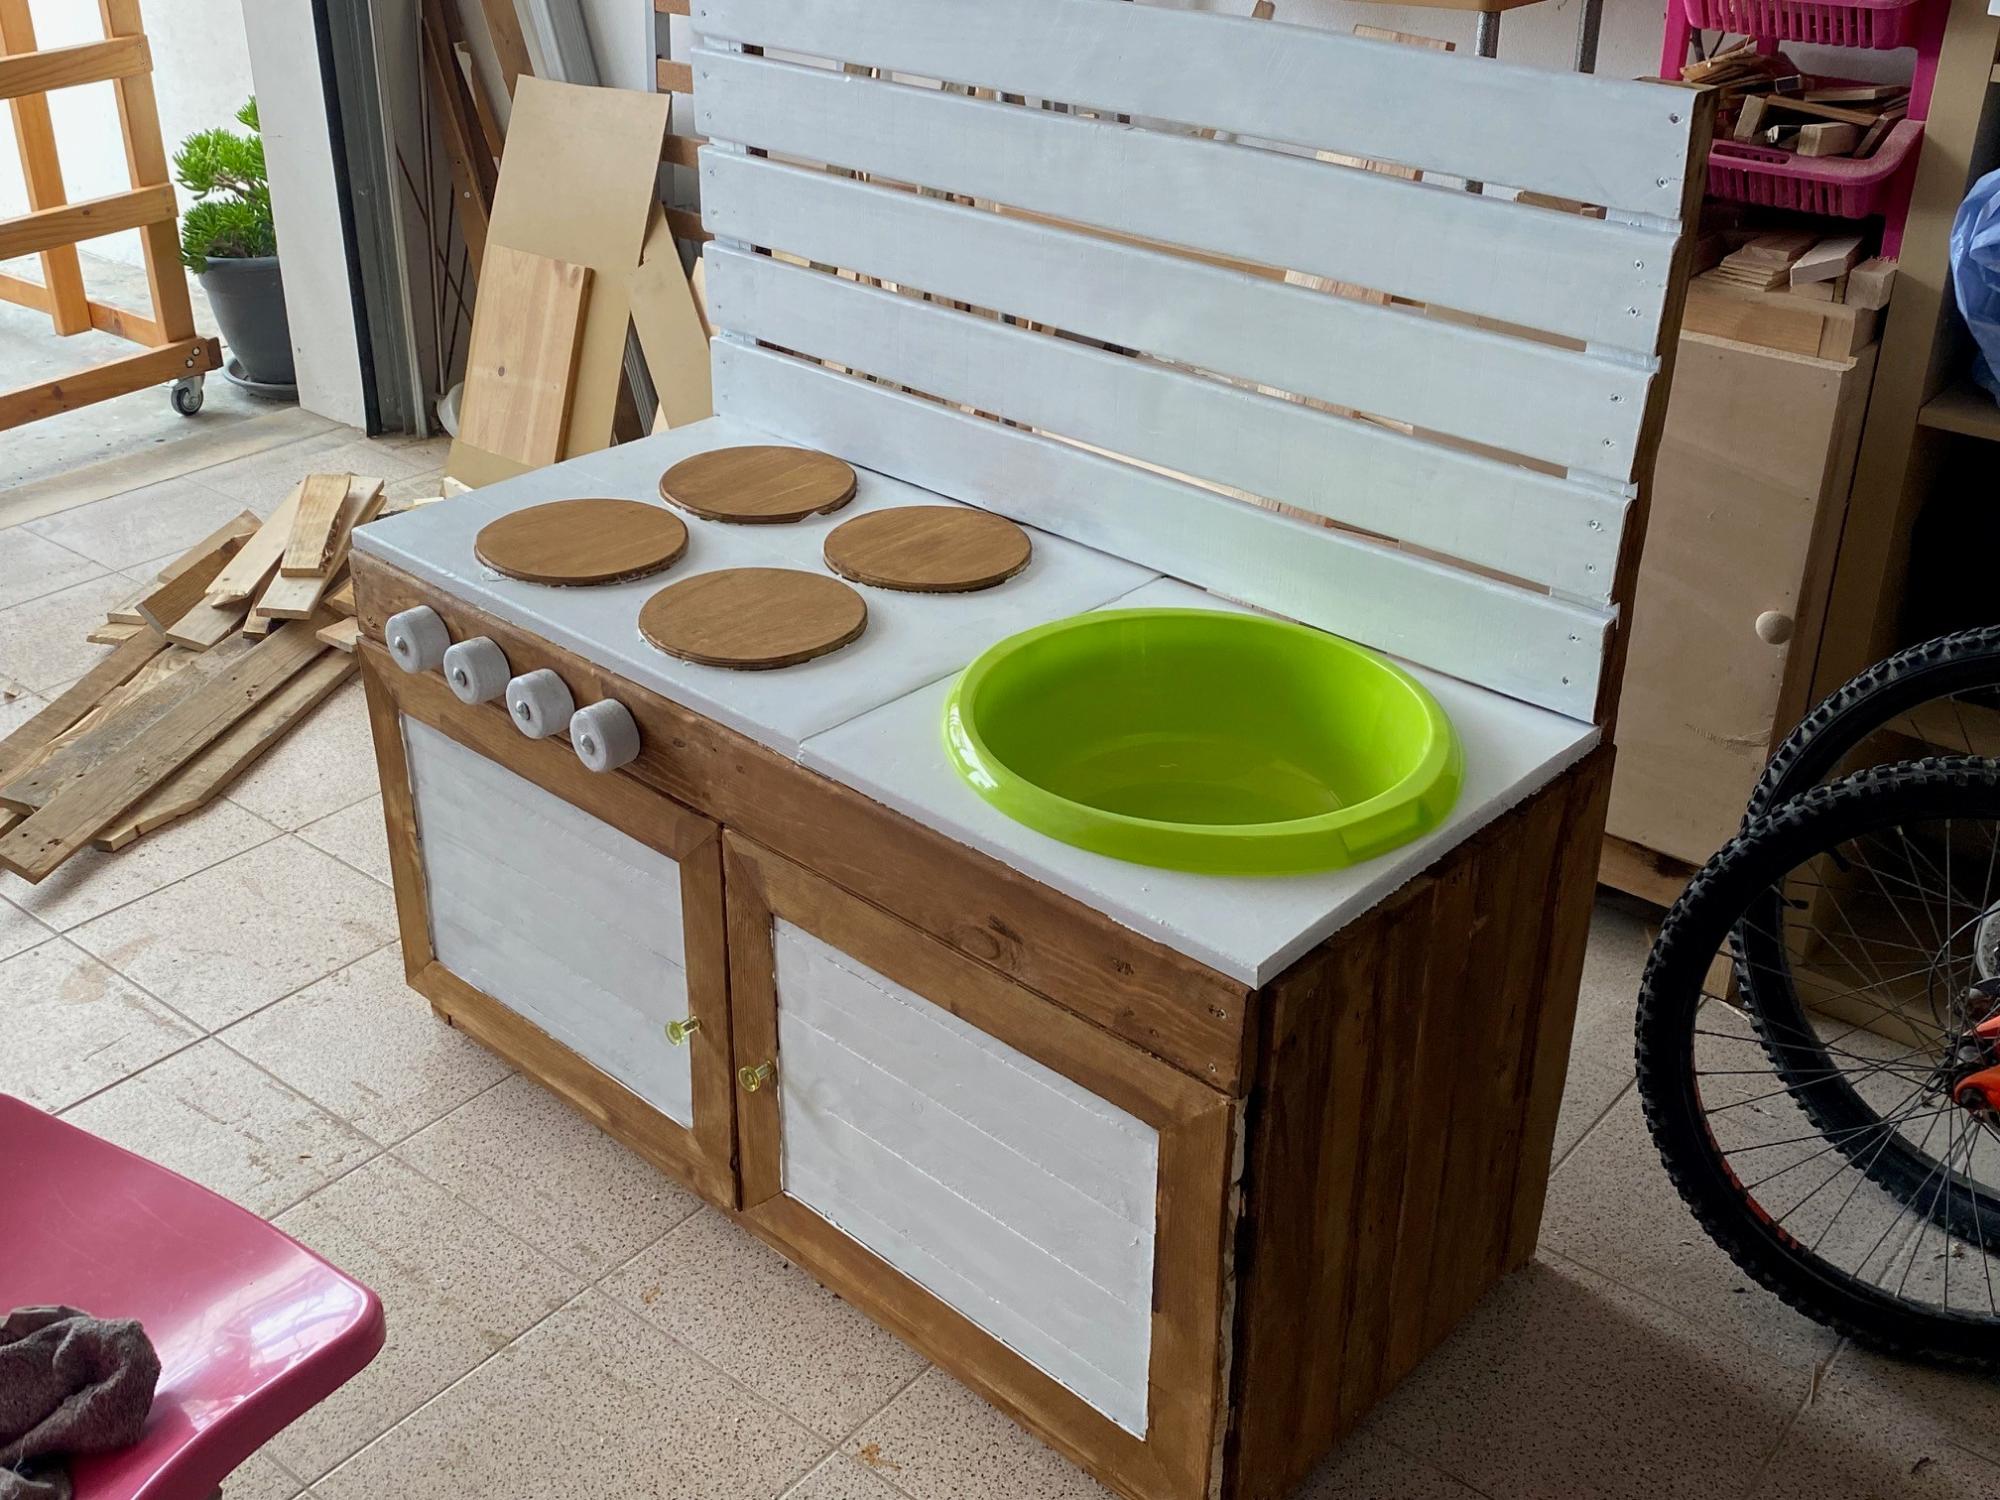
Here's the Mud Kitchen I made for my son's kindergarten. All made from palettes. Unfortunately your plans came out just too late
Fri, 05/05/2023 - 11:40
Thanks for sharing your version, it looks like a lot of fun!
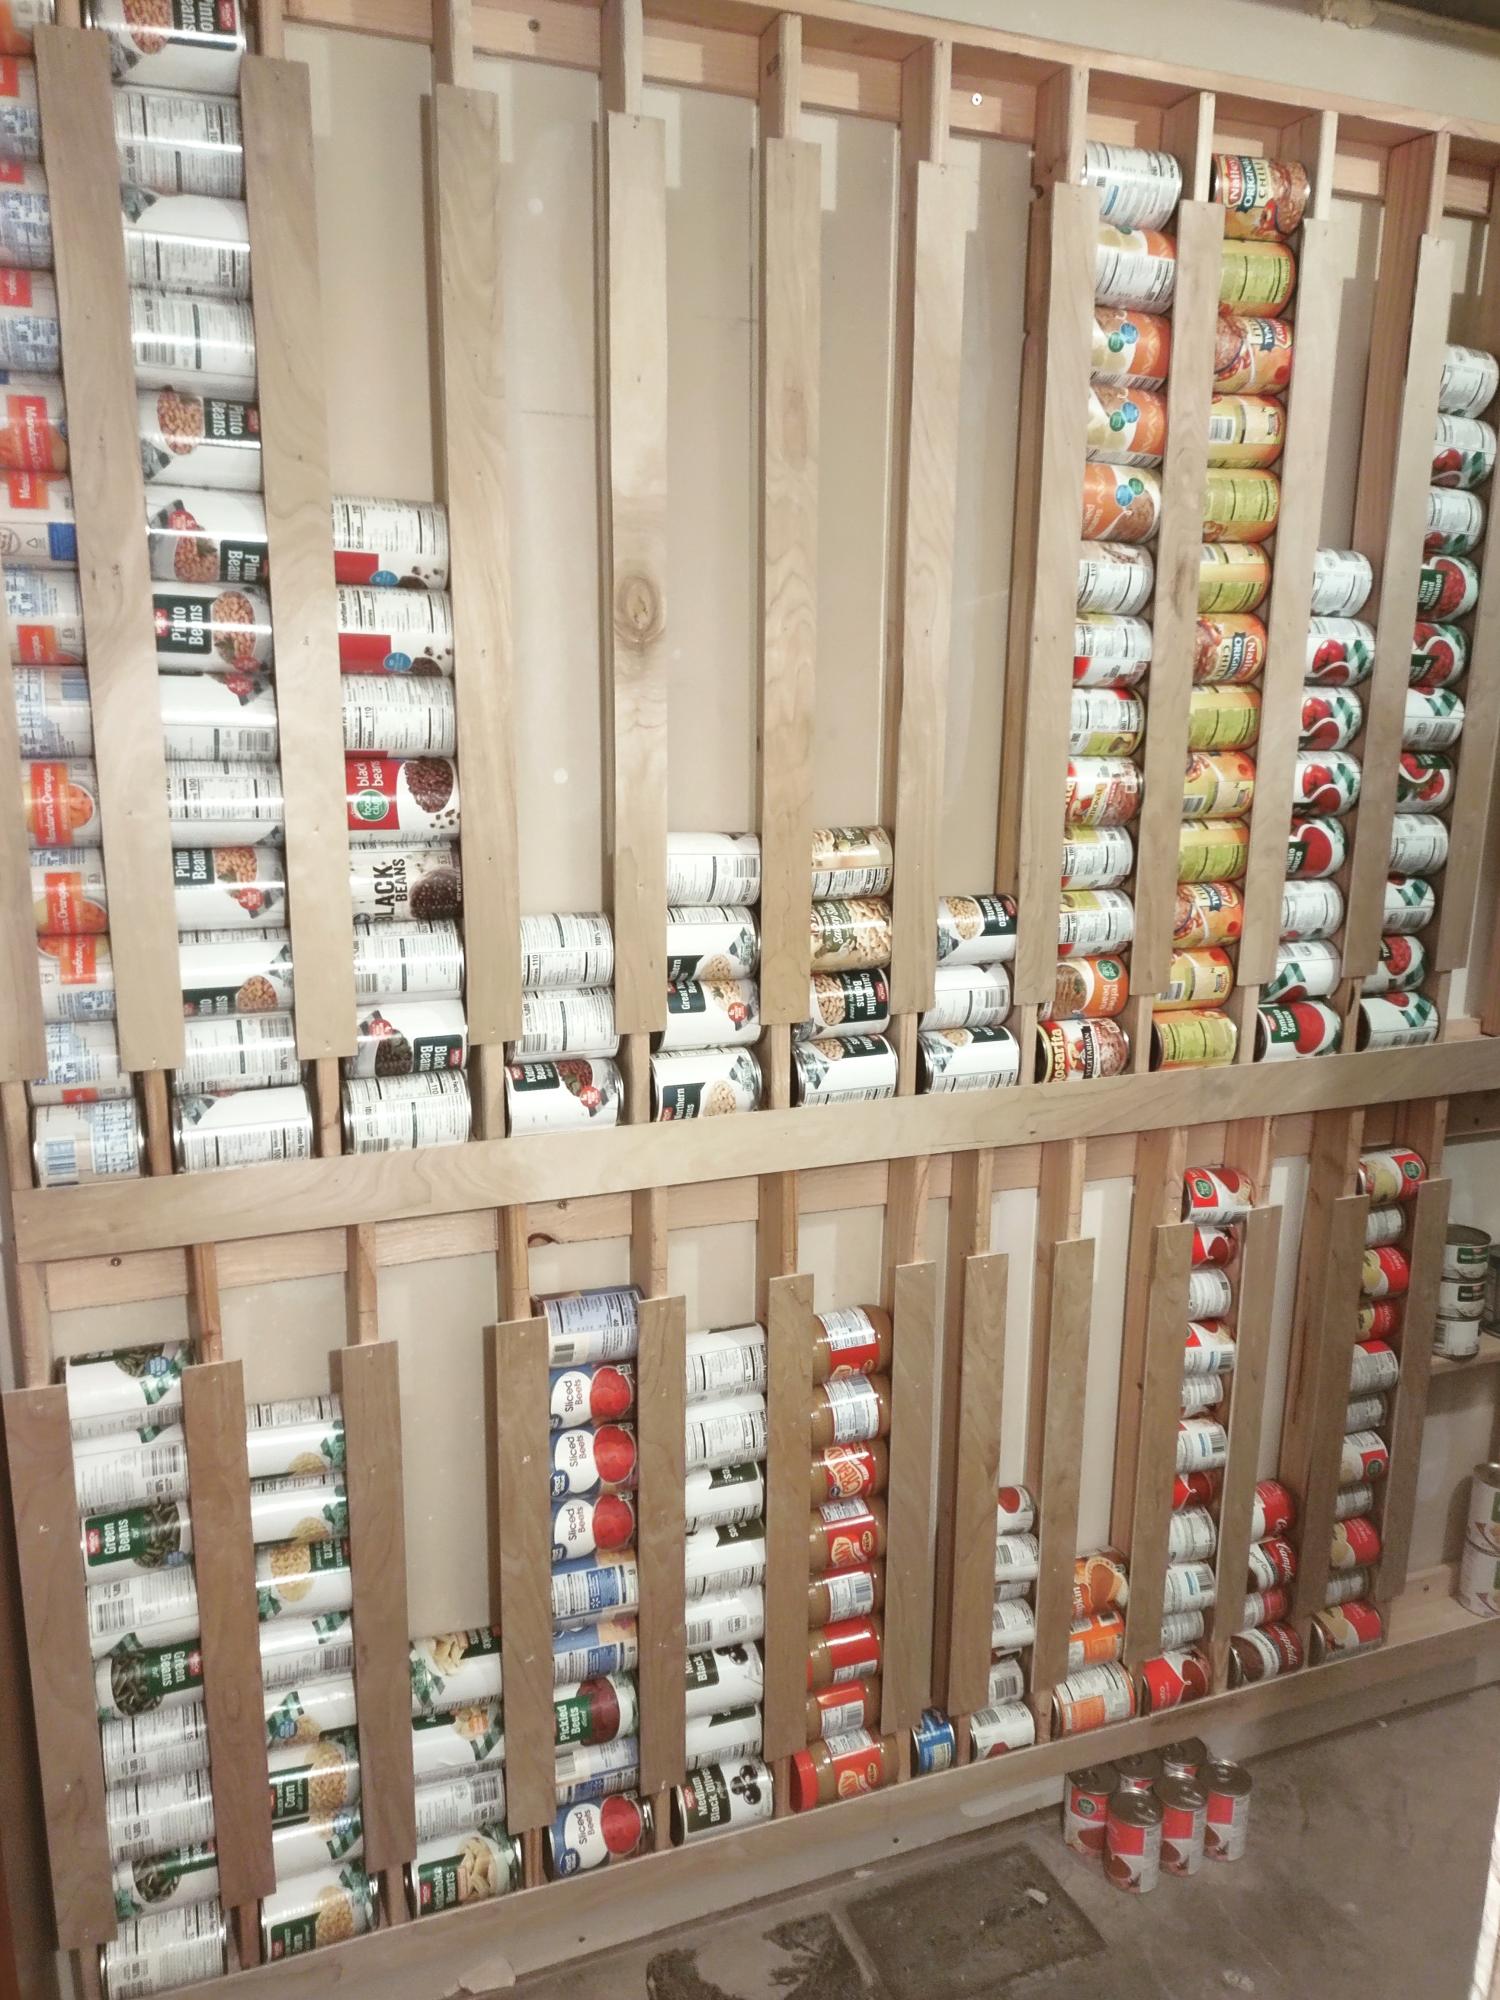
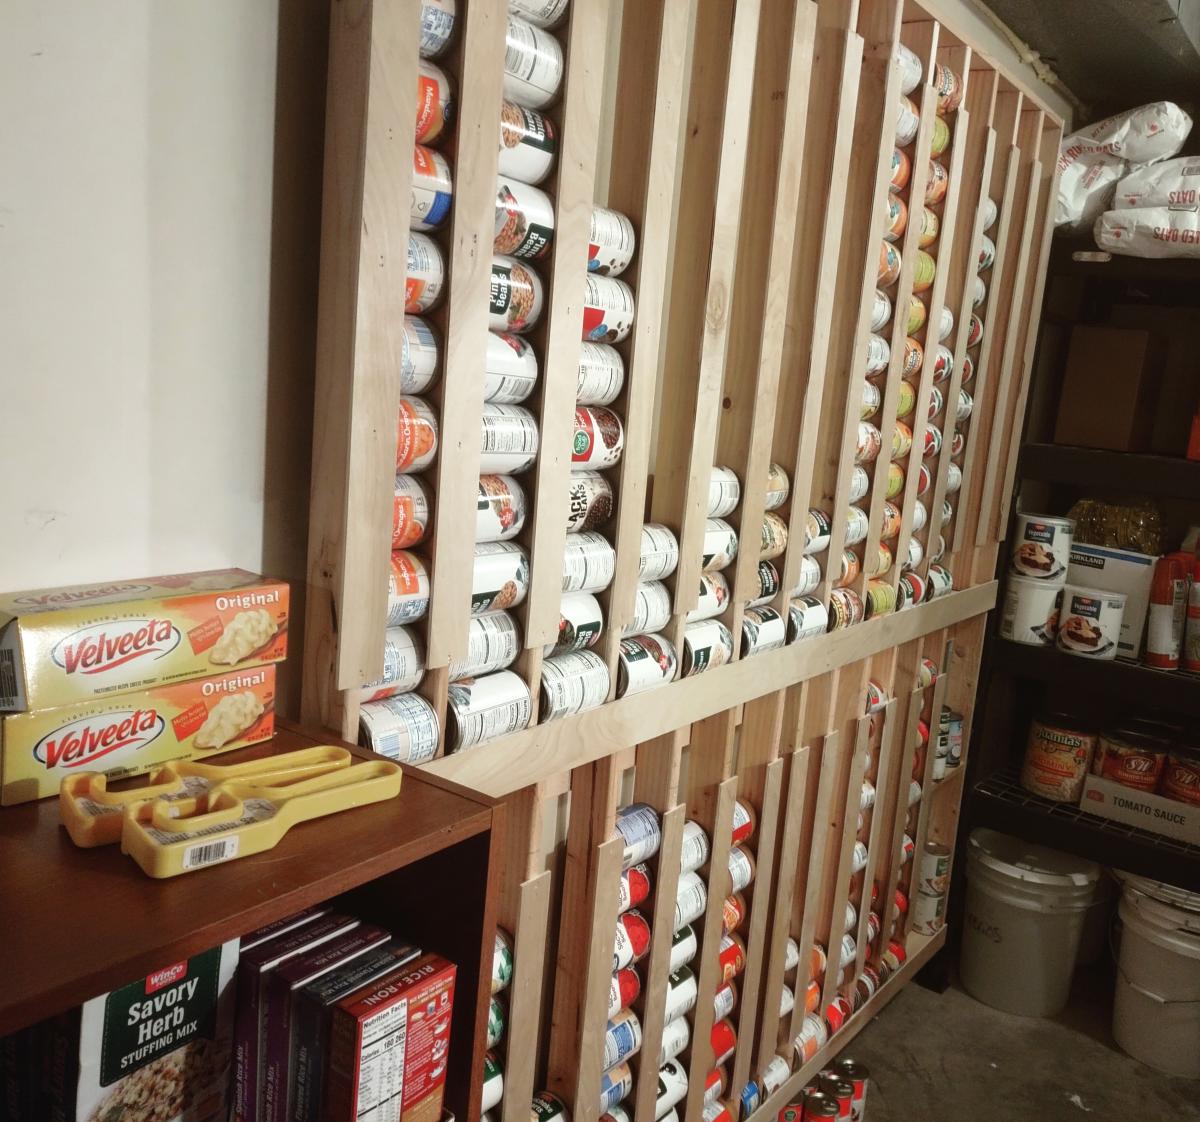
We love our new can storage!
Shayla Shumaker
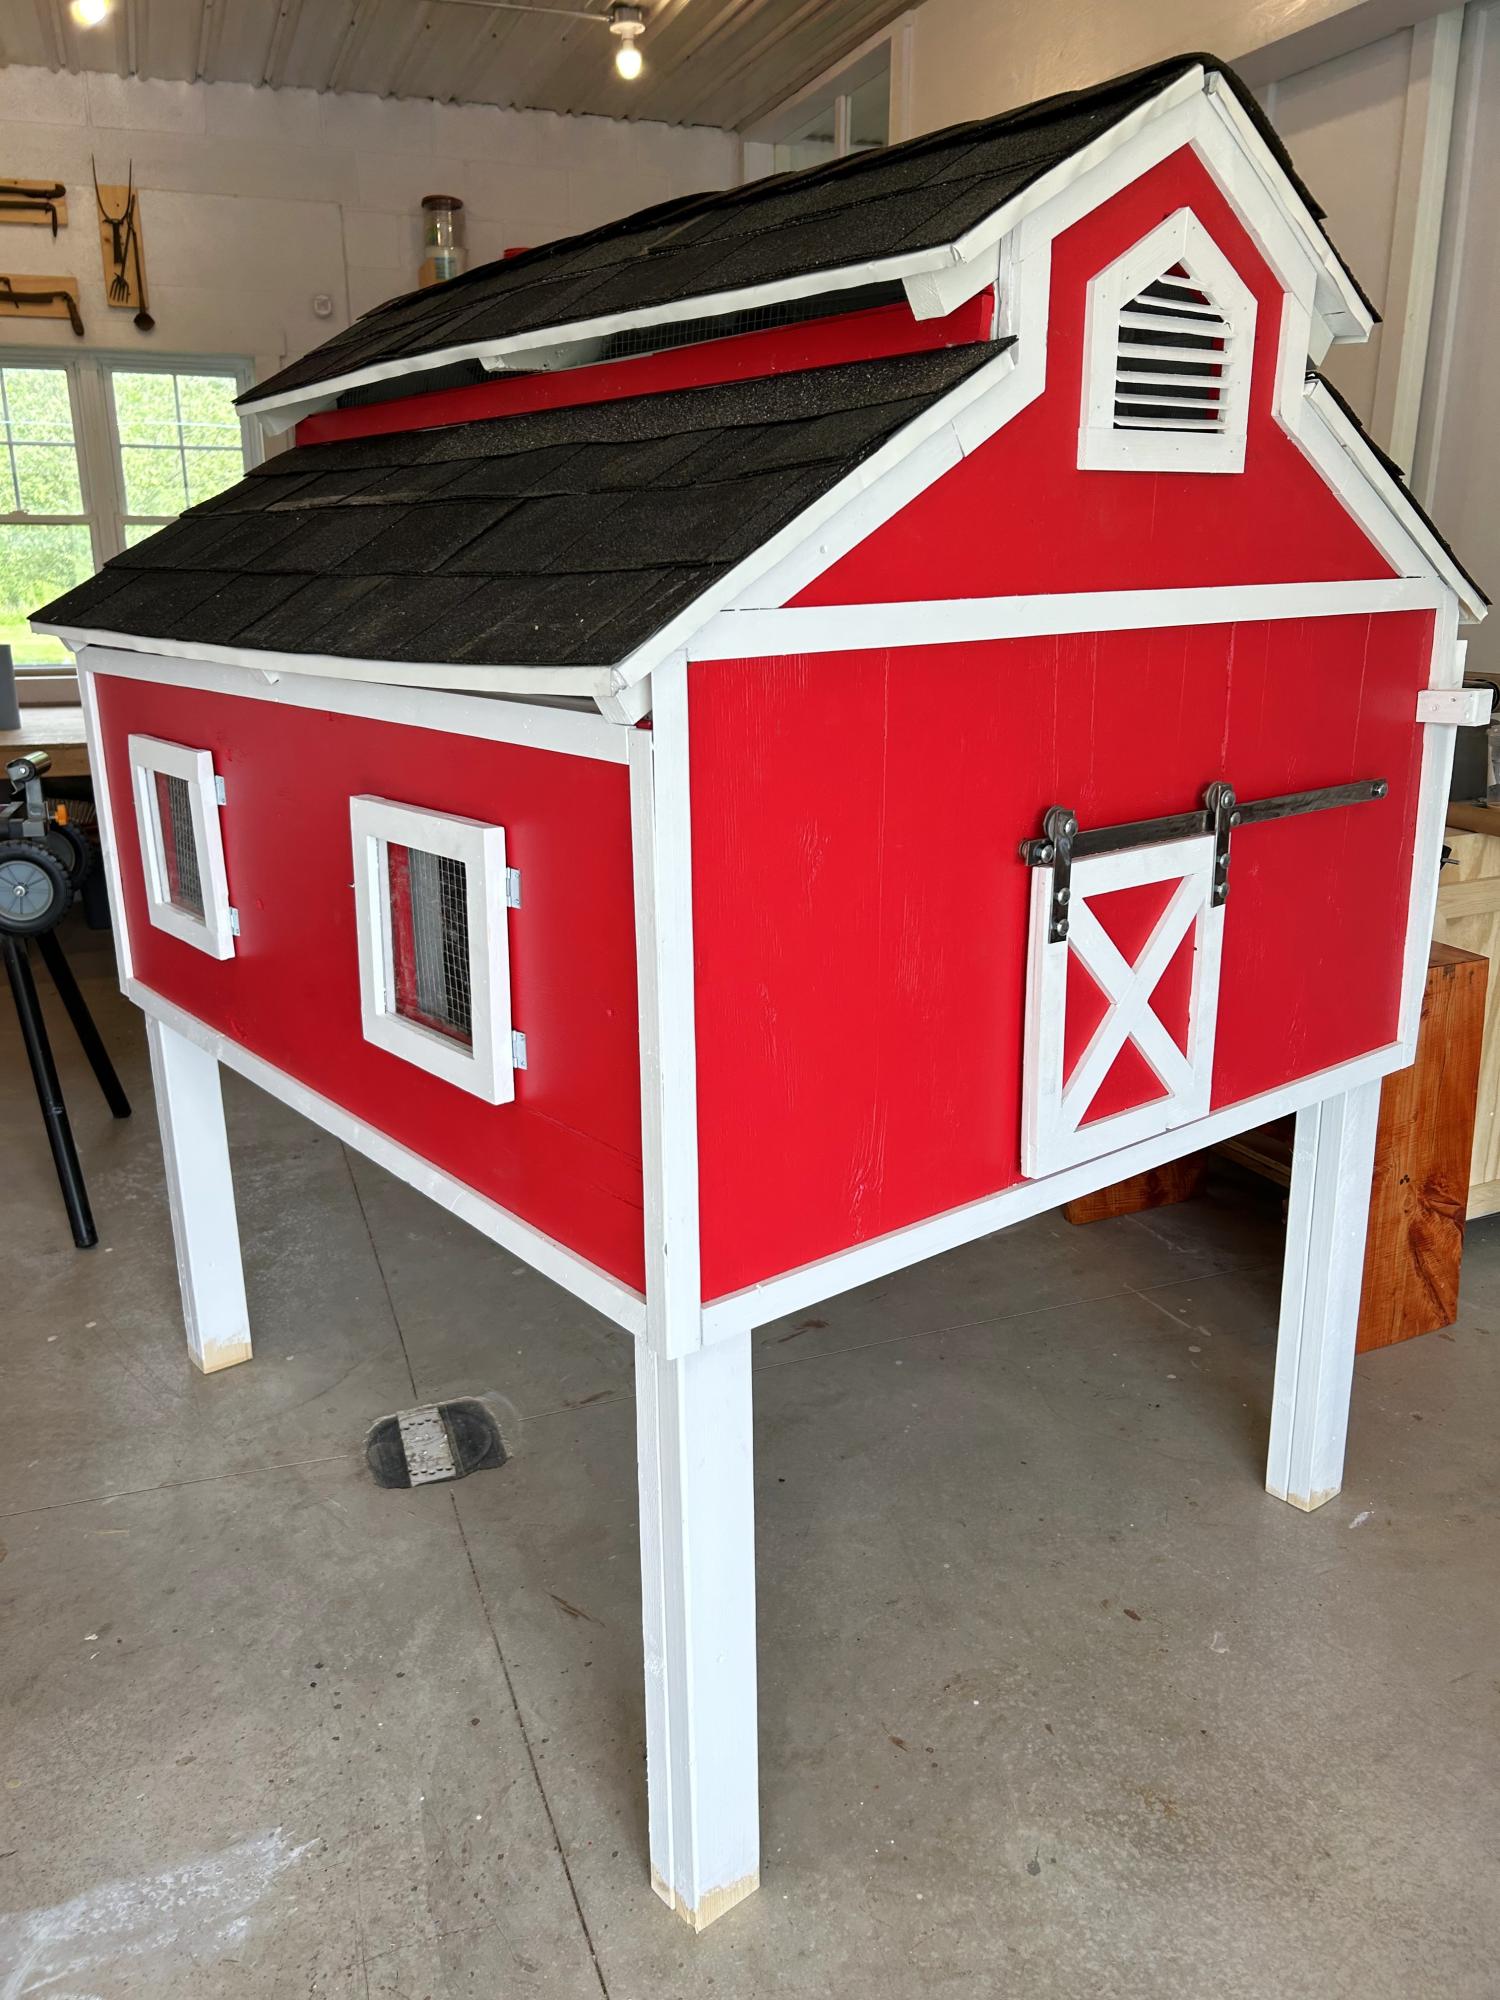
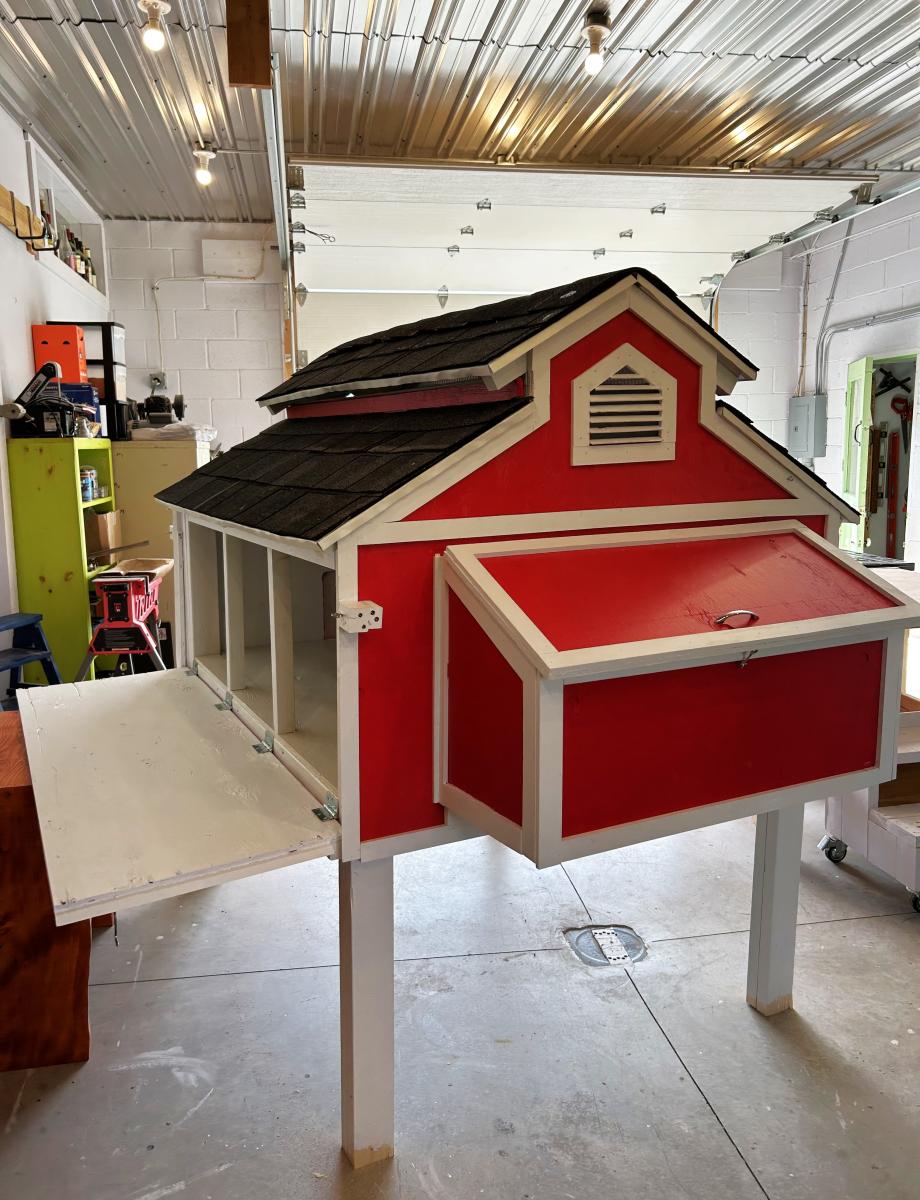
Chicken coop I made to look like a little red barn complete with a working barn door. We have seven girls and they love their lovely barn home.
Sue Laidacker