Adirondack Chairs
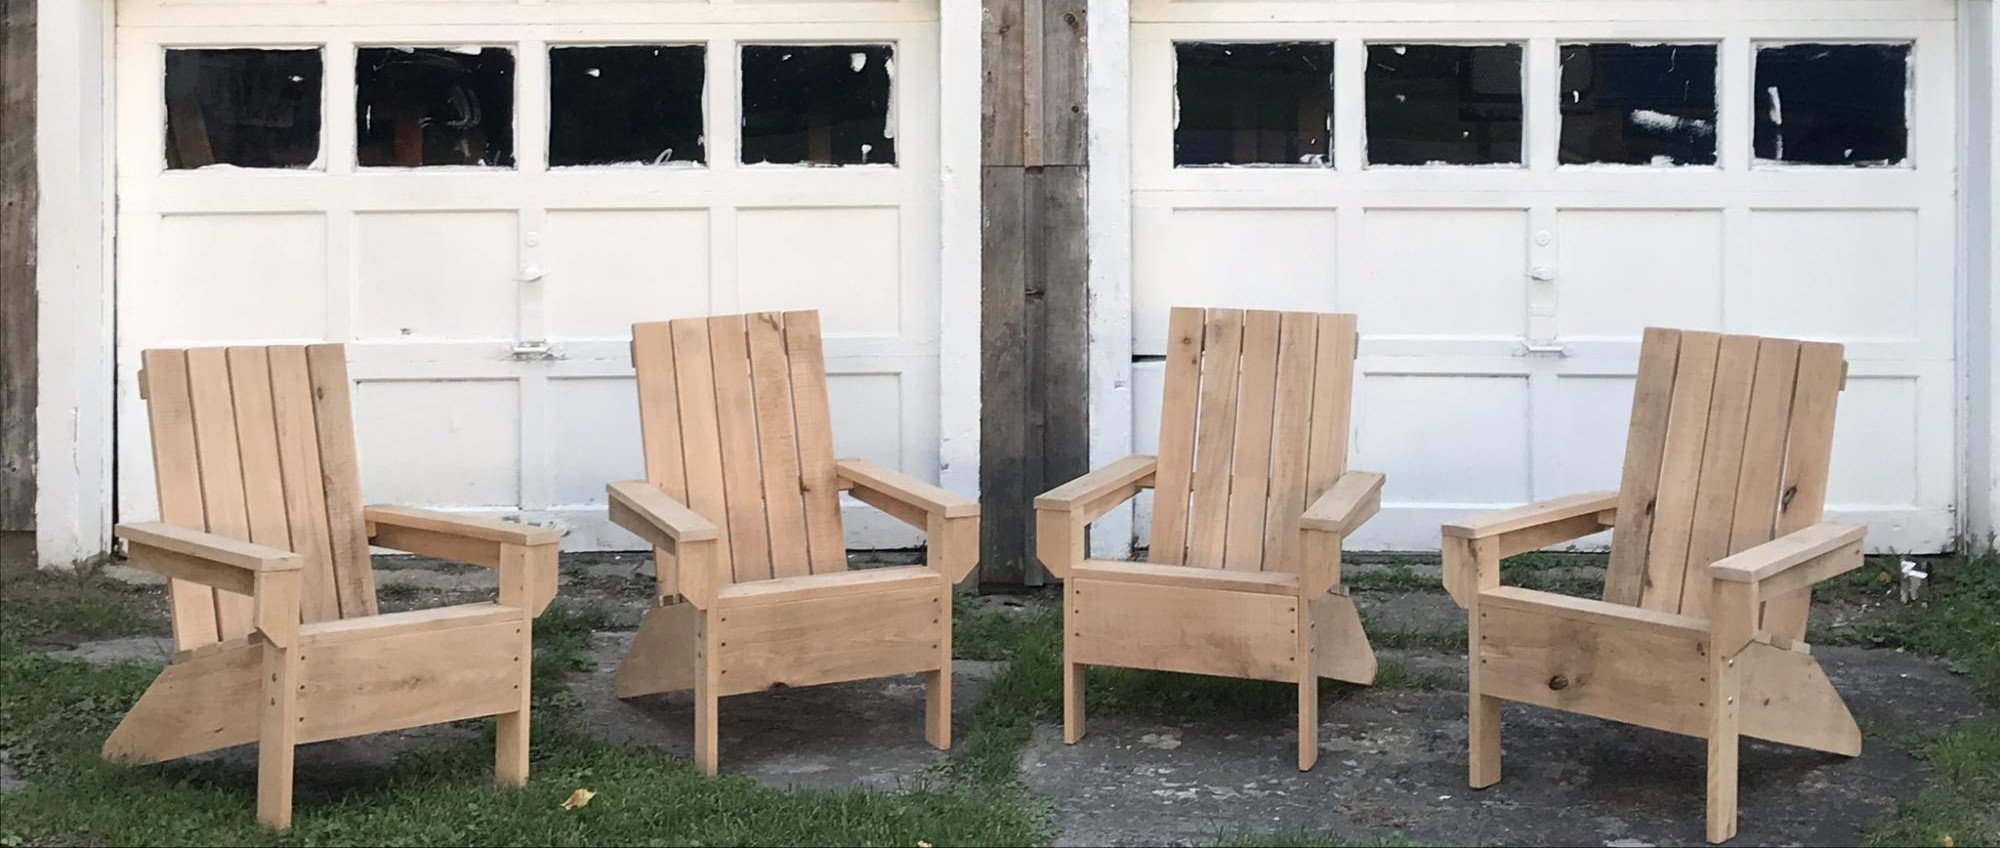
Needed some chairs, quick, for my daughter’s new fire pit. Used your design and the they love them.

Built from Plan(s)
Needed some chairs, quick, for my daughter’s new fire pit. Used your design and the they love them.
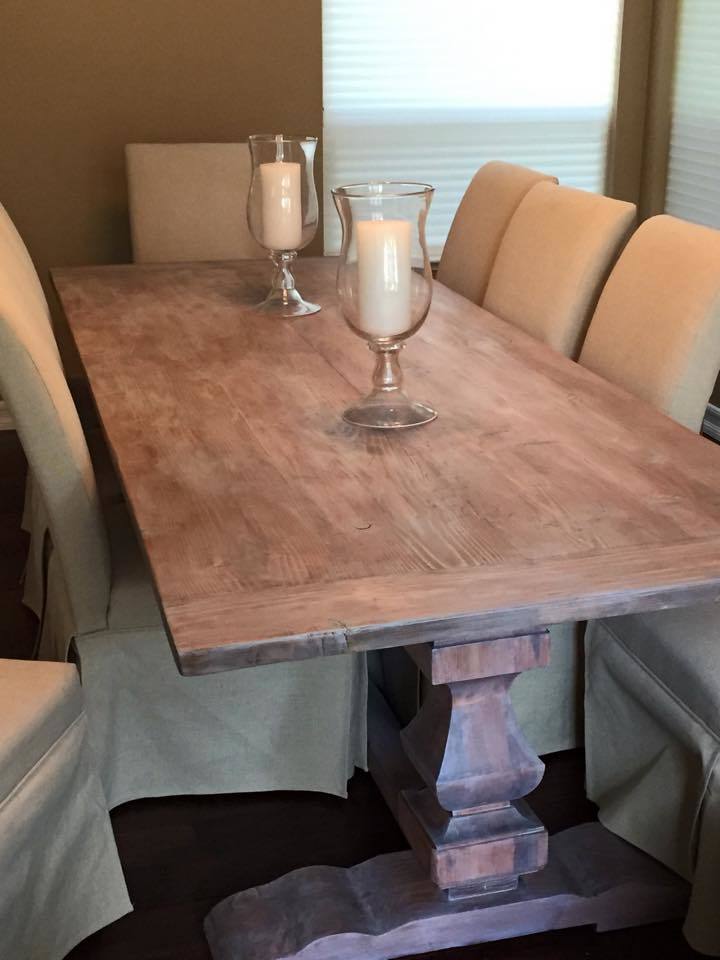
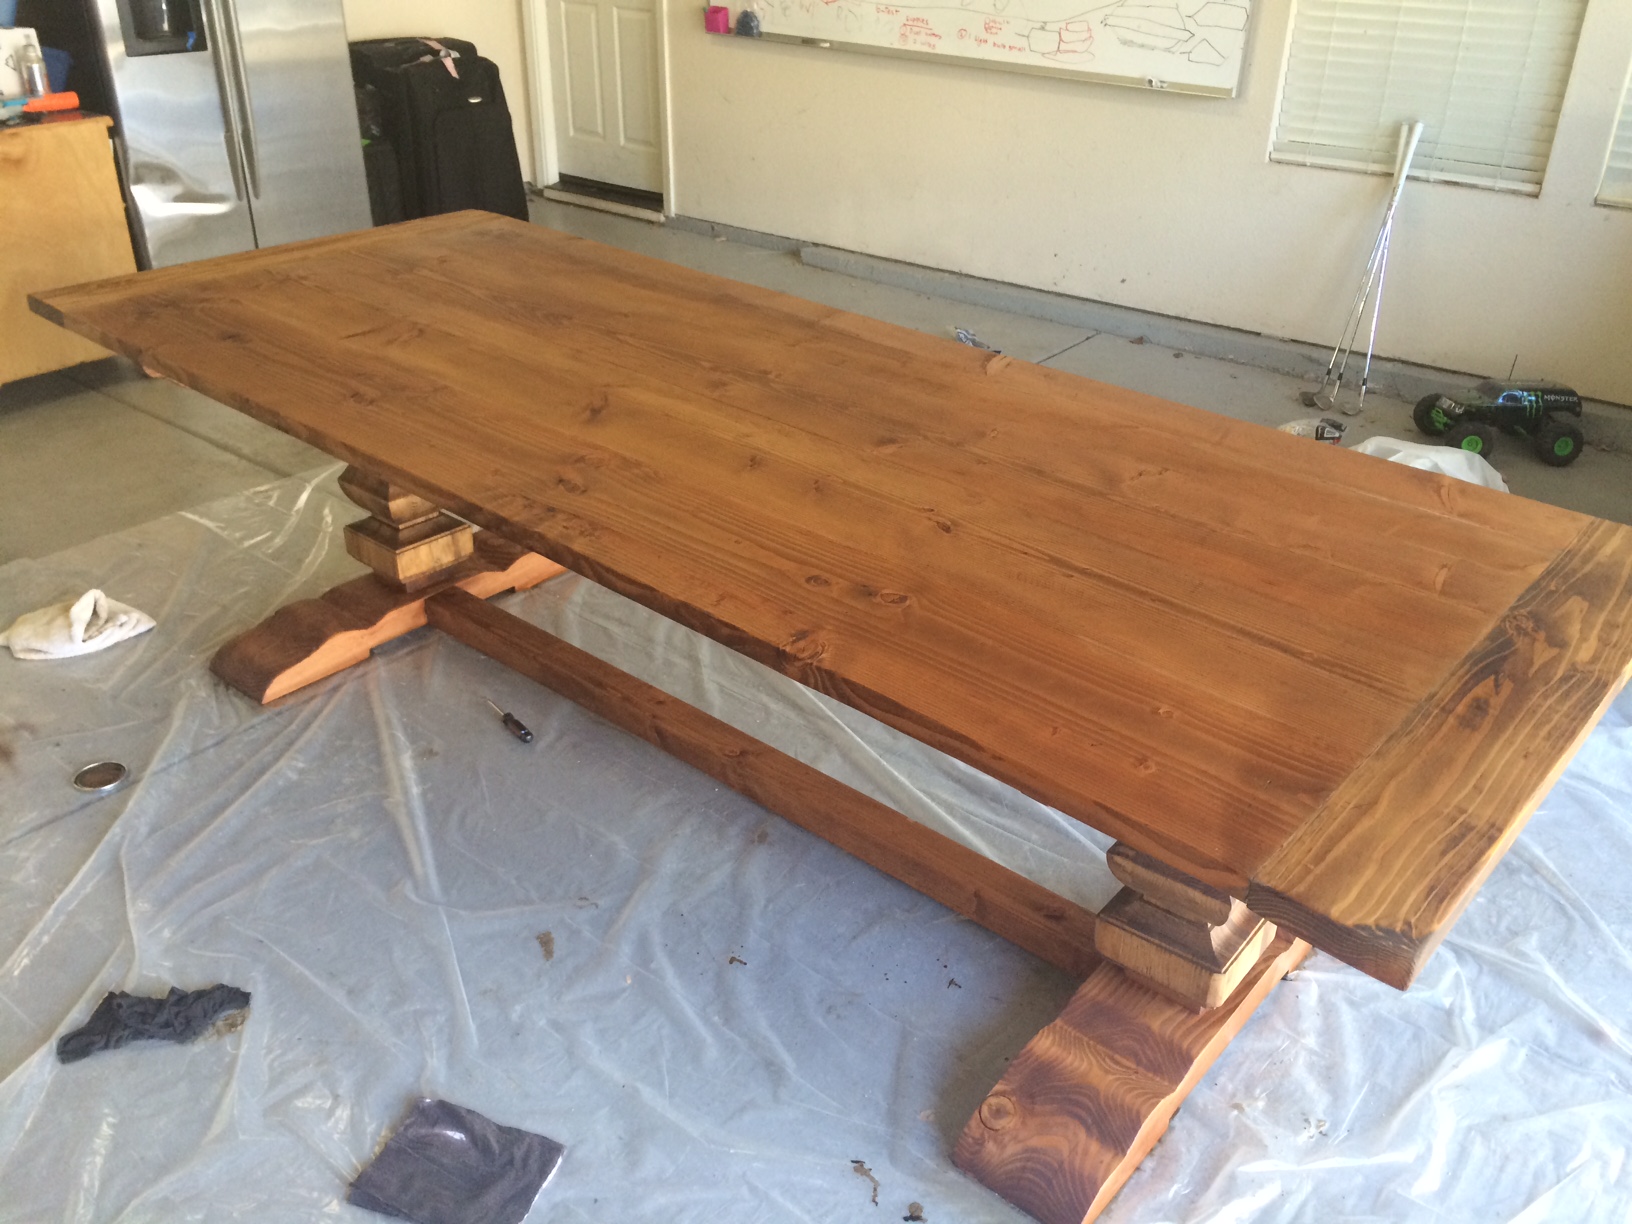
Was inspired to build this table after a visit to R.H. with my wife and realized a table this size and style would cost us about $3000.
So I decided to build myselft. With a little help from Ana's plans and my own modifications, I think I got pretty close to the Restoration Hardware Trestle Table.
I bought the pedestals at Osbornewood.com and asked them not to drill the leg holes and ordered it in pine. That was the most expensive part of the table, about $380 a piece. The rest of it is Douglas Fir.
I created a template and shaped the feet myself out of 4X8 beams. I was able to use my jig saw and a Bosch 10" blade. I made the rough cut with it and then sanded the rest of the shape using my belt sander.
The pedestals have a hollow center and were too tall so I cut them down and created plugs and glued them into the pedestal. The bottom plug has a large threaded rod and is glued and bolted to the feet, and the top plug was used to create the horizontal supports for the table top. I too created a template for this and used a jigsaw to cut the shape.
I then used Minwax American English, then weathered oak, (Like in one of Ana's stain posts). I then wanted to give it that weathered/reclaimed wood look so I add a fair amount of the White Pickling stain. I wanted a little less of the red tones and more brown...I may sand and refinish it someday, but it is in the house for now and can't wait for our first dinner party.

Modified the design to allow me to roll lawnmower directly in the end. Fun project.
This was the first table that I built and turned out great.
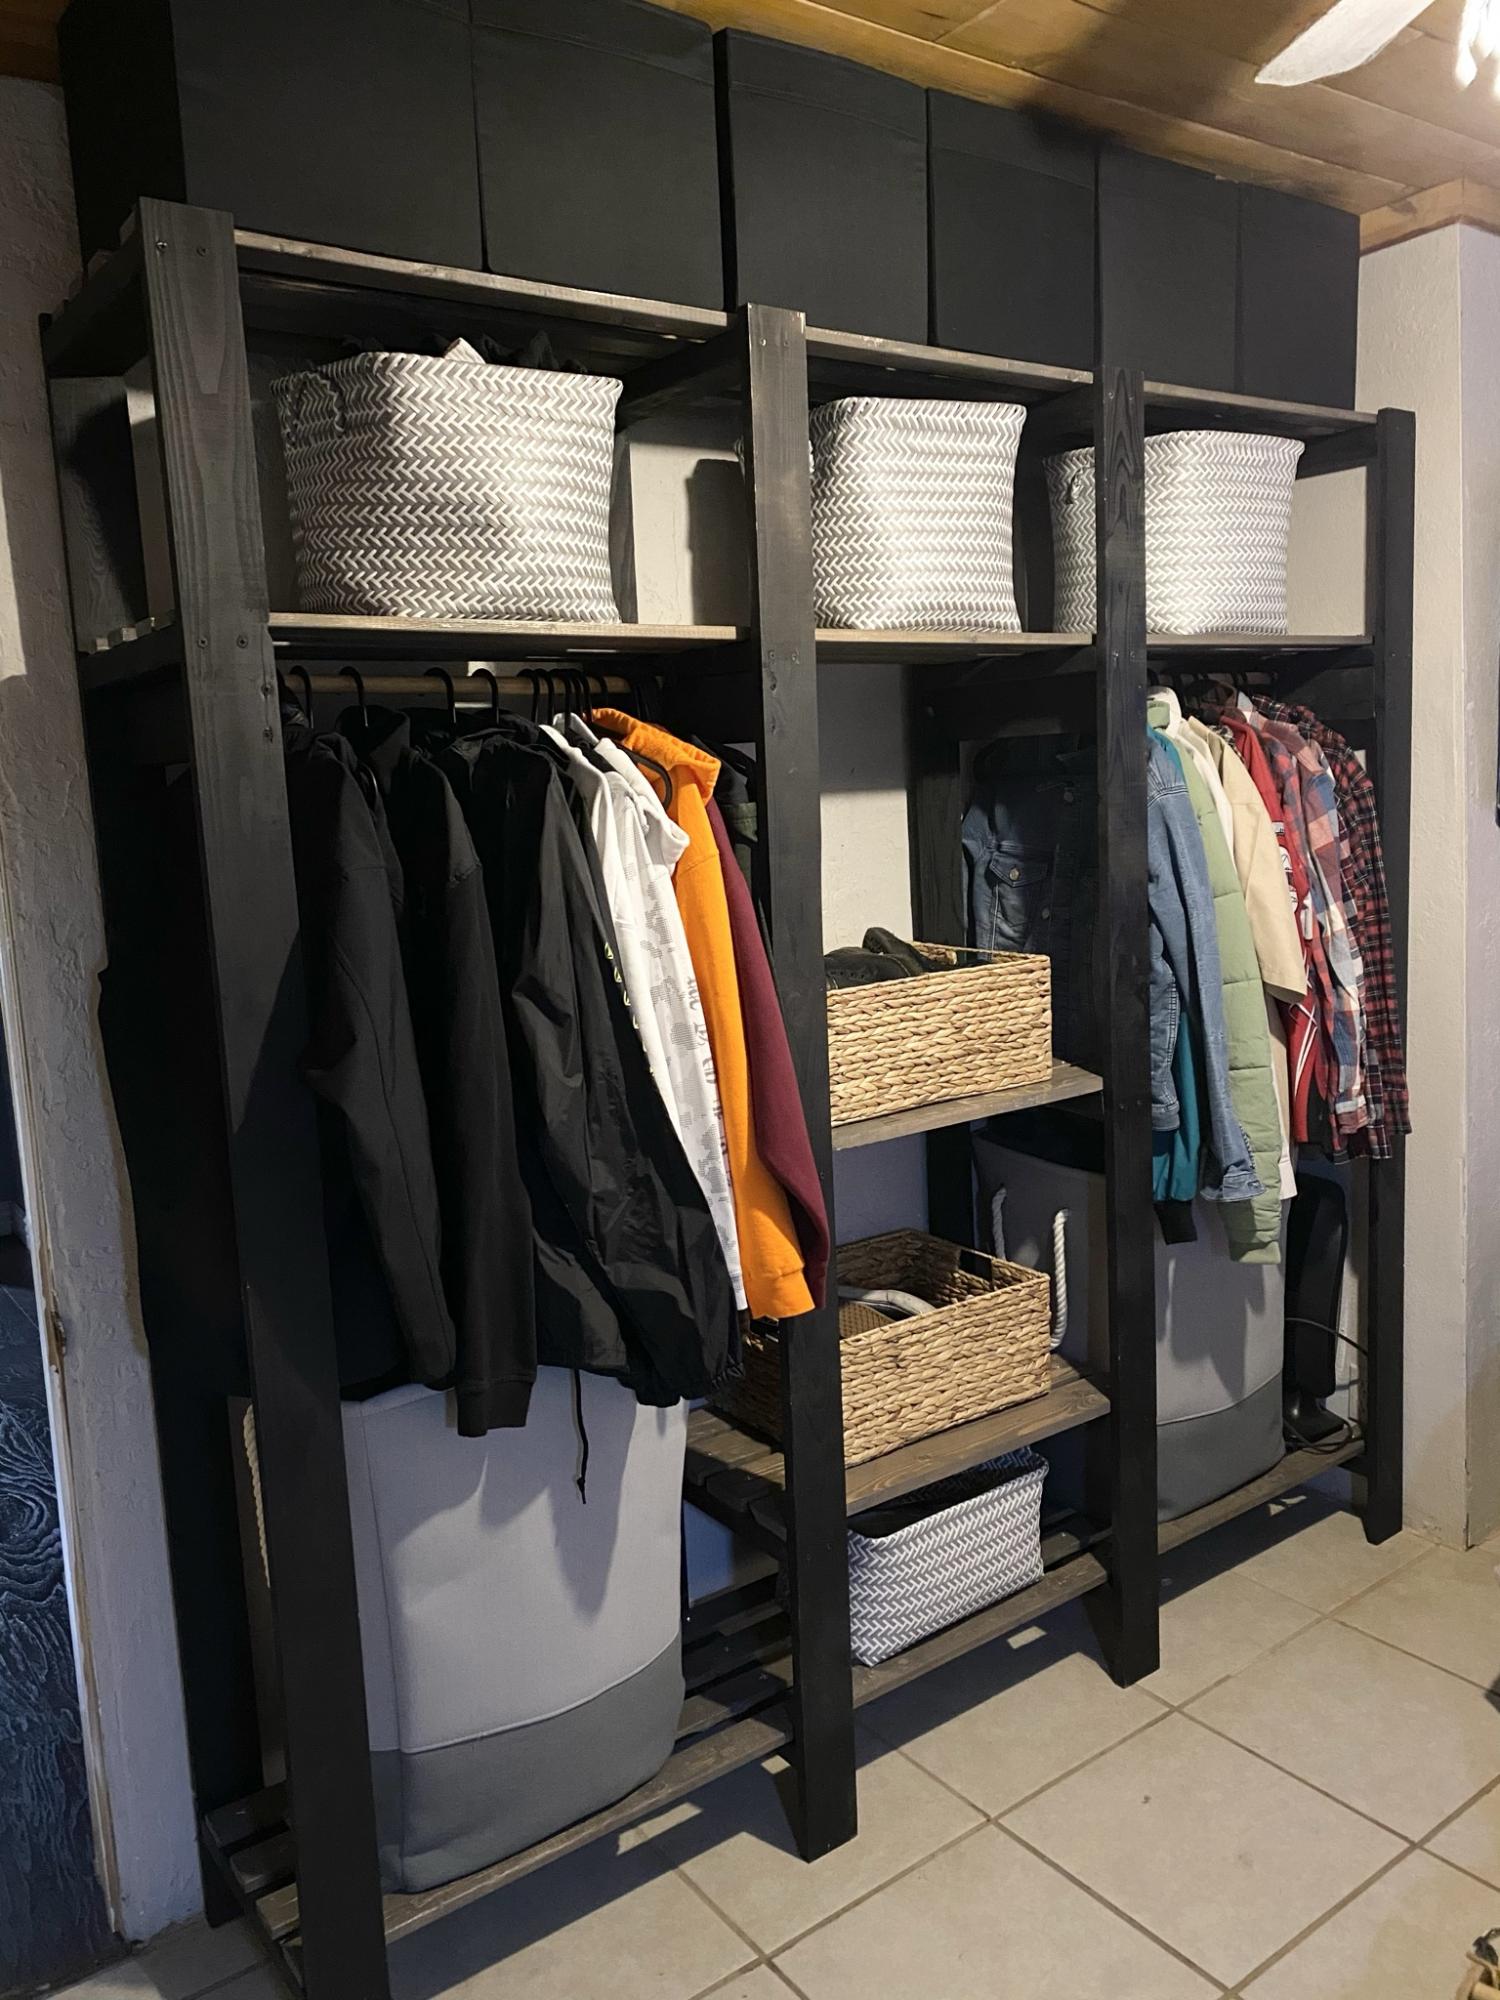
Closet
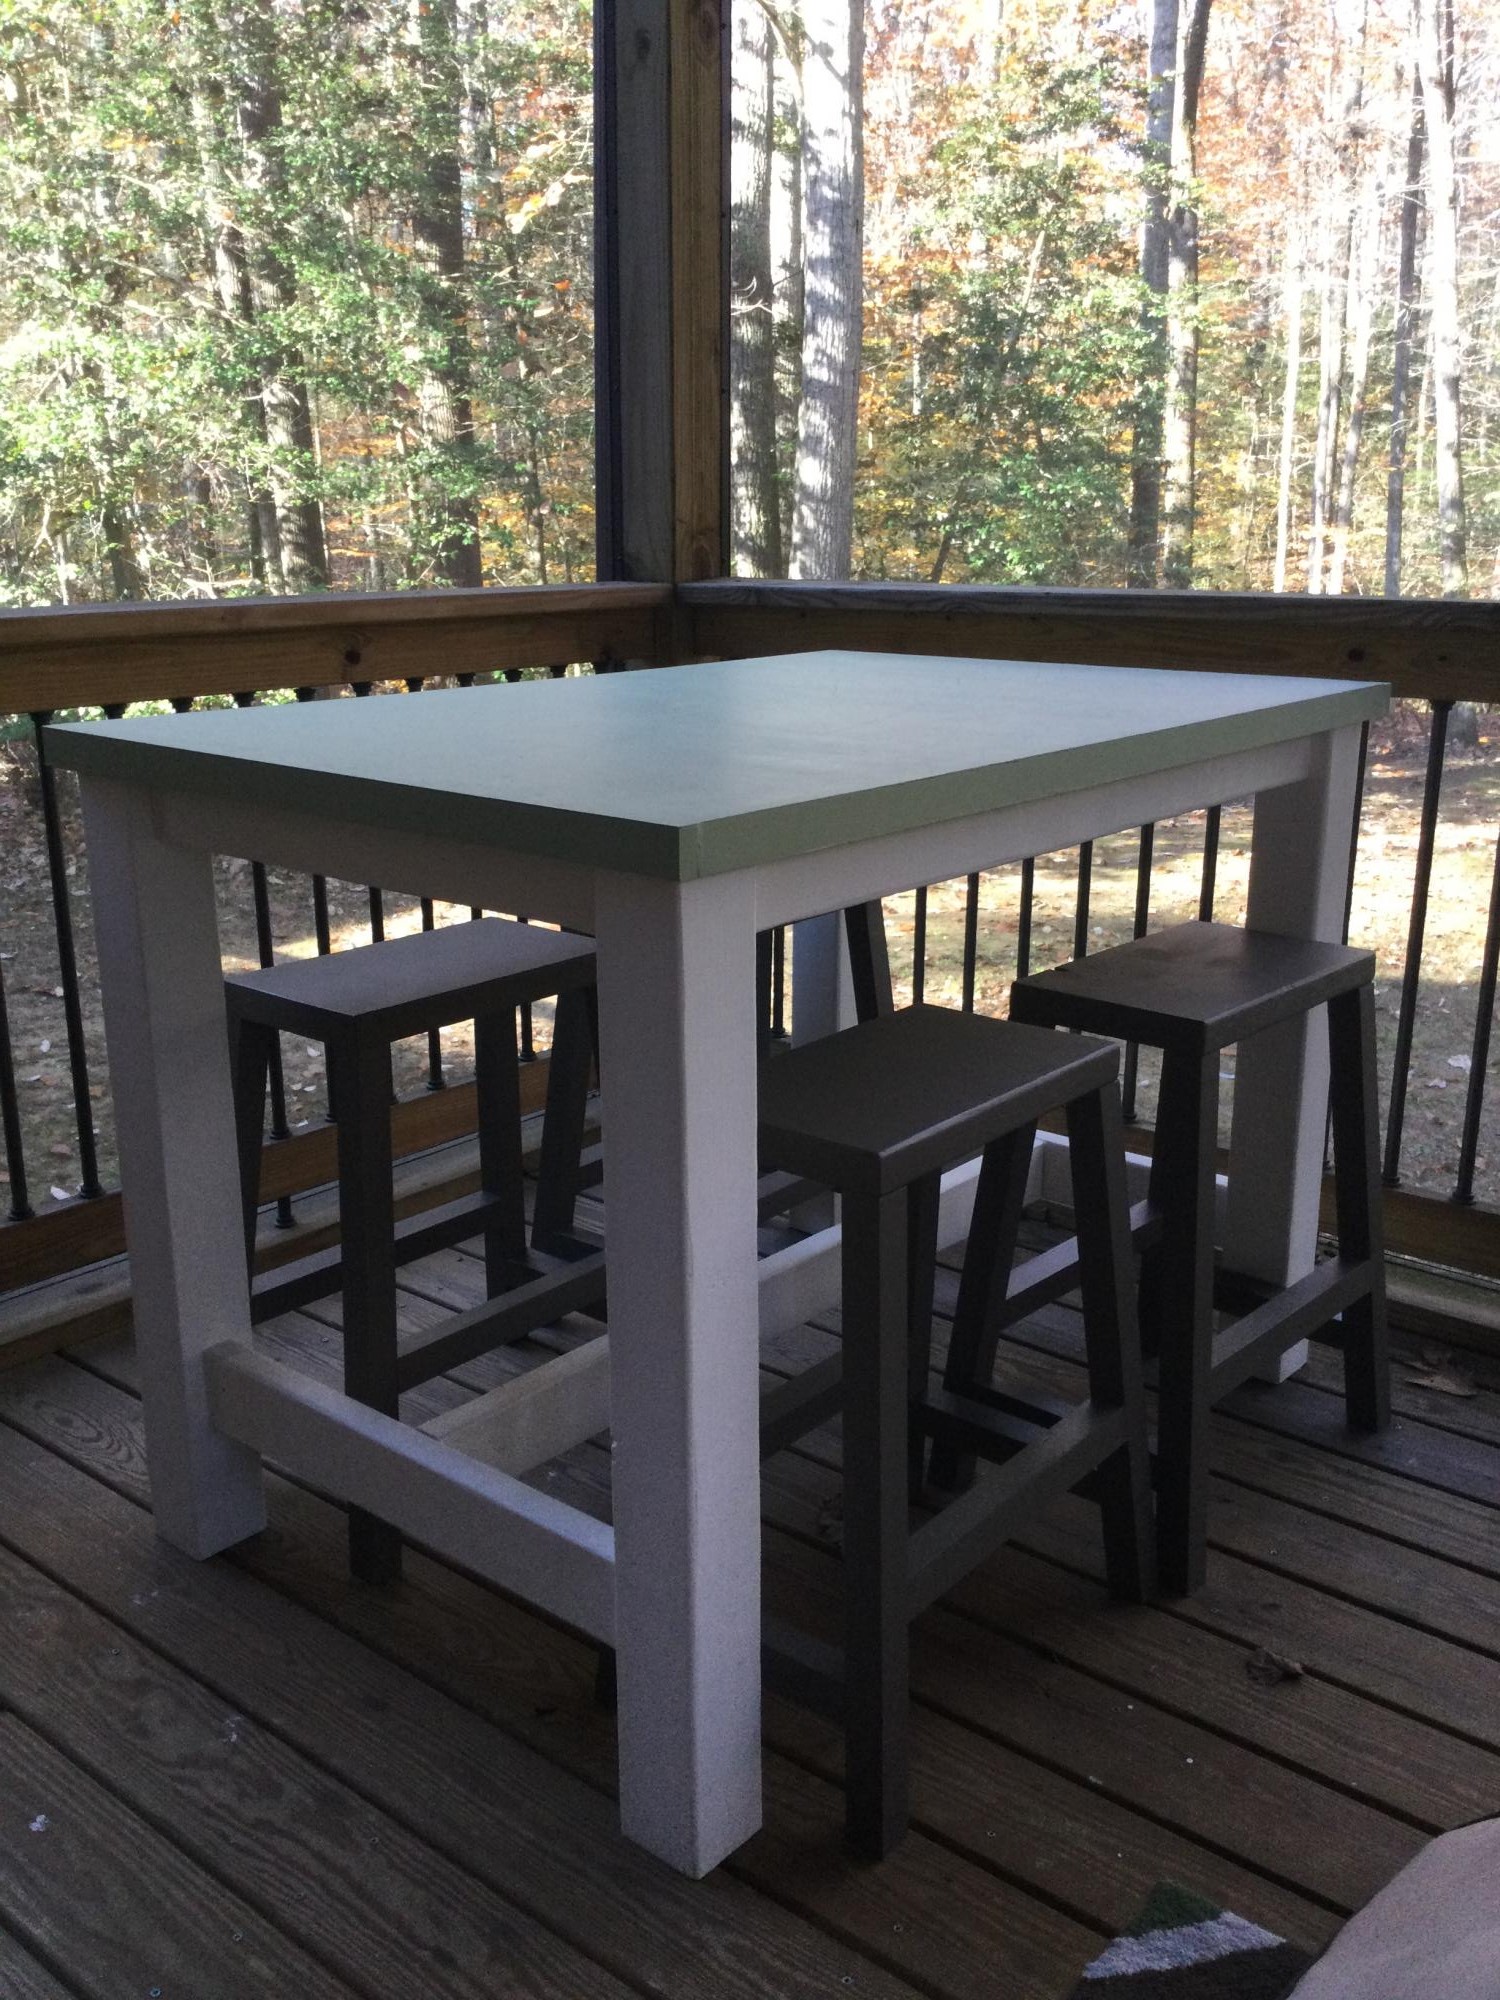
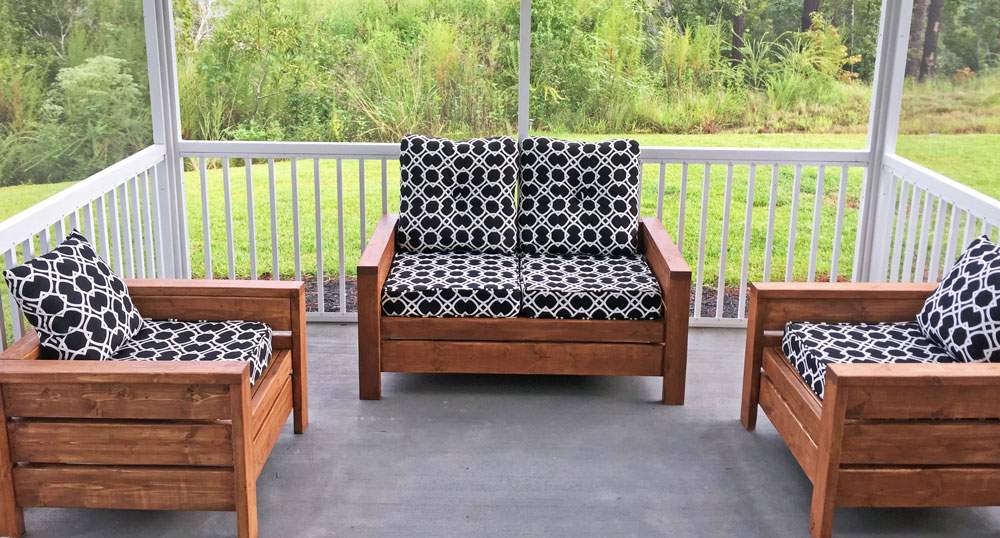
My husband and I made the table and chairs for our screened porch. We really like how the project turned out. Many more Ana White projects on the our list!
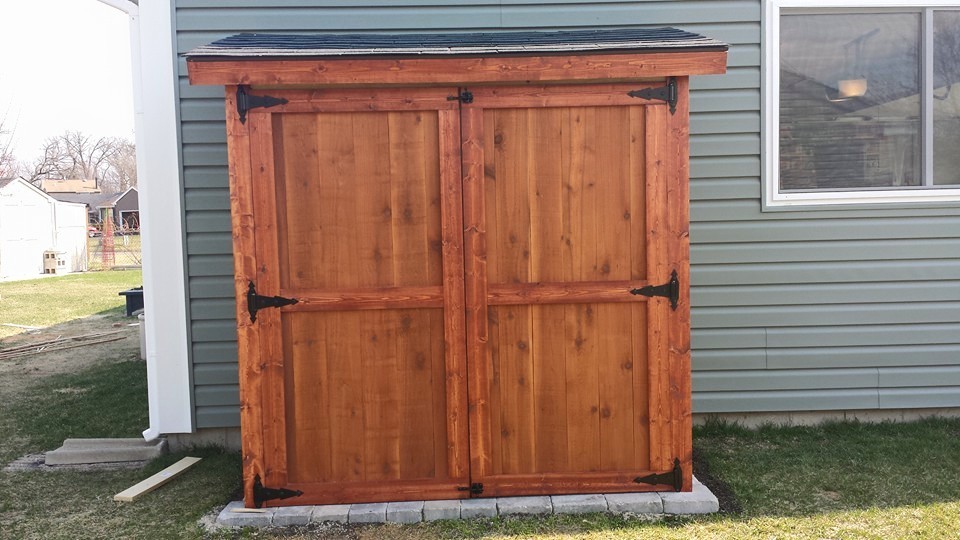
I poured a 3 1/2" concrete pad first then bolted the completed shed to it.
Shed was easy enough to make, the plans were well done. Spent about 25 total hours on shed, including staining. Hinges were very expensive ($20 a pair with latches), spent about $400 NOT INCLUDING gravel, sand, & concrete for the pad or clamps.
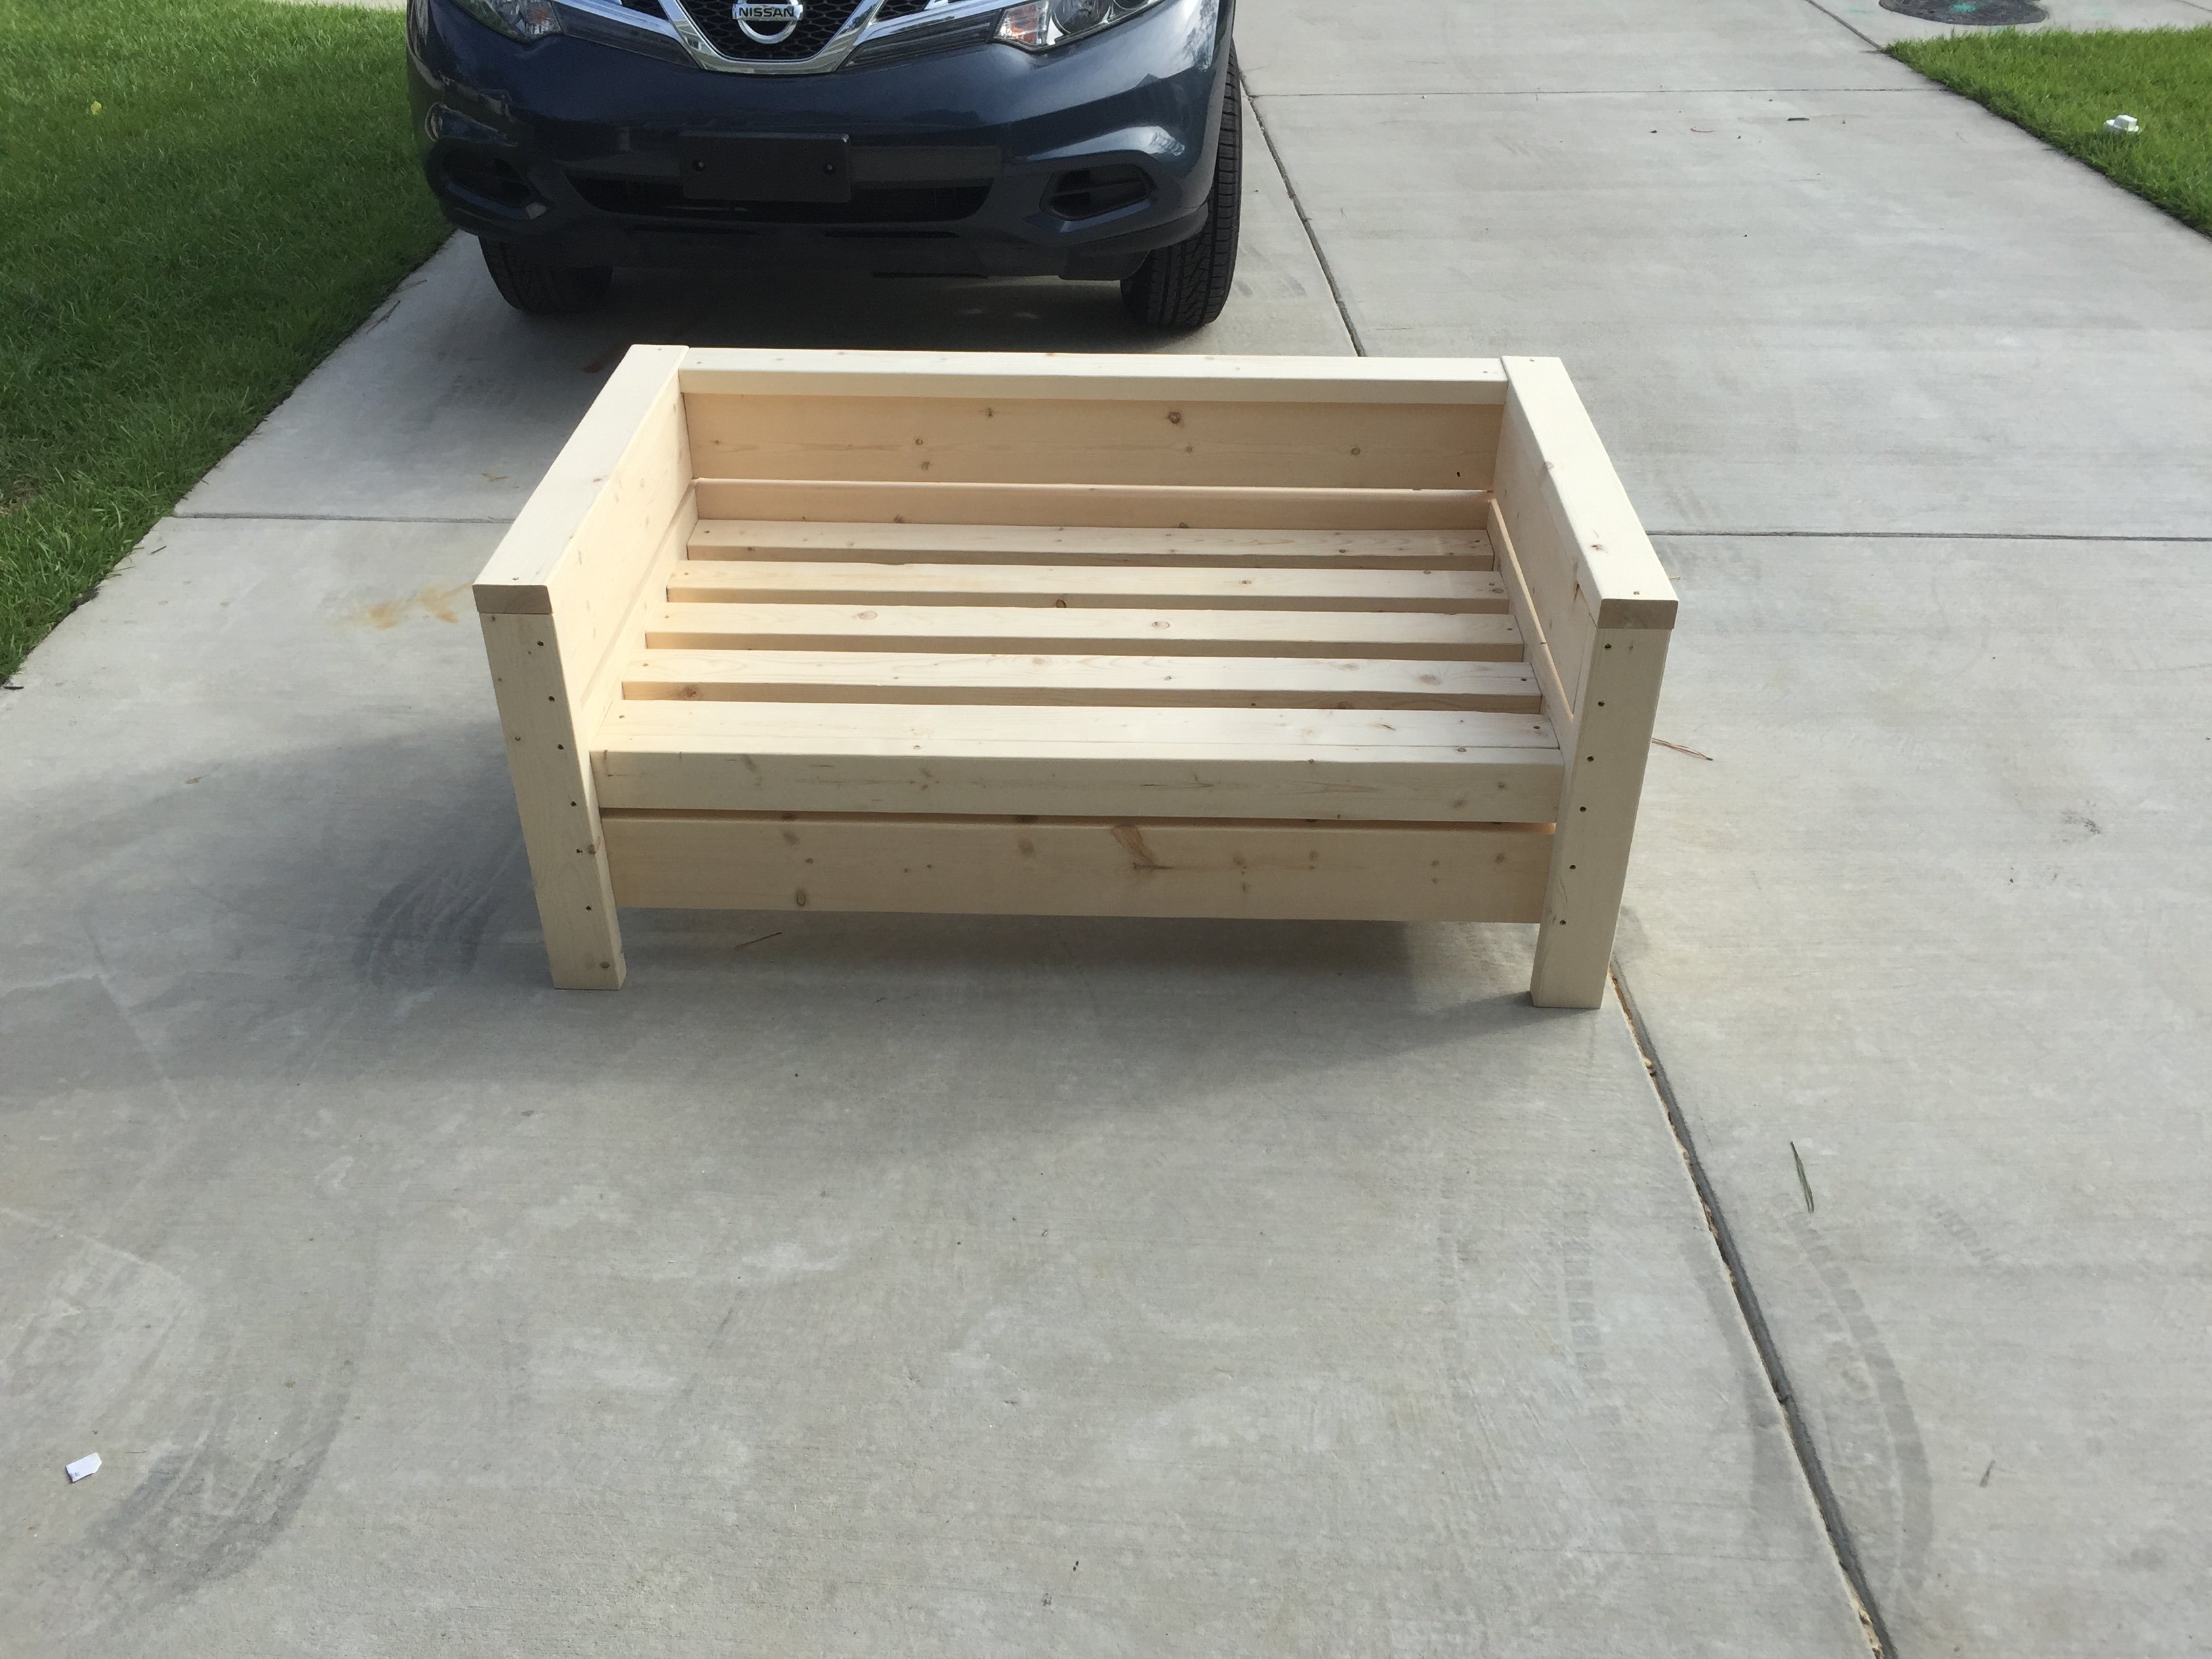
Built the 2 chairs according to the plans, and then modified it for a bench that's 48" (our cushions are 23.5 x 23.5). Worked really well!

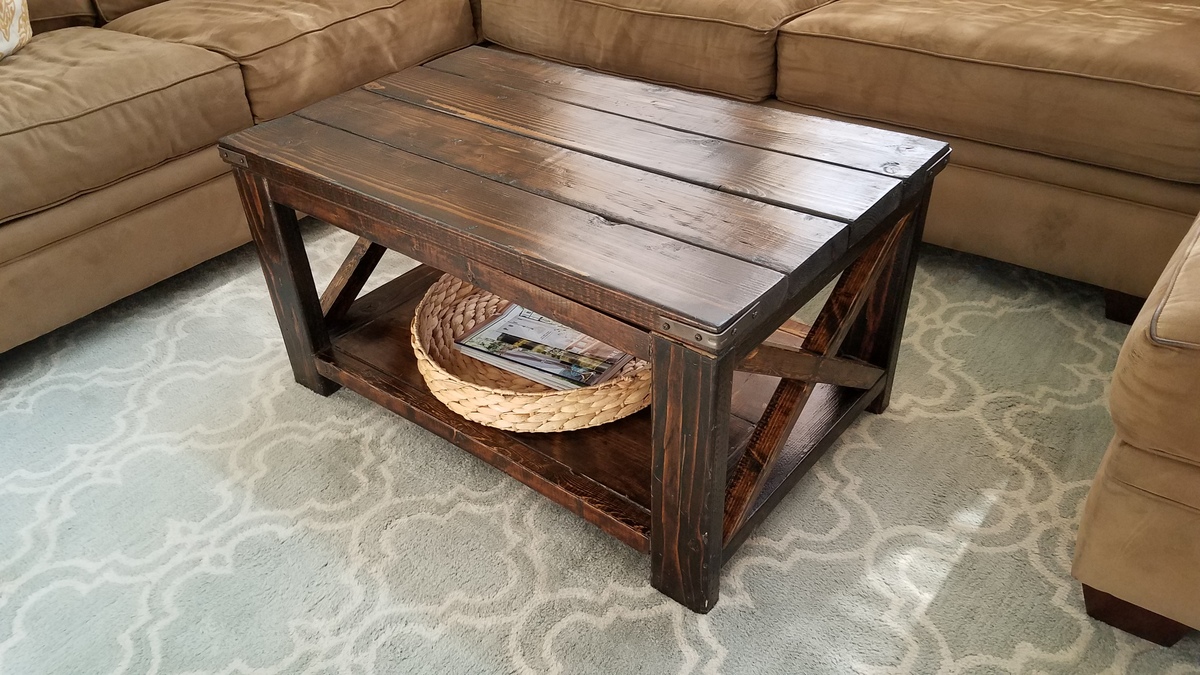
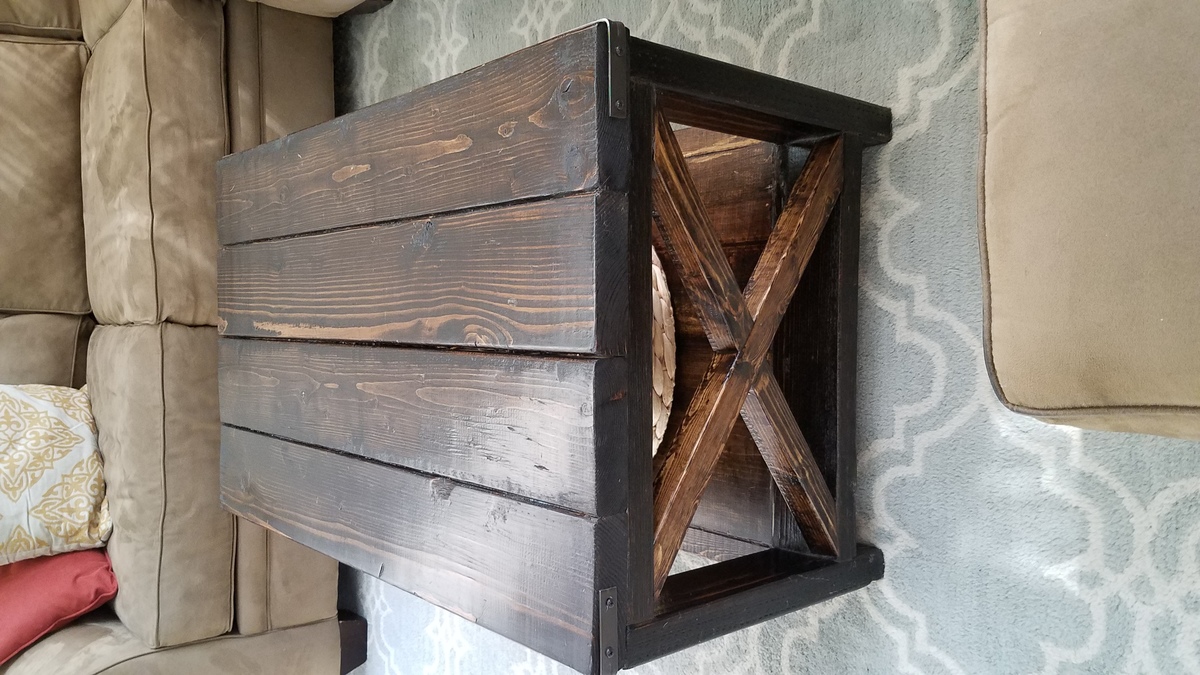
I loved Ana's version of the coffee table but it was way too big for my space, so I scaled it down quite a bit and it fits perfectly!
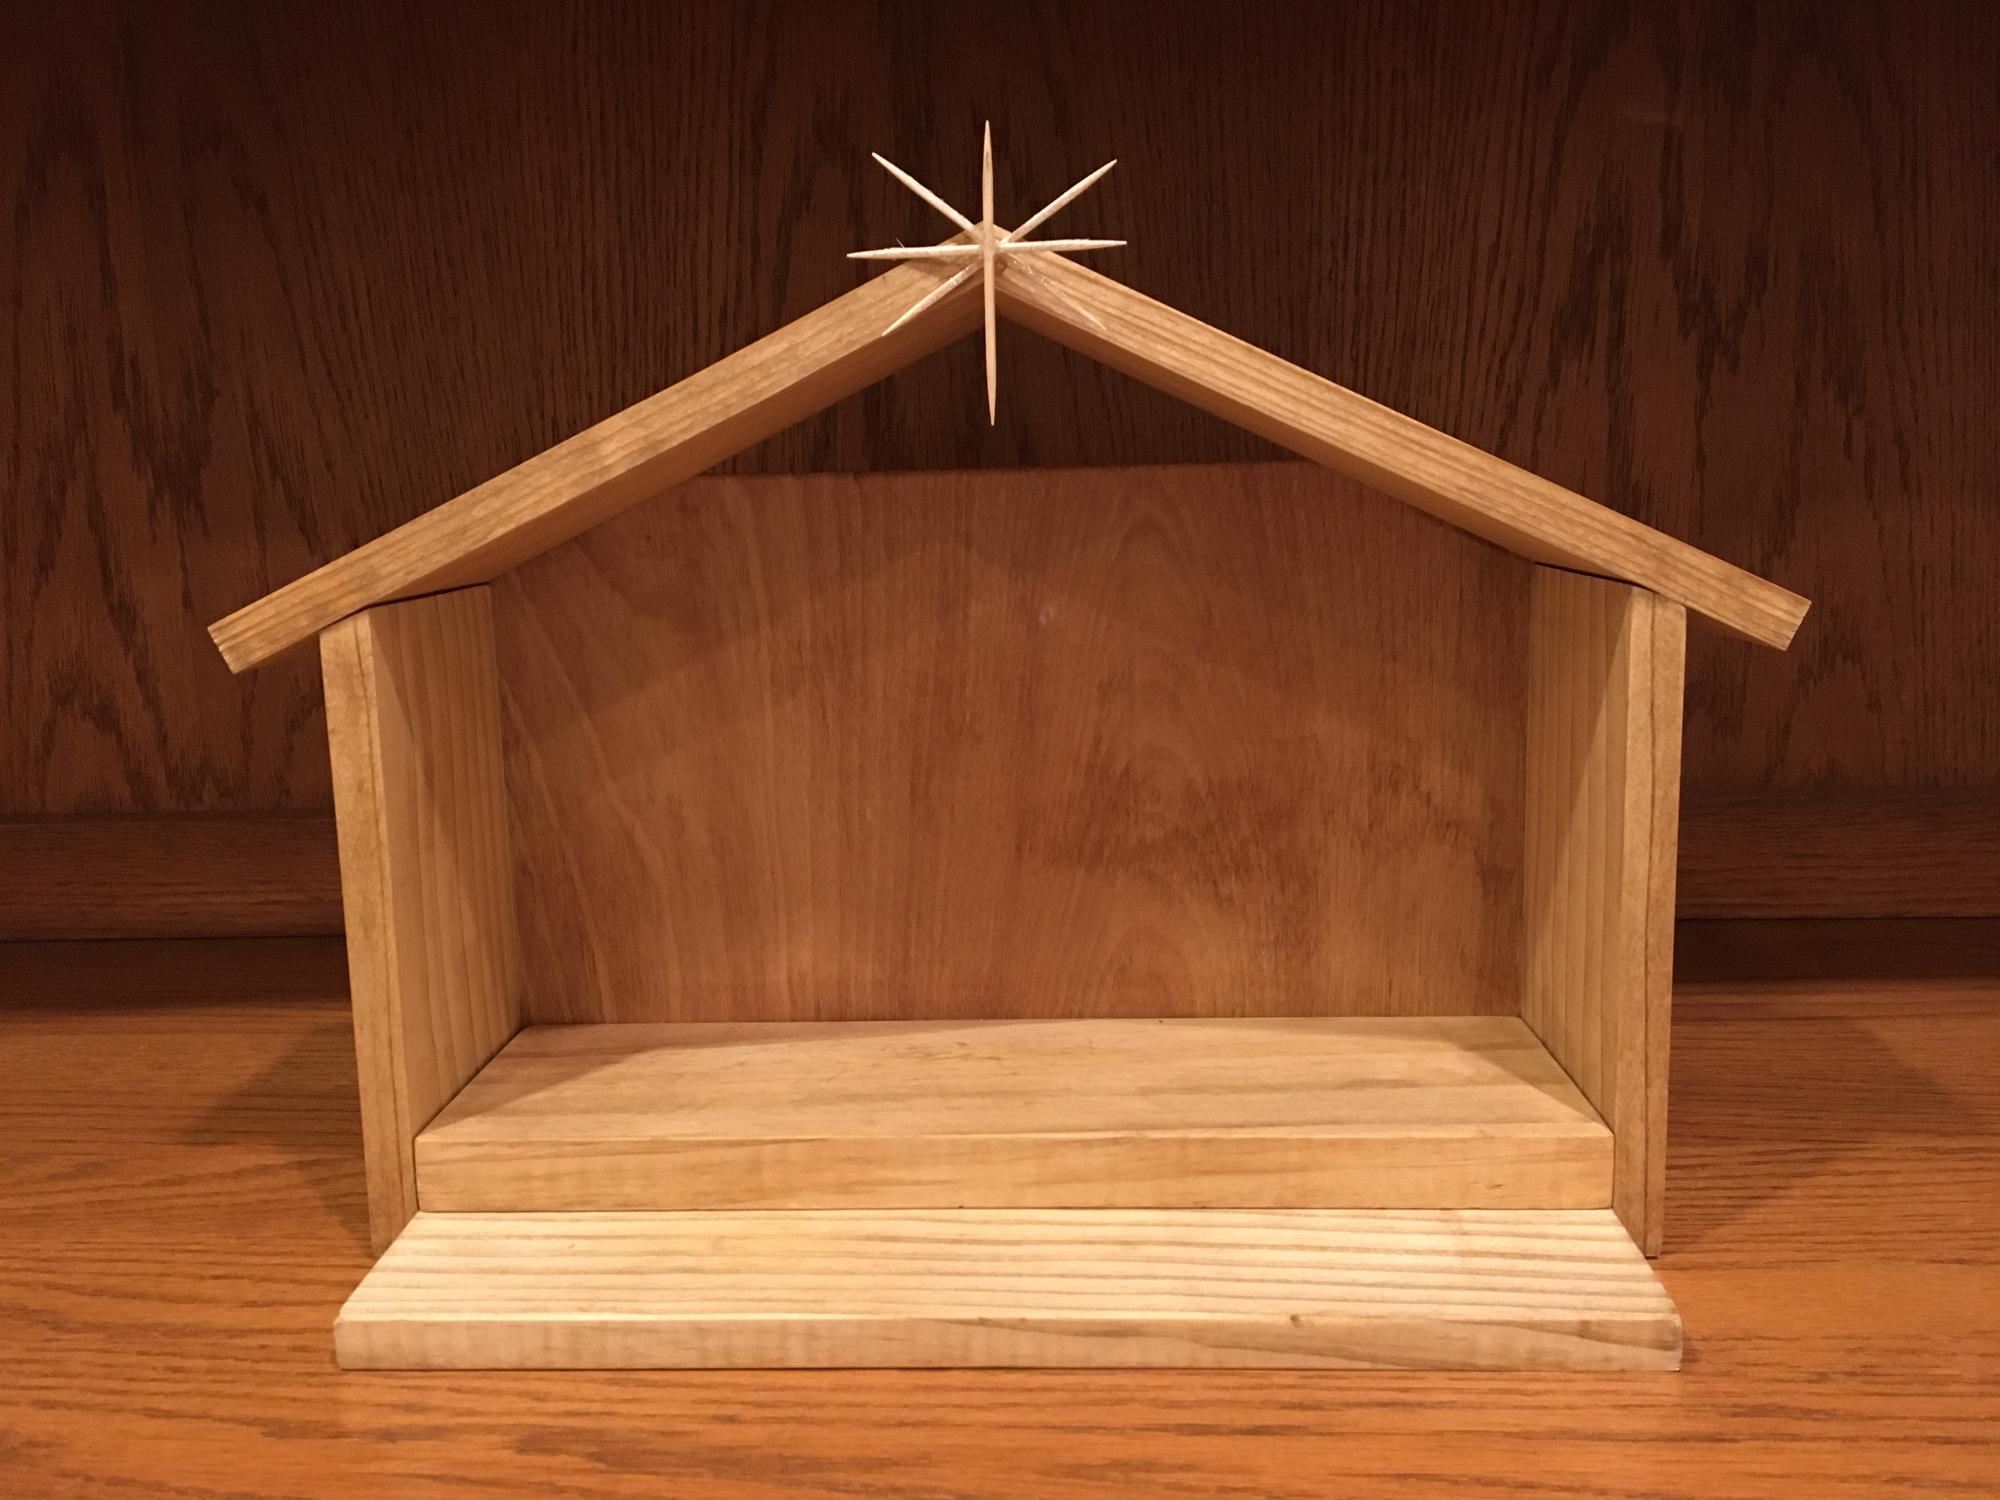
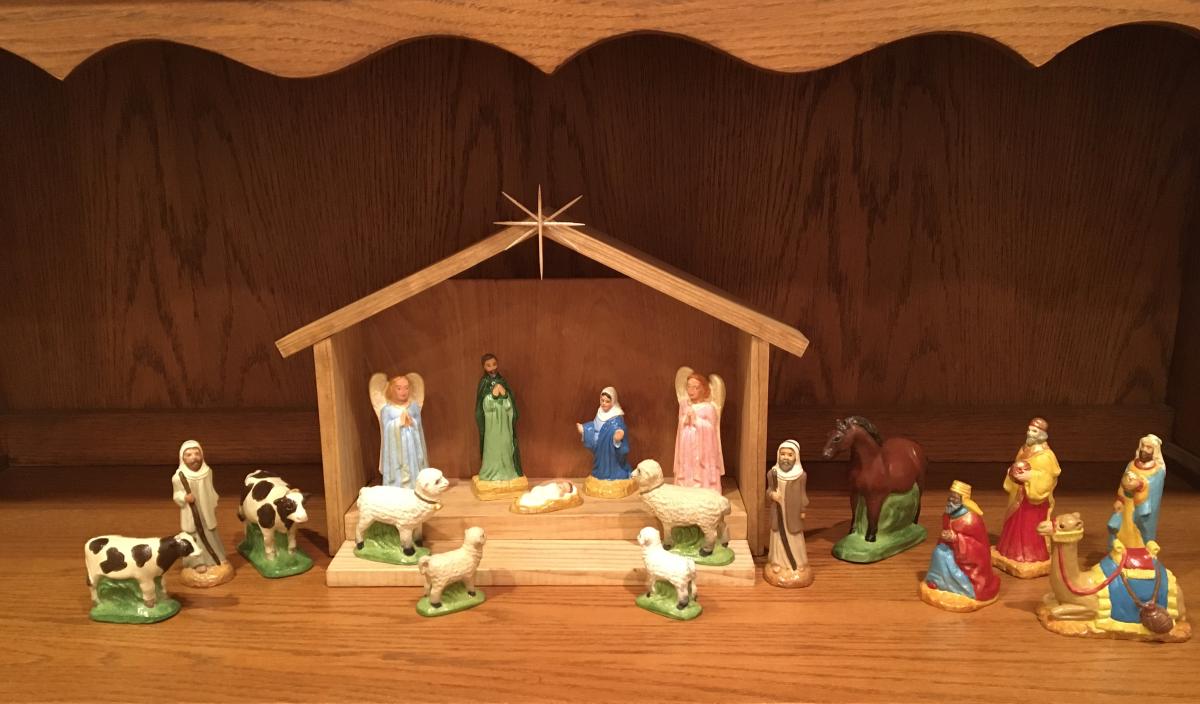
Stable made from scrap wood I had on hand (plus a few toothpicks).
Mon, 11/29/2021 - 05:42
Awesome use of material, it looks great! Thank you for sharing, God Bless~
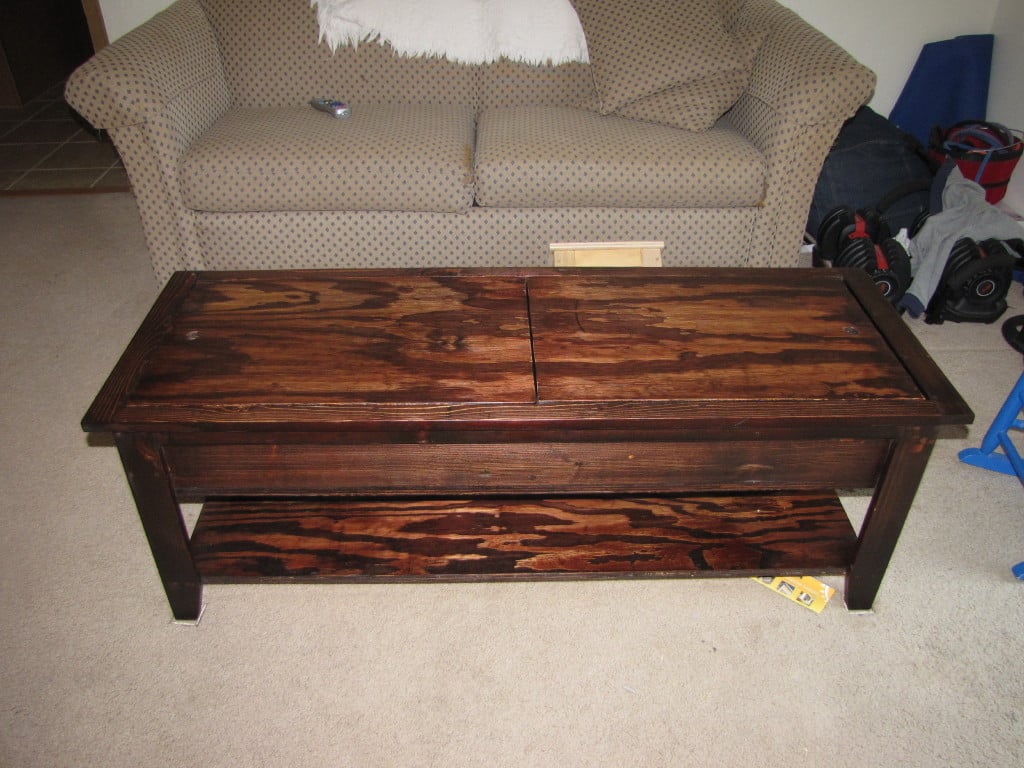
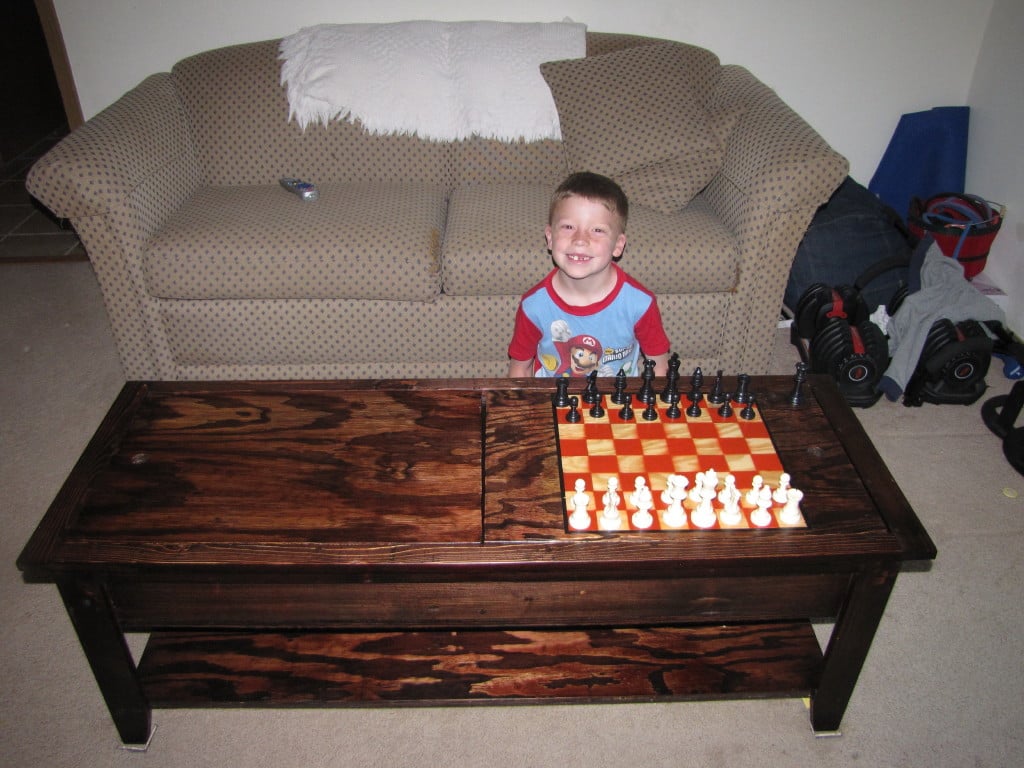
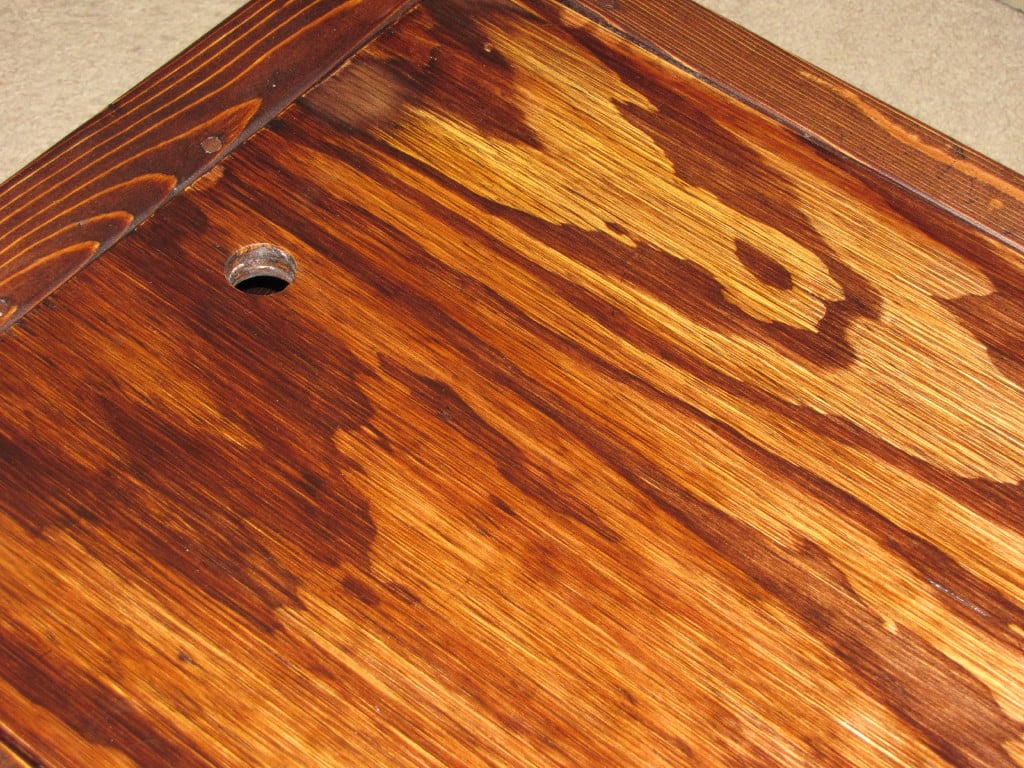
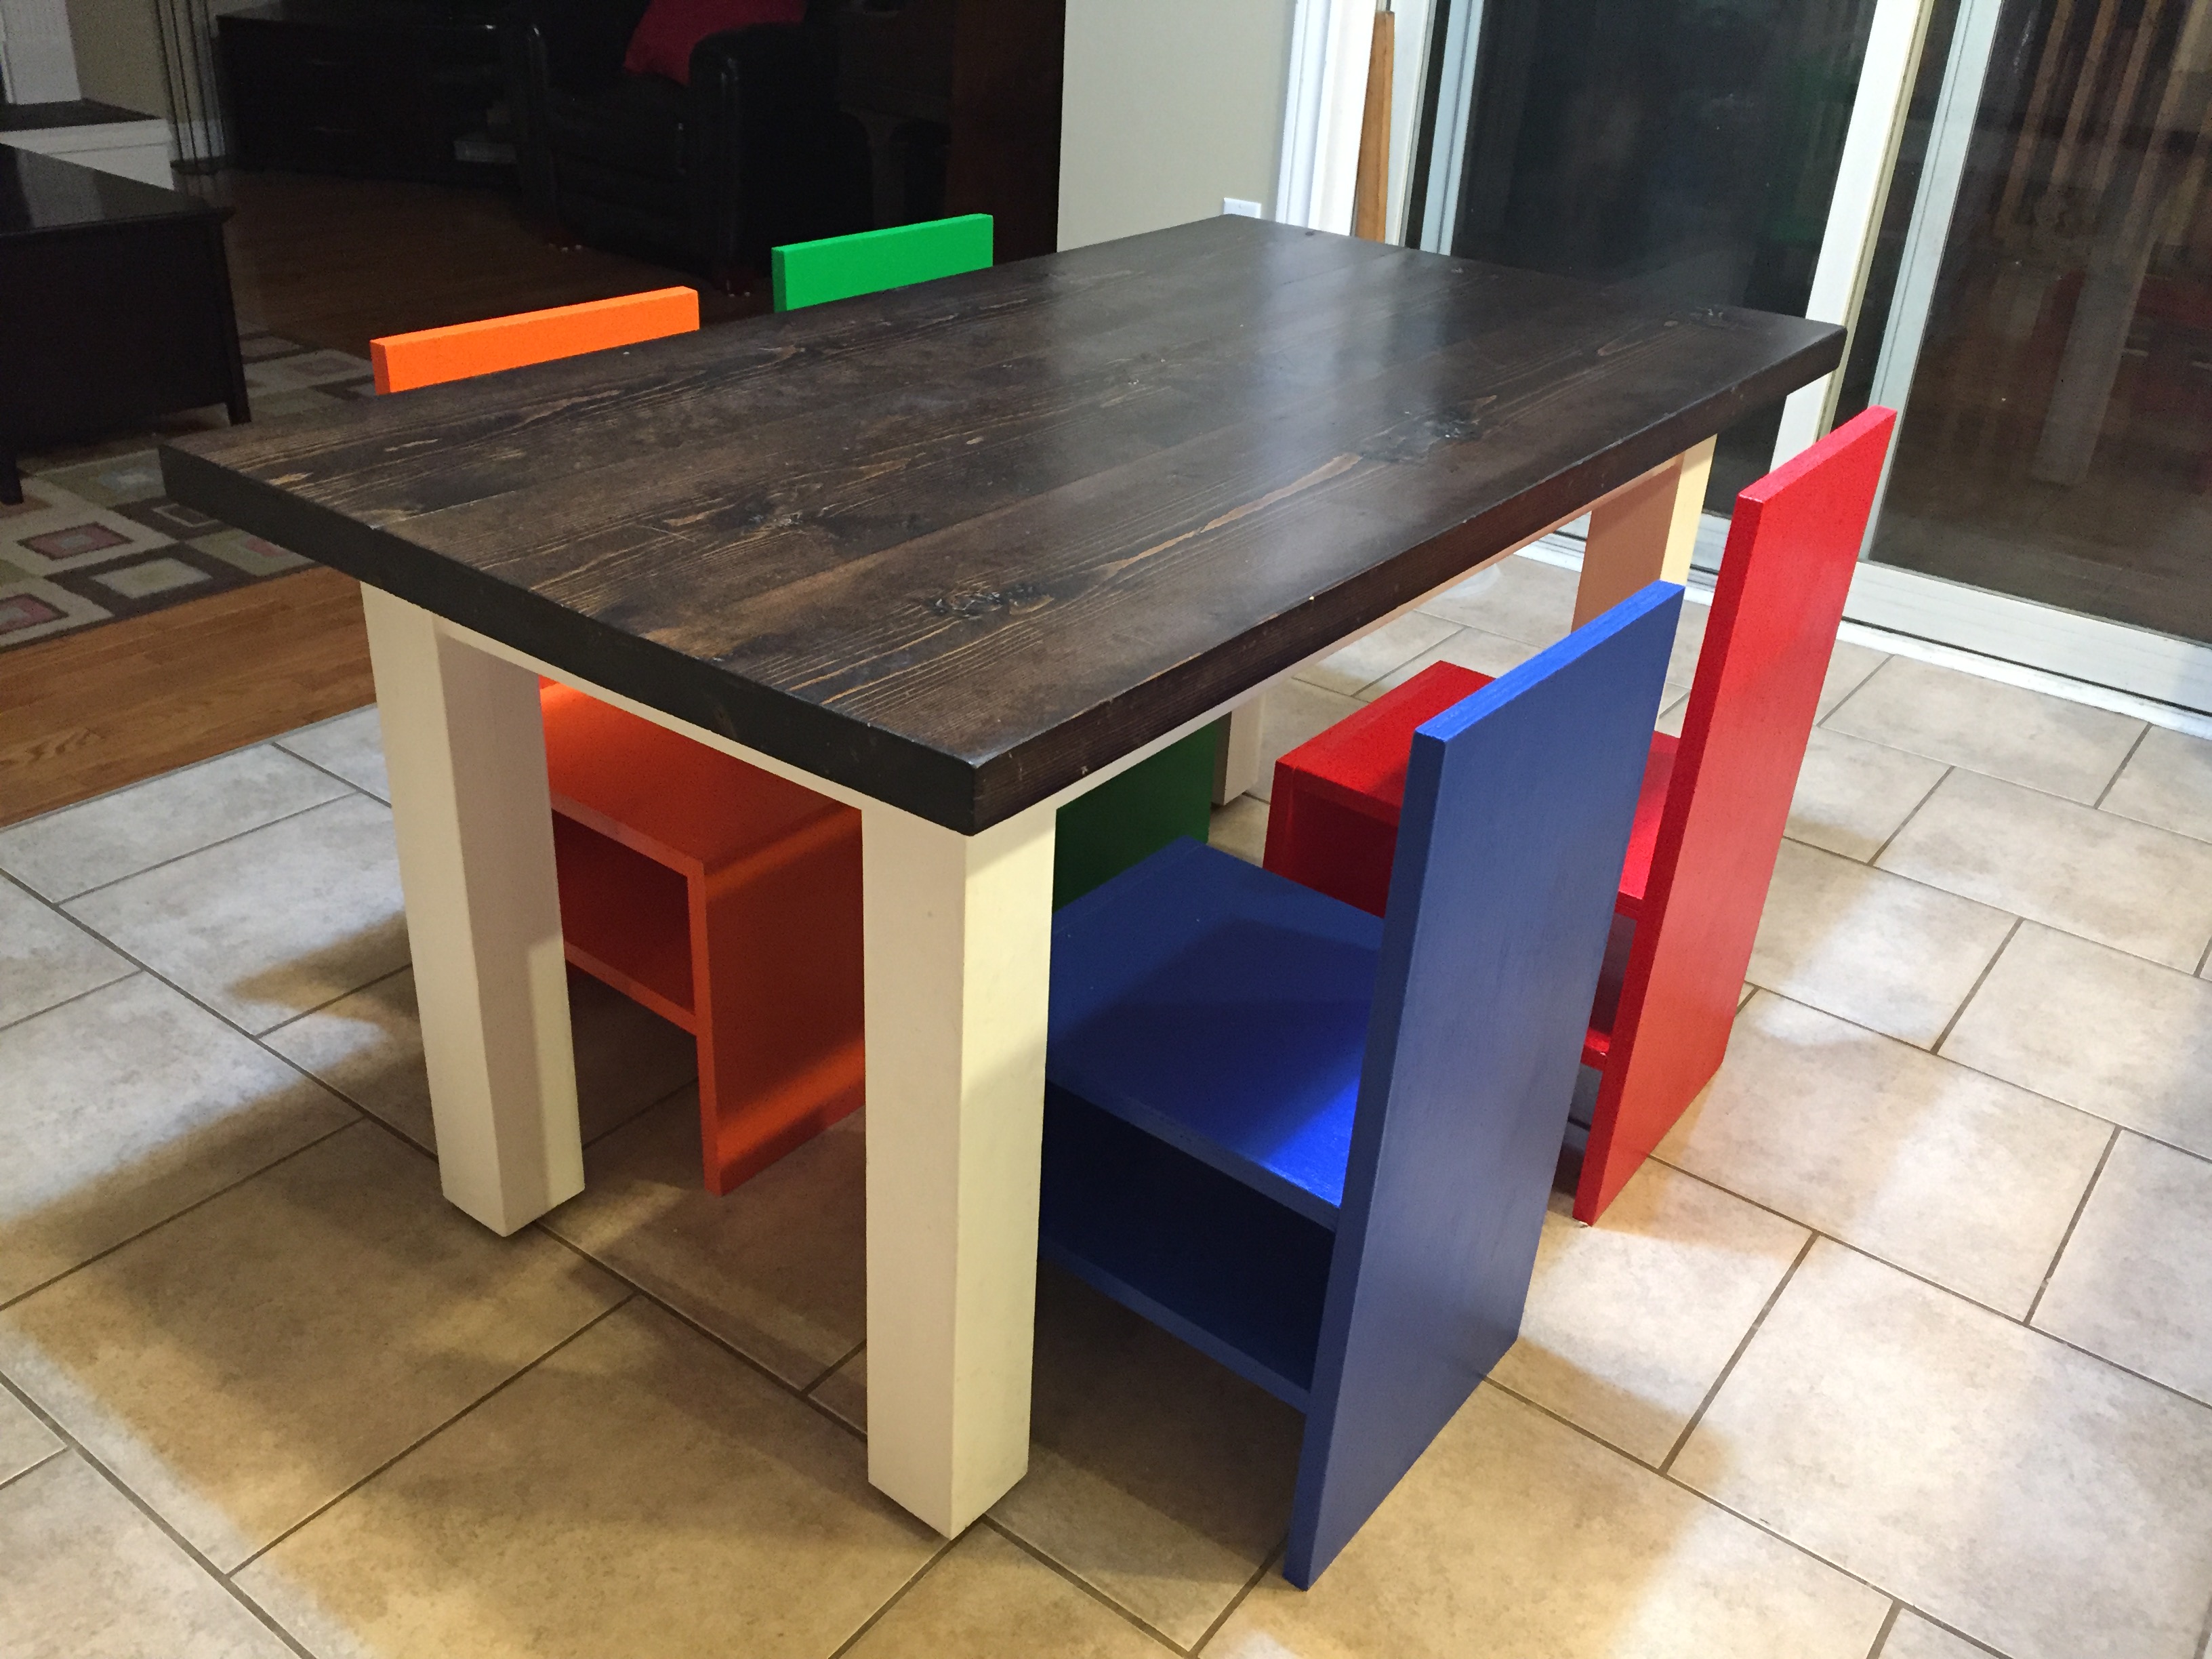
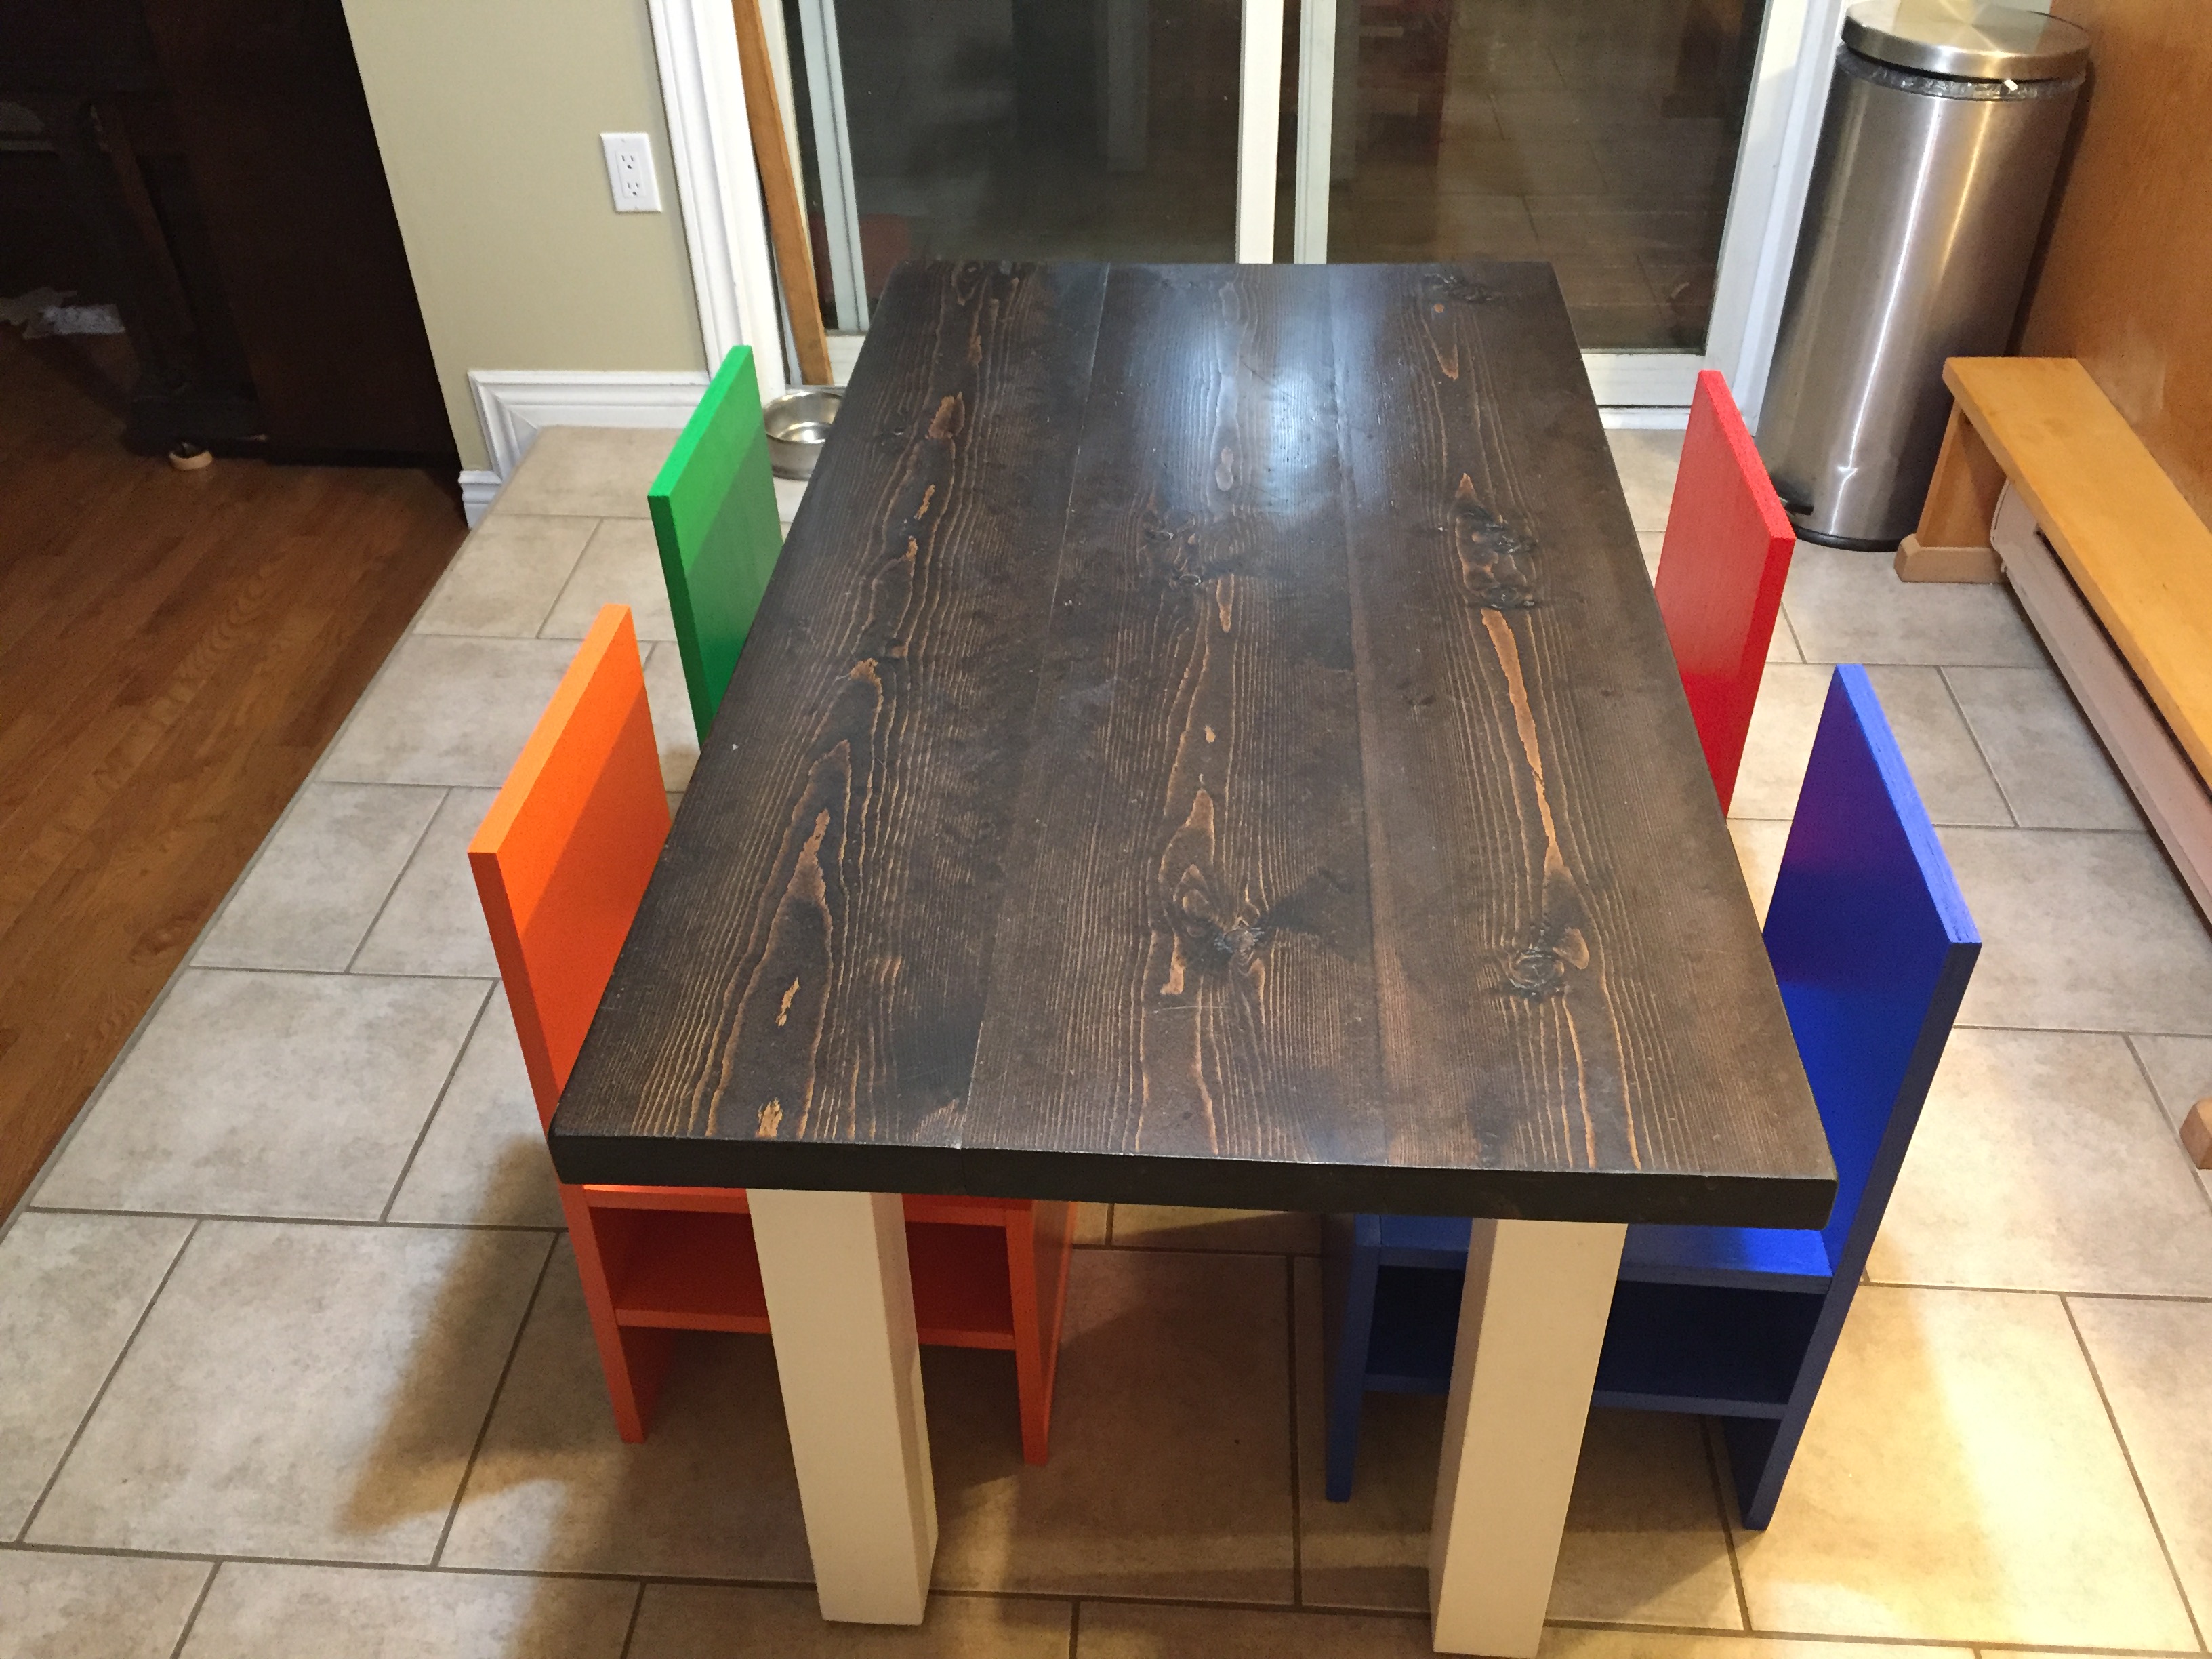
This is the Mom's Lego Table everything went according to plan until, I cut and tried to place the table tops in ... Ooops. Was not square, with the help of my father-in-law we got them to fit. So, as Ana says ..CHECK FOR SQUARE!!! The other part that took awhile was the chess board but was worth it my son loves chess!
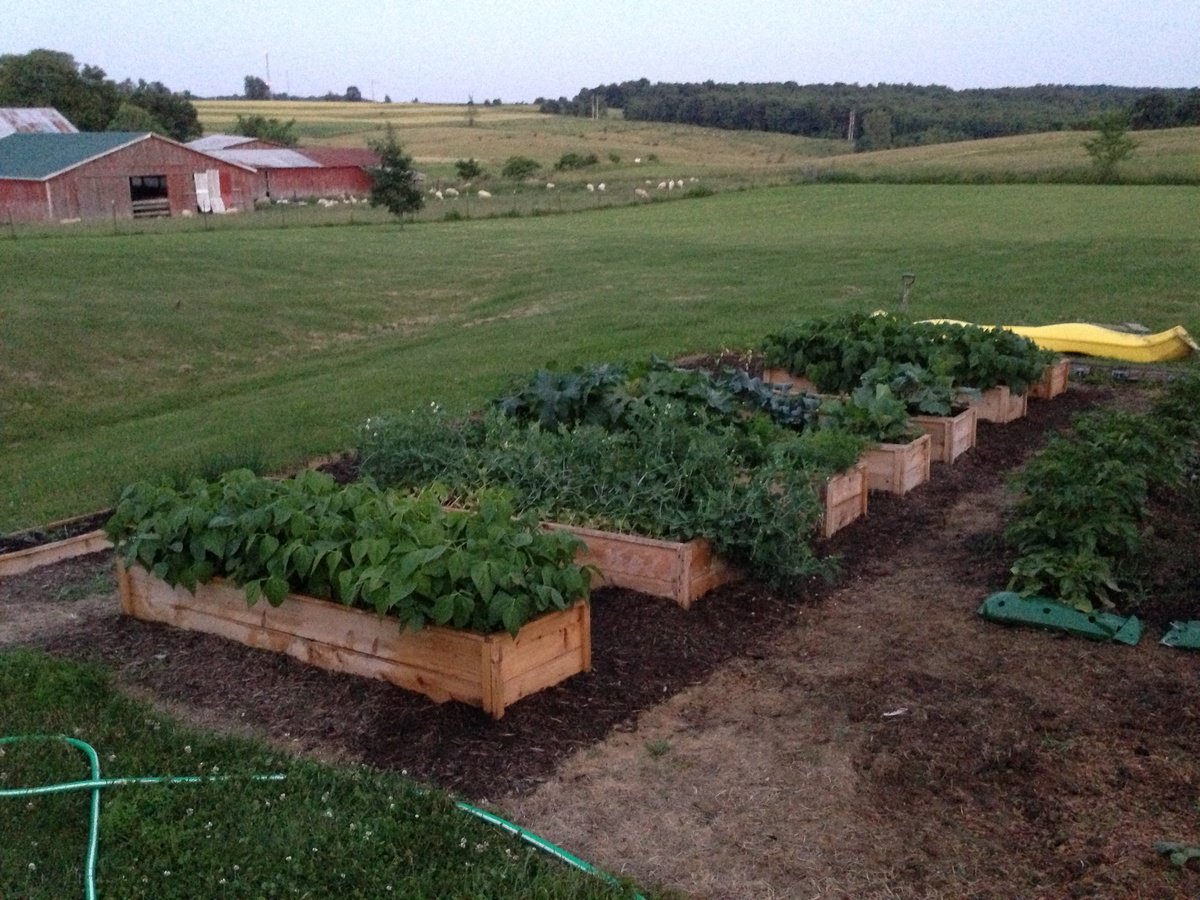
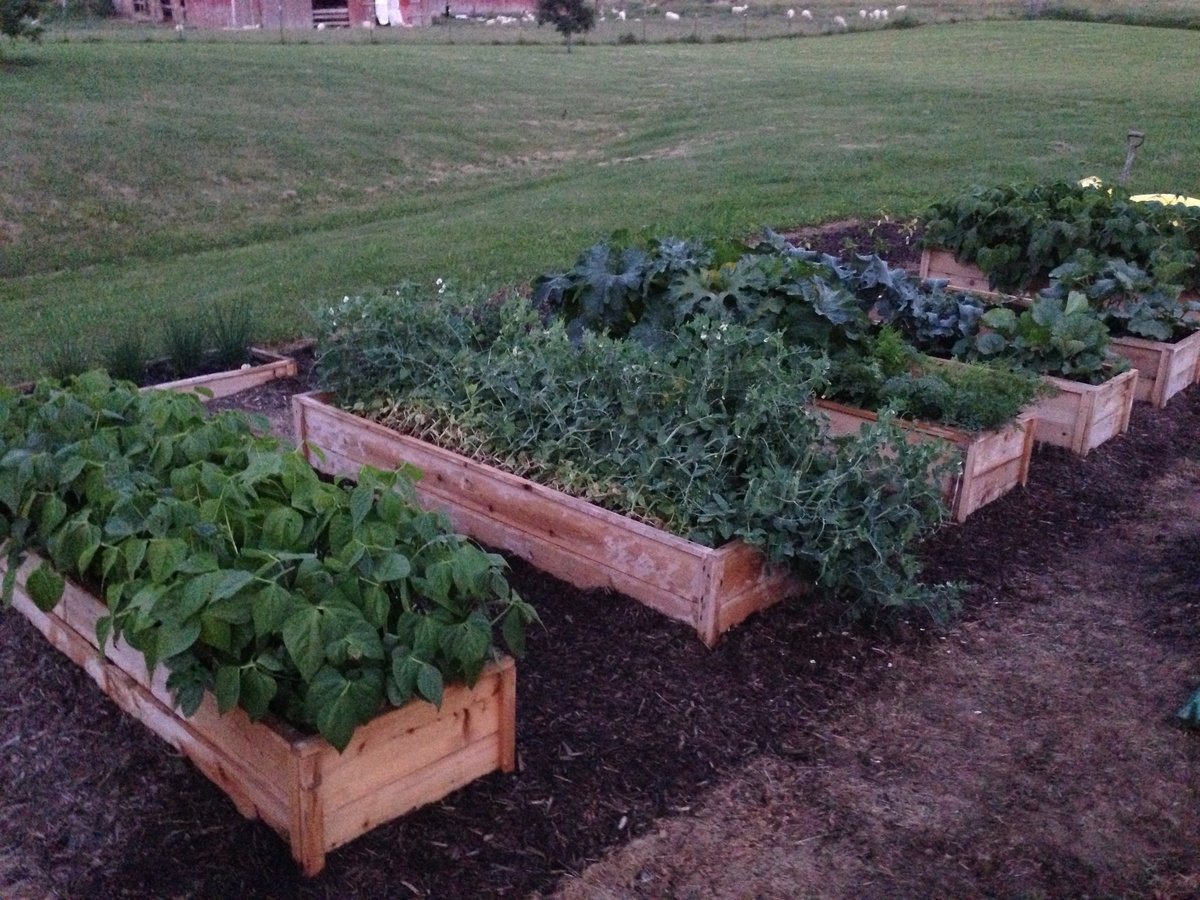
These garden beds are fantastic! They were so easy to build and look great in our backyard. We have always found ourselves with a garden covered in weeds or plants out of control. Our garden this year looks wonderful and we have hardly any weeds in the beds. Thanks for the great plans!

Fri, 05/24/2019 - 10:05
I'm so glad the plans worked for you! Your garden looks fantastic!
I washed the plans for the farmhouse table in hot water!
I modeled this kids table off the farmhouse table and then made the chairs out of 3/4" plywood with bright colours.
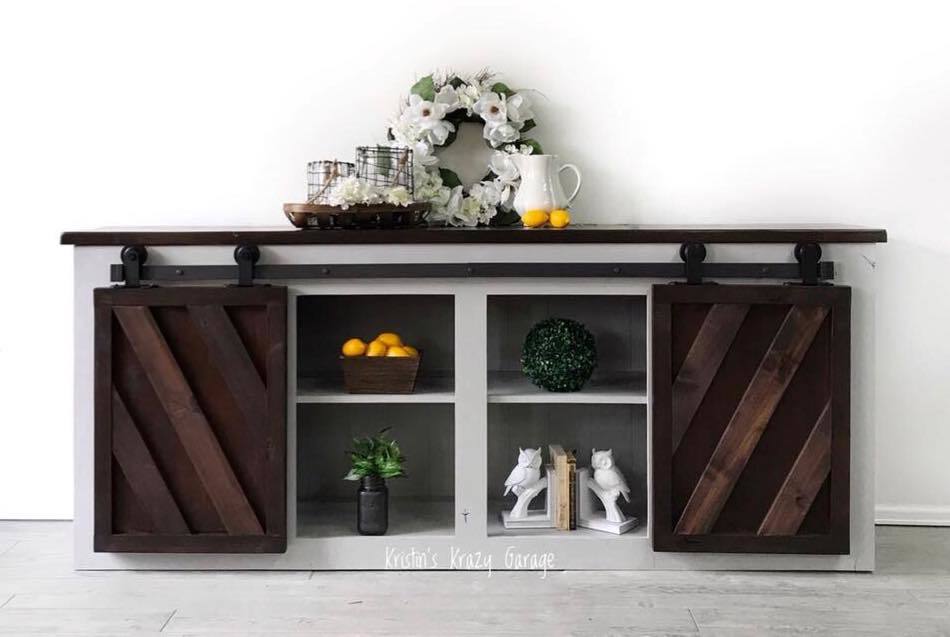
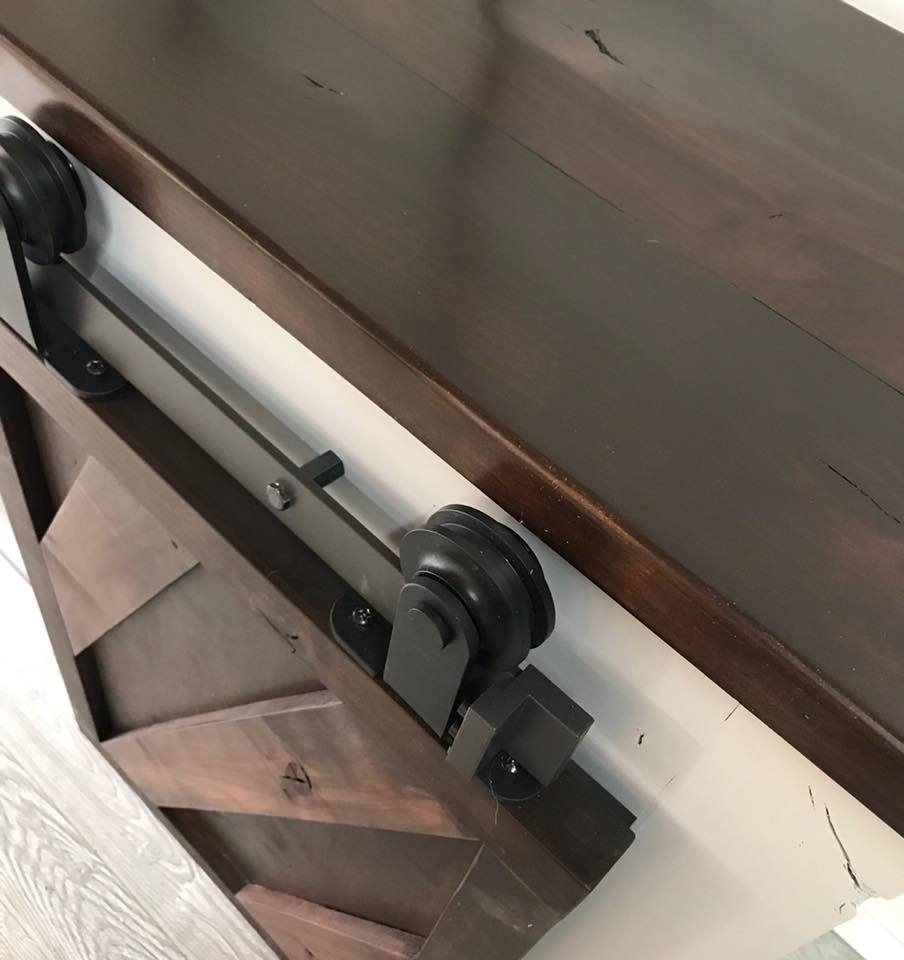
We decided to go big or go home. We made the console almost 8 ft long out of all Rustic Alder. Took almost a month with a few hours here and there in the garage. But everyone loves it and we can't wait for it to find a new home!
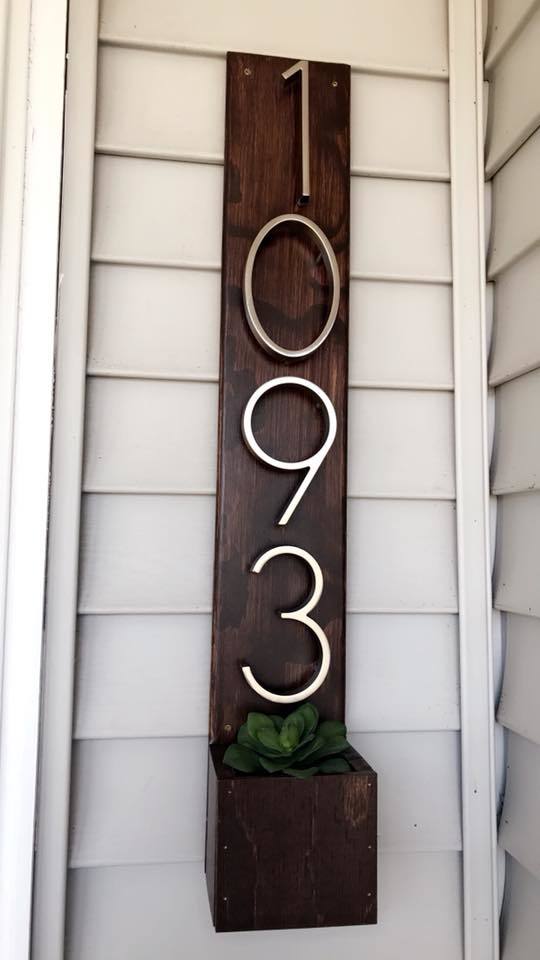
Address Sign
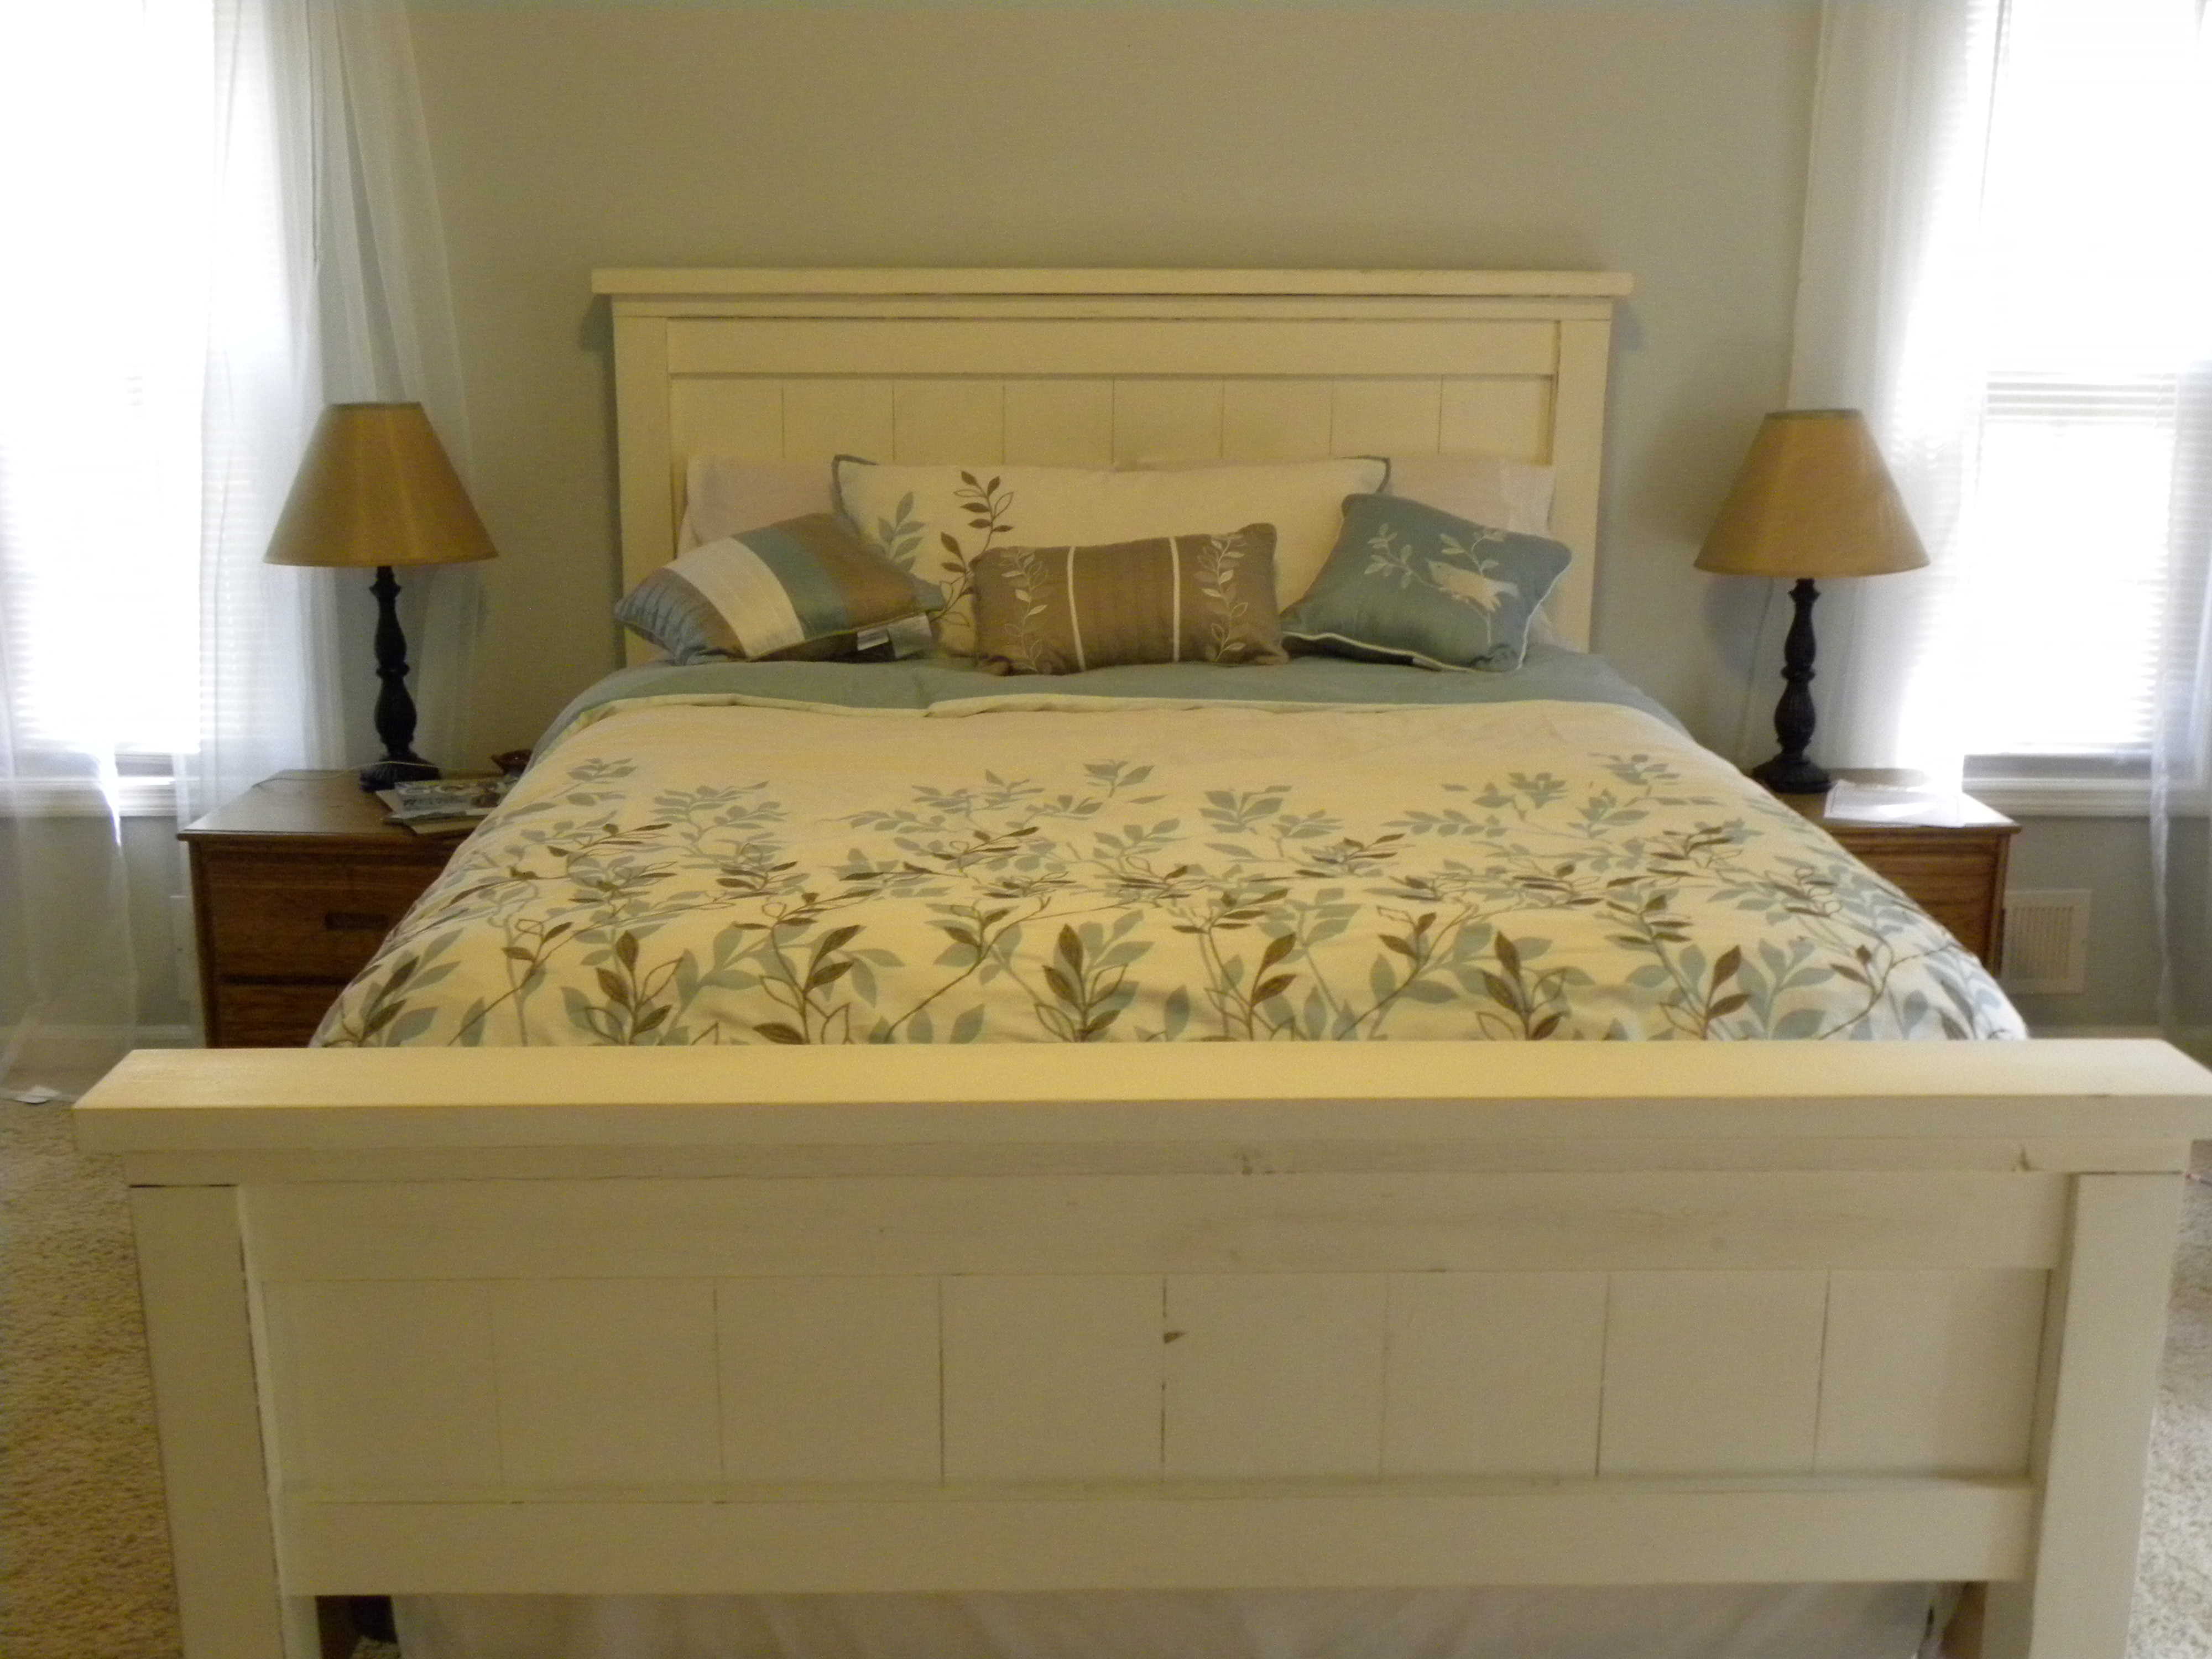
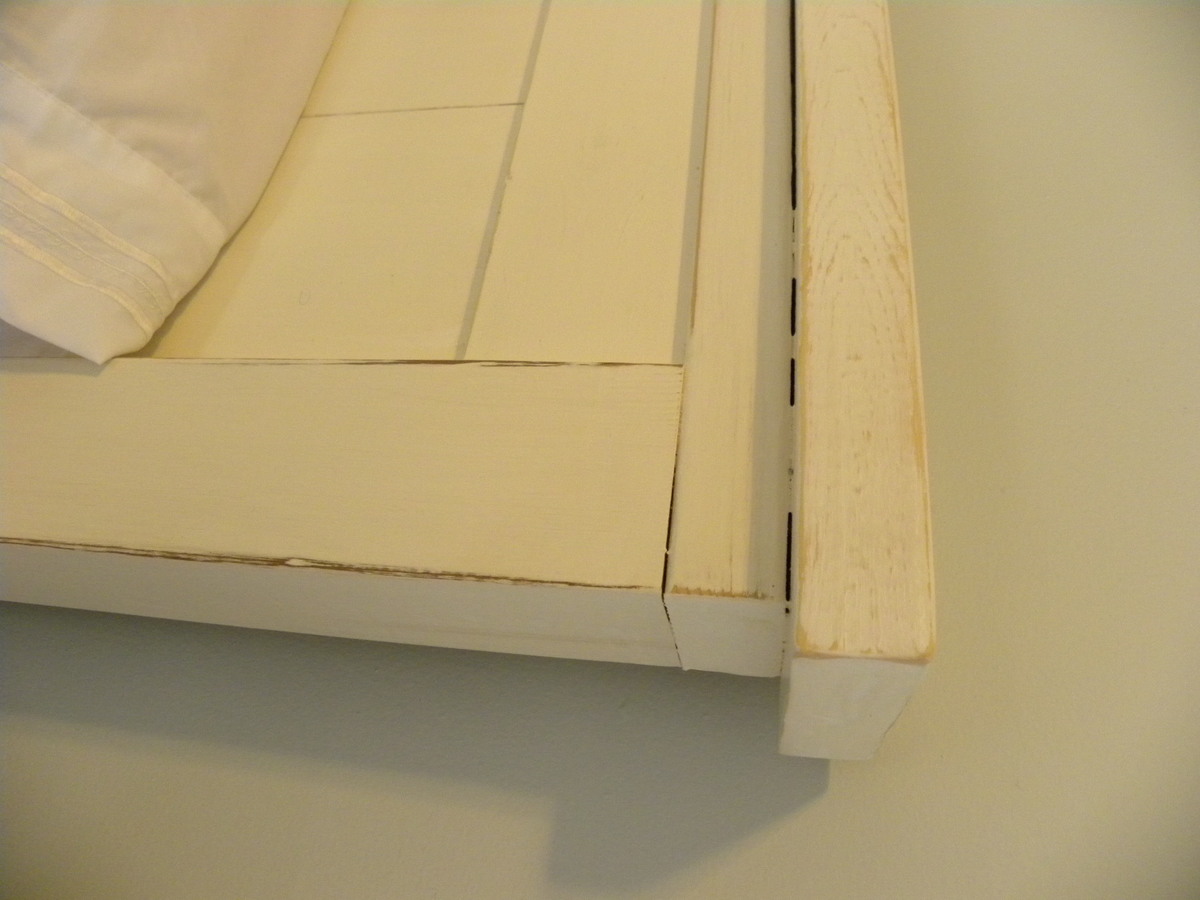
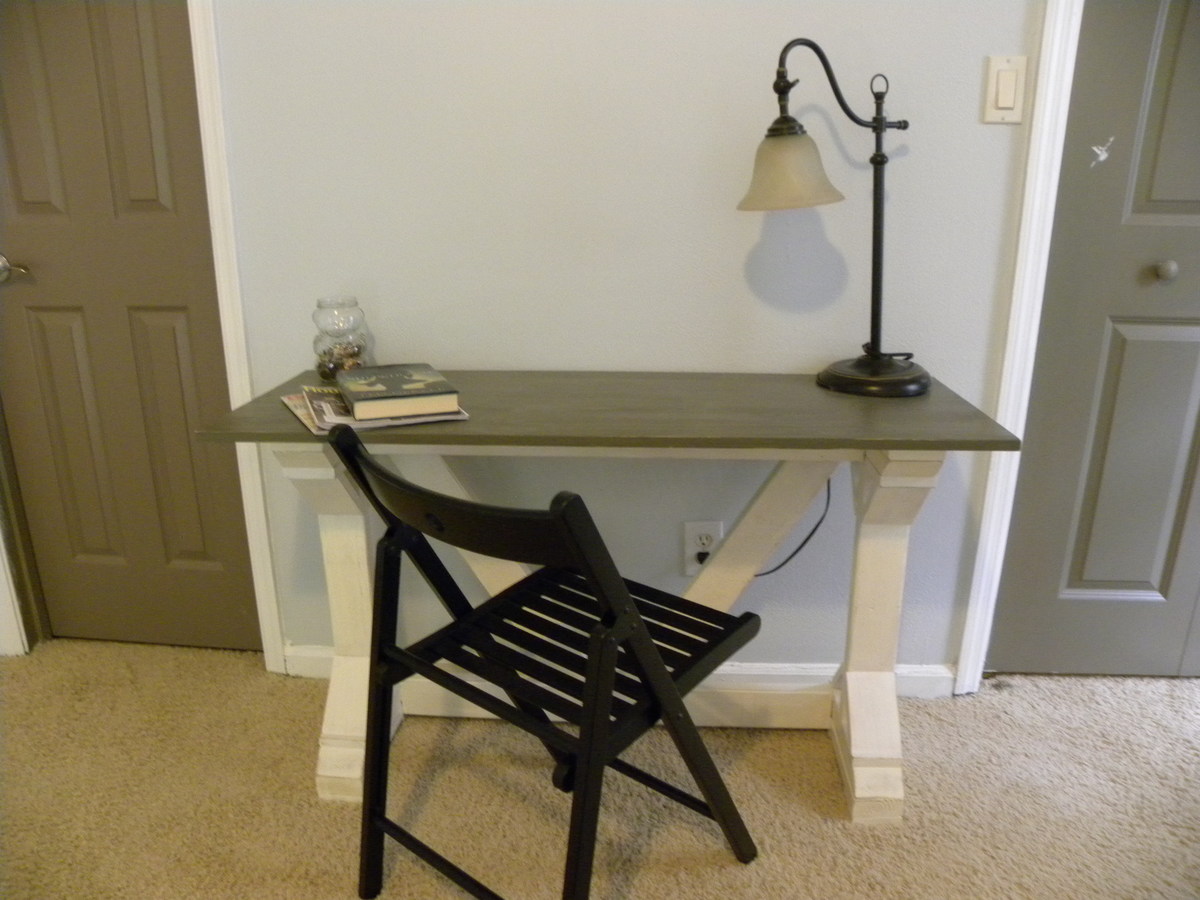
We built the Farmhouse queen bed and fancy X desk for our bedroom. It was relatively easy and looks so great! The bed is made of pine and cedar. (It is really really hard to find pine 4x4 posts that aren't pressure treated around here.) We used pine for the desk. Paint color on the bed and base of the desk is Behr "Polar bear" with a coffee stain distress. The desk top is Benjamin Moore "Dash of pepper." The bed cost about $175 to build and the desk cost $30. (We used a lot of scraps for the desk.)


Thu, 09/05/2013 - 17:03
Your bed and desk are beautiful! Great job on this build, and I love the colors!
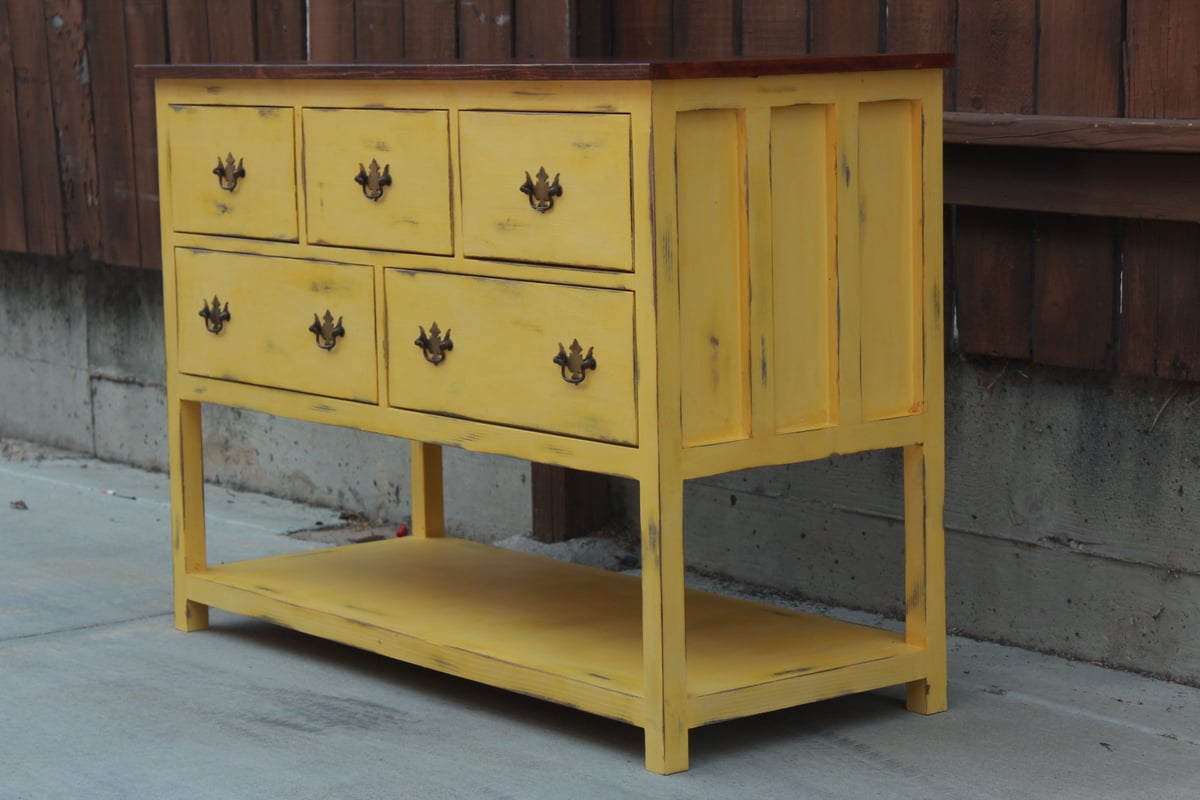
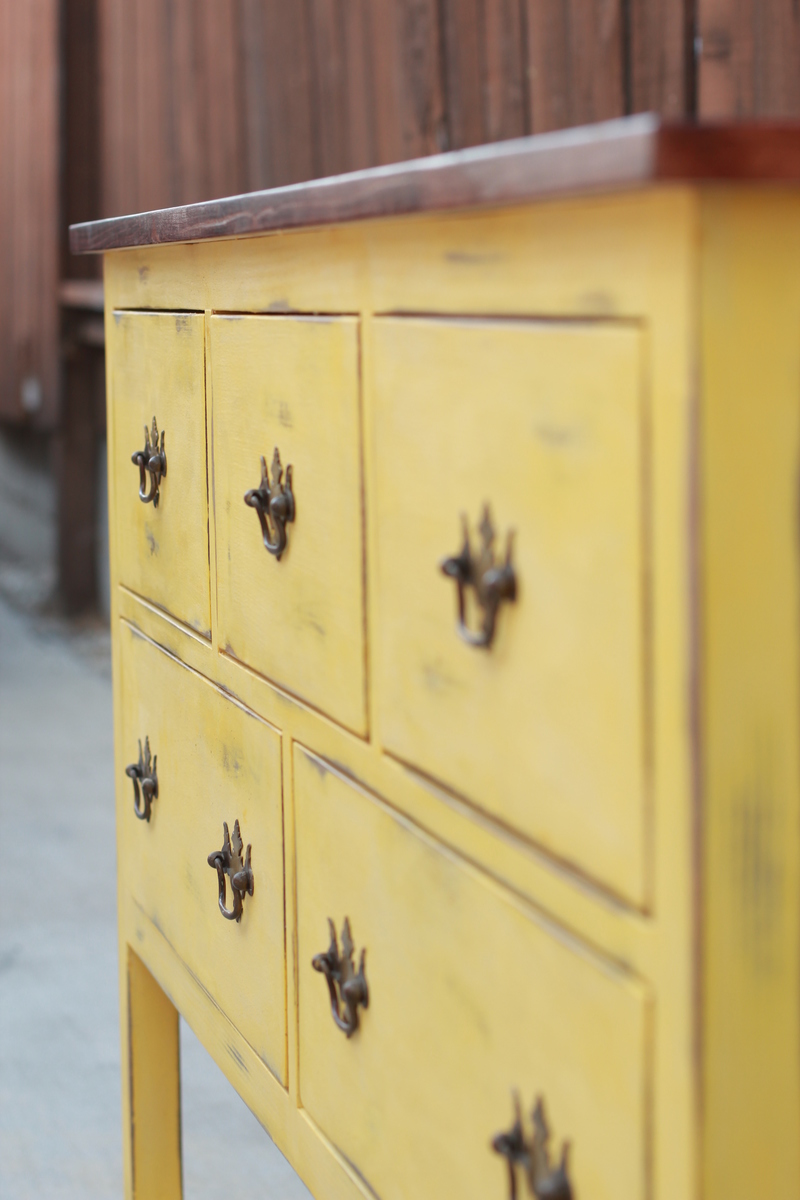
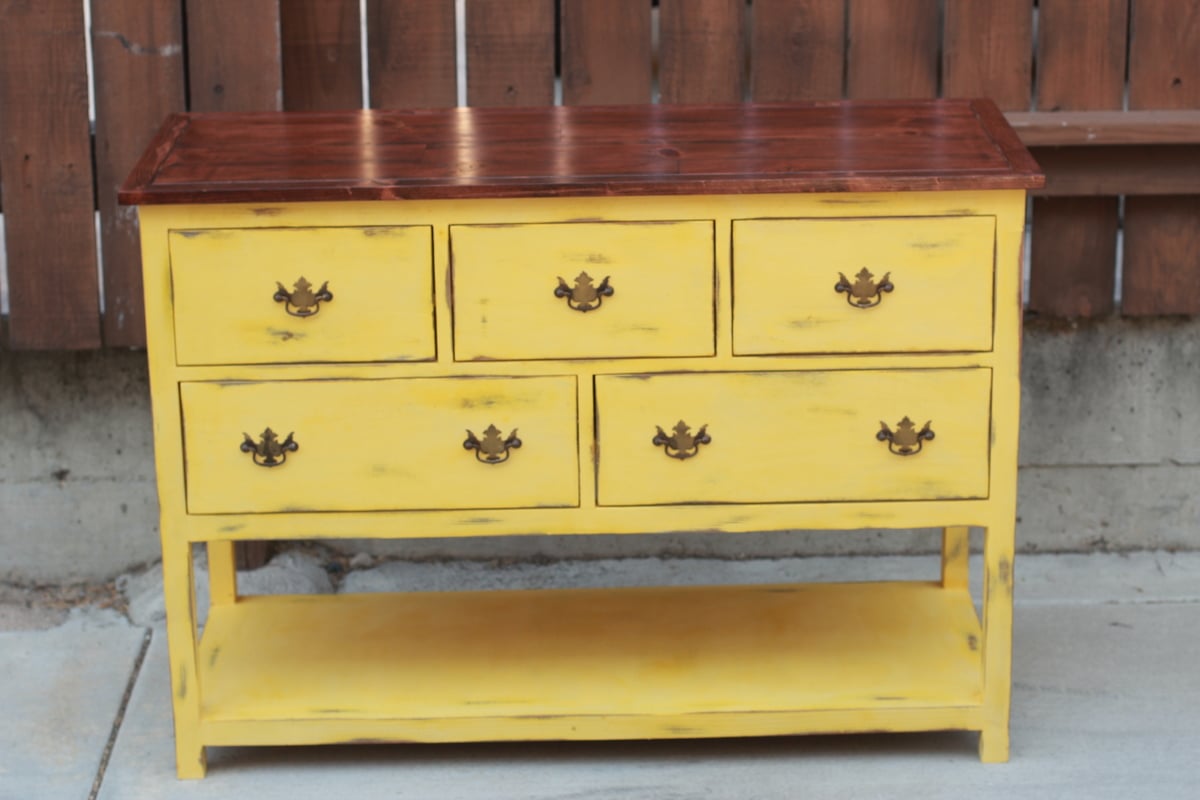
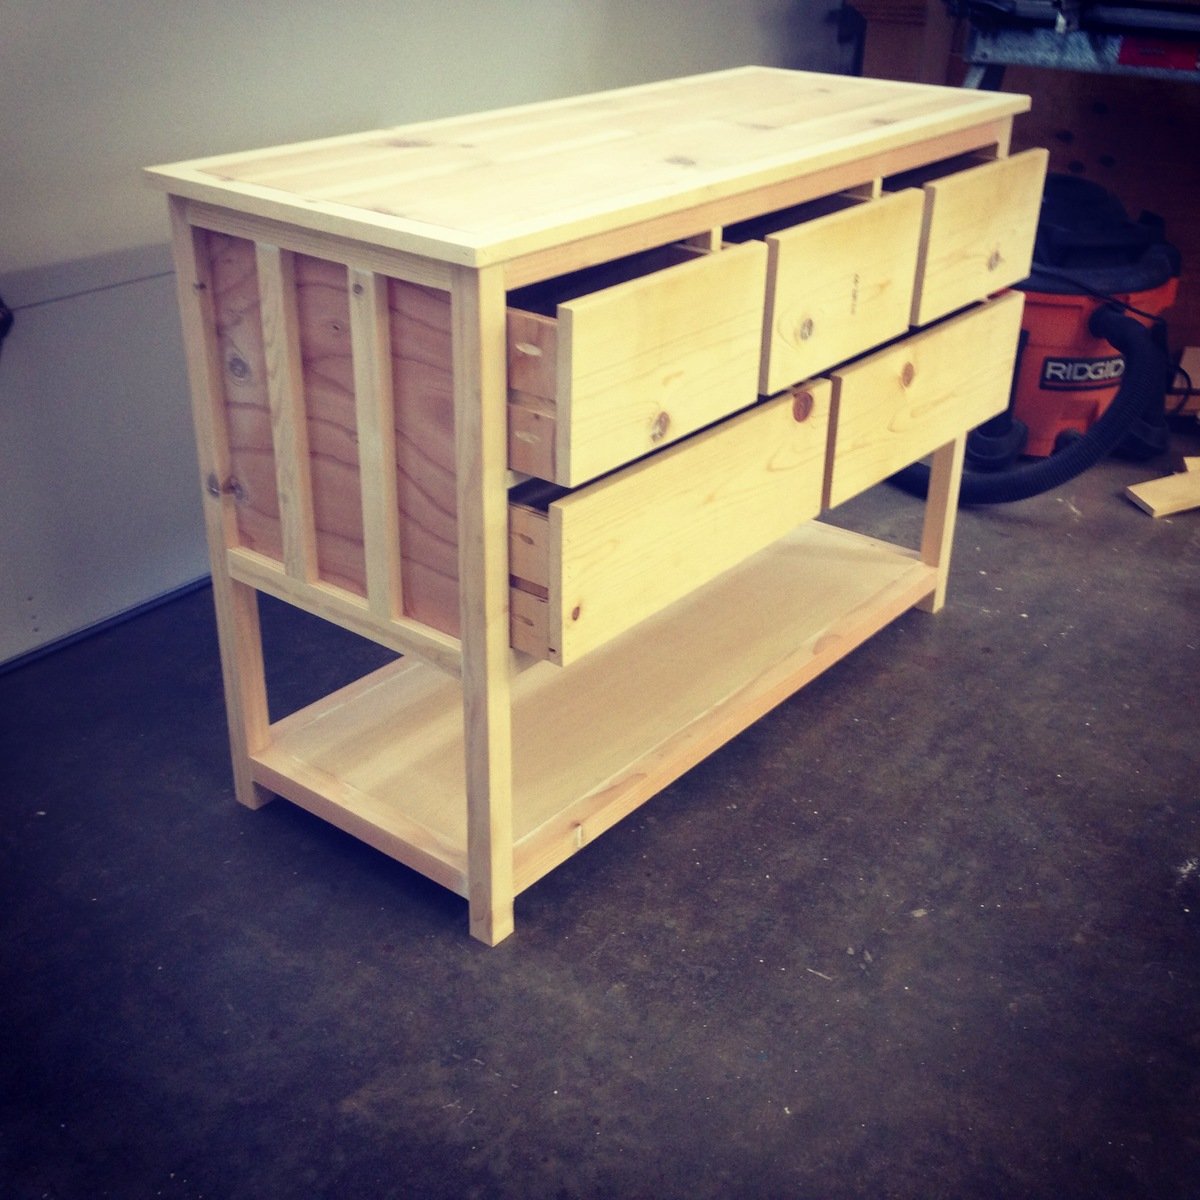
This is a country style dresser I built from one of ana's plans. I slightly modified the top and the dimensions to fit my needs. Painting this dresser was the biggest challenge. First I stained the entire dresser, then I applied 3 coats of ce ce caldwells chalk paint. I then used a wet rag to wipe away the yellow in areas I wanted distressed. Last I applied a paste wax to seal it.


I followed the plans except for the top, I used a 2x12, 2x4 and 2x12 pocket holes together.
Burnt the wood with a torch and stained over.
Thanks for the plans!
Questions? [email protected]
Loved making this. Used old sun curtains and a sheet for extra splendor.

Wed, 07/03/2019 - 11:19
This is beautiful! Thank you for sending in a brag post, we very much appreciate it!
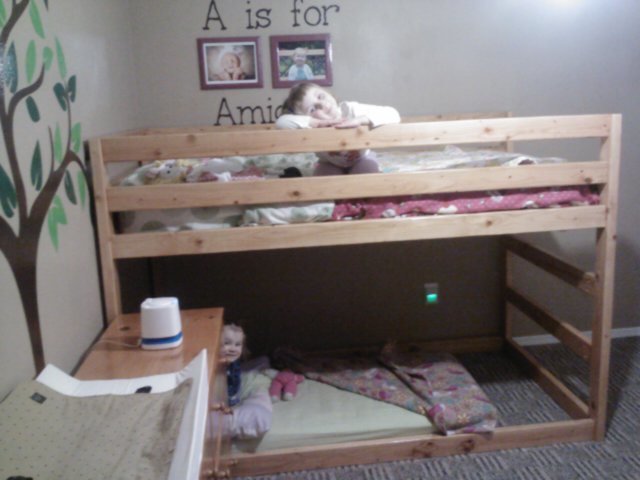
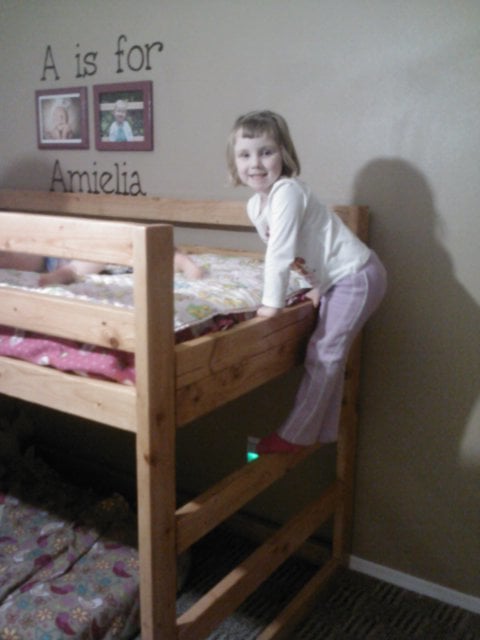
We loved the idea of the Jr. Loft Bed, but made some modifications to fit our needs.
Modifications:
-I didn't really feel the 2x6 railing was needed, so to cut costs, we used all 2x4s. On the end, I put two 2x4s one on top of the other to keep the mattress from sliding off the ladder side.
-Height was a concern for me as my kids are 4 & 2. So I lowered the overall height by about a foot. 54in is the height. Since we are putting my youngest on the bottom (on the floor) we made sure she had enough head room.
-We wanted this to be STURDY and reversible. So we added bottom supports on both long sides to ensure that the frame wasn't going to move. We also added six 2x4 supports under the mattress on the top. I can climb up there to tuck in sheets with no problem.
-We skipped the stairs & landing. I didn't want my kids to be playing on the bed. So we skipped the stairs and just built a ladder into the frame instead.
This was a fairly easy build. We previously built a HUGE Ana White Table. And I felt like I was kreg jigging for DAYS. This was only a few hours of cutting, sanding, kreg jigging, and a simple put together. Staining took the longest! It's a great bed and we're so excited it's finished!

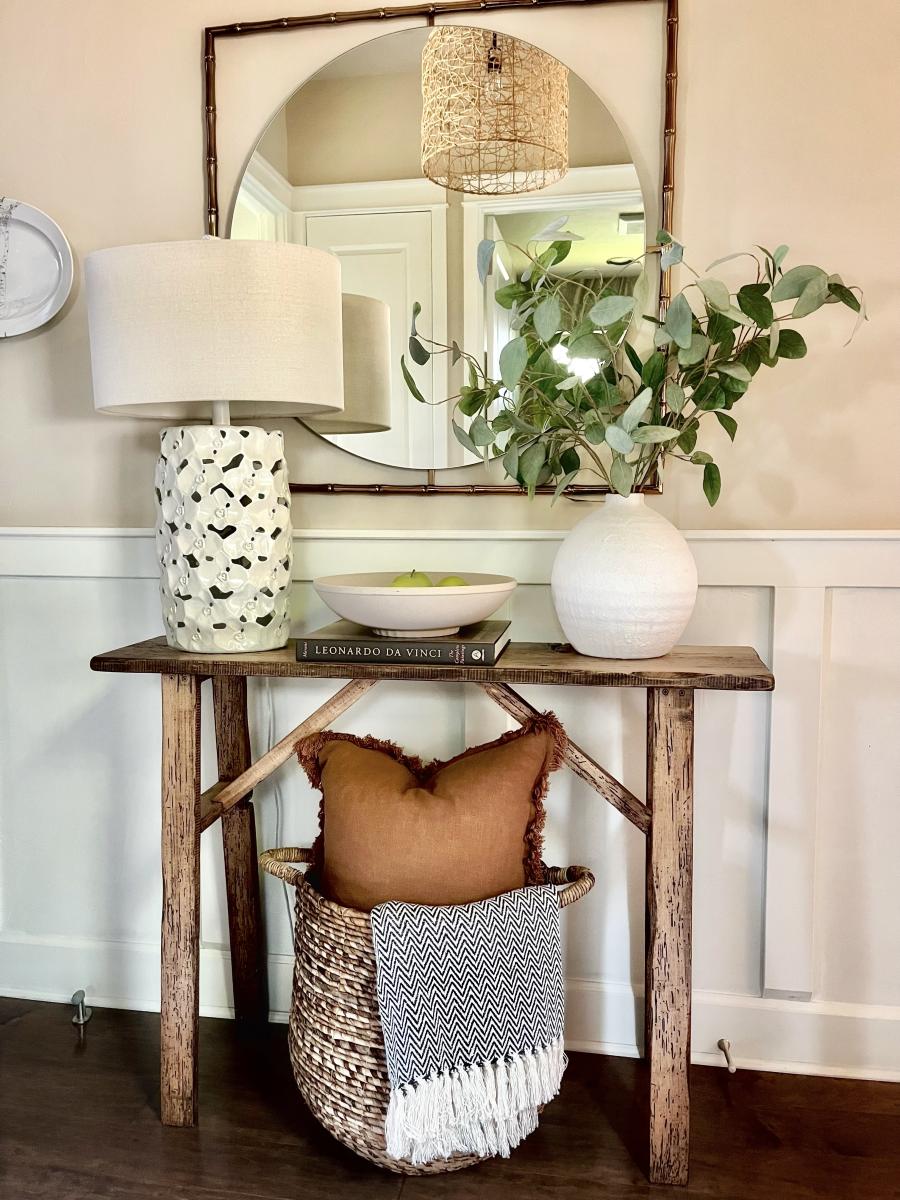
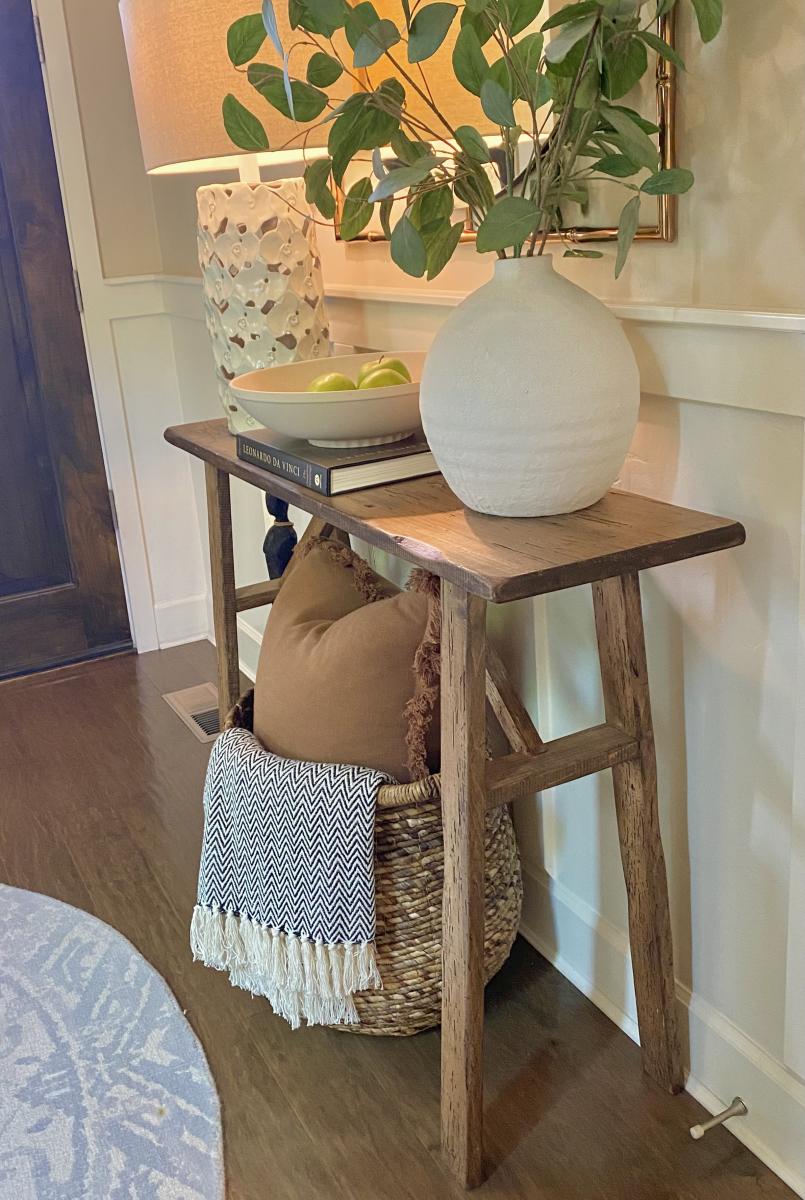
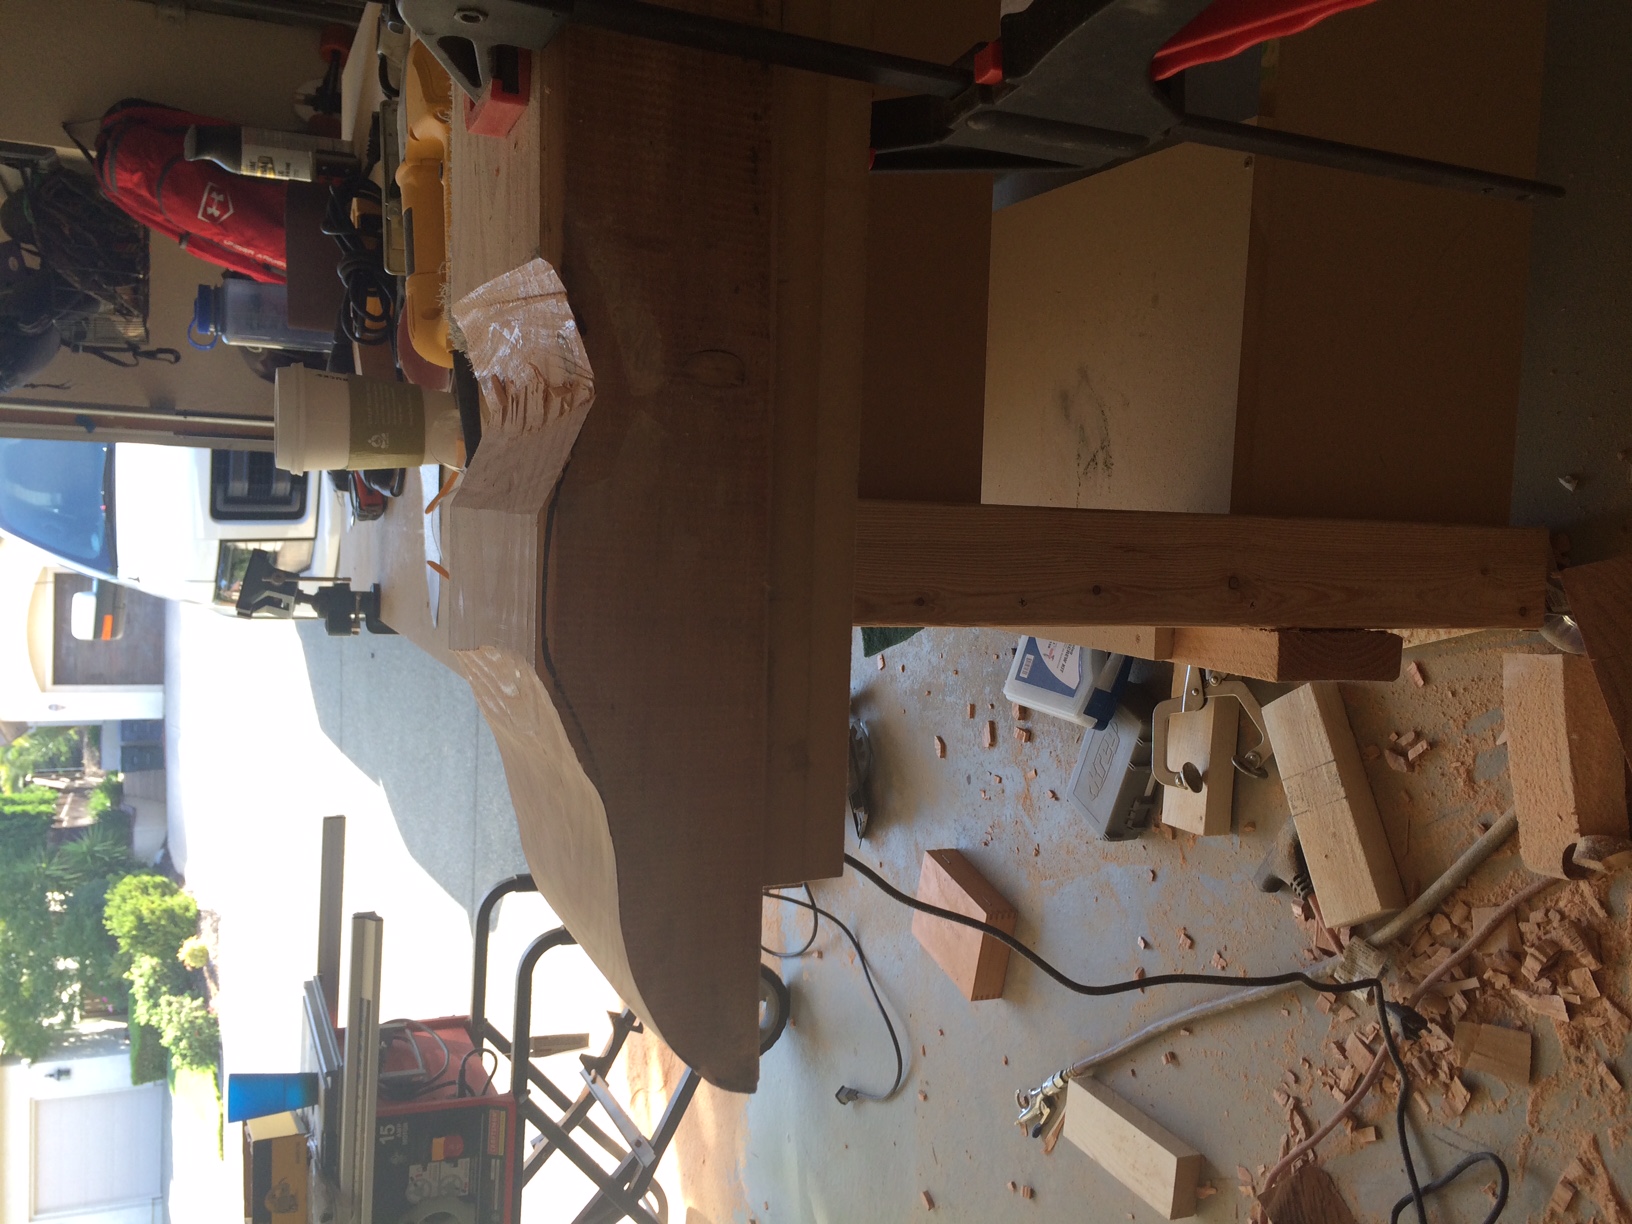
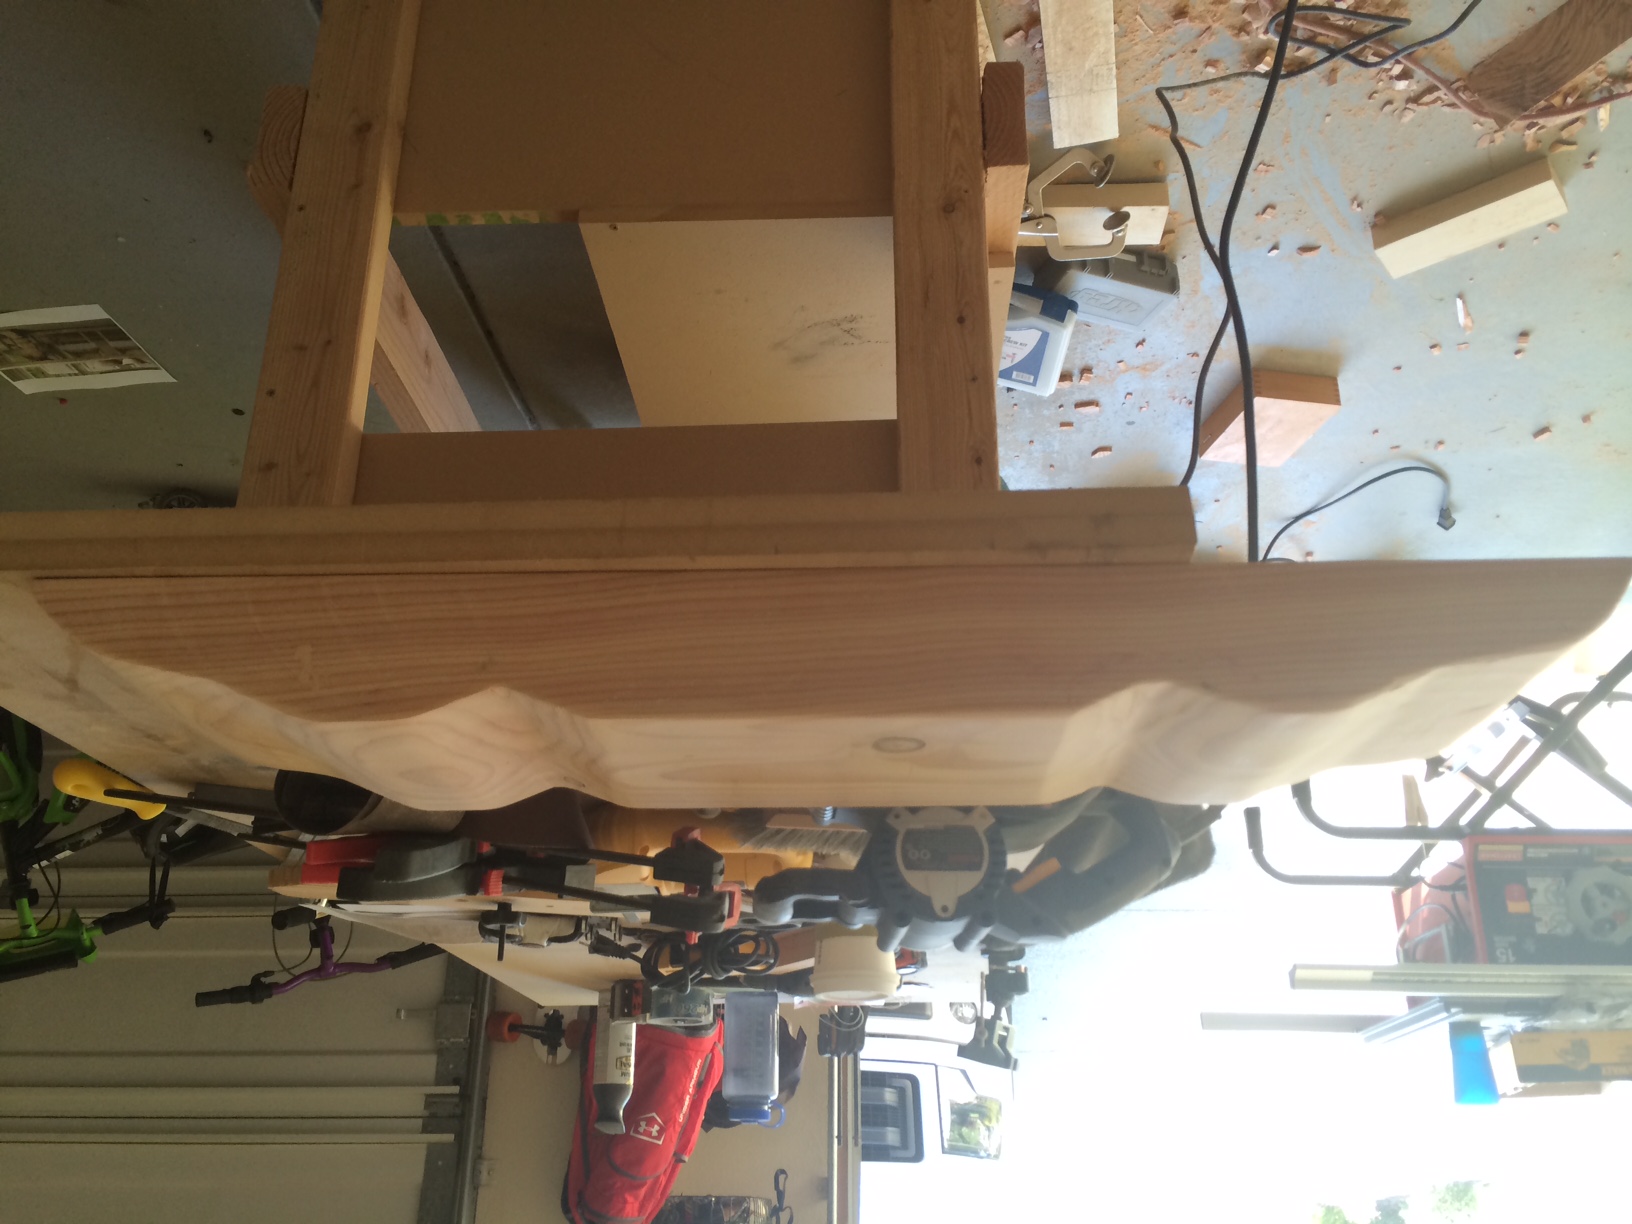
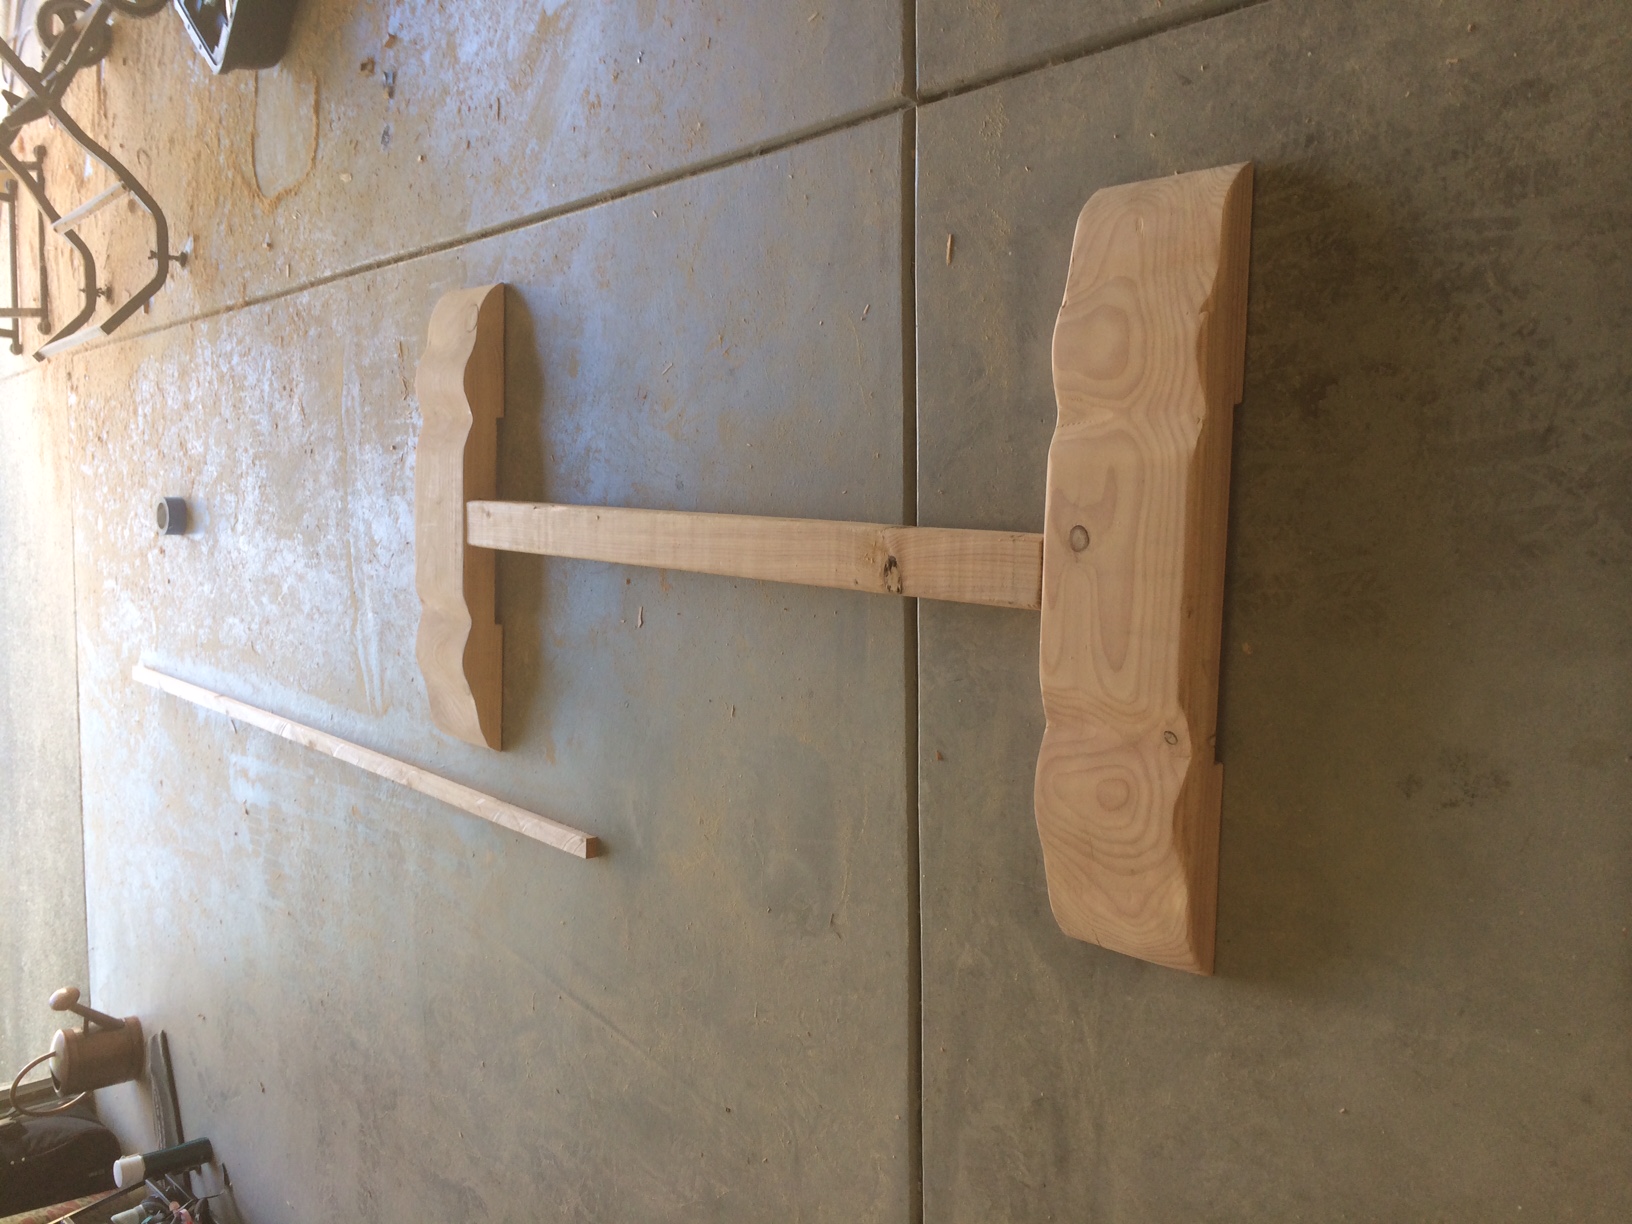
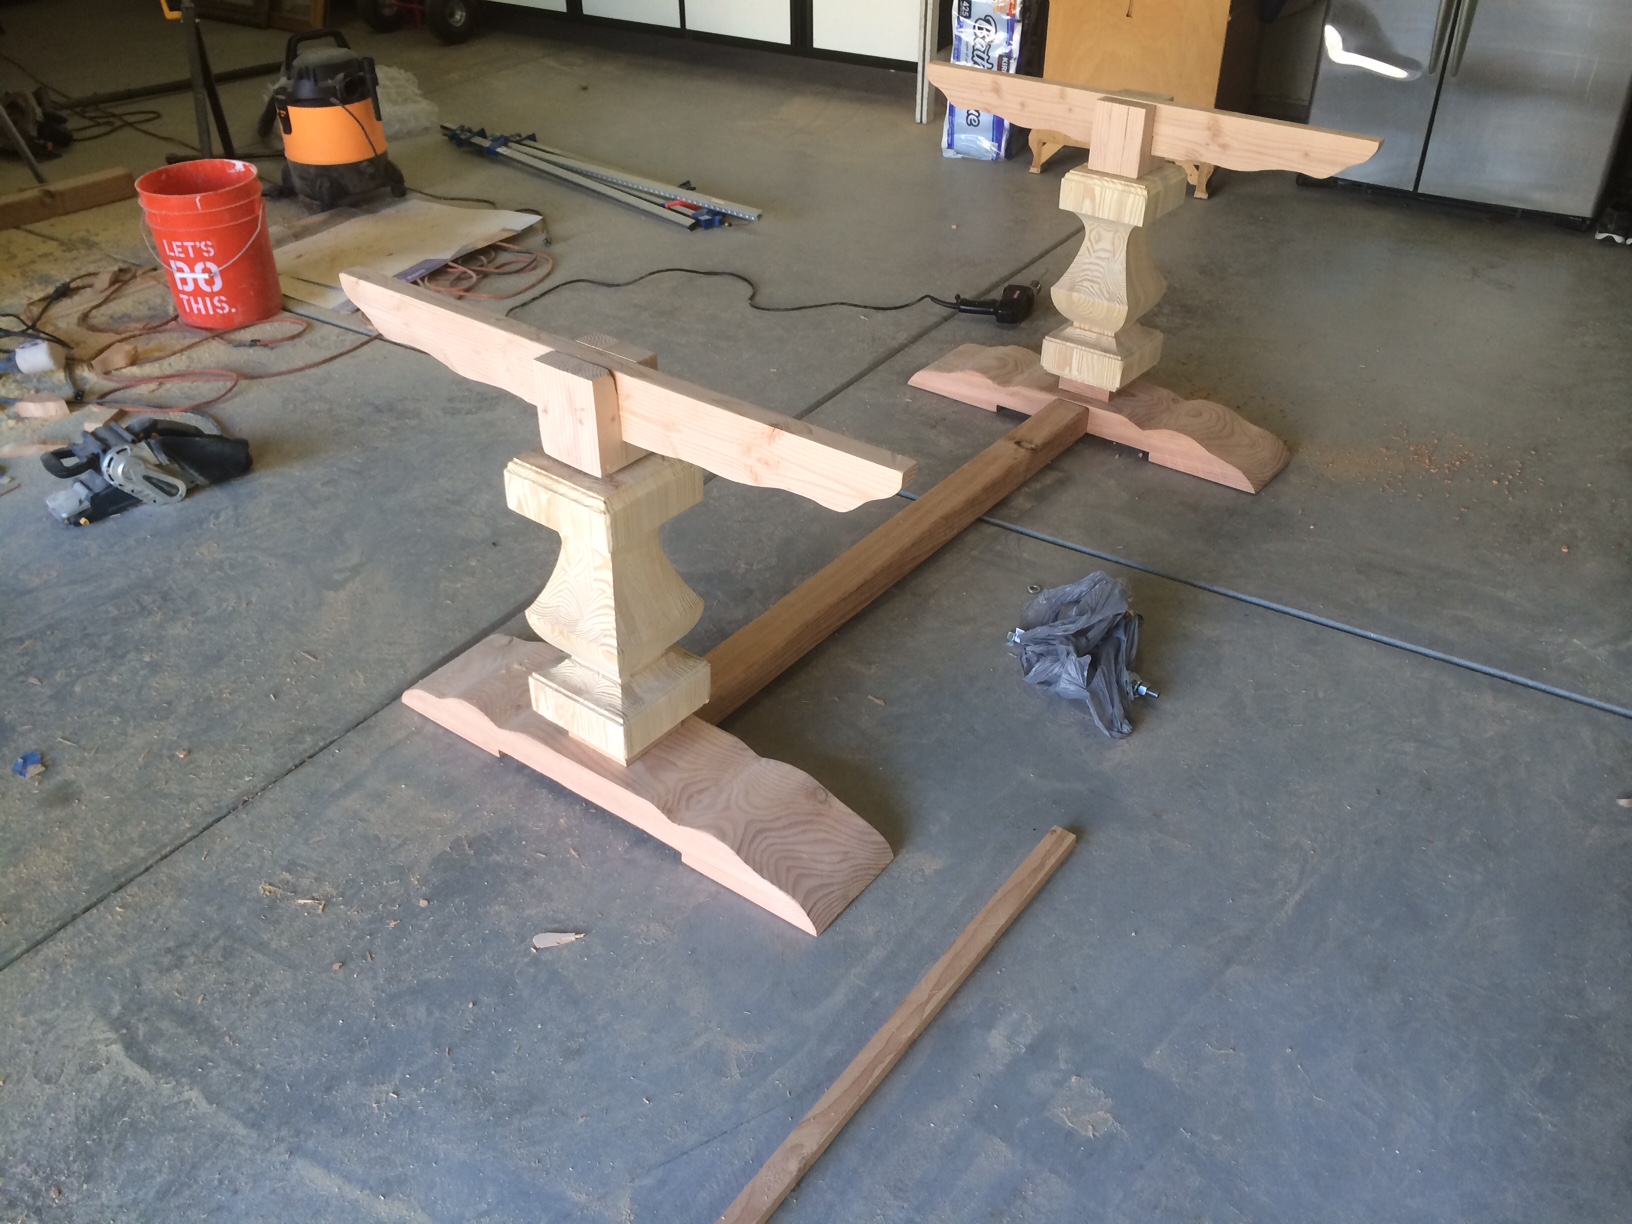
This entry table I made from wood I got from a recycle center of wood products. It’s been in our entry now for several years. I have only basic tools-no planers and jointers, etc. I do have a fold up table saw that I use once in awhile. I enjoy working with natural /live edge and or construction grade materials. Always impressed with the items Ana has built. Good job Ana😁👍