Community Brag Posts

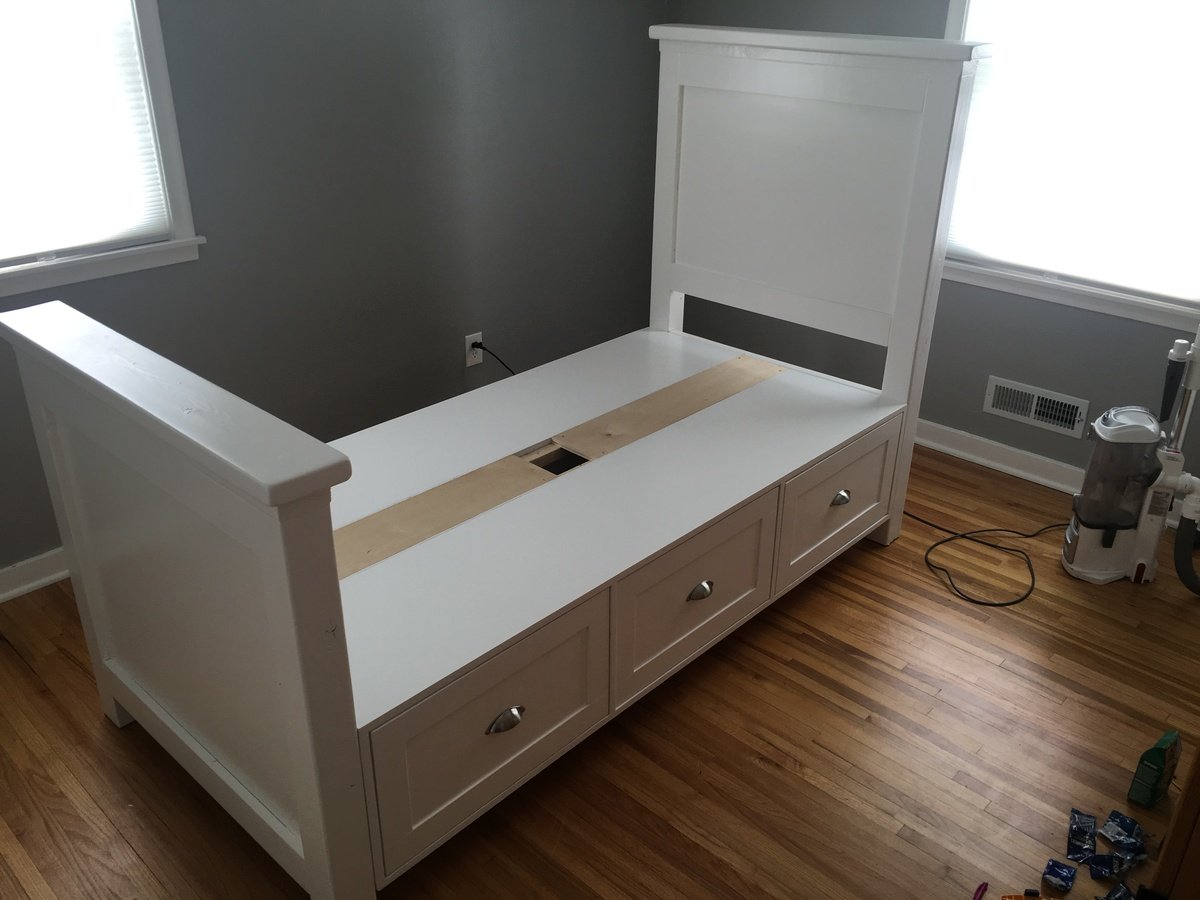
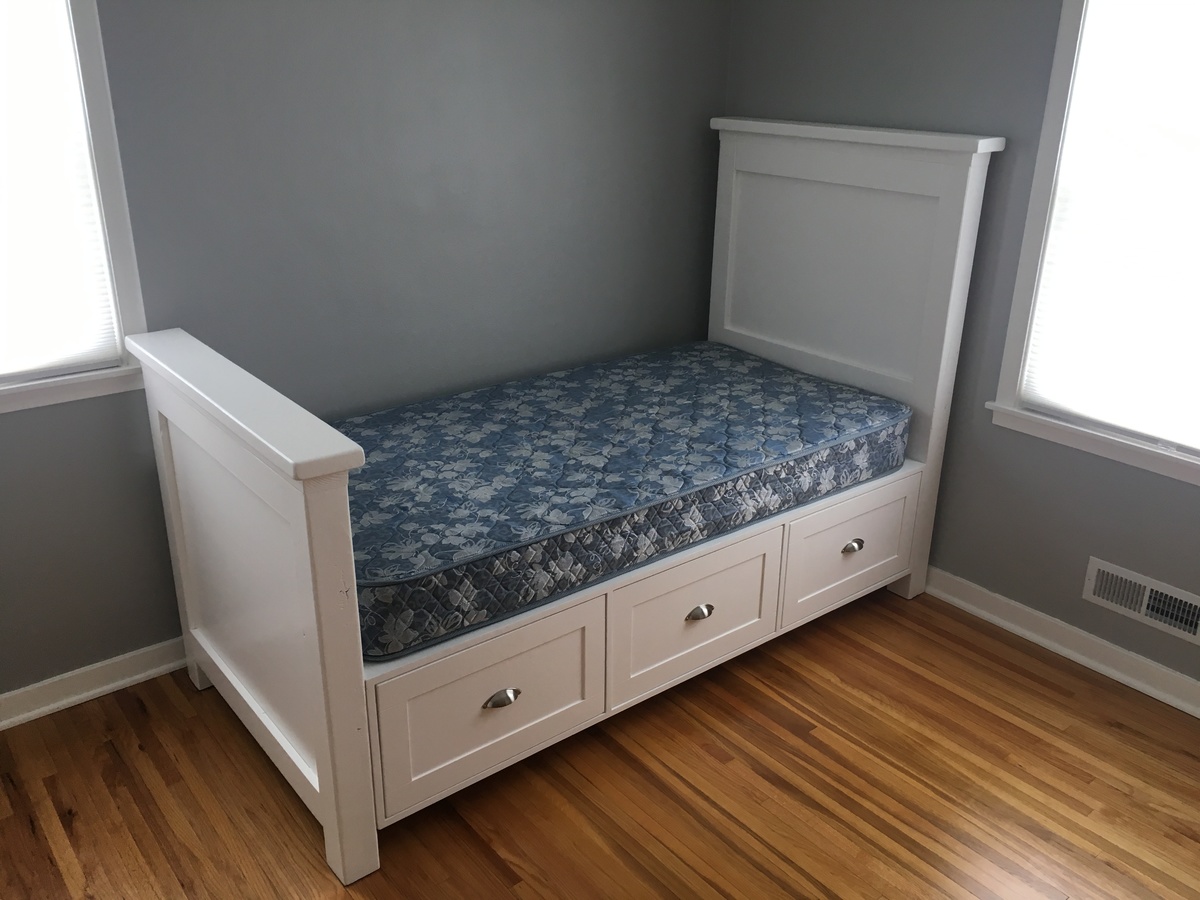
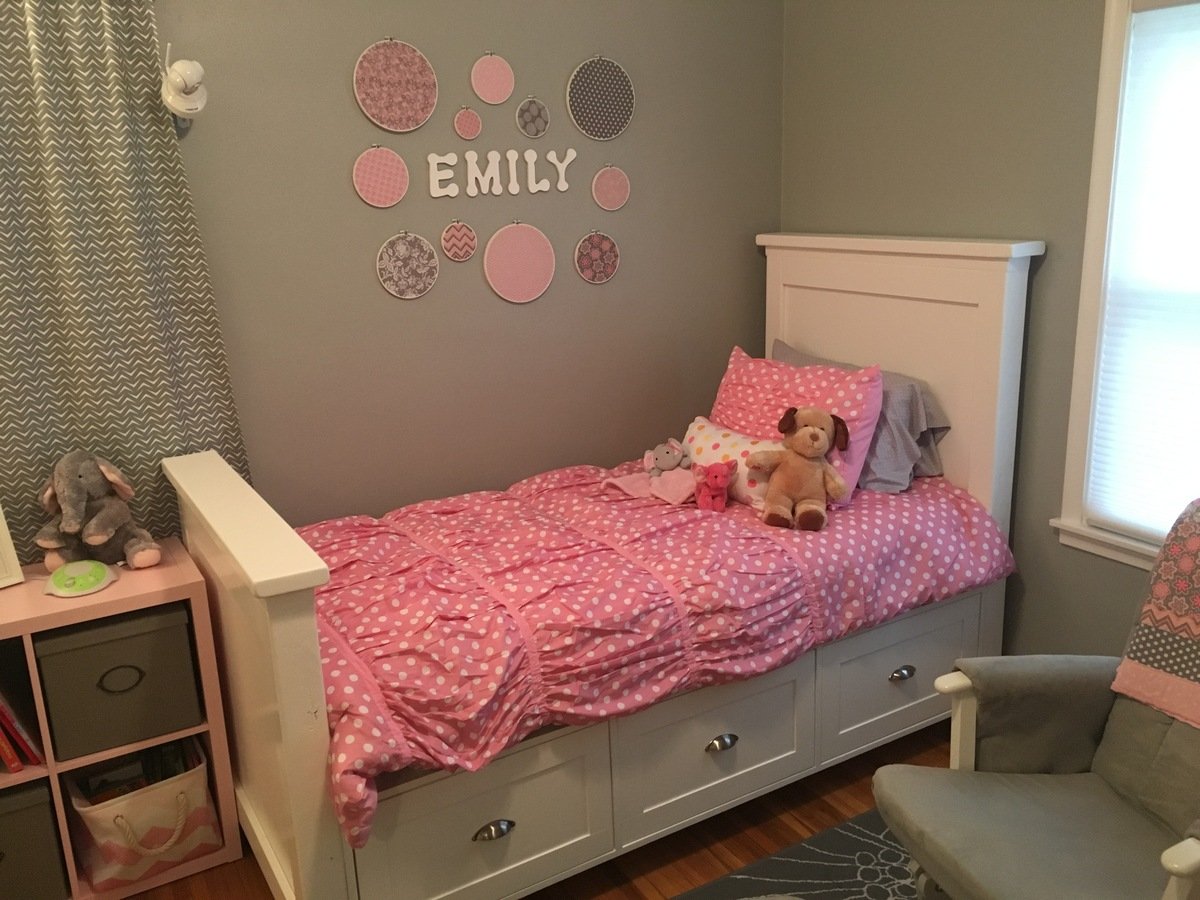
Twin size Farmhouse bed with storage drawers!

Submitted by Anonymous (not verified) on Fri, 08/12/2016 - 10:12

This bed was made from Ana White's plan for the farmhouse bed with storage drawers (twin size). I made this bed for my daughter as her first "big girl" bed. I did modify the plan somewhat to make the footboard taller and act as a bed rail on the end of the bed. This bed came together really well! Plans were great! 

Estimated Cost
$350
Estimated Time Investment
Week Long Project (20 Hours or More)
Finish Used
Paint
Recommended Skill Level
Intermediate

Comments

X Bookcase

Submitted by pcarroll on Sat, 08/09/2014 - 12:09

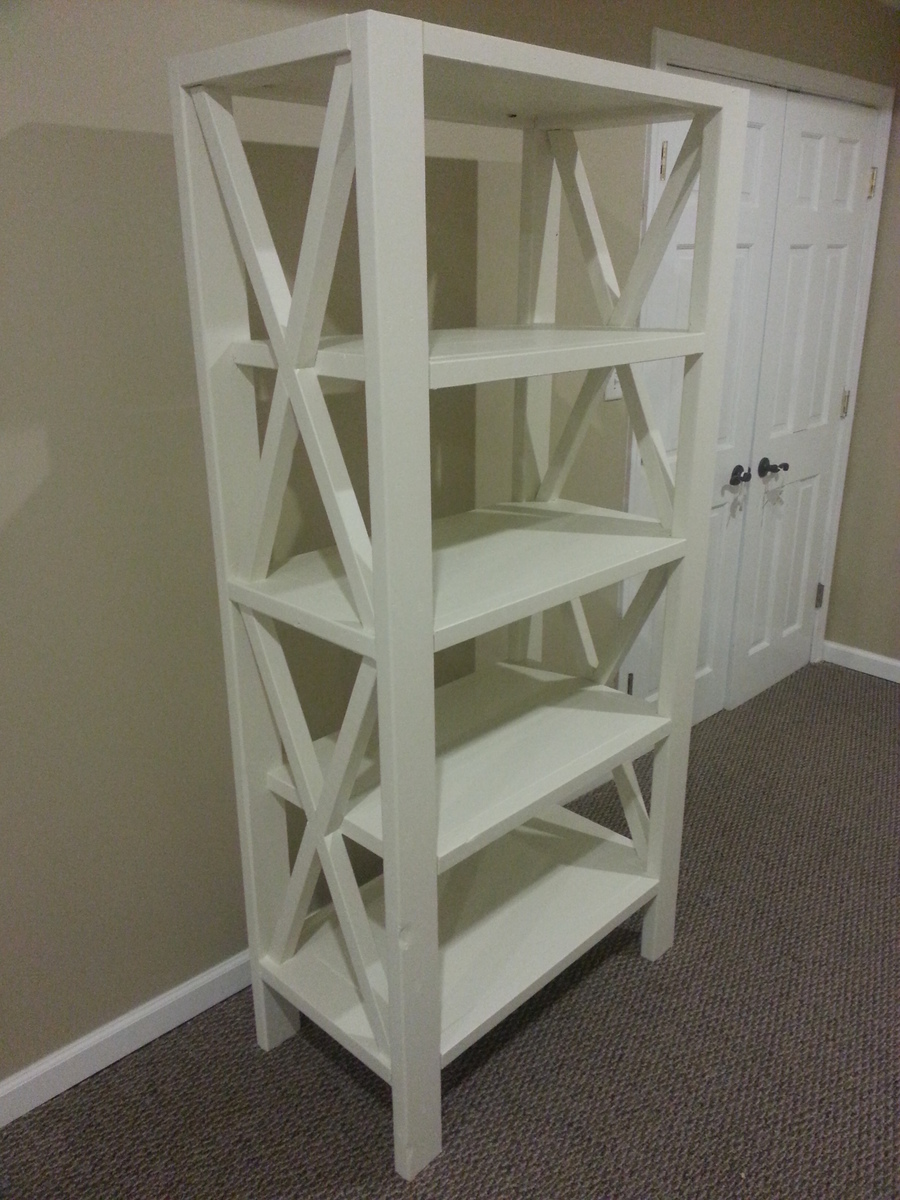
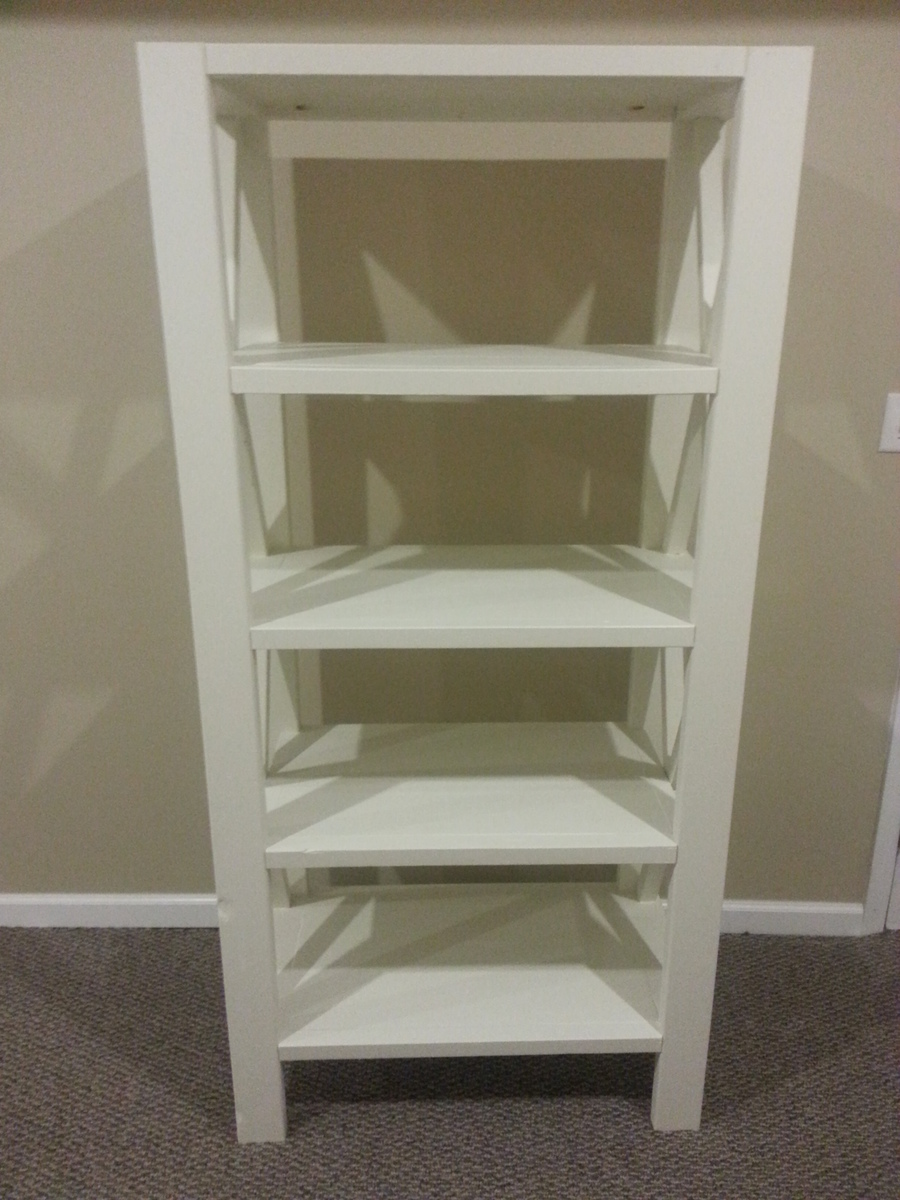
X Bookshelf. Followed Ana's great plan, only change was to spare 1x4s that I planked for shelves. Finished with antique white milk paint. Very happy with result.

Estimated Cost
70
Estimated Time Investment
Weekend Project (10-20 Hours)
Finish Used
Antique white milk paint (love it).
Recommended Skill Level
Beginner

Comments

Picnic table cover table bench

Submitted by project101 on Wed, 08/19/2020 - 14:59

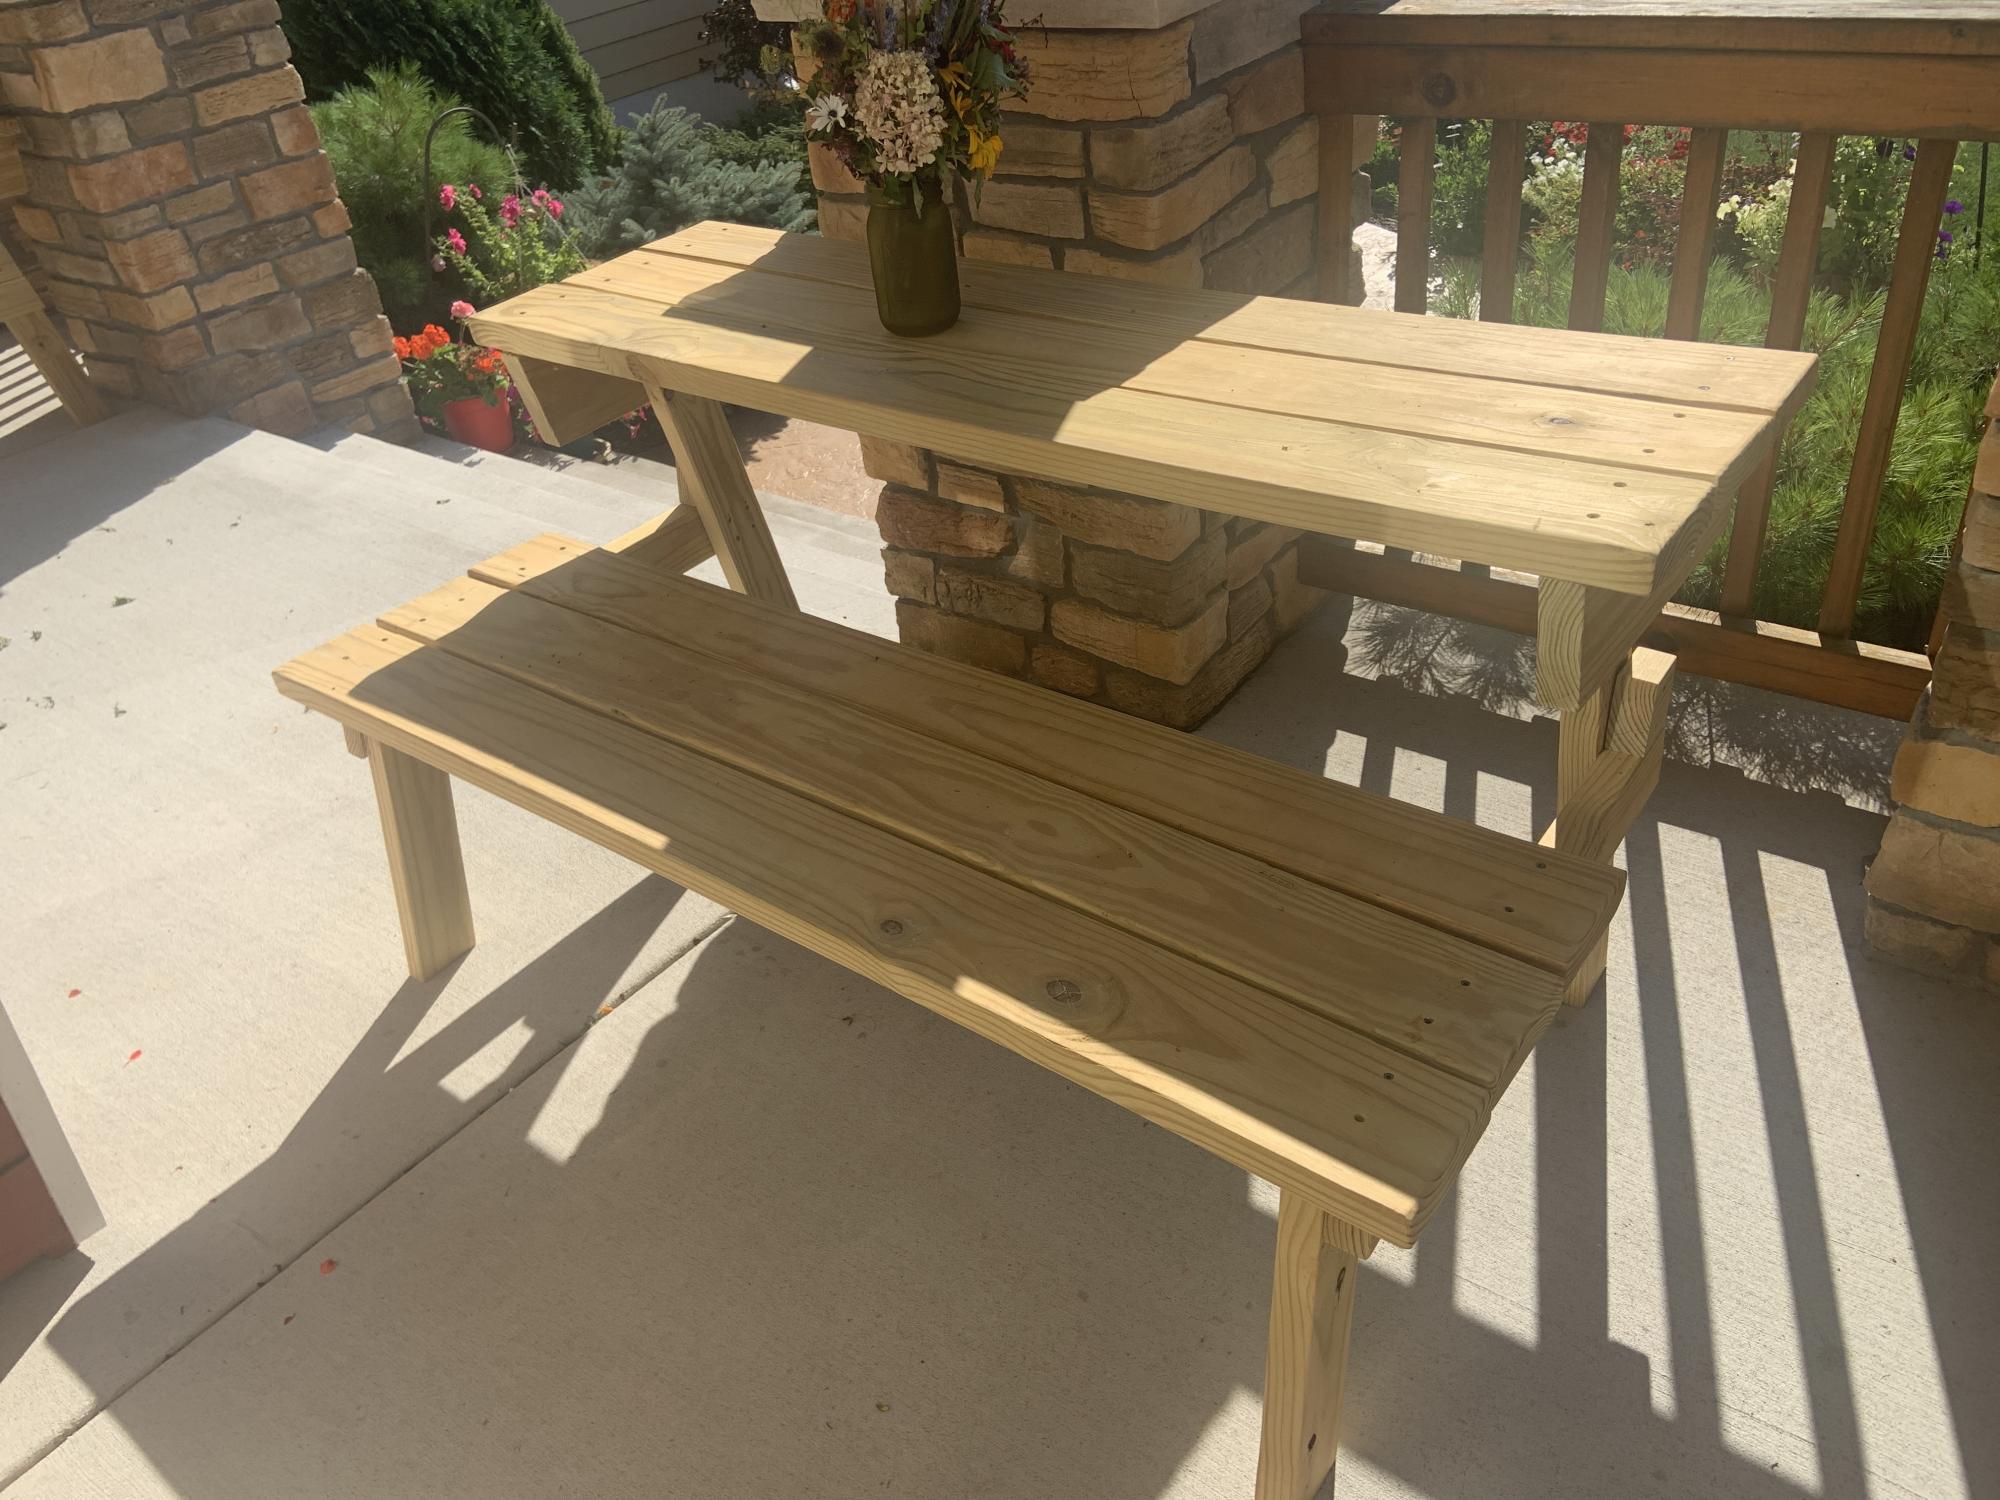
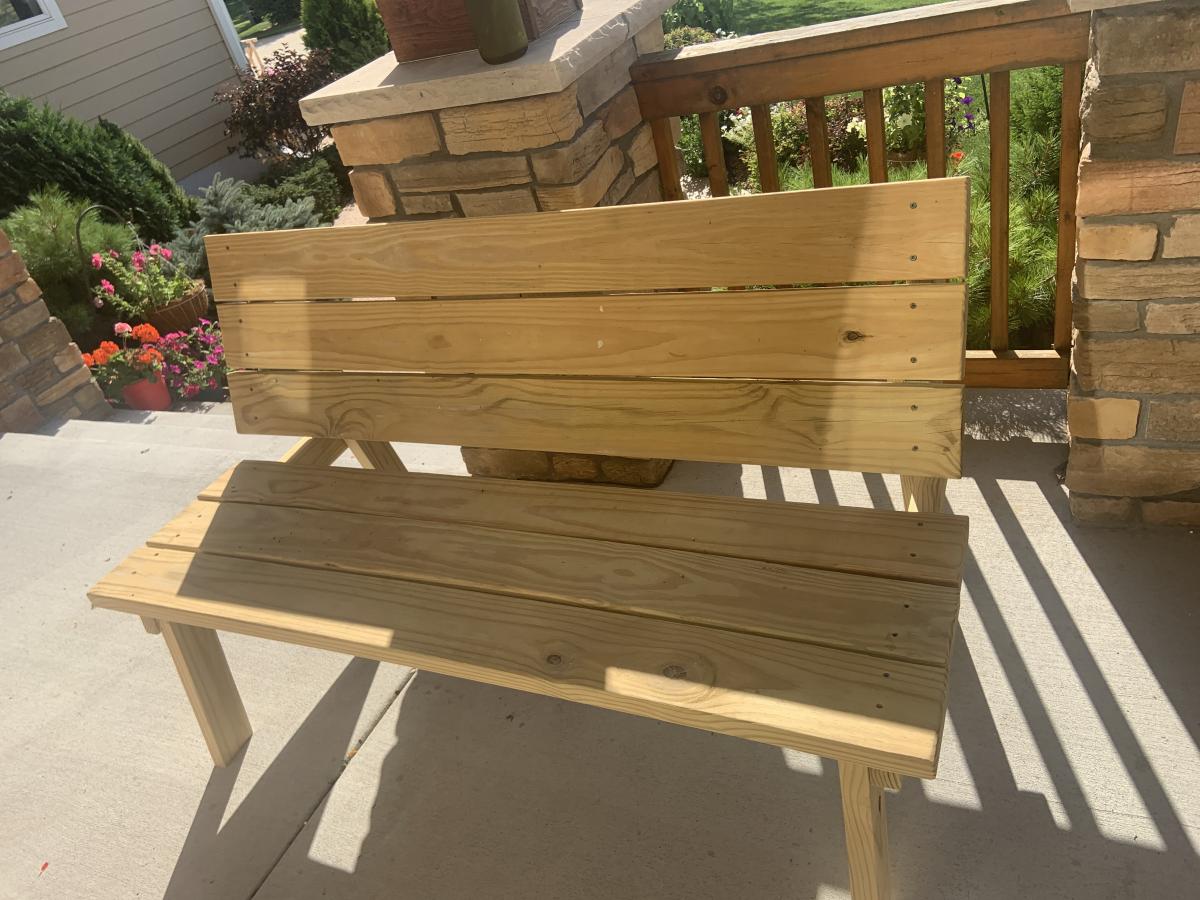
I bought the treated lumber from a local liner yard. I enjoyed doing this as it is so versatile. My daughter uses it for her outdoor art projects. I made 2 of them. Took 3 hours after work to cut and put them together and another hour to sand. I haven’t painted or stained them but will wait a few months.

Estimated Cost
100 dollars for 2 benches
Estimated Time Investment
Day Project (6-9 Hours)
Finish Used
None so far
Recommended Skill Level
Beginner

Rustic X Desk - My 1st Gen Build

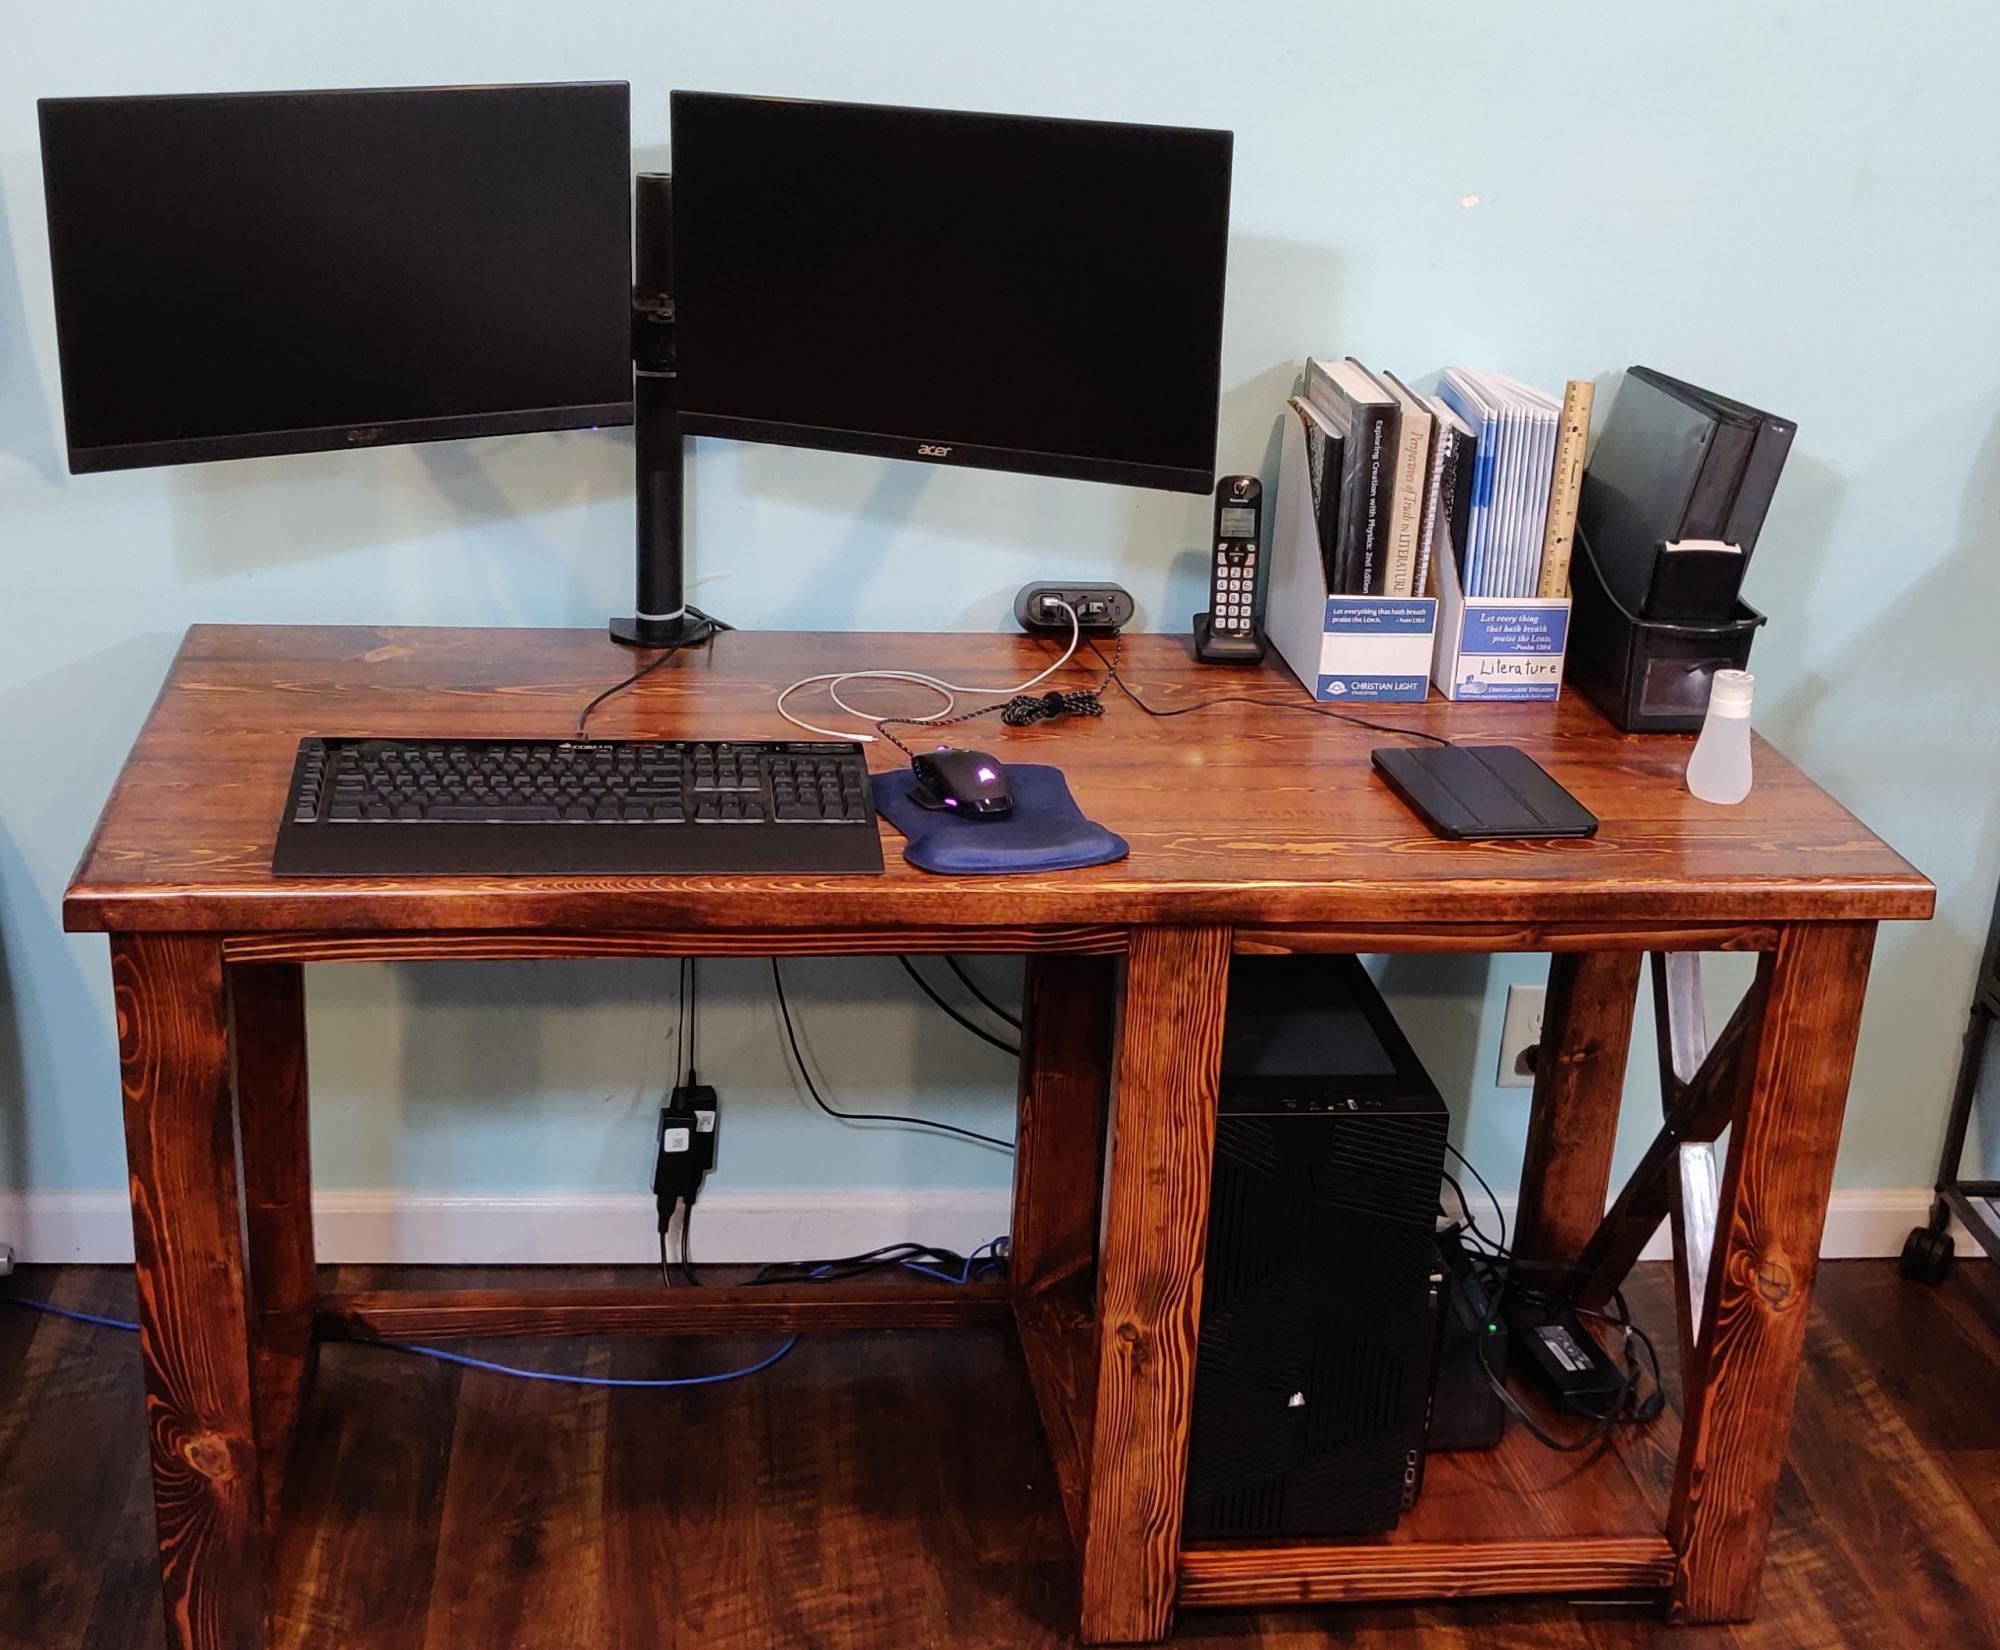
I built this iteration for my second son to give him a spacious workspace for his schoolwork, dual-enrollment activities, and for the occasional moments of kicking back and enjoying a bit of PC gaming.
We stained it with Minwax #215 Red Oak and used Minwax Satin polyurethane to finish ours.
I stuck to the Rustic X Desk plan for the most part and made the following modifications:
1) I used five 2x6 planks instead of four, to give it a 27.5-inch depth.
2) I used a 3/4-inch roundover bit to round off the tabletop to give it a smooth feel.
3) I left out the "middle" X, so my son could have easy access to the "guts" of his computer
4) I left out the middle shelf so my son could stow his PC tower "below deck"
5) Not really a modification; I used a 3/4" straight router bit to cut notches into the 2x2's used for the X detail so they would sort of lock together because I wasn't happy with the way the angles and all were coming out with the two half-leg parts of the X detail.
6) I hated the selection of furring strips at the local big box home improvement store and didn't want to travel all the way across town to see if the "lumber stores" had anything better, so I ended up milling my own on my table saw from cherry-picked 2x4 lumber. It was cheaper than buying the premium pine to boot, since a 2x4 would give me a pair of 2x2s and leftover 1/4x2 that I'll be able to run through a planer and turn into something useful. Not a modification, just more of a "if you're plagued with lousy selection, try this instead" idea.
7) Installed a Wiremold WMC220BK convenience 120V/USB power center to make it easy to plug in a desk lamp, charge a cell phone, etc. without making a cable mess. (https://smile.amazon.com/dp/B0768R2JDG)
8) Added felt pads under the feet to make it slide easily on wood/vinyl flooring
9) I set the bottom of the leg assemblies 1-1/2 inches above the floor instead of 3 inches, so our indentured robotic servant "Mo" won't get trapped underneath any of them. He isn't the sharpest tool in the shed but at least earns his keep. Mo is a late-model Roomba 675, if any are curious to know.

Between the "custom" milling and the fact that I should have run all this 2x4 and 2x6 through a planer to cut down on all the sanding and resurfacing needed, this ended up taking a lot longer than the initial couple weekends to build plus the staining and finishing time. I'm in the middle of building a second one of these with some slight modifications since the need/use case is a bit different. I'm also planning a third revision and build that will include some "geek-friendly" customizations, namely integrated cable management and will have two shelf bays instead of one, just half as wide (a single 1x10 on the left/bottom and another 1x10 on the right/bottom, with the seating area in the center). The third "generation" will be a Christmas present for a computer science student (who consequently also graduates at the end of this fall semester).
Built from Plan(s)
Estimated Cost
80
Estimated Time Investment
Week Long Project (20 Hours or More)
Finish Used
Minwax #215 Red Oak stain and three coats of Minwax Satin Polyurethane

Big Sandbox with Lid

Submitted by flinchball on Mon, 09/21/2020 - 13:18

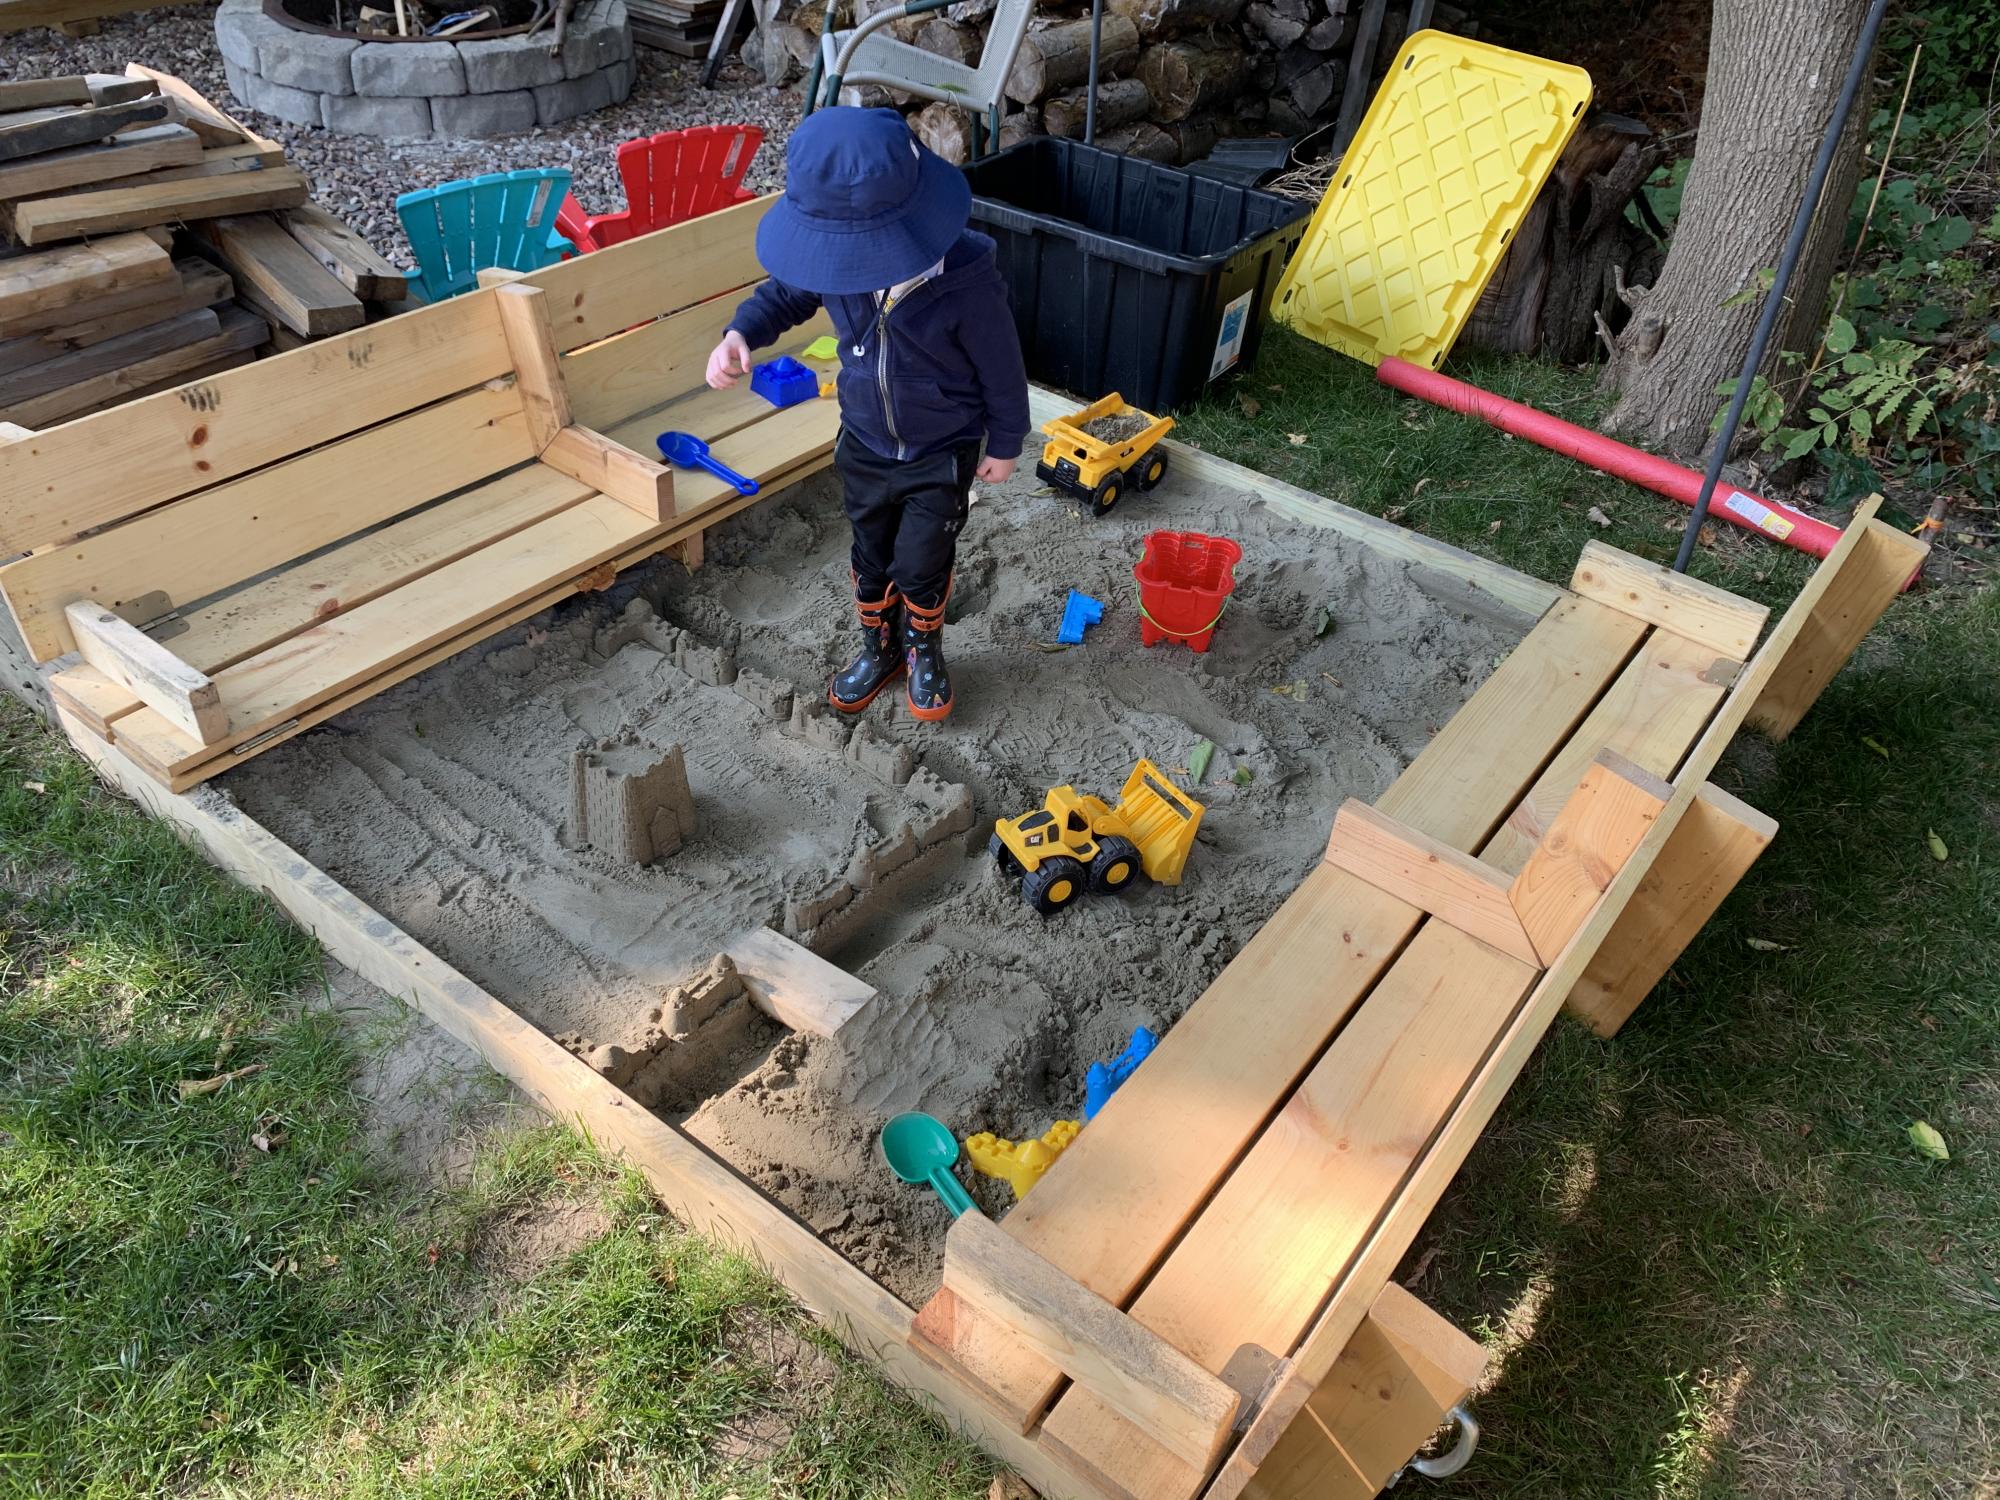
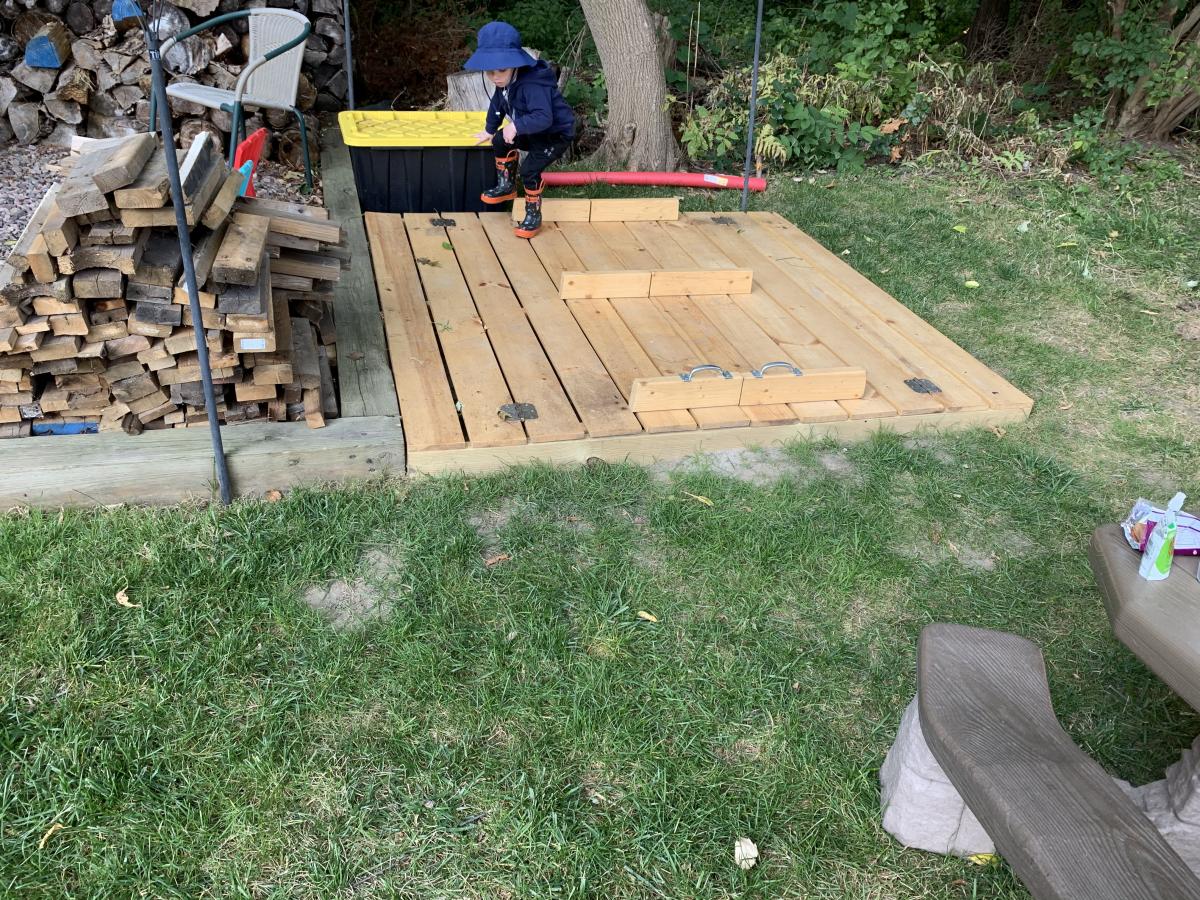
Made the sandbox 6x6. Recessed it so it sits flush with the timber’s around our fire pit area. I added extra armrests in the middle that double as supports when the lid is closed in case anyone wants to walk on it. Filled the sandbox full enough that the armrests sit on the sand when closed. It’s very sturdy now for walking on and the kids have tons of room to play. Thanks for a great plan to work from.

Built from Plan(s)
Estimated Cost
$100
Estimated Time Investment
Day Project (6-9 Hours)
Finish Used
Boiled linseed oil.
Recommended Skill Level
Beginner

Comments

Plant Stand

Submitted by Farmer Kim on Tue, 12/09/2014 - 14:46

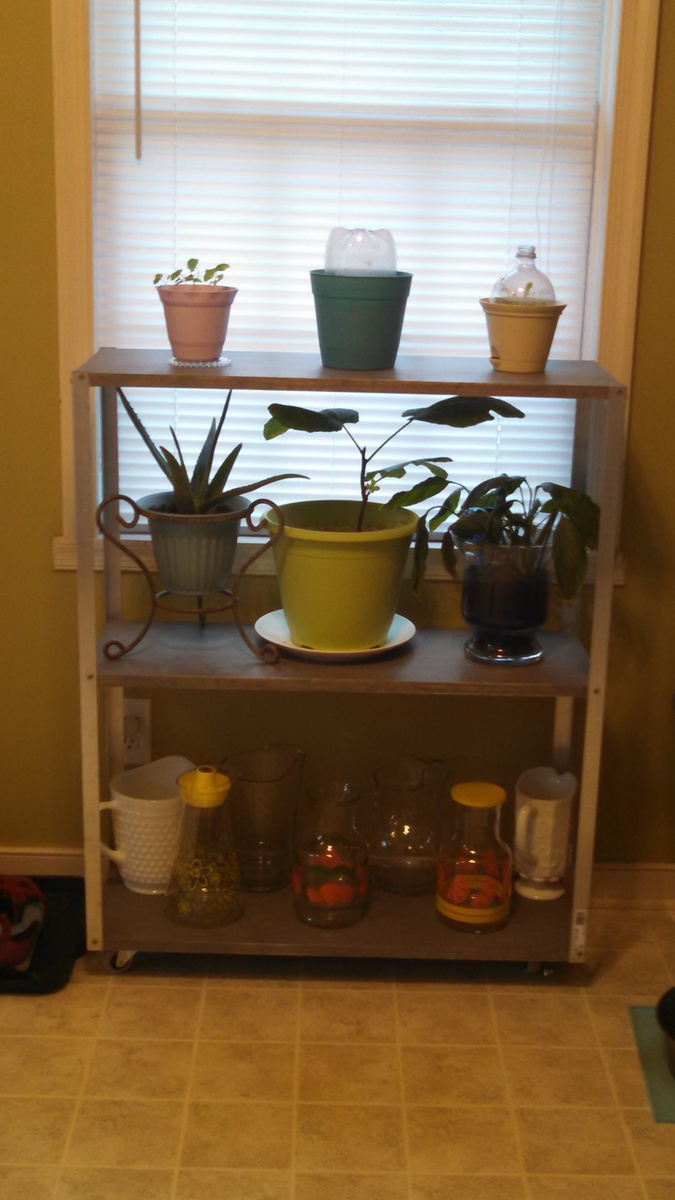
I loved this plan when I first saw it.  I did make mine with metal that was 36 inches for the legs, it was the length available at my local hardware store and it also allows me to have plants on two levels and still be high enough for sunlight (unplanned bonus).
Estimated Time Investment
Afternoon Project (3-6 Hours)
Finish Used
Weathered Gray Stain
Recommended Skill Level
Starter Project

Greenhouse

Submitted by Anonymous (not verified) on Tue, 01/05/2021 - 08:08

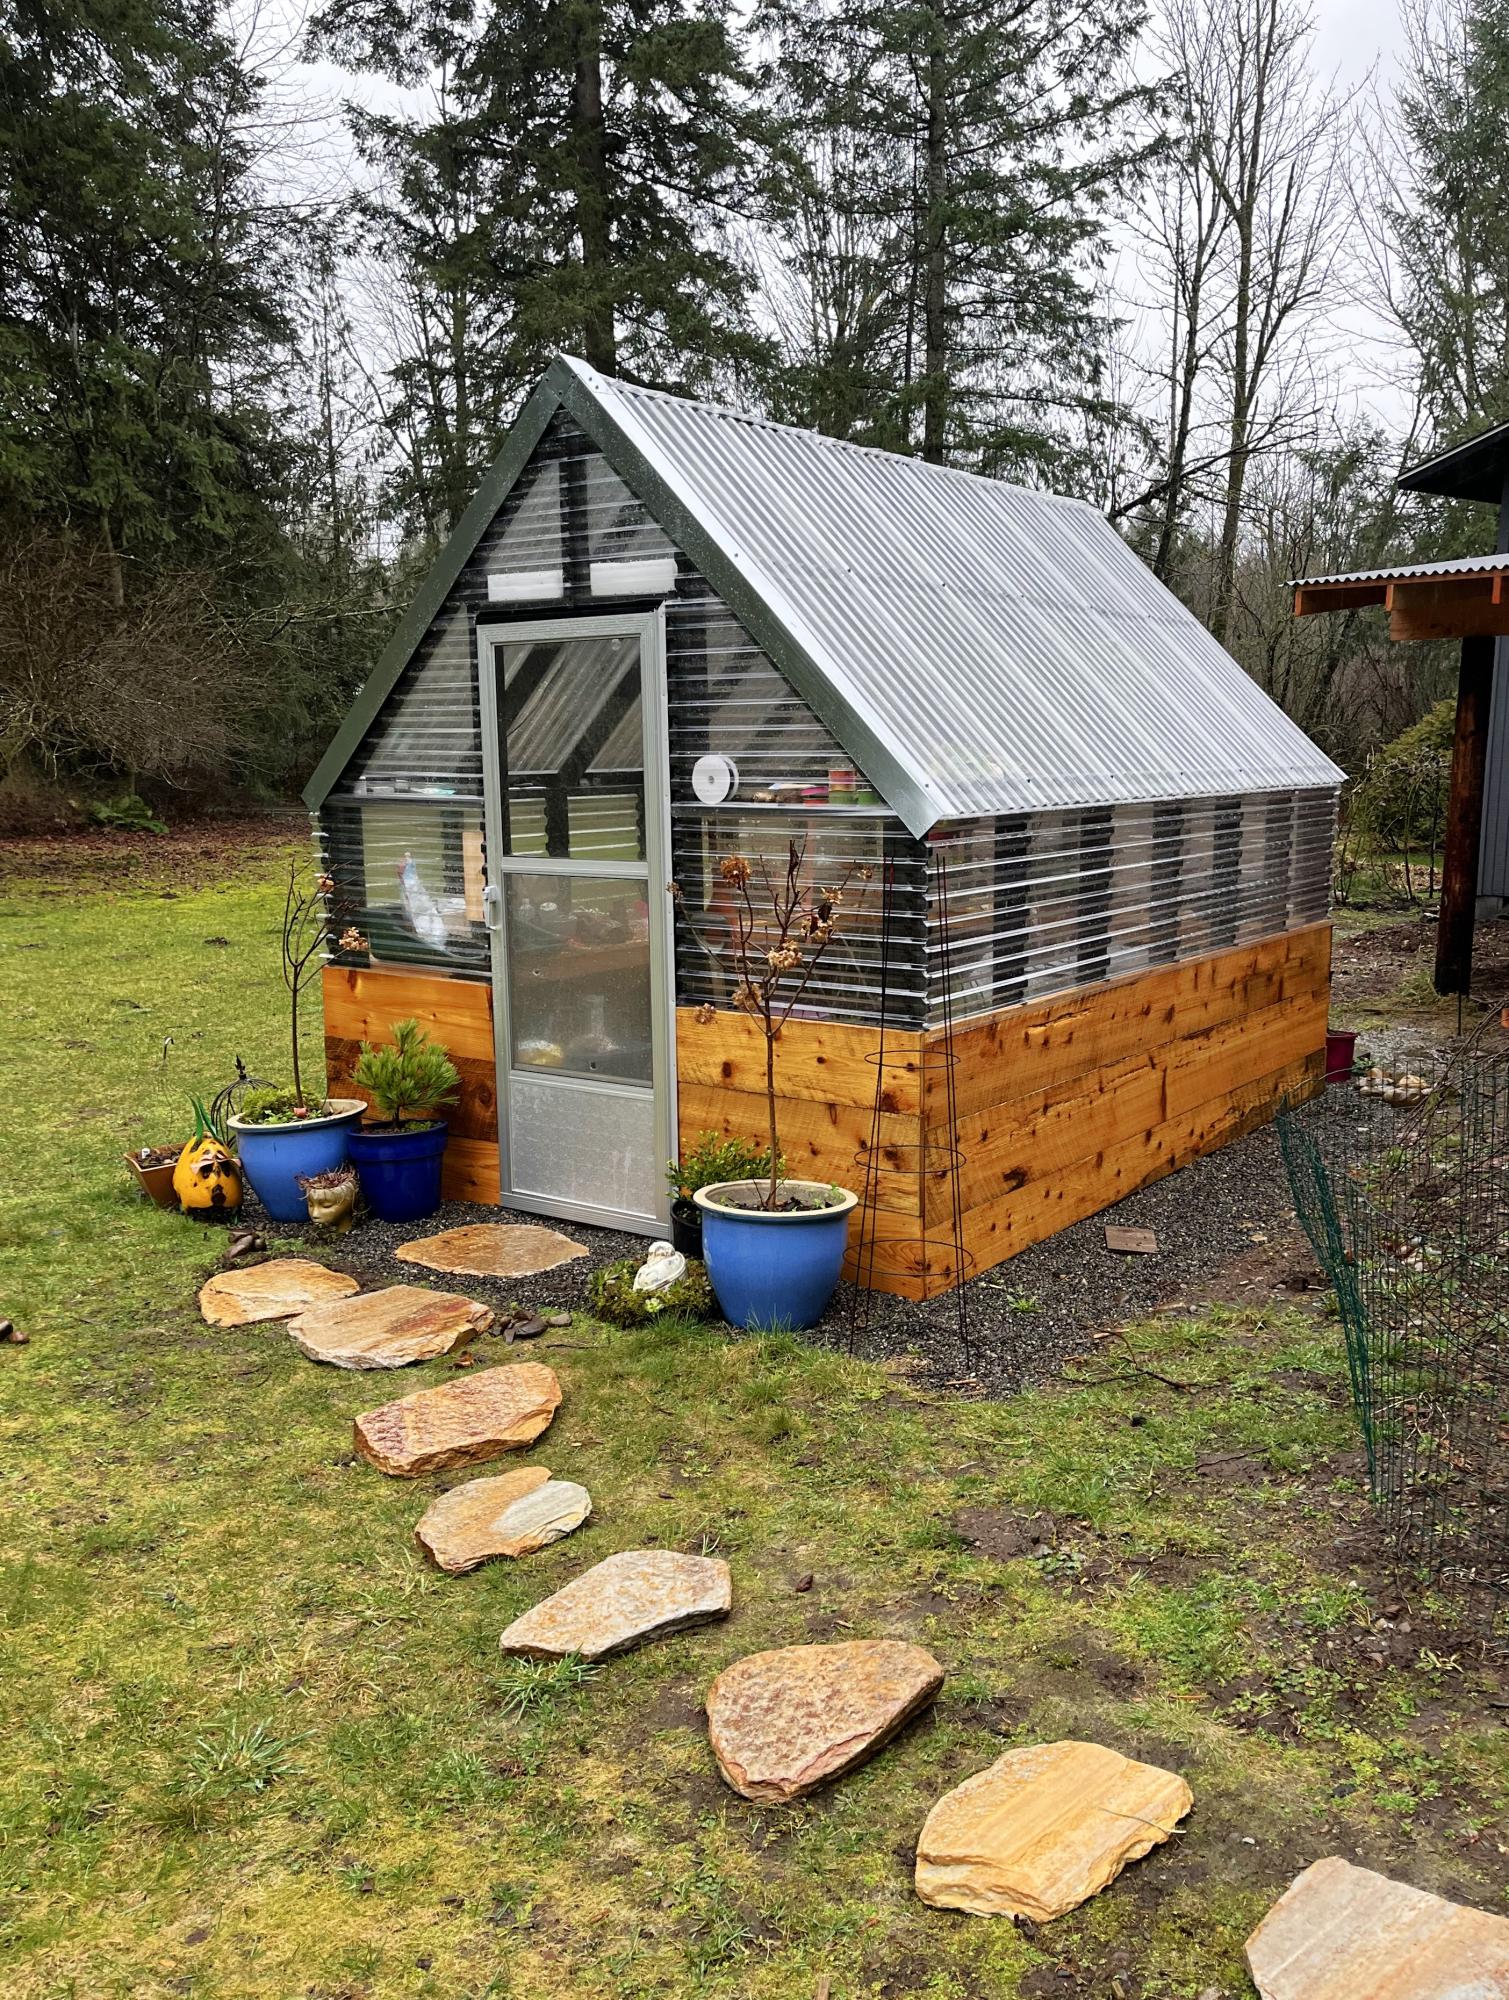
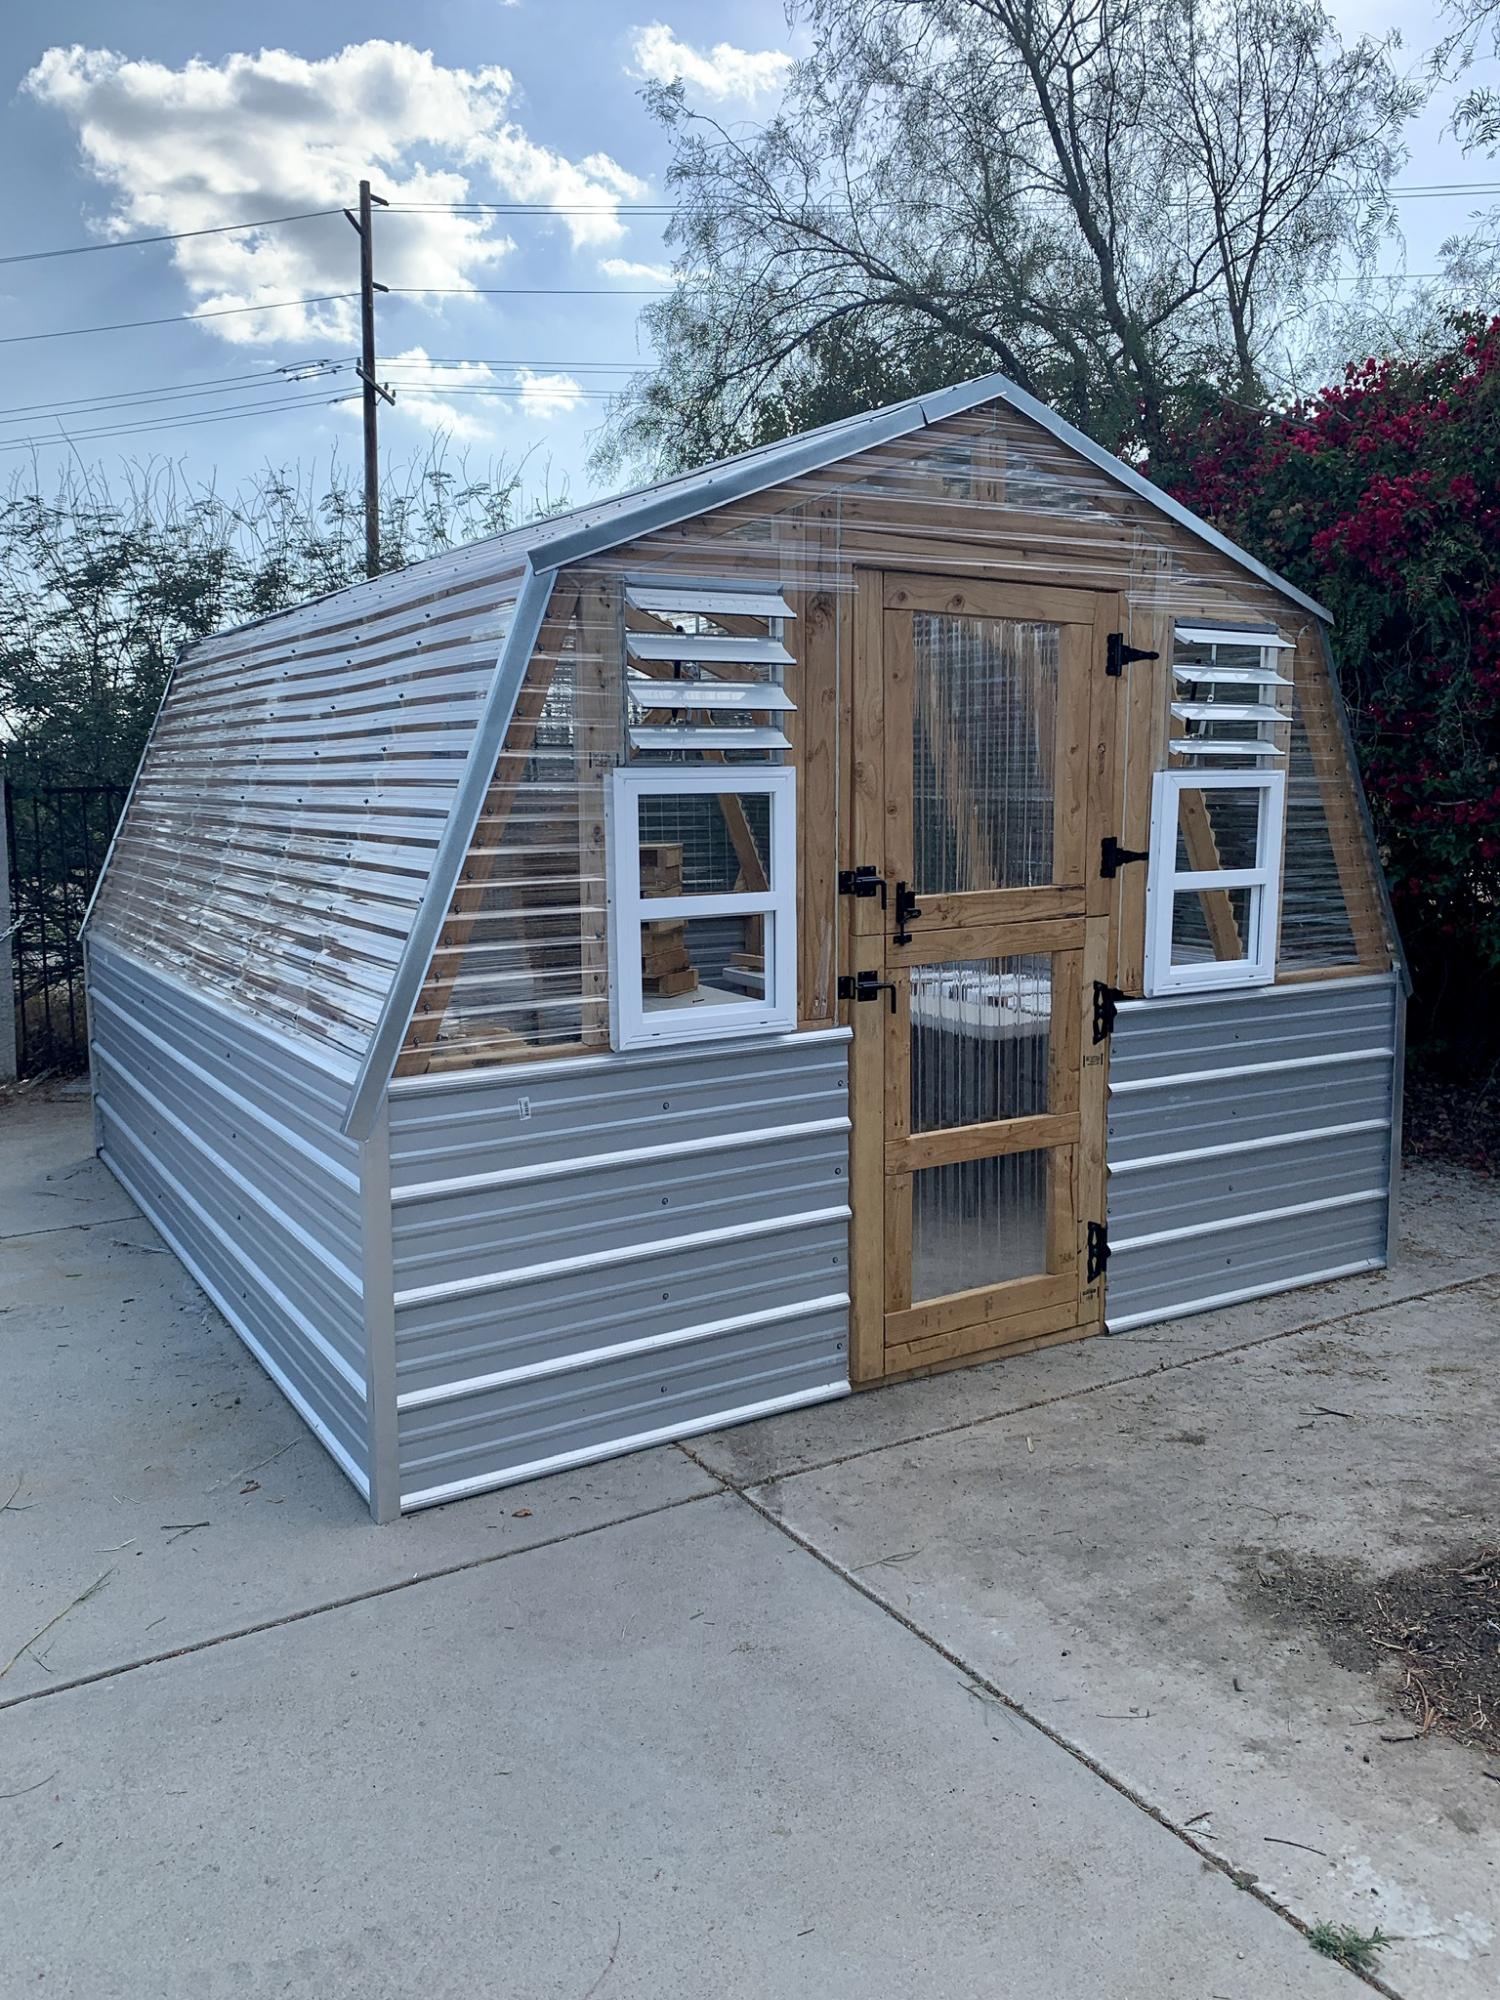
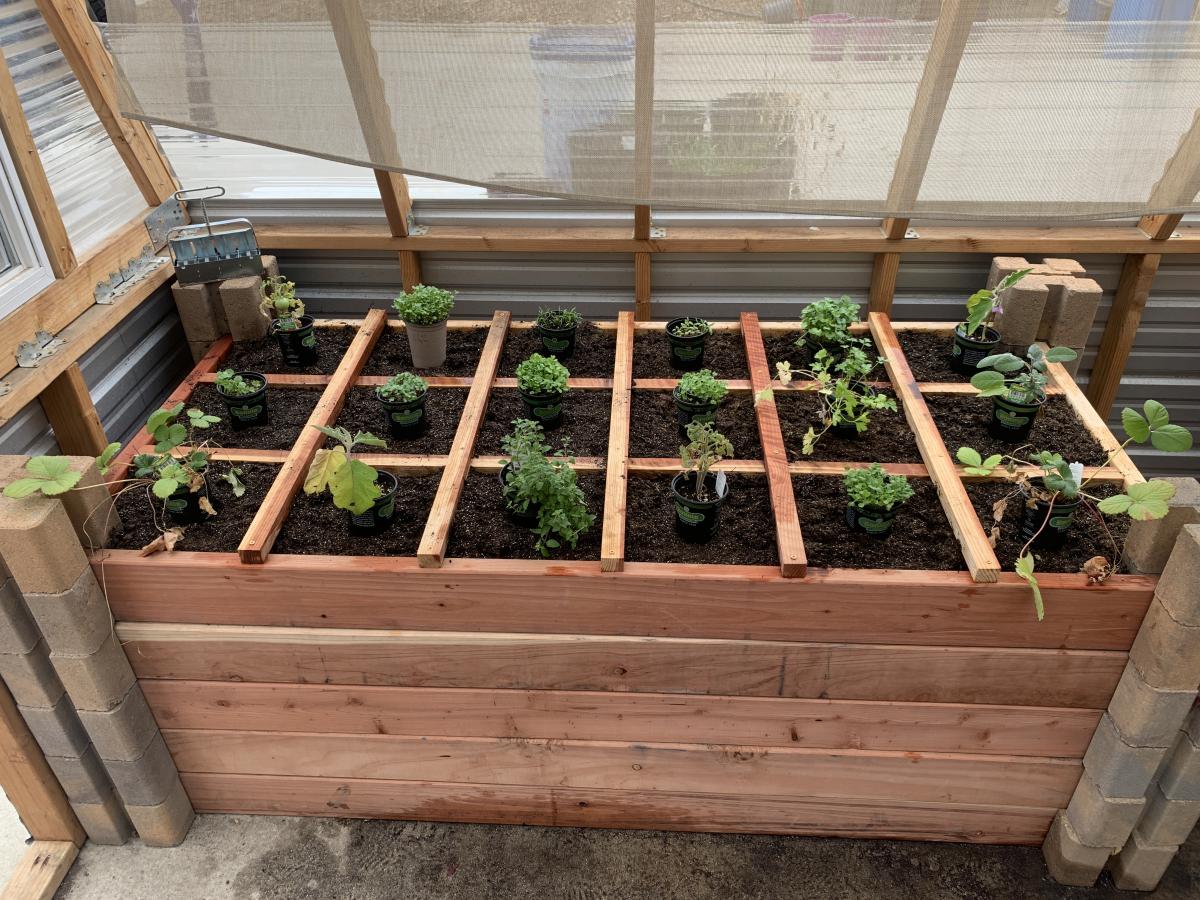
We made some modifications to the greenhouse to include a bench with three levels, a working bench and a square foot garden. We also put it on concrete to keep all the weeds out from the bottom as well.
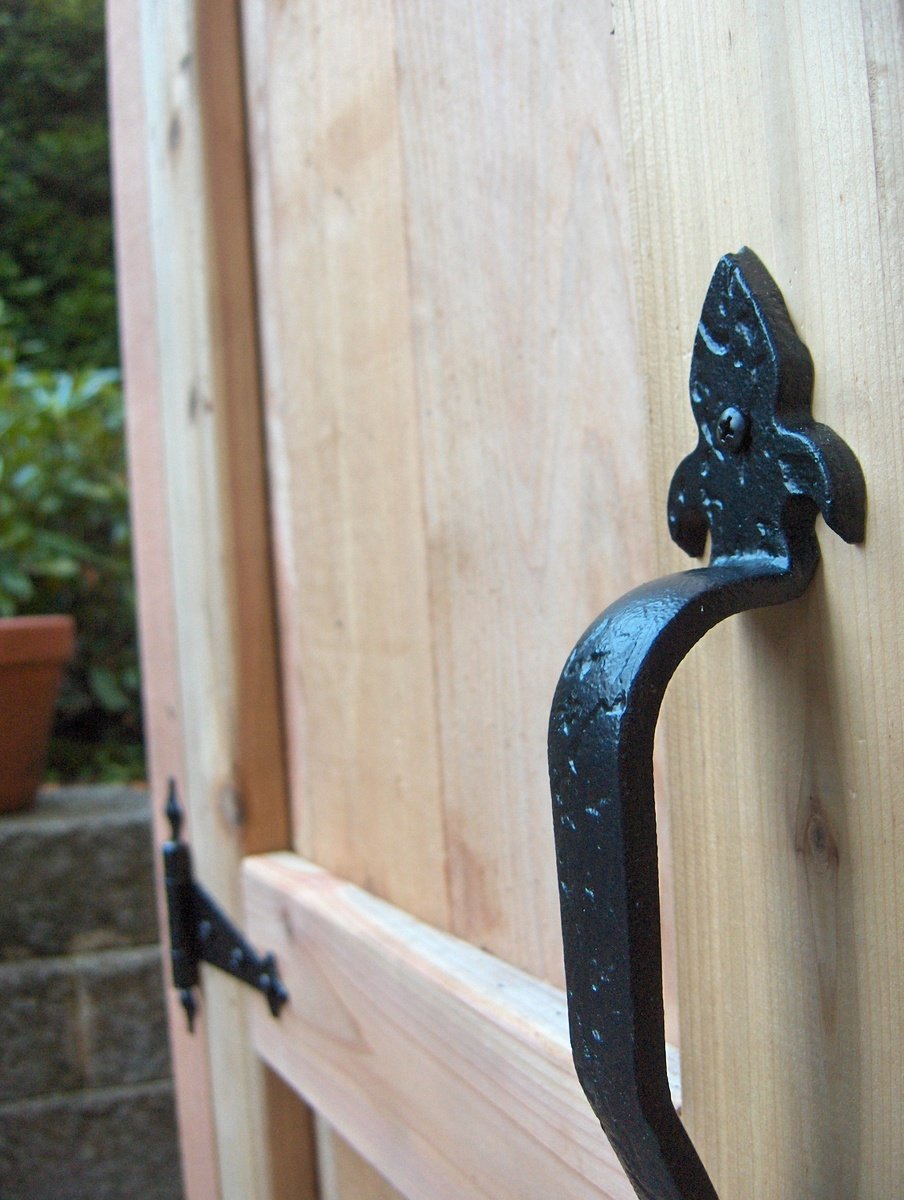
Built from Plan(s)
Estimated Cost
2500.00
Finish Used
We start our own seeds and plan to grow 15 different varieties of vegetables inside this greenhouse all year long.
Recommended Skill Level
Intermediate

Comments

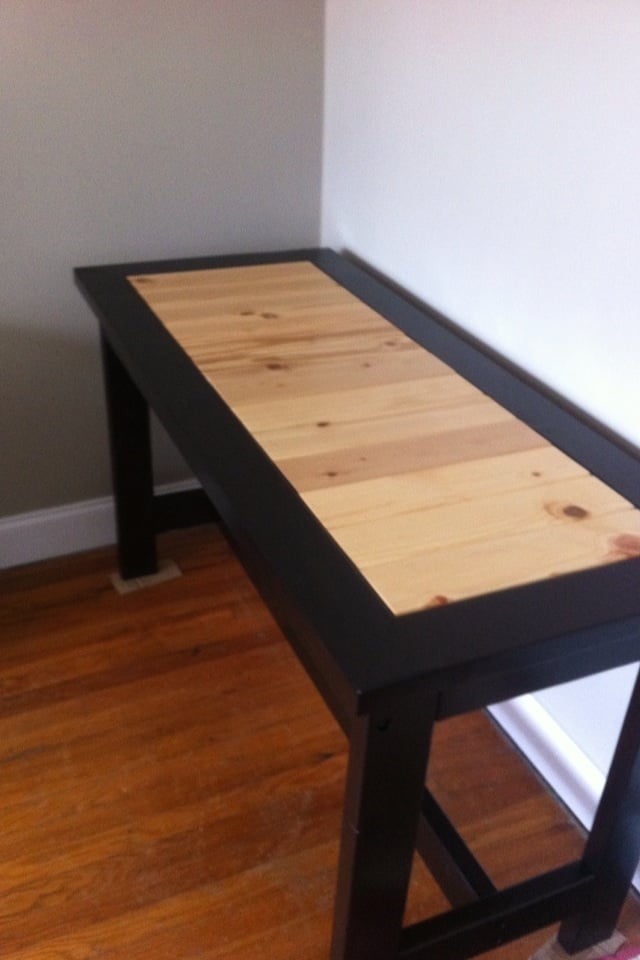
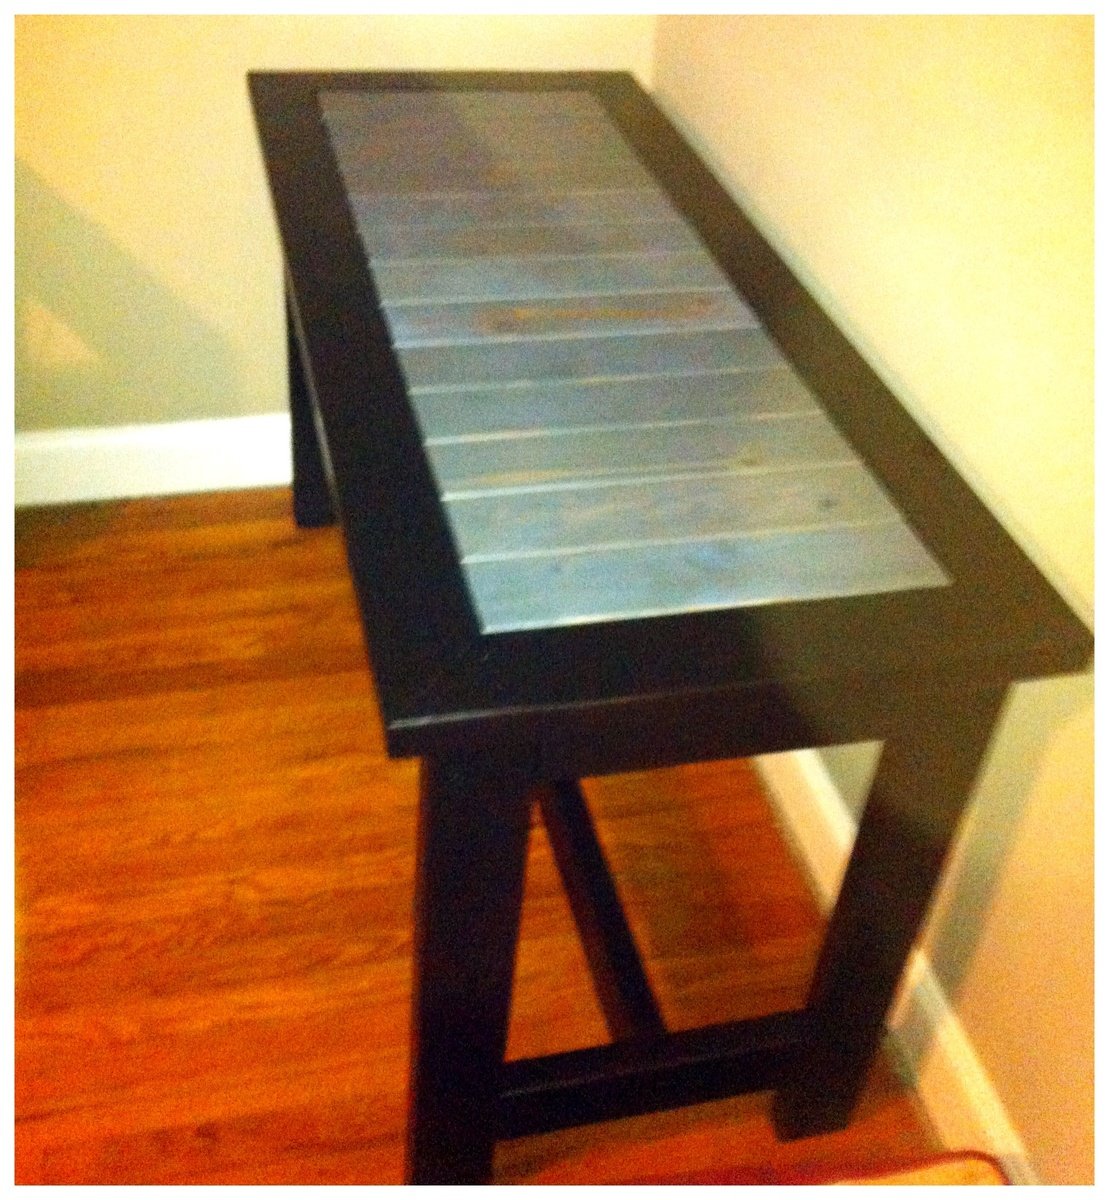
2x4 Casual Desk Tweaked

My new fav stain. Minwax Expresso Polyshades in satin.
Followed the 2x4 desk design but had so many scrap pieces of 2x4 (from other projects) , ended up changing the direction of the table top.
Finished with Minwax gray and even though it looks blue , I like it...
Going to make some benches to match , weather pèrmitting :)
Didn't take long to build , just a couple of hours - staining was the killer. Needed 3 coats to get that rich dark even look.

Built from Plan(s)
Estimated Cost
$40
Estimated Time Investment
Weekend Project (10-20 Hours)
Finish Used
Minwax products
Recommended Skill Level
Beginner

Comments

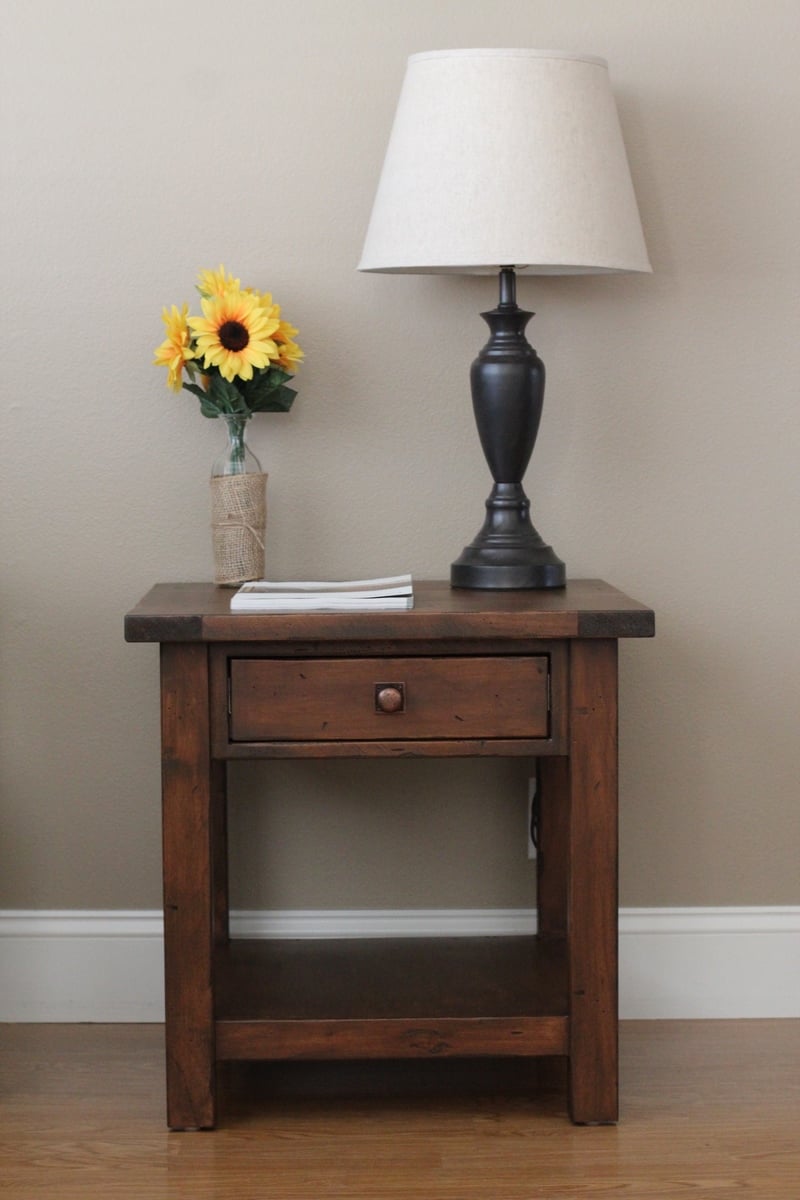
Benchwright end table

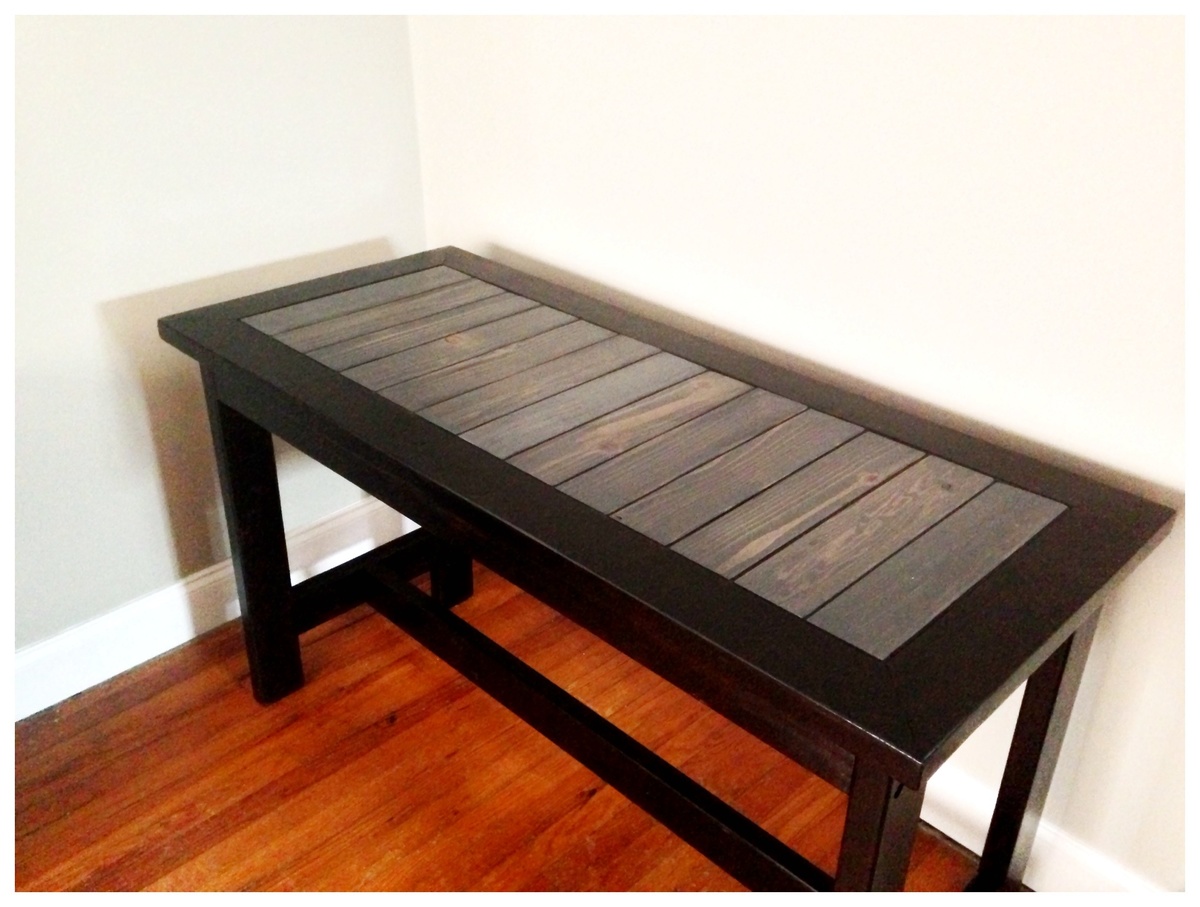
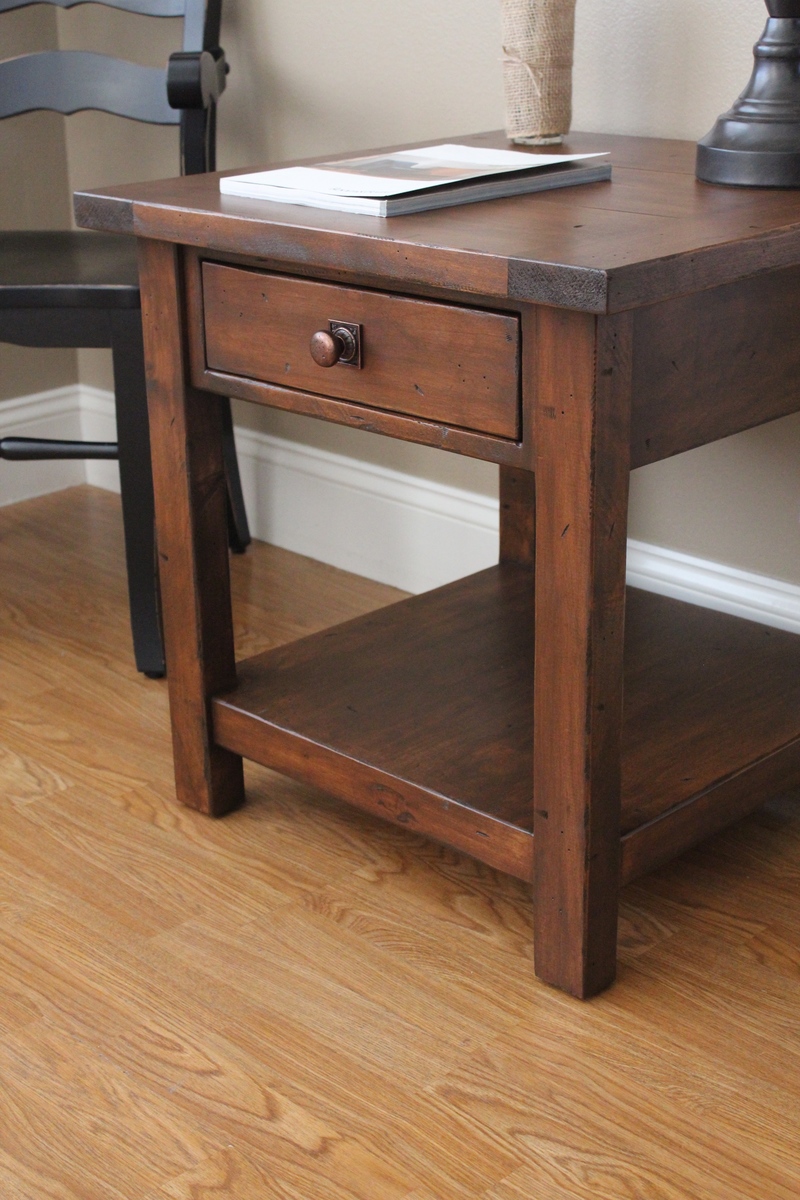
I took the plans for ana white's benchwright coffee table and created this end table.  This is an exact replica of the Pottery Barn benchwright end table.  The wood was distressed by hand and finished with dye, dark walnut gel stain and three coats of satin poly. 


- Brad 

Built from Plan(s)
Estimated Cost
$200.00
Estimated Time Investment
Weekend Project (10-20 Hours)
Finish Used
Transtint dye, antique walnut gel stain, water based poly
Recommended Skill Level
Intermediate

Comments

marenras

Mon, 02/09/2015 - 14:33

Your finish work is phenomenal. Closest I've seen to pulling of the PB finish. What color transtint do you use? Any other finishing tips? I've build a couple of knock off PB pieces, but haven't nailed the finish yet.

In reply to by marenras

timberandsoul

Mon, 03/09/2015 - 22:10

Hi. Thank you for the compliments. First of all, using Alder vs douglas fir or pine plays a big difference in the finish look, but start with pine and see where you get using this process. I first mix de-waxed shellac with a few drops of medium brown transtint dye. It MUST be de-waxed shellac. Experiment with the amount of dye added. I spray one coat of that shellac and dye mixture on the wood. The shellac seals the wood allowing for even stain absorption and a non-blotchy finish. The dye obviously darkens the wood. Then I apply one to two coats of gel stain. I like general finishes antique walnut color. At the next step I sometimes add a glaze, and sometimes I don't, it just depends on what I am seeing. Lastly I seal the wood with a water based poly. Good luck!

colleenps

Tue, 03/31/2015 - 10:04

I love the finish you've done on these, and like someone else said it is the closest to PB I've seen yet! I am trying to fix a horrible stain job I did on a project and had a quick question. When you said you sprayed the shellac and dye, do you mean with a spray bottle? Also what kind of de-waxed shellac did you use? I've never used shellac and I see they have flakes and premixed stuff. Thanks!

timberandsoul

Thu, 04/09/2015 - 15:25

Hi There. Sorry for the late response. The spray the shellac with the dye using a HVLP sprayer. Google HVLP sprayers. They are very cheap and will help out tremendously. I don't recommend using shellac flakes, they can be challenging for a beginner. I use premixed shellac. I use de-waxed shellac because you can apply polyurethane over it. If you plan on applying shellac as a top coat instead of poly you don't have to worry about de-waxed.

juliekayg

Thu, 03/24/2016 - 11:41

This is absolutely beautiful and what I've been looking for to match my Benchwright coffee table!! Do you remember the dimensions you used?

dbender49

Fri, 01/21/2022 - 09:26

I really like your take on this PB table. It looks like you changed it significantly from the console table plans from which you derived it, and I have a couple questions. First, the legs do not look like 2x4s; what are the dimensions you used? Second, the bottom shelf is much thicker than the 1x12 from the plans; what lumber did you use? And how is this bottom shelf attached to the legs? Square-notched to fit around the corners of the legs?

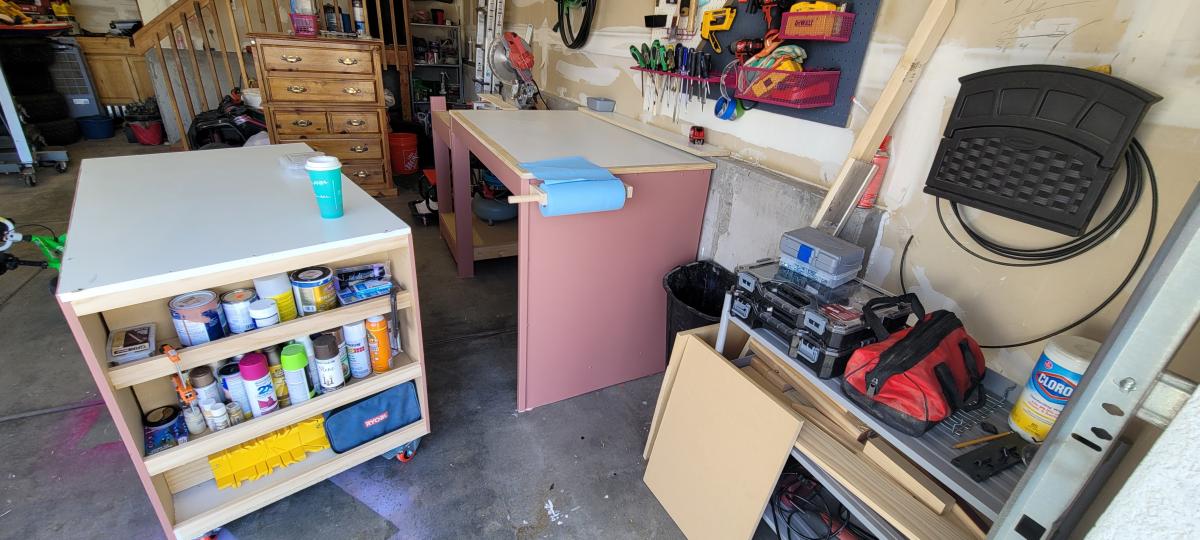
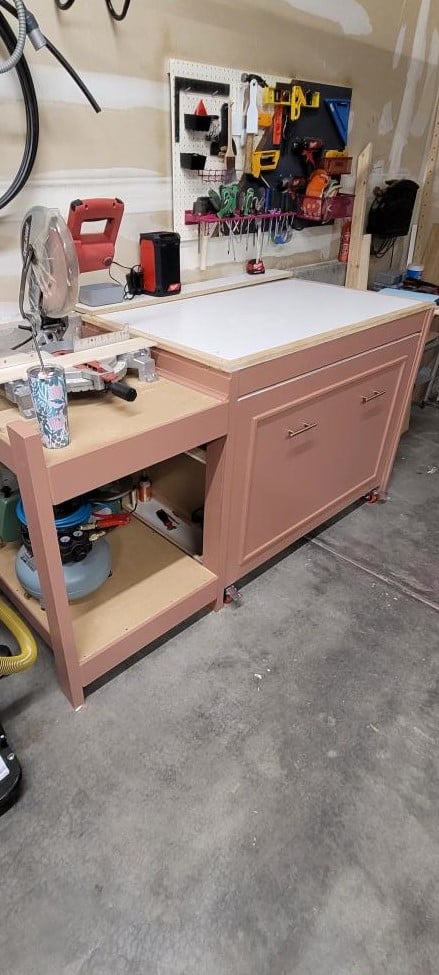
Workbench to look good and get the job done

Submitted by Anonymous (not verified) on Tue, 06/06/2017 - 07:31

I designed this bench based off Ana's workbench to get the job done template.  I added a few features like a pegboard, under-cabinet lights, and a recessed saw table and spent some extra time to stain each piece before adding to the bench.  I took my time to build this - using free hours on the weekends and evenings over the course of about 4 months.

Built from Plan(s)
Estimated Cost
Probably about $250-$300.
Estimated Time Investment
Week Long Project (20 Hours or More)
Finish Used
Behr Cedar Naturaltone All-in-one wood finish for the frame. Varathane Cabernet Stain & Poly for the tops, with two coats of clear poly on top of that. I like the poly finish for the look and because it makes it easy to wipe up glue or other messes.
Recommended Skill Level
Beginner

Four station desk (PB inspired)

Submitted by monty742 on Sun, 03/15/2015 - 08:58

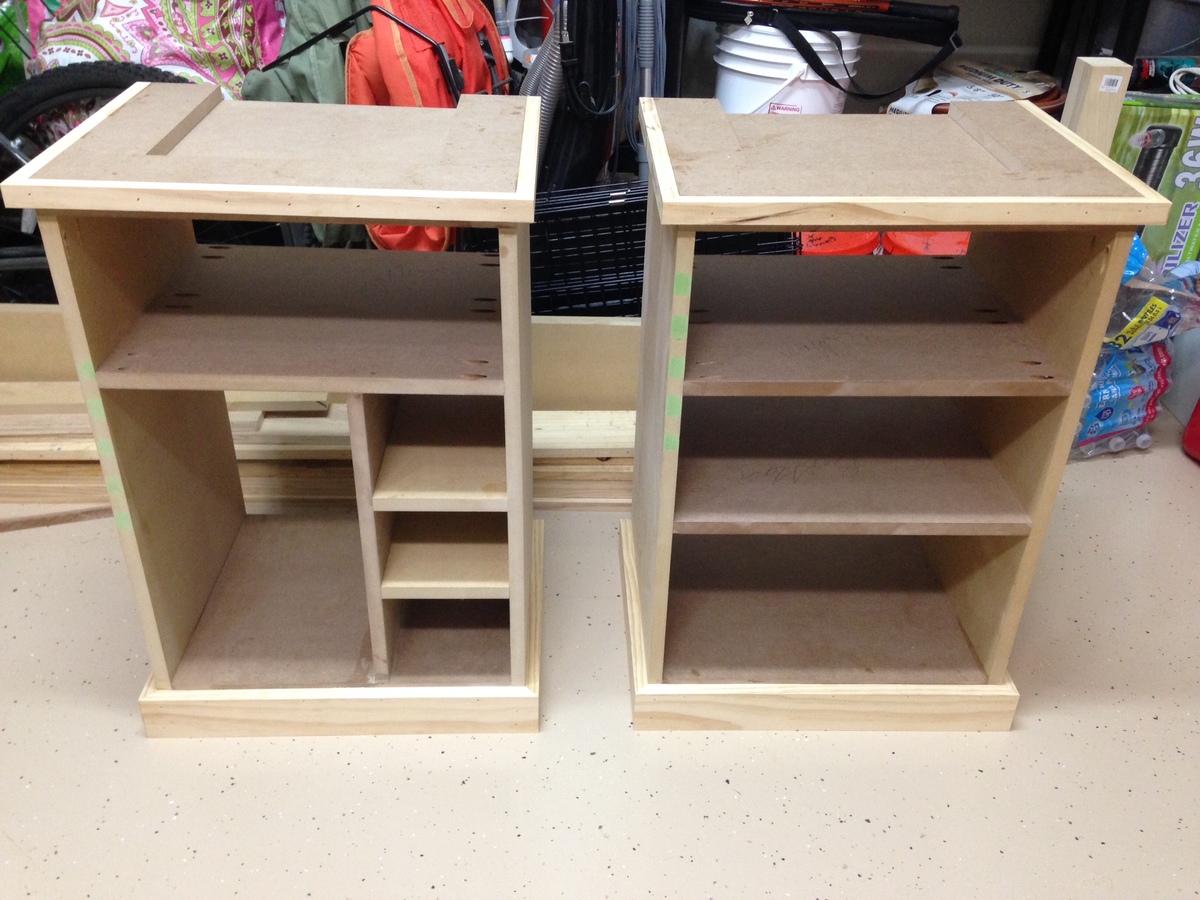
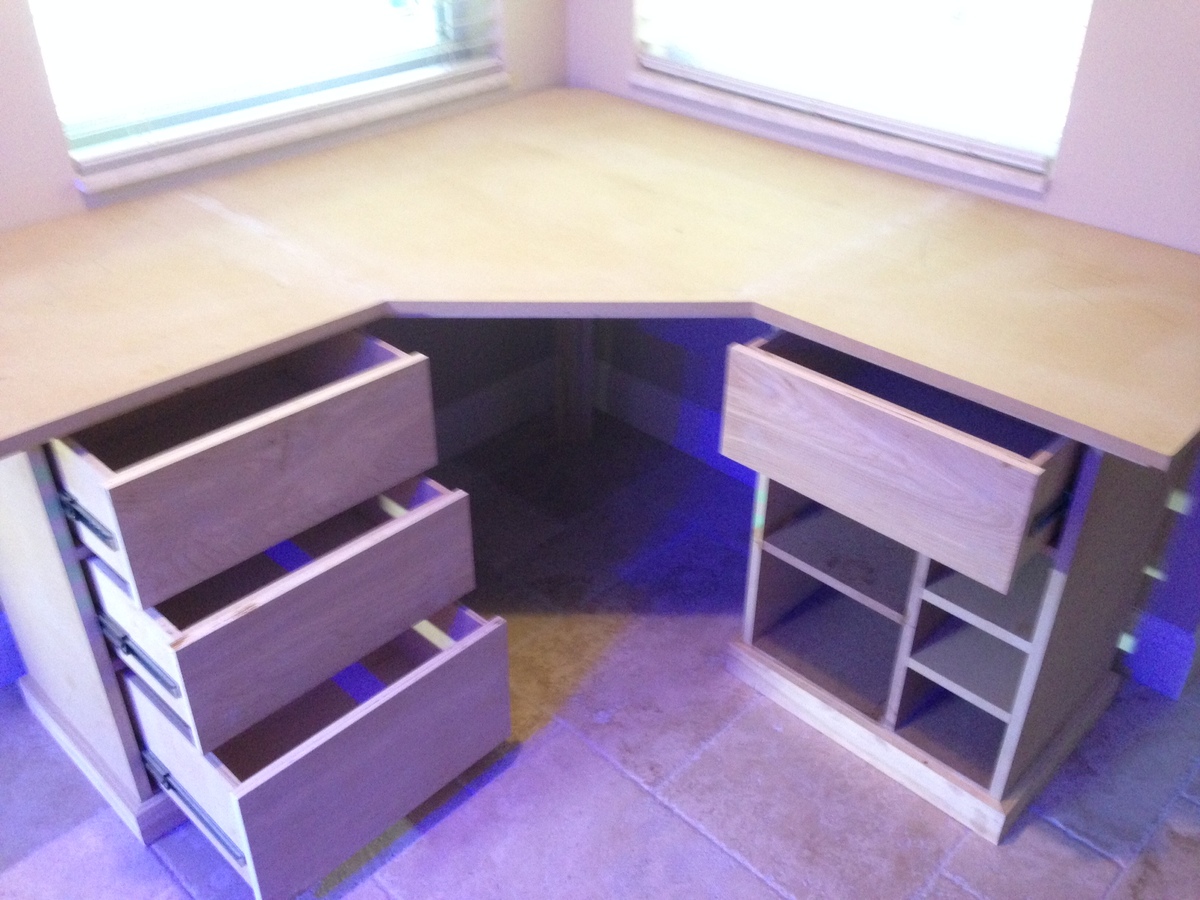
I really liked the PB mega desk, but I didn't want to spend $1600 on it.  After seeing someone's post here (a couple years ago...) asking for plans on that desk, I decided to do it myself.  I took these two plans and made 4 base units.  They are 18" square at the top and 34" tall.  I used 2 IKEA table tops connected underneath for the top, to make a total height of 36" - counter stool height.  I constructed them a little differently than the plans, but no matter how you make them, the idea is the same.  The plan is to take them apart and make 2 desks once everyone is too old and cool to do homework/artwork together.

Estimated Cost
$500
Estimated Time Investment
Week Long Project (20 Hours or More)
Finish Used
Kitchen and Bath finish paint (2 coats) - it's a little shinier than eggshell (I only used it because I had 2 or 3 gallons extra at home :) then 2 coats acrylic top coat matte finish.
Recommended Skill Level
Intermediate

Comments

monty742

Sat, 08/15/2015 - 04:33

Just seeing your comment...sorry for the delay!  I got the stools and the light fixture at a Ballard Backroom (outlet) store near me.  3 of the stools ended up being about $40 each with the sale they had at the time, and the 4th was $60? - bought at a later time than the first 3.

AlisaH

Wed, 11/04/2015 - 07:40

How did you connect the table tops from the bottom so that the tables were secure together? I'm curious what's the best way to do this. Since two of the four seats will be where the seam is, I want to make sure I secure it properly so it's not wobbly. Thanks so much.


monty742

Sat, 01/09/2016 - 05:06

I'm just seeing these latest comments for the first time, so you may have long finished this project already!  The tops were surprisingly sturdy but I did reinforce them.  I placed the tops on the floor upside down and screwed some metal brackets (about 12" long each) across the joint in four places.  I just screwed them in through holes already in the brackets.  This wasn't the most stable because those tops are particle board and don't hold screws very well...  But since it was already pretty sturdy, I figured it would do.  It has been fine, even with standing on the top (kids who get up there and me hanging the light fixture above).

Once the tops were joined, I placed the bases so there was about a 1" overhang on the top.  To hold the top in place, I used small pieces of wood screwed to the underside of the top at the inside corner to act as a placement stop.  The top is pretty big and heavy even though they are IKEA tops, so they don't have a tendency to move or slide at all anyway.  I'm going to try to figure out how to post another picture of the braces and corner stops...we'll see if I can do it!  Let me know if you have any more questions...again, sorry I didn't see this in a more timely manner!

Pmprdwife

Sat, 01/02/2016 - 05:55

Is the photo above the Pottery Barn version or your product result?  I'm trying to figure out the dimensions for the drawer and shelf configurations.  Thanks!  BTW, I'm totally addicted to your style and personality...my husband loves the productivity inspiration I've received. :-)


monty742

Sat, 01/09/2016 - 10:17

Hi!

I'm glad you like the desk!  The one in the picture is the one I built, not the pottery barn one!  My dimensions were a good bit different than the PB desk - square bases instead of rectangular and counter stool height instead of desk/table height.  So, I have no idea if I have my plans for this anymore, so I went and measured it again for you!  

So each base is 18" x 18" square and 34" high so that with the 2" top the total height is 36".


Each base was made of oak plywood that made with 3 sides, a top and a bottom.  All edges were rabbit joints (3/8" deep in thickness of boards and probably 3/8" wide - not 100% on width of rabbits).  It's kind of a pain to do rabbit joints if you don't have a dado blade for your table saw, so you could use pocket hole screws instead.  I glued and nailed these joints with a finish nailer, I believe.  

I figured a diagram with measurements would be easier than trying to write descriptions...so I'm adding another pic with the dimensions outlined.  Drawing is NOT to scale, so sorry about that!  I really need to learn to use SketchUp.  Let me know if you have any questions!  

Monty742

monty742

Sat, 01/09/2016 - 07:57

Hi!

I'm glad you like the desk!  The one in the picture is the one I built, not the pottery barn one!  My dimensions were a good bit different than the PB desk - square bases instead of rectangular and counter stool height instead of desk/table height.  So, I have no idea if I have my plans for this anymore, so I went and measured it again for you!  

So each base is 18" x 18" square and 34" high so that with the 2" top the total height is 36".


Each base was made of oak plywood that made with 3 sides, a top and a bottom.  All edges were rabbit joints (3/8" deep in thickness of boards and probably 3/8" wide - not 100% on width of rabbits).  It's kind of a pain to do rabbit joints if you don't have a dado blade for your table saw, so you could use pocket hole screws instead.  I glued and nailed these joints with a finish nailer, I believe.  

I figured a diagram with measurements would be easier than trying to write descriptions...so I'm adding another pic with the dimensions outlined.  Drawing is NOT to scale, so sorry about that!  I really need to learn to use SketchUp.  Let me know if you have any questions!  

monty742

Thu, 07/28/2016 - 14:13

No you can't buy them from Ikea.  I bought the table tops from Ikea, but I built the bases.  The dimensions for the bases are in one of the additional pictures with the post if you want to see them!

treverandamber

Mon, 10/10/2016 - 07:41

What are the total dimensions of the table top? Thinking of building something like this, but want to make sure it will fit in my space.

Simgre81

Thu, 12/28/2017 - 07:00

Are these just slide in drawers, or did you use some sort of hardware to have them slide in and out?

Mini Cedar Storage Shed

Submitted by jakevdp on Sun, 06/09/2013 - 23:10

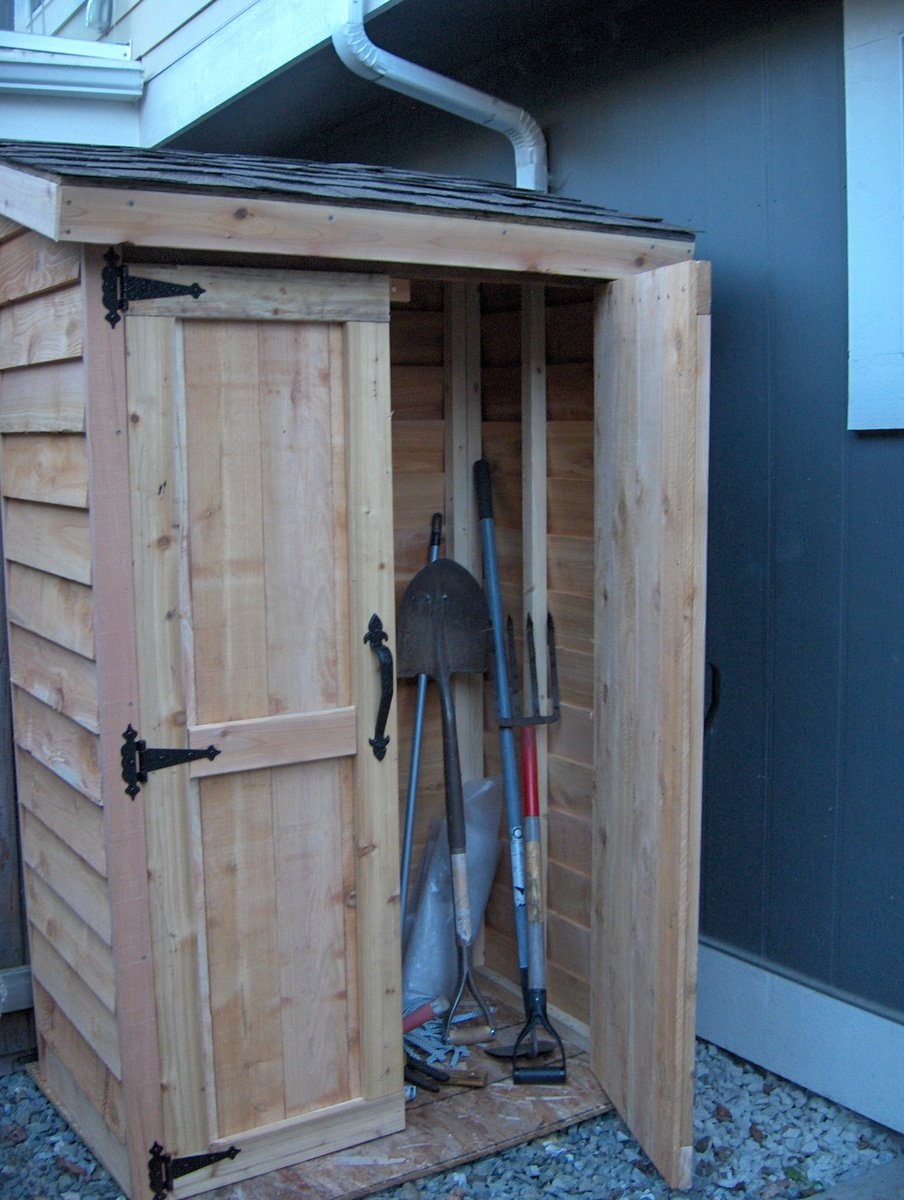
I loved the idea of re-purposing fence pickets as siding for a cedar shed, but the plans on the website were much too big for the space I have. I ended up modifying the design to make a smaller shed, with approximately a 4 foot by 2 foot footprint. It turned out beautifully! Cedar is expensive, but I was able to save money on the project by buying much of the material at local salvage and second-hand stores.

Built from Plan(s)
Estimated Cost
$140
Estimated Time Investment
Weekend Project (10-20 Hours)
Recommended Skill Level
Intermediate

Comments

HOWsMom

Thu, 04/30/2015 - 05:44

This is exactly the size I want - did it take much to modify the plans to be smaller like this ?

RenoRustic

Tue, 05/19/2015 - 11:19

My mom just asked me about building her a garden shed in a small area. This looks perfect for what she is looking for. I'll have to show her this. Great job!

BeckfordRVA

Sun, 03/29/2020 - 09:59

I'd also love to know what modifications you made to create the mini version. Did you just take out one of the sections of the back frame and adjust the side widths? Thanks!

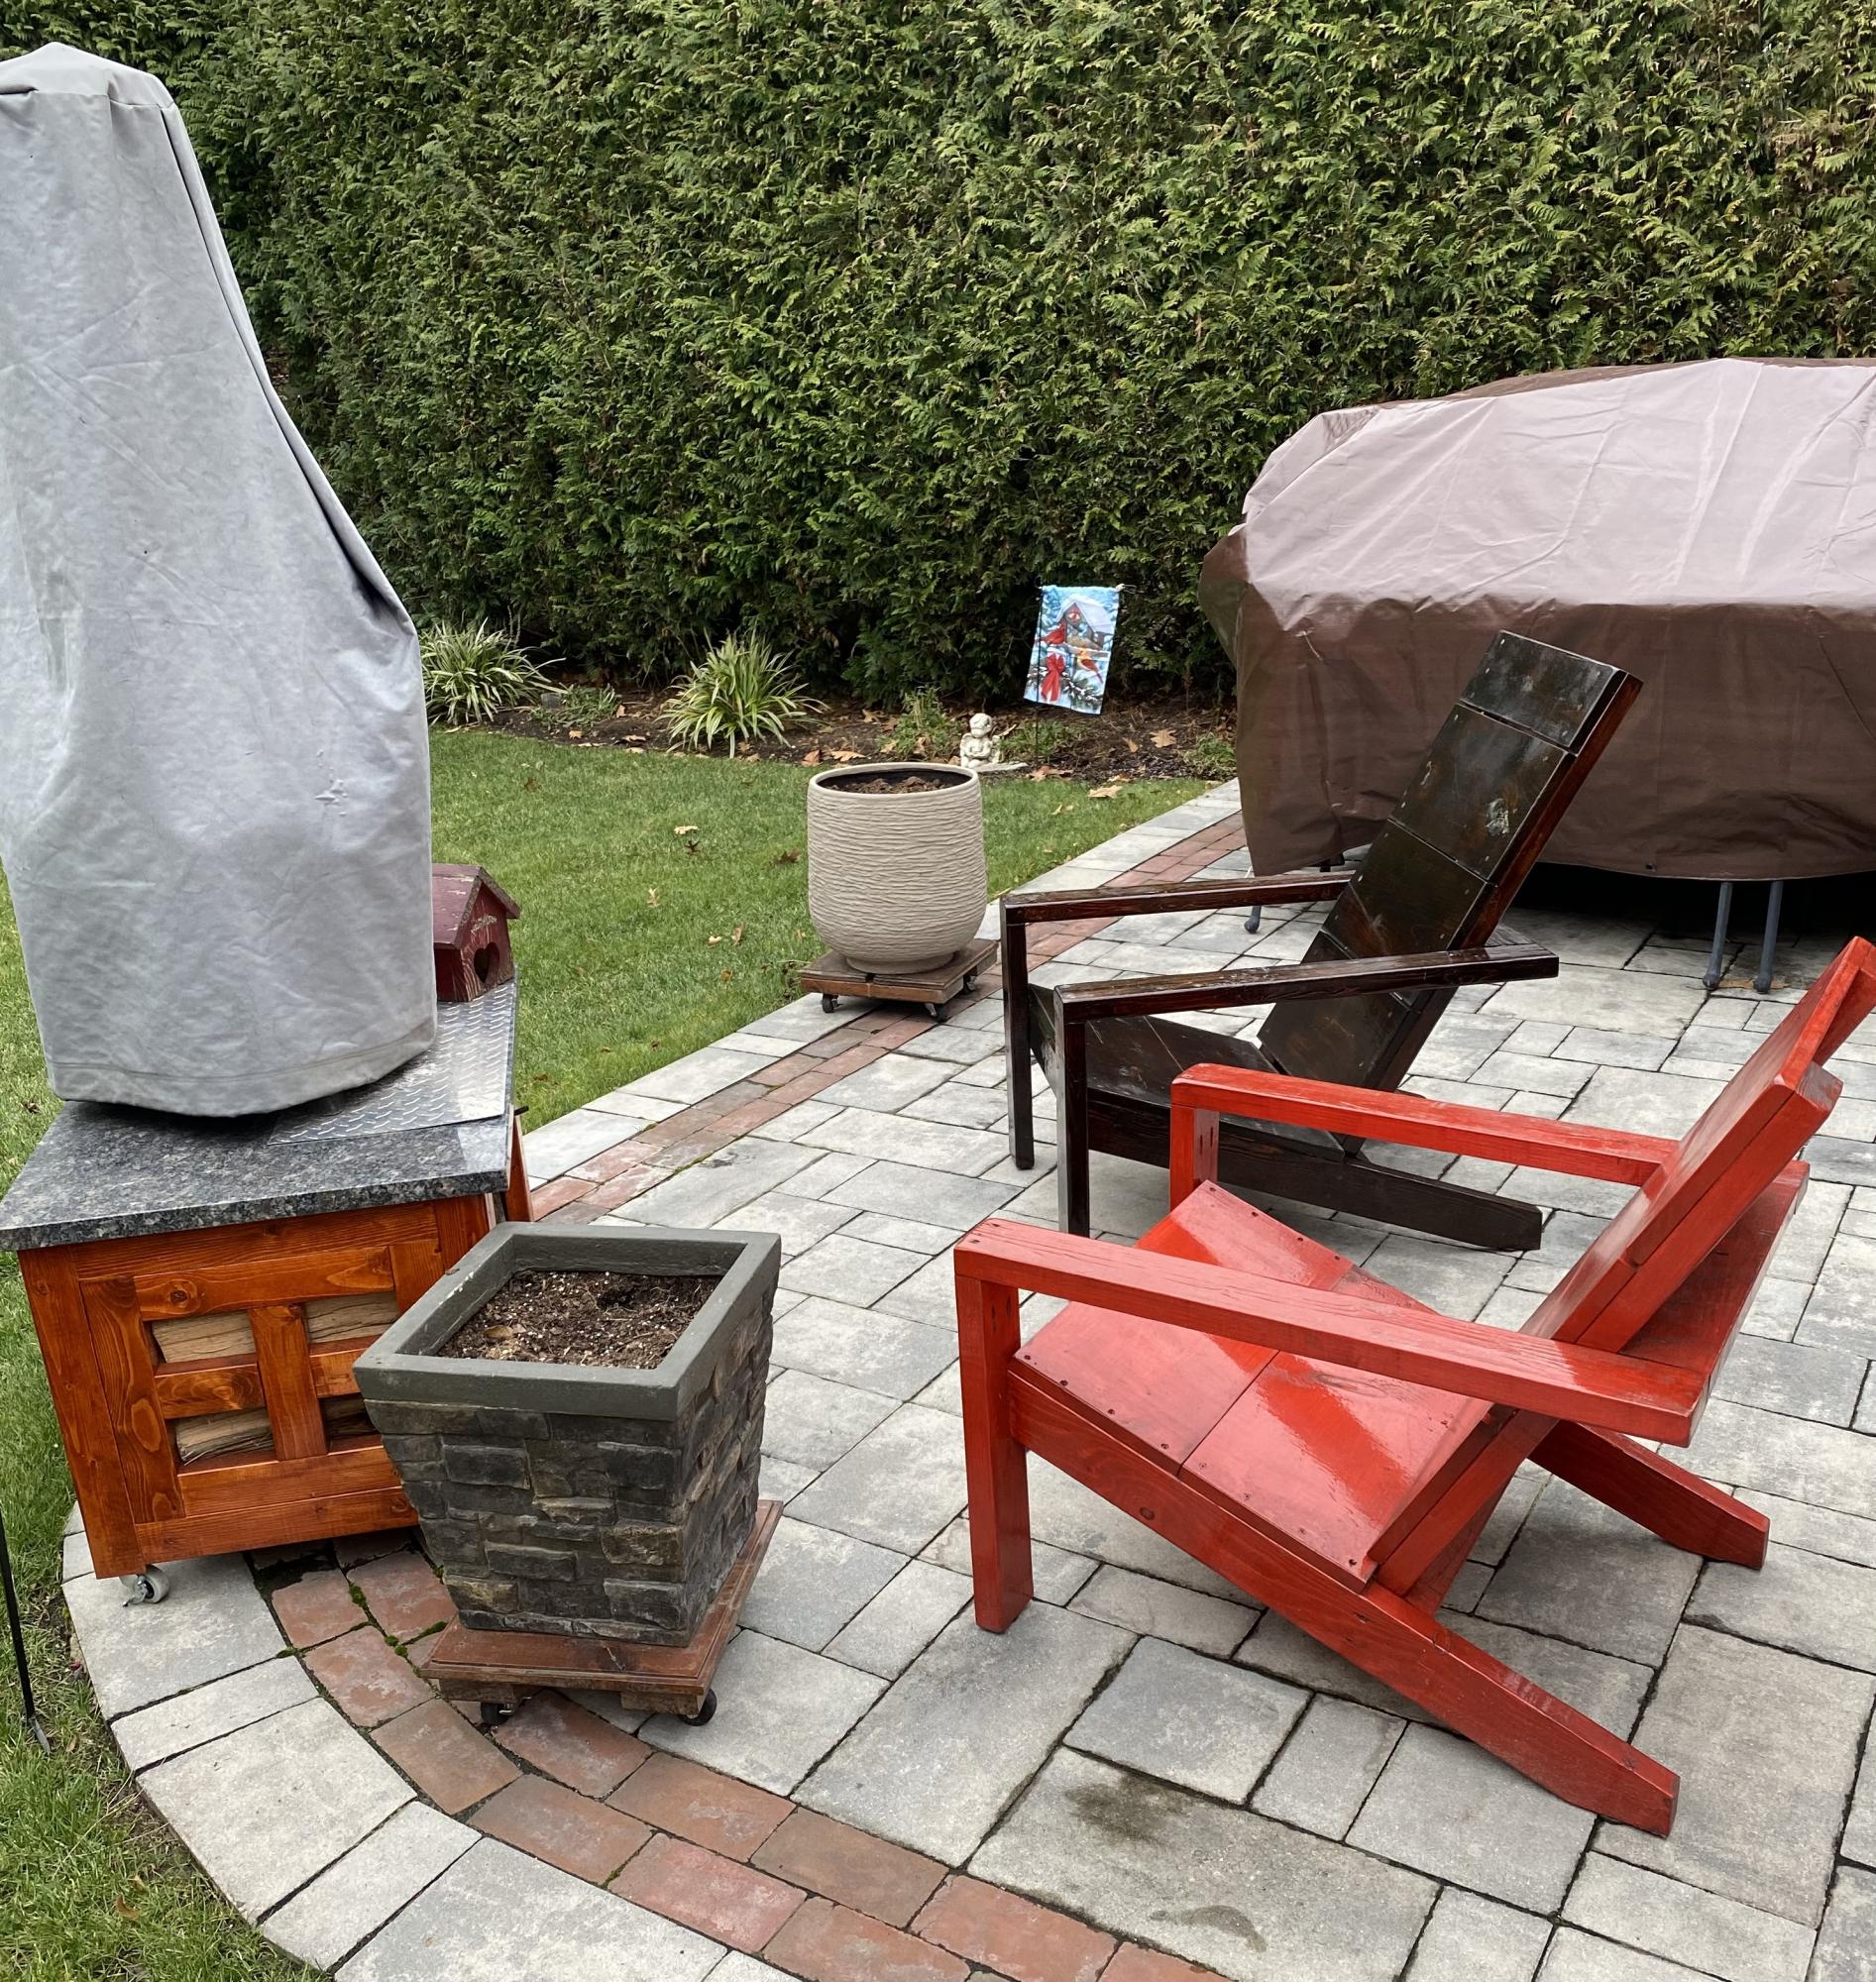
Ana White Outdoor Chair

Submitted by Anonymous (not verified) on Mon, 12/27/2021 - 06:57

Thank you Ana for the plans to make these two outdoor chairs. They are most comfortable while sitting by the fire pit. Thank You!

Comments

Modified Weatherly Pergola

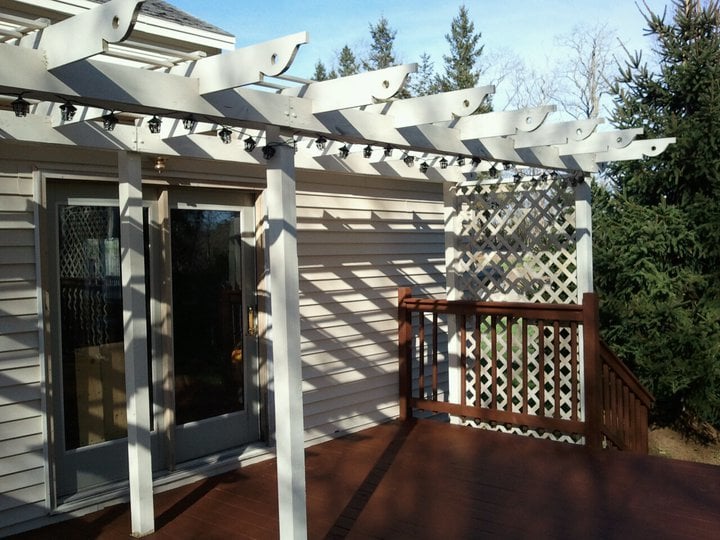
Submitted by ColleenM on Tue, 05/10/2011 - 09:15

I've wanted a pergola for a long time. I liked some parts of the Weatherly Pergola, but needed some different aspects because of my deck, property and locale. I did some research, laid out a modified design and plan - and voila! Easy as pie - you just need 2 people (or more) because of the weight of the cross beams support. I did it myself using clamps, but I don't recommend it.
My current project is designing cabinets and a bar for an outdoor kitchen to go under the pergola! :D

Built from Plan(s)
Estimated Cost
$500
Estimated Time Investment
Weekend Project (10-20 Hours)
Finish Used
I used the same exterior paint that I used on the house, so it would not appear as this large dark looming thing on an already dark deck. It's a Valspar exterior satin paint, watered down to be more like a stain and sprayed on (2 coats).
Recommended Skill Level
Beginner

Twin over Full with Trundle, storage stairs

This project took a week to build.  Working during my boys' nap time and late nights, I was able to complete everything in about 7 days.  I used cedar, and sealed with Cabots Bleaching Oil.  The cost of wood for the beds and stairs and drawers came to about $700.  The extra cost came from the additional side rails on the top bunk and the stairs and drawers.  Still comes in about $500 less than if bought commercially.  The famiy loves the bed and as my kids are 2 and 3, I expect to get many years out of the bunk bed.  Side note:  I had to add quite a few brackets and angle joists to secure and minimize wobble due to the additional weight of the top bunk.  (2 2x4s from the 4x4 to the side of the cleat and side rail of the bottom bunk, on the back side only, made a world of difference)

Estimated Cost
$700
Estimated Time Investment
Week Long Project (20 Hours or More)
Finish Used
Cabots Bleaching Oil
Recommended Skill Level
Intermediate

Comments

Ms.Bungalungalow

Mon, 12/11/2017 - 14:28

Hey there, I absolutely love your bed. The $700 scares me a little but i will not be using cedar. I will be doing everything else just like you. Thanks for sharing.


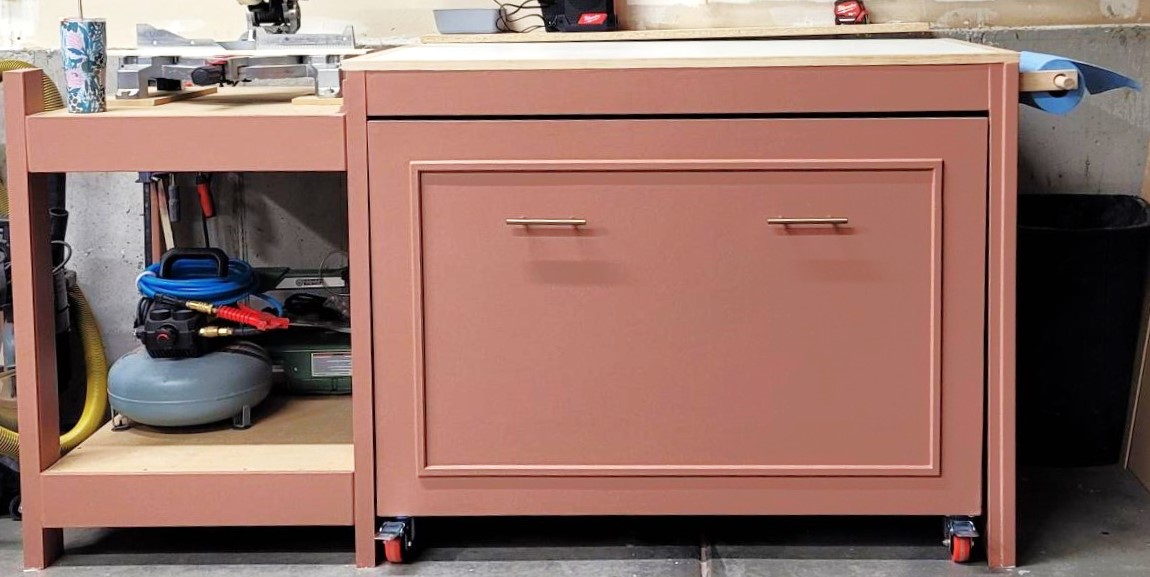
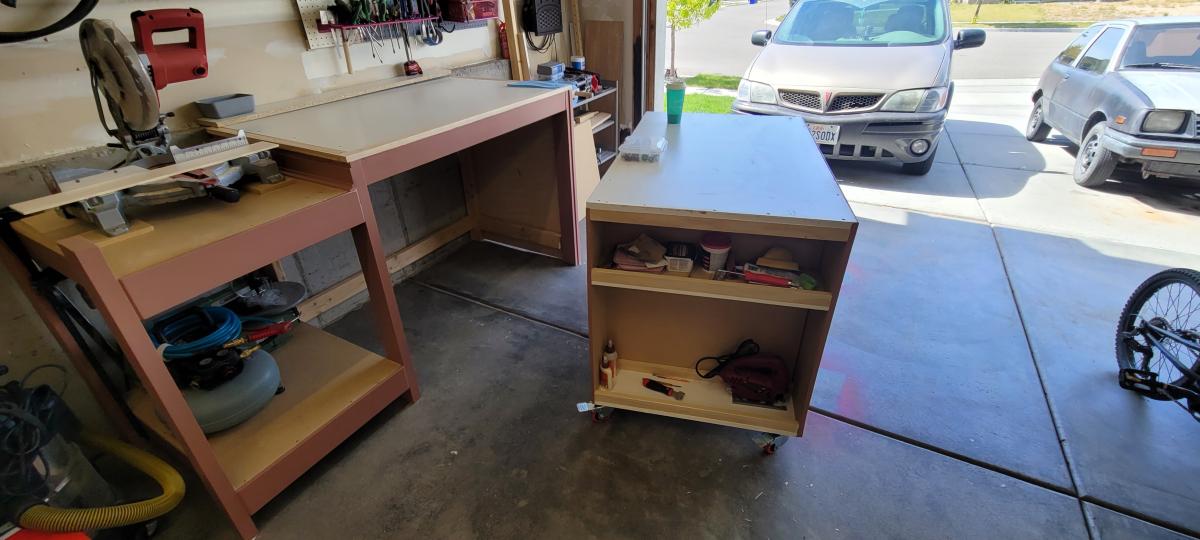
Ultamate Roll Away Workbench

Submitted by Anonymous (not verified) on Fri, 05/13/2022 - 15:54

Adjusted the shelves slightly. Love the roll away portion.

Comments

Ana White Admin

Sun, 05/15/2022 - 11:55

This is gorgeous, thank you for sharing! Just shared on our facebook page, we'd love to give credit if you'd like to respond with your name:)

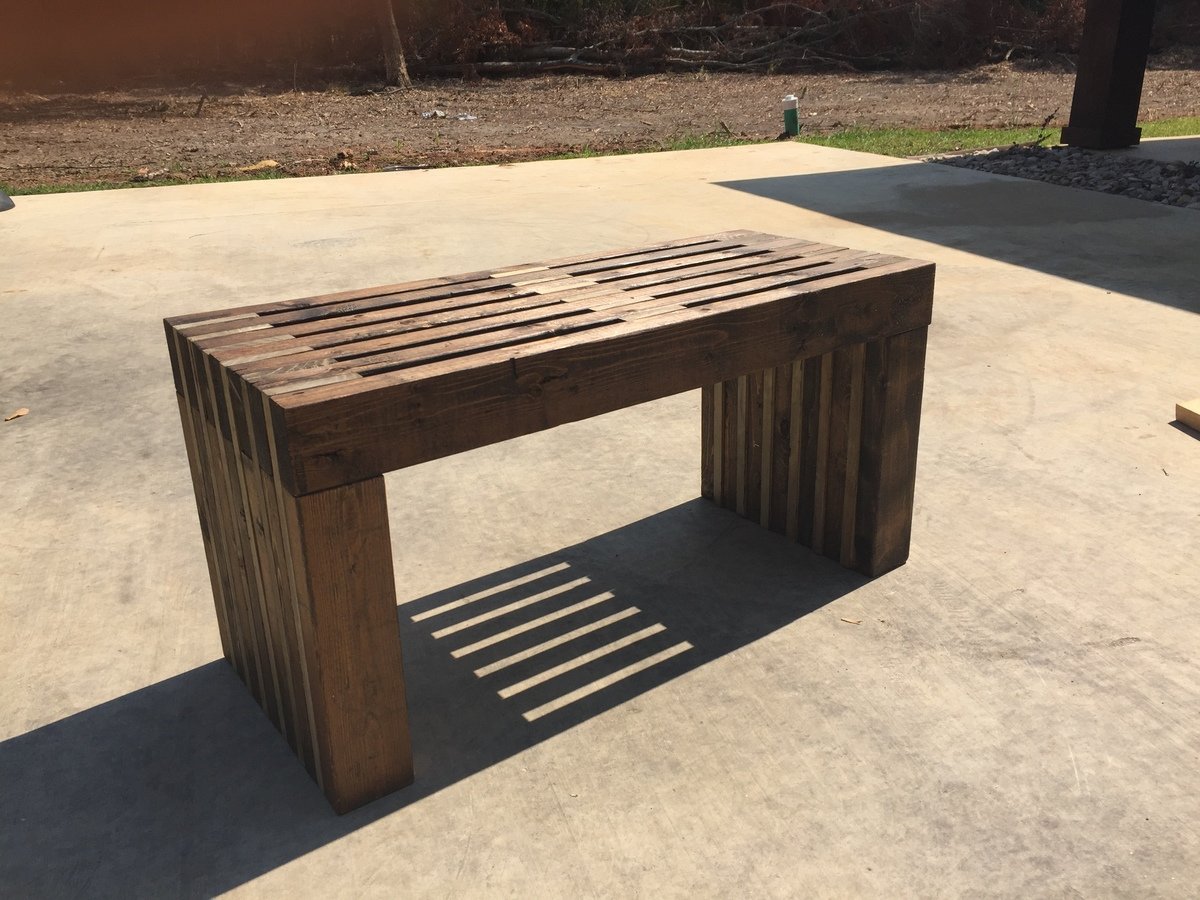
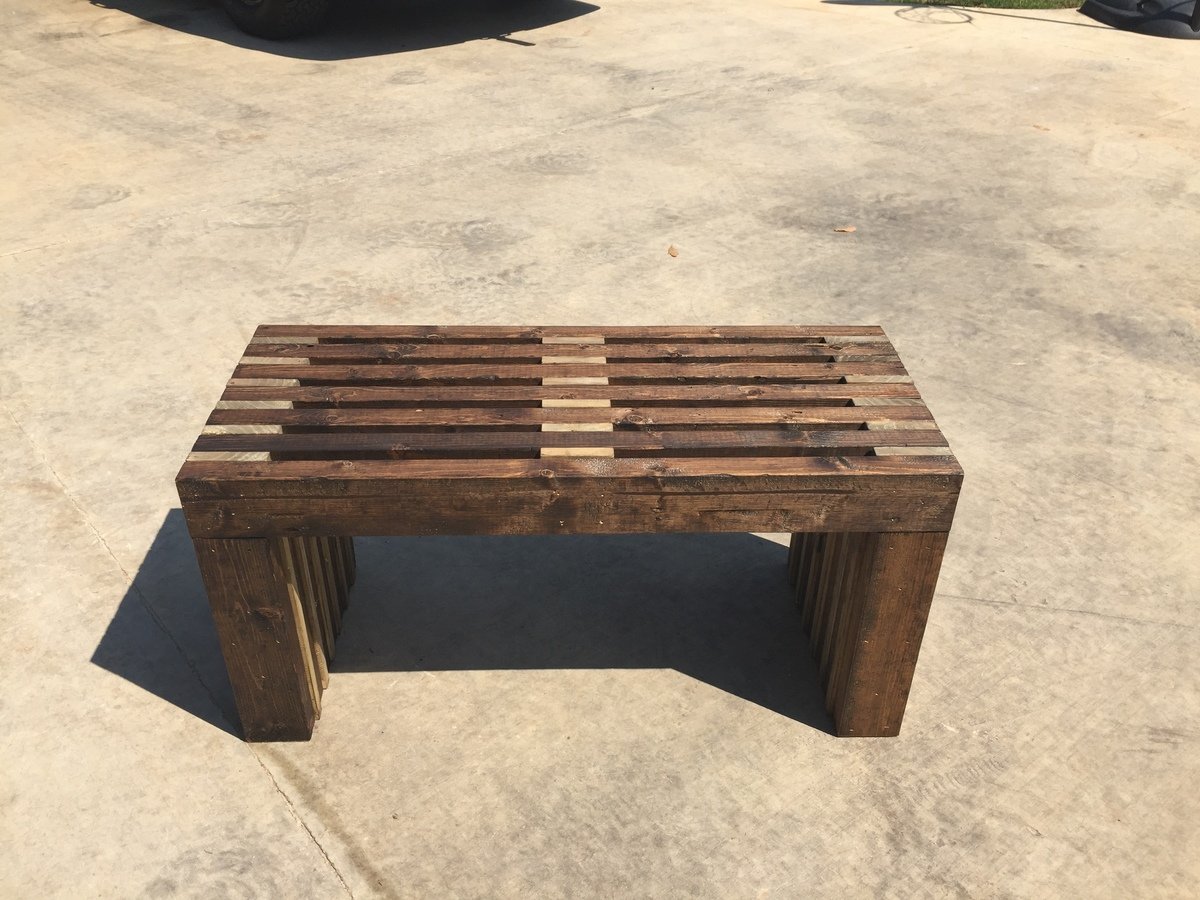
Modern Slat bench

Two tone 3 ft long slat bench

Estimated Time Investment
An Hour or Two (0-2 Hours)
Finish Used
Dark walnut and chestnut fence stain
Recommended Skill Level
Beginner

Comments

Audrey Wright

Thu, 10/22/2015 - 05:16

I love the two toned rhytm. I wonder how you attached the slats. Did you just glue or did you nail / pocket hole etc.. 

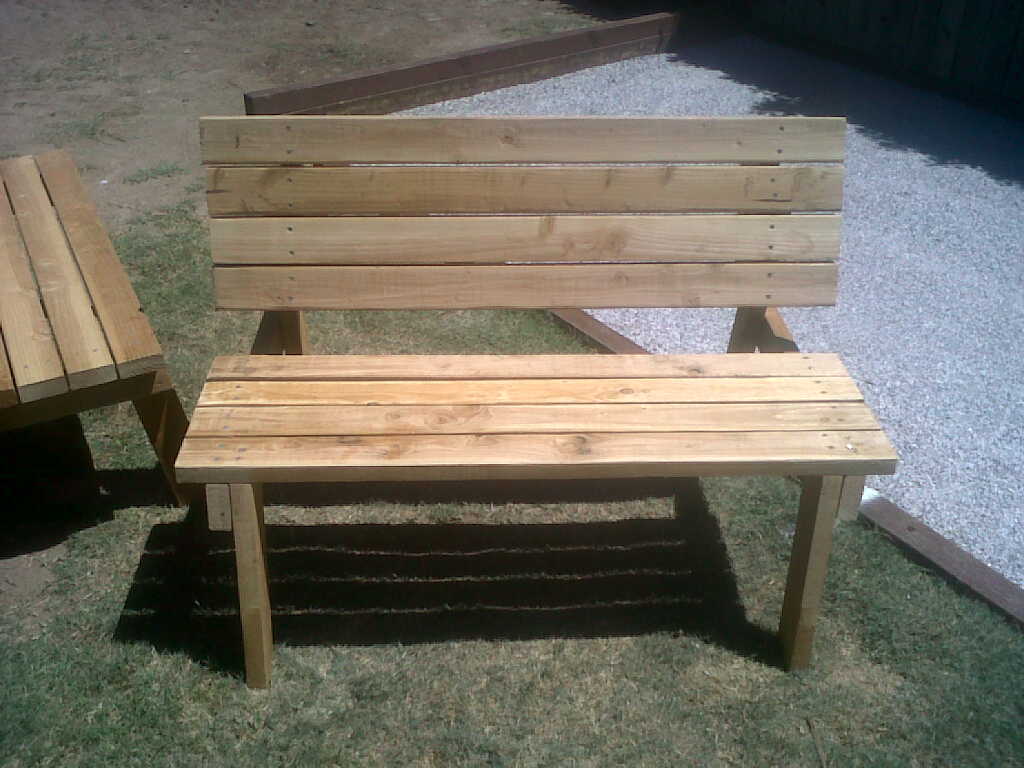
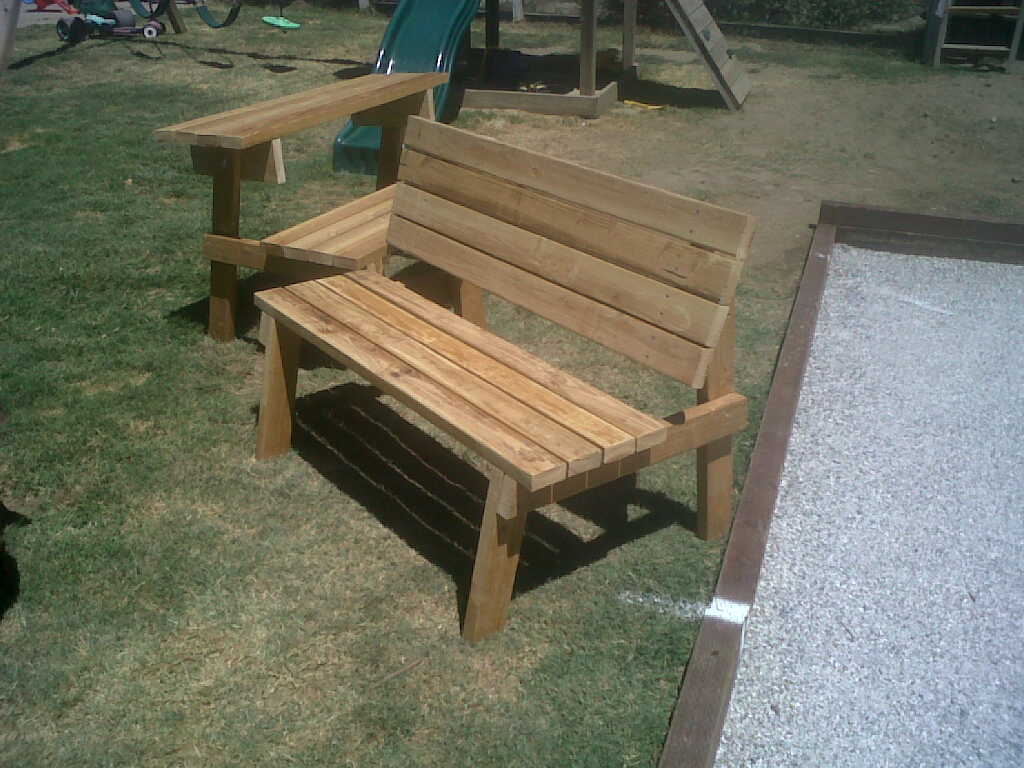
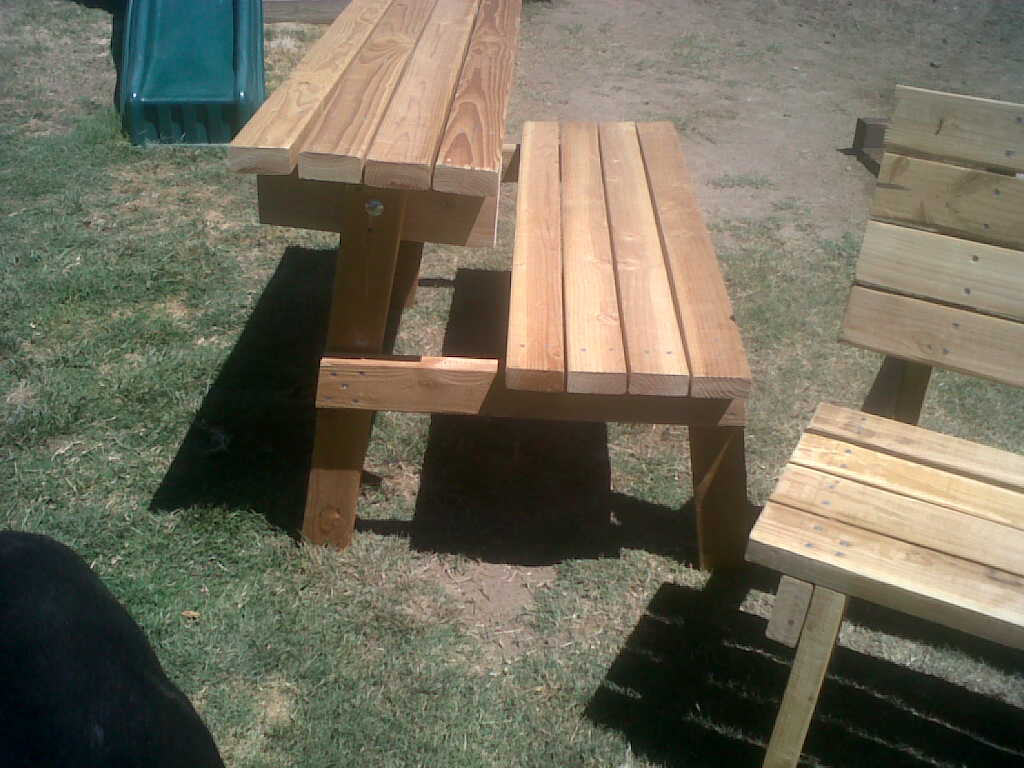
"Cull" Lumber from a big box store= cheap 2x4's for convertable picnic table

Submitted by MrQuinn on Mon, 08/15/2011 - 14:10

I found out what the rack in the drive up area of my local Lowes was!
I often see piles of wood and sheets or plywood and such sitting there, but I never paid it much mind-turns out its a clearance rack of sorts they call it the "cull" rack, because they are culling the items from inventory that may be cut, chipped marked etc.
So I was at the store buying something for my Bocce Court and saw this pile of 16ft 2x4's and saw they were only $20 and there was 8 of them- so I picked em up for a "future project".
Needless to say they weren't the truest boards but they worked well enough for something like this. I had to buy a 2x6 to attach the top to because 2x4's aren't wide enough to give proper clearance as the plans showed(and I really didn't want to reinvent the wheel on this) so i bit the bullet and bought a $3 2"x6"x8'
Now if you notice I used all 2x4's for this instead of 2x6 so I adjusted the top to 14 1/8 to accommodate 4 2x4 pieces separated by spacers I use when installing wood floors. I made no change to the seat dimensions, but there is 4- 2x4's vice 3- 2x6's.
Great plan- perfect for more seating on my weekly bocce nights and they hold in excess of 600 lbs easily for those concerned about load limits.
(Note for those curious, that is my Bocce court in the background, it is 10'x60' and built with pressure treated 4x6's and 2x4's and a whole bunch of DG and crushed oyster shells.)

Estimated Cost
$36
Estimated Time Investment
Afternoon Project (3-6 Hours)
Finish Used
none-I very rarely finish my wood projects-I will probably spray with a sealant to slow the elements since they will stay outside.
Recommended Skill Level
Beginner

Comments

sgilly

Thu, 02/23/2012 - 11:14

I plan to build several of these for my daughter's family. They stand around a fire most nights in the spring. Those nights often end up with roasted hot dog dinners with the friends who have dropped by. The dual purpose of these would be perfect!

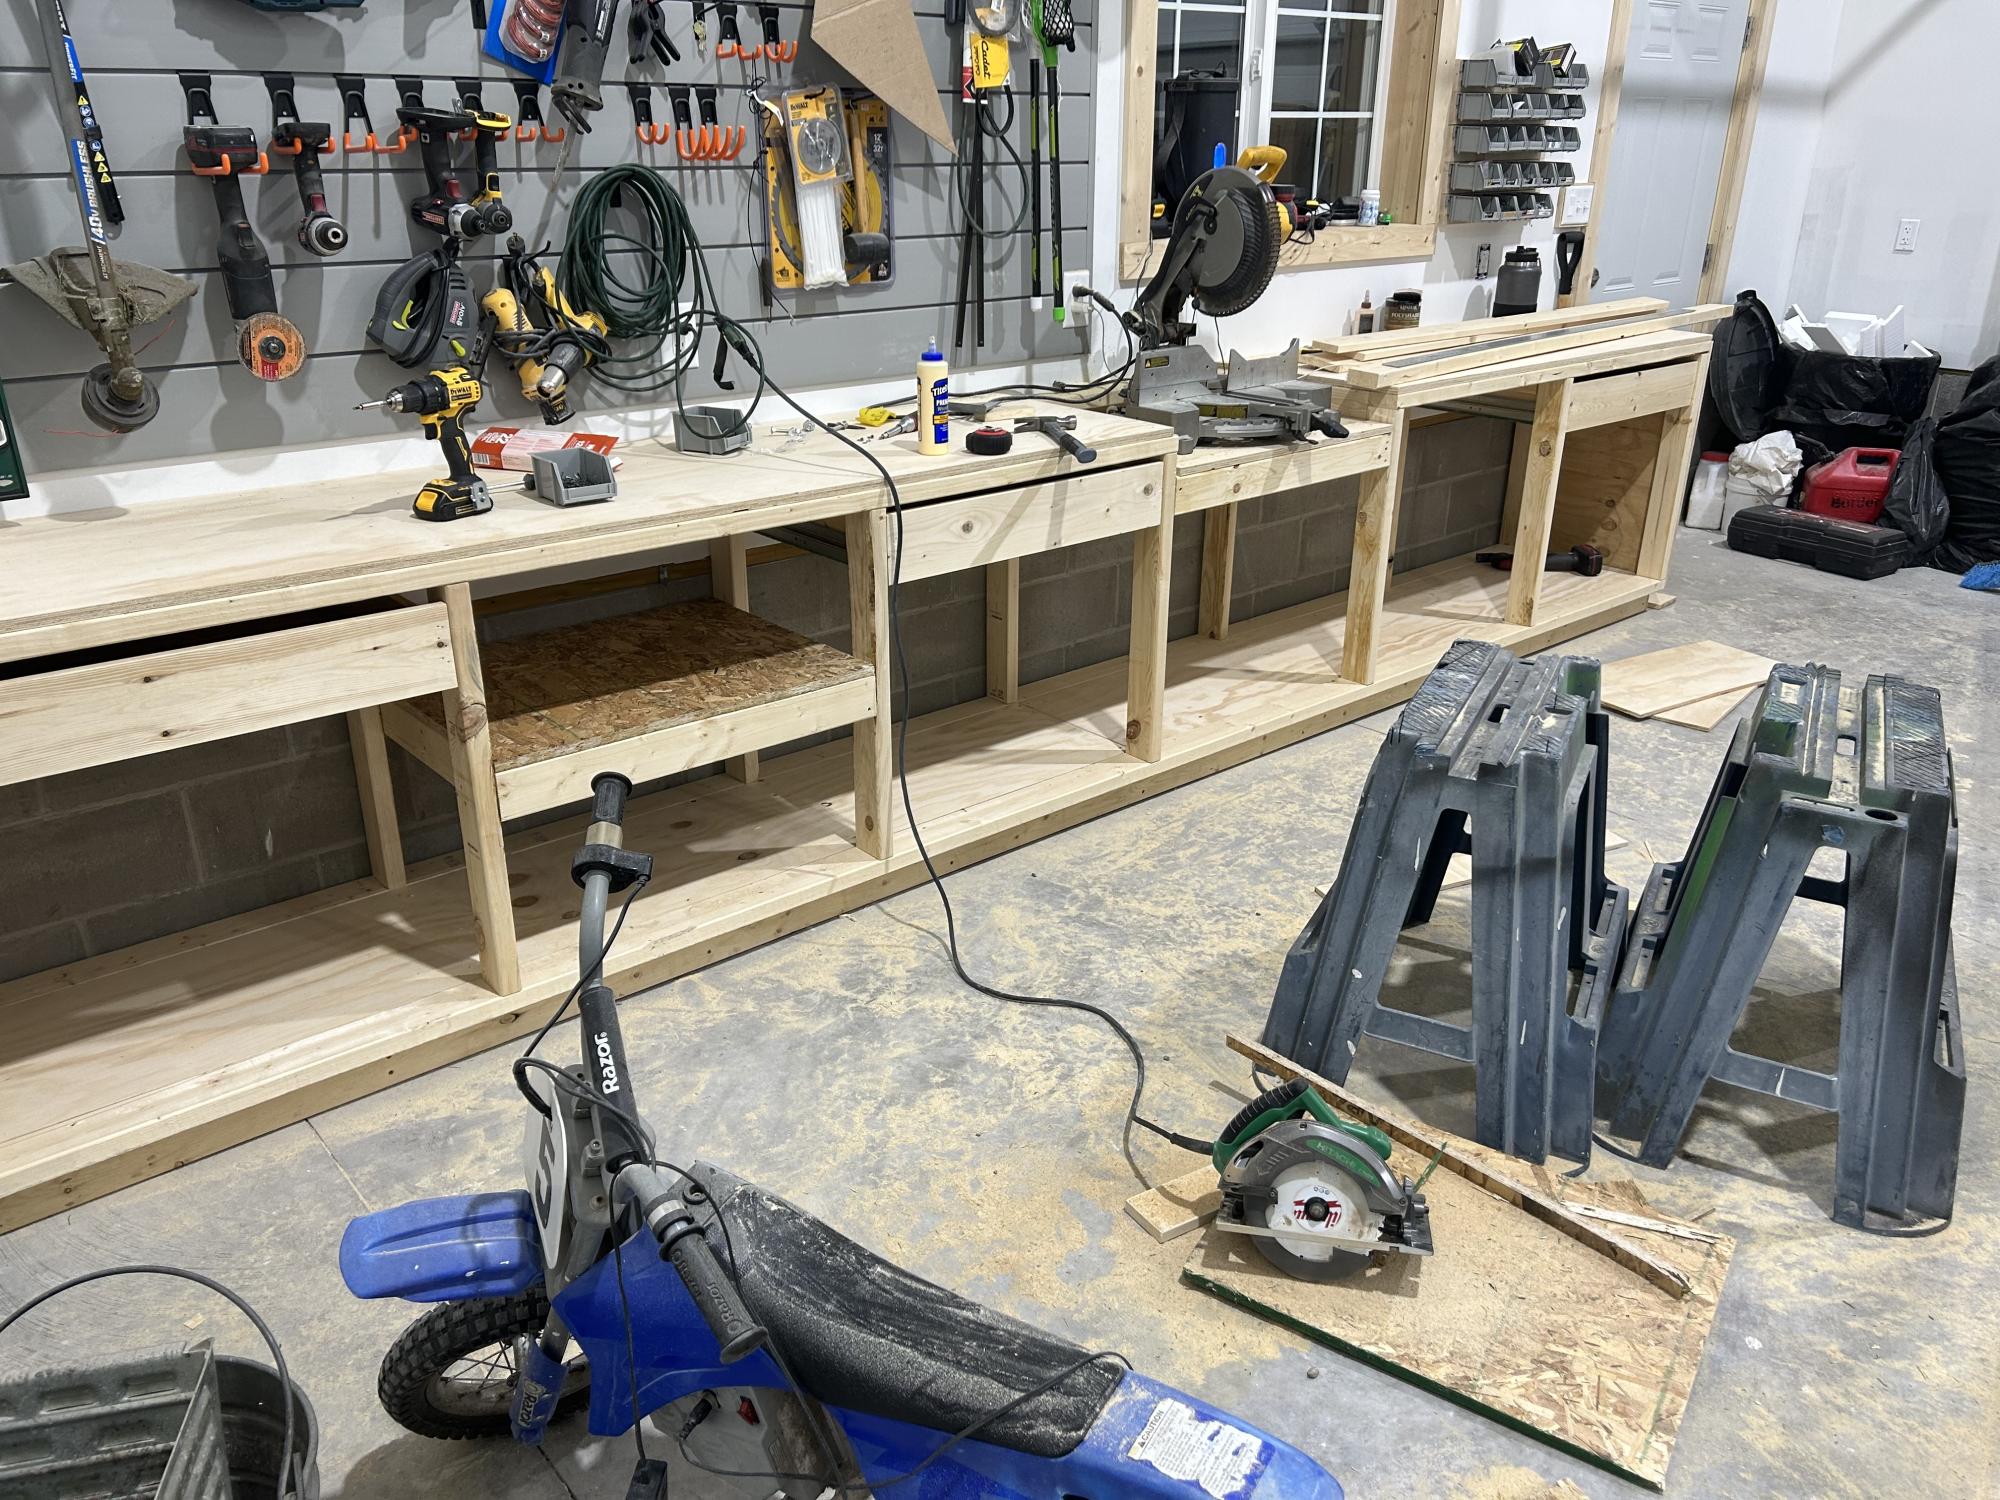
Workbench w/Mitre

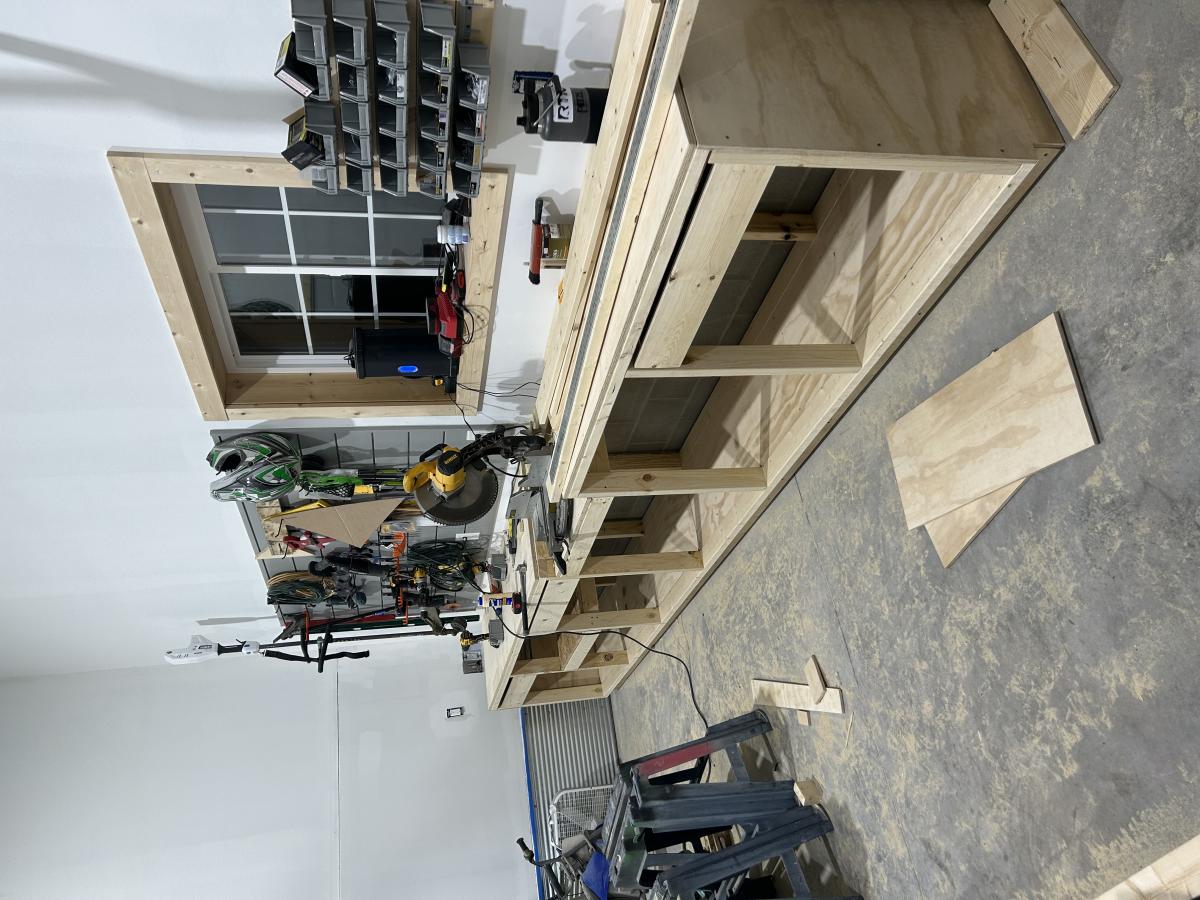
Submitted by mdgurnoejr on Tue, 01/31/2023 - 21:45

Still need a couple more drawers, plus stain and seel, but I just couldn’t wait to post. Took me most of the day (drawers suck), but it was extremely helpful to have the article and visuals to aid. Can’t wait to move on the the next project. I’m slowly becoming obsessed and a “wood whore”

Built from Plan(s)

Comments

Back