Community Brag Posts

Washer/Dryer Platform Pedestal
Submitted by Dimarc67 on Fri, 04/17/2015 - 10:45


THE MOTIVATION
After a recent washer outage (that I was ultimately able to repair myself), my wife and I talked about eventually replacing our front-loading washer/dryer set.  One of the bullets I hate biting is paying the exhorbitant prices for the matching pedestals for new washer/dryer sets.

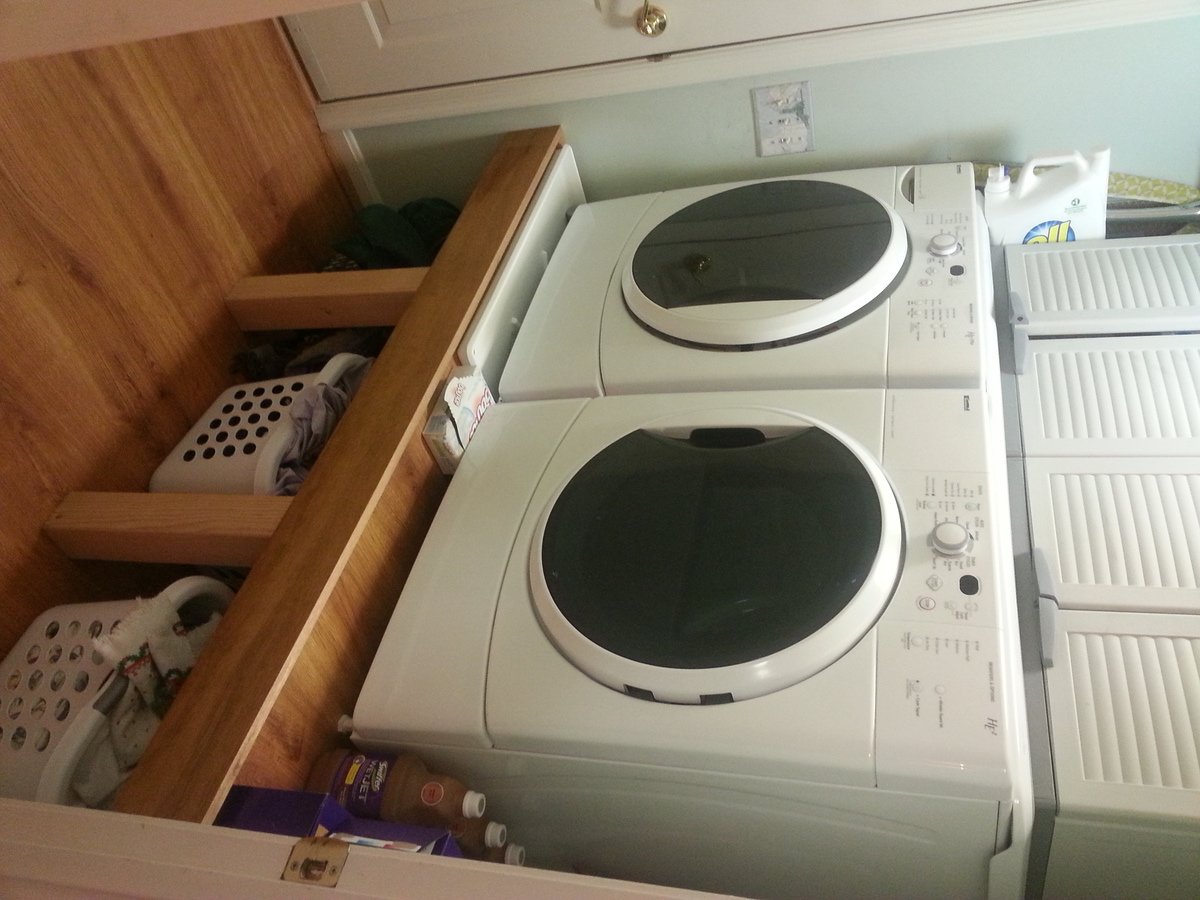
Having just bought a good set of cordless powertools, and having watched my father when I was a kid build countless household fixtures, window dressings, furniture pieces, etc., I decided to try my hand and construct a permanent platform for our current washer/dryer set, thereby eliminating the need to ever buy manufacturer pedestals again.

The existing pedestals were a standard 15" high, with a storage drawer, which we felt was still not high enough for comfort.  And, the washer pedestal drawer was entirely inaccessibl due to the 2" walls on the washer drain pan, so its drawer was totally useless, wasted space.

And, lastly, we really wanted more space for clothes baskets full of laundry, which we generally stacked (full and haphazardly) on top of the machines.


THE CHALLENGES
The largest challenges were mainly logistics, and gravity.  The washer/dryer would have to be unavailable for at least 2-3 days while they sat disconnected in the next room waiting for their new home.  So I coordinated with the family so they'd know when they needed to have their laundry done, or tough it out until I was done.

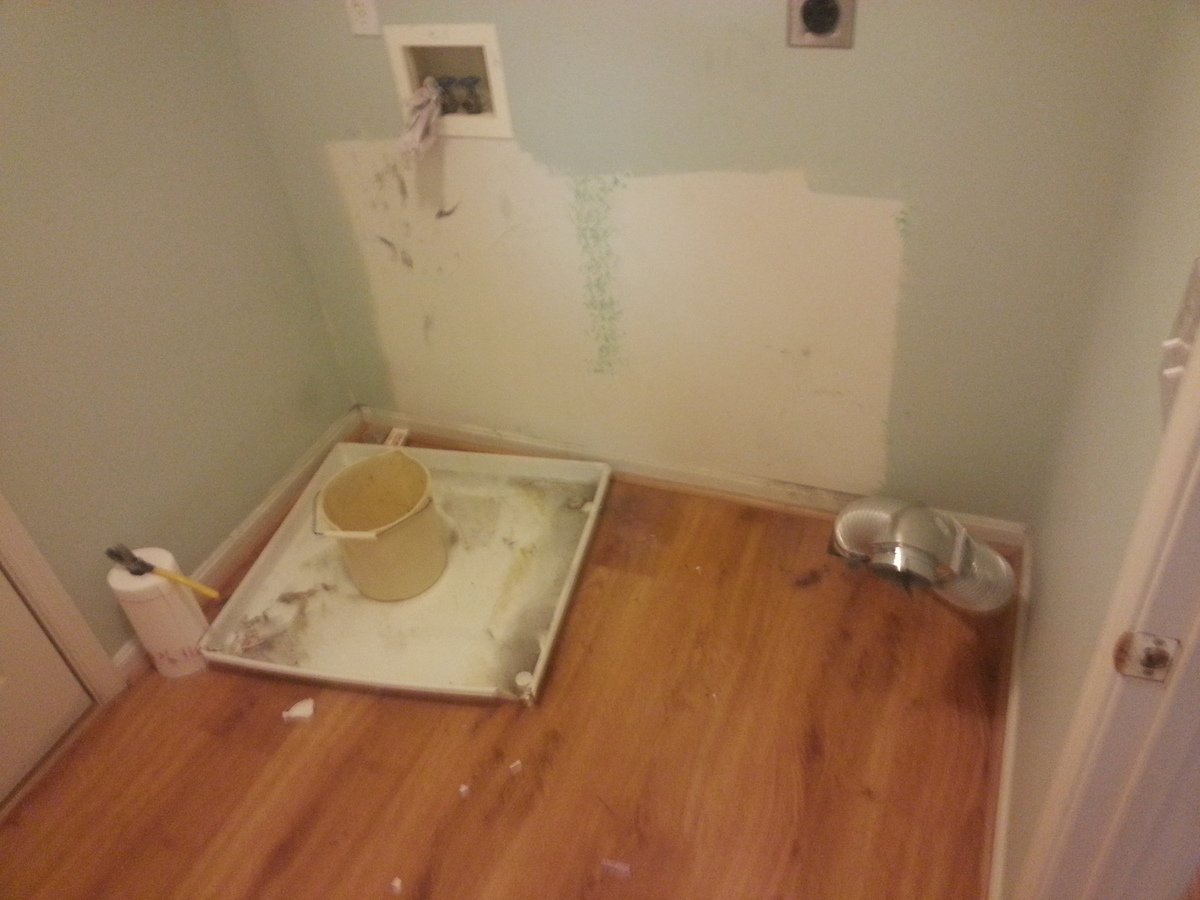
There was no way to know for sure what the drain connection for the washer pan looked like until I got the washer out.  So it was a small gamble that I'd be able to get the parts needed to extend the drain pipe up to the new platform right when I was ready for them.  Fortunately, this was no issue at all.

The biggest challenge turned out to be toward the end when it came time to lift our 230-lb. washer onto the new platform.  I seriously considered disassembling the washer to the point that I could remove its molded concrete counter-weights, but instead (and arguably stupidly) elected to use a large hydraulic car jack to raise the washer.  This ultimately worked, but I have to STRONGLY ADVISE AGAINST trying this.


THE SPACE
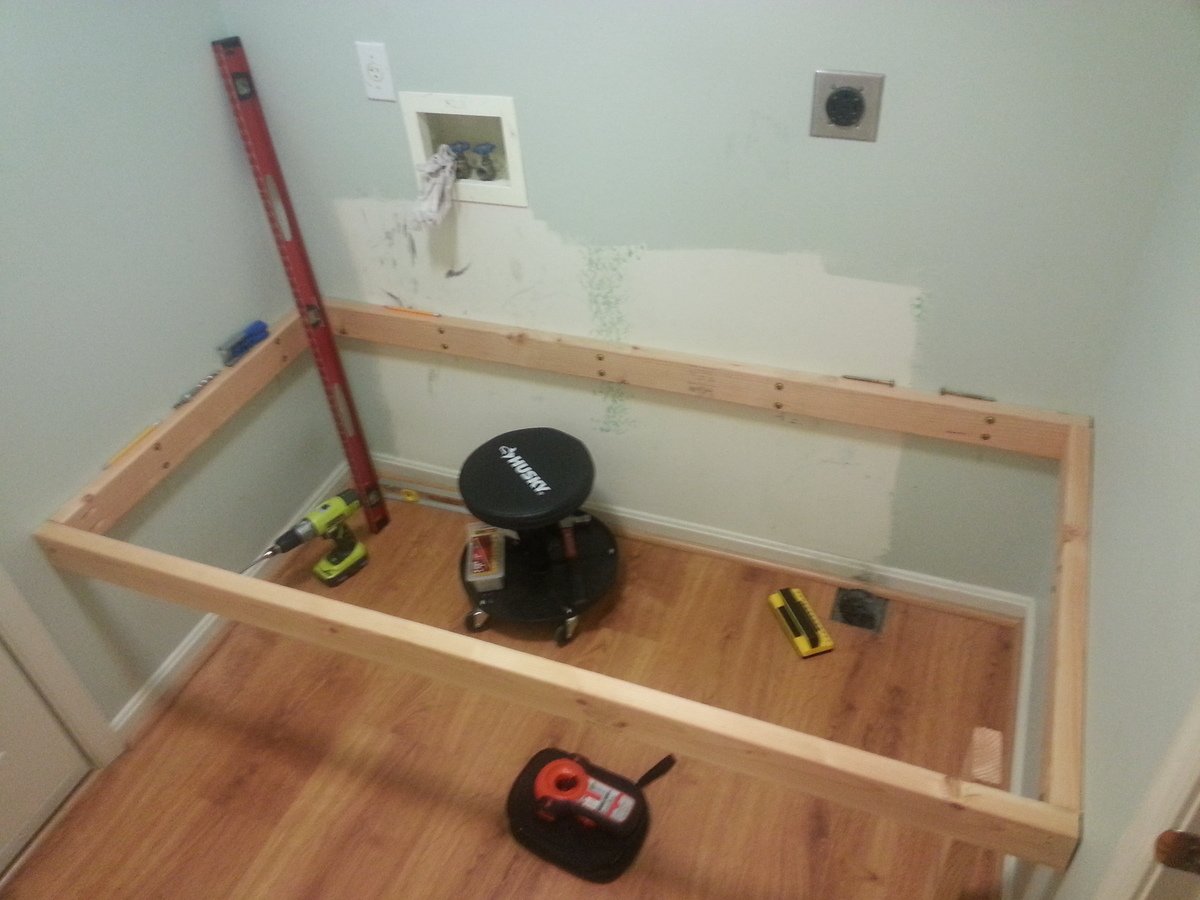
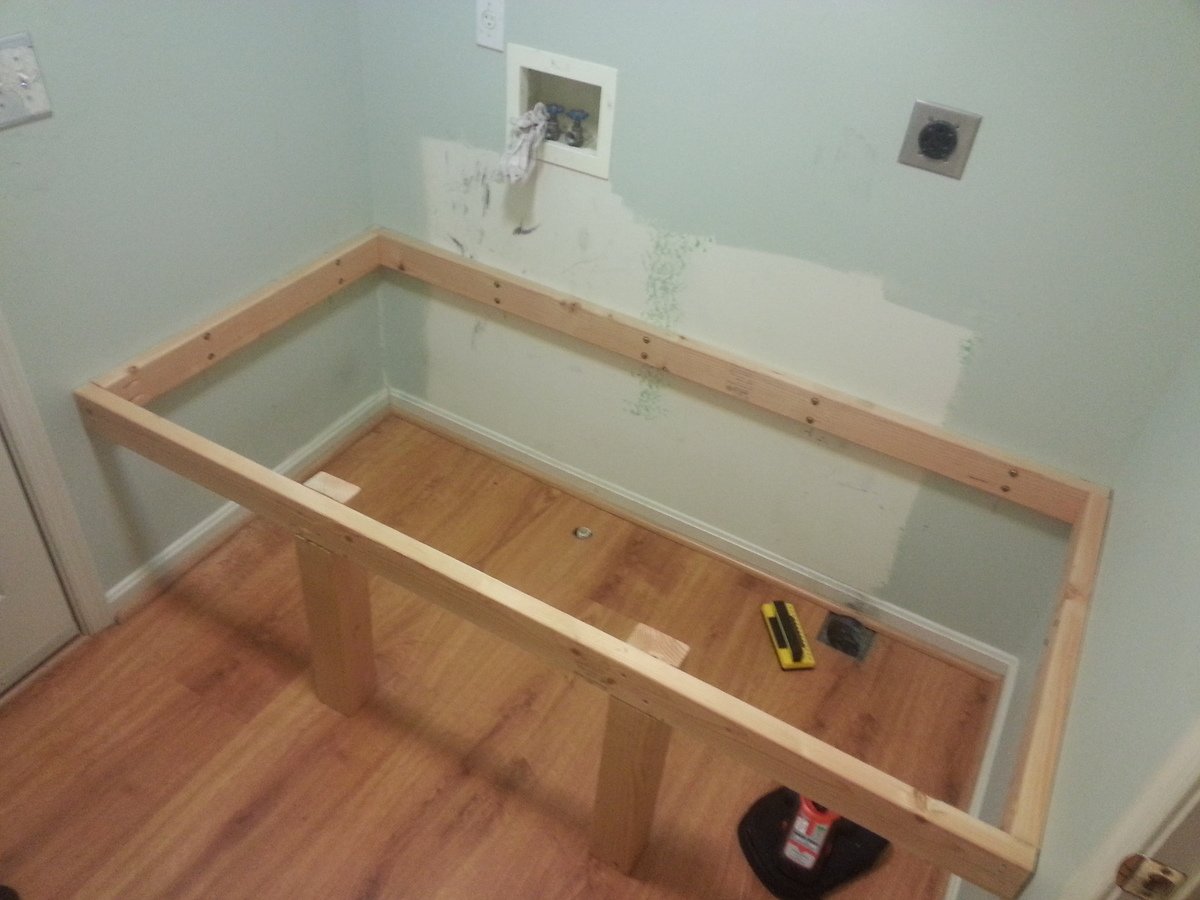
Our laundry room is also the "mud room" between our kitchen and the garage.  It is only large enough for the two machines, and the walk way between the two doors--in total, about 70.5" square.  Building the platform from wall-to-wall made the most sense, and minimized framing by fastening edge framing directly to the wall studs. 


THE PLAN
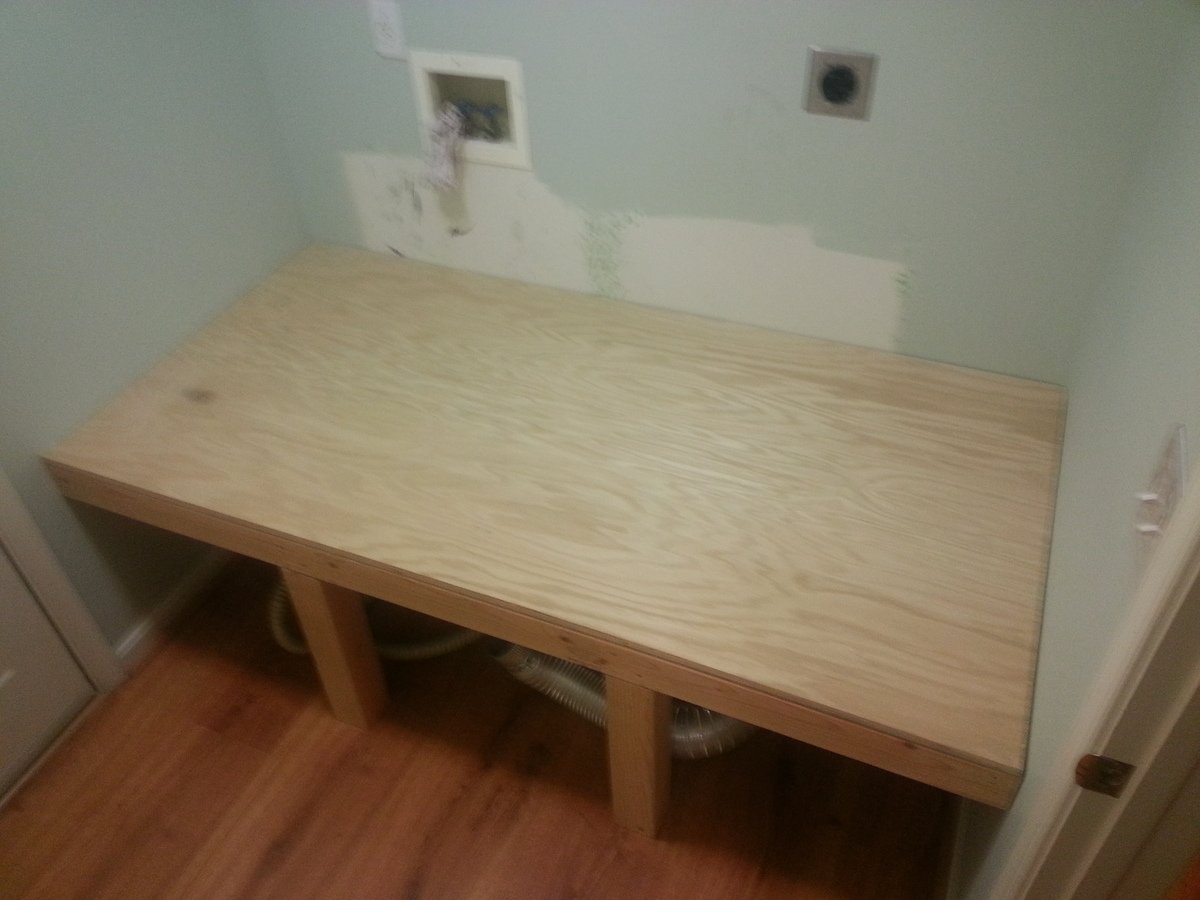
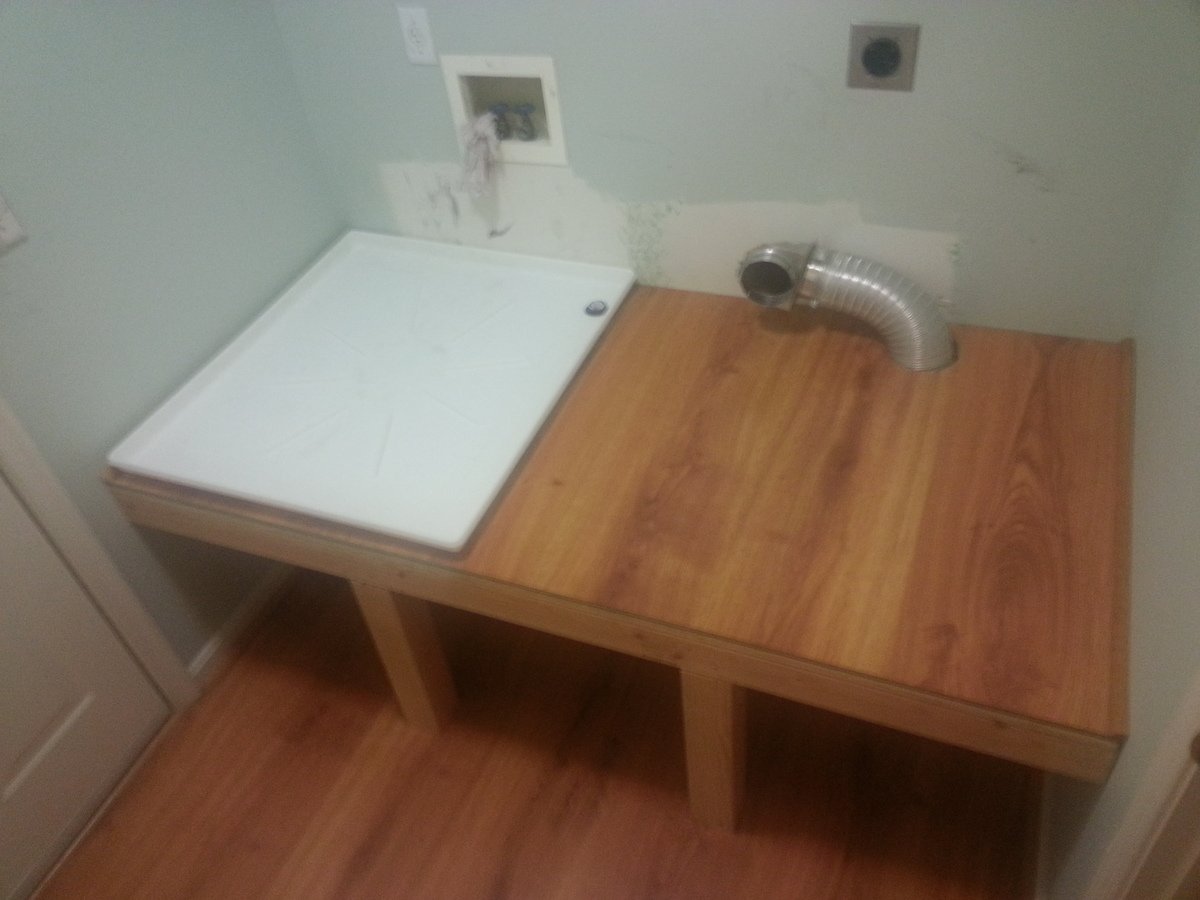
Pretty basic:  2x4's all around for the edge framing--back and sides fastened directly to the wall studs, and front 2x4 supported by two, notched 4x4 legs.  3/4" plywood for the subsurface, and 1/4" laminate faux-wood flooring on top (left over from reflooring, so it matches the floor below).  Bore holes for the washer pan drain and the dryer vent.  1" quarter-round molding on the sides, and 5.5" face piece flush with the top of the molding across the front (spare lauan I had looks perfect).  I also made a point of putting the machines on the platform before the face piece since it might have been in the way or damaged.

Anyone will tell you that it's best to at least sketch out what you want to do so you can minimize surprises, forgotten parts, etc.  I, of course, did virtually none of that, and made several course changes and corrections along the way.  For this project, I was lucky that I didn't need to backtrack at any point, and probably won't learn this lesson any time soon anyway.  However, you SHOULD.


TAKE-AWAYS
The main mistake I made was while gathering the platform dimensions for cutting the plywood.  It was only blind luck that kept me from having to do it more than once (and having to buy more than one 4x8 sheet).  I know that it's actually very unlikely that two adjacent walls are perfectly square, so I made a point to measure the width between the walls at the back and at the front--and, sure enough, found a 1/8" difference--wider at the front.  But when I measured and marked the plywood for cutting, I measured both distances from the precut edge, and then cut.  By doing this, I inadvertently assumed that one of the back corners was perfectly square. 

What I should have done was used a carpenter's square in each back corner to extend a square line from the back edge to the front, and then measured from the square lines to their respective side wall.  This would have accounted for neither back corner being square.

Fortunately, my mistake wasn't big enough to keep the plywood from fitting, but it was very, VERY close.


GIDDY
I honestly couldn't be happier with the finished project (or more smug).  We've raised the washer/dryer 9" higher than they were (24" off the floor), and we now have basket storage underneath all the way across.  I placed two 24" plastic cabinets on top, which still leaves room for the detergent right over the soap inlet on the washer.

And, most importantly, I got to use every powertool I own.  Kinda beats "the quick brown fox jumped over the lazy dog" thing, huh?
 

Estimated Cost
Most of my project made use of spare lumber and materials I've had on hand forever. The 4x8 sheet of plywood was about $30 at Home Depot.
Estimated Time Investment
Weekend Project (10-20 Hours)
Finish Used
Natural. No finishing, staining, or painting. Lauan has a natural stained oak coloring, so it was perfect for the facing. (A soft wood, Lauan--"lao-AHN", also sometimes called "Philippine Mahogany" simply for the darker color--used to be as readily available as pine, but I haven't seen it in stores for many years.)
Recommended Skill Level
Intermediate

Comments

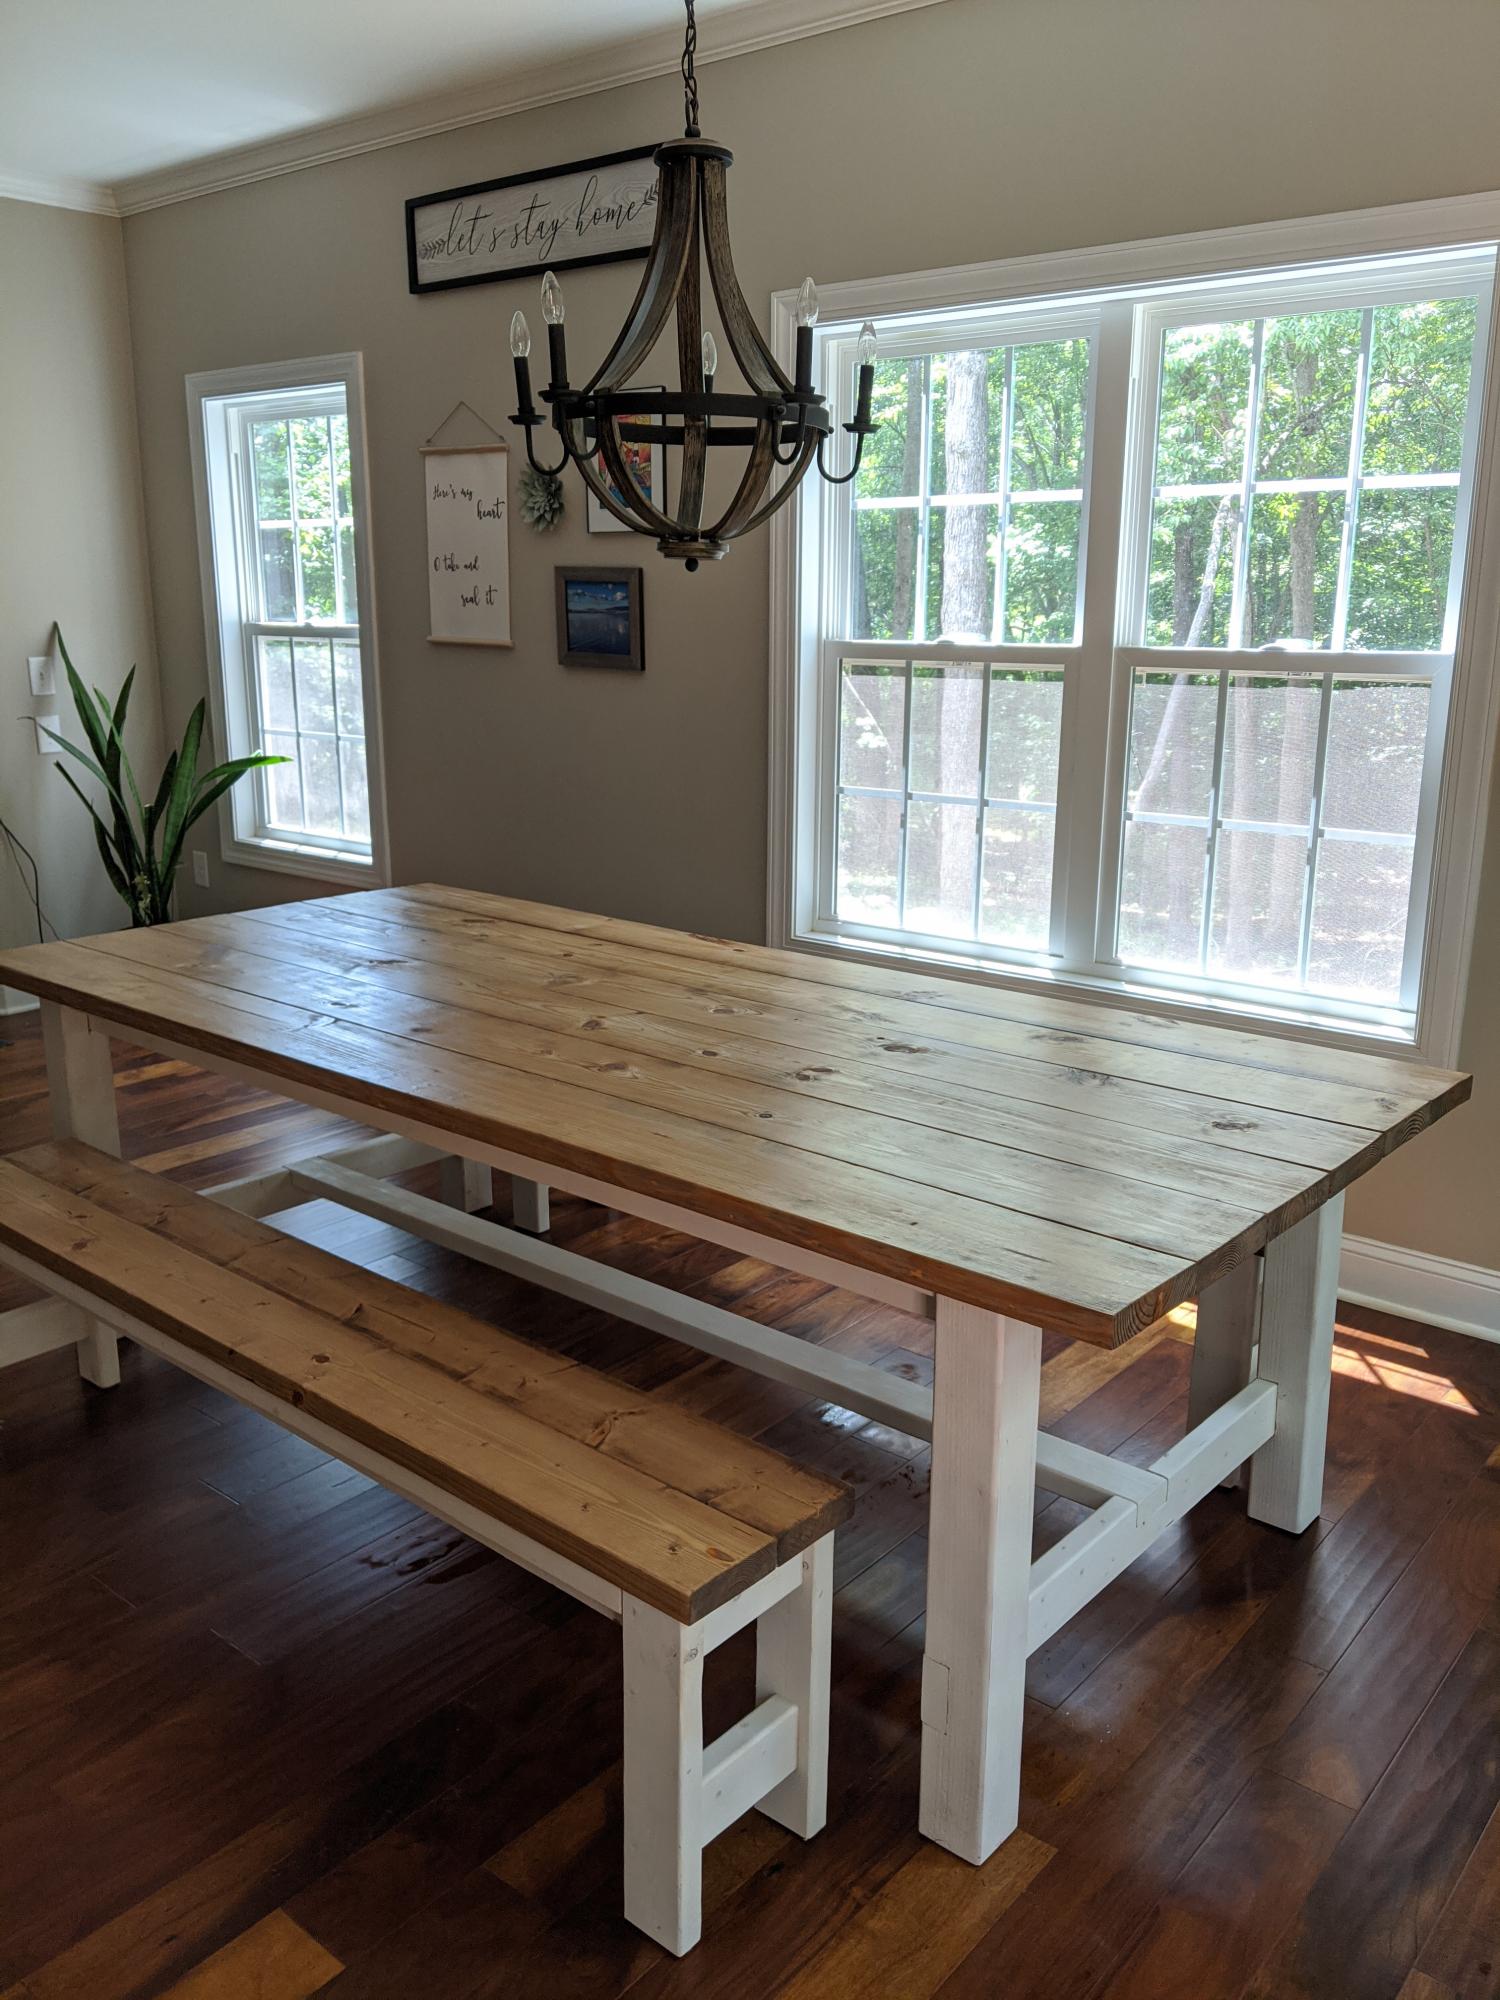
Farmhouse table

Submitted by Anonymous (not verified) on Thu, 06/18/2020 - 19:25

First table build! We modified the plans with no breadboard ends since we live with lots of humidity and wanted to allow the wood movement. We also used 4x4s for the legs. White chalk spray paint legs and custom mix of special walnut and weathered oak stains. We LOVE it!!

Estimated Cost
200
Estimated Time Investment
Weekend Project (10-20 Hours)

Swing and arbor

Weekend swing project

Recommended Skill Level
Beginner

Comments

Ana White

Tue, 05/07/2019 - 10:42

We don't currently have this plan available, although I'd be happy to draw it with the author's permission.

I have linked a few plans above that could be used to create this plan.  Just make sure you bury the arbor uprights underground on concrete pier posts or similar (like building a fence)

Chicken Run with Turkey House

Submitted by vendo on Wed, 10/13/2021 - 10:03

My daughter helped me build this enclosure. We used Ana's chicken run plan, but just made it taller so we could walk in easily. We added an overhang to store food and pellets under, for the supports we used Ana's easy shelves angle support plan, and finally we used the playhouse base plan for the base of turkeys house. All plans used are linked below. We ran the chicken wire out under the structure and still need to bring in some large rocks or pavers, but so far no issues with predators. Turkey was getting too big to fit in the smaller coop, so we decided to have fun with his house and used cedar fence pickets and some treated 2x4's, built a box and jig sawed the shape of a turkey. As you can see in the first photo the ladder for turkey wasn't big enough, all the other chickens were in his house, lol. So I beefed up the ladder and he happily can put himself up at night now:) Overall a super successful project, I wasn't sure what to do with the top and just at that point, the neighbor walked over and offered the metal, talk about a huge win and the perfect solution! We attached the run to the previous smaller structure and now they have so much more room and are laying like crazy:) Finally, I think this would make a great dog kennel as well...

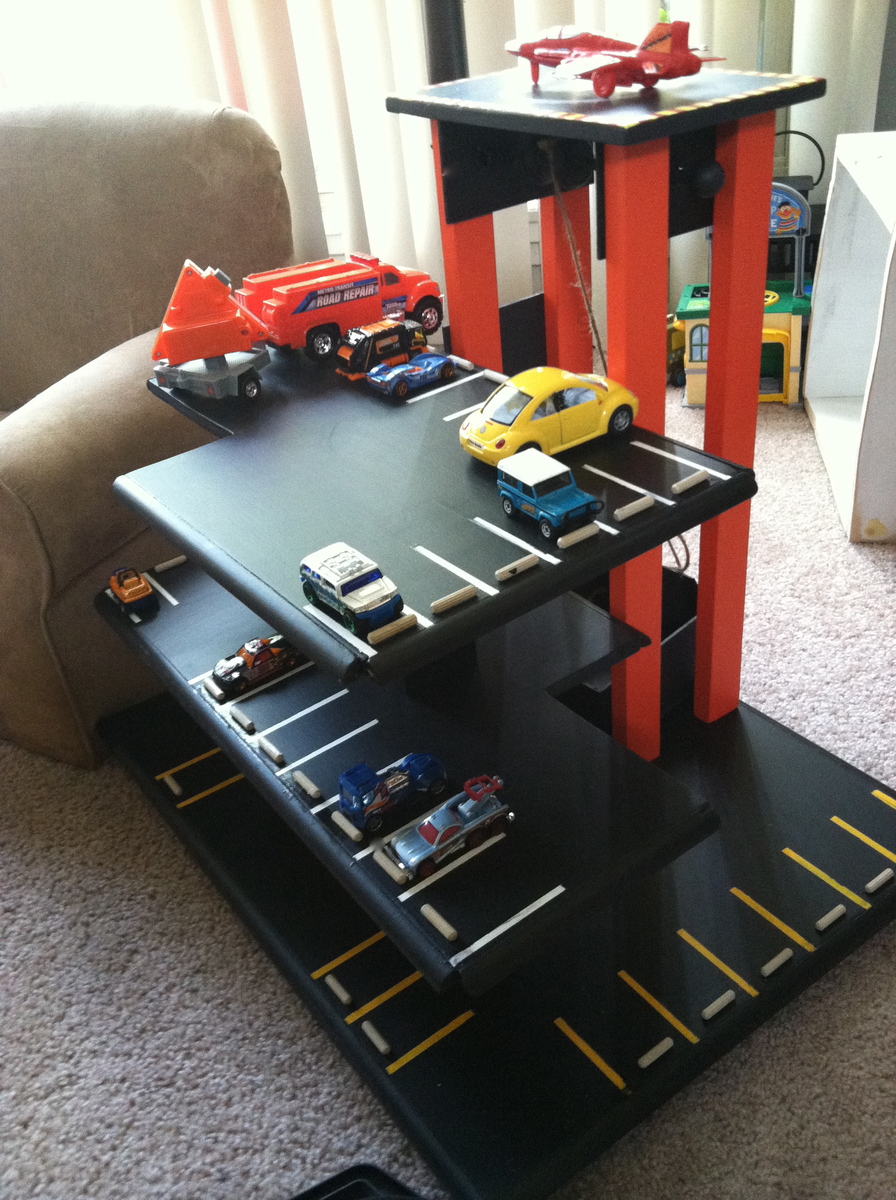
Wooden Play Parking Garage

Submitted by DMax2010 on Fri, 06/21/2013 - 14:23

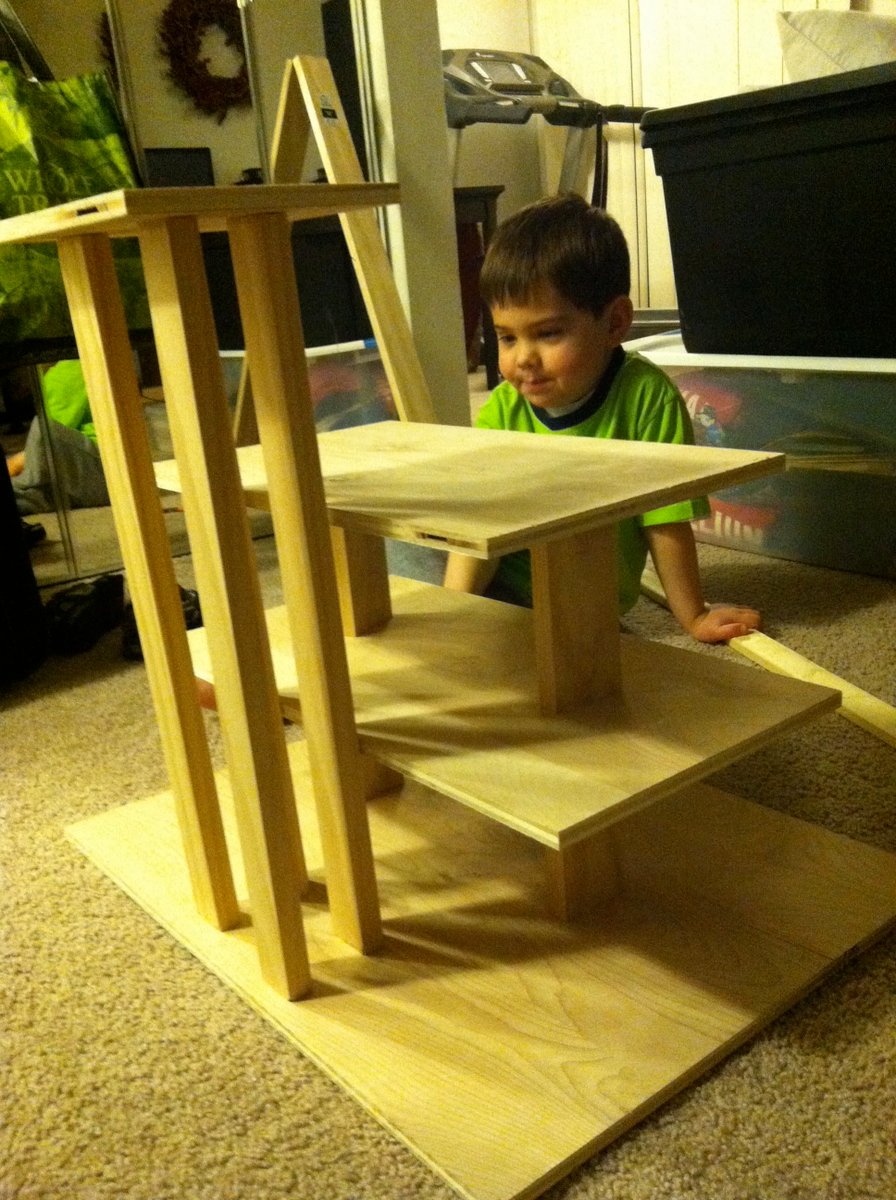
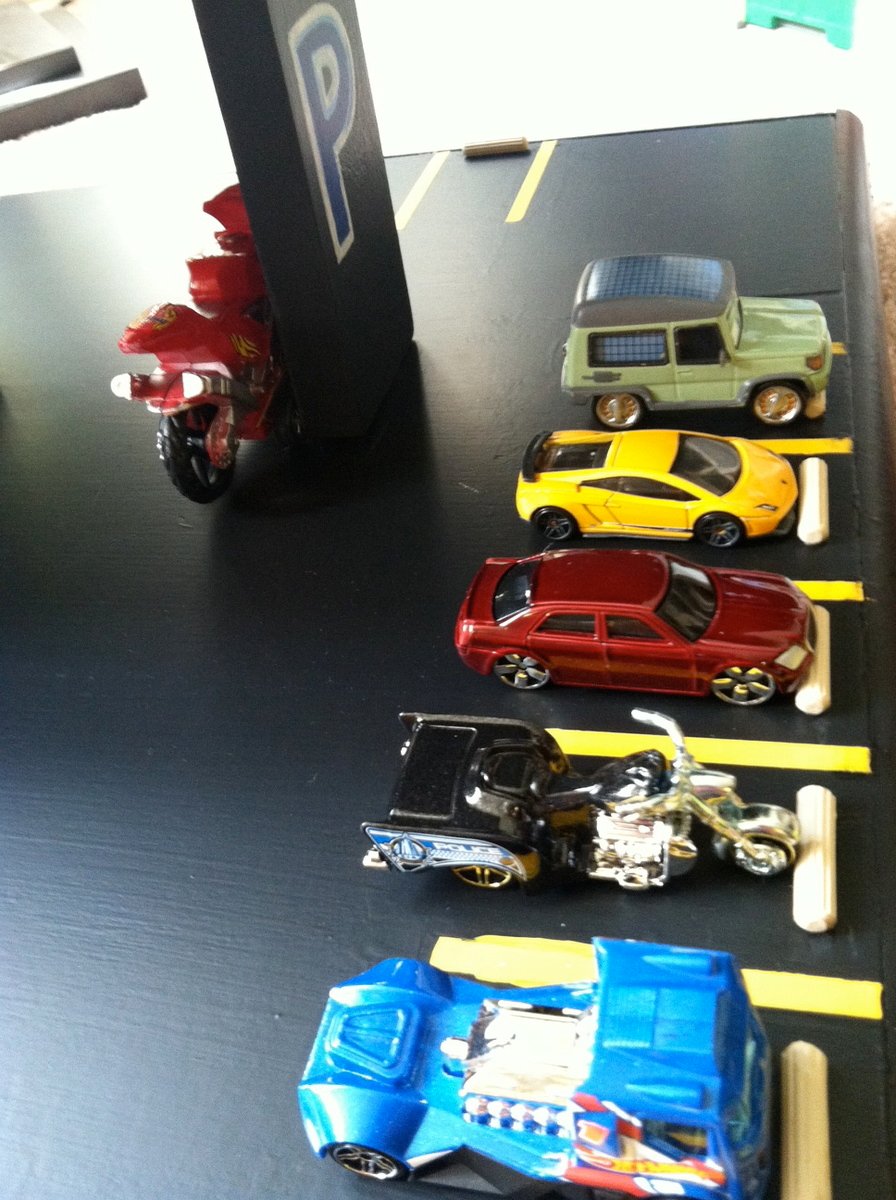
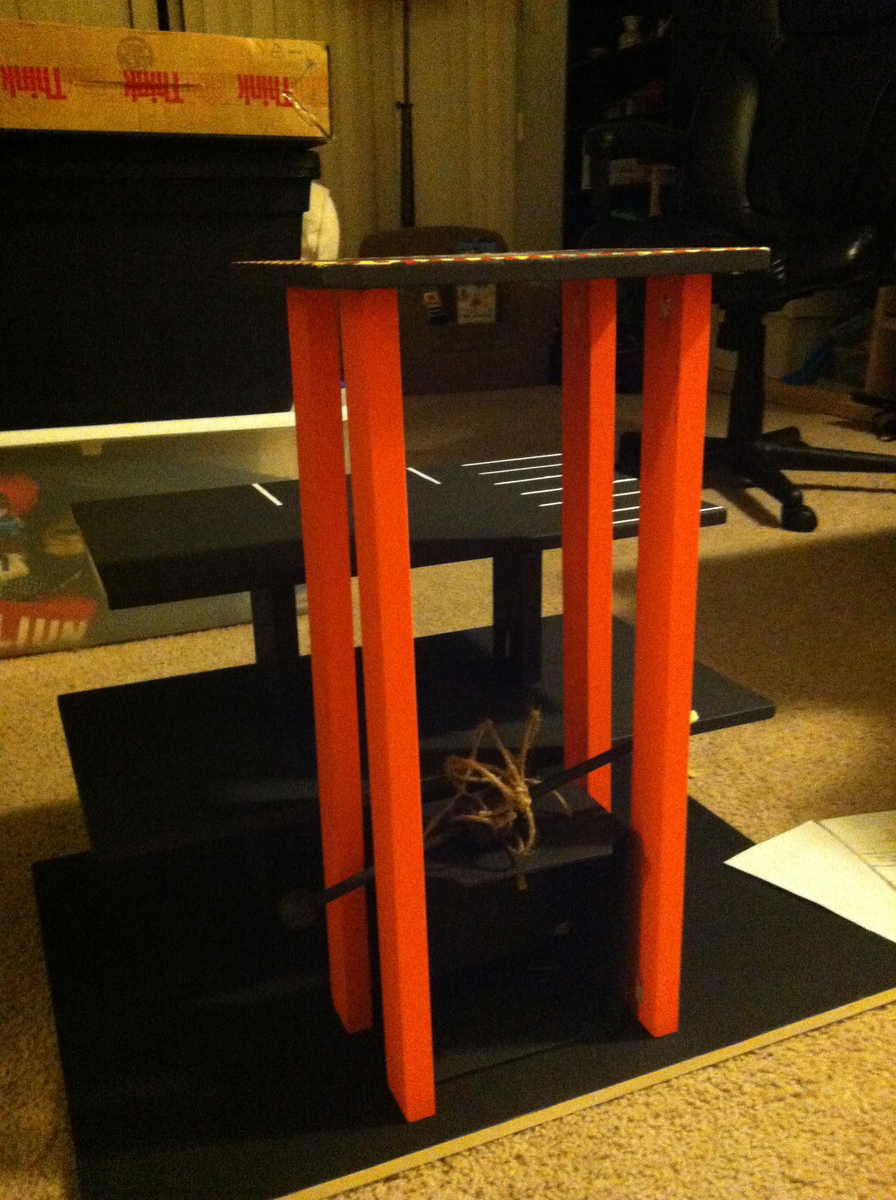
I was looking for a wooden parking garage plan for my little guy, but couldn't find one! I looked a bunch of the dollhouse plans for inspiration and found a wooden toy garage online that I based my plans on. I still need to add the ramps and a few more parking spots, but my son loves it! It has an elevator (need to refine it) and helicopter landing zone!

Estimated Time Investment
Weekend Project (10-20 Hours)
Finish Used
Chalkboard paint for parking levels, regular orange craft paint for the elevator
Recommended Skill Level
Beginner

Comments

DMax2010

Sat, 06/29/2013 - 09:53

My son loves little cars and parking garages, so it was fun to do.

terdickison

Mon, 07/01/2013 - 11:26

I love this! I want one. Better hide this screen before the kid sees it and gets some ideas :)

snoopy369

Tue, 02/25/2014 - 10:05

Hi, curious if you ever finished the project. I'm planning to do something similar next week and would love to see the finished project (and plans if you made them!)

Miter Saw Cart

Submitted by Nermell on Wed, 07/31/2013 - 16:51

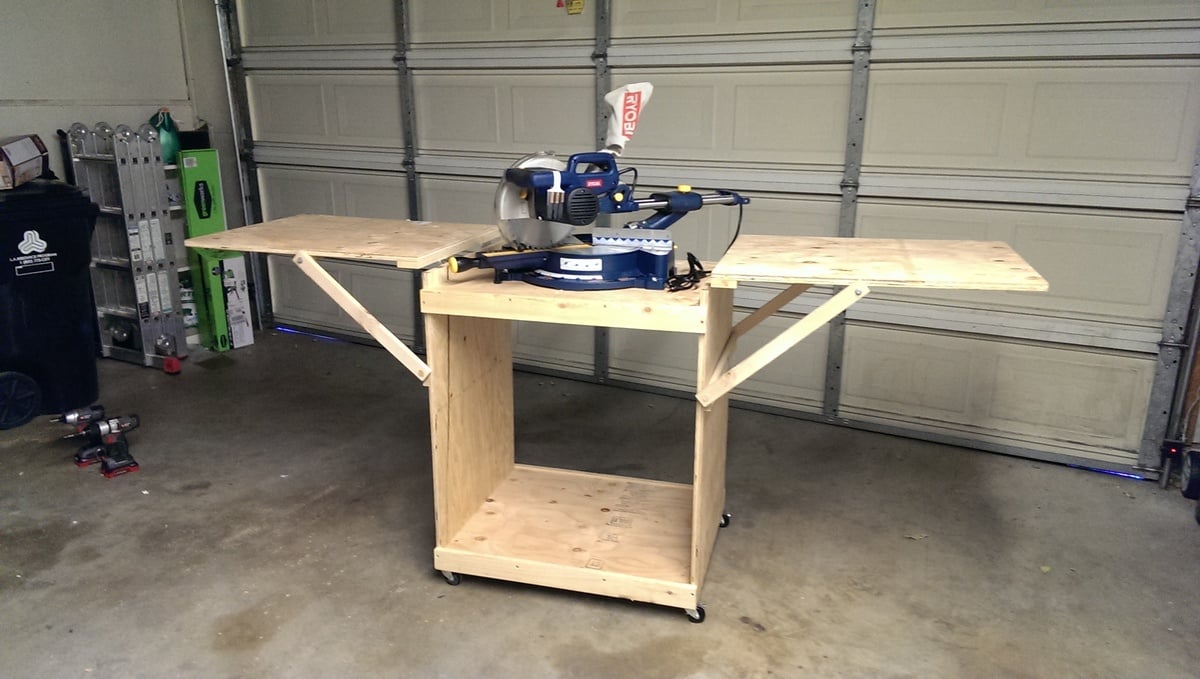
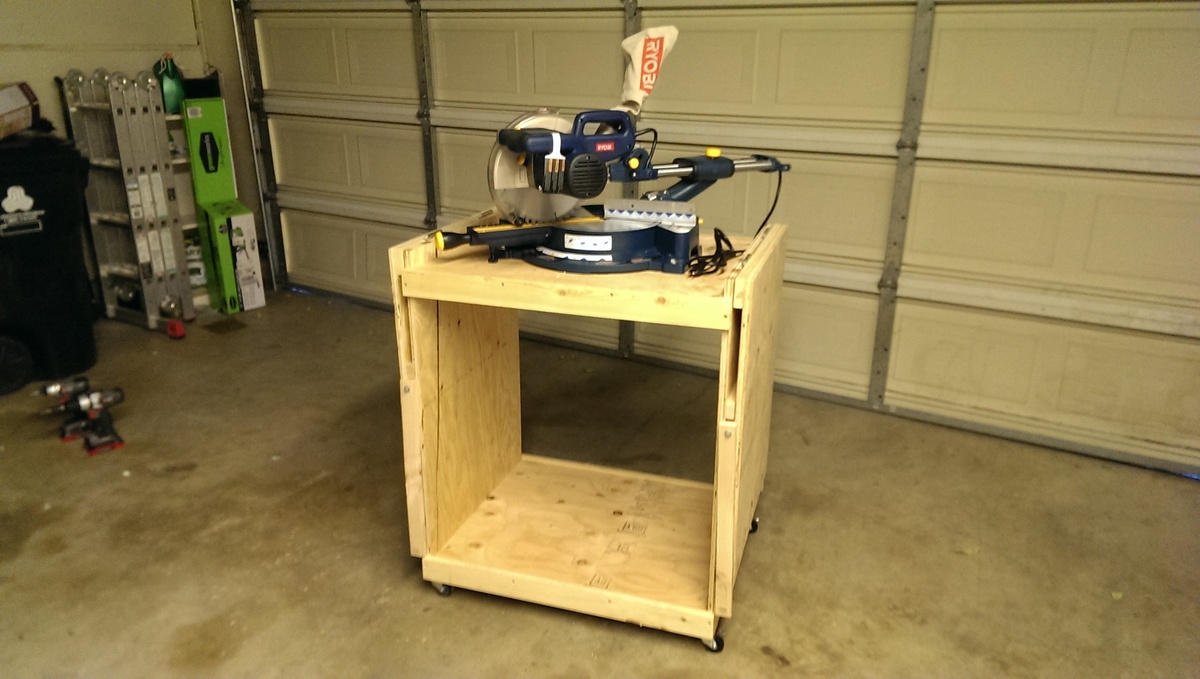
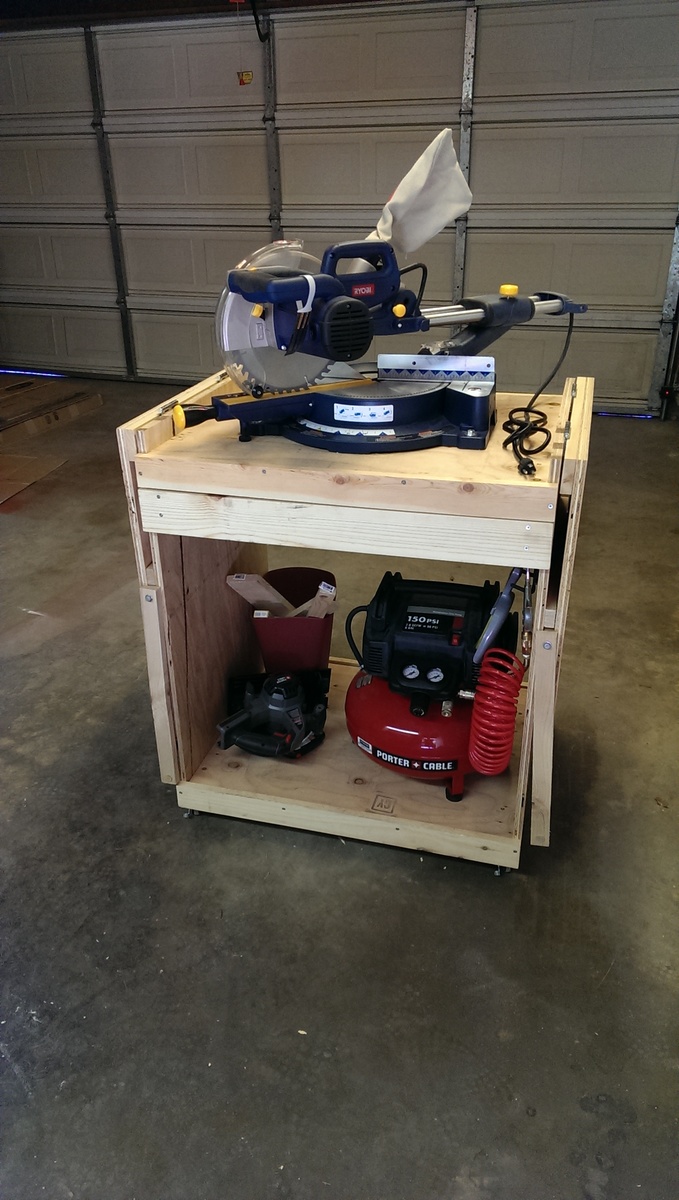
As a complete beginner in wood working (unless you count a year of woodshop over a decade ago), I decided that building a cart for the miter saw I just bought would be a great first project. So what did I do with that brand new miter saw? I left it in the box and made all of the cuts with a circular saw. Not sure what I was thinking there...
I mostly followed the excellent plan provided here but used wooden arms to prop up the wings in order to save on cost. I got the idea from the folding sling chair plan. It took quite a few screw ups and adjustments of the lower support bar before getting one of the wings level but I got it eventually.

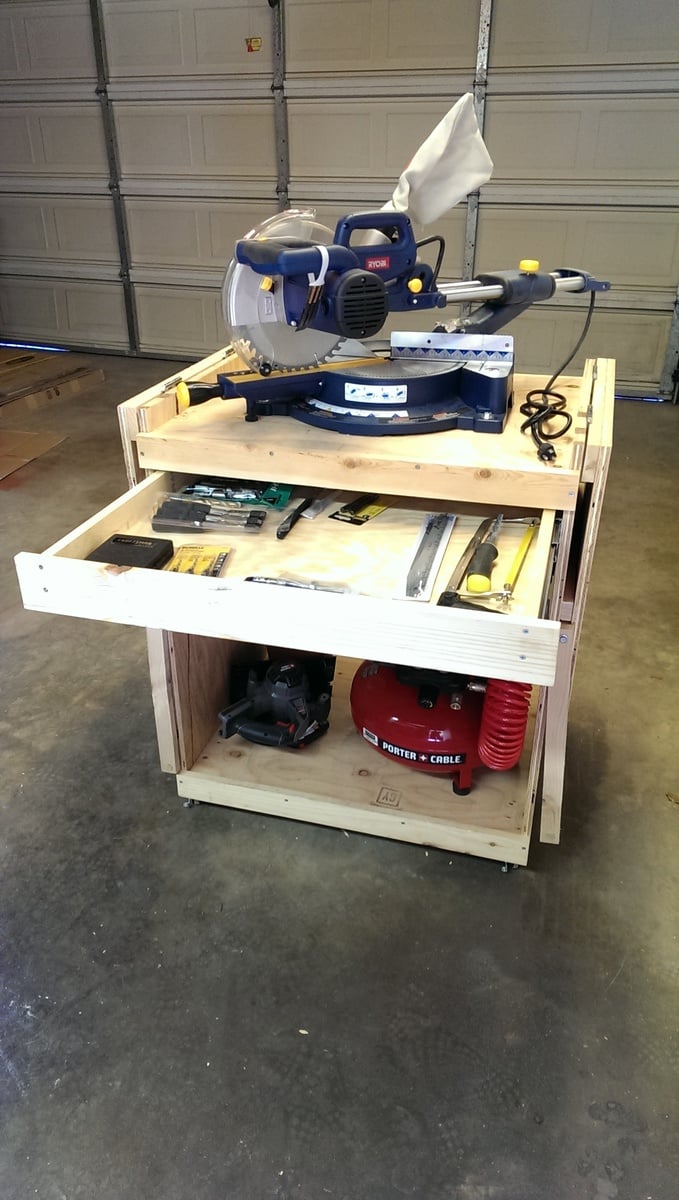
Update 8/20/13: The miter saw has been a joy to use with the cart and the big flip up wings provide a ton of really convenient work space in addition to stabilizing 8 ft boards for cutting. I added a sliding drawer and some utility hooks for additional storage.

Built from Plan(s)
Estimated Cost
$70-80
Estimated Time Investment
Weekend Project (10-20 Hours)
Finish Used
none
Recommended Skill Level
Starter Project

Comments

davidmauer15

Thu, 08/01/2013 - 08:10

I originally just had a 2x2 and two blocks to hold up the wings on the cart. They kept falling out, so I replaced them with hinged arms, which were a pain to fit and install, but they work well. Your approach has the same advantage of hinging the support arms: the wood can't fall out and it looks way simpler to install than my system.

One hint if you try Nermell's approach: Flip the cart upside down when you fit and install the support arms. I did all kinds of complex sketches and measurements, then realized it was just faster to lean the support bracket at roughly 45 degrees, then I installed the two block (one on the side, one on the wing) to hold the bracket in place. Flip the cart over, and your wing will sit at a perfect 90 degrees to the sides of the miter saw cart.

John Deere Tractor Bunk Bed

Submitted by Veronica P on Sun, 07/06/2014 - 16:43

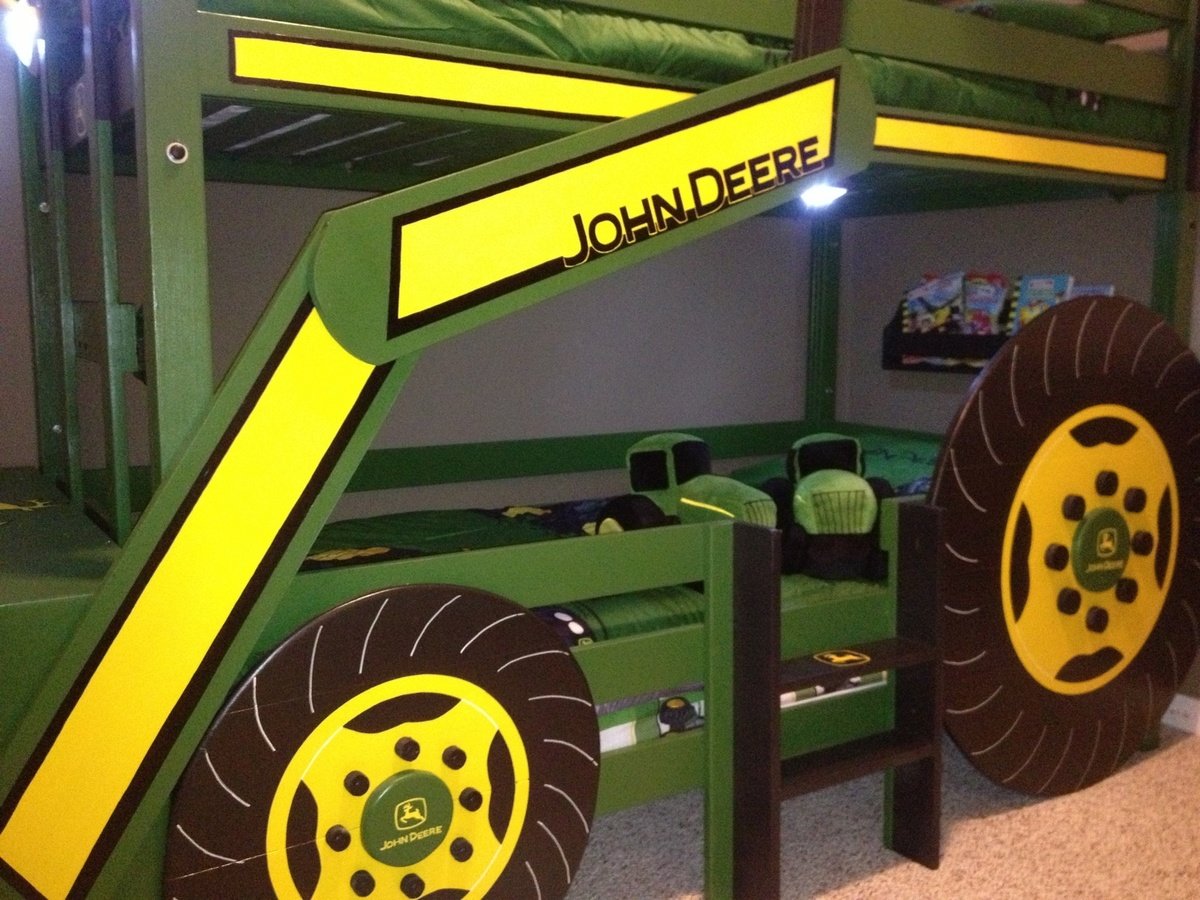
With another baby boy arriving in August, my one and three year olds are moving to a "big boy" room. My oldest decided he wanted a bunk bed and as they both are obsessed with tractors, when I saw the "John Deere Tractor Bunk Bed" plan, I was sold.

We would be needing a twin sized bunk bed though not a toddler. I used the classic bunk bed plans and simply modified them to suit our needs. I moved the ladder to the front, added a rail on the bottom bunk and added a small ladder to the side for my one year old to climb into the bottom bunk.

Once the the frame of the bed was complete, I added the tractor accessories. A couple of storage cubby shelves with fabric baskets for toy tractors which act as stairs up to the ladder and make the tractor bucket at the front. Also, the wheels which are made from joined 1x6s as I find plywood hard to sand and paint to the quality of finish I like. A cab & roof from 1x4s framed together. A side mirror that I decoupaged a picture of another tractor on. I used push lights for the headlights as well as a reading light above each bed (they're on timers so they'll turn themselves off). A steering wheel (play equipment access from toys r us). Also, I built and mounted by the head of both beds a "flat wall book holder" so they would have somewhere to store a few books.

My boys and I are fairly new to building so I spent a lot of time planning and measuring to ensure it would all come together in the end. It paid off because it all went smoothly (even with "help" from my boys). It's not perfect but they're very happy with the result. We also built a John Deere themed "Just my size closet" and even finished with over a month to spare before the new baby arrives! :)

Just want to say a quick thank you to Ana both for the amazing plans and also the inspiration to take on these projects. The time spent with my boys building as well as the resulting treasures are priceless and I would have never realized what we were capable of had I not stumbled upon your website and been so inspired by you and everything you've accomplished. Thank you!

Estimated Cost
$550.00
Estimated Time Investment
Week Long Project (20 Hours or More)
Finish Used
John Deere Green paint (home depot was able to color match a toy tractor), marigold yellow and black and polyurethane.
Recommended Skill Level
Beginner

Comments

Ana White Admin

Mon, 07/07/2014 - 12:13

I love this, such a great build and eveything came together perfectly! Thanks for sharing!

spiceylg

Thu, 07/10/2014 - 19:12

What an incredible build! I agree with Thriftygirl, I love all of the details!

carongirls

Tue, 09/30/2014 - 05:35

I am in the process of copying your bed right now. Just mine will be a toddler loft bed. Thank you for the ideas!

busymomof3

Thu, 10/09/2014 - 14:12

I am new to this and I was wondering were to find the measurements for the twin size bed?  I would love to make this for my boys!!

Veronica P

Mon, 11/03/2014 - 07:48

Sorry for the slow response to those requesting plans. For main structure of the bunk bed, I used Ana's "Classic Bunk Bed" plans. For all of the add-ons, I made up my own plans. I'm pretty low tech so unfortunately they're just pencil & paper plans but I'd be happy to scan and email them to you if you're interested. Just message me and I'll send them your way. :)

MartyC

Wed, 01/28/2015 - 14:08

Hi Veronica, Well done fantastic job! Two little men who want to move in together because of a new addition on the way. Their request though is a John Deere Bunk Bed! would be grateful if you could forward on your plans if you have time, Kindest regards.

tkdiver1

Tue, 05/26/2015 - 18:13

These are just what my grandsons need. I would love your plans.

Thank you

tkdiver1

Tue, 05/26/2015 - 18:14

These are just what my grandsons need. I would love your plans.

Thank you

Mimi64

Sun, 09/06/2015 - 10:06

Dear Veronica,

Our grandson, 6 years old, will absolutely adore this bed.  He loved riding on Grandpa's real JD tractor.  Please send me your plans for the attachments.  They are just darling and I could not do any better.  Thanks for your generosity!

bmeche

Fri, 09/13/2019 - 21:11

Hi Veronica. My 3 year old just loves the tractor bunk bed. I was wondering if you would mind sending me the plans you have. It would be greatly appreciated. My email is [email protected]   

Thanks in advance 

MyMaw

Wed, 10/16/2019 - 17:56

If you're still sharing, we would love a copy of your add-ons plans. 

Thanks,

MyMaw and PawPaw

Veronica P

Tue, 12/16/2014 - 07:21

I just emailed those plans. There should be nine attachments. Please let me know if you don't receive any of them.

cnejones

Thu, 12/18/2014 - 21:51

Could you please email me the plans for this project my son would love this

Veronica P

Tue, 01/06/2015 - 08:21

Hello all. I've tried emailing plans to all those who've requested them. I had some trouble attaching the files as they were large so if you didn't receive them, please let me know and I can resend. Thanks

Alwardt2708

Tue, 01/06/2015 - 11:53

Hi Veronica. I did not receive an email. Woul you have time to try again? If you email me your address I can send you my fax number if that's easier too. Thank you so much! I can not tell you how much I appreciate your dedication to this! [email protected]

Daybed with Storage Trundle

Submitted by Crafty-Mom on Sat, 01/27/2018 - 10:38

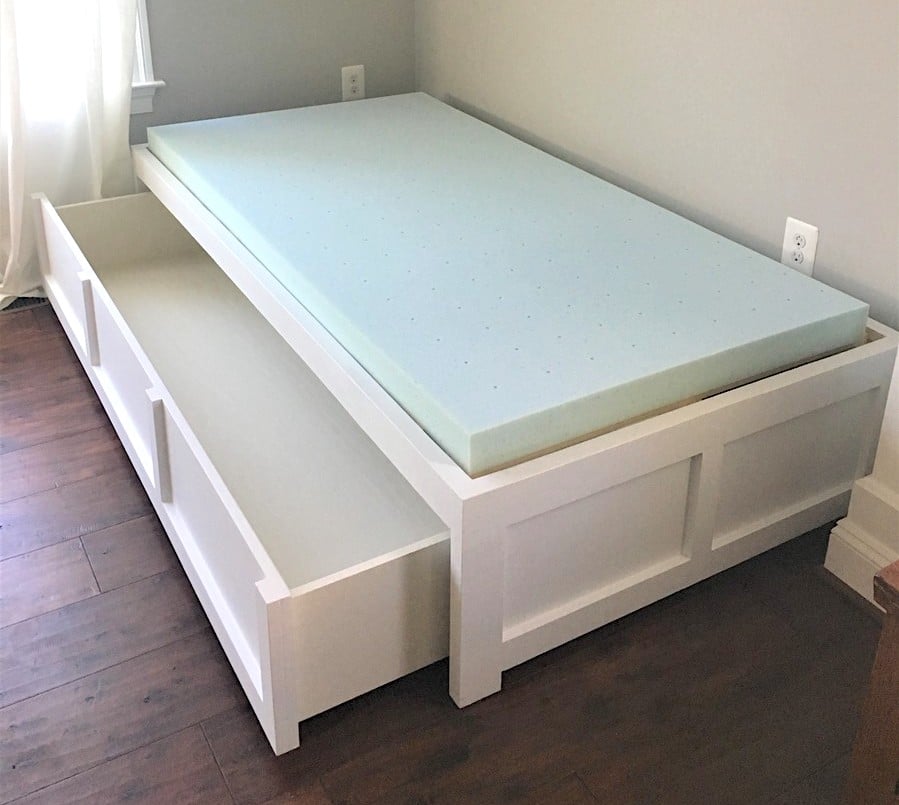
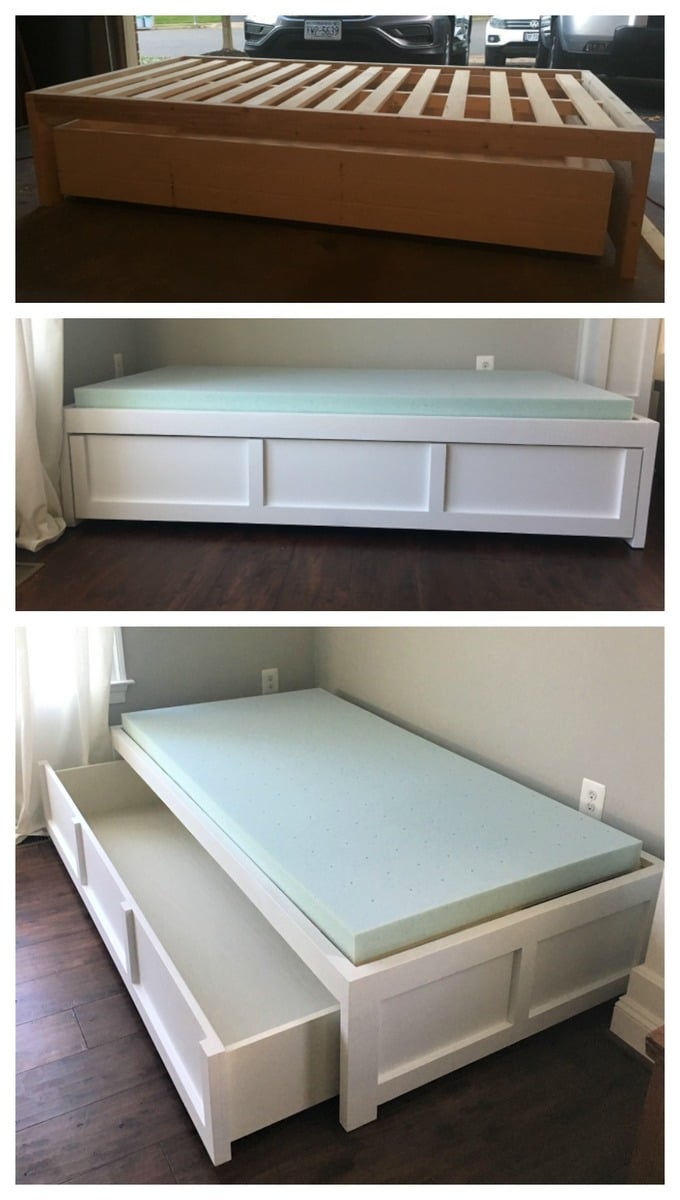
This was my first project from Ana's website and I'm hooked! I'm a beginner, but thank goodness for my Dad's help because I have a lot of learning to do!

I wanted the drawer to be 1 drawer instead of 3. I feel like it looks cleaner (without having to adjust 3 drawers constantly to make it look good when you push them in). I was thinking the bed could actually be used as a trundle bed in the future too! I use this to store toys right now and it is Awesome!

I increased the bed size to fit a twin mattress and increased the height of the bed slightly so that the drawer would be a little bit deeper. We also added a back to the bed and carried around the trim to make all sides look the same. We added a bumper to the back and sides of the inside of the bed so the drawer is easy to push in and fits in snug. Finally we reinforced the bottom of the drawer with more 1x4 boards so that if a child does sleep in it, it would be more sturdy. I now have kids come over and jump into the drawer (literally) and I'm glad we reinforced it.

The changes we made did add to the cost and our time (as well as being newbies), but I think it's worth it and the bed turned out beautiful!

Estimated Cost
$180
Estimated Time Investment
Weekend Project (10-20 Hours)
Finish Used
Behr Marquee (I'll have to find the name of the white color we used). We almost went with chalk paint, but after talking to the HD guy, he talked me into this paint and I'm glad we used it! So much cheaper and turned out beautiful.
Recommended Skill Level
Beginner

Comments

Nisssc

Mon, 10/12/2020 - 07:51

This looks great! Any suggestion if I want cubbies instead of a trundle? Also, cubbies only on side as bed would be against the wall. Thanks for the inspiration!
Sandy

Cedar Garden Shed

We needed a way to get all of the lawn & garden stuff out of our garage and organized. I found Ana's plans for the Small Cedar Shed & adjusted them to fit our space. We used 2x4s as our studs & added front walls on the sides. Our shed measures 9.5'x30". We had a concrete slab poured for our foundation. We are experienced DIYer's but had never taken on a project of this scale from scratch. This project was much easier than I was anticipating, and we were able to complete it in one weekend! Similar shed kits were way more expensive and not the size that we were looking for. Thank you so much for the inspiration!

Built from Plan(s)

Comments

Seasonal And Holiday

DIY Bar Cabinet

Submitted by Anonymous (not verified) on Mon, 02/24/2020 - 16:27

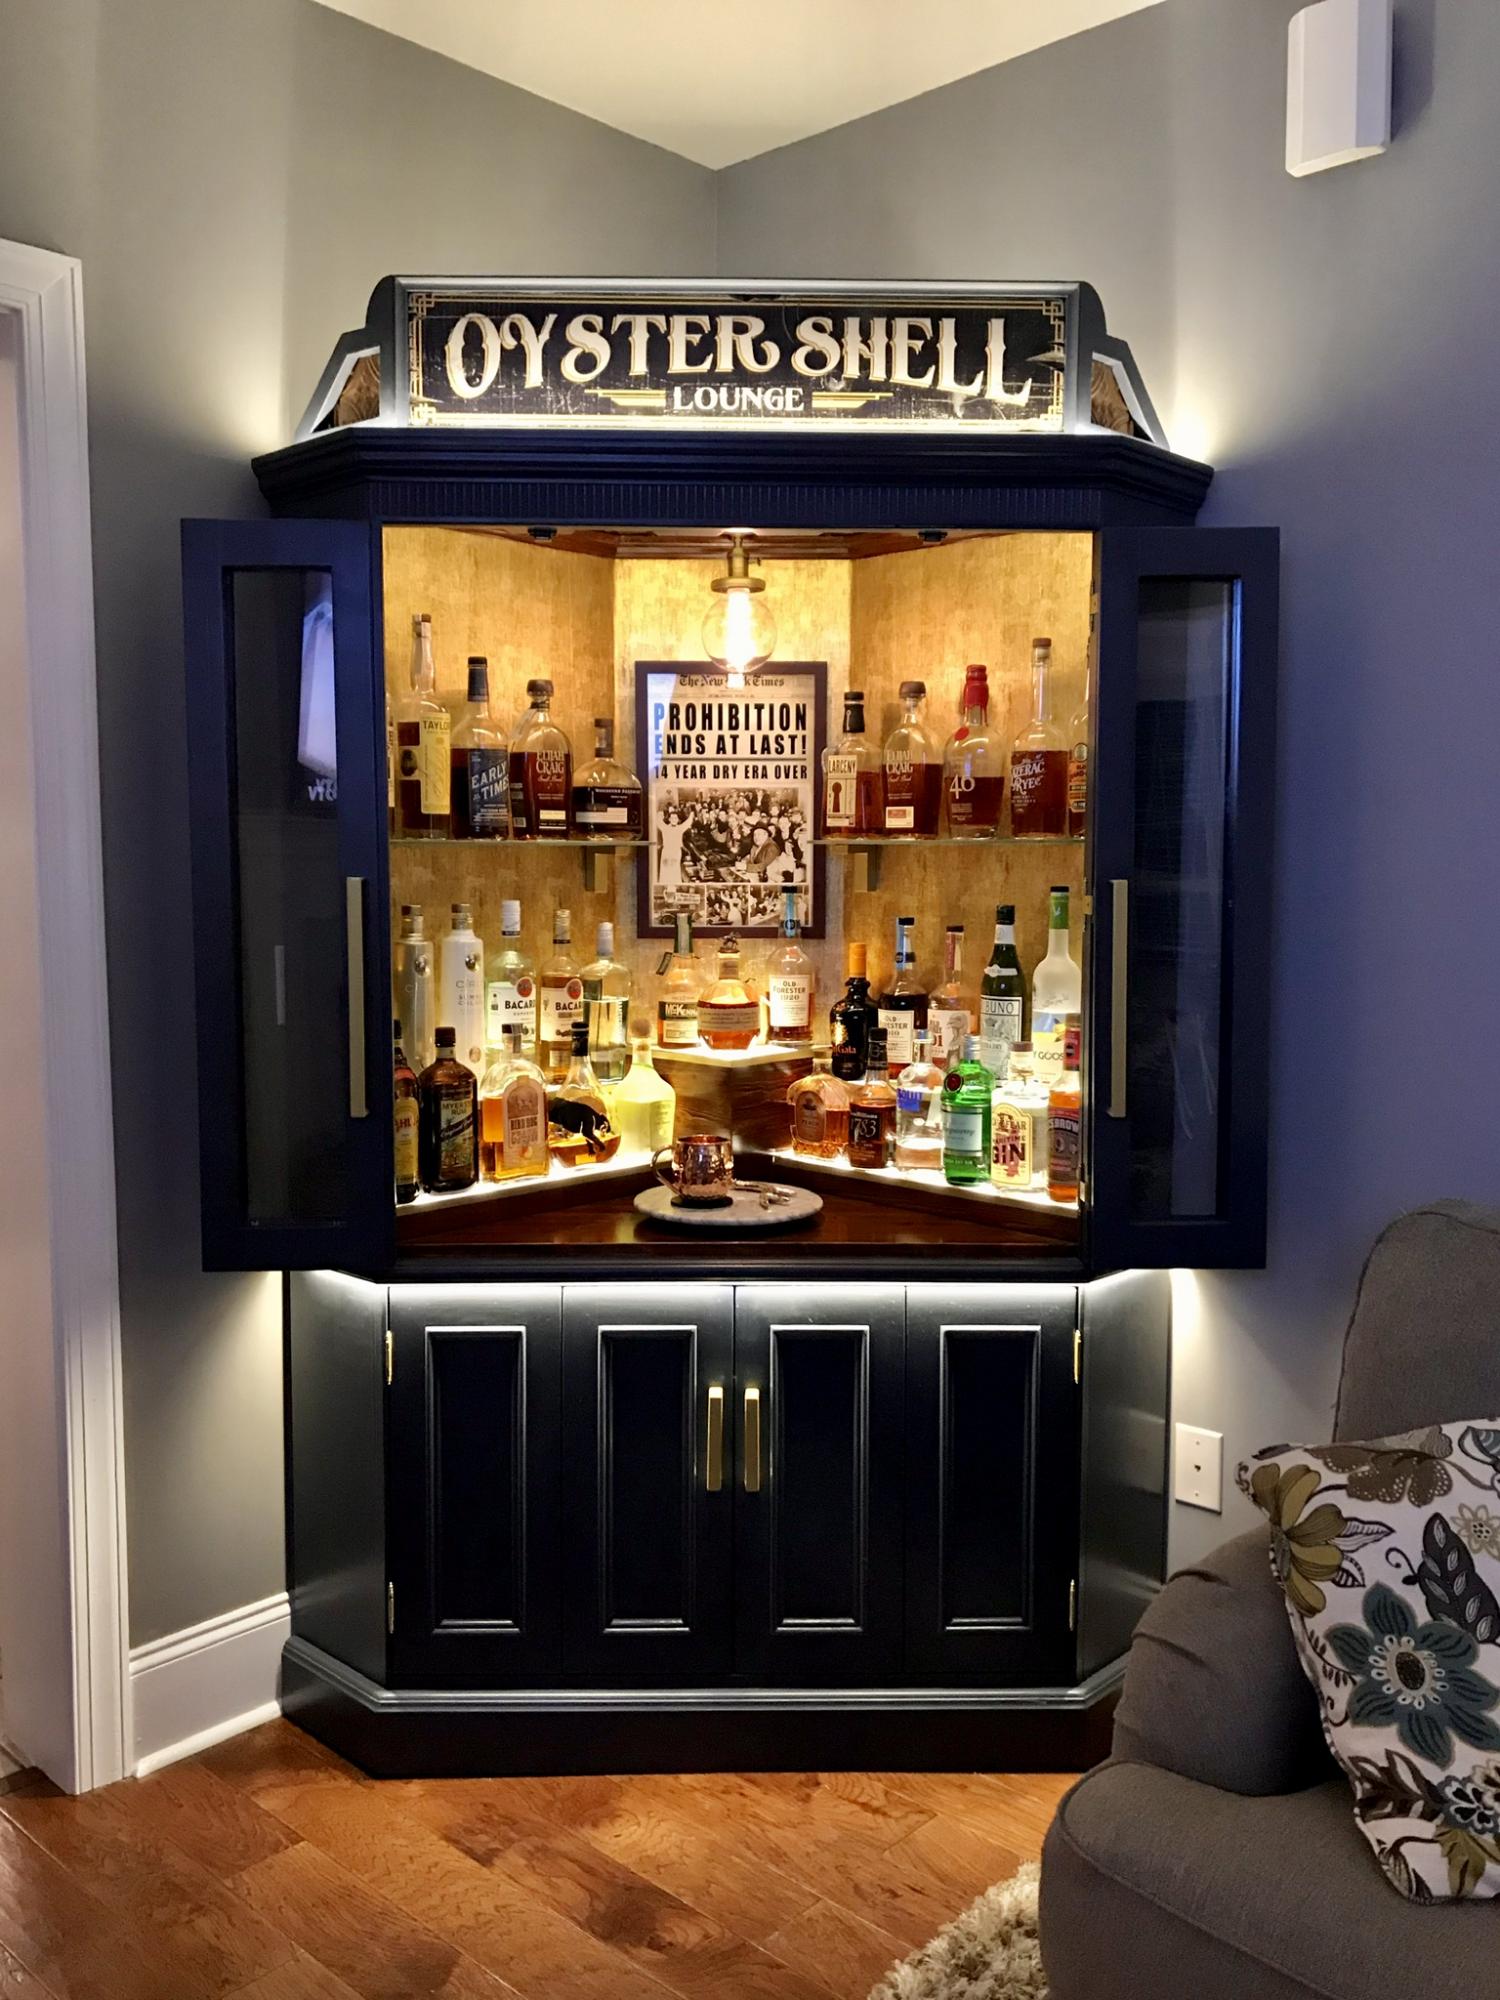
I bought this tv corner cabinet for $40. I spent many hours turning into my perfect bar cabinet. I built a custom lighted liquor display. I have posted photos of the transformation.

Estimated Cost
$1000
Estimated Time Investment
Week Long Project (20 Hours or More)
Finish Used
Benjamin Moore- hale navy
Recommended Skill Level
Intermediate

Comments

frendlygrl

Tue, 07/06/2021 - 19:04

So this is not your project? Because there isn't much information or a before and after picture. This gave me an idea for our home.

Play Deck/Fort

Submitted by seeca13 on Sun, 06/01/2014 - 10:06

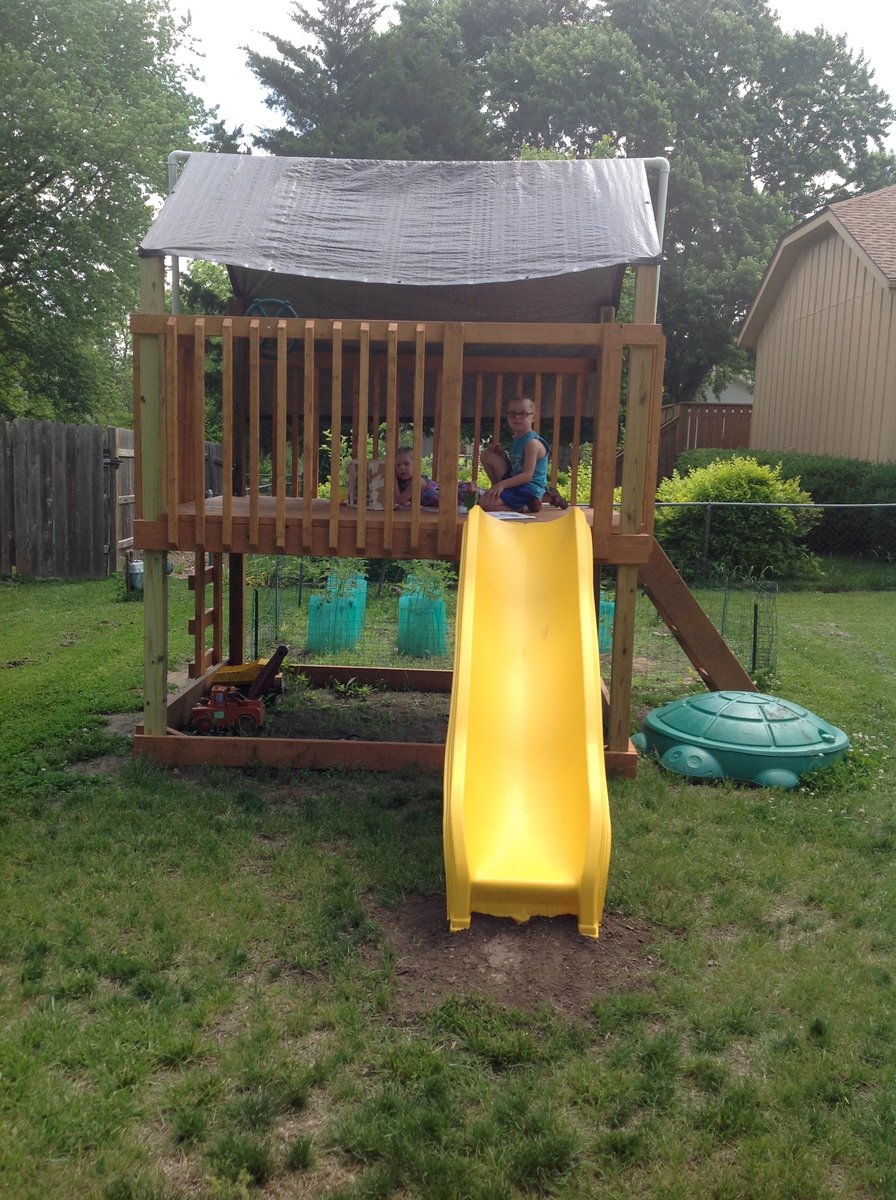
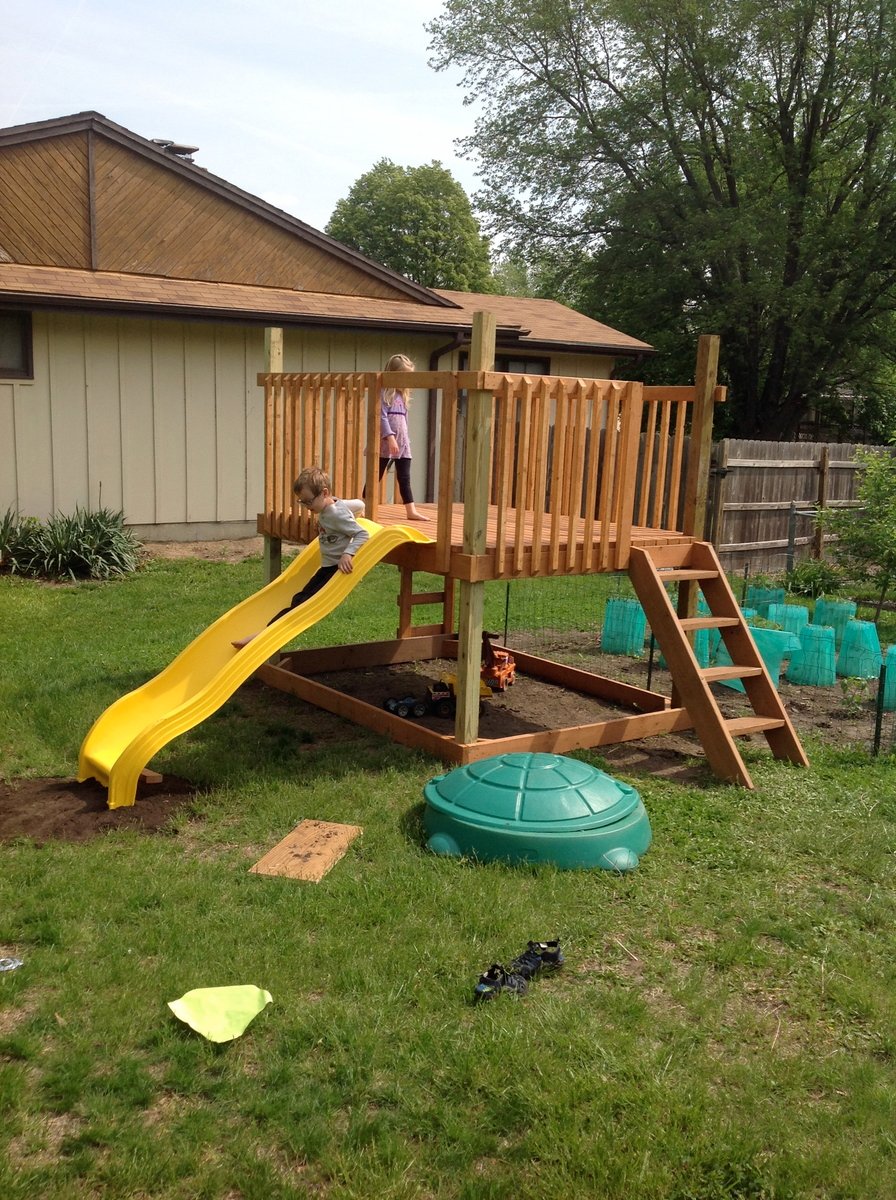
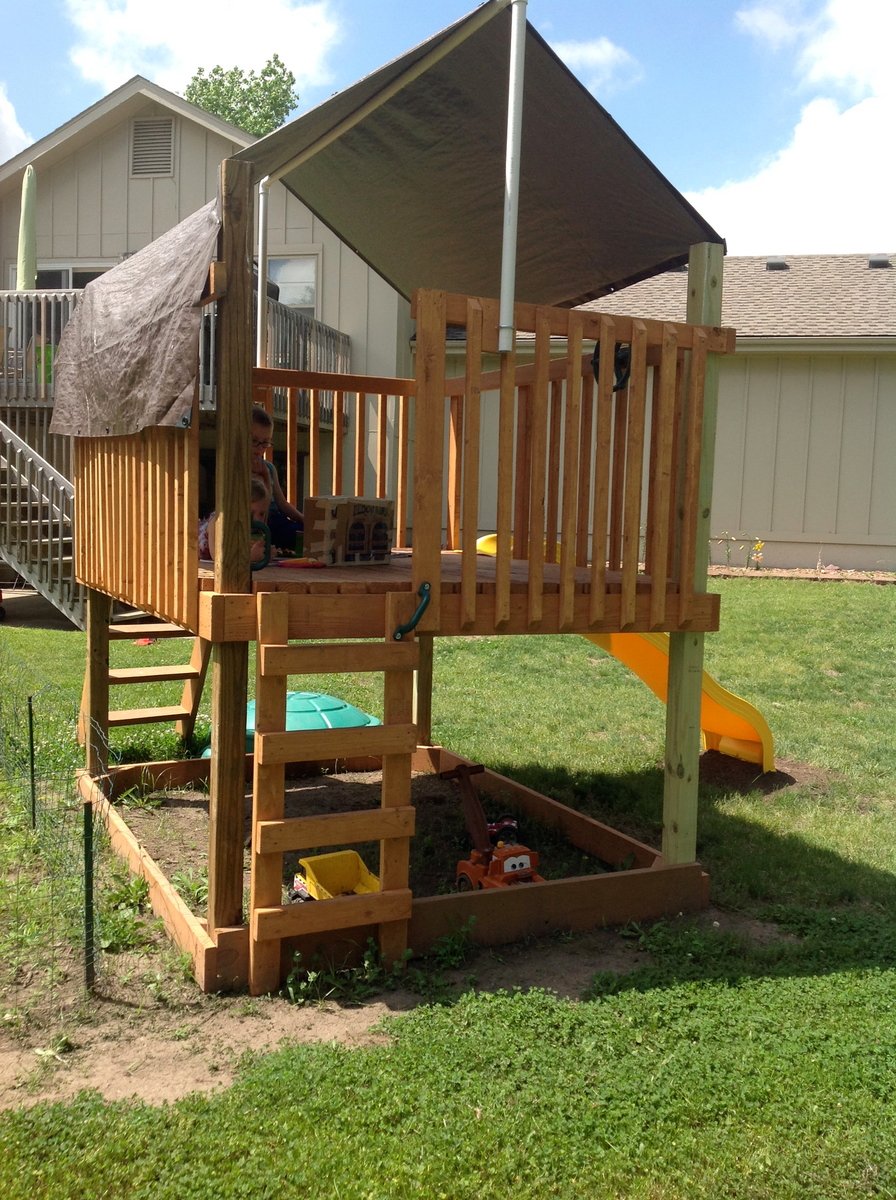
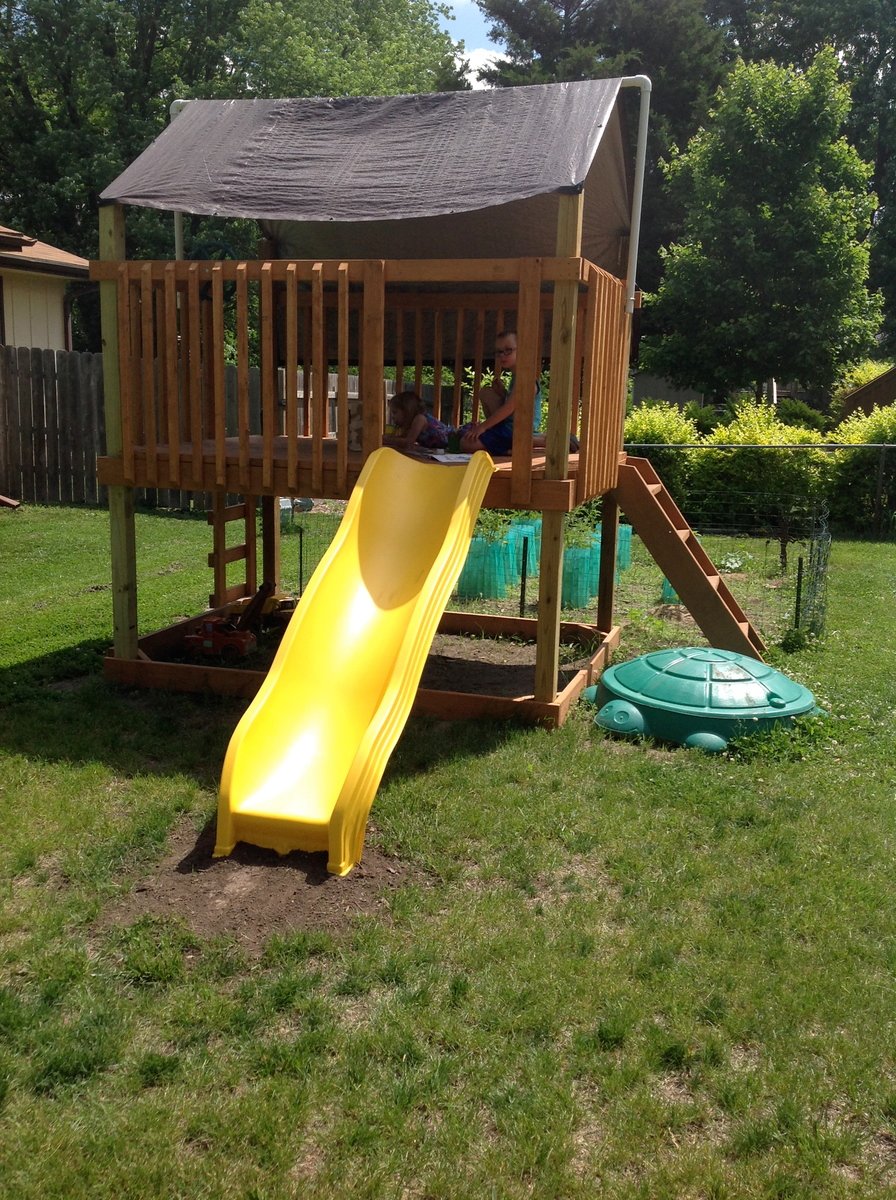
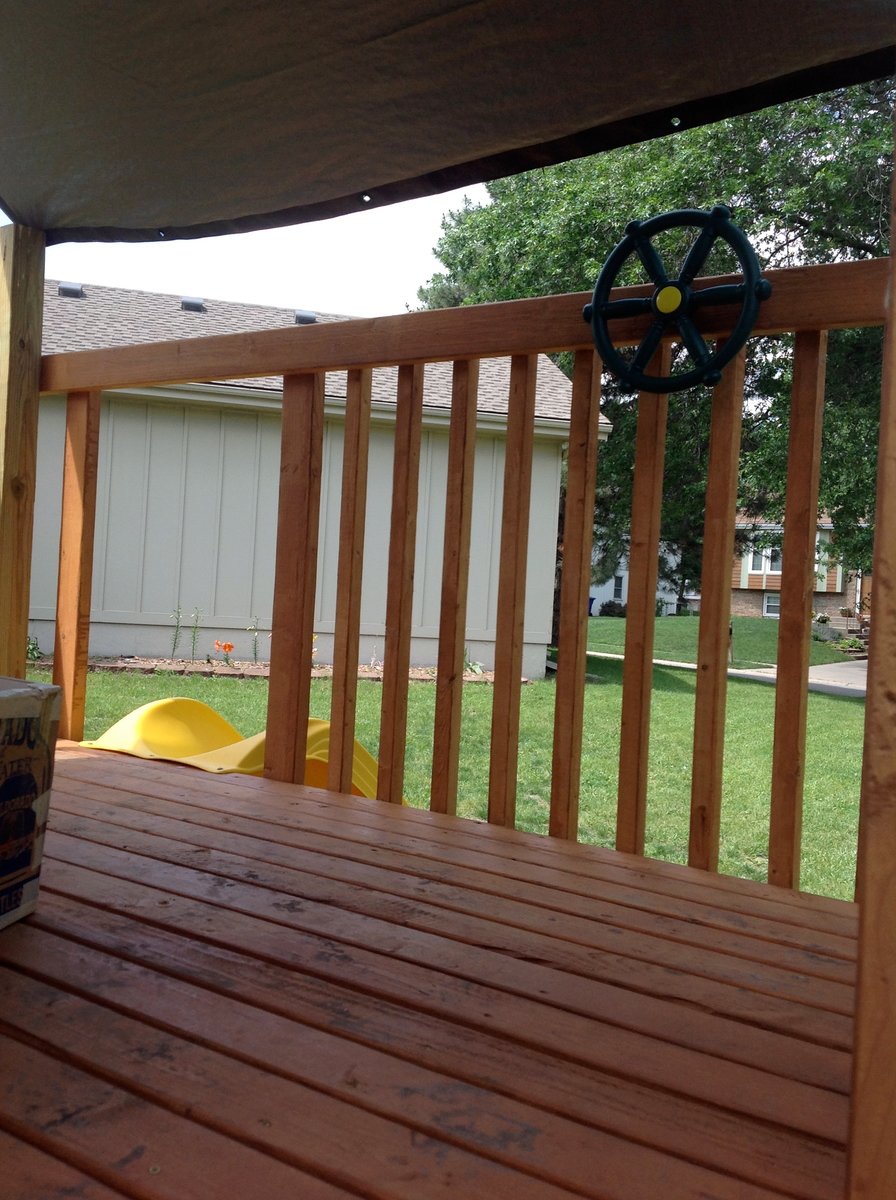
I wanted to build a structure for the kids to play in, but not include a playhouse. I used the playhouse deck design and made it slightly smaller (6 feet by 8 feet). The "roof" is removable to provide shade when it's sunny. It's just PVC and a tarp - pretty simple, but it does the job. I used treated posts and untreated lumber for the rest of it. I painted everything in my garage before assembling it. Once all of the wood at been painted, but came together pretty quickly!

Estimated Cost
$300 (including screws and paint)
Estimated Time Investment
Weekend Project (10-20 Hours)
Finish Used
Thompsons deck stain
Recommended Skill Level
Intermediate

Daughters blue Playhouse

Submitted by rysos81 on Thu, 07/23/2020 - 08:55

I used the basic framing plan for the project, but extended roof overhangs, added engineered siding / trim and cedar shake roofing. I put 2x4 bracing on for the platform.

Estimated Time Investment
Week Long Project (20 Hours or More)
Recommended Skill Level
Intermediate
Seasonal And Holiday

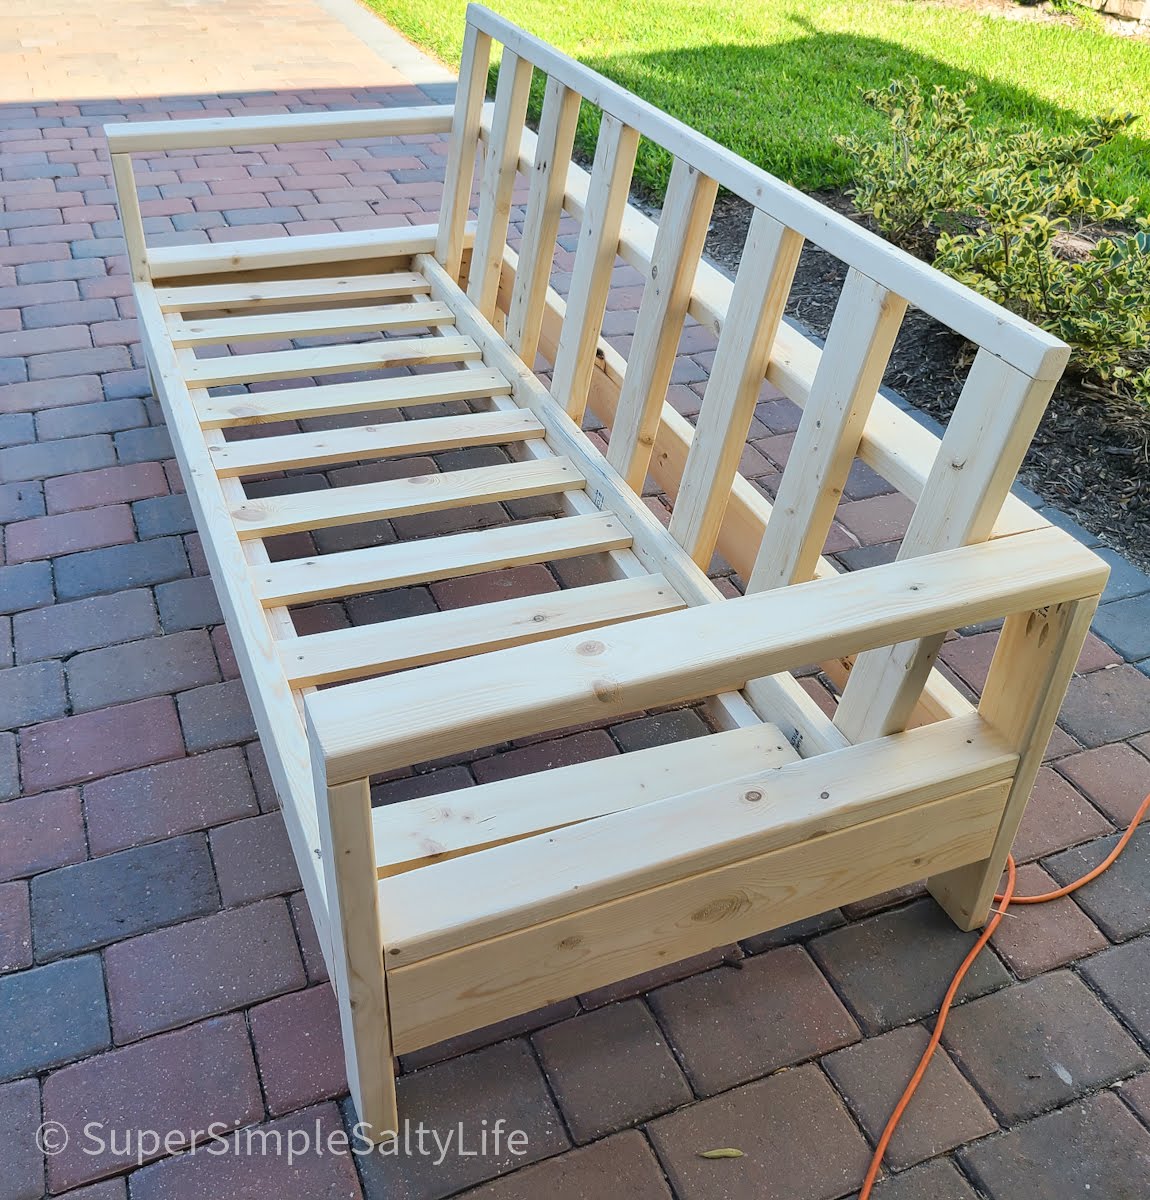
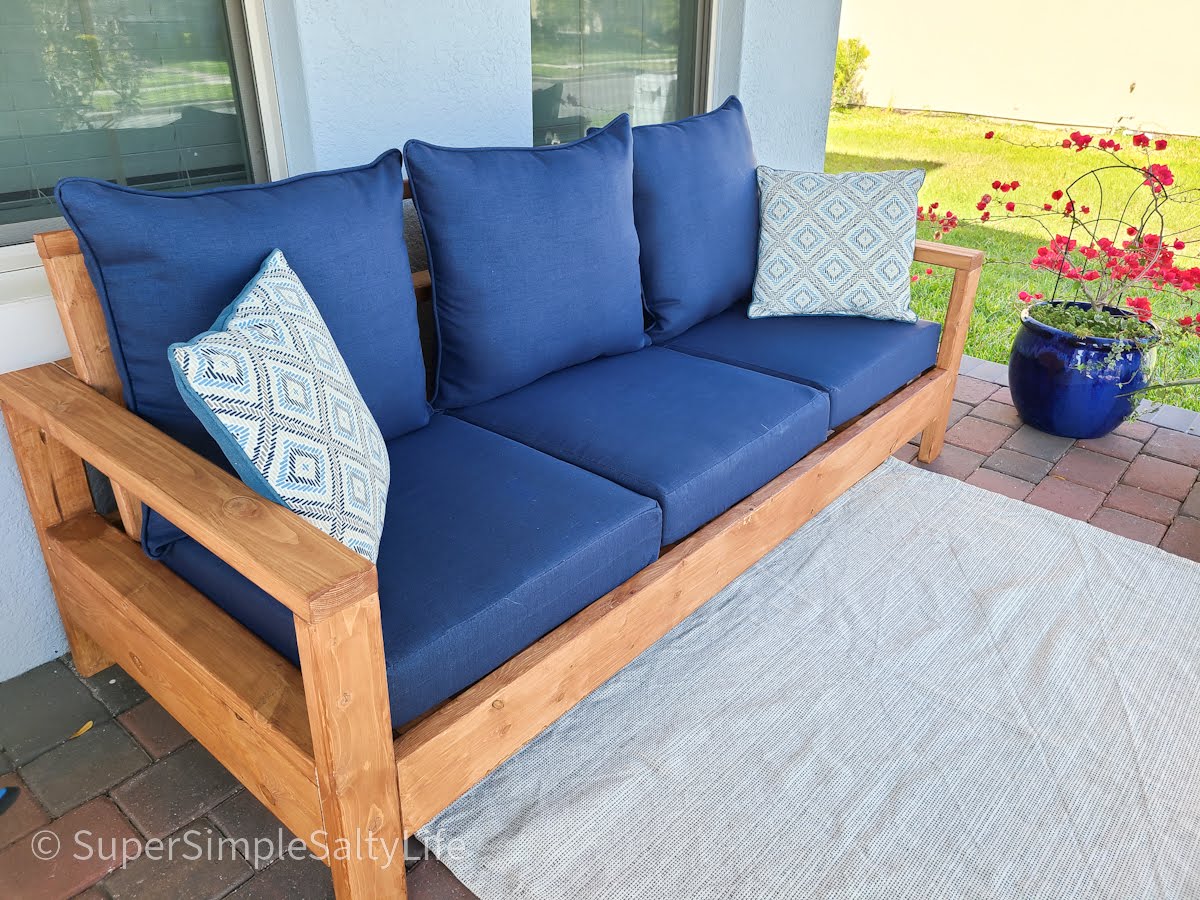
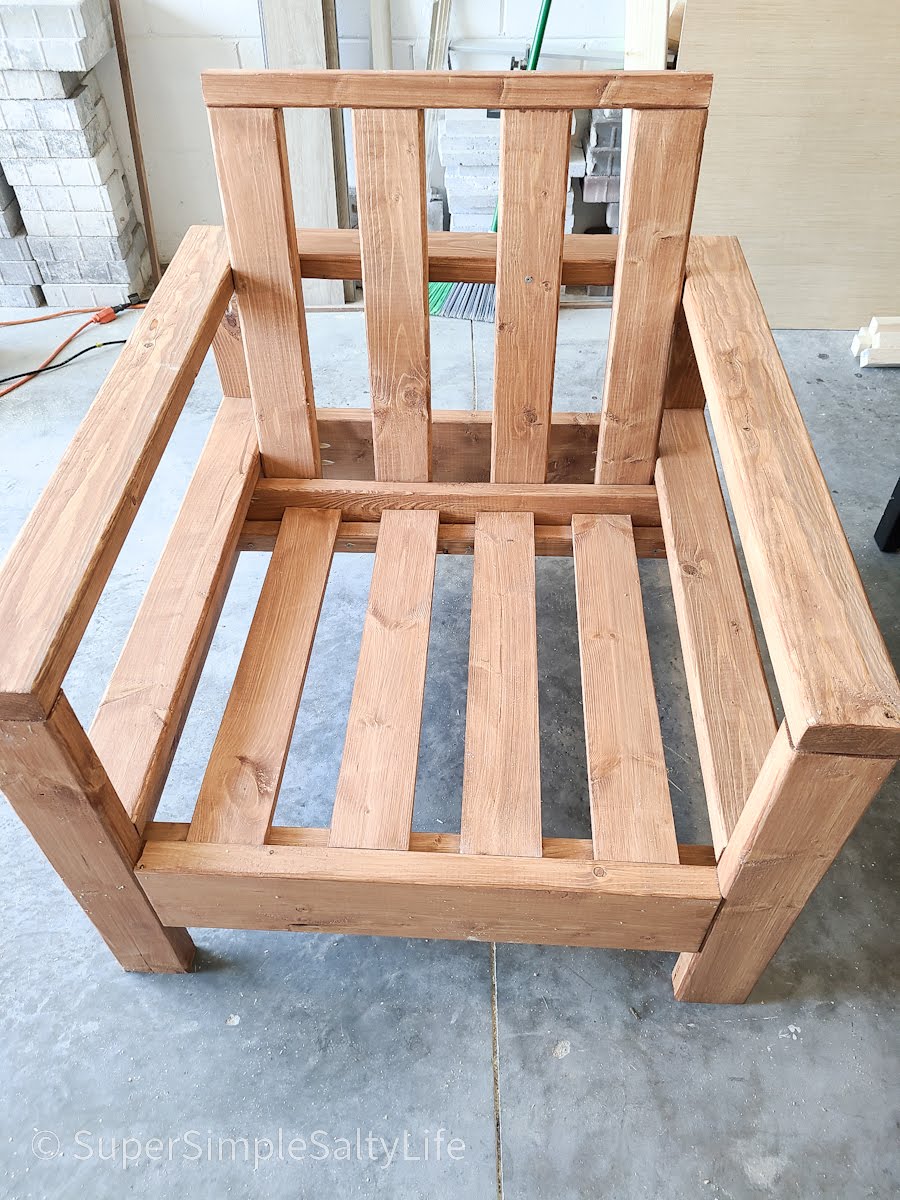
Reclined Back Outdoor Sofa and Chair DIY

Submitted by Anonymous (not verified) on Sat, 04/09/2022 - 07:12

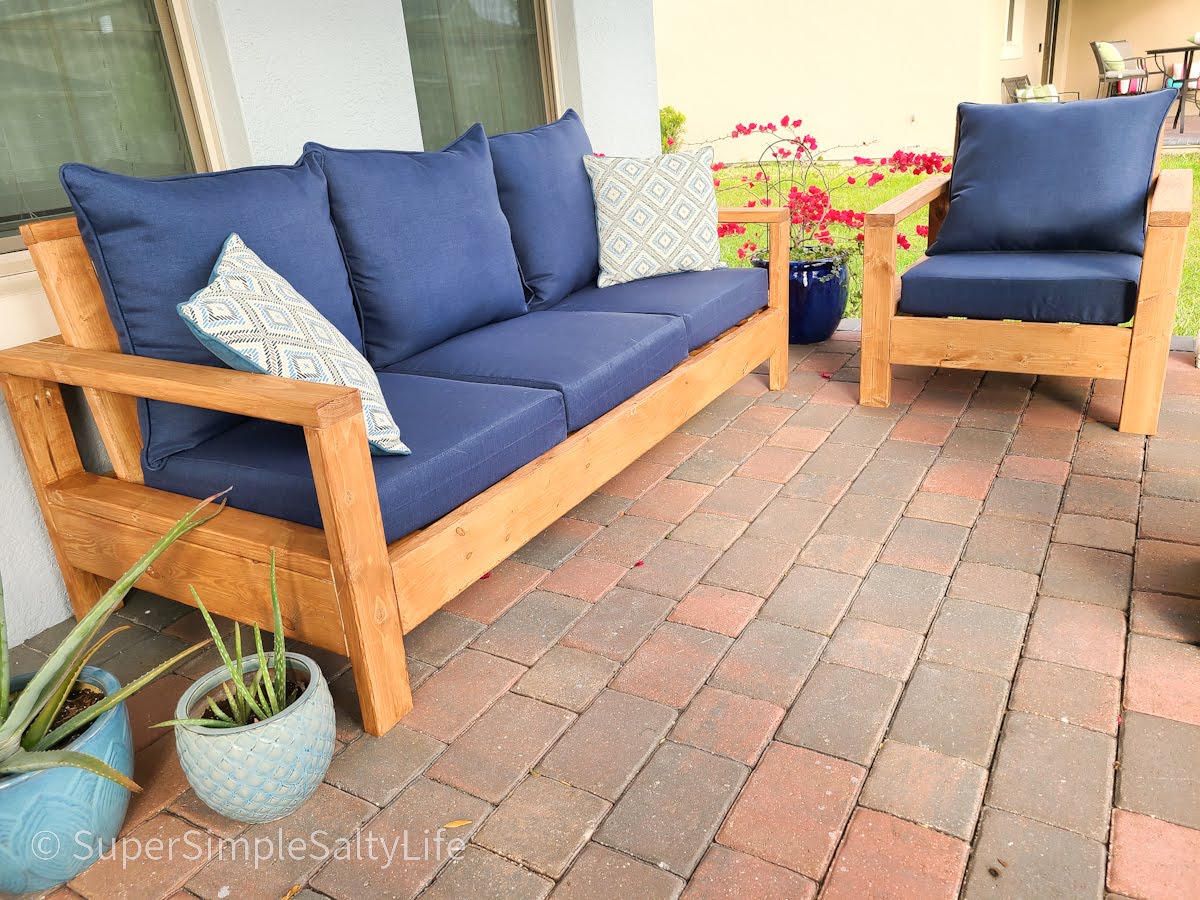
OK, I think this build may be my biggest project yet! It is definitely the heaviest. With the strong winds we can get here in Florida we needed substantial outdoor furniture.
I did make some modifications along the way measurement-wise so the sofa would fit my front porch better. All in all, this took 2 full days. I built the sofa first, stained it the next day and then decided (due to trying to get stain in all the nooks and crannies) to stain the chair pieces first before putting it together.
I am so happy with the results and so far, almost a year later, this furniture looks great and hasn't moved an inch in any of the thunderstorms we've had! Thank you Ana!!

Comments

Custom Modern Chicken Coop

Submitted by Anonymous (not verified) on Wed, 08/30/2023 - 08:49

I made this coop twice as wide like Ana suggested since I have 4 chickens and wanted to make sure there was some extra wiggle room in case “chicken math” got the best of us. I made a nesting box to mount on the outside. I also used plywood for the sides like Ana did in the video. I installed a Run Chicken automatic door that opens at sunrise and closes at sunset. I added some hasps and clasps to make sure all my doors would close tightly. I put hardware cloth across the top before installing the roof panels. I stapled and buried hardware cloth around the perimeter for predator protection. I also spray painted the hardware cloth flat black so that it would be easier for us to see inside the coop. I stained the rest of the wood with Varathane Semi-Transparent stain, color “Carbon Gray.” I also added some roosts and cedar shingle siding for some extra protection during our New England winters at to match our house. Working 2-4 hours a day, off and on, with a bum shoulder and weak hands, this took me about a week! Thanks for the great plan, Ana!

Built from Plan(s)

Comments

Seasonal And Holiday

lawn and garden shed

Submitted by brittanyj on Wed, 08/19/2015 - 13:17

Needed a shed to store bikes and mowers, etc, so I'd have more room in the woodshop : )  I made a lot of modifications to the plan to fit my space and make it much larger.  The completed size is 7 foot tall at the peak, 6 feet deep and 5.5 feet wide.  I made it as a 3 sided shed, using the wall as the 4th to save on cost, increase air flow, and make the exterior house wall accessible.  I also made an egress in the back of the shed in order to get behind the shed if needed. 

Instead of roofing shingles, I opted for ribbed metal sheets and one clear sheet in the middle to make a skylight, so there would be light in the shed.  This is my favorite part of the project.  It was a huge pain to attach the roofing from a ladder with very limited access, but it looks great and I love the light coming in.  We have very little rain in CA, so I'll have to wait until winter/rainy season in order to test out its waterproofing. 

Since the shed sits between the house and the neighbors block wall fence, and I wanted to use as much of the space as I could, I decided to design the shed to have the side wall against the house rather than the back wall, as shown in the plan.  This took a large amount of modifications, but with careful planning and measuring, it can be done.  This also meant blocking off access to behind the shed, so I cut an egress in the back wall and added hinges so you can lift the back cut out panel, and rest it on a stop block attached to the fence behind it in order to have access.  That's what woodworking is about- problem solving.  Love it. 

As you can see by the full shed picture, it fits a large amount of stuff- 2 adult bikes, mower, edger, trimmer, chainsaw, hedge trimmer, garden tools, shovels, etc, with plenty of room for more.  I now have a free corner in my garage that I've already filled with a DIY rolling workbench and more pegboard space for tool hanging.  Woodshop increased space= happy Brittany. 

I should also mention that building the frame and adding the pickets was quite a quick and easy job.  The hardest and most time consuming part was the roof (I didn't have metal cutting tools), rolling each very heavy wall to the site (I was alone) and the previous 2 weeks in which I built the paver patio the shed sits on.  Hard work, but worth it.  I love it!

Built from Plan(s)
Estimated Cost
$280
Estimated Time Investment
Week Long Project (20 Hours or More)
Recommended Skill Level
Intermediate

Comments

brittanyj

Mon, 01/25/2021 - 13:15

It has been incredibly useful for storing! One thing about the skylight- Over time the sun has warped it and there is now a hole and crack there. So I wouldn't plan on the clear roofing being a long term solution- I will be replacing it with either thicker clear roofing or 2 layers.

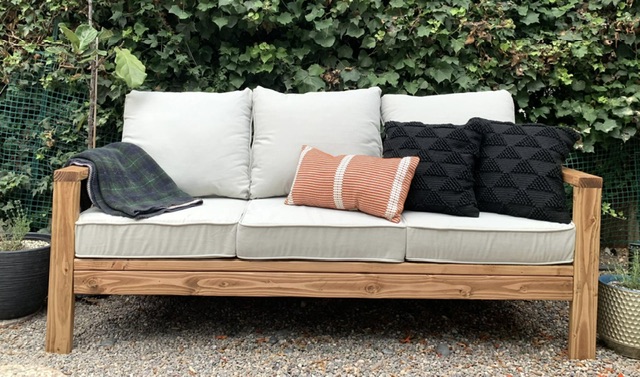
First Ever Furniture Build - Outdoor Sofa

Submitted by Anonymous (not verified) on Wed, 08/02/2023 - 10:30

This was my first ever piece of furniture that I made and it was so much fun! I’ve got the furniture making bug now!

Melissa Pilcher

Built from Plan(s)

Comments

DIY Greenhouse Project -Added elevated raised beds & temp/humidity control

Submitted by Anonymous (not verified) on Sun, 07/05/2020 - 09:09

We loved this greenhouse plan from AnaWhite and wanted to be able to grow in 3 seasons so we modified the design to include humidity & temperature control & 18" deep elevated cedar beds inside with 4x4 posts for support and trellis option. We added electricity in order to have a lighted workspace and the ability to put in a circulating fan to control mold and fungus. We added 2 work tables (2x2') on the inside of the door left and right side door in order to do seed trays & store supplies. This was a wonderful project for my husband and my plants inside are doing incredibly well compared to my outside garden beds here in zone 5. Products used:

Foundation
We had a landscape company come and scape/dig a platform and then fill/compact with crushed rock
My husband then used rebar driven into a 4x4 frame in order to secure the frame to the ground and create a base upon which to build the greenhouse

Active ventilation
AC Infinity Cloudline T8 Inline duct fan
Air king range hood wall cap 8" on the bottom outside of the greenhouse wall for air intake + flex 8" duct to the fan itself
Shelter logic autovent automatic shelter vent kits (1 on each side of the front wall) in order to allow air intake from the bottom back of the greenhouse under the elevated beds to flow to the front of the greenhouse and out
Circulating fan- Hurricane wall mount fan 16" - this fan has 3 speeds with tilt function and small mounting bracket

Soil - sourced 3 yards of 50/50 loam/compost from local landscaping supply
60% loam
30% organic compost
10% organic topsoil + perlite

Soil beds
-cedar frame 2 feet wide along sides, 3 feet wide on the back wall
-galvanized metal roofing with holes drilled into it for drainage
-landscape cloth lined

Built from Plan(s)
Estimated Cost
$2000
Estimated Time Investment
Week Long Project (20 Hours or More)
Finish Used
None
Recommended Skill Level
Intermediate

Comments

bushy99

Wed, 09/09/2020 - 13:09

Thanks for that update! I was wondering how to vent this project, as Green houses need the ventilation. Good to know dollar amount also. Great photos.

bushy99

Wed, 09/09/2020 - 13:09

Thanks for that update! I was wondering how to vent this project, as Green houses need the ventilation. Good to know dollar amount also. Great photos.

bushy99

Wed, 09/09/2020 - 13:09

Thanks for that update! I was wondering how to vent this project, as Green houses need the ventilation. Good to know dollar amount also. Great photos.

Best Chairs Ever!

Submitted by Anonymous (not verified) on Tue, 06/09/2020 - 18:16

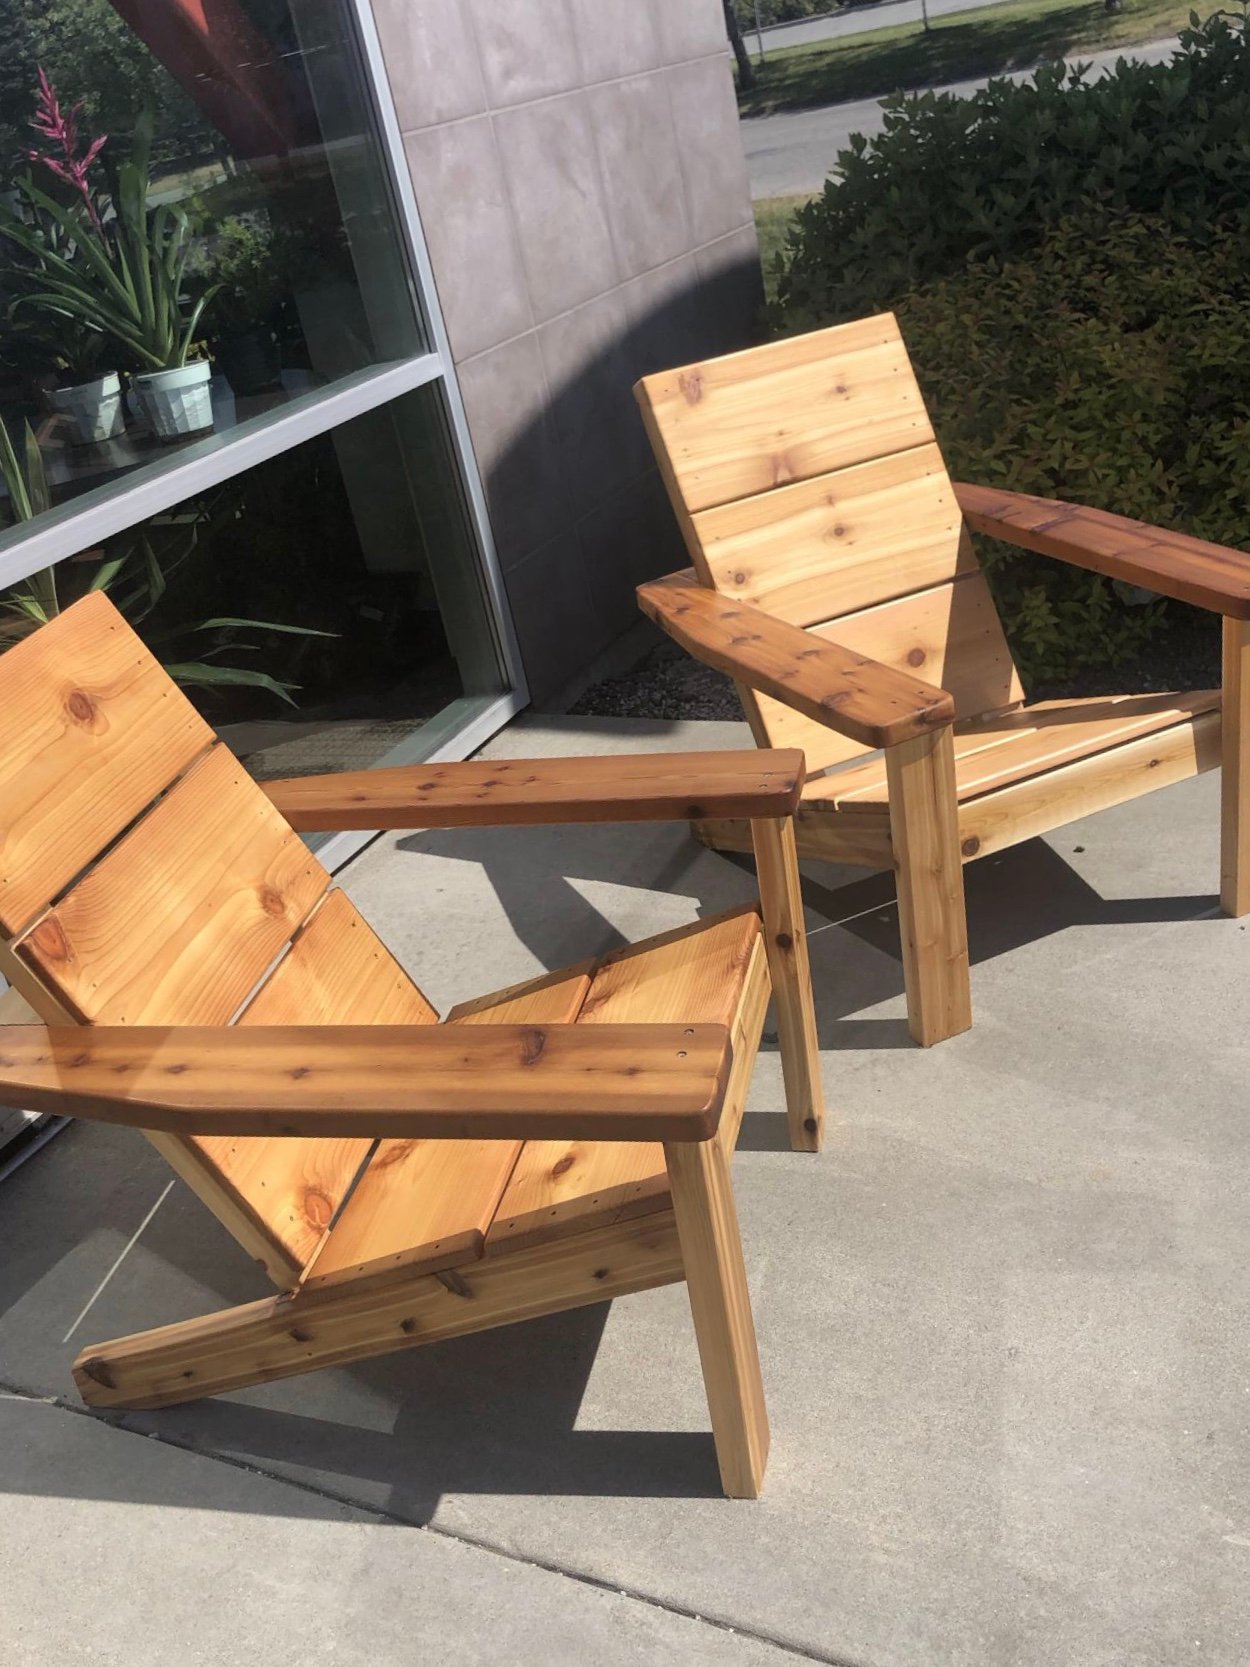
I made these modern Adirondack chairs for our business in Anchorage. GREAT and easy to build design by Ana - we upgraded the arms to tapered 2x6 and they're awesome!

Paper Roll Dispenser

Submitted by vendo on Wed, 11/17/2021 - 10:44

This took me about 20 minutes! I love the look of it and that it can just be left out when the kids aren't doing art. A great little item to add to keep the kids busy and inspired. I made a couple of mods from the plan. I used glue and nails instead of pocket holes and I did that bottom board flat instead of on it's side. I also used a little bigger dowel, and bought two rolls of paper on Amazon for $14.I'm giving this to my daughter for her birthday with some fun art supplies, so I think it's a great gift idea for any occasion for those crafty people out there!

Built from Plan(s)

Comments

Monika

Tue, 04/02/2024 - 06:09

Sometimes, when working with papers, you might need to convert file formats, right? So, I recently came across this website https://pdfflex.com/webp-to-png It's super handy for converting. It's been a real time-saver for me, especially when I need to tweak documents for printing or sharing. I'd desided to share in case it helps someone else out there too!

Cubby/Bookshelf/Corner Desk Combo

Submitted by Anonymous (not verified) on Wed, 01/18/2017 - 20:40

This is a mashup of several plans, combined into one big, bad ass, office desk. I've had a little experience years ago in high school woodworking classes, but haven't really built much since. This reminded me how much I enjoy working with wood. So rewarding to be typing this message at my new office desk!

Estimated Cost
$400
Estimated Time Investment
Weekend Project (10-20 Hours)
Finish Used
Minwax "Early American"
Recommended Skill Level
Intermediate

Comments

treemeagher

Wed, 08/19/2020 - 06:25

This is amazing! So amazing could I ask you to share with me what prices from the collection of plans you used and how? I’m looking at your pic trying to figure out how to incorporate the plans you used. I want to build one for myself lol fantastic job!!!!

Playhouse Loft Bed with Storage Stairs

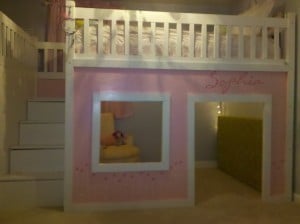
I changed this plan and made it into Full size. Feel free to contact me if you would like more information about how to do this too. 

Estimated Cost
$350
Estimated Time Investment
Week Long Project (20 Hours or More)
Recommended Skill Level
Beginner
Back