Community Brag Posts

Colorado Backyard Gable Greenhouse

Submitted by Anonymous (not verified) on Tue, 05/24/2022 - 20:17

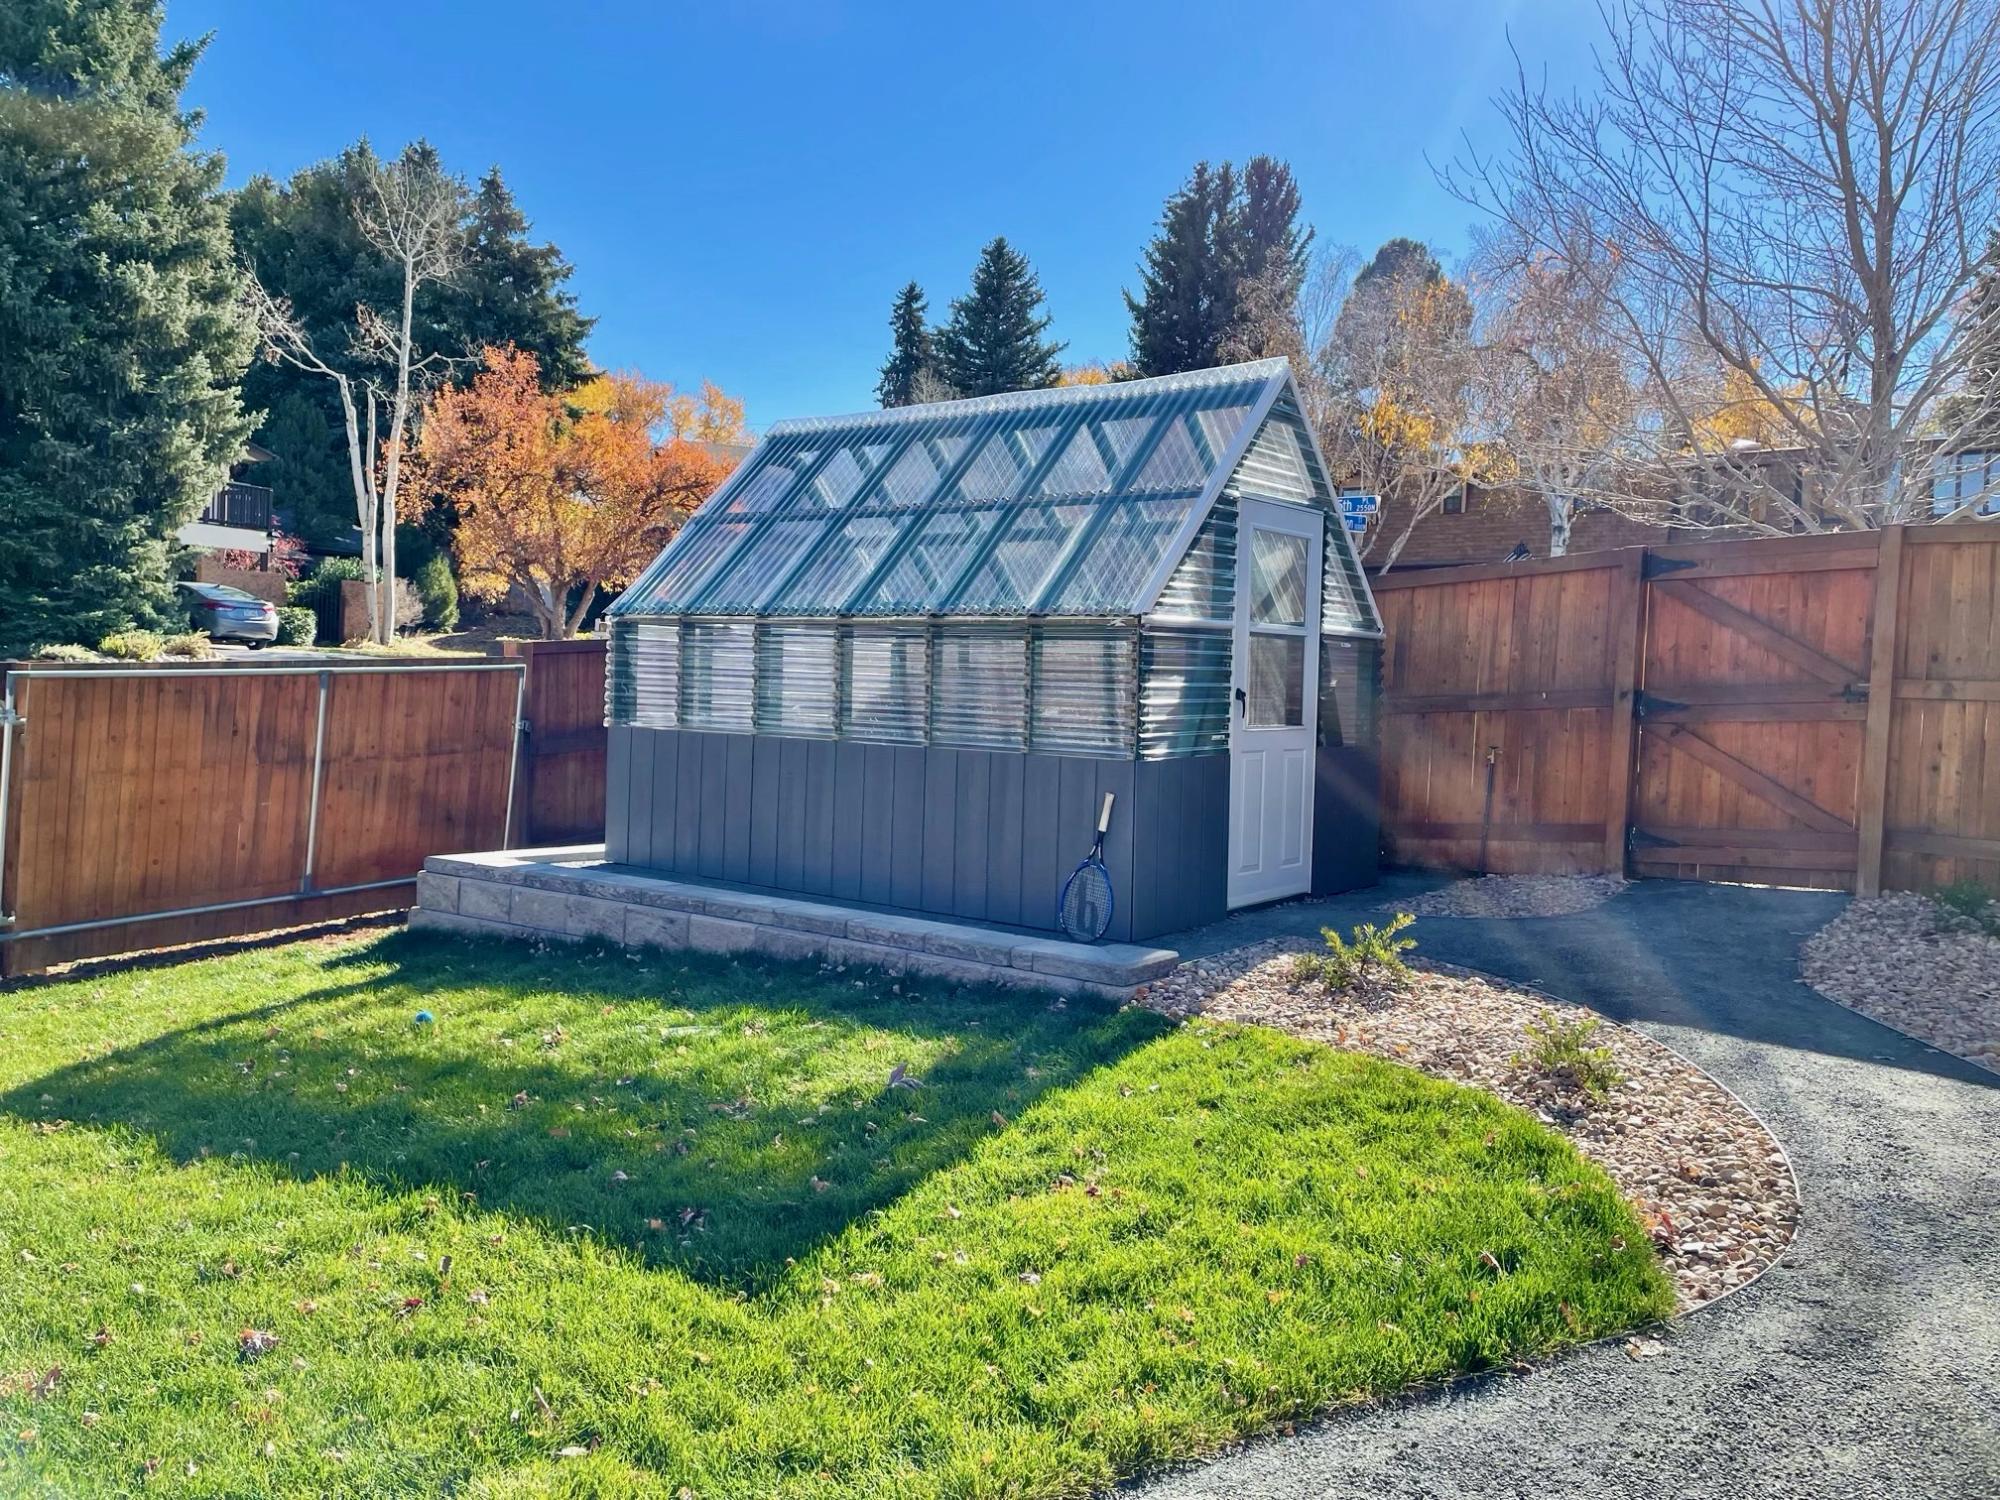
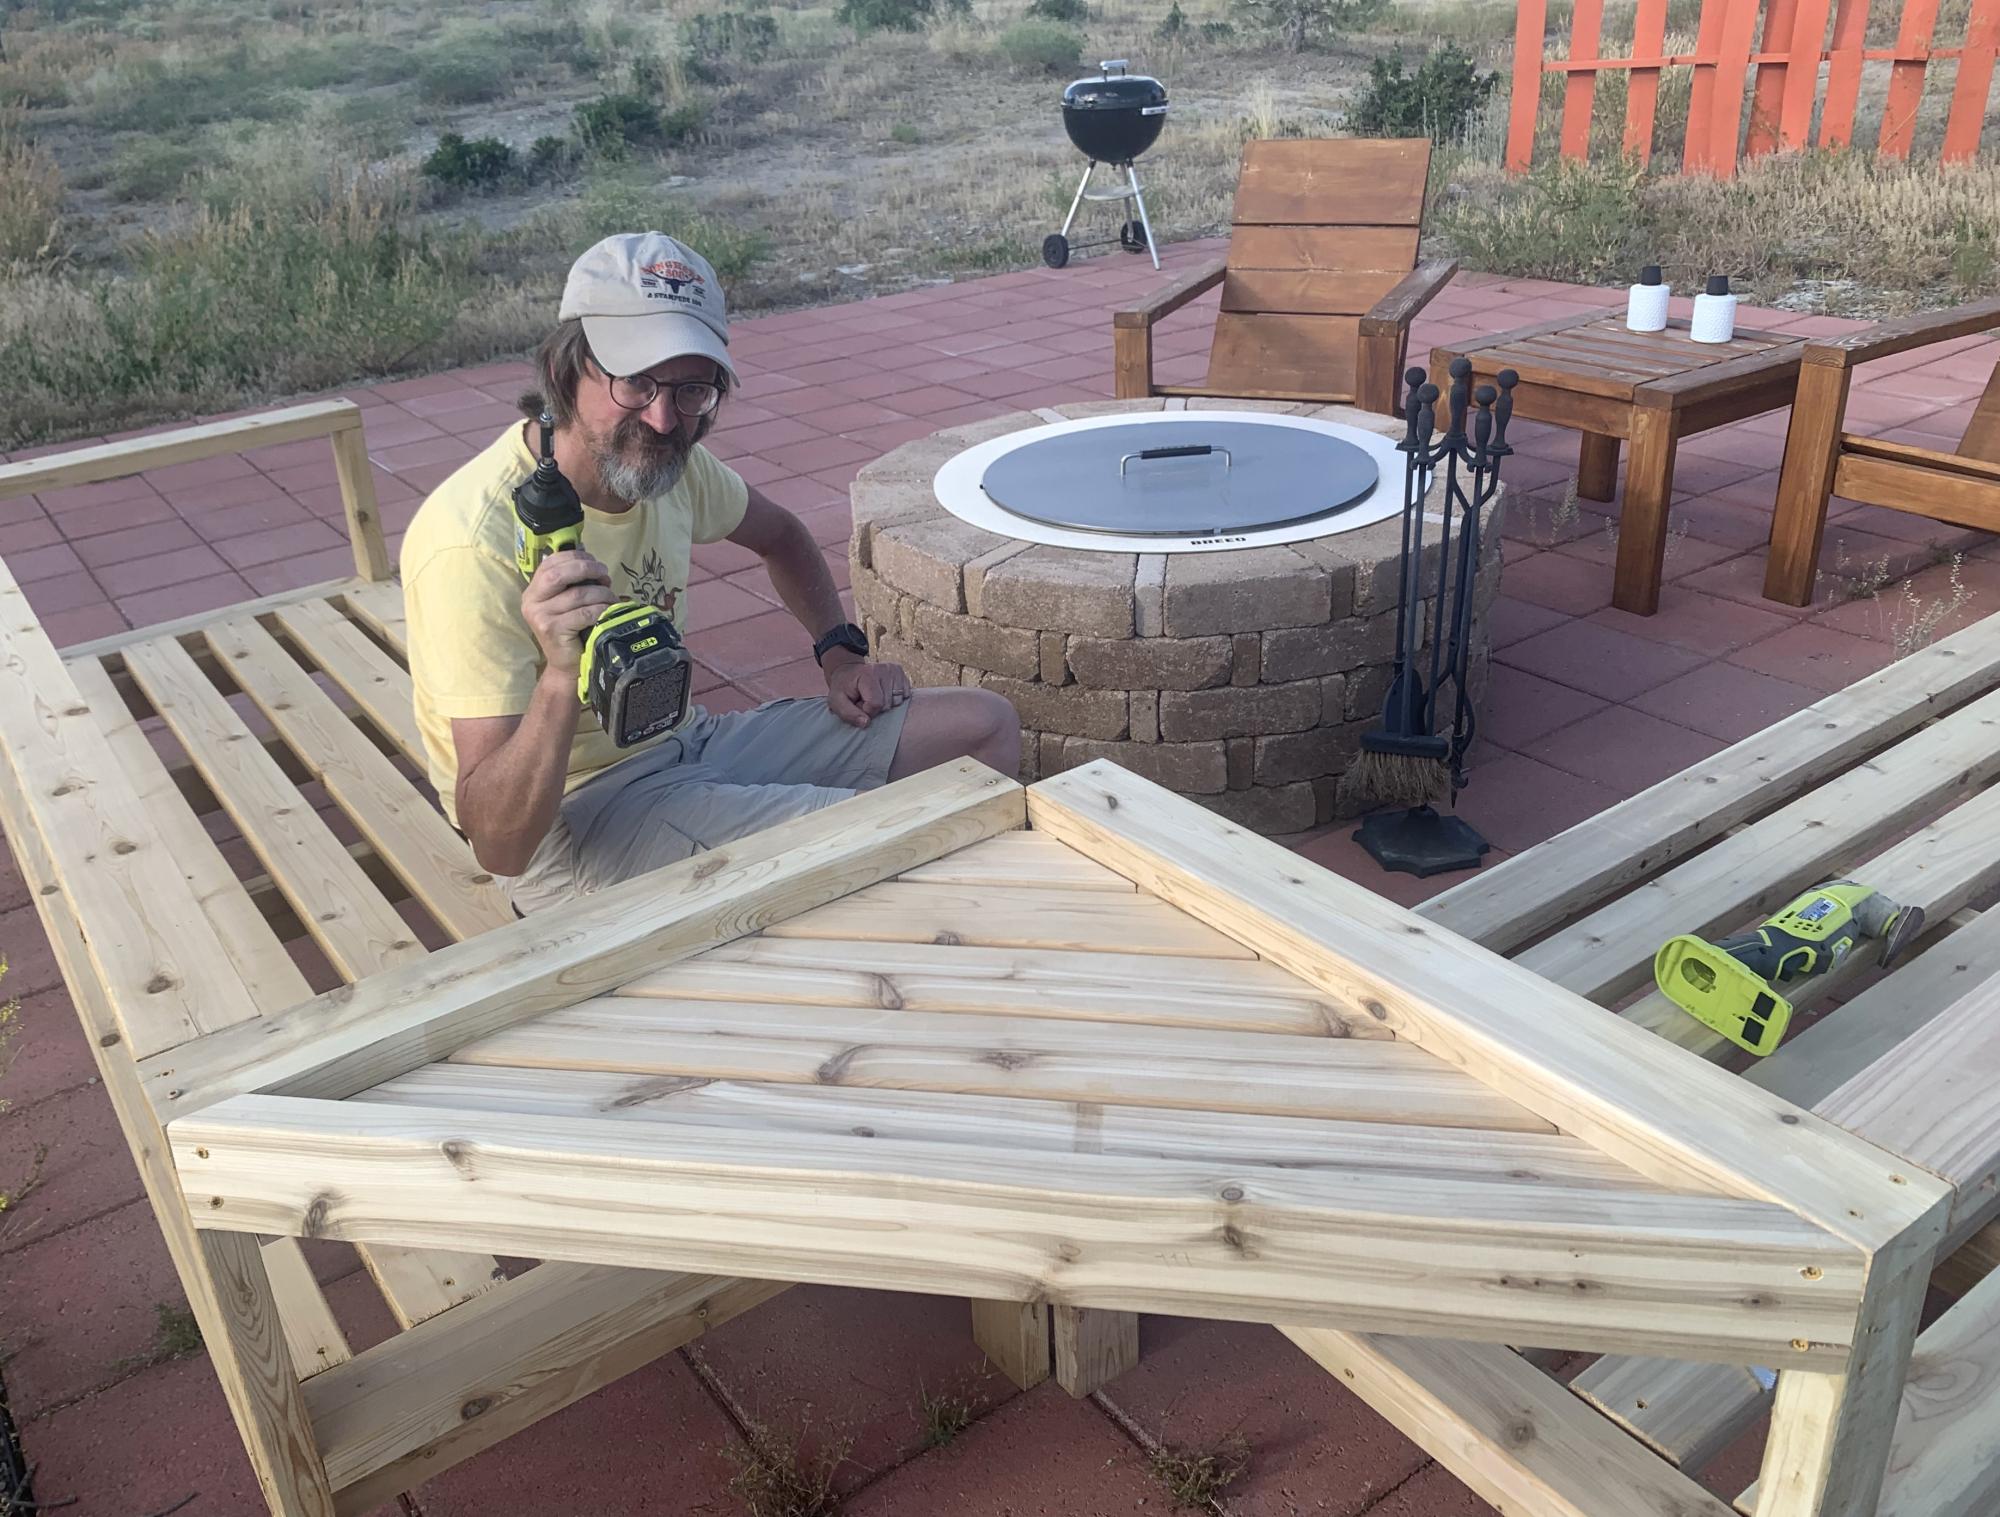
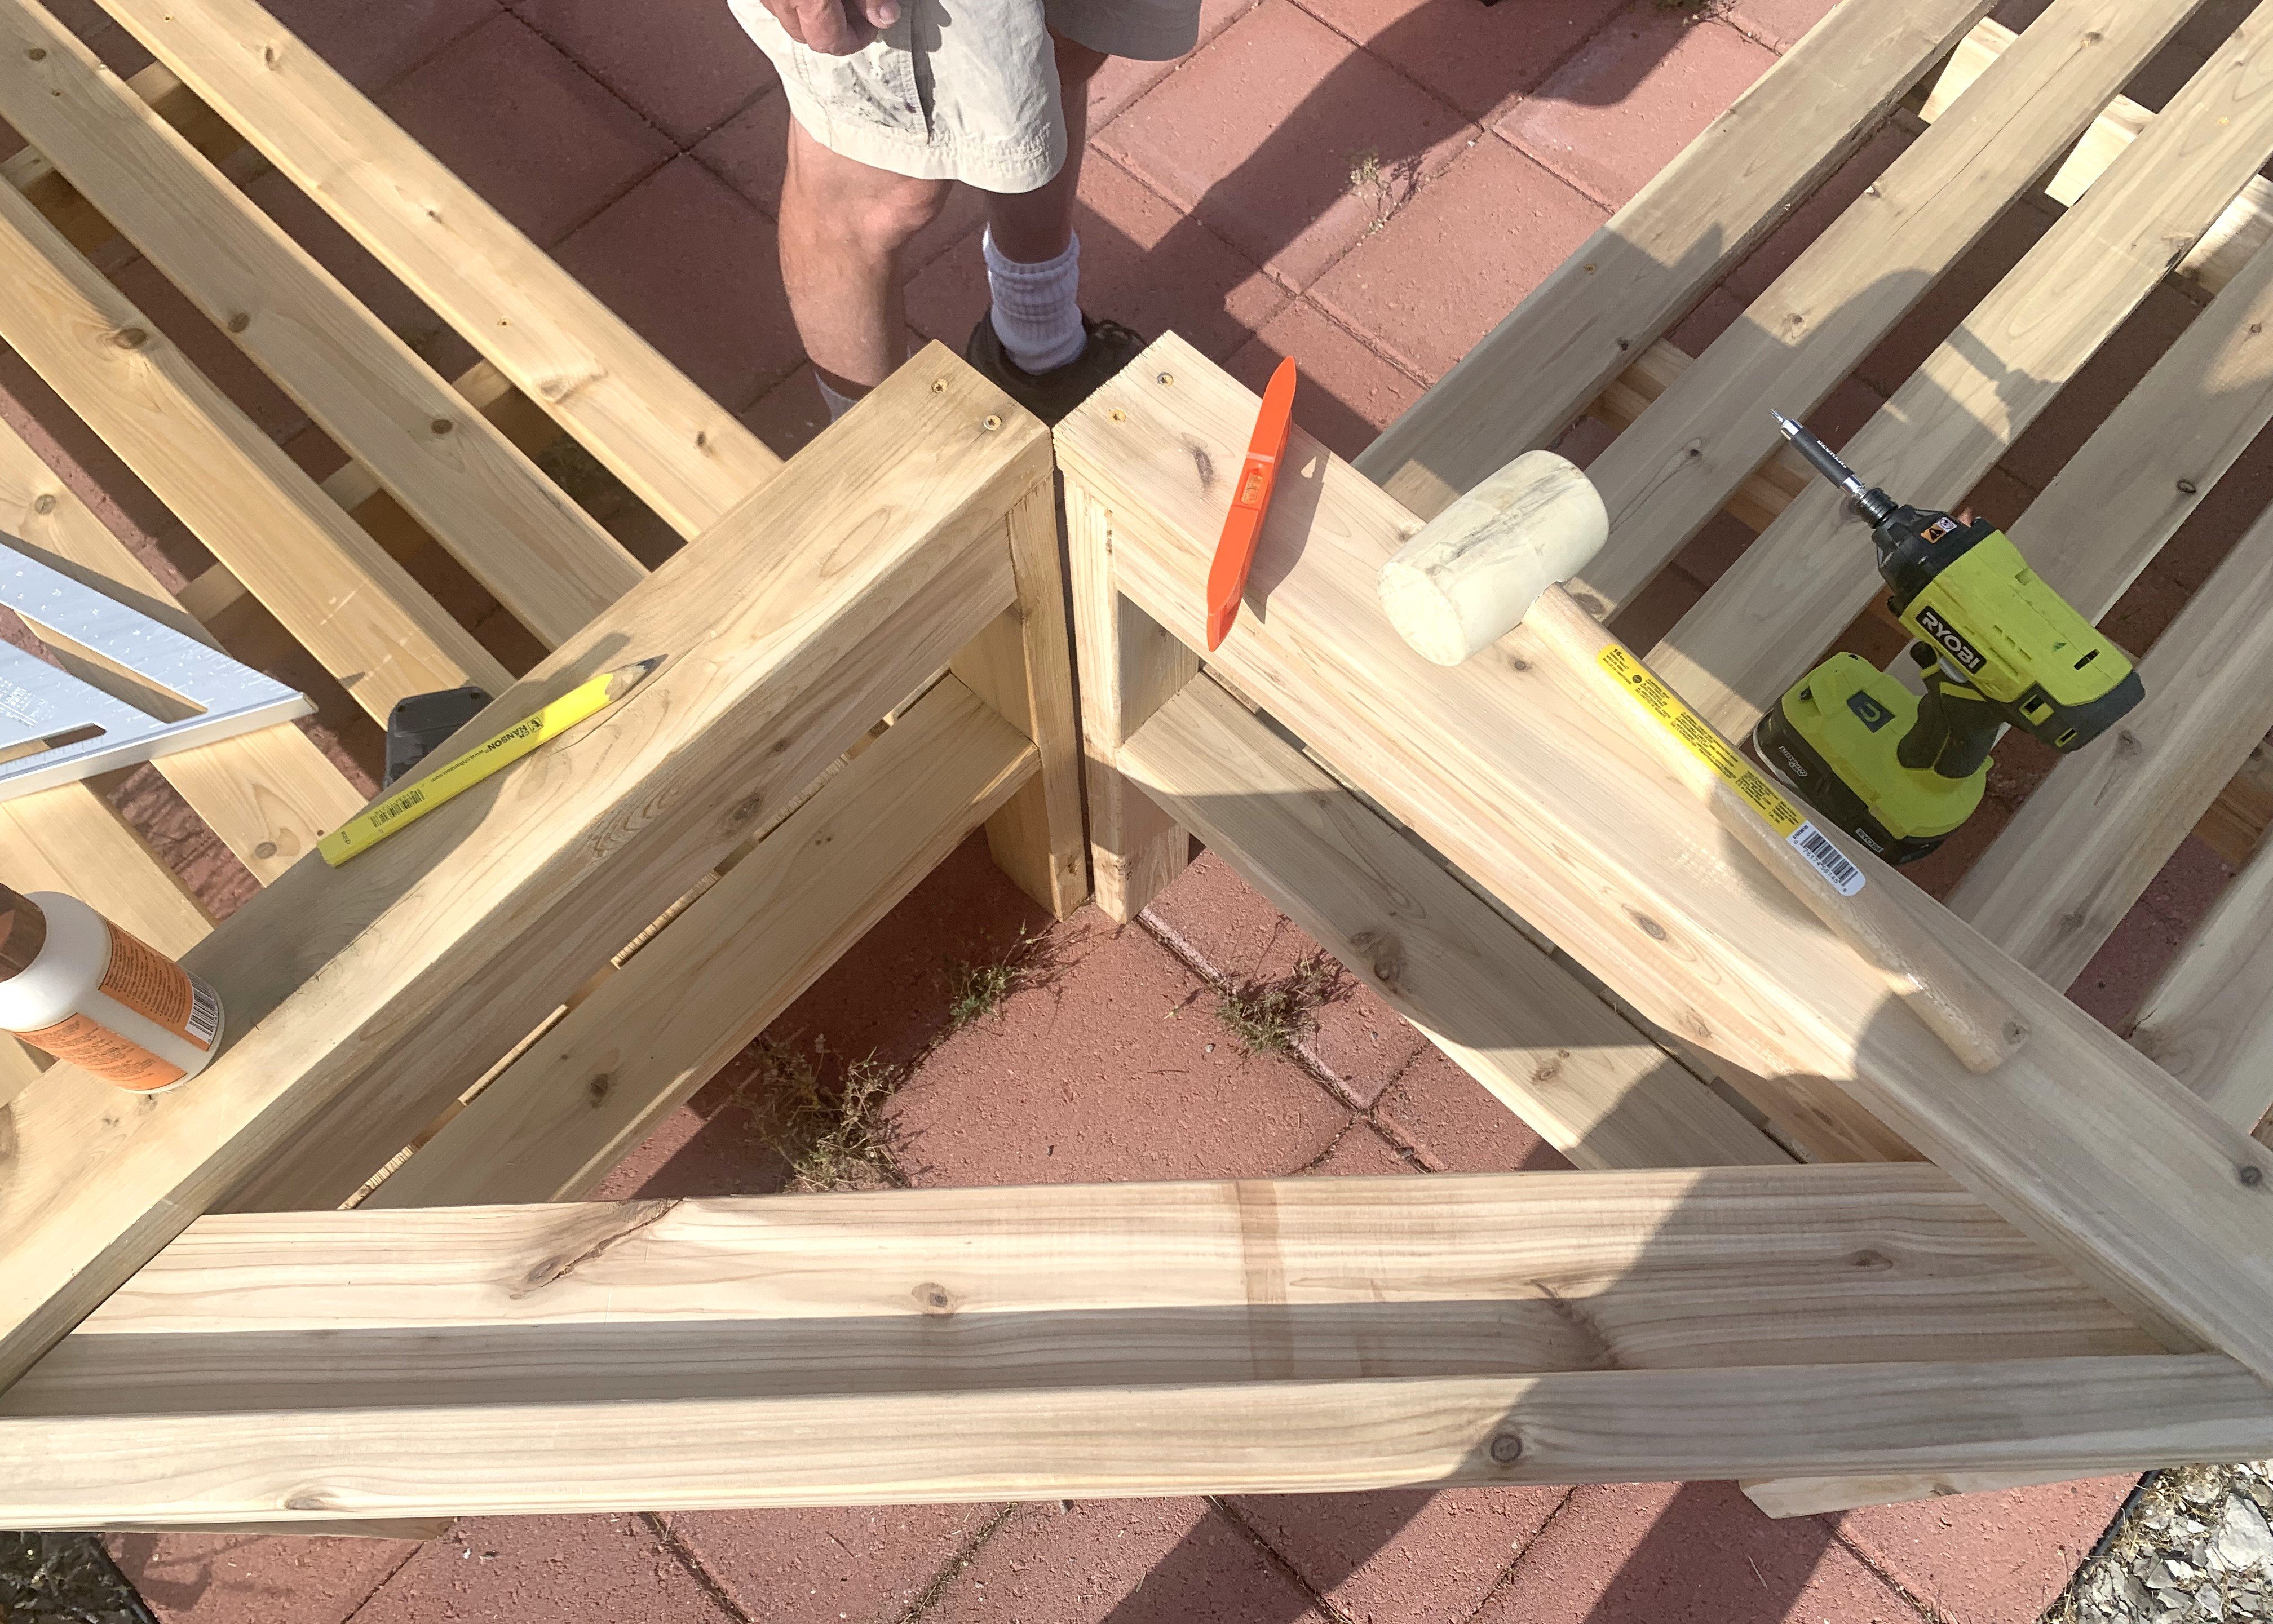
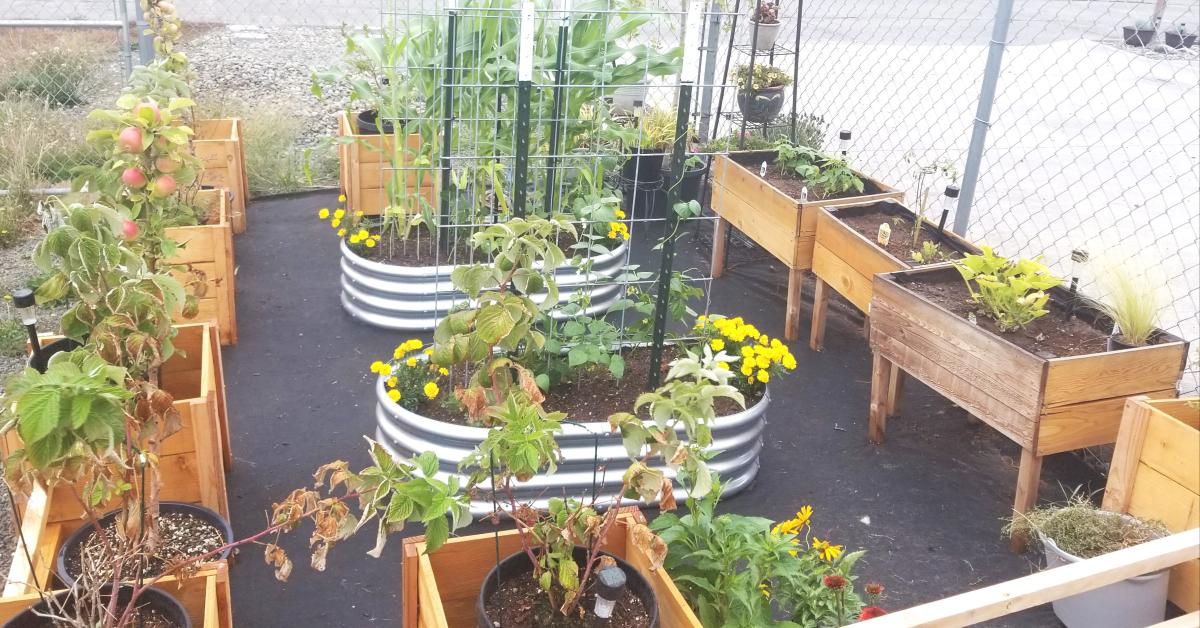
We started this project last fall with the goal of creating a multi use hobby greenhouse with plenty of space for the kids to get their hands dirty. We purchased the Small Gable Roof Greenhouse plans and made our first (of many) trips to the hardware store. Since becoming homeowners in 2015, we've done countless projects but nothing as big as this. We are still very much learning the nuances of greenhouse growing in Colorado, but that has become a fun experience for our entire family. Since completing the structure, I've found that I'm more interested in making the space more functional than I am in actually gardening. I added a shelf built almost entirely from old pallets, a raised cedar bed and solar powered exhaust fan/lights. Luckily, my wife loves spending time in there tending to the plants! As the summer heat sets in, we will face new challenges of how to keep the space cool. Maybe by adding a shade cloth and misters? Regardless of what the "output" looks like we are loving this new hobby and are looking forward to learning new skills!

Comments

L-Shaped Triple Bunk

Submitted by mommy to 3 on Sat, 09/01/2018 - 20:21

We recently had our 6th child and needed to rearrange our kids' rooms.  We decided to put our 3 oldest girls together and wanted a triple bunk.  We used the classic bunk plans, but increased the height to allow for a middle bunk.  We wanted L-shaped to give each child some headroom.  We used pine wood, common board and select pine.  We finished it off with two coats of Behr interior latex paint/primer in one, satin finish.  Finished dimensions--height from floor to base of bottom bunk, 10 in.  from floor to top of top rail, 79.5 in.

Built from Plan(s)
Estimated Cost
$350 for wood/screws
$40 for paint
~$500 for tools--this was only our second build and our last build only required a drill.
Estimated Time Investment
Week Long Project (20 Hours or More)
Finish Used
Behr interior latex paint/primer in one, satin finish. Color is "classic silver"
Recommended Skill Level
Intermediate

Comments

bcheese06

Tue, 02/18/2020 - 20:41

This is exactly what my boys need in their room. I'm having a hard time grasping how you did the middle bunk. Is it just the top bunk chopped right before the horizontal slats of the bottom bunk? tia

First Build - Redwood Adirondack Chairs

Love the results of my first building project.....a pair of redwood adirondack chairs. Angled cuts were a great way for a beginner to learn to use the miter saw.

Estimated Cost
$75 for redwood per chair
Estimated Time Investment
Weekend Project (10-20 Hours)
Finish Used
Discovered a non-toxic, non-flammable, water-based, environmentally friendly product called Seal-Once. Quick and easy two coat application in natural clear to protect wood outdoors for up to 10 years. Soaked right into redwood without leaving a shiny finish or residue.
Recommended Skill Level
Beginner

Comments

JoanneS

Sat, 09/07/2013 - 19:59

Love these gorgeous redwood chairs! The color and grain on that wood is awesome, and the clear coat is perfect for it. You did a great job on this build! I popped over to your blog and I enjoyed your post on this build very much. Well done!

Seasonal And Holiday

Trash Can Cabinet w/ Bead Board Insert

Submitted by dhunt on Sat, 09/17/2011 - 22:00

My mom bought a similar one several years ago and I've been wanting something like this ever since...so glad I came across this site so I can proudly say I built it myself whenever someone asks!

Estimated Cost
$50-$75
Estimated Time Investment
Day Project (6-9 Hours)
Finish Used
Olympic One
Paint and primer in one!
Recommended Skill Level
Intermediate

Comments

shammrocky

Sun, 05/19/2013 - 13:44

I would like to purchase something like this, but I cannot find it any where. I actually want to make it into a laundry hamper where it is deep enough to fit two tall thin laundry baskets. Can anyone help me on this?

dia

Thu, 10/10/2013 - 20:59

Absolutely adore how yours turned out. Such an elegant look. Please share the color you used. Can't really tell if it's black or a very dark brown. Thanks and congrats on the gorgeous result!

Debbie440

Mon, 11/25/2013 - 16:23

Yes, I agree, this turned great. I'd also like to know what color it is?

Twin Storage Beds with corner unit

When we moved into our new house, I figured it was time to replace my girls's mattresses on the floor with actual beds. so I set about making the twin storage beds with corner unit. I primed all the wood prior to cutting and assembling, and that made things go much faster. Assembling the corner unit was tricky, since i really didn't want to have sanding and much paint in their bedroom. (i loaded in the beds first and the corner unit a week later). I added trim that wasn't on the plan, and also used the magnetic paint on the center area, although it makes a weak magnetic surface. All in all, I LOVE the way it turns out and no one can believe that I built it and didn't buy it... (although it seems obvious to me when you look closely LOL)

Built from Plan(s)
Estimated Cost
~$500?
Estimated Time Investment
Week Long Project (20 Hours or More)
Finish Used
paint
Recommended Skill Level
Intermediate

Comments

tannisg

Fri, 11/04/2011 - 11:42

It looks great, and I love what you did with the walls! Free hand with paint, or decals? Either way, its darling and clearly gives each girl her own space.

We have the same lamps - quite popular :)

I am trying to figure out a clever way to put three girls in a (huge) room and I think something like this or a bunkbed combo would make it fun and new for them..

Guest (not verified)

Sun, 01/08/2012 - 18:36

Where can I find the plans for the top half of the corner unit.? Your beds are exactly what I want for my girls. Thanks for sharing.

Ultimate Workbench/Miter Station

Submitted by Anonymous (not verified) on Mon, 03/06/2023 - 15:32

This plan is exactly what I needed for my workspace. I ended up adding some slat wall pieces and cabinets above from cubicles in an old office nearby that closed down for a tool wall and storage. I left the right opening empty due to how unlevel my floors are. I may close it in later with drawers or cabinets, but it will be my sitting workspace for now. I trimmed out the edge with 1x2s and painted and stained everything for aesthetics.

Comments

Patio Furniture in Progress

Submitted by lbrown on Thu, 01/05/2012 - 13:08

I built six armless and two corner sections of the outdoor sectional but now I need to paint it and make cushions. For more details: http://www.homeandawaywithlisa.com/blog/2012/1/5/patio-furniture-in-pro…

Estimated Time Investment
Weekend Project (10-20 Hours)
Recommended Skill Level
Intermediate

Industrial Coffee Table

Submitted by Anonymous (not verified) on Tue, 02/16/2016 - 12:24

I was seeing this coffee table everywhere so I knew we had to make it. It's the easiest build ever. I think the only tricky part is the painting near the edge. We like a more sanded/finished top. We tried spray painting the base and then attaching the top, but then we sanded the top and the spray paint on the base near the top came off, so I had to cut in and I'm not good at that.

So we're still working on a way to do this properly. We tried making the top on the ground and then sanding & attaching it. But the top needs to be completely exact/square in order to do this. We live in a old farmhouse, so we prefer to attach it as we go - then sand. We also plane the top for a more exact and modern look. 

Estimated Cost
Under 50.00
Estimated Time Investment
Afternoon Project (3-6 Hours)
Finish Used
Top stained in our custom beachwood mix. A mixture of Minwax stains, Bottom spray painted in Oil Rubbed Bronze & semi-gloss polyurethane ( two coats )
Recommended Skill Level
Beginner

Comments

floating shelves

Submitted by amcateer on Mon, 02/13/2012 - 16:37

First project we have done. We love how well the shelves turned out. We modified the original plans to 9 inches deep. We had one hang up with the original plans b/c the two inch screw at the end of the frame go in perpendicular to the wall and we didn't have a way screw the frame into the wall and hit a stud. We added a hidden bracket on the end directly to the outside piece. It was a fun project and opens up our small kitchen tremendously.

Built from Plan(s)
Estimated Time Investment
Day Project (6-9 Hours)
Finish Used
black -high gloss.
Recommended Skill Level
Starter Project

Comments

amcateer

Wed, 02/15/2012 - 15:50

yes and no. We have more space but not everything we had in the cabinet (water bottles etc) worked with open shelves and we had to move elsewhere. We are thinking about adding another shelf in the middle that goes from the door to the coffee maker. But I'm not sure if it will look to cluttered. Eventually I would like to make a tilt out trash can cabinet with a cubbie for the microwave on top.

Outdoor Sectional with Corner Table and Umbrella

Submitted by Anonymous (not verified) on Wed, 07/12/2023 - 15:06

Originally, we were going to build the 2x4 outdoor sofa and the one arm version, but we didn’t like how far away the corner seat was from the fire pit, so we switched gears and built a second two arm sofa, and using skills we learned building from some of your other plans, we custom designed the corner table to attach the sofas and hold an umbrella.

outdooroutdoor

Built from Plan(s)

Rustic Table

Submitted by anne_c on Mon, 03/21/2016 - 07:24

I have been eyeing up plans to build a table for awhile, but wasn't sure exactly what I wanted. I like this plan because it's a beginner plan and is pretty simple to follow. I have built a few smaller projects, but this was the first big piece. I love the way it turned out.

Things I changed:  I made it a little shorter (table top is 68 inches) to accomodate the size of our kitchen.  I used 4x4 legs - I like the chunkiness of thicker sturdier legs.  Used 2x8 for the bench. Again, I like the thickness over a 1x.  I did use 1x10s for the table top, but I added trim (1x2) to make it look chunky. I would have just used the 2x10, but b/c they have rounded edges, and I didn't want gaps for crumbs to have to clean out. I wouldn't have minded this for a dining room table, but we're using in kitchen with 3 small children. The 1x10s are squared off so they fit together better. And adding the 1x2 trim gives it the chunky look I added the corner brackets and lag bolts, mainly for decorative style I used kona stain and white paint. 

Used 4 coats of satin poly. I built both piece in a weekend, but I would say it's more of a week project on a realistic timeframe.

Built from Plan(s)
Estimated Cost
The lumber for the table and bench ran about $120-130. I used top choice pine. I spent an additional $40ish on stain, wood glue, filler, paint, etc.
Estimated Time Investment
Week Long Project (20 Hours or More)
Finish Used
kona stain (Rustoleum) with 4 coats of poly
white paint
Recommended Skill Level
Beginner

Double Shed Coop

Submitted by Anonymous (not verified) on Sat, 08/05/2023 - 09:31

Our family decided to raise chickens but needed a place to keep them safe at night. We used your shed plan and adapted it to create necessary venting for the chicks.

Since we had 16 chickens we knew one coop would not be enough space so we built two. We created a vented tunnel between the two coops so the hens could go back and forth between them as they wished while still being protected. The girls are very happy in their new space!

Thank you for your great plans.

Holly

Built from Plan(s)

Floating Truss

Submitted by Bonsai on Wed, 01/15/2014 - 06:47

I love love love this table. I got the inspiration from here, but it is totally original. I made several design change, but I also added handmade iron-forged bolts and washers.Don't forget the floating top!!!!!

Estimated Time Investment
Week Long Project (20 Hours or More)
Recommended Skill Level
Advanced

Comments

Football Lockers DIY

Submitted by Anonymous (not verified) on Mon, 09/11/2023 - 11:27

Here are a few pictures of the football lockers I built for our school. I used your mudroom locker plans and changed the dimensions to accommodate the boys' football gear. It worked great! I built 6 sets of 4 lockers, for a total of 24 lockers. I also used one of your plans to build 6 benches for the fieldhouse. Three for the home locker room and three for the visitor locker room. Each locker is 30 inches wide and 6 feet tall. 

Melinda Glenn

Full/Twin Simple Bunk Beds

This is a Twin over Full Simple Bunk Bed for my girls who share a room. The bottom bunk leaves plenty of room for even adults to sit down without hitting their heads. We mounted Large decorative flowers on the railing to match the room just in case my daughter woke up in the middle of the night and decided to look over the edge. We were nervous she'd hit the ceiling fan and it's too hot in South Texas not to have ceiling fans. The flowers work perfectly in that area and she loves it. We pretty much followed the plans found here: http://ana-white.com/2011/01/plans/twin-over-full-simple-bunk-bed-plans. We have not added a ladder yet, but are thinking about it. On a side note, the girls like to mount blankets and cover the bottom bunk to create their "own" personal space/fort and it's pretty cool. Special note: Untreated wood for this project was hard to find. Only one of the local home improvement stores had it and it wasn't from a large chain.

Estimated Cost
300-400
Estimated Time Investment
Week Long Project (20 Hours or More)
Recommended Skill Level
Beginner

Comments

Karli (not verified)

Wed, 12/05/2012 - 17:12

Hi! Your beds turned out darling. Is your total cost guesstimate including mattresses or just cost of building? Thanks!
Karli

DIY Nursery Closet

Submitted by Anonymous (not verified) on Mon, 10/02/2023 - 10:46

This project is based on the floating closet tower build. This is the first time I’ve attempted a renovation project of this size, and I feel satisfied with the results. I did not purchase my boards from shelf help, I cut mine from a sheet and a half of plywood. Thank you for providing your plans for free. They are very helpful for beginners like me!!

Charity P

Wood Cooler Stand

Submitted by Lisa_Ann_B on Mon, 02/17/2014 - 16:14

This was my second Ana build. I picked the cooler out of someone trash. (the wheels had broke off) Thank you brick house!!! I been wanting to do this plan for a while now, I'm just too cheap to buy the cooler.
The cooler stand plans were nice to have. I had lots of scrap from my hubby but I did have to buy two 1x3x8 to finish the lid. I had trouble with the lid lining up with the cooler. With the hinged attached to the lid, I lined up the cooler, mark it out and re-screwed it to the cooler . Easy. Next time I'll go to Habitat for Humanity or the like for the hardware. I will also remember to finish the wood before assembly. I didn't put the drain in the stand. After inspection of the cooler if won't drain completely if I did, so let it off.
It took me almost a week to finish between mom duties, volunteer work, and church but she's done.
Thanks Ana for the plans. I couldn't have done it without them.

Built from Plan(s)
Estimated Cost
$30 I went alittle crazy on the hardware
Estimated Time Investment
Week Long Project (20 Hours or More)
Finish Used
polyshade bombay something. It was in the shed and full. Wipe on wipe off. wear gloves
Recommended Skill Level
Beginner
Back