Community Brag Posts

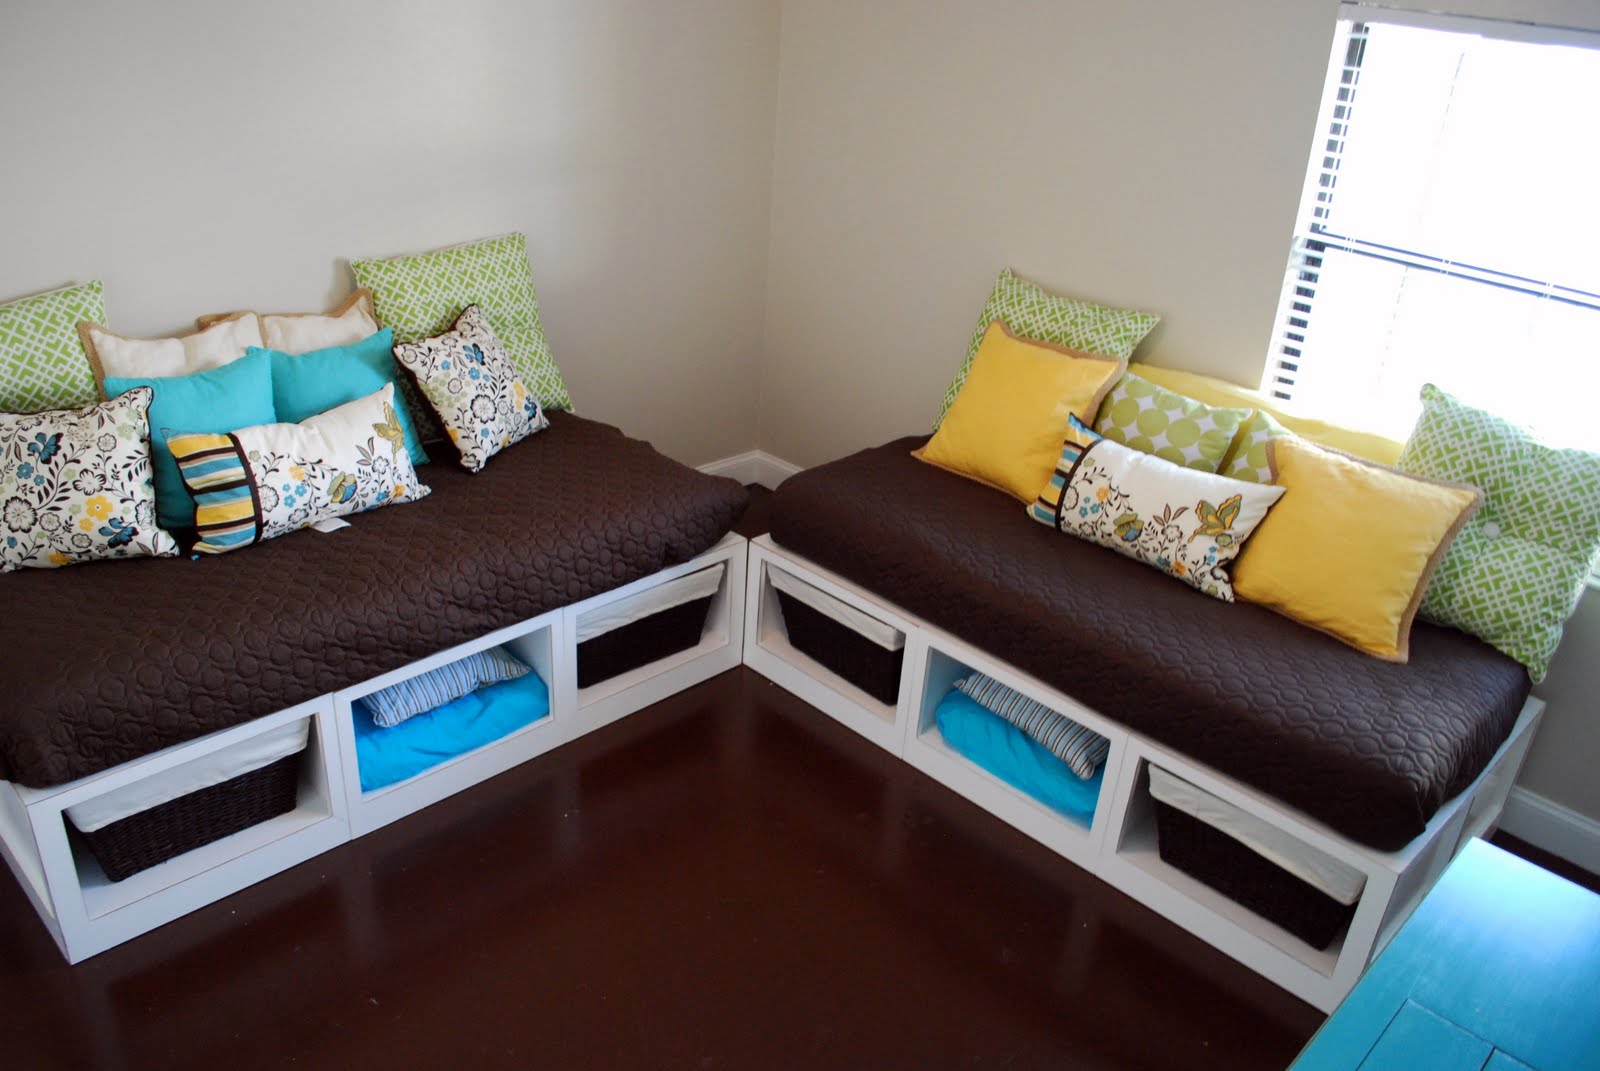
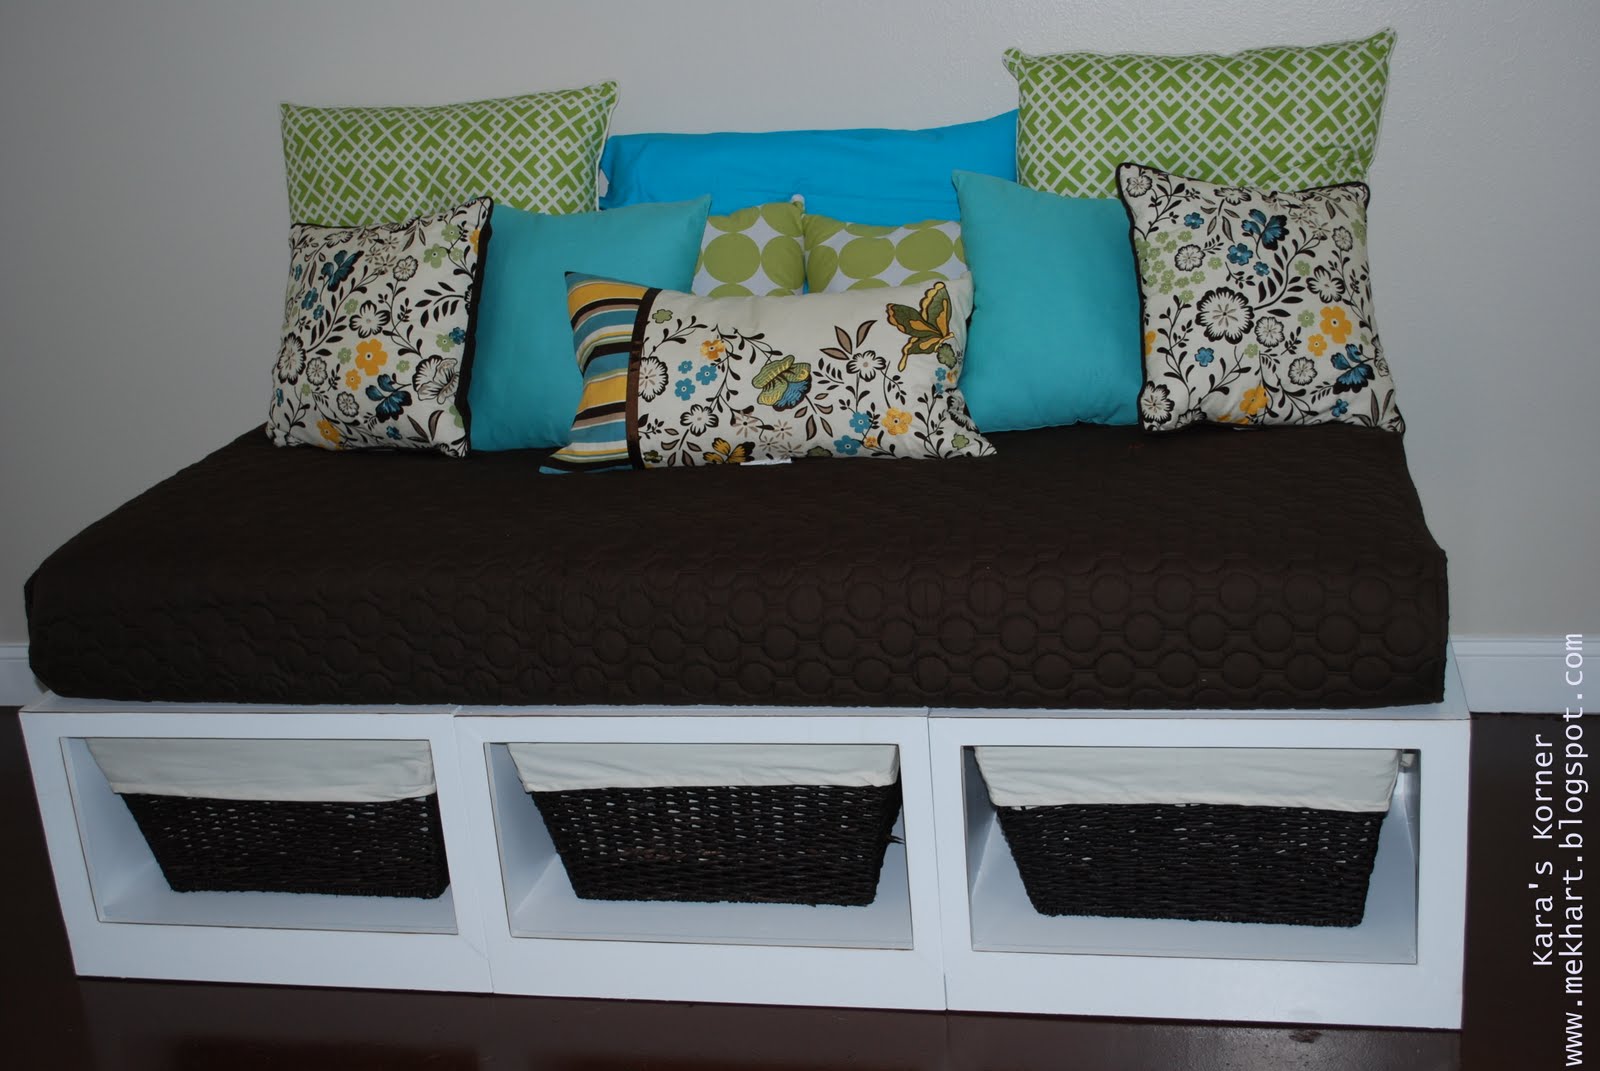
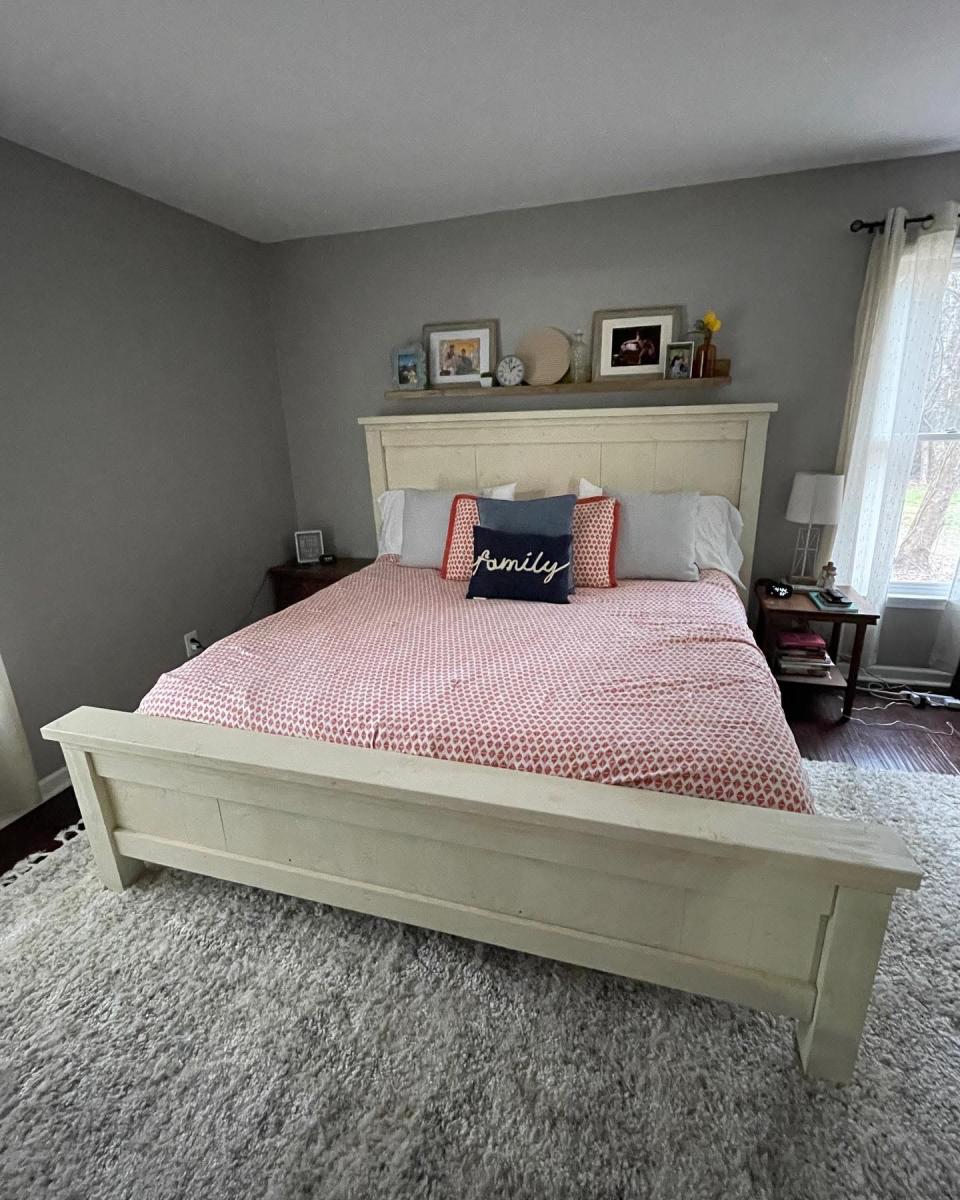
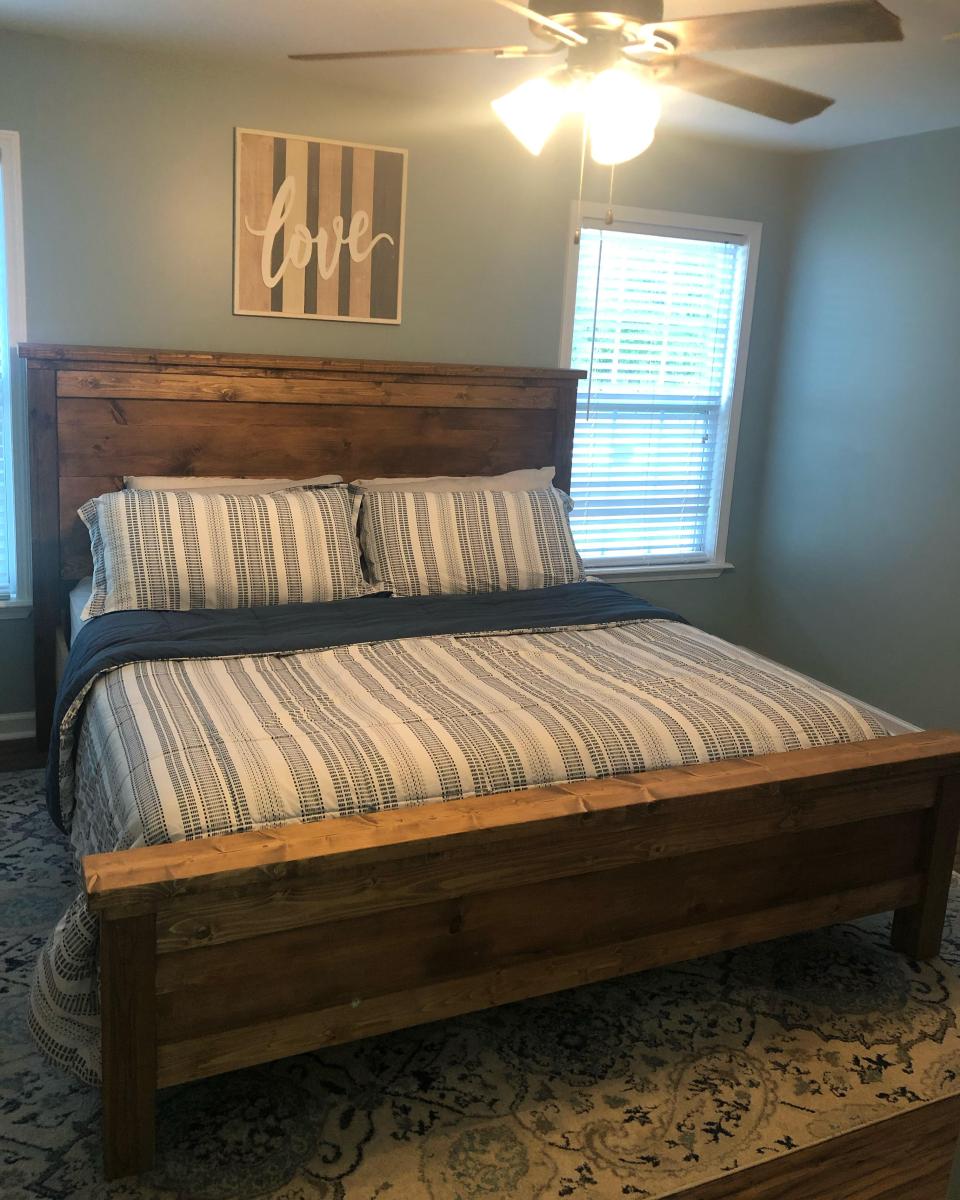
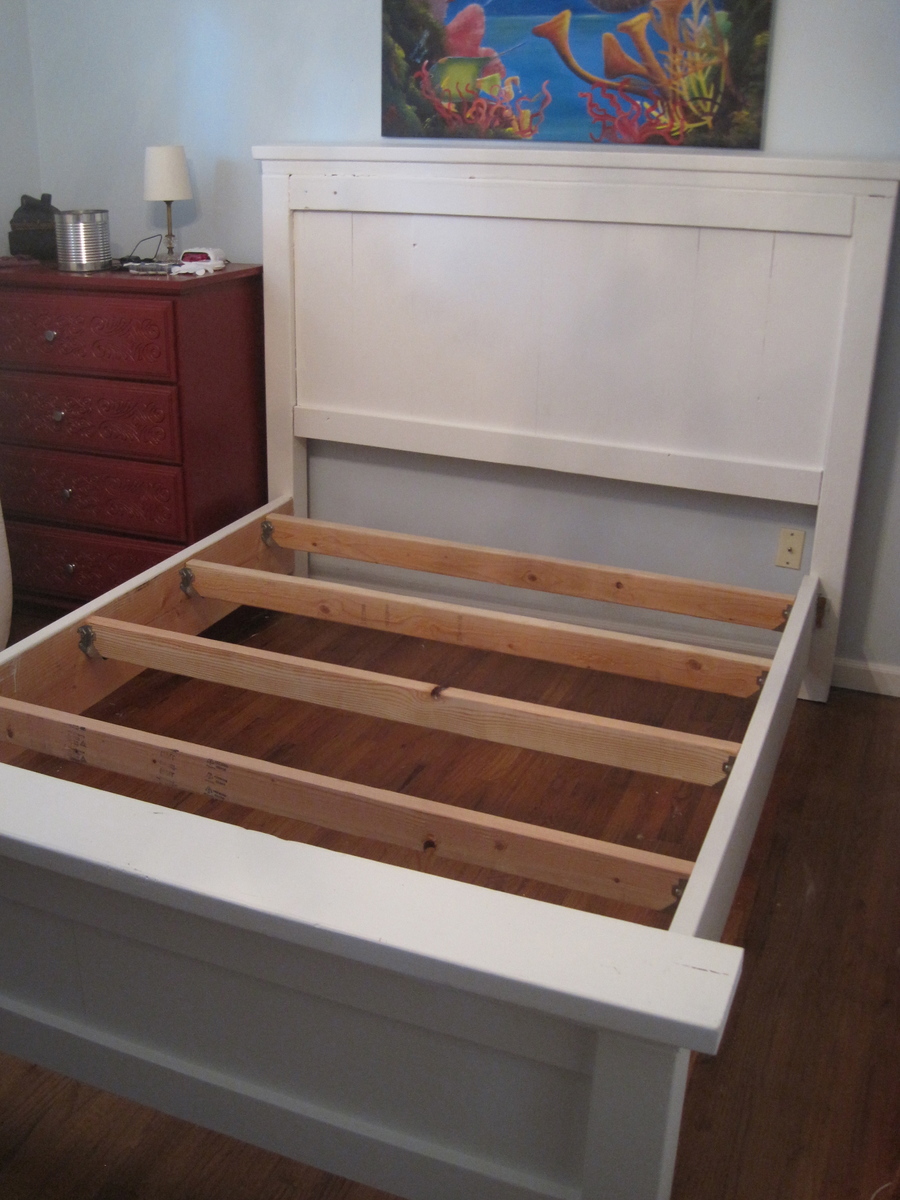
Queen Farmhouse Bed (First Build!)

Submitted by Holli13 on Sat, 03/16/2013 - 19:59

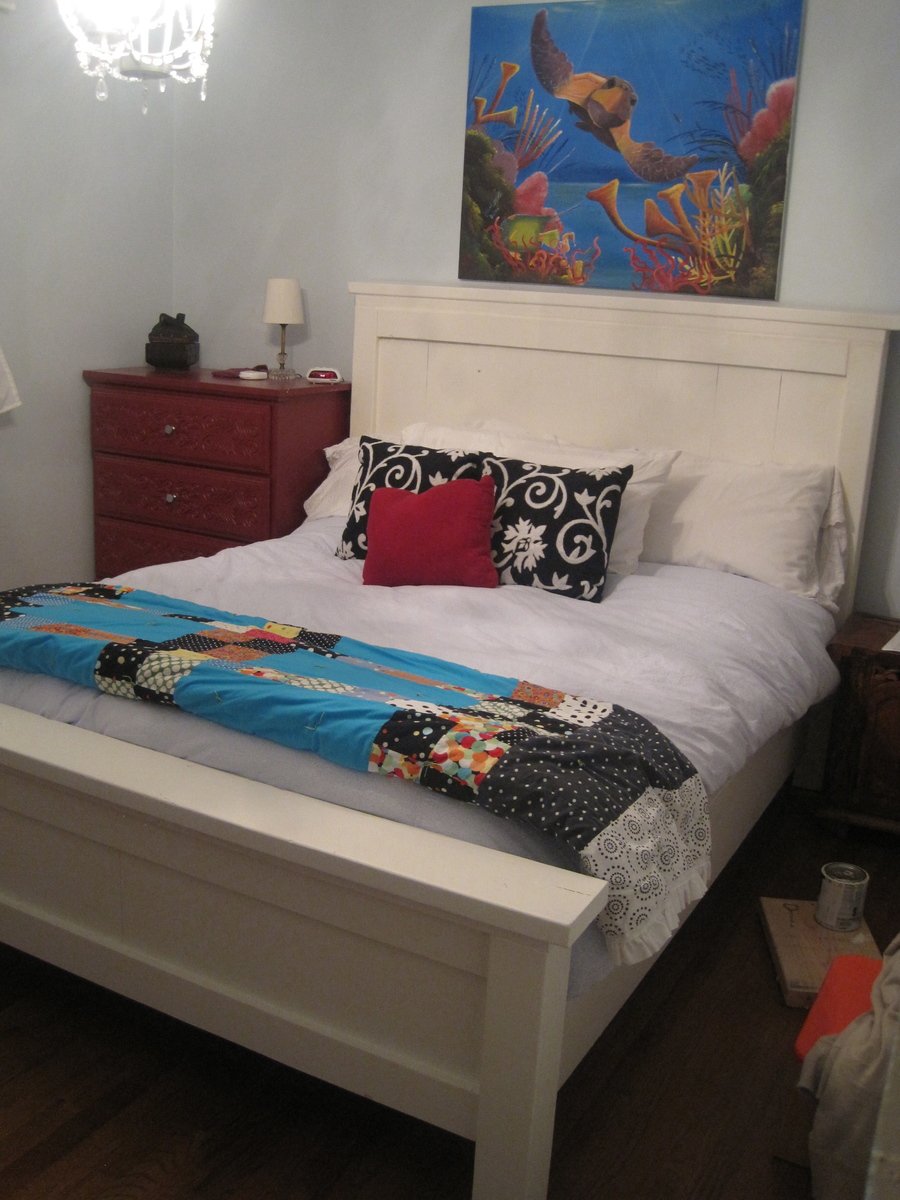
This is my first ever build using Ana White's awesome plans! I stuck to the plan mostly, but used 4.5 lag screws and joist hangers like others had suggested. Oh, I also used a 2 inch board in the middle of the headboard and footboard, since my HD only carried 7.25" 2 X 8's. I had a couple of hiccups.....the headboard fell down in my garage and some boards got tweaked out of place, but I think I was able to sufficiently cover up the aftermath with wood filler and paint :D I really wanted to do this project by myself (sort of a "I am woman, hear me roar!" kind of thing, but it would've been a lot easier to have a helper.....just some advice :)

Built from Plan(s)
Estimated Cost
$175.....about the same as a bed frame from ikea :)
Estimated Time Investment
Week Long Project (20 Hours or More)
Finish Used
Primed with Zissner Bull's Eye, painted with Clark and Kensington Flat Enamel in Antique White (with a free quart that I got at Ace!) and finished with Trewax clear paste wax.
Recommended Skill Level
Beginner

Modern Adirondack Chairs & Outdoor Side Table

Submitted by j_bowman on Sun, 04/11/2021 - 11:35

These modern Adirondack chairs were my first wood working project ever and they turned out awesome! I wanted to build a small table to complete the set and Ana’s new side table plans were exactly what I was looking for. I am truly amazed at how easy these projects were to make and how great they look on our front patio. Ana’s step-by-step plans make it so simple. My wife and I can’t wait to build some more of these projects for our backyard lanai and pool area.

Finish Used
General Finishes Red Mahogany stain
Spar Urethane

Comments

Seasonal And Holiday

Traditional Bird House Brag Post

Submitted by MMTruncale on Sat, 04/06/2013 - 19:15

My very first project using the Compound Miter Saw. Easy Cuts. Easy assembly. Cost was about $1.50. I think I am going to make kits (as suggested in the sister plan) for a couple of birthdays coming up!

Estimated Cost
$1.50
Estimated Time Investment
An Hour or Two (0-2 Hours)
Finish Used
No finish. Used spray paint to put Little One's hands on the roof.
Recommended Skill Level
Starter Project

Hanging daybed

Submitted by hponce28 on Sun, 04/14/2013 - 14:24

I wanted to make a large porch swing but just couldn't find the exact design. I wanted to be able to stretch out and take a nap but also be able to have a back to lean against. Most plans that I found were just basically a box you could put a mattress in and then hang. So I found Ana's plan for a basic daybed and chopped off the legs and raised the back just a little. It's perfect!! Thanks Ana. The plans were very simple to follow. This is my first project and I think it turned out great.

Built from Plan(s)
Estimated Cost
$250
Estimated Time Investment
Weekend Project (10-20 Hours)
Finish Used
Colored stain in cocoa. Applied two coats.
Recommended Skill Level
Starter Project

Comments

melimew

Sat, 07/26/2014 - 07:37

Looking forward to do one like this !
Do you still have the measurement for the back you have raised ?
Really nice !

Thanks :-)

jdaybama

Tue, 11/18/2014 - 17:38

We made the bed and it looks awesome!  Thanks for making the plans easy to follow and providing the picture, which was a fantastic reference.  I do have a question for you in regard to how you hung the beg.  We would like to hang this from our porch, but can see that we simply have 2x4 roof trusses.  We are concerned that the weight of the bed (pretty heavy) plus mattress and support plus a person may be too much.  Any additional information you could provide on how you hung the swing would be greatly appreciated!  Thanks!

The Mail Boss (my attempt)

Submitted by stonejamie on Tue, 07/27/2021 - 20:14

This was my take on the mail boss. It took a lot longer than I thought but I learned a lot in the process.

Built from Plan(s)
Estimated Cost
$150
Estimated Time Investment
Week Long Project (20 Hours or More)
Finish Used
Benjamin Moore Advance in Pure White
Recommended Skill Level
Intermediate

Comments

Cedar outdoor table with scraps!

Submitted by Anonymous (not verified) on Sat, 08/21/2021 - 06:28

I had a pile of leftover wood after getting my deck rebuilt; so I had some brand new cedar as well as some used pressure-treated wood. (Of course, I made the deck builders leave anything worth keeping!) I thought it would be put to good use as an outdoor table for storage & serving on my new deck! I started off with the Rustic X Console Table plans from this website, and then I made just a few modifications on length (to fit the space better). I was able to re-use my leftover wood, and I think it turned out beautifully! It's been used several times for food serving when the neighbors come over for happy hour, for storage of random outdoor things, and for climbing on when I need to reach the TV above it...so it's definitely sturdy! Thank you, Ana White, for such great plans that are easy to use and easy to modify as needed. Really happy with this one!

Built from Plan(s)
Estimated Cost
Free
Estimated Time Investment
Afternoon Project (3-6 Hours)
Finish Used
None - naturally weathered cedar
Recommended Skill Level
Beginner

Comments

We love the skylights in our version of your greenhouse!

Submitted by Anonymous (not verified) on Tue, 08/31/2021 - 08:23

This was the perfect post-retirement project for me. It was a lot of work, but very rewarding.
I documented most of it on my blog.

We sure love this greenhouse!

Built from Plan(s)

Comments

rick1956

Wed, 09/01/2021 - 05:37

Thank you! They definitely added a LOT more work, but we've already used them a lot. The plants are sure glad for them. I'll post pictures of the finished greenhouse when it's finally there.

Garage Storage

Submitted by Smokeydog on Fri, 03/20/2015 - 08:59

Thanks to Ana's 2x4 storage plan and a neighbor's discarded kitchen cabinets we now have a very clean and convenient storage area  in our garage.  It even features a work bench and sorting area.

Estimated Cost
40-50 dollars
Estimated Time Investment
Afternoon Project (3-6 Hours)
Finish Used
None
Recommended Skill Level
Starter Project

Comments

17” square, 2x4 side tables / stools

Submitted by Anonymous (not verified) on Mon, 10/04/2021 - 12:33

Well my wife bought 2 x 17” square seat cushions the problem was we didn’t have any stools to put them on so decided to enhance our front seating patio area with 2 solid 2x4 side tables that would double up as stools.
I based the design on Ana’s table design but decided to counter sink all the screws & cut plugs to suit so no screw heads could be seen, they turned out perfect & very robust, perfect for the U.K. weather, my wife finished them in grey outdoor paint to match the furniture, all in all they took only around 6hrs to make & paint.

Built from Plan(s)

Comments

Modified Adirondack Chairs and Coffee Table

Submitted by carvern on Mon, 10/04/2021 - 14:16

I had some Kebony deck boards left over from another project and thought they would work well. I think they did! Kebony is pine that is soaked in an alcohol and then heated up. It has a 30 year warranty and requires no care. I used a Penofin oil on the 2x4s and Cutek oil on the Kebony

Comments

Ana White Admin

Tue, 10/05/2021 - 09:53

Kebony sounds like a great material for outdoor builds, very pretty too! Well done, thank you for sharing!

Cedar Boxes made with Pallet Wood

Submitted by flashfire on Fri, 09/15/2017 - 22:19

Thanks for the plans, I was able to make this for a friend's birthday. I made it from pallet wood and it was so easy, I did a mitred top though because I wanted it to look neat and trim. .

Built from Plan(s)
Estimated Cost
Nil
I used pallet wood
Wood glue & screws I already had
Estimated Time Investment
Week Long Project (20 Hours or More)
Finish Used
Linseed oil
Recommended Skill Level
Beginner
Seasonal And Holiday

Outdoor 2x2 end table

Submitted by Anonymous (not verified) on Sun, 11/07/2021 - 04:19

I made the end table a little taller than the instructions and the top boards further apart for rain to fall thru, then drilled a hole so it can be used as an umbrella stand too!

Built from Plan(s)

Comments

Hall Tree Storage Bench

Submitted by ScottyG on Sat, 12/02/2017 - 14:46

Hi Ana!  This project was pretty much inspired by ALL the great things you build on this site, as well as from watching a 'Fixer Upper' marathon (hence, the white color and shiplap).  Last Christmas, I promised my sister that I'd build her a hall tree since she's now up to 10 grandkids and needed more hooks for all those coats and hats.  Unfortunately, I also came down with a WICKED case of vertigo, so no power tools for yours truly. : (

Well...  The vertigo finally cleared up, so it was time to get out my trusty ol' Kreg Jig and fire up the tools.

This project started with 2 4x4s.  I cut 17 1/2" off each, then used the long pieces as the back and the sort pieces as the front legs.  Then I built a rectangle (shored up by some cross supports) out of 2x3s and used those to attach the back legs together with pocket holes.  I did the same thing with the 2 front legs, then attached the 2 sets of legs together with shorter pieces of 2x3s that framed up the side.

Next, I added a front to back support to the underside, and then attached the bottom of the seat on top of that.  I built the front, back, and side pieces of the bench section by cutting a couple of 8' x 8" x .5" planks to size, and attached 2 pieces to each side by gluing and nailing them to the frame.   Then, I rans some shiplap up the back (glued and nailed to the back frame) and topped it all off with a mantle.

For the seat, I used a 12" project board ($11 at Lowes for a 6 foot section) because I love all the knotty details and nail marks.  I framed it out with 1x1 and attached with pocket screws on the underside.  I finished that piece by staining it in Rustoleum Dark Walnut.

As for the rest, I just framed the shiplap section with leftover 1x1s, then sanded and stained the whole piece with the same Dark Walnut stain (so that something would show through after distressing).  Finally, I applied 2 coats of Rustoleum Linen White Chalk Paint (LOVE that stuff!), distressed it, and topped with one coat of Minwax 1 Coat Poly (ALSO love that stuff), and added some hardware and country do dads from Hobby Lobby (Rustic Hooks, 'Bless This Home' Sign, Decorative Doorknob, and "Mitten Clip" for wet mittens and gloves coming off little hands) .  What do you think?  ヅ

Estimated Cost
About $100
Estimated Time Investment
Weekend Project (10-20 Hours)
Finish Used
Rustoleum Dark Walnut Stain (Bench Seat), Rustoleum Linen White Chalk Paint (Rest of project), sealed with Minwax 1 coat poly.
Recommended Skill Level
Intermediate

Ana's ultimate workbench (Ryobi)

Submitted by CABANE on Fri, 01/12/2018 - 13:38

This is the perfect workbench for my needs.

I upgraded the casters to bigger ones as my shop's floor is in rough shape.

I also added storage under the two work surface next to the miter saw. This was just a matter of closing under the 2X4 frame and making the two sections on casters a little shorter. The only downside for that mod is that the plywood can bend a bit since it is not screwed to the frame. I don't mind since it falls flat as soon as there is weight on it. Also, this mod makes it hard to include fence system (it would need to be removable, like fixed with dowels only, no glue) and almost impossible to include a precise fence system since it would need to be removable. In my case, I do rough, non-repetitive cuts, so there is no need. 

TIP : Pay a little extra for smooth plywood. I lost a lot of time sanding mine :(

Estimated Cost
$150 CAD
Estimated Time Investment
Weekend Project (10-20 Hours)
Finish Used
Linseed oil
Recommended Skill Level
Beginner

Comments

groche

Tue, 02/04/2020 - 08:21

Awesome! Do you have pictures/info for the cart that has the Dewalt table saw? I have the same one and would love to build the cart for it.

Stratton Daybeds times Two

Submitted by karahart on Wed, 05/11/2011 - 08:25

I built my first daybed in May of 2010, and my second one in August of 2010. I've since moved one of the daybeds to my new nursery I'm creating. These beds are so versitle, so sturdy, and can be moved anywhere and 'go' with whatever decor. I love both of them!

Built from Plan(s)
Estimated Cost
$450 for BOTH beds
Estimated Time Investment
Week Long Project (20 Hours or More)
Finish Used
I primed the beds with Kilz oil based primer, then added a bunch of ultra white paint by Behr. I finished with sanding down the edges and staining them, before applying a top coat of polycrylic. Only use polycrilic, not polyurethane for white painted furniture!
Recommended Skill Level
Intermediate

Oak - Hutch And Buffet

Submitted by UeckerFan on Tue, 07/16/2013 - 17:43

This project was on the honey-do list. My wife was looking for antiques and had a pretty specific look she wanted this one fit. It was a fun and relatively fast build. I choose Oak as that is the most regular wood I use and had some on hand.

I modified the dimensions a bit making the hutch a foot taller and the buffet a little larger in width and smaller in depth. I used full extension ball bearing drawer slides for the drawers.

I rabbeted the back in and put a middle brace in for support and so that I could hide the back seam. I don't like to face nail face frames, but for this it turned out pretty nice nonetheless.

Estimated Cost
$125
Estimated Time Investment
Weekend Project (10-20 Hours)
Finish Used
I used min-wax pre-stain conditioner, followed by special walnut stain, then 1 coat of satin pre-catalyzed lacquer, then 320 sand paper, then a second coat of lacquer.
Recommended Skill Level
Intermediate

Comments

Lasso the Moon

Fri, 07/19/2013 - 11:52

Oh, man could I use one of those in my house. At some point I'd like to flank a doorway with two "half versions" of a hutch like this one. Yours is beautiful. Love the oak!
Btw--combining those two plans--brilliant!

Anna