Community Brag Posts

Modern Patio Chairs/Love Sear

Submitted by Anonymous (not verified) on Sun, 09/25/2022 - 15:57

Super easy and fun project! We altered the original plans to build a loveseat and had zero issues. We did add some extra support below.
I did not find 25”x25” cushions within our price range so I settled for 25”x22.5” and they work but ultimately 25x25 works best.

Farmhouse Table

Submitted by Anonymous (not verified) on Fri, 01/04/2019 - 22:25

Love this table!

Recommended Skill Level
Beginner

Comments

Numbered Cubbies

Submitted by kari on Sun, 08/28/2011 - 15:16

Like so many others, I saw this and had to have one of my own. It was cute and quick - perfect! I had the same height issues that others had. The center supports are too tall for the 1x2 and 1x3 on the front. I wound up using all 1x3's, 2 on the front and 3 on the back. Because the cubbies came out a bit deeper, I thought I would try it as a utensil holder in the kitchen. Cute, huh.

Built from Plan(s)
Estimated Cost
less than $10
Estimated Time Investment
Afternoon Project (3-6 Hours)
Finish Used
I tried Ana's antique finish. The first layer I spray painted black. I didn't know if Ana sprayed or brushed on the white, but I brushed on mine. Painted the numbers on, then distressed it a bit.
Recommended Skill Level
Beginner

Comments

Breakfast nook table and banquette

Submitted by wtclarke1 on Thu, 10/03/2019 - 10:07

When we moved into our house, there was an empty breakfast nook.  I built in the banquette seating, and then built the table out of oak.  This was inspired by the Triple Pedestal Table (http://ana-white.com/woodworking-projects/triple-pedestal-farmhouse-tab…)

Estimated Time Investment
Week Long Project (20 Hours or More)
Recommended Skill Level
Intermediate

Simple jig to save time and increase accuracy

Submitted by Anonymous (not verified) on Thu, 06/15/2023 - 12:13

I downloaded the plans for the octagonal table. I have made several and used a few different woods, made a few minor design changes as well as creating a routine and using a jig or two. This jig fits in between the two boards that form the seat support frame. I used a large paint stick and a scrap piece of 2 x 4. Using a table saw, I cut a groove in the 2" edge, approximately 1/2" deep, this took two passes (pass it through, turn it and pass again), a slight adjustment and another two passes. Insert the paint stick and seat all the way down. Place jig between seat support frame, might be a little snug or use a clamp to hold in place. Adjust so just the paint stick sticks up enough to separate seat boards. With seat boards against the jig, it forms the perfect angle/guide to match cuts. I also used 1/2" spacers to create consistent spacing. Love the various plans you make available as well as your videos.

Comments

Reclaimed wood king bed

Submitted by Anonymous (not verified) on Thu, 10/17/2019 - 20:34

Built for a customer out of reclaimed 2x6 spruce corrral boards. There was a lot of sanding involved in prepping this wood, but I couldn’t be happier with how it turned out!

Built from Plan(s)
Estimated Time Investment
Week Long Project (20 Hours or More)
Recommended Skill Level
Intermediate

New Bed for my tween: chestwick platform bed full

Submitted by autma on Sat, 01/04/2014 - 20:35

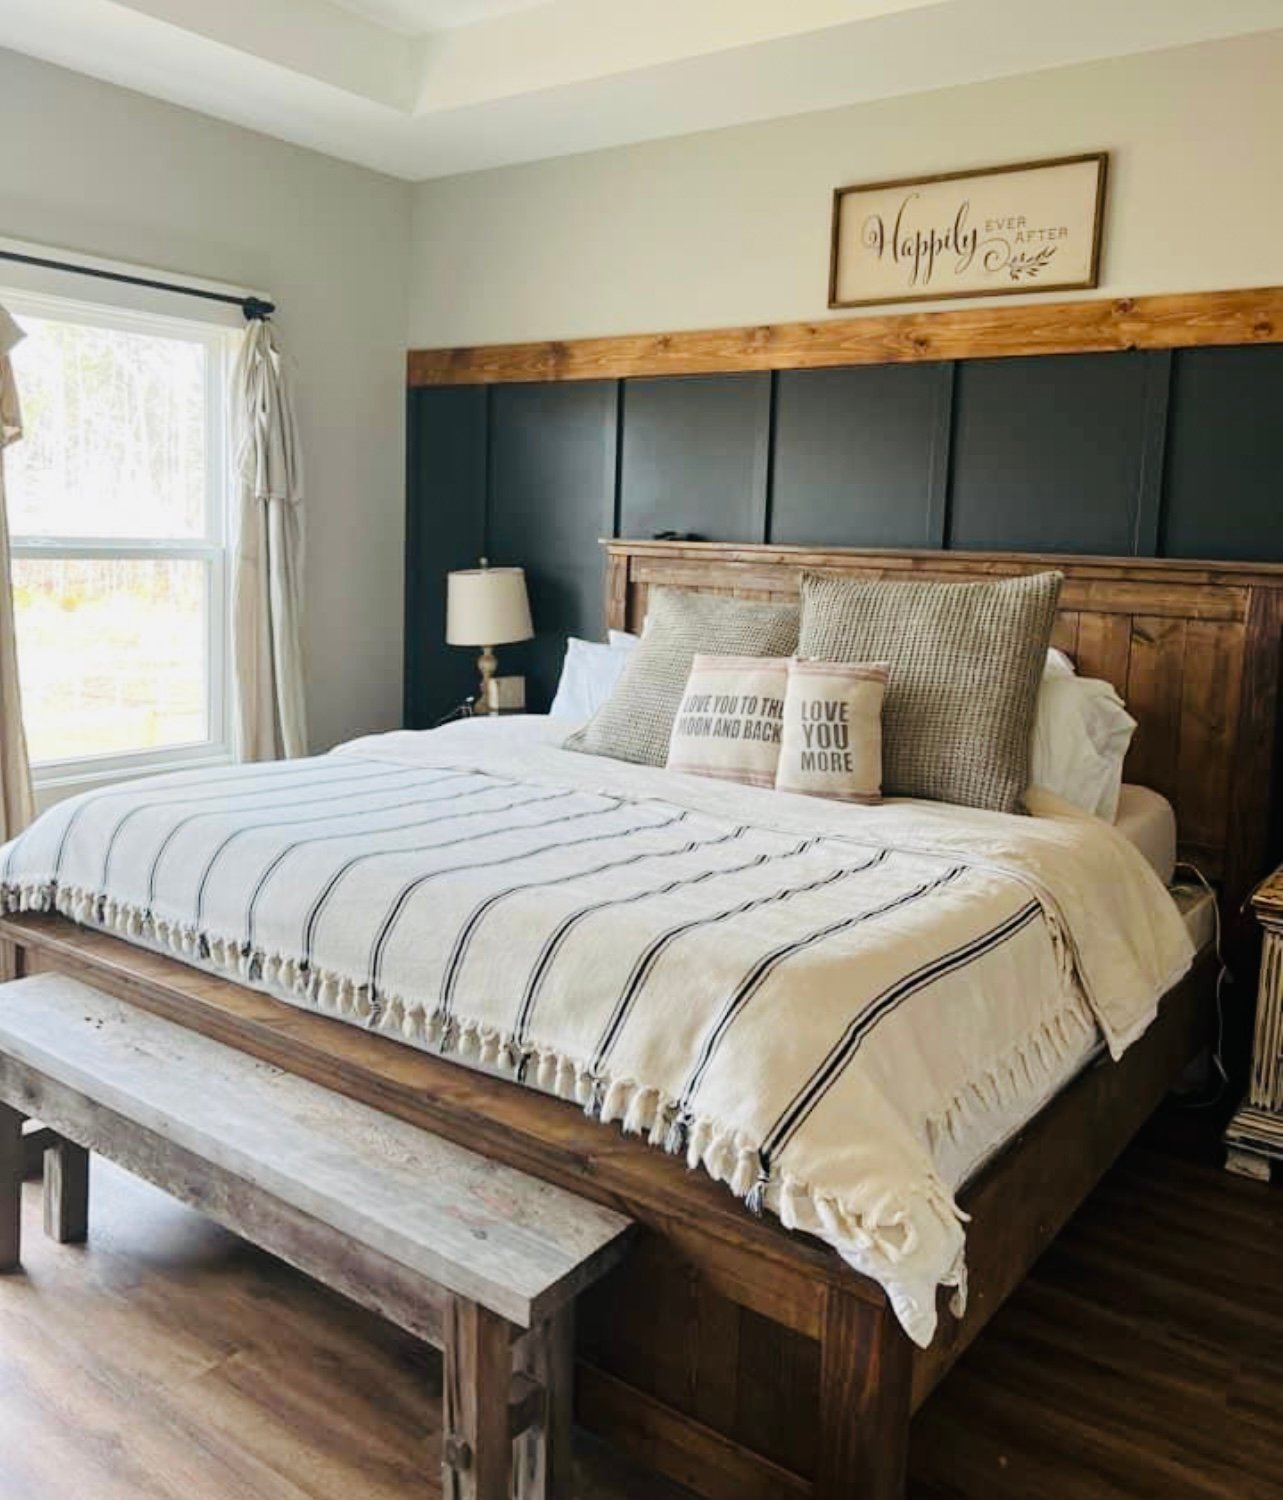
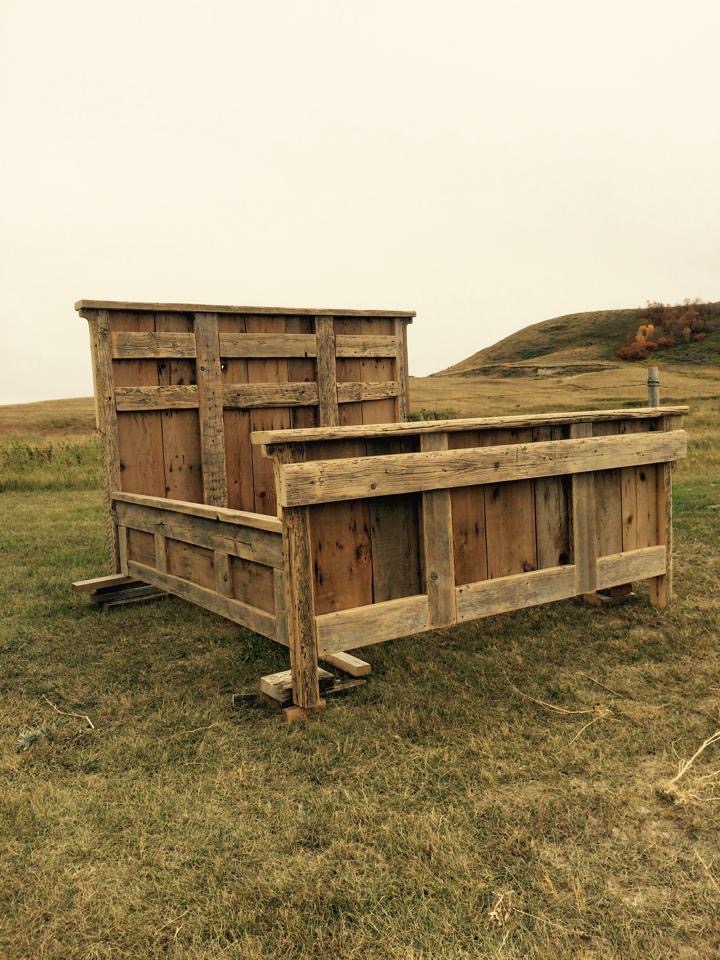
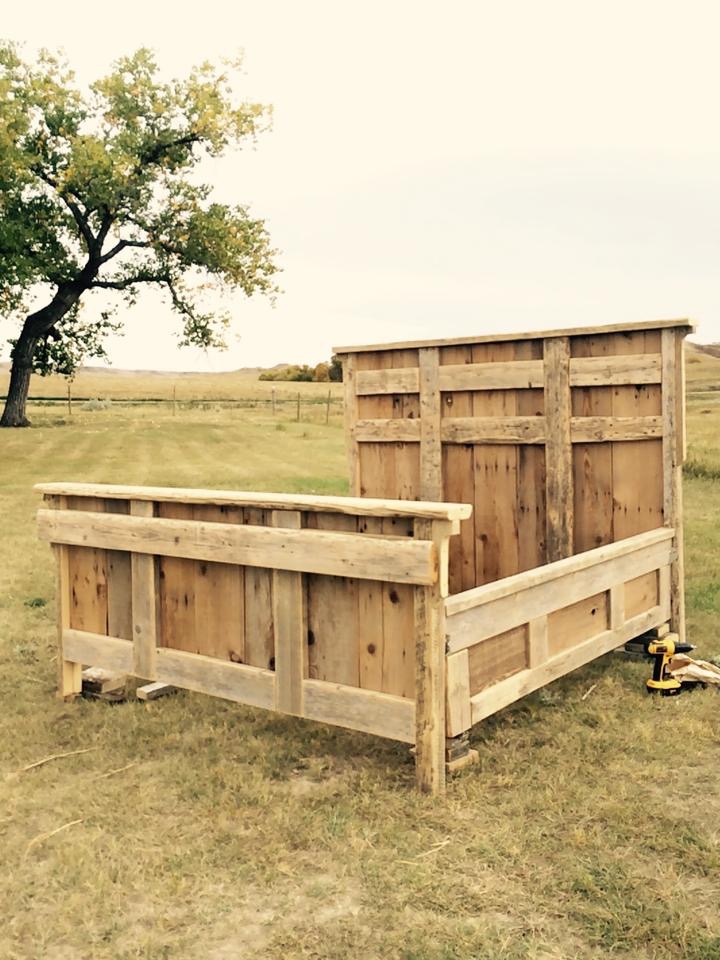
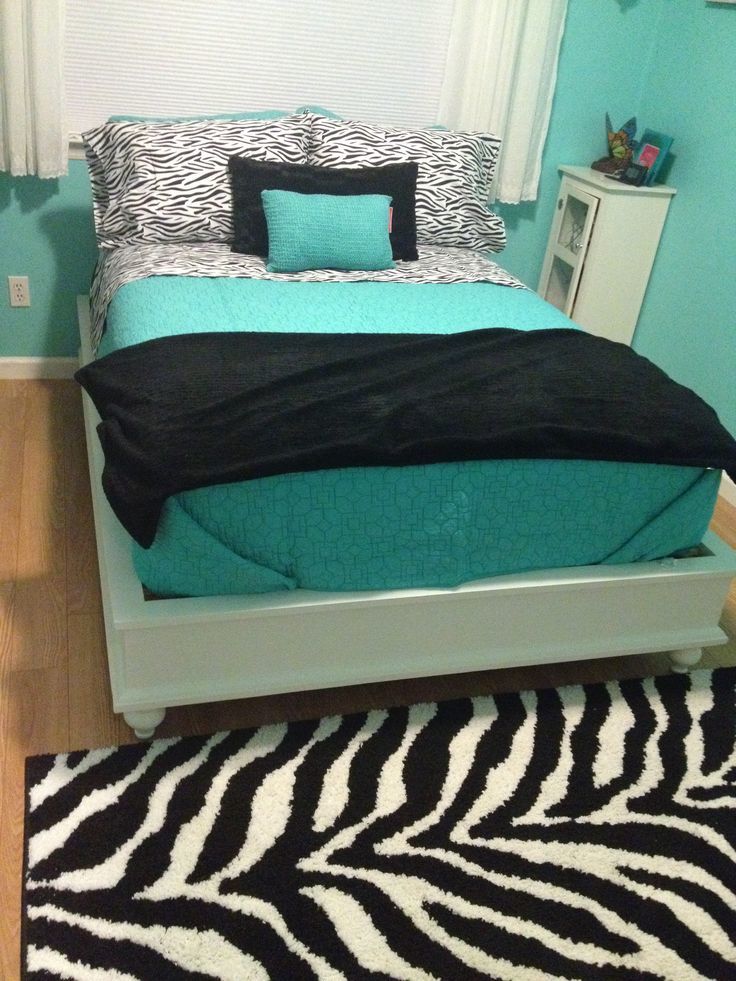
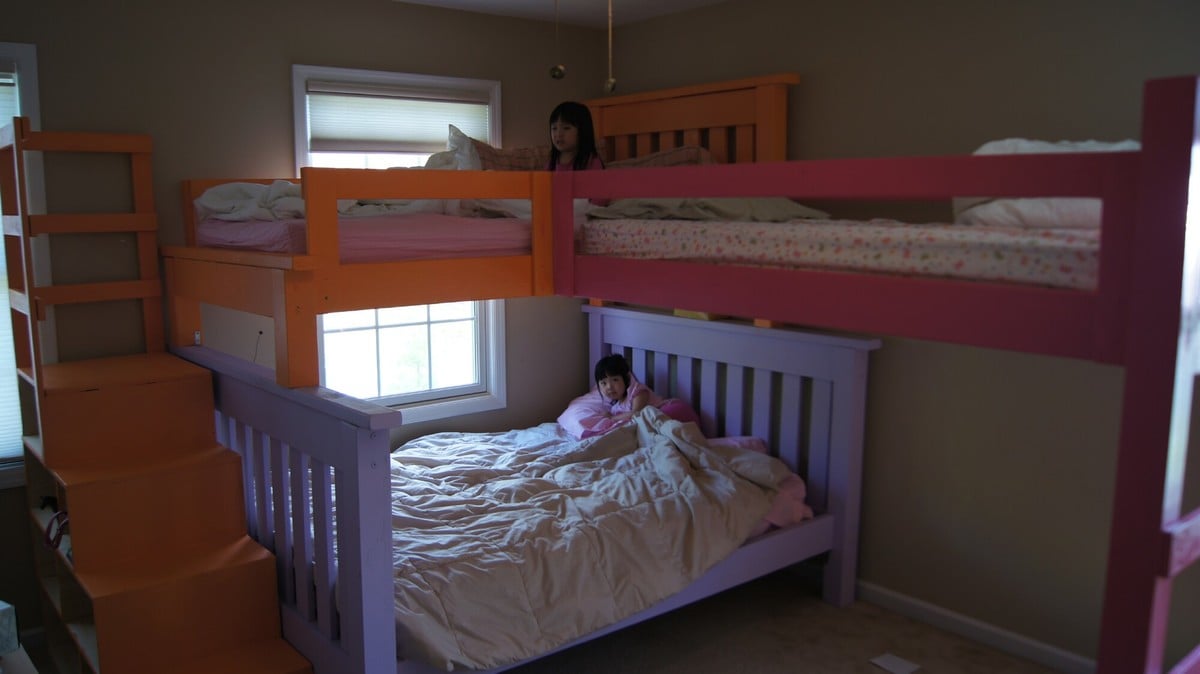
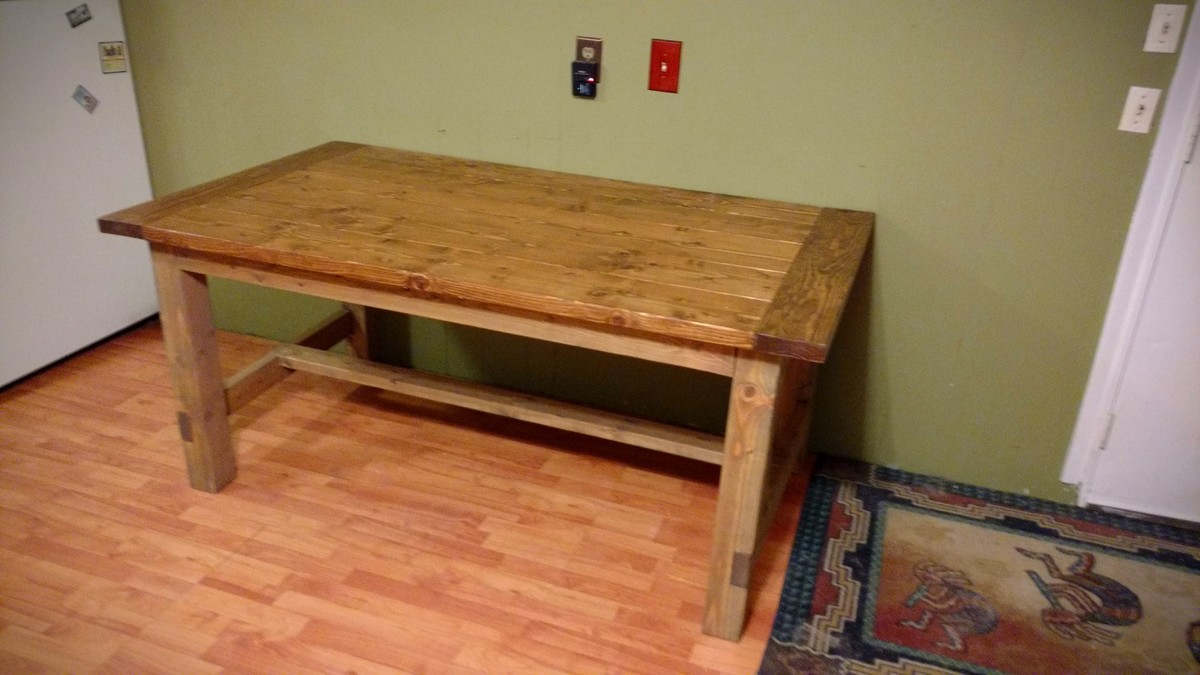
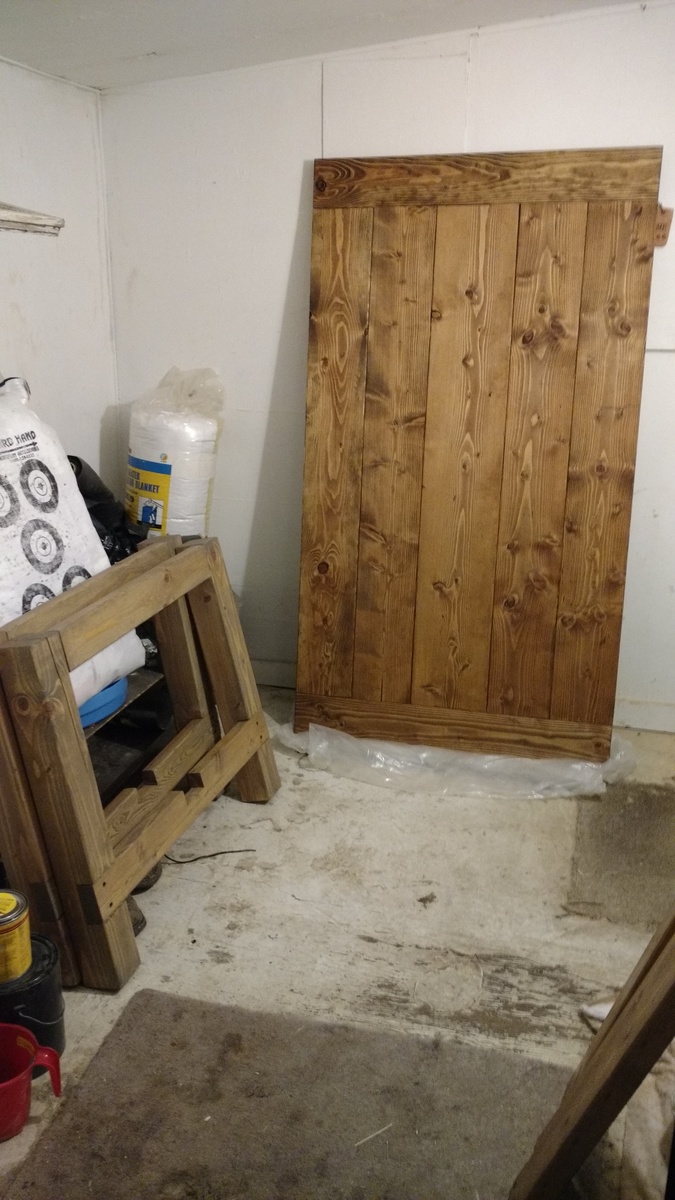
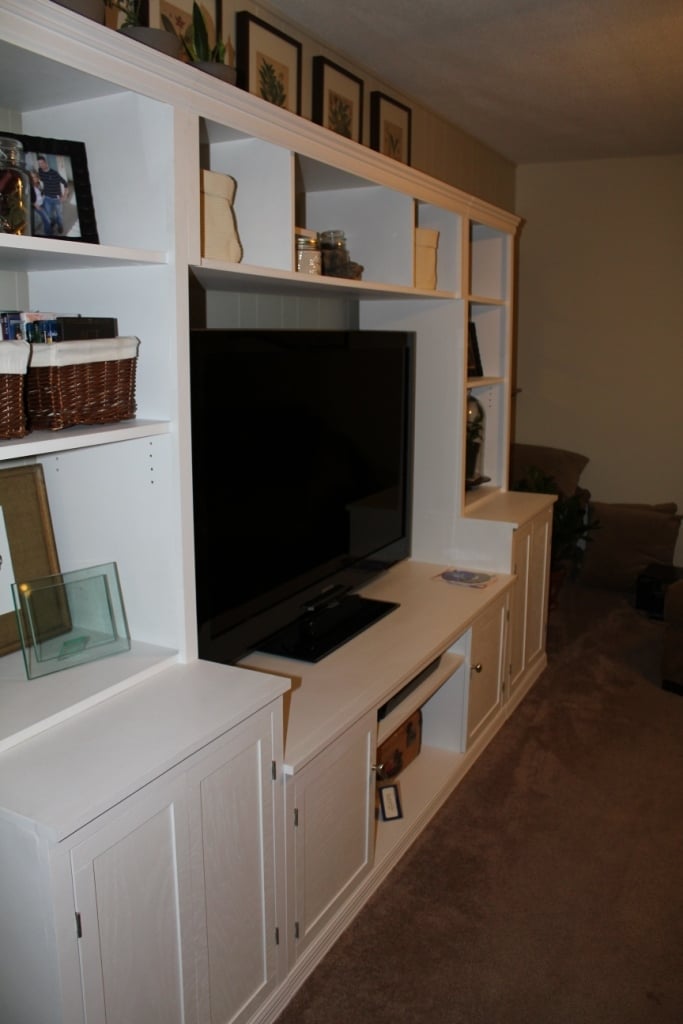
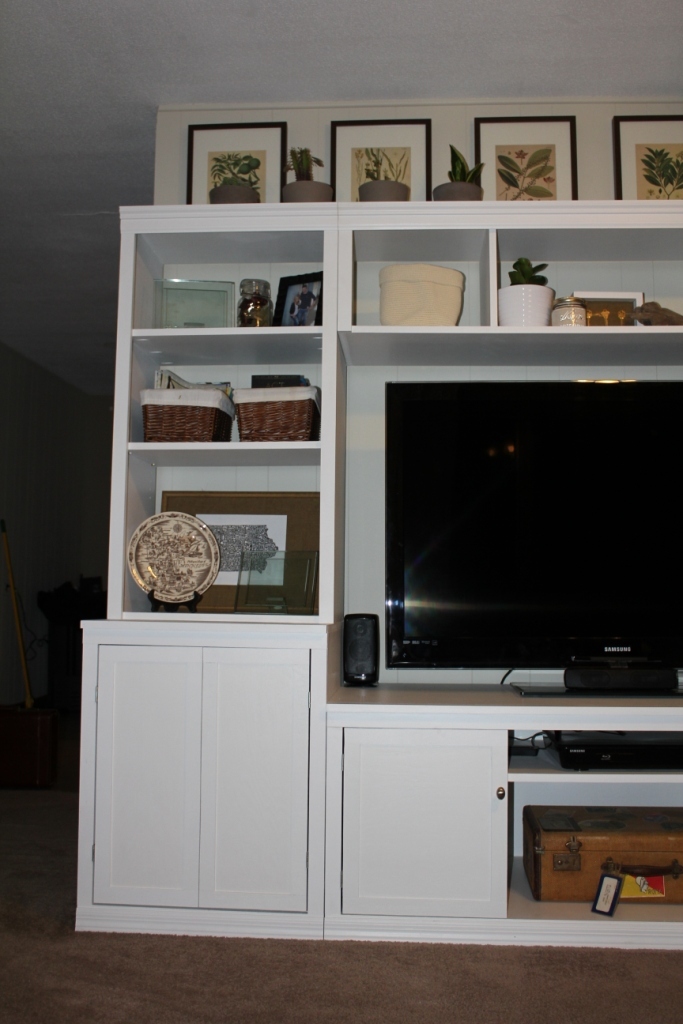
After searching for a bed for our tween we found that we couldn't find the bed we wanted for the price we wanted to pay. I'd been eyeing this site for months and finally decided to take the plunge. The Shanty-2-Chic blog really motivated me to get this going.

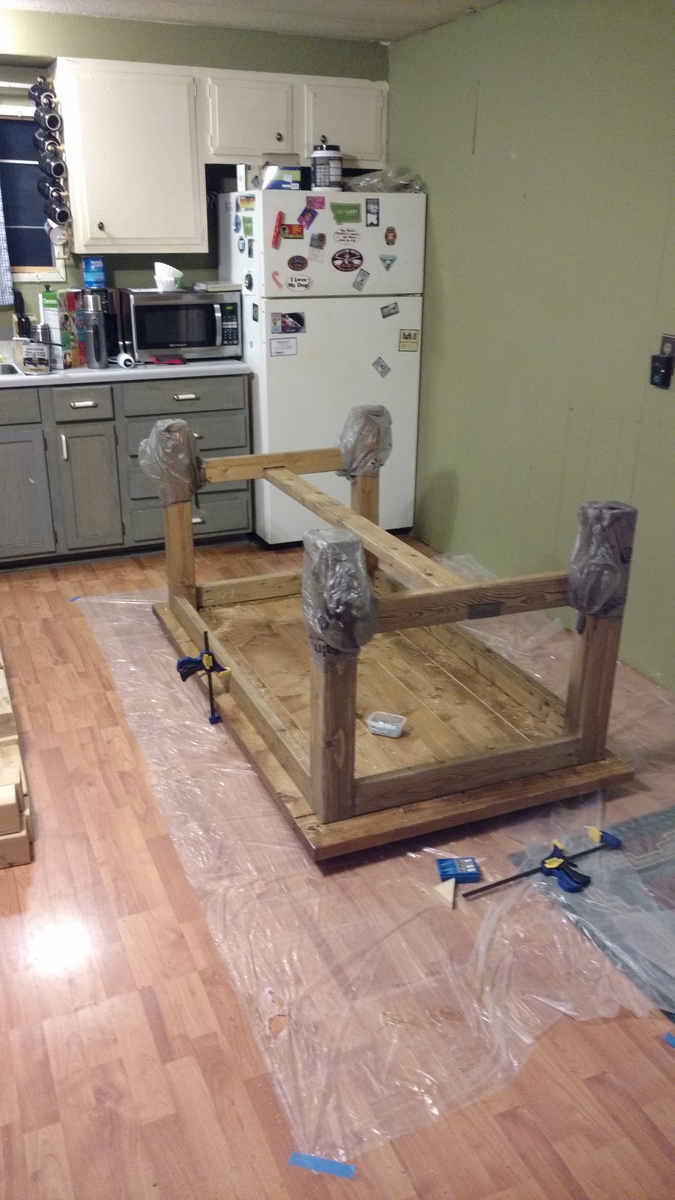
This was our first (and arguably most expensive) project ever- husband ended up acquiring new tools to make the job easier, haha.

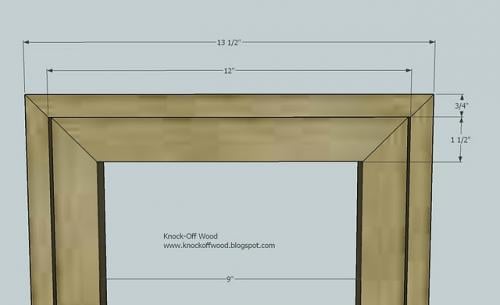
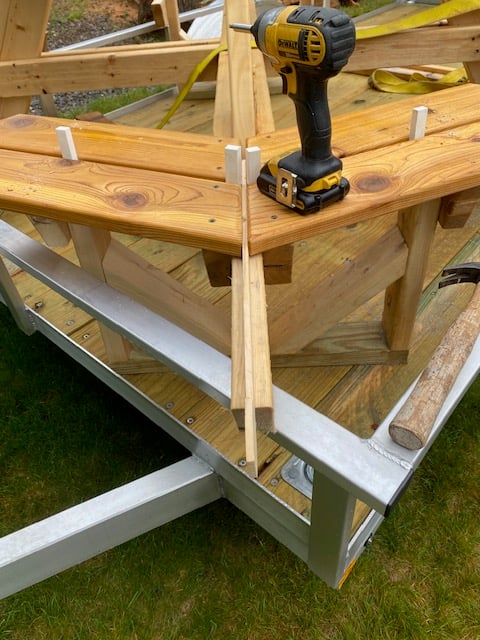
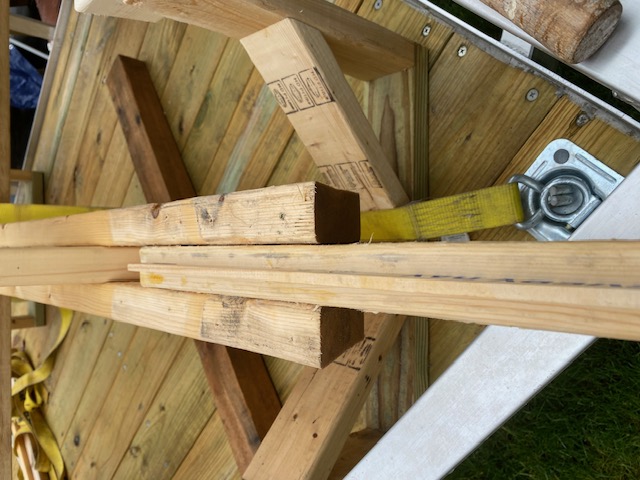
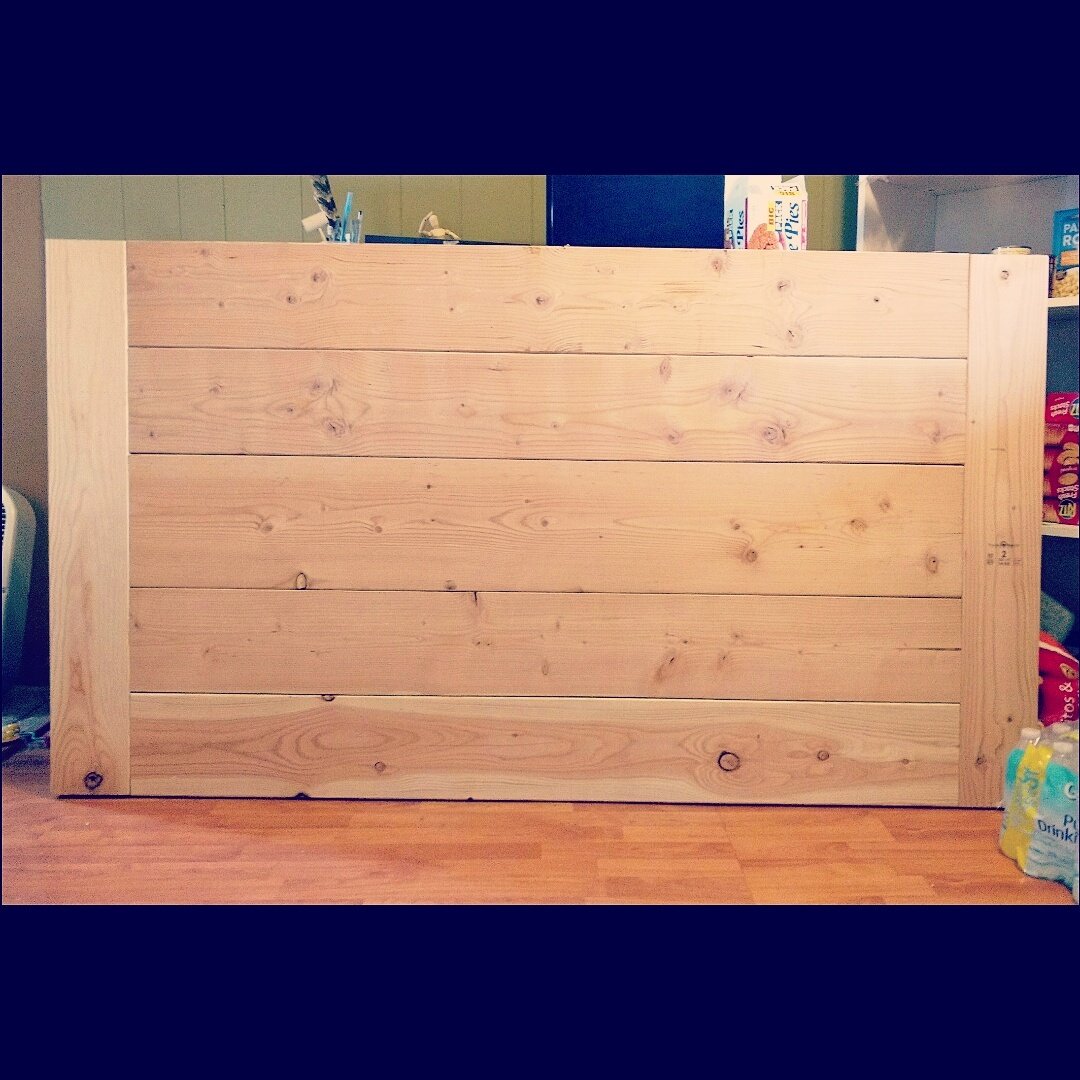
We followed the tutorial from the site with modifications for a full size mattress. (Just substituted 53x75 for the queen measurements and adjusted cuts accordingly.)

Used furring strips (1x3) for mattress support to save money.

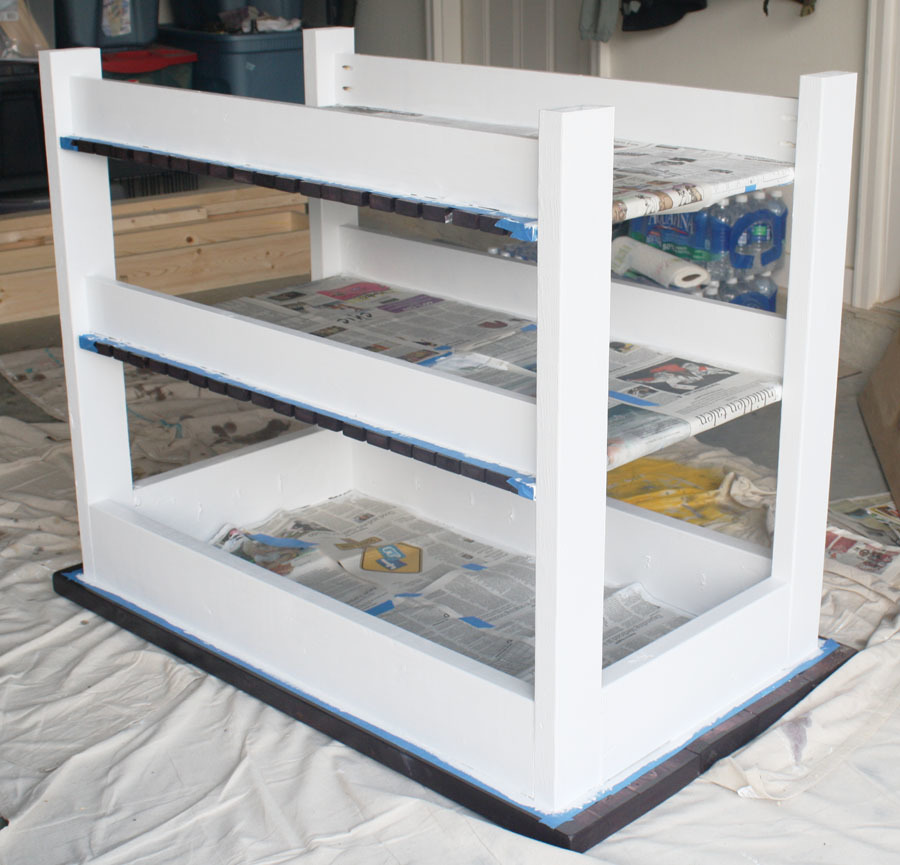
Finished with zinsser primer (bought a quart for all our future projects)- this stuff is awesome!

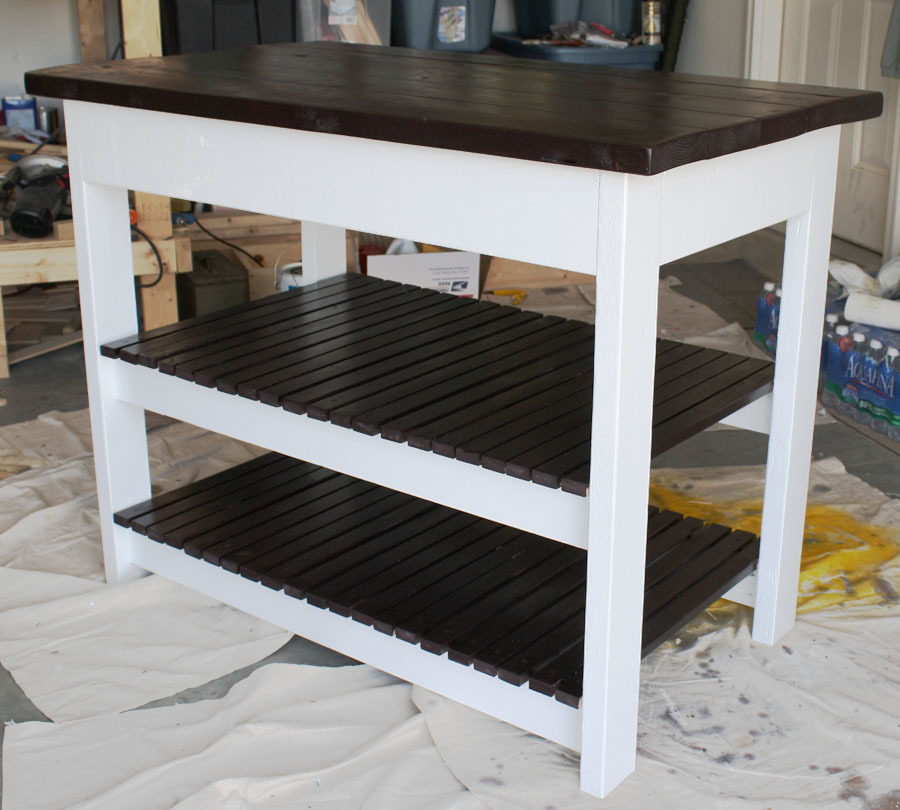
Picked a flat white paint in a color that matched her dresser.

Cost of Daughters New Bed:
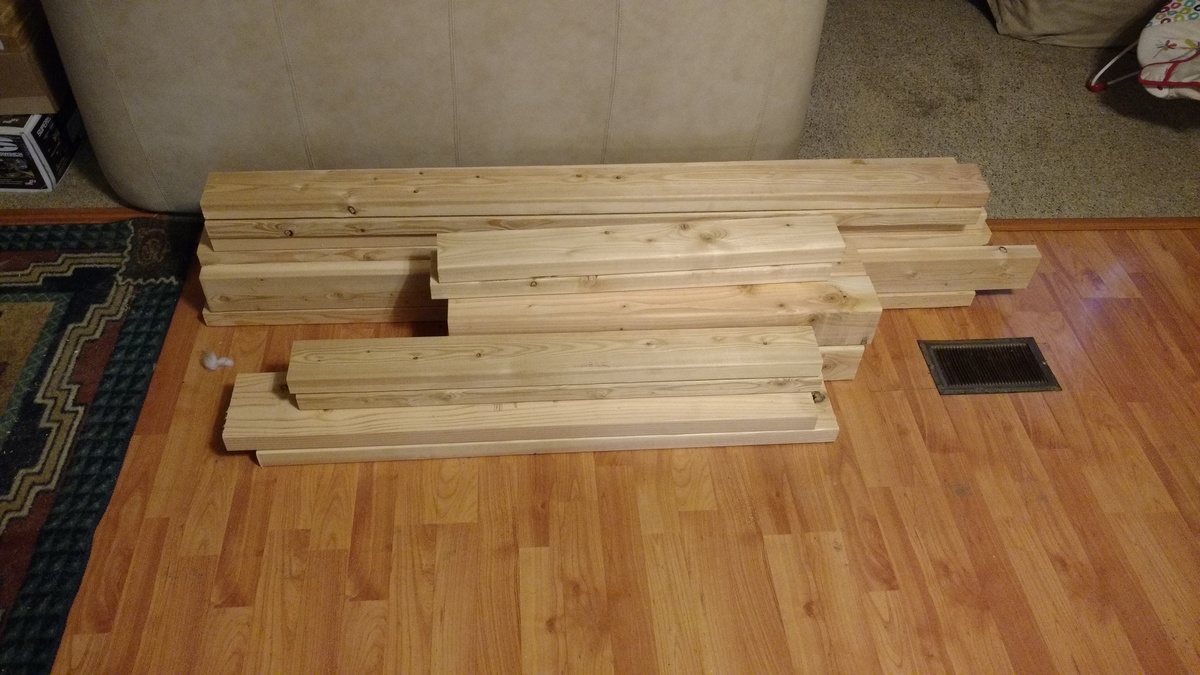
Lumber $120,
Kreg jig clamp $29
Air compresser with nail gun $150

Learning how to construct furniture ourselves: Priceless

Estimated Cost
$120 or so- I don't recall exactly
Estimated Time Investment
Day Project (6-9 Hours)
Finish Used
Zinsser primer (2 coats brush on)
white paint- flat finish
Recommended Skill Level
Beginner

Horse stable for 18" dolls

Submitted by petera on Thu, 01/09/2014 - 08:03

This was a neat project that made a great Christmas present, along with some horses, of course. What really finished it off was the shim shingled roof. I also liked the hinged doors which gives it a little action for the kids to play with.

Thanks for the plans.

Peter

Estimated Time Investment
Weekend Project (10-20 Hours)
Finish Used
Minwax golden oak on the roof.
Recommended Skill Level
Beginner

Swingset with playhouse

Submitted by Handy Dad on Thu, 12/19/2019 - 14:44

I deviated quite a bit from the plans.  Mostly, I used readily available swingset hardware to beef up the design. This stuff can be found on big online sites or specialty sites. 

I bought all of the swings, and ninja rope online along with the 4ft slide and safety handles.

Estimated Cost
$1200
Estimated Time Investment
Week Long Project (20 Hours or More)
Finish Used
Outdoor Stain/Urethane
Recommended Skill Level
Intermediate

Comments

Simple Bunk bed with a triple twist and cubby steps.

Submitted by Jason_NJ on Fri, 05/11/2012 - 11:29

I'm a father of 4 girls ages 6,5,4, and 1. So a regular bunk wasn't enough so I decided to add the 3rd bunk. Each painted in my girls favorite colors. The paint was Martha Stewart signature paint which was on clearance on Lowes. Think it was 3 or 4 dollars a quart. The cubby steps are basically just 4 boxes stacked on top of each other and nailed together and made from 3/4" furniture grade plywood.

It didn't come out perfect but I'm pretty happy with the results. Let me know what you guys think. Thanks.

PS, Ana...my wife is a big fan of yours. She's the one who turned me onto your site.

Estimated Cost
$200-$250
Estimated Time Investment
Week Long Project (20 Hours or More)
Finish Used
Martha Stewart Signature Paint
Recommended Skill Level
Beginner

Comments

calisarah2005 (not verified)

Sat, 11/24/2012 - 09:06

Hi,
We are looking to build something very similar, but are needing more information. How did you attach the loft bed to the top bunk bed? What do you have at the foot of the loft bed to keep it up? Thanks so much for any information.

Playhouse with Swing Set

Submitted by Anonymous (not verified) on Wed, 06/01/2016 - 12:48

We really enjoyed building this playhouse swing set for our kids.  We have a decent slope to our backyard, so we needed to sink our posts, which required a bit more work thank Ana's plans.  We also used a real window (my dad just happened to have in his garage) instead of the 3 open aired windows Ana's plans called for.  Inside we built a fold under table, shelf, and a chalkboard for thier entertainment.  

Estimated Cost
$800
Estimated Time Investment
Week Long Project (20 Hours or More)
Recommended Skill Level
Intermediate

Farmhouse Table

Submitted by Malka on Fri, 06/03/2016 - 23:32

This was my 5th build. Took a few weekends working in the morning. Table is Weathered Oak (base) and Early American (top) stain. Modified the plans to make it slightly smaller so it would fit better in my kitchen. Very sturdy and table looks gorgeous in person, very happy.

Estimated Cost
$110+/-
Estimated Time Investment
Weekend Project (10-20 Hours)
Finish Used
Minwax Early American and Weathered Oak
Rustoleum Triple Thick Polyurethane (2 coats on base, 3 on table)
Recommended Skill Level
Beginner

Logan Media Center / Classic Storage Collection

Submitted by Jen Marzen on Sun, 06/17/2012 - 23:31

This media center was my hubby and I's very first project! It was definitely a learning experience and its definitely not perfect, but we love it! We love how much it looks like the pottery barn version and that WE MADE IT!!!

This project took us quite some time to complete..... and its still not 100% done as we still need hardware for the 2 outermost doors but are having a hard time finding ones similar to the pottery barn ones that aren’t going to cost us a fortune..... My hubby and I put this together piece by piece as we had time (which seemed to be few and far between). If you had uninterrupted time to work on this , one could probably start and finish it in a weekend. But because of lack of uninterrupted time and the learning curve of this being our first project it took us months to finish.

We got the TV base (the bottom middle piece) done first and we were so excited about it that before attempting the rest of the project, we painted it and set it up in the living room :) We were so excited to get the rest of the media center made but my hubby got busy with work and was unable to help me. I got antsy, so antsy in fact that finished the rest of the project COMPLETELY on my own!! And I am SO PROUD OF IT!!! I made and painted the rest of the media center except for the doors because i (not sure why) was completely intimidated by the doors so I procrastinated making them, so the media center sat in the living room for a month or 2 without doors or the adjustable shelves on the towers lol. Last week I finally got up the courage to make the doors and they (to my surprise!) really weren’t that bad!! I painted them and the adjustable shelves and finished assembling the media center. Its now finished and decorated except for some of the door hardware!!! SO EXCITED!!!

Since this was our first project we hadn’t bought a Kreg Jig jet (we have since bought one) and I HIGHLY recommend getting yourself one. It would have made this project so much easier.

Estimated Cost
$300
Estimated Time Investment
Week Long Project (20 Hours or More)
Finish Used
Primer (1 coat) White paint (3 coats)
Recommended Skill Level
Beginner

Comments

spiceylg

Mon, 06/18/2012 - 05:04

First project? That was a serious undertaking! You did a great job, looks fab!!!

Western Saloon doors

Submitted by tracysmith on Thu, 08/02/2012 - 00:44

I built these doors for a very good friend of mine who actually helped me get started turning my new love for building (after finding Ana's site) into a way for our family to make some extra money.

It took me a little while to wrap my brain around building something without using my Kreg Jig. I used a router table set up with some raised panels bits and put the whole thing together with glue and nails! Wonderful experience!

For the finish, I used a vinegar solution to give the cedar wood an old barn look. I think the final result turned out great and the final step was a clear coat sprayed on out of a rattle can.

Estimated Cost
Lumber cost was about $80
Estimated Time Investment
Week Long Project (20 Hours or More)
Finish Used
Vinegar solution and a clear coat put on.
Recommended Skill Level
Advanced

Comments

birdsandsoap

Thu, 08/02/2012 - 10:51

These turned out great! I haven't seen this style of door in forever! They used to be really popular, I remember my Aunt and Uncle having these in the entry to their kitchen. They were the coolest thing ever when I was a kid! Maybe they are a making a comeback?
I'm really impressed with your routing skills, that's a task I have yet to tackle, but I've got the bits laying around waiting.

Nice job!

tracysmith

Thu, 08/02/2012 - 21:10

Thanks a bunch! My friend is replacing an old set of louvered doors that went into her laundry room. Her family are farmers and rodeo people so the western decor really fits in their house. Great western stuff there. They made a chandelier out of a wagon wheel! Really cool!

This was my first attempt at routing so I really appreciate your compliment! It's really simple if you can get the basics of it. I'm sure you'll do just fine when you get to that point. If I can do it, anyone can do it! Thanks again!!

laneal1987

Mon, 01/23/2017 - 09:32

I really want to try and build this for a closet.  Are there any instructions for this?  This is the first door of this style that I have come across that I absolutely love.

A Bittersweet Building Project

I built this table for my friend who is moving away in a couple days :( She's going to use it as a coffee bar in her new home. Visit my blog link for the complete play-by-play!

Built from Plan(s)
Estimated Cost
$125
Estimated Time Investment
Weekend Project (10-20 Hours)
Finish Used
Rustoleum Ultimate Wood Stain in Black Cherry and White High Gloss Paint
Recommended Skill Level
Intermediate

Pool Lounge Chairs

Submitted by Fitnpink on Wed, 07/15/2020 - 17:00

Part of a huge order I did for outdoor furniture. Love how they turned out! Thank you!

Comments

Seasonal And Holiday

Jelly Cabinet for Heather

Submitted by itzann on Tue, 10/09/2012 - 07:14

This project was built by my husband, for our daughter who needed some storage for her card-making and scrapbooking supplies. I had the easy part of doing the painting and purchasing the hardware. The hinges and handles are from Home Depot. It is a challenge to find good lumber at our big box stores. That was probably the most difficult part of the build...dealing with warped wood. This piece is suited for the primitive and rustic look so it didn't matter that the wood had some dings and splintering from the edges. Everything was sanded well and these marks just added to the character. He did encounter some problems with drilling the 1 and 1/4" kreg screws into the frame of the door. The wood wanted to split. Also, the plans called for magnetic closures but we could not determine how those would be installed as the shelves do not reach to the doors. So we cut some wooden swinging closures and attached them to the top of the cabinet. They seem to work well. One modification if he builds this again (and our other daughters are now putting in their orders!) would be to add a wooden support down the center front so that the doors would have something to close against. The way it is now, the doors could be pushed inward and put a lot of stress on the hinges. We were very pleased at how this project turned out! Thank you for the plans.

Built from Plan(s)
Estimated Cost
$75.00
Estimated Time Investment
Week Long Project (20 Hours or More)
Finish Used
Top coats are Benjamin Moore Regal, Pearl Finish in Frappe color. I started by thoroughly sanding and then primed using Ace Royal Shield Primer (latex). Then I sanded again to remove the raised grain. The final coats of the Benjamin Moore Regal were applied using a Fuji HVLP spray gun. The inside of the cabinet (shelves) were sanded but not finished in any way. We like the look of the unfinished pine for the shelving.
Recommended Skill Level
Beginner

Comments

lawson4450

Tue, 10/09/2012 - 13:20

I like the way that came out and I agree its hard to get good wood at the big box stores it took me a while to go through the stacks they had there to find straight pieces. The other thing I had an issue with was the 1 1/4"
Kreg screws as well but if you dont over drive them it generally will not crack the wood. Just be gentle and if it still does turn the clutch down on the drill that will help as well.

itzann

Thu, 10/11/2012 - 18:11

Lawson4450,
Thank you for your comment, and for the advice on the Kreg screws!

We are in the process of cleaning up our garage, so that future building projects are easier to do! One thing my husband also built was a small workbench, with a lower shelf to store the Kreg jig, screws, etc on. It comes in handy as we always know where to at least find the Kreg stuff! We should also keep some notes on the shelf, too, to refer to when the wood cracks, etc.
-Ann

itzann

Thu, 10/11/2012 - 18:13

Patrick,
I think the plans said to make the shelves 1 x 10? And because a 1 x 12 was used for the side frame, the shelves therefore didn't reach to the doors.
Ann

itzann

Thu, 10/11/2012 - 18:04

Aisha,
Thank you for the photo of the magnetic closure. That makes a lot of sense! We could still add those, and also leave the swinging locks in place, too.
-Ann

HRagg (not verified)

Sat, 10/13/2012 - 10:43

I am the lucky receiver of this jelly cabinet. It is exactly what I had in mind when I was on the hunt for one. I was so pleasantly surprised when my parents came to visit and showed me my early birthday present in their trunk! :)

Back