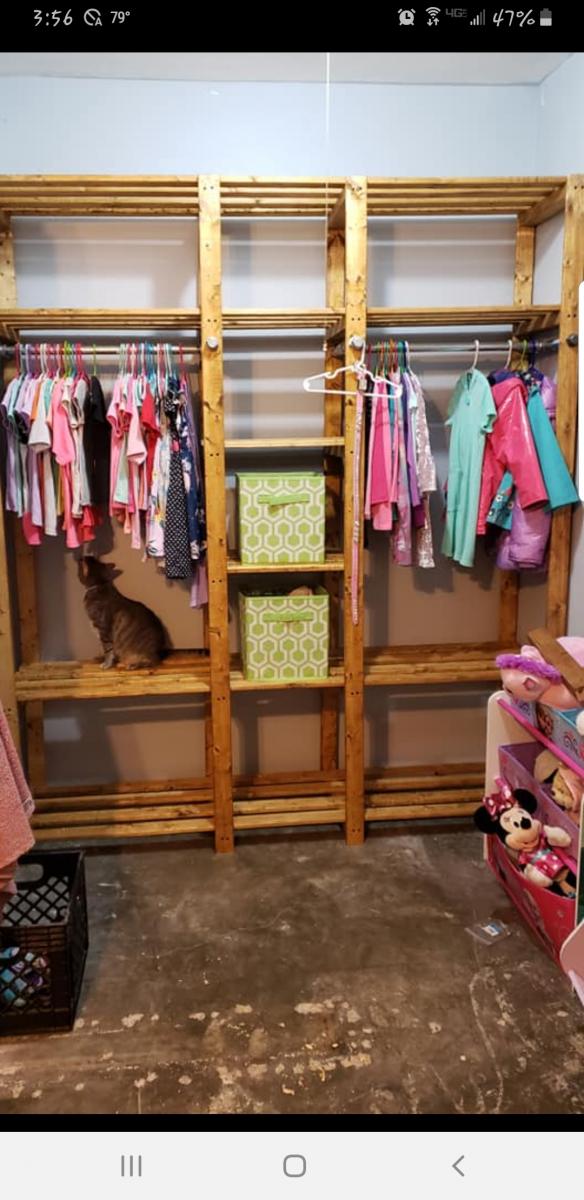
Wood Closet Shelving
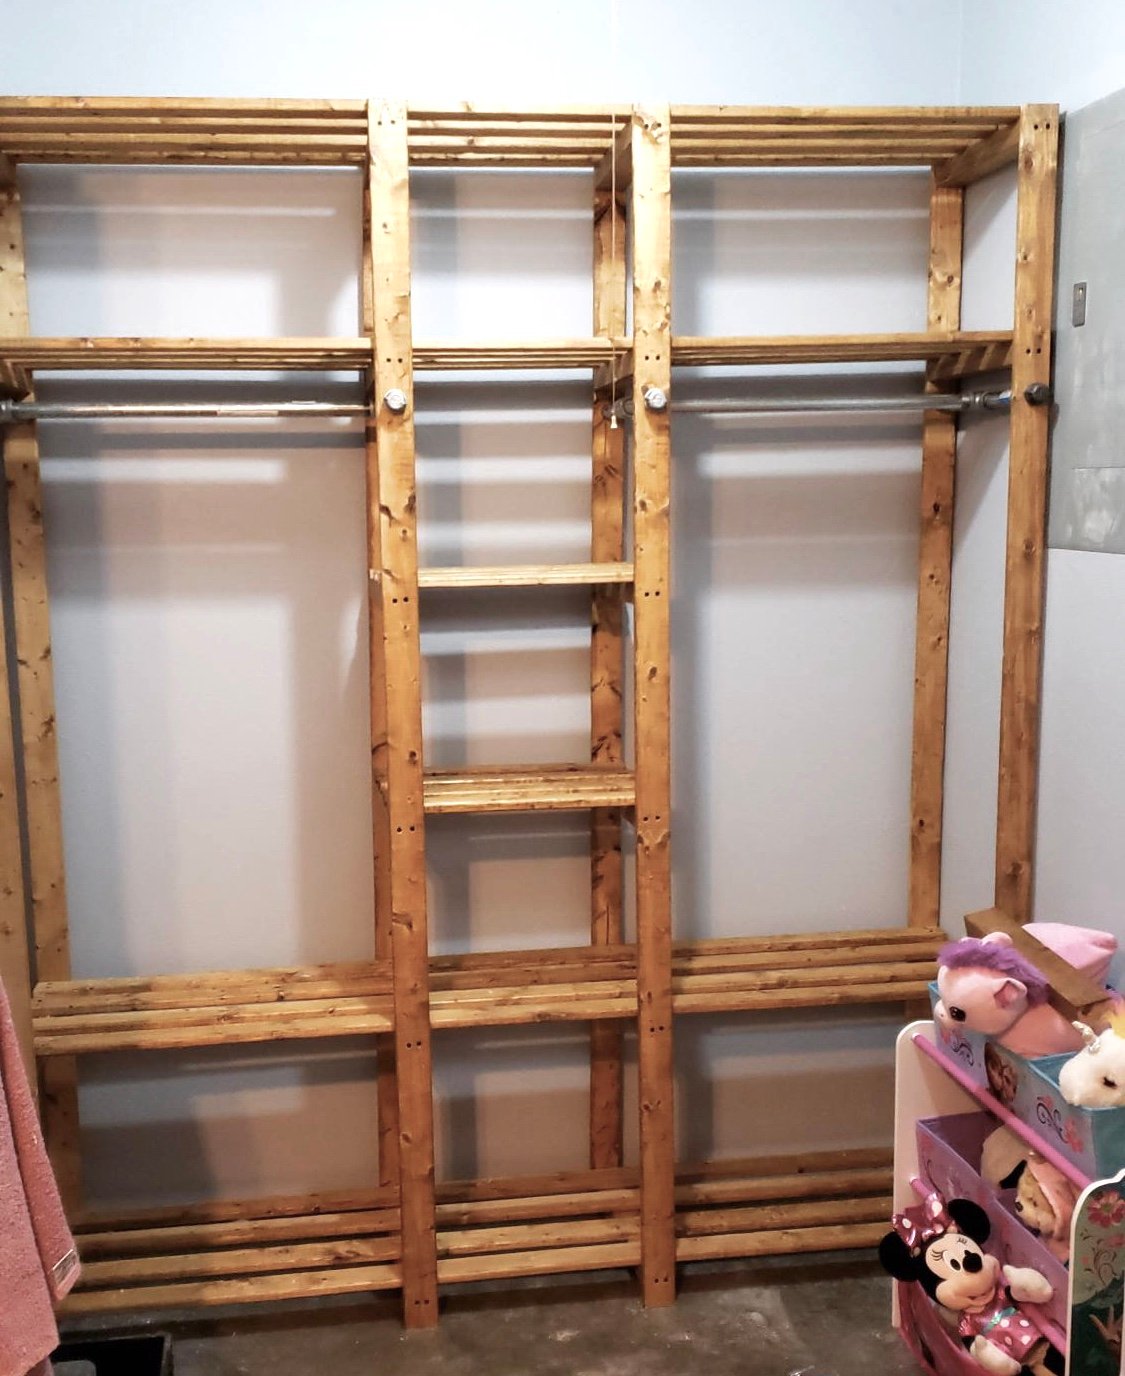
This was a great build and easy to do.
Built from Plan(s)
Estimated Time Investment
Day Project (6-9 Hours)
Recommended Skill Level
Beginner
This was a great build and easy to do.
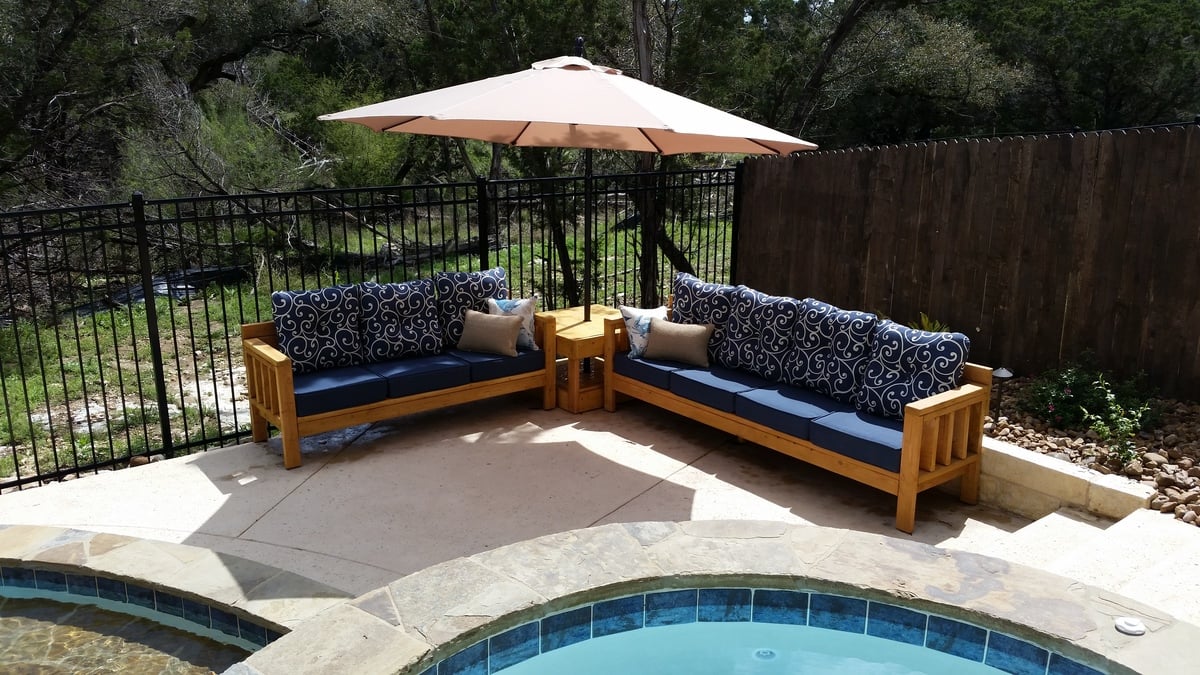
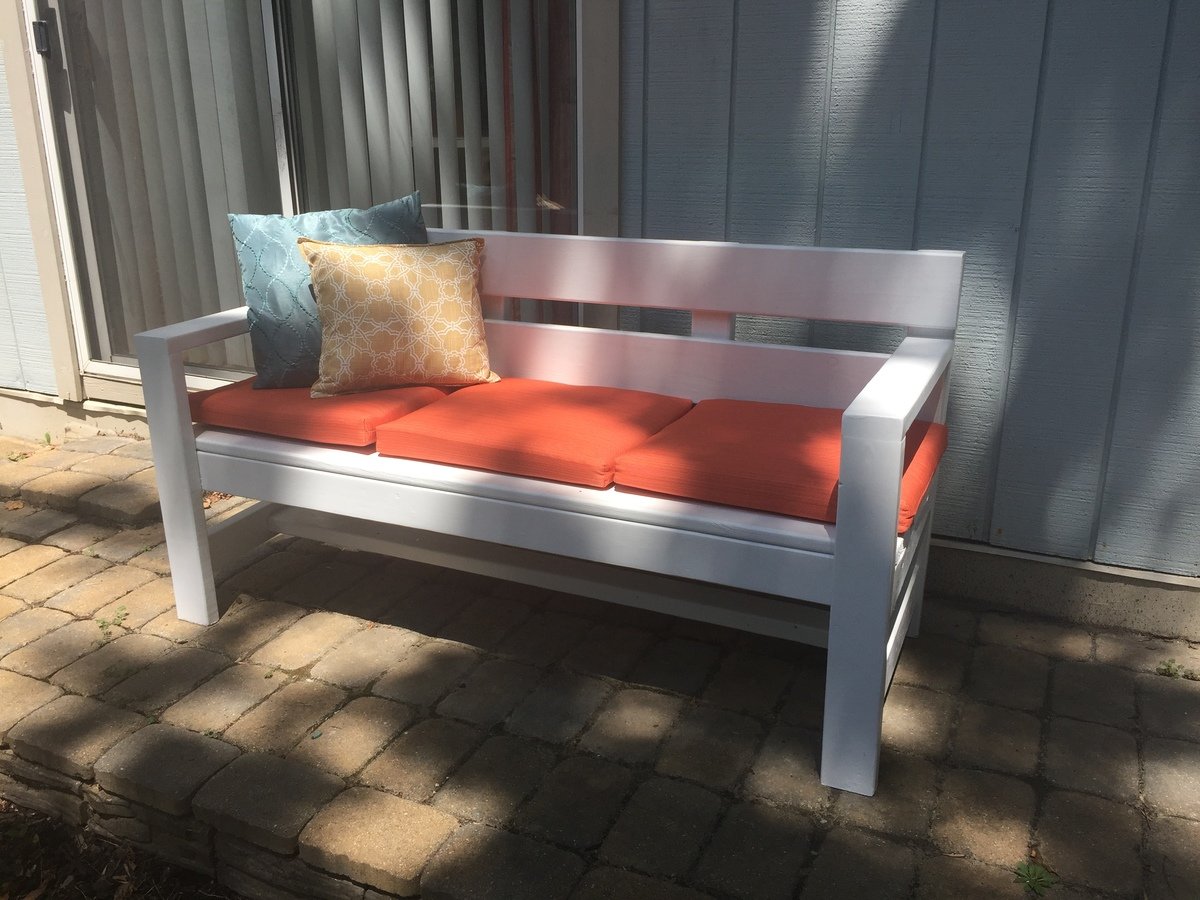
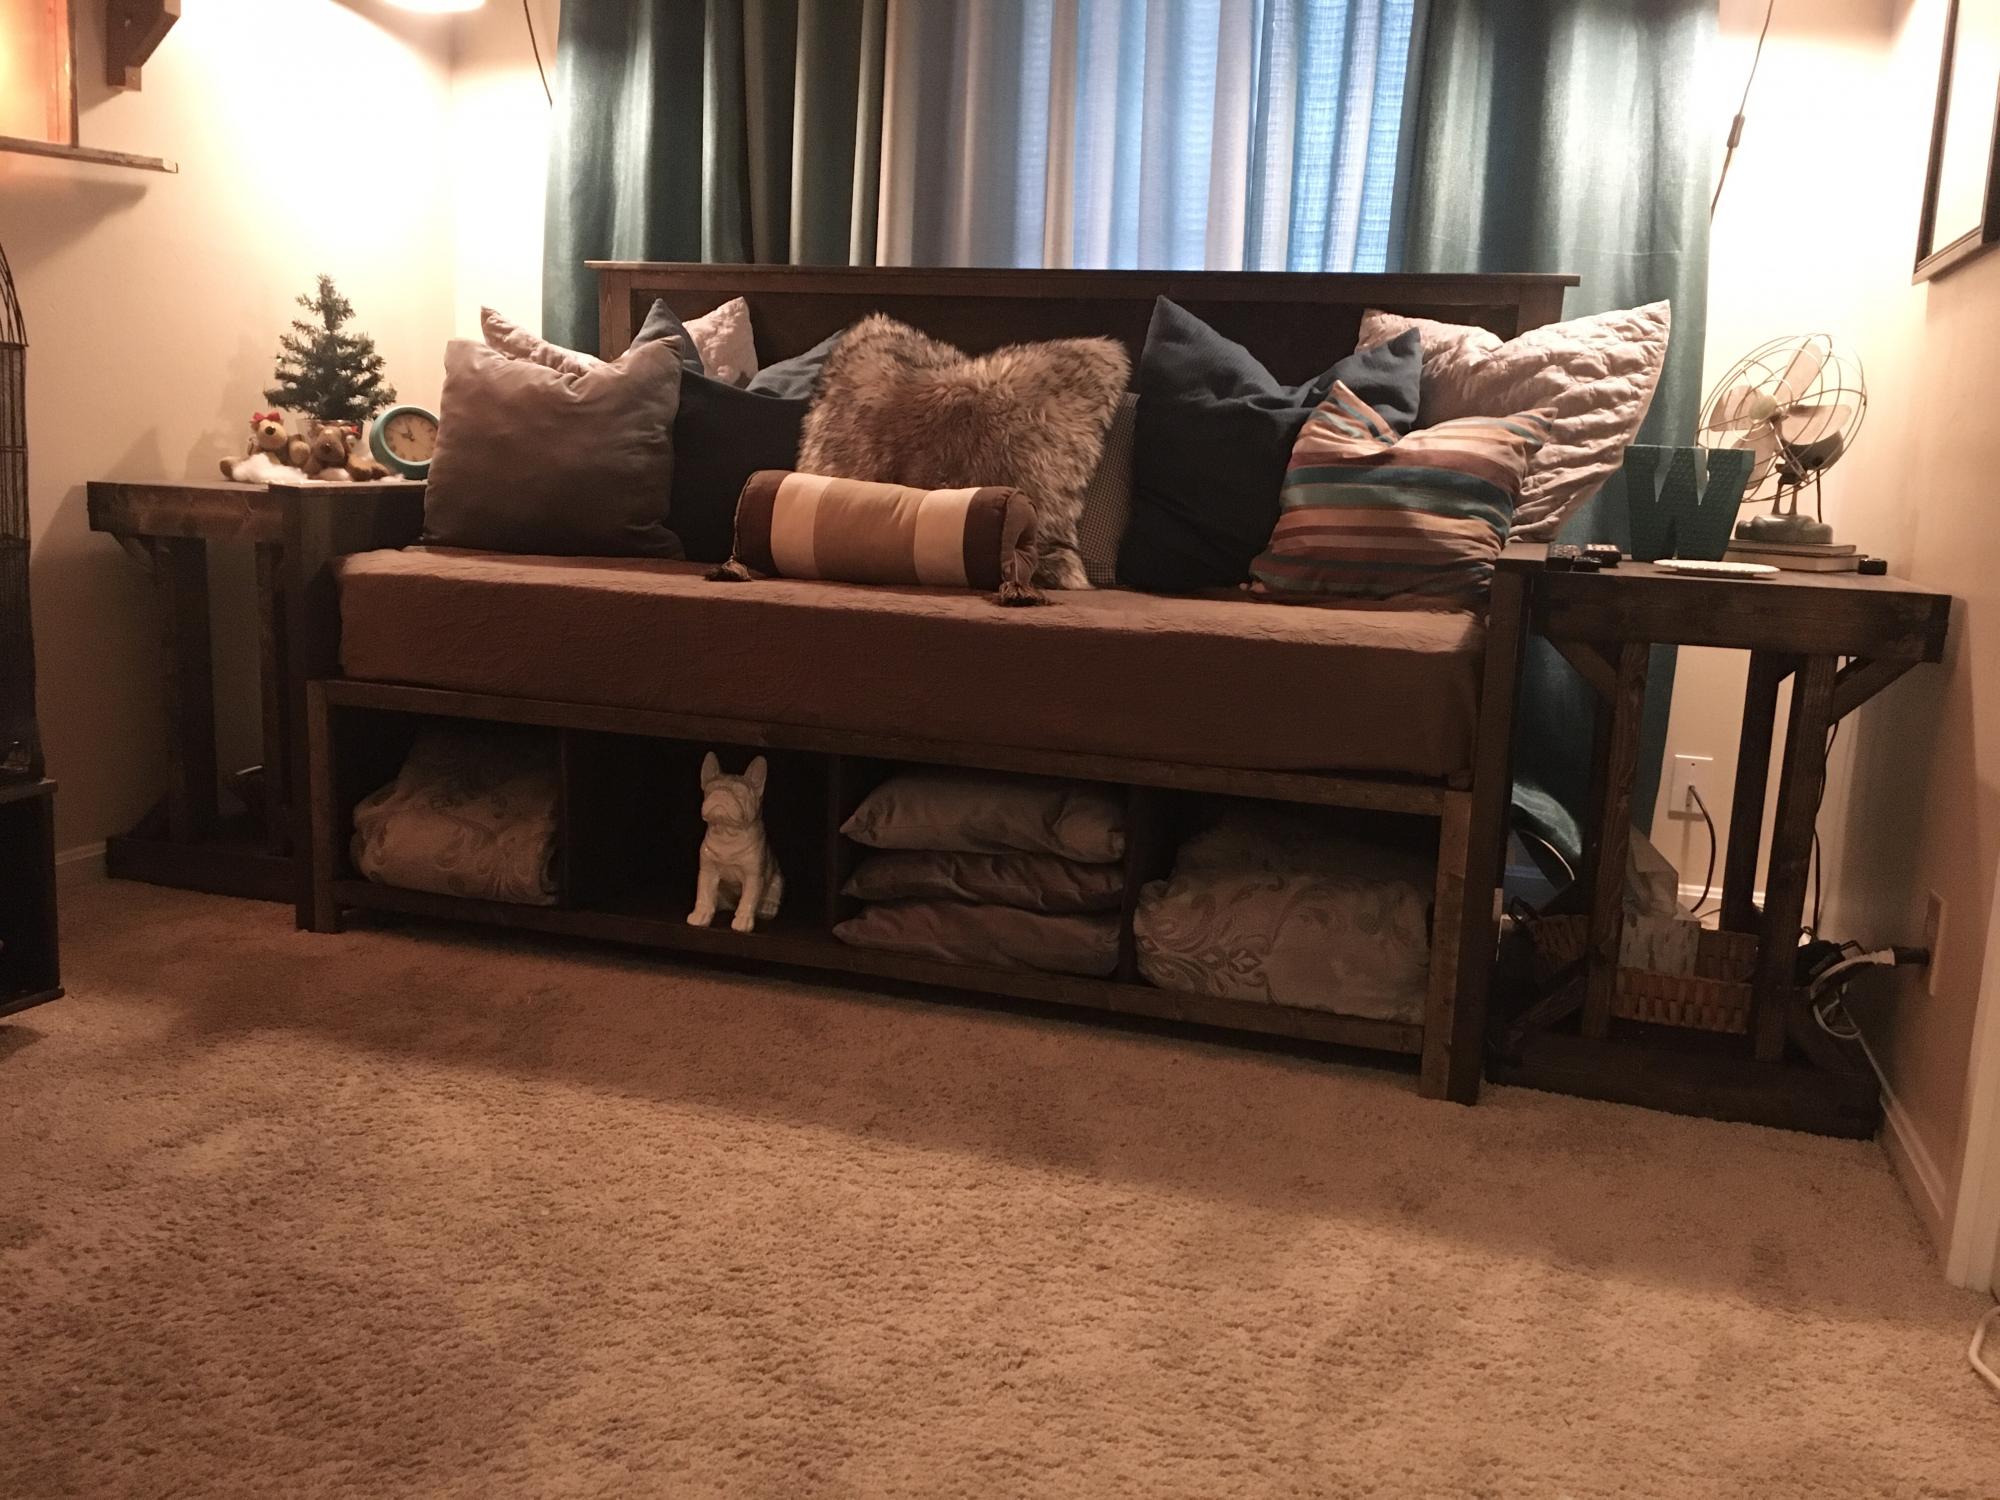
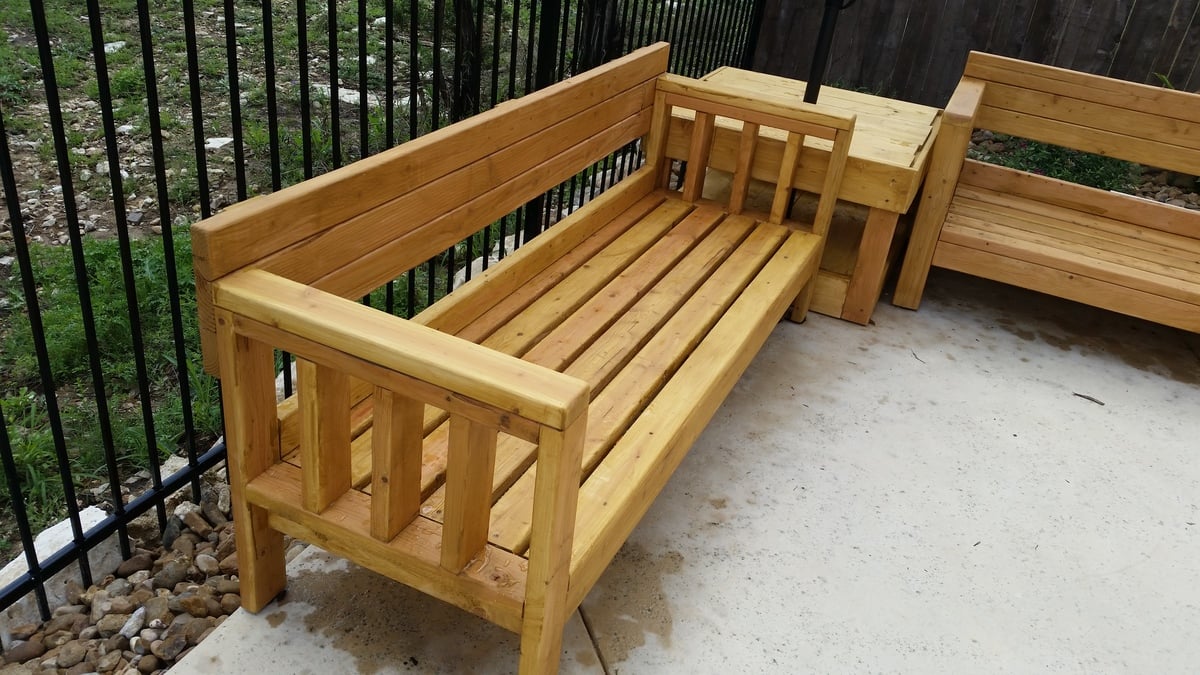
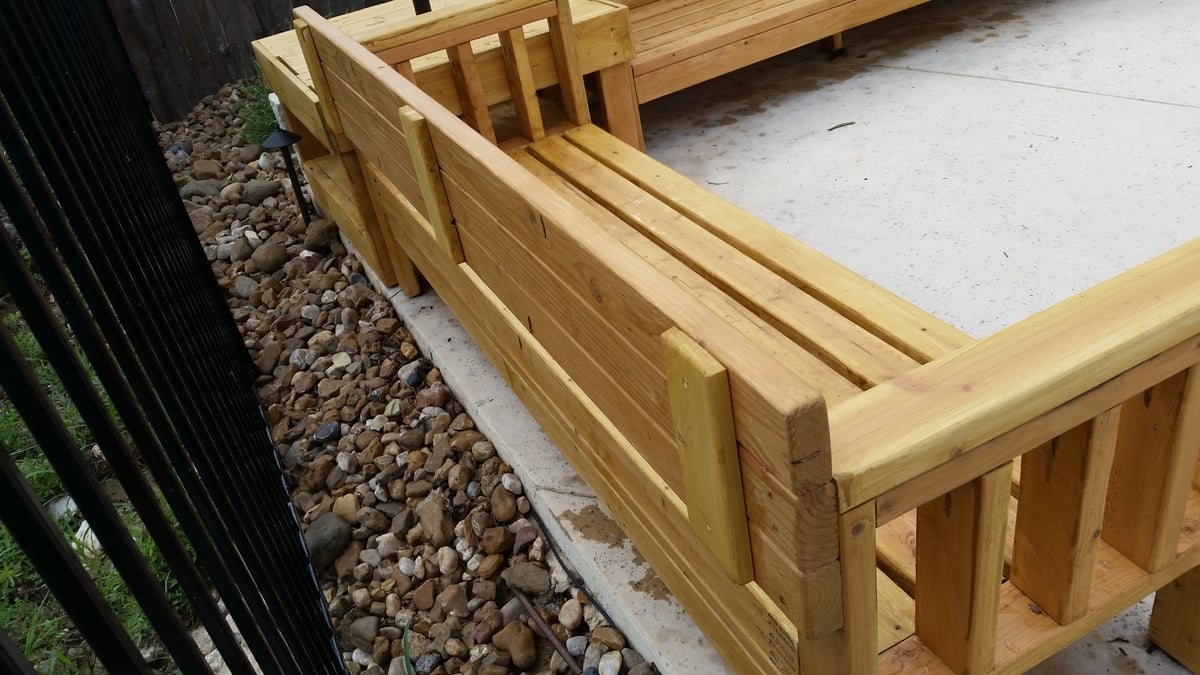
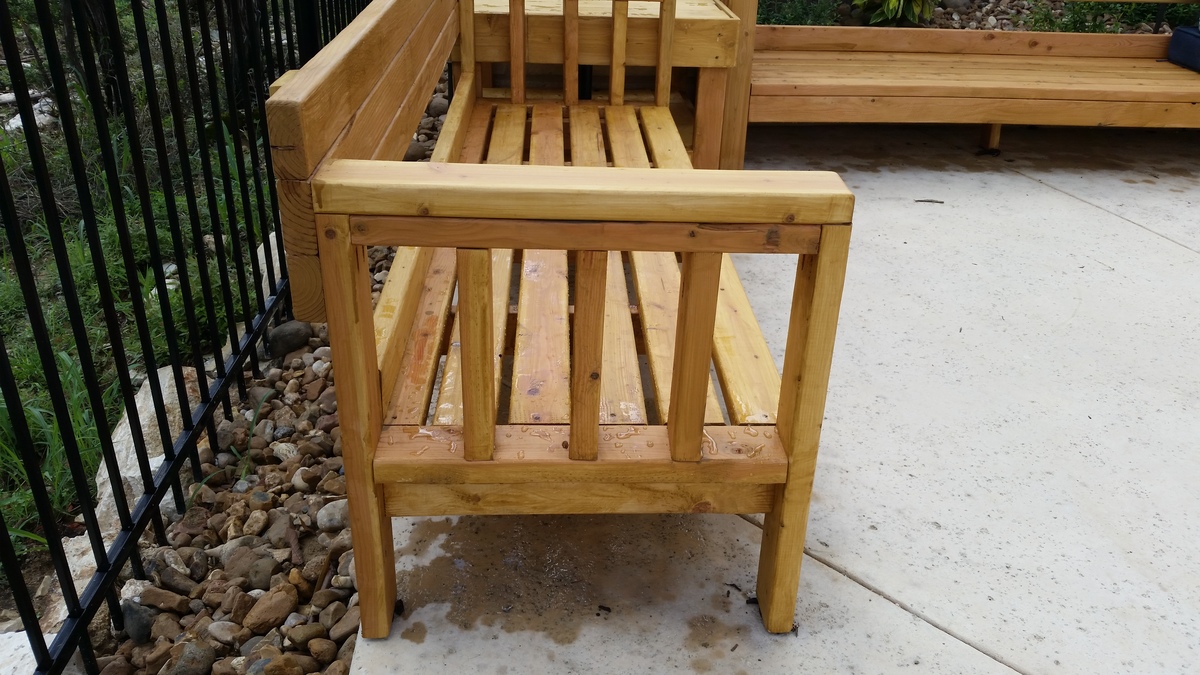
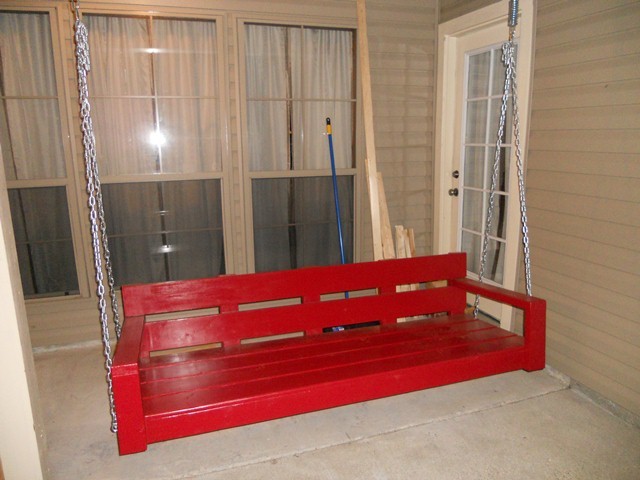
So, we basically took the pans for the 2x4 outdoor sofa and extended it for one of the sofas because we wanted 4-across seating. We also finished up the look by adding vertical beams in the arms and a second 2x4 across the top (see photos). Because of the really long couch, I added extra bracing foot to make sure it won't sag.
Once complete, we determined the pillows across the back were a bit too tall, so we adjusted the plans by adding a couple beams and then lengthening it to attach to the back of the arms rather then between the arms. We pocket drilled the beams together and then braced it with 1x4 slats across the back. I also used a 1/4 router bit to soften all the edges. Anna we took your advice and pocket drilled all attachments except the seat slats for a real finished store-bought look. Cost of wood was under $100 because we went with pine. Pillows and seats from At Home put us at about $600 total for the project.
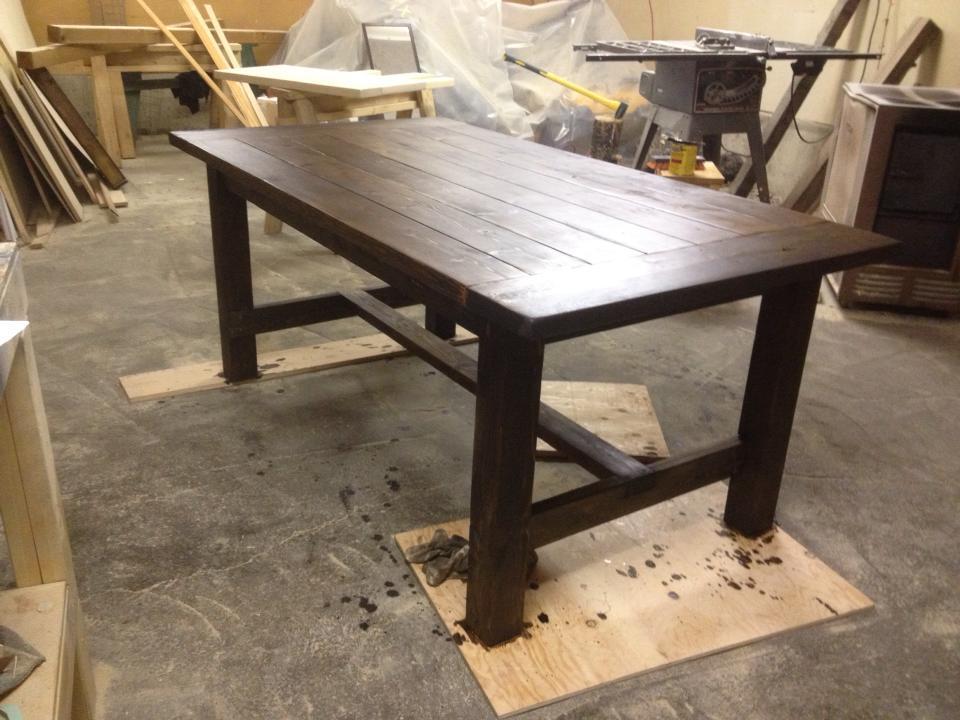
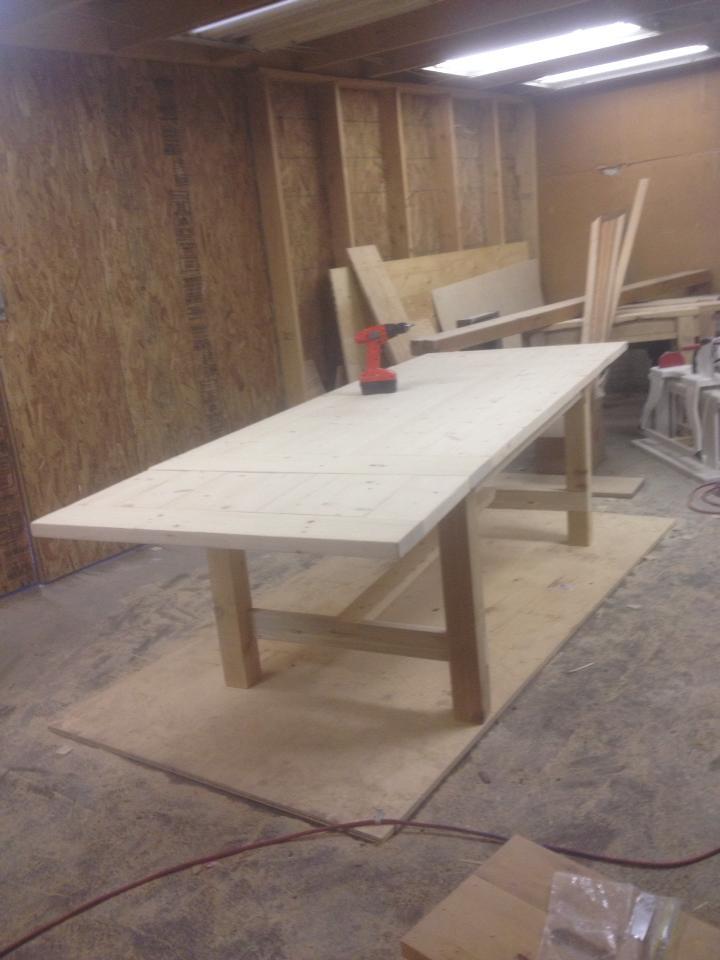
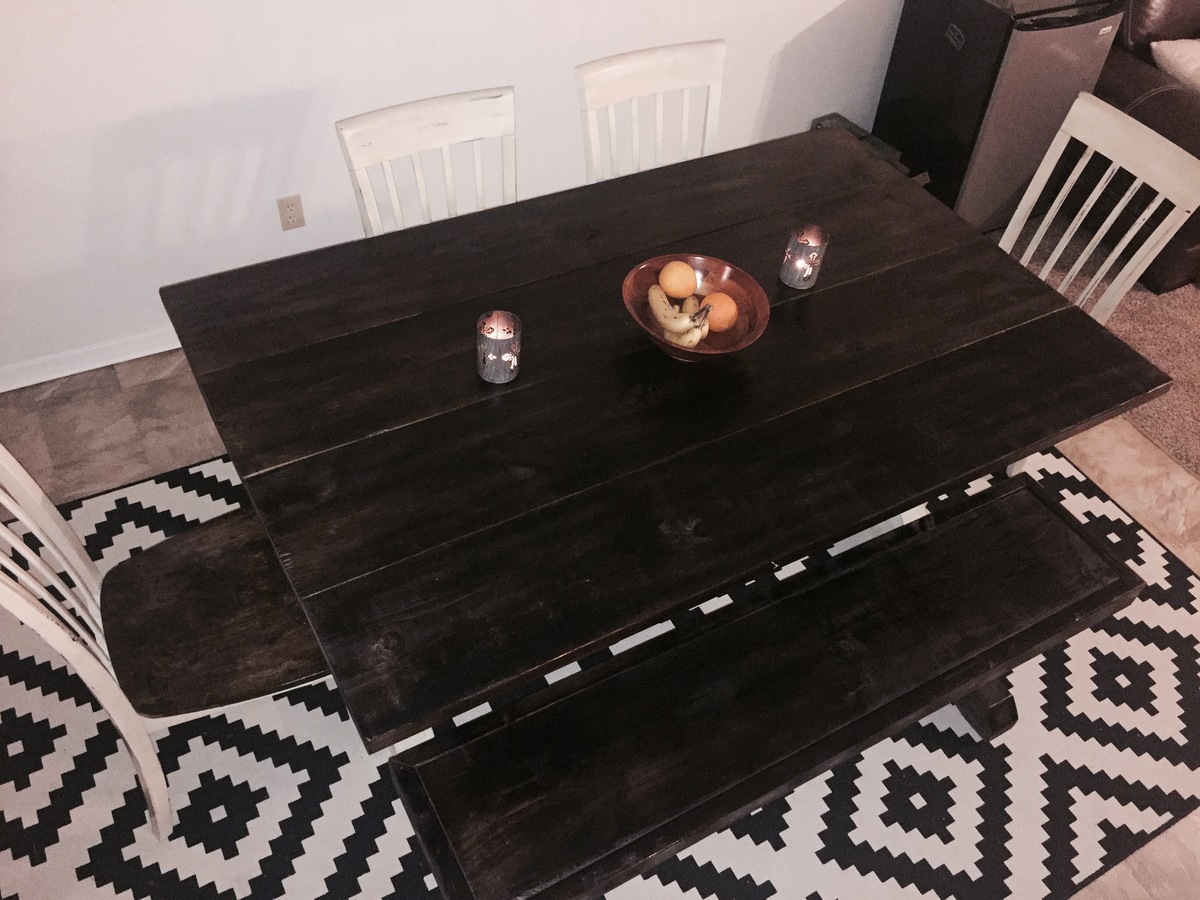
This was the second table I built - it was much improved on my first and was for my sister as a Christmas present. It has 4x4 legs that I notched out with a circular saw for the legs and a spruce top. I modified the length down to 6' for her house but added extensions on the end that make the table up to 9' long when fully extended.
Tue, 09/23/2014 - 13:42
How was the epoxy worked out in the cracks?
And separation or trouble?
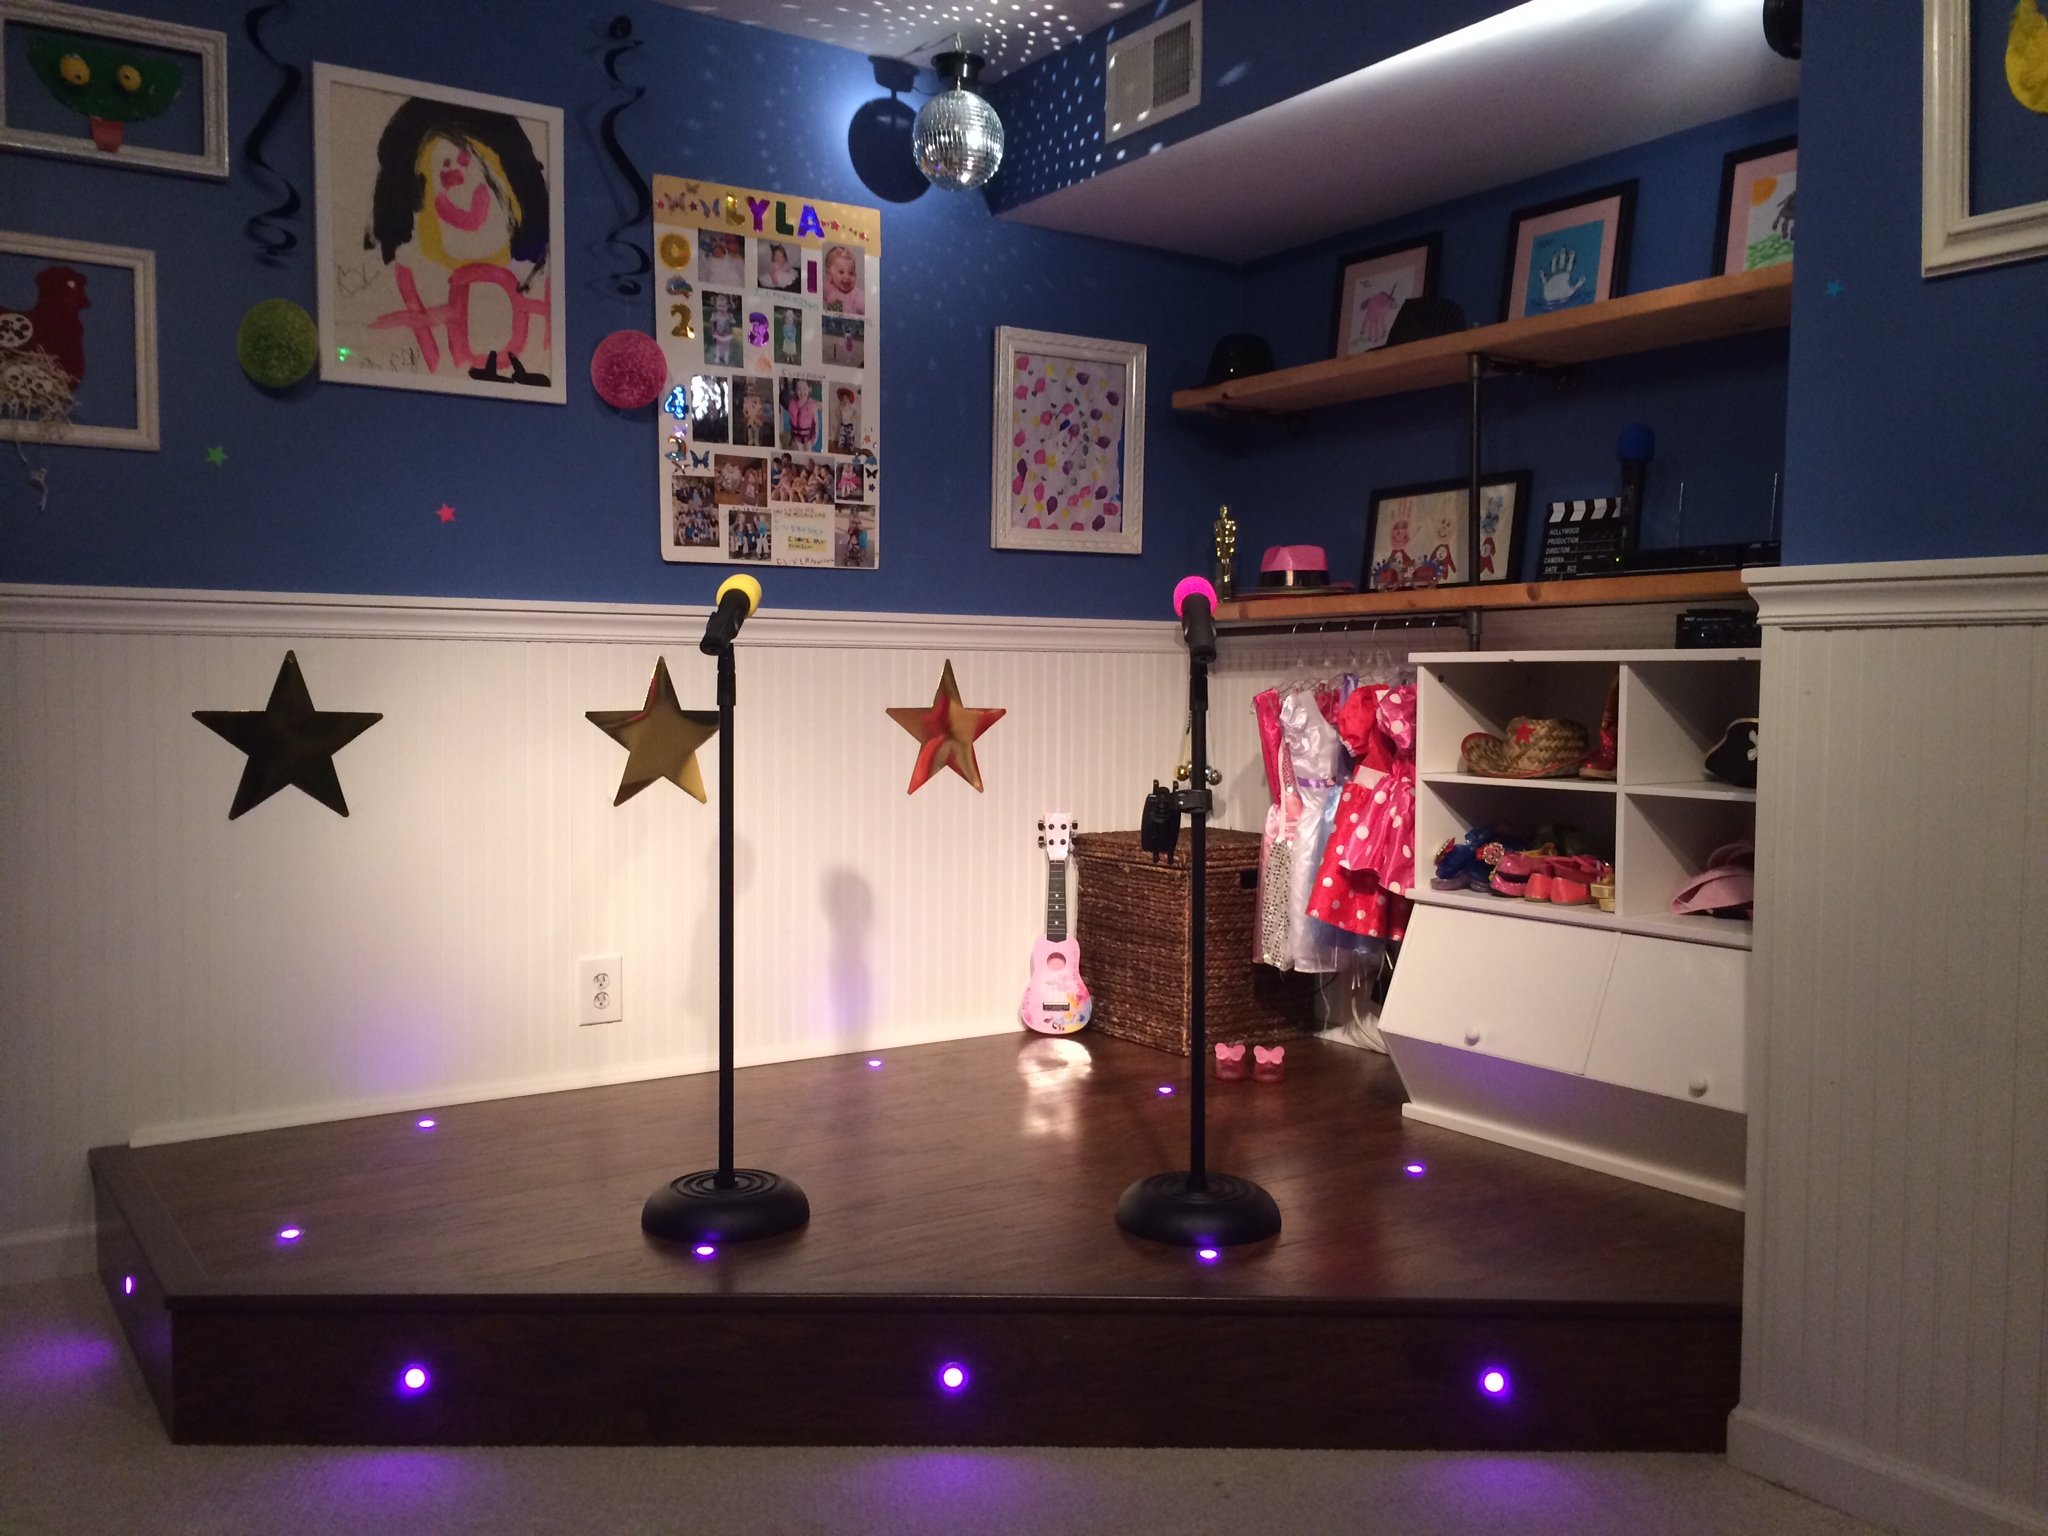
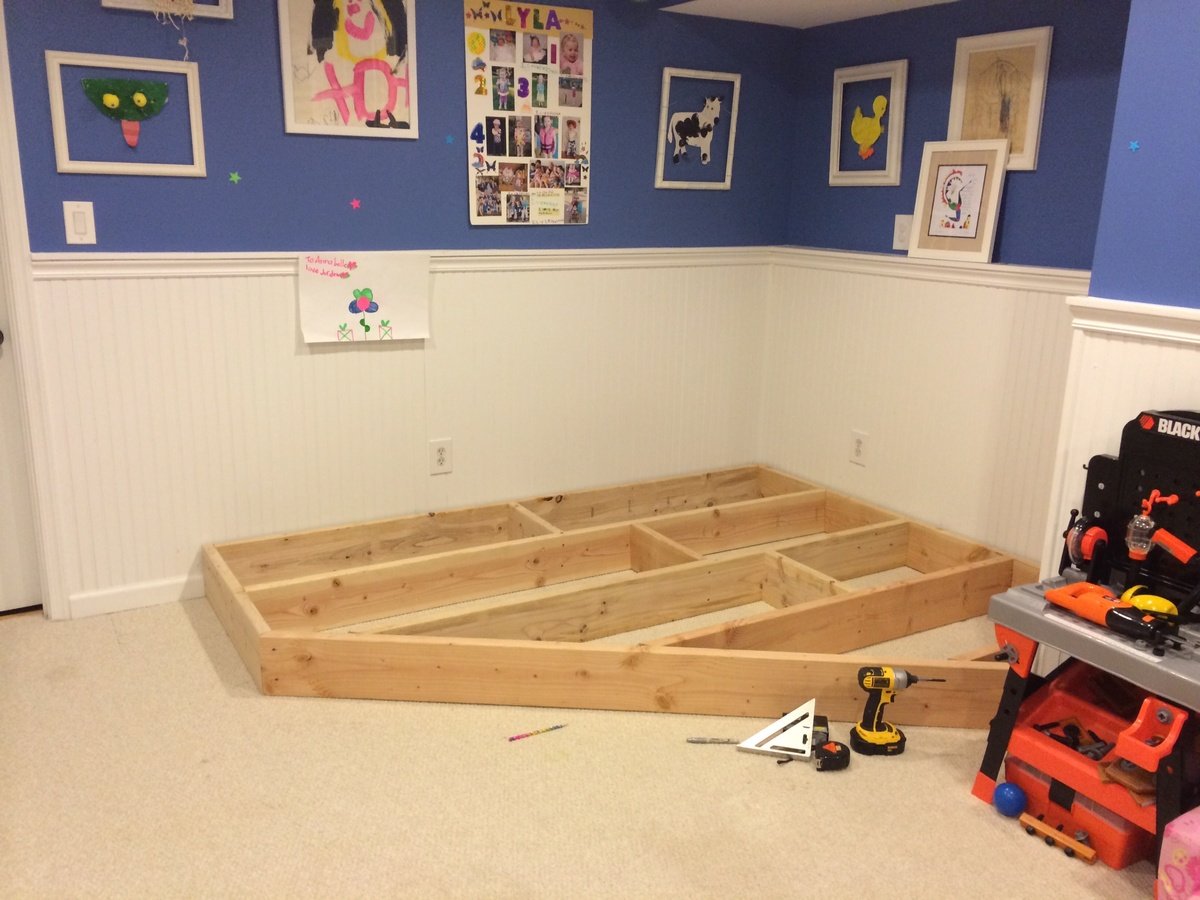
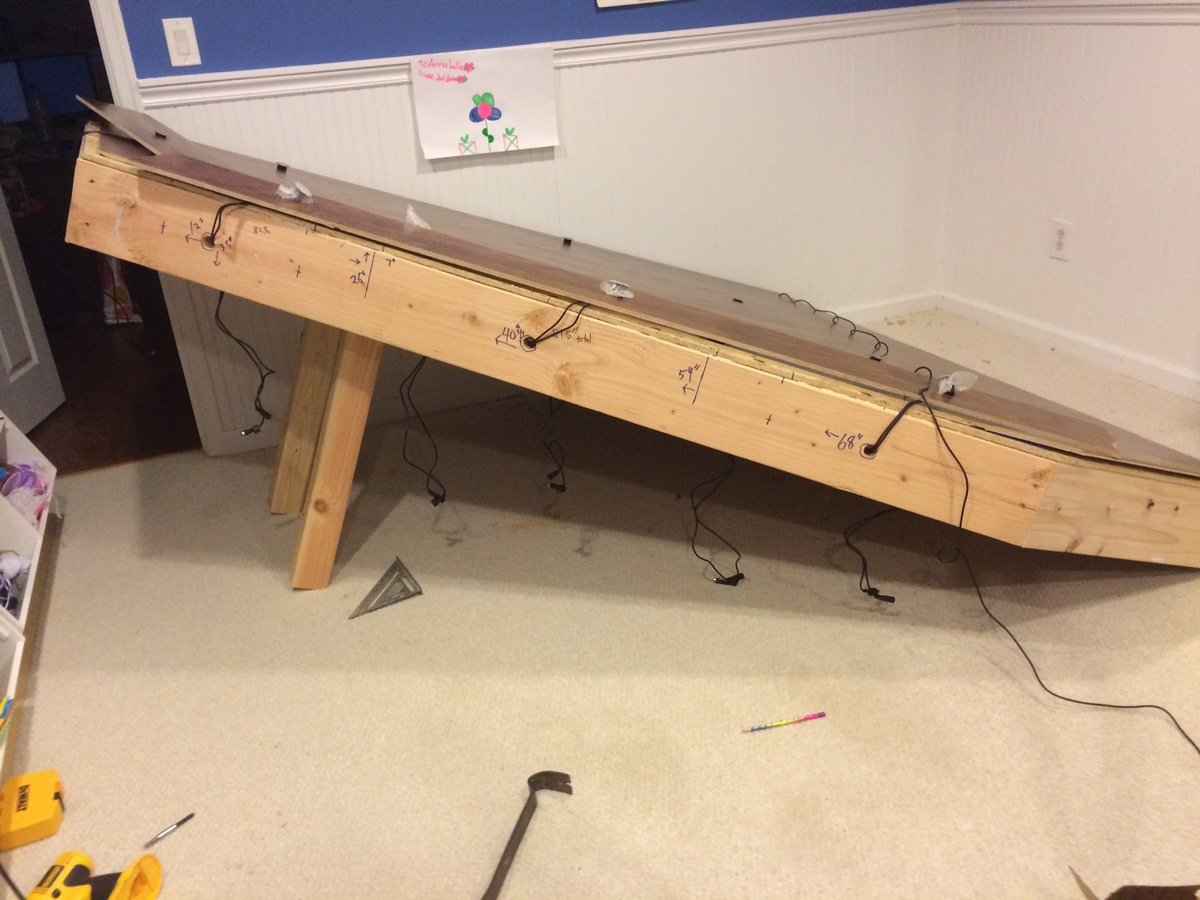
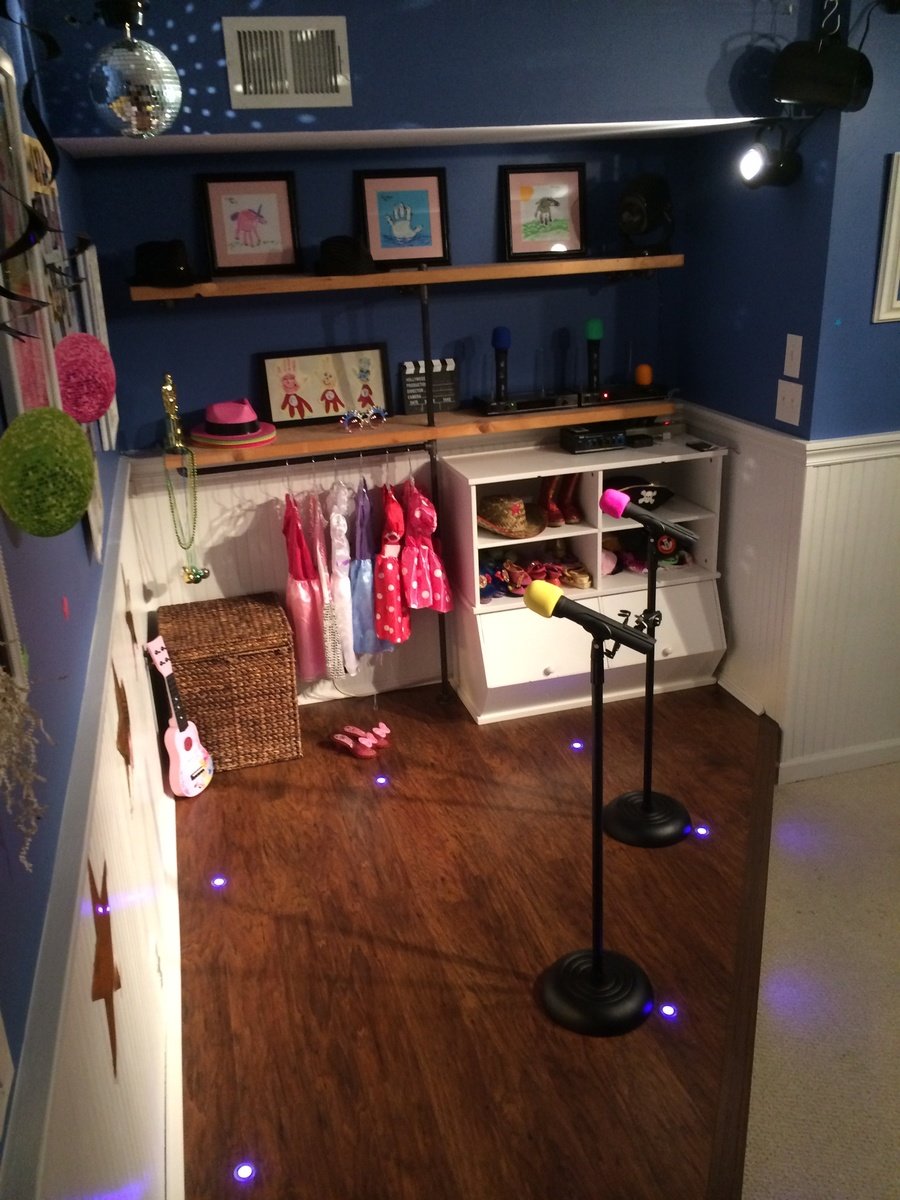
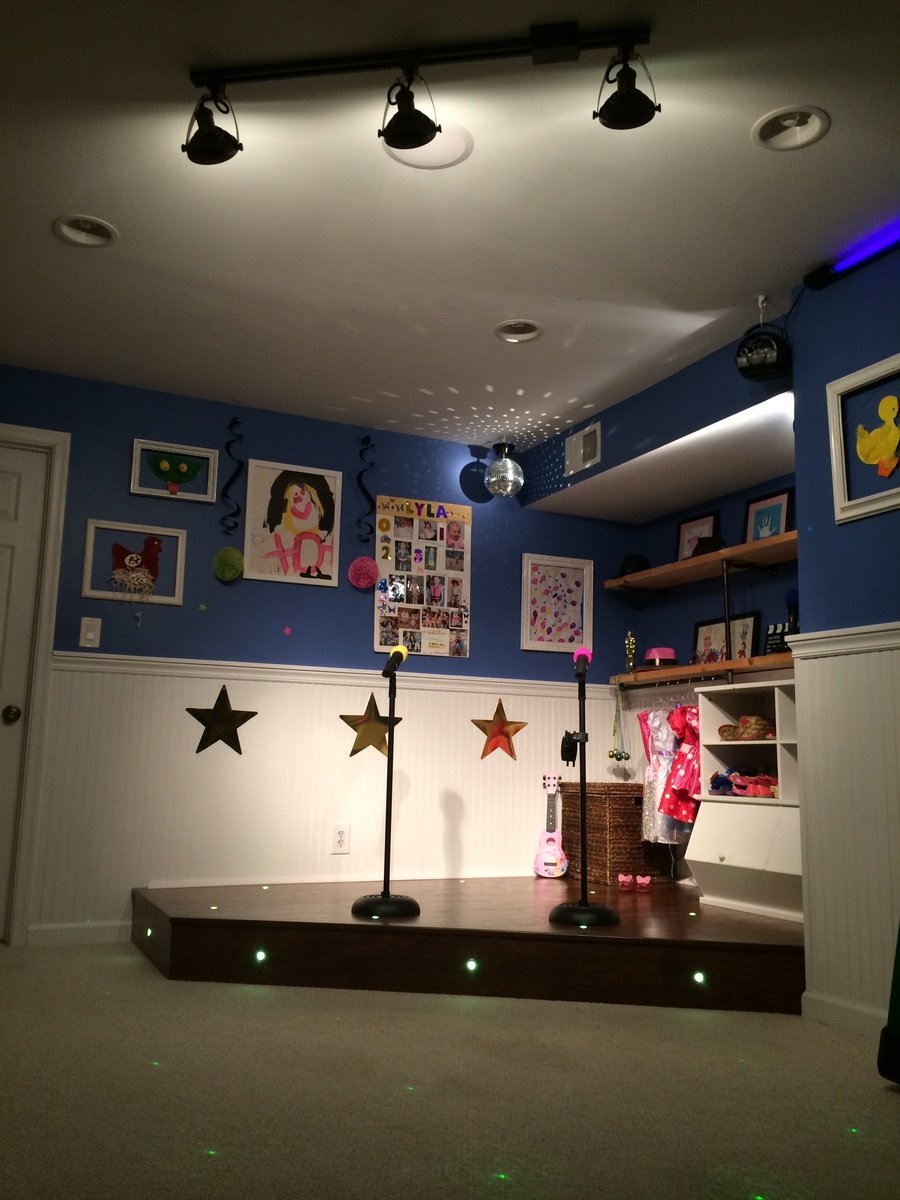
I had a perfect corner in our playroom that was reserved mostly for clutter and always wanted to do something fun with it. The base is made with 2x8"s topped with Handscraped Hickory laminate flooring. Bored holes into the floor and installed 1" diameter color-changing LED decklights. Added theatre-style tracklights, disco ball and other dance floor lighting for extra effect. Of course the stage wouldn't be complete without wireless microphones for karaoke and mic stands hooked up to a small amp and speakers in the ceiling. I made the shelving on the right side with 1/2" black pipe and used leftover 2x12" shelves from an old garage shelving install from 7 years ago! The kids were ecstatic on Christmas morning for the reveal!

Sun, 07/27/2014 - 15:52
This is great! I was just wondering what your dimensions were? I've been looking for something like this to do for my niece but have been struggling to find a plan and figure it out myself LOL.
Tue, 08/05/2014 - 05:58
Hello, the back wall is 8' and side wall is 6.5'. The stage comes out about 2.5' on each side then the front is around 7'.
Hope that helps, good luck!
Sun, 04/10/2016 - 14:44
Actually, I was wondering ,what lights did you use? I'm working on a very similar project and was curious to the lights your used please.
Sun, 12/08/2019 - 17:11
Can I ask about the lights you used or would recommend? Getting started tomorrow. A stage from Santa. Please help! 😬
Sat, 12/18/2021 - 14:09
Hello! Also wondering which lights you used. Thank you!
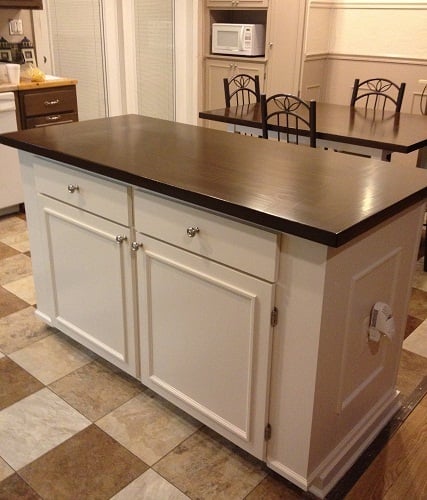
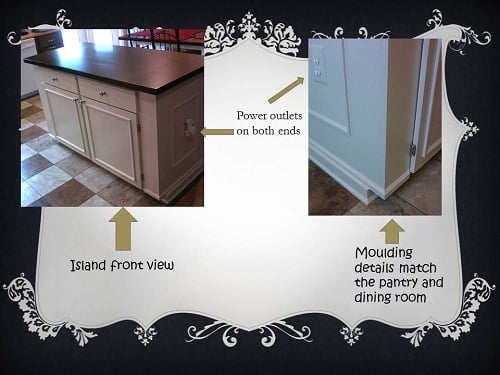
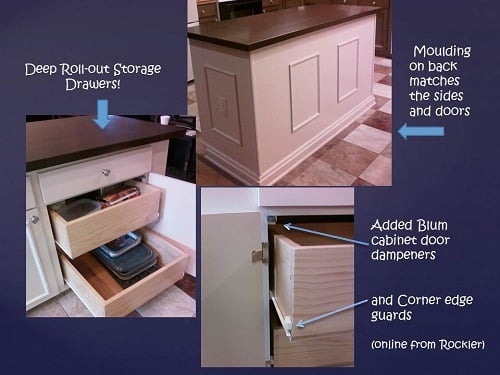
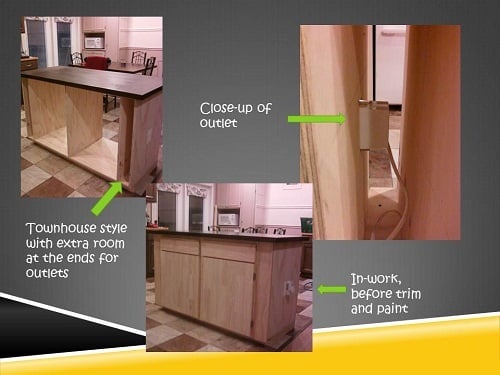
I’ve wanted a new island for awhile but wasn’t quite sure what I wanted it to look like, until I saw Ana’s cabinet plans for the Momplex kitchen! We wanted a fairly large island, so we did two 24” base cabinets “townhouse style” (from Ana’s Kitchen Cabinet Base 101 post) plus we added a little extra space at both ends, so Hubby could install some electrical outlets and we’d still have plenty of room for the drawers. The old island had power already, so he got the outlets wired pretty fast. Behind the doors are some deep pull-out drawers to hold all the stuff you’d usually have to bend down and reach for. Now it’s so convenient! I built a Farmhouse Table top for it and love it! We built flat doors and trimmed them up to match the island sides and back (also matches our pantry and dining room). This project took us about 40 hours to build and finish, and it was so worth it! Ana, you are a rockstar in our house! We now have a real showpiece for our kitchen, thanks to Ana White!

Fri, 03/30/2012 - 21:14
Absolutely stunning! I'm in the process (sooo sooo close to being done) of making a banquette seating area with the creamy colored drawer base and the top stained in walnut. I put the same half round trim on my drawer fronts too. I saw a vanity on display at Lowes with this detail and had to copy it. I love the look! I am also building a trestle table from plans from www.thisoldhouse.com to match. I bought some beautiful matching chairs from Target.com. I can't wait to get it finished. I'm about to go paint the drawers right now. The table components were just primed 15 minutes ago. :-)

Sat, 03/31/2012 - 08:04
Brigitte and Pam, thank you very much for the nice comments! :) I'm having a ball building projects from this site. This is our favorite one so far (we say that every time haha). I have to smile and run my hand across the top whenever I walk past it - I guess when the novelty wears off I'll stop doing that :) Now I'm ready to add those door dampeners to all the cabinet doors in my house (so cool not hearing a slam when you shut them). Brigitte, your project sounds beautiful, can't wait to see the pictures of it!
Sat, 03/31/2012 - 18:57
Absolutely gorgeous! I really love the colors. I've never tried the color express stain - and I have to try it now! The top is so seamless. Love it!
Sun, 04/01/2012 - 05:33
Mebohn, thanks very much for the nice comment! You'll love the color express when you try it. Walnut is my favorite and I've used it for lots of projects. I like brushing it on to get a nice dark first coat, and then on this one, rubbed on a 2nd coat (needed to wait an extra hour for the first coat to dry). I used lots of wood glue and Kreg screws to assemble this top (it's 5 pieces of 1x10, 3 across and 1 at each end) and then added 1x4 underneath (around the edges and across the center for attaching) to make it 1 1/2 inches thick. Then a whole lot of sanding :)
Sat, 05/26/2012 - 06:46
Mariah, Thanks very much for the nice comment! I'm really happy with how this turned out. Now I want to re-do all my kitchen cabinets with Ana's plans. :) PS -- I saw your jugsaw puzzle table this morning on the brag board -- super creative!!
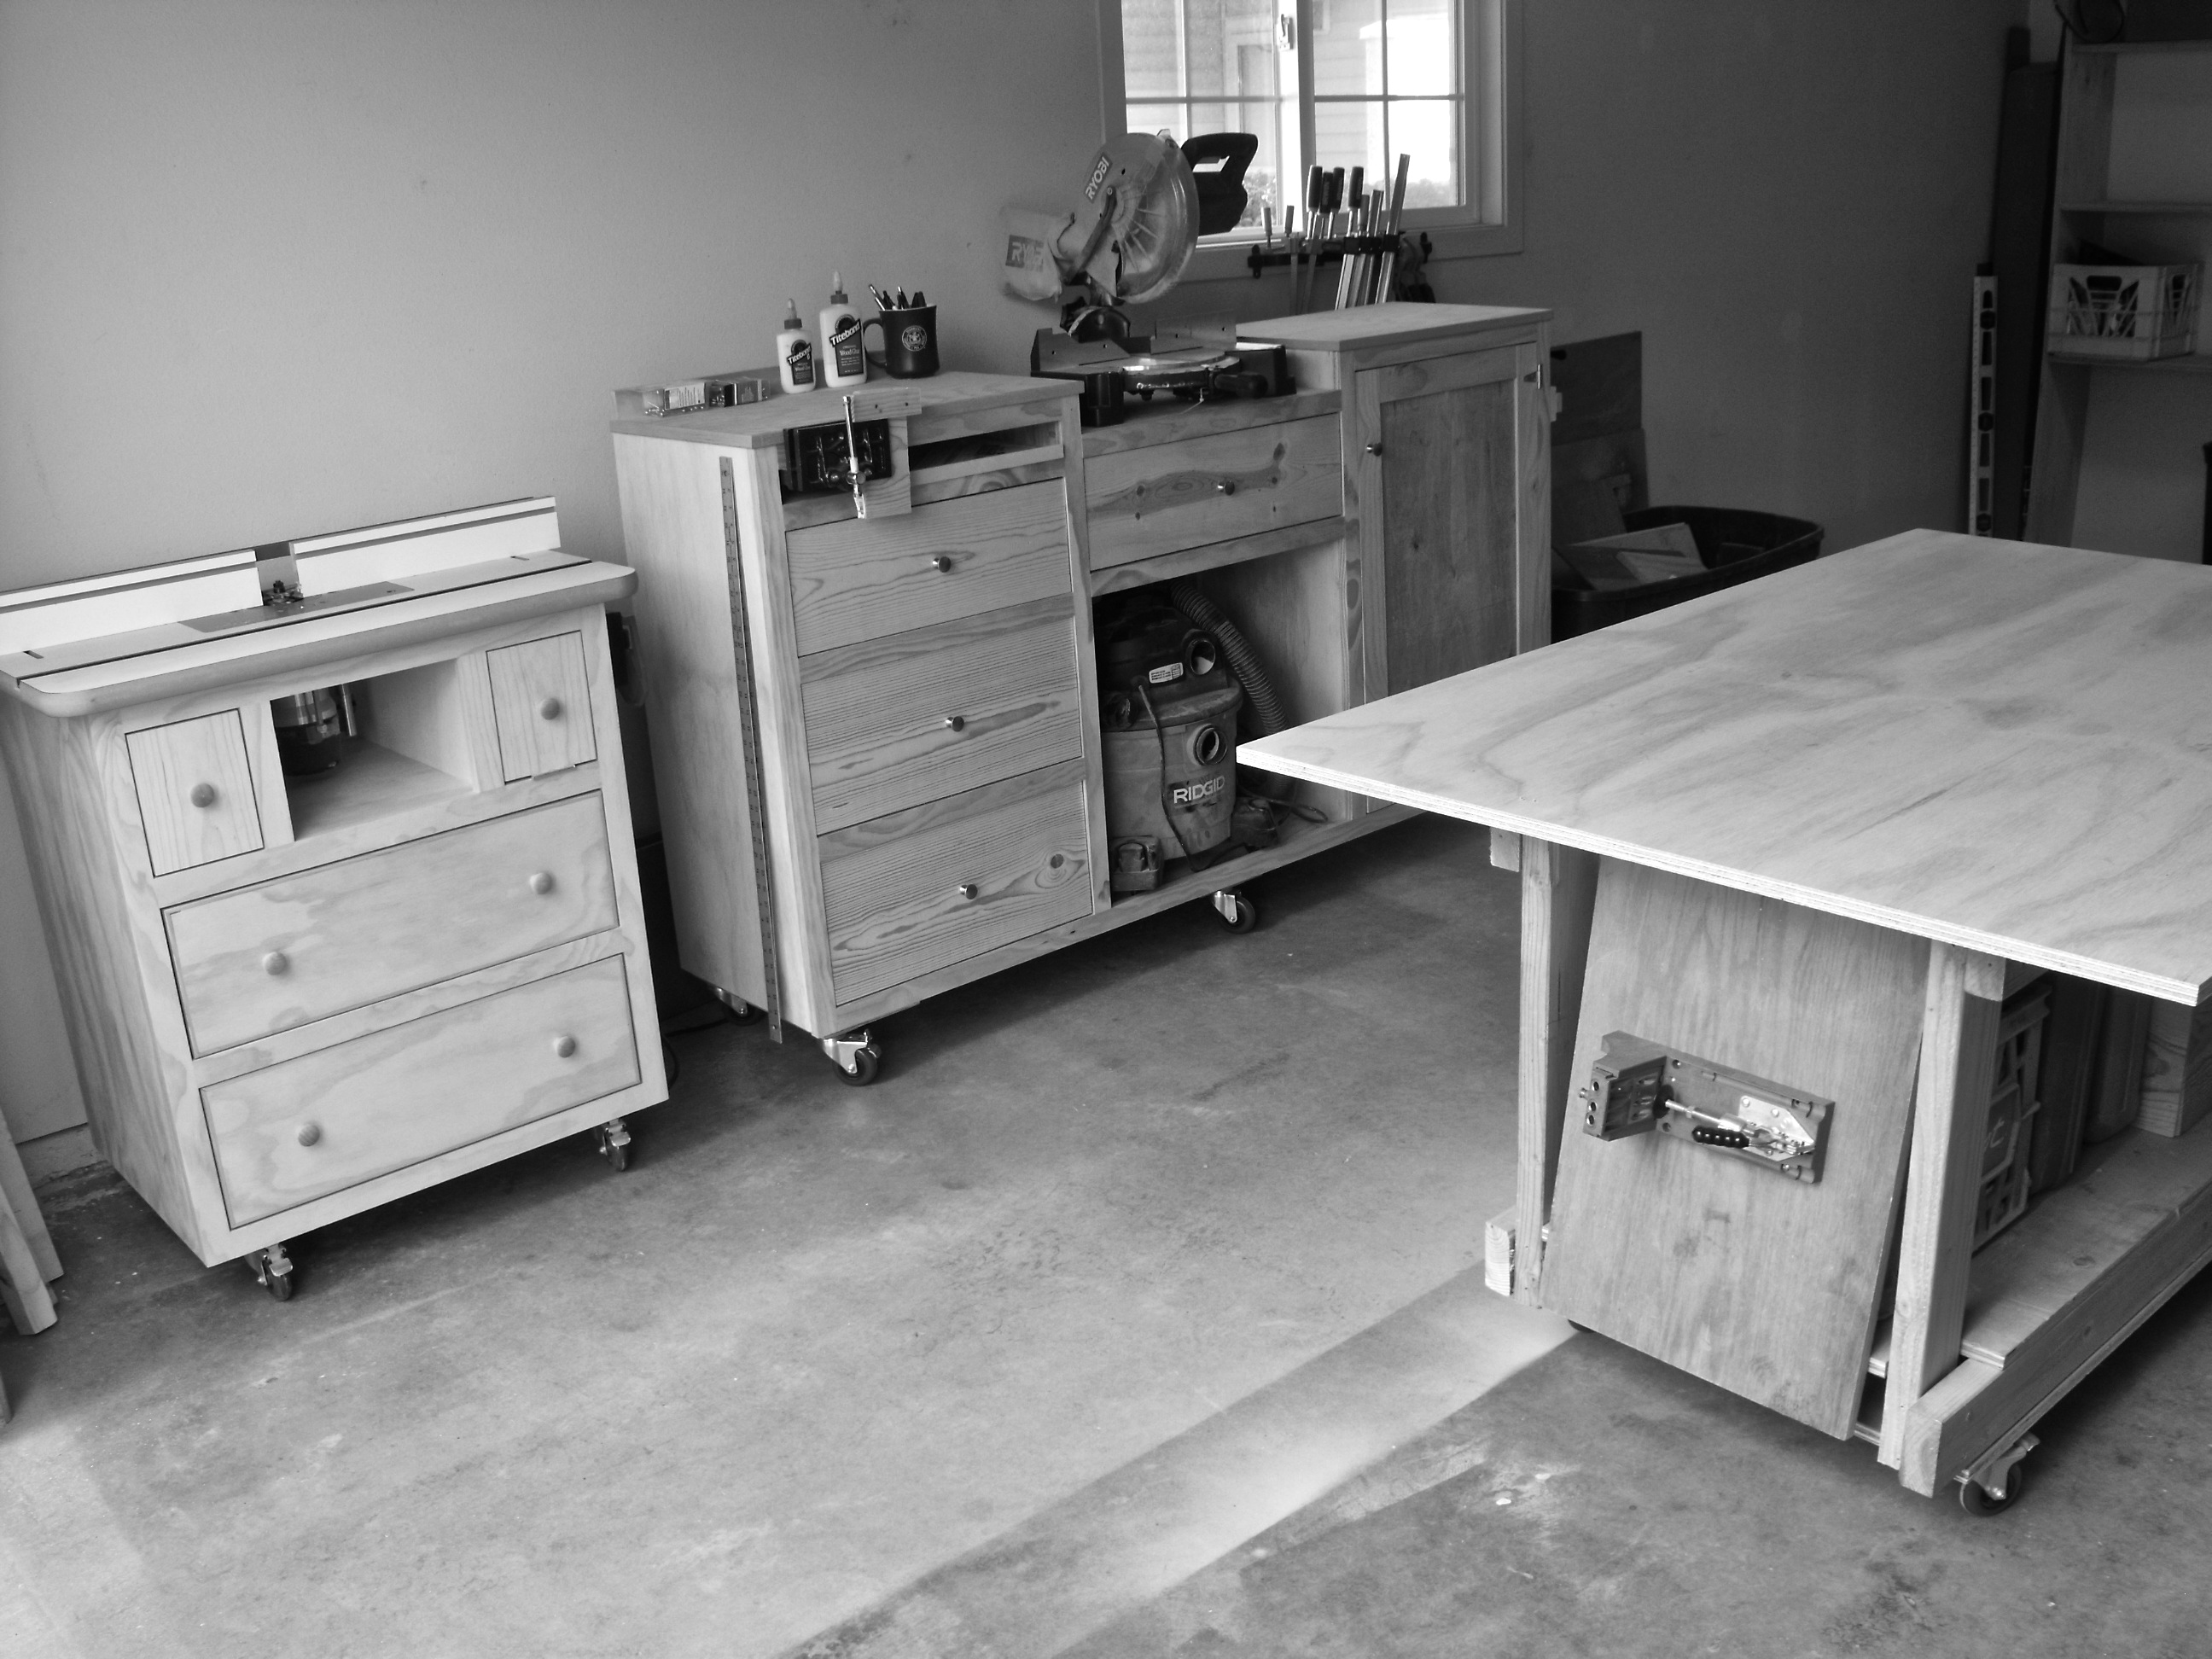
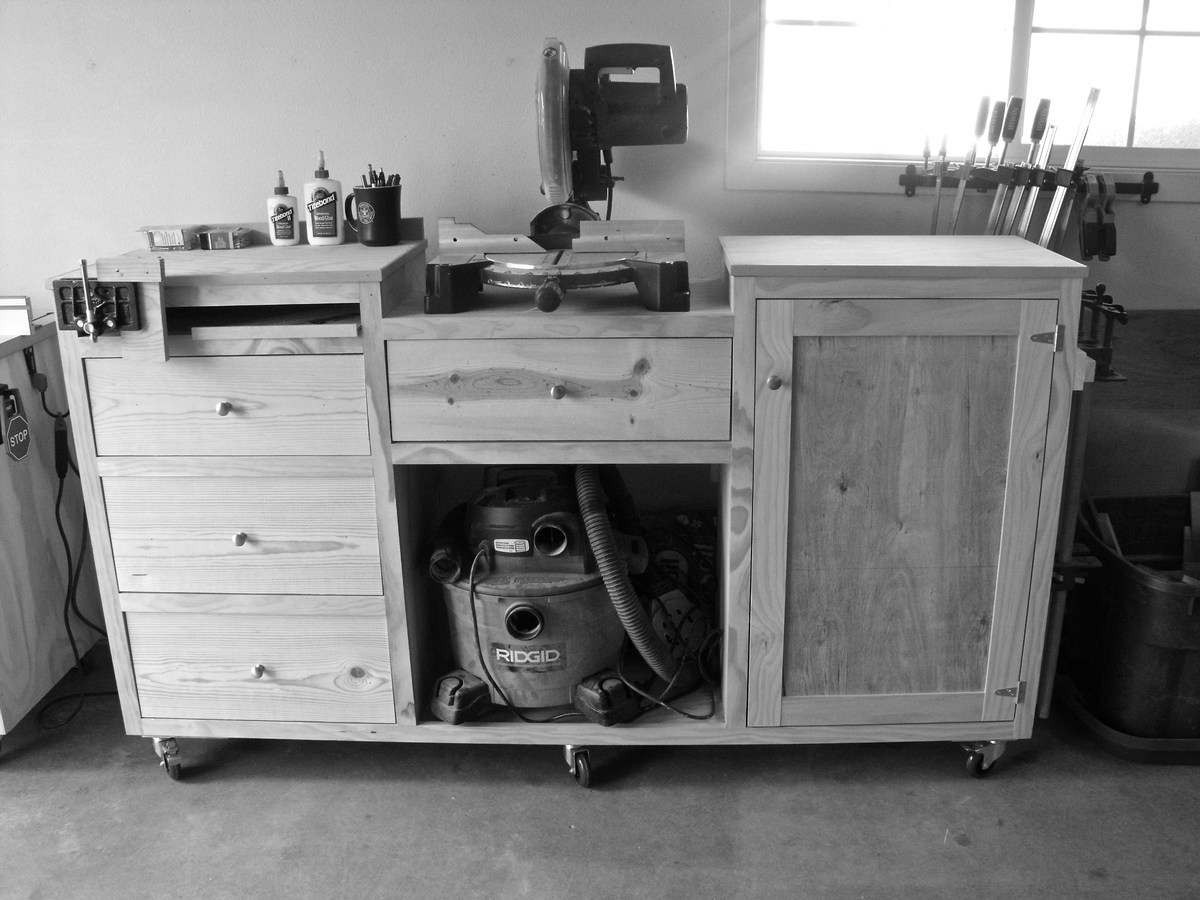
It seems like organization is always a work in progress especially in my one car garage shop. Honestly it took years to realize what I needed to customize my space in order to organize things. I've built bulky work benches out of 2x4s and plywood. I've rearranged the work space over and over again over the last few years and finally came up with my own system
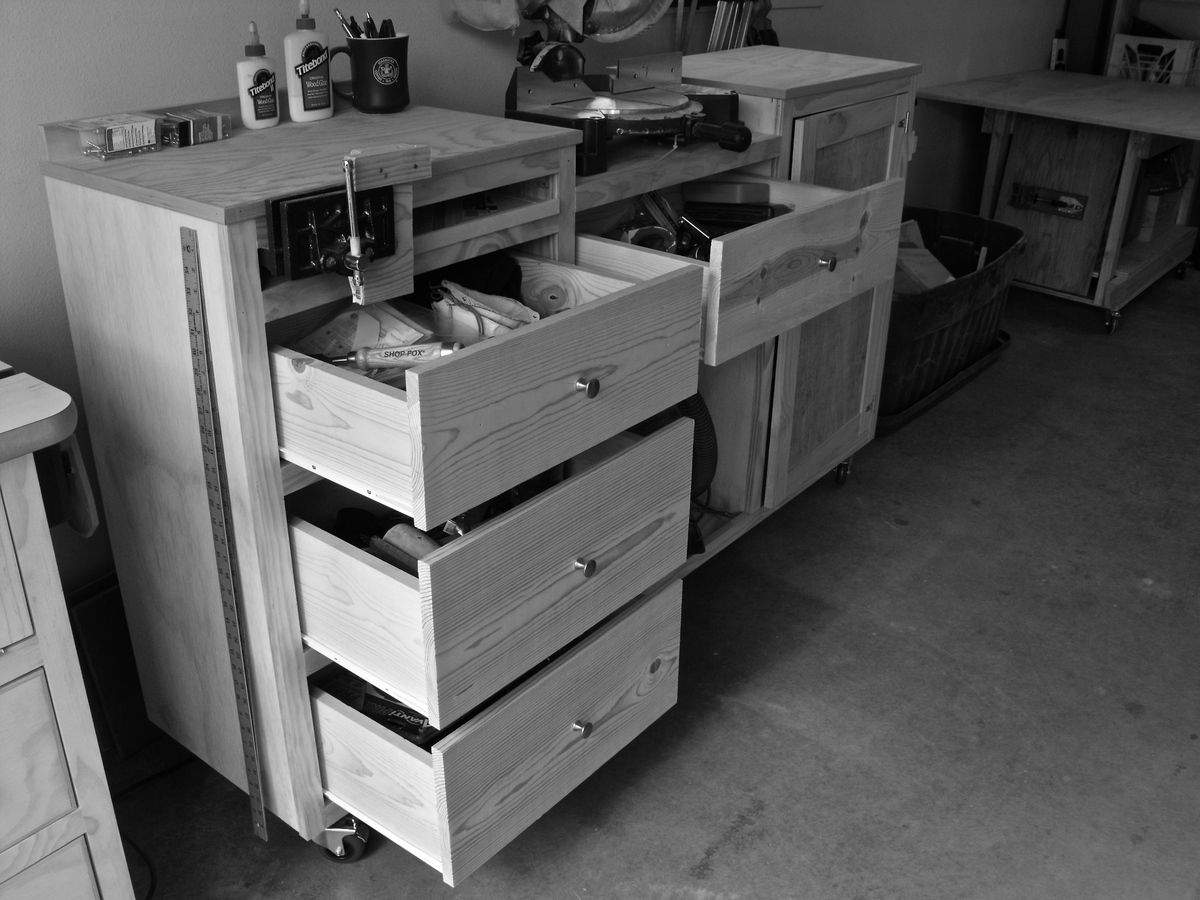
The miter station is a life saver. I had one of the fancy ones with the foldable wings but didn't like it. The object of it was to be able to fold the wings down for storage but I never did and it caused other space saving problems. Now I can easily store all of my small tools and woodworking knick knacks all in one spot. You can find plans for these if you google miter station, but take my advice and custom make one that fits all of your needs. There's a spot for my vice and speed square too. Things like that make it count.
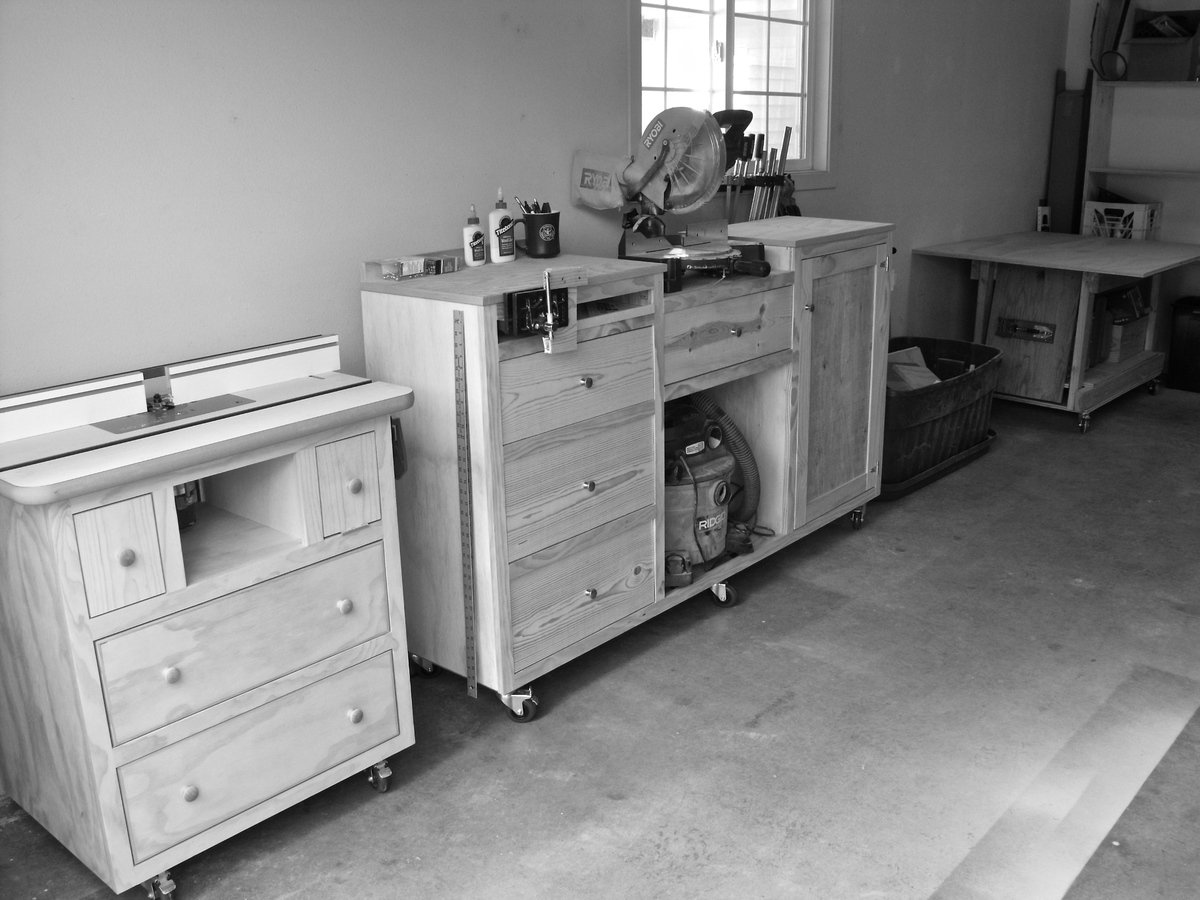
The router table is probably my favorite tool in the shop. You can do so many things with the router table. I started out with just a top and a base and worked from there. Now everything router is in the cabinet ready to go.
Everything is on wheels. Us military guys and gals have to move around a lot so we have to plan for that. Now everything can just roll up the ramp and in to the truck.
Take some time and think about the efficiency of your shop space. How does everything flow? Or do you even flow at all? I used to woodwork myself in to a bunch of brick walls and now I don't.
Thanks for checking it out
Patrick


Fri, 04/06/2012 - 22:05
wow. This is very impressive. I love how tall the pieces are so you don't have to bend down, I'm always working with my tools on the ground and it is a pain.
I covet your router table.
And the miter station is awesome. I just may copy that! I love how it houses all of your other tools as well. OMG! It even holds your shop vac, and has a handy ledge for pipe clamps?! I would love a simple plan.
I'm really curious about your kreg jig setup on that work table too.... details please.
Well Done!
Sat, 04/07/2012 - 09:20
You've got to get up off the ground. I did that for a looooong time and my back suffered big time.
The kreg jig is mounted to a piece of plywood. Then I drilled 2 holes in the top corners and hung them on the side of the work table.
The miter station has to be custom made for your shop needs but planning it out is very important. I needed a spot for my vice and a quick spot for my speed square. So I calculated all the space needed for 3 drawers and then just added a few inches. Also measure how high your saw sits and recess your work surface exactly that amount.
Grizzly tools has a good deal on simple router table set ups right now. I'd check that out. Eventually the miter saw will be hooked up to the shop vac. I bought an outlet that automatically turns the vacuum on when I use the saw.
It's just like the other stuff. Start with the face frame and the rest will come to you.
Patrick

Sat, 04/07/2012 - 11:49
If working without plans makes you twitch, Startwoodworking.com, Fine Woodworking and Popular Woodworking usually all have plans for shop furniture like this. There are enough variations over the years that you can usually find the features you're looking for if you do some mixing and matching. I know there was a very nice router table plan last year.
For the record, I work more like Patrick unless what I'm building gets complex.
Sun, 04/08/2012 - 00:25
Me too! i always seem to get inspired by a plan, and by the end of the project, it's totally different than the original because of all of the adjustments I make. I have never even considered building shop furniture before, these photos are inspiring!
Thanks Clay for the link, I will have to go burn some time on that site as well. Someday (when I don't have a leaky garage) I will have a shop worthy of such beautiful equipment.
Great Job again, Patrick!

Sun, 04/08/2012 - 04:06
Really nice job on these and oh so practical! And Patrick, thanx for serving!

Sun, 04/15/2012 - 14:24
Uh, this is amazing. Good thing I can tell your shop vac and scraps bin have DUST on them, or I think you might be lying about this somewhere you actually work :) ! I just got around to finishing my work space table. I am planning on doing some major organizing before the heat of the summer hits, and then maybe a router table like this might make it to the top of my list.
Mon, 06/11/2012 - 19:56
Patrick, with the recent release of your Farmhouse Table, I find myself watching it over and over and my jaw is always on the floor by the end. In a way, the flow and the craftsmanship is intoxicating. My family is in the process of moving to a new home and I am mostly looking forward to organizing the garage space. I need a man cave and it needs a miter saw station and a router table.
Did you construct it all with pocket holes? What material is the majority of the carcasses, face frames and drawer fronts?
Thanks for the excellent pictures and marvelous video!
Scott
In reply to Sheer inspiration! by Scott Kershaw (not verified)
Mon, 06/11/2012 - 22:54
The materials are just standard pine boards from Home Depot. White pine for the face frames and drawers and 3/4 pine plywood for the cabinets. I'm glad you like the video and I really appreciate the nice words. We have some new stuff coming up, so be checking back for the router table plan.
Patrick
Tue, 06/12/2012 - 18:36
Do you use a table saw for any of your projects? What would you estimate the cost of the miter saw station, alone, to be? For some odd reason, nice 3/4" birch plywood is the same cost as 3/4" pine/fir plywood here is Missoula, MT. An 8' x 4' sheet goes for ~$45. Is your switch for the vacuum the Rockler product like in this video: http://www.youtube.com/watch?v=7LmSVvOnxsI ? Sorry for all the questions. Your station is by far the closest to the what my mind has been imagining and what my garage could handle. Thanks!
In reply to Thank you, Patrick! by Scott Kershaw
Tue, 06/12/2012 - 20:18
I just bought a used Grizzly table saw. It's pretty new to me so I'm all excited about learning on it. For the most part I used a circular saw with a straight edge. Now that I have a table saw, all that should go a lot faster. The switch is very similar to that one, but I bought it from sears a few years back. The miter station is hard to make plans for. Every miter saw is different so the platforms need to be different sizes to match whatever saw you're using. Then you have to keep in mind the size of your shop vac and design it around that as well.
Wed, 06/13/2012 - 05:31
Table saws are something that can last fifty years or more without any trouble, so you can get them used pretty readily. You want to buy a good sturdy saw. Locally the used market is dominated by Craftsman/Sears saws. The saws made before 1962 were made by King-Seeley, a company local to me, and those are pretty good saws (I own one and really like it). The ones made after that were made by Emerson Electric, and the owners of those saws have not had such kind things to say about them.
In reply to Patrick what router table top by jlouki01
Tue, 03/12/2013 - 12:47
I got that table top at Rockler. It's been great so far.
Tue, 09/16/2014 - 06:30
Hi Patrick,
I am in the process of desinging a similar miter station, but am curious as to how long your's is? Some of the recommendations call for a full 8 ft long base, but not sure I have the space in my garage for something like that. What is the length of yours?
Thanks!
Thu, 06/02/2016 - 13:55
Hey Patrick. Thank you for providing so many plans to such beautiful pieces. I am about to start working on the router station this weekend. I can't wait to get started. The reason for the message, could you possibly provide the plans for the miter station you created. I am a new woodworker and I need plans to be able to create some of these pieces. I would love to have a garage of similar pieces. Is that something you could provide? I would be happy to purchase it from you. Thank you again for your hard work. - Justin
Tue, 12/12/2017 - 10:25
I would also be very interested in the plans for your saw table.
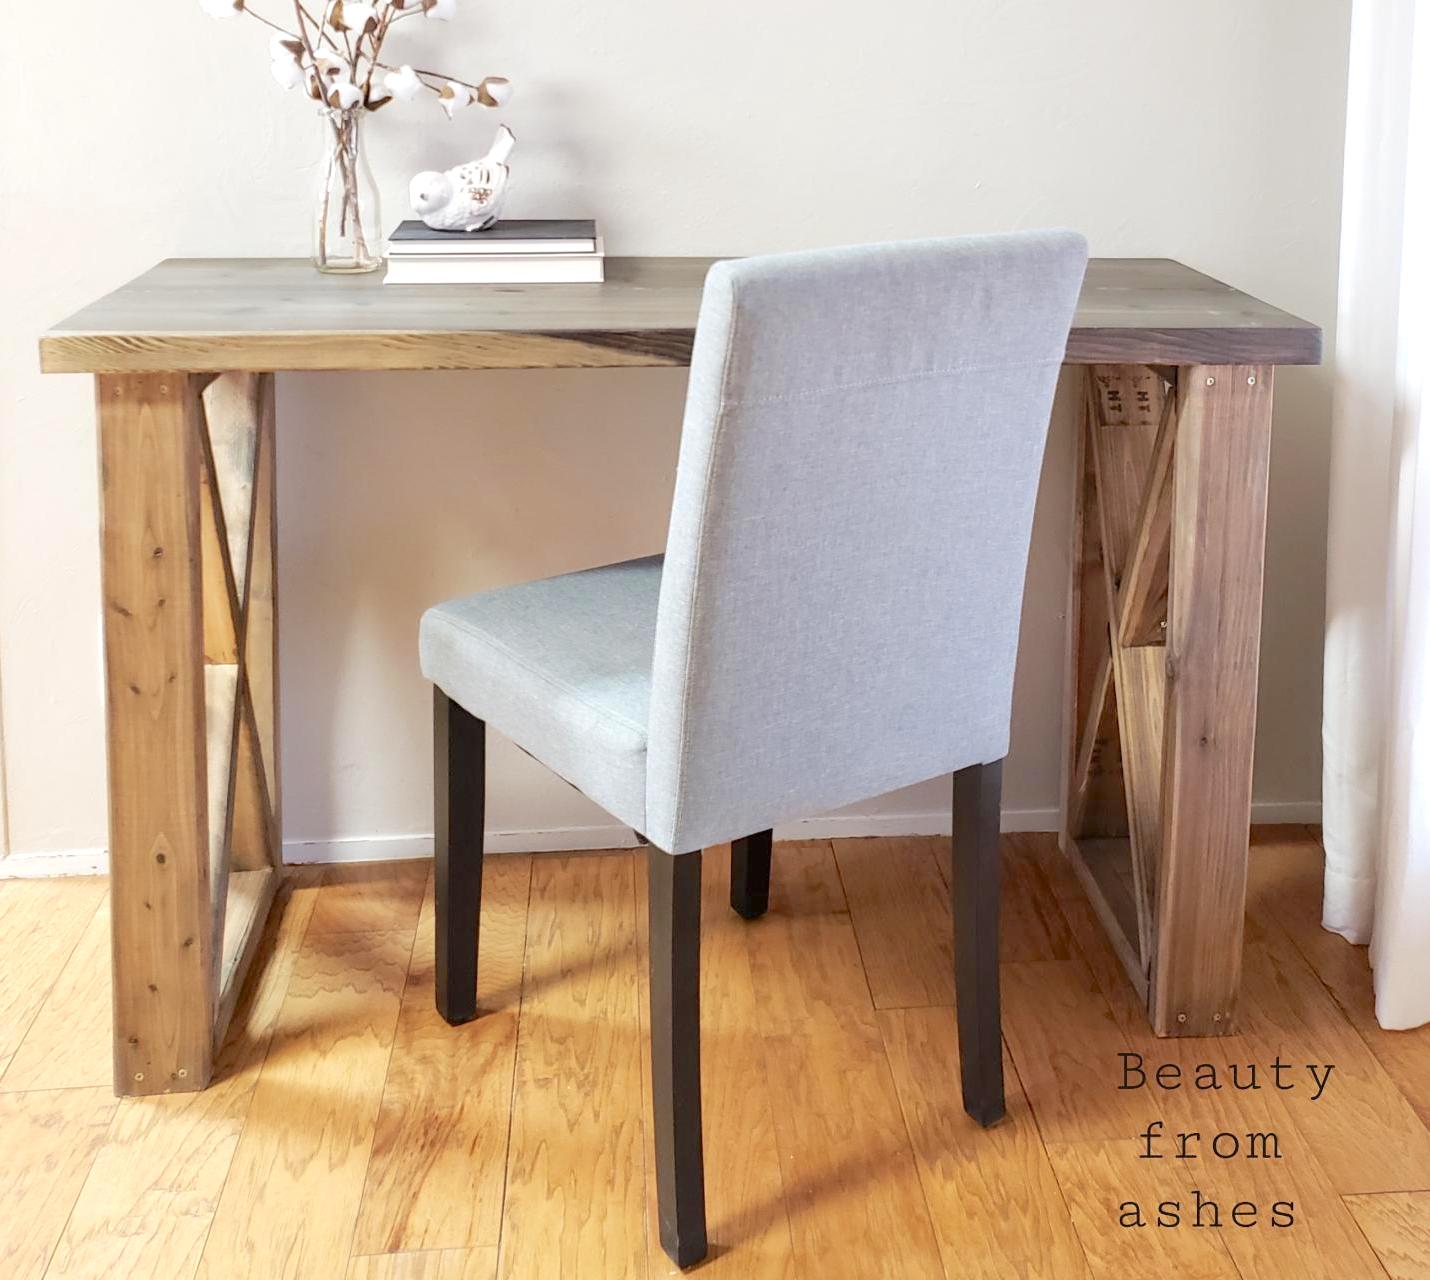
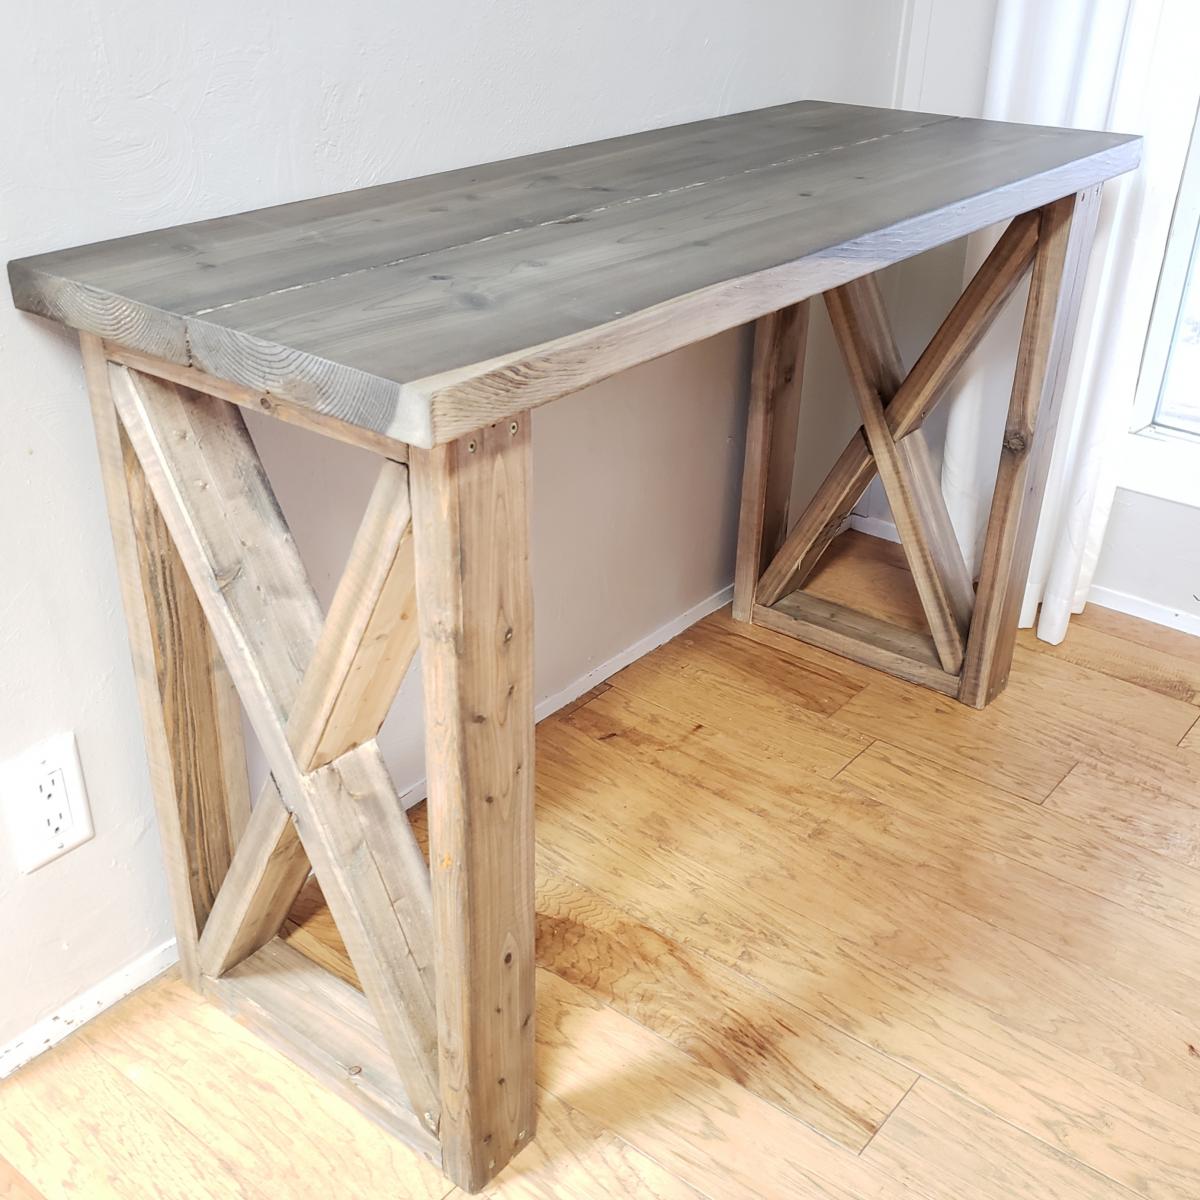
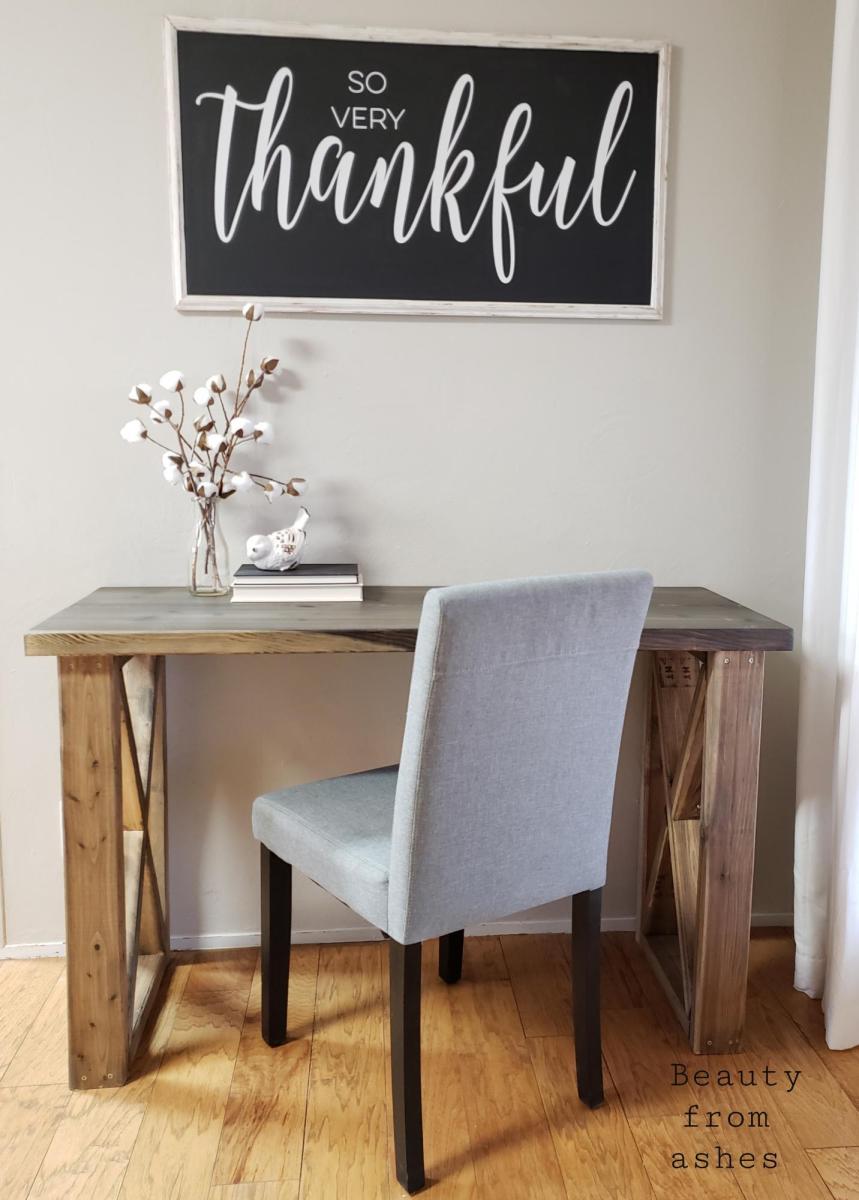
I built this table for my son to use as a "Lego building station" in his room. I made it narrower (18" deep) x 4' long to fit along three wall in his small room. I had some trouble chiseling out the piece for the "X" part to interlock and ended up just cutting the piece through like Anna does with her "$40 farmhouse coffee table", which worked well. I sanded and then stained using homemade vinegar and coffee stain and sealed with water based polyurethane in matte finish.

Thu, 07/09/2020 - 16:19
Hi what angel do I cut the wood to make the X shape on the 2 sides?
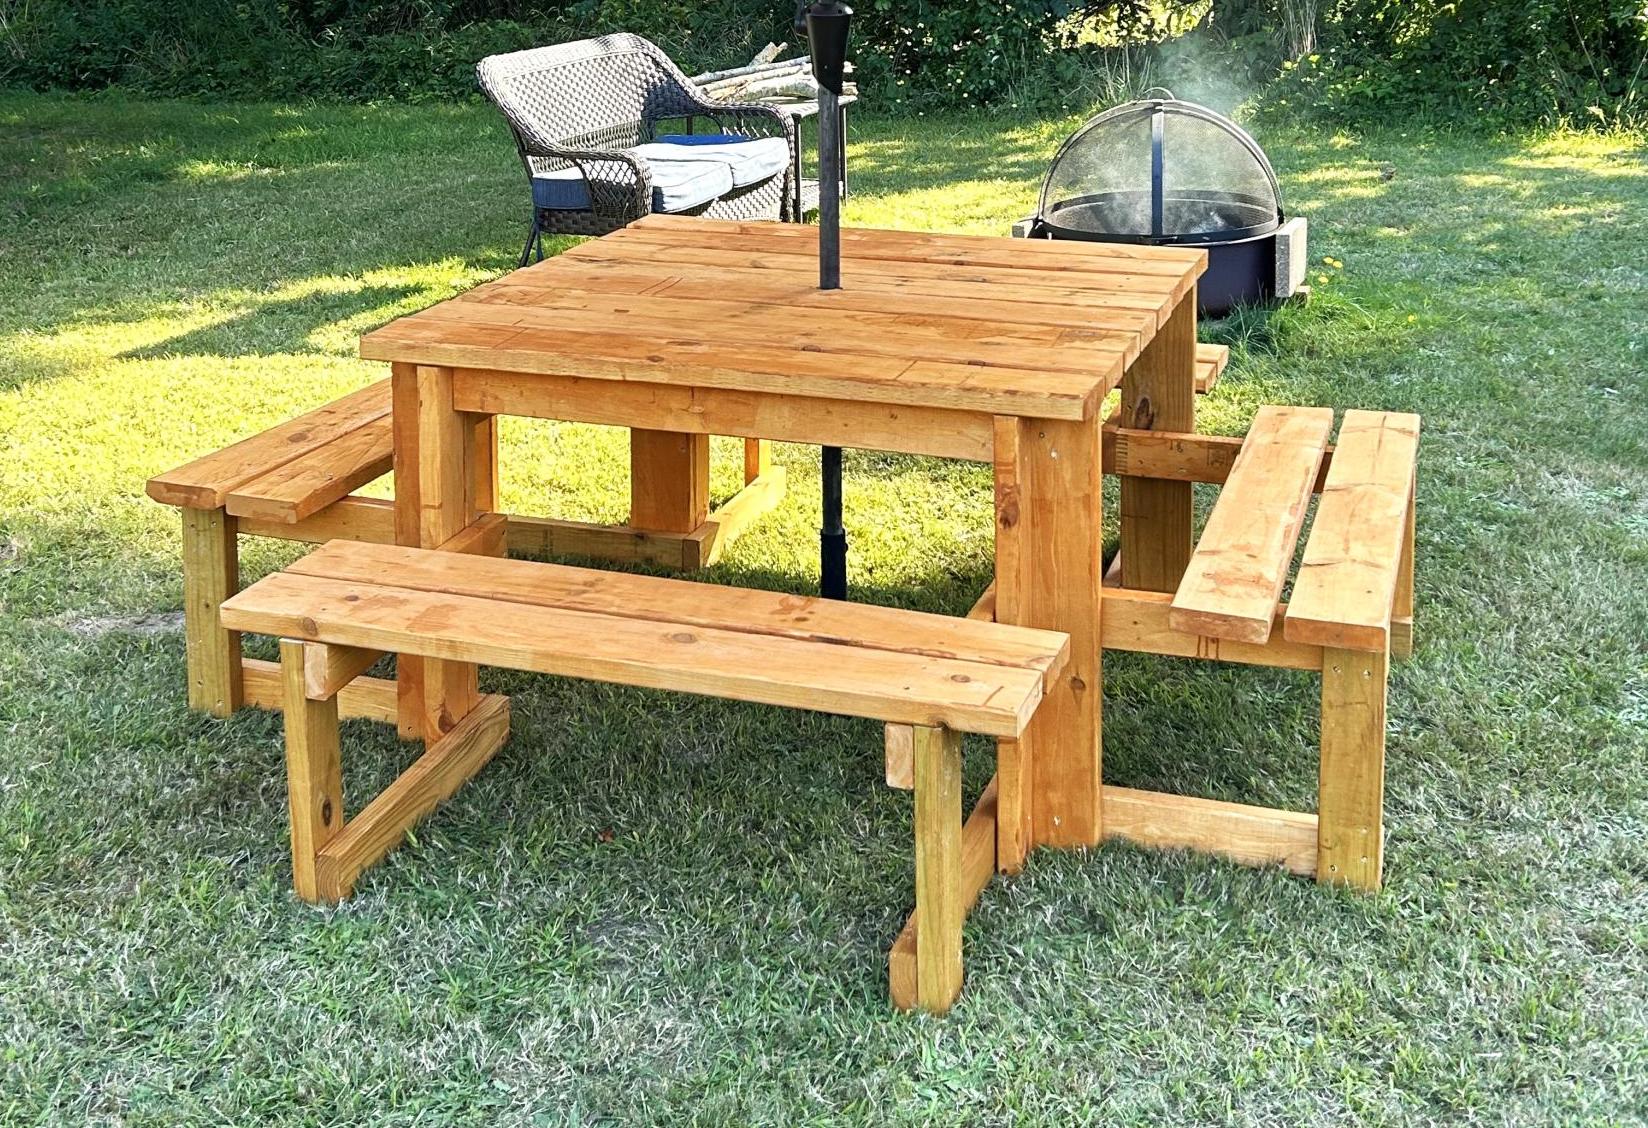
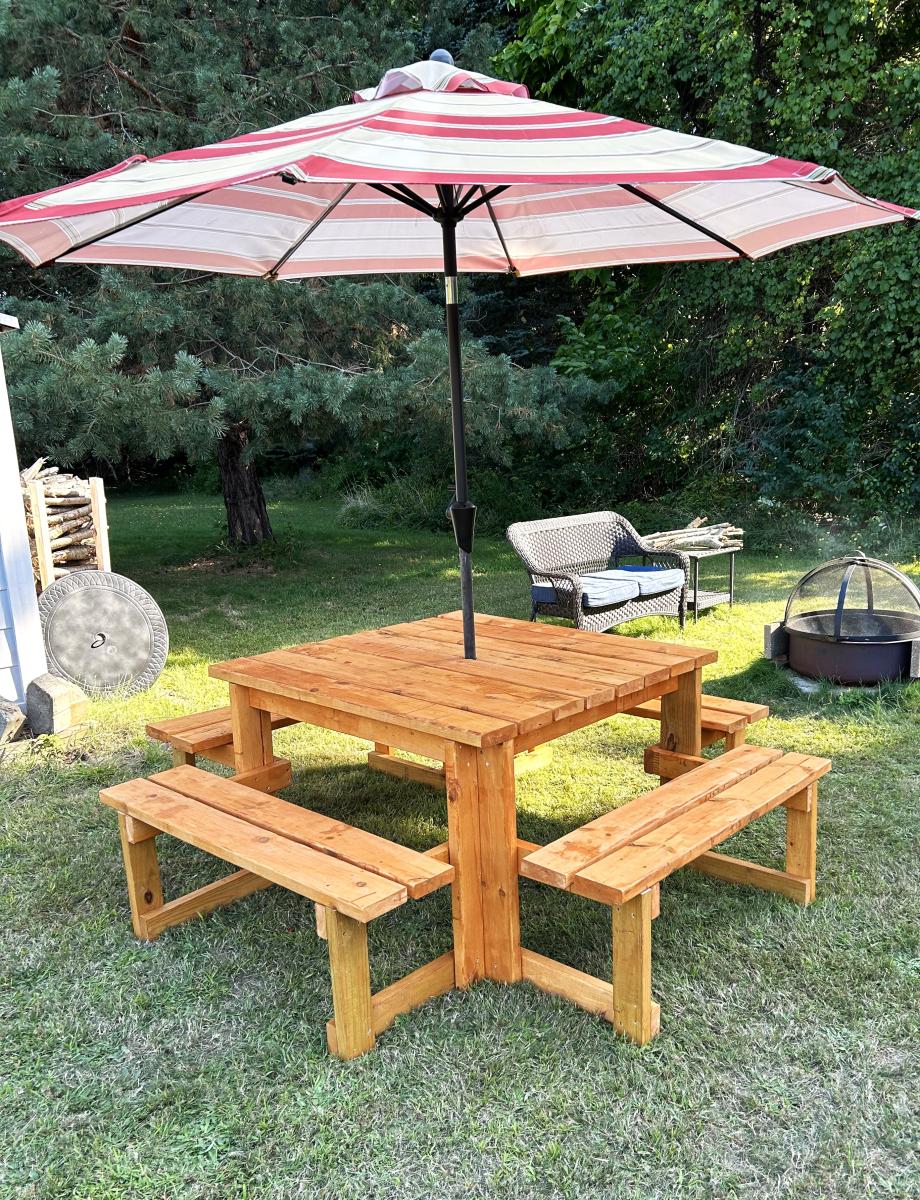
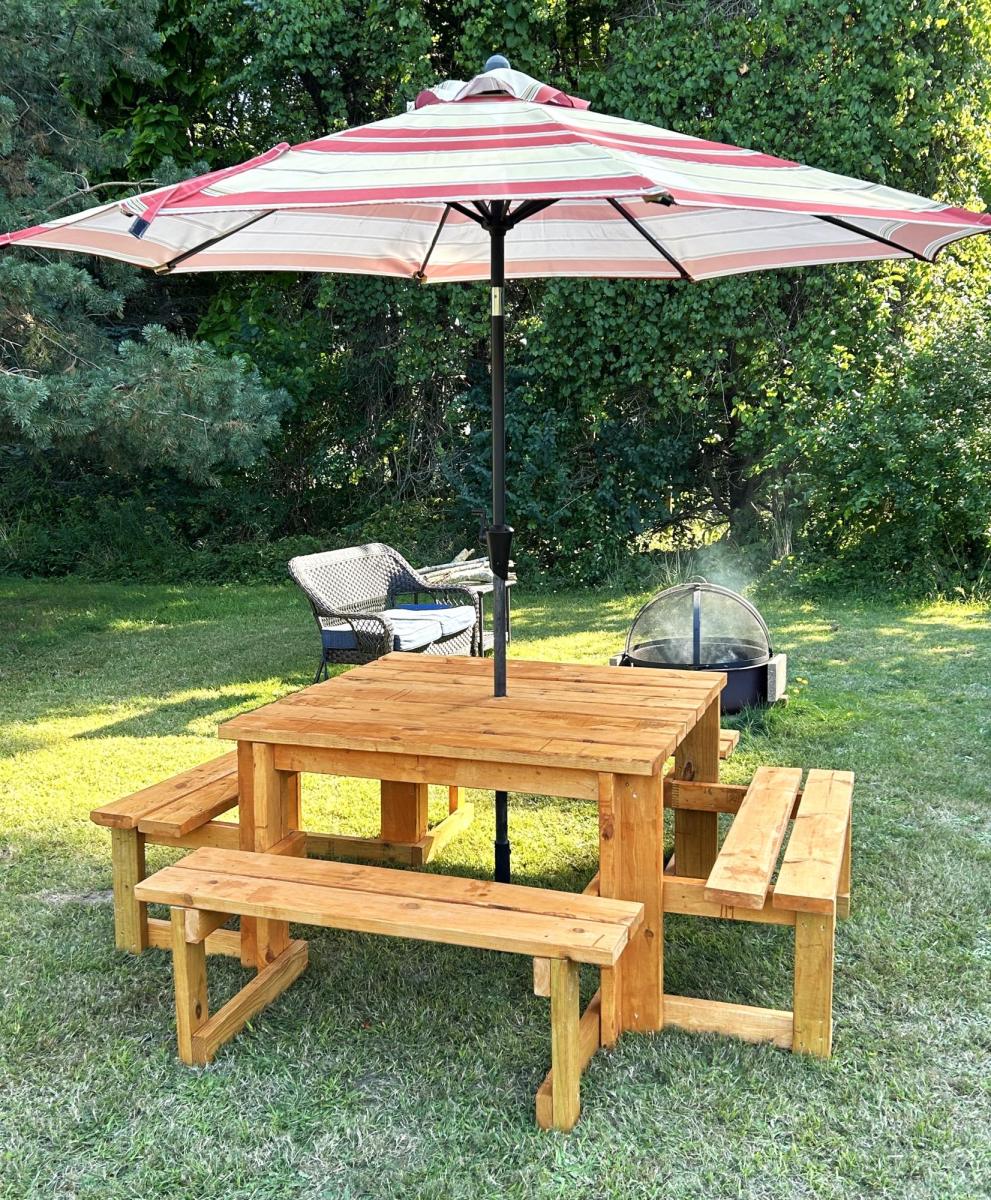
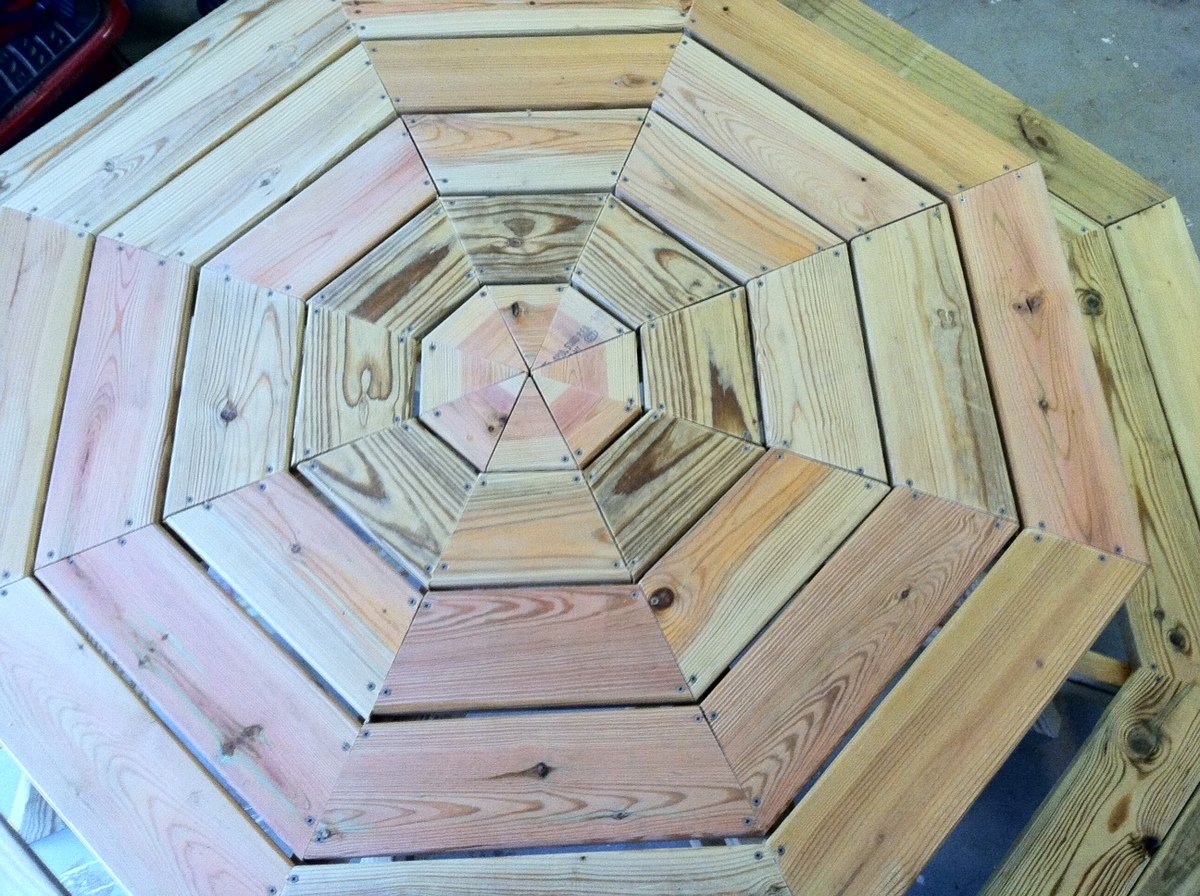
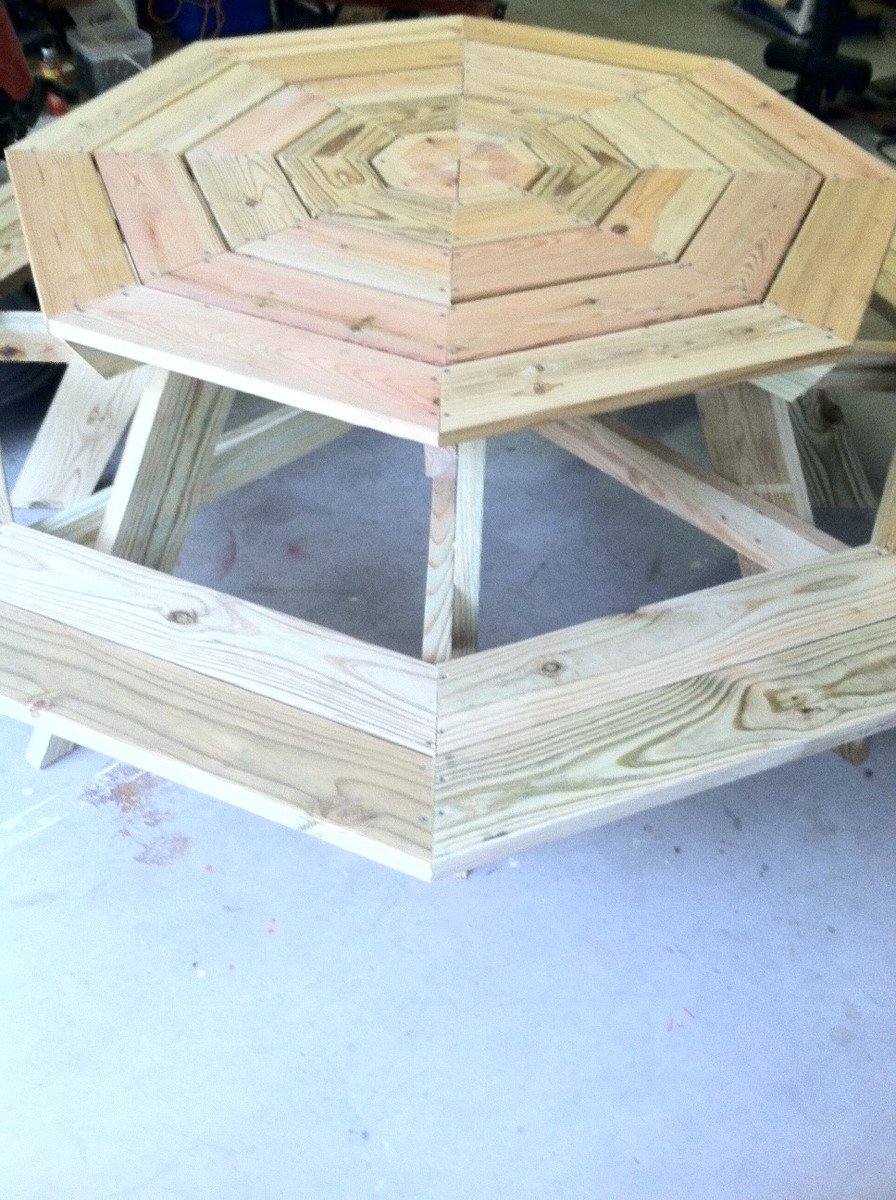
Picnic table with slight modifications. Assembled with the help of our five grandsons. A day to remember.
Kerry Still
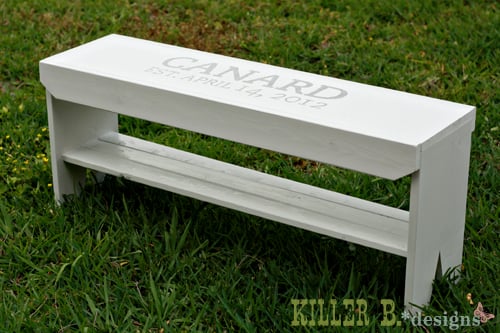
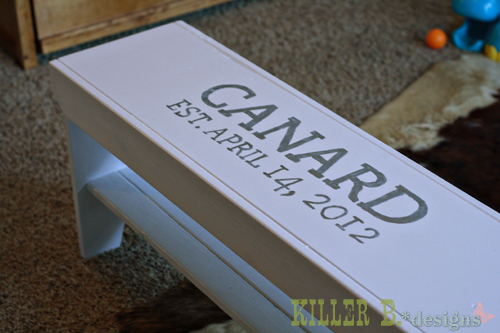
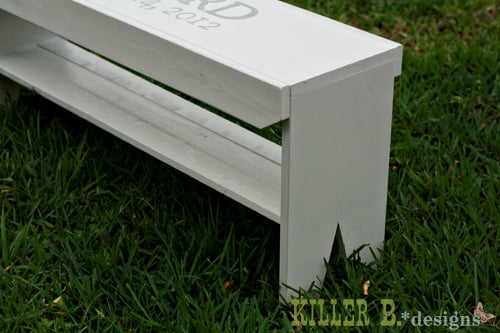
To contribute to an upcoming family wedding, the mother of the groom asked me if I could build the couple a guest book bench like the one we had at our wedding. We only had a few days to build, so instead of using the same Rustic Bench plan I chose Ana’s 5 Board Bench. I had some spare 1×3′s so I decided to add a shelf to the bottom for added stability. It turned out to be a really cute bench! The little details were fun to add. For the art on the top, i traced their last name and wedding date in Cecilia font onto printer paper straight from my computer screen since my printer is out of ink. I taped it in place on the bench, then traced over it with an empty mechanical pencil which indented the outline on the wood. I filled it in with a silver metallic Elmer’s Painters paint pen. The guests used a fine tipped paint pen to sign it at the reception. A bench is so much more fun than a plain old book! Now they have something to display and use in their new home together!
This was the first thing me and the hubby ever built. We had lots of fun and even got the kids involved. Pretty sure we got the building bug now! Thanks Ana for inspiring families to build better lifestyles one board at a time. :)
My son and I had a blast building this table last October. I have been meaning to write and thank you for the great plans. We took the suggestion of staggering the legs for better access and it turned out great. I also used deck boards for the top to help reduce weight and they were already slightly curved on the sides which made sanding easier. Thank you!
My cost includes a nice Kreg Jig set up (approx $100)
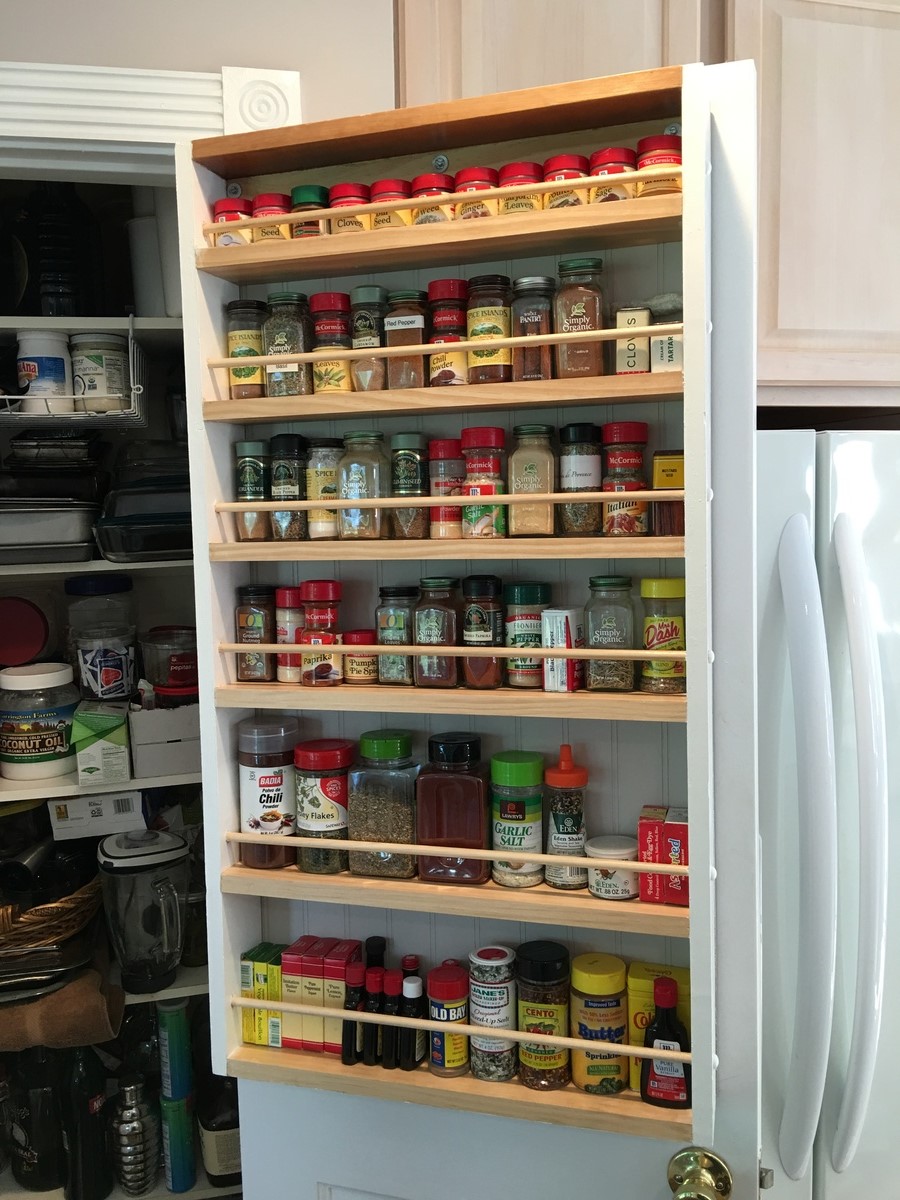
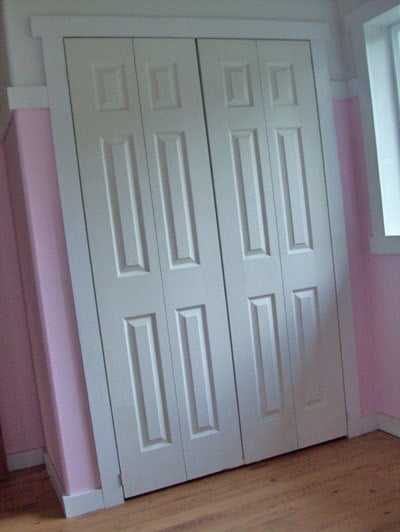
love Ana! We moved from the city to a late 1800's Victorian farm house with no closets, no basement, no storage! This was a great Woodshop 101 project for my husband and me, and gave us extra space in the kitchen. Can't wait to do another Ana project.

Wed, 08/28/2019 - 11:03
This is awesome!!! Thanks so much for sending in a brag post!
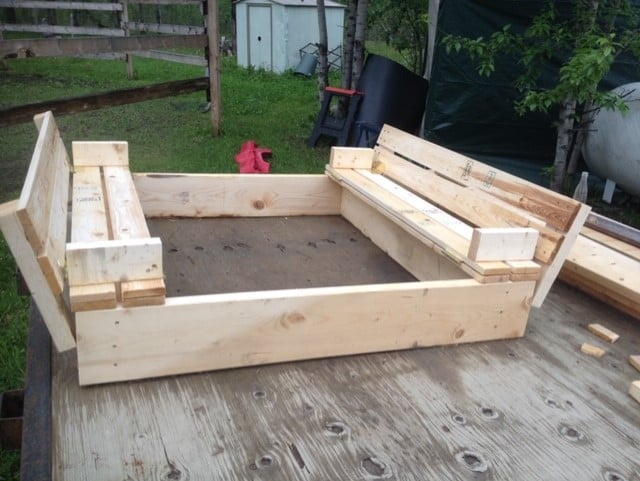
I built this sandbox for my kiddo's because we have cats! It was great. Easy to build, great plans for it.
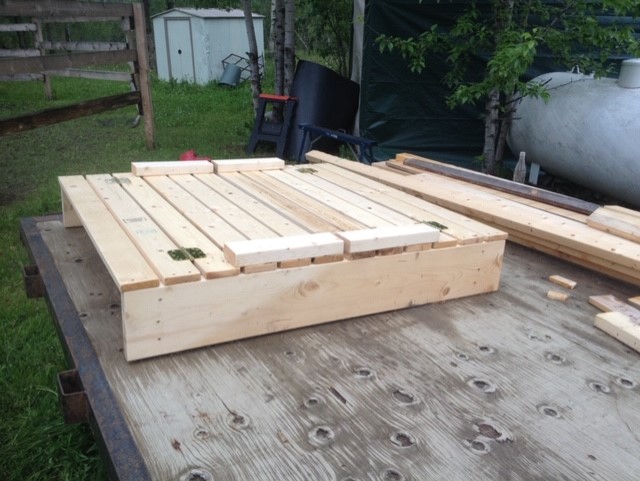
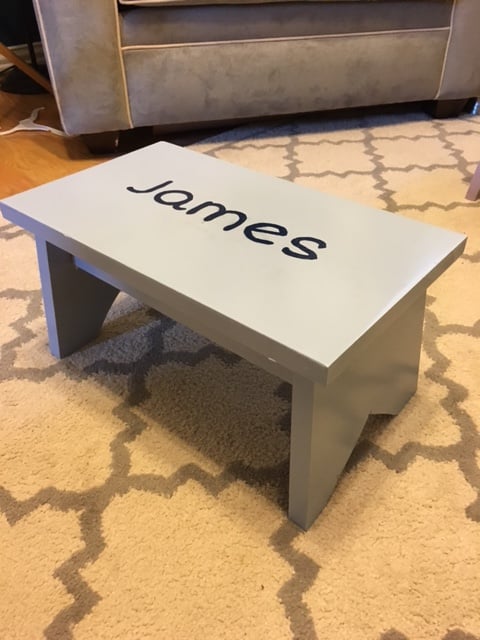
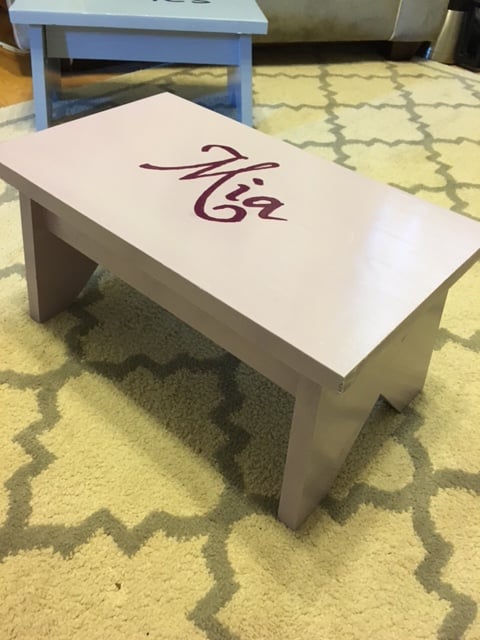
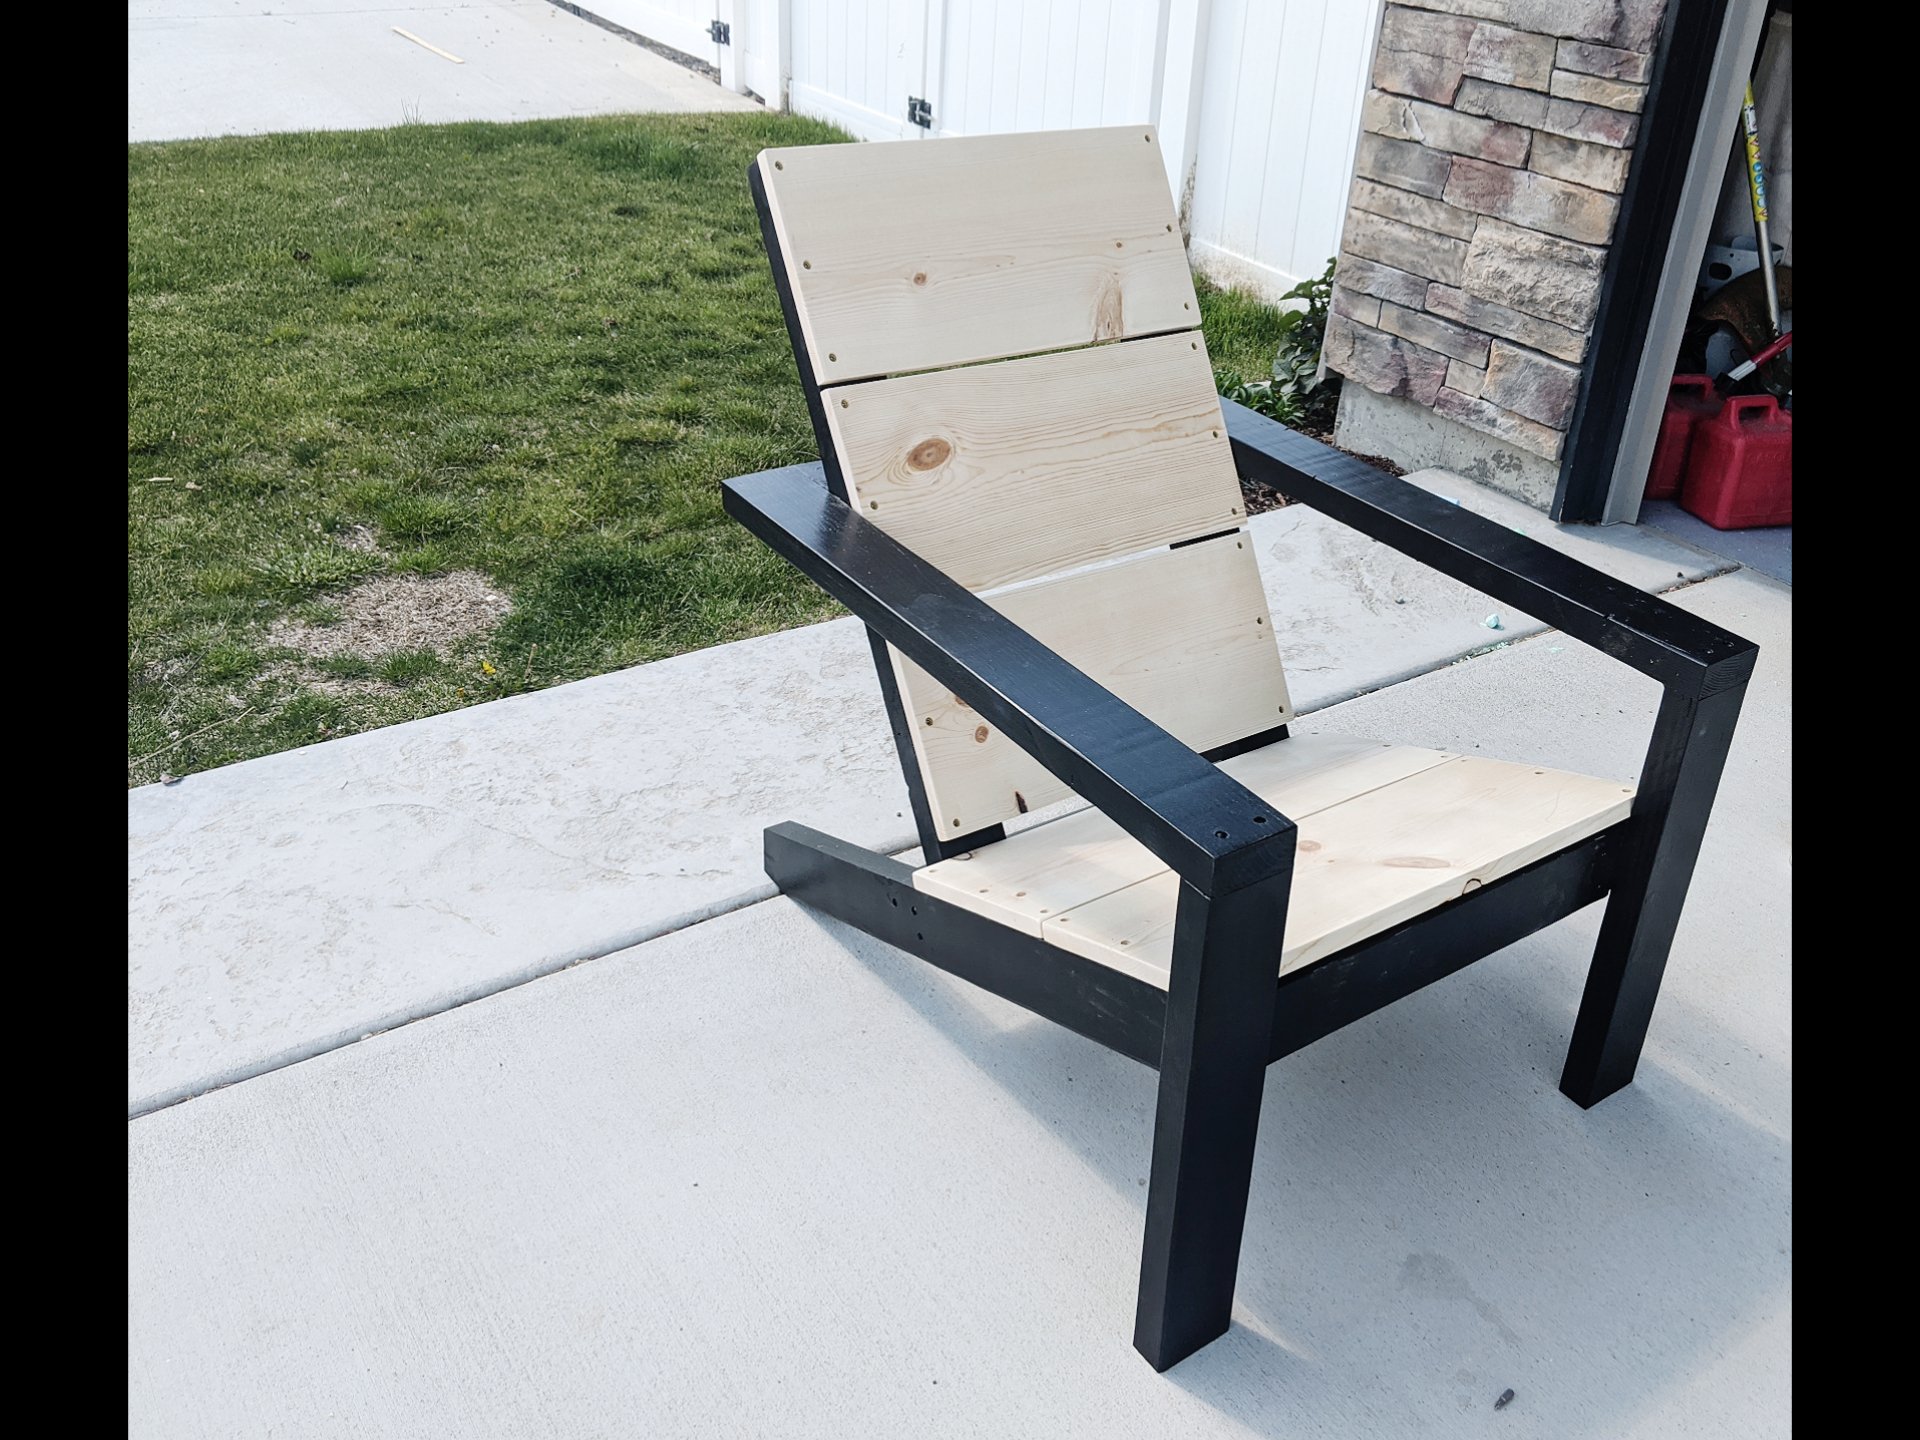
This was my second project from Ana White, and overall it was successful. I used a miter saw for the cuts (struggled with the bevel because my 12 inch saw isn't a slider, a kreg jig to attach everything (struggled to attach the 1x3s to the legs due to the angle of the dril and tight space), but everything eventually was held solidly together and it's really very sturdy. My husband is about 160 and he was able to jump on it with absolutely no give.
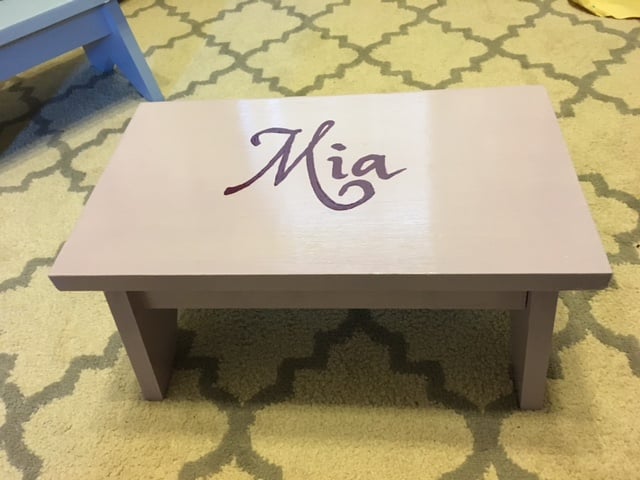
The paint is just small samples we had on hand from home depot to coordinate with other projects in the kids' rooms, and I handpainted the letters. I finished it with a double coat of polycrylic.
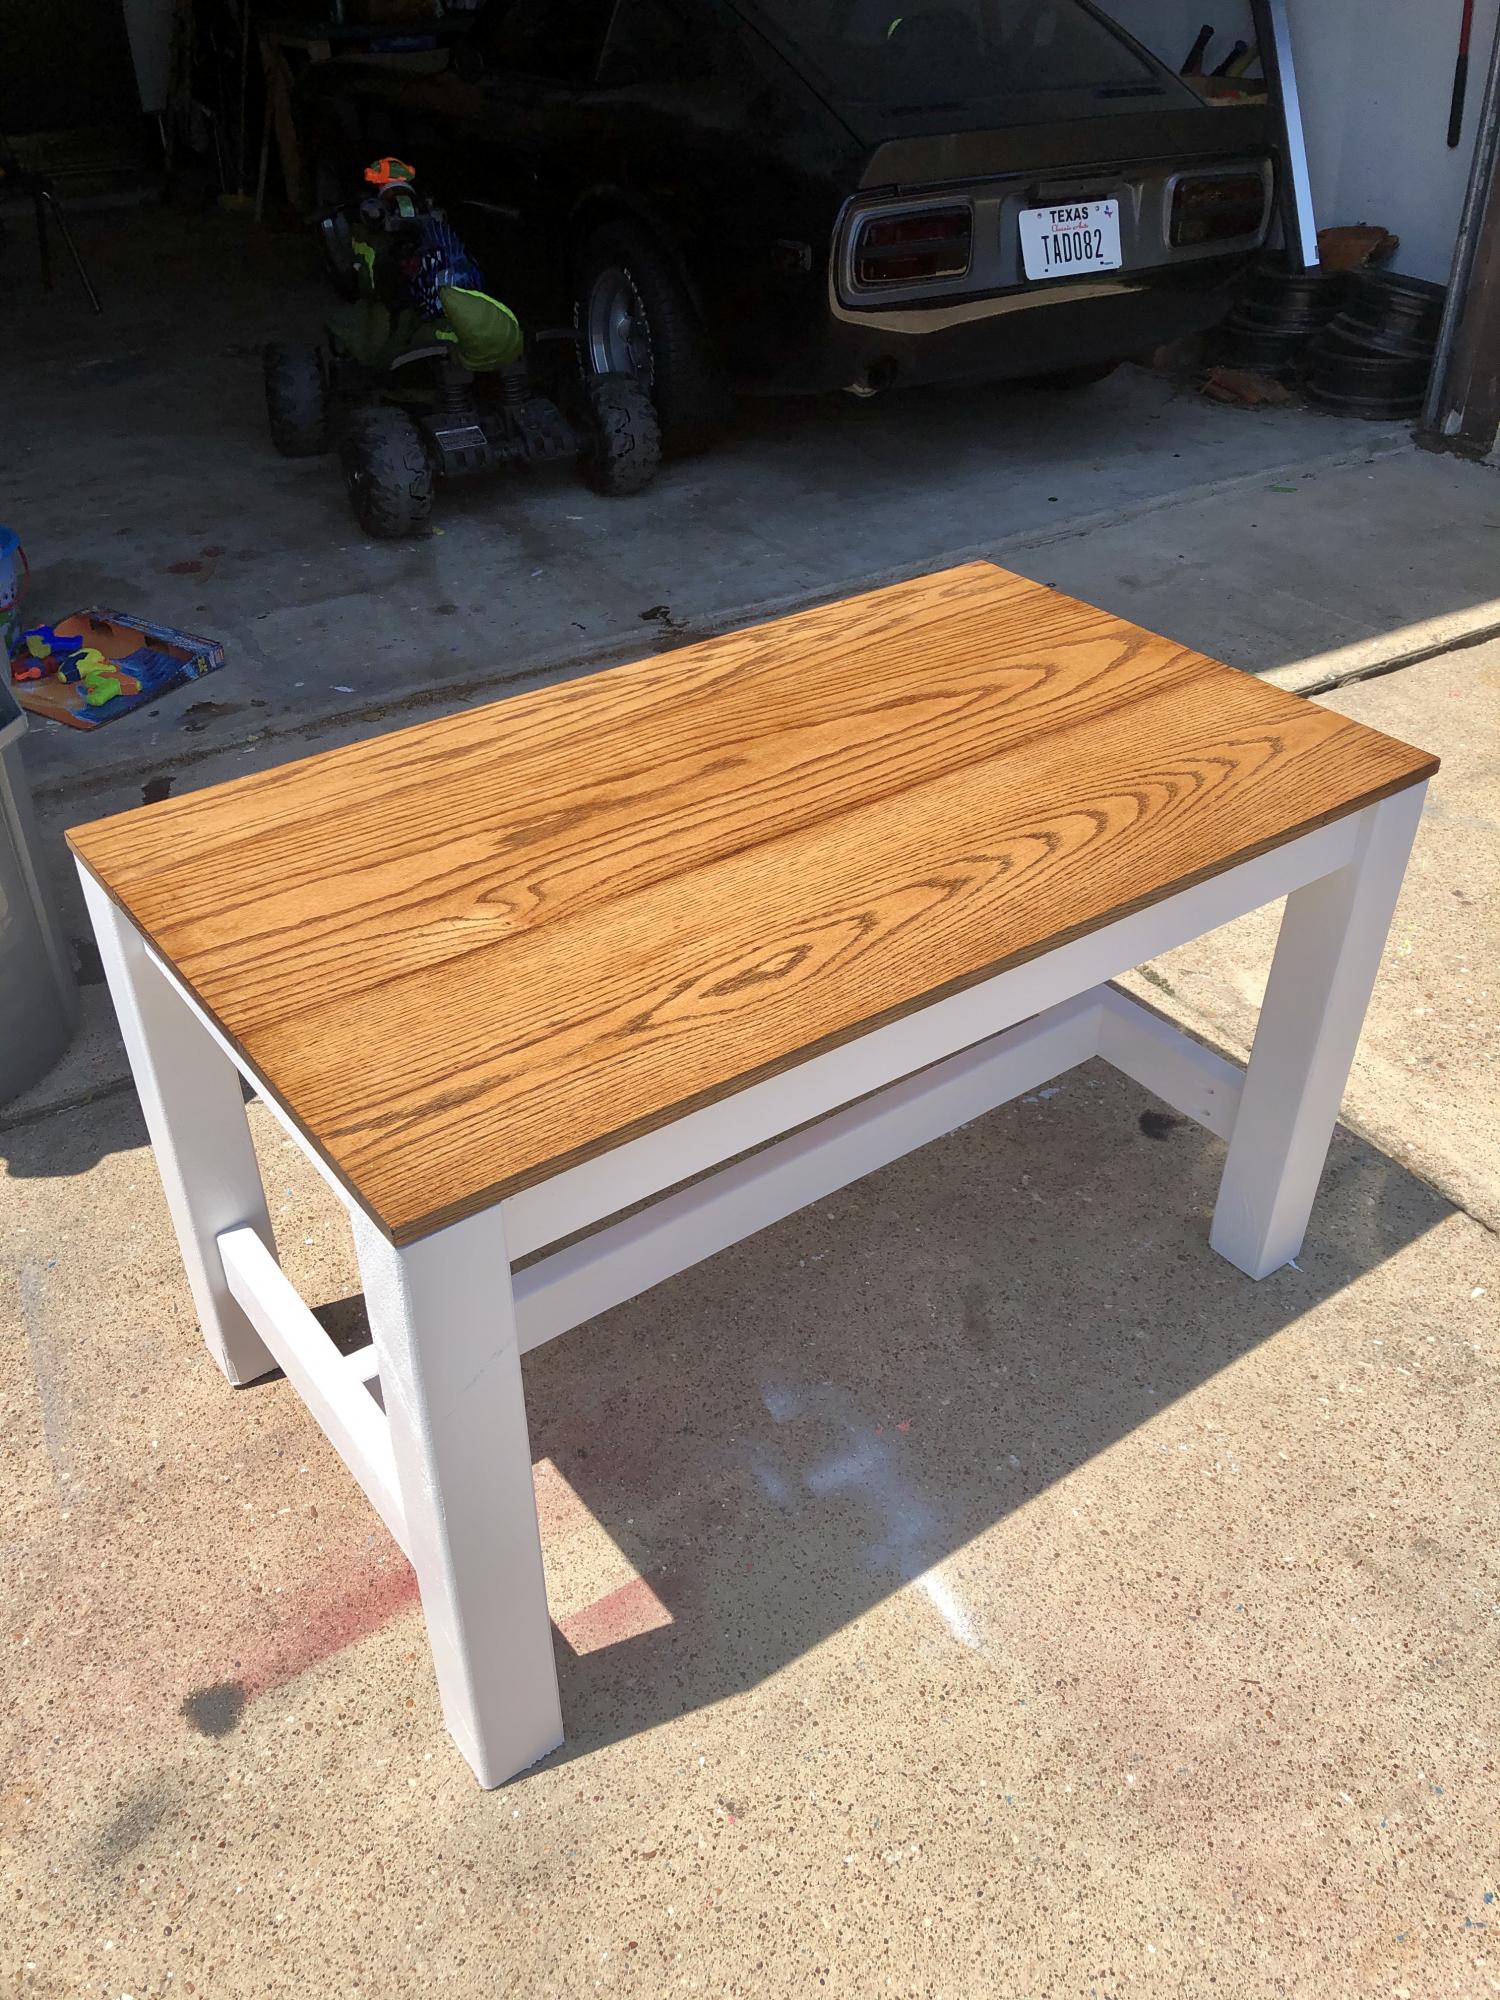
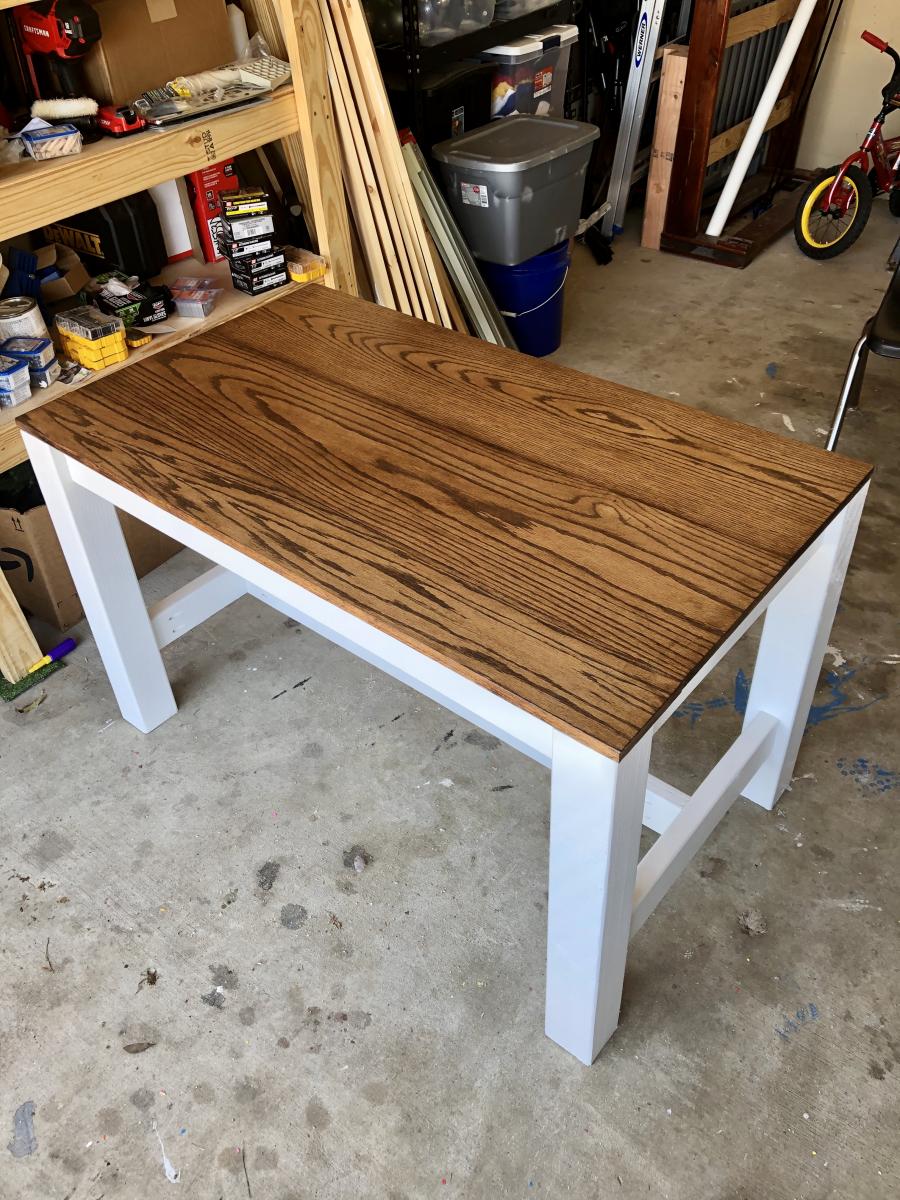
I liked the look of the “counter height table” and adjusted the height to make it a table for an office. I used 4x4s for the legs and oak for the top.
I used a biscuit joiner to join the top, a Dremel tool to carve grooves in the frame so I could attach the top with figure 8 fasteners (allows wood to move as it expands and contracts).
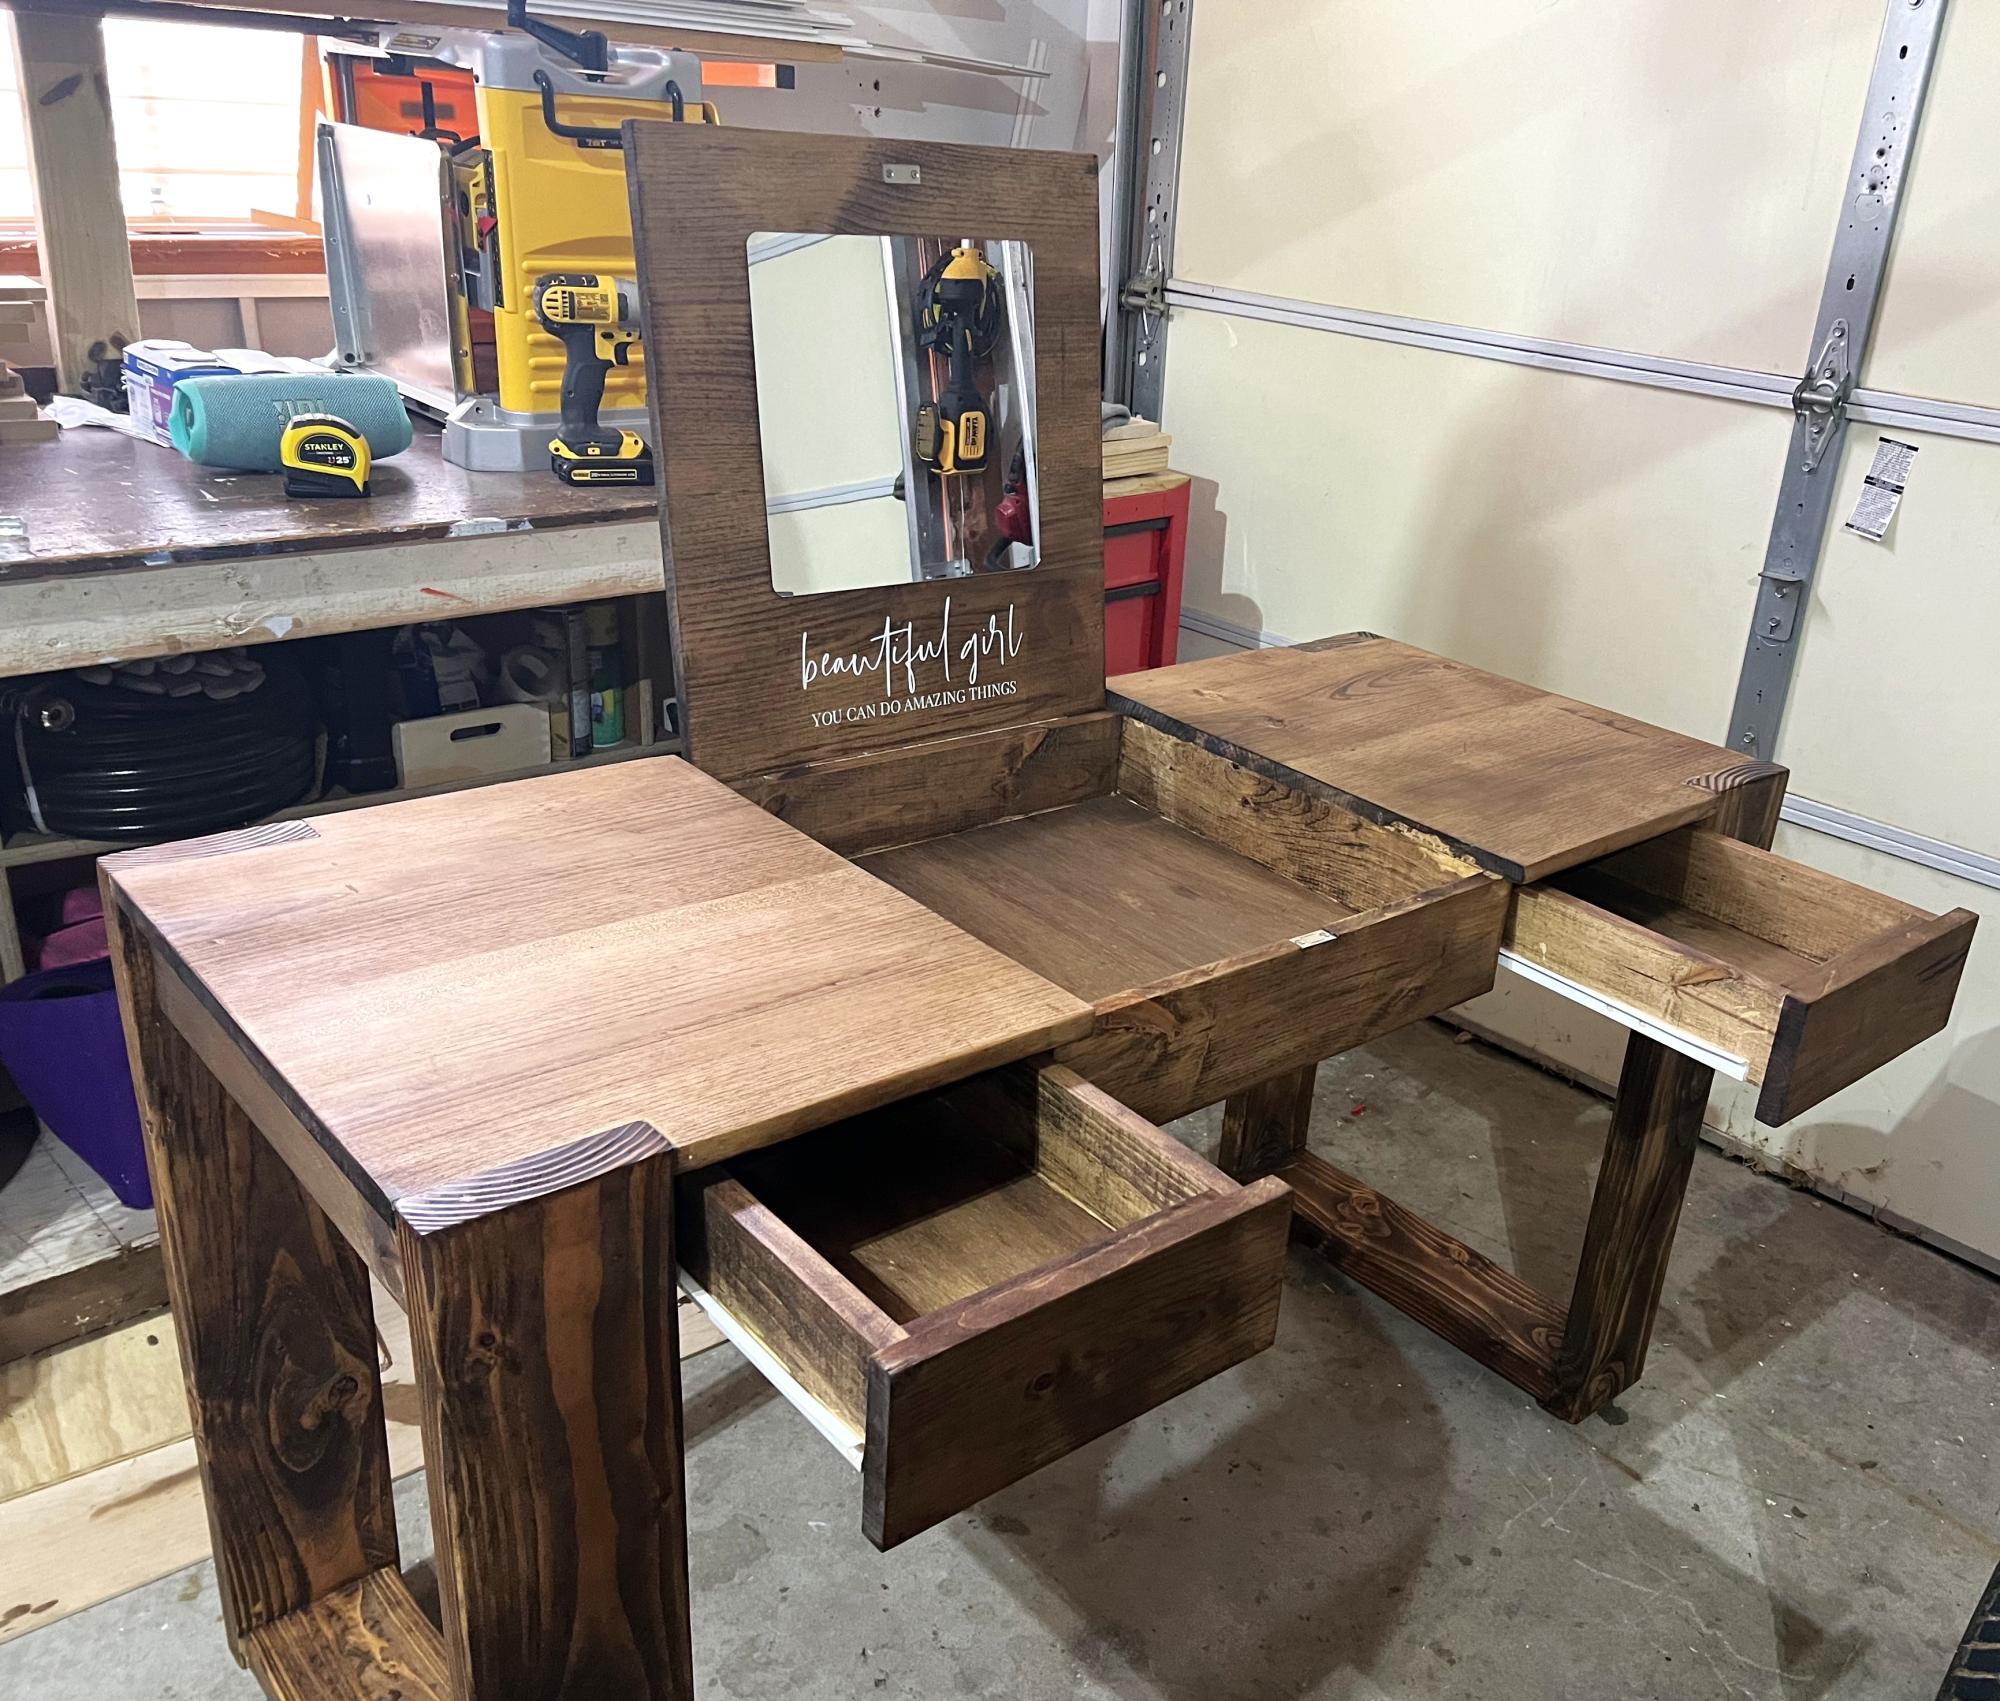
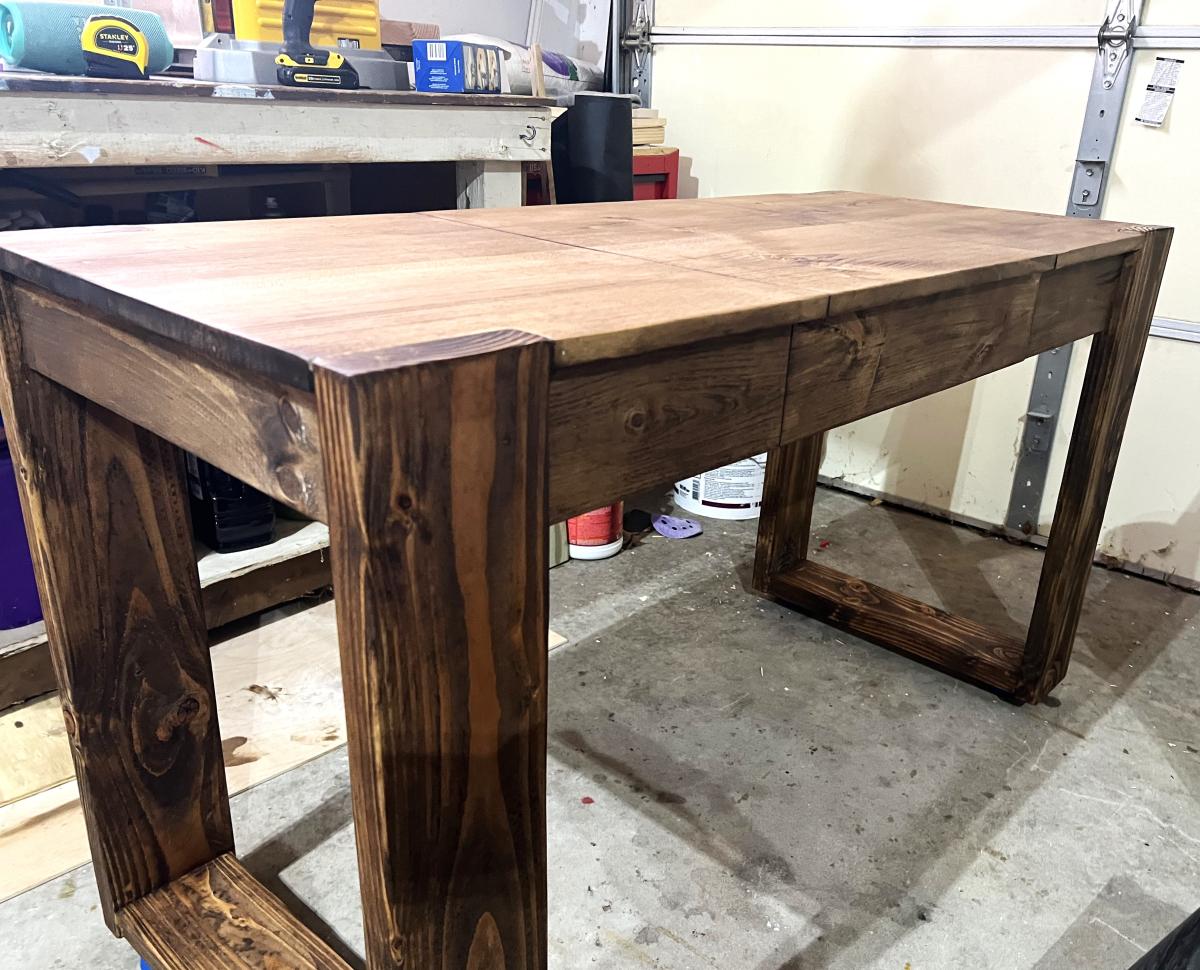
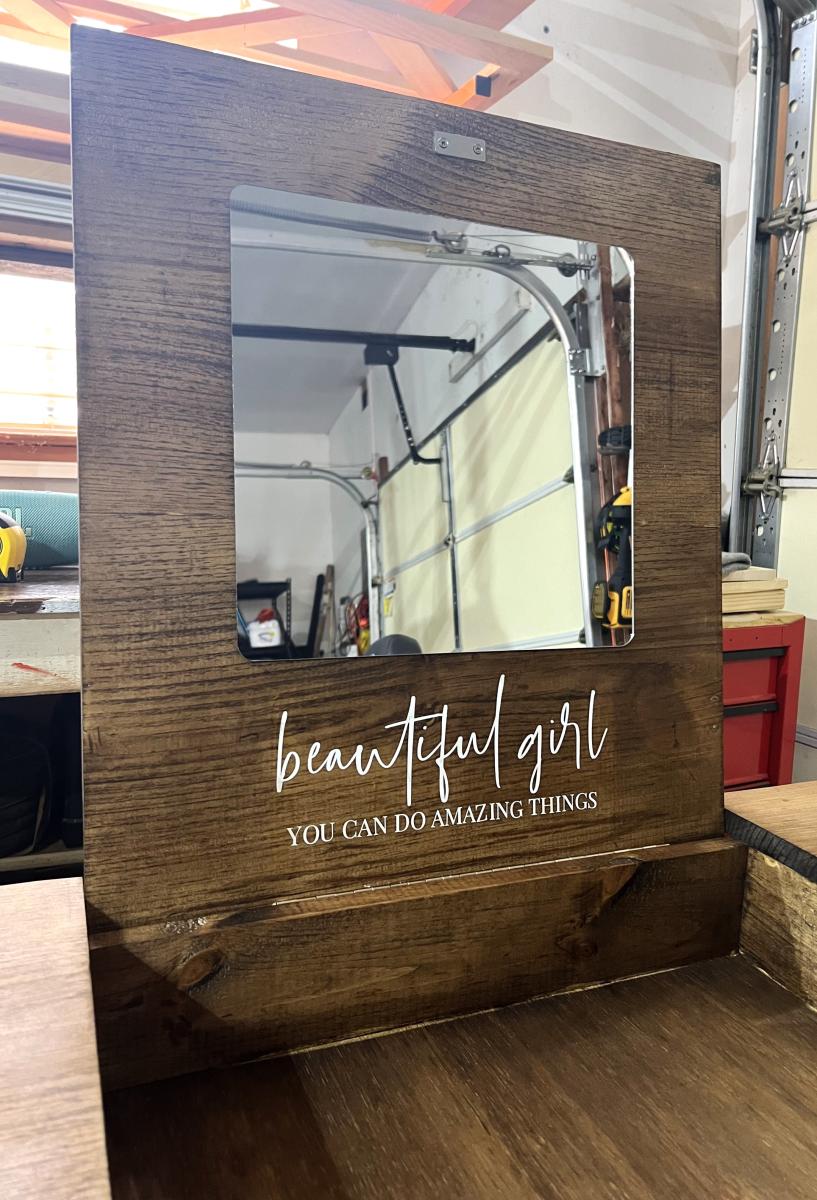
Hi! I love Ana White's plans! I used the chunky leg desk plan and added drawers and a flip-up vanity top! :) https://www.instagram.com/bow_and_timber/

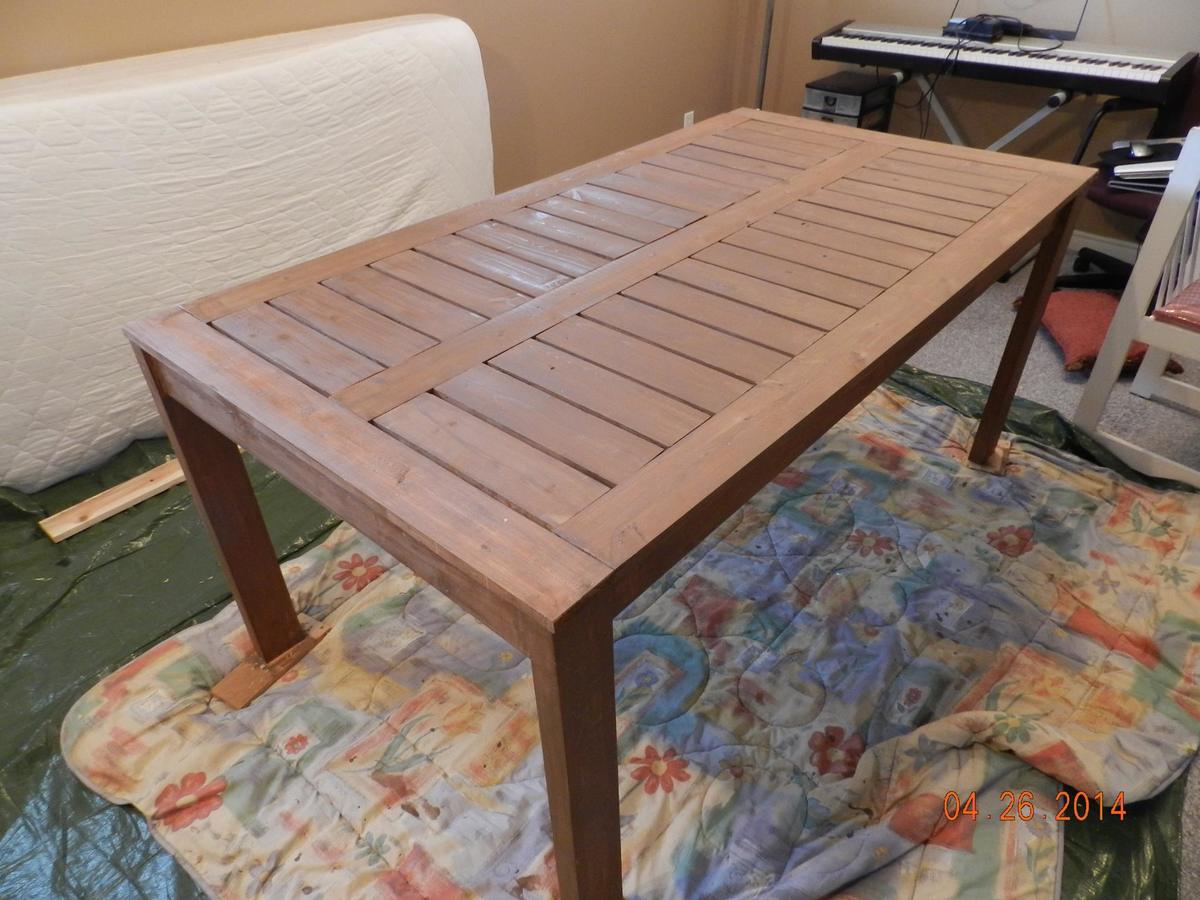
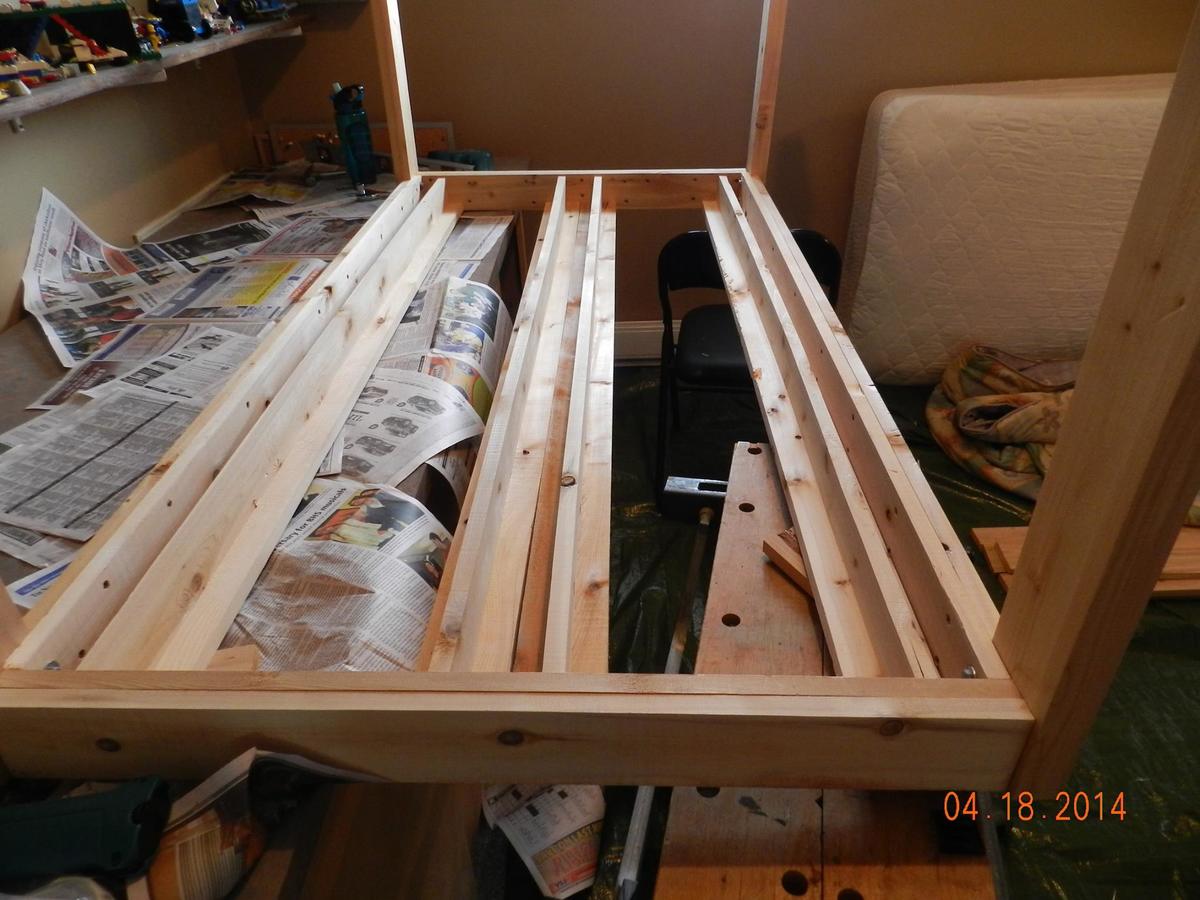
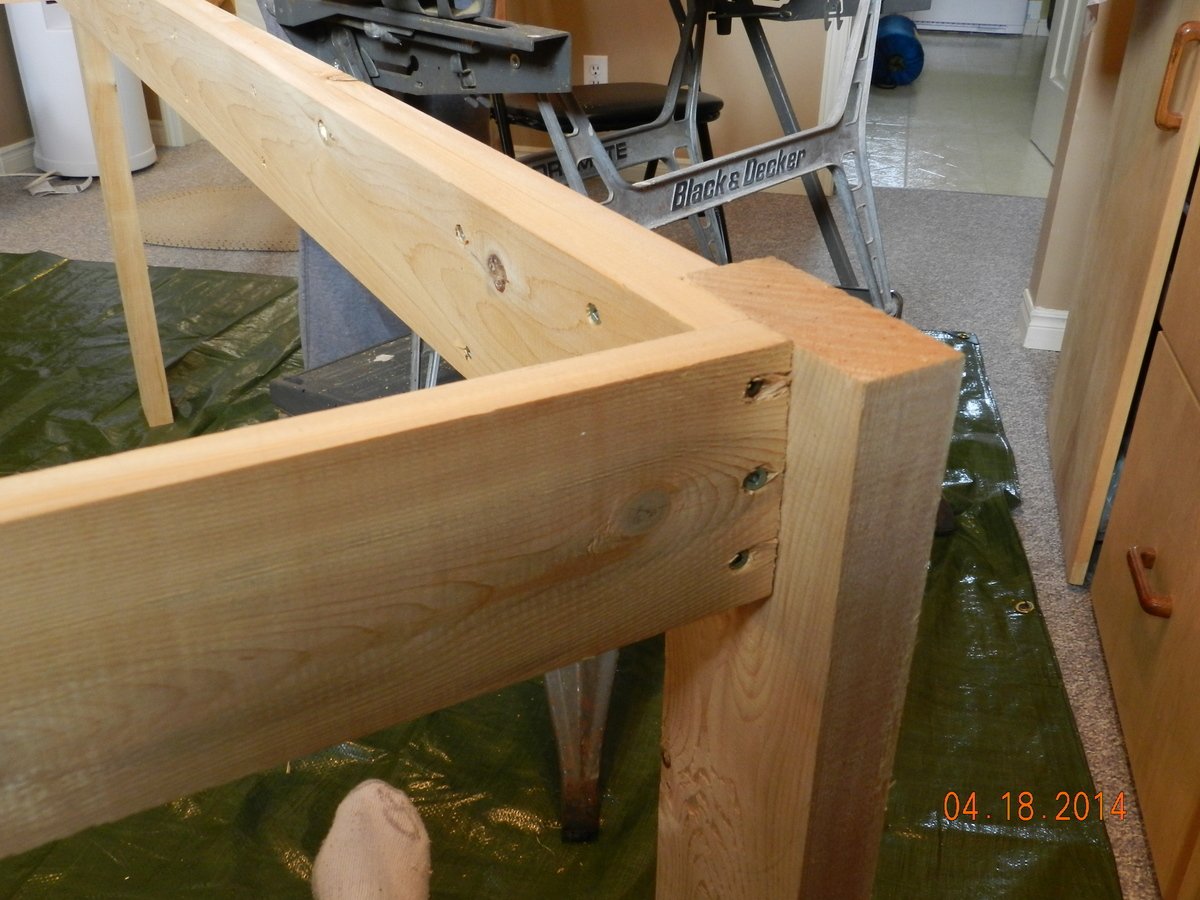
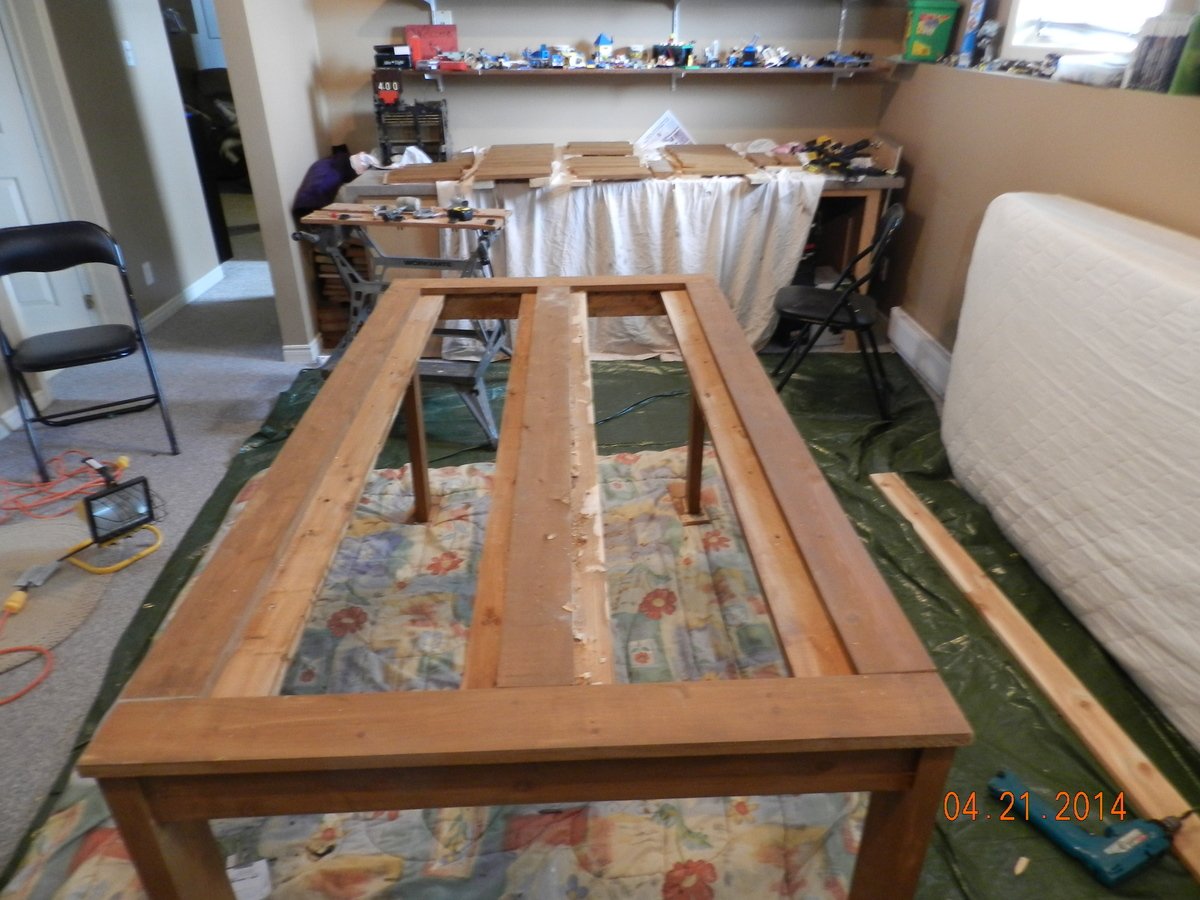
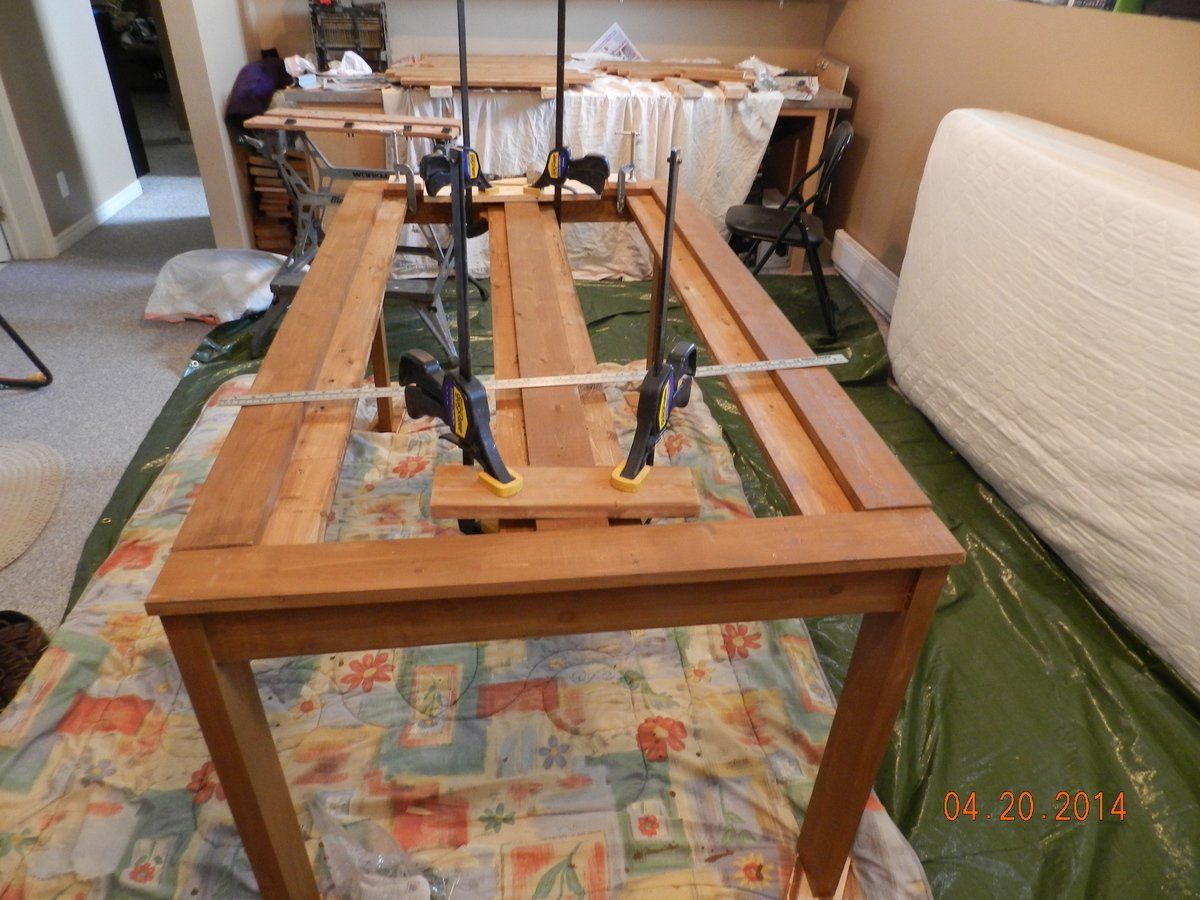
I didn't make any changes , his orginal design was great. Hope these pictures help others. I tried to link to the modified-simple-outdoor-dining-table but wasn't able too.
Sun, 04/27/2014 - 14:06
Found the plans "modified-simple-outdoor-dining-table" and I built it. Very nice table, I posted more pcitures to help others
Sun, 04/27/2014 - 14:06
Found the plans "modified-simple-outdoor-dining-table" and I built it. Very nice table, I posted more pcitures to help others
Just followed the plans, and am in love with the finished look!
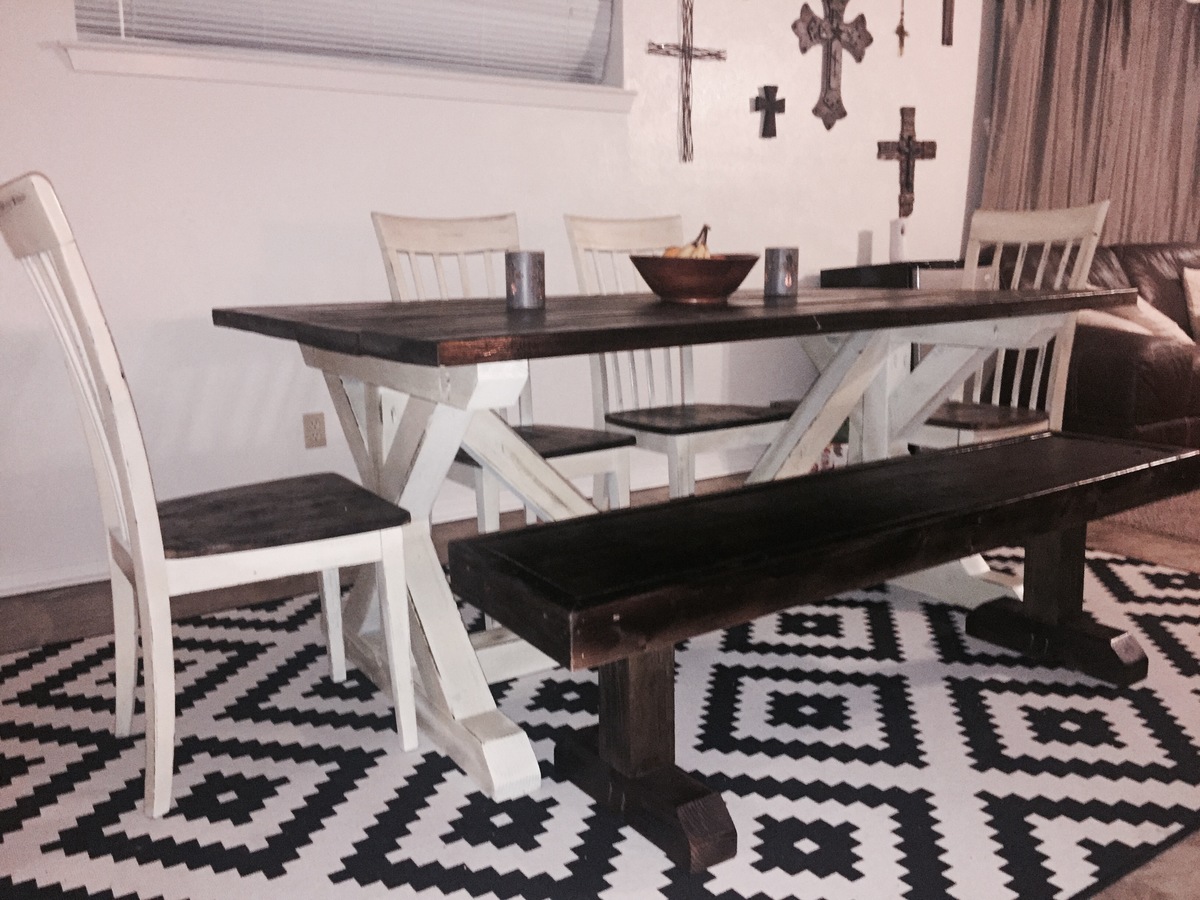
Took the plans from Ana white and made my own twist to it! Came out awesome and the person loved it that I made it for! Kona stain on table top and Navajo white on the bottom. Did the same for benches and chairs to match! Thanks for the great instructions!
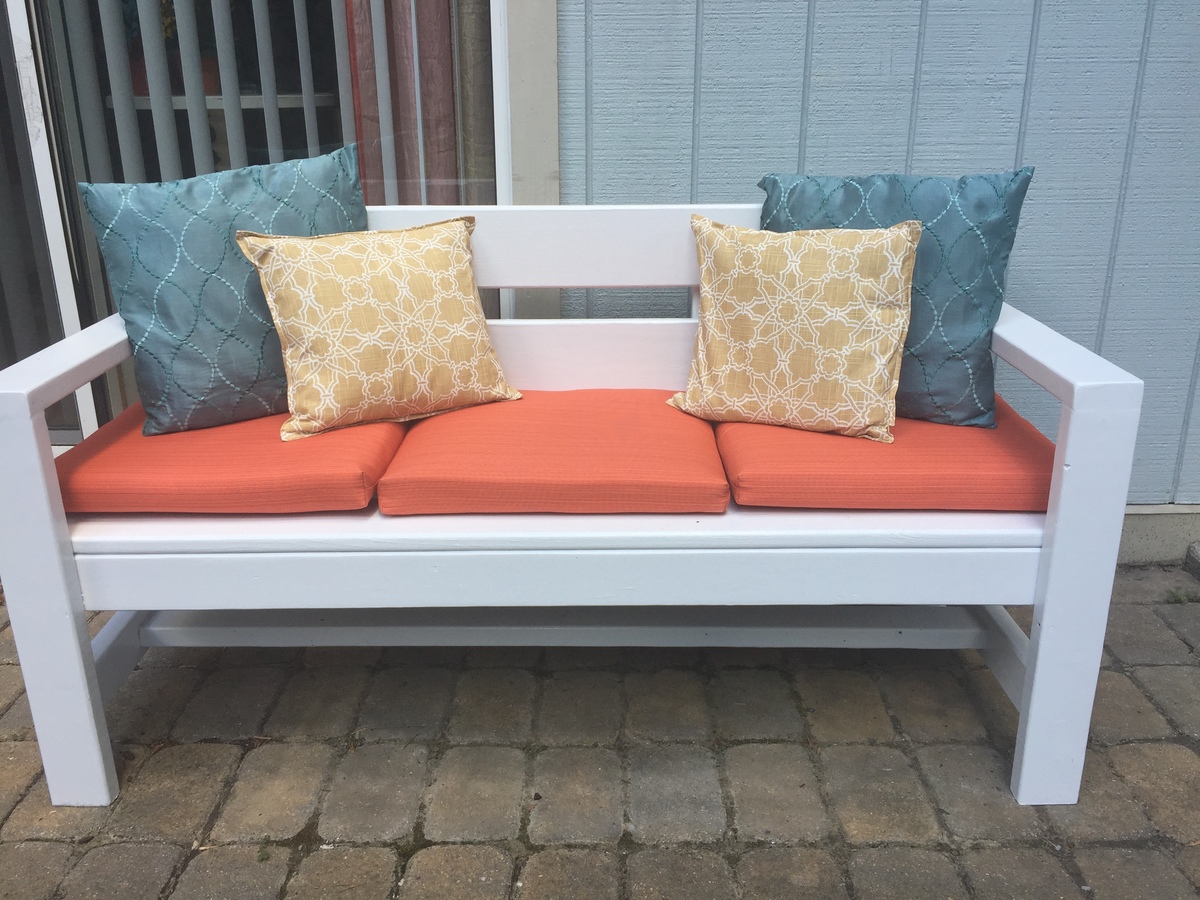
I changed the dimensions to make it a little smaller to fit the front of my house. My husband and I now spend our evenings sitting there drinking tea and enjoying the nice weather.
I spent close to $60 and ordered 3 cushions from target for $8.99 each.