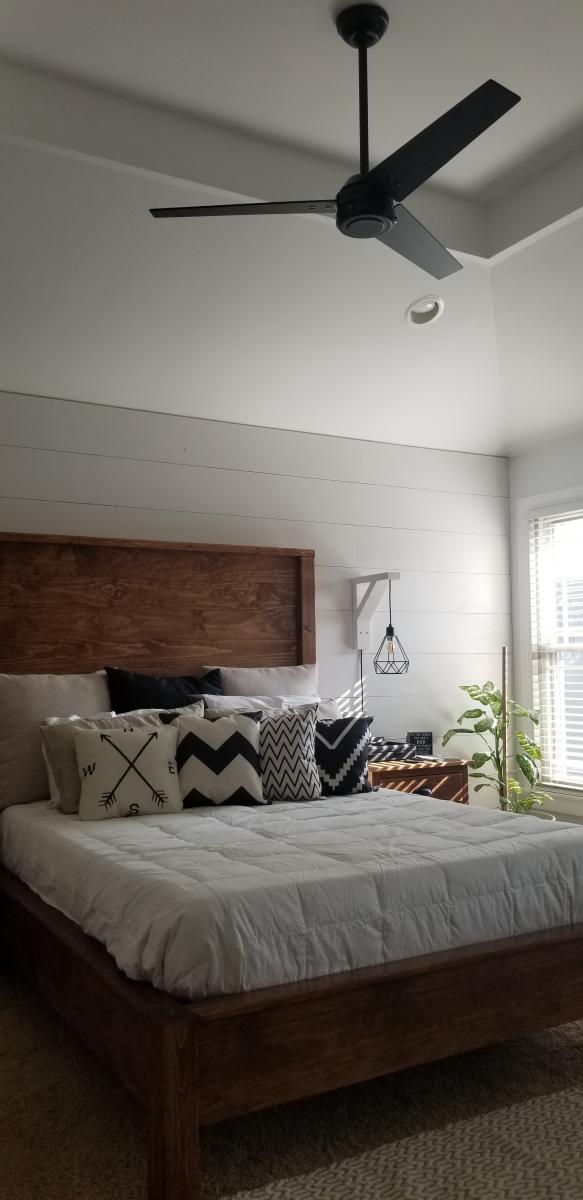
Bunk Bed with Stairs
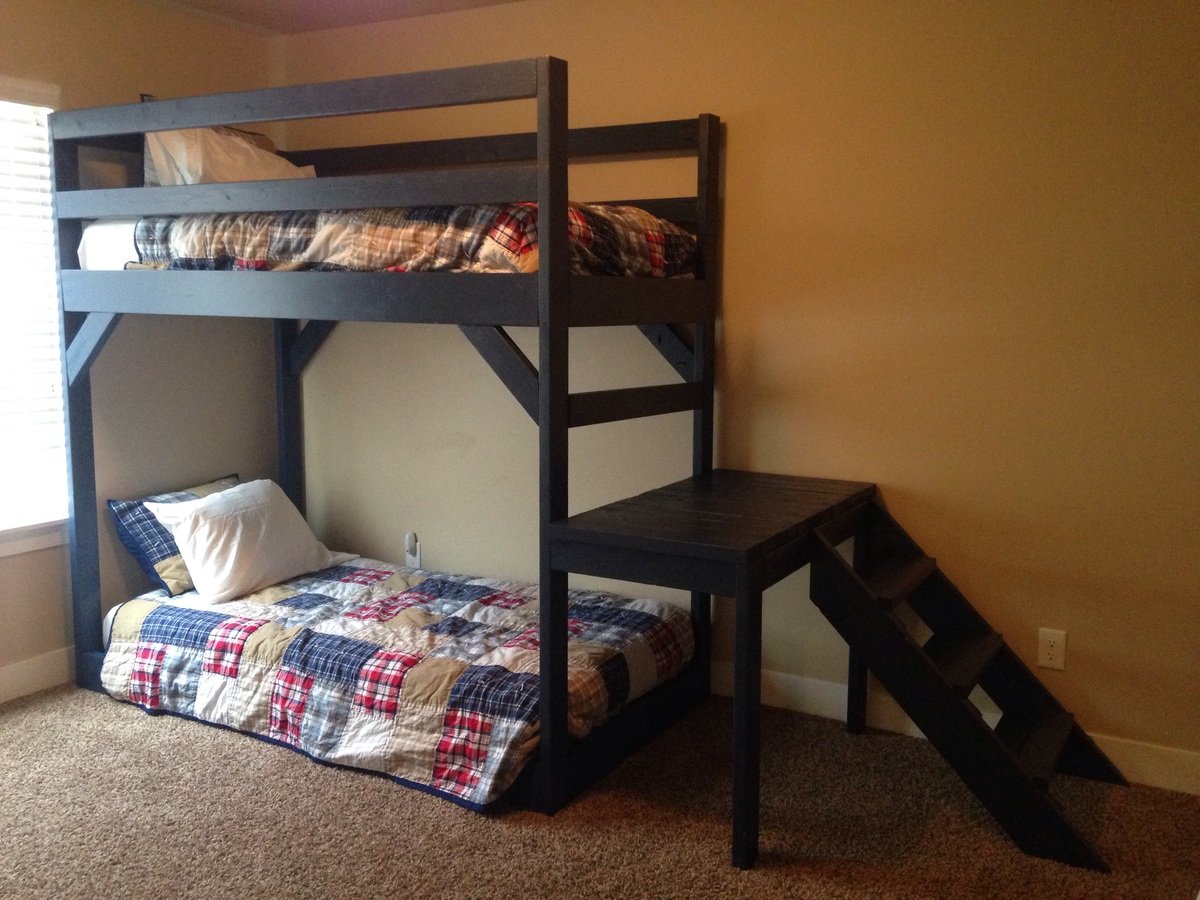
Modified plan to accomodate lower bed and changed stair location. Used pallet wood as bed supports.
Built from Plan(s)
Recommended Skill Level
Beginner
Modified plan to accomodate lower bed and changed stair location. Used pallet wood as bed supports.
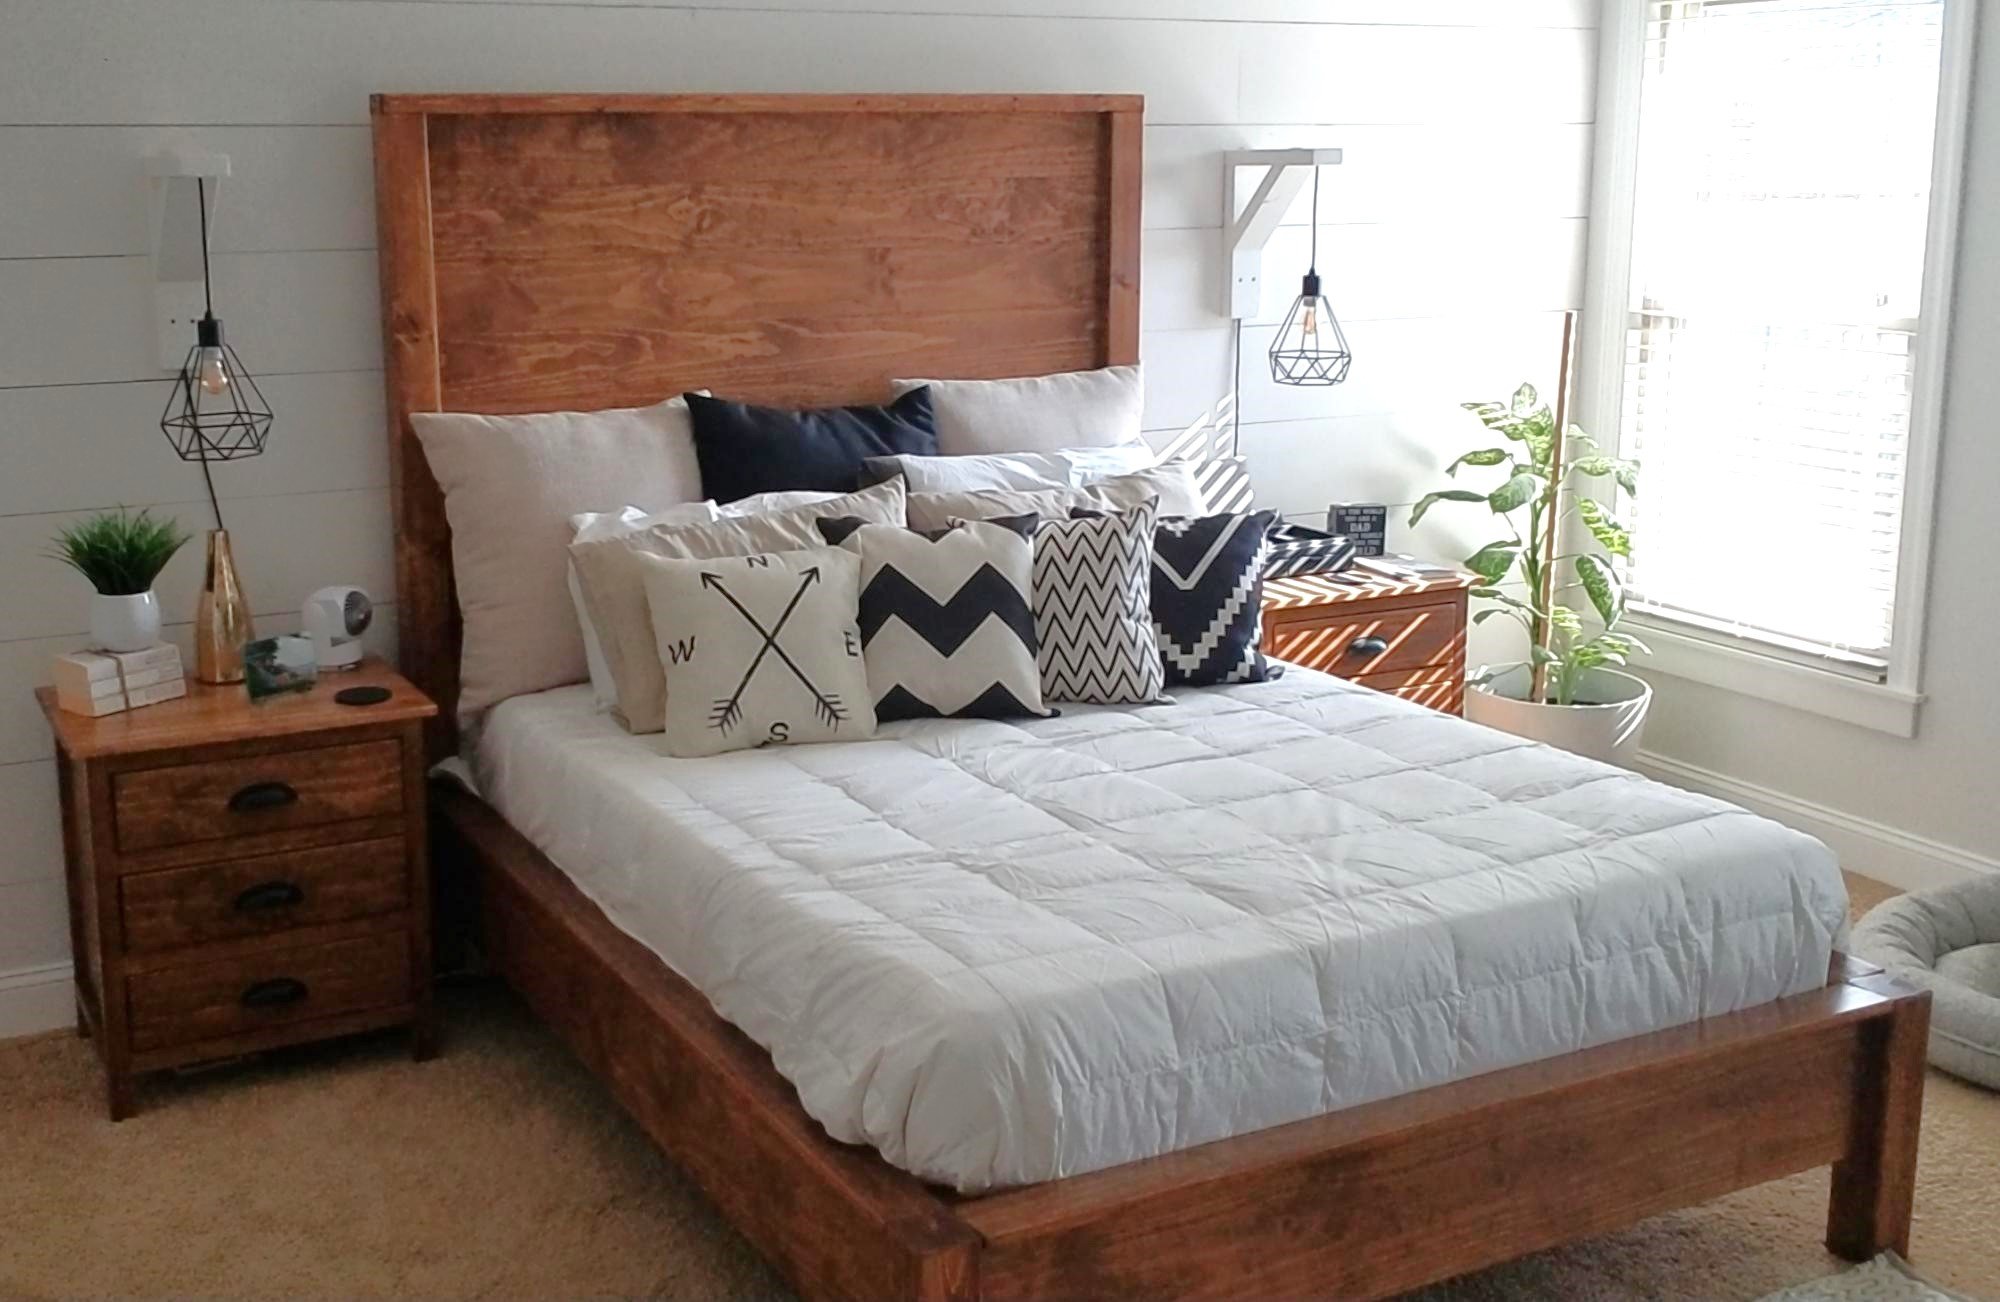
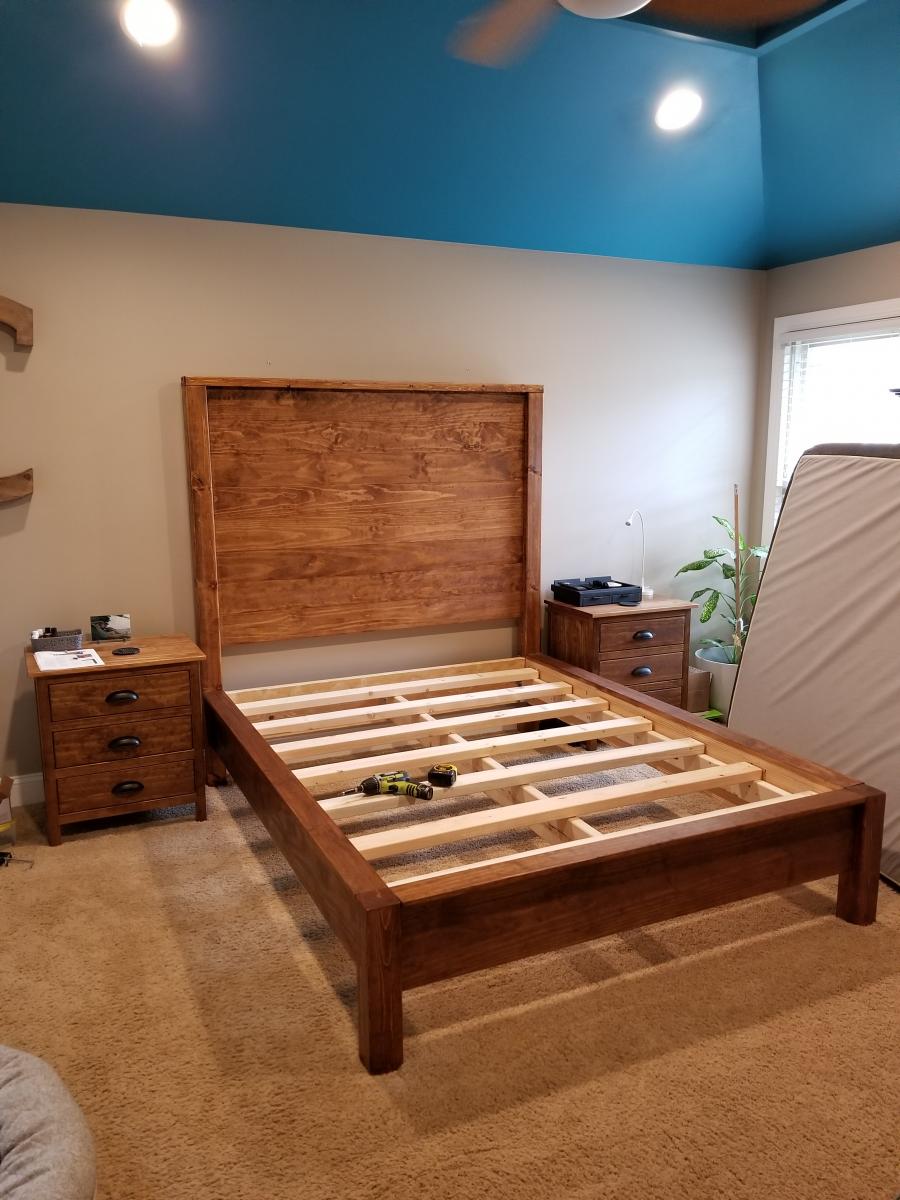
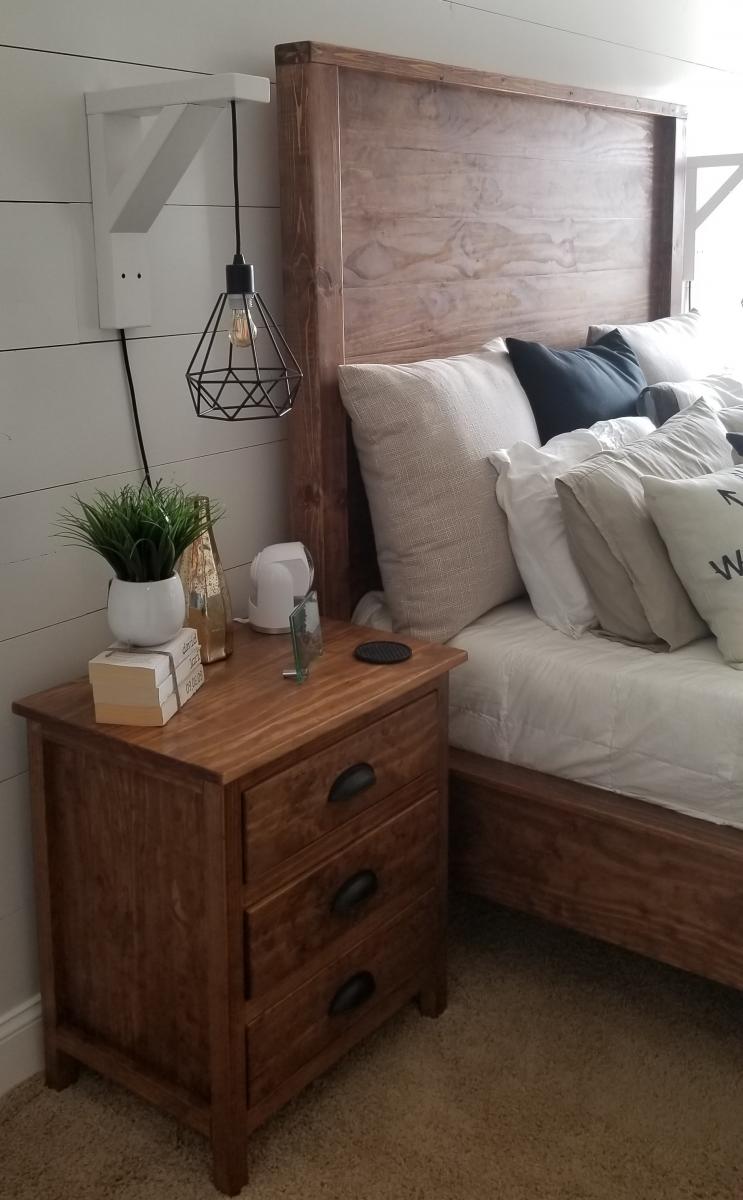
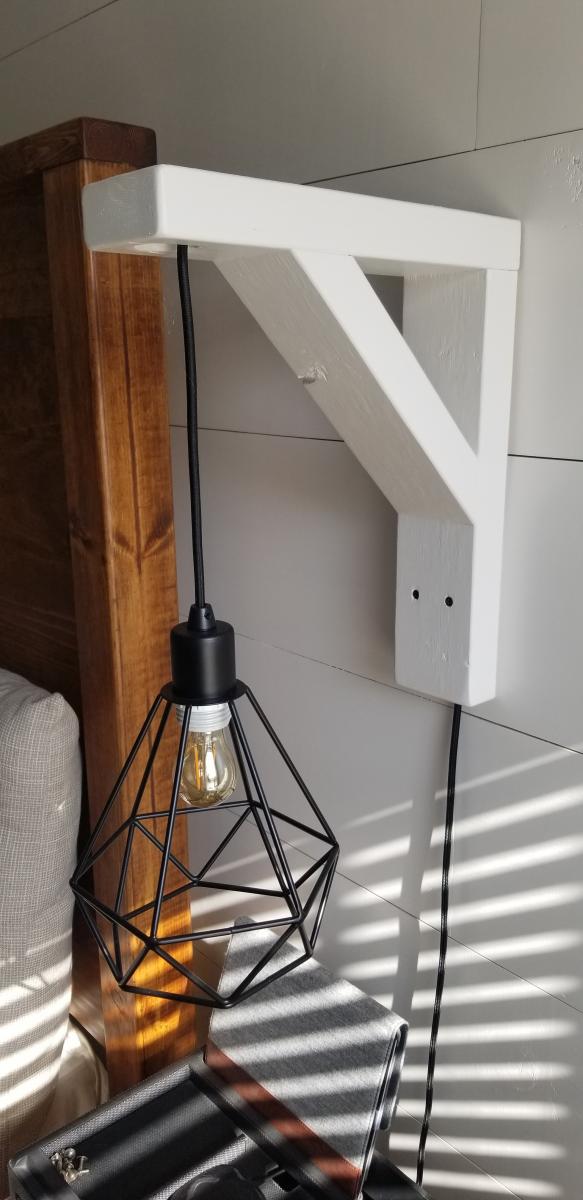
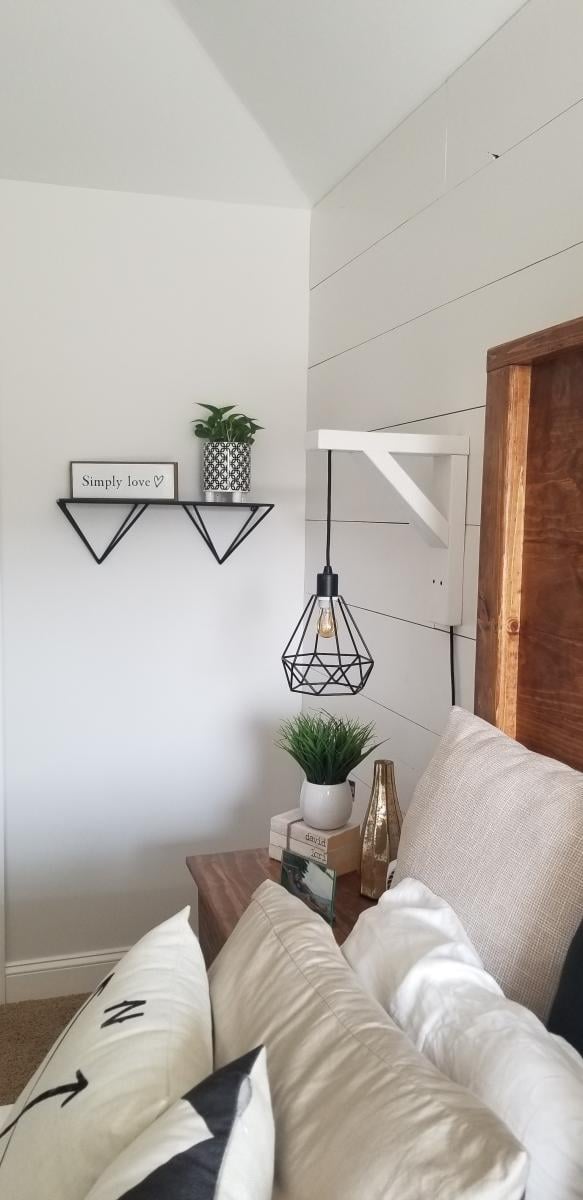
Just like my previous post on the nightstands, It was cheaper to build a bed that I envisioned instead of searching for something over priced. I found the plans for this bed on the site but made the headboard a little over 6 feet tall. This came out amazing and really compliments the nightstands. I also built the sconces that are centered over the nightstands to keep the tops of the nightstands clean and not cluttered. They also have touch pads for the lights mounted behind the bed to make them easy to turn on and off.
This is hands down the best transformation in any room in my house. Ana, you saved me a ton of money with DIY. I even picked up most of the Kreg jigs along the way which is an added bonus!

Tue, 07/09/2019 - 10:09
What a gorgeous room! The bed is just stunning in the space! Those nightstands and lights are perfect. Thank you so much for sharing brag posts!

In reply to What a gorgeous room! The… by Ana White
Fri, 07/19/2019 - 11:39
Thank you so much! I need to thank you for the plans!

This was a super easy project and I like the way it turned out. I just got a 1x6 board in pine (that cost about $3.50) sanded it, stained it and marked all the inches with a pencil. I then used a painter's pen in black along with my square to get all the lines straight. Then I used some stencils to do the numbers - also with the painter's pen. The whole project took probably an hour to do (besides waiting for the stain to dry).

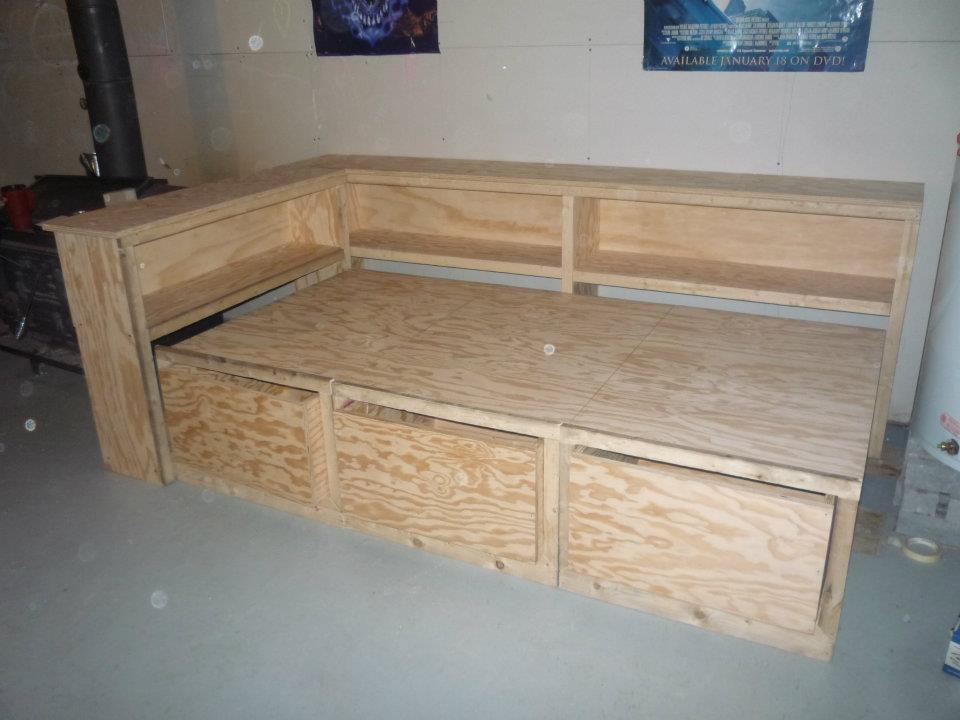
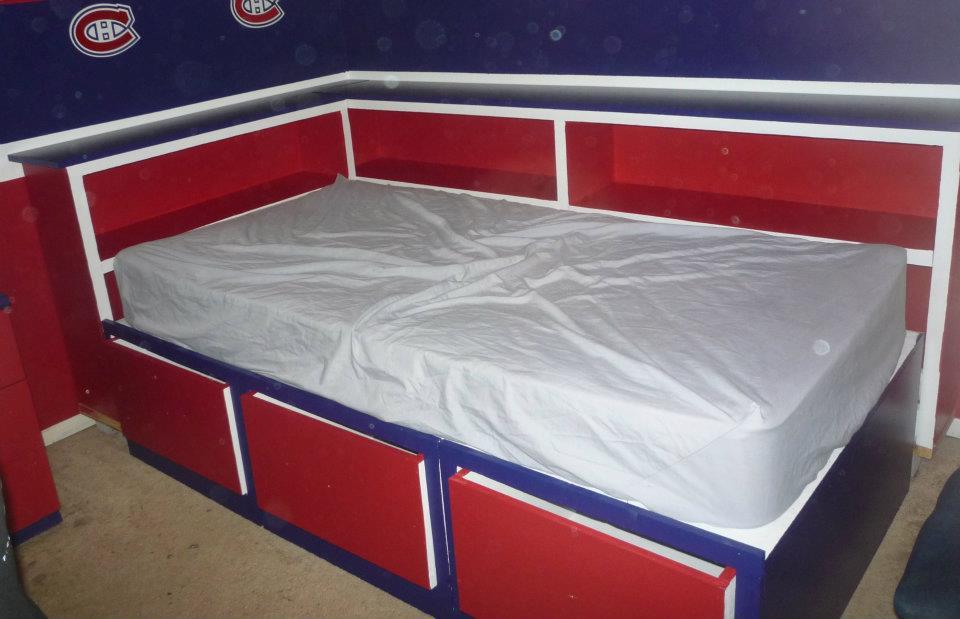
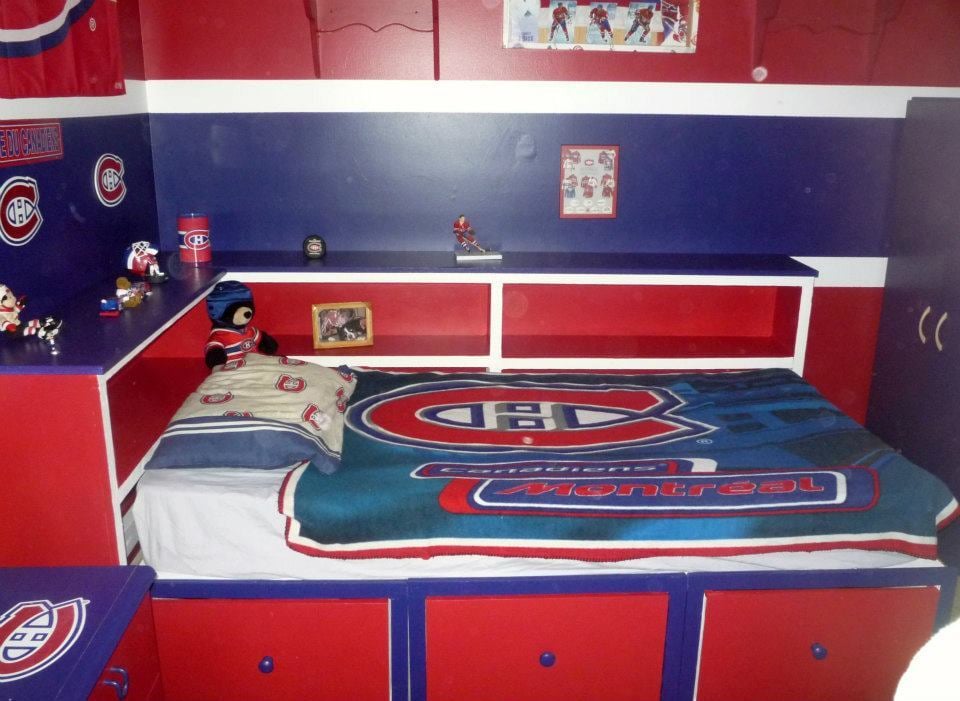
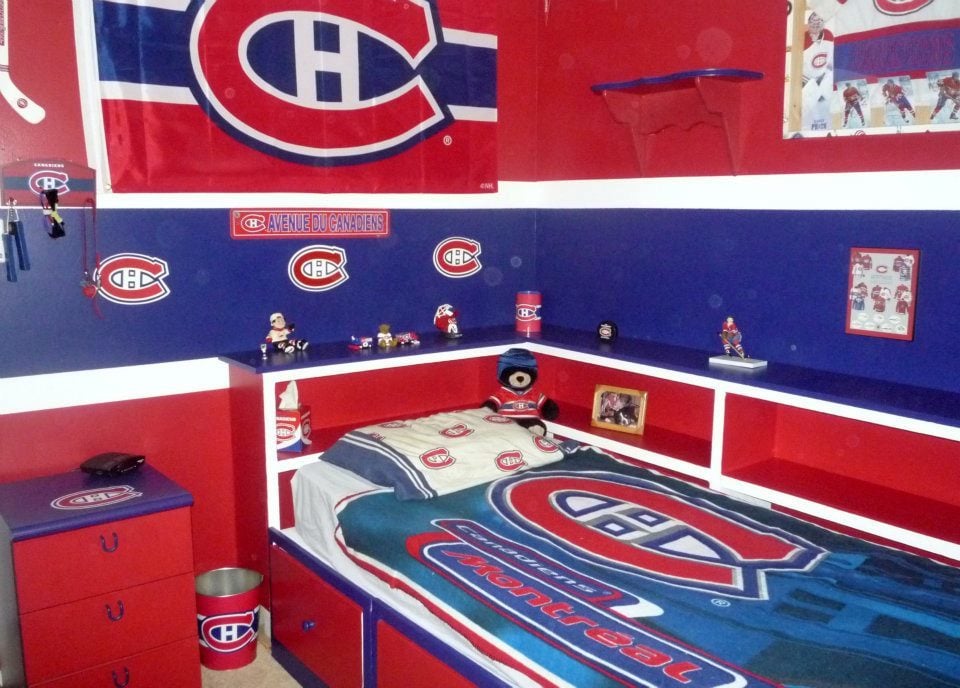
Our nephew Nathan really wanted a captain's bed like his friend. We built him one even better for Christmas this year. I couldn't find one plan with everything we wanted to I used the plans for the Storage Daybed for the base, and used the plans for the Cozy Corner twin bed collection wide bookcase unit. We combined both the headboard and sideboard into one unit (by extending the top to the short end) giving him an L shaped headboard for all his hockey stuff :) The only thing we messed up on was the height of the bookcase. He wanted it higher so it's on blocks for now to raise it. My sister did all the final painting to match his room and it looks AWESOME!!!
Steve had everything cut at work and we put it together in one 12 hour day! Nathan LOVES his new bed. Thank you Ana!

Fri, 01/06/2012 - 16:52
That is one nice, cool looking bed. Interesting colors, is it his school colors? I've never thought of painting plywood, you've given me some ideas.
Fri, 01/06/2012 - 21:24
The colors are the official Montreal Canadiens hockey team's colors, My son is a HUGE fan! Nathan LOVES his bed. and it is very solid.
Fri, 01/06/2012 - 20:29
Ummm... The bookcases were too short because you didn't take the mattress height into account. Looks really good though.
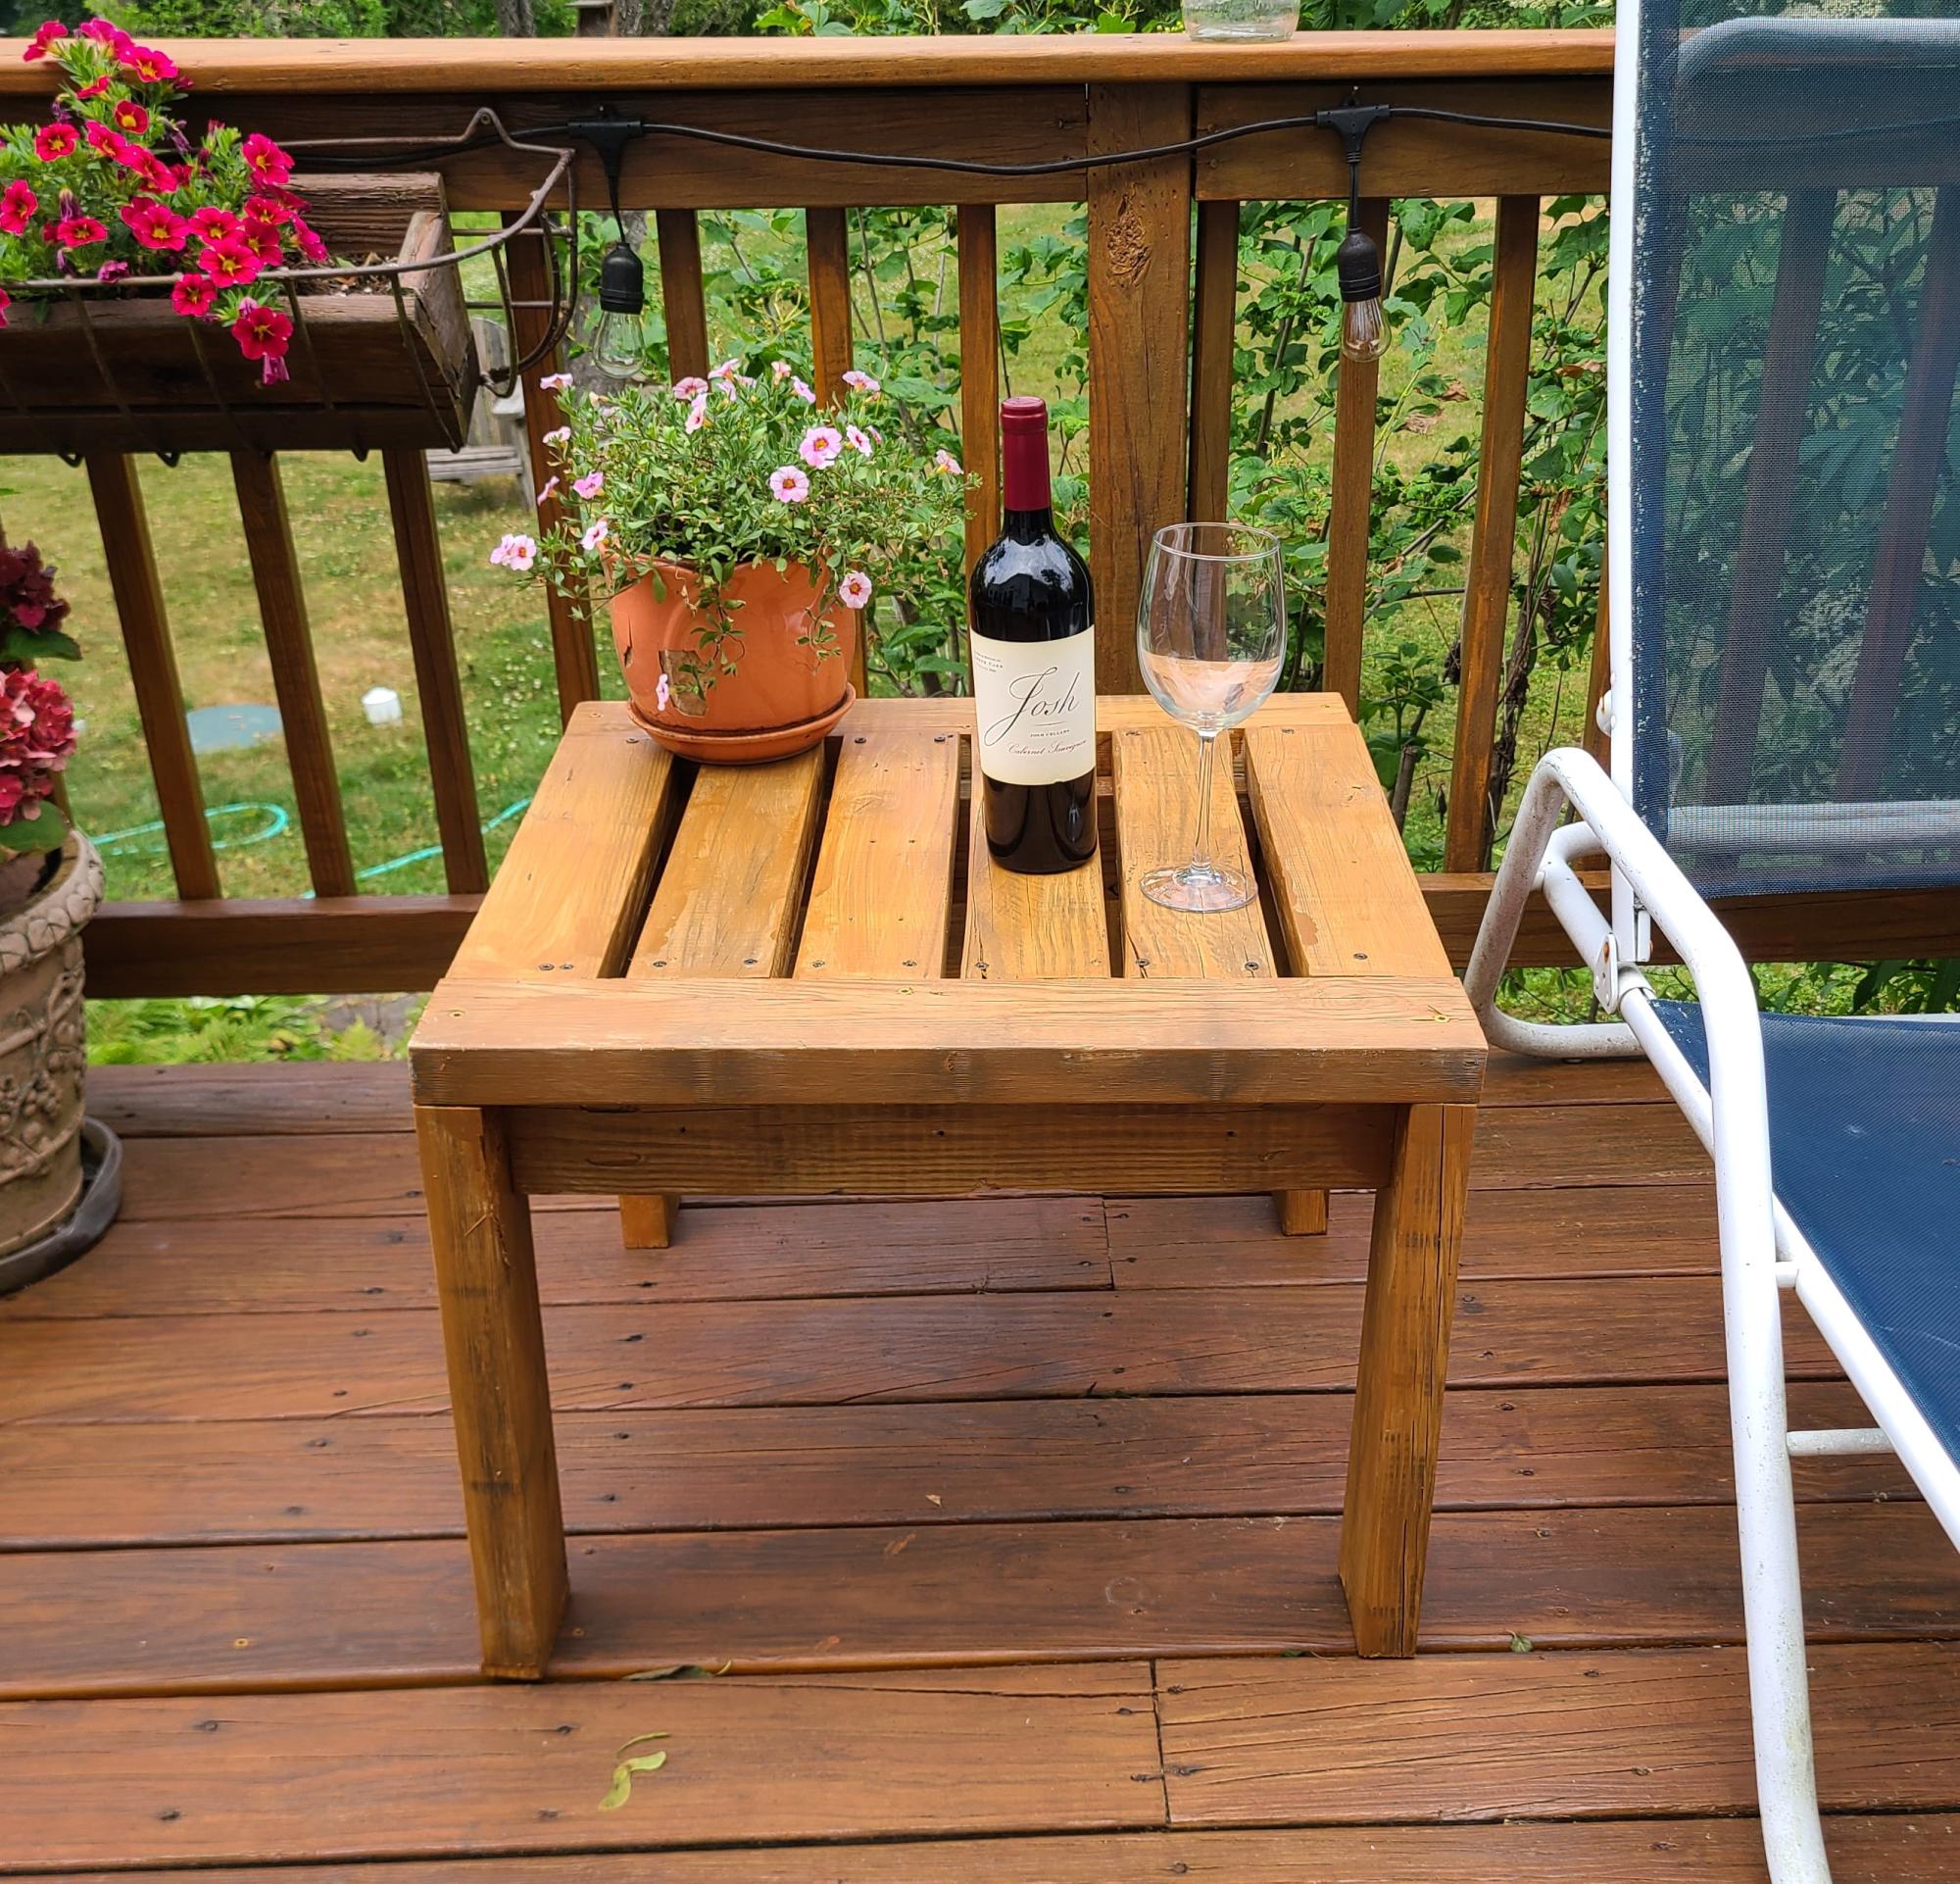
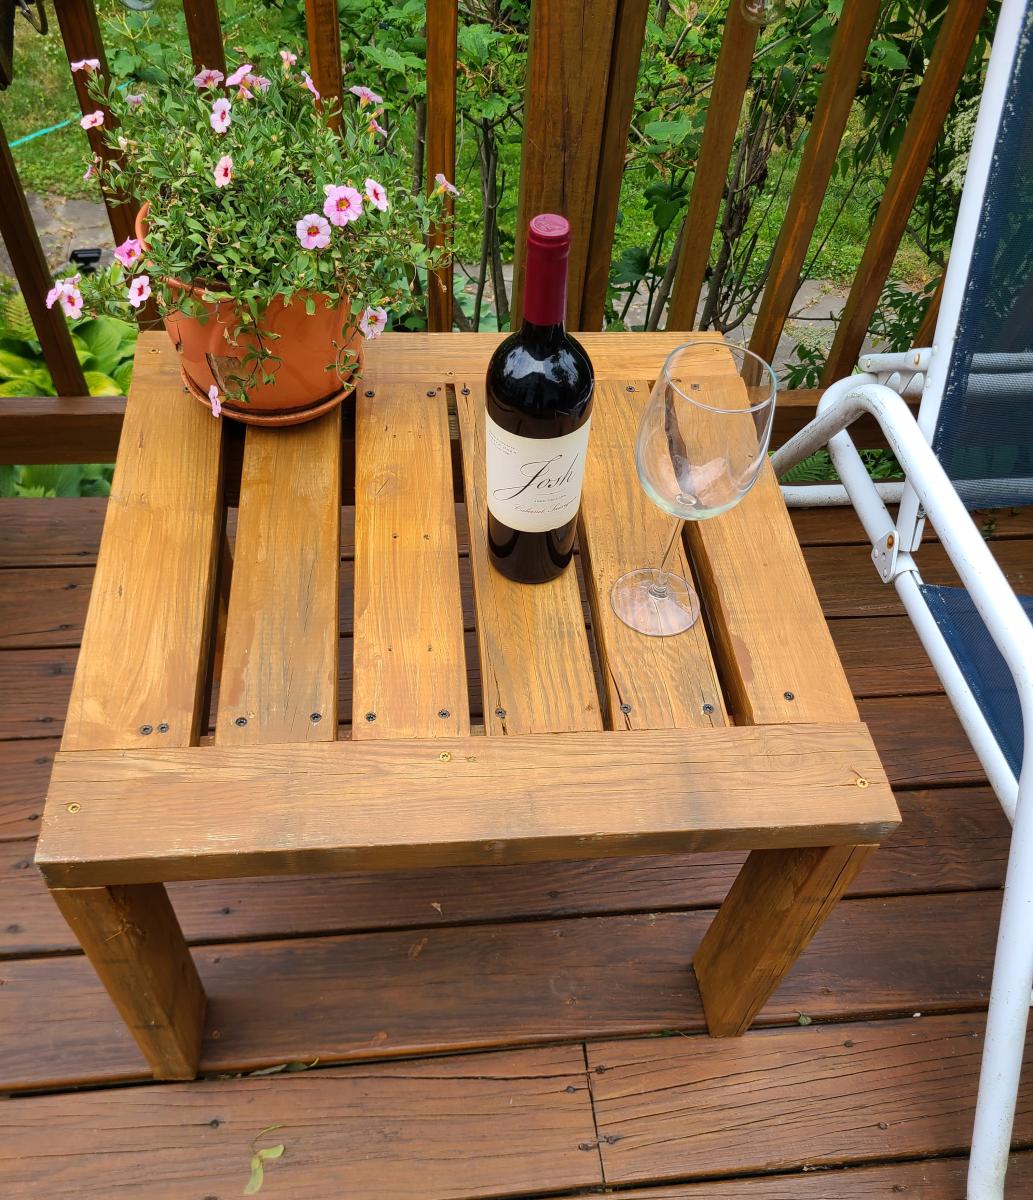
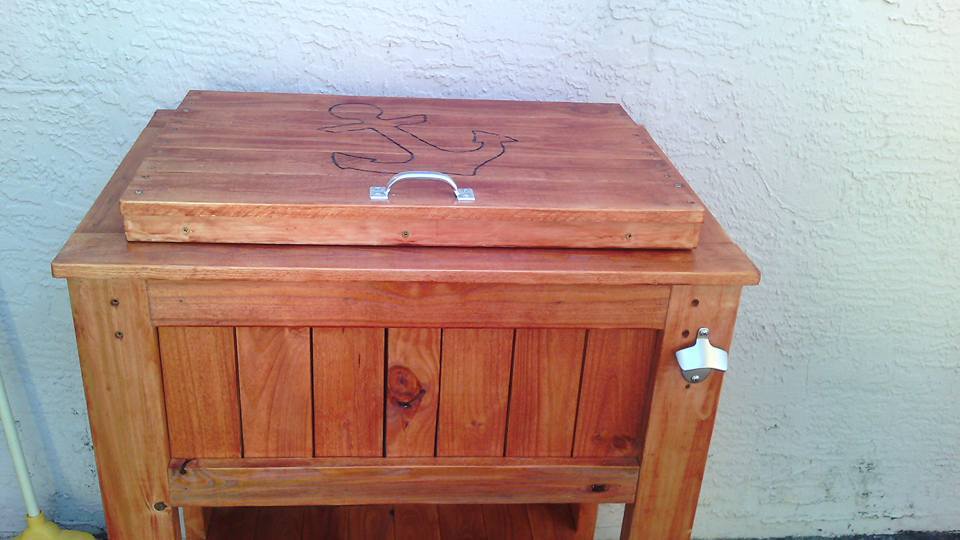
I built these deck end tabled from reclaimed decking.
Greg P
This was my very first project I did. Very proud of how this turned out. Now my sister has one and I am building another one with Mickey Mouse on it for my other sister. I build it in a day with lots of breaks due to 4 teenagers.
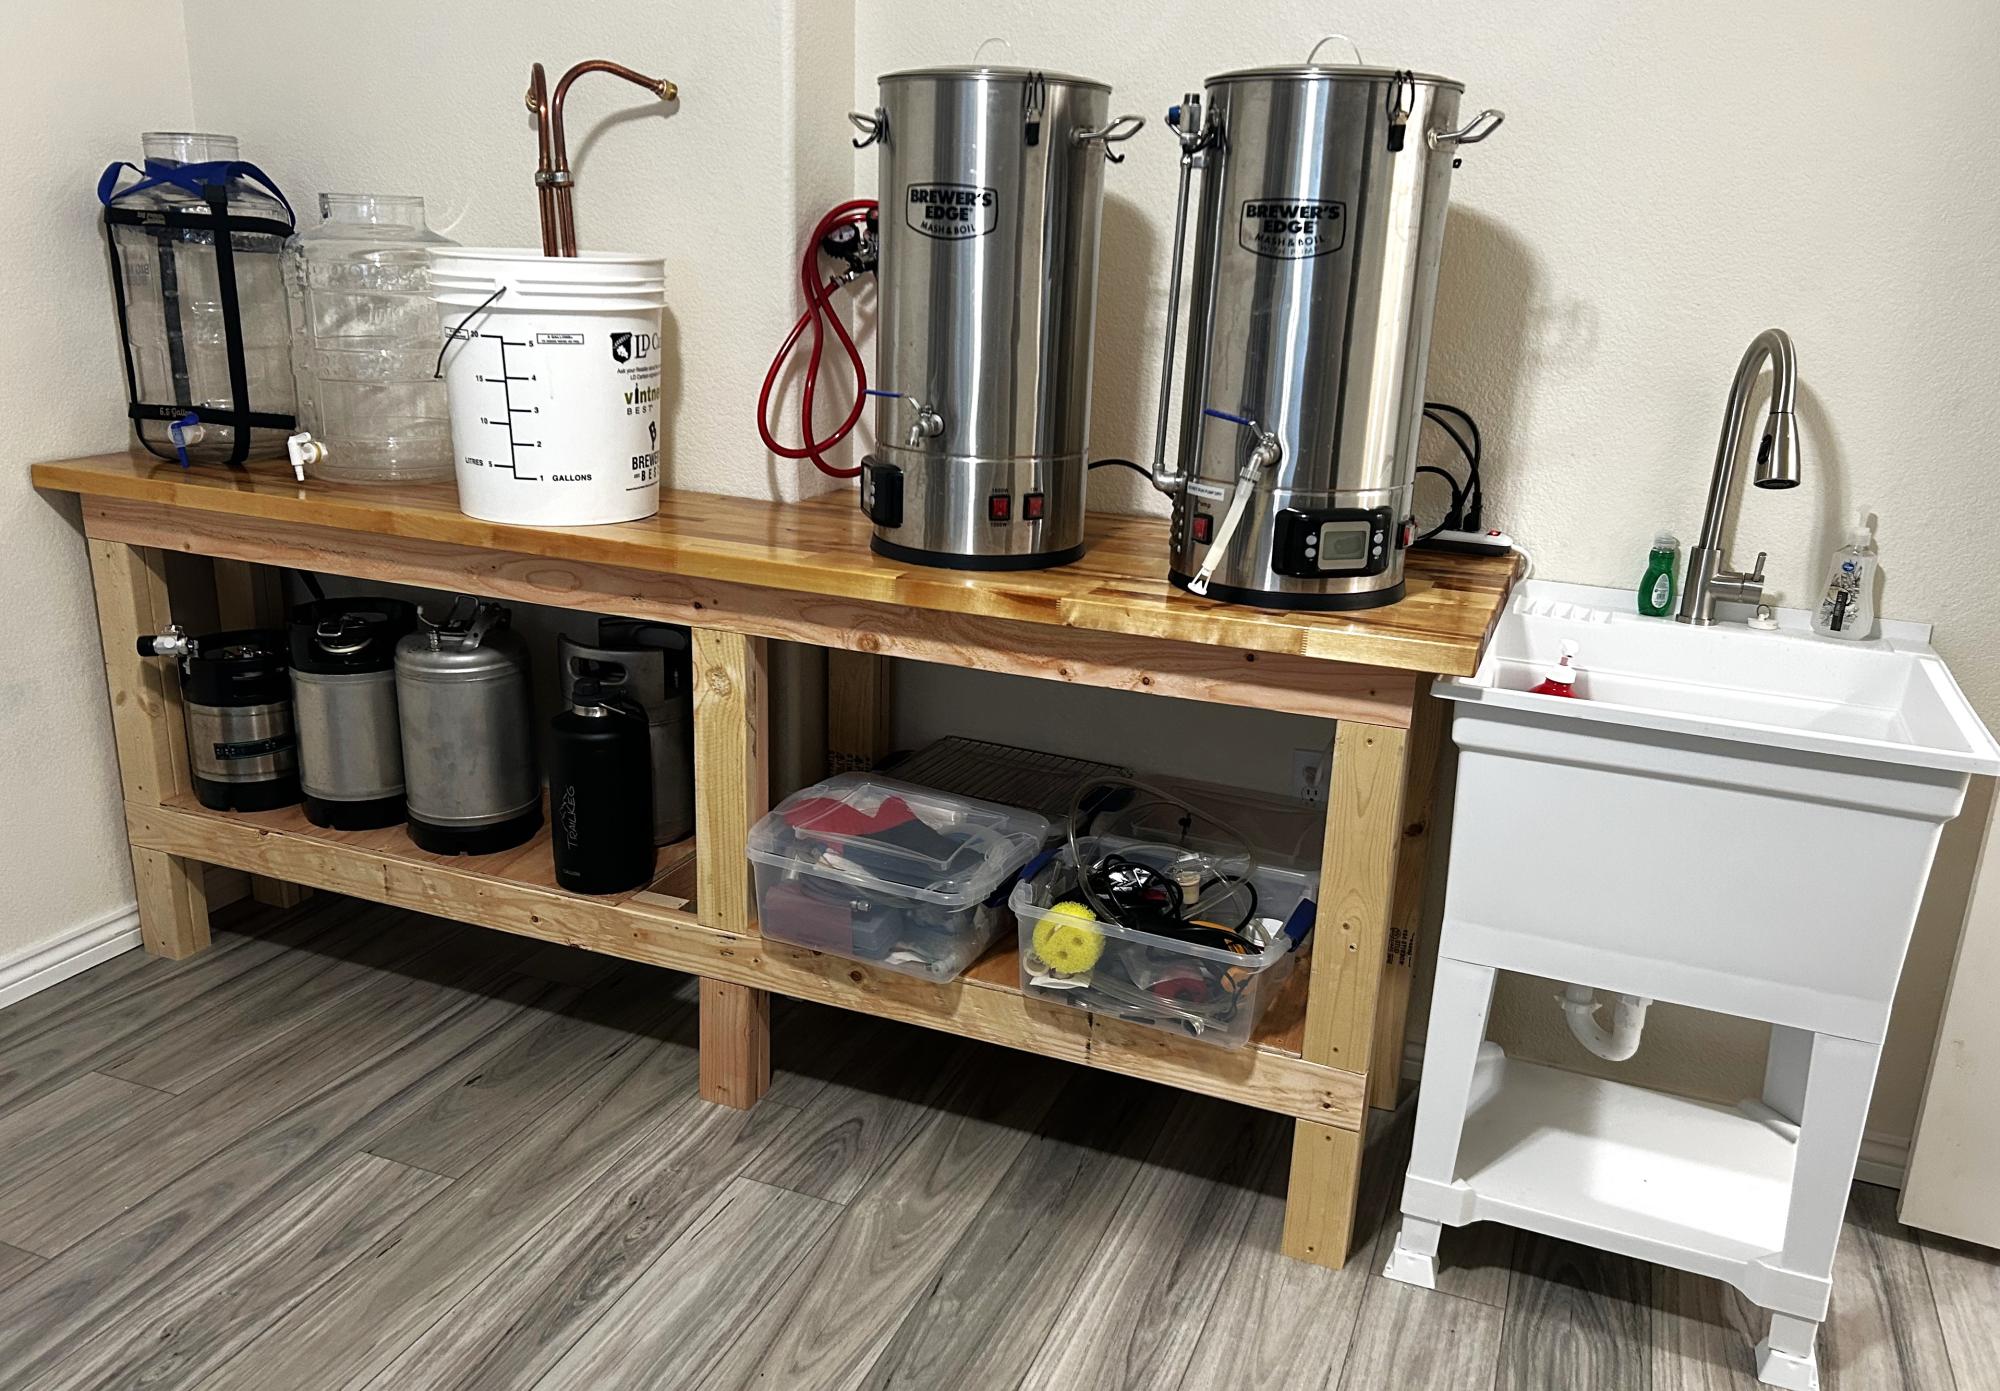
I used your workbench plan to build my Brew Bench. I changed the measurements to fit my space and used a butcher block for the countertop. Very sturdy and pretty easy project. Took one day to build.
Scott R
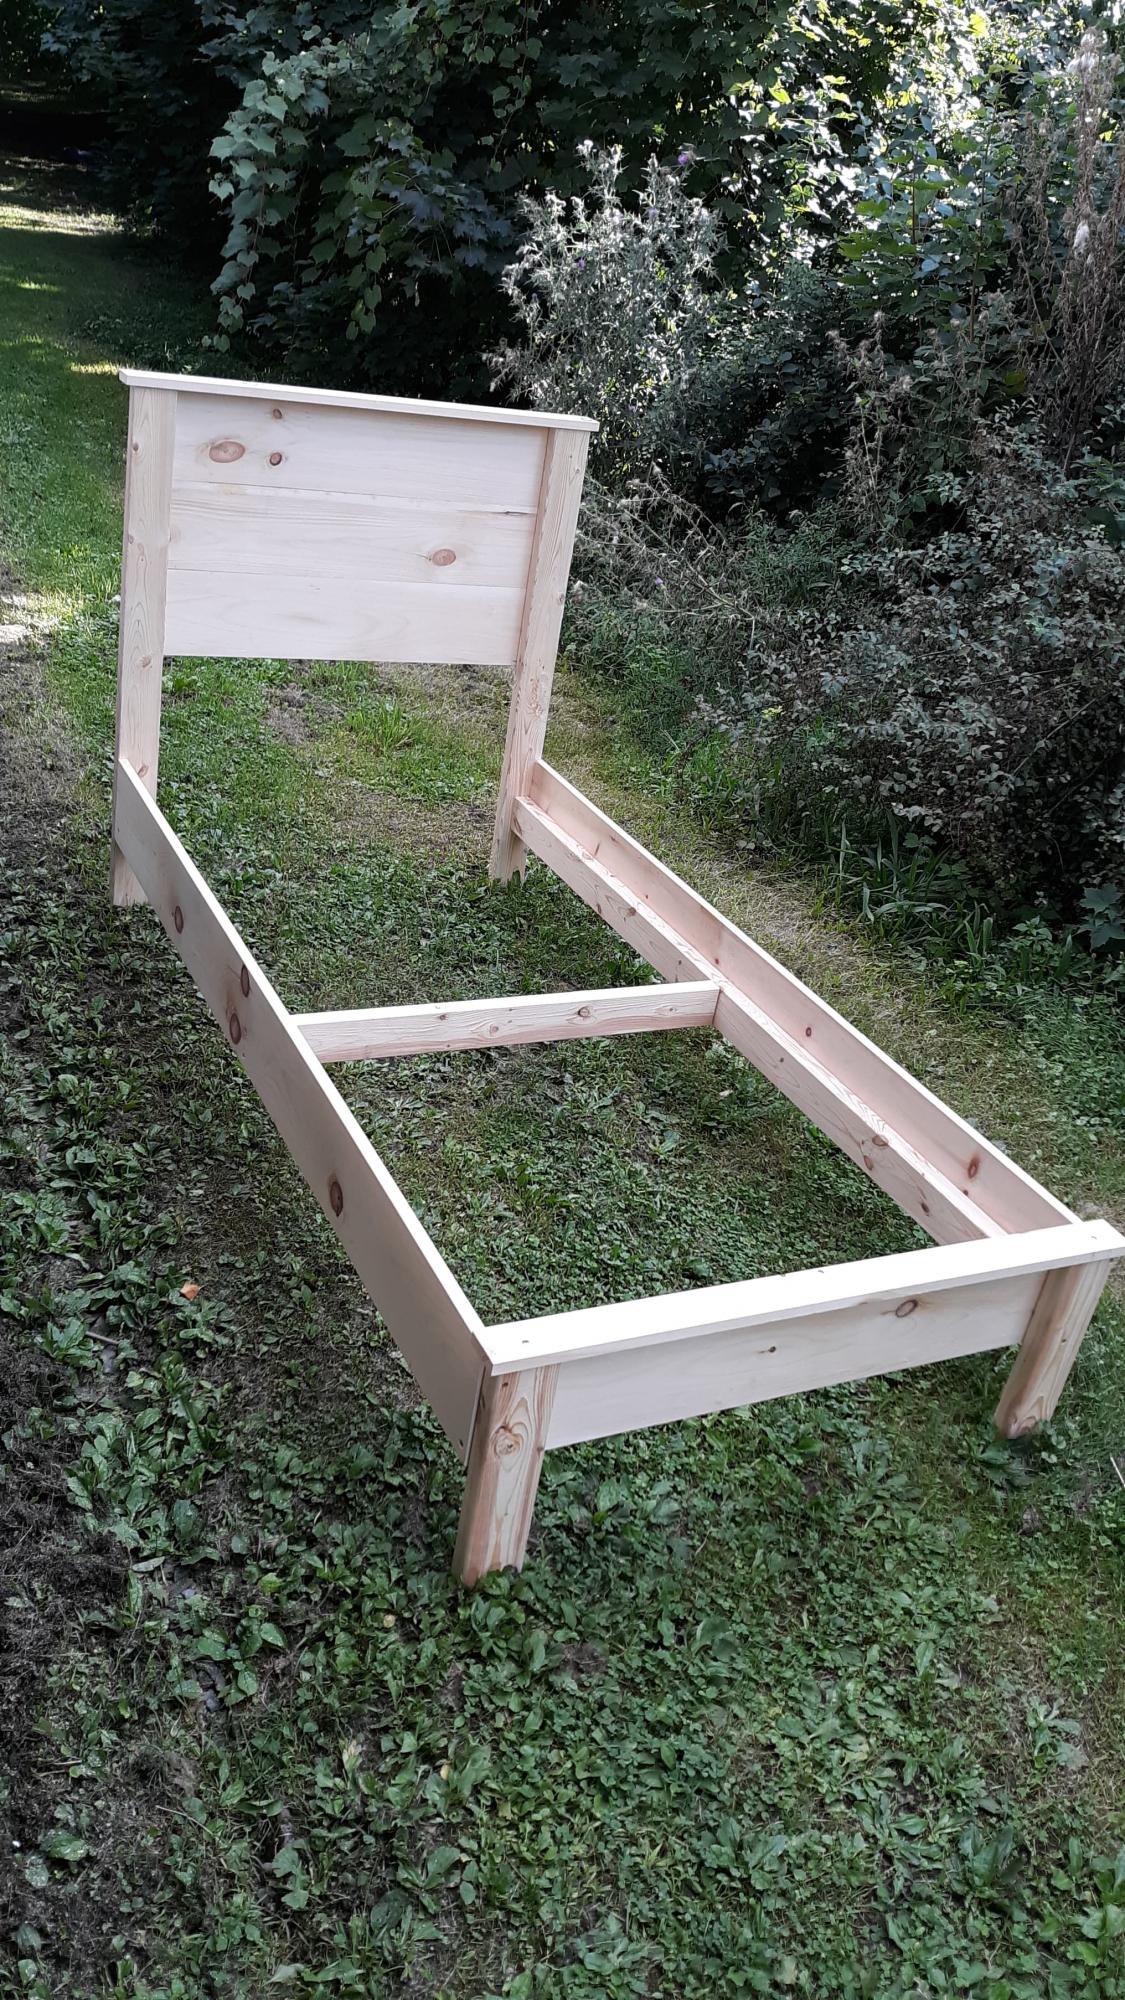
My daughter has a twin XL bed, which we had been unable to find a frame for since getting it. After 2 years of her mattress and box springs on the floor, this plan came out and a plan was hatched to get it made. The biggest change we needed to do different from the twin plans was to make the side rails and the side rail cleats 5" longer to accommodate the XL length. We also added a middle support to keep the side from bowing out, and the cleats are at the bottom of the siderails, as we are using a boxpsring and mattress.
Mon, 03/28/2022 - 09:47
Hi do you have the measurements and what to buy for this bed frame? We also have a twin xl mattess and cannot find a frame anywhere
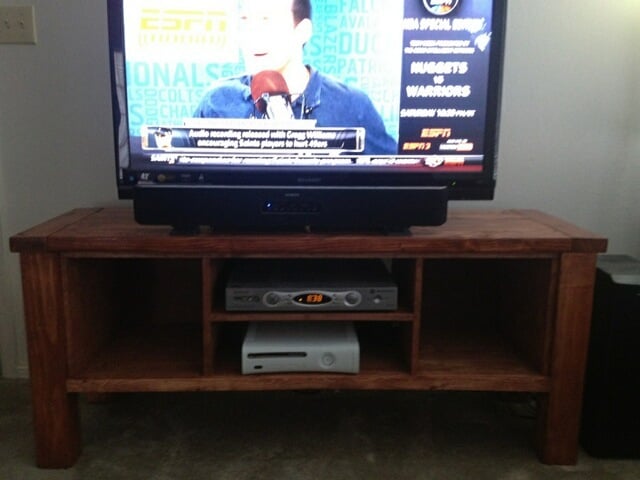
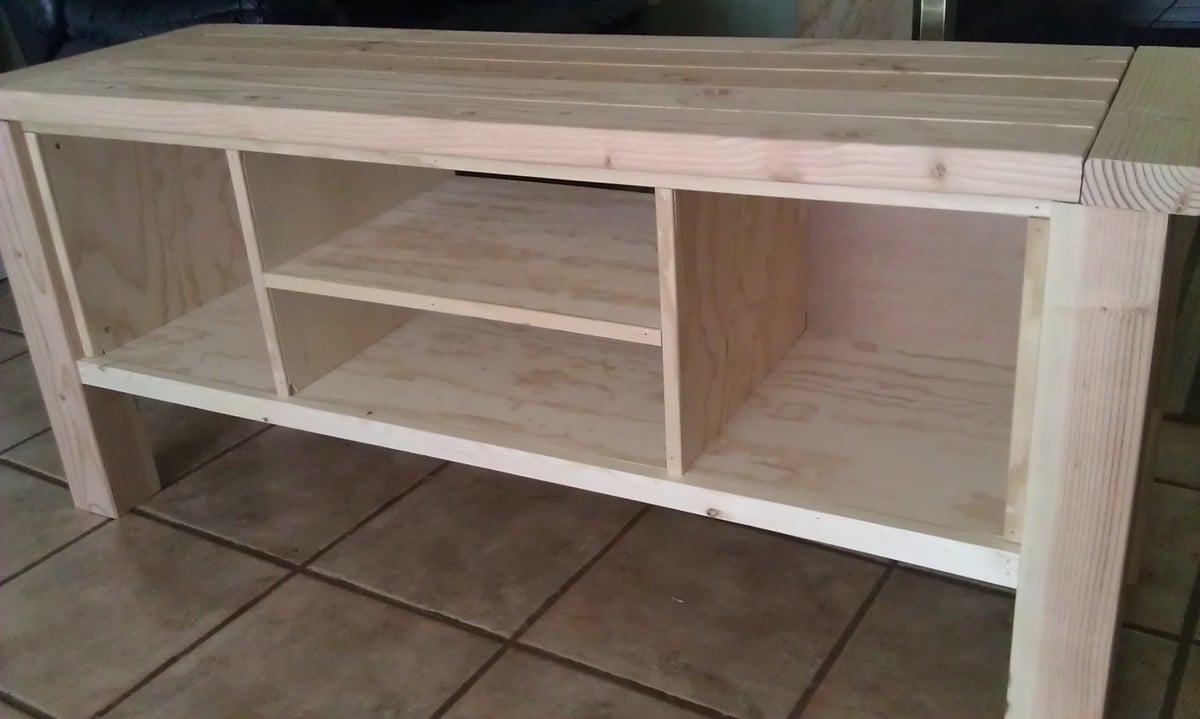
I had just built the Tryde Side Table and it was so easy I gave a shot at this project. Took about 4 hours to build and is a really sturdy, good looking entertainment center. The only thing that I did not like that I would change is an overlap of the tabletop in the front. There is an overlap on both ends but not in the front. Other than that, I really like the outcome.

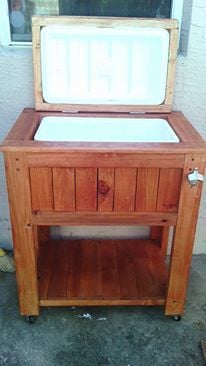
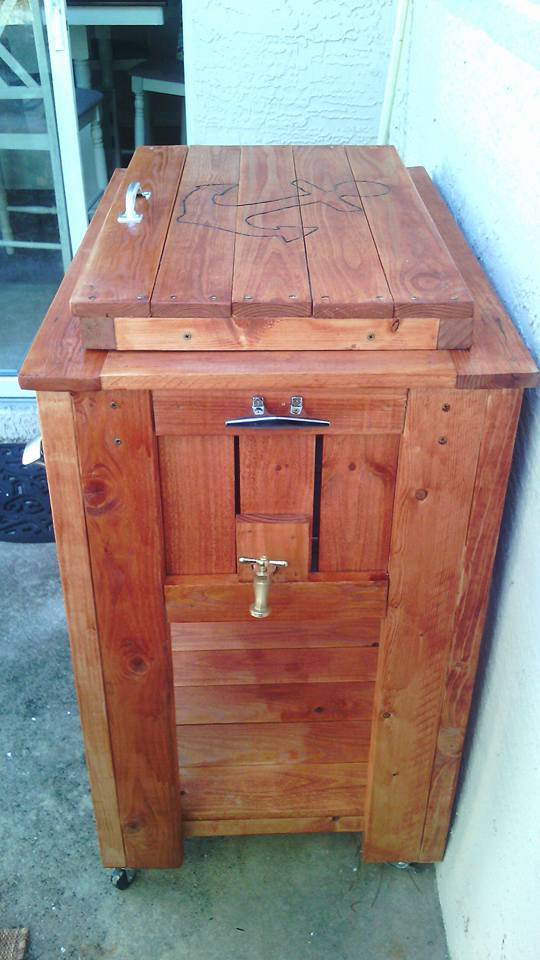
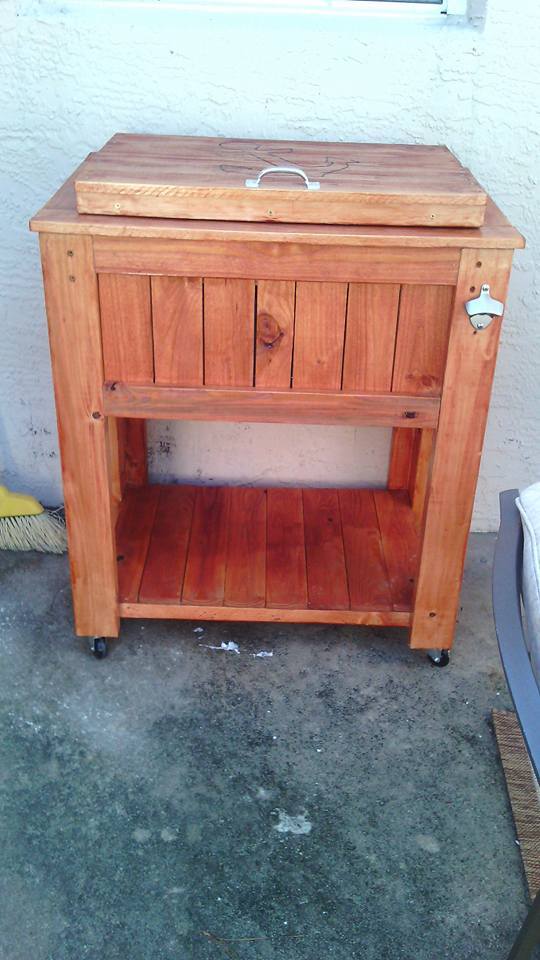
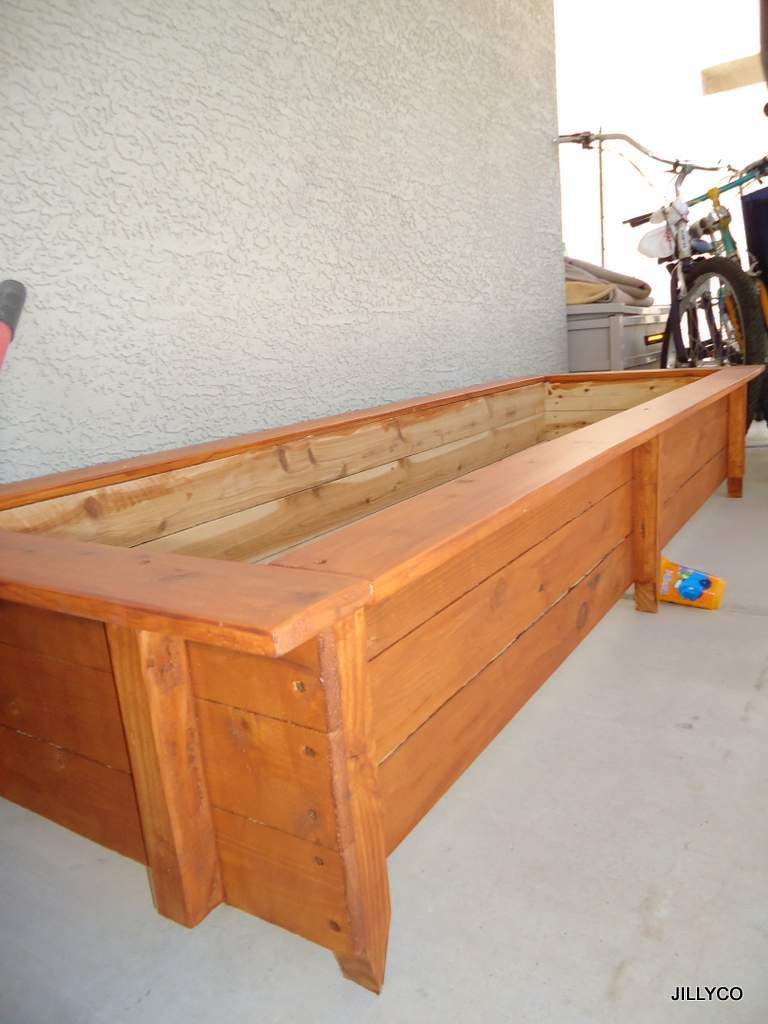
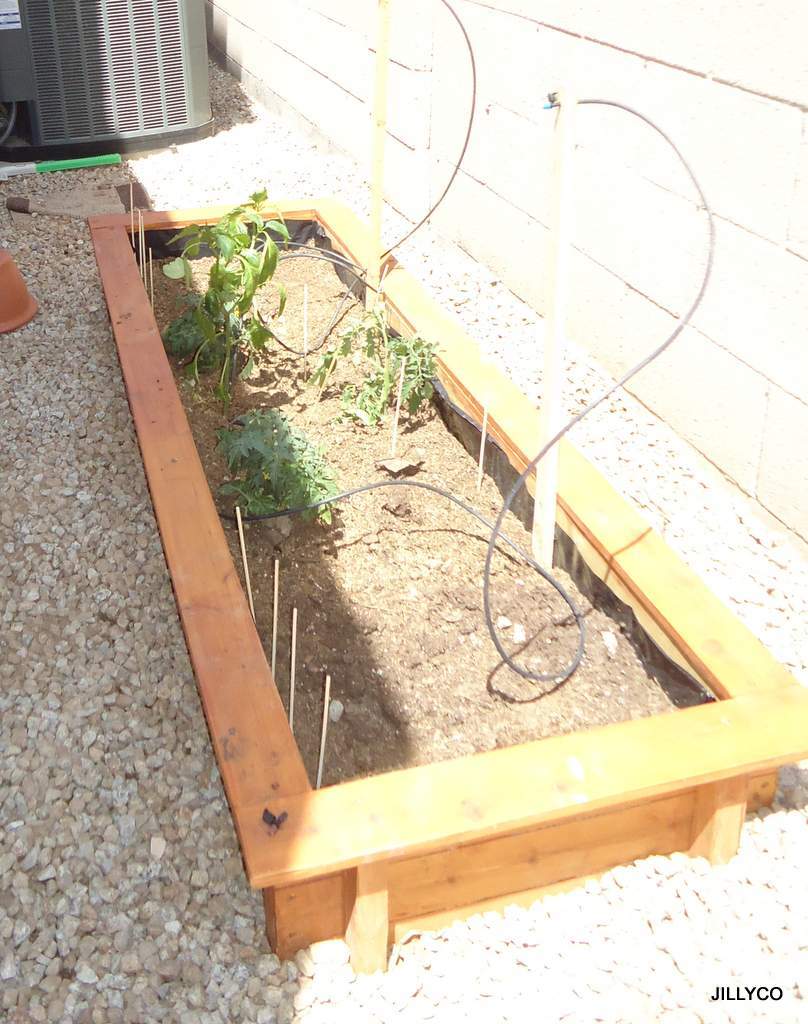
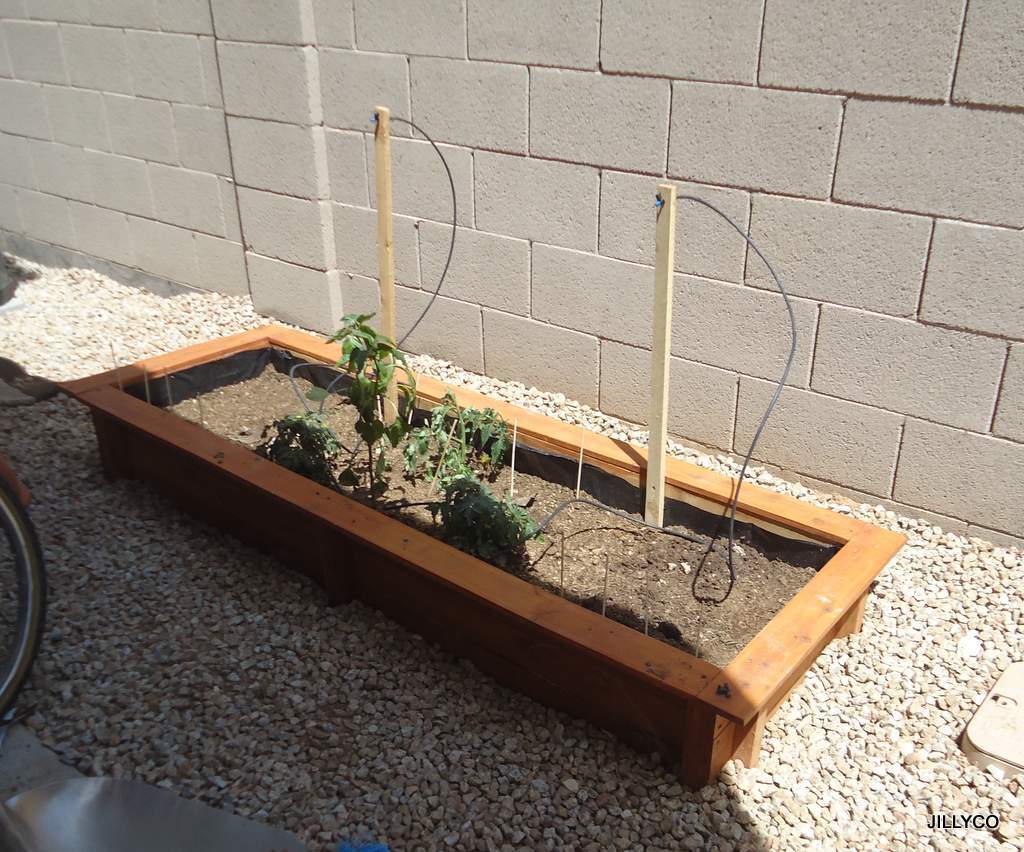
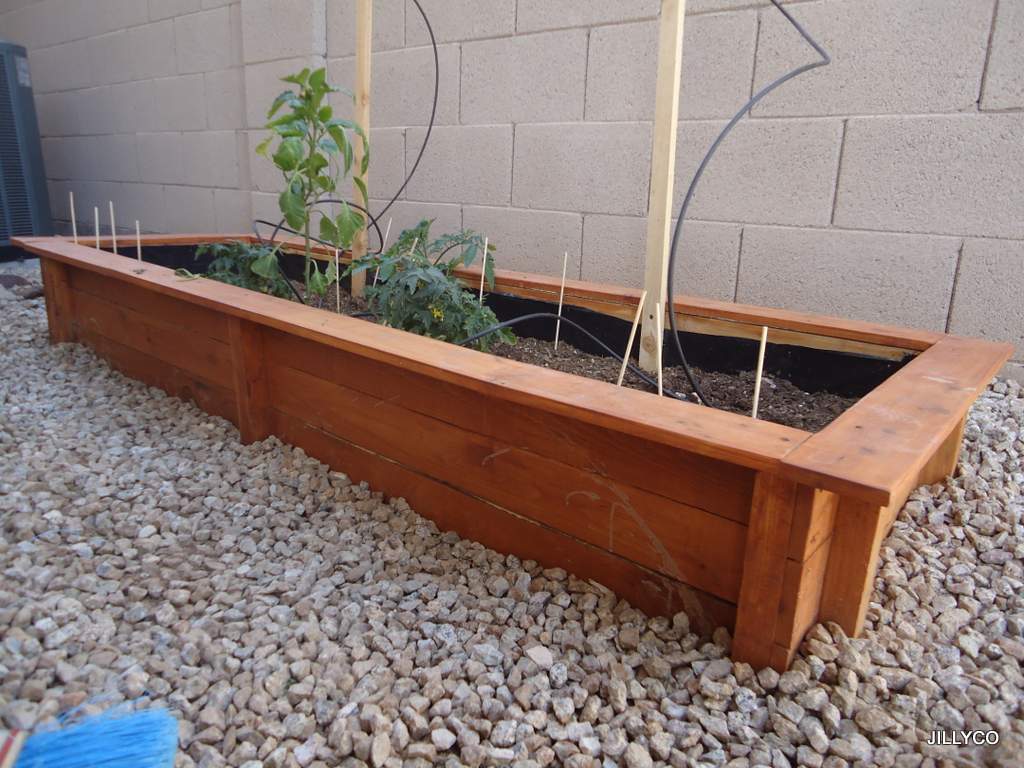
THANK YOU Ana's your plans are a life saver and pocket book saver as well. You make your plans so easy to follow and use. For my project I used the cedar fence pickets and redwood 2" x 2" stakes that where on sale at the orange box store for "6 pack bundle" for only $.50 each. All I can say is SCORE! ;') Since we live in Arizona I treated all the lumber with a outdoor weather proofing wood finish (Cedar Color), lined all the interior beds (only the Wood Sides) with 4 mil plastic to keep the cedar from absorbing all the water and wired mesh on the bottom of the garden prior to adding dirt. This keeps my local rabbits/other creatures from eating my roots from the bottom up. And I have my dog from the top side. We are already a 100 degrees here and we needed to get our seedlings in a garden asap. Thanks Again for the Plans, Ana! I will be making more of these garden boxes to come.
Thu, 08/08/2013 - 09:39
Love this! We are new to Phoenix - originally from the Midwest - and I really would like to add some raised beds to our backyard. I appreciate your comments on how you adapted these for the desert! May I ask what side of your house they are on? I'm thinking to put mine on the east side so they get morning sun, but not the scorching afternoon rays. Thanks for your AZ advice!
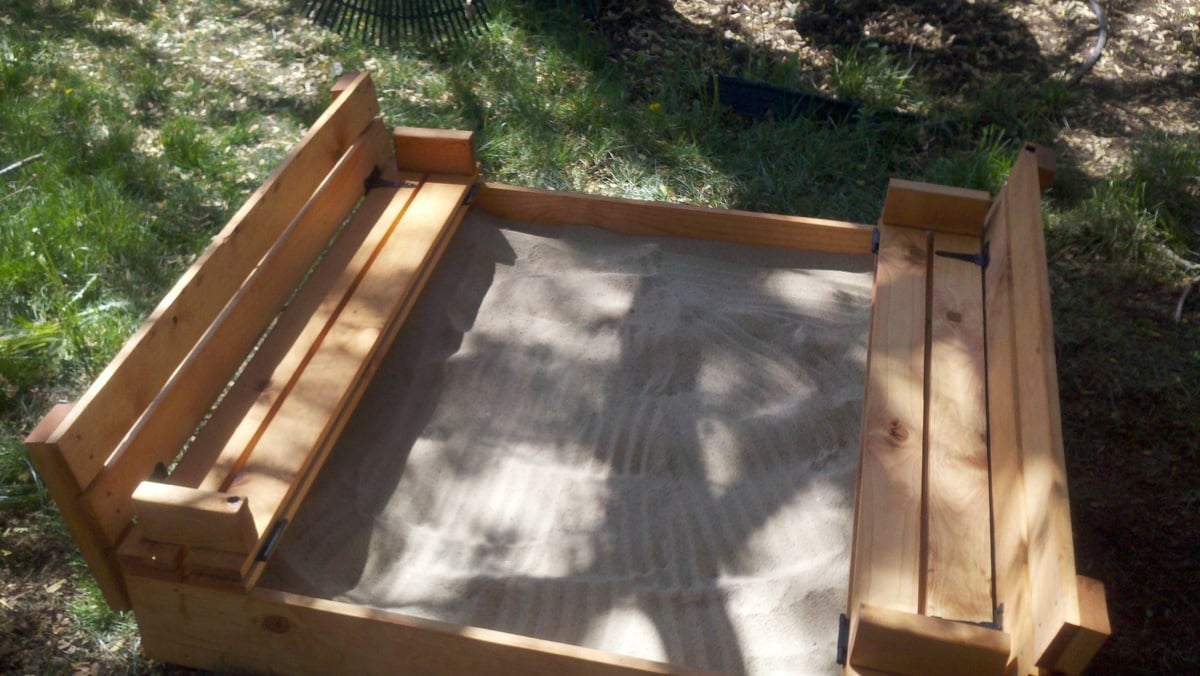
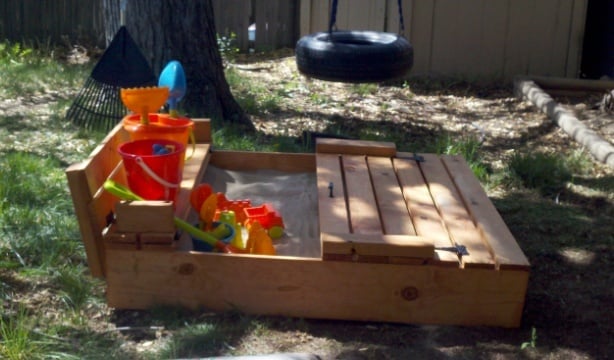
This sand box was very easy to build and it works great. The only thing I would change is cutting the "arm rests" at 7 1/2" instead of 6 1/2". I did that for the second set of arm rests (when I downloaded the plans many weeks ago the cut list was wrong). It made putting that section together a lot easier.
I easily spent more on the hinges (at $5 per hinge x 8 hinges) than I did on the wood itself.
My 1 and 1/2 year old loves playing in it and now I need to build a toy box for him to put all of his sand toys in!

Sun, 04/29/2012 - 00:06
It's been zen-raked! haha.
Those little benches are adorable. I wish I had seen this plan before I built ours.
Mon, 09/17/2012 - 10:29
I just want to say that I asked for my husbands help, and his advice increased the price significantly.
He does not like to paint, and will spend the extra dollar to purchase pressure treated wood. So I sent him with my materials list and the wood he purchsed was $60.00, plus $22.00 for hinges and $10 for a box of deck screws. Actually, I am a artist and had wanted to paint the project to look like a big frog.
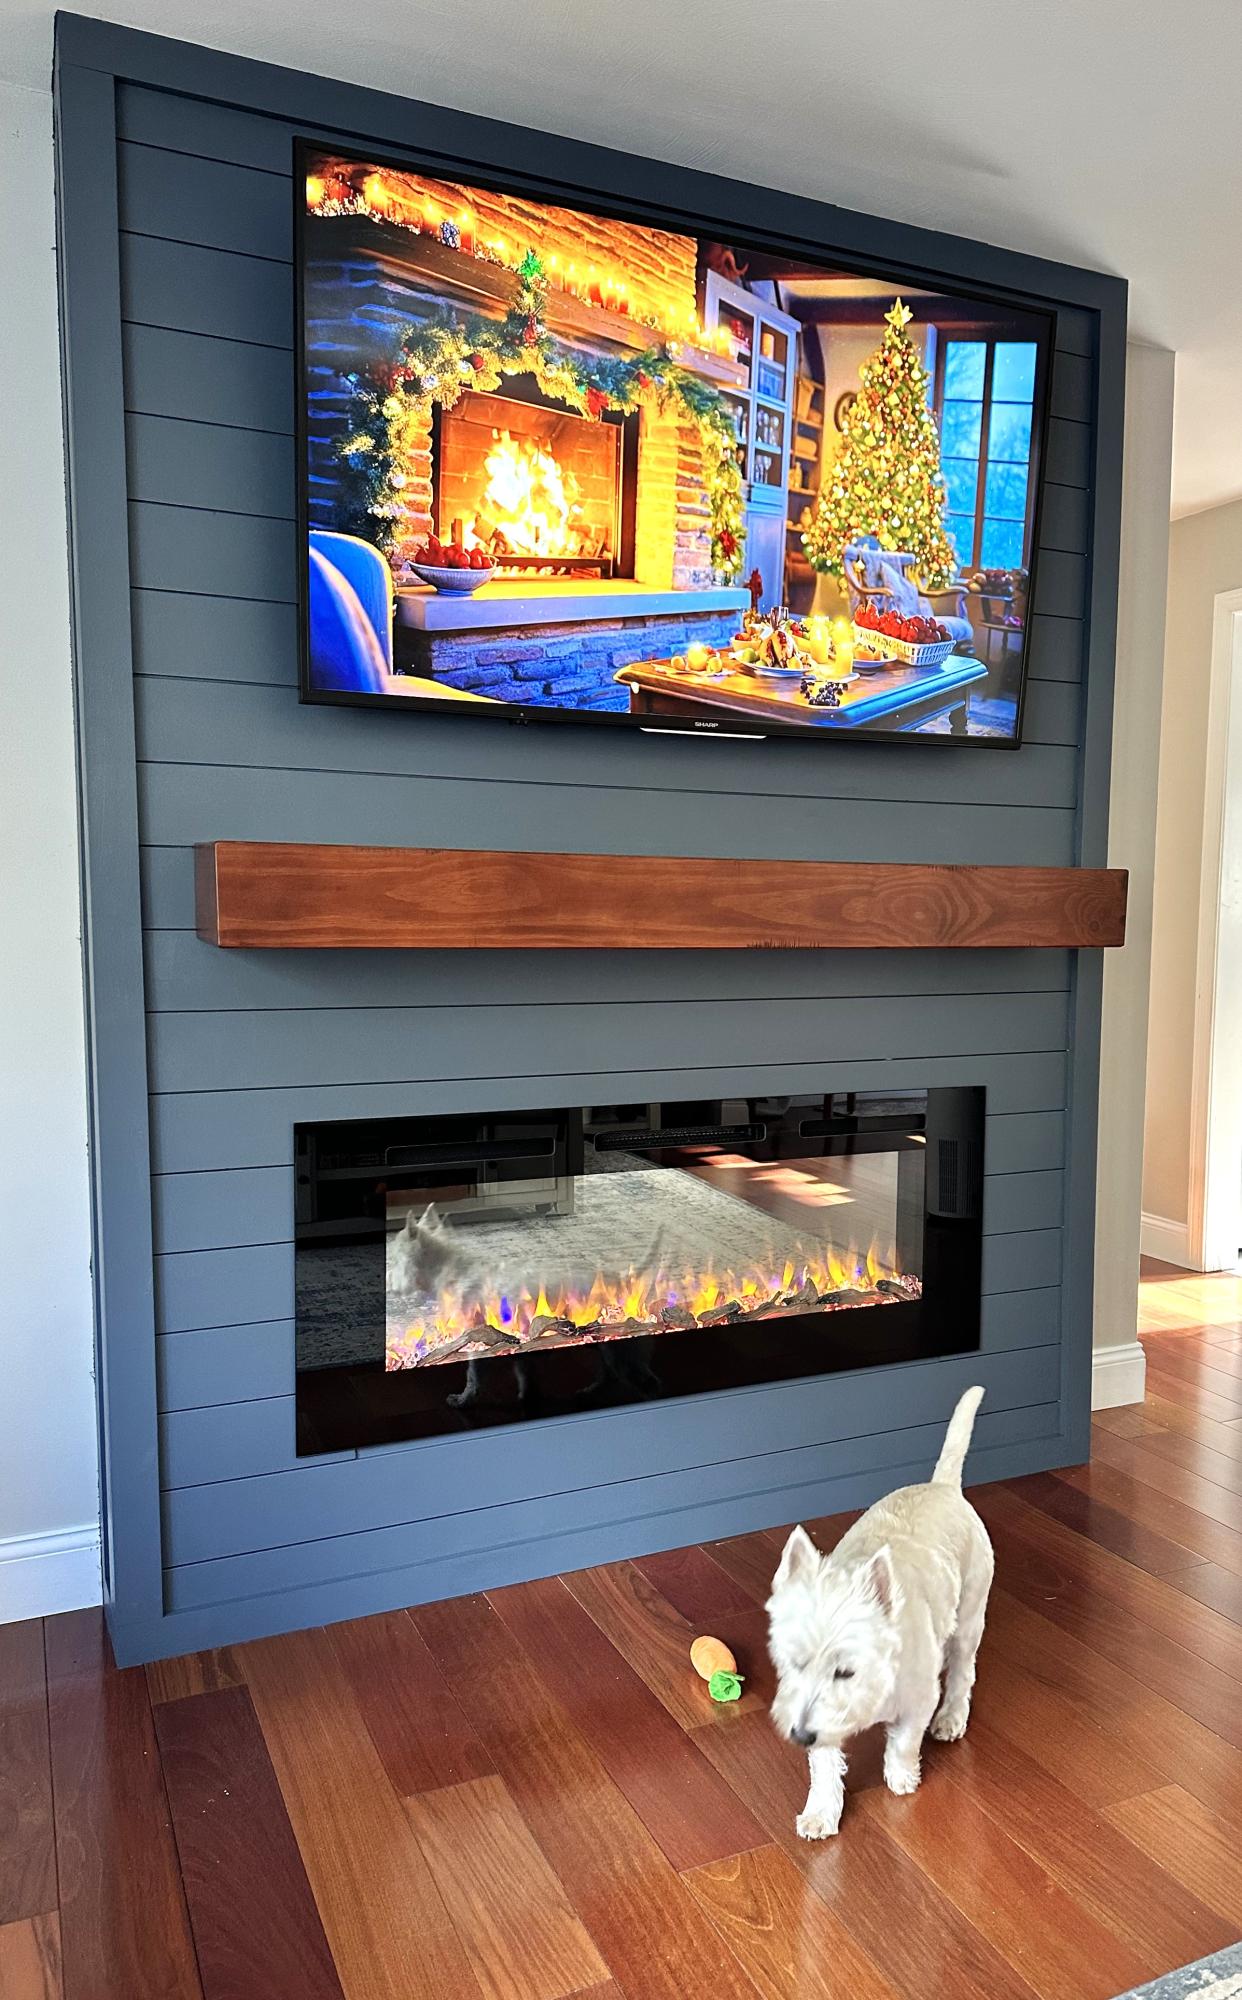
Shiplap fireplace build. Painted with Behr Marquee in color Calligraphy. My first building project ever!!
Jenn Lawson
All scrap lumber was used on this, cost was $0
3/4 plywood 2'x4'
1x6x24"
1x4x24"
1x2x13" front trim
Mon, 08/29/2016 - 08:29
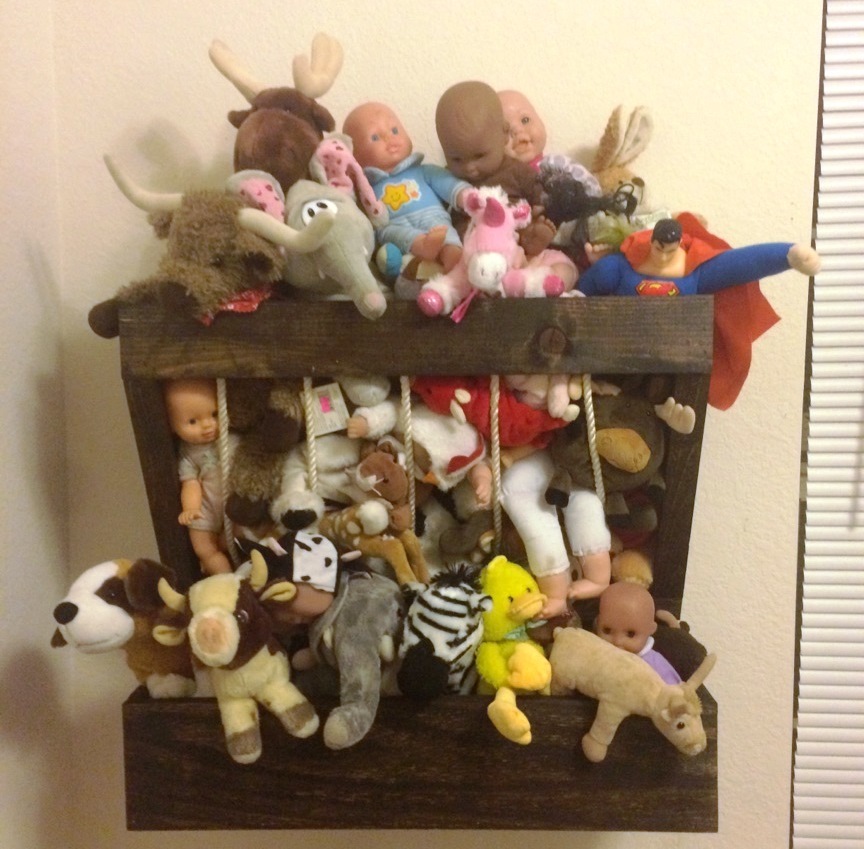
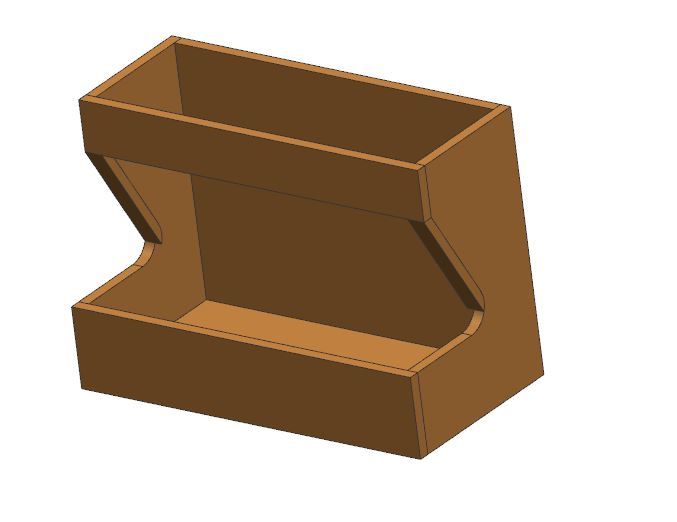
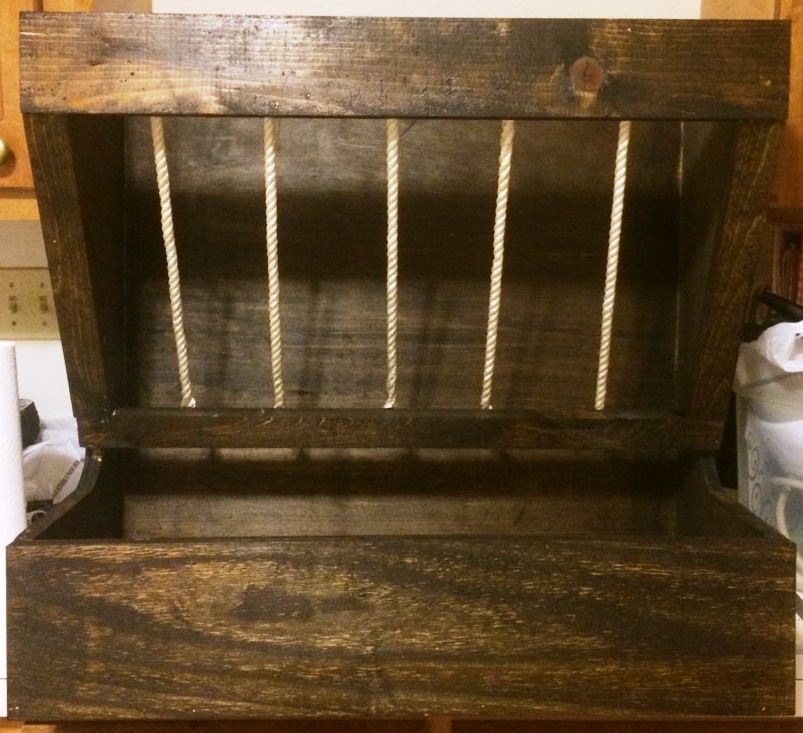
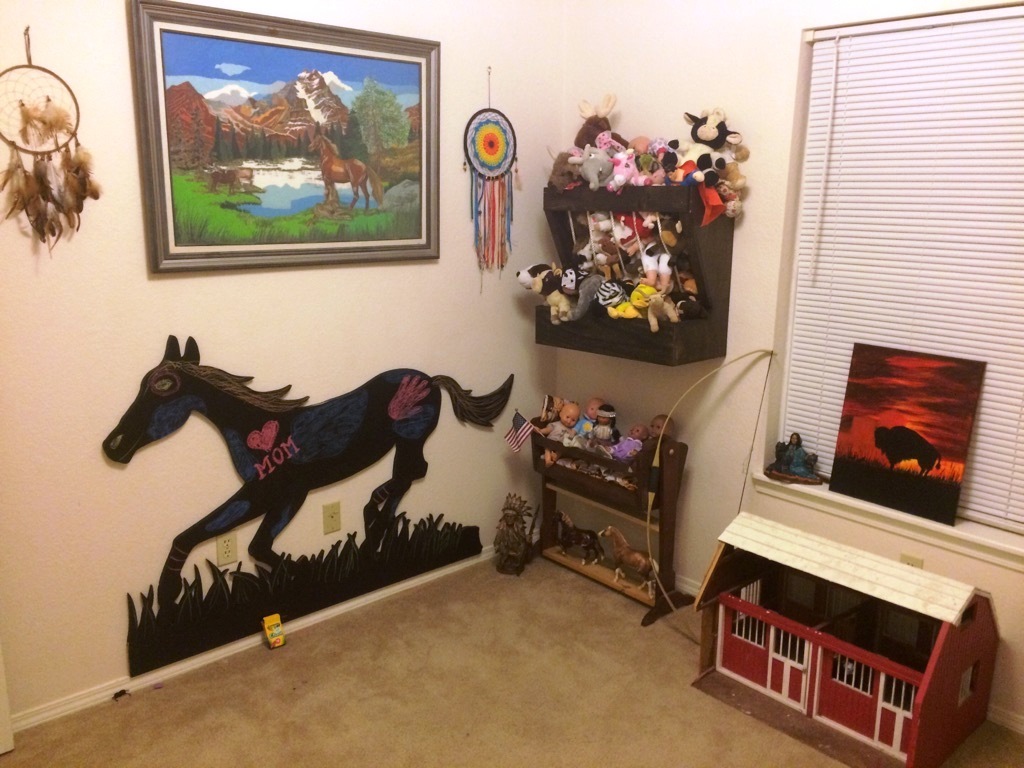
My son loves horses, so I made him this Horse Wall Hay Feeder to keep with the theme but where he would have a place to put his babies! :)
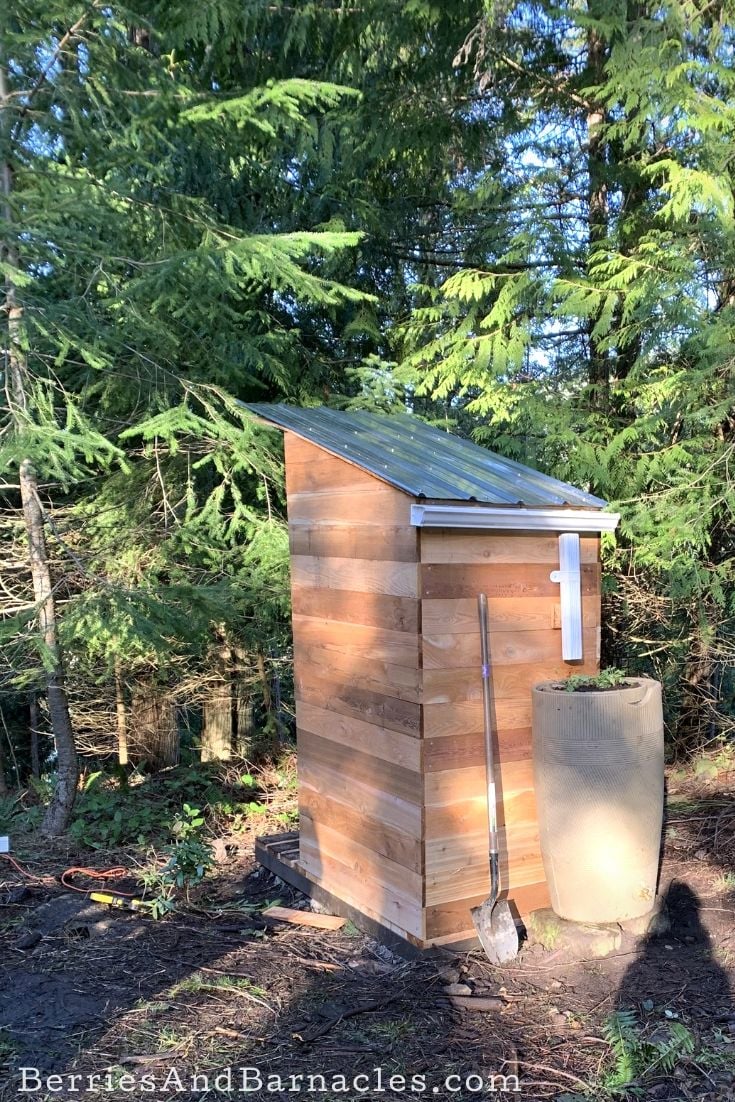
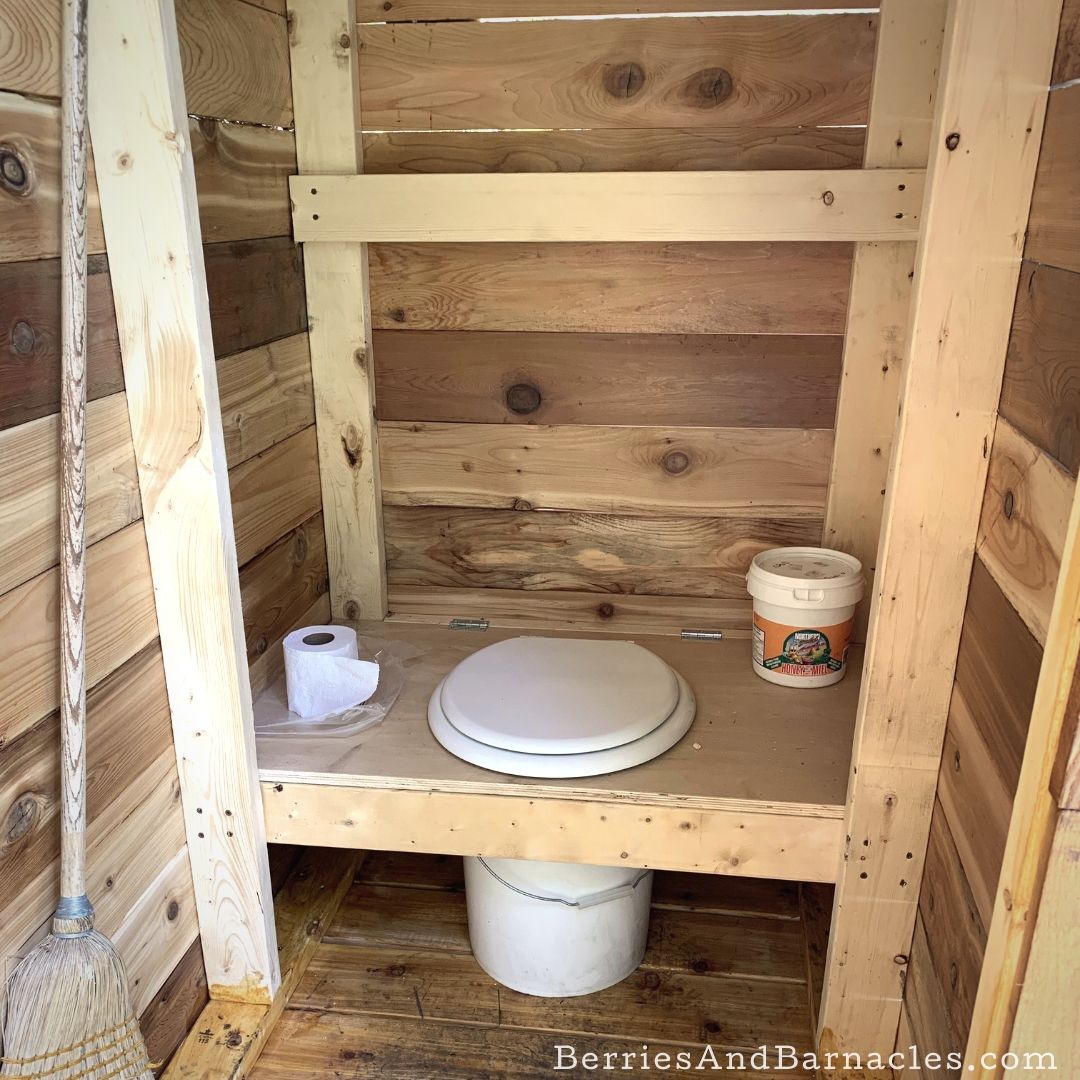
We built this composting toilet as one of the first things we did on our piece of vacant land. (How can you build anything else without somewhere to go when nature calls?)
An eco-friendly design was important to us, so we used cedar fencing instead of plywood. Otherwise, we followed Ana White's simple outhouse plans. It came out perfectly! It even has a rain barrel for hand washing.

Golf Locker. We love it!
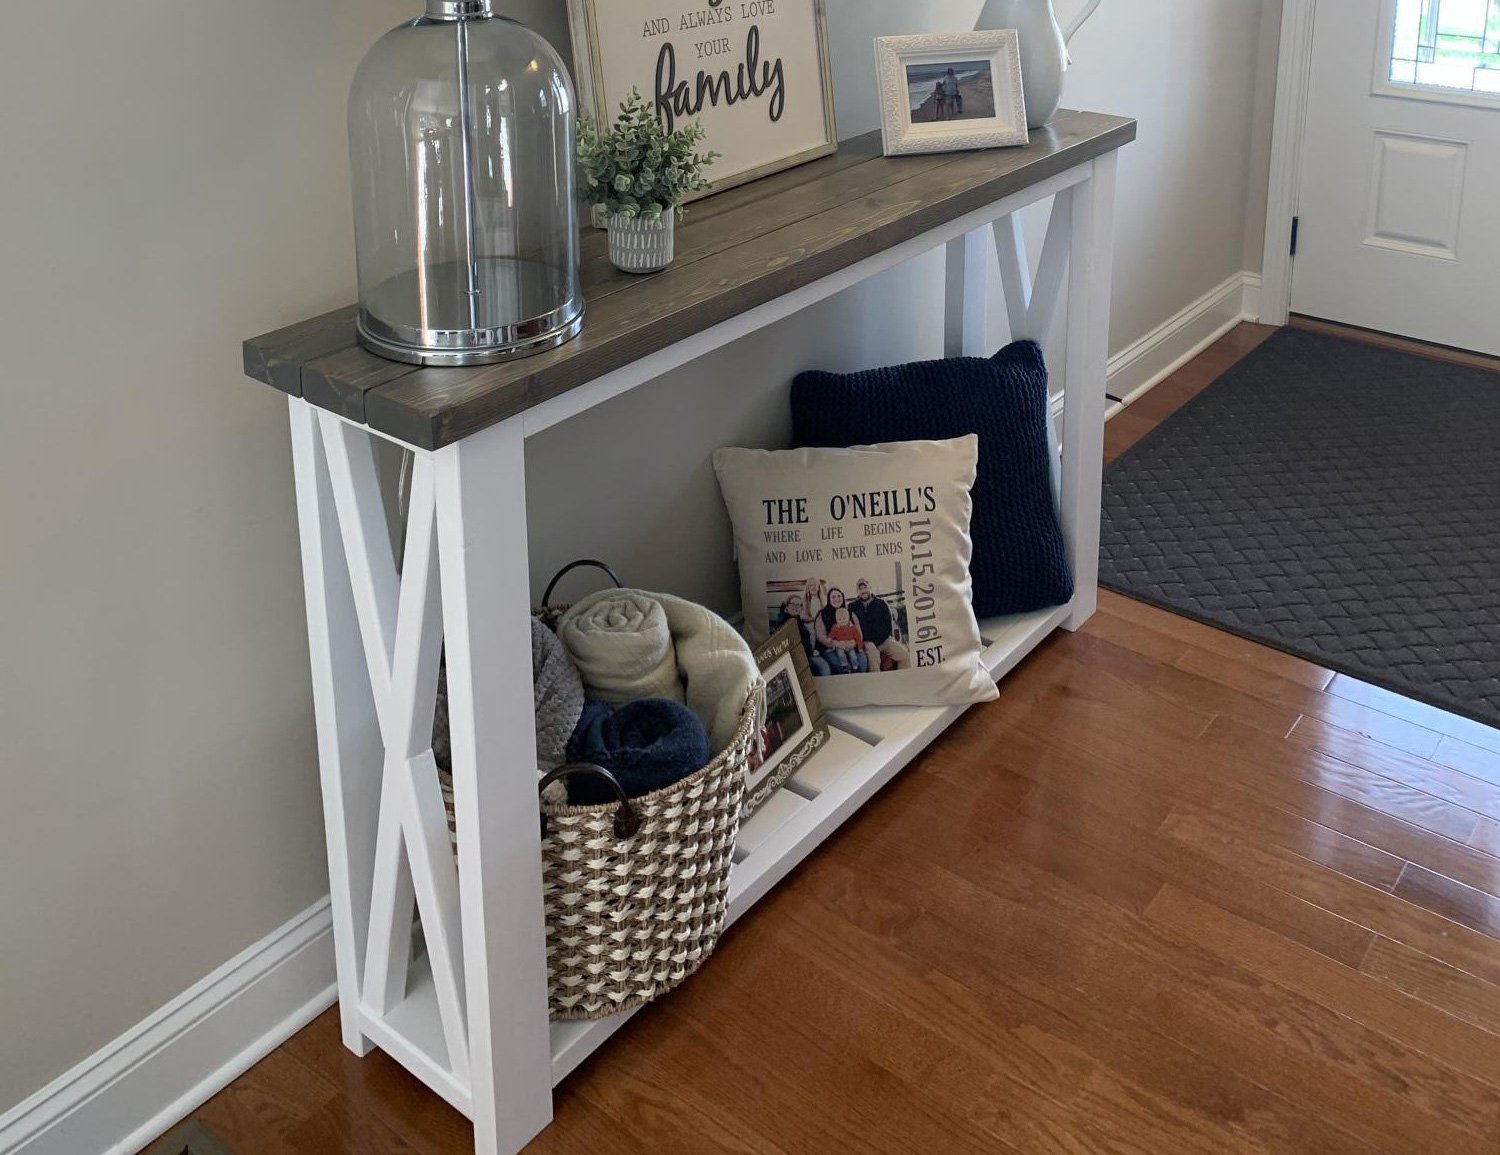
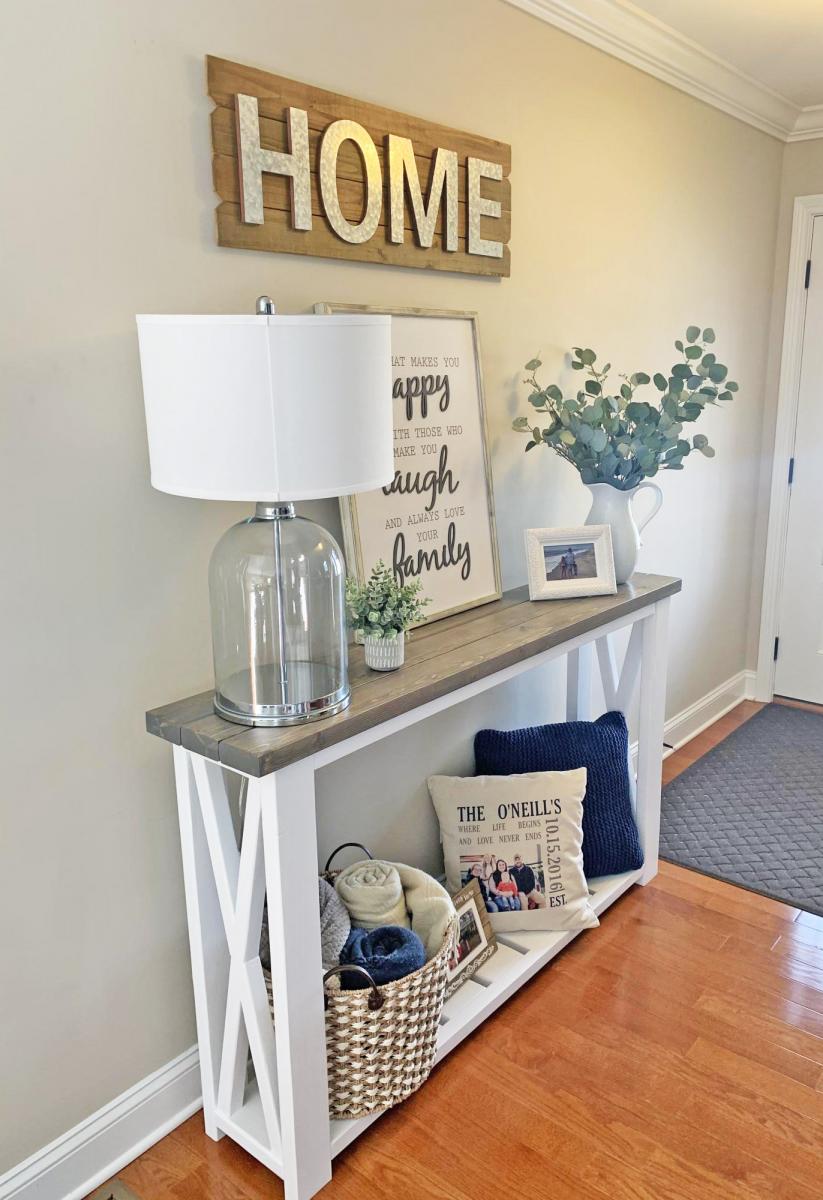
Modified the size to 60” length , 12” depth , 36” height . Went with satin white frame , Minwax classic grey stained top with 3 coats of poly clear coat satin (quick dry).
Mon, 09/07/2020 - 23:07
Do you happen to have a revised shopping/cut list for this table? Thanks!
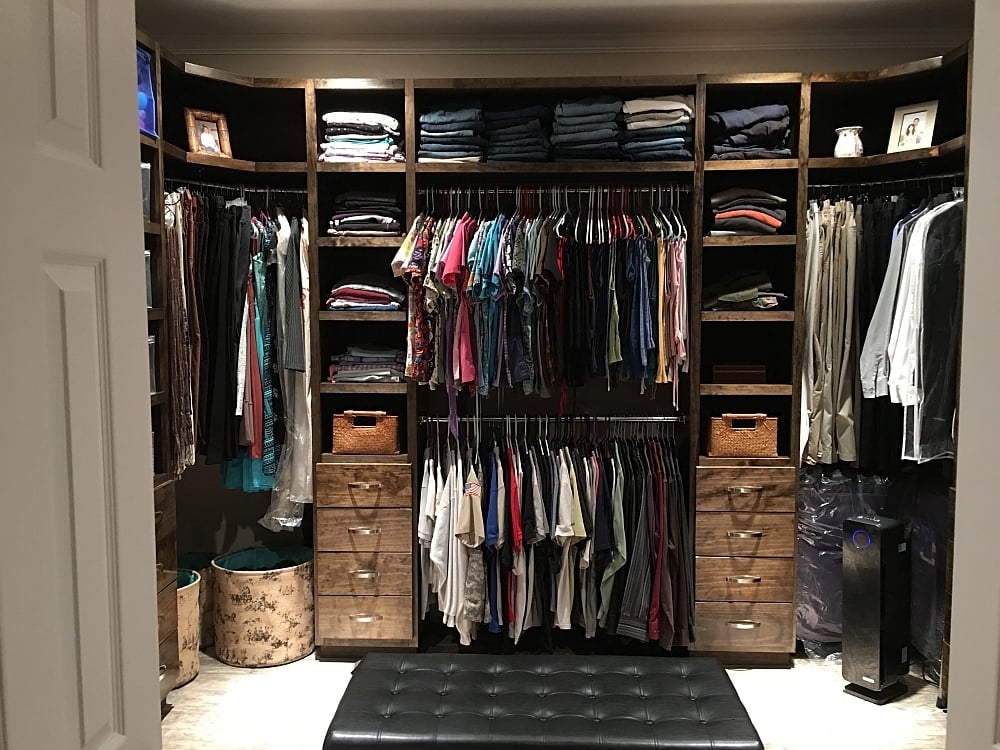
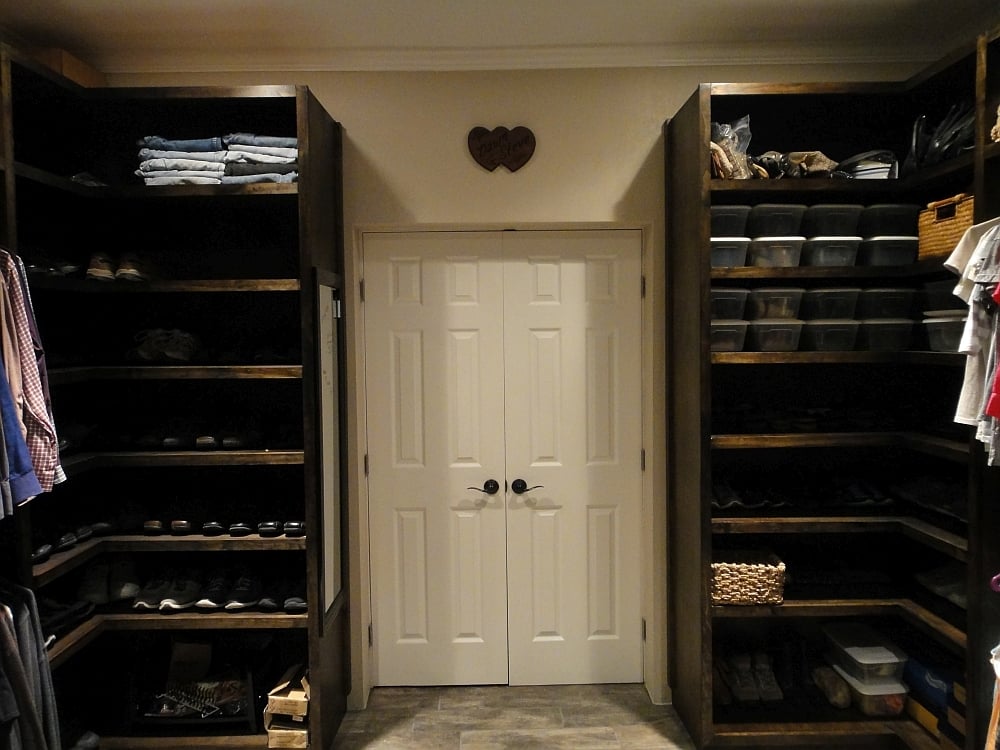
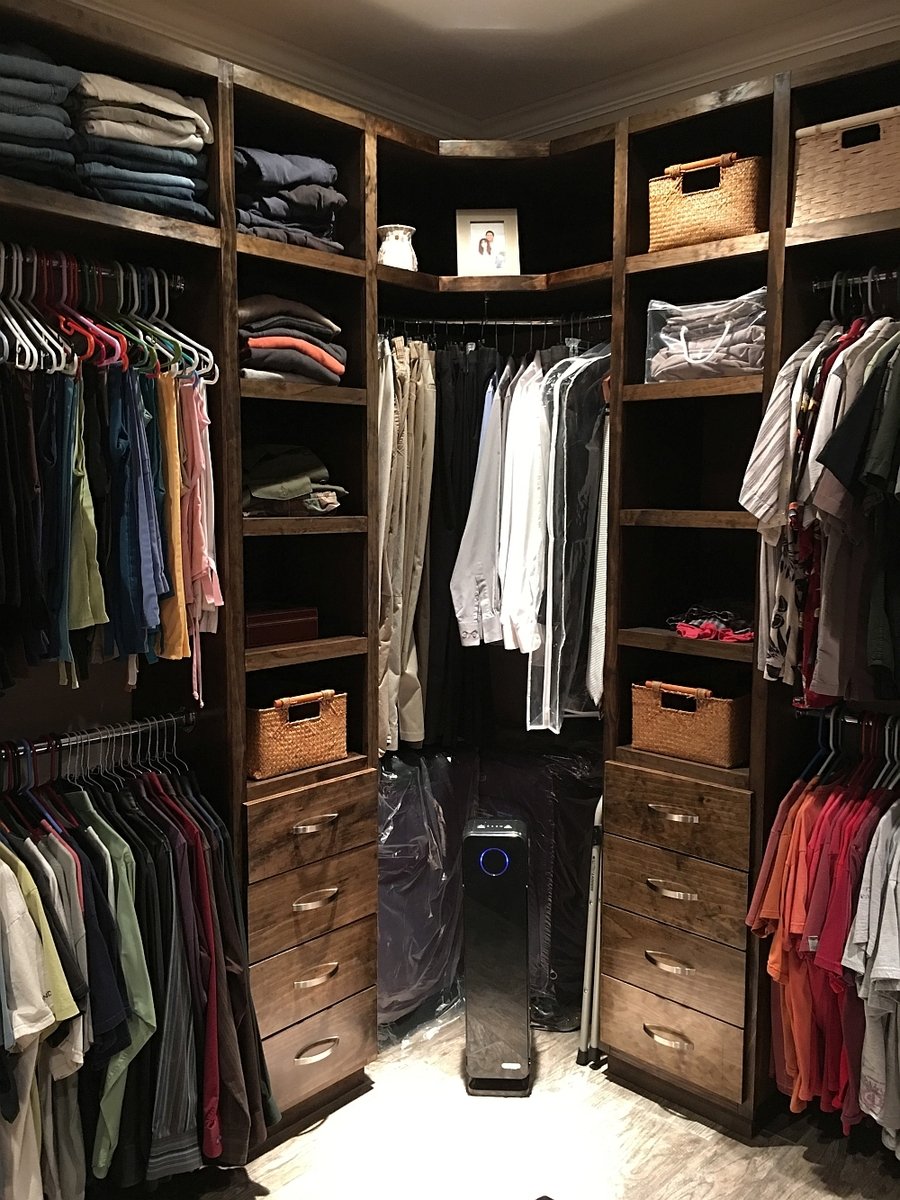
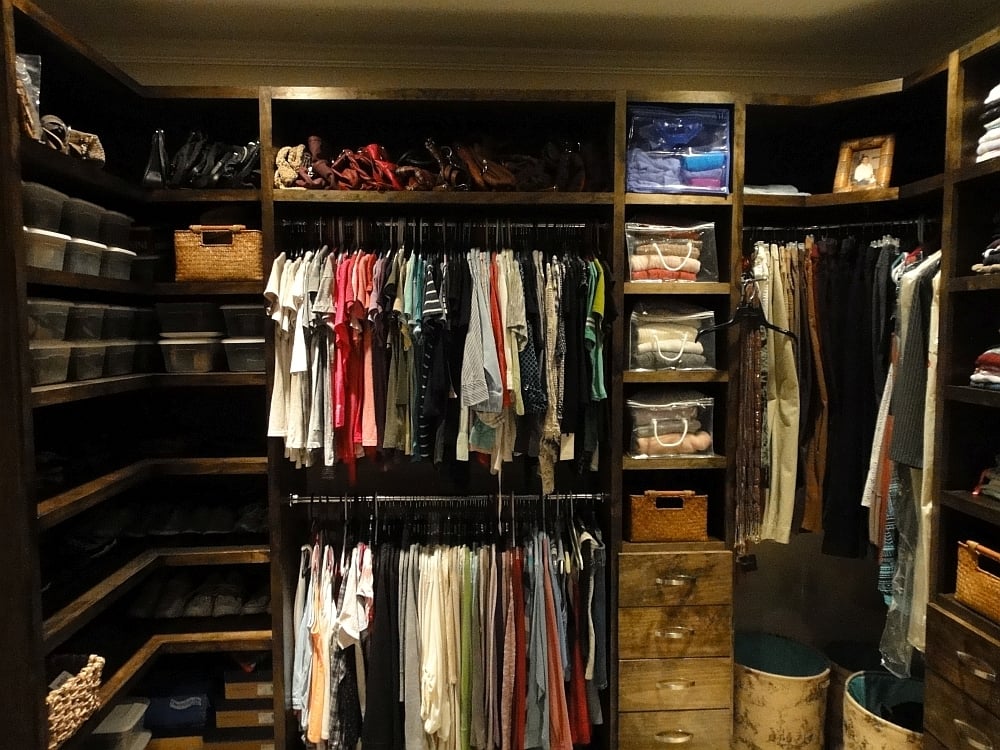
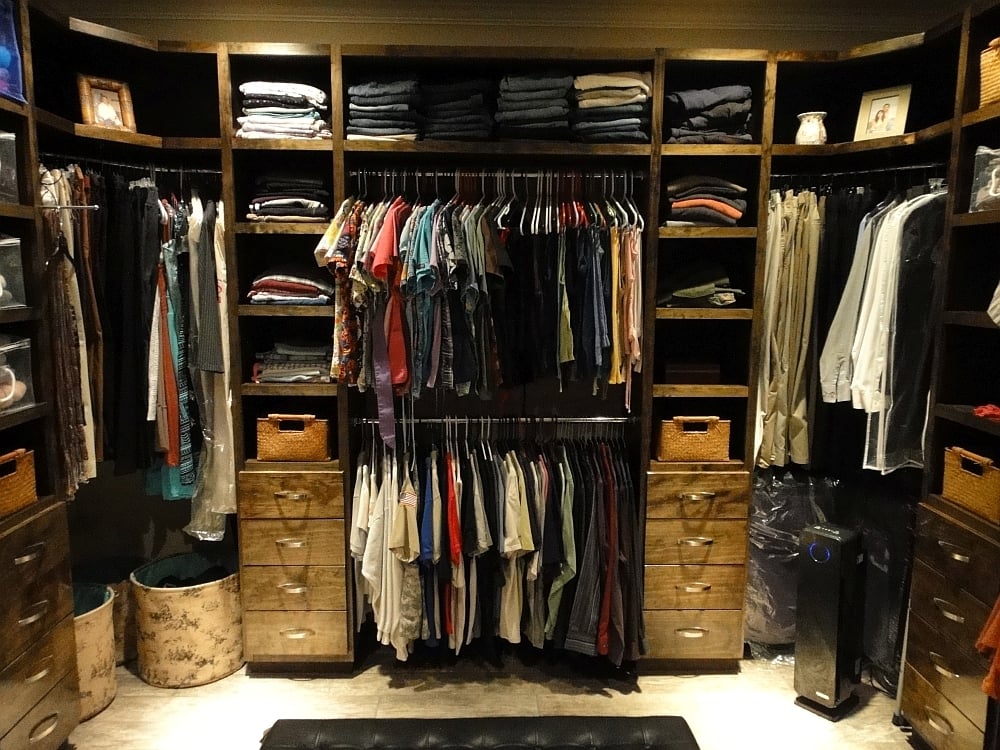
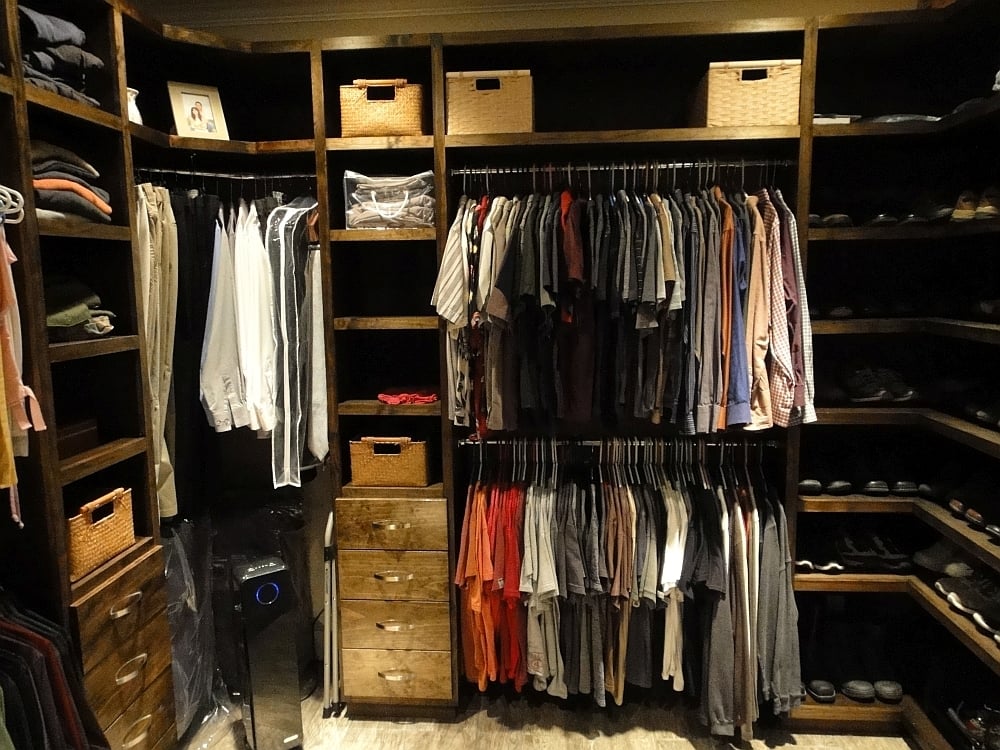
I expanded on the plans I found at Ana White and made this closet. They are 8' high, and made from Birch plywood and 1x2's from my local Home Depot. I ended up using 12 sheets of plywood and 18 1x2's. Sanded and stained with Minwax Jacobean and Satin clear on the unit and semi-gloss on the drawers. I intalled soft-close drawer slides that I found on Amazon for $120 for 15 pairs which included the rear mounting brackets, which I highly recommend using as they save you a ton of labor and make it much easier to install the slides.
What I like most about my work, is that I found regular hanging rods that were too expensive or just plain did not fit the end sockets. I used galvanized fence rod typically used for the top of chain link fences, and simply brushed them with 0000 steel wool and then polished them on my buffing wheel. If you want the brushed look, simply don't buff them. What was best about using fencing rods, was that it cost about a dollar a foot and was much stronger than buying the actual chrome rods which were over three times more money.
For the corners, you will see that they are three angled rods, which you can not buy anywhere. So, I purchased 1" galvanized electrical conduit. and bent it with a tubing bender. I simply measured what I needed, and put two 45 degree bends in the rod, installed 1" sockets on each end, and a center rod support for the middle. These two were polished with 0000 steel wool and then polished to a chrome finish. They look amazing, and the best part is that it cost $6 for a ten foot piece, which was more than enough to do both corners. You cannot beat the cost of using fence rods and electrical conduit for closet rods.
I plan to install a small drawer island in the middle later as I require a need for more drawere space.
Thanks to Ana White for the help. I already have a few more next projects lined up using her ideas here.
Tue, 10/18/2016 - 10:26
That is one lucky wife and one heck of a build! Thanks for sharing:)

Still needs stain and cushions. Will post finished product once complete.
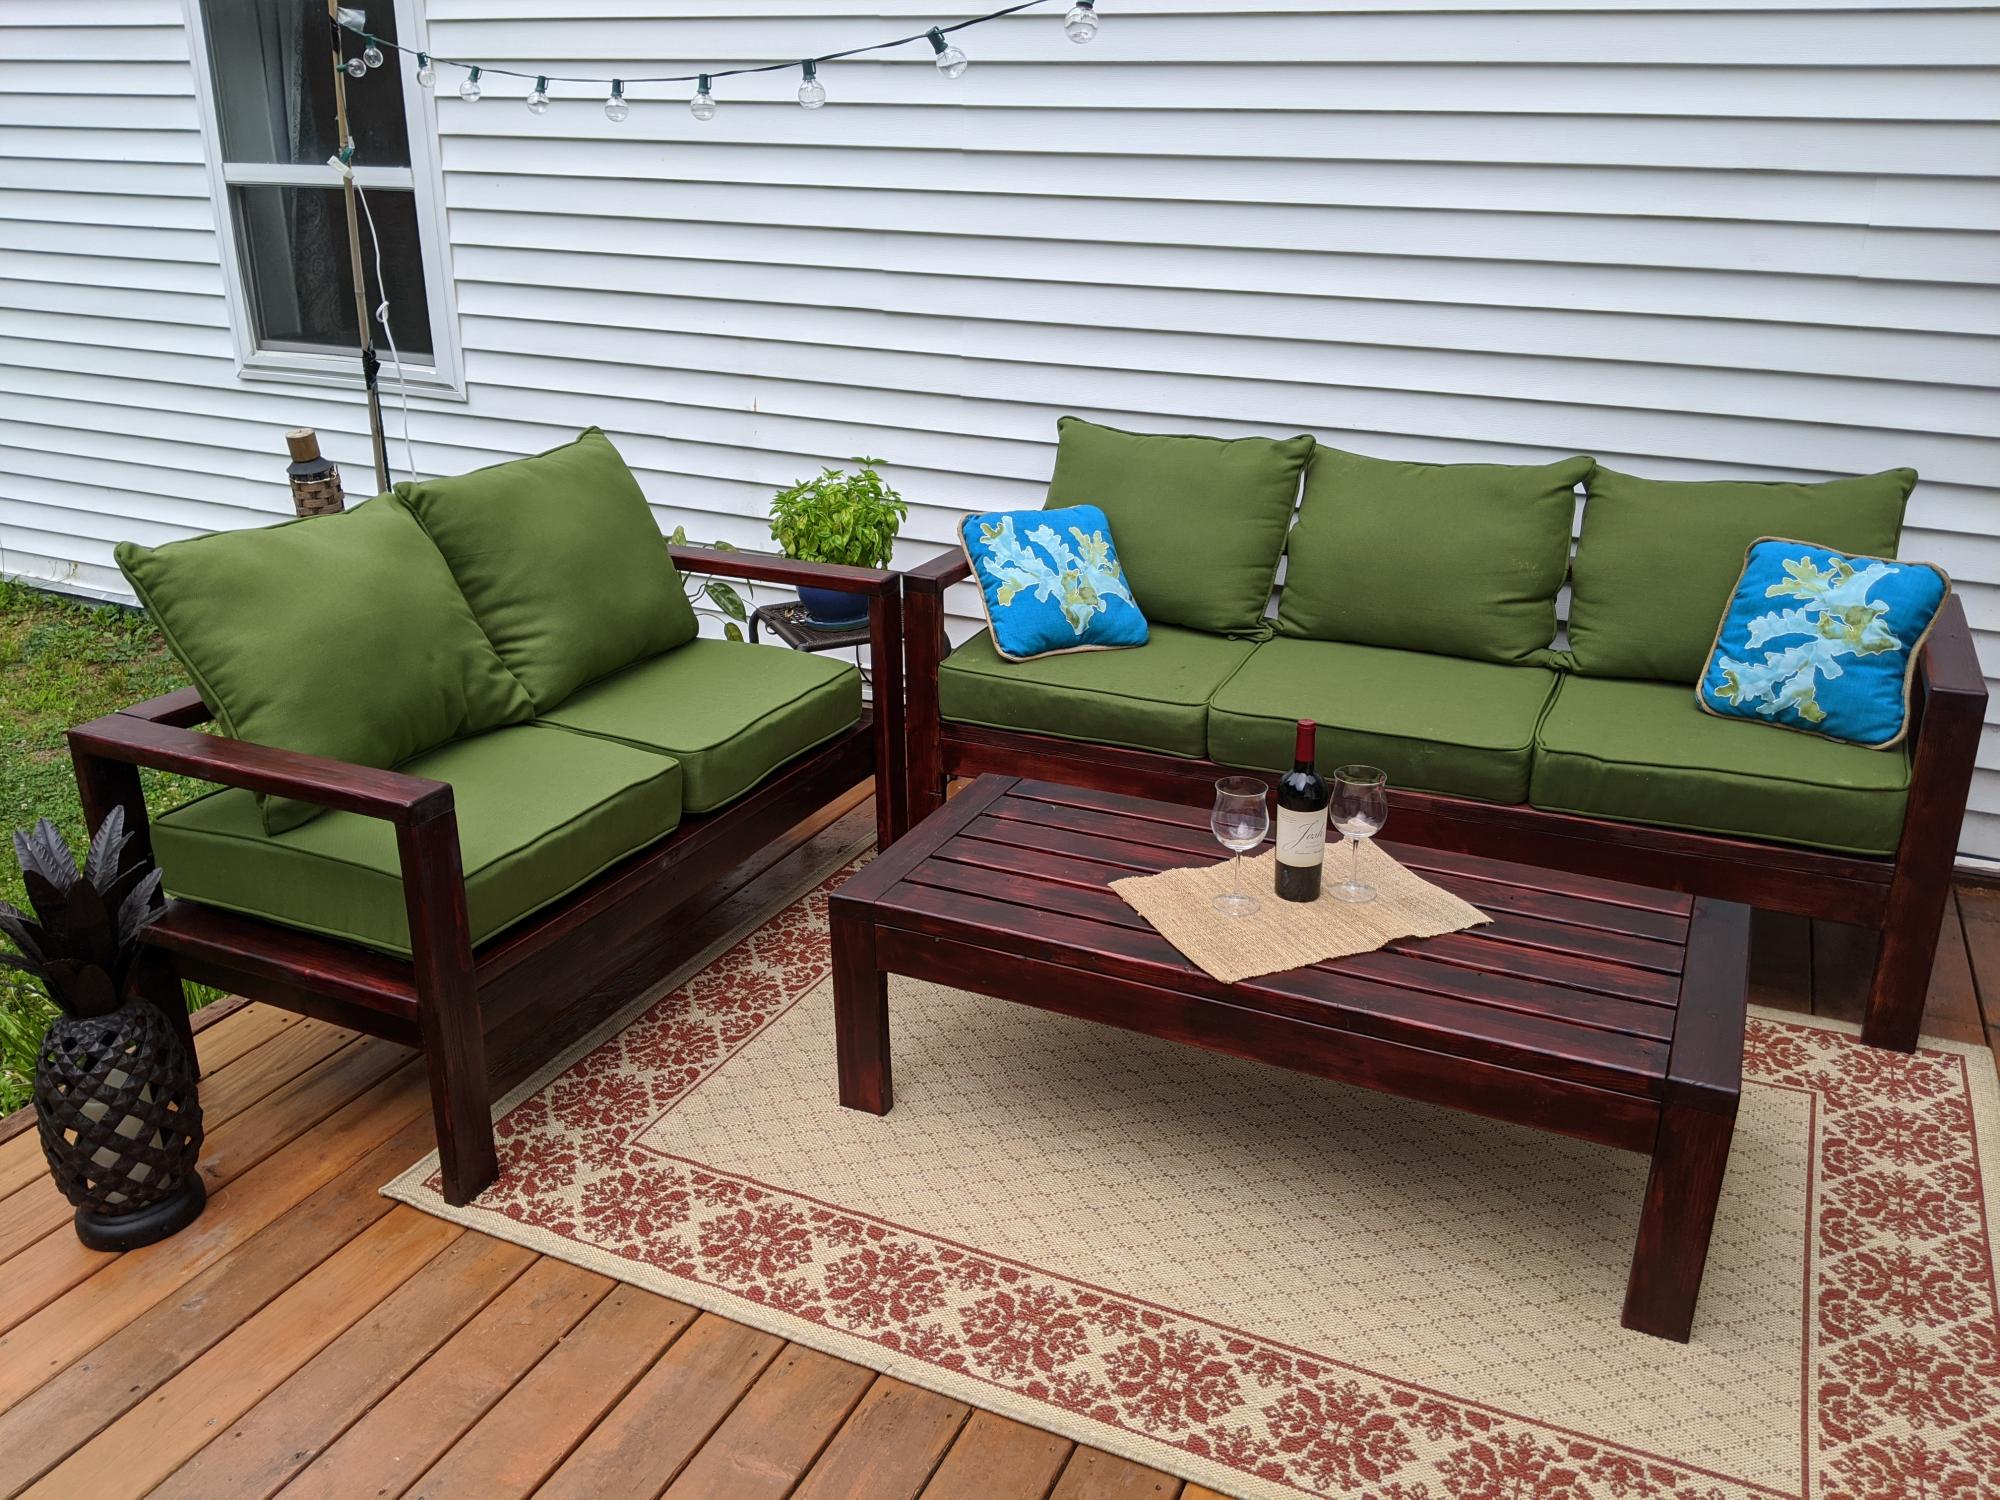
Thanks Ana, for the great plans and inspiration!
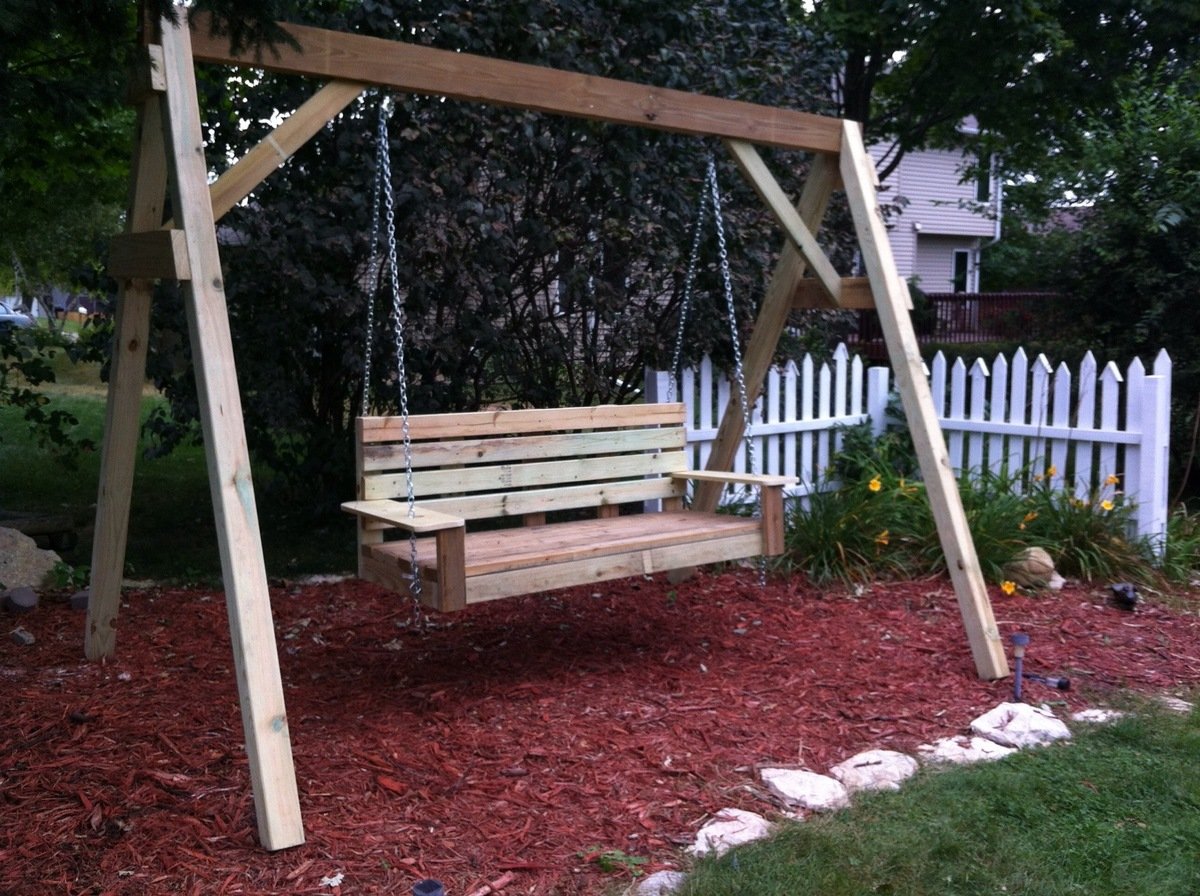
I wanted to make this porch swing ever since seeing it in the plan catalog (Large Modern Porch Swing). Just a matter of setting aside a weekend to get it done and then to find A frame to support it. I made the A-frame from a combination of this post:
http://www.buildeazy.com/newserve/swing_seat_support_dec07_1.html
and this one:
http://www.hgtv.com/home-improvement/custom-a-frame-childrens-swing-set…
I made the back a bit higher on our swing... and not quite as wide.
Reading several other blogs on this- I chose to attach the chains to the top back of the swing to keep it from tipping backwards...
Now just get to enjoy it!!
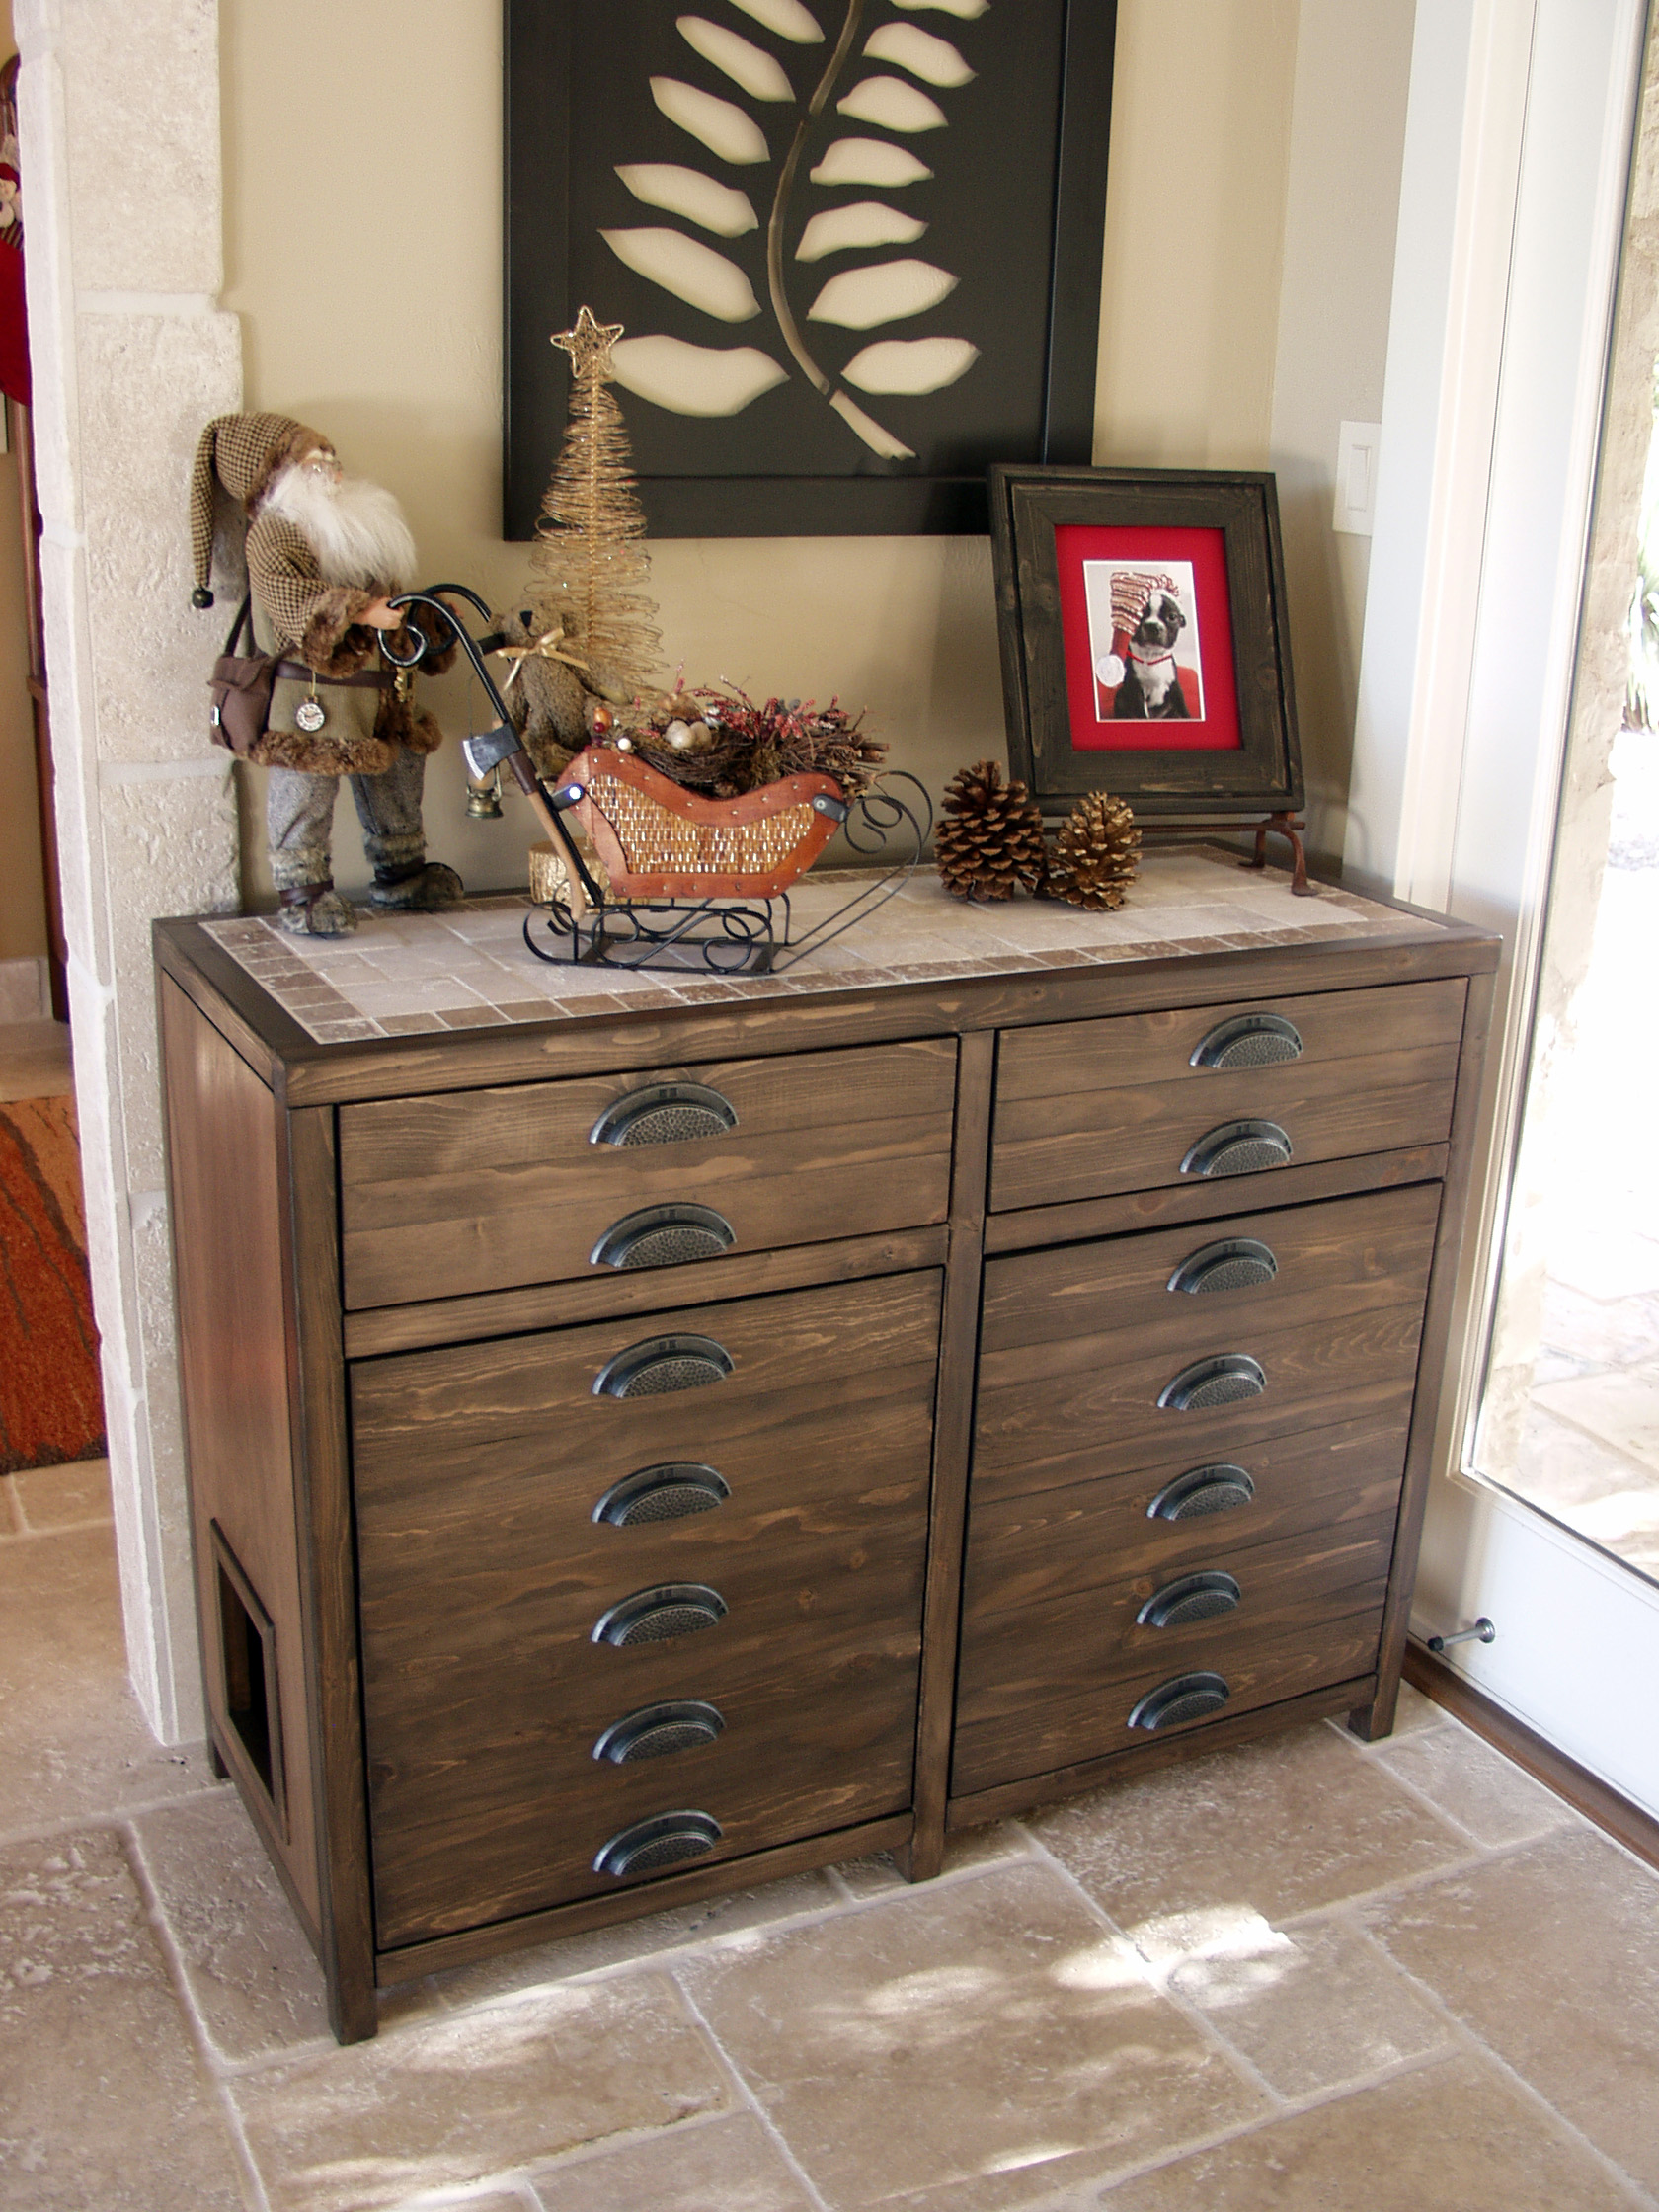
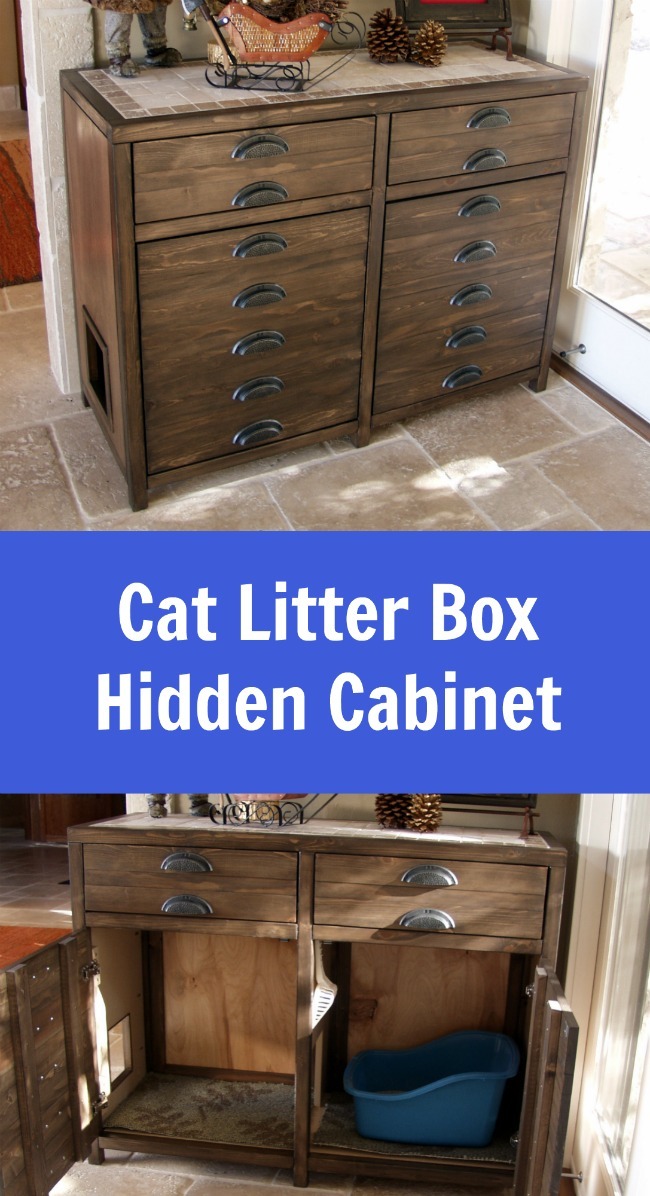
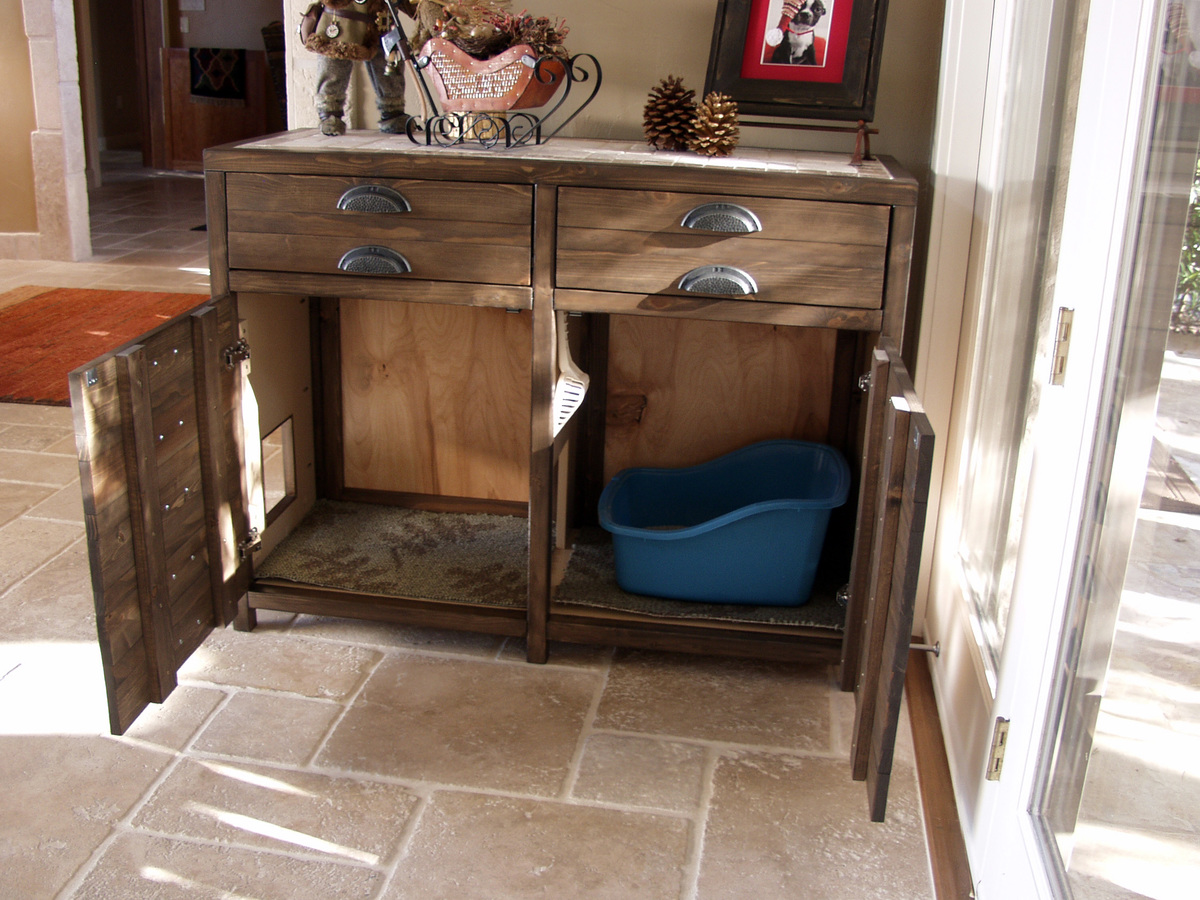
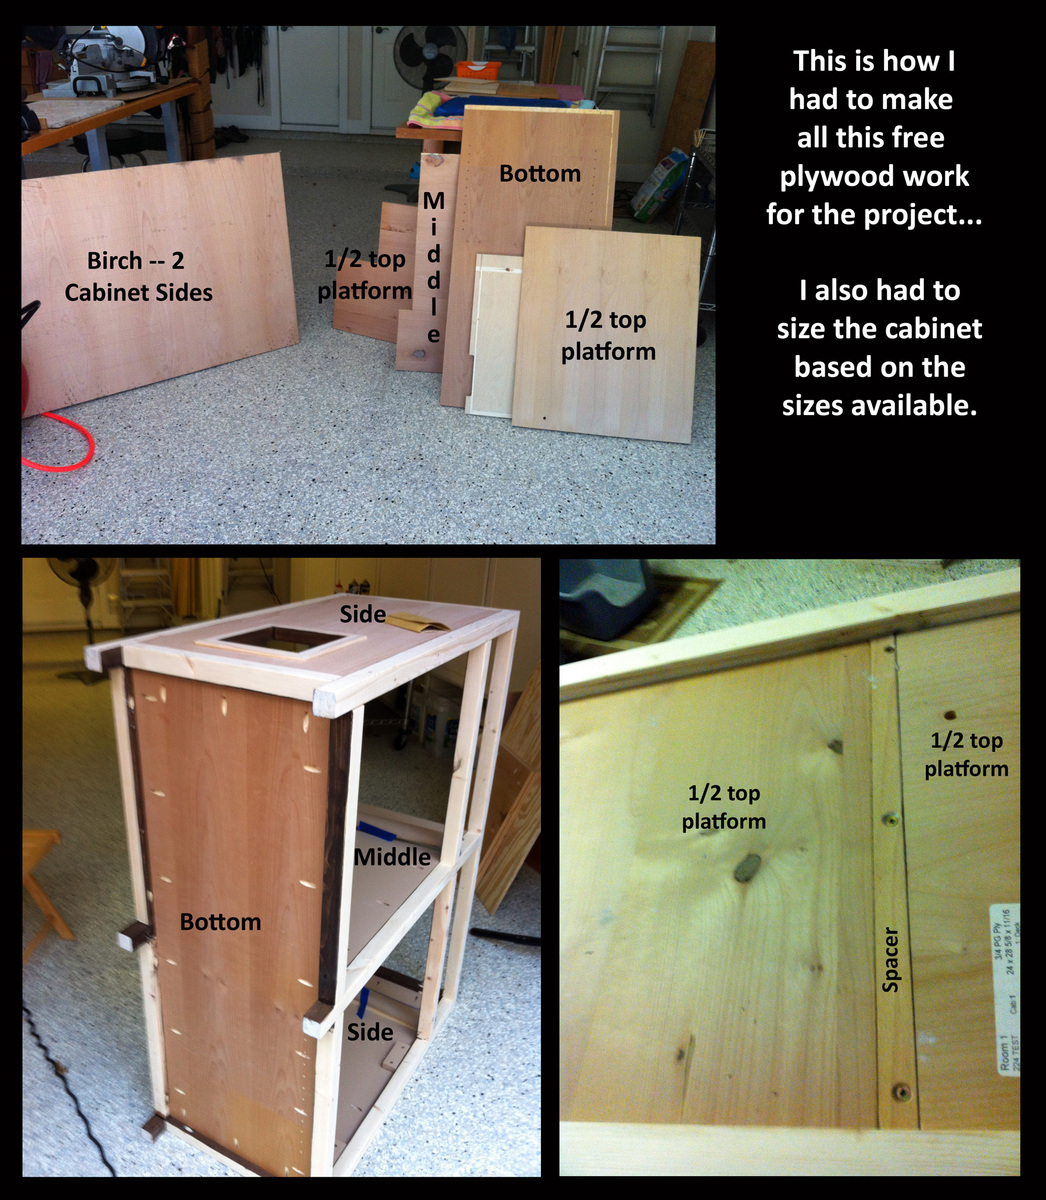
I had been wanting to build something to hide the litterbox for a long time. When I saw the Printer's Console plan, I knew this was the perfect plan for a cat litter box furniture. I loved that Jen Woodhouse's version was completely modified to her bar plan, so I thought I could modify for my litterbox idea. I modified the plans on size, as I was trying to use a bunch of mis-matched plywood. I also modified it to include a cat door, a cat passageway on interior panel, a vent on the back behind one of the drawers, and the stone top. I built a frame on the back to house the backing as an inset piece, as I didn't want it to be seen at all. I learned a very important lesson during this build. Not all 1x3s are created equal. Once I got my doors assembled, they were too big for the opening. I couldn't shave off the tiny amount needed, and couldn't make anything work short of starting over with 1x4s, sawing off a small amount, and cutting down the # of "drawers" (and handles). I wanted the inside to be fully finished (because cat pee on raw wood would not be good!). I had to finish certain "planes" prior to putting the thing together. I used kitchen and bath paint on the inside floor and sides for easy cleanup. The stone was carryover from construction on our house 12 years ago. The handles were an amazing deal @ $1.81/each .


Sun, 11/25/2012 - 09:51
That is a fantastic idea and the table top is beautiful.

Mon, 11/26/2012 - 09:38
That is the most beautiful litter box I have ever seen!
Mon, 06/17/2013 - 12:23
Love your use of the buffet. Our family has discussed making a piece of furniture like this for our smaller dog. Nice to see someone has done it! Our big dog has scheduled feedings but our little dog would prefer to be a free feeder. Poor thing chokes down his food in our pantry listening to our big dog breathing under the door waiting for him to finish. When he is done we open the door and the Big, greedy dog bolts in looking for left overs. A family member has to wait patiently for the little dog to finish so he can escape the pantry. I really don't want a doggy door in my pretty swinging bi-fold doors to my pantry which is also access to our kitchen.That would be a pain to have to keep closed all day. But this buffet idea is super cute! Thanks for the inspiration.
Fri, 01/09/2015 - 22:01
I know this is an old post, but I'll ask anyway
I love this piece and am in the planning stages for ours. Thank you for sharing!
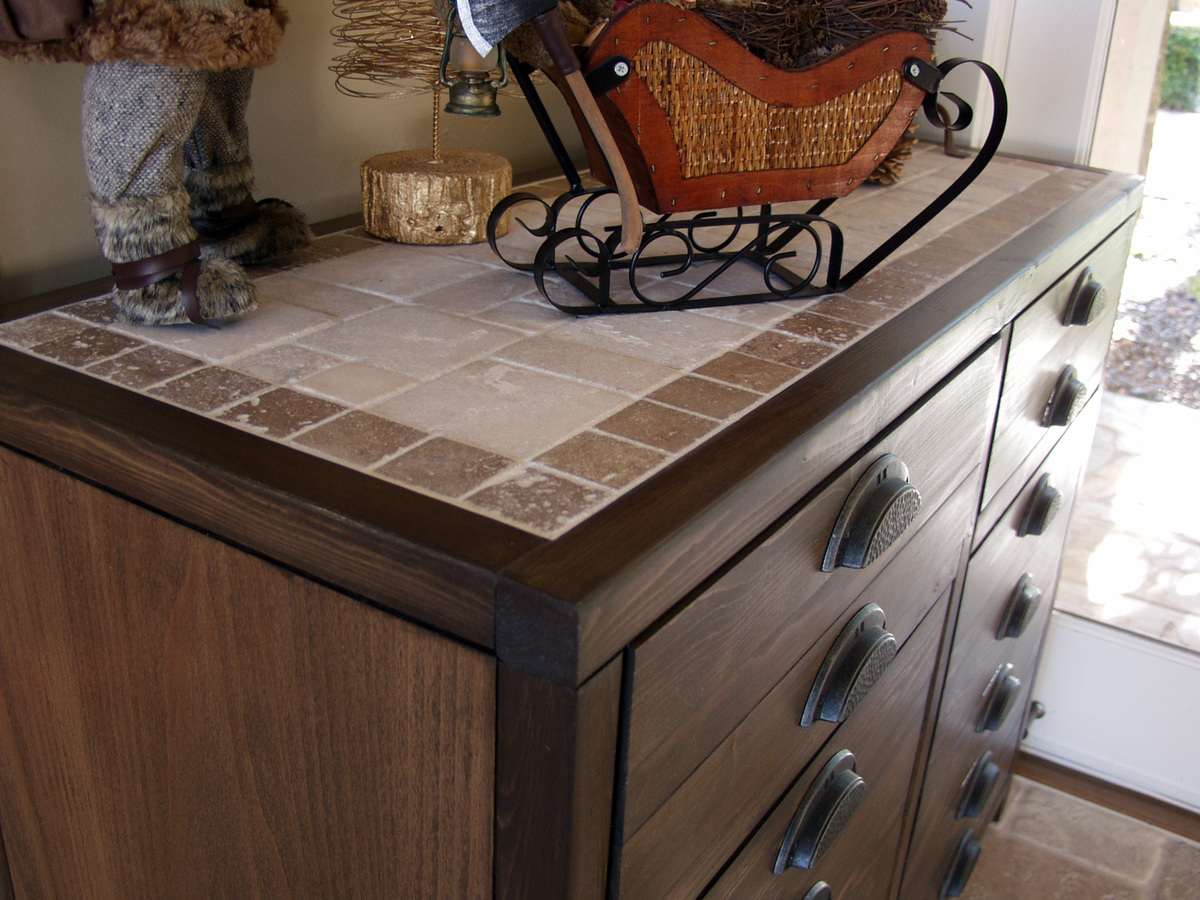
I am Wondering how you went about the table top. Did you install a 3/4 ply on top but not flush, allowing room for mortar and tile? If so how much room did you allow for the tile/mortar? 1/2 inch? How did you keep the surface of the tile level and uniform? Lastly, did you seal the tile with anything when you finished?
Aesthetically, the tile top really sets this piece off and I really want to make my own.
Thanks