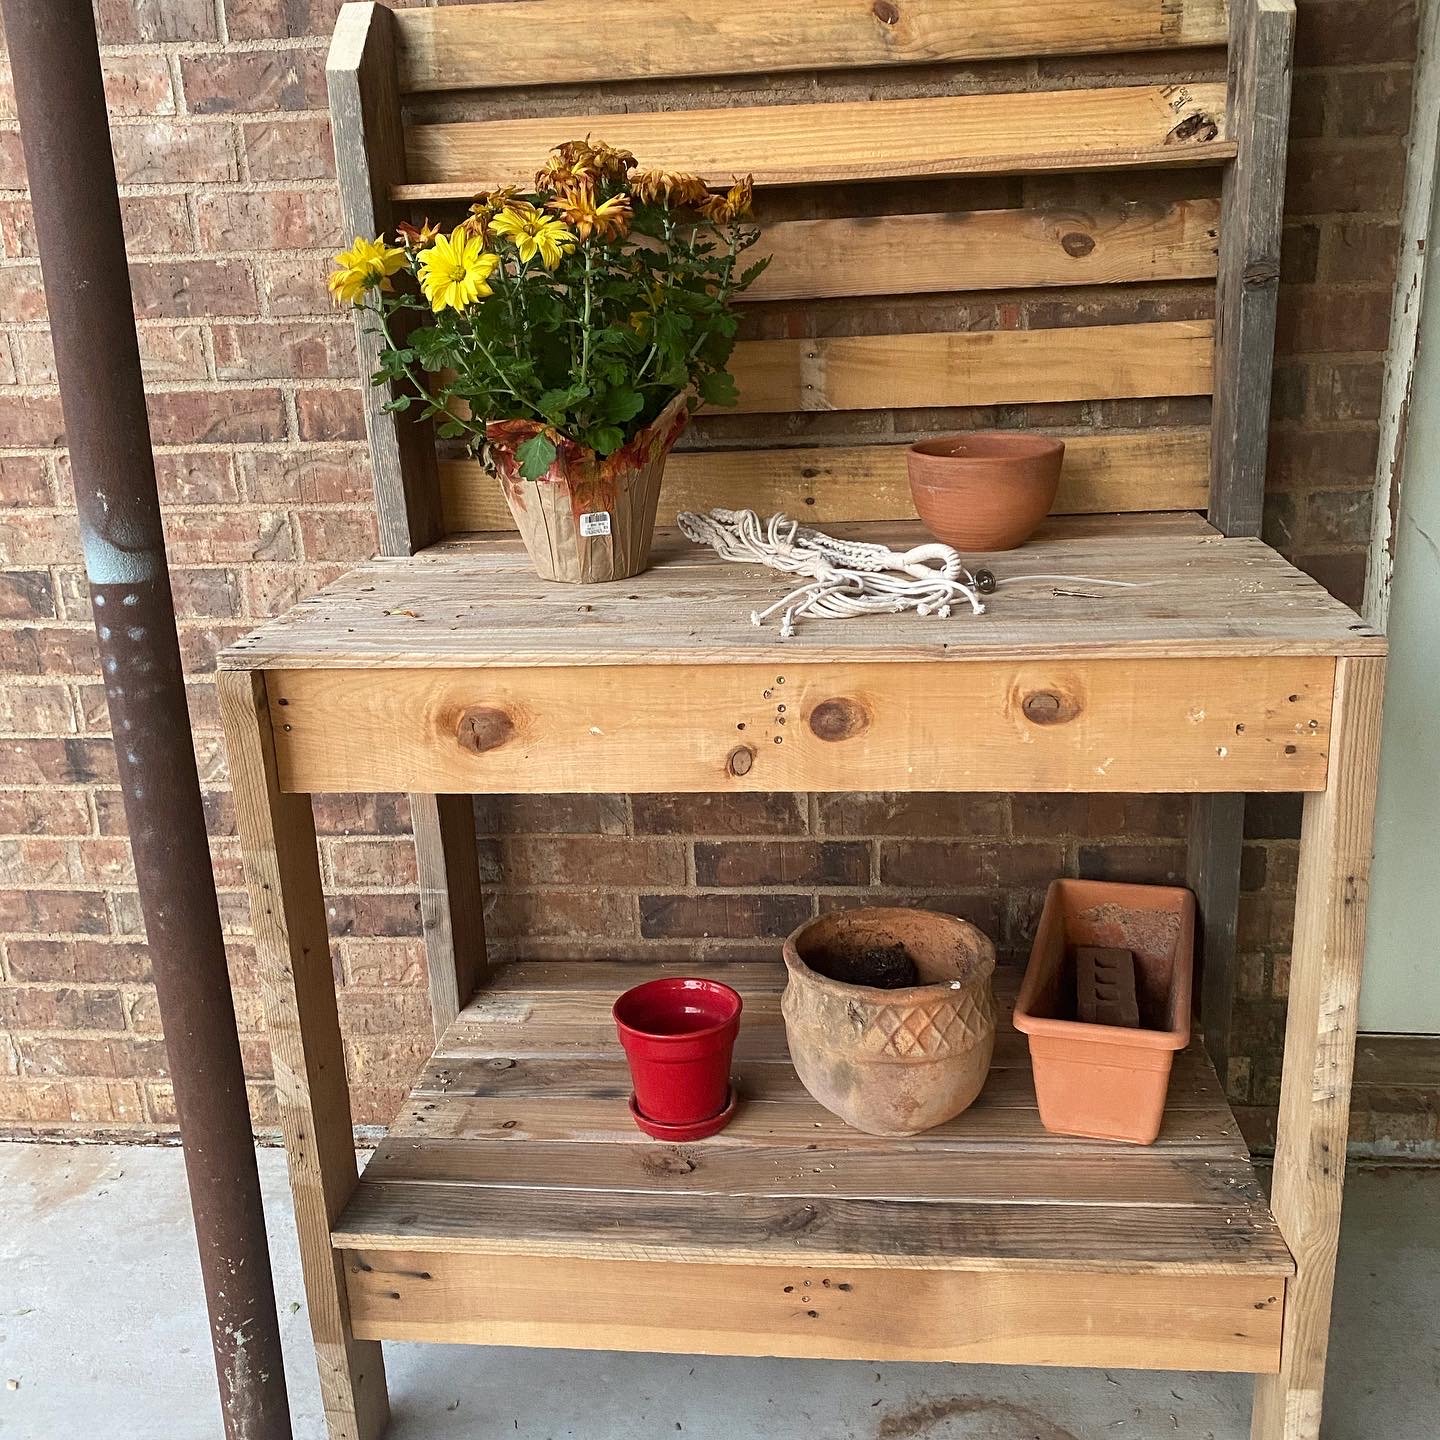
Cedar 3 tier planter
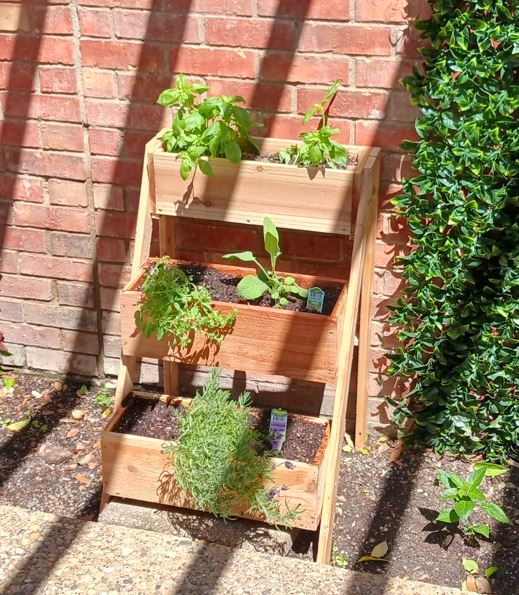
I made the boxes a little wider than the plans called for but still came out great. I'm very happy. Thanks Ana for the inspiration.
Built from Plan(s)
I made the boxes a little wider than the plans called for but still came out great. I'm very happy. Thanks Ana for the inspiration.
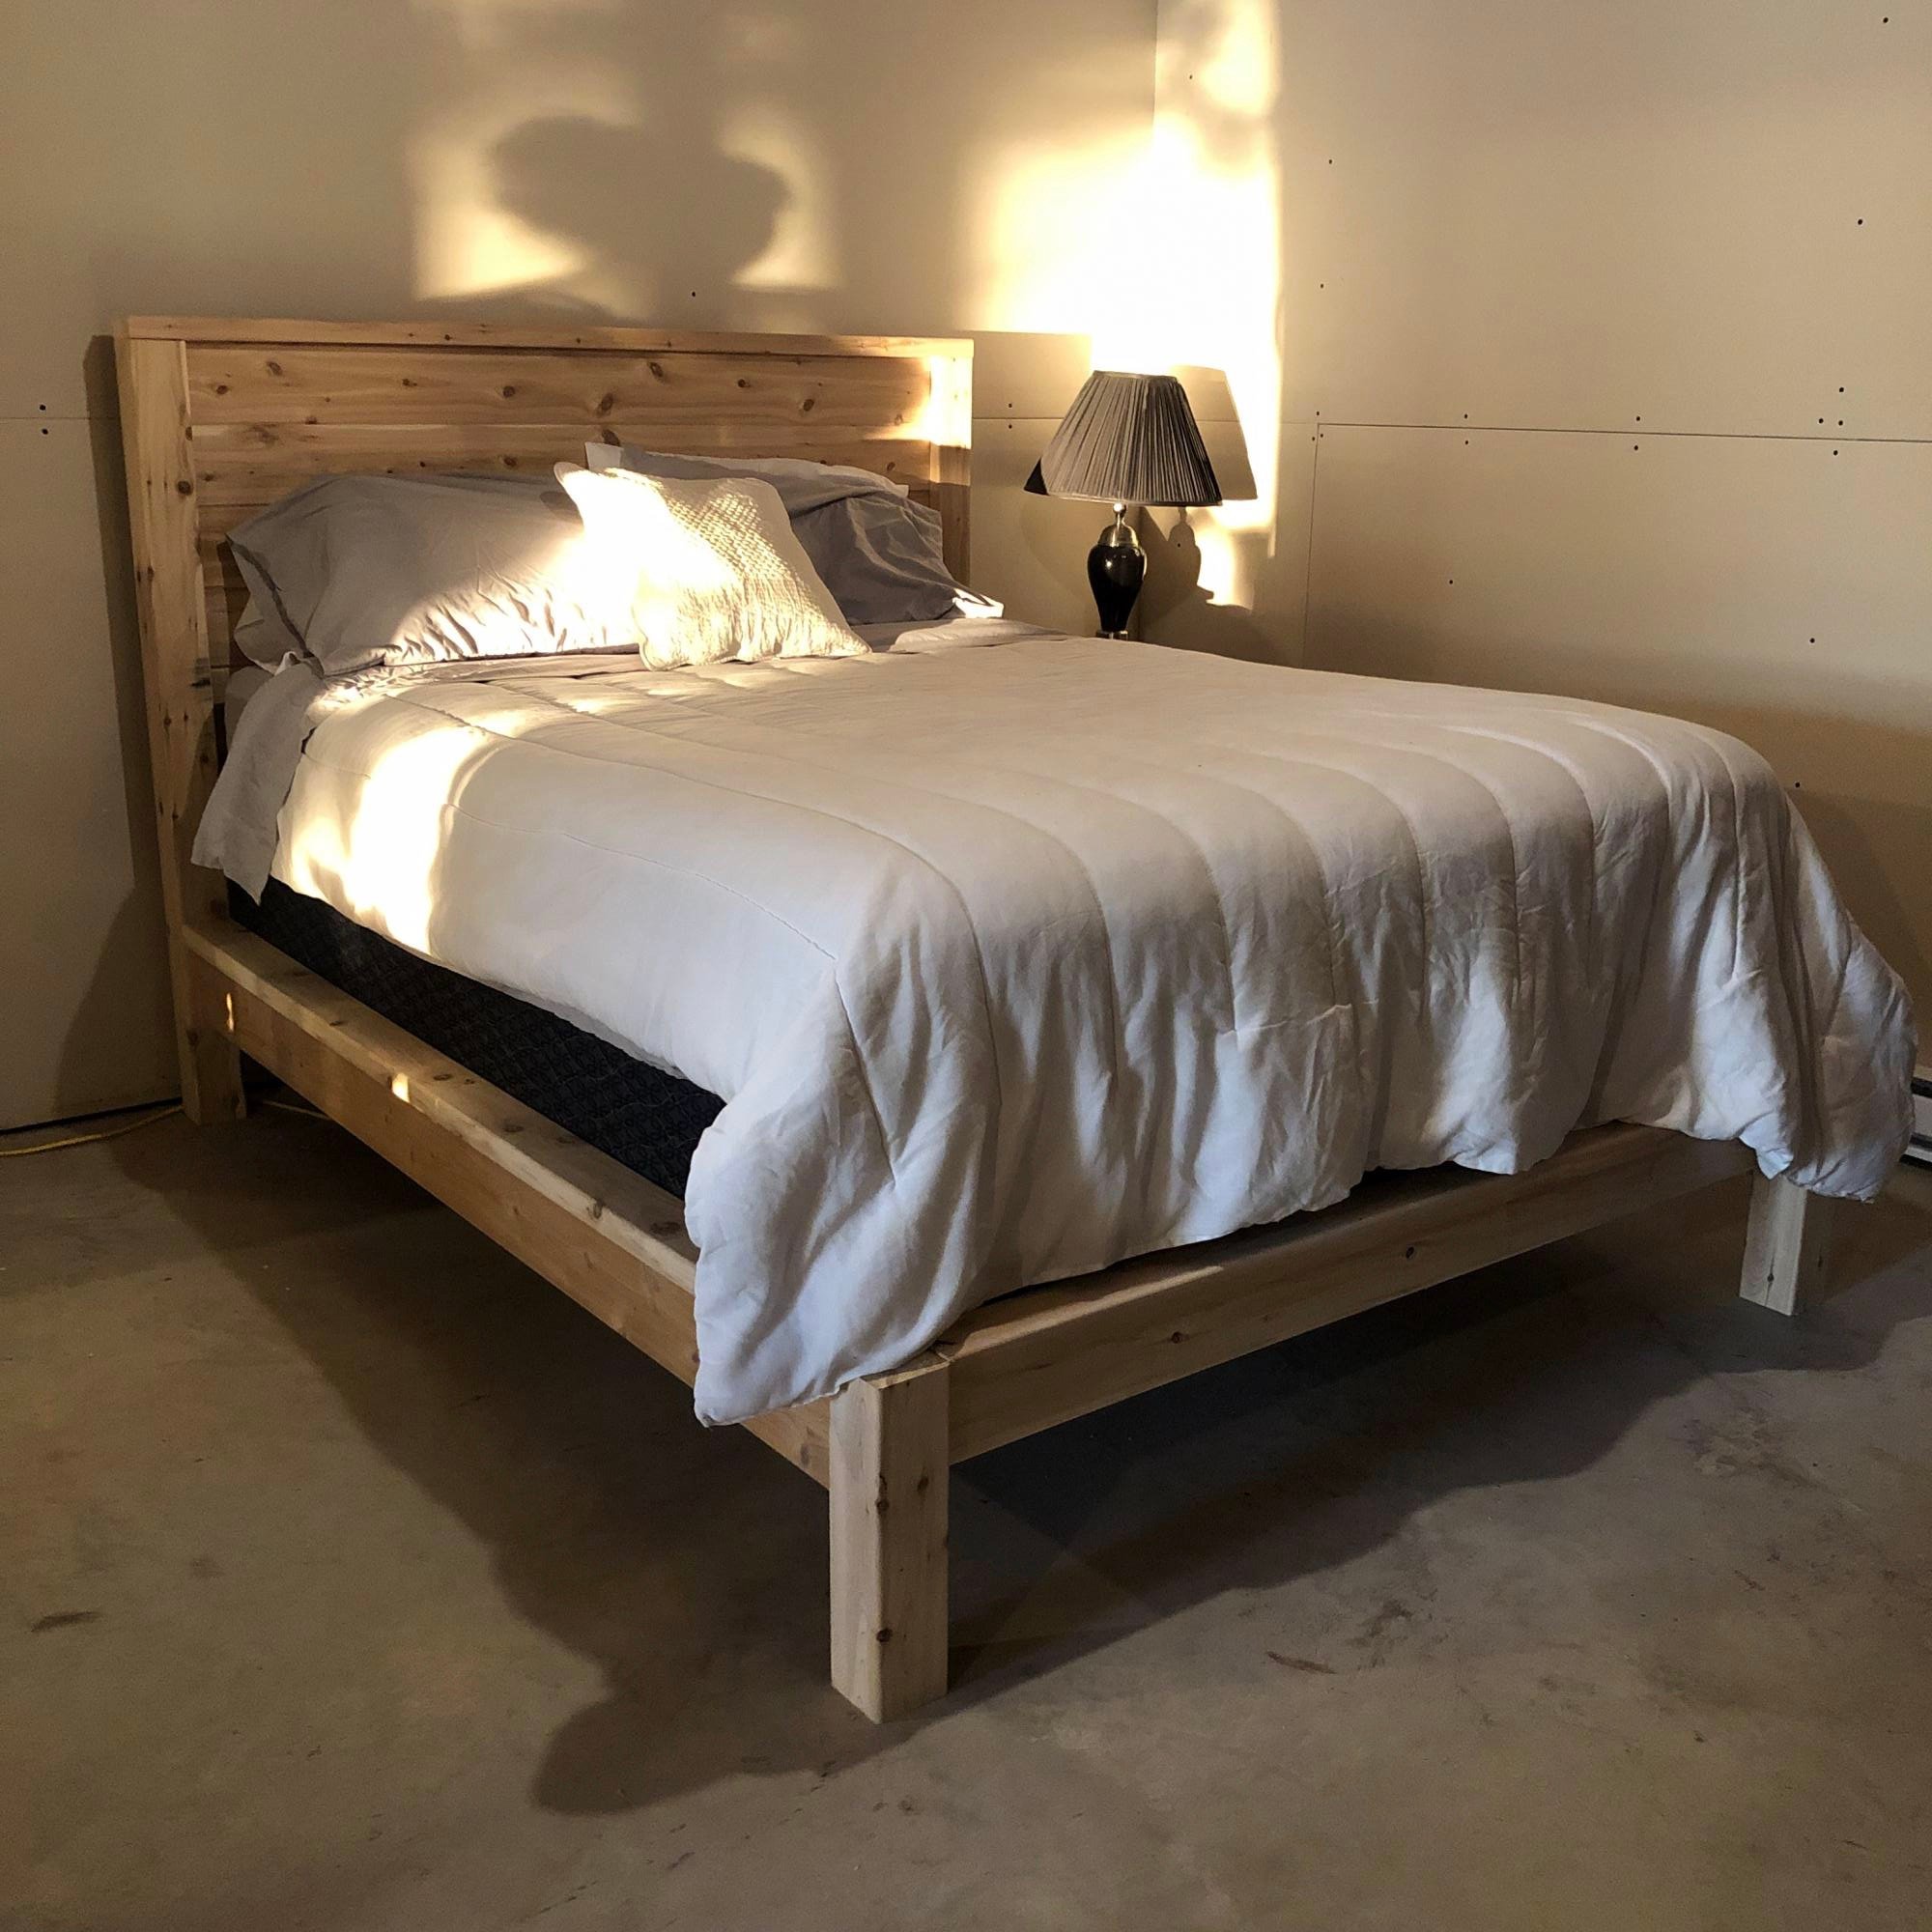
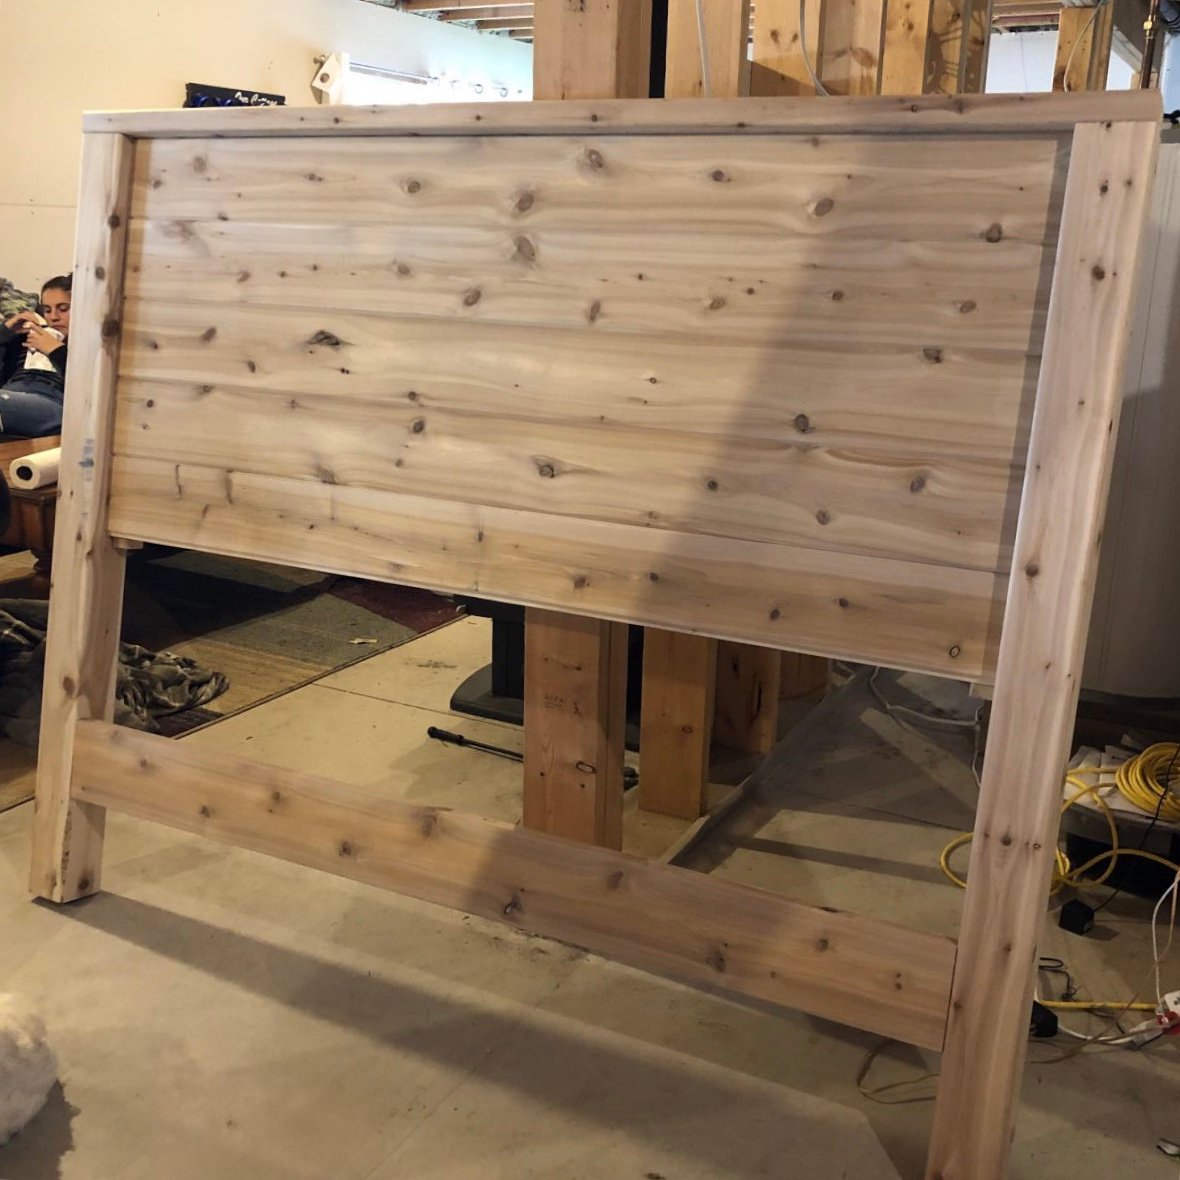
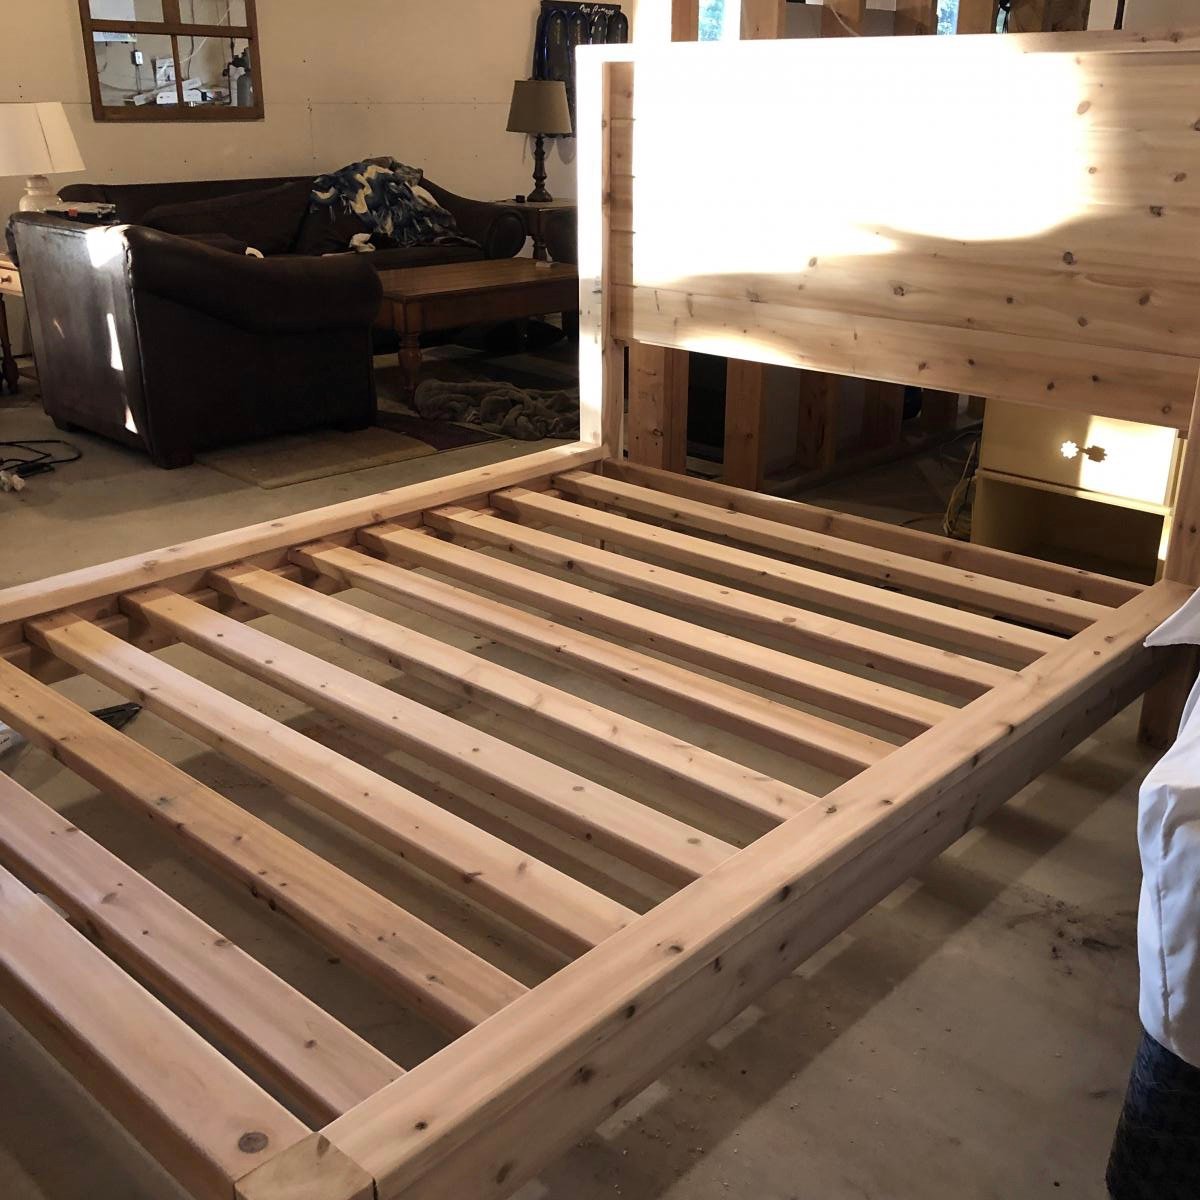
Love this bed so much, we plan to build another 3. Used local white cedar milled just down the road from our cottage.
http://www.ana-white.com/woodworking-projects/modern-farmhouse-bed-frame
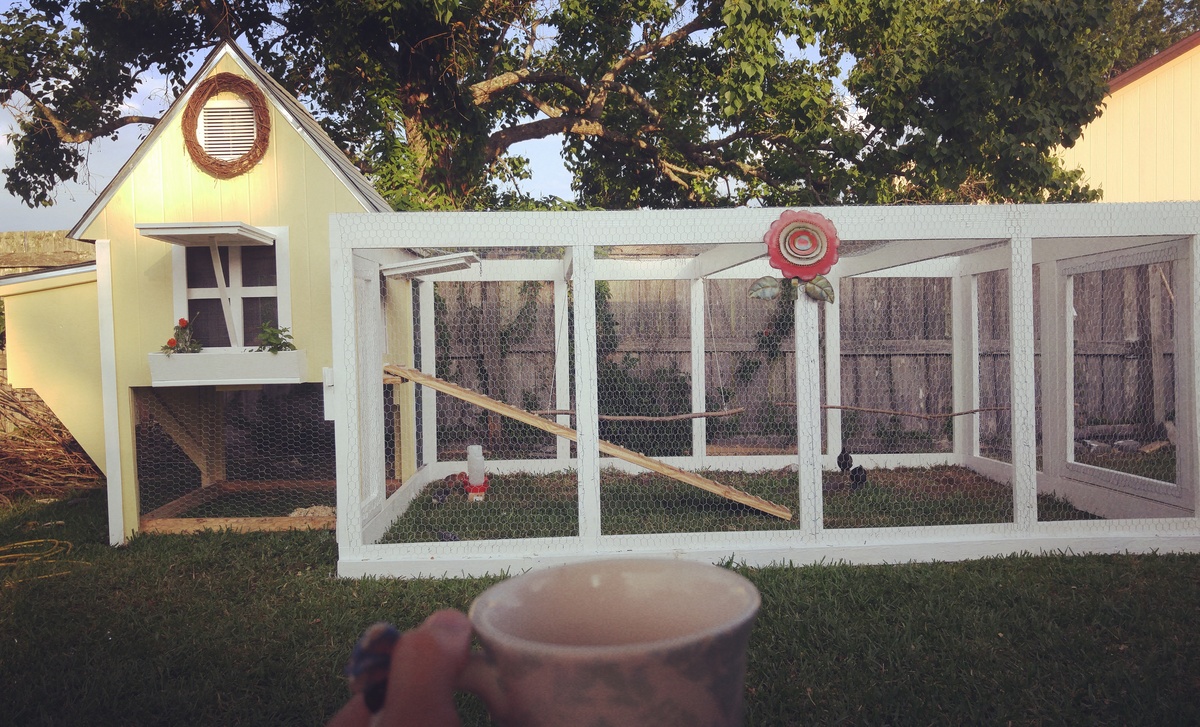
My husband bulky this coop from pallets and used Ana White's chicken run plans. Took us a weekend to build the run.
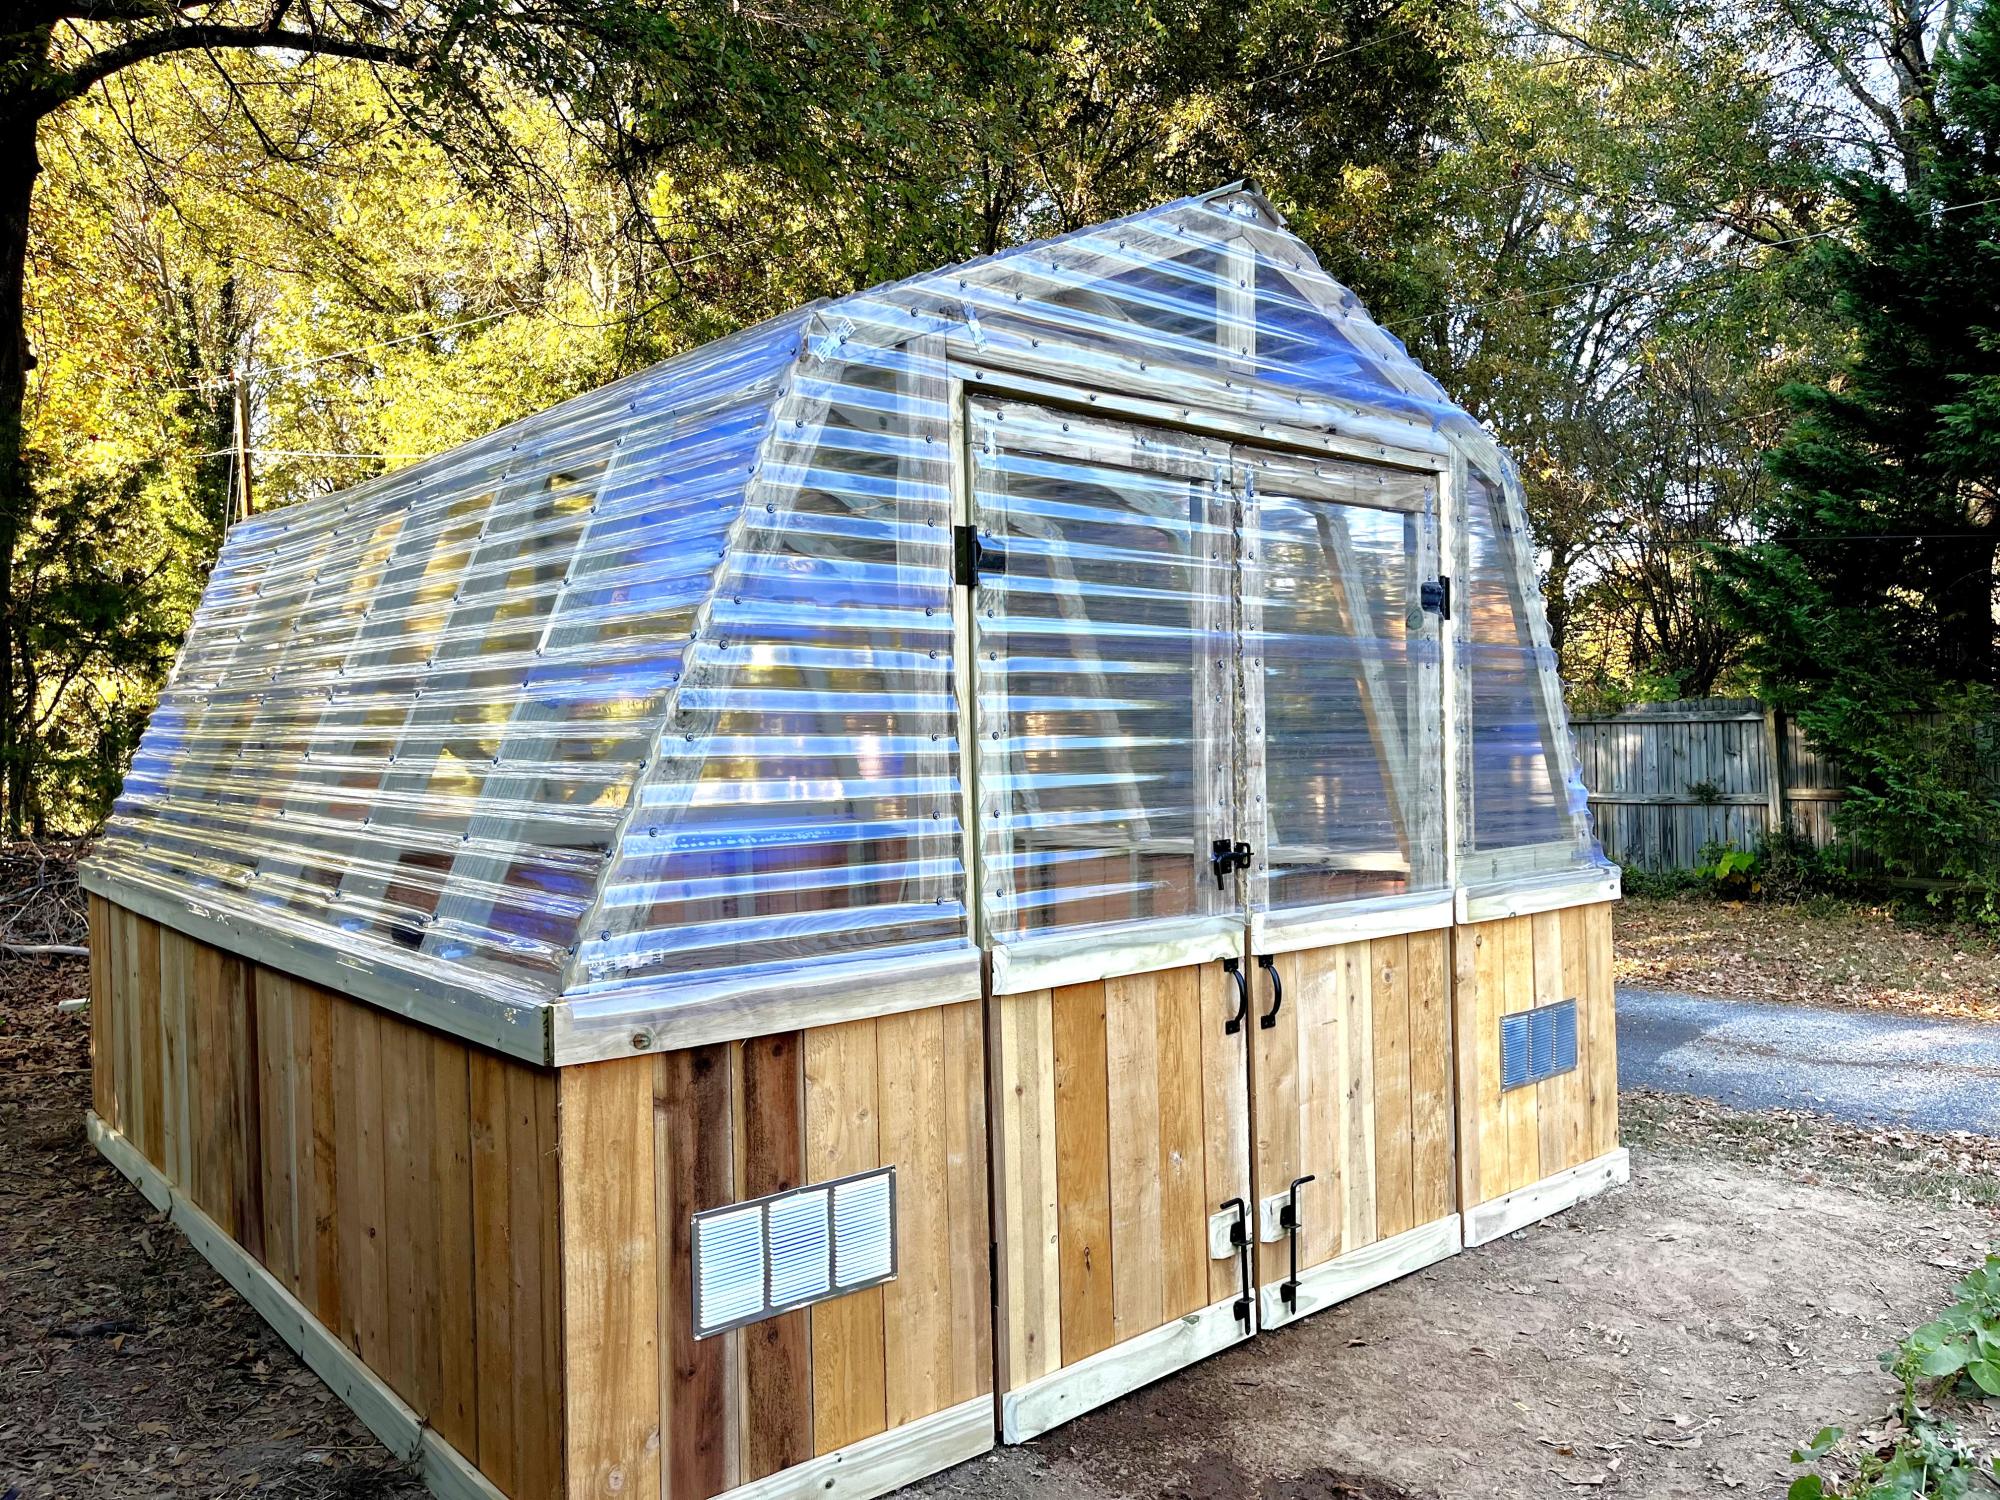
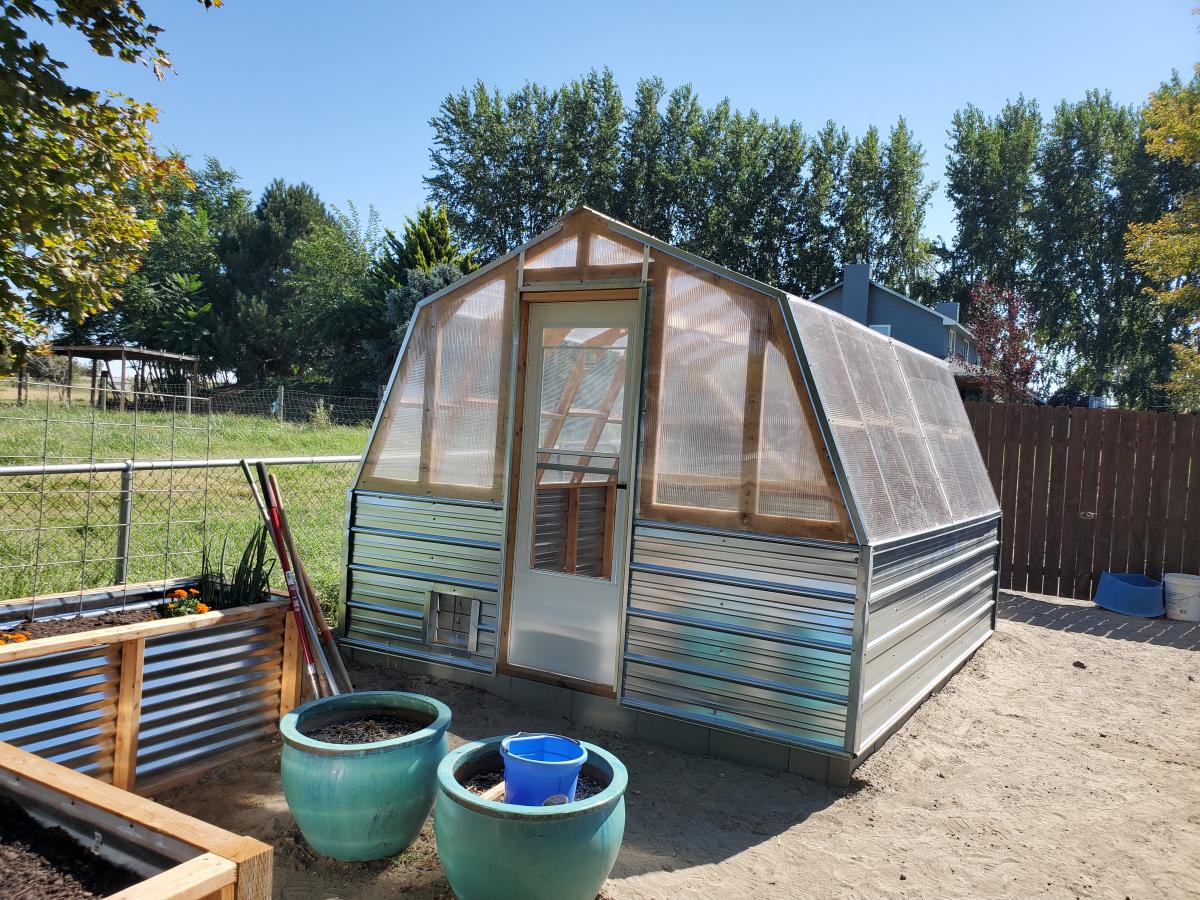
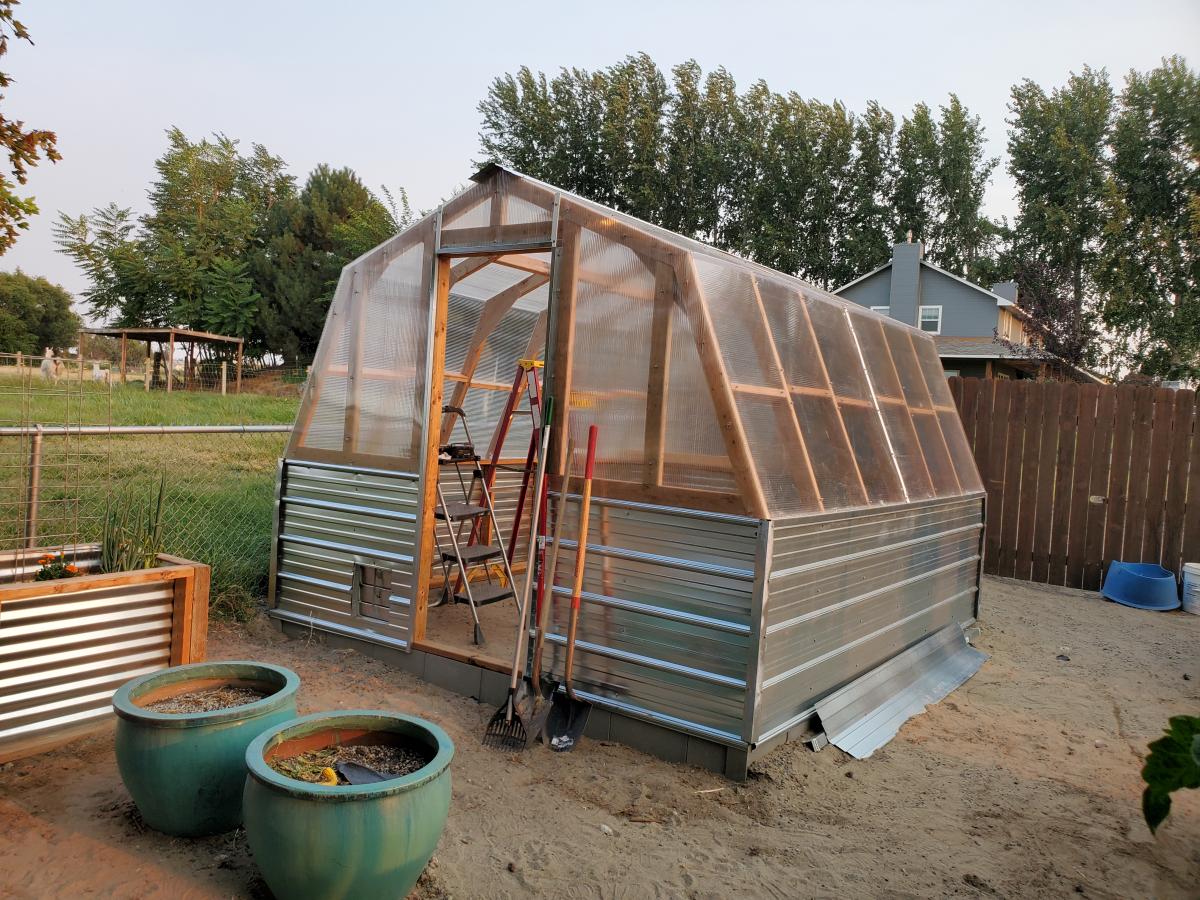
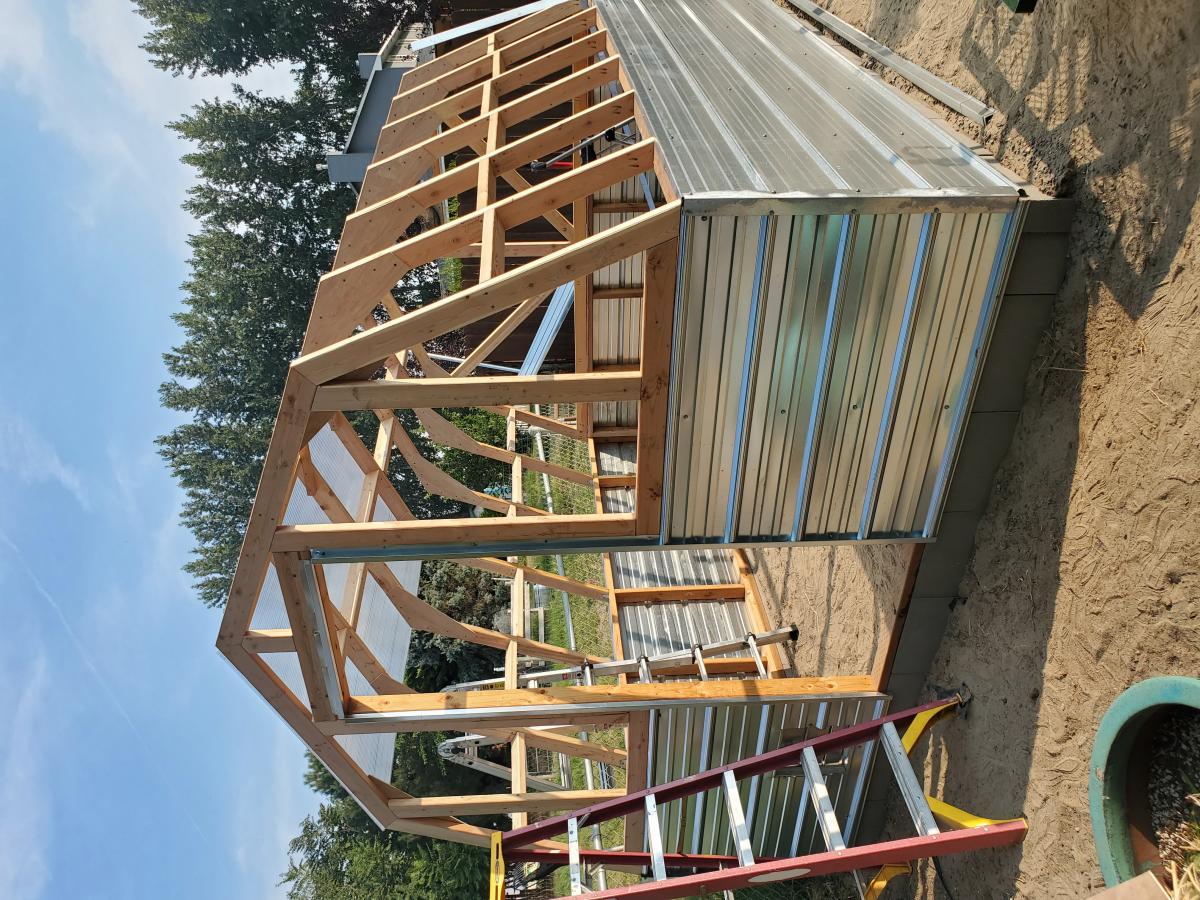
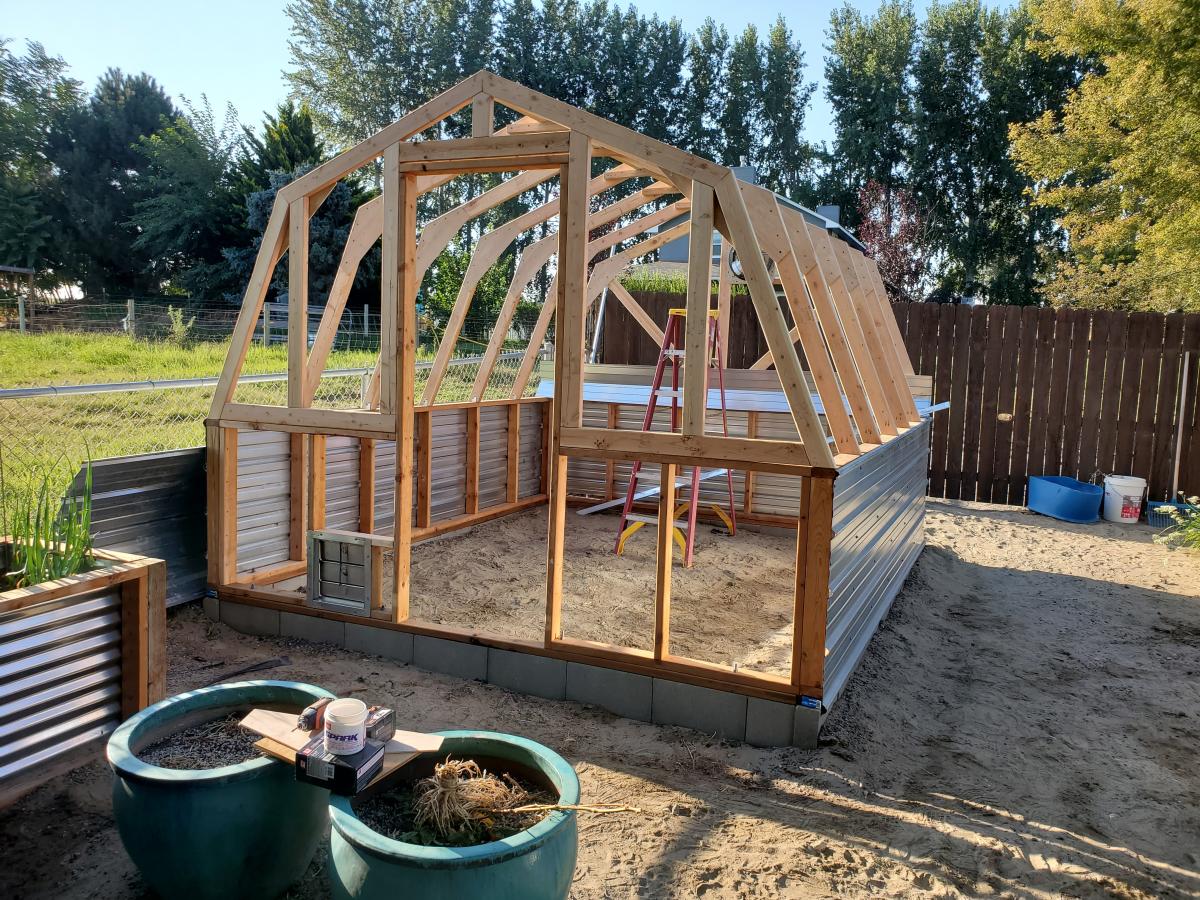
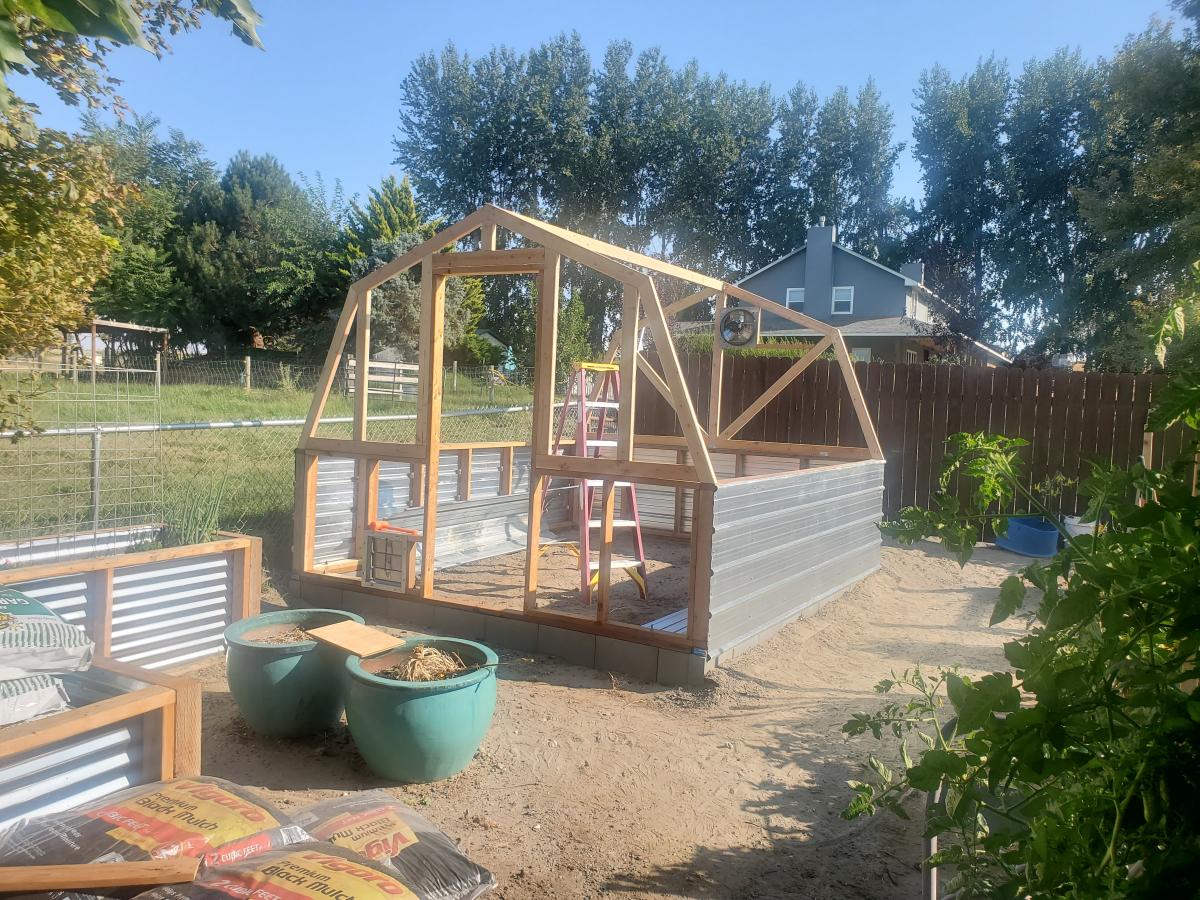
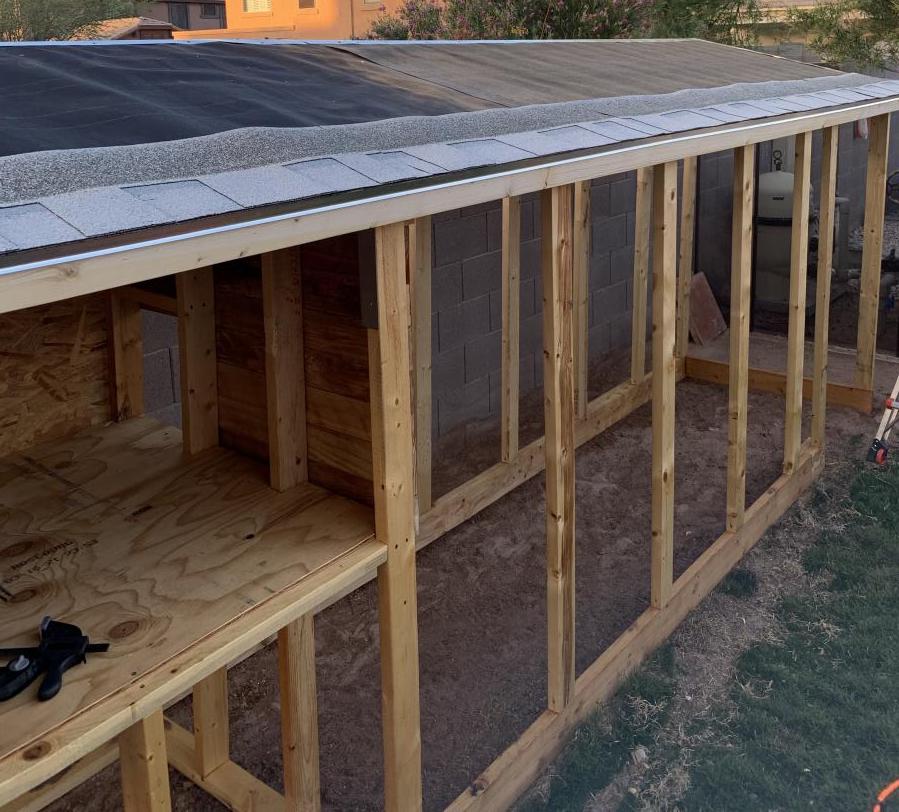
I loved this plan so much but I really wanted double doors so we made a few modifications to fit them. Can’t wait to build out the interior and start growing! Thank you for the amazing plans!
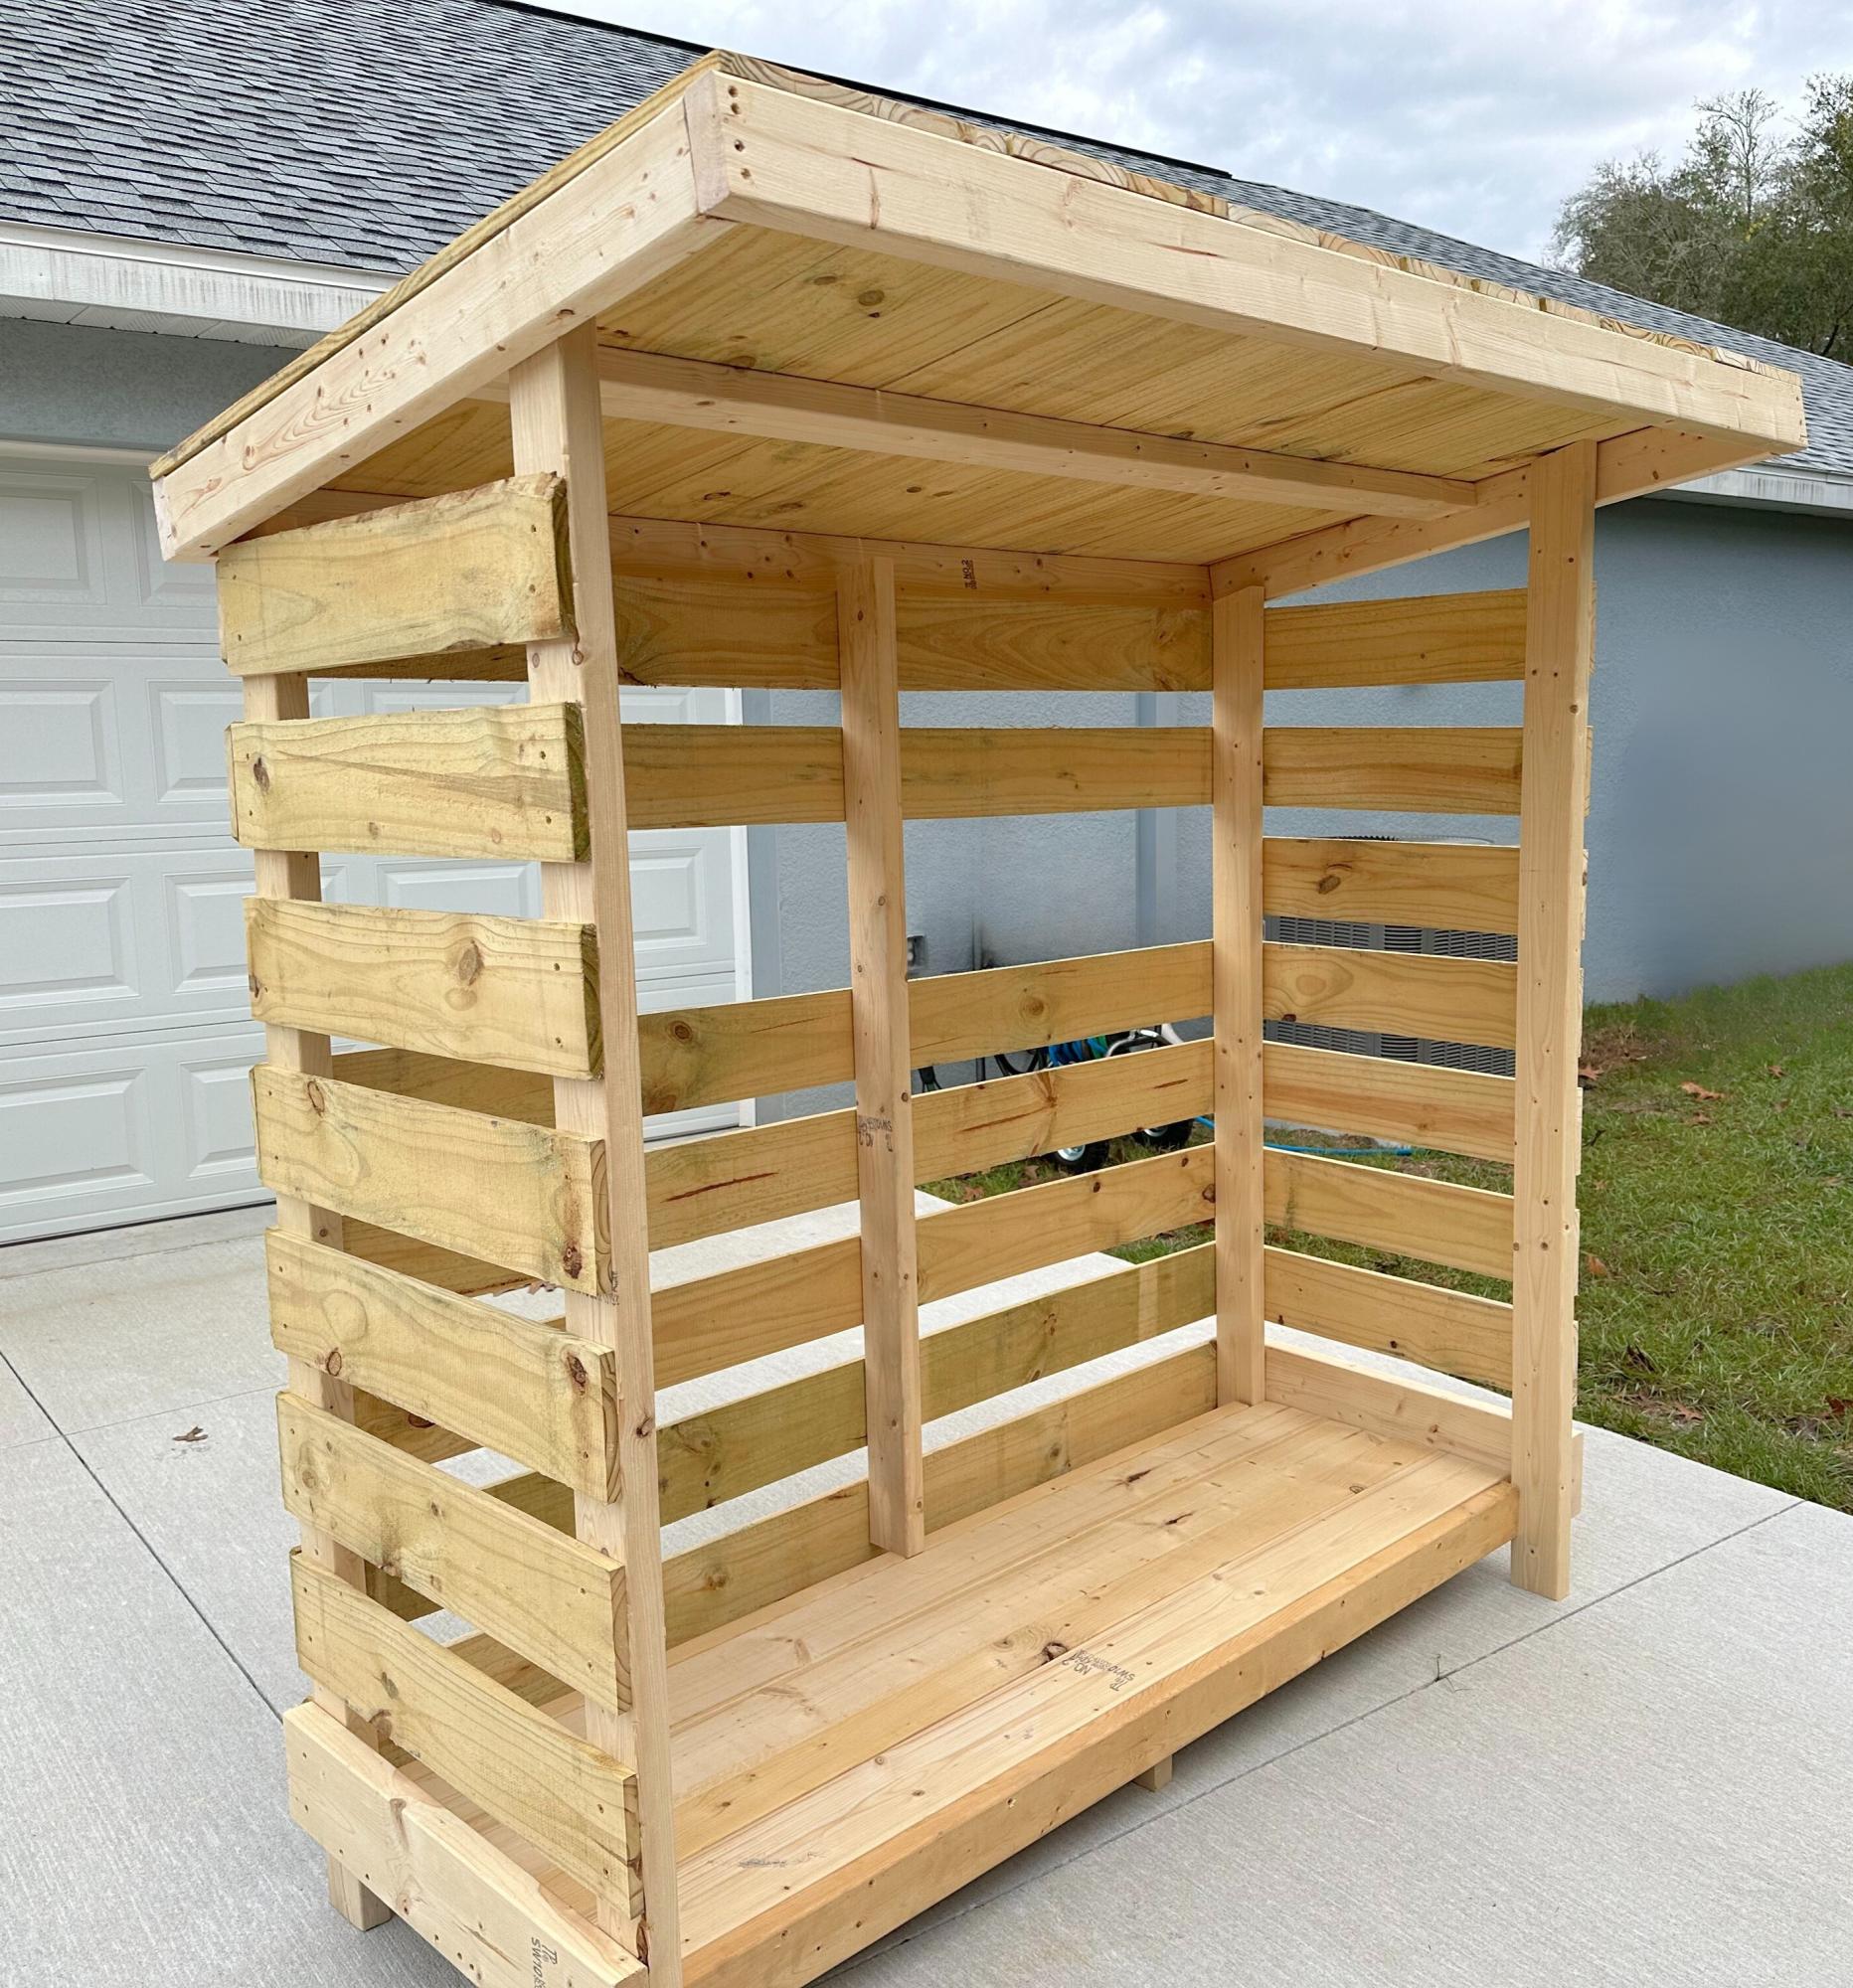
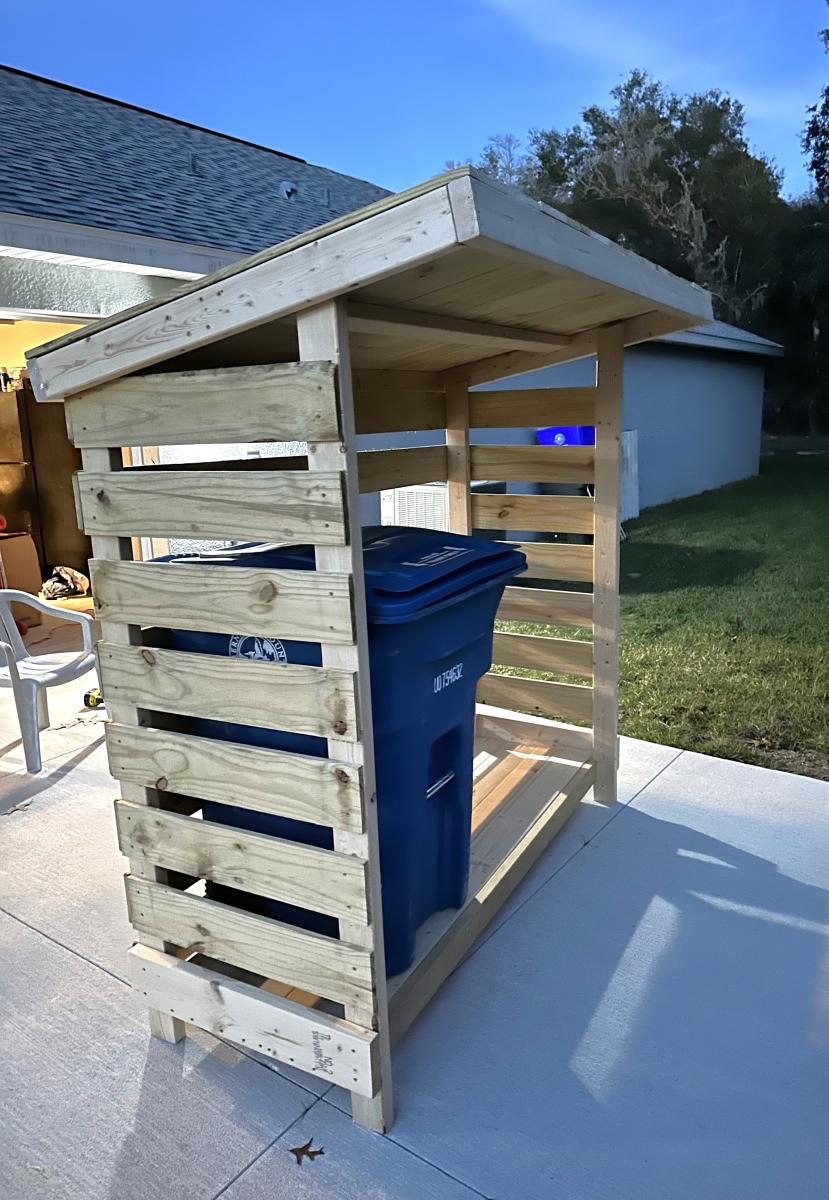
Chose the small firewood shed project as a "template" if you will .. built this to house our garbage cans and eventually put a gate on it to "help deter" the Florida black bears (we do multiple things to keep them at bay) but this will also just be a nicer looking way to keep the cans outside.
I modified the floor since the firewood shed had a floor that was suitable for, well, firewood but not so much for rolling garbage cans. Had to leave the one slat off the back for the depth of the can which I didn't completely account for in the beginning. Overall, still need to paint it and water seal it but happy with how it turned out.
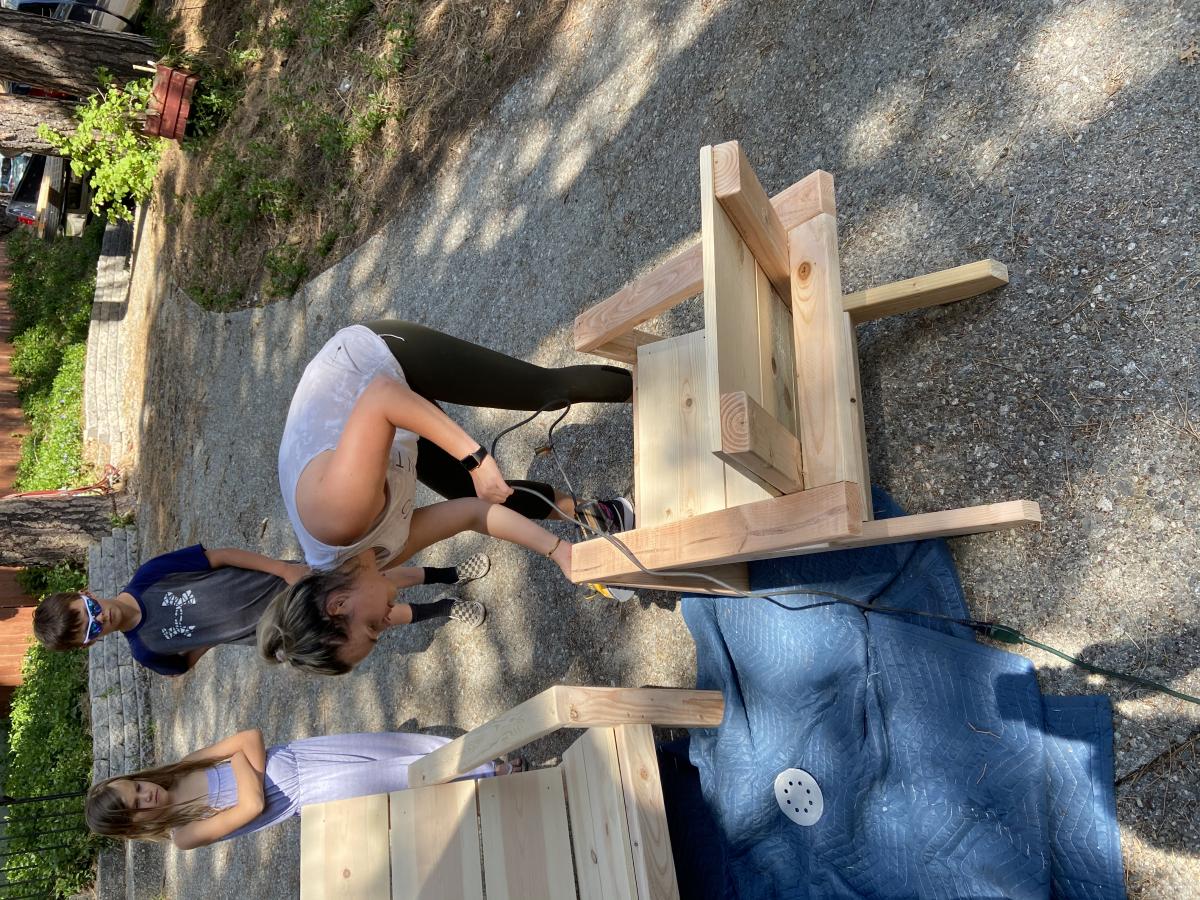
My daughter and my first project .. thank you for the easy plans and YouTube tutorials! Onward and upward ...
Thank you Ana for the great plans! We adapted the project for wood we had on hand. It is only 40 inches wide instead of 42”. Our widest pallet board was only 40”.
Thank you for continuing to inspire us! We made two couches a couple of months ago. Great plans!


This is a wishing well I made for my sister for her wedding. It will be used during the wedding for people to drop "wish you well" cards into and afterward she can use it as a planter in her yard.
I followed ideas from multiple plans here on Ana-White.com, but I didn't follow any specific plan. Mostly I followed tips and instructions for cutting angles, drilling pocket holes and some finishing tips. This is the first "big" project I've done and I"m quite proud of it.
With everything, it measures 44.5 inches high. The well measures 21 inches across and 15 inches high. The roof measures 22.75 inches by 23.75 inches.
I hope y'all like it. I worked hard on this! :)
Thank you, Ana and everyone who contributes to this site. It's been so much fun and I've got lots of ideas for more stuff. If I was any good at all at Google Sketchup I'd put up the plans but I'm not. If anyone could help me with that, that would great. :)
Have a great day!


Mon, 07/21/2014 - 20:04
Anyway you can please tell me the angle for the boards ont the walls. I reallly like your well, and would like to build this for my wife but im not sure on what angles to use thank you

In reply to wishing well by bellows86
Sun, 07/10/2016 - 17:10
The 8 sided wishing well is going to be 22.5 degrees all the way around. hopes this helps
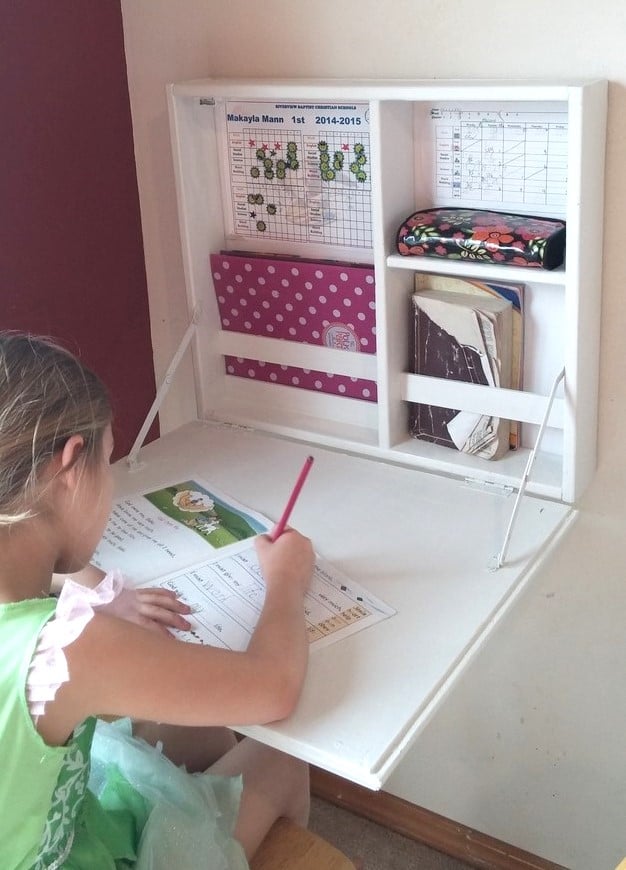
This was just what I needed! My daughter started homeschooling and we needed a place to neatlly contain her school stuff. I had her working at the kitchen table next to me, but it still felt like it lacked the school atomosphere. I removed the area for the paper holder and instead added a few support scraps to hold her folders and books upright.
It did take me awhile to get the support hinges placed correctly (I almost gave up and went with a rope or chain) but I finally got them placed correctly after placing a pencil mark on where they could lie correctly open and closed - seriously this took me awhile because just when I thought I had it, the brackets when closed would be to deep for the desk or when I placed it it correctly inside when open it wasn't 90 degrees.
The only thing I wish was that I had made it slightly shorter, because when it is open it is a little hard for her to reach the top shelf, but its not to bad and that is the height my scrap bead board was and I was to lazy to cut it =)
I had a magnetic clasp left over from another project and that has worked well to keep it closed nice and tight, I also used some foam board I had lying around for the back so that her things were not tapped/pinned on my wall. I choose the bead board on the front because A: it is what I had lying around and B: it is in my dining room so I wanted it looking a little nicer.
I had everything on hand excpet for the support brackets which cost me 2 something each at Lowes. YAY for projects under $10 bucks! Thank you so much Ana!


Thu, 08/15/2019 - 12:45
What a beautiful desk! I'm so glad you got the brackets to work, they look awesome!
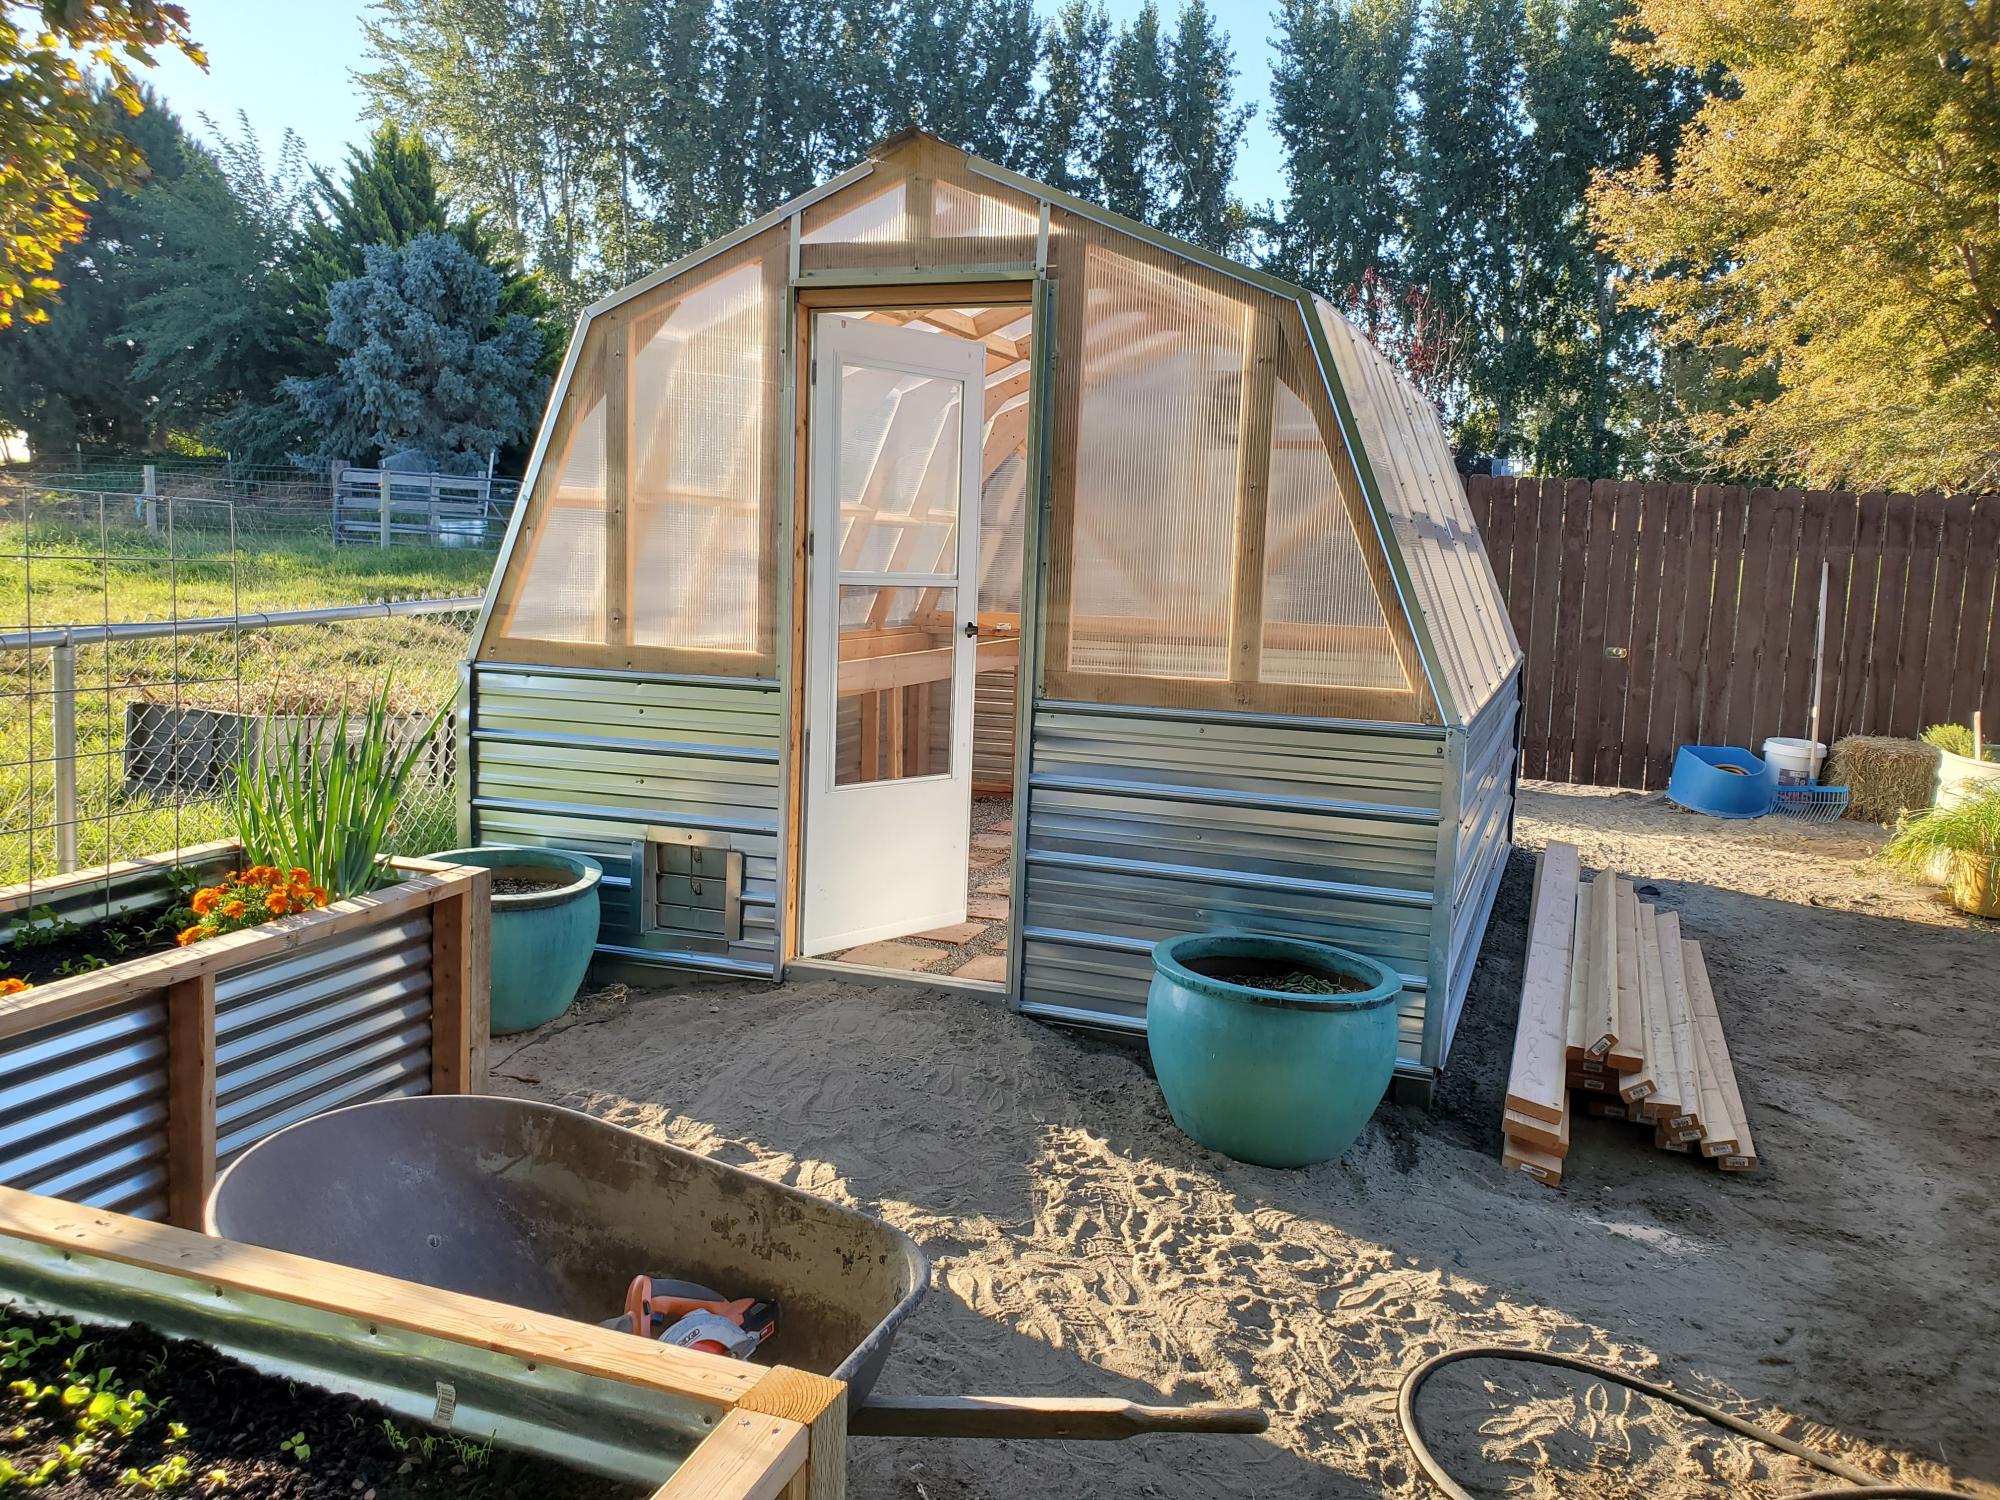
My wife and I built your green house! It is turning out awesome! I just want to take the time to say thank you for the plans. You are a great designer and generous with your sharing.
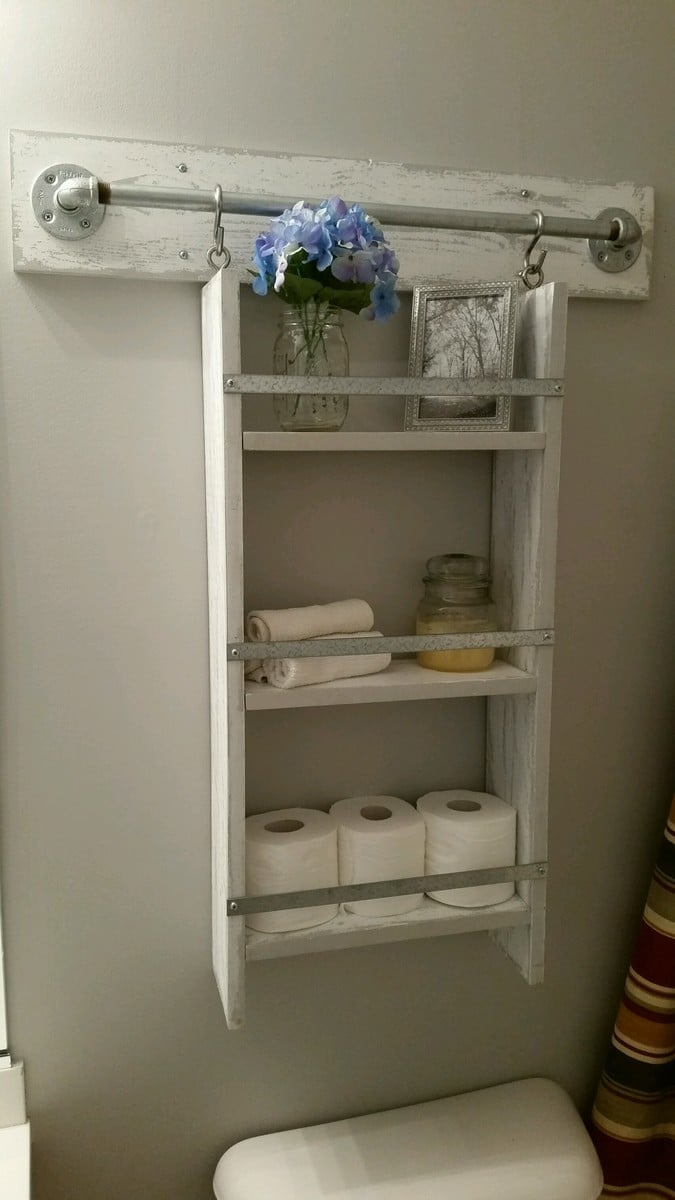
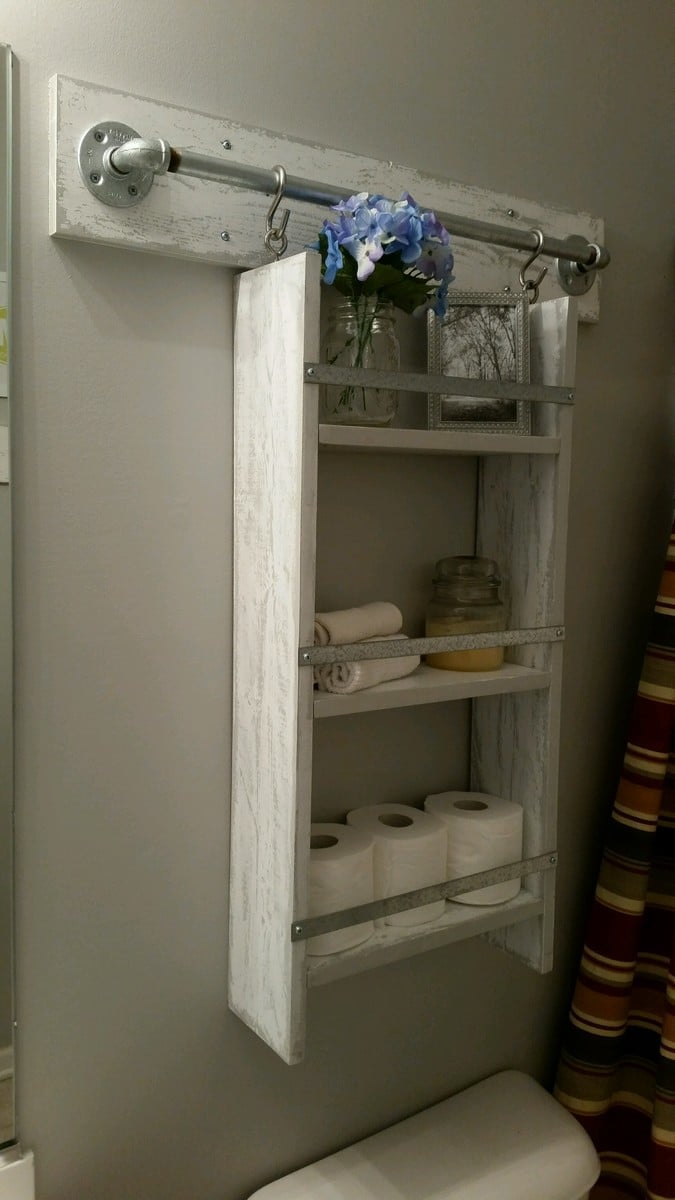
This was a very fun project to build. I pretty much followed the directions that were posted, but I used 1x6's instead of 1x4's because I wanted more storage space on the shelves. I also used 1/2" iron piping instead of 3/4" and am happy with how it turned out. Since the guest bathroom is gray, we didn't want to stain the wood and chose to do an easy to do "weathered" (directions below) look. Now all we need to do is replace the ugly shower curtain!
Wed, 03/30/2016 - 06:41
Love the weathered/distressed look you did. Can you share your technique for the paint job?
Sun, 10/30/2016 - 19:55
Love this! What is the length of the iron pipe and also the board that's mounted to the wall? Do you remember what color gray you used?
Tue, 02/07/2017 - 21:31
What is the measurements for the metal pipe and also the board itsbibe.

Built in bookcase with lighting and power outlets in cupboards for audio and DVD equipment to feed to the wall mounted tv (to the left).
The photo with the lights is when it was unfinished and I also decided that I didn't like the inset doors and so made new overlay ones. Now I have four doors I need to use on another project...


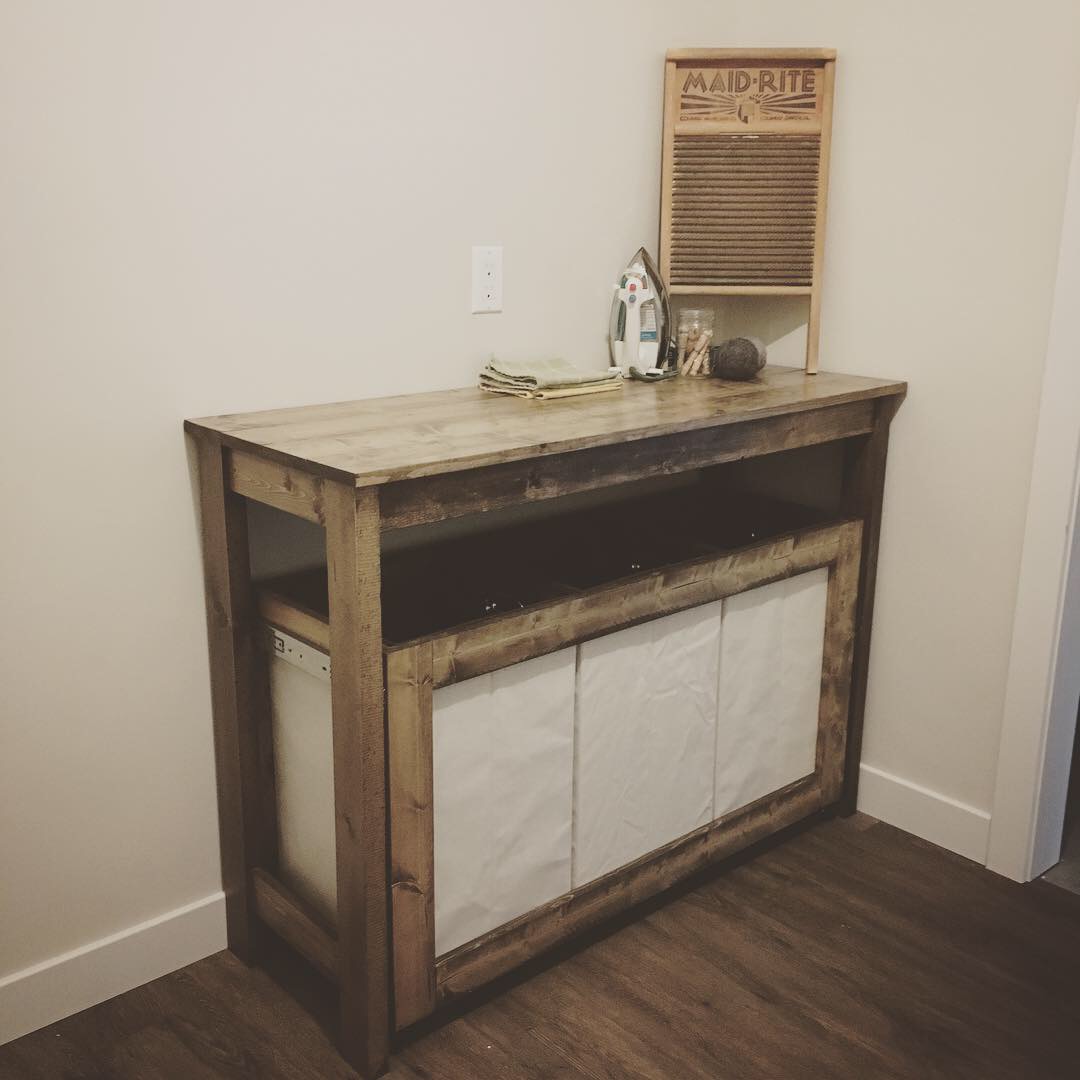
This plan was a lot of fun!! I have been wanting a laundry sorter for some time now and this one fits in my laundry room perfectly!!
The pull out works awesome!!


I made this bed for my 6 year old daughter. I loved Anna's Loft Bed plans, but she wanted a bigger play area underneath. So I modified the twin loft bed plans to fit a queen mattress. I also added extra supports for the mattress, and I used PureBond plywood on top of the supports for the mattress to sit on.
That's the Farmhouse Toddler Bed underneath. My younger daughter inherited her big sister's twin bed, so the toddler bed was put to use in the new "playhouse."

Wed, 02/09/2022 - 15:31
We’ve been looking for exactly this!! Can you share your modified plans and the list of lumber and supplies needed?
Sun, 09/02/2012 - 12:45
I think it's great that you modified it to a queen! I live a studio and NEED something like this. Could you share the modifications? It looks beautiful = )
Sun, 09/02/2012 - 20:58
The changes I made were:
End planks cut to 63"
Top back guard and front and back rails cut to 87"
The top guard rails on ends cut to 66"
I measured for the mattress supports and the front guard rail after the rest was completed.
You should also measure for the bookcases after the rest is completed, but each of mine wound up being about 31" wide.
Everything else was pretty much the same.
Hope that helps.
Thu, 11/01/2012 - 08:24
This is wonderful - I've been looking to make something like this for an urban efficiency (adult) apartment! Thanks so much for sharing your modifications!
Mon, 07/29/2013 - 14:08
Will the height of the bed allow for adults to stand under it? If not what modifications should be made to make the height fit a standing adult? (the highest being 6'1" male) Thanks! =D
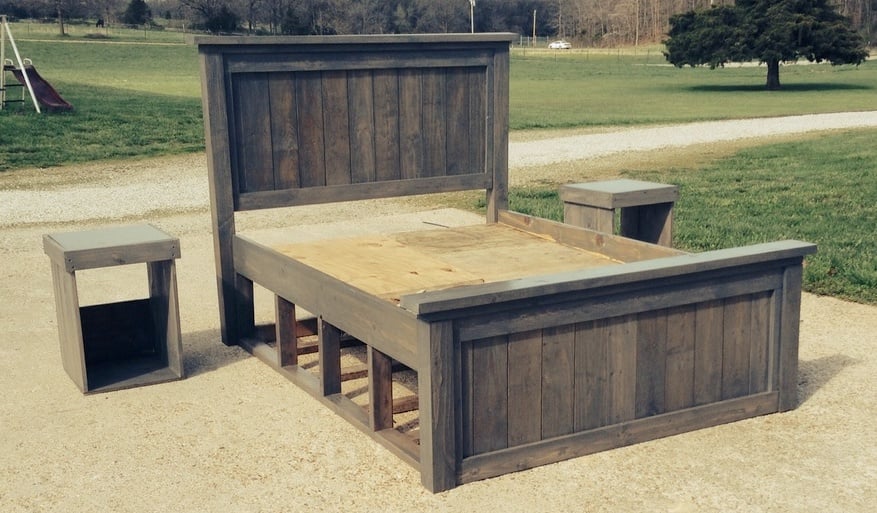
Started with the farm house queen bed and changed the plans. I made the head/footboards 3 inches taller and took the panelling on the footboard all the way to the floor. I made storage underneath the bed and night stands. I'm using old apple crates for the storage. I made the night stands with the crate in it too to match the bed. I used a single piece of 18x18 ceramic tile for the top of the nightstand. The set is stained Minwax classic grey. I used a mixture of wood. Oak and pine, surprisingly it stained good and matched up. The crates aren't in the pictures yet. We have an older house with small rooms so the storage is perfect. The grey finish looks good for the old wood look with newer wood used

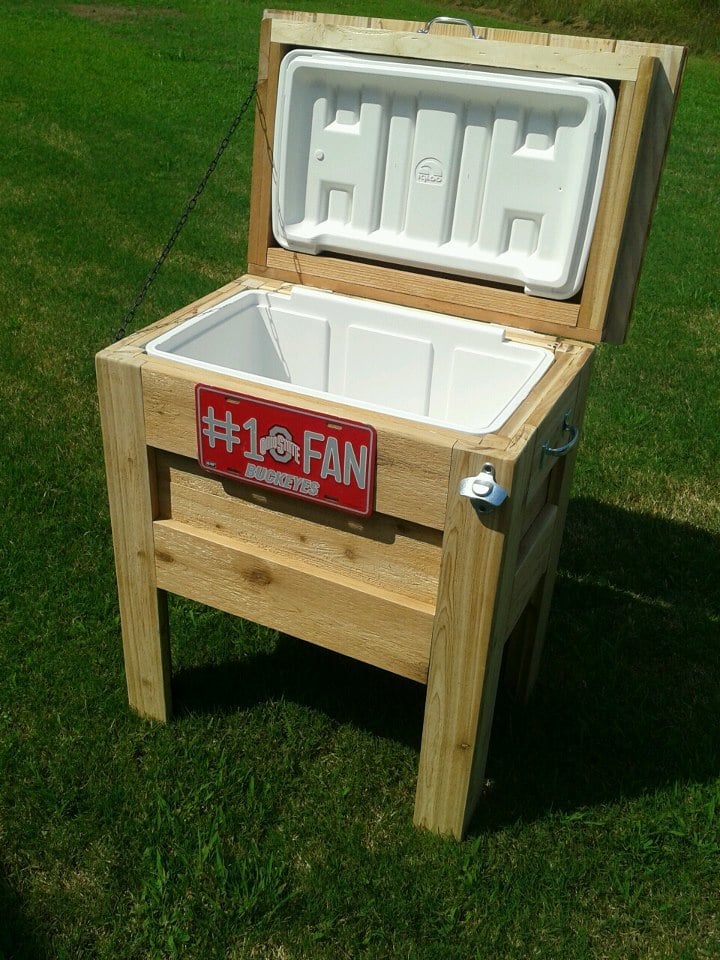
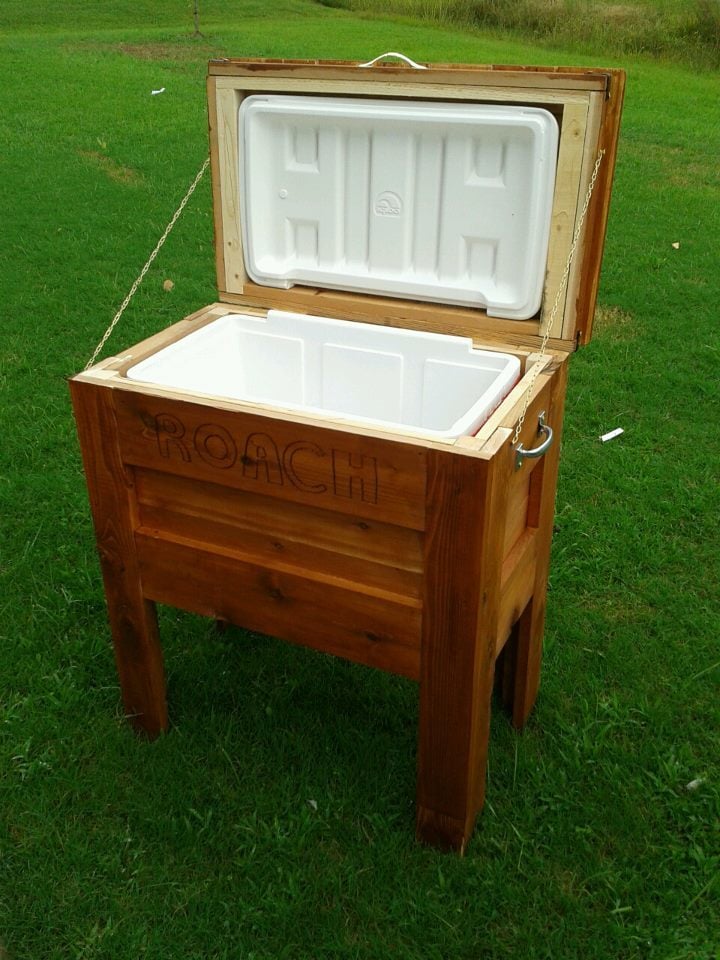
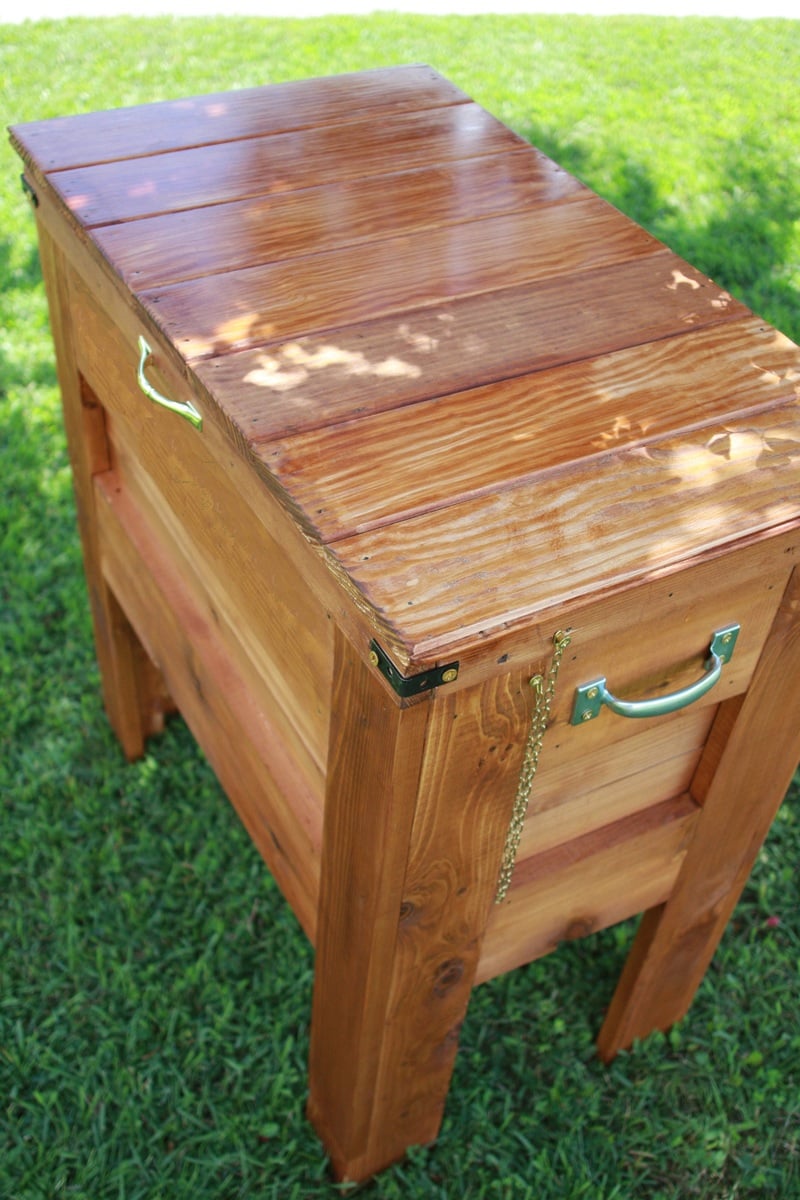
An Outdoor Wooden Cooler is the perfect way to accent any deck, patio, or garage. Can be made from Cedar, Pressure Treated, Cyprus, etc. Sizes can vary from small 28 qt coolers to Large 120 qt coolers capable of holding hundreds of drinks. These coolers can be themed for your favorite sports team, favorite hobby, or anything of your choice. Engraving or wood burning is available.
Fri, 08/31/2012 - 09:52
Well, actually, two. My beer loving son-in-laws would love this, and Christmas is coming! Do you happen to have any "step-by-step" directions you'd be willing to share? I can figure out the dimensions but it would be really helpful to read - or see - the components and how you put it all together.
Thanks for sharing!
In reply to I want to make one of these by sgilly
Fri, 09/28/2012 - 11:43
I had to make a new page because of some password issues. Thanks for comments. I have no plans yet, I've built so many it's sort of muscle memory now. Shoot me an email at [email protected] and perhaps I can help.

Sat, 09/01/2012 - 10:59
I want to make one too. Is the lid tricky at all?
Fri, 09/28/2012 - 11:41
I had to make a new page because of some password issues. Thanks for comments. I have no plans yet, I've built so many it's sort of muscle memory now. Shoot me an email at [email protected] and perhaps I can help.
And no, the lid style I like is nothing more than some tongue~n~groove boards cut to length, attached with pocket holes and nailed to the lid frame. Tongue~N~groove is optional of course, you could just use regular boards.

Thu, 03/14/2013 - 21:08
I don't mean to hijack Adam's great build, but I have some step-by-step plans available for a cooler I built with a similar style. It has a 2x2 frame with old fencing facing. For those of you looking for plans/tutorial http://www.killerbdesigns.com/rustic-cooler-a-how-to/

Thu, 05/07/2015 - 07:20
My husband used a similar design to Adam's but made it a double. :) He also added wheels and a bottle opener/cap catcher. Great work Adam!
http://purposefulproductions.blogspot.com/2015/04/diy-wood-drink-cooler…
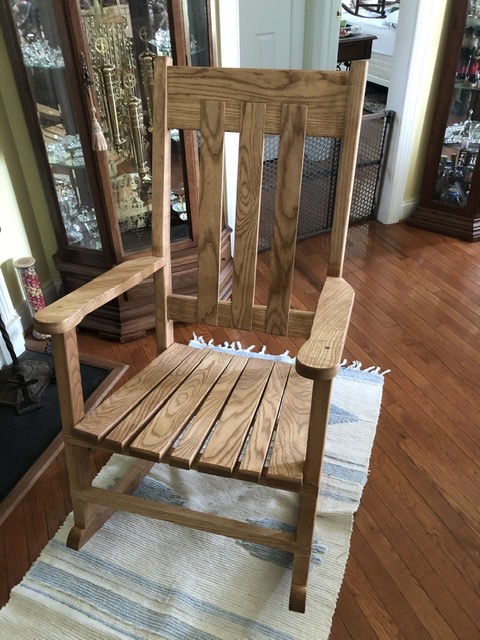
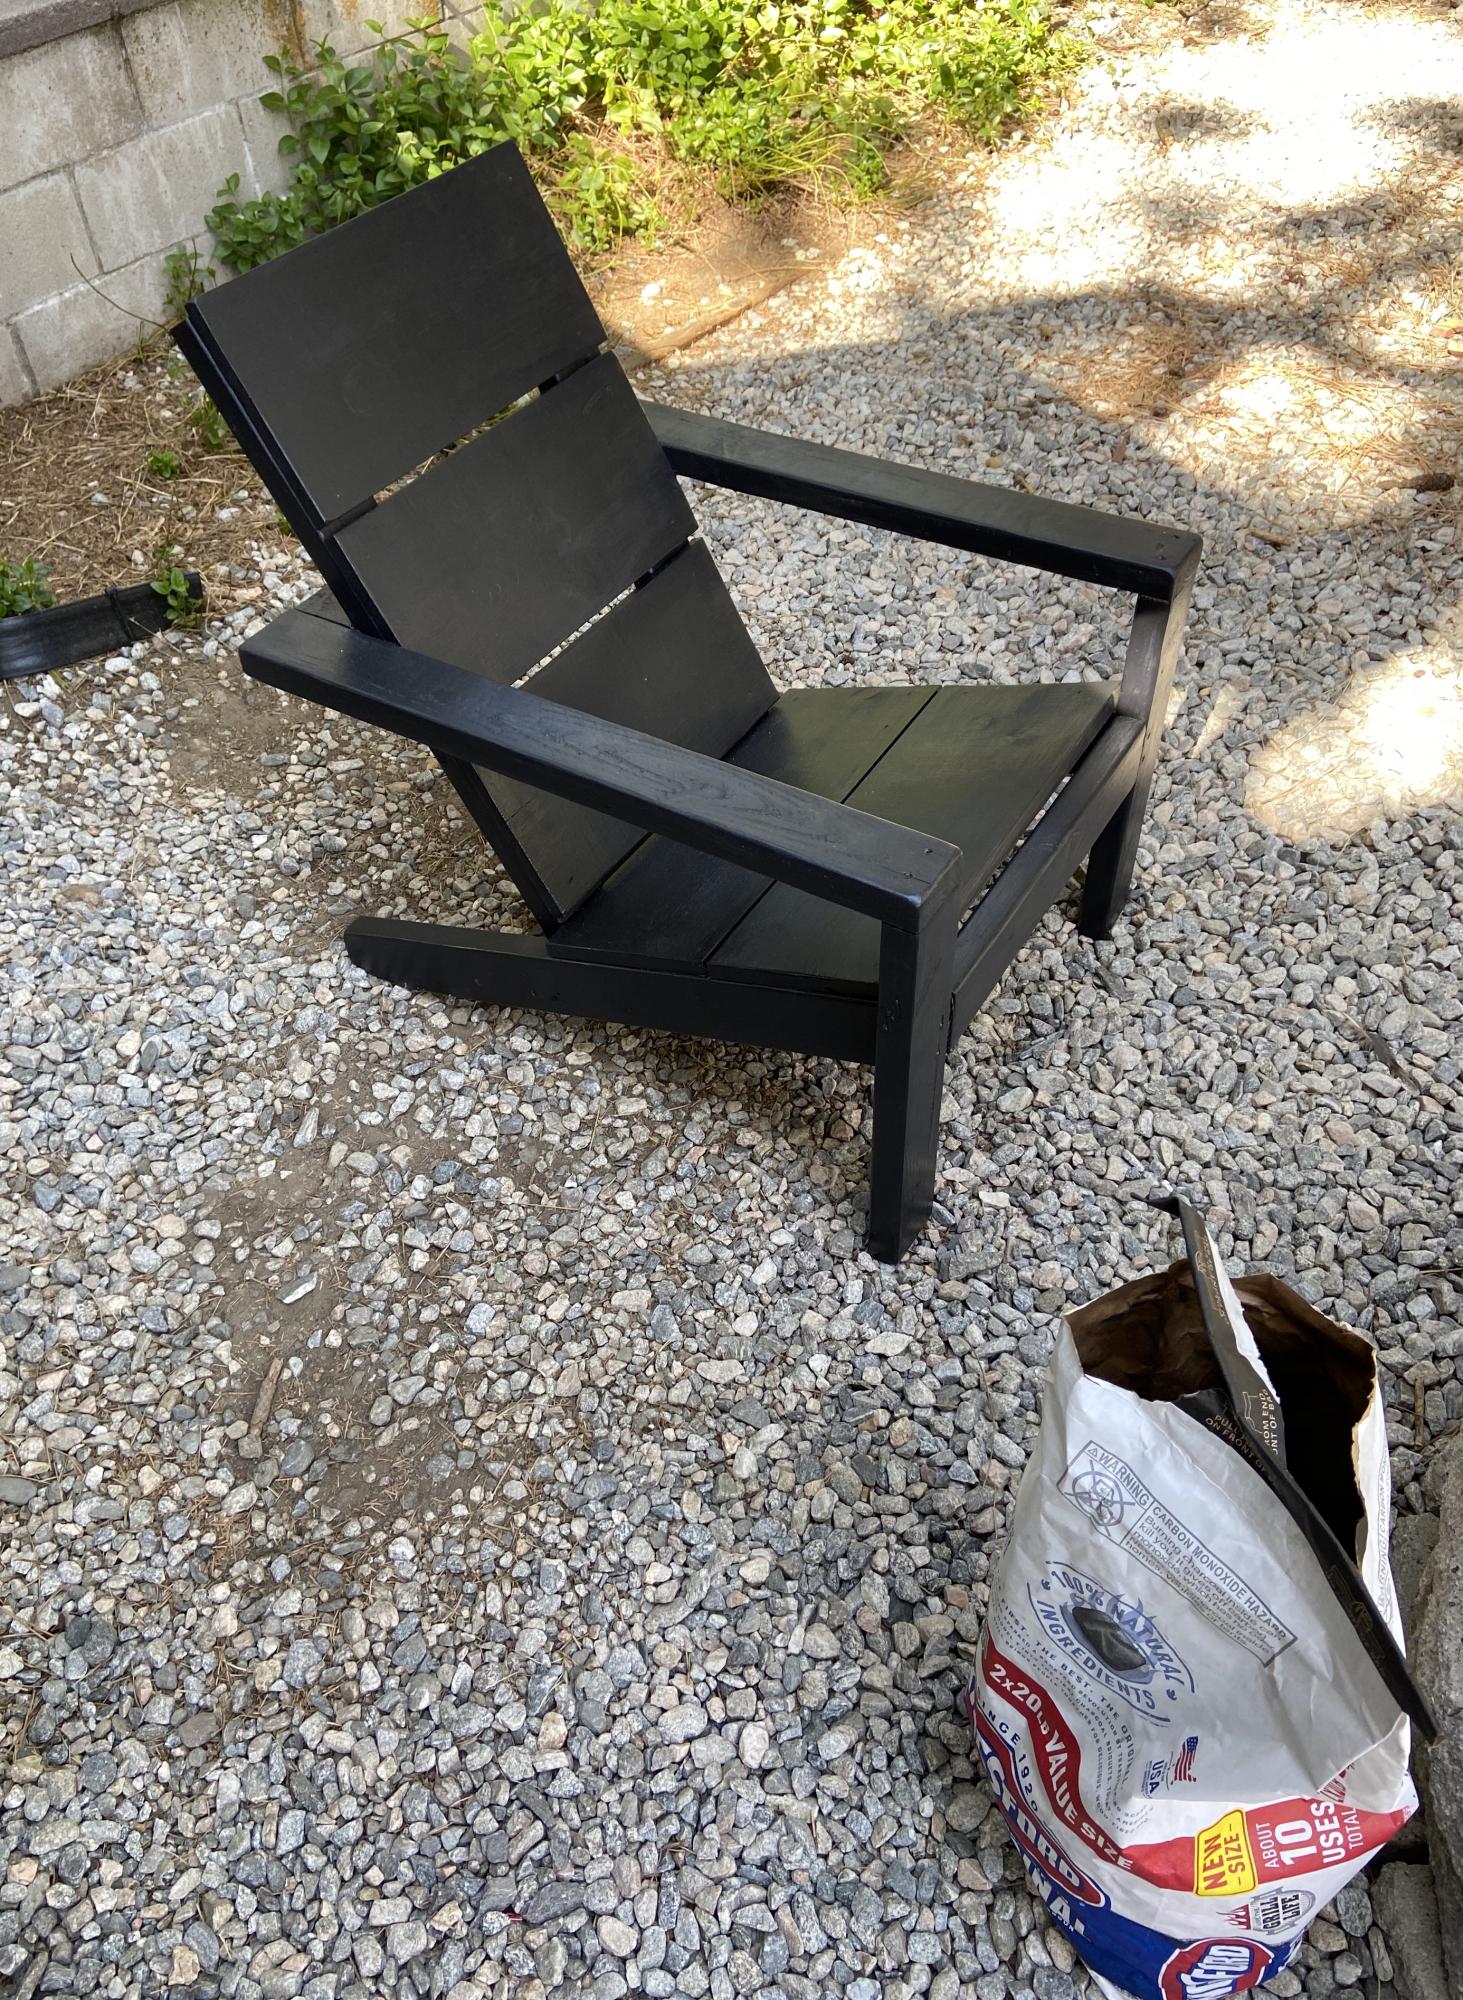
Getting ready for retirement, so I thought I needed a rocking chair.
No plans, just built what looked and felt right.
Thu, 03/18/2021 - 01:27
Lovely chair. Nice proportions. Would like to copy it. Have you got any plans, sketches, or dimensions to share?
Fri, 02/10/2023 - 13:10
Love this rocking chair! Do you have any dimensions or plans. I would live to take this project on. Thank you.
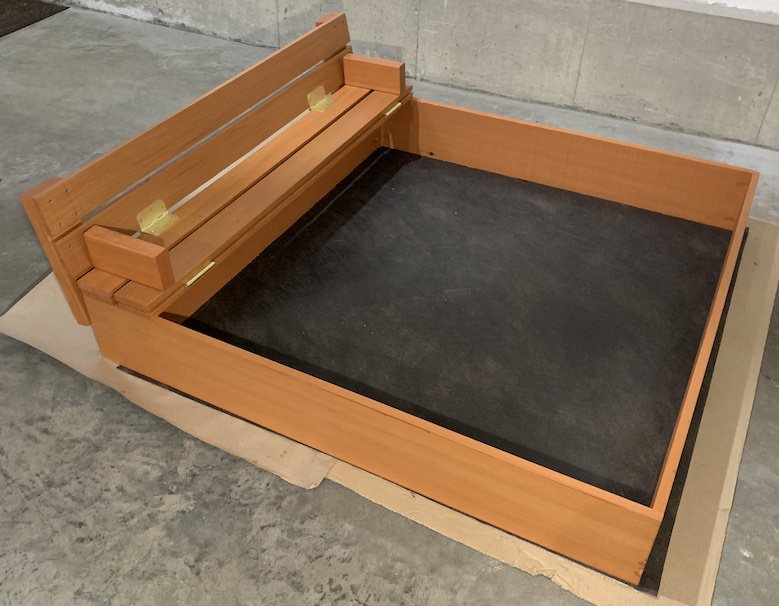
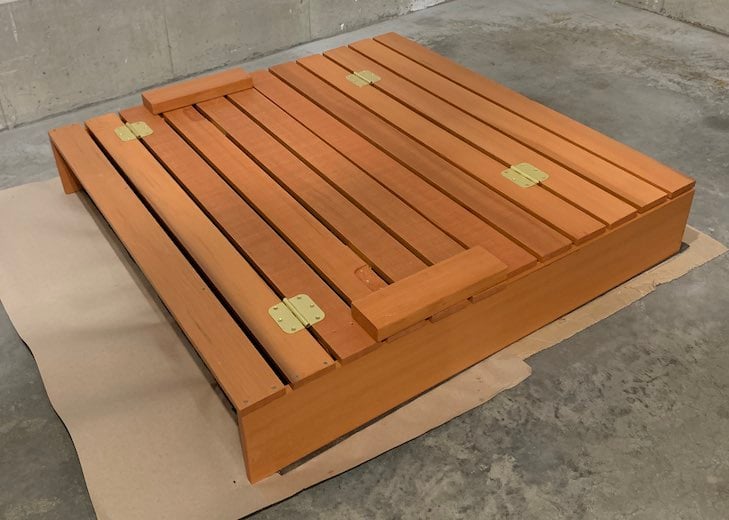
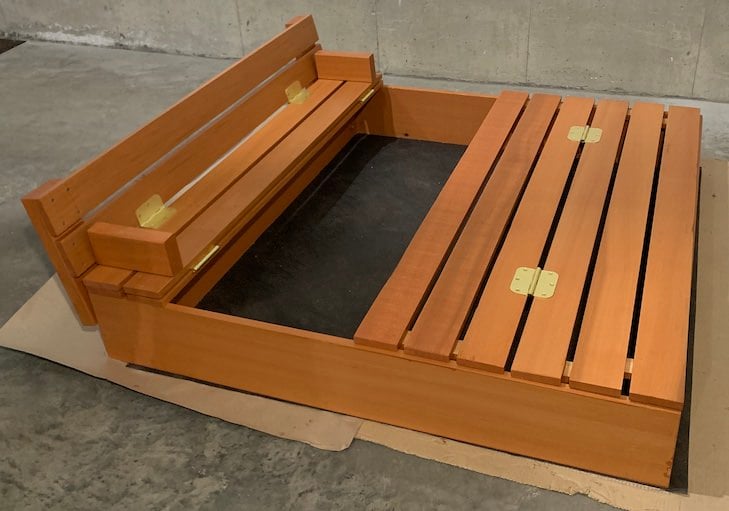
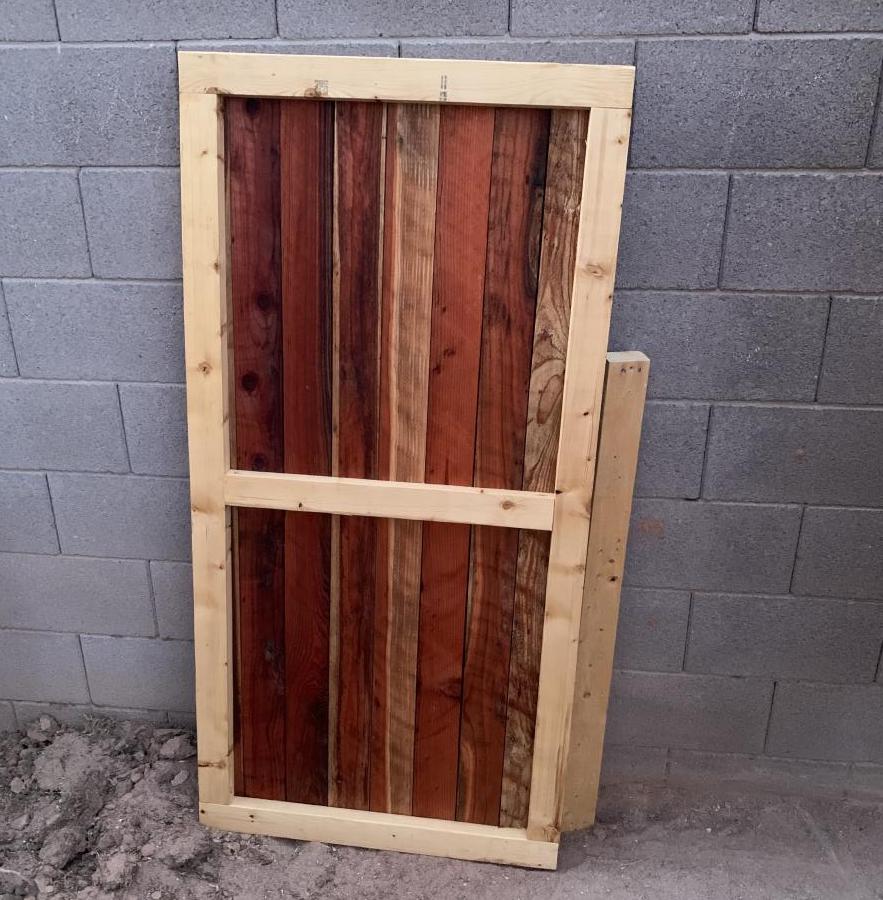
Followed the original plan except below changes:
- Only one seat to make it more spacious
- Made 2 groups of 3 planks each and connected both using hinges so it can cover the end without seat
- Stapled Hardware Cloth with landscape fabric
Cedar wood was the most expensive thing in this project, since I would want it to last long.
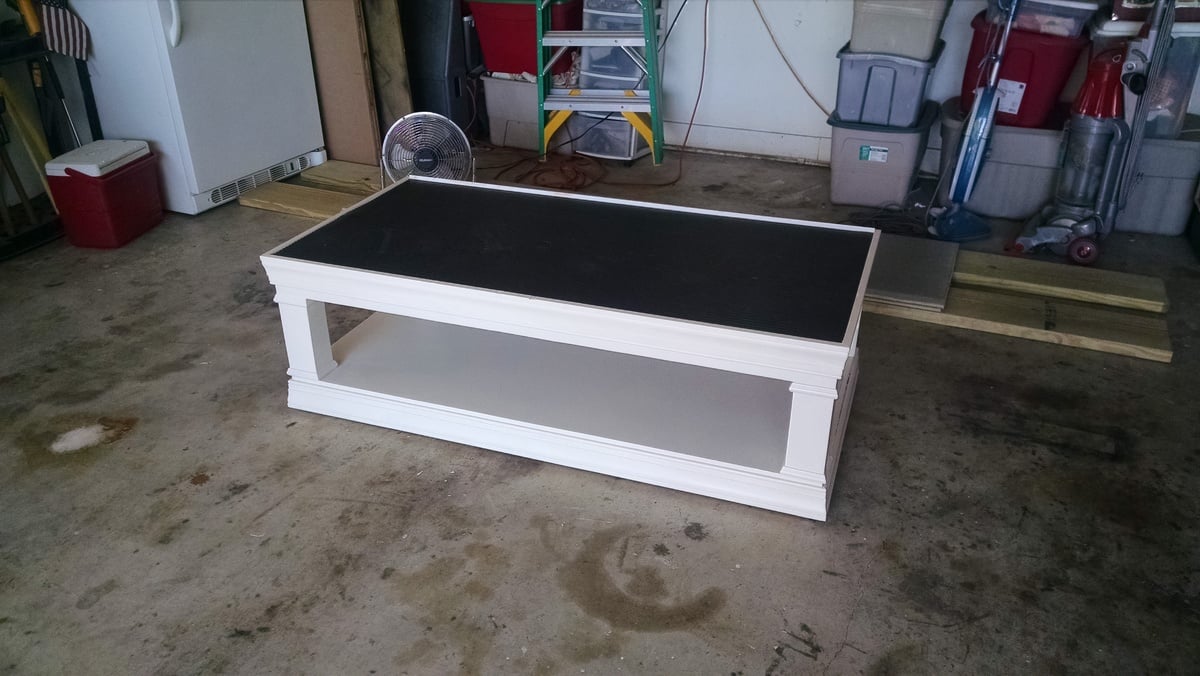
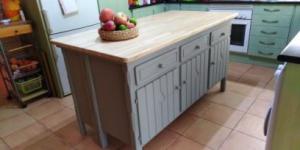
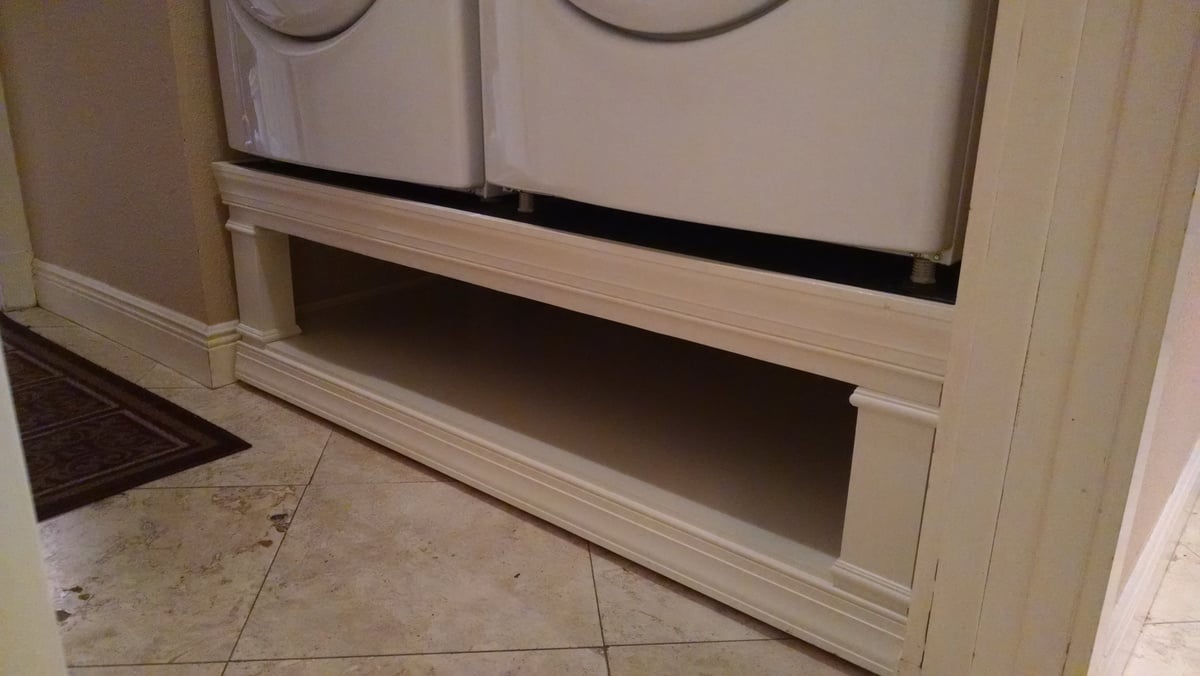
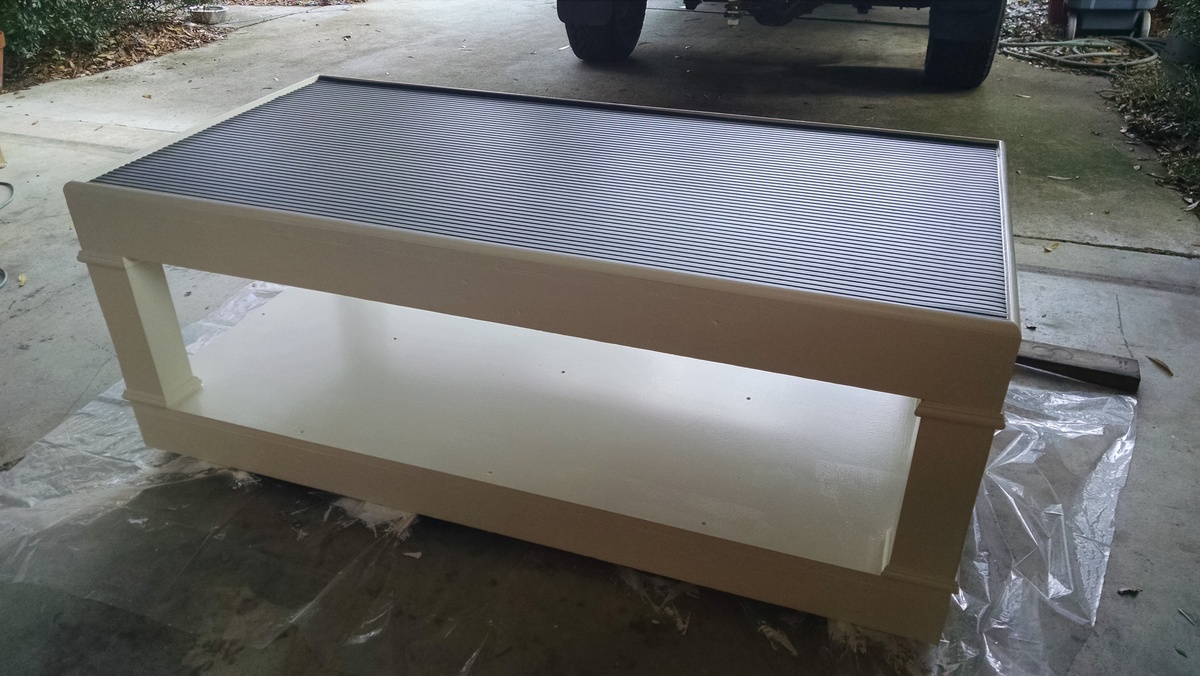
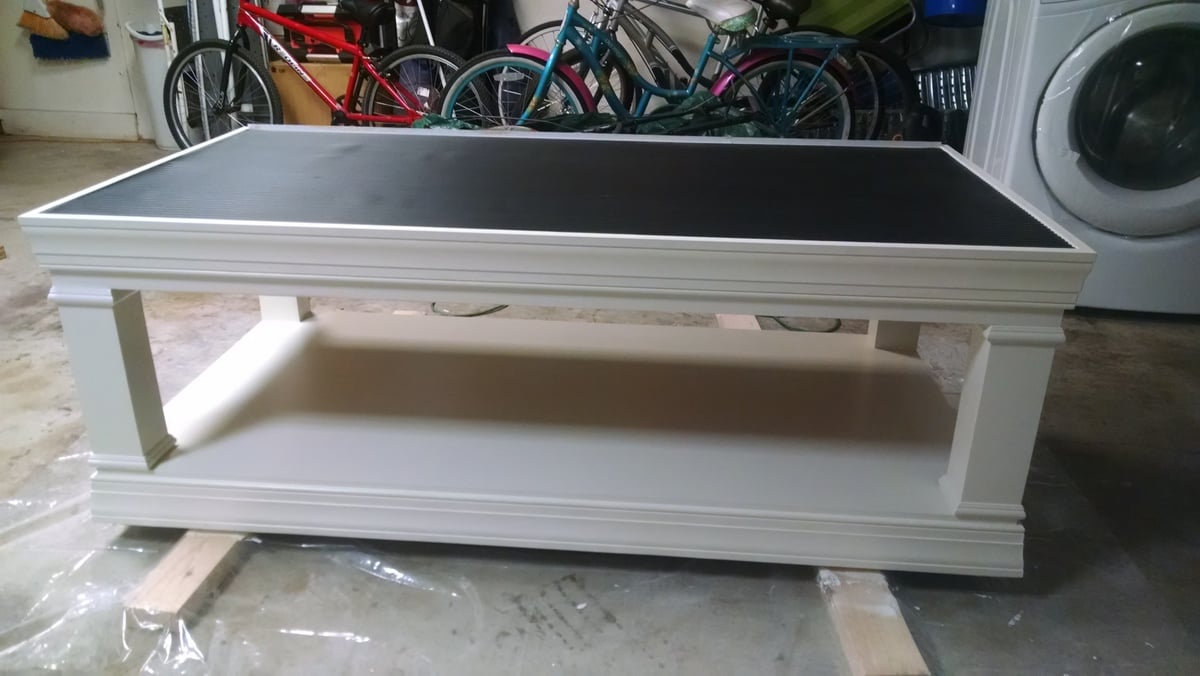
I ended up making three sets of these pedestals this month!
One set was for my In-laws, one for a friend and finally one for us. The two sets I gave away have a 12.5" opening underneath to accomodate two laundry baskets stacked inside each other for a total of six which is pretty good for most households. Our pedestal could only have a 9" opening due to the overhead cabinets in our laundry room so the shelf will not accomodate standard laundry baskets which is kind of a bummer.
I kept one pedestal fairly minimalistic because it's going into a laundry room off an outside patio, I added a bit of quarter round trim all the way around the top edge to act as a guard rail just in case the washer or dryer tries to travel off the platform.
The other two I trimmed out identically they just have different post heights to fit the space they are intended for. I used a little more trim than on the first pedestal, I believe it's window sash trim. Just as on the first pedstal I wanted a guard rail of sorts so I left the window sash trim with about a 1/4" reveal on the three visible sides and used quartter round on the back.
I used a very heavy black rubber runner I found at Home Depot which is sold by the foot on top of each pedestal as an additional water barrier and vibration dampner. I think this finished it off and really works well, I'm very glad I decided to add that.
My version was inspired by Ryans modification of the original plan so thanks to Ryan and Ana for these awesome pedestals, my wife, In-laws and friend love them!

Wed, 06/29/2016 - 14:17
Glad I could help. Yours turned out great. I should have thought of creating more than one while I was doing it. Every time someone sees them, they ask me to make them one. Ain't nobody got time for THAT! :)
Sun, 01/29/2017 - 17:29
Thanks for sharing the detailed information of your builds. It's been a while since you built, have you noticed any sagging? They look solid!
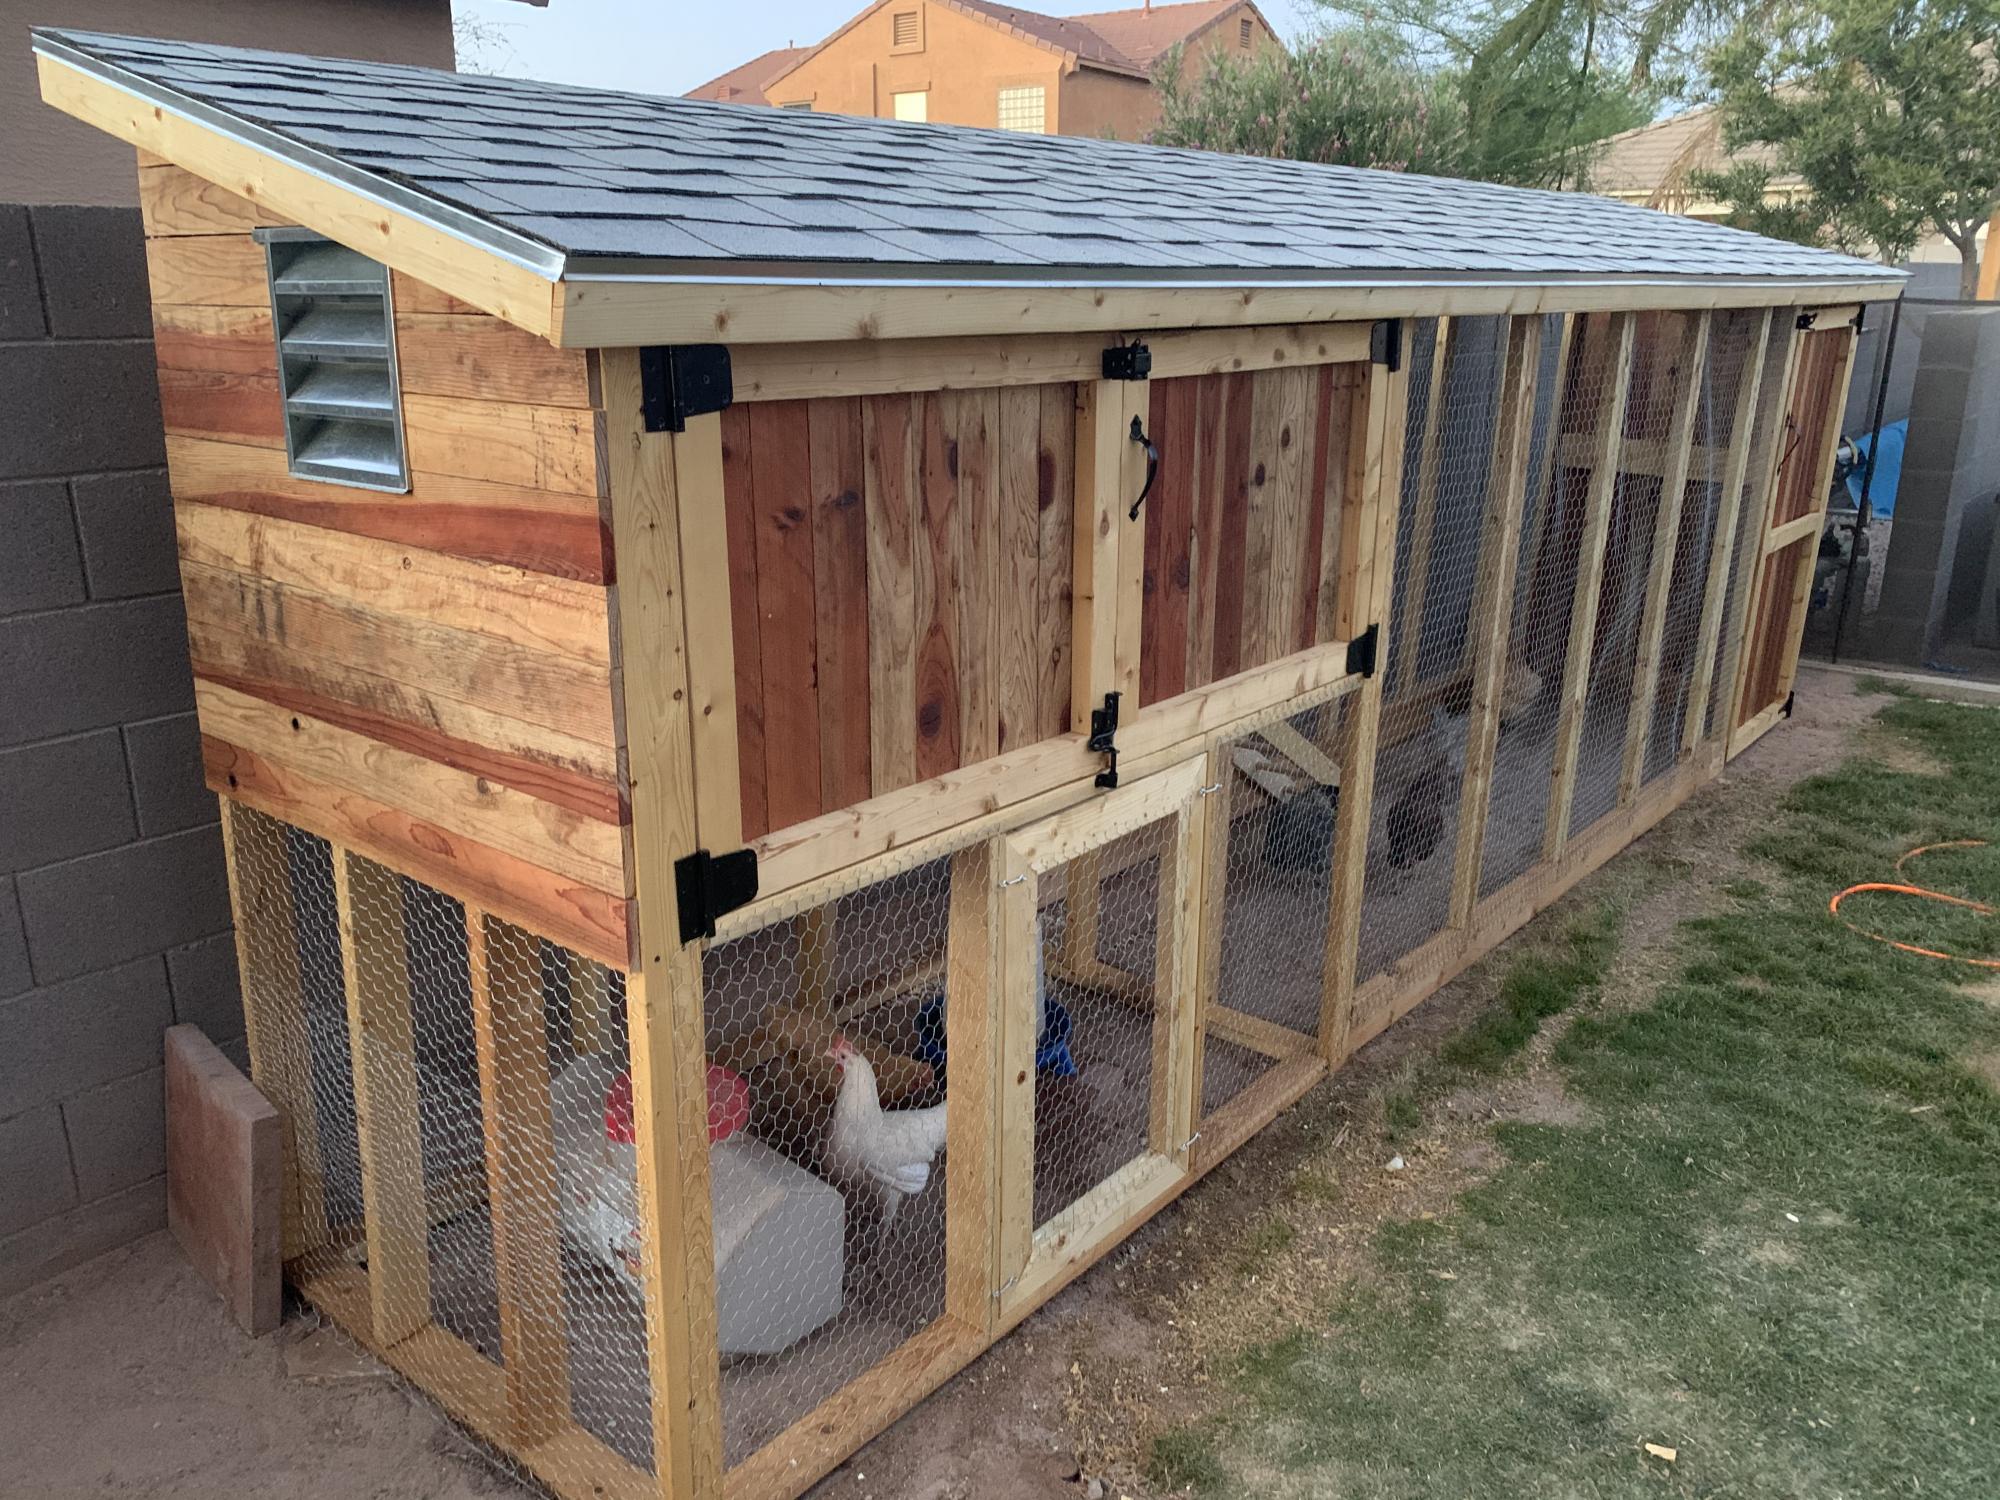
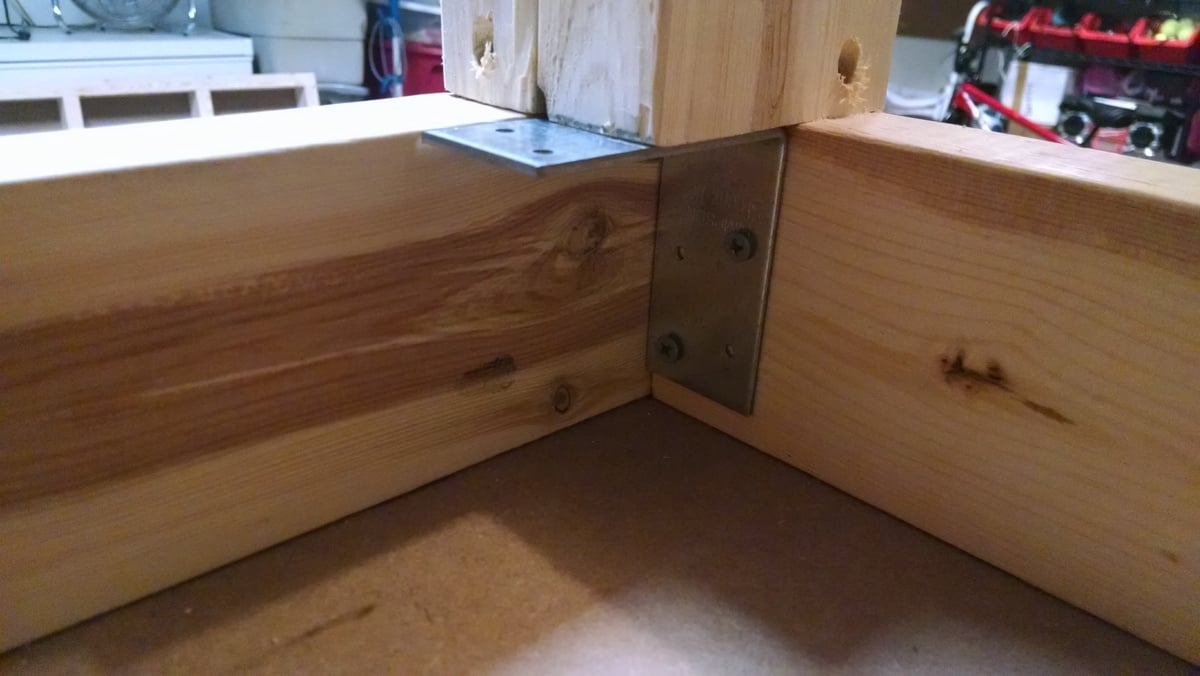
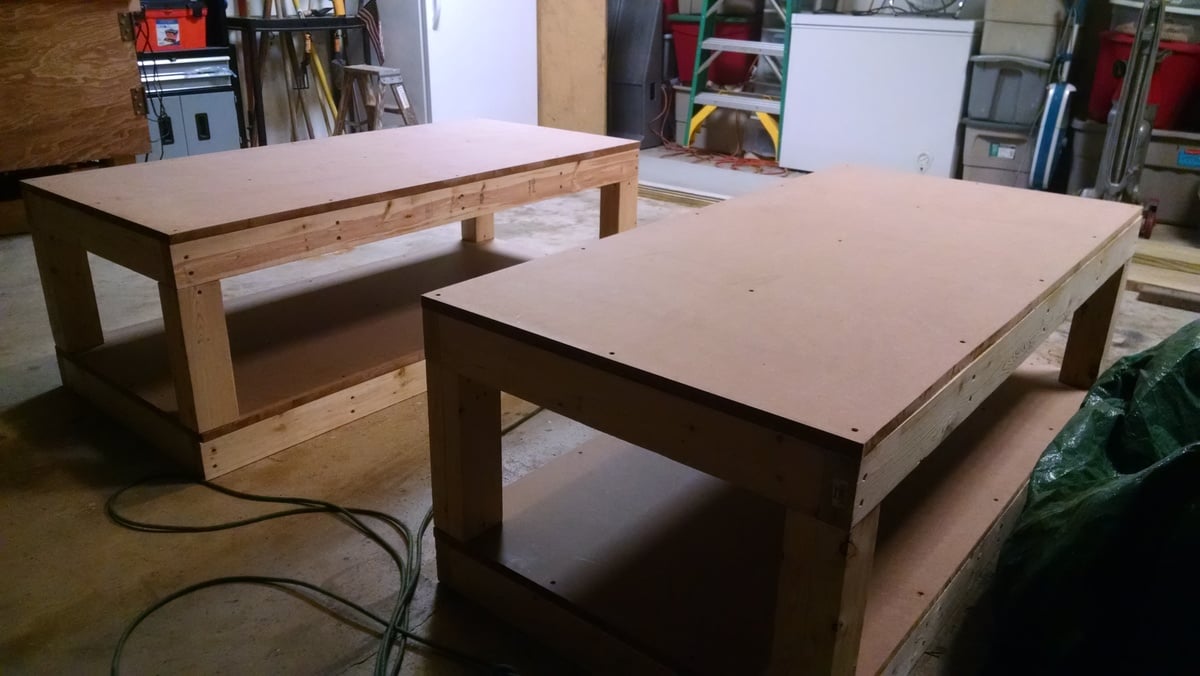
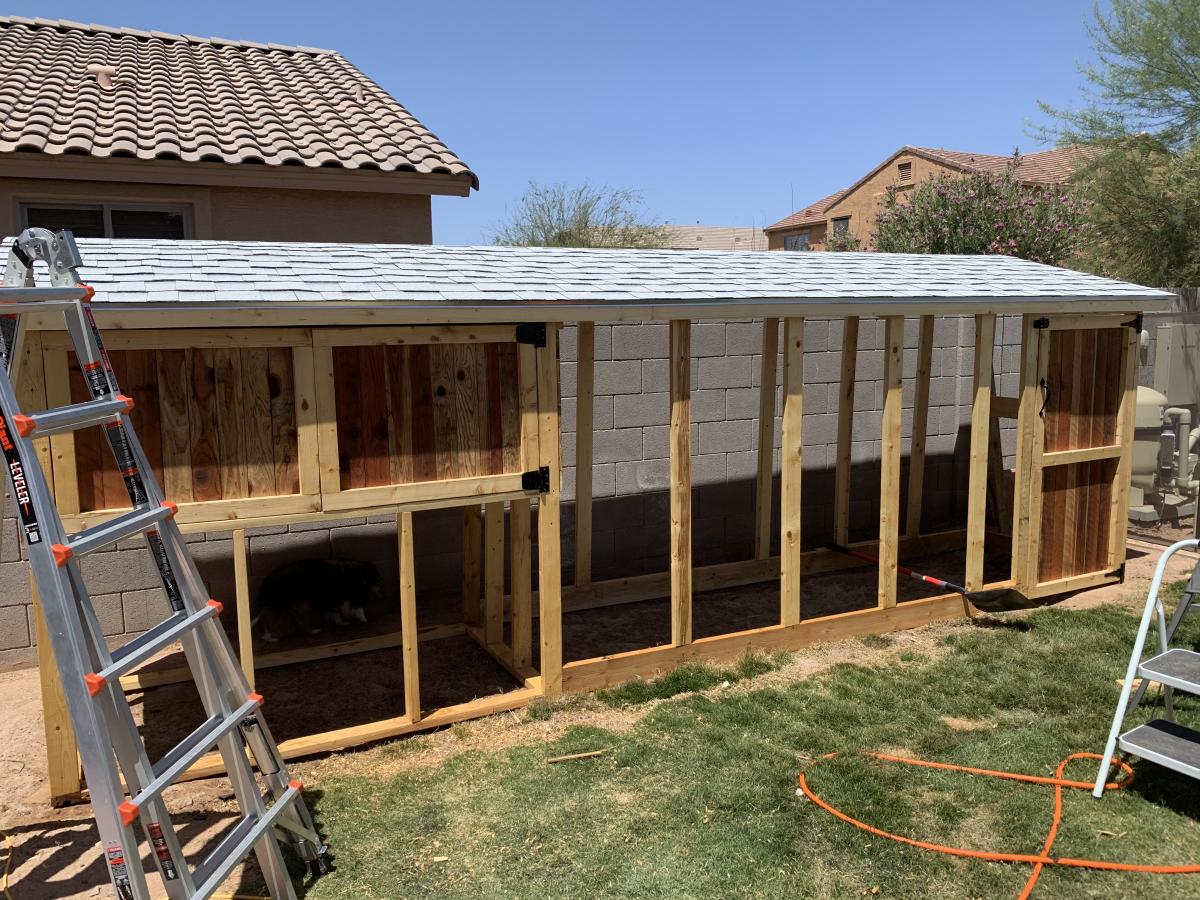
I took the idea of the "small cedar shed" and decided to upsize it for a new chicken coop. Our old one was small enough that we had to let our six hens out to roam the yard. Chickens. Poop. Everywhere. I wanted one big enough to have them live in it. The nesting box is about 24 sf. The whole coop is 18' long, about 6-1/2' at the back with a 15° slope to the roof, and about 4' deep. I built the ladder up to their nesting box and made a mitre-cut panel under the nesting box for cleaning out, feeding, and watering. Total materials cost was about $1000, but a couple of local homebuilders helped by letting me scavenge the lumber for the nesting box from around houses that they were finished framing.

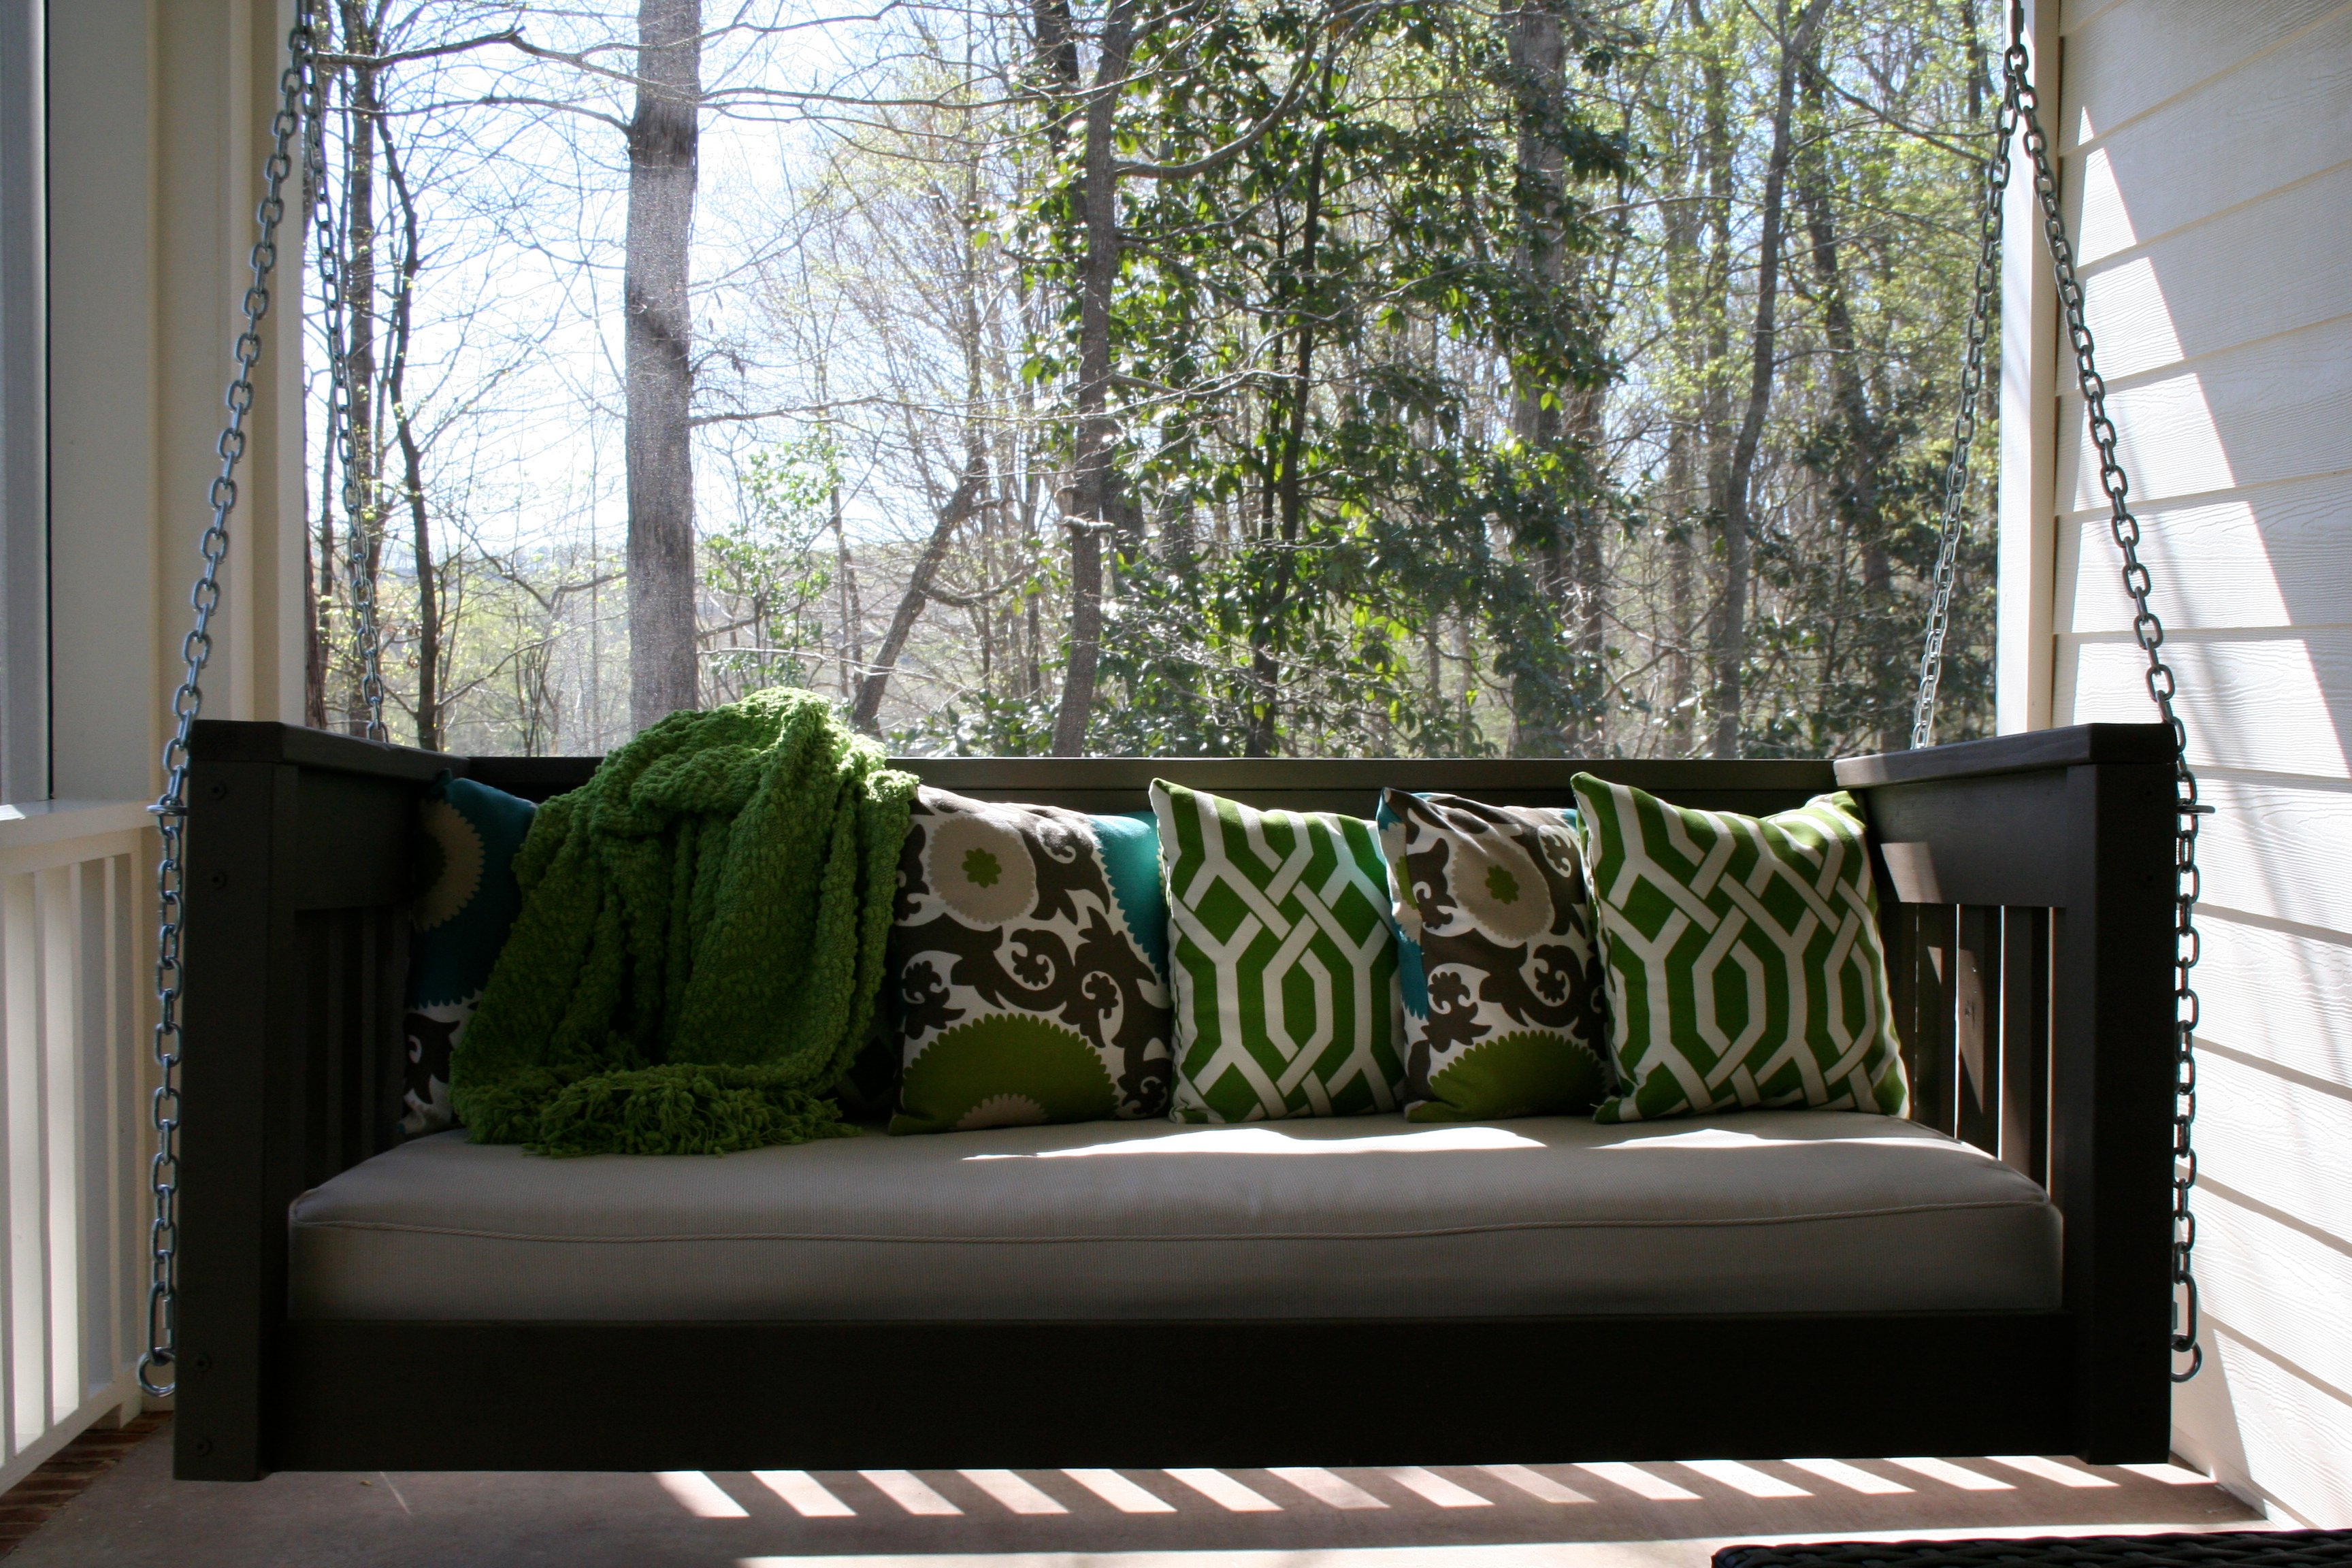
I wanted to make a large porch swing but just couldn't find the exact design. I wanted to be able to stretch out and take a nap but also be able to have a back to lean against. Most plans that I found were just basically a box you could put a mattress in and then hang. So I found Ana's plan for a basic daybed and chopped off the legs and raised the back just a little. It's perfect!! Thanks Ana. The plans were very simple to follow. This is my first project and I think it turned out great.
Sat, 07/26/2014 - 07:37
Looking forward to do one like this !
Do you still have the measurement for the back you have raised ?
Really nice !
Thanks :-)
Sat, 09/20/2014 - 16:33
Thanks! The height of the back and sides is 28 inches.
Tue, 11/18/2014 - 17:38
We made the bed and it looks awesome! Thanks for making the plans easy to follow and providing the picture, which was a fantastic reference. I do have a question for you in regard to how you hung the beg. We would like to hang this from our porch, but can see that we simply have 2x4 roof trusses. We are concerned that the weight of the bed (pretty heavy) plus mattress and support plus a person may be too much. Any additional information you could provide on how you hung the swing would be greatly appreciated! Thanks!


Comments
Ana White Admin
Sun, 04/30/2023 - 17:00
Great planter!
I like your mods, it looks fantastic. Thank you for sharing!