Community Brag Posts

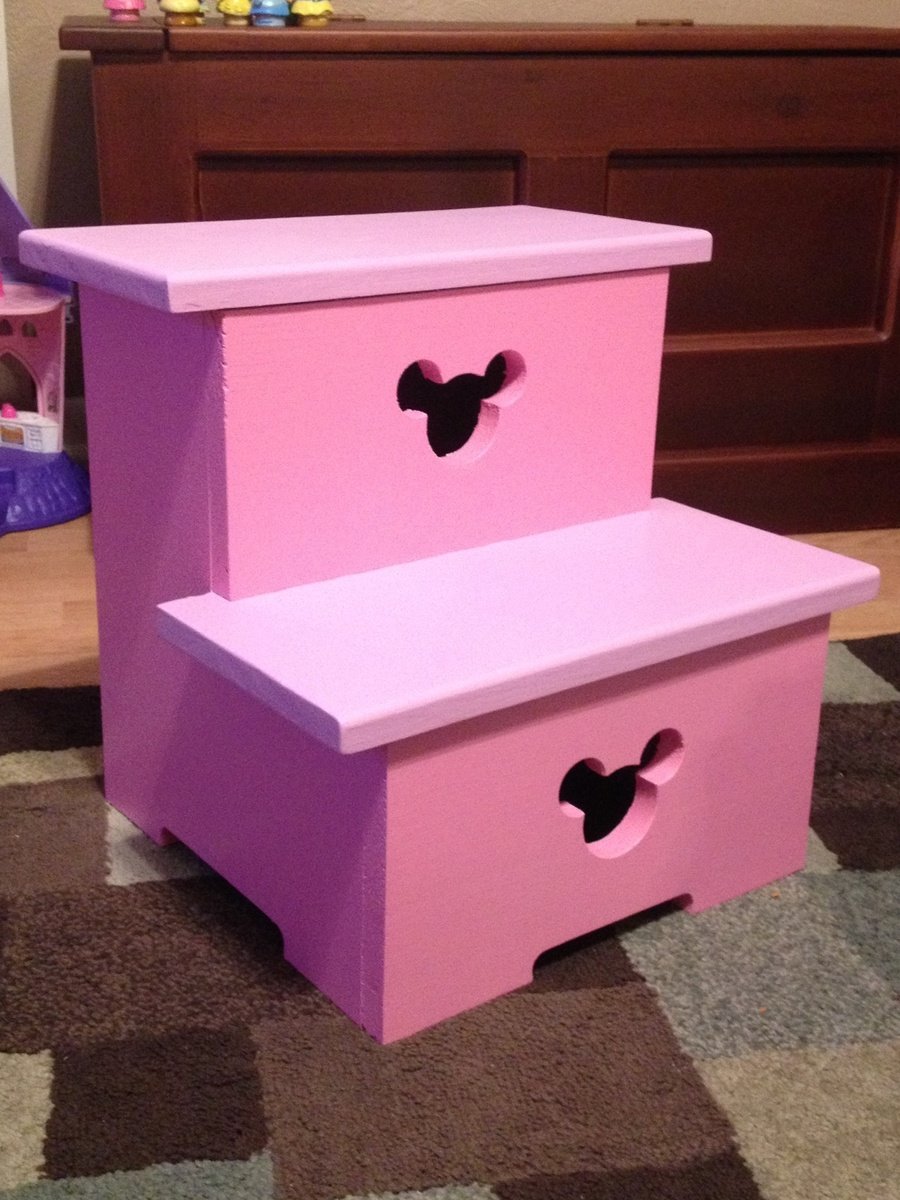
Minnie Mouse step stool

It was time for potty training and when it came time to wash her hands her arms were a little too short. So I threw this step stool together over a few hours and with the little one being a Minnie Mouse fan I had to add the Mickey head. Great project for those wanting something easy and quick.

Estimated Cost
$15-20
Estimated Time Investment
Afternoon Project (3-6 Hours)
Finish Used
Disney paint from wal-mart and Rustoleum clear coat.
Recommended Skill Level
Beginner

Comments

disneynut

Fri, 07/05/2013 - 05:37

I loooove this! Nice job! I will have to add this to my to-do list. Thanks for sharing :)

Outdoor Sofa

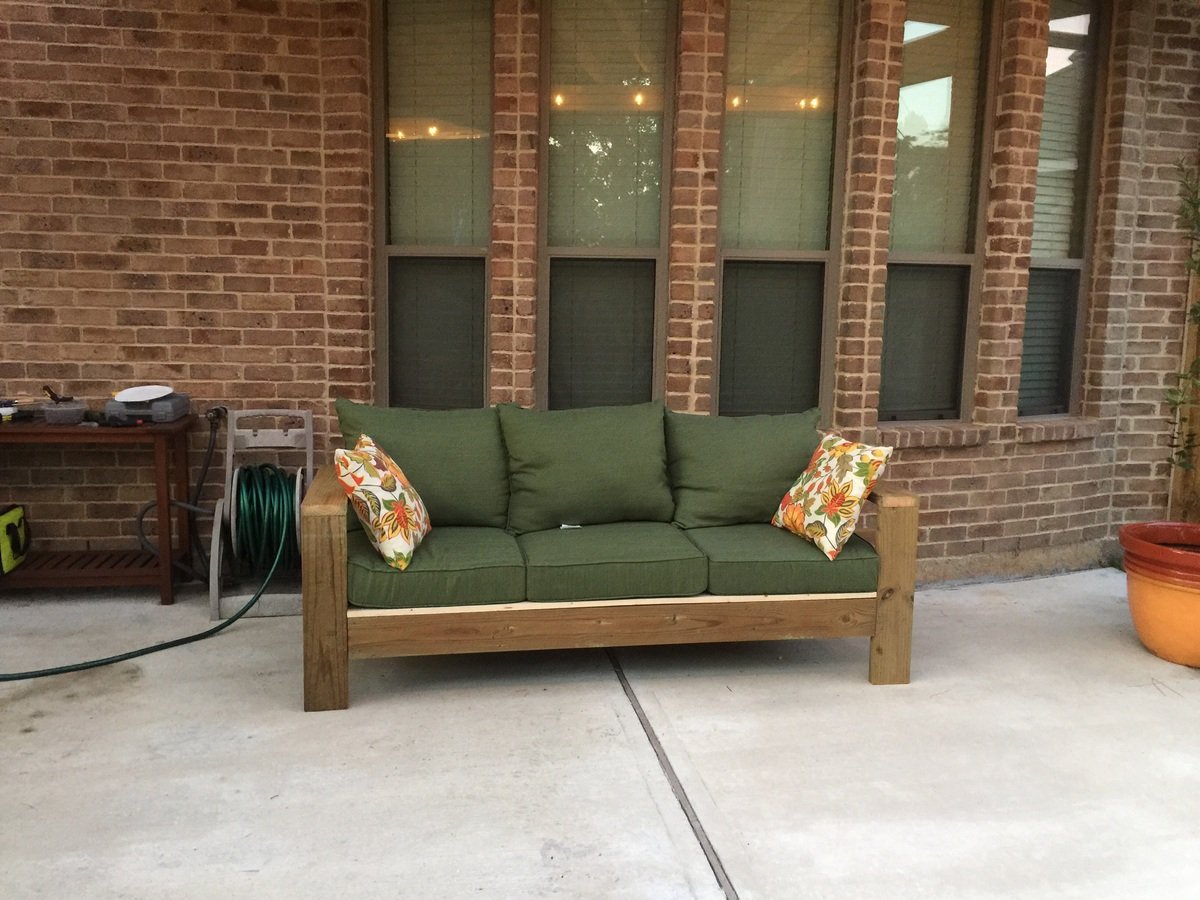
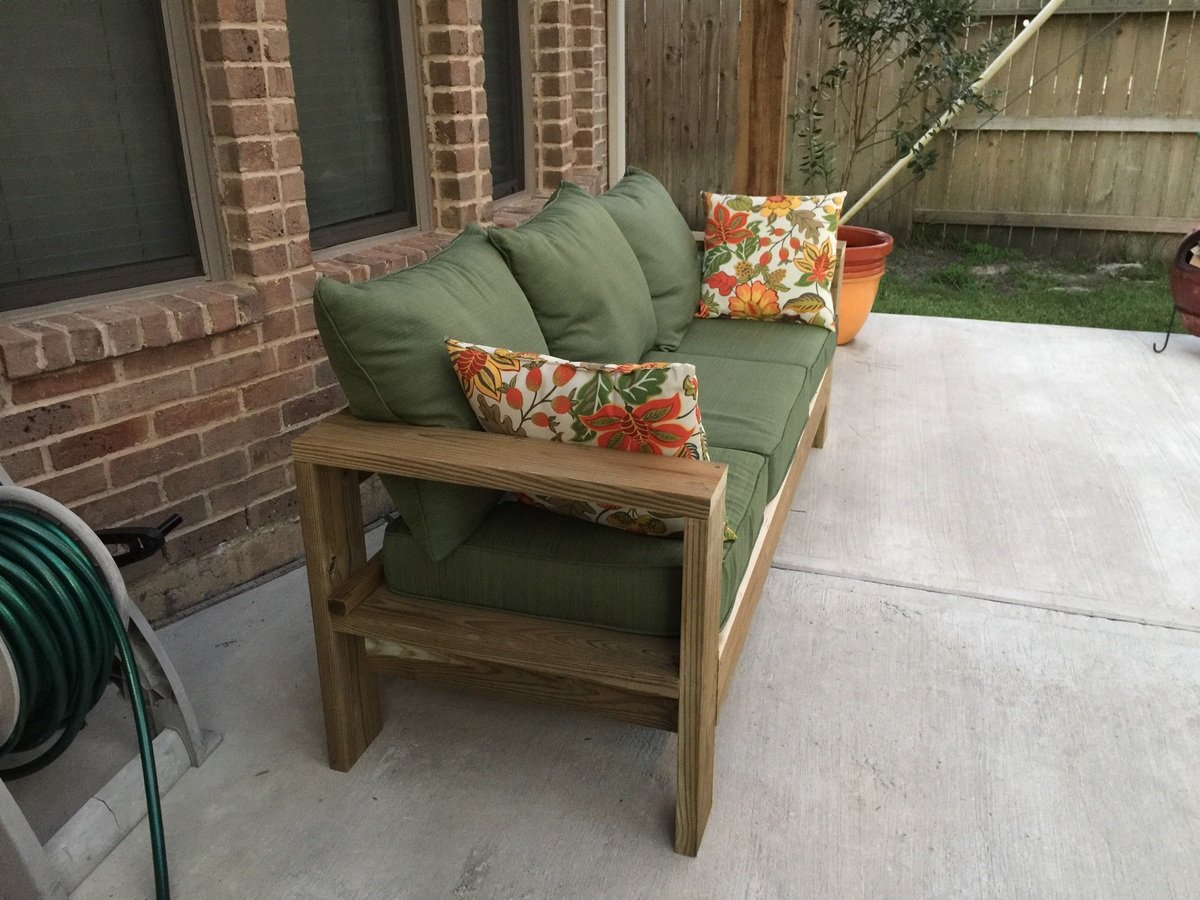
I created this sofa from 2x6s that were left over from a pergola we built. I got the cushions at Lowes for $57 per set (3 sets). This is the first thing I ever built and I did it all by myself including cutting the boards to length. In total it took about 4 hours. I am so proud!!! Thank you Ana White for giving me the confidence to build this furniture. I will never, ever, ever pay outrageous retail prices for wood furniture again.

Estimated Cost
$180 pillows, Leftover lumber $0
Estimated Time Investment
Afternoon Project (3-6 Hours)
Finish Used
None
Recommended Skill Level
Beginner

Comments

Kim N.

Fri, 06/26/2015 - 09:27

I love the way your couch turned out in 2x6s! I, too, plan to build this soon. I really like the cushions you chose, too. I ordered mine from Amazon for about the same cost (a little more $, but without exorbitant WA state tax!). Thanks for sharing!

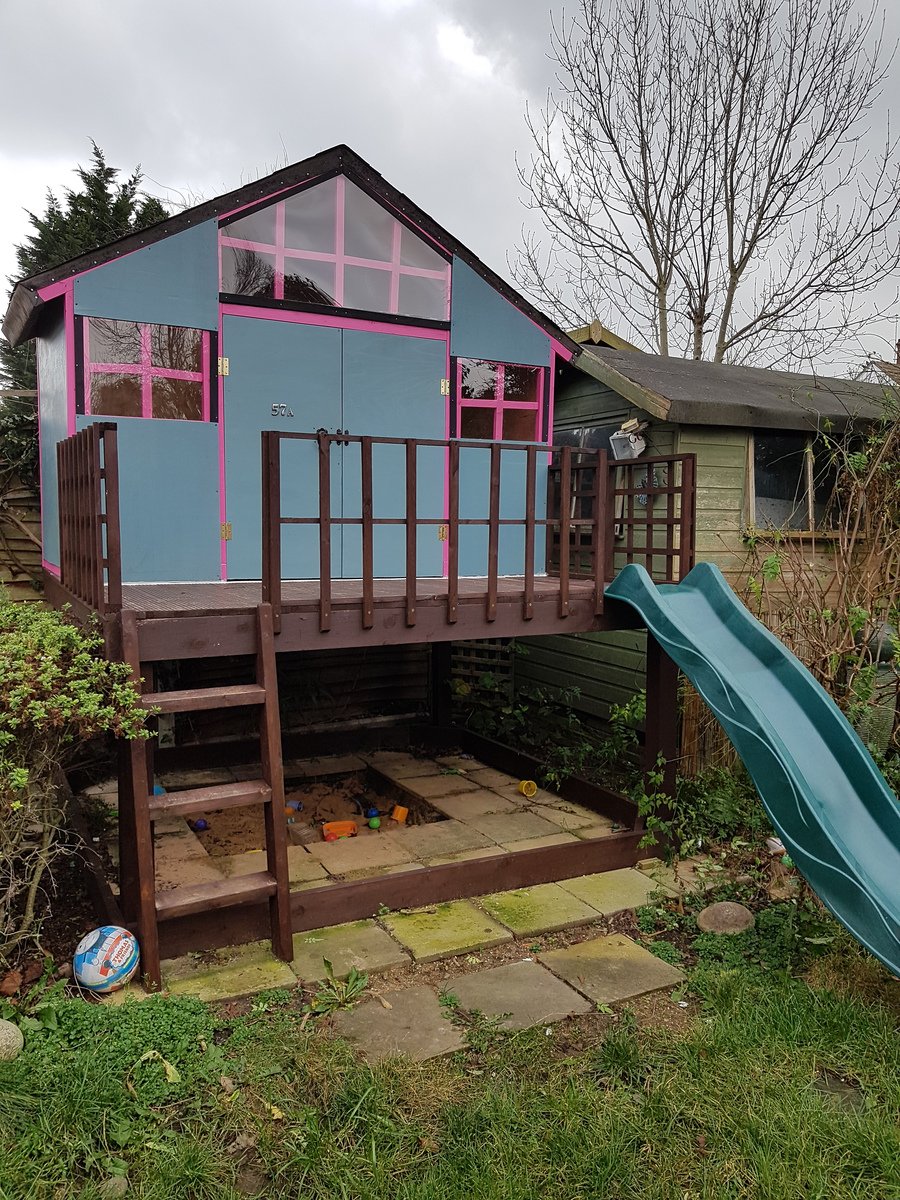
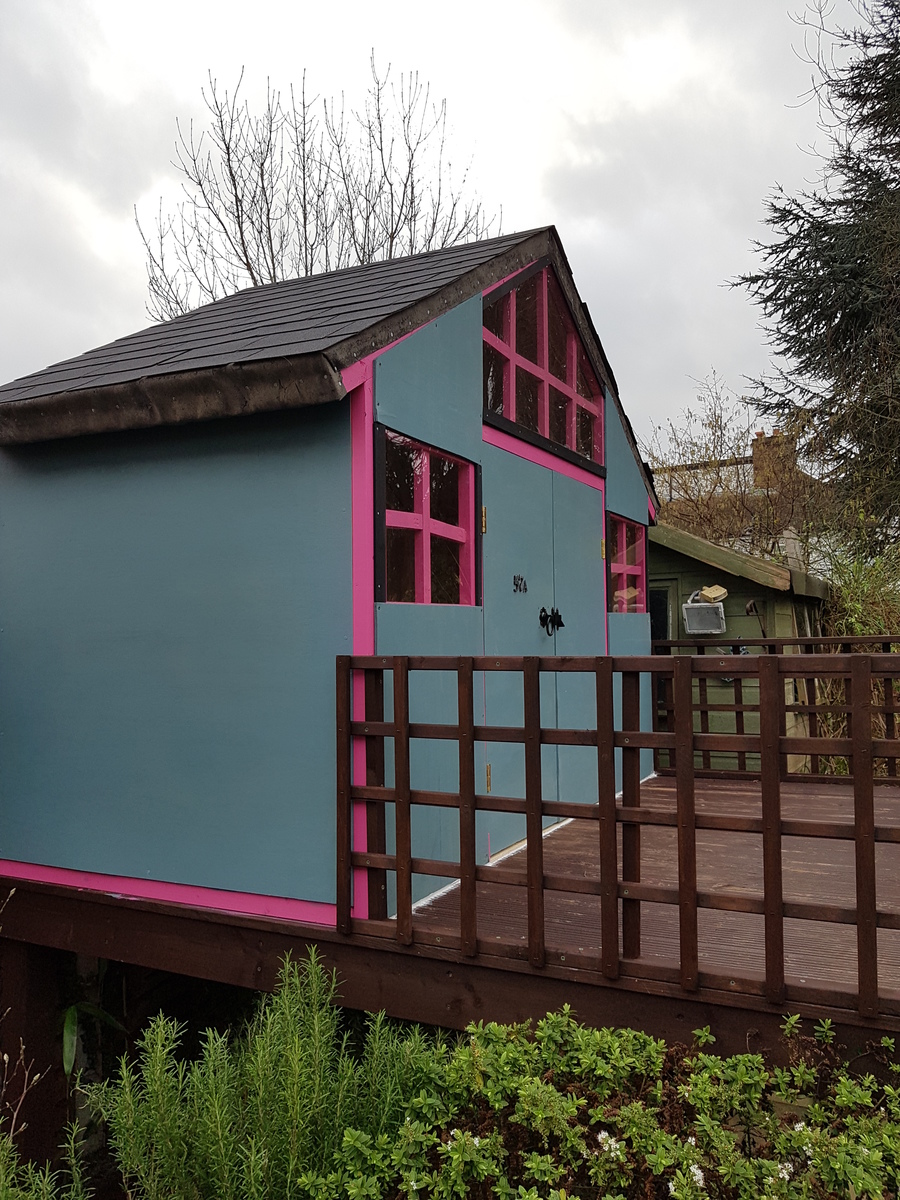
Craftsman style playhouse with raised deck (and power/lights)

Submitted by Ruth Ward on Sat, 01/13/2018 - 06:27

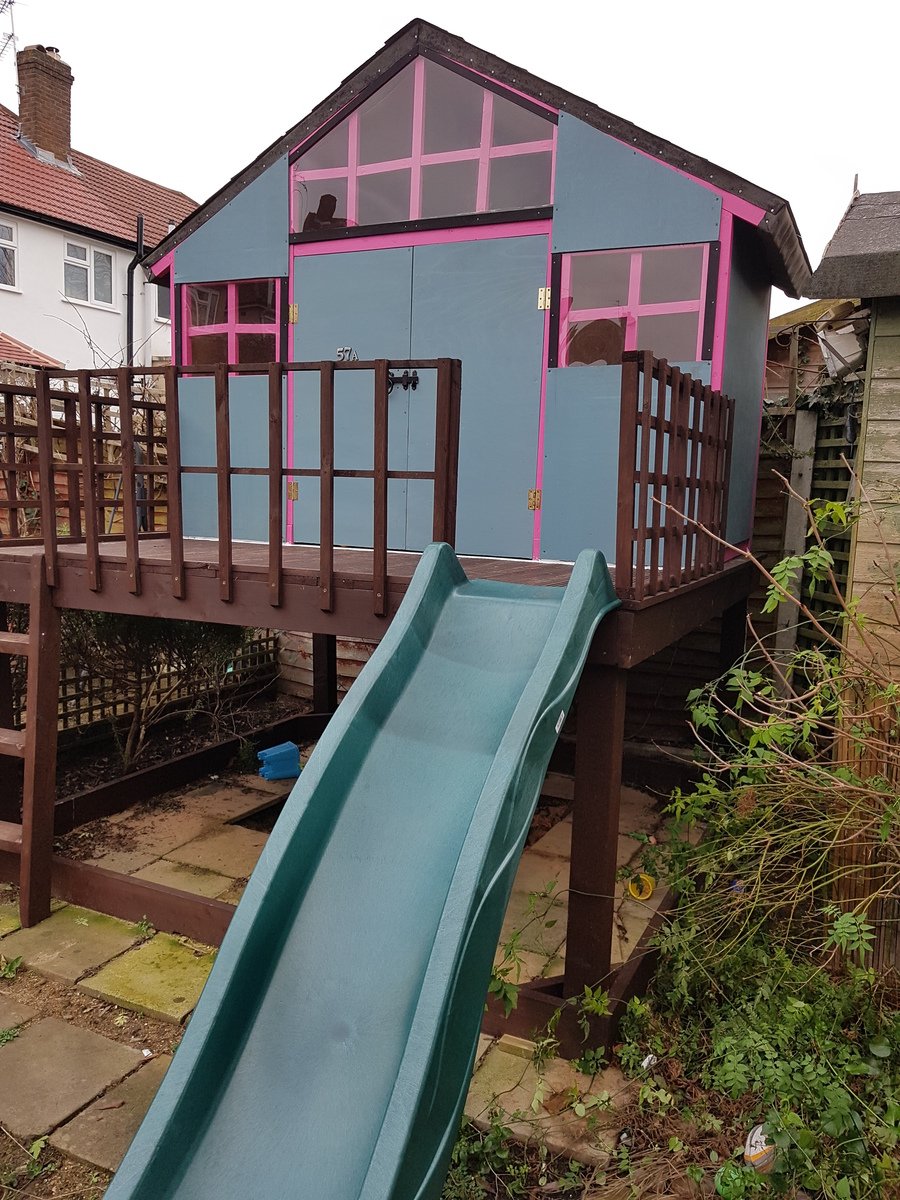
I needed a project to keep me together during 2017, as I took maternity leave after the birth of my second son. I wanted something that both boys could grow into, and enjoy, for many years to come. I also wanted to challenge myself to go big.

Our garden is tiny, so I was really attracted to the idea of raising a playhouse up and gaining the space underneath too. This corner was taken up by a big wooden raised pond, which wasn't wildlife friendly because of the high sides - and that meant you couldn't see the water unless you walked right up to it, either, so it seemed like a bit of a waste of space.

First of all I took out the old pond, and dug up tons of invasive bamboo that was growing around it. Then I lifted and relaid the concrete paving slabs underneath, leaving a smaller pit for a sandpit in the middle. With that all in place, I was ready to start building.

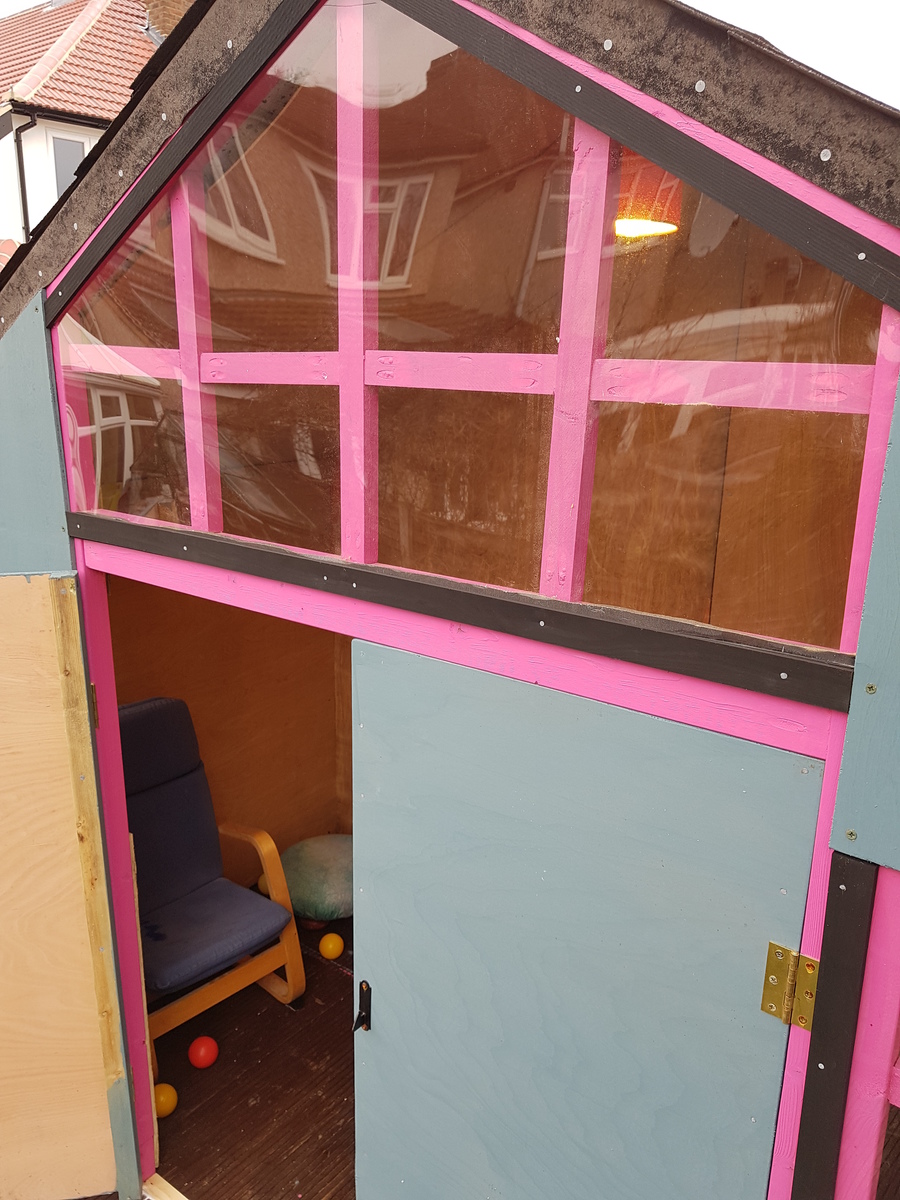
Wood tends to be expensive in the UK, and given the amount of rain we get I wanted to get the roof thoroughly waterproof and the windows covered. I also included a layer of polystyrene insulation behind a additional plywood inner walls, and I painted the whole thing in rot-proof garden paint. Everything added up, and the materials cost was probably £1k or more.

If I'd been able to work continuously, I reckon I would have completed the whole project in a week or so. However, I was mostly only able to get out in the garden when both my sons were napping (about 2 hours a day) or at the weekends when my husband could watch them. Given the time constraints, I was expecting this to be a long project. I started in April 2017 and completed the build late in October.

The deck was finished in June, and the sandpit in the shady space underneath was a great resource on the hotter days of summer.

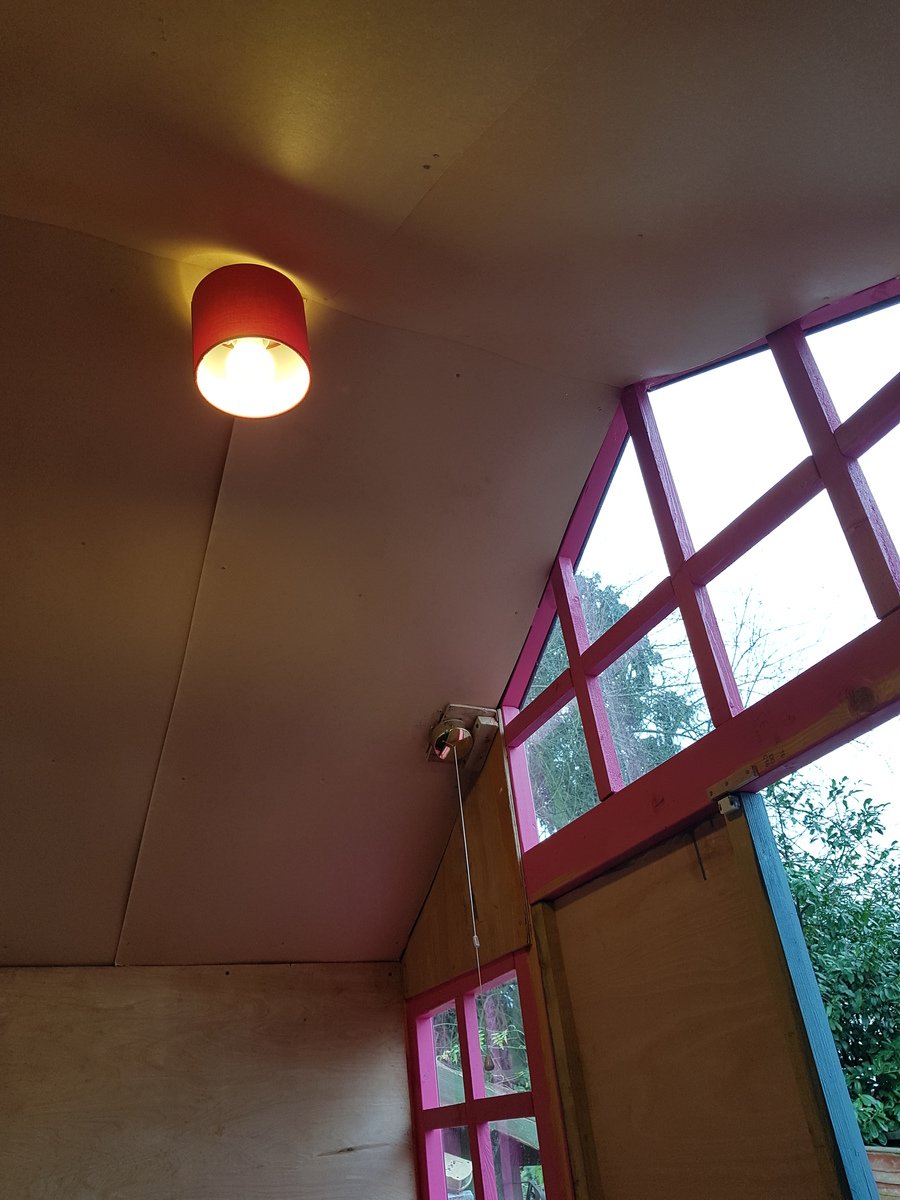
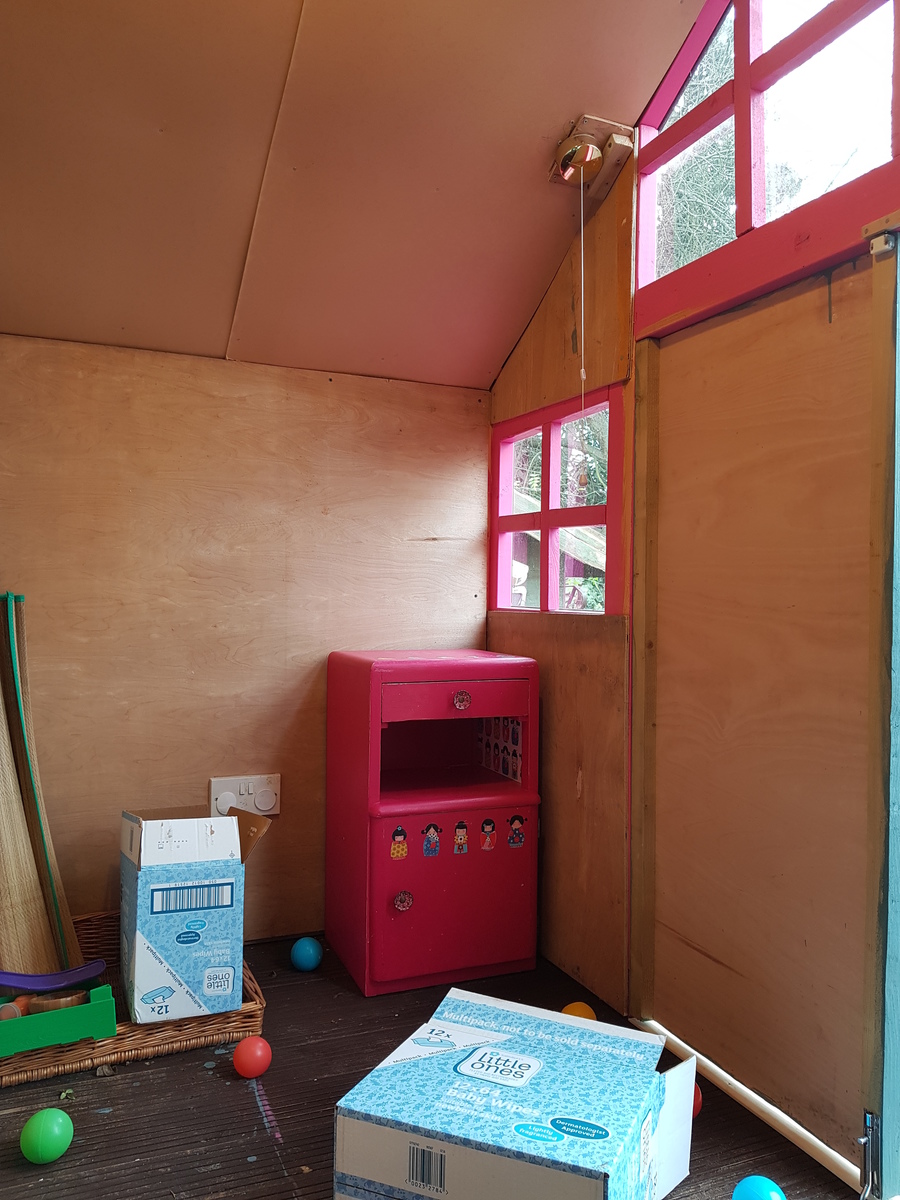
The old garden shed we inherited when we moved in here is rotting away, but it had power and lighting which the electrician told us was sound. I transferred the circuit into the playhouse, securing it behind the inner wall and installing a plug socket and a ceiling light. Having the power socket means that we can take a little electrical heater out there, and (under supervision) the three year old has been able to play in his little house throughout the winter.

One issue has been that water tends to pool on the deck in front of the house, and then seep under and into the house. When a big furry throw got left out there for a couple of weeks it acted as a wick and sucked the water up and into some of the plywood at the back, making it a bit manky and mouldy. We've learned our lesson and I've now run a bead of general purpose sealant along the front of the house, preventing water running in. The decking boards came with grooves for added grip, which helped channel the water along, and this was worse by the doors because I kept the doors a centimetre or so above the floor, leaving a gap. I've added a thin strip of wood for a lintel and sealed that too.

Now that we're on top of the damp issue I'm planning to paint the interior, add some old water-resistant flooring boards that I found in the shed when we moved into the house, and generally spruce things up. I hope this will be a comfortable den for the boys for years to come.

Thanks, Ana!
Estimated Cost
£1k-1.5k
Estimated Time Investment
Week Long Project (20 Hours or More)
Finish Used
Cuprinol outdoor paints (blue and pink); Wickes own brand wood preserver (dark brown)
Recommended Skill Level
Beginner

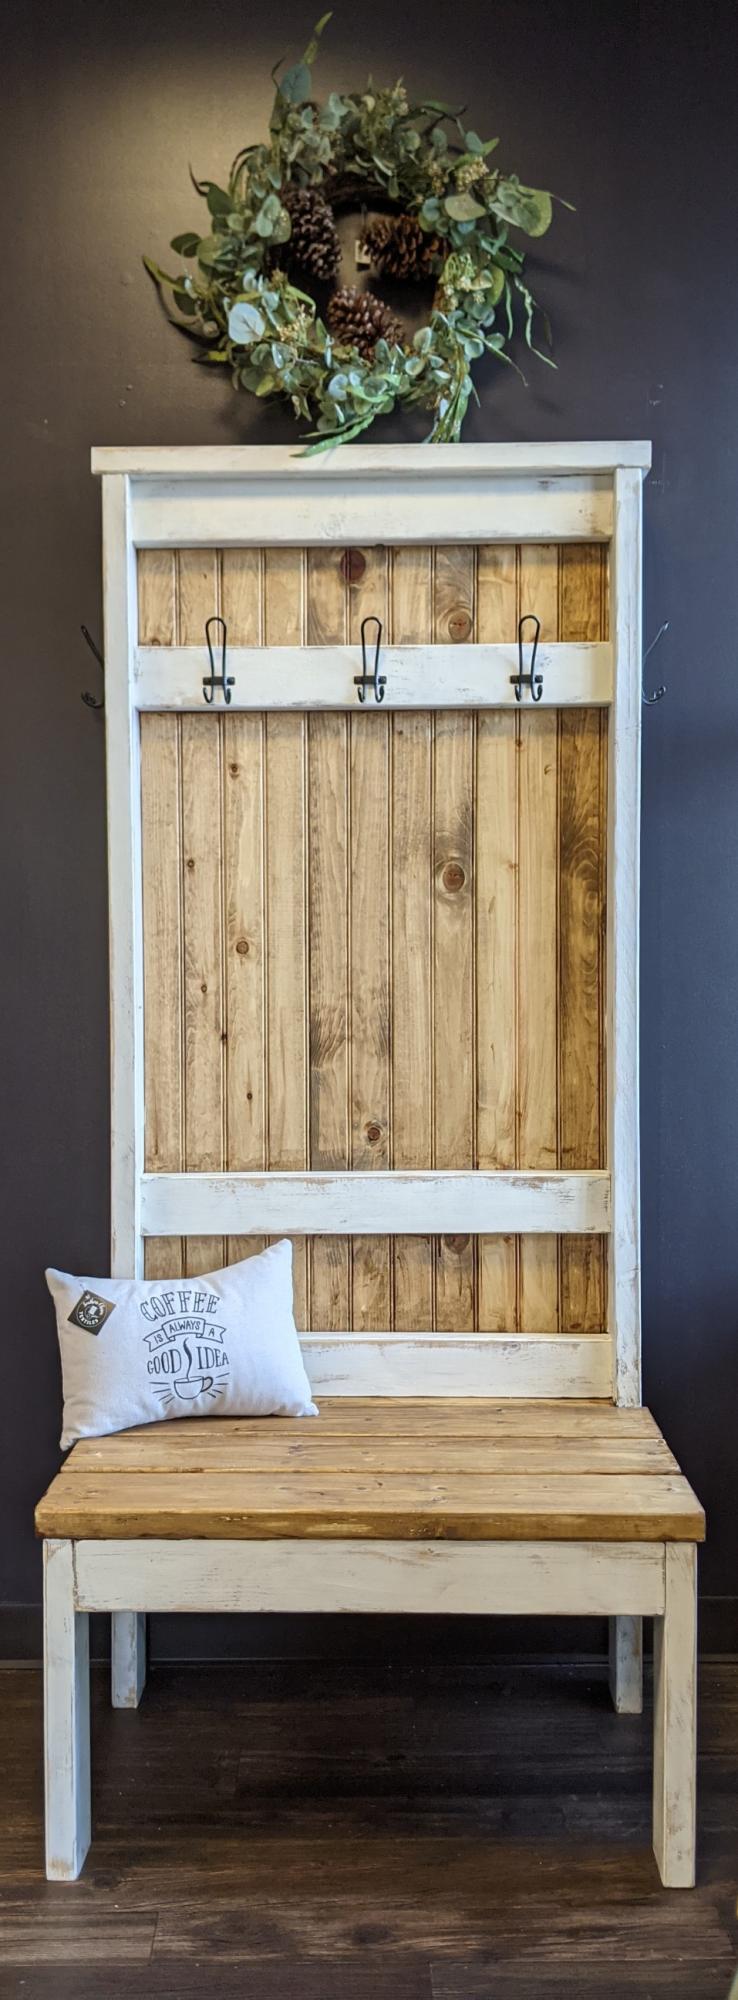
Rustic Modern Hall Tree

Submitted by Anonymous (not verified) on Wed, 12/29/2021 - 02:48

I made this slightly smaller version of Ana’s Hall Tree to fit smaller spaces. I added beadboard to the back to put an added farmhouse touch. Finished in Golden Oak and white.

Built from Plan(s)

Comments

Nursery Room Book Shelves from $10 Ledge Plan

Submitted by karahart on Wed, 05/11/2011 - 08:42

I built these bookshelves with the help of my husband for our daughter's nursery. They were so simple to build, the finishing work is what took the most amount of time. They're very sturdy, and we get tons and tons of compliments on the 'feel' that they add to the nursery!

Built from Plan(s)
Estimated Cost
$35
Estimated Time Investment
Afternoon Project (3-6 Hours)
Finish Used
I put on a coat of white primer, and then painted quite a few coats of ultra-white paint on each shelf. I sanded between each coat of paint, and finished it off with a top coat of polycrylic. I also filled in the screw holes with white caulk and painted over that once they were all mounted.
Recommended Skill Level
Starter Project

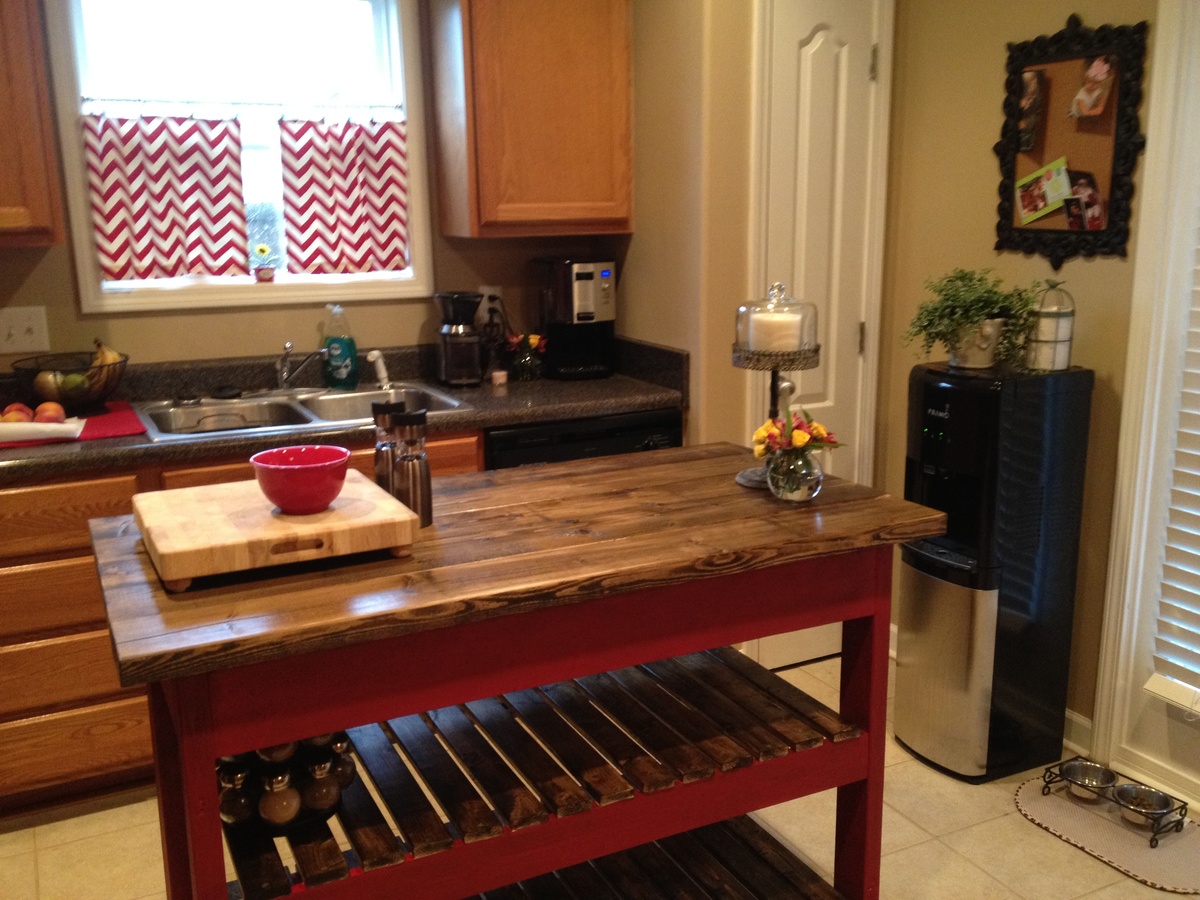
Allen/ Ana White Island

Submitted by tfj1283 on Sun, 07/07/2013 - 17:16

This was my husband and my first DIY project and we were thrilled at the outcome! It took us a day to build and then a couple days to stain and paint.

Built from Plan(s)
Estimated Time Investment
Weekend Project (10-20 Hours)
Finish Used
It is stained with min wax Jacobean and painted with Martha Stewart's Barn red. This was a super fun project; thanks Ana White!
Recommended Skill Level
Beginner

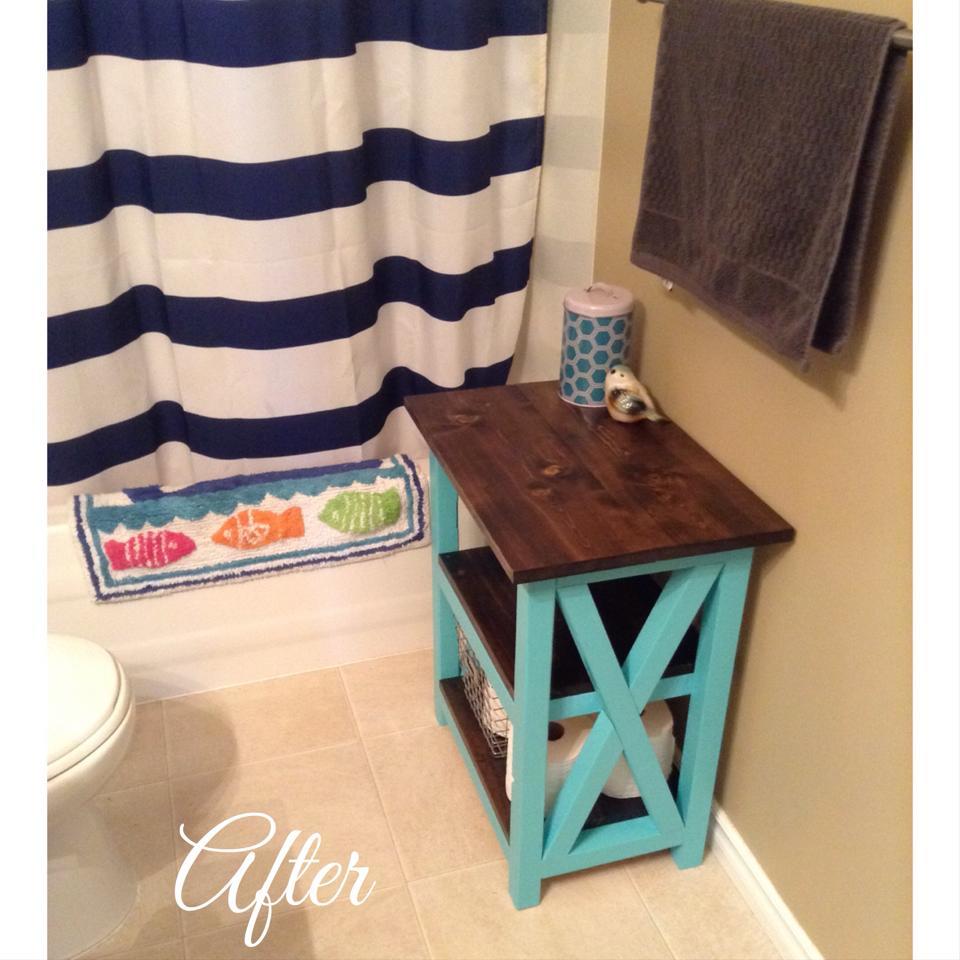
Side Table

Built this without plans for my bathroom

Estimated Cost
$50
Estimated Time Investment
Afternoon Project (3-6 Hours)
Finish Used
Stain, paint & polyurethane
Recommended Skill Level
Beginner

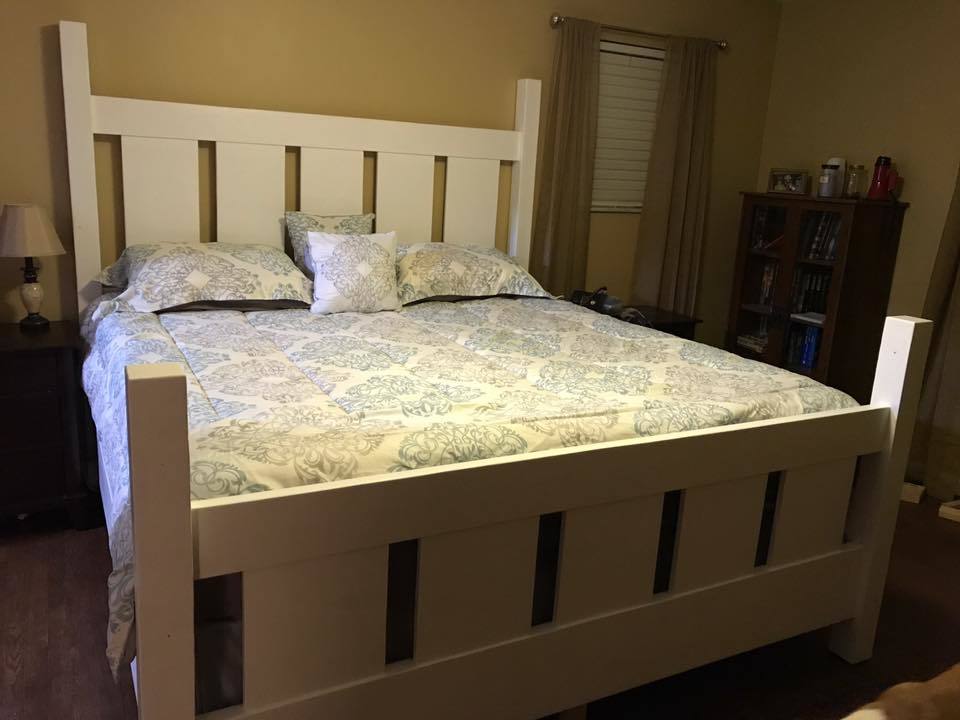
King Size Farmhouse Bed

Submitted by jeb6294 on Tue, 01/16/2018 - 12:56

What do you do when you want to upgrade to a king size bed but cant find one you like at any store?  You build one yourself.


I actually built this before the king size plans were available by using the queen size plans and bumping up the measurements accordingly.  We both loved the farmhouse bed so we only made a couple little changes.  One obvious change is to the posts at teh footboard...i cut those to about 48" high so I would still have a place to hang my PJ's.  I also took the router to the tops of the posts to round off the edges just a bit.


It came out great and my wife and I love it.  She likes to show off pictures every chance she gets.

Estimated Cost
Probably $150 in materials. The most significant costs were the purchase of a Rigid table saw and a Kreg jig which were both invaluable and will be used on future projects.
Estimated Time Investment
Weekend Project (10-20 Hours)
Finish Used
We had wanted to do a white wash but unfortunately the only 4x4's they had at the local big box were the pressure treated variety so it would work. We ended up painting it white which we ended up really liking.
Recommended Skill Level
Beginner

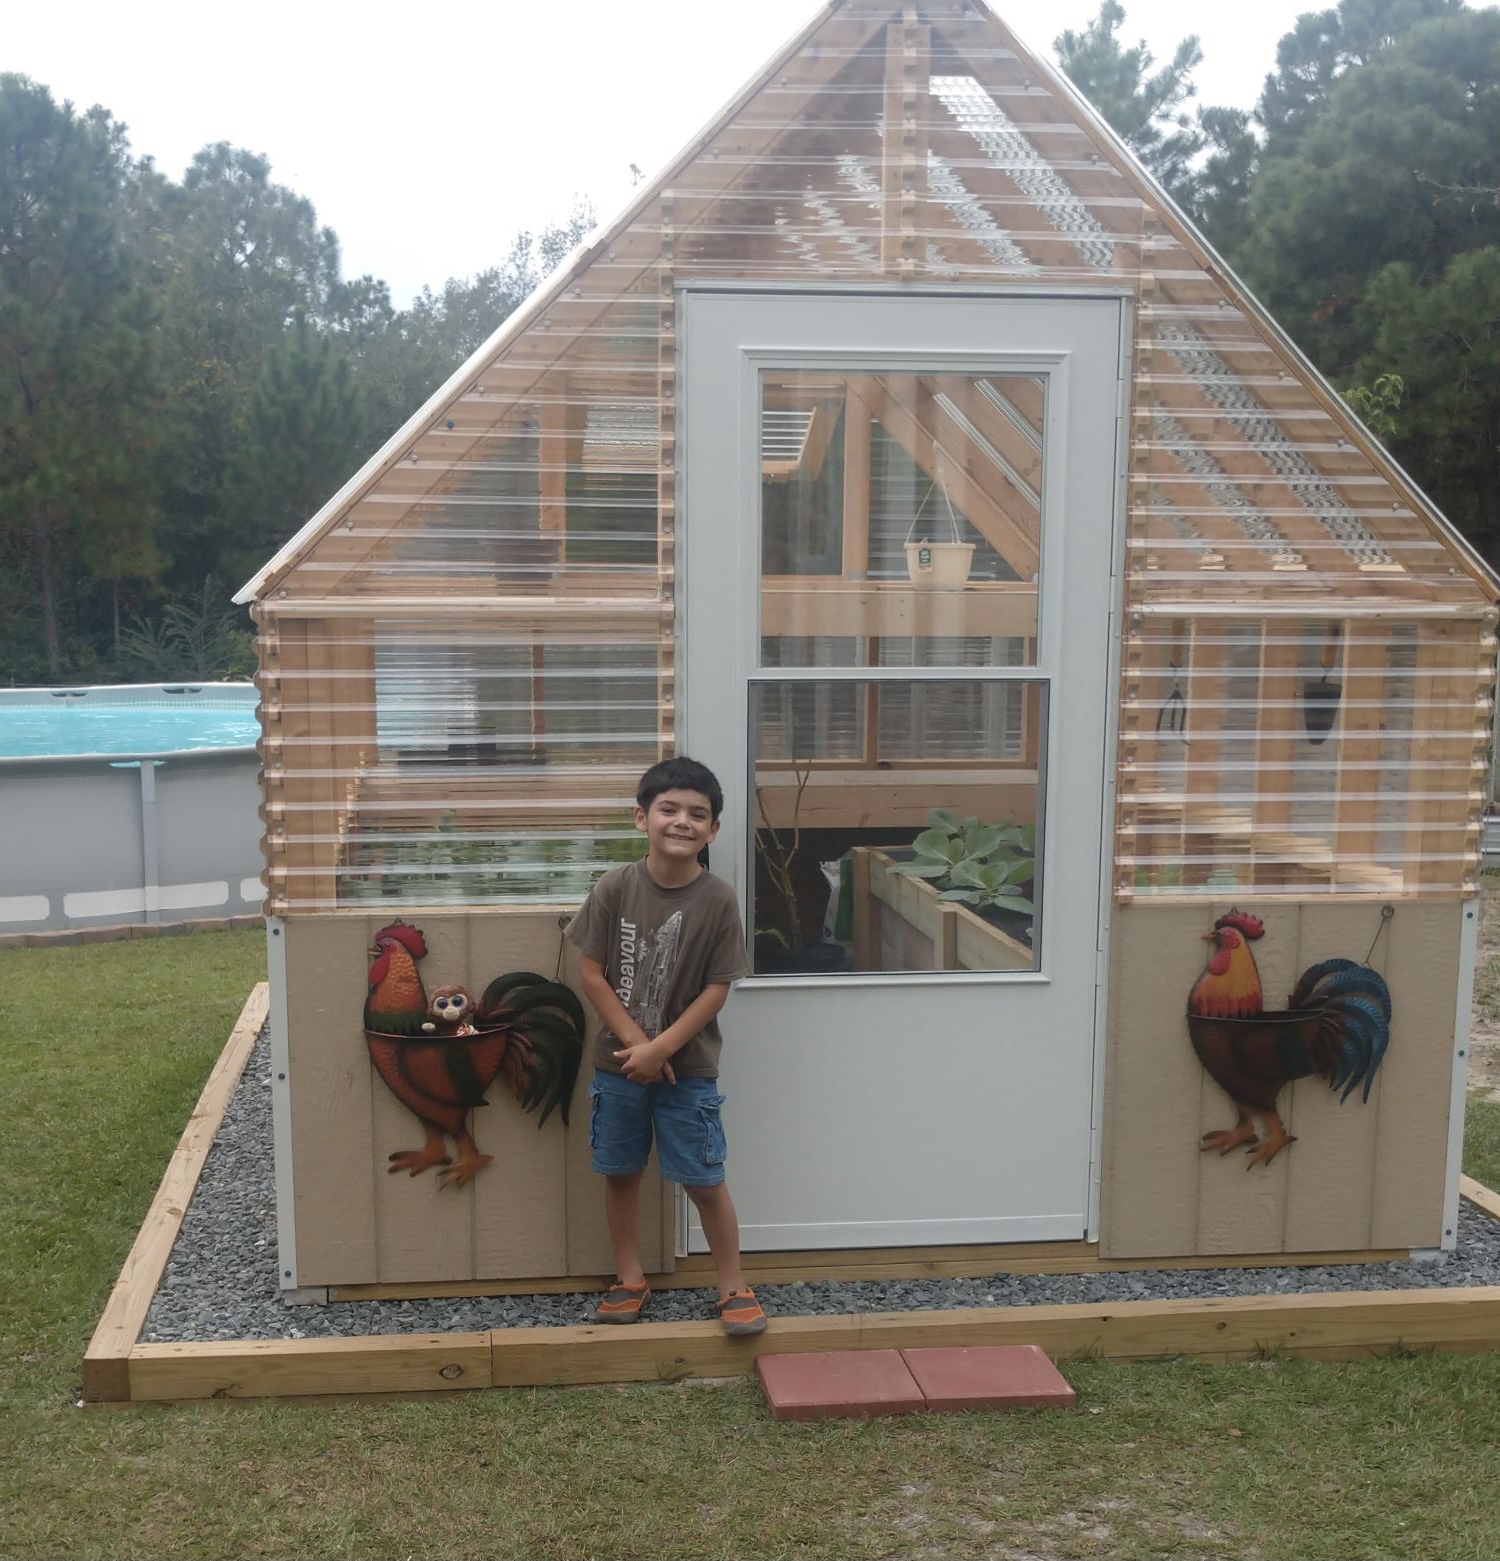
Greenhouse

Submitted by Anonymous (not verified) on Sun, 01/02/2022 - 12:30

Built the greenhouse from Ana Whites plan
She did the plan really well..

Built from Plan(s)

Comments

Little Kids Picnic Table with alterations

Submitted by jsle_bel on Thu, 05/12/2011 - 10:22

While out shopping with my 4 year old son we came across a picnic table that he absolutely adored. I had wanted to purchase a kids picnic table last summer but never got around to it. After checking out the price tag on this little gem I decided I would check out Ana White’s collection of plans before I spent $80!!! I made a few alterations in size and added extra support for those changes, but even with the added lumber I got it ½ off the $80 store price!!

Built from Plan(s)
Recommended Skill Level
Starter Project

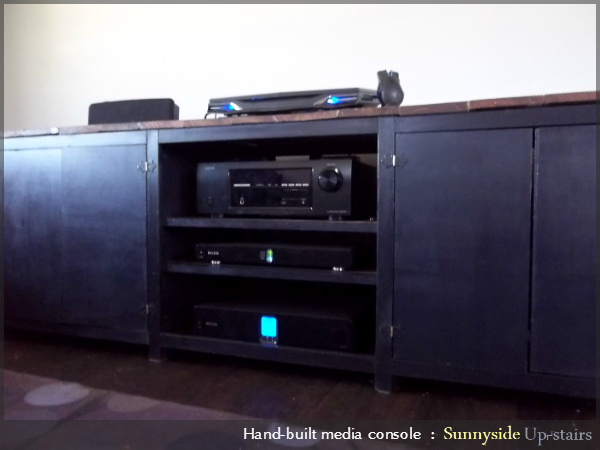
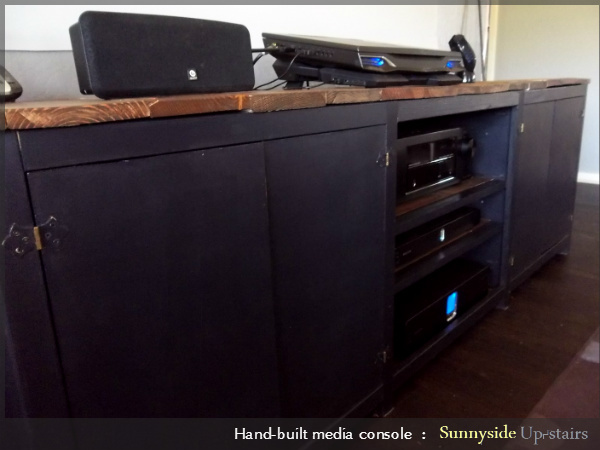
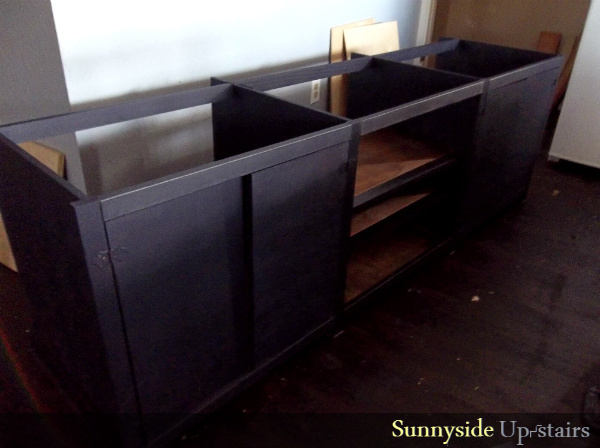
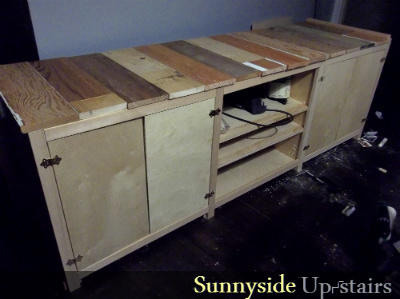
Leftovers and Reclaimed Wood Media Console

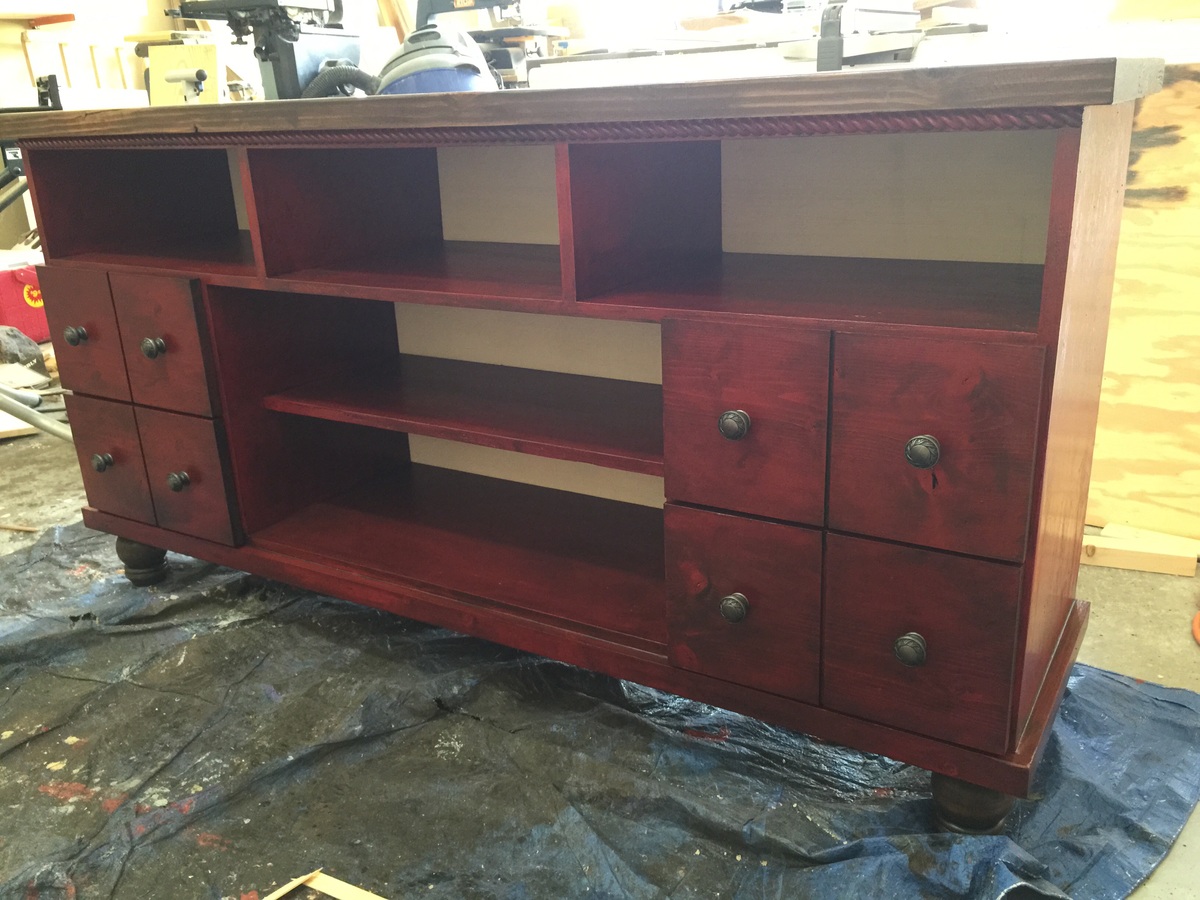
Last winter, our friend's boss built our kitchen cabinets. We've had cuts of plywood leftover, sitting in our garage since then.

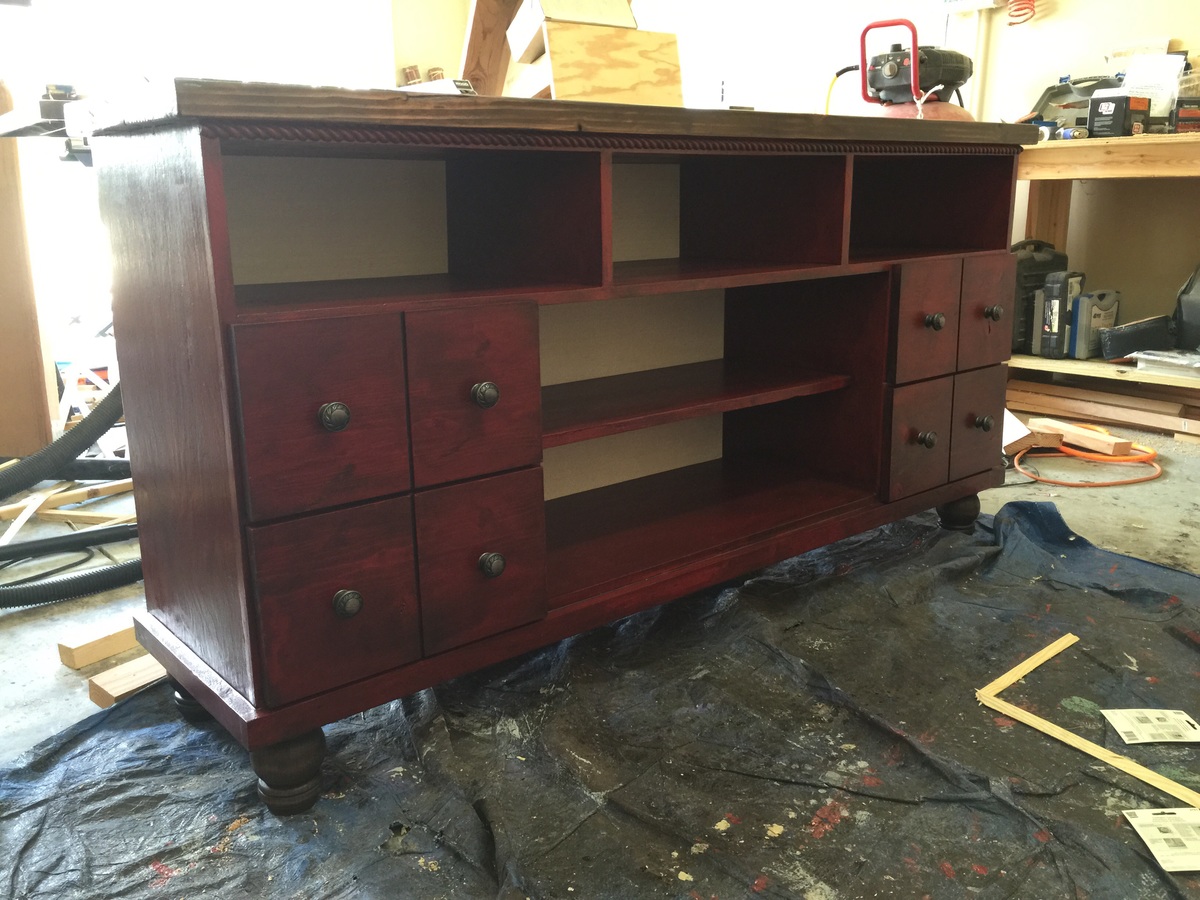
Our home needed a media console, so I thought to give building one a shot now that I own a circular saw and am only slightly afraid of it. I didn't follow a plan, honestly, but I did look at Ana's Classic Storage Wall, Extra Wide Media Unit as inspiration.

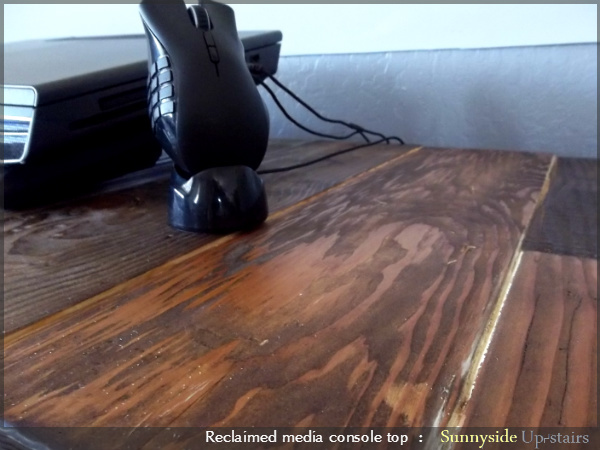
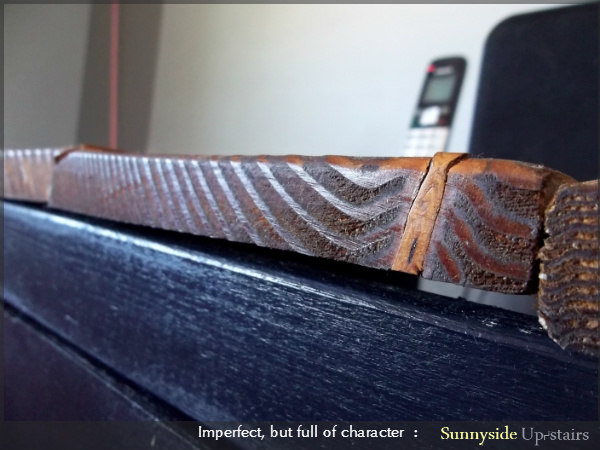
The console is actually a slate-indigo-black, called Napoleon. The top is made of reclaimed 1x6s that I mixed and matched with scrap 1x6s and gave one coat of Dark Walnut. We ordered handles for the doors and it needs another coat of paint (we ran out of the quart we had on hand), but we love it!

Estimated Cost
$30 using leftover plywood, otherwise, $100
Estimated Time Investment
Week Long Project (20 Hours or More)
Finish Used
Olympic Flat in Napoleon
Watco Danish Oil in Dark Walnut, Watco Wipe-On Poly
Recommended Skill Level
Intermediate

Comments

JoanneS

Tue, 07/09/2013 - 16:30

Love this! The reclaimed wood top is fab, and the color looks perfect. I checked out your blog - your apartment is looking awesome!

yurra-bazain

Wed, 07/10/2013 - 02:18

Thank you for your kind words. :) Our apartment wouldn't be furnished today if not for ana-white.com. The motivation I've gained by learning and sharing back here has been key to keep me building the things we need, the way we want them. =D You've built so many things; I'm so impressed!

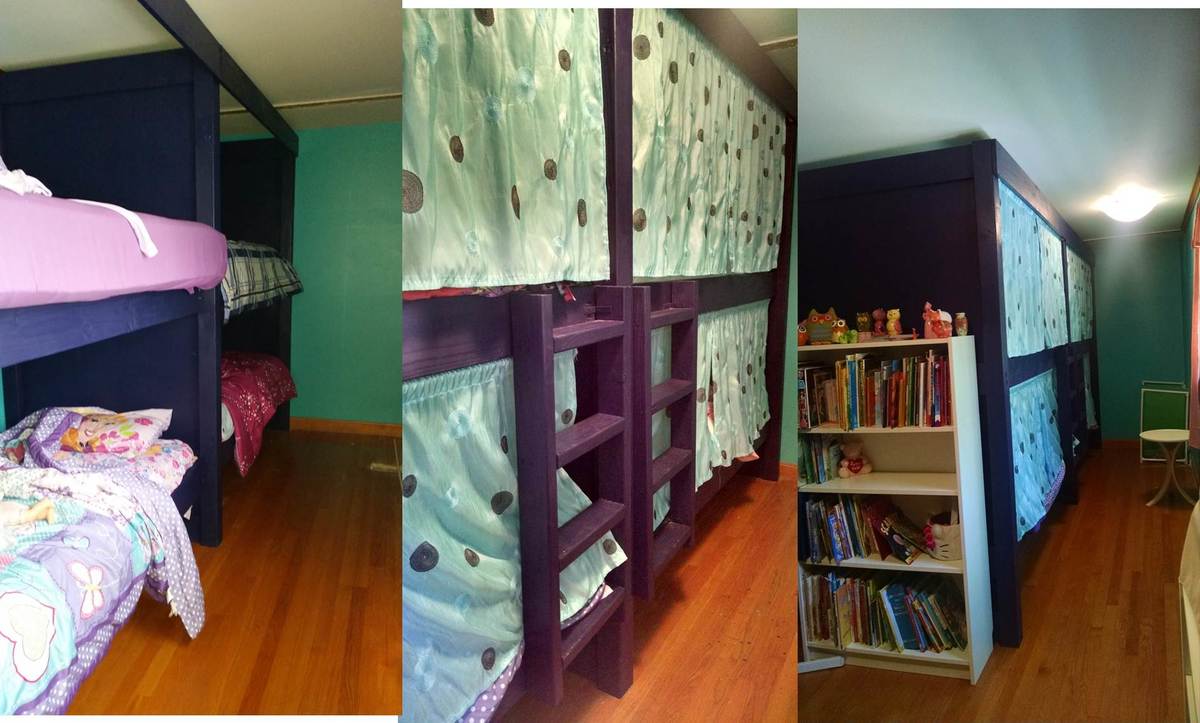
Bunk Beds for 4 to 6

Submitted by Judianne on Thu, 07/02/2015 - 10:32

We used the Build a Simple Bed plan and the Bunk Bed from Simple Bed. I modified the plans to build a double bunk bed. We needed a way to fit up to 6 small children in a long, narrow room. Although we haven't built the trundle beds yet, each bunk will also have a trundle bed. The kids especially love their "privacy" curtains!

Built from Plan(s)
Estimated Cost
Under $300
Estimated Time Investment
Weekend Project (10-20 Hours)
Finish Used
paint
Recommended Skill Level
Beginner

farmhouse table and bench

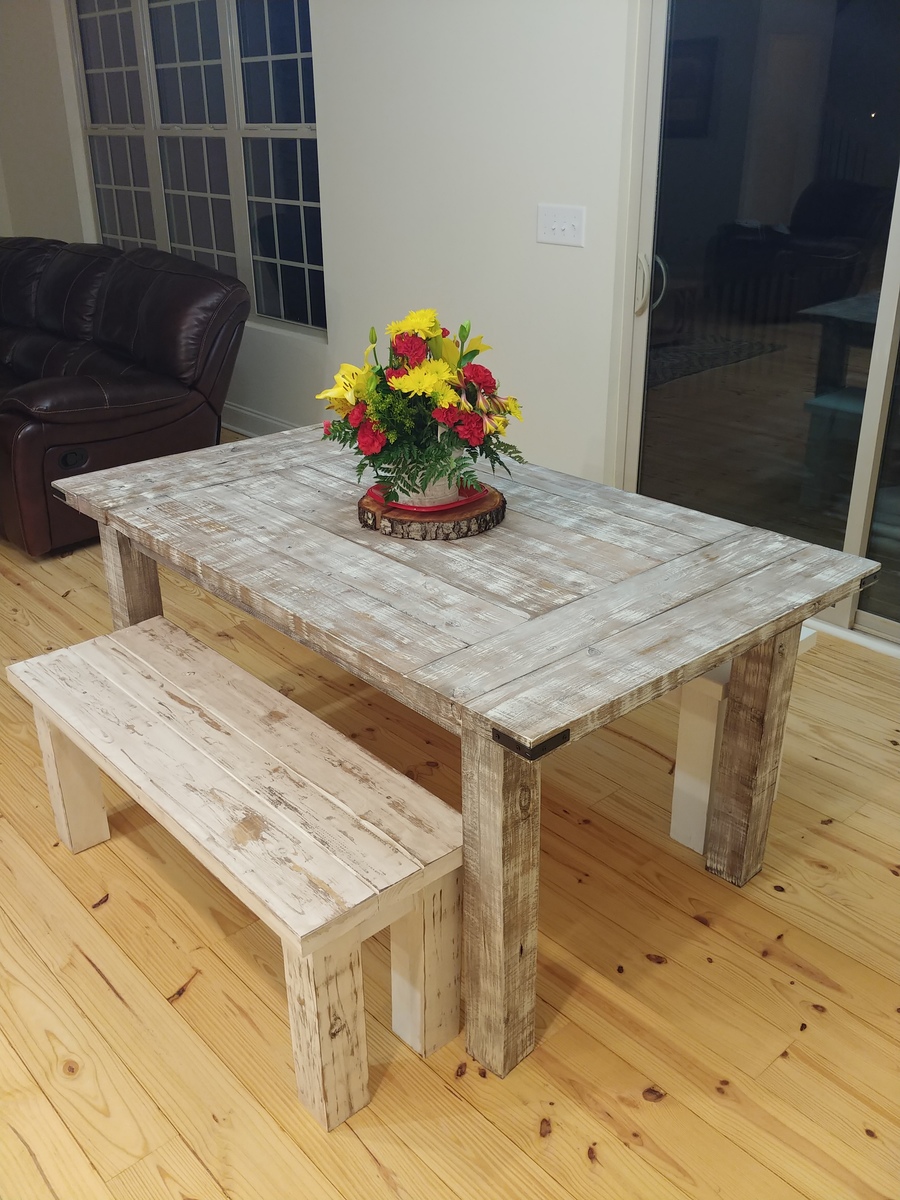
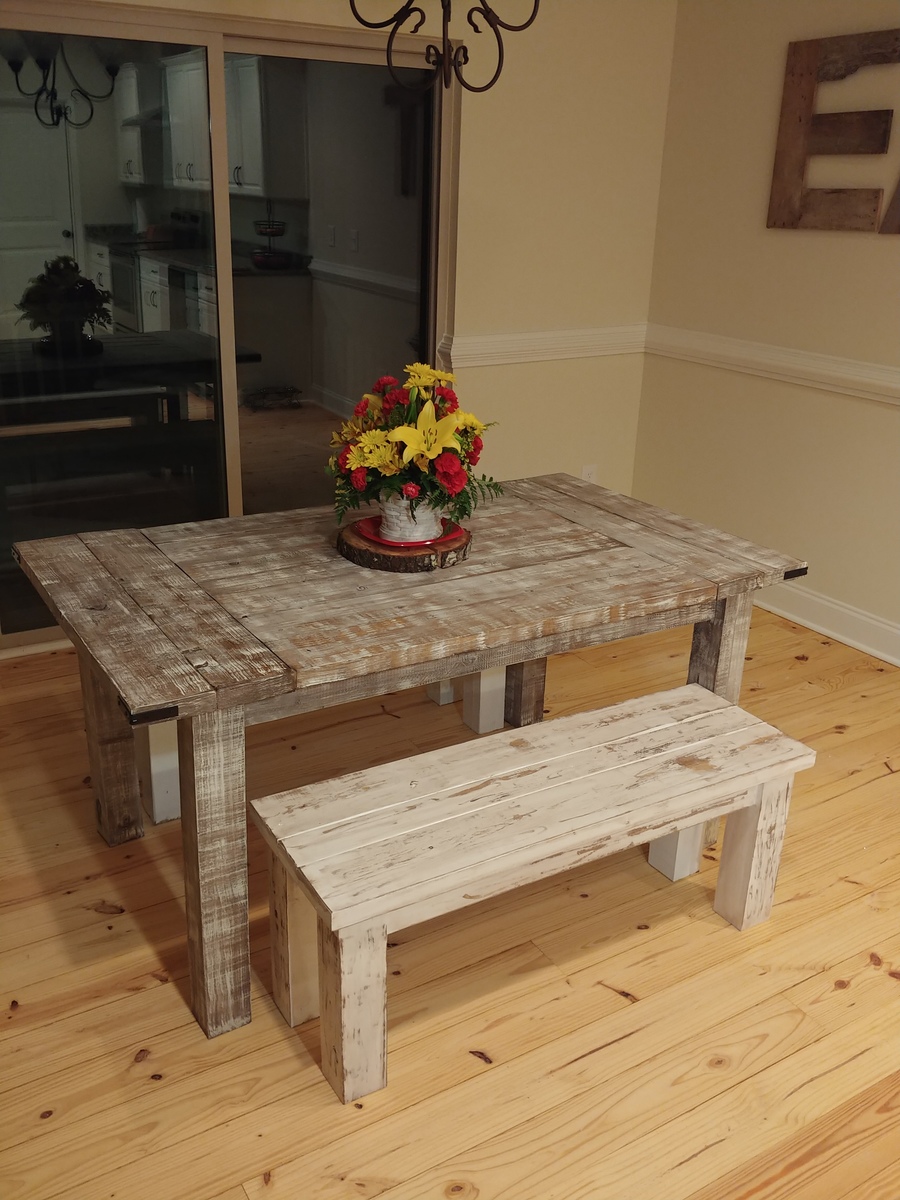
Submitted by Don123 on Fri, 01/19/2018 - 09:28

I built this table and two simple benches, inspired by the farmhouse table plans. I modified the plan slightly, in that I didn't add the center 2x4 on the bottom, or the two 2x4's between the legs. I also added a second "bread end board," and customized the corners with some "L" bracket accessories. It took me a week to build everything, then add the finish. It would have gone quicker, had I had time to do it all at the same time, but I had to make time after work to do everything. All, in all, this is probably a weekend job, at most. 

Estimated Cost
approximately $100.00 for everything
Estimated Time Investment
Week Long Project (20 Hours or More)
Finish Used
For the table, I stained with a dark stain, then sanded with a fine grit sand paper, then lightly painted with a light colored paint to give the wood that weathered and worn appearance.

For the bench, I whitewashed with a white paint, then rough sanded, to expose the wood in places, then where the wood is exposed, I added dark stain, then wiped clean to give that worn, paint flaking appearance.
Recommended Skill Level
Beginner

Flat Wall Book Shelves

Submitted by river4250 on Mon, 05/16/2011 - 16:30

This plan was a breeze to put together (go out and buy some clamps if you don't have any!!) until I finished it, then looked at my wall and saw the baseboards. I really wanted it to be screwed/nailed into the wall, so it needed to be flush. That's where the nightmare being. Eventually (over a week later) I got that finished, however, and am loving my little one's new bookcase! I just can't decide where to put it now, in her bedroom or in her playroom. Maybe I'll make another and she'll have two! :D This plan was very simple to follow, and the materials weren't expensive, so I could definitely do that.

Built from Plan(s)
Estimated Time Investment
Afternoon Project (3-6 Hours)
Recommended Skill Level
Beginner

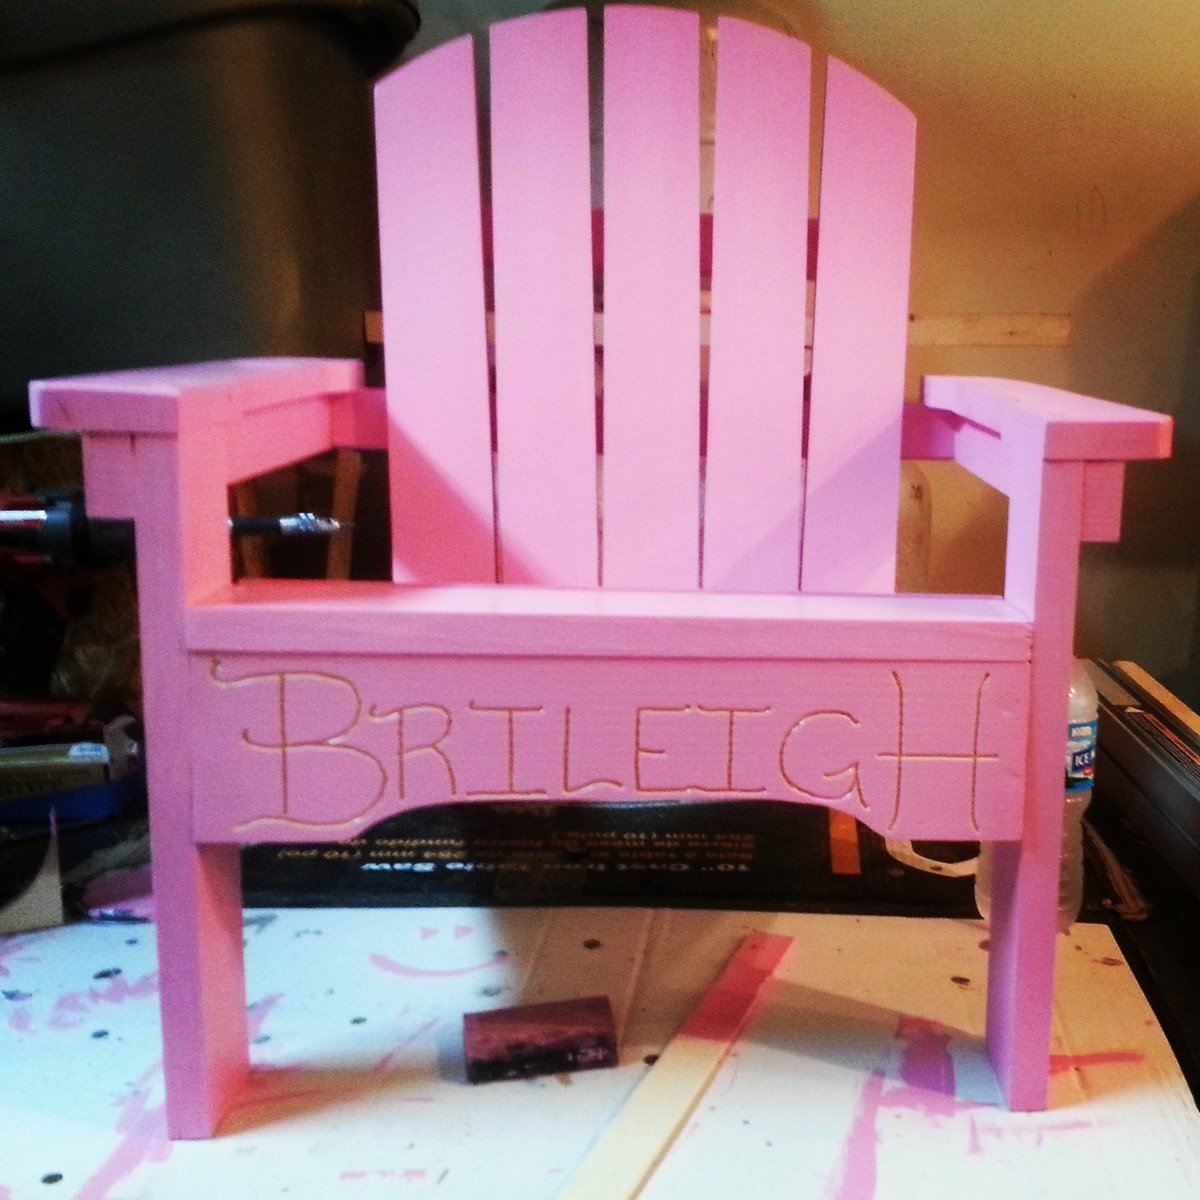
modified kids Adirondack

Submitted by jrh413 on Wed, 07/10/2013 - 09:27

Modified back to match my adult chairs. Armrests are also cut out like adult chairs you just cant tell in picture. Also put an arc on faceplate. Then i couldn't resist routing her name into it. Enjoy!

Built from Plan(s)
Estimated Time Investment
Afternoon Project (3-6 Hours)
Finish Used
Just some exterior pink paint.
Recommended Skill Level
Beginner

Farmhouse table

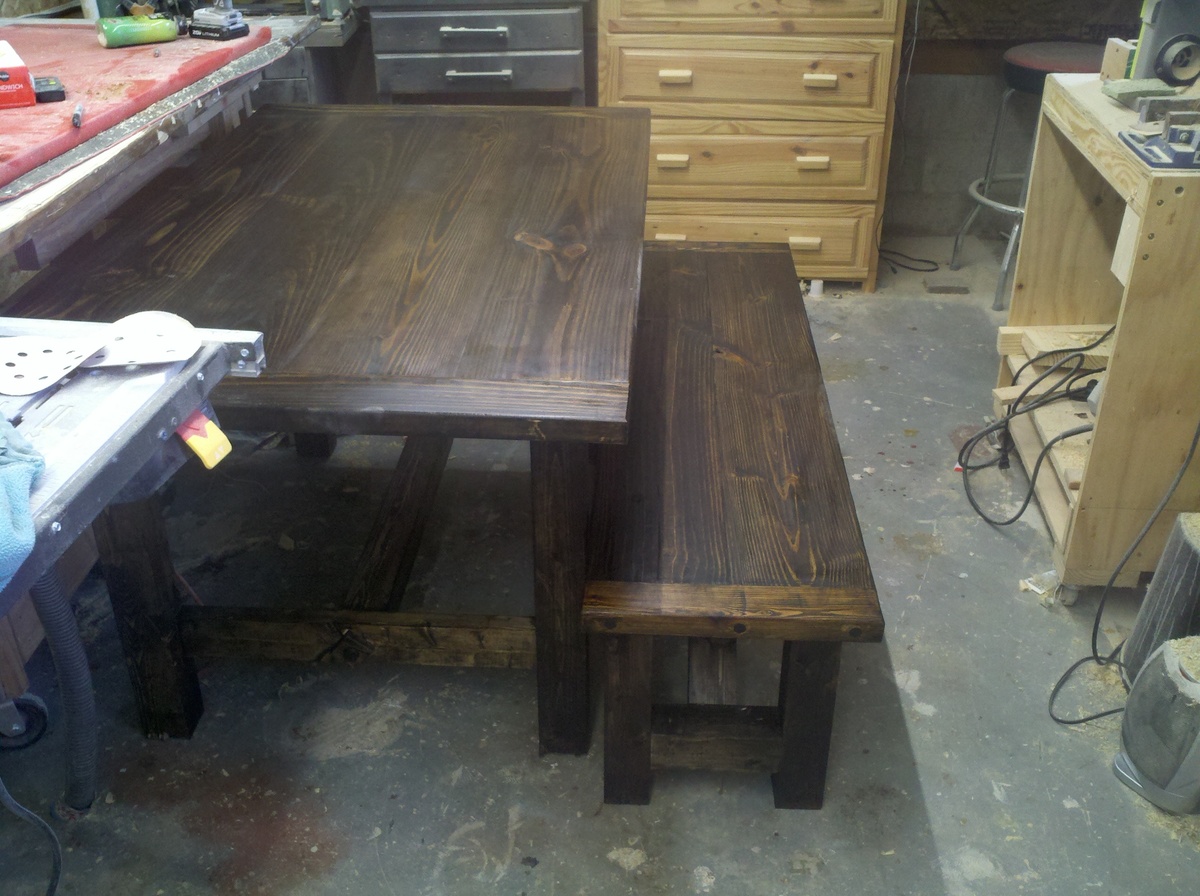
This table was inspired by the pocket screw table. only I did not use pocket screws. it is constructed using loose tenon construction and dowels. Notice the middle stretcher  and the wooden nut and bolt that holds it together

Estimated Time Investment
Day Project (6-9 Hours)
Finish Used
minwax jacobean stain and Minwax clear satin finish
Recommended Skill Level
Beginner

small bed large bed project

Submitted by Anonymous (not verified) on Mon, 01/17/2022 - 08:03

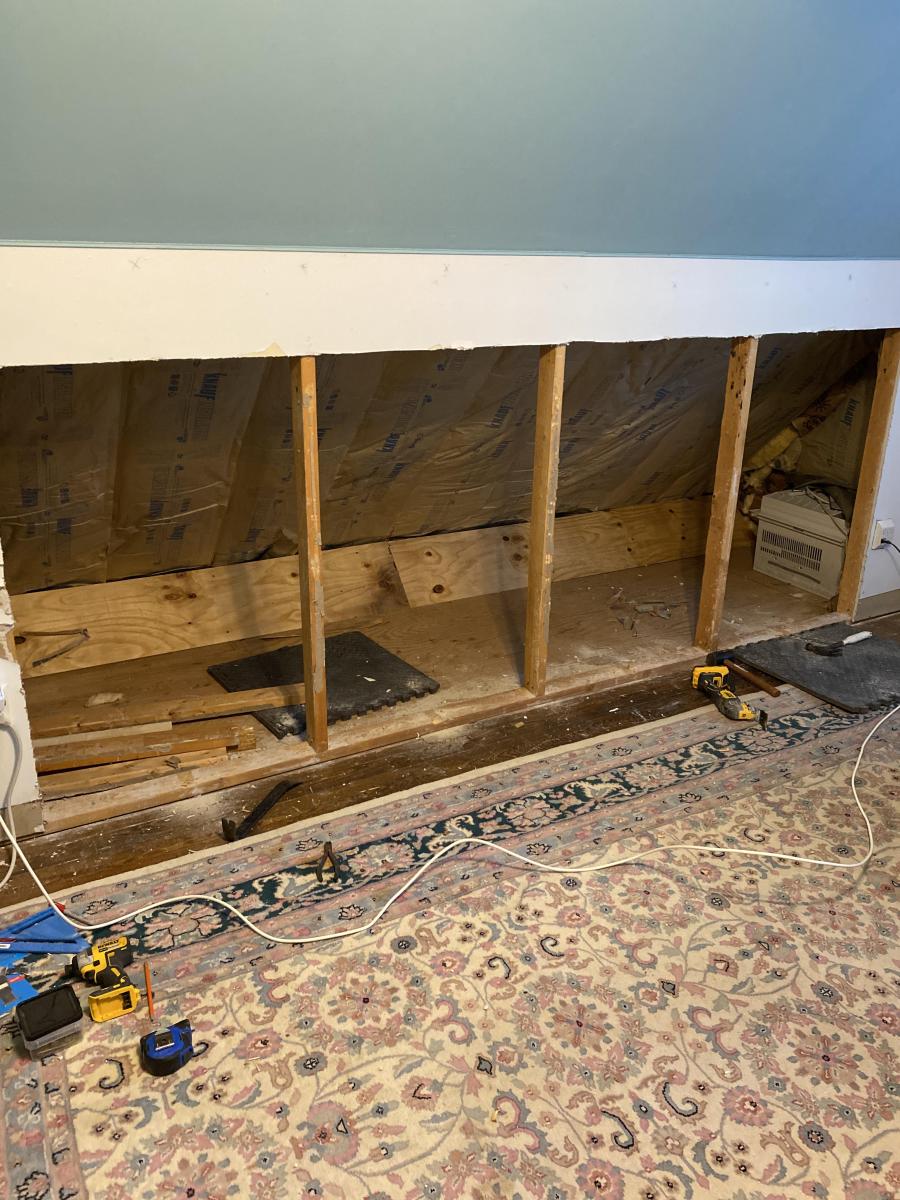
After seeing your knee wall project I decided I could modify it to work for me. first I insulated the angular wall to provide a conditioned environment. (wife wanted to store Christmas decorations. Then removed existing sheetrock, removed every other vertical 2x4 and had the opening size I wanted . Currently working on sheet rocking the interior and will then begin to work on the doors. Waiting on hinges. I think my wife likes it so far. I'll upgrade with photos when done. thanks

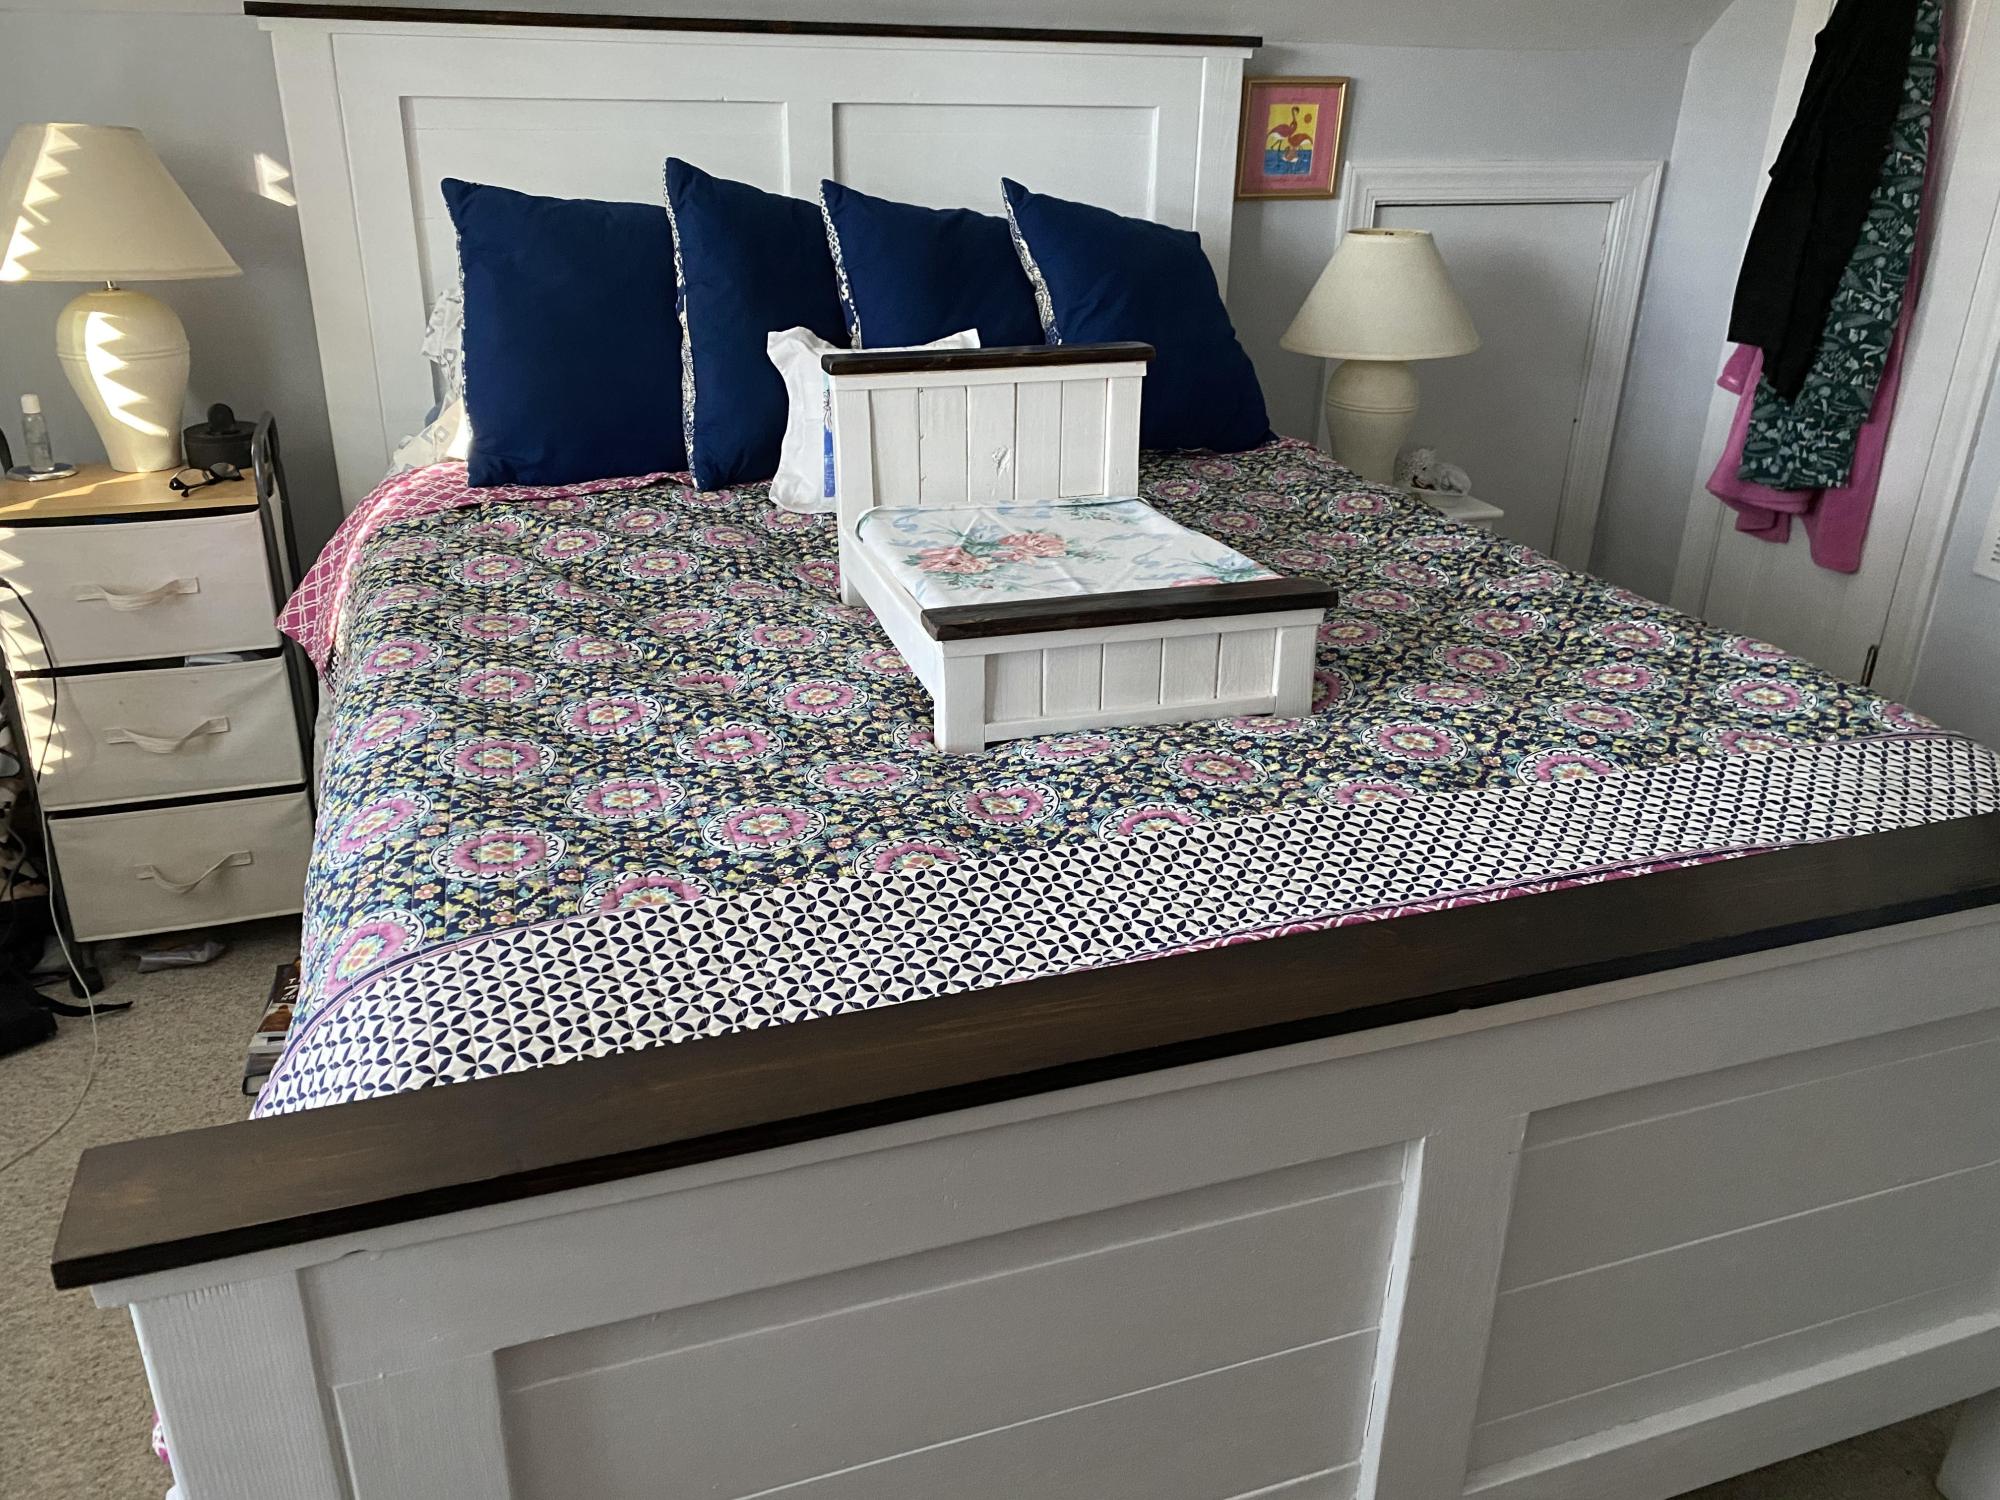
the small bed was from one of your plans (american girl bed) and then we just changed dimensions and made our master bed (Queen). That was a fun project.

Thanks for sending plans, we look forward to them.
George, Mechanicsville, Virginia

Comments

Ladder Shelf

We modified this project to fit our space. We also made the shelves sturdier by cutting a groove for the bottom of the shelves to slide into. This project is much easier when completed by two people.

Built from Plan(s)
Estimated Cost
$35
Estimated Time Investment
Day Project (6-9 Hours)
Finish Used
Glossy black paint.
Recommended Skill Level
Intermediate

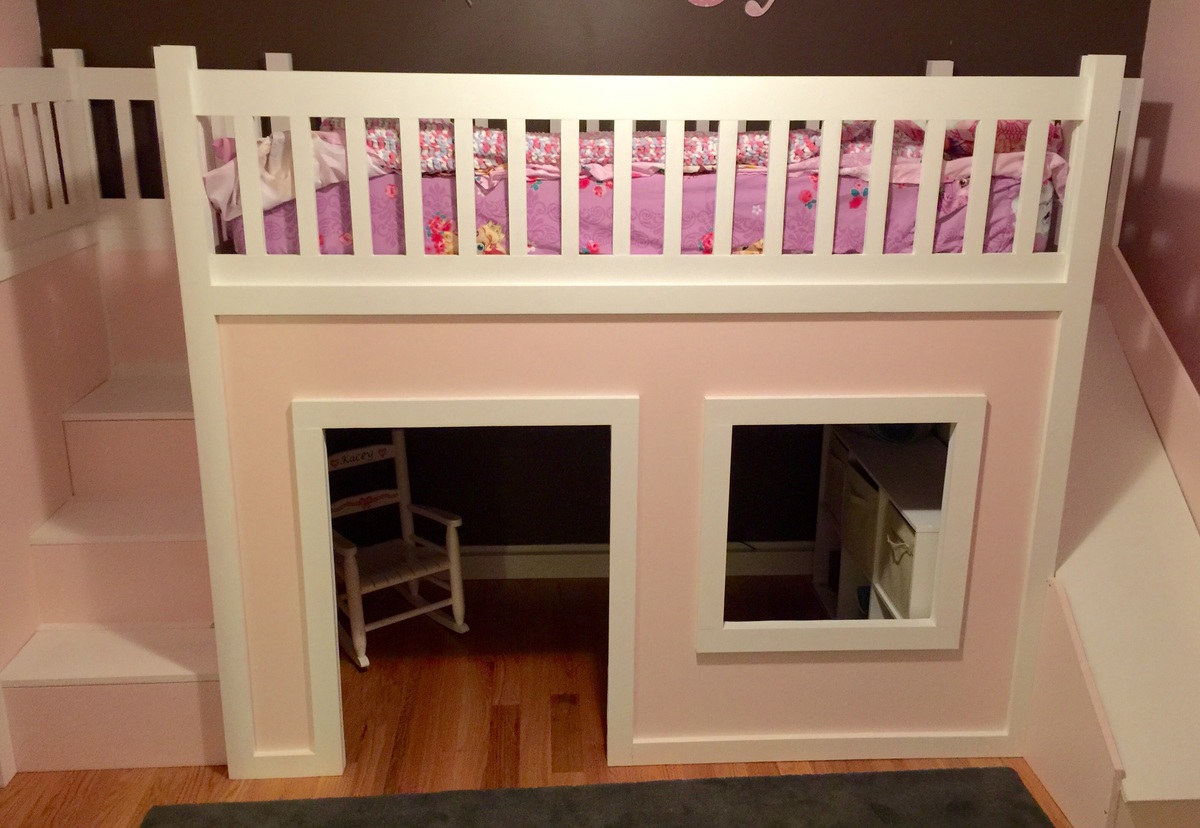
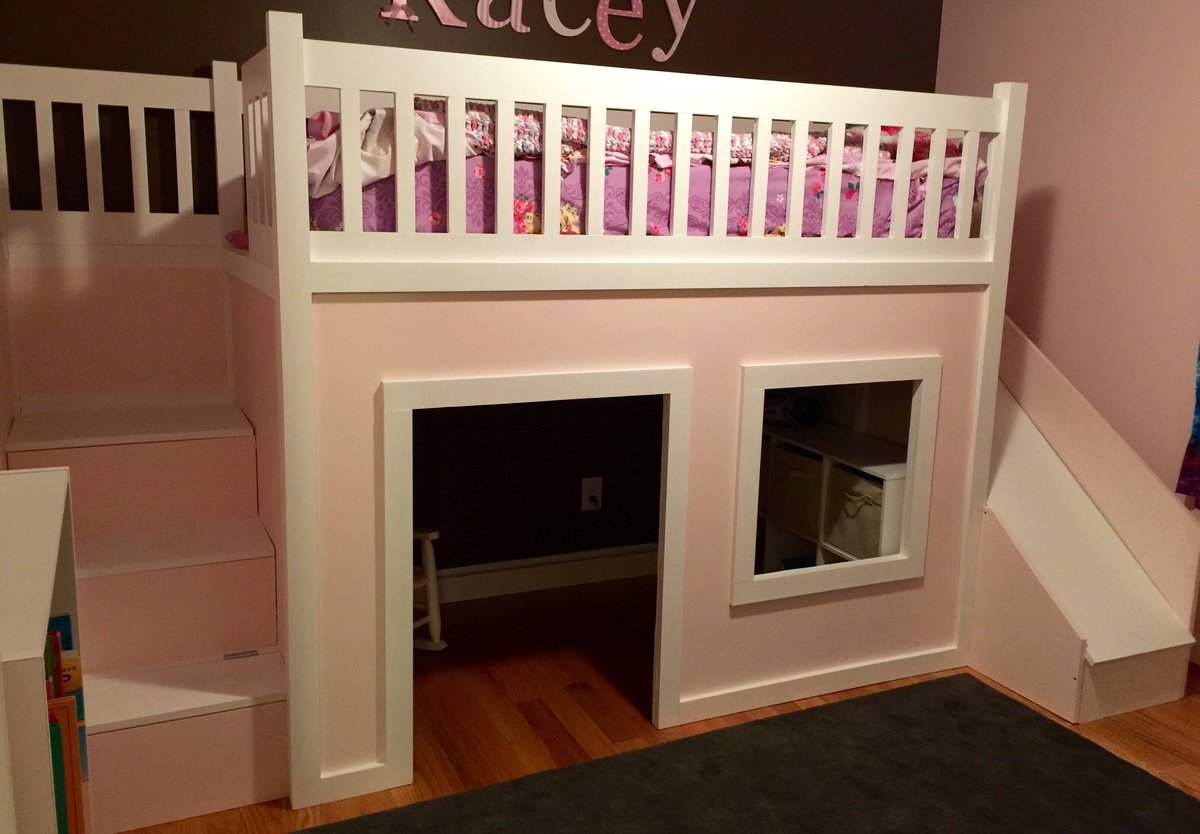
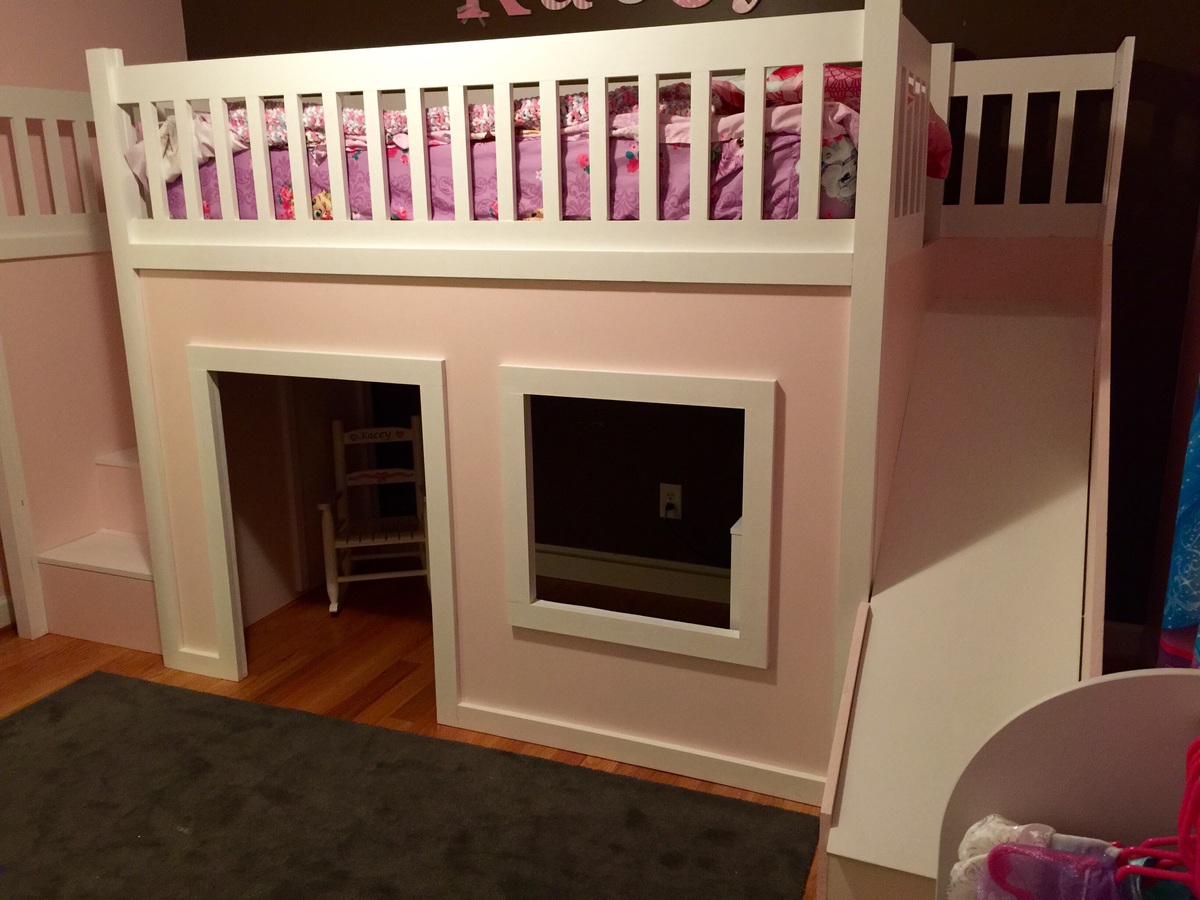
Playhouse loft bed with stairs and slide

Submitted by alminter on Wed, 07/08/2015 - 21:29

This is by far the biggest project I've completed yet. It actually surprised me how easy it was to complete. It did take me about 4 days to build the project and an additional week to sand and paint the project.

I followed the playhouse loft plans and the storage stairs plans, adjusting only the back to allow for the additional length of the slide. I didn't add the windows to the sides (I didn't see any point in having them there). I also used the castle loft plans for the slide. When I first started this project I was planning on making the slide completely separate. I changed my mind mid project after I had the side wall cut to length at Lowe's, so I just added that small piece to the left of the slide to make up for the gap. I also made this project in 4 separate pieces (stairs, slide, front wall, back) so I could put it together in her room in one evening and not have to kick her out. Once we moved it to her room all I had to do was screw the four corners in and attach the back wall and bed slats.

I definitely recommend not using particle board. I had no idea what the difference was between particle board, mdf and plywood when I started this project. Particle board was less then half the cost of plywood, but looking back I would pay the extra for the plywood. I don't feel like the screws hold well in the particle board and it also chipped on the bottom some. I actually had a chunk come off in the corner where I must of screwed to closely to the edge. I'm sure this is basic knowledge for most, but for those newbies (like me) just a little tip.

I had a lot of fun building this bed (not so much sanding and painting) and learned a lot. Now off to browse for my next project :)

Estimated Cost
400-500
Estimated Time Investment
Week Long Project (20 Hours or More)
Recommended Skill Level
Beginner

Comments