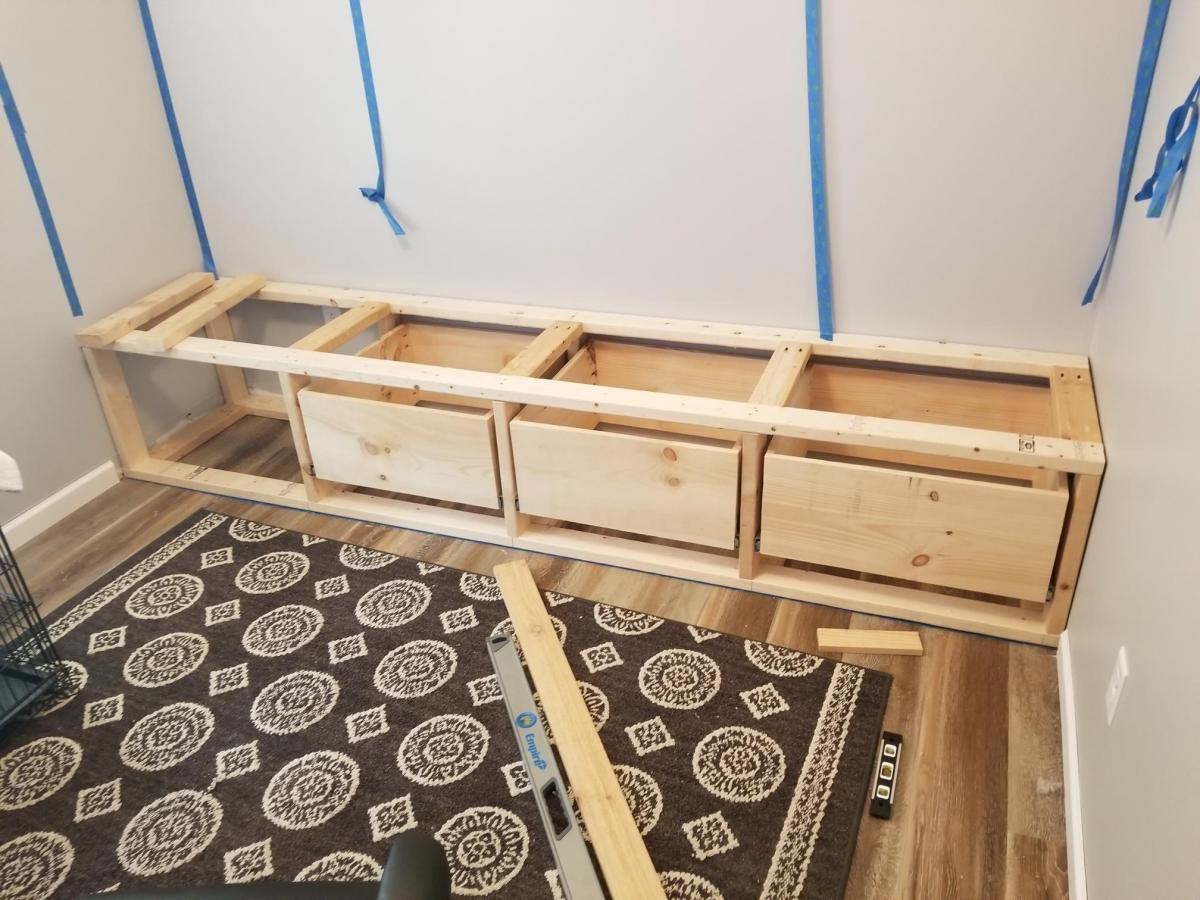
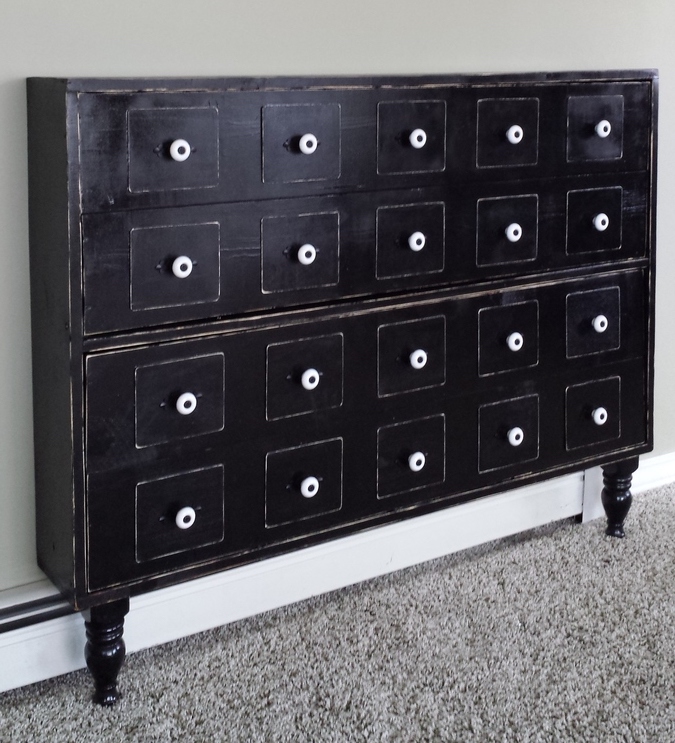
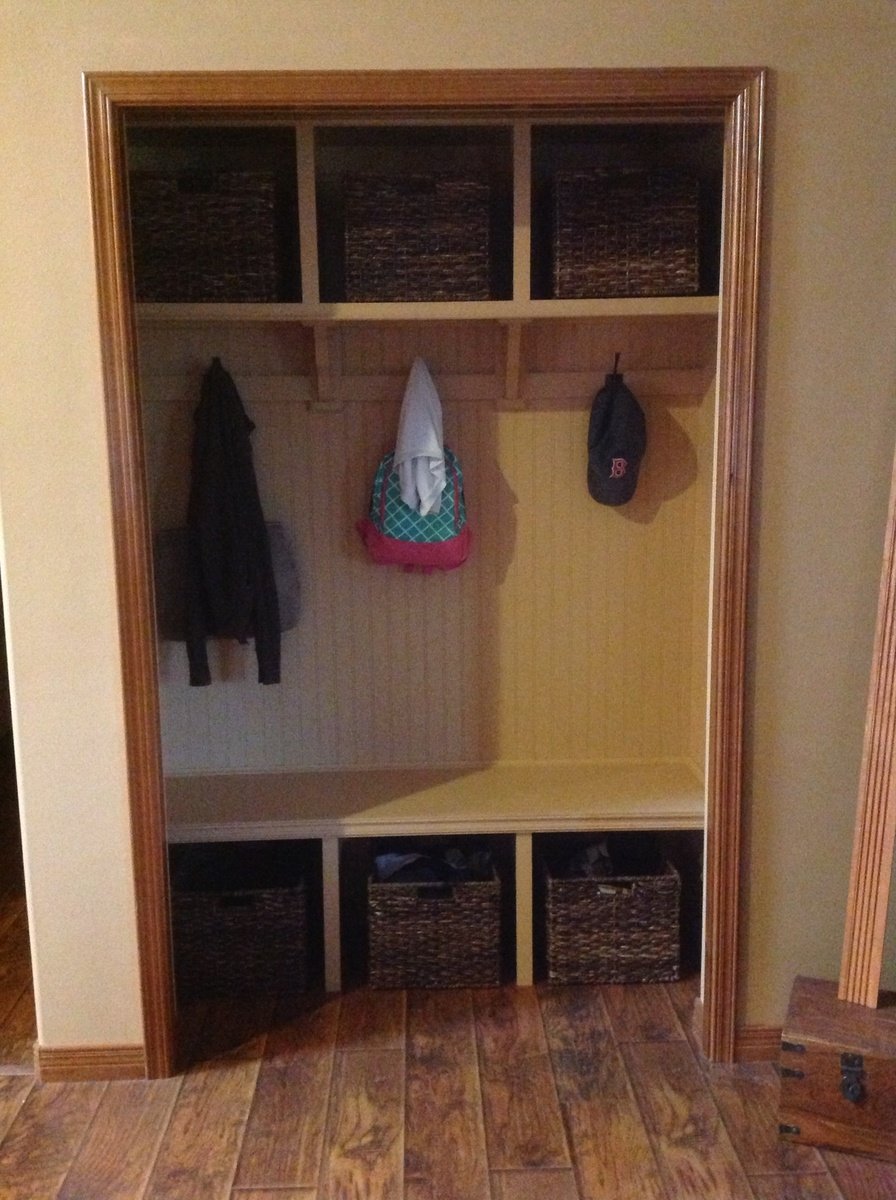
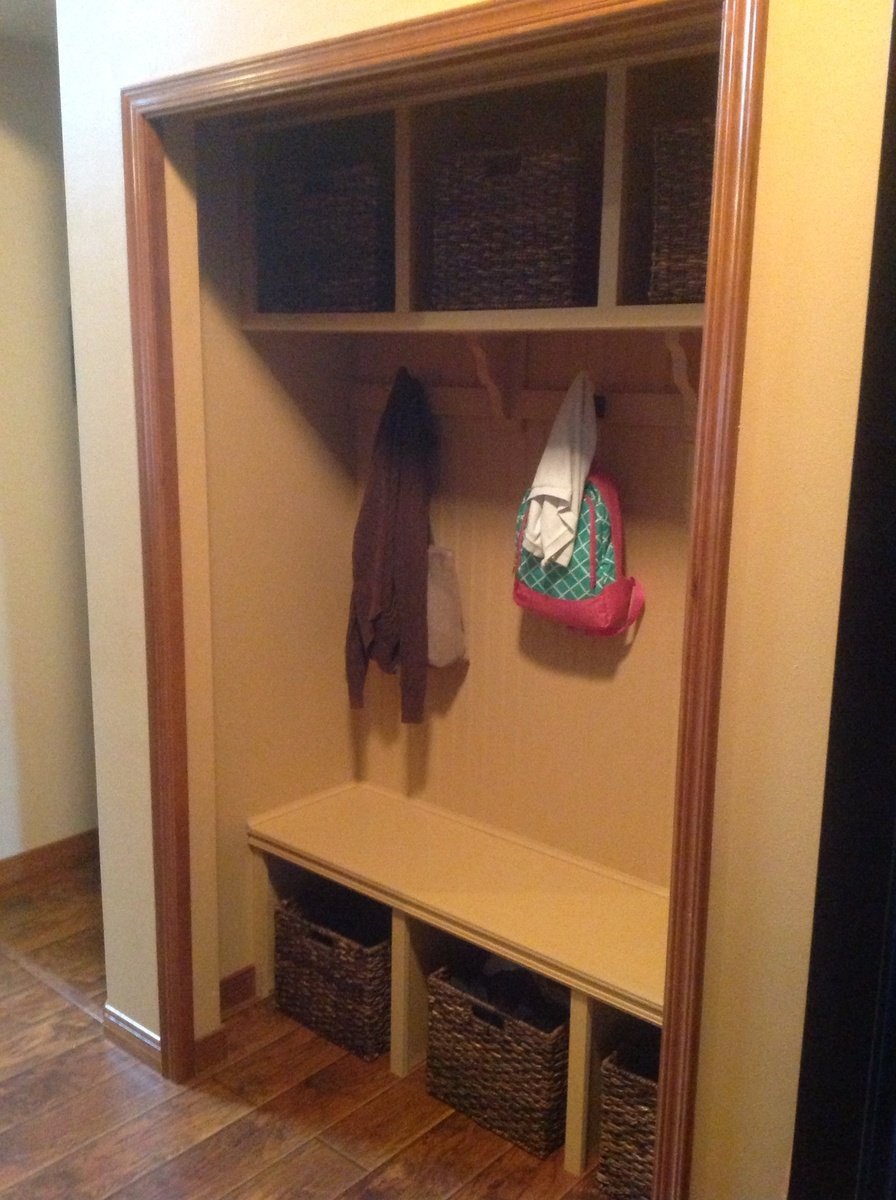
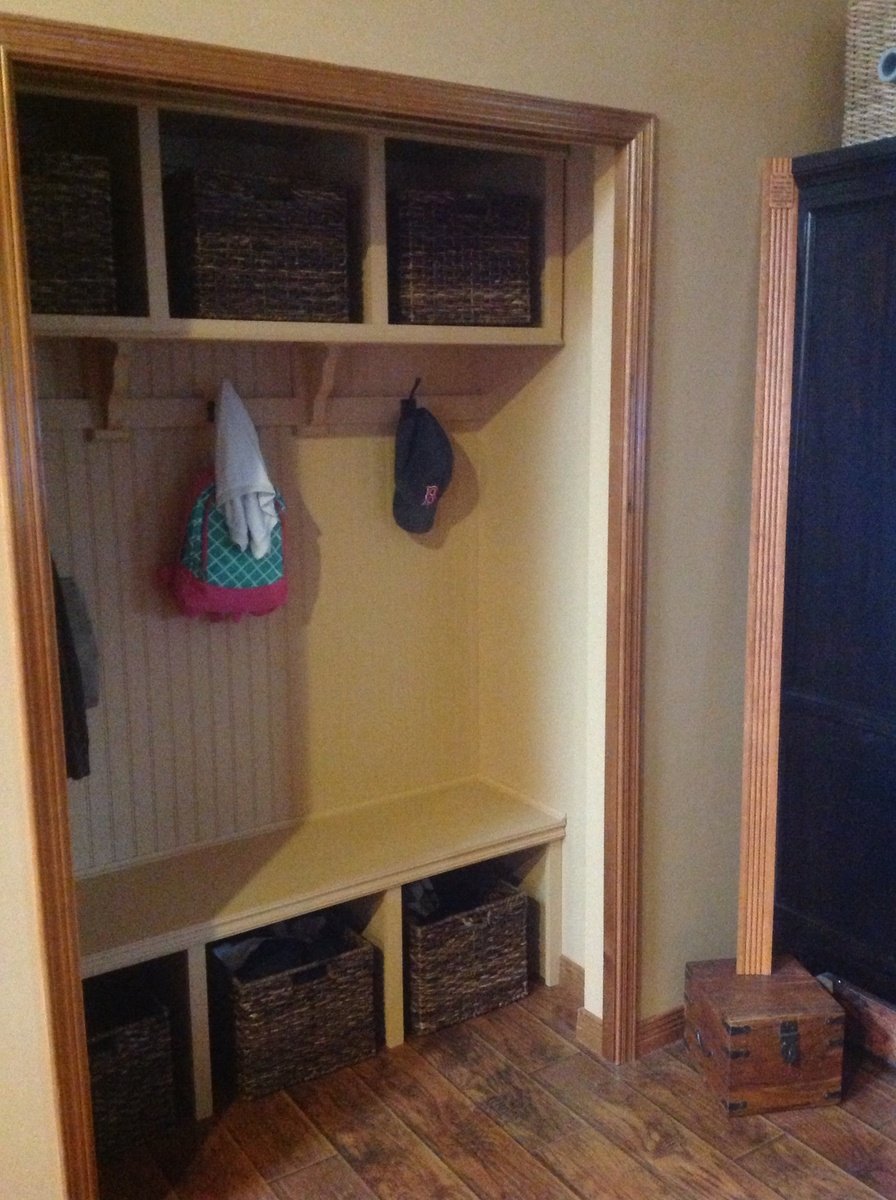
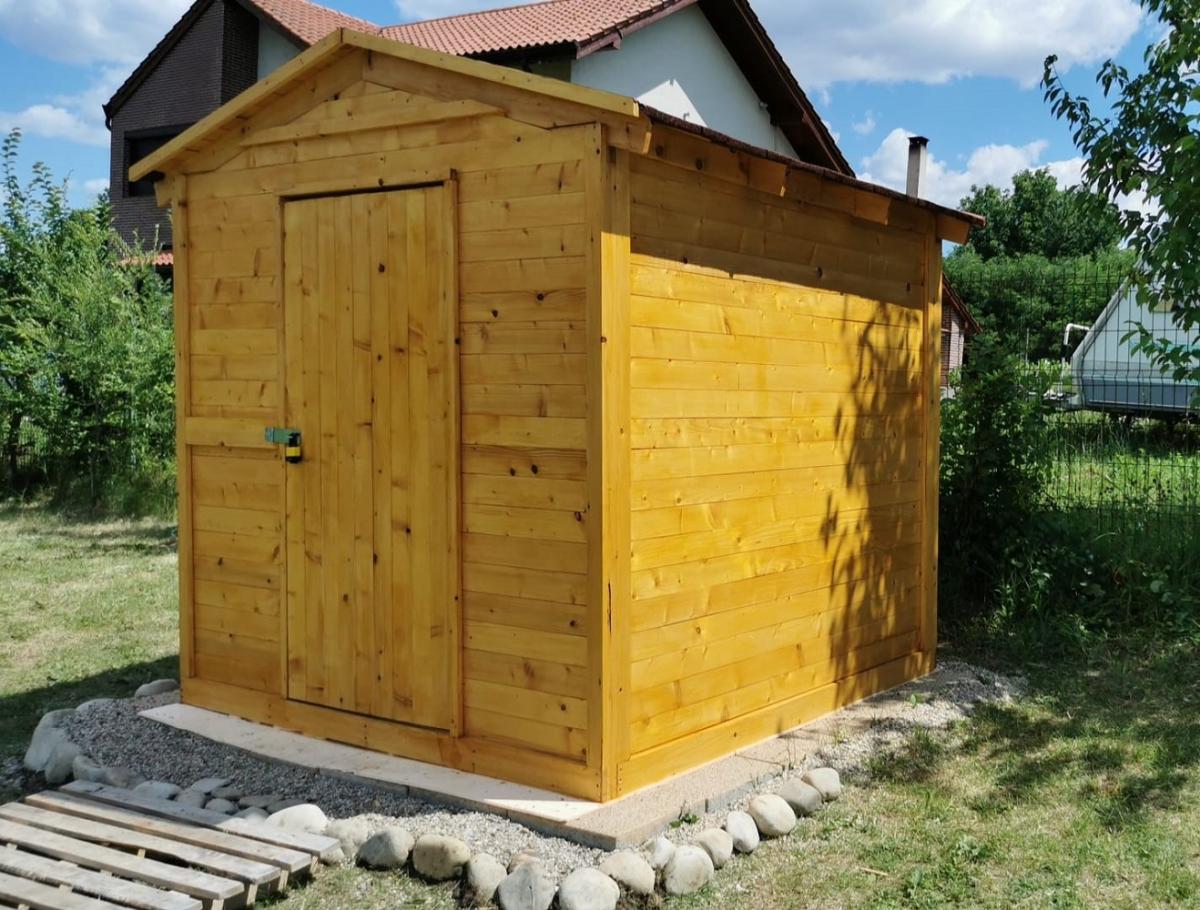
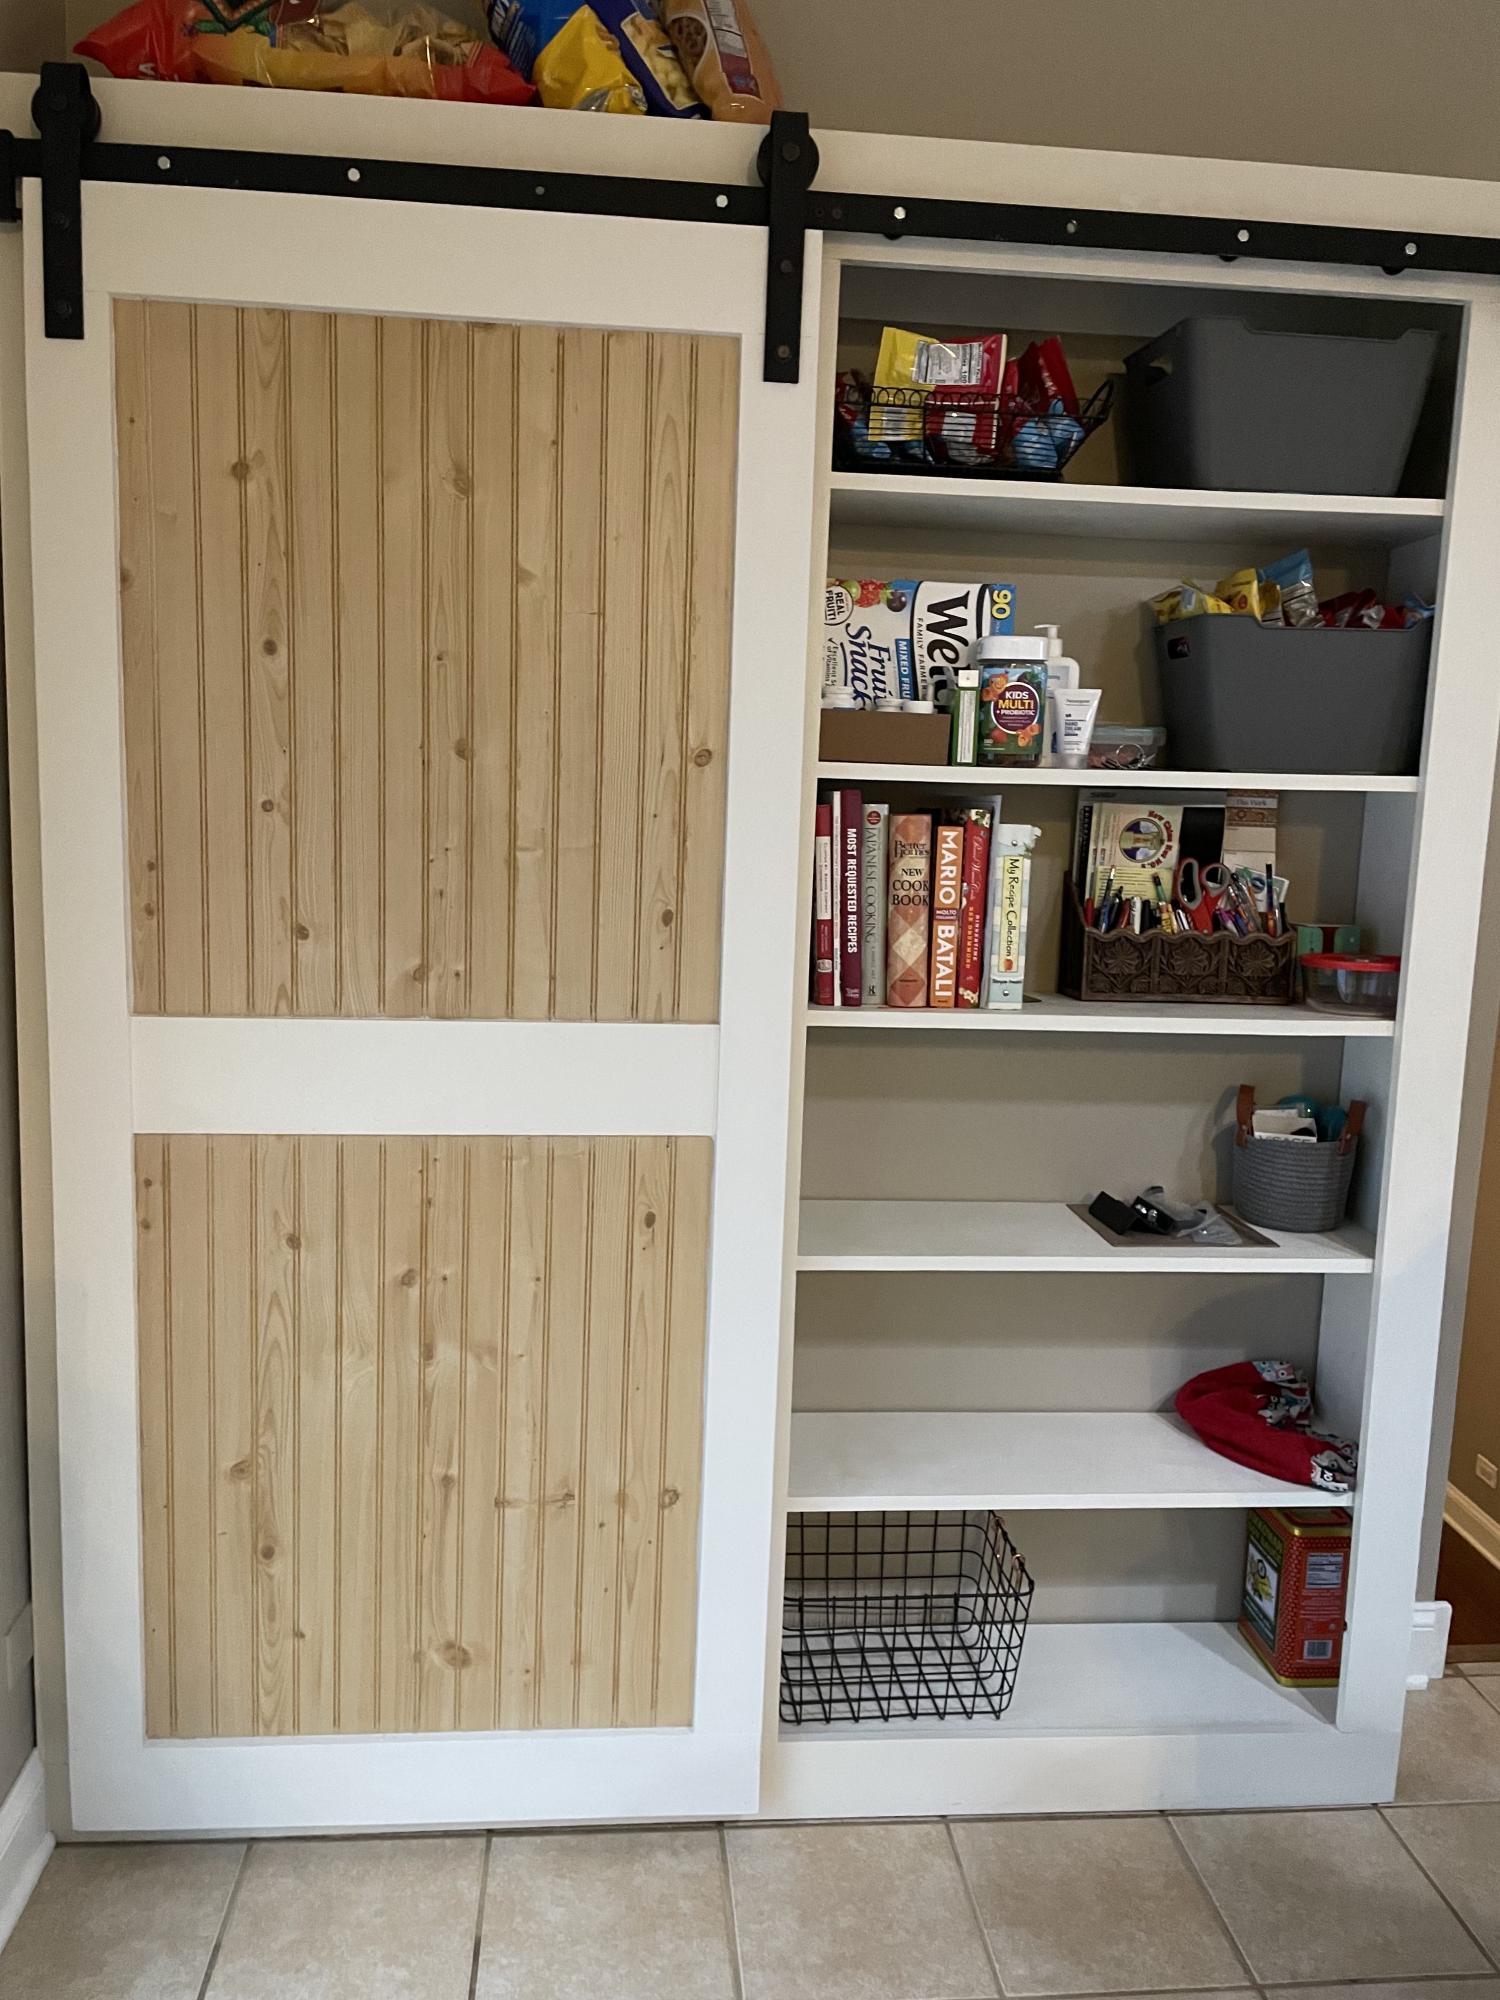
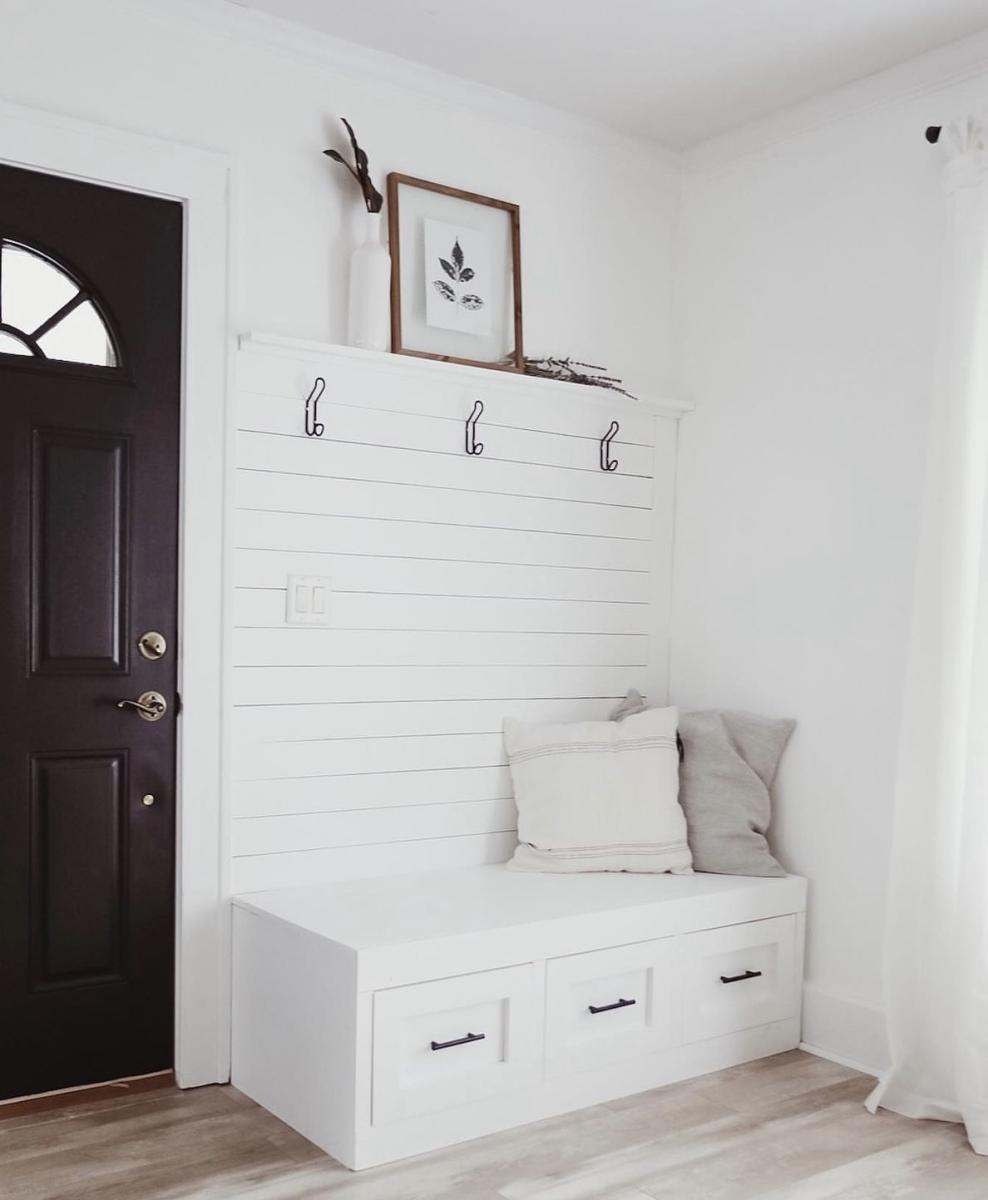
New Mudroom
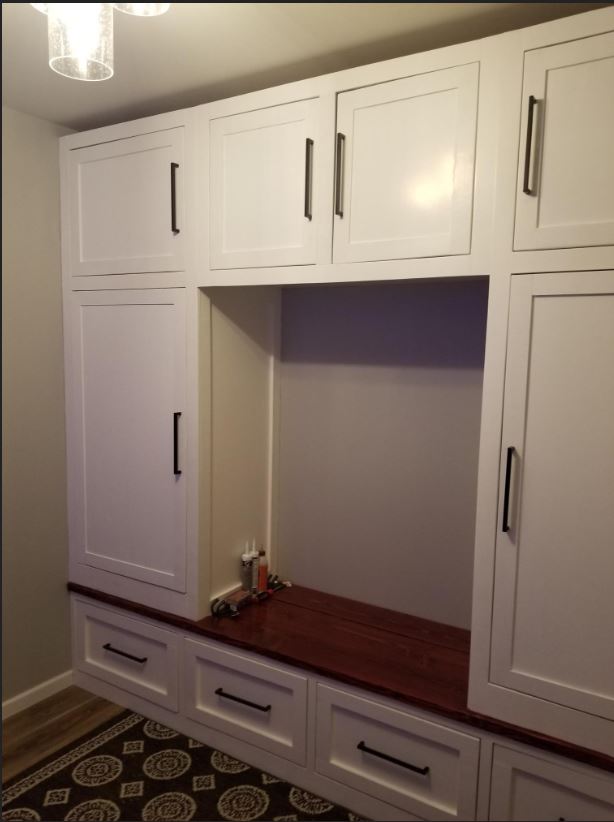
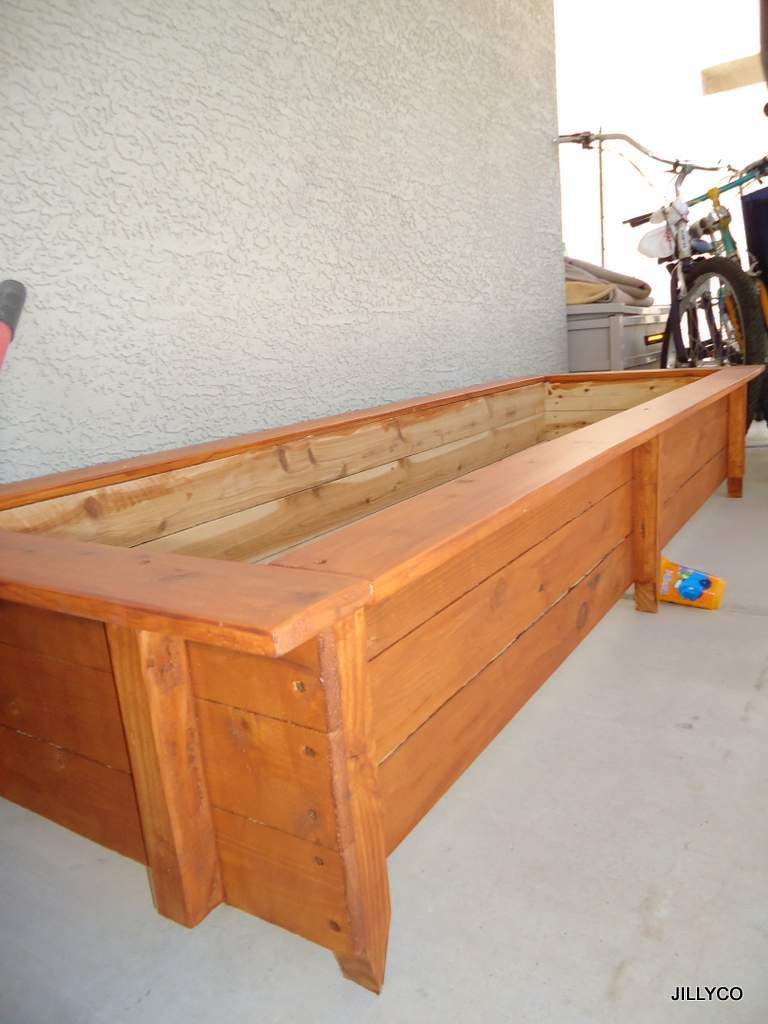
Built this new Mudroom / Office from some plans i found on your website and I absolutely love it! It has turned out better than I Expected and I learned soo many new things when planning and building this out!
Loved this project! We had an old headboard so my wife came up with the idea to cut off the top posts and use them as legs.
Made this one with shelf edges/trim just on the sides. Somehow my top shelf didn't span the width so had to add a little shim on each side but it all worked out! We had all the pallets and used 1x3s for the frame because some of my pallet wood was heavy hardwood. It was not without frustration because I was working with uneven/warped pallet wood but it hits the rustic look. I am happy with how it turned out.
First project I tried from here. Not too bad. I have a Cordless miter saw (Ryobi)
Wed, 04/15/2015 - 15:48
This looks great. This is on my todo list as well for holding my small gas grill. :)
This project took me the majority of a three-day weekend to complete, but it was well worth it! I had the lumber store cut the beadboard panel for me so that it would fit in my car. This was also the first time I built something with doors on it, which was a bit of a learning curve, but came out alright in the end. I used pocket holes to build the face frame, and attached the shelves to the frame first before attaching them to the 1x8 back. I used 1 1/4" pocket hole screws and 2" wood screws. I left off the trim at the top and didn't bother to cut out the footer, but I think it still looks pretty cute.
Project is still in progress but so far this has consisted of a firepit, 20x20 slab, 4 cypress columns, bistro lighting, 2 modern outdoor chairs, 1 modern outdoor bench, 4 matching tables, and a project screen. To come: flower bed, projector storage stand with casters and hinged top, outdoor speakers, and possibly a green egg stand, and extending power to the back of the slab.
We enclosed an unused wet bar and then I built the shelves to make it into a pantry.
We were replacing the floors in our house so we decided to build a closet mud room. We used the plans for the smiling mudroom and altered them slightly. We didn't end up building the partitions because the left and right seats would have been too closed in. We installed bead board on the back wall and used moulding on the shelf and bench. The only hard part was that we had to actually assemble the shelves and bench in the closet because they wouldn't have fit in once built! The Kreg Jig was extremely helpful and well worth the purchase.
Thu, 01/02/2014 - 13:37
I am going to do this in our laundry room which you walk into from the garage - what do you suggest doing when you remove the doors for the current closet? I do not want to install all new trim since that was just done recently, before the mudroom idea came! Thanks!
I had a customer ask if I could make a chair , they sent me a picture and I used your,and another persons chairs as my pattern, I made a few adjustments for my liking. Turned out great, thanks for always sharing and inspiring your ideas
Our last project was building a tiny garden tools storage shed. We used only 1 x 4 boards. We don't have any plans, but you can watch the entire building process on our YouTube channel. We are very proud of the way the project turned out.
I built this bed as a modified farmhouse bed. I chose to have a solid wood headboard instead of having a slotted look as it fit better in the decor of our home. I purchased a bed rail kit from Rockler so that I could remove the rails without removing any screws. (http://www.rockler.com/product.cfm?page=5783) It was a relatively easy project considering my skill set was very low when starting! http://www.lifewithfingerprints.com/2010/09/labor-of-love.html
Wed, 08/17/2011 - 14:03
Very beautiful! I dream to build the farmhouse bed. The finish is awesome in black.
I built a couple of these for the garden area and they are wonderful to sit in. As an experiment I painted these with chalk paint then finished them with several thin coats of spar urethane. After a couple of years in the sun, they seem to be holding up pretty good. I may sand and apply more spar urethane this summer just to keep them looking good.
Fri, 02/03/2023 - 12:45
Looks fantastic, thank you for sharing, so glad you are enjoying them!
Using the Barn Door Pantry plan, I partially built this in my shop then took it apart and transported it to my son's house where we reconstructed it. This is a massive project and I recommend that you have enough room (and help) to build it and move it. The door is built with 1/2 inch plywood, framed with 1 by 4's with bead board inserts.
Sat, 03/18/2023 - 19:18
Very pretty and functional, what more can you ask for! Thanks for sharing:)
I decided to make beds for my kids after looking at ones to purchase that all had bad reviews about the sturdiness.
Thank you for providing such comprehensive plans here. I have never built anything from scratch before, and this project was a lot of fun. I'll be starting a second one this week.
Mon, 05/01/2023 - 08:25
You did such a great job, thank you for sharing and tagging on social media!
I made the picnic table for my grandchildren. The plans were great and so easy to follow. The cuts, measurement are perfect. Table is sturdy and came out balanced! I used water based paint. Thanks for the plans!
Second wood-working project to go with our shiplap wall. Pretty happy with how it turned out!
My granddaughter loved the console table she saw in your plans. Together, we made it! The same one at Pottery Barn was $1,299.
Nicole Stevens grandfather (pasta Joe)
Full length mirror made from a cheap $10 unframed mirror from IKEA. Trimmed out with some 1 by 3, 1 by 4 and 1 by 2. Stained black and then painted white. sanded between coats of white to show some of black through and give antique worn look.
The Custom Built-ins started out with lots of research, and like many DIY project we looked to Pinterest and Houzz for inspiration. A lot of love and time went into this project. I can't stress enough how important research is. This process is often over looked because DIYers just want to get to the building process as quickly as possible, but trust me when I say doing solid research will save you a lot of stress and time when it comes to building.
Modified so that it could fit 12 people comfortably.
THANK YOU Ana's your plans are a life saver and pocket book saver as well. You make your plans so easy to follow and use. For my project I used the cedar fence pickets and redwood 2" x 2" stakes that where on sale at the orange box store for "6 pack bundle" for only $.50 each. All I can say is SCORE! ;') Since we live in Arizona I treated all the lumber with a outdoor weather proofing wood finish (Cedar Color), lined all the interior beds (only the Wood Sides) with 4 mil plastic to keep the cedar from absorbing all the water and wired mesh on the bottom of the garden prior to adding dirt. This keeps my local rabbits/other creatures from eating my roots from the bottom up. And I have my dog from the top side. We are already a 100 degrees here and we needed to get our seedlings in a garden asap. Thanks Again for the Plans, Ana! I will be making more of these garden boxes to come.
Thu, 08/08/2013 - 09:39
Love this! We are new to Phoenix - originally from the Midwest - and I really would like to add some raised beds to our backyard. I appreciate your comments on how you adapted these for the desert! May I ask what side of your house they are on? I'm thinking to put mine on the east side so they get morning sun, but not the scorching afternoon rays. Thanks for your AZ advice!
Comments
Ana White Admin
Mon, 03/15/2021 - 12:08
WOW!
That turned out awesome in your space, thank you for sharing!