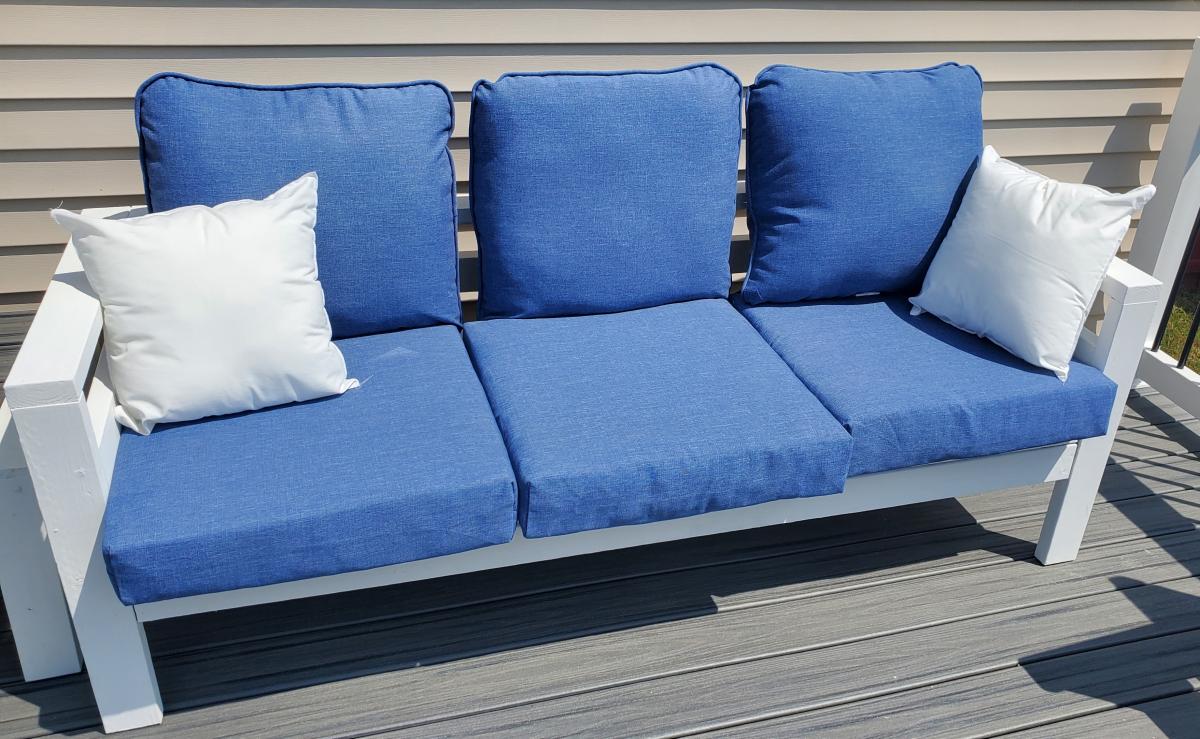
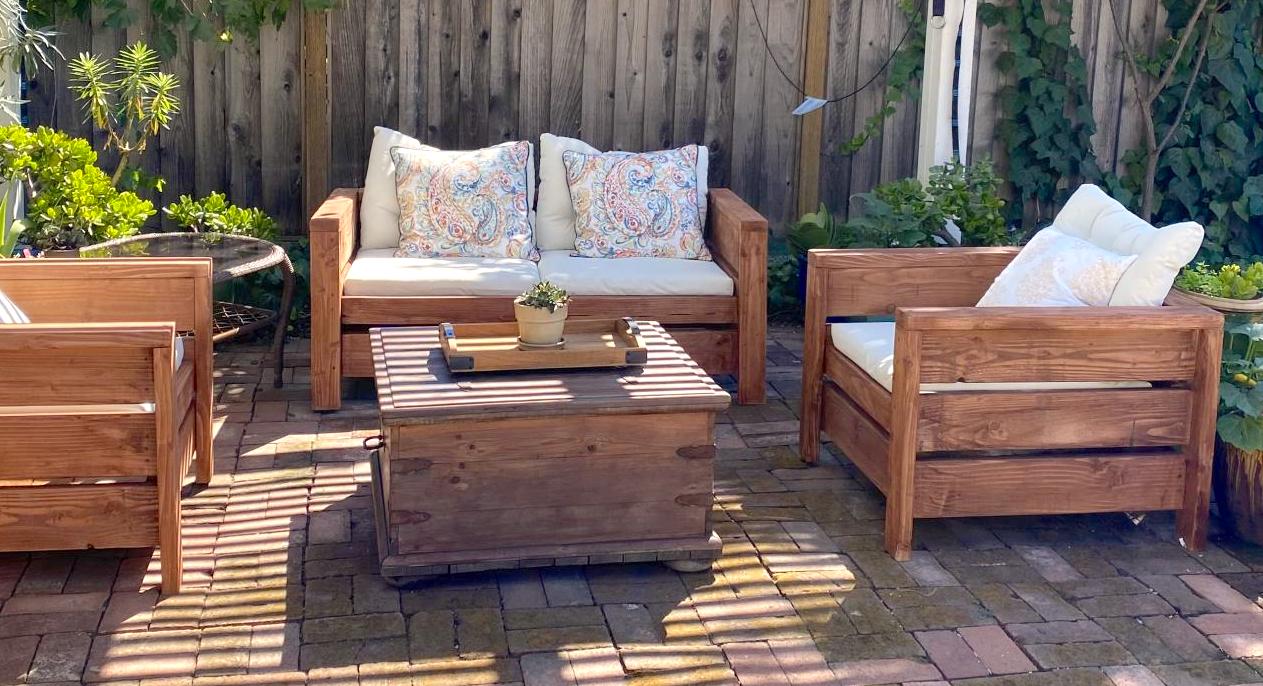
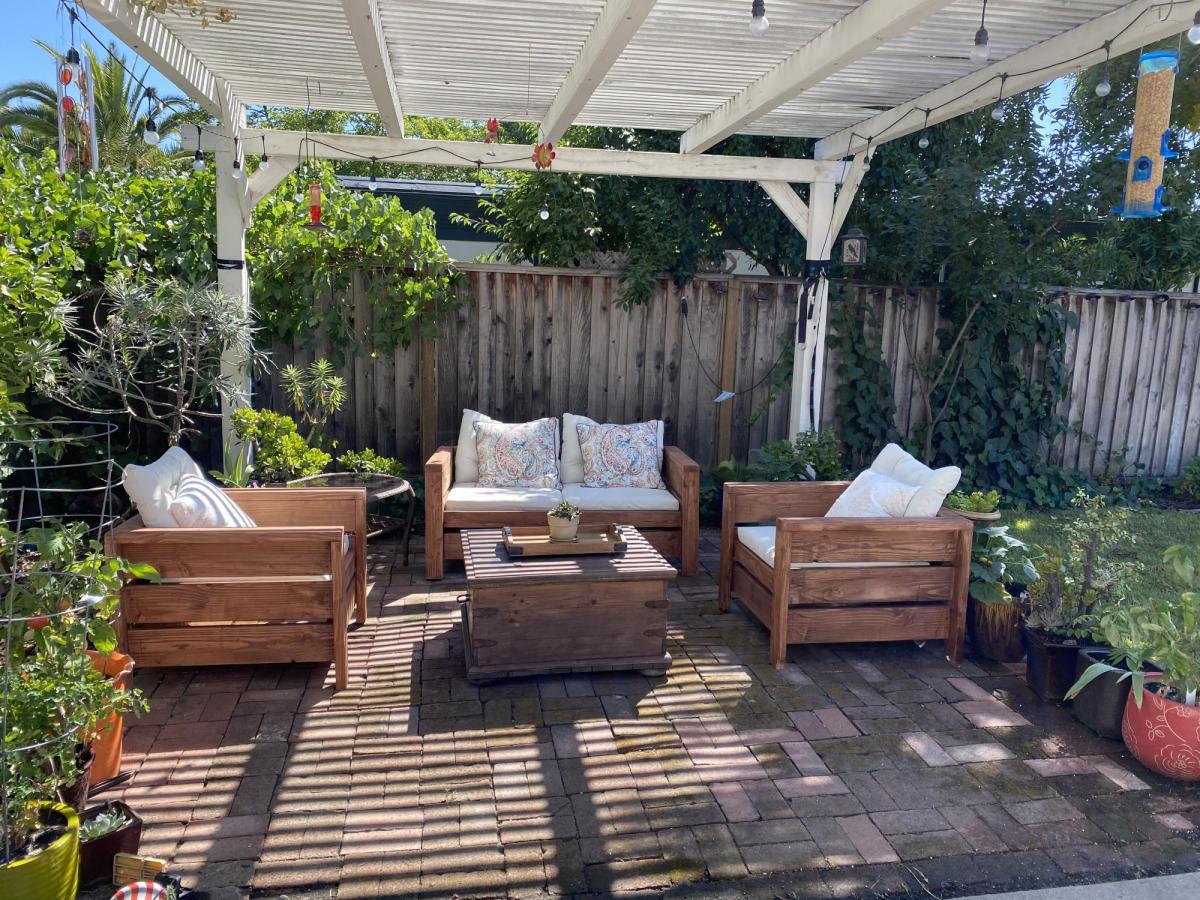
Outdoor Sofa and Table
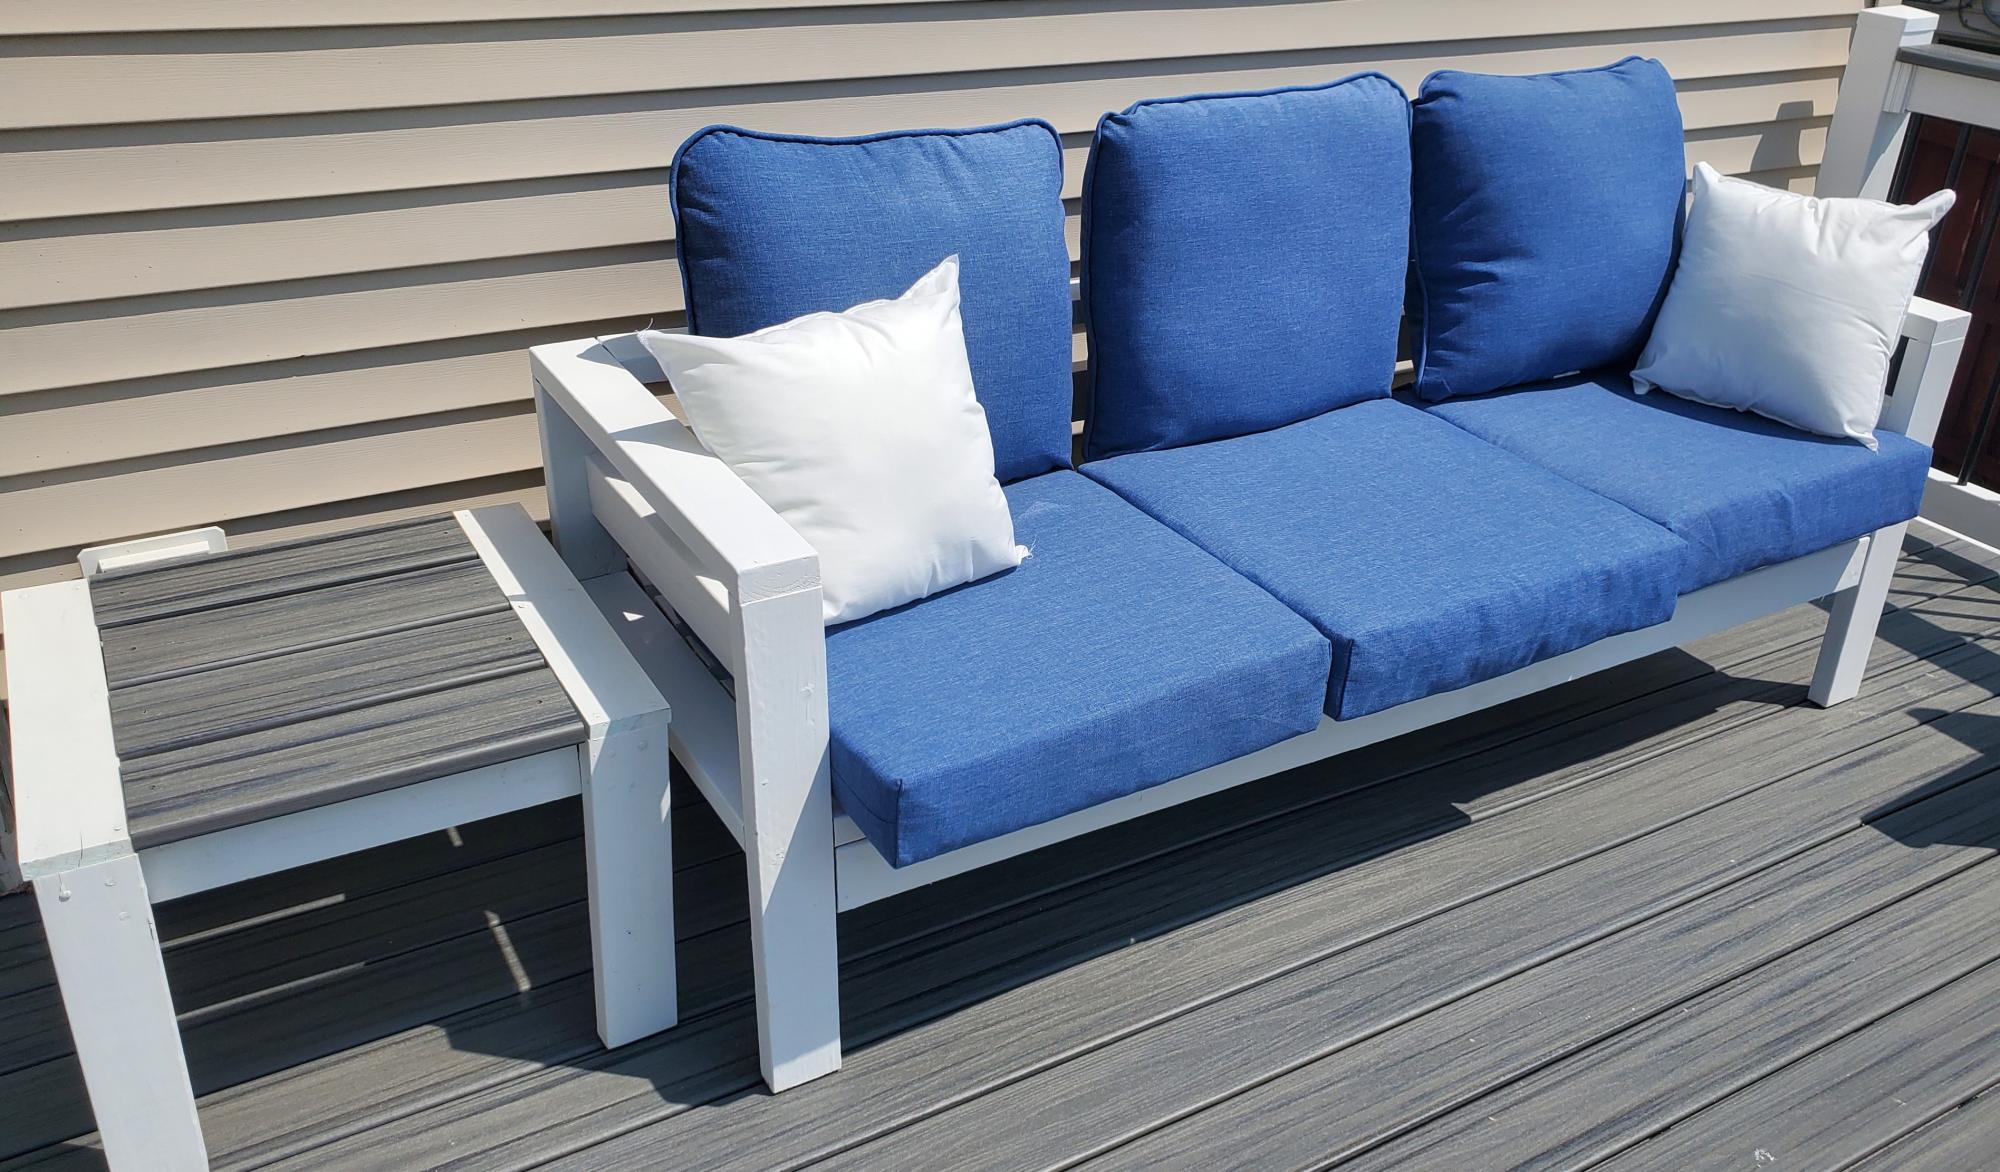
Deck sofa from a Ryobi/Ana video a few years ago. End table is also from Ana's plan using leftover Trex decking. Special thanks to Jen for her assistance.
Built from Plan(s)
Deck sofa from a Ryobi/Ana video a few years ago. End table is also from Ana's plan using leftover Trex decking. Special thanks to Jen for her assistance.

This was one of my first bigger builds. I am so happy with the way it turned out!

Thu, 05/10/2012 - 10:32
So stunning! It's gorgeous! I just love the wood!
Thu, 05/19/2016 - 19:05
This bookcase wouldn't be out of place amongst the Pottery Barn's bookcases. In fact, it inspired me to go out this afternoon and buy some cedar boards so I can start building my own version first thing tomorrow. Thank you, Becky.
love Ana! We moved from the city to a late 1800's Victorian farm house with no closets, no basement, no storage! This was a great Woodshop 101 project for my husband and me, and gave us extra space in the kitchen. Can't wait to do another Ana project.
Wed, 08/28/2019 - 11:03
This is awesome!!! Thanks so much for sending in a brag post!
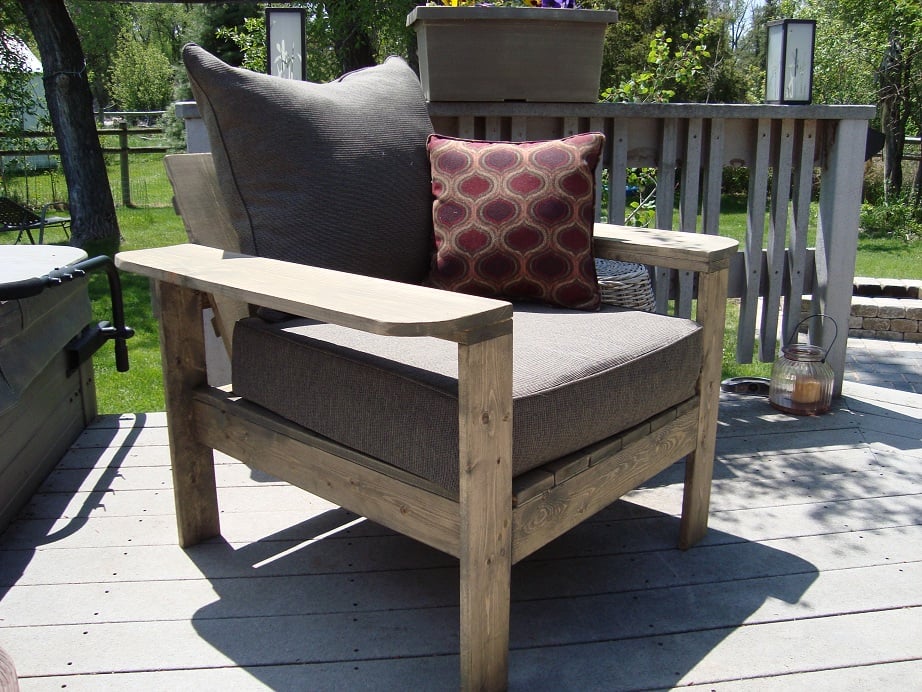
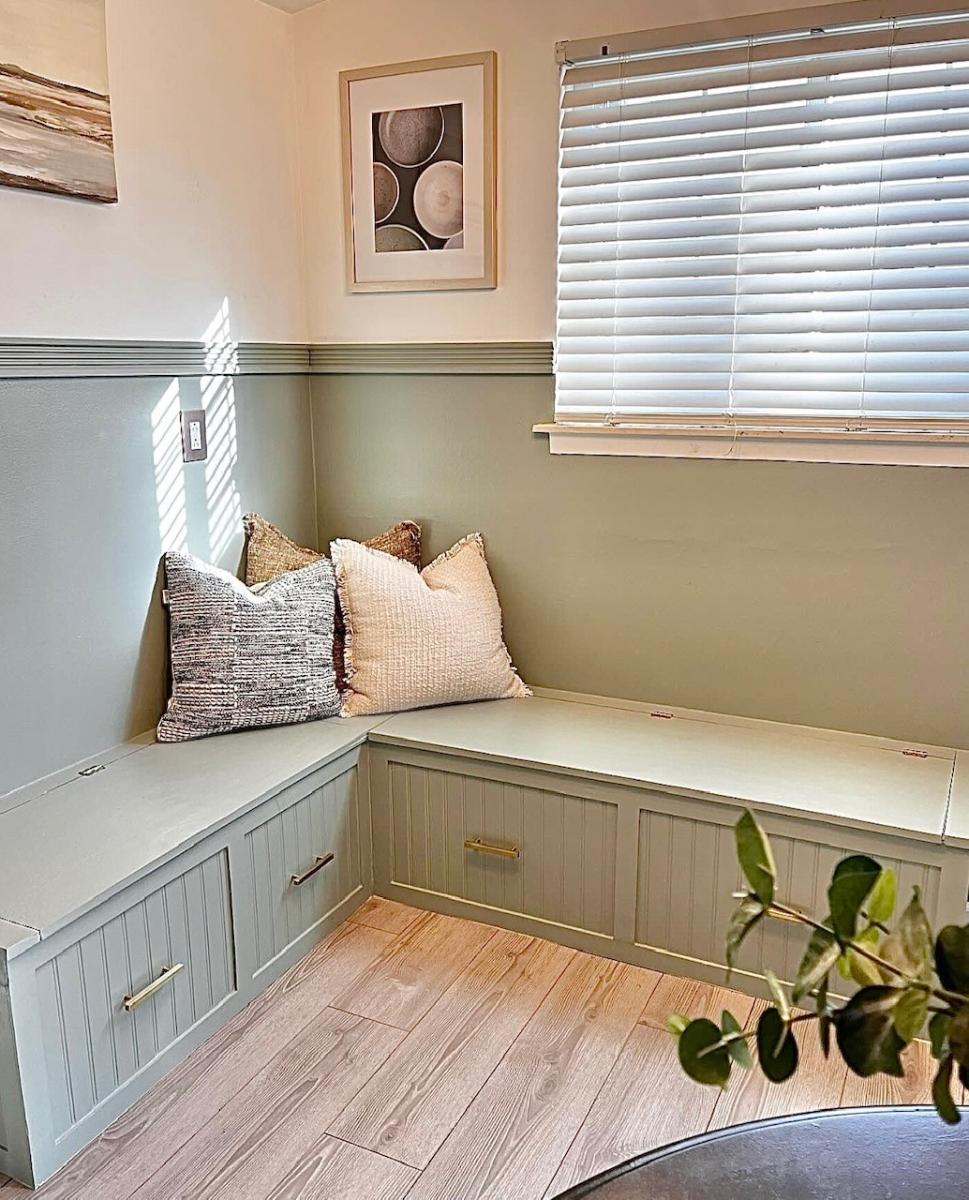
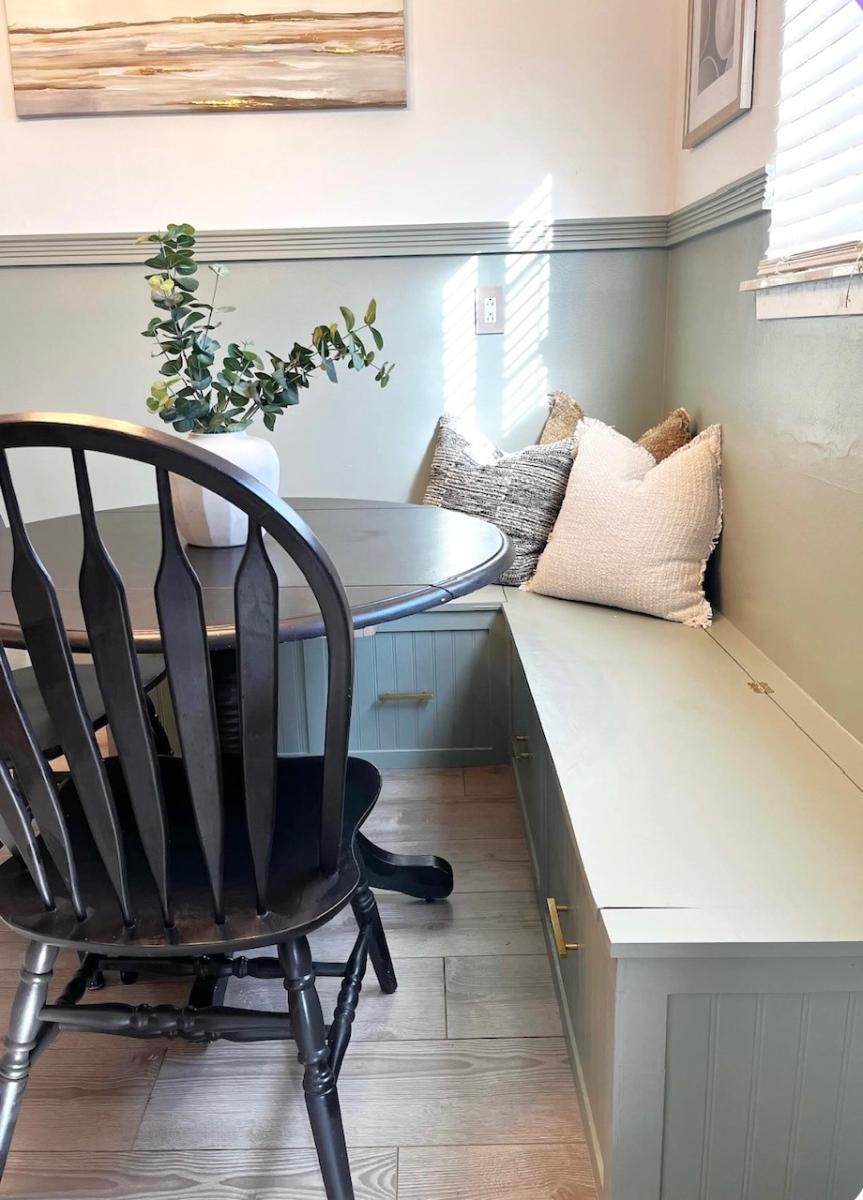
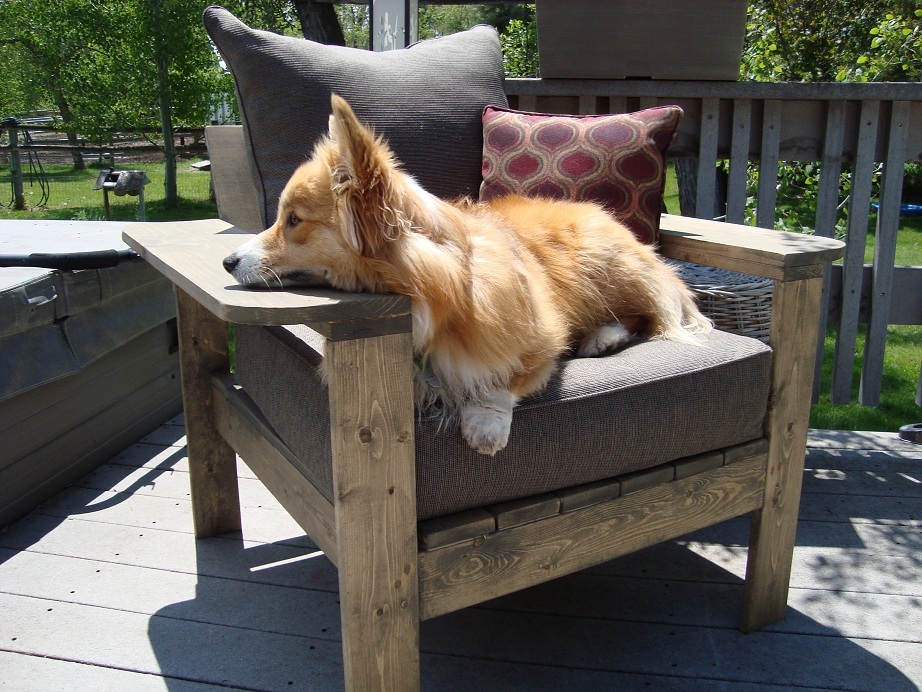
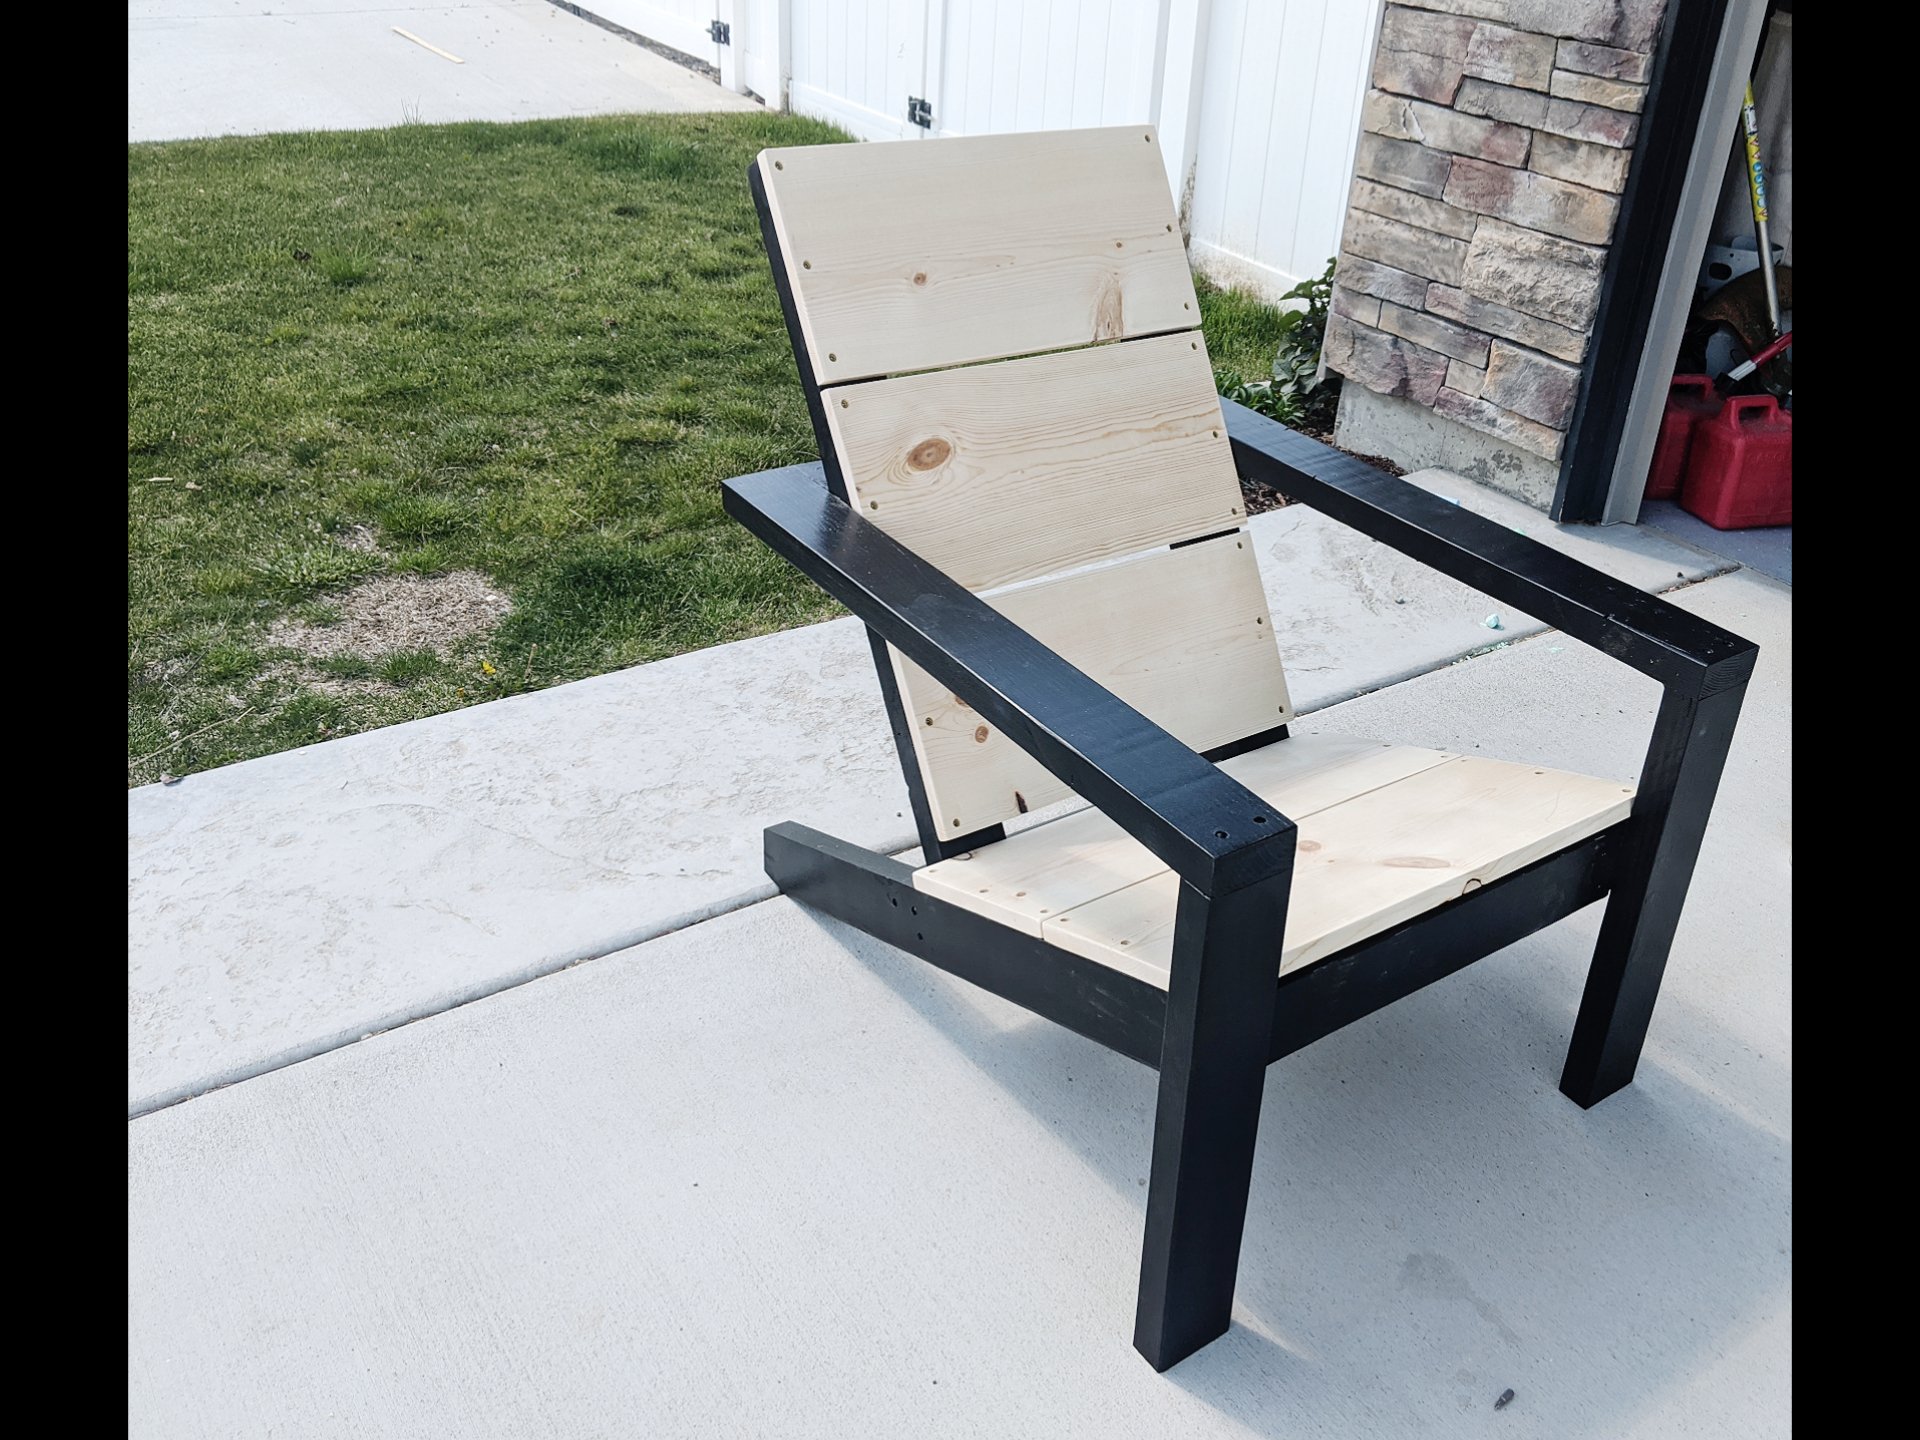
I used the plans for the simple outdoor lounge chair and just made the arms wider, the cushions came from Target.............the dog loves it !
Thu, 05/31/2012 - 07:14
This is BEAUTIFUL!!! Nicely done woodwork and cushions too!
Thu, 05/31/2012 - 07:15
This is BEAUTIFUL!!! Nicely done woodwork and cushions too!
Thu, 05/31/2012 - 09:28
I love how you made the arms wider and rounded. Adirondack chair meets school desk! Bravo!
Sat, 07/28/2012 - 18:06
My husband and I love to sit outdoors and read with a hot cup of tea. The wide are will be perfect for us. Would you mind sharing the cost of your project?
Sun, 09/14/2014 - 22:04
Hi! I would love to make this patio set but I am having some trouble with cushions. I noticed that Ana stated this chair will use a standard size 20x20 cushion. On your notes it says you got your cushions at Target, are they 20x20, I love the deep cushions but cant seem to find any that sized. Are yours 20x20, or did you modify you project? If so, what dimensions did you use? Thanks so much!!!
Sun, 09/14/2014 - 22:05
Hi! I would love to make this patio set but I am having some trouble with finding cushions. I noticed that Ana stated this chair will use a standard size 20x20 cushion. On your notes it says you got your cushions at Target, are they 20x20, I love the deep cushions but cant seem to find any that sized for the bottom ones. Are yours 20x20, or did you modify your project? If so, what dimensions did you use? Thanks so much!!!
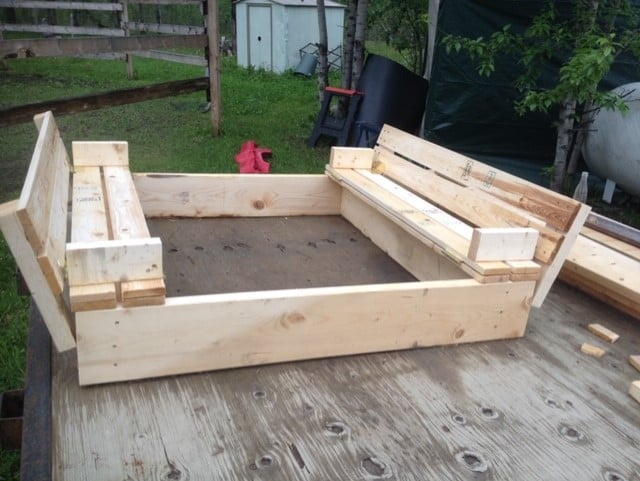
I built this sandbox for my kiddo's because we have cats! It was great. Easy to build, great plans for it.
This was my second project from Ana White, and overall it was successful. I used a miter saw for the cuts (struggled with the bevel because my 12 inch saw isn't a slider, a kreg jig to attach everything (struggled to attach the 1x3s to the legs due to the angle of the dril and tight space), but everything eventually was held solidly together and it's really very sturdy. My husband is about 160 and he was able to jump on it with absolutely no give.
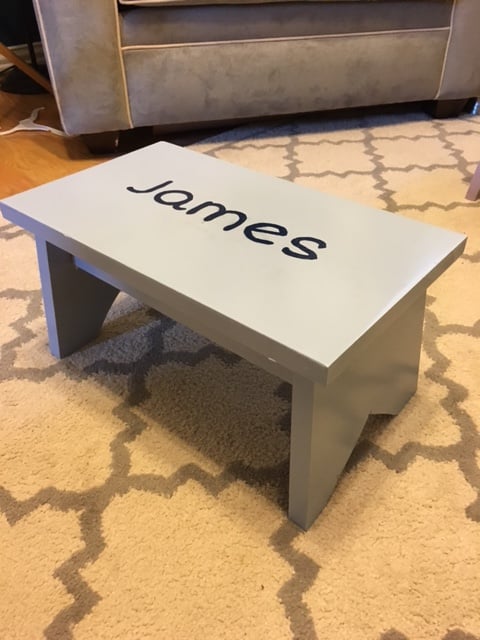
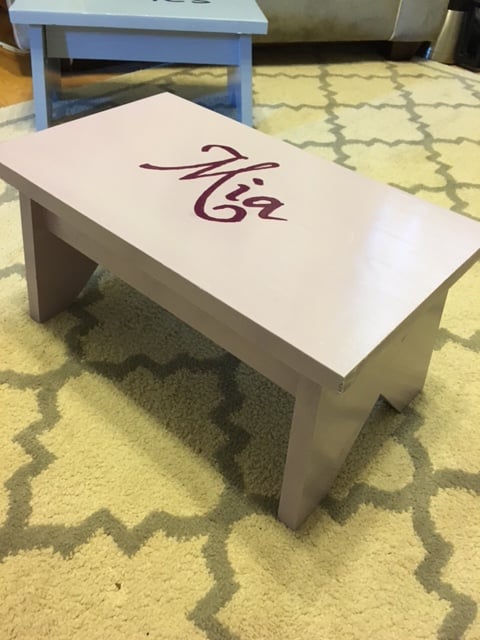
The paint is just small samples we had on hand from home depot to coordinate with other projects in the kids' rooms, and I handpainted the letters. I finished it with a double coat of polycrylic.
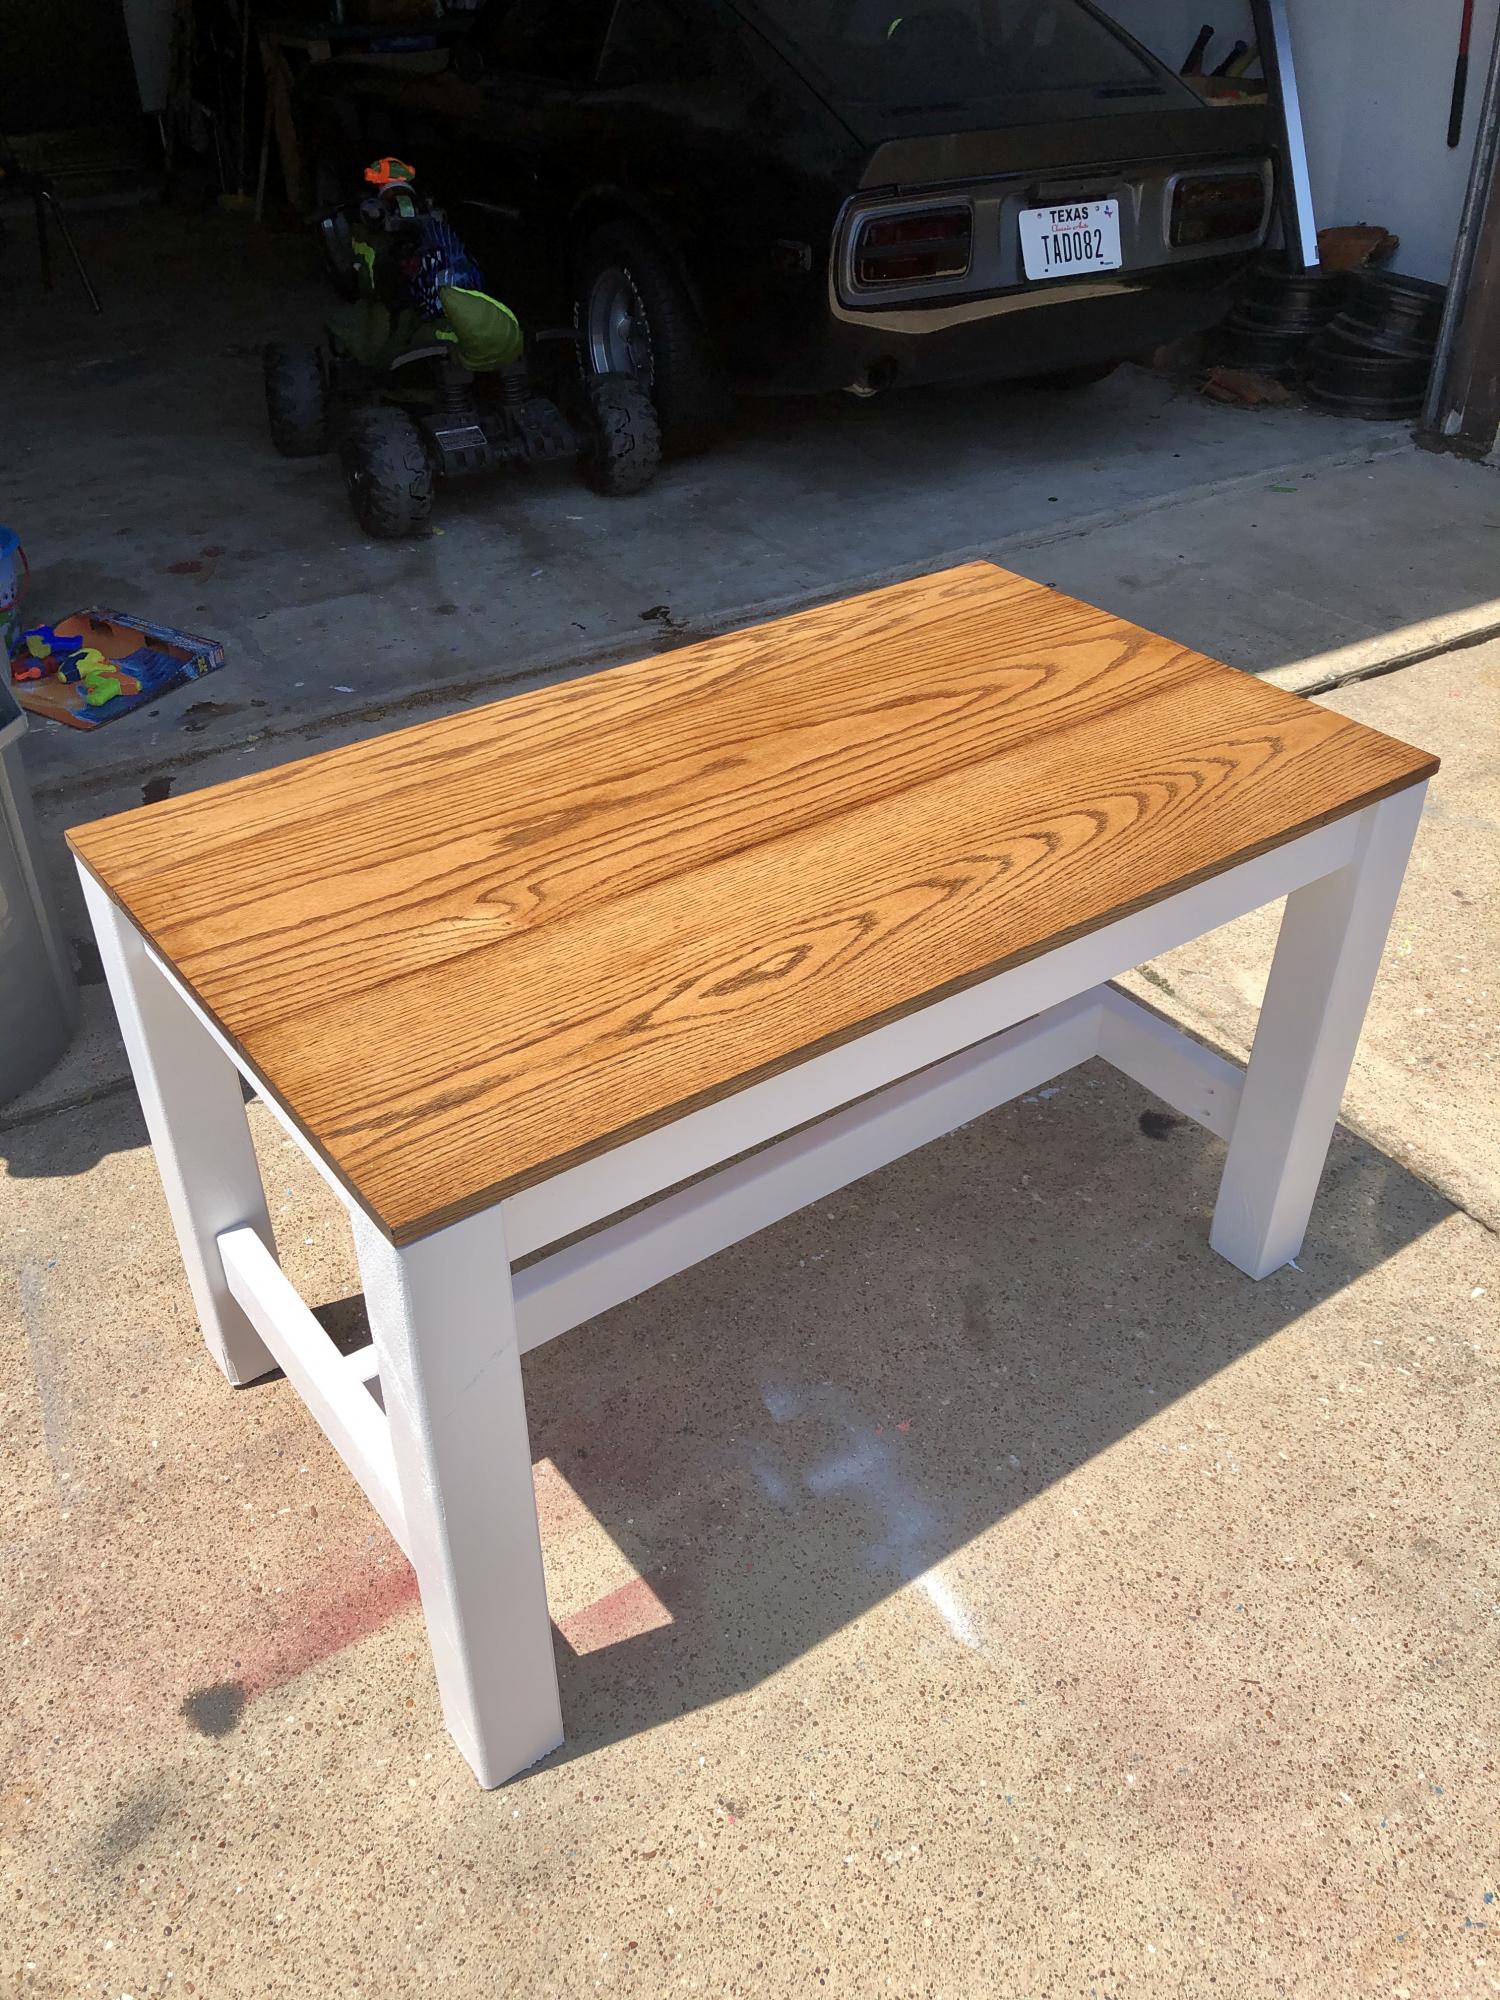
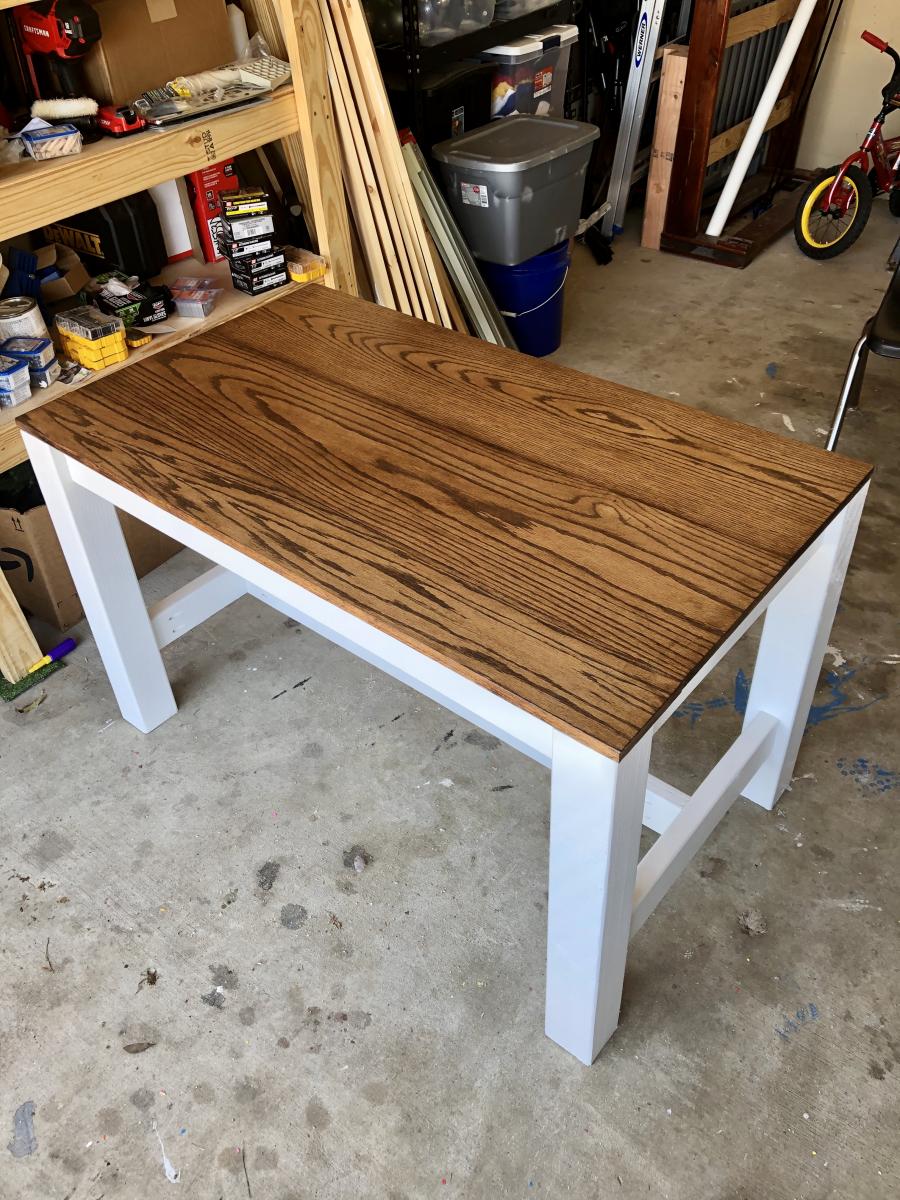
I liked the look of the “counter height table” and adjusted the height to make it a table for an office. I used 4x4s for the legs and oak for the top.
I used a biscuit joiner to join the top, a Dremel tool to carve grooves in the frame so I could attach the top with figure 8 fasteners (allows wood to move as it expands and contracts).
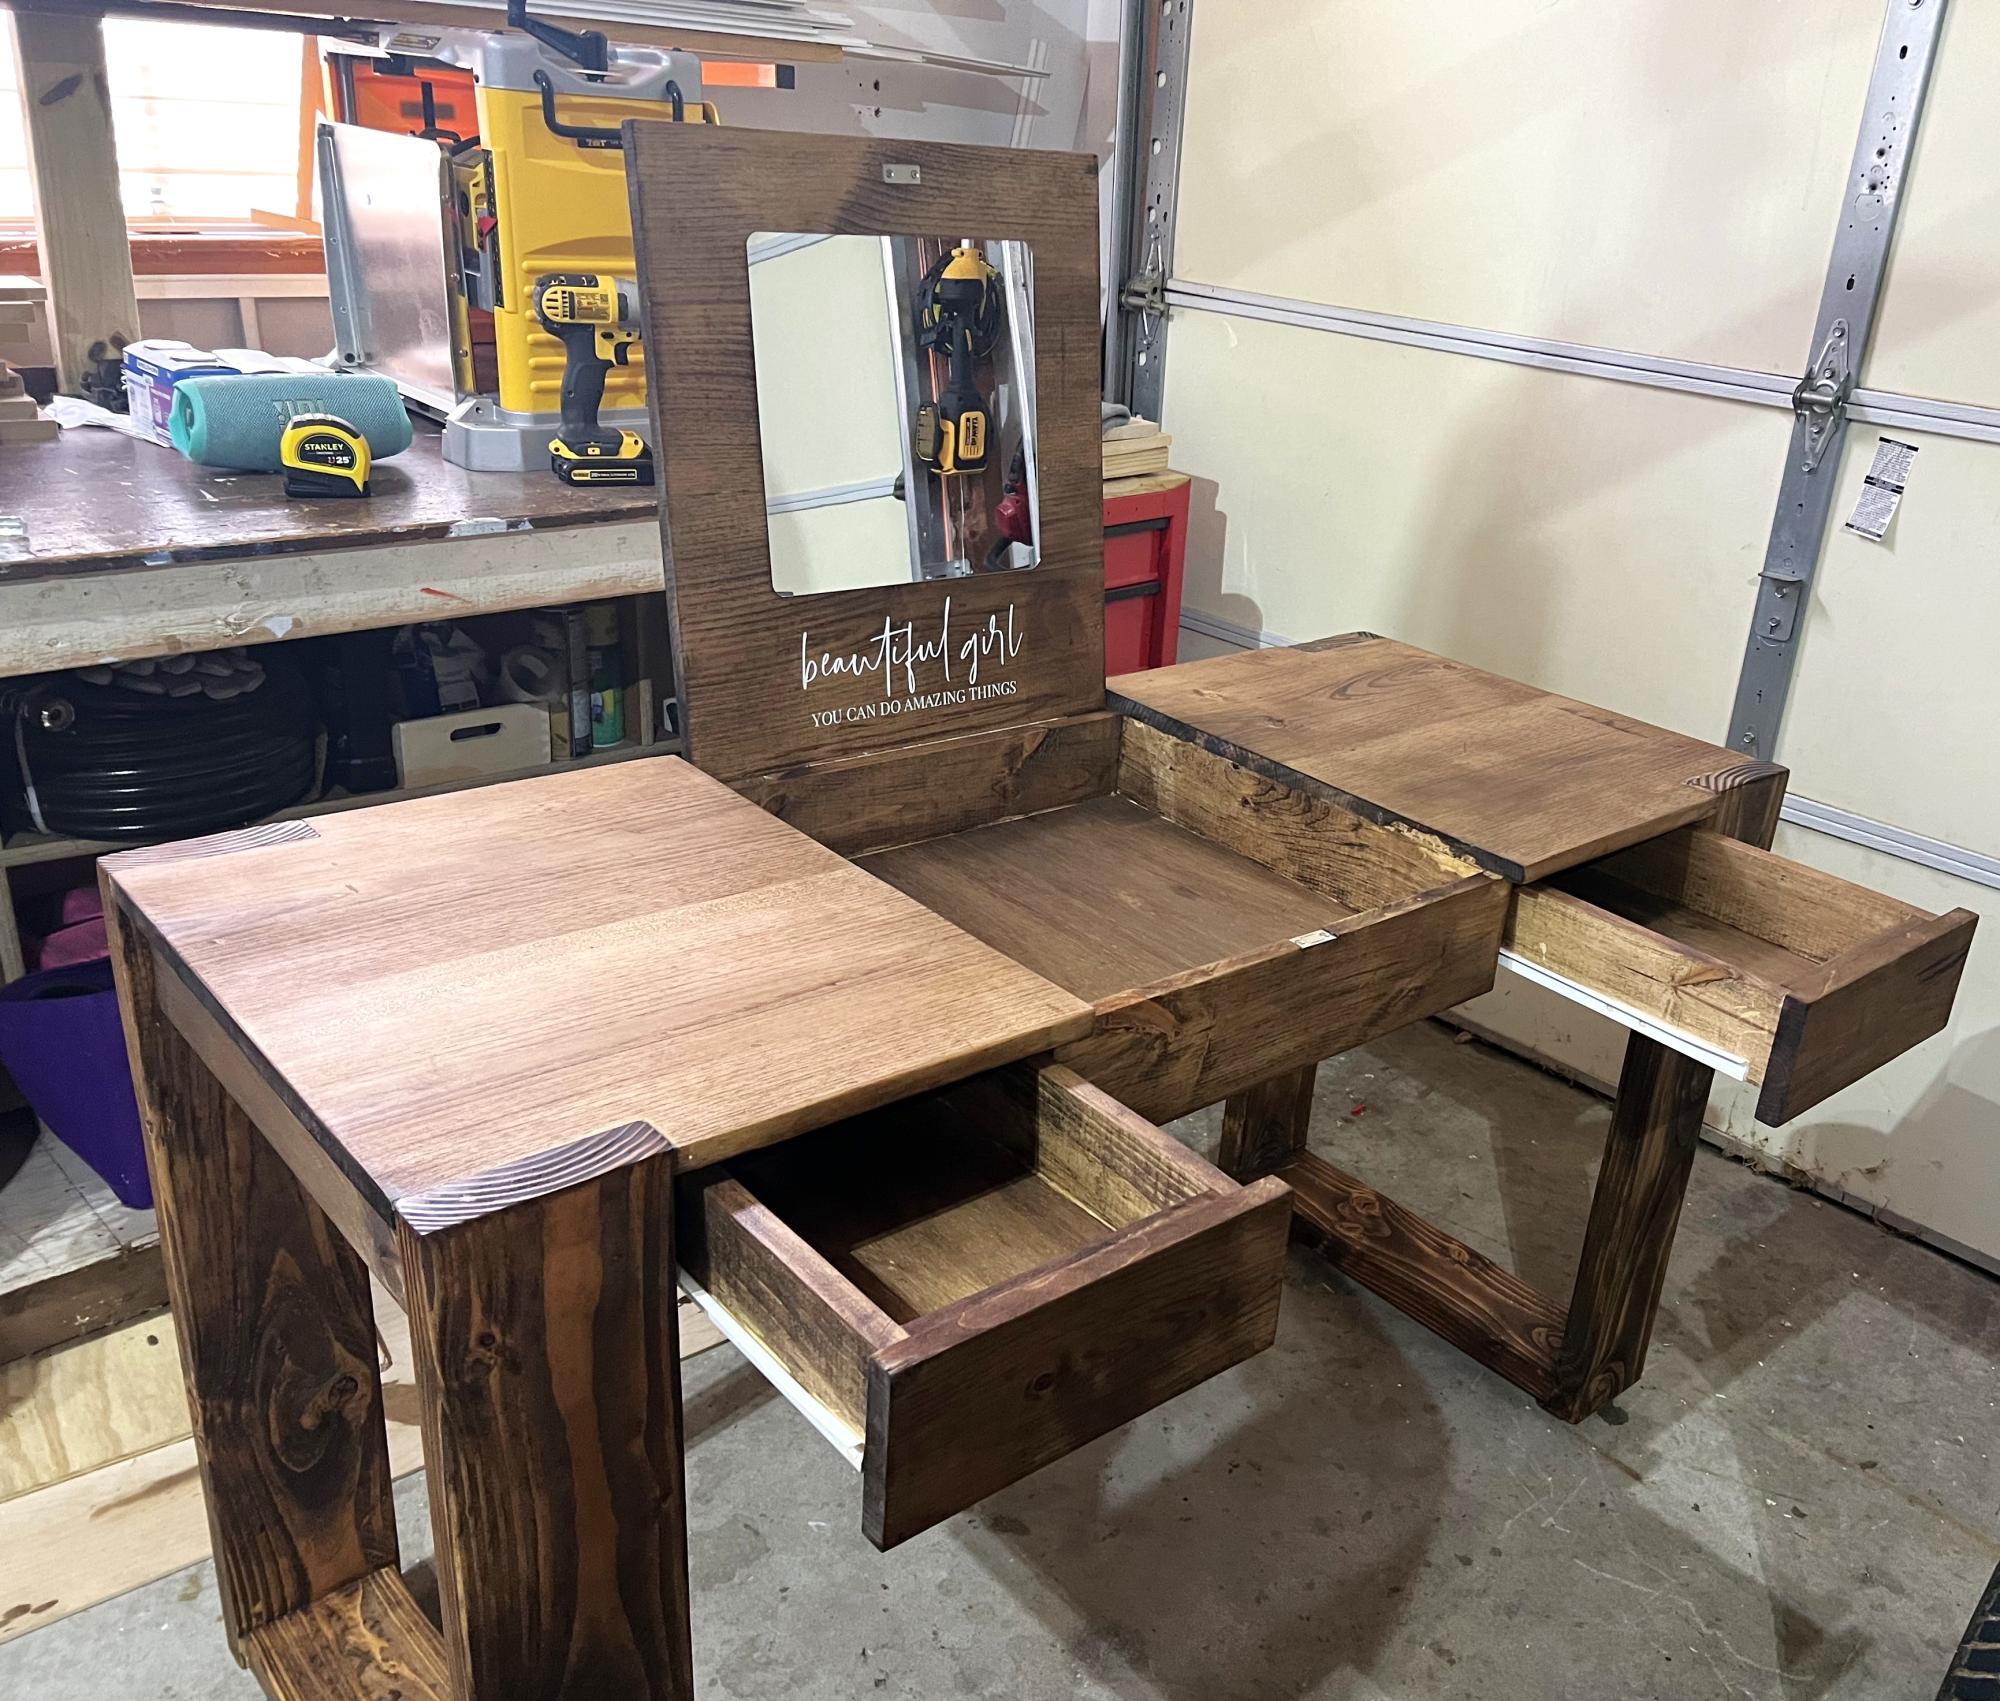
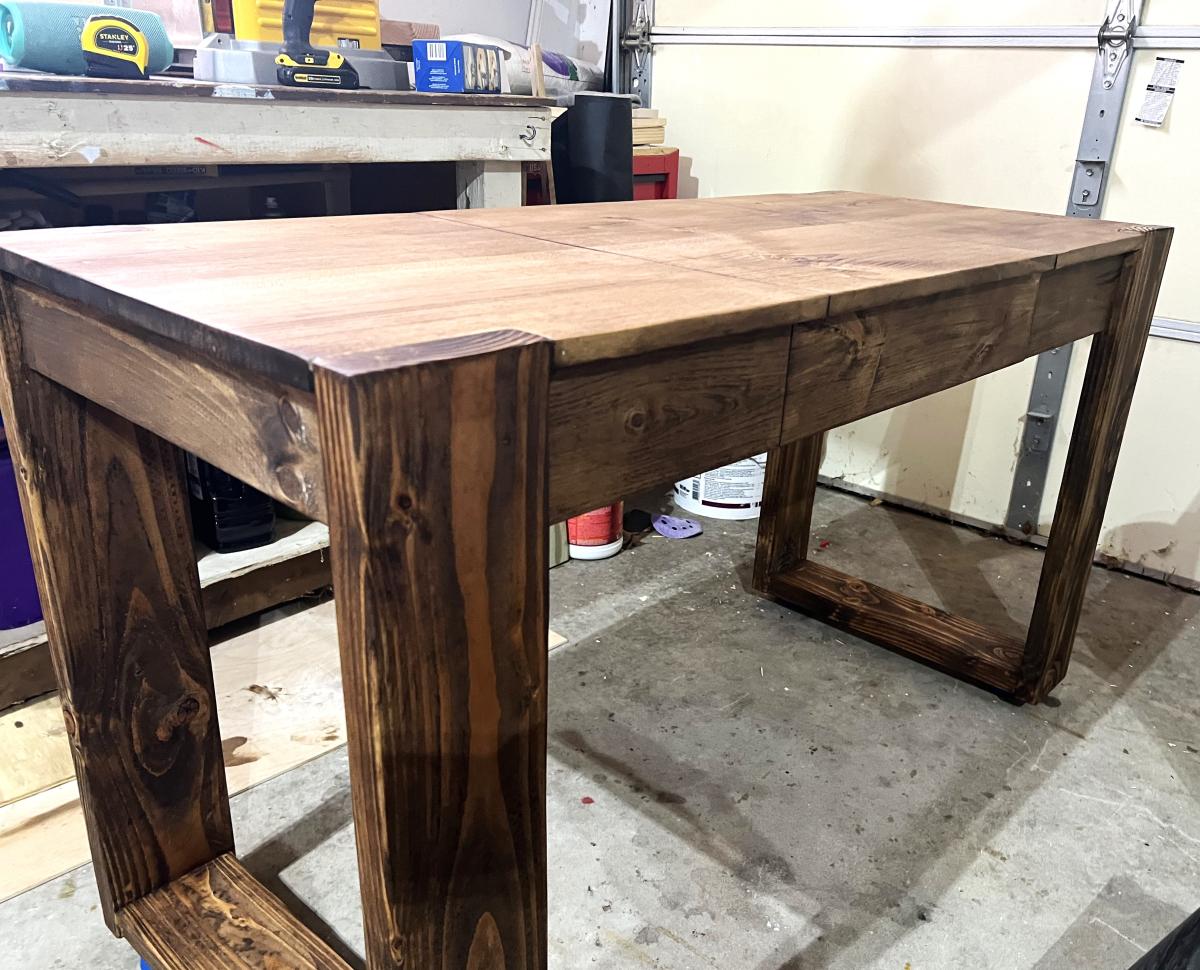
Hi! I love Ana White's plans! I used the chunky leg desk plan and added drawers and a flip-up vanity top! :) https://www.instagram.com/bow_and_timber/

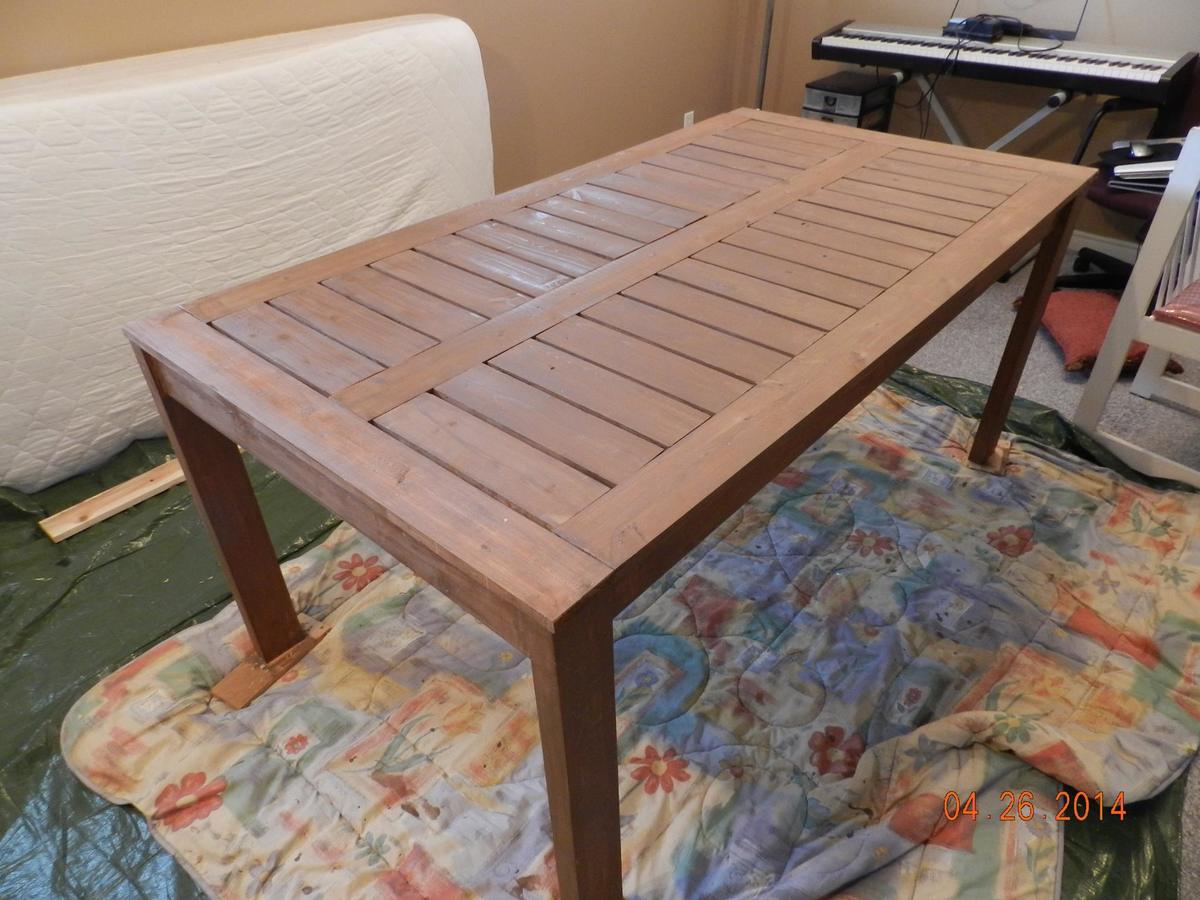
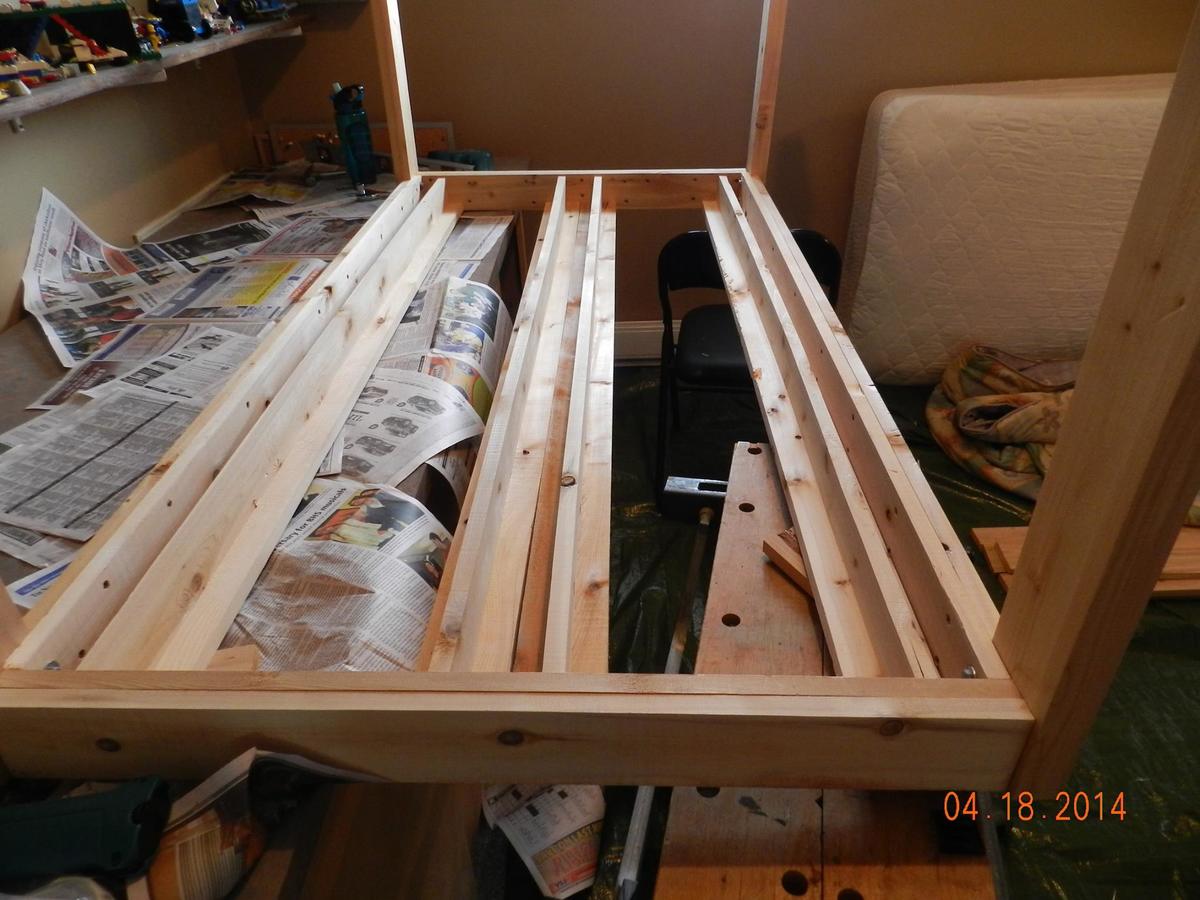
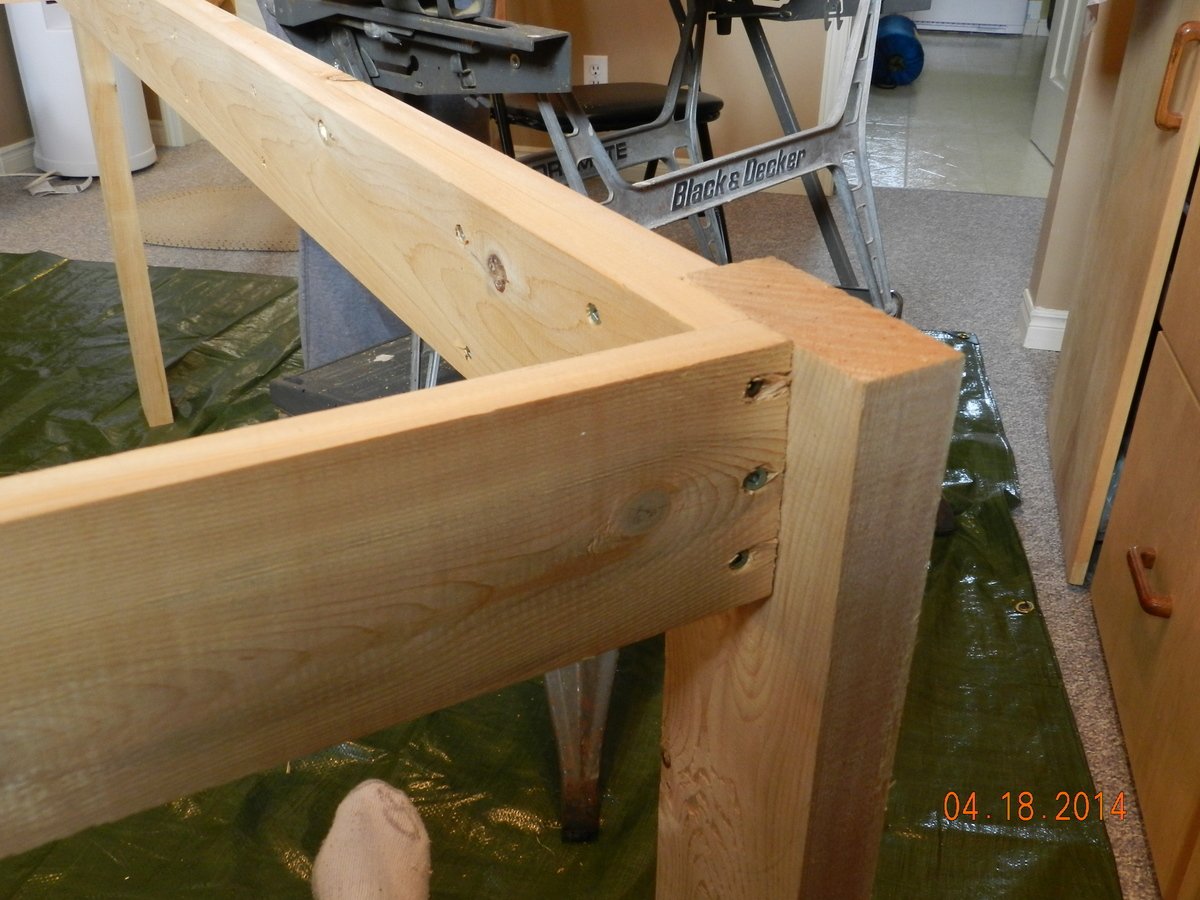
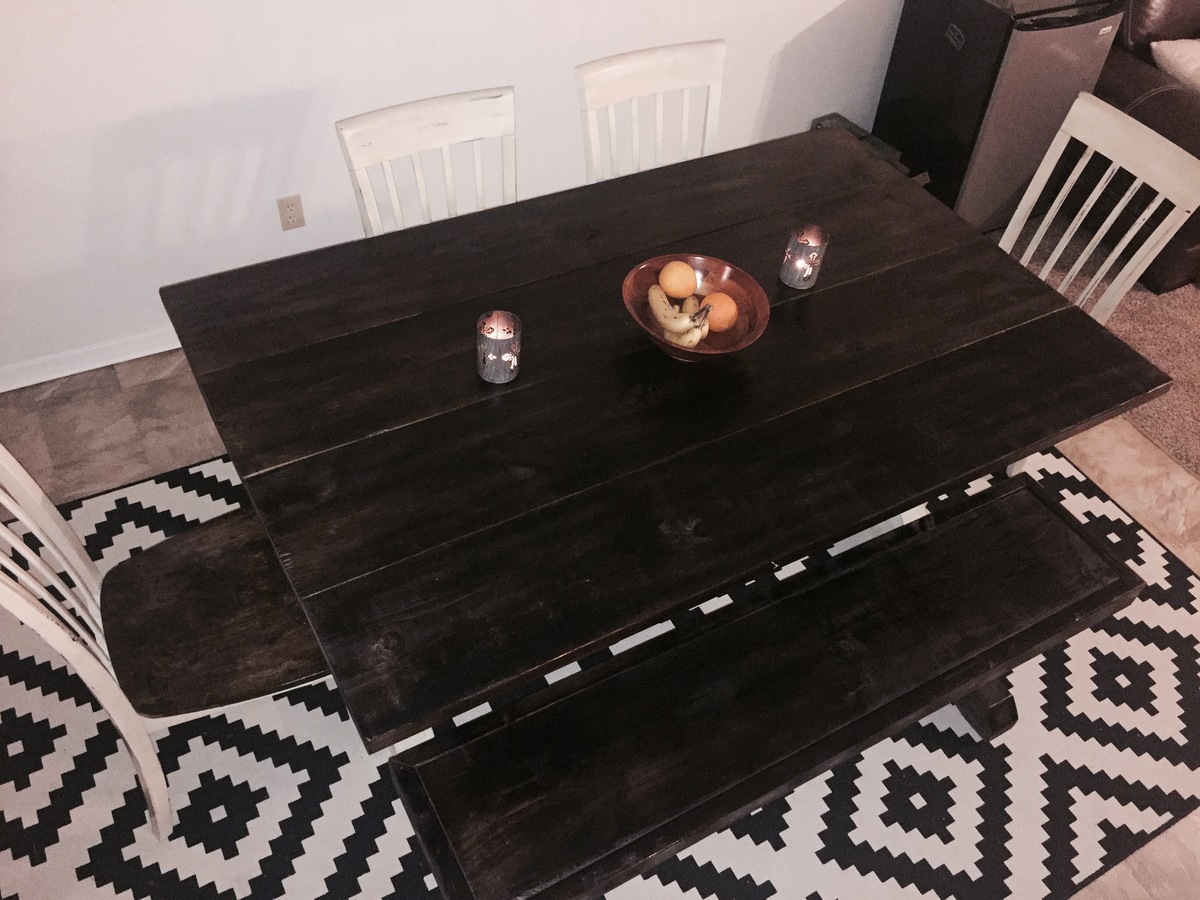
I didn't make any changes , his orginal design was great. Hope these pictures help others. I tried to link to the modified-simple-outdoor-dining-table but wasn't able too.
Sun, 04/27/2014 - 14:06
Found the plans "modified-simple-outdoor-dining-table" and I built it. Very nice table, I posted more pcitures to help others
Sun, 04/27/2014 - 14:06
Found the plans "modified-simple-outdoor-dining-table" and I built it. Very nice table, I posted more pcitures to help others
Just followed the plans, and am in love with the finished look!
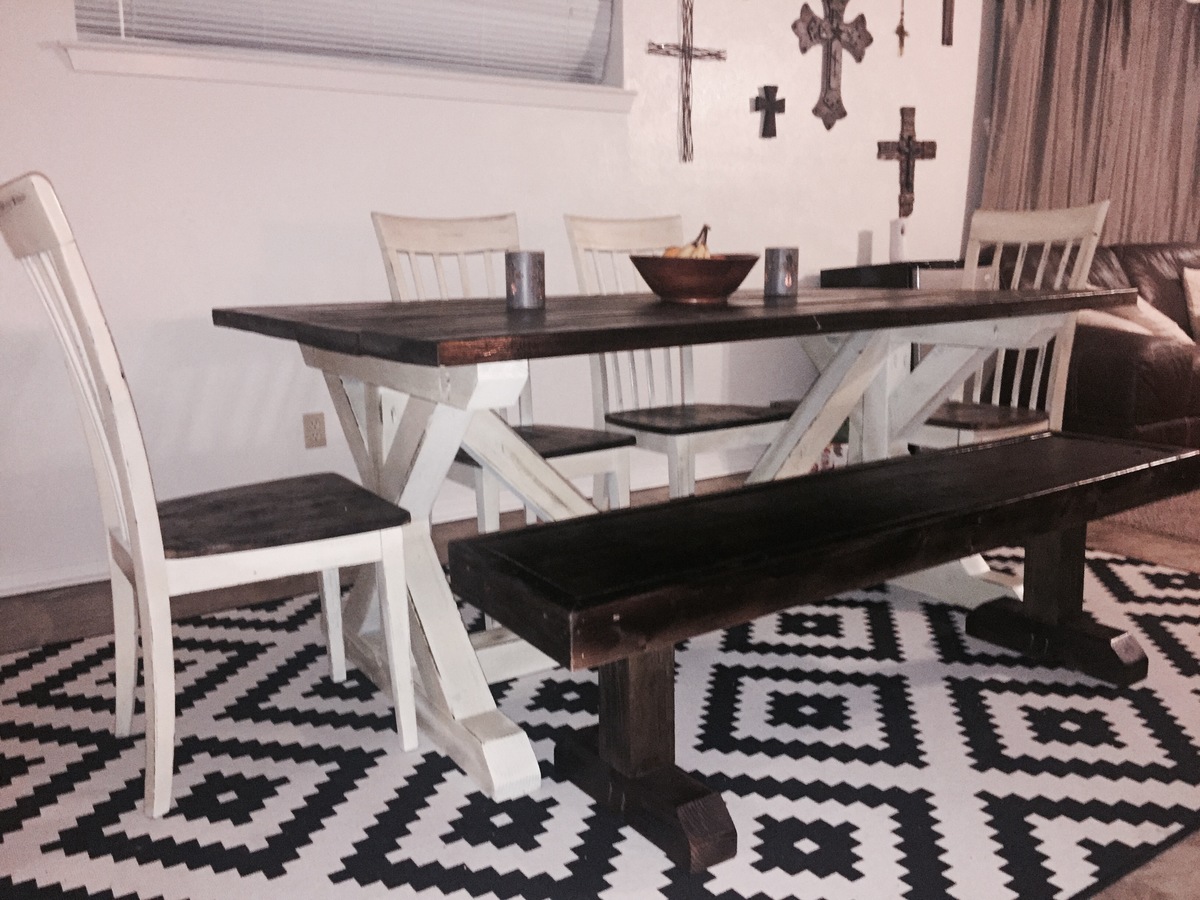
Took the plans from Ana white and made my own twist to it! Came out awesome and the person loved it that I made it for! Kona stain on table top and Navajo white on the bottom. Did the same for benches and chairs to match! Thanks for the great instructions!
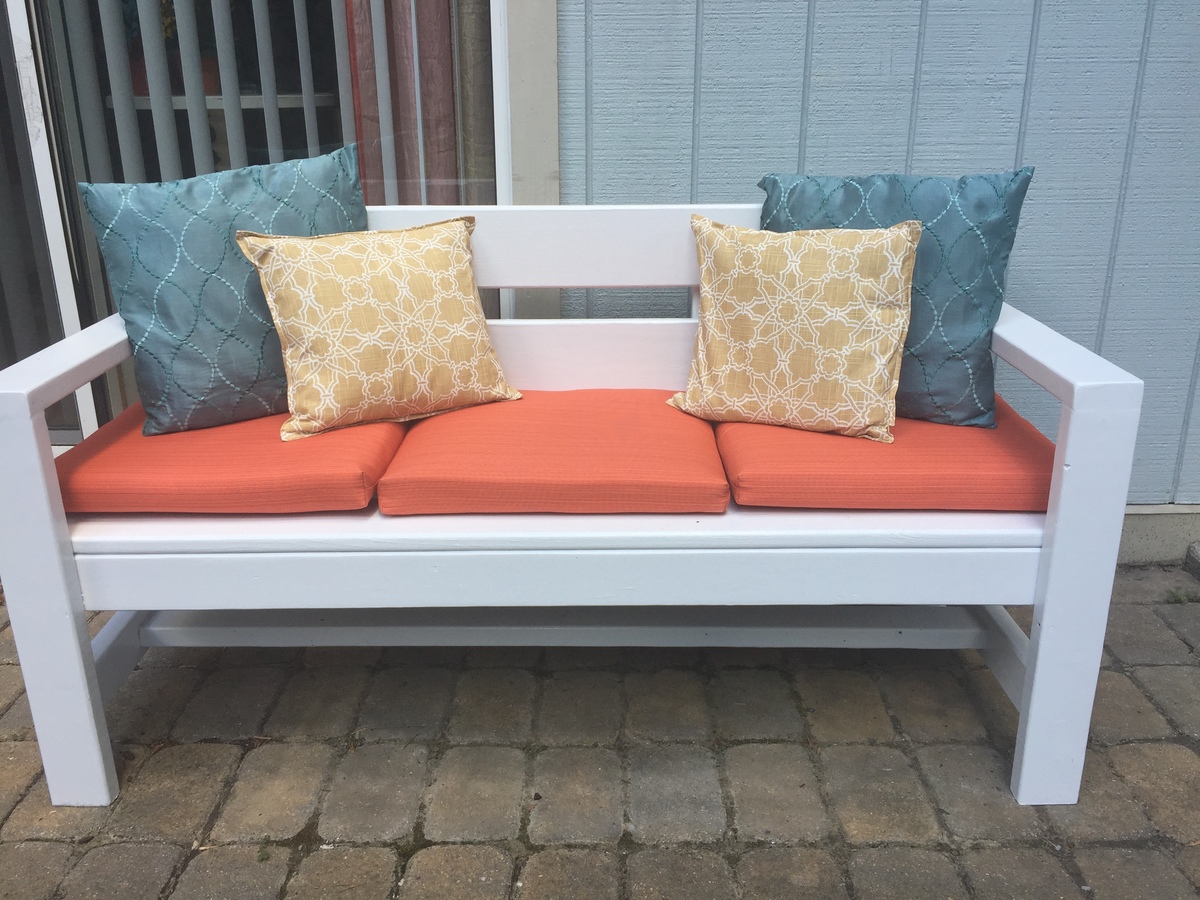
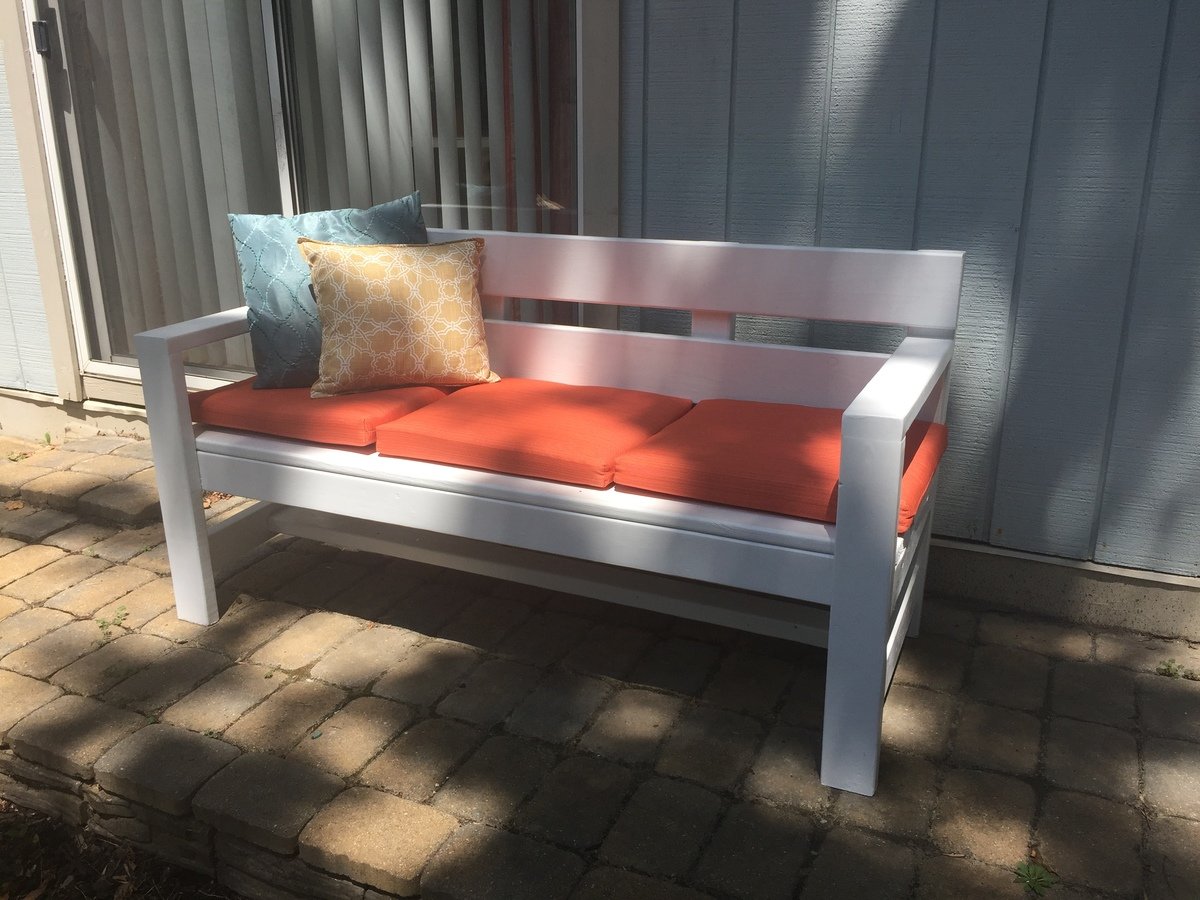
I changed the dimensions to make it a little smaller to fit the front of my house. My husband and I now spend our evenings sitting there drinking tea and enjoying the nice weather.
I spent close to $60 and ordered 3 cushions from target for $8.99 each.
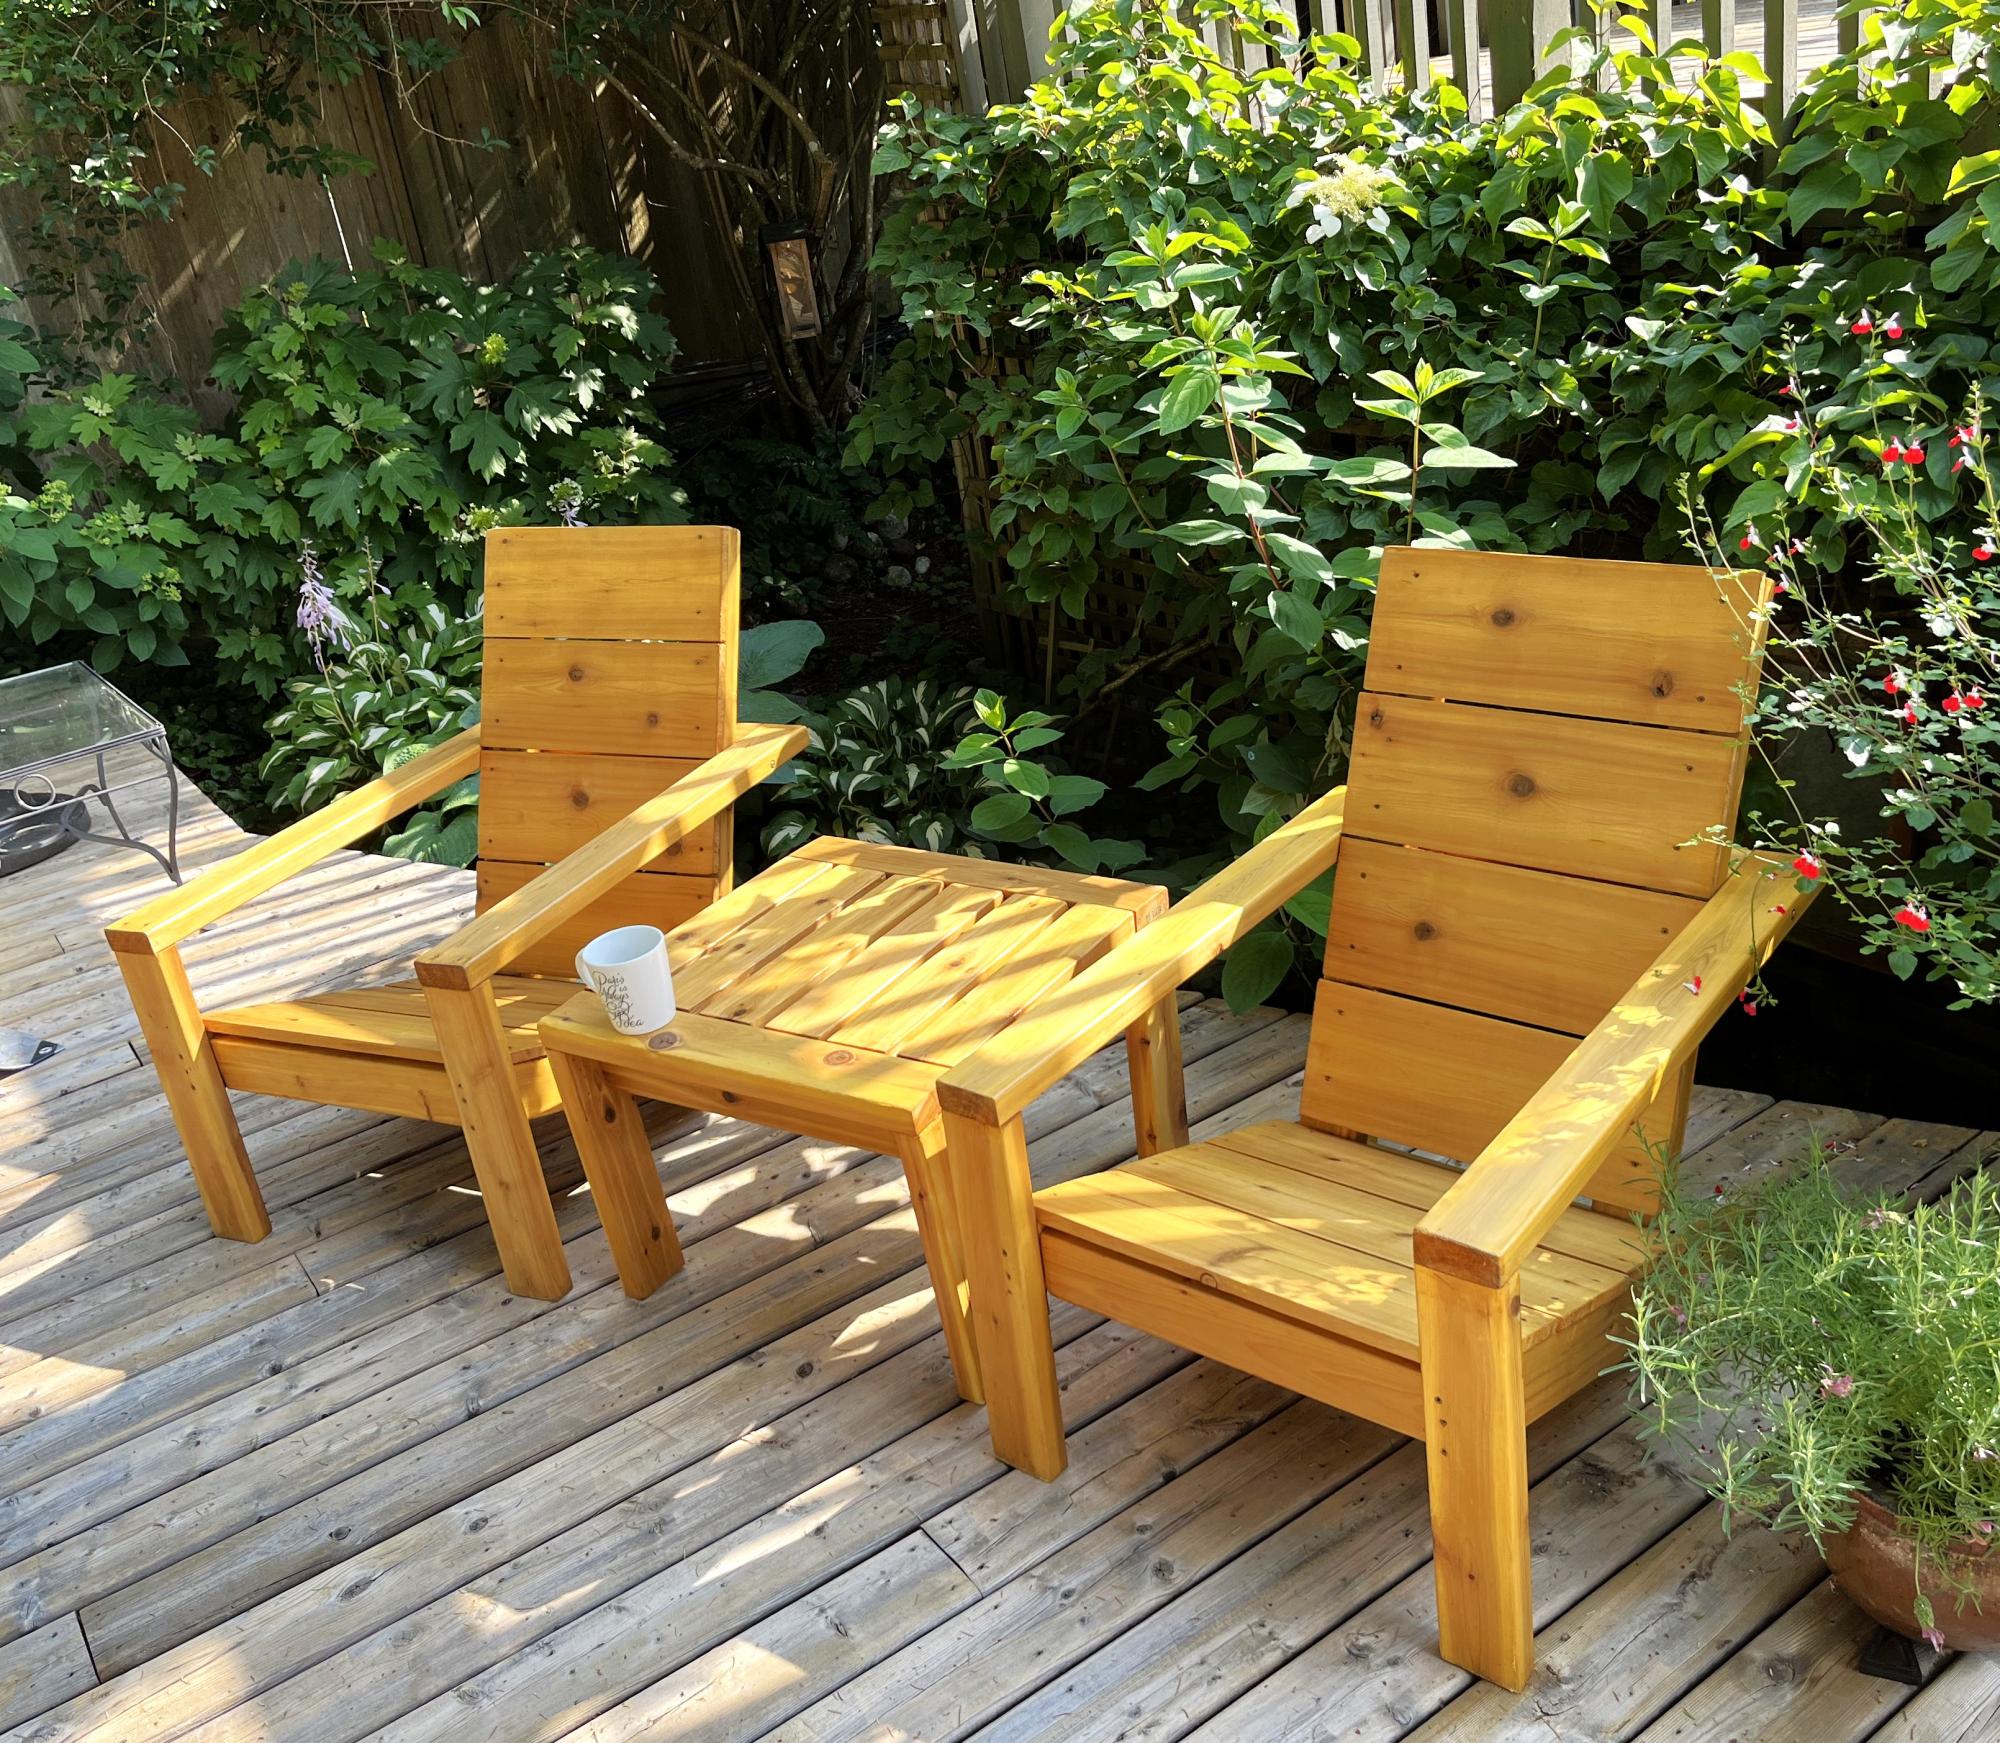
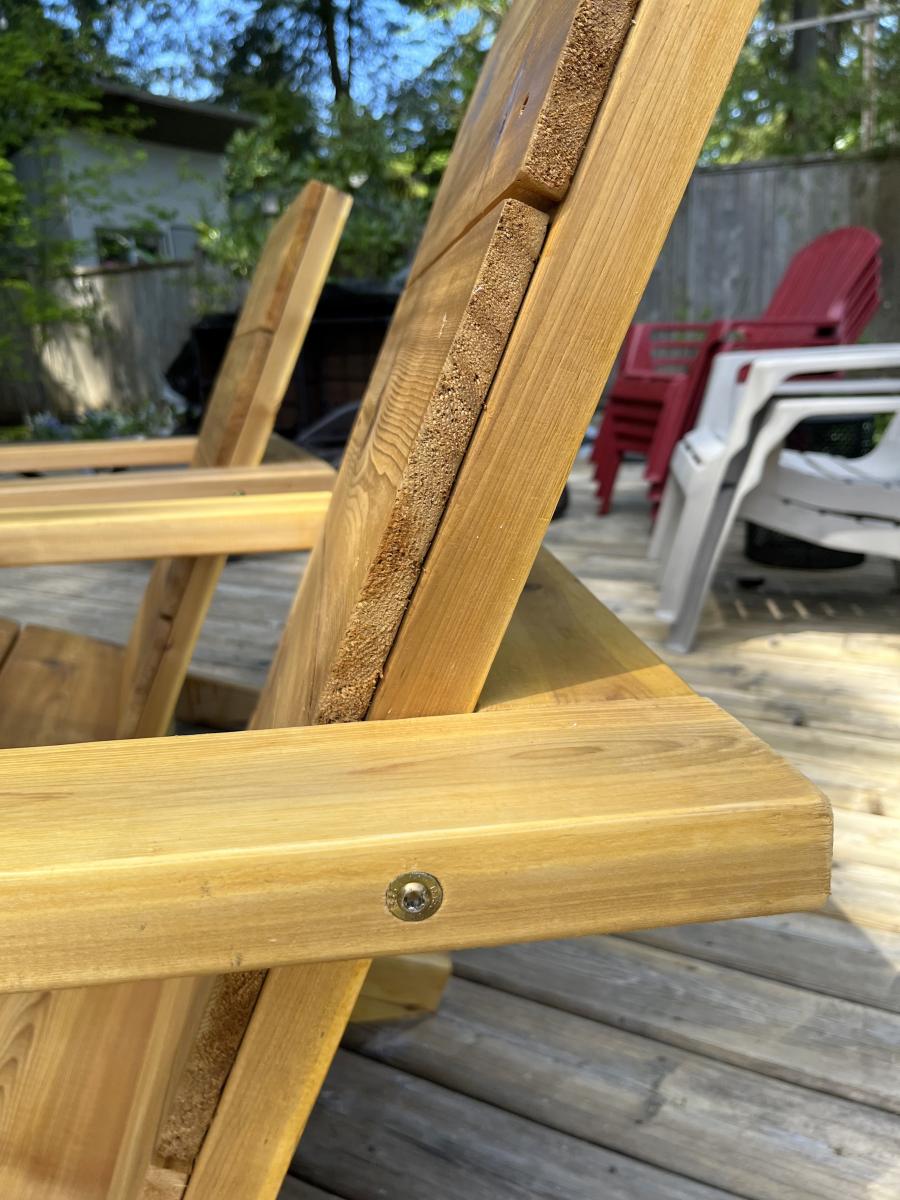
I added a 6 inch lag screw to support the arm in case someone sat on the arm. I also added small metal brackets hidden to help secure the leg strength.
Matt
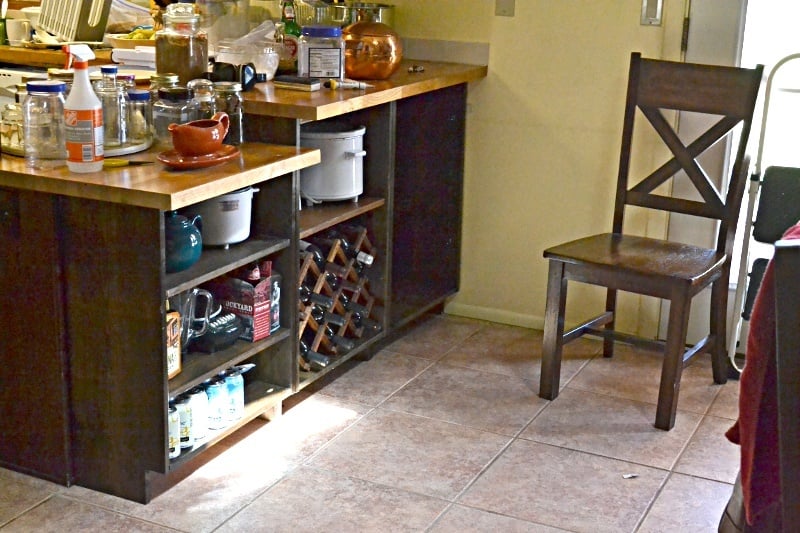
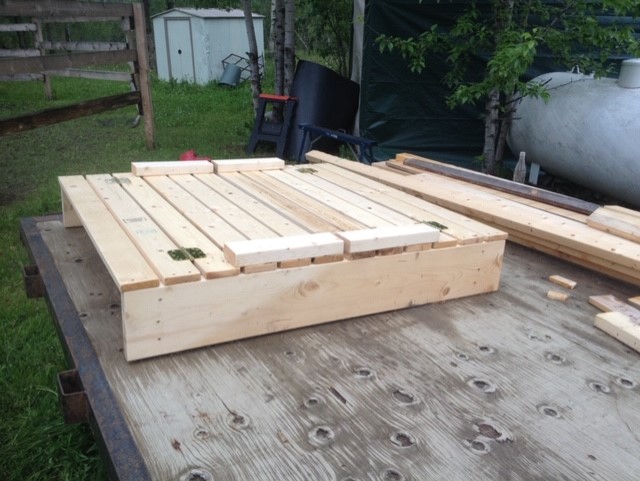
Added kitchen and dining room storage by building bookcases / shelf units to fit under the peninsula breakfast bar overhang. It's the simplest possible "box with a toe-kick", loosely based on Ana's plans for a bookshelf and the closet master system.
Much of the "working time" was stain and finishing time. Actual cutting and assembly time was under 3 hours.
No dimensions: every breakfast bar is different.
1 - The boards were cut to fit under the overhang, with 1/8 or less clearance. Top and bottom of unit is between the upright pieces.
2 - Width of units was also cut to fit. One unit is the width of the lower section of countertop (appx 23 in), the taller section was divided into 2 equal units (appx 21 in)
Shelves were cut about 1/4" narrower than the insiude dimension of the unit, to allow for insertion and the shelf pegs.
3 - Toekick space cut to match the cabinet on the far side of the peninsula. Used a circular saw and then a hand saw to finish the corners.
4 - Drilled pocketholes in the top and bottom boards.
5 - Used Rockler's jig for drilling shelf pin holes in the 6 uprights. Oops! I should have drilled every possible hole. I drilled every other hole and don't have the shelf flexibility I really need.
6 - Stained and topcoated everything, let it dry.
7 - Assembled each shelf unit, using corner clamps and a carpenter's square to make sure it was square. The bottom shelf is screwed at the same level as the toe-kick.
8 - Slid units under the overhang, shimmed them firmly under the countertop.
9 - Added shelf pegs and shelves
DONE!
Doors could be added, using the hinges for inset doors on frameless cabinets.
==========
NOTES:
The units are backless. I considered nailing a 1/8 hardboard back onto them, but because the finished back of the peninsula is visible behind them, and they are shimmed into place to prevent slouching it was not needed.
Cost is low because we had some 1x12 boards in the attic. Already had the tools and stain from earlier projects. 3 1x12 x 6ft boards were new, the rest were salvage.
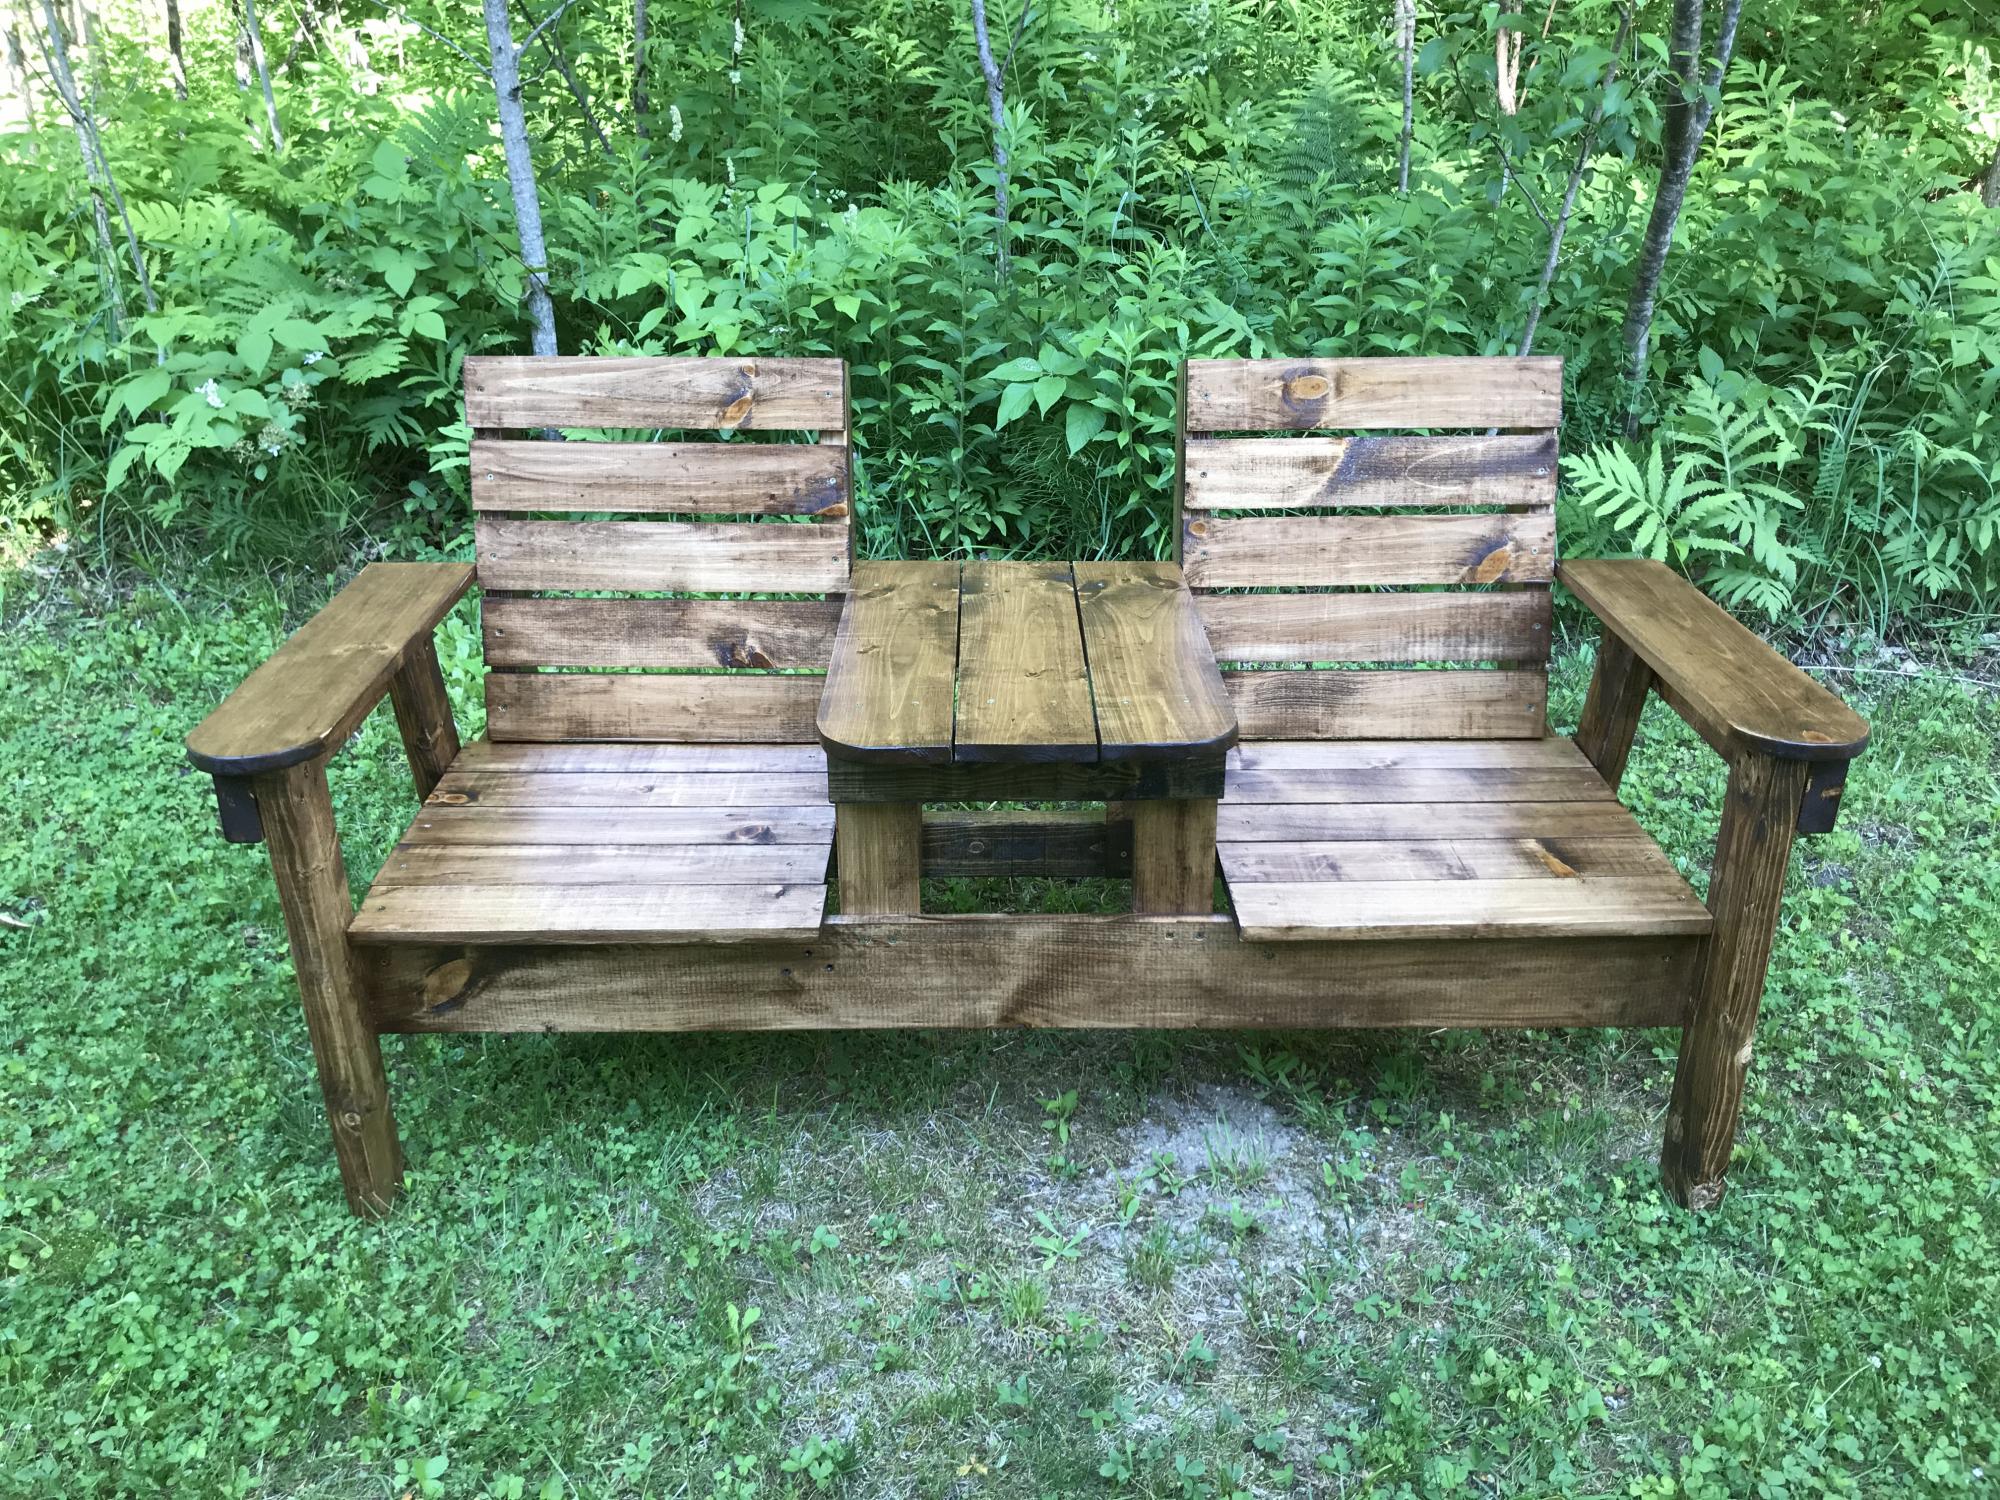
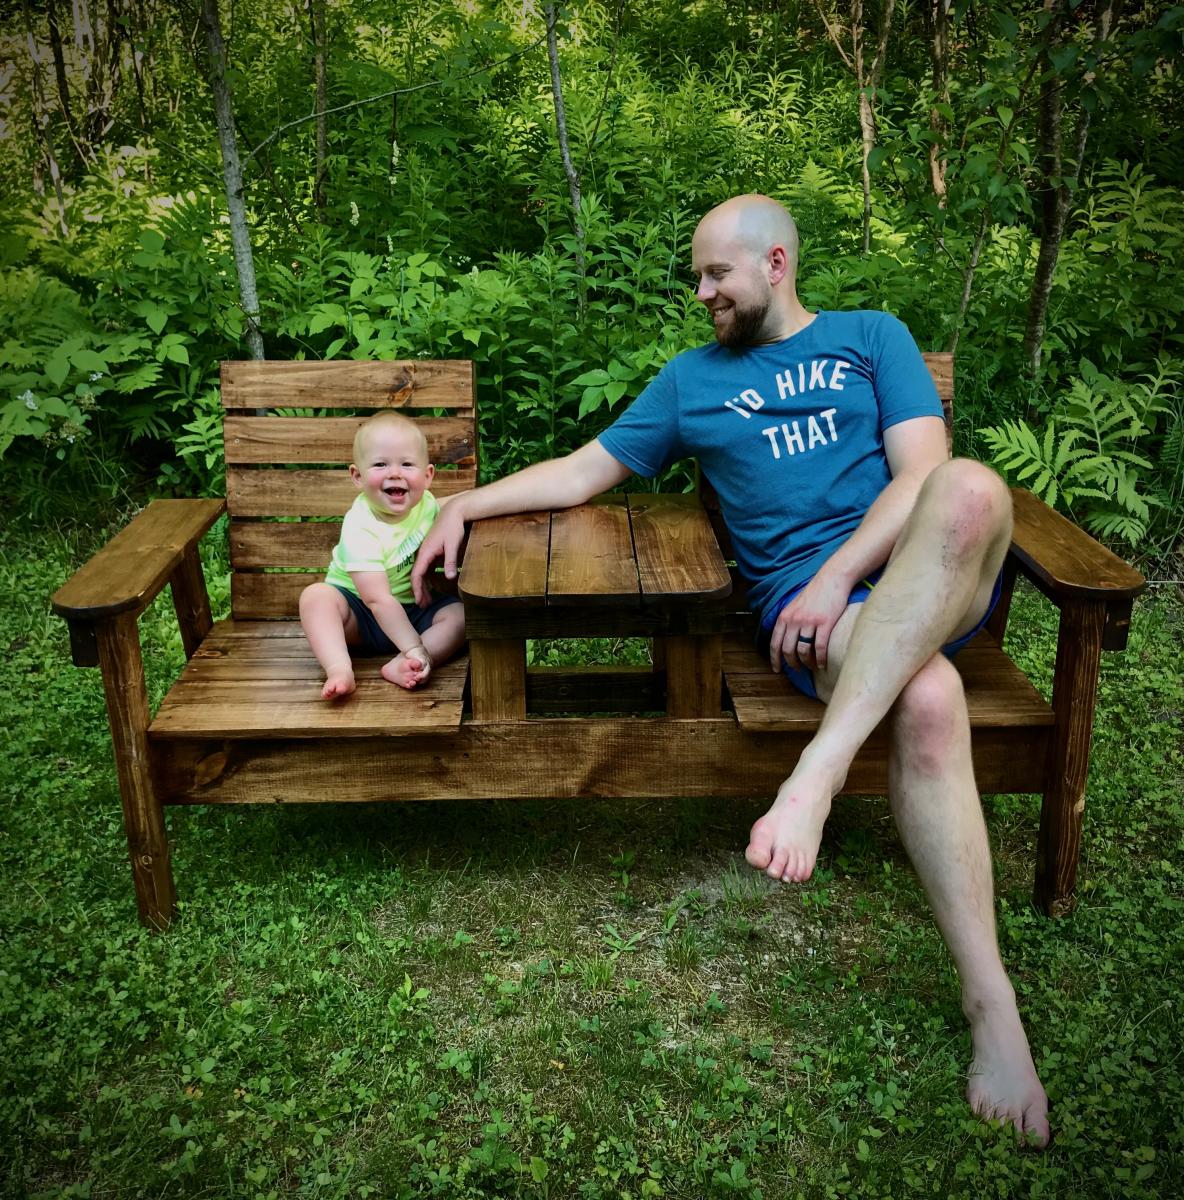
This was my second bigger builds. It came out beautifully and I am so proud to have built this for my husbands very first Fathers Day. Easy to build.
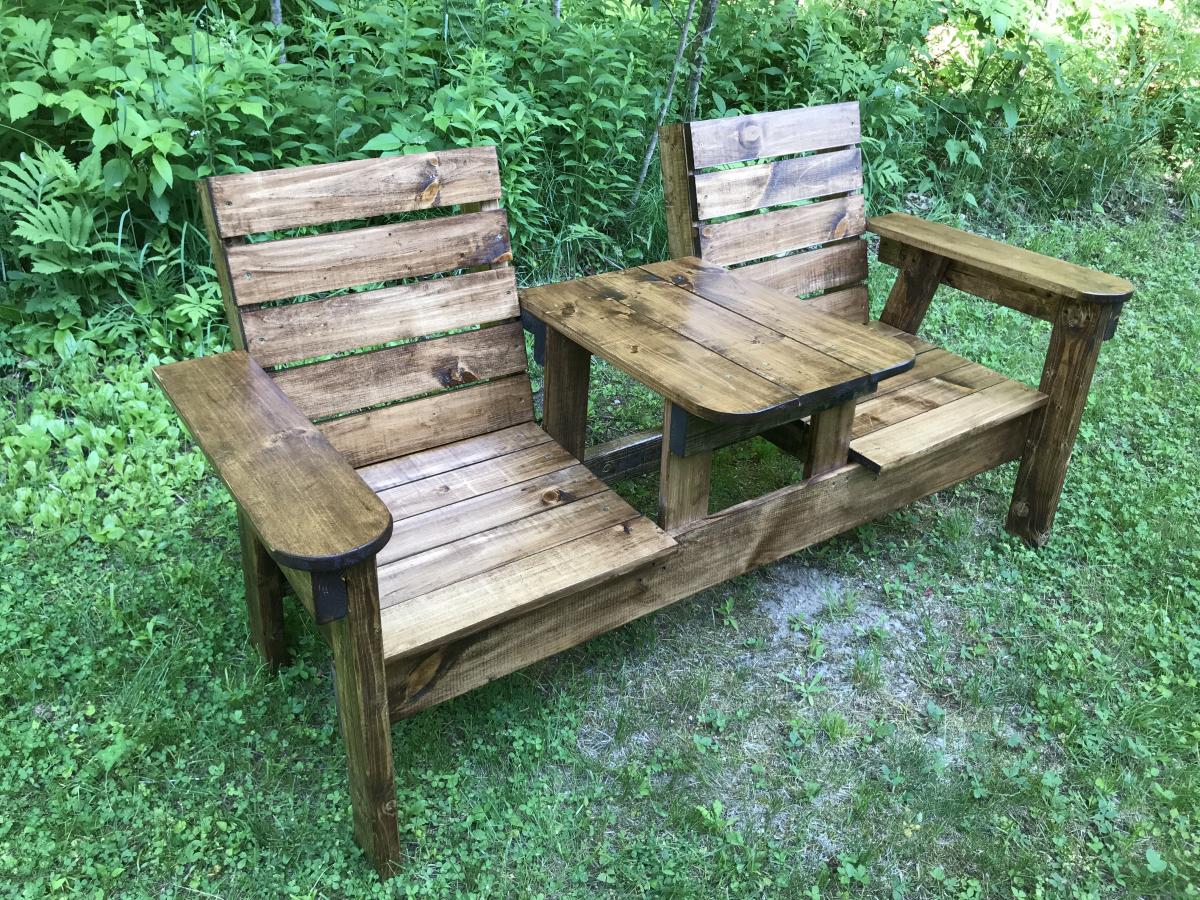
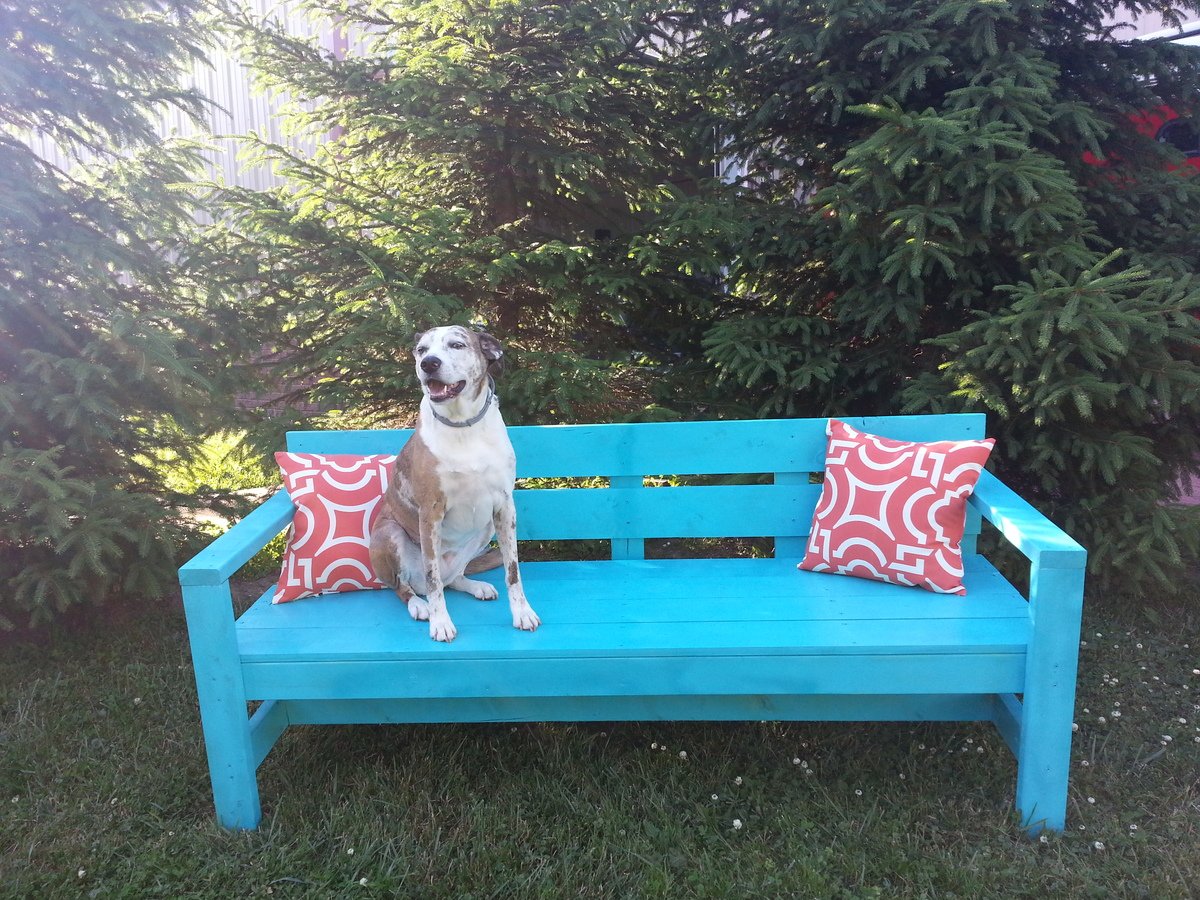
This was my wife and I's first Ana White project. We are now hooked, and loved spending time together building something we will enjoy for years, and our dog mindy of course was the first to test our beautiful bench out!
Thanks Ana,
Steve & Courtney
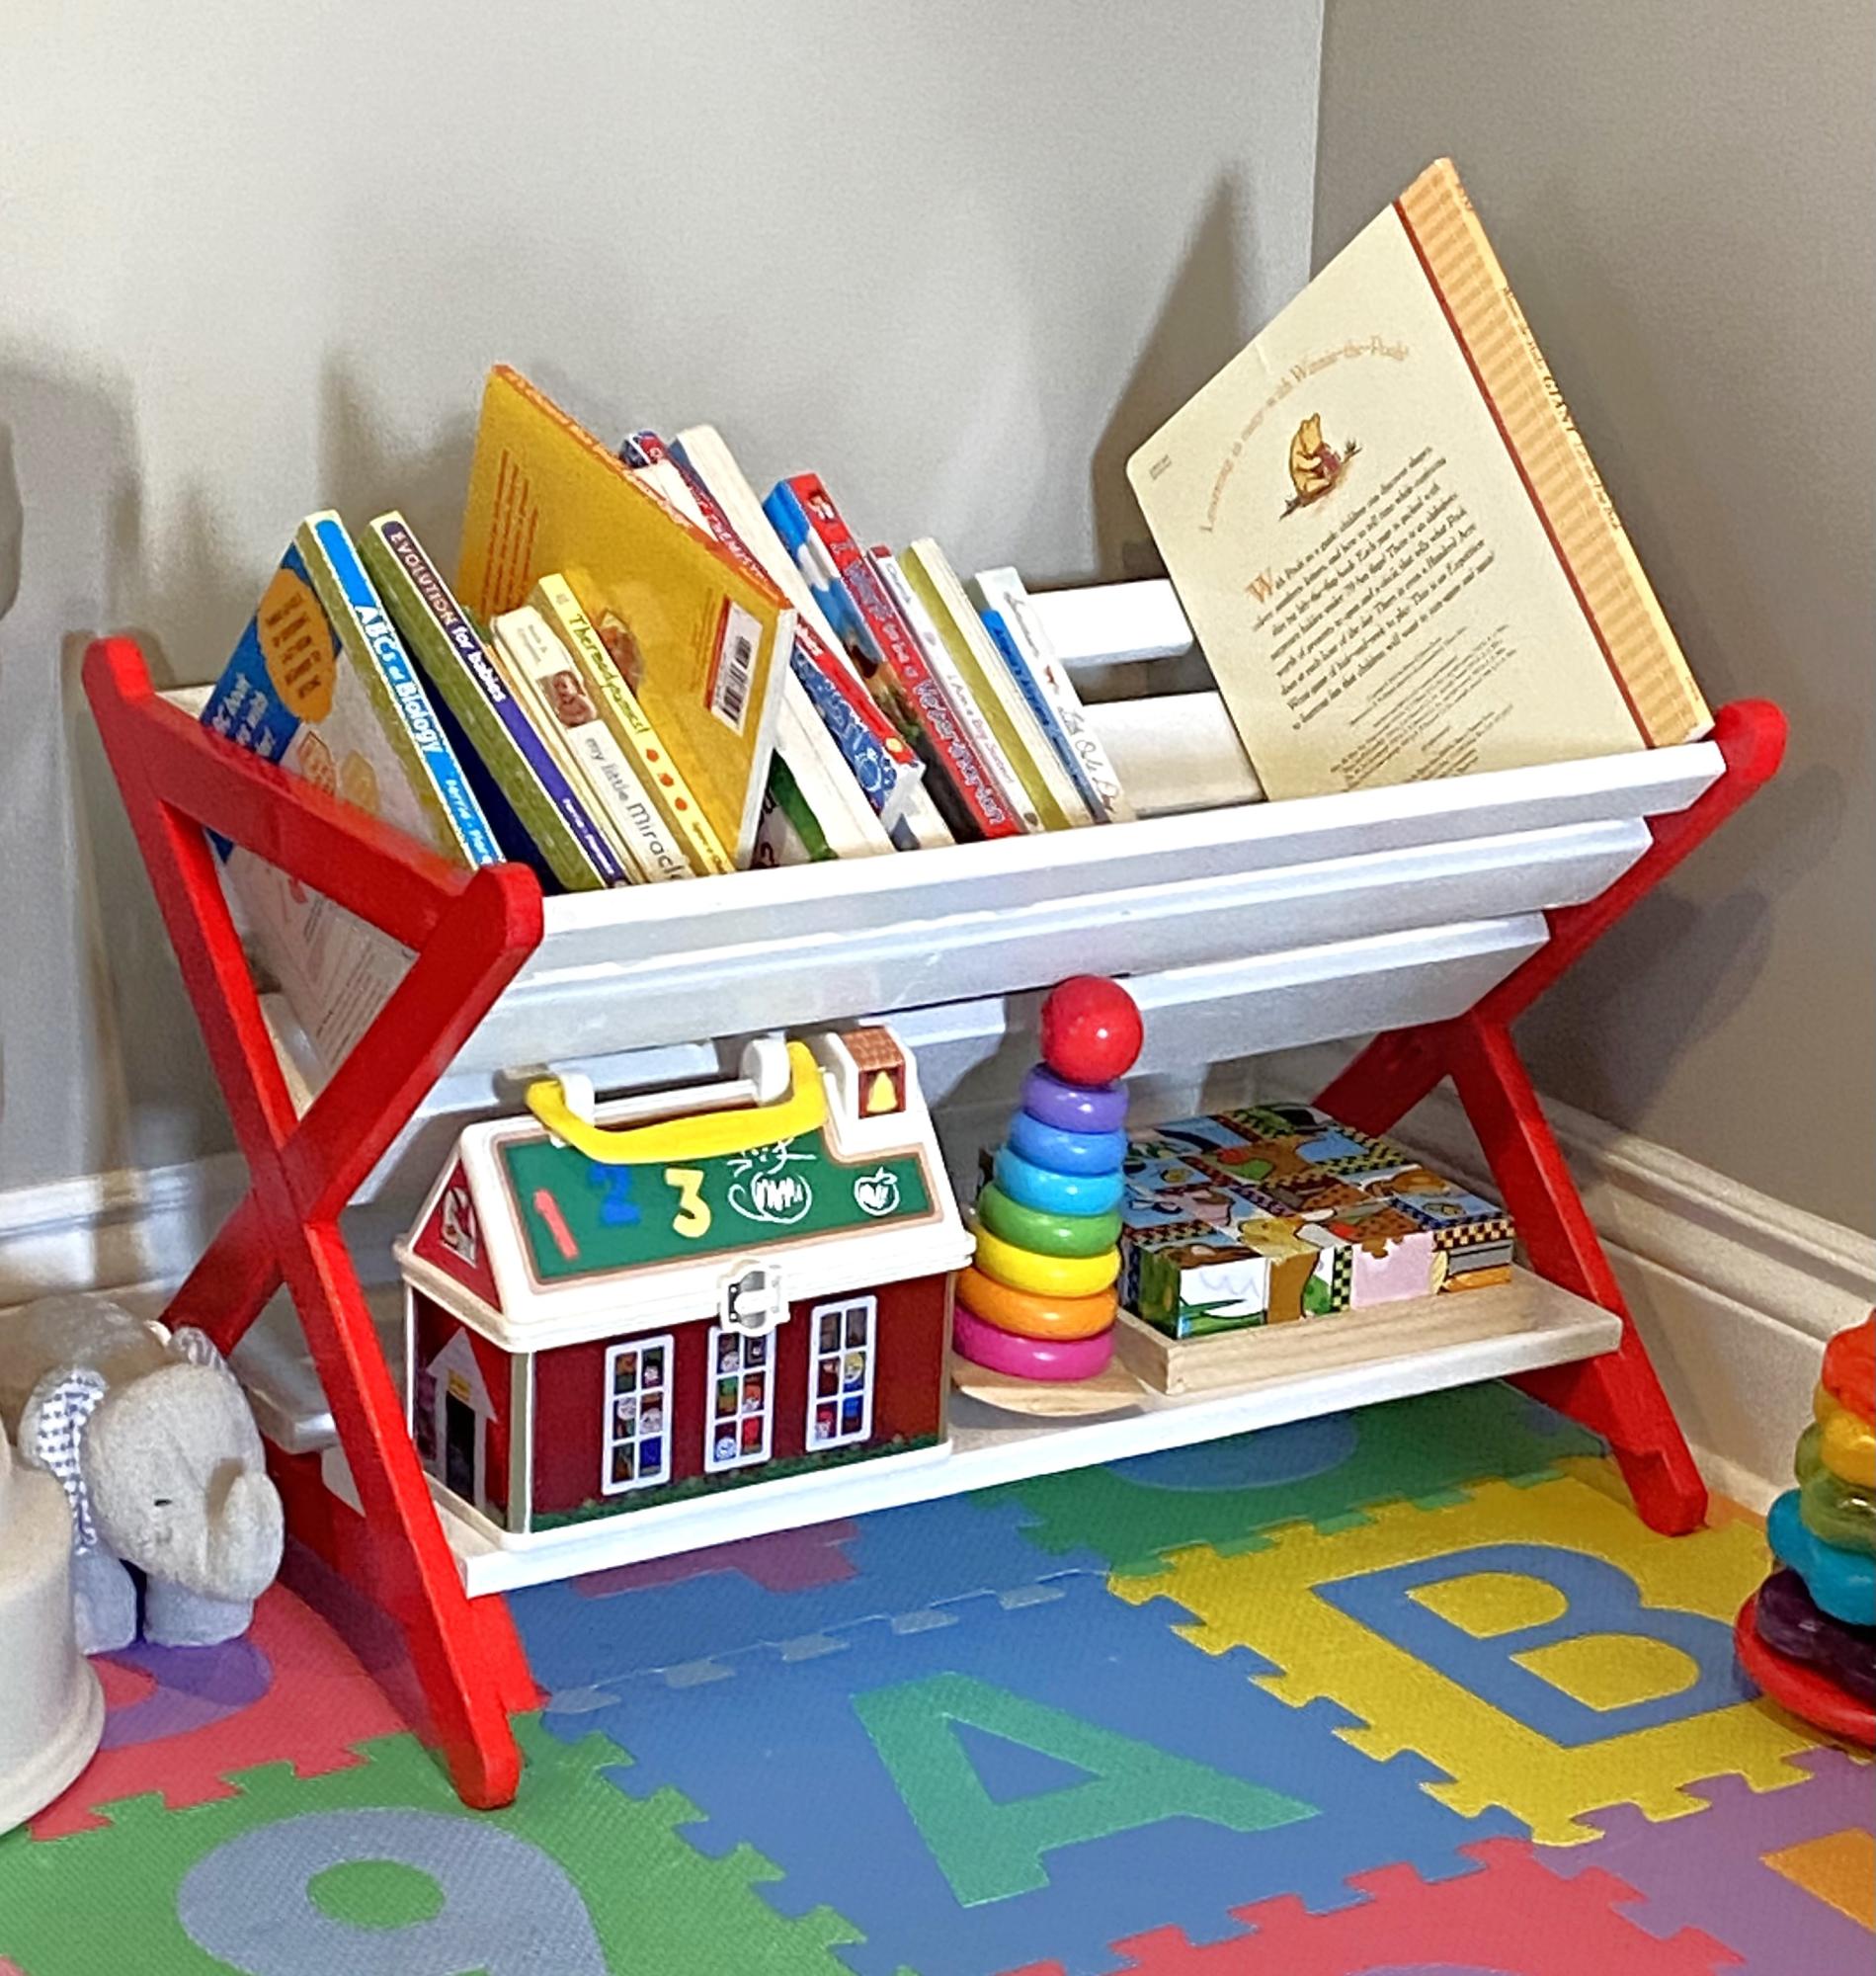
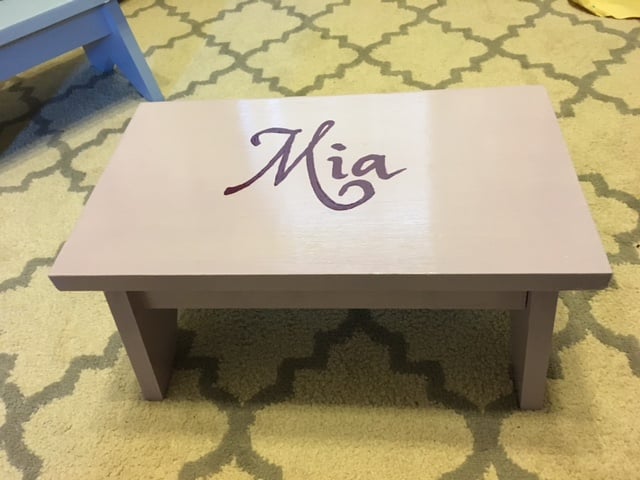
Perfect size for my granddaughter and her growing book collection. Turned out great! Thx so much.
Trevor
These plans were great. Easy to put together and they look quite amazing. And they are solid! Bought cushions from IKEA and the wood from Home Depot. Stained and sealed.
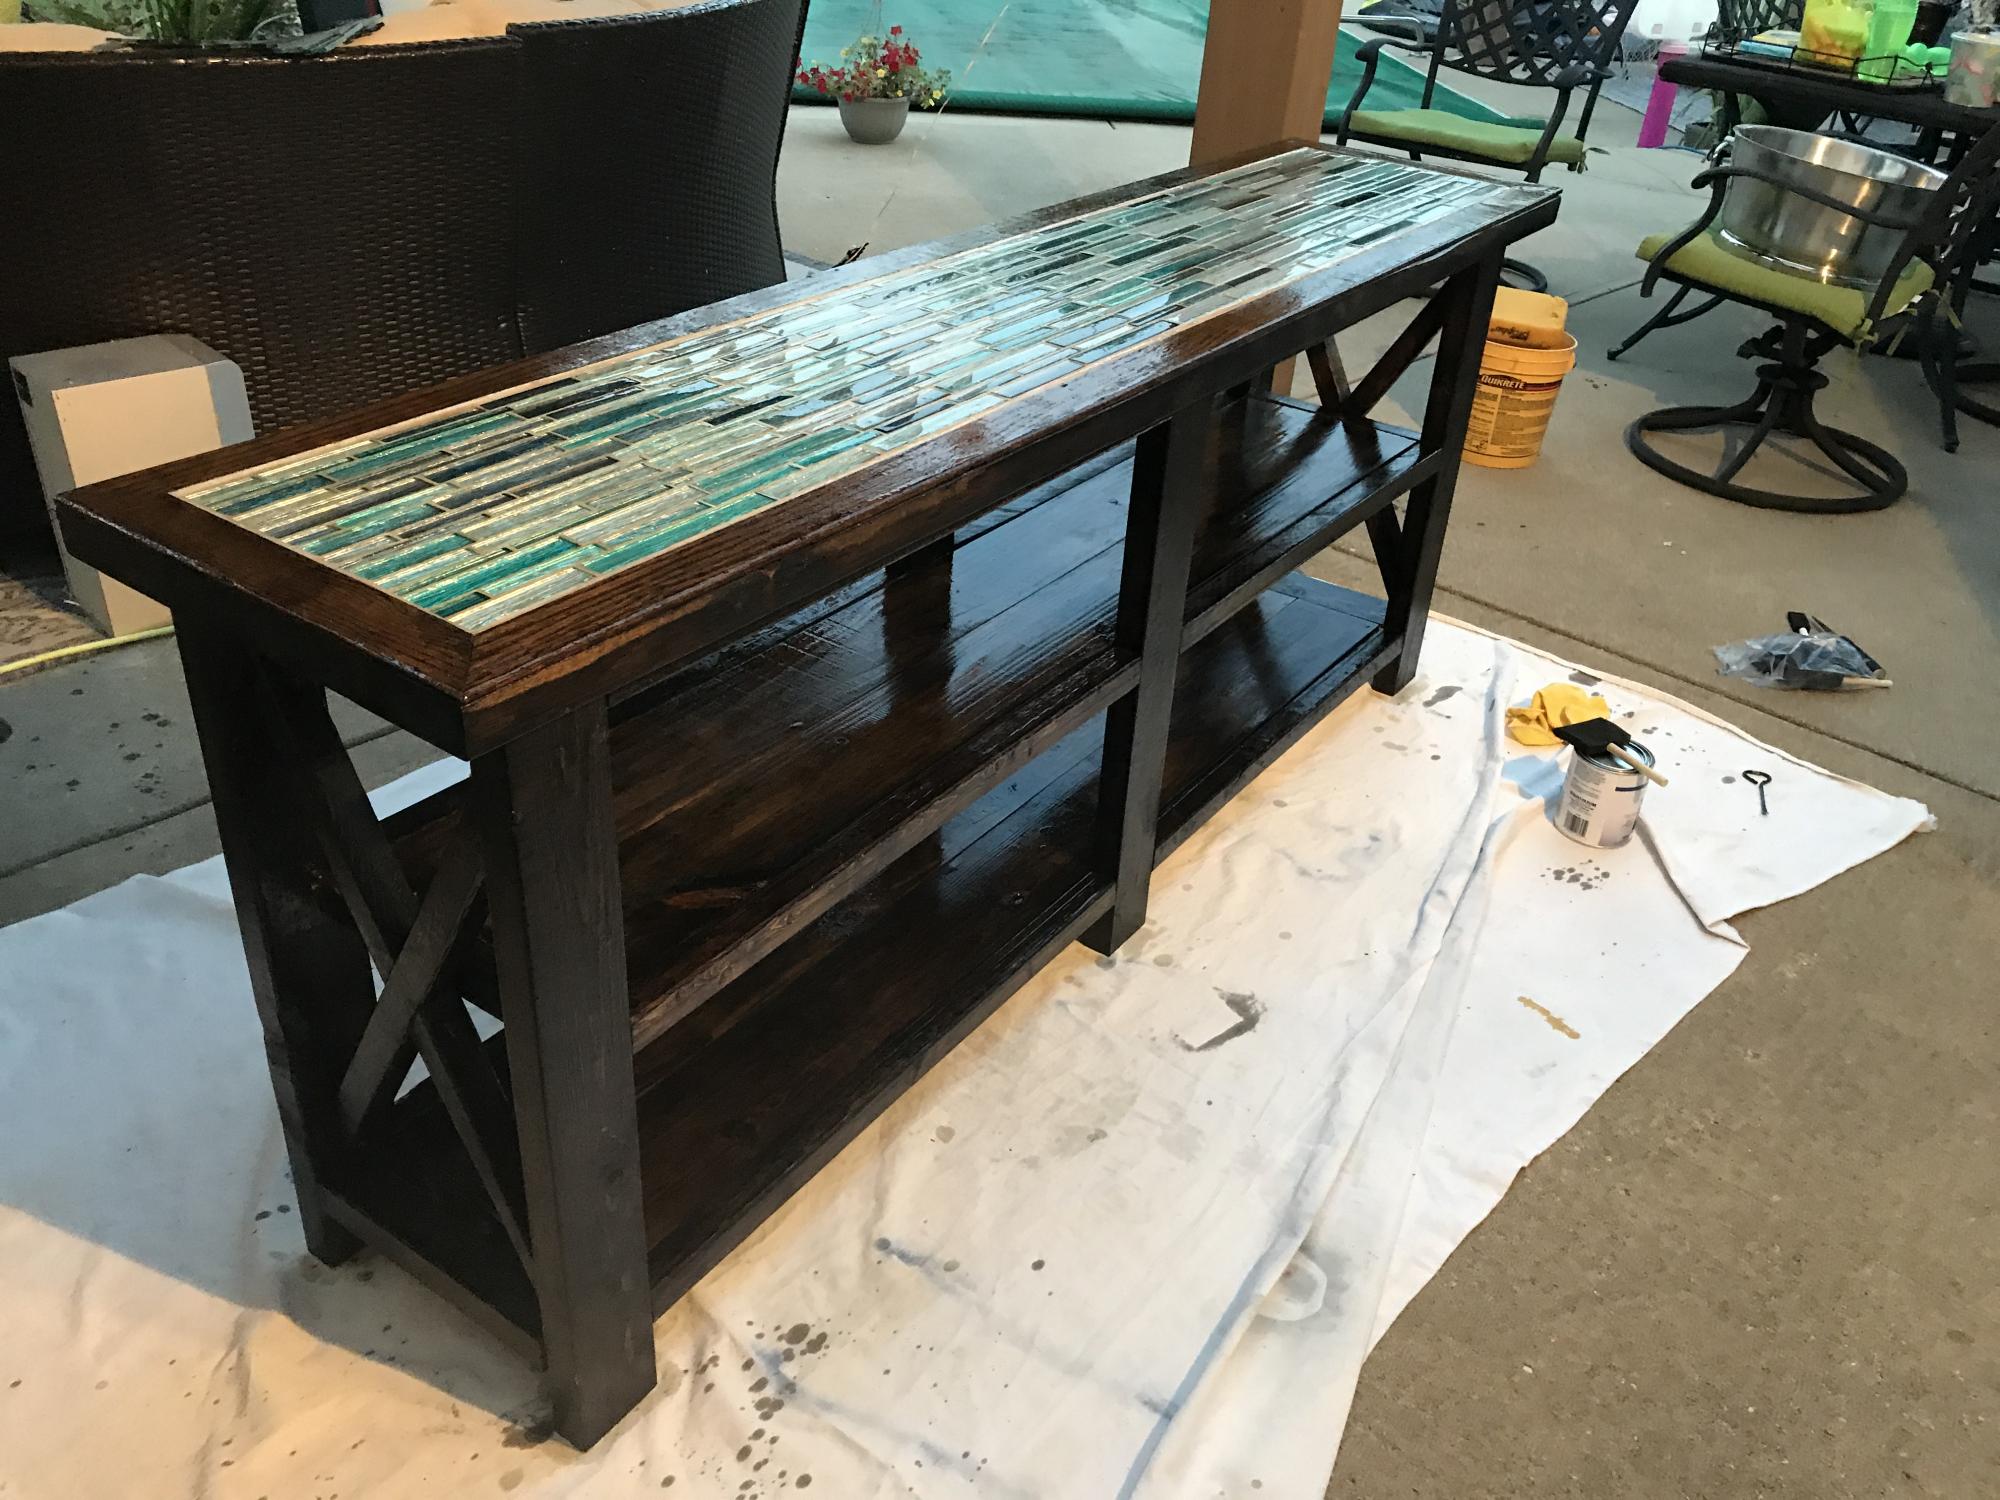
I took the rustic x console table but wanted it to be a nice piece for our outdoor seating area. I used some ebony stain, purchased mosaic tile from lowes, and finished with Spar Varnish. Around the tile, I used some old hardwood flooring strips as trim. Sanded and stained the trim to match. I'm very happy with how it turned out. And the varnish is UV resistant so it'll stand up to the rain and won't fade in the sun.
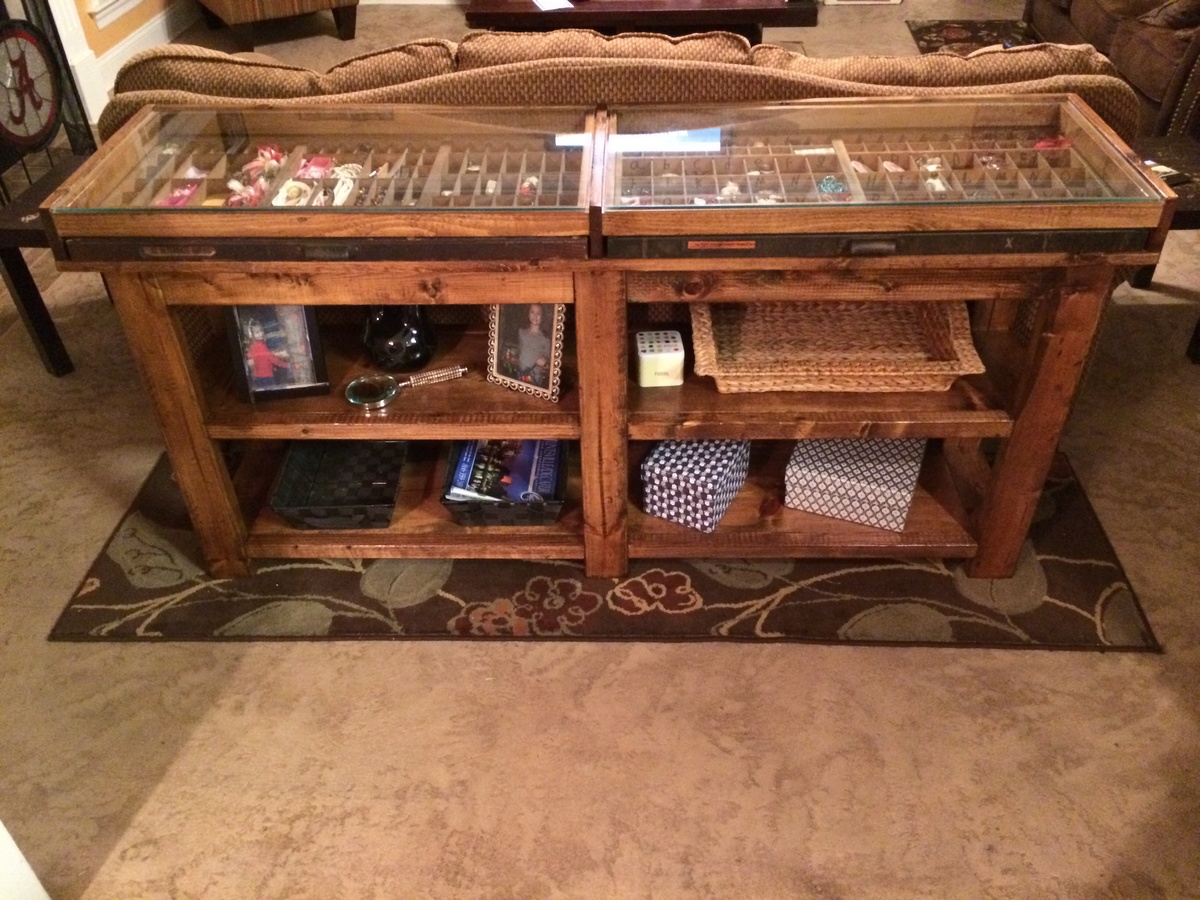
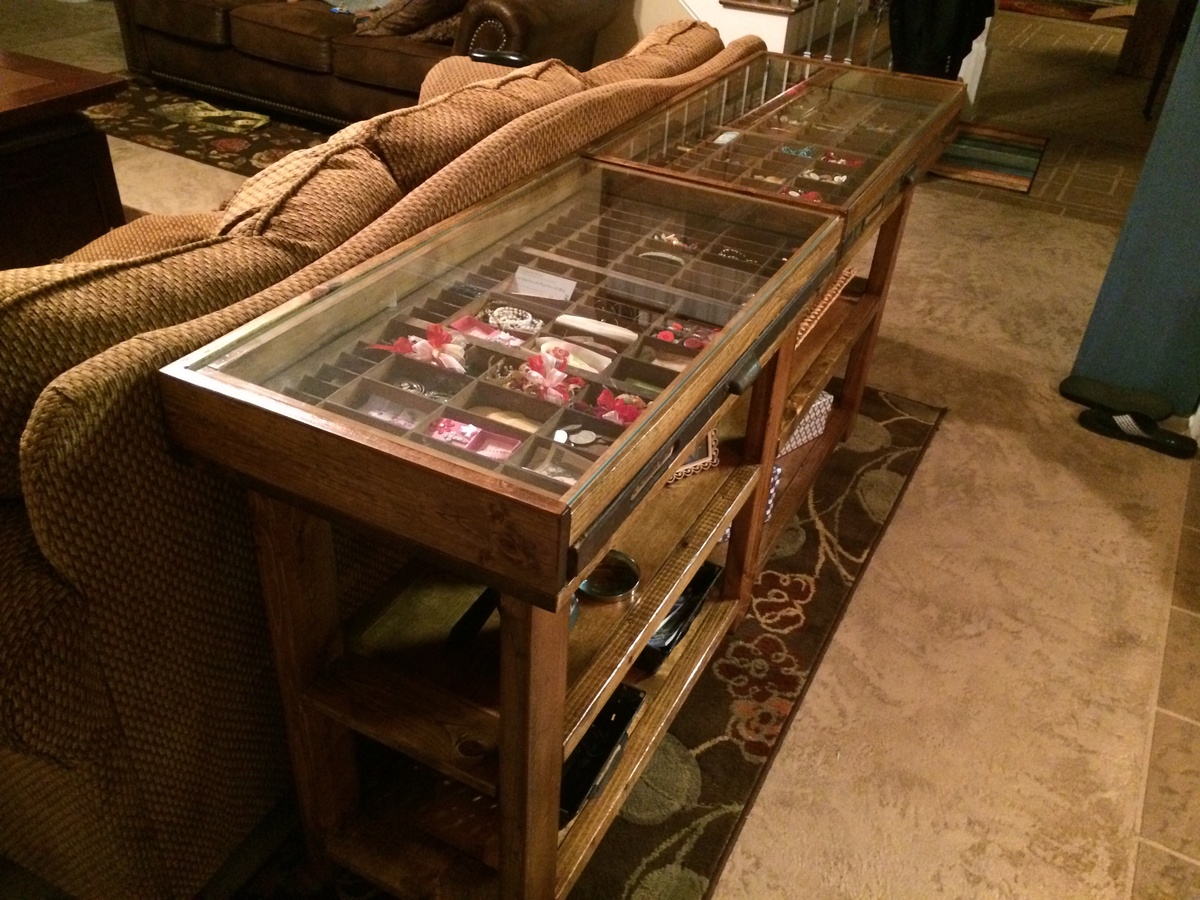
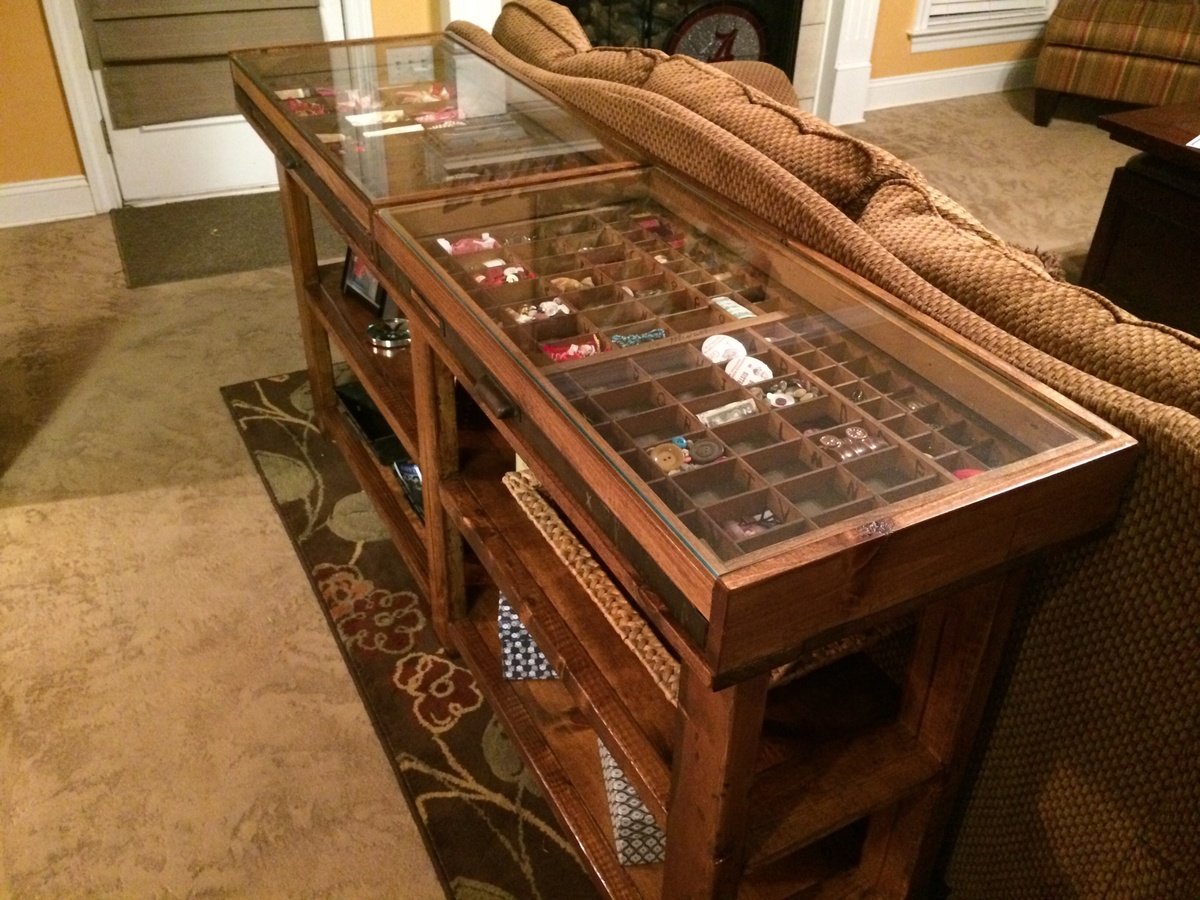
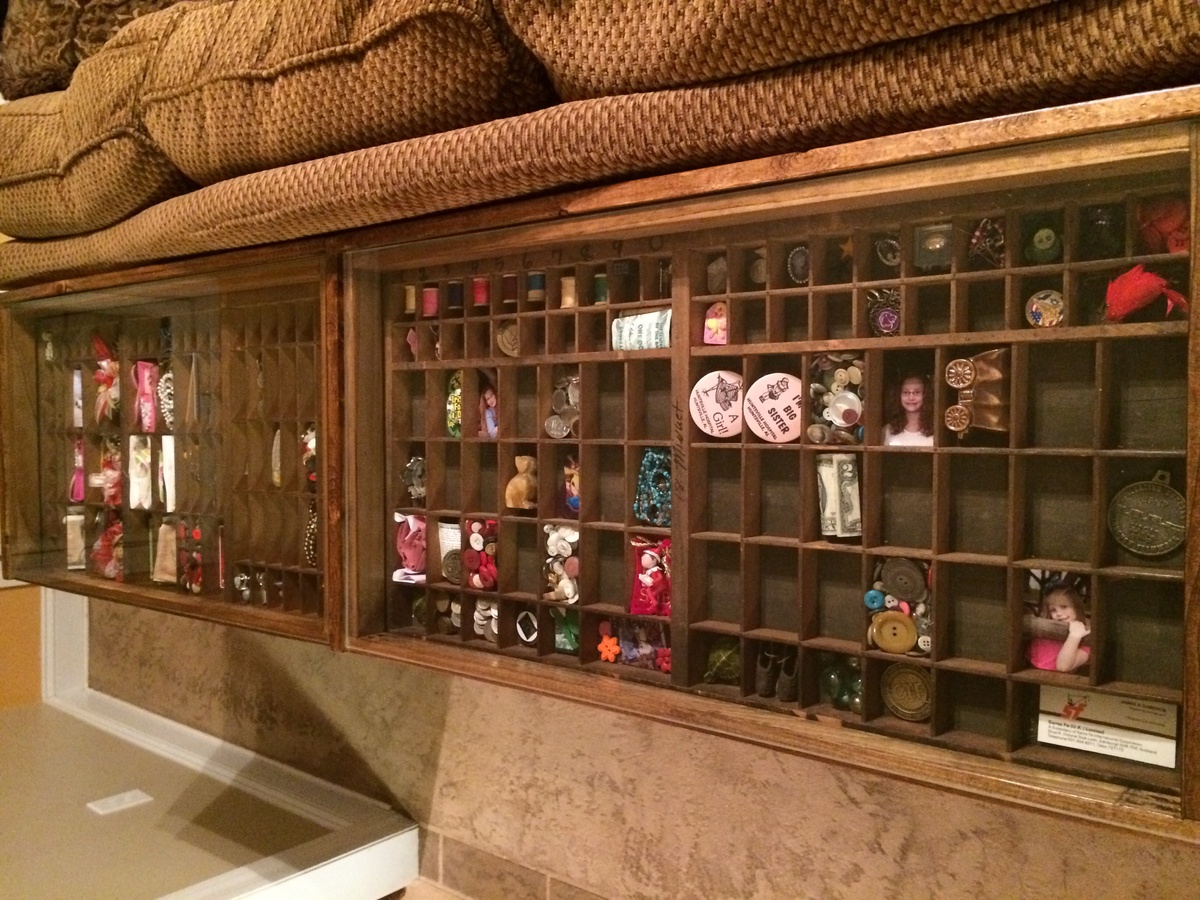
My wife had purchased a few antique printing press trays a few years ago to use to display family keepsakes. She also wanted a sofa table for the Living Room so I combined the two concepts into one table. I used the Rustic X Console table concept and modified it to fit my space and added the drawer compartments for the trays to slide into. I added two glass pieces to the top and there you have a sofa/display table. I used pine boards, hammer to distress the piece, Early American stain and a couple of coats of poly for the finish. The glass pieces we the biggest expense at $50. The table itself was built for around $55 before the glass was added.