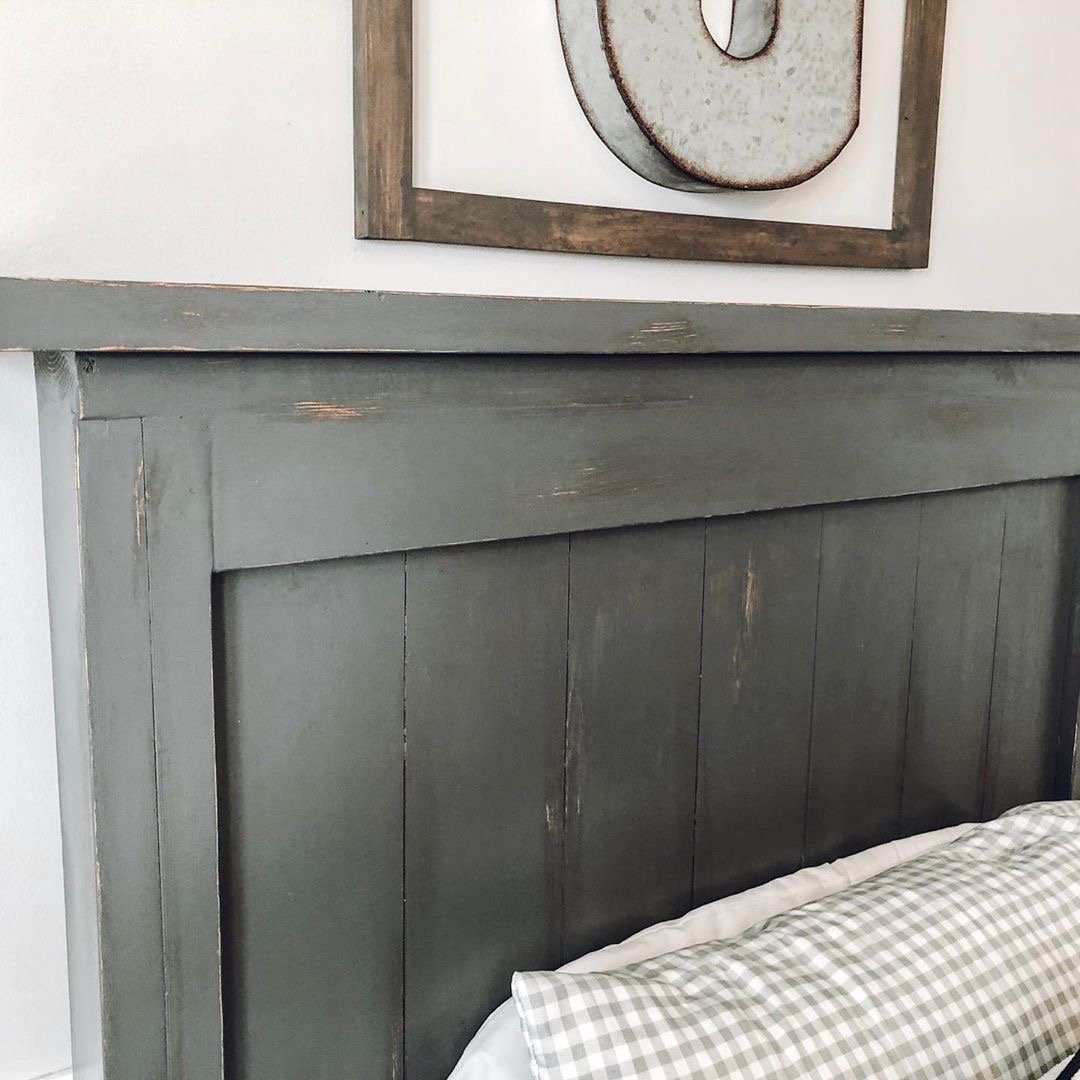
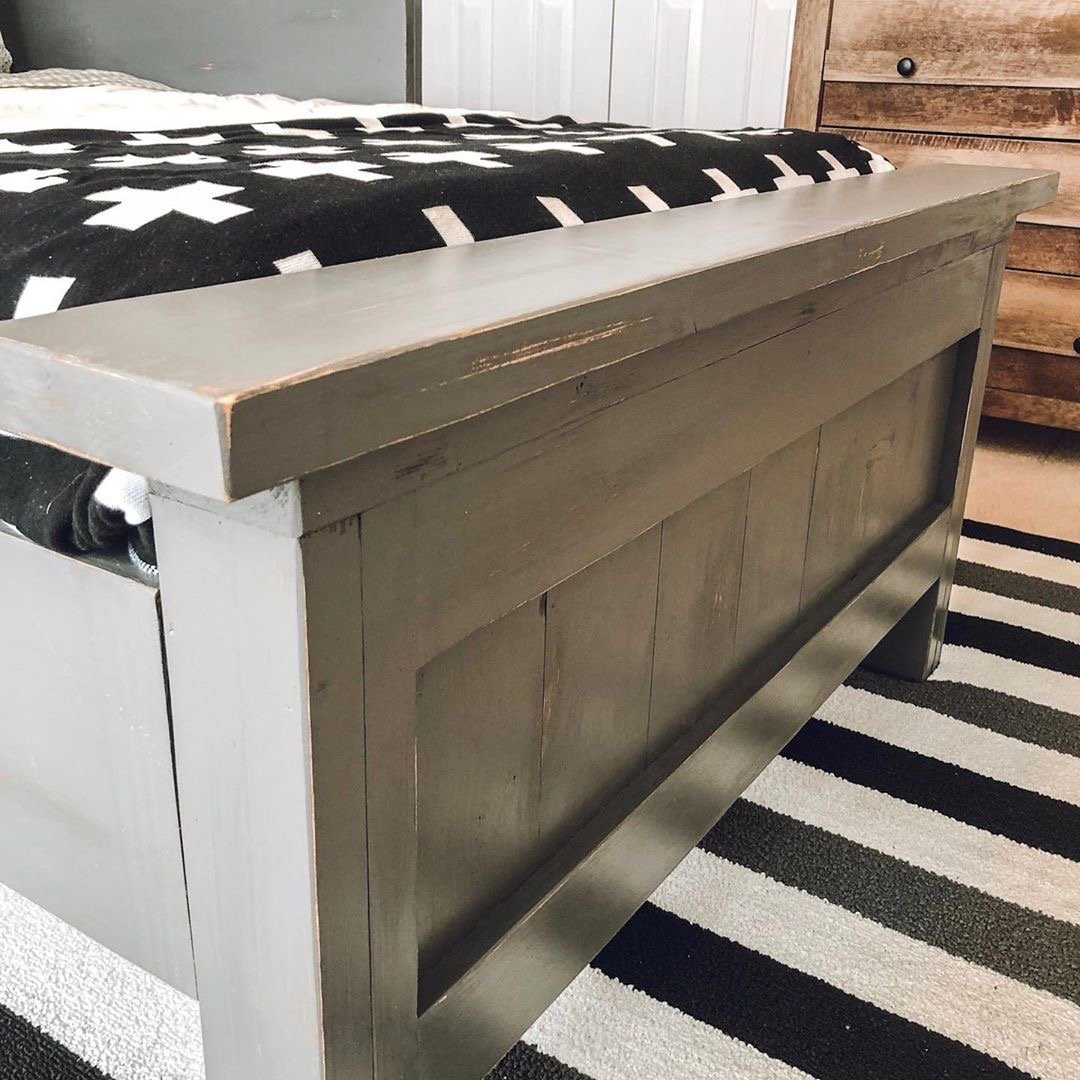
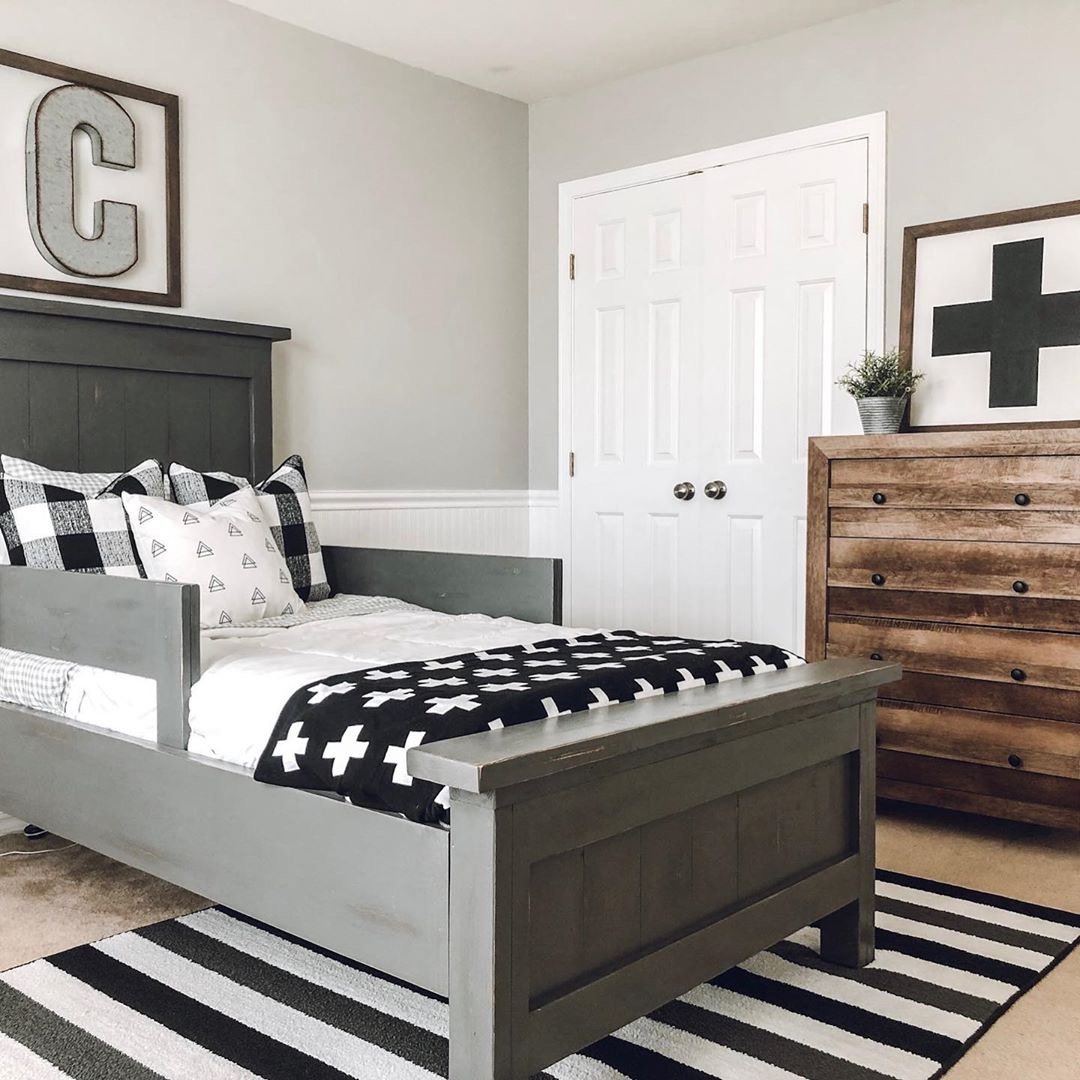
Black Twin Farmhouse Bed with Guardrails
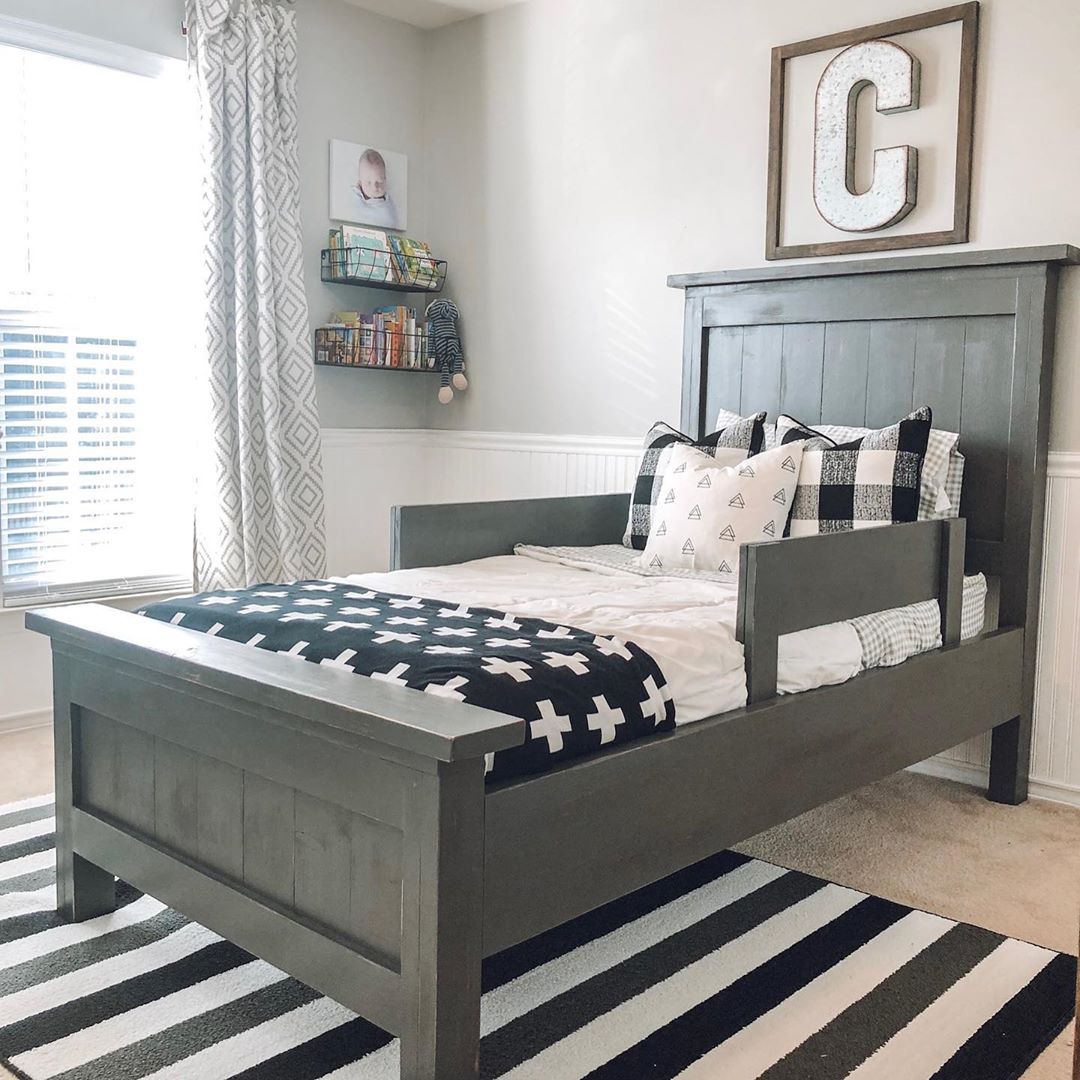
For more photos and details, see my Instagram post here.
Built from Plan(s)
Recommended Skill Level
Beginner
For more photos and details, see my Instagram post here.
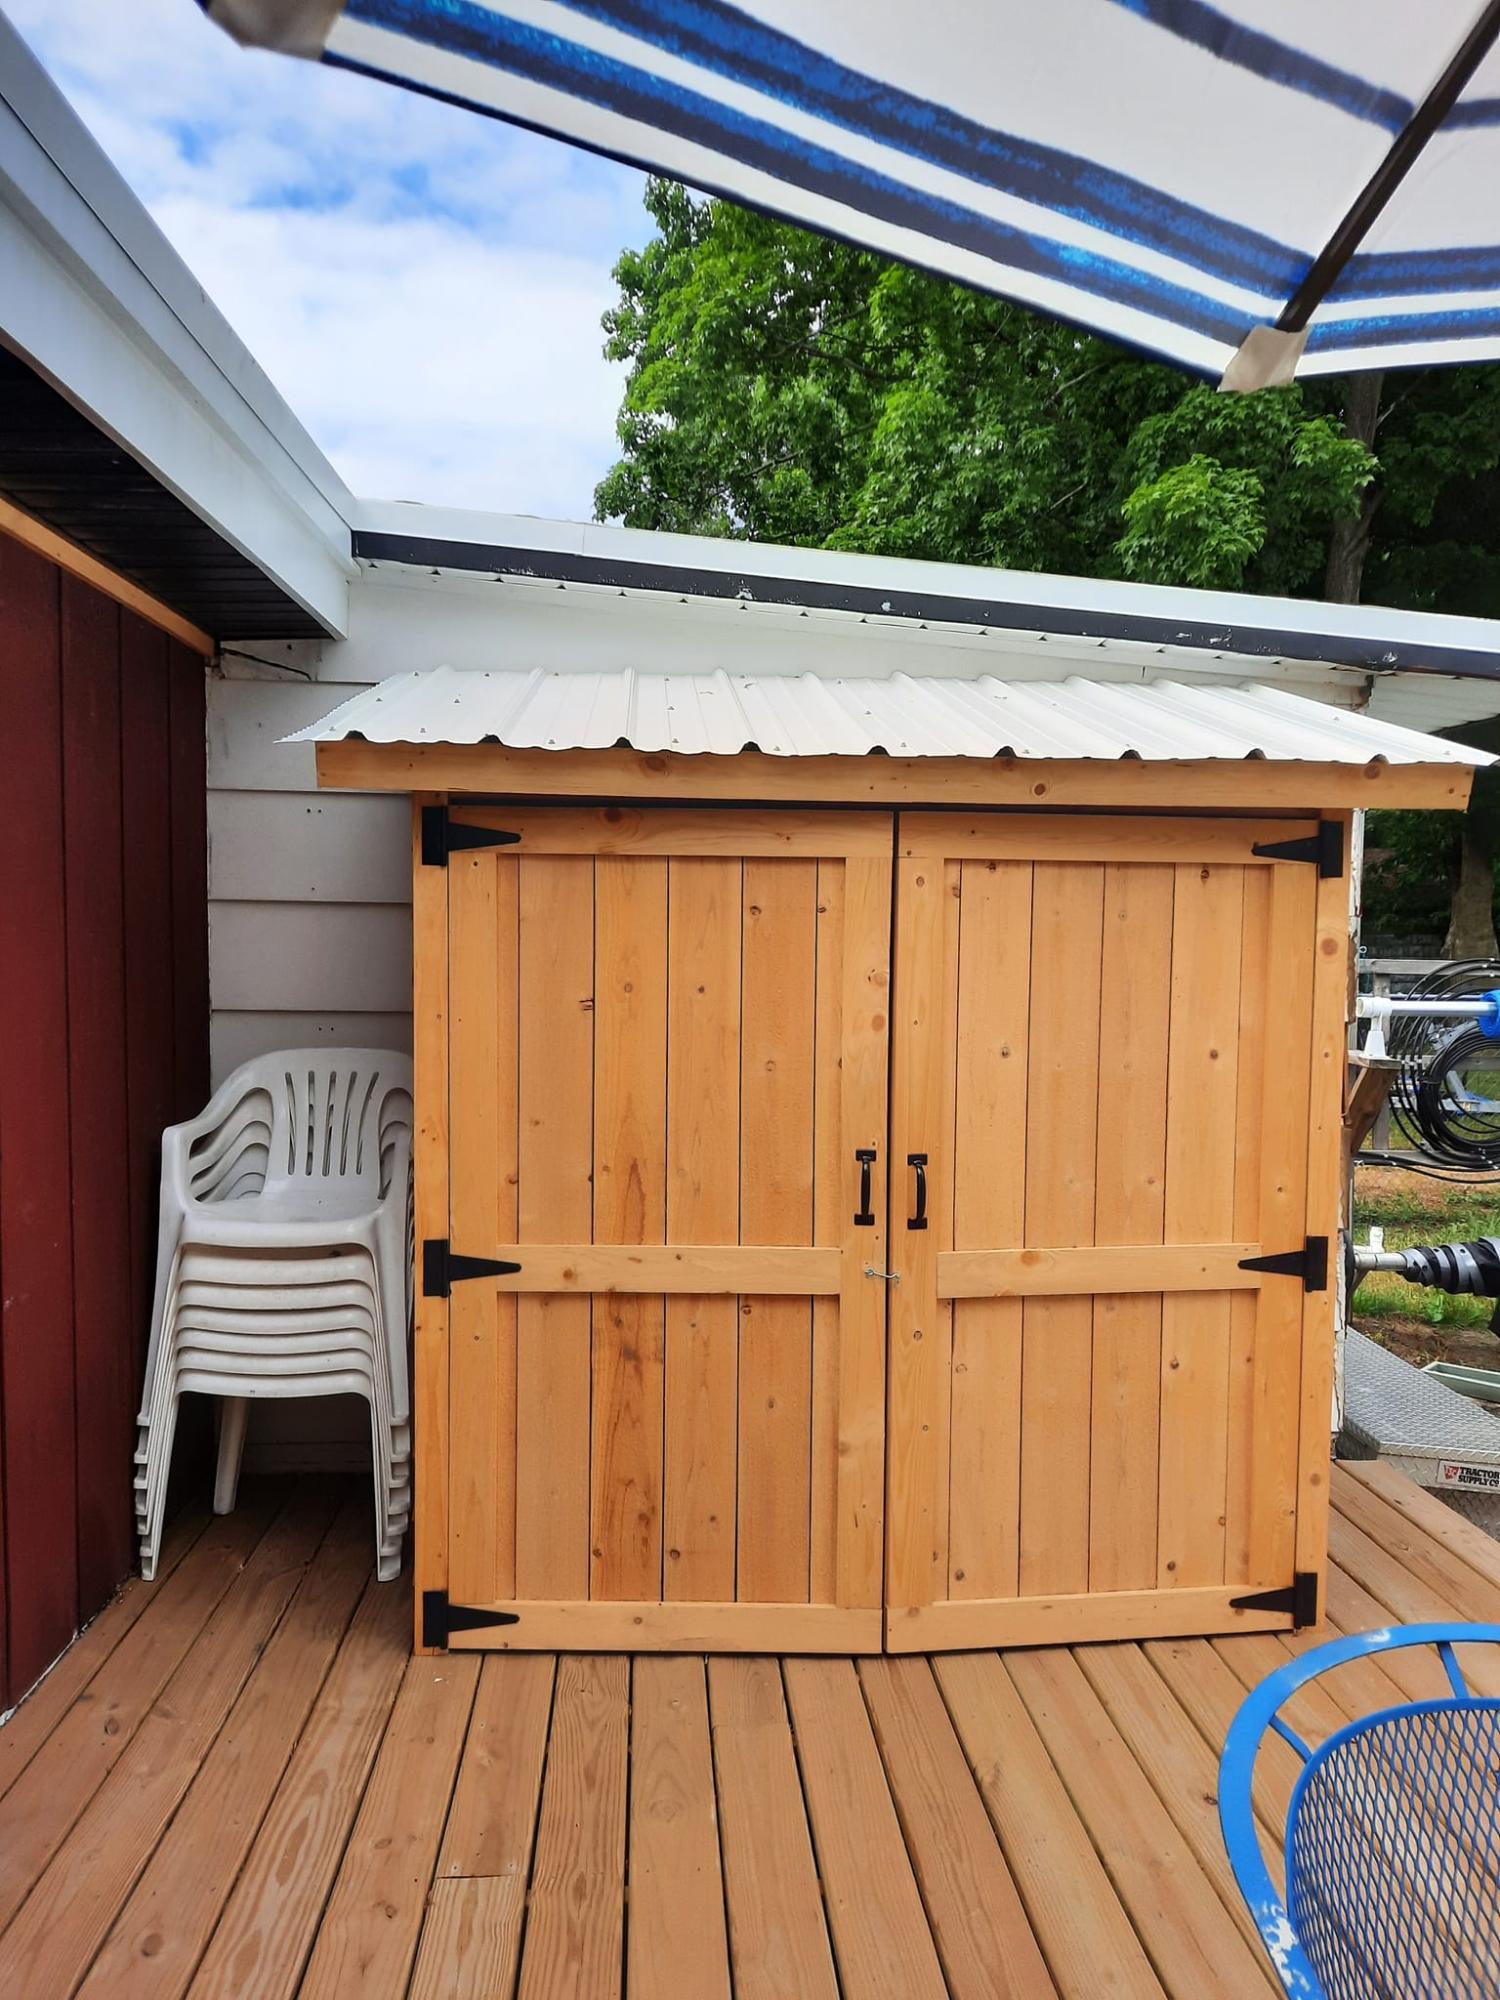
I was looking for a shed to keep pool towels and other deck and pool items. This shed hit every feature I was looking
for. My husband loved the plans. He's always saying he can build anything with a measured drawing and a
cut list. The only thing we changed was the roofing material. we were given some metal roofing by a friend.
Mon, 06/26/2023 - 12:20
Fabulous, so glad you found our plans helpful! It looks great.
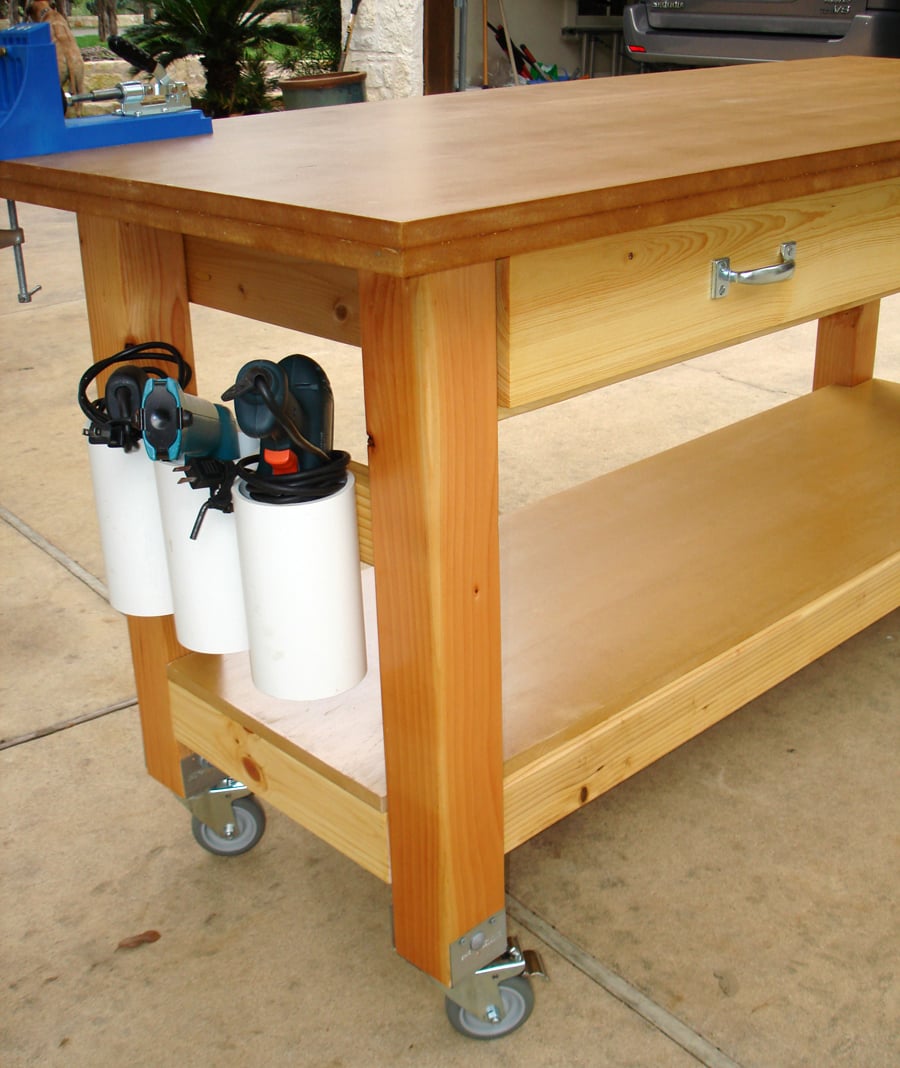
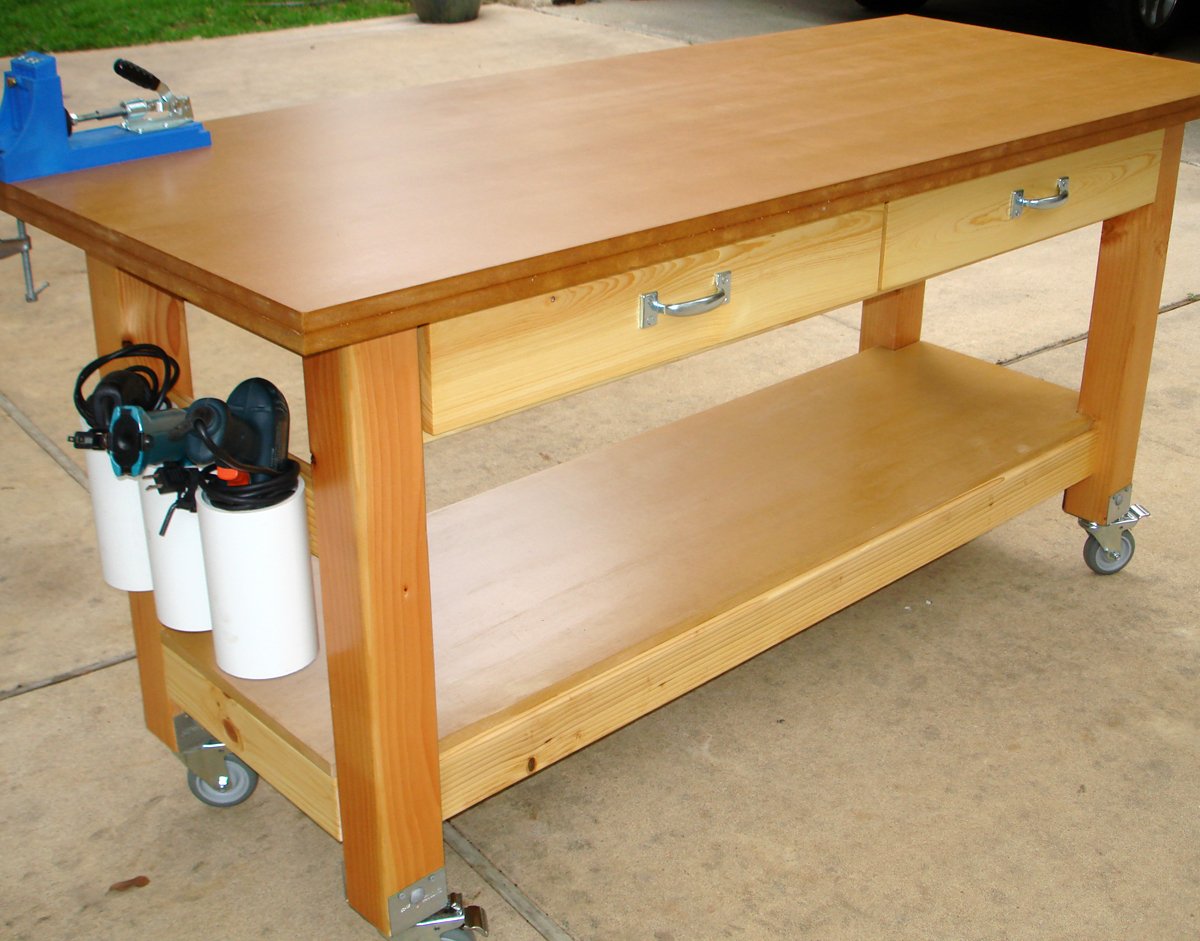
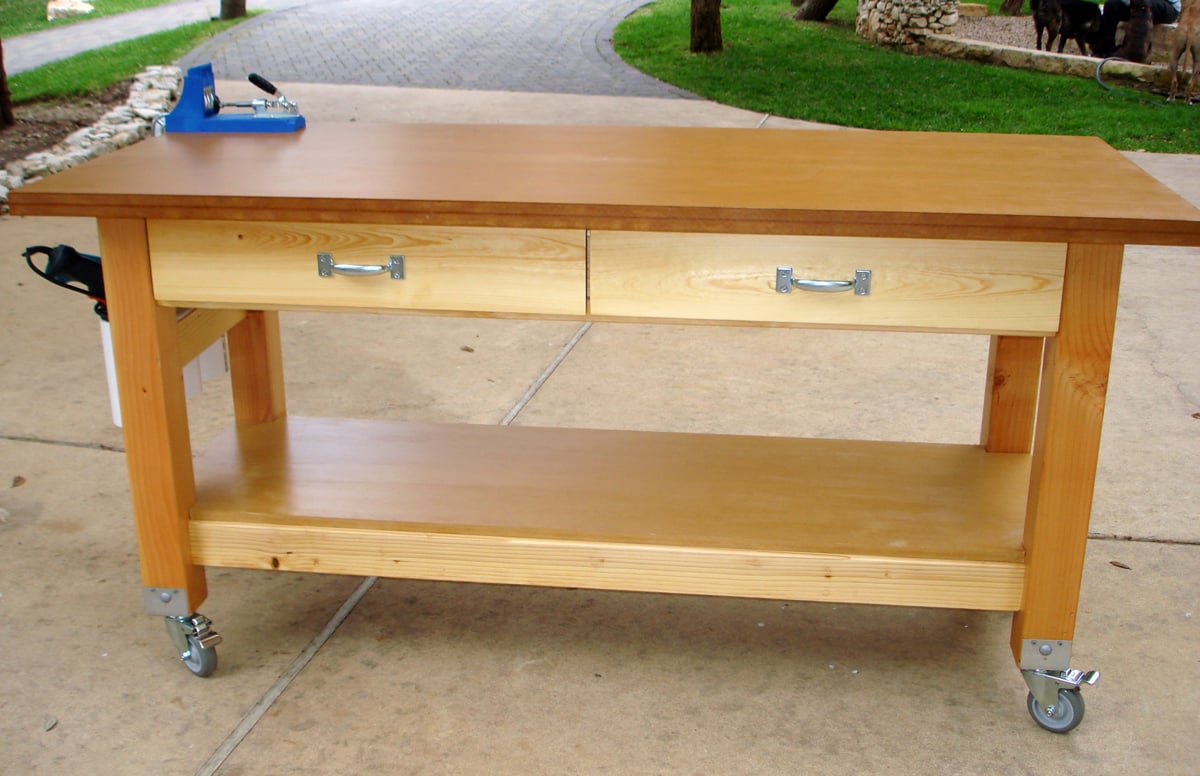
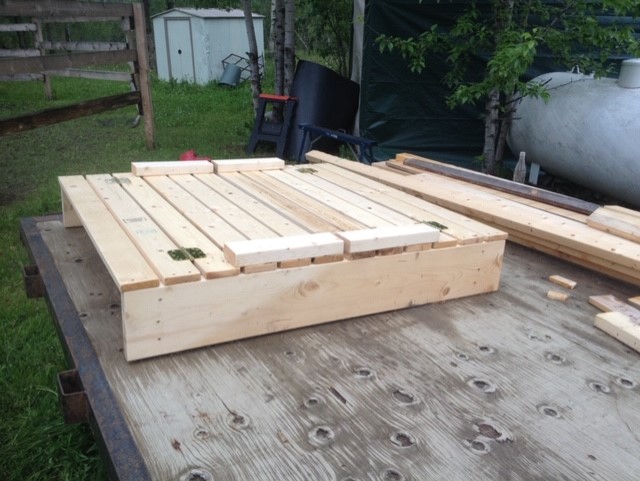
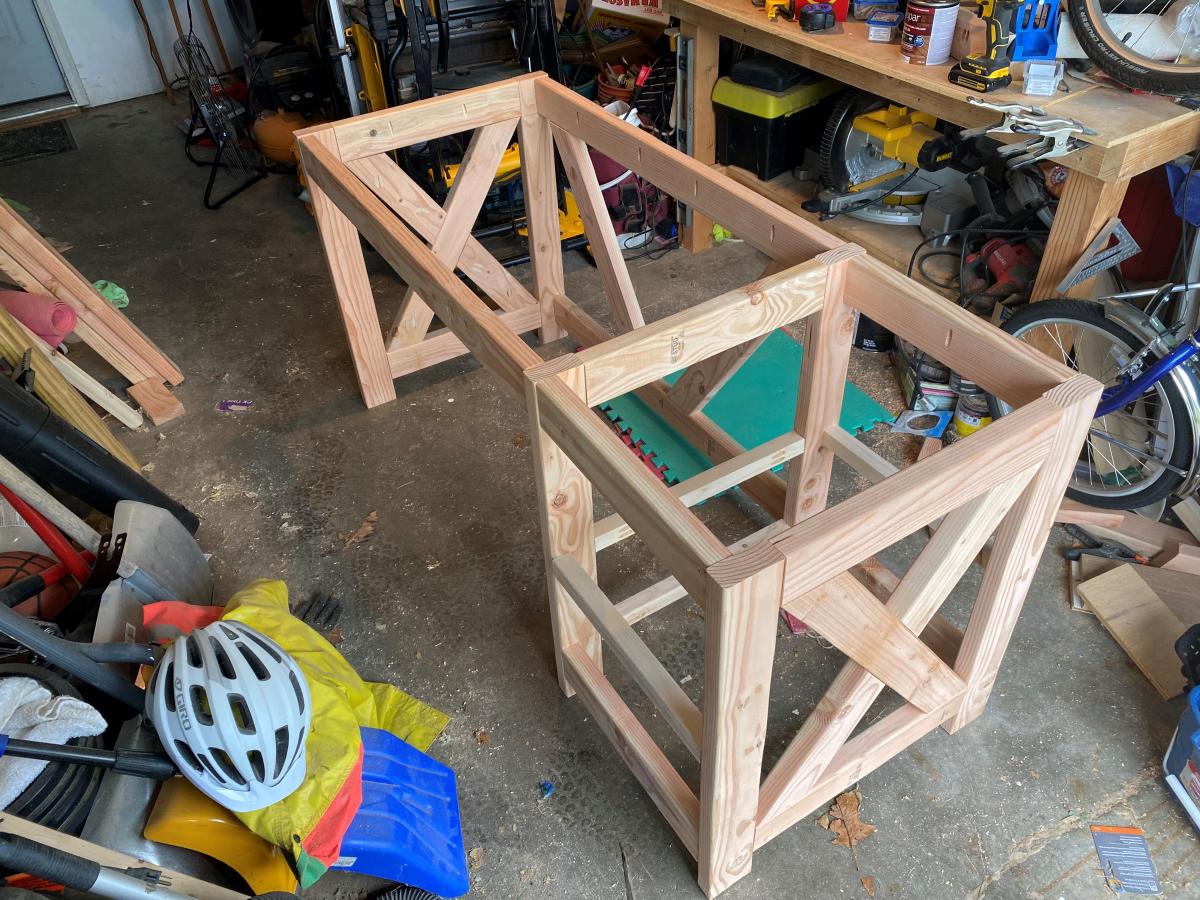
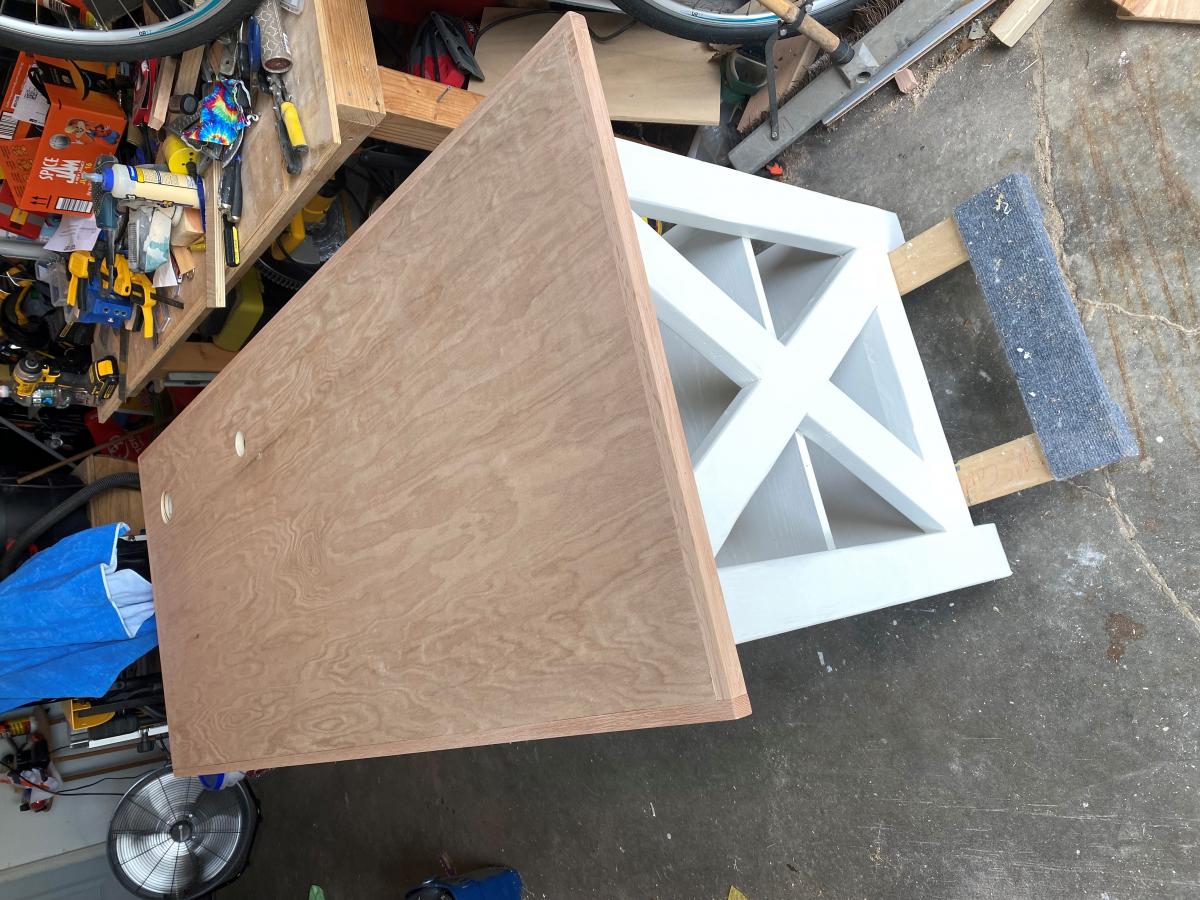
Given that I work out of my garage, I desperately needed a rolling workbench in order to roll out, make the sawdust mess, and roll back in. I had already made Michaela's island for another purpose inside my house, and I loved the sturdiness of the 4x4 posts as legs. I had industrial-type locking castors, but they only screwed in with a threaded post. Thanks to my engineer dad, he determined the best way to attach a screw-in castor to the bottom of the 4x4 (and did all that work for me!).
The size is modified from Michaela's original plan to include a 3 1/2" overhang all the way around for easy clamping (and top is 6' x 2.5'). I also cut a 2' piece of PVC pipe into 3 sections and attached for my drill storage. I put full-extension glides on the drawers and made some dividers from scrap wood.


Sun, 03/18/2012 - 18:21
This workbench is just outstanding!!! I want! Great job!
Mon, 03/19/2012 - 11:51
This would be the perfect workbench for my small shop/garage. Would love a full write up on how to create it. Great work.
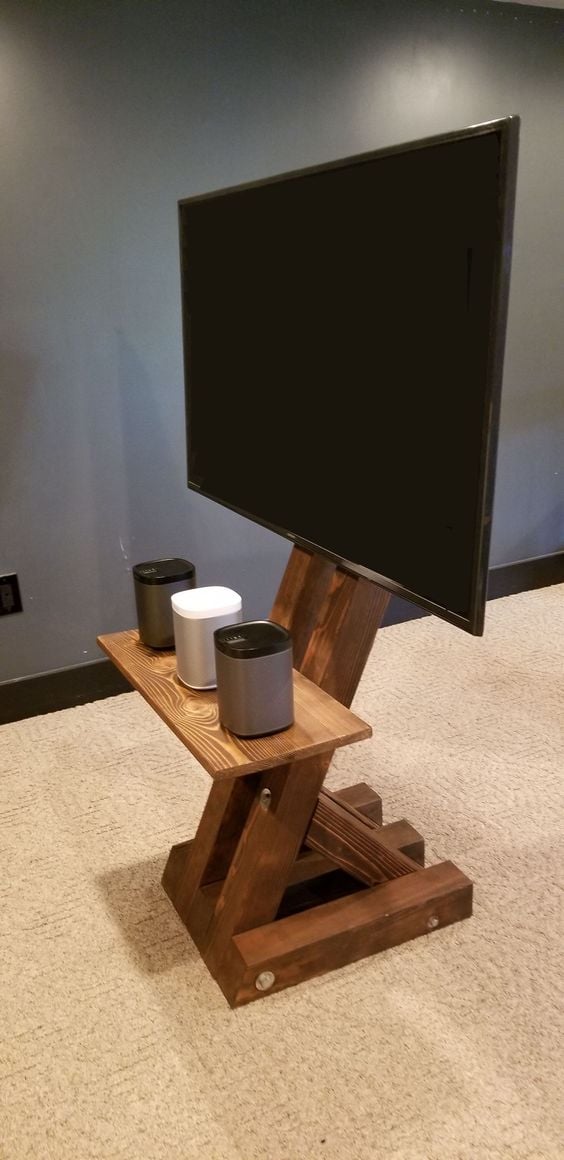
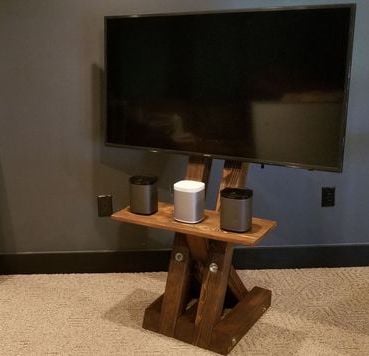
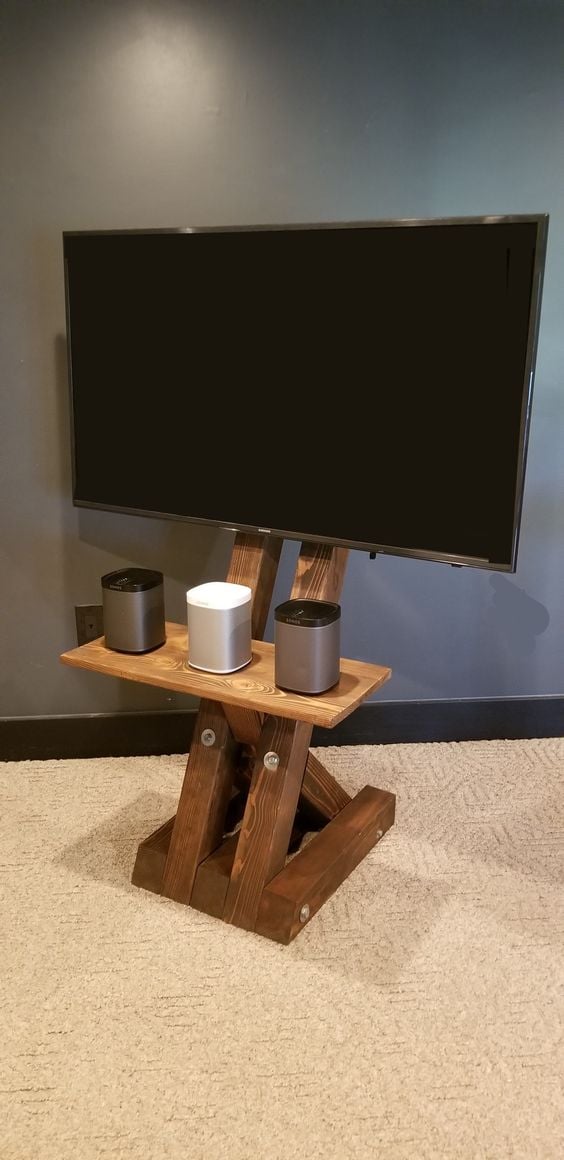
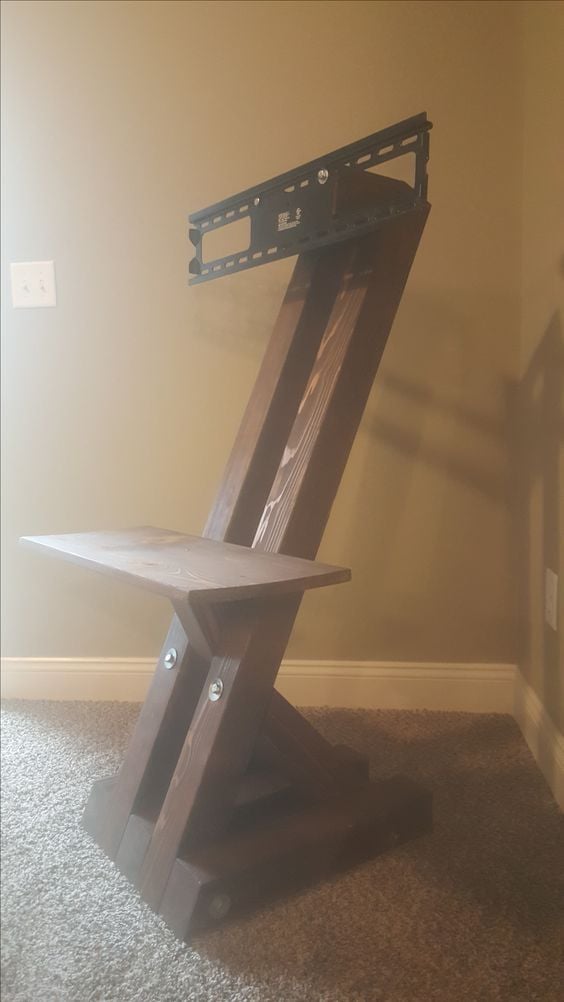
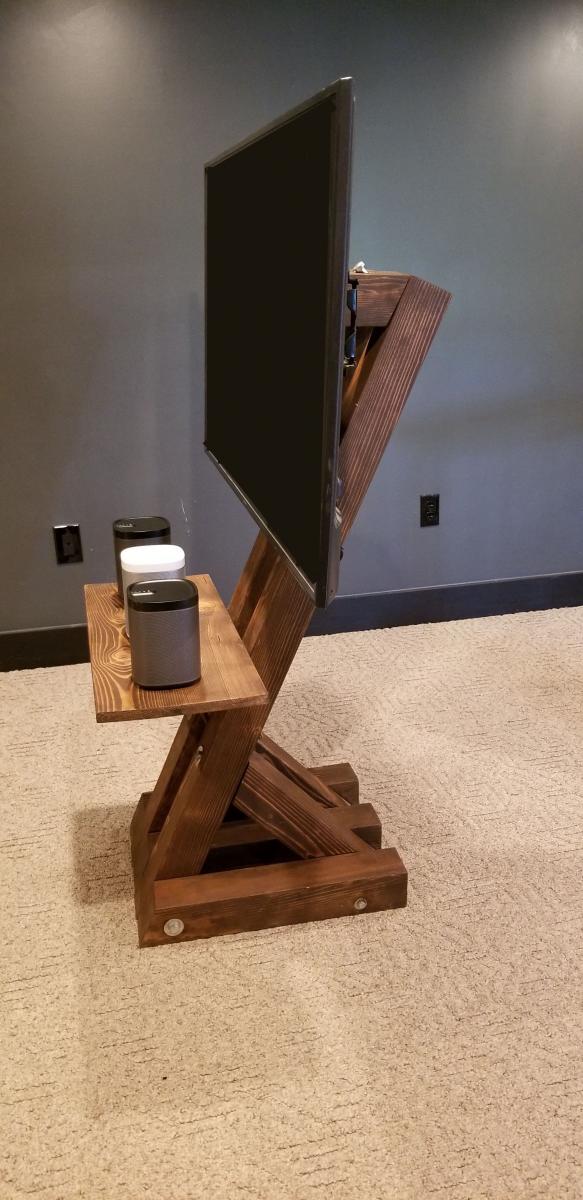
The Gíaffe Free Standing TV Mount. Handcrafted and engineered to use its center mass to deliver strength and balance for tv sizes 30-60". Display your television without detracting from your home's decor. The Gíaffe Free Standing TV Mount is the perfect solution and its rich finish will be perfect for any house/office room.
Wed, 03/11/2020 - 07:16
I absolutely love this!! Are there plans available?
My first woodworking project. The plans were easy to understand and my four kids love it!
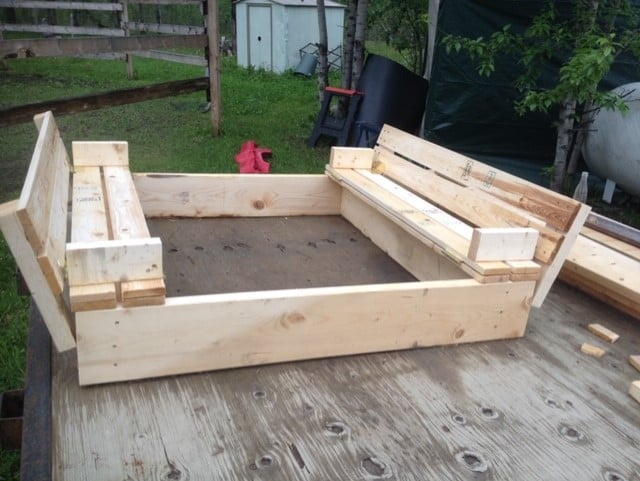
I built this sandbox for my kiddo's because we have cats! It was great. Easy to build, great plans for it.
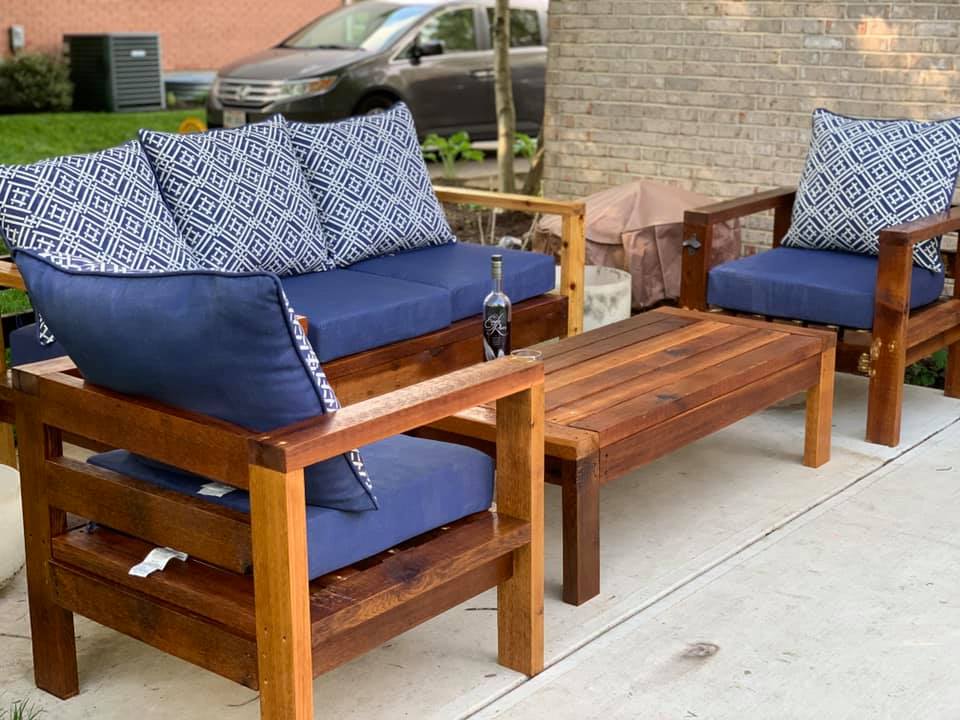
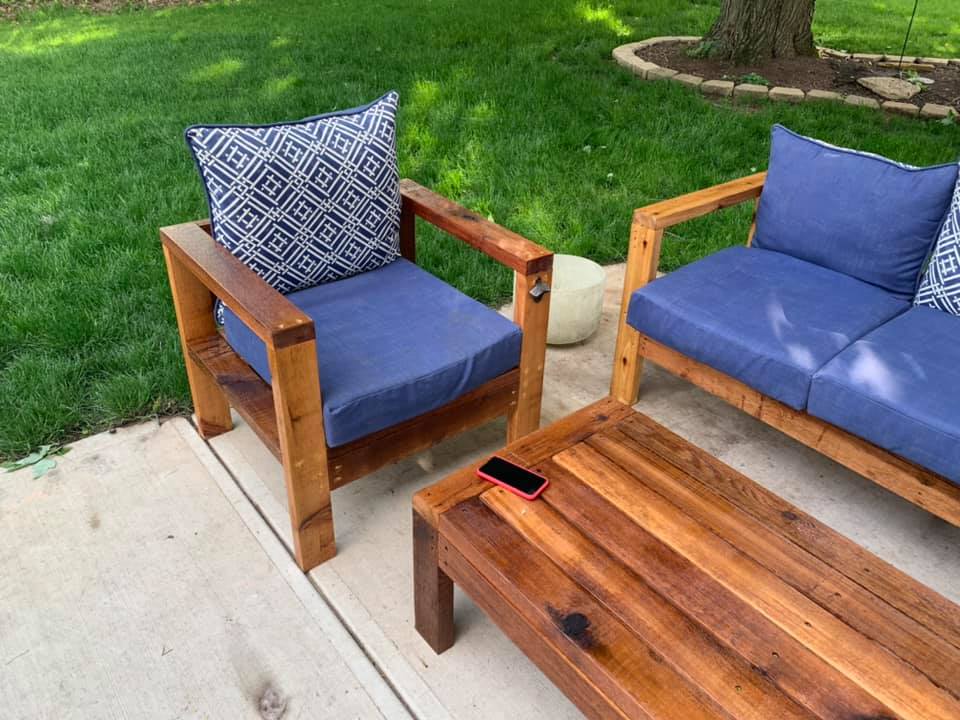
Been working from home for the past two months due to the health crisis. To stop from going crazy from being at home with my wife and four kids, I decided up pick up a hobby - here's where my homie Ana enters! I didn't want the sectional for my patio, but certainly the couch, chairs and table. The only mistakes had were my own (using wood putty, not sanding it well), but the plans were spot on. The only real issue I ran into was the cedar wood I used wasn't 1.5 x 3.5, but 1.75 x 3.5. This caused me to make additional cuts were I otherwise would not have needed it. Other than that, just remember to make the longest cuts first... I ended up needing to buy about five additional boards because it.
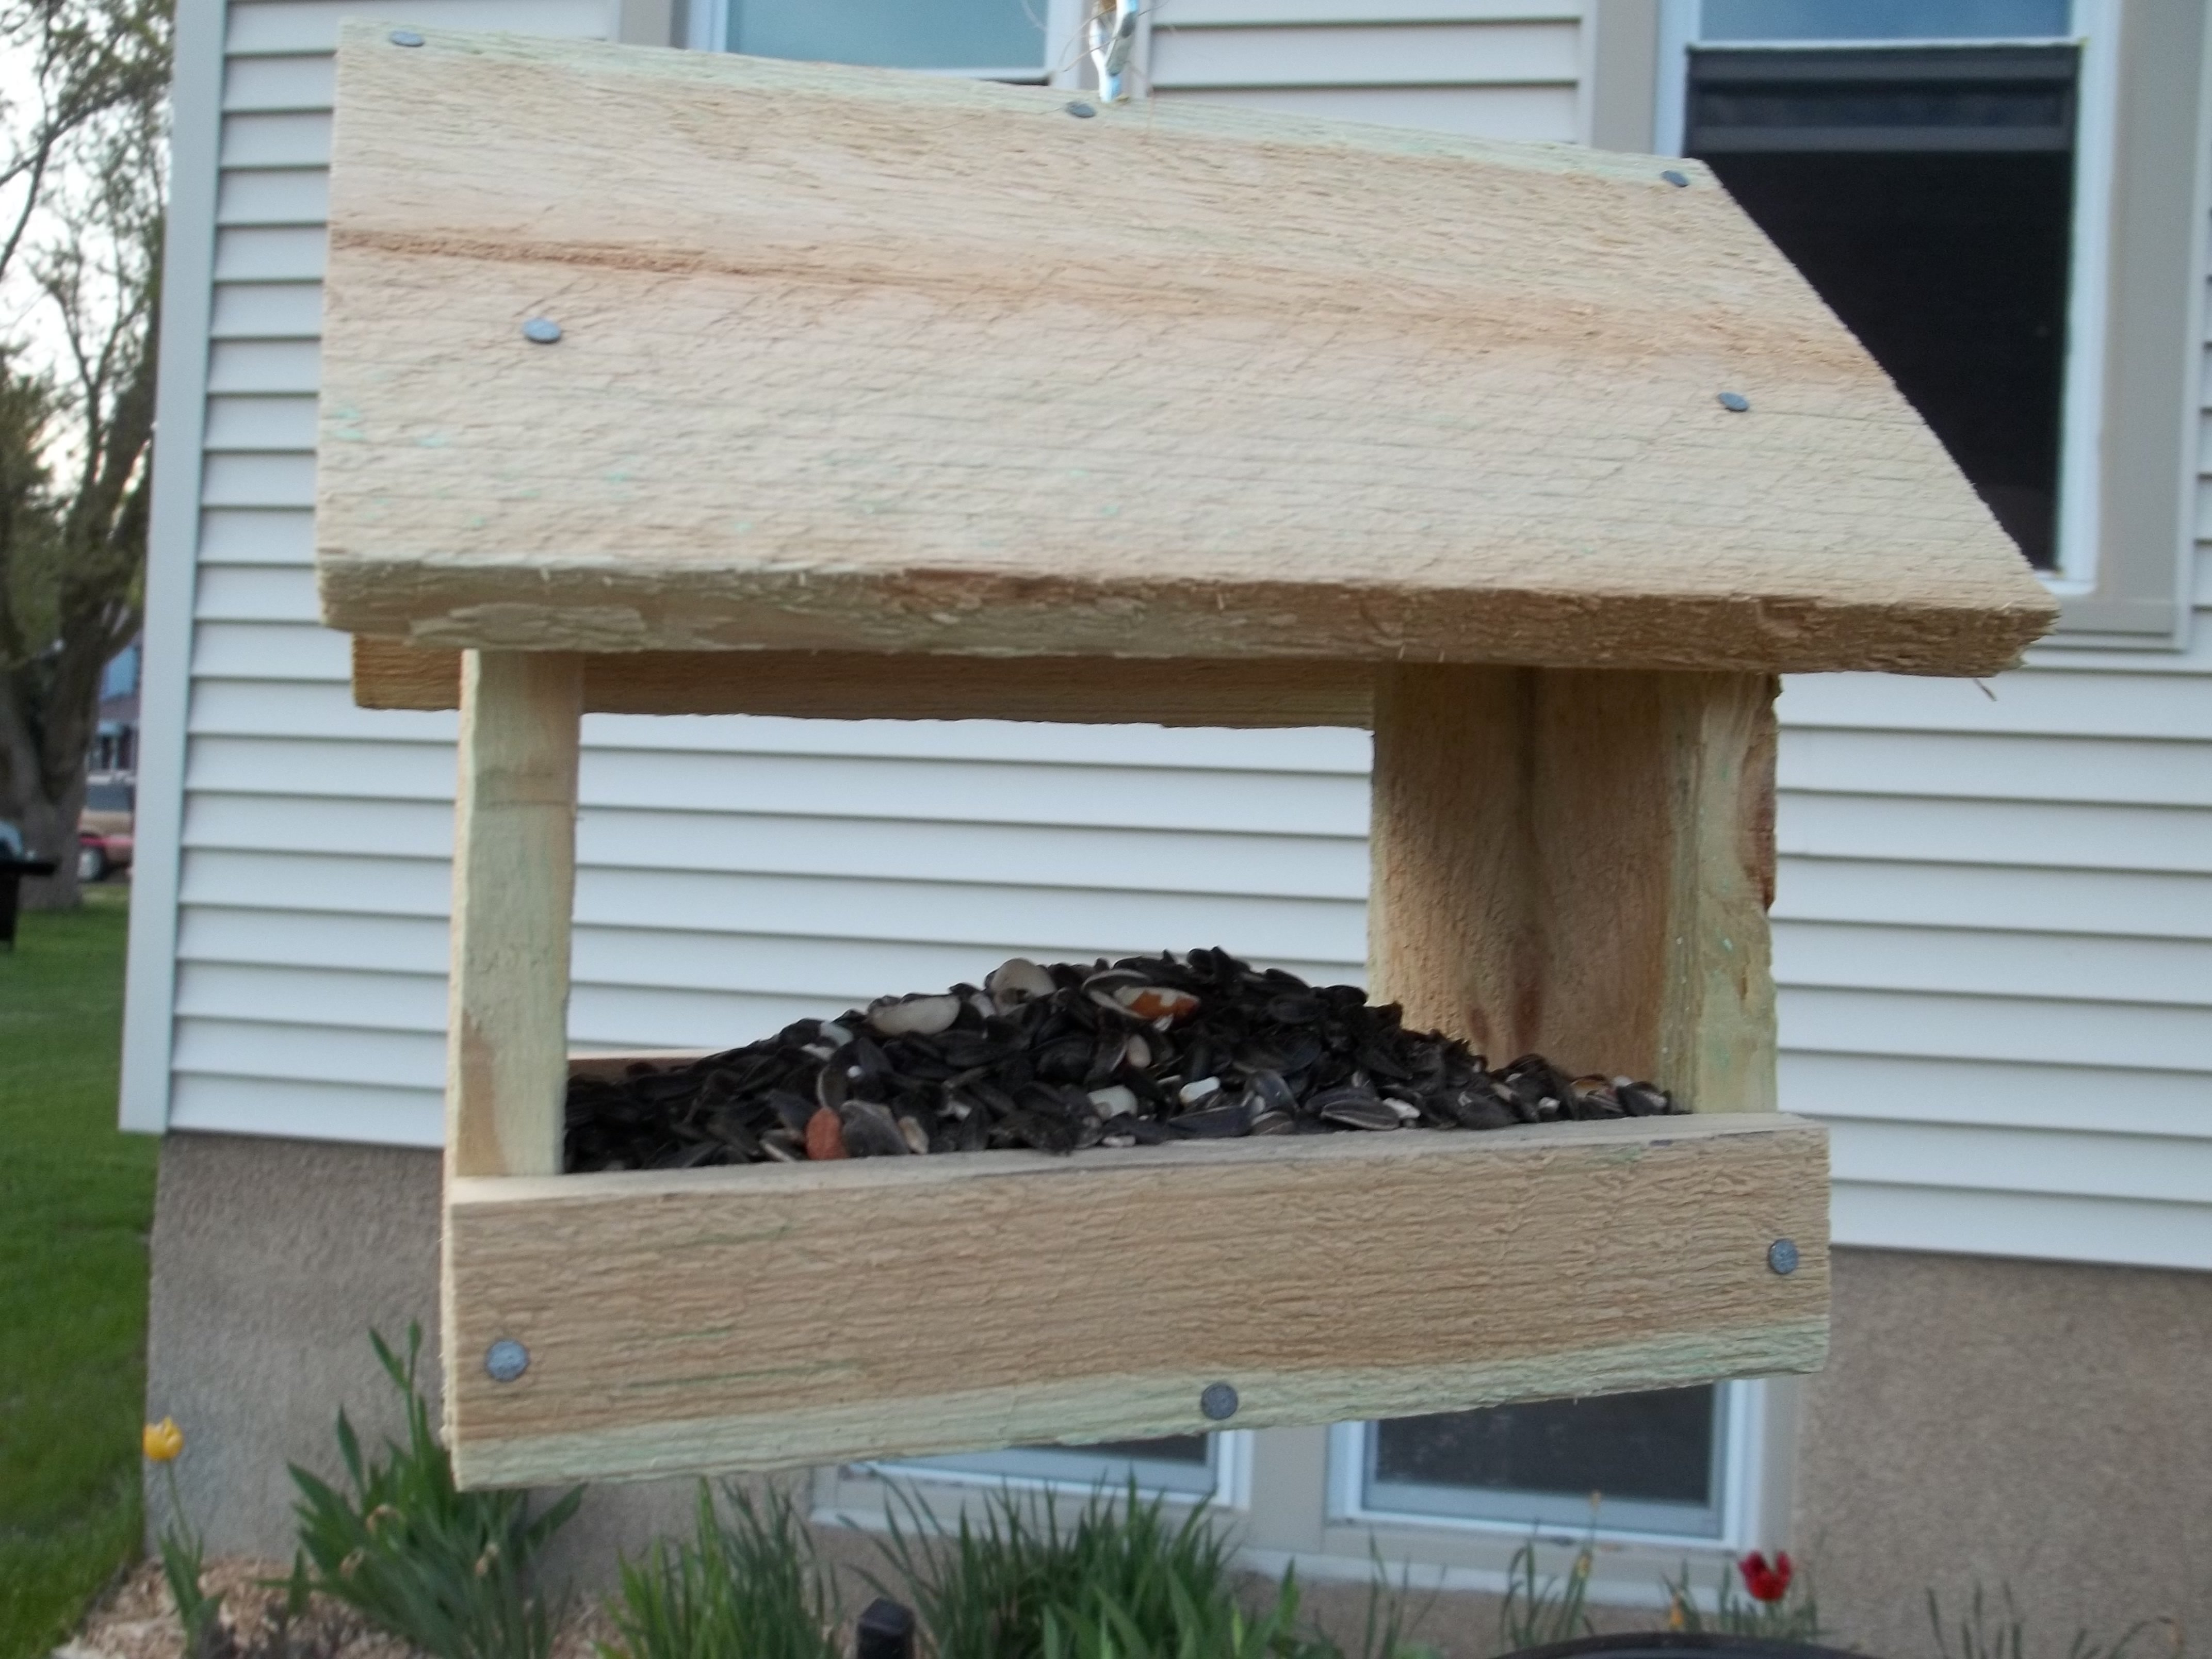
I have been trying to attract more birds. I built and put up some more birdhouses, added a bird bath, and wanted to add some more feeders. I found this quick and easy plan and I had to build it.
This took me less than an hour to build. I bought my picket from Menards when it was on sale for $1.18. That's not a bad price for a bird feeder!
You can see the steps I took to build this on my blog.
http://jaimeofalltrades.blogspot.com/2014/05/make-bird-feeder-for-under…

Sun, 03/01/2020 - 17:05
I can tell just from looking at this wood it was treated with a copper based chemical (note the green/blue blotches) while cedar is a good natural resistant wood these can sometimes be treated a well check for those greenish blotches around the Heartwood lines, chemical won't penetrate the tree sap in the wood and builds up along these lines. *I've worked in the pressure treated industry as a chemical tech for 3 years, and industry as a whole for more than 7.

I have built two of these modern farmhouse beds. One from the original farmhouse bed plans and one from the updated plan. This bed was basically the original plan but with the headboard and footboard built with horizontal boards. I did not like the revised farmhouse bed plans and the sides were way to heavy and more complex than they had to be. The were also supported only by pocket screws but I did block underneath each end to add more support. For the slats I also purchased #1 prime 1 x 4's as opposed to construction grade. They were nice and smooth and no need to sand or paint.

Sat, 02/20/2021 - 21:02
I love this! It’s exactly what I want. It’s like the mix of Ana’s two different farmhouse bed plans. I like the horizontal boards instead of the vertical and I didn’t want the ledges on the side trails. Thanks for showing me the way. :)
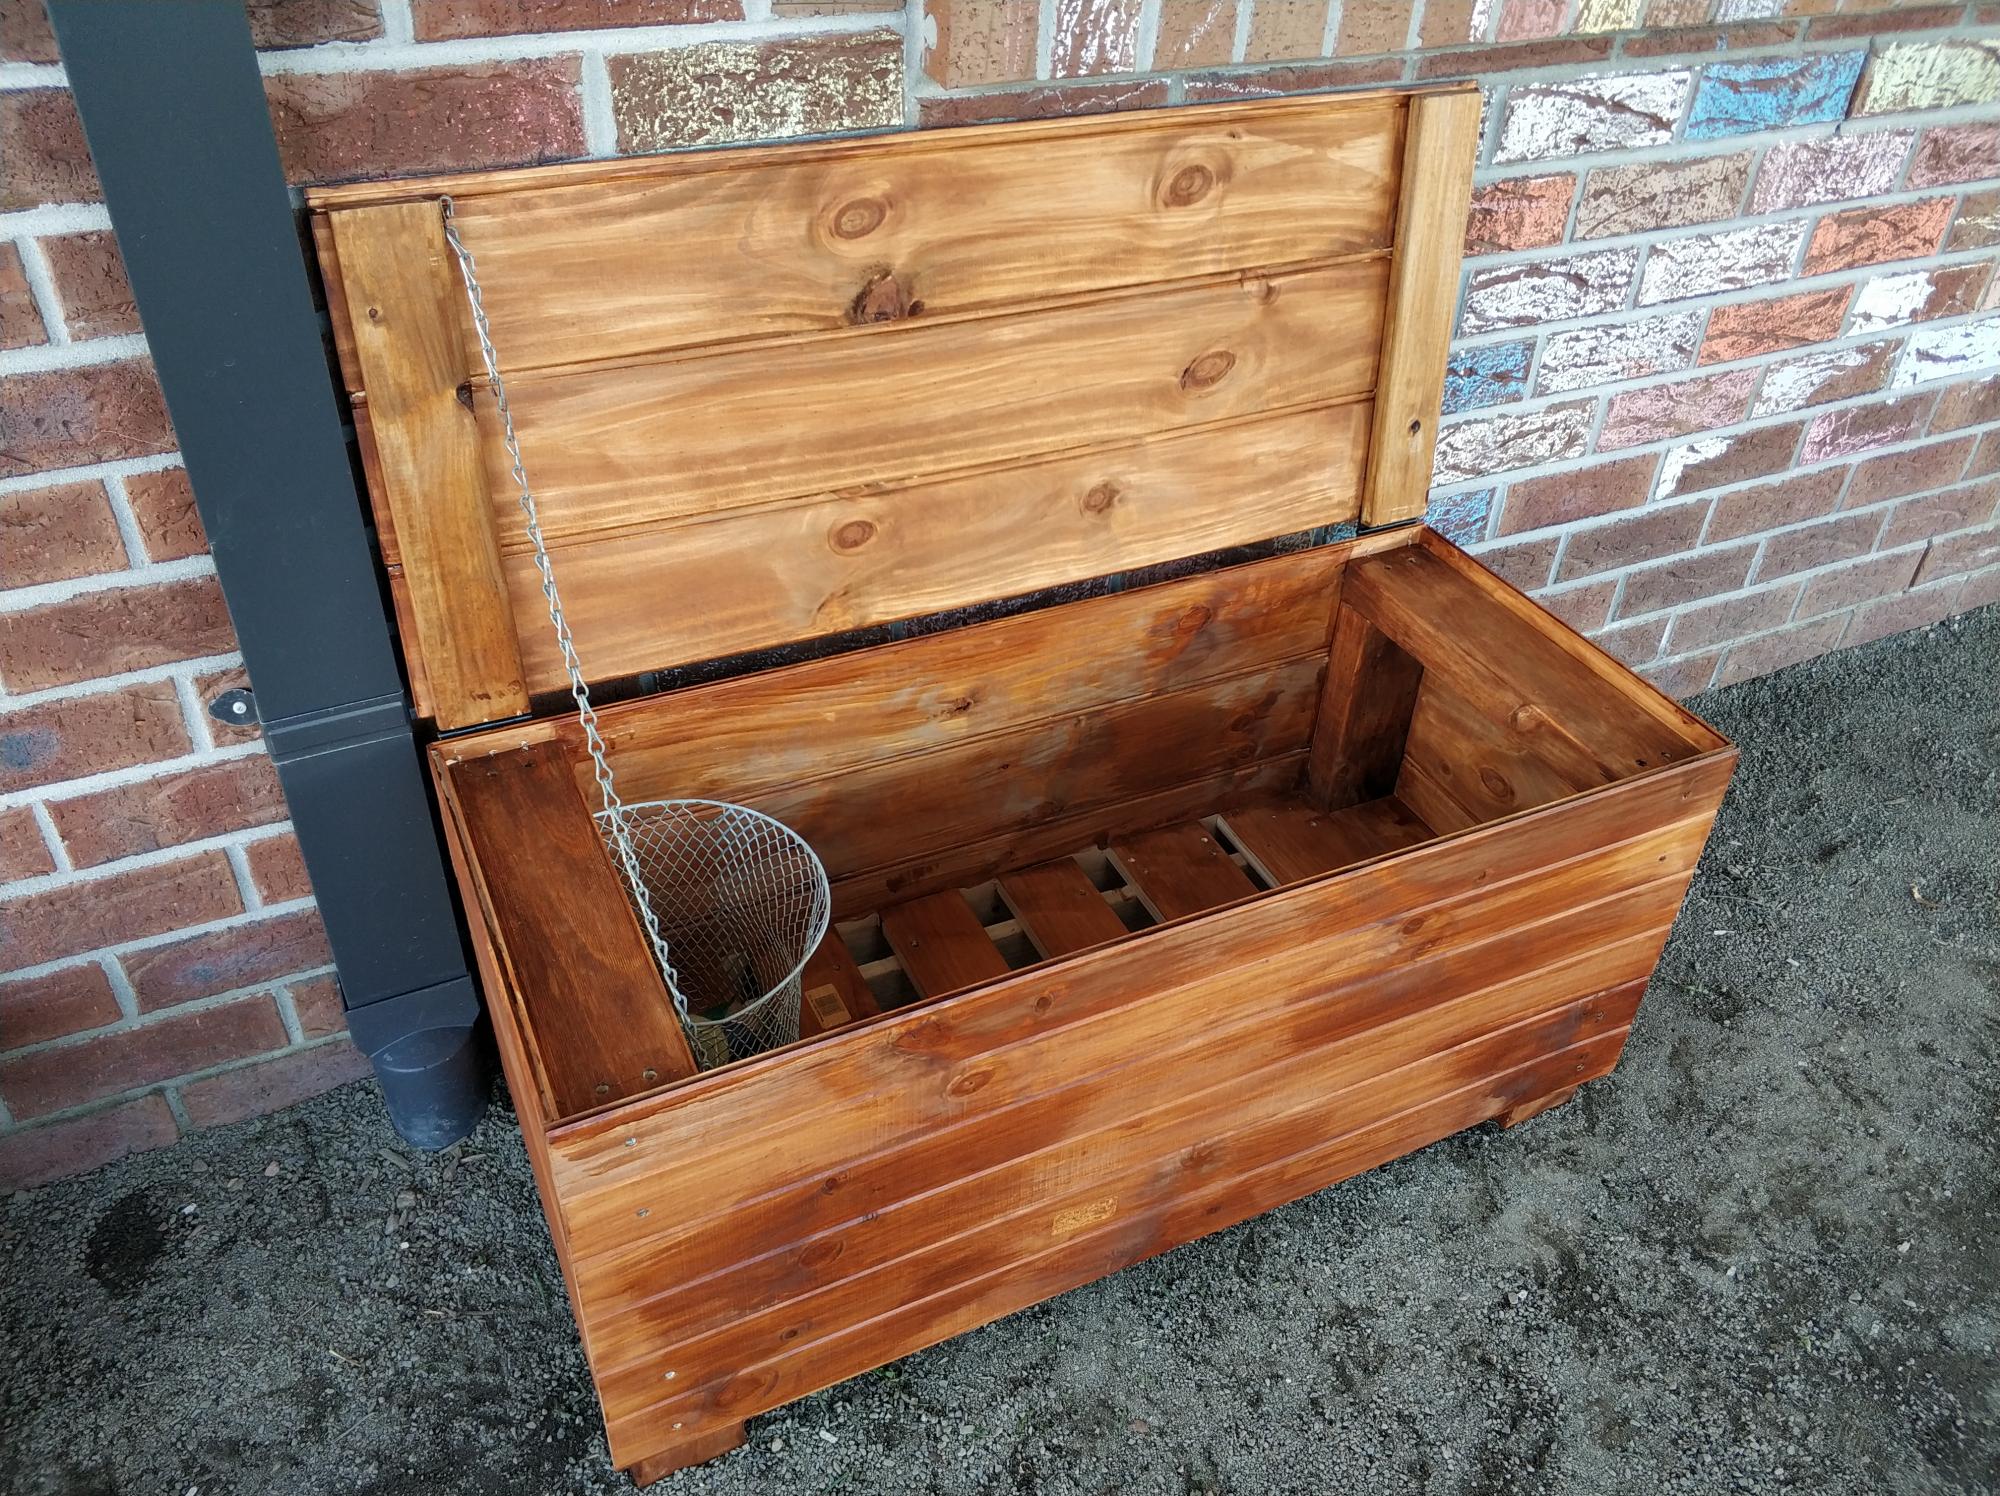
First time making anything half decent and it turned out ok. Followed the Cedar Box plans with a few adaptations. I live in regional Australia so used different materials, also extended the length. Used an app on the phone to convert the measurements to as close as I could. Worked out well, a few teething issues but does the job.
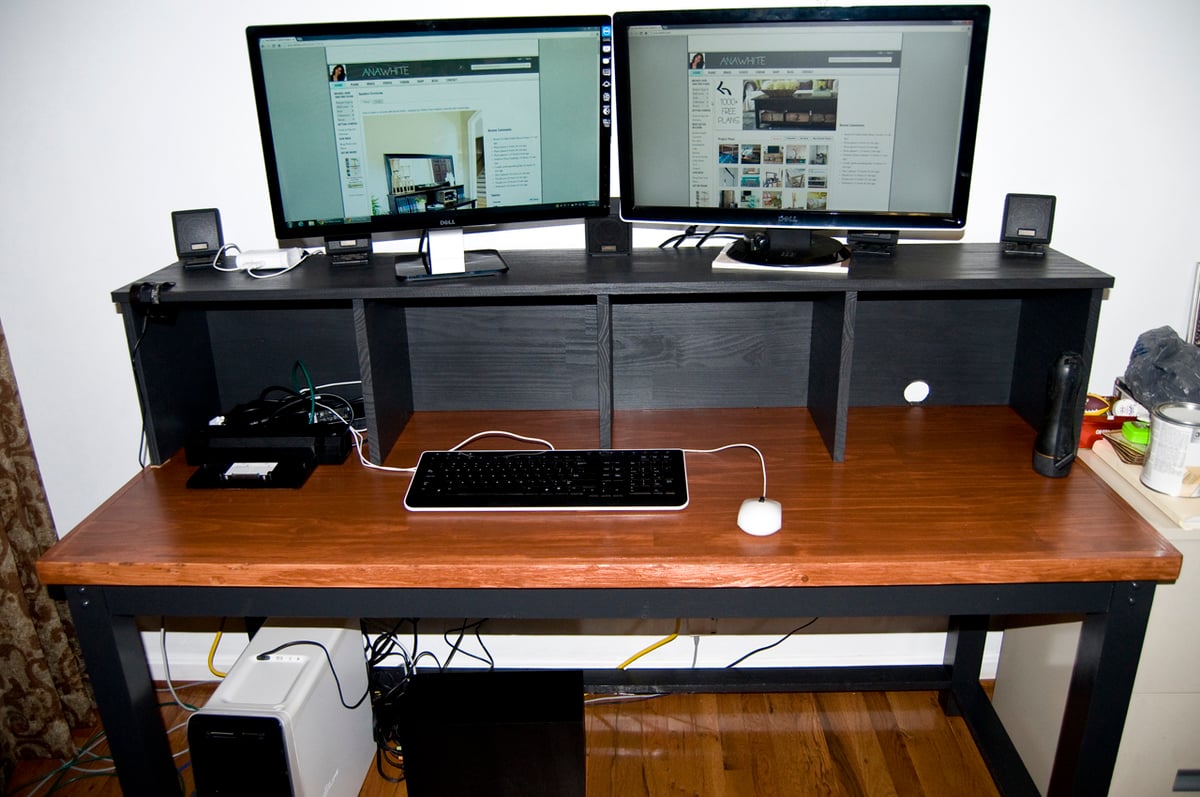
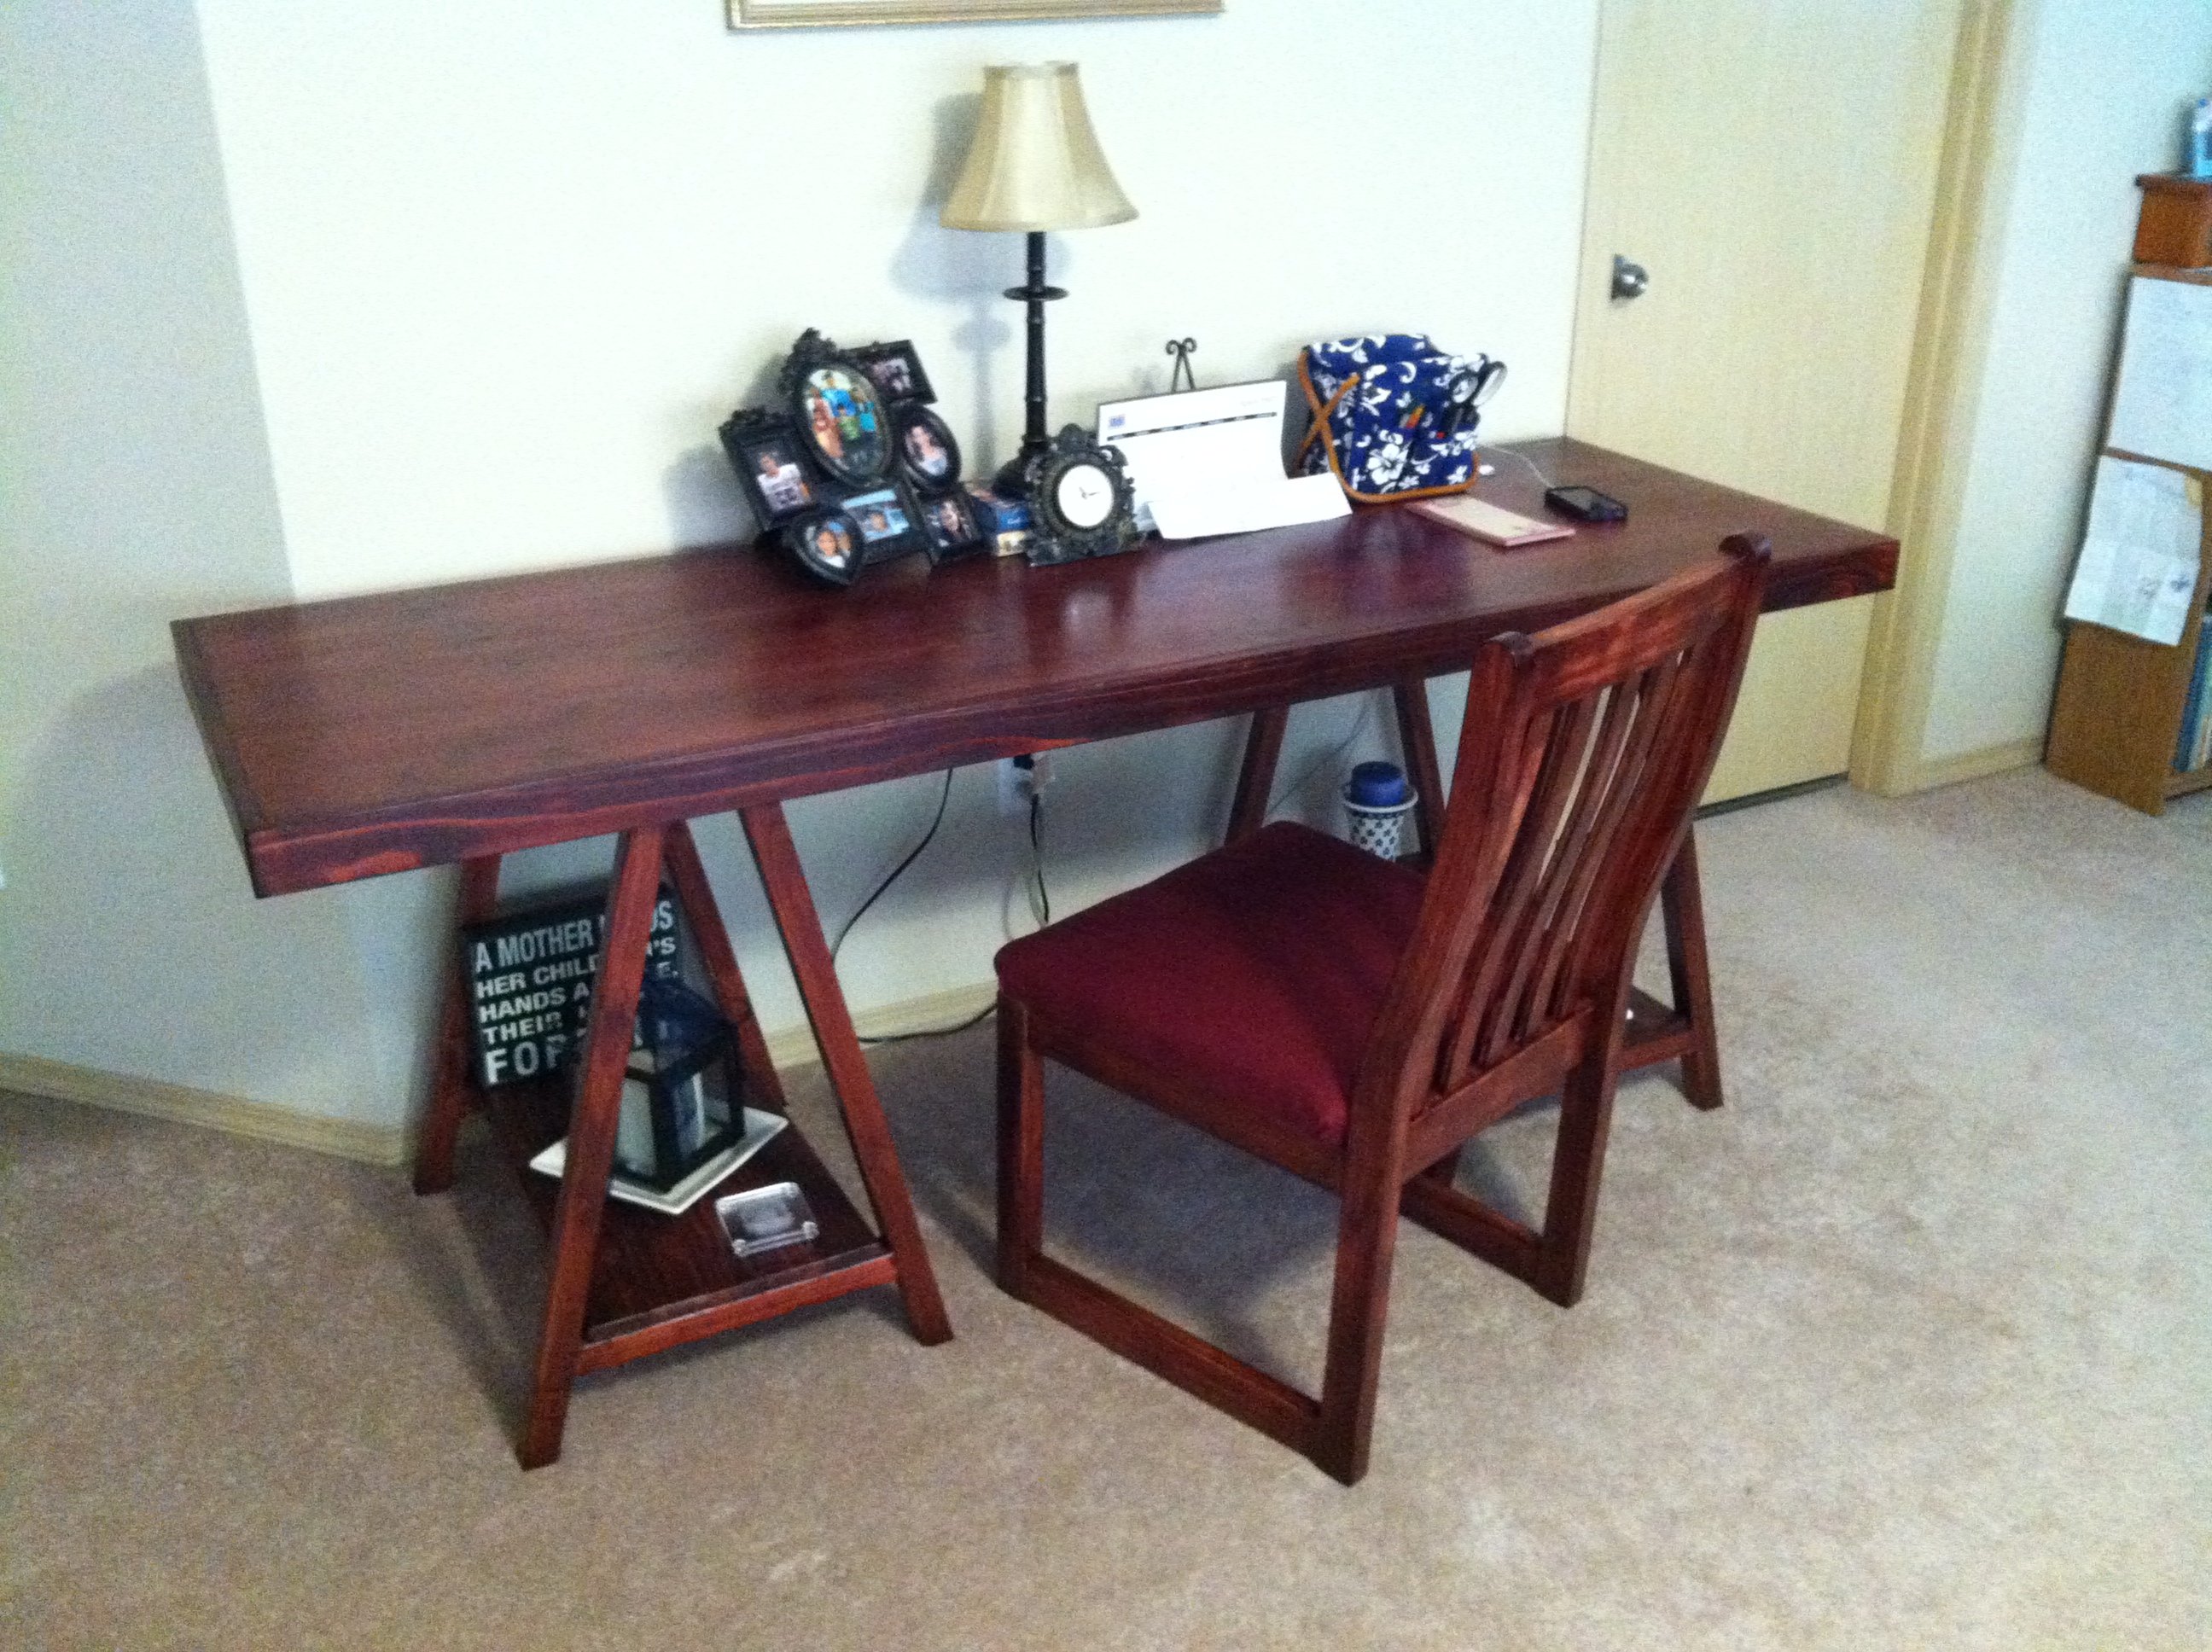
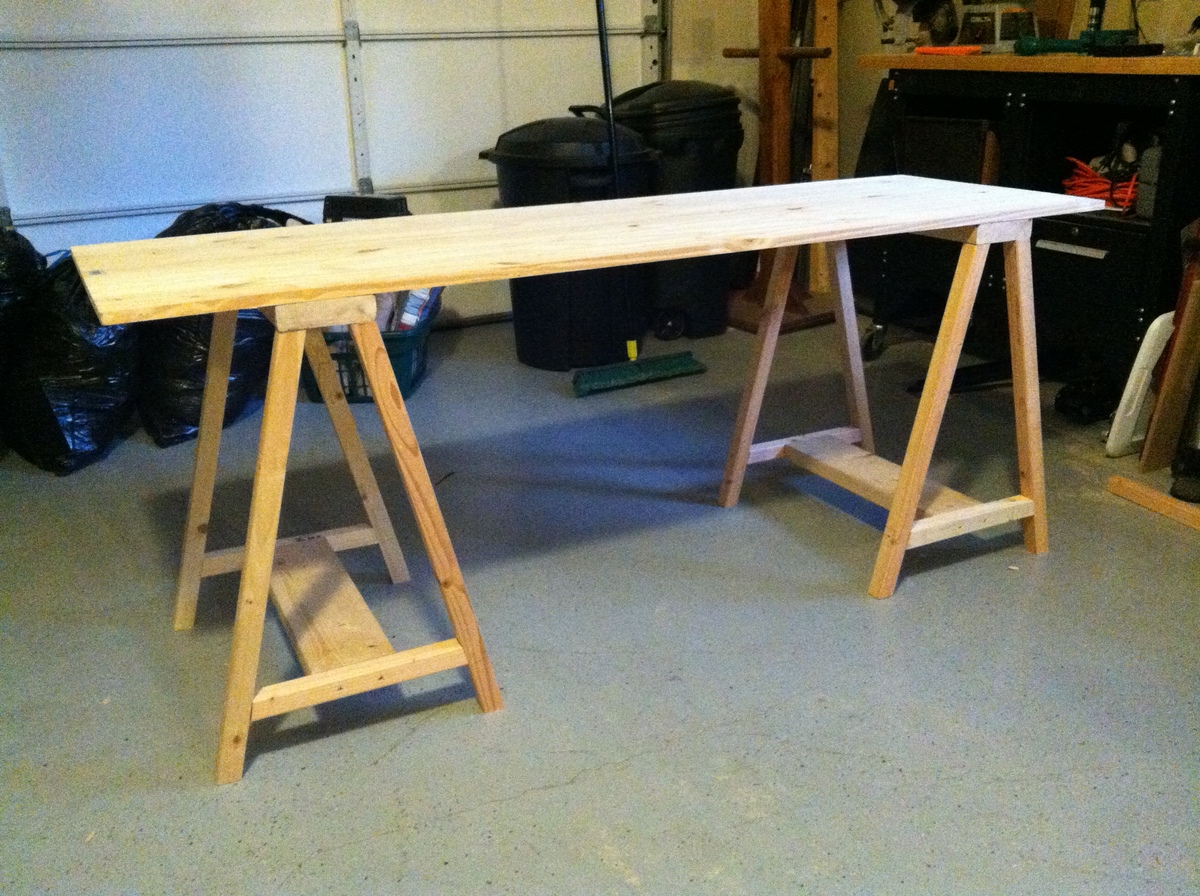
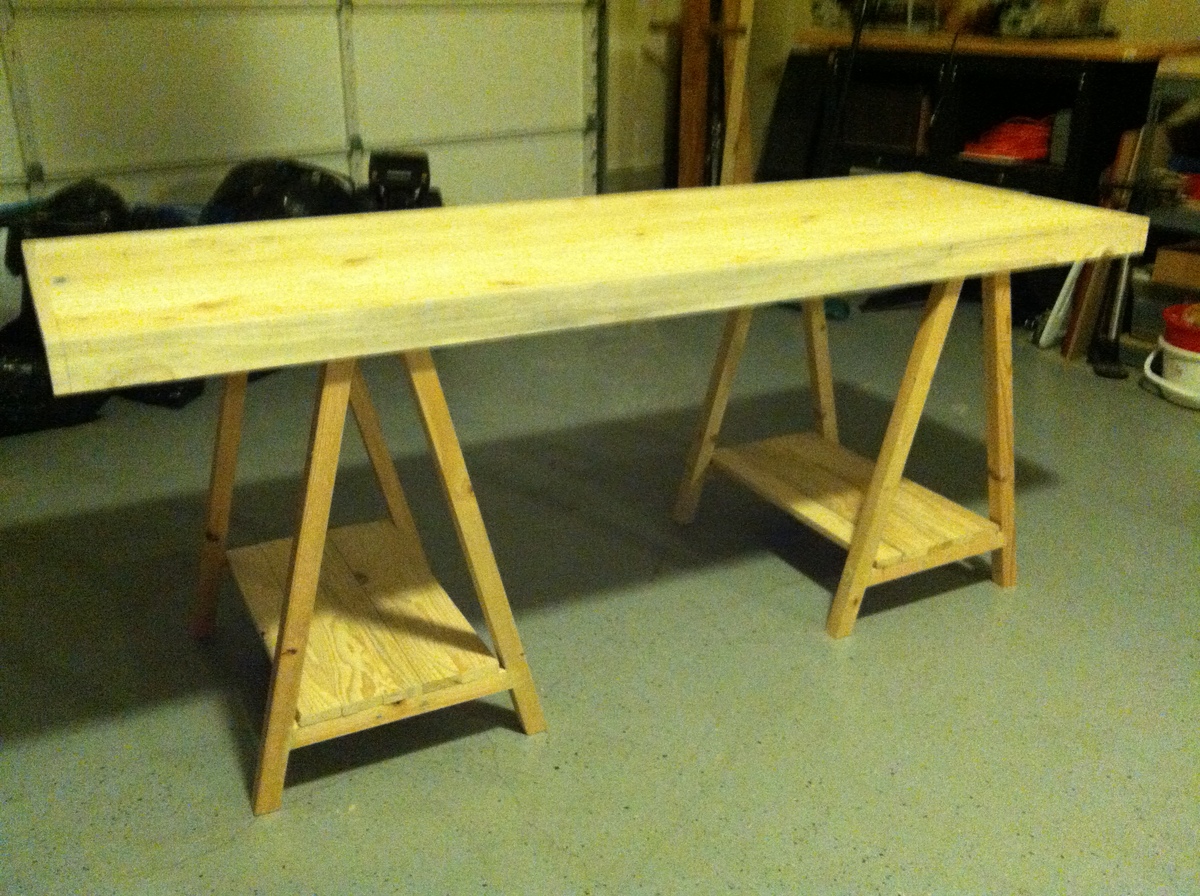
I used the Seaten Console Plan as the basis for this project. I made the legs longer to raise the desk up to the height of a computer desk. I also added extra sections to the top to proved extra storage areas for books, etc.
Sat, 09/06/2014 - 18:30
Did you build this to be the height of a standing desk? It looks great either way! I am looking for a good plan to modify. I like the staging of Ana's website on the monitors. :)
Sun, 09/07/2014 - 08:26
No, it is still a regular height desk. The legs are actually 28 1/4 inches. This makes the desk right at 29 inches. I set the monitors up on the top because I like them a little higher and it frees up the desk space. It makes them comfortable viewing for me. I appreciate your nice comments. If you want a nice but simple desk, this is the perfect plan. I started building this one right after I saw it on the site.
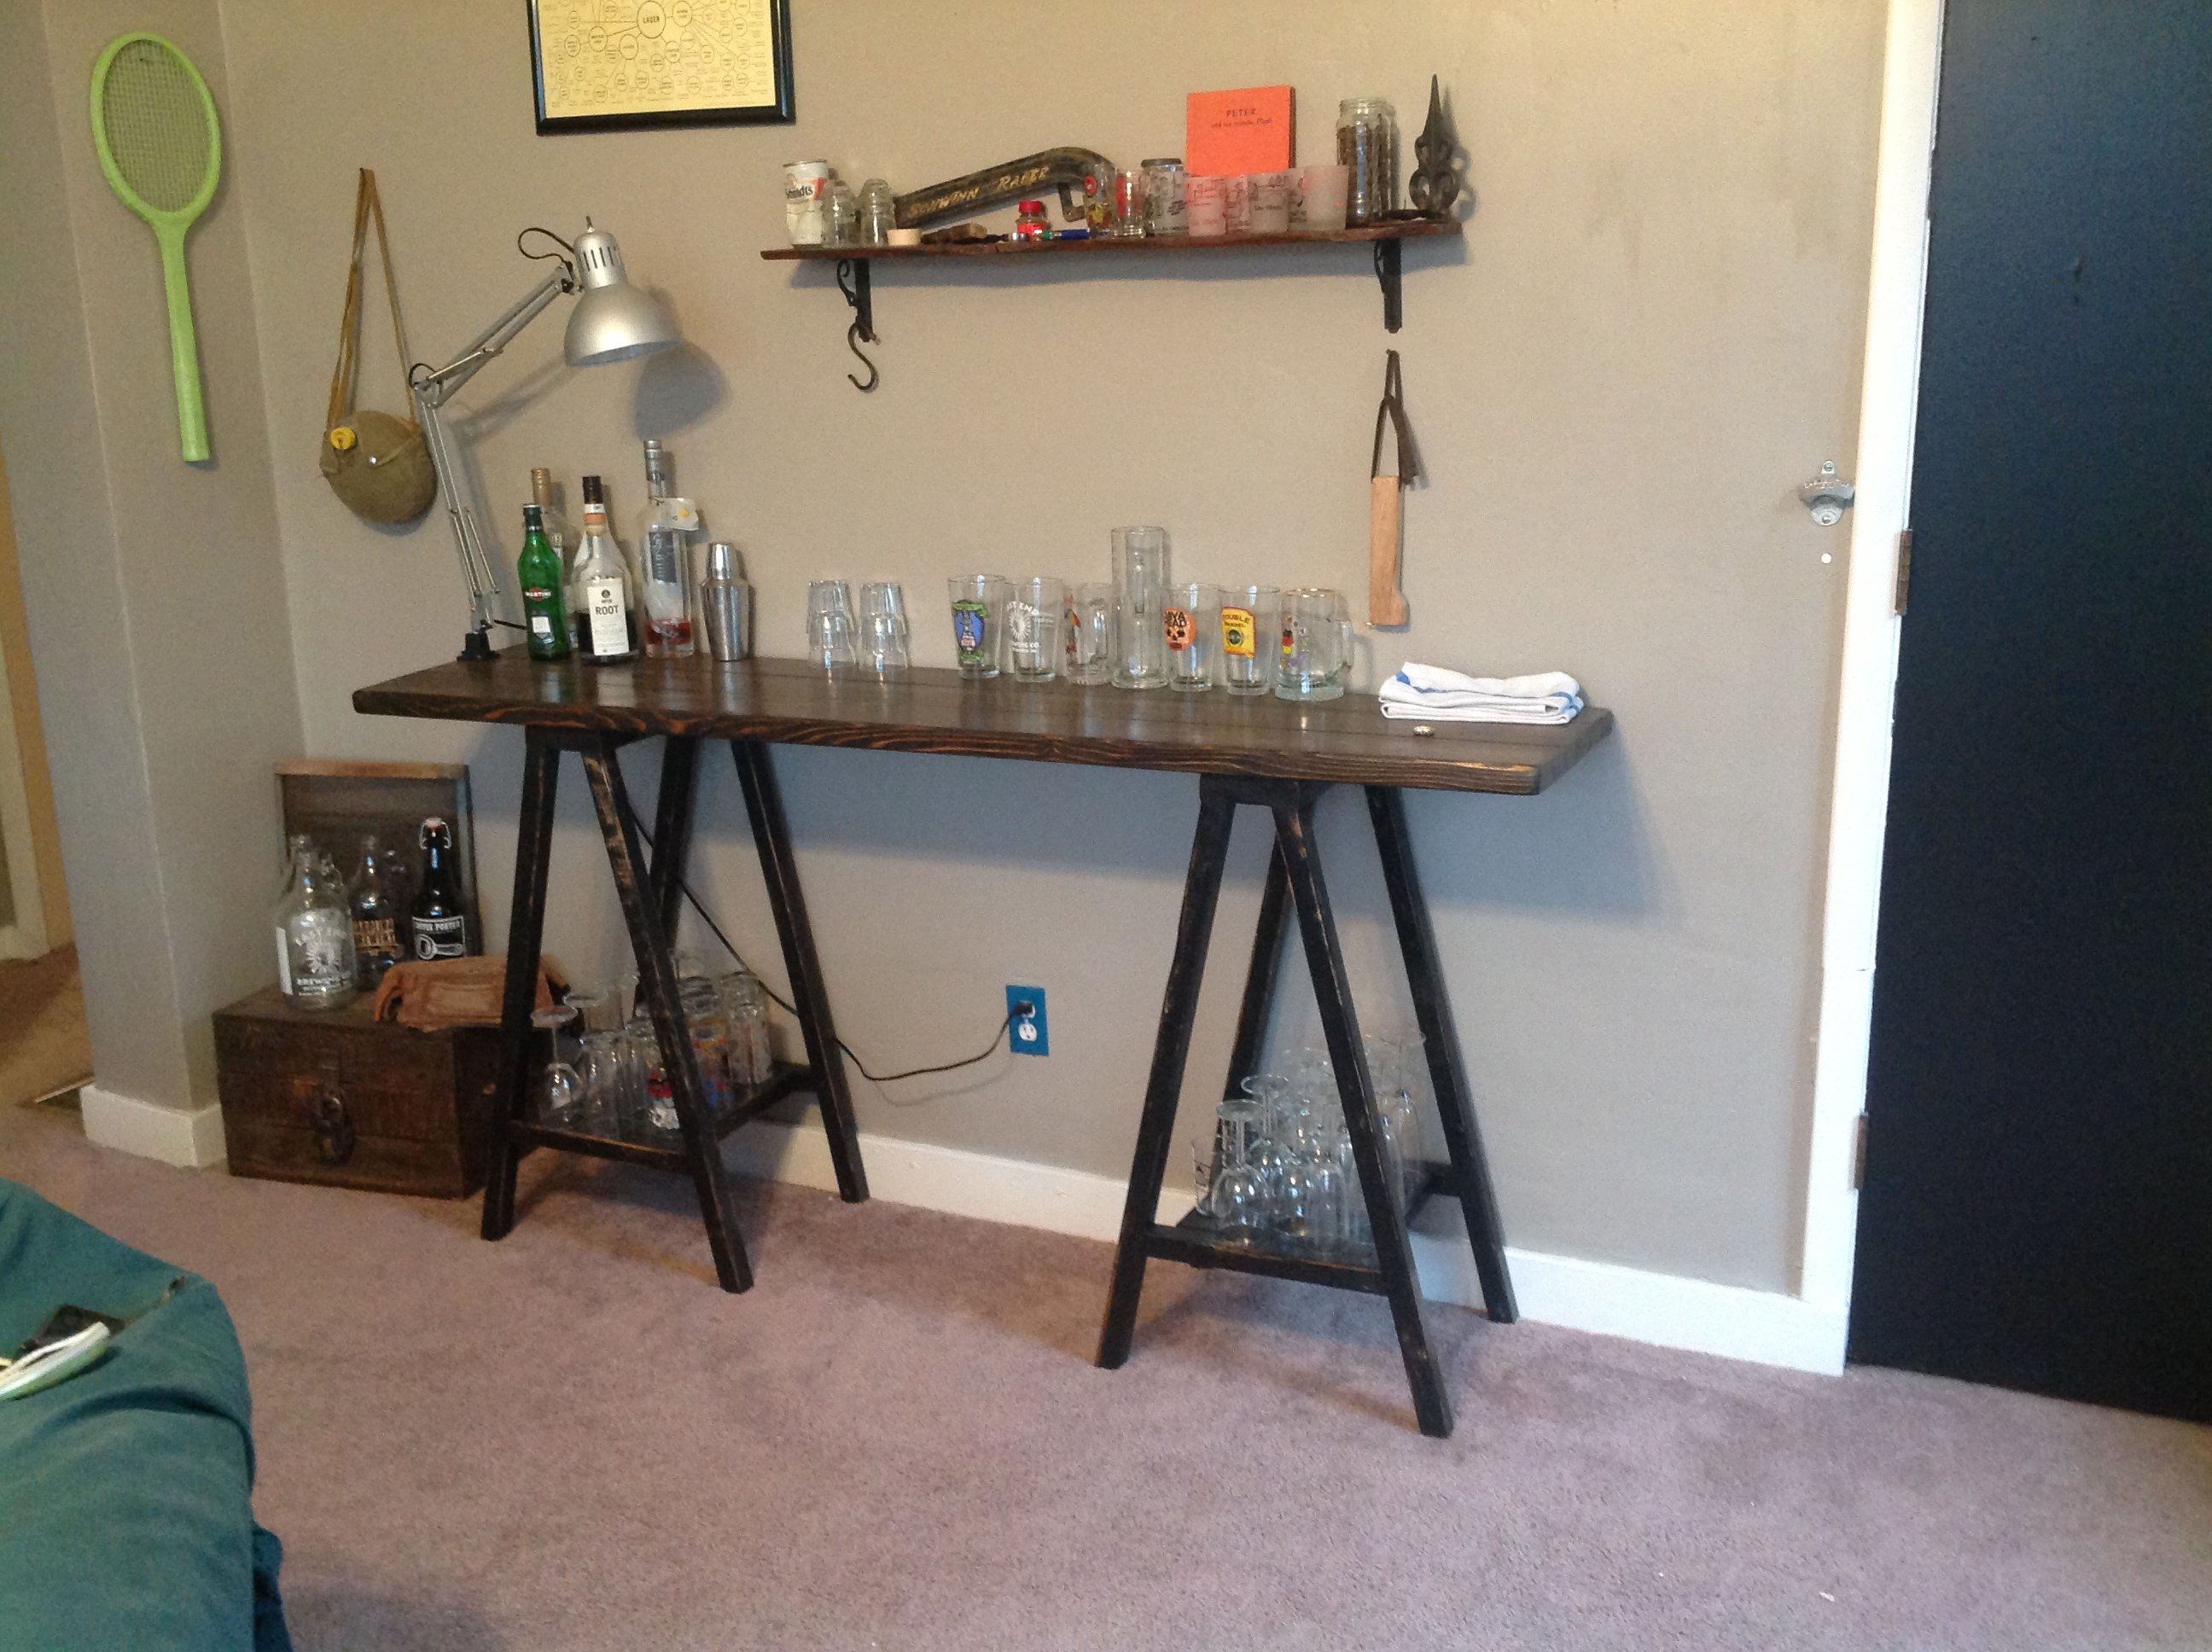
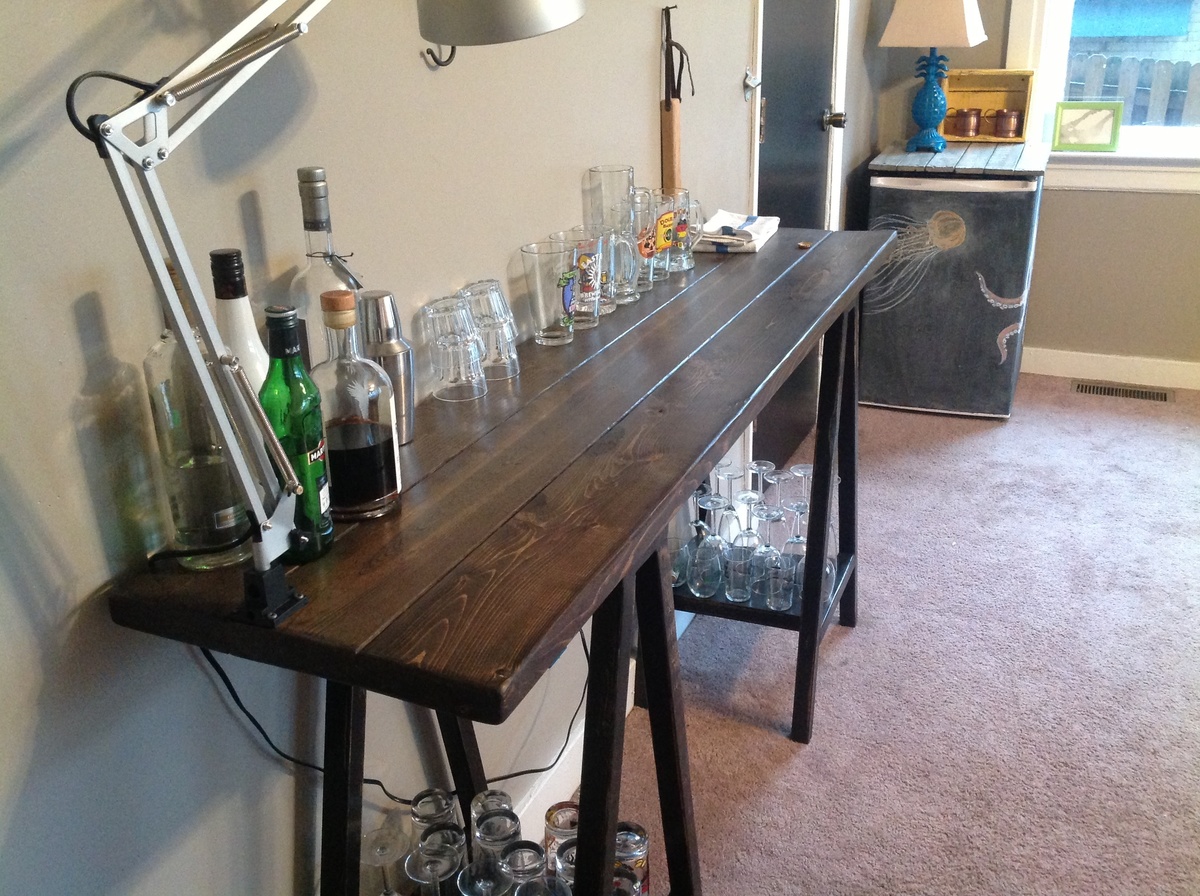
Like many others have mentioned, I wanted a 36" high table so I could use it as a bar. Ana mentioned that it would be too wide at 15 degrees so perhaps 10, after busting out some trigonometry I found that 10 degrees would give you about a 16" base and 15 would give you a 24" base. So, 12.5 degrees it came to be if you want a 20" base.
Many have said it takes 4 2x2's, that definitely holds true with this modification.
Here are my measurements, otherwise the cuts and assembly are the same as the original:
All angles are now 12.5 degrees rather than 15.
The legs are 33 3/4" from end to end
The outside edges of the legs should come to 20 1/4" wide for the base.
The stretcher will stay the same 13 3/4" on the bottom length, just cut at 12.5 degrees.
The stretcher is now 7 3/8" up from the ground, I found it was easiest to measure 7 1/2" up along the inside of the legs and line the bottom of the stretcher up at this mark.
And that's it!
A tip I used was clamping 4 2x2's together to get all the legs even, this only works if you have a sliding compound miter saw. I also recommend doing the straight cuts first and then leave the saw set at 12 1/2 degrees until you finish the project, this will keep cuts consistent.
Other modifications I made were to shorten the depth to 16 1/2" and use 2x6's for the top, I needed a narrow table in the room. I also made the depth of the sawhorses only 15 inches so the top would have a 3/4" overhang in front and back, I think this cleaned up the look some.
Our first build, all of the lumber was sourced from our land, milers on our sawmill and planed here. White pine frame, poplar seating. Great plans Ana! It was so nice to have success on our first furniture piece!!
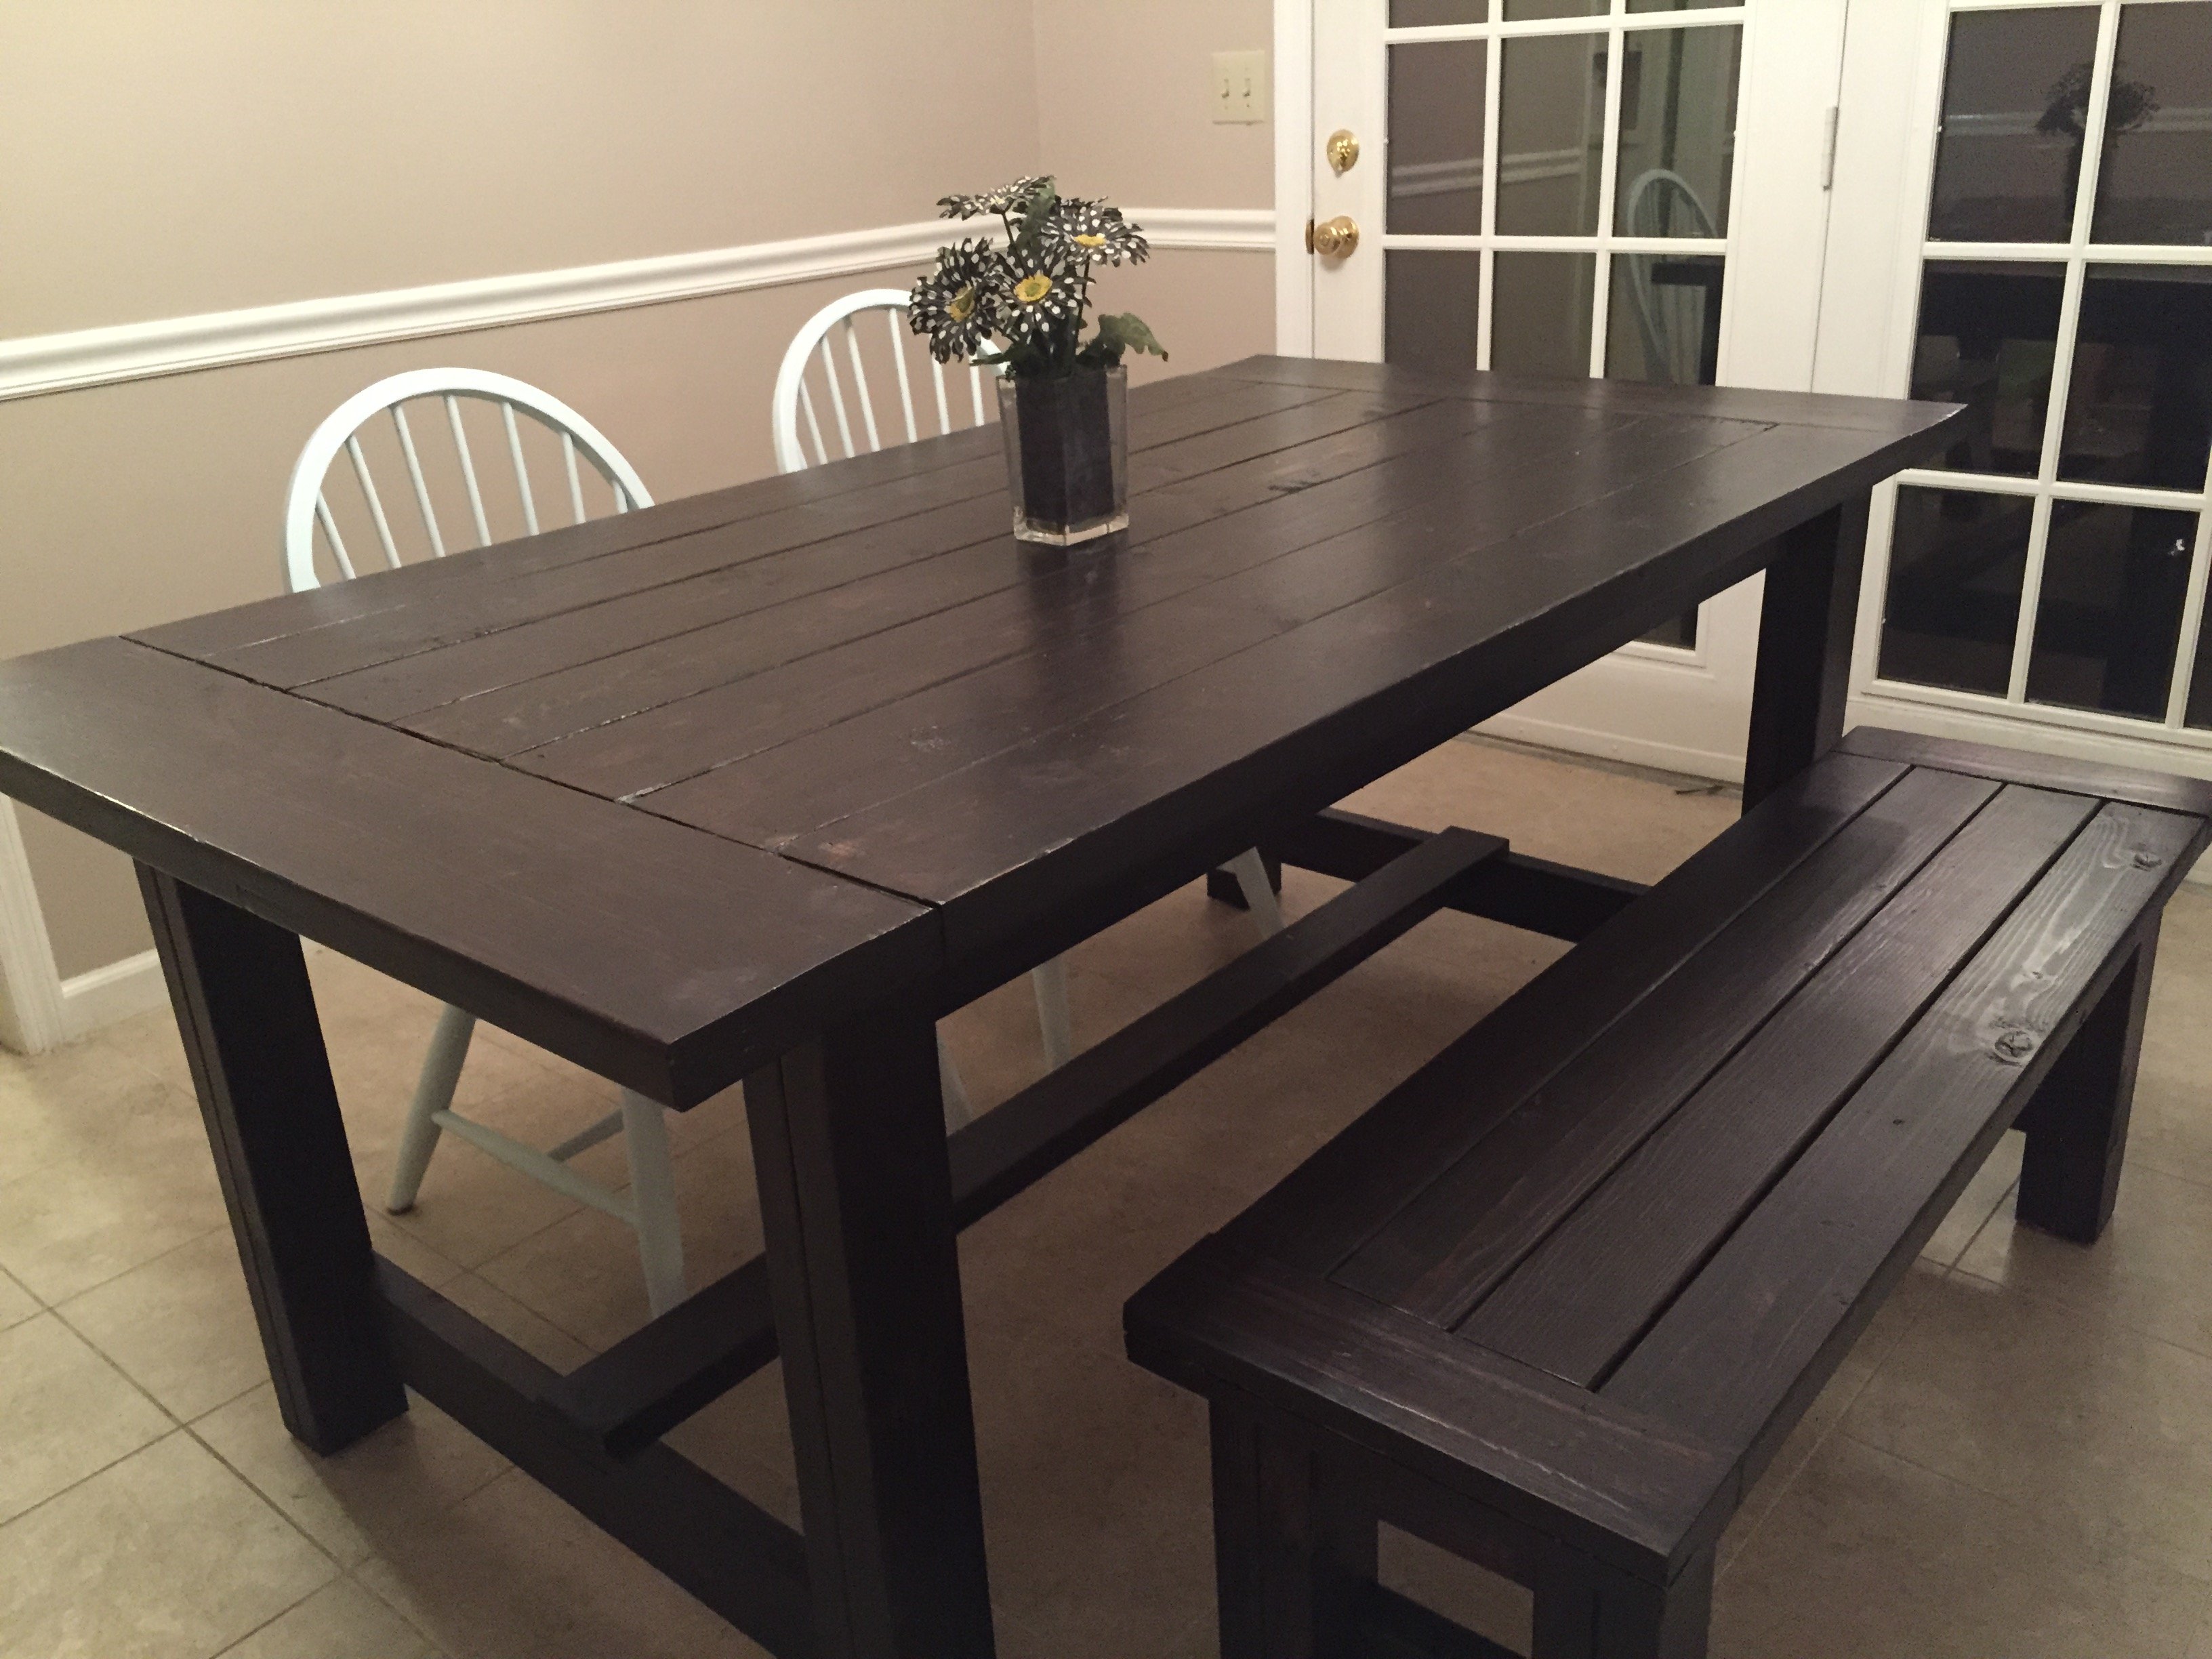
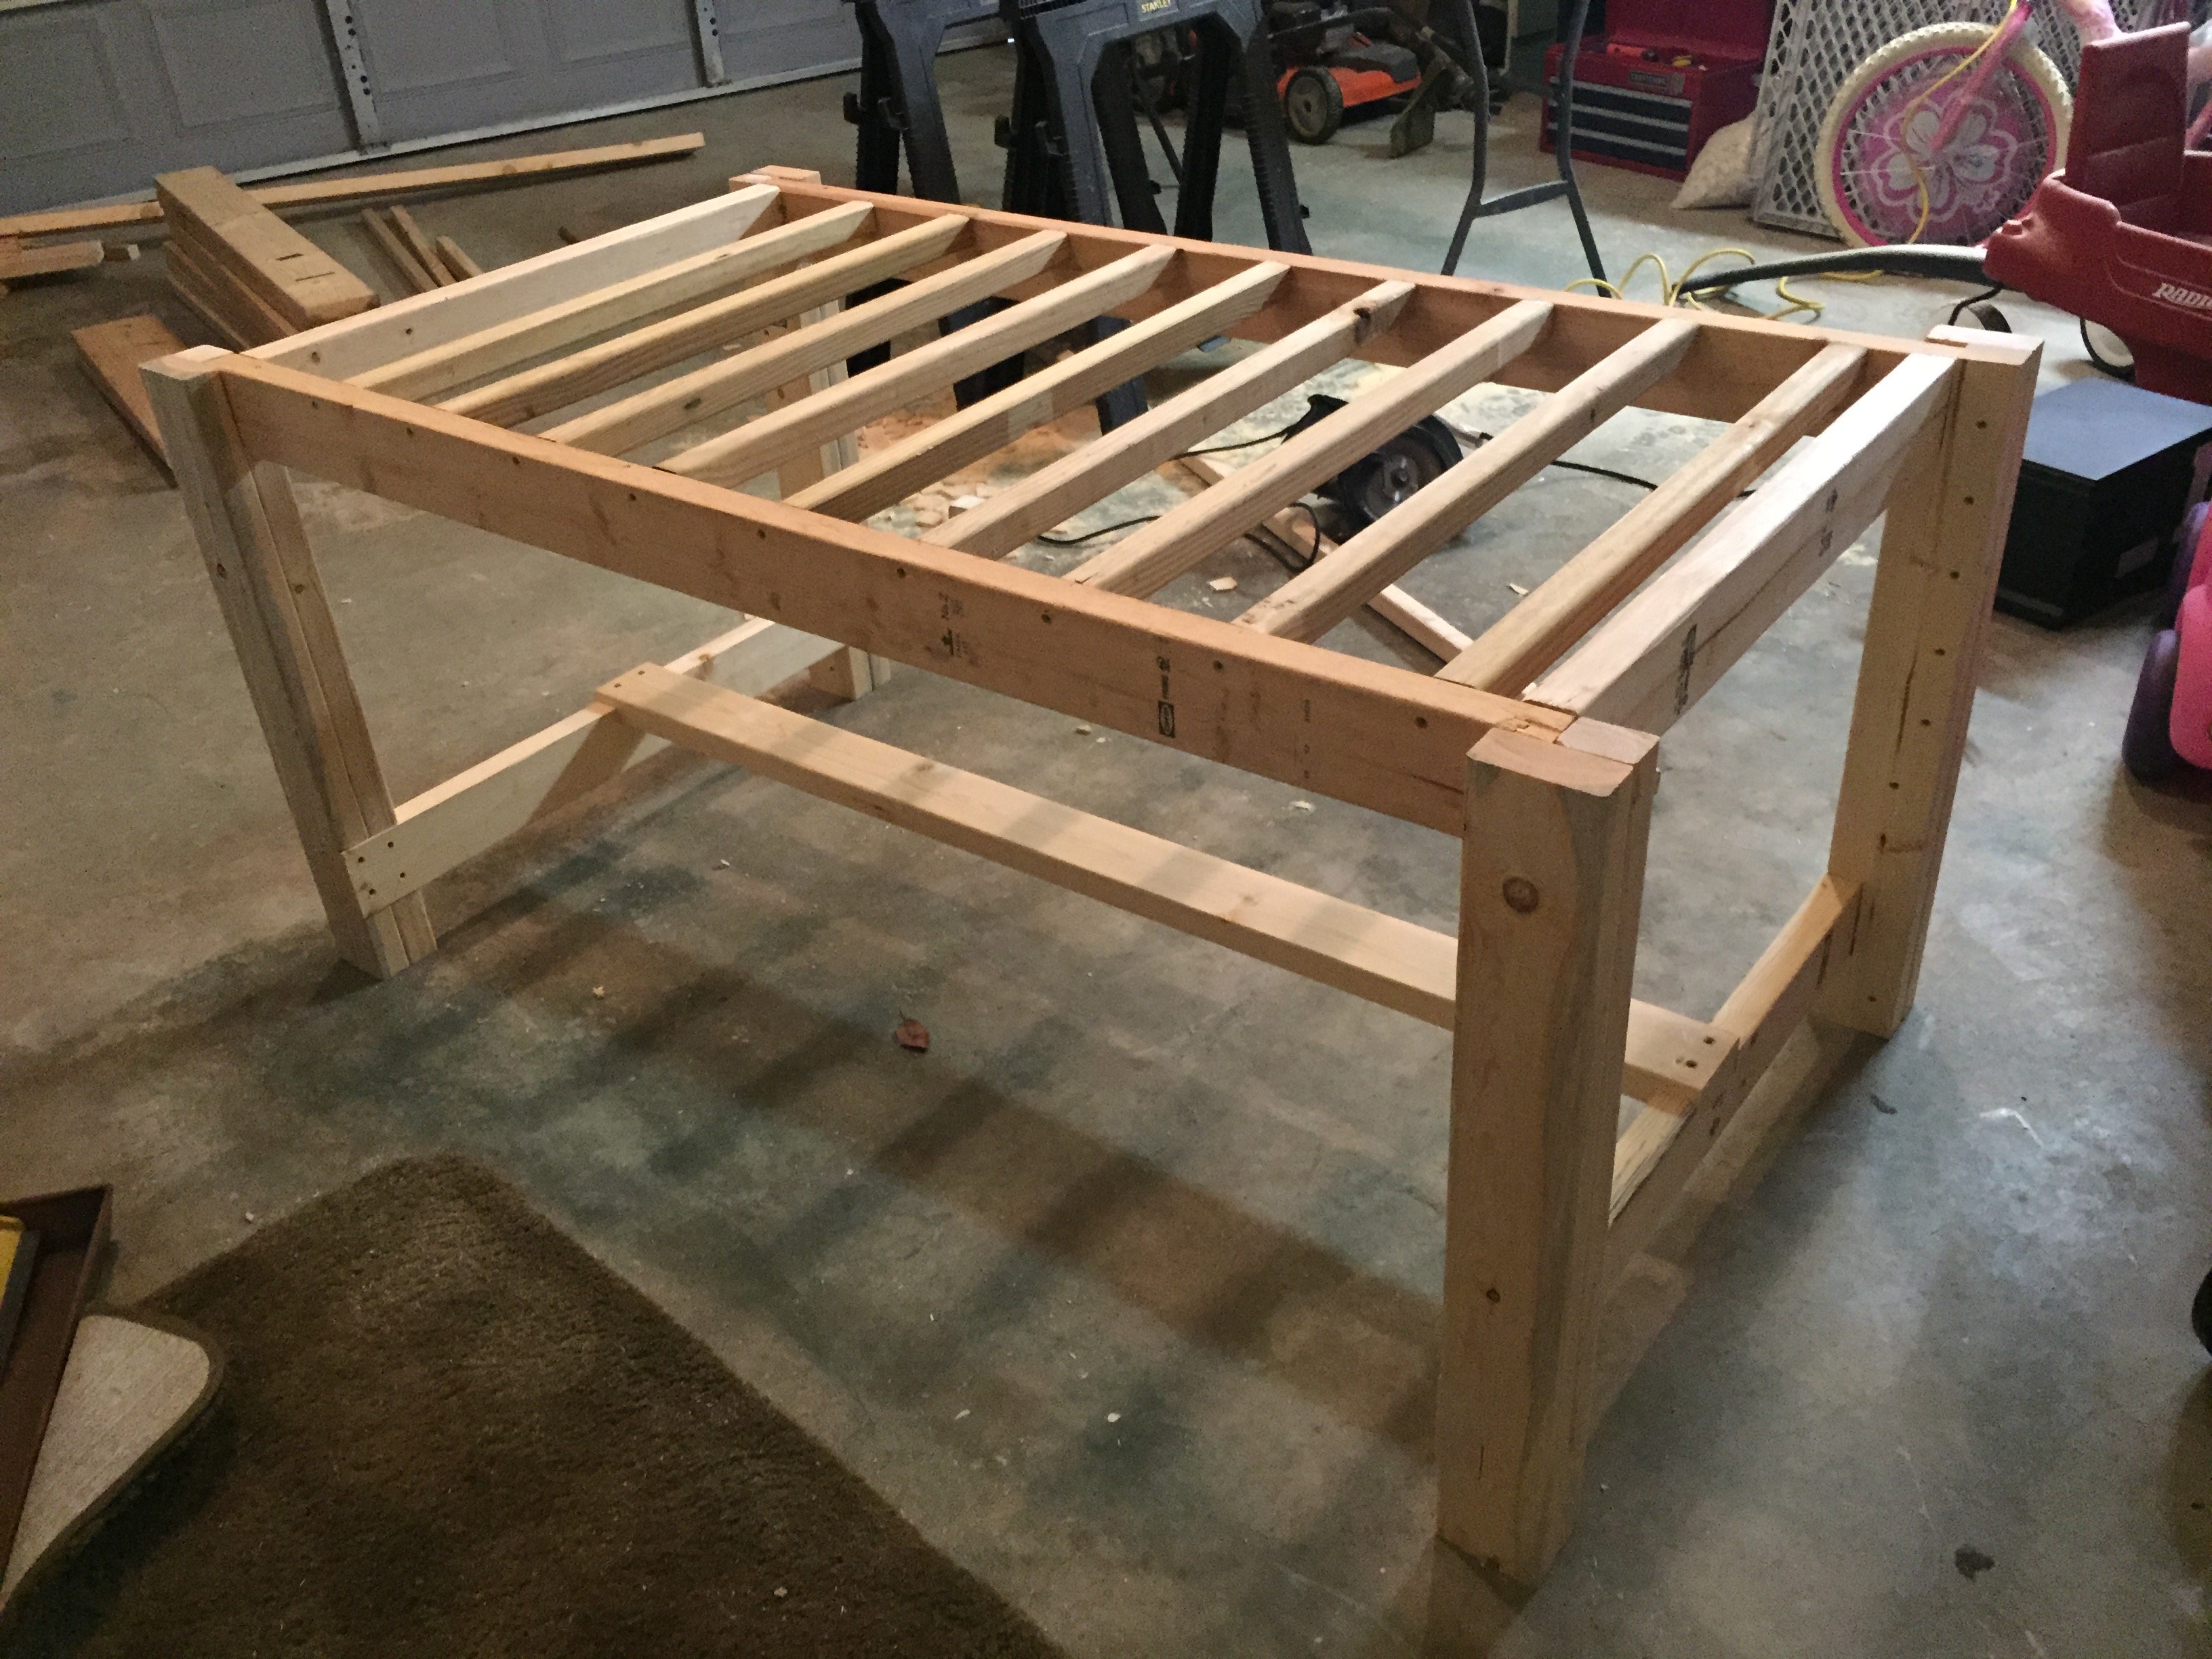
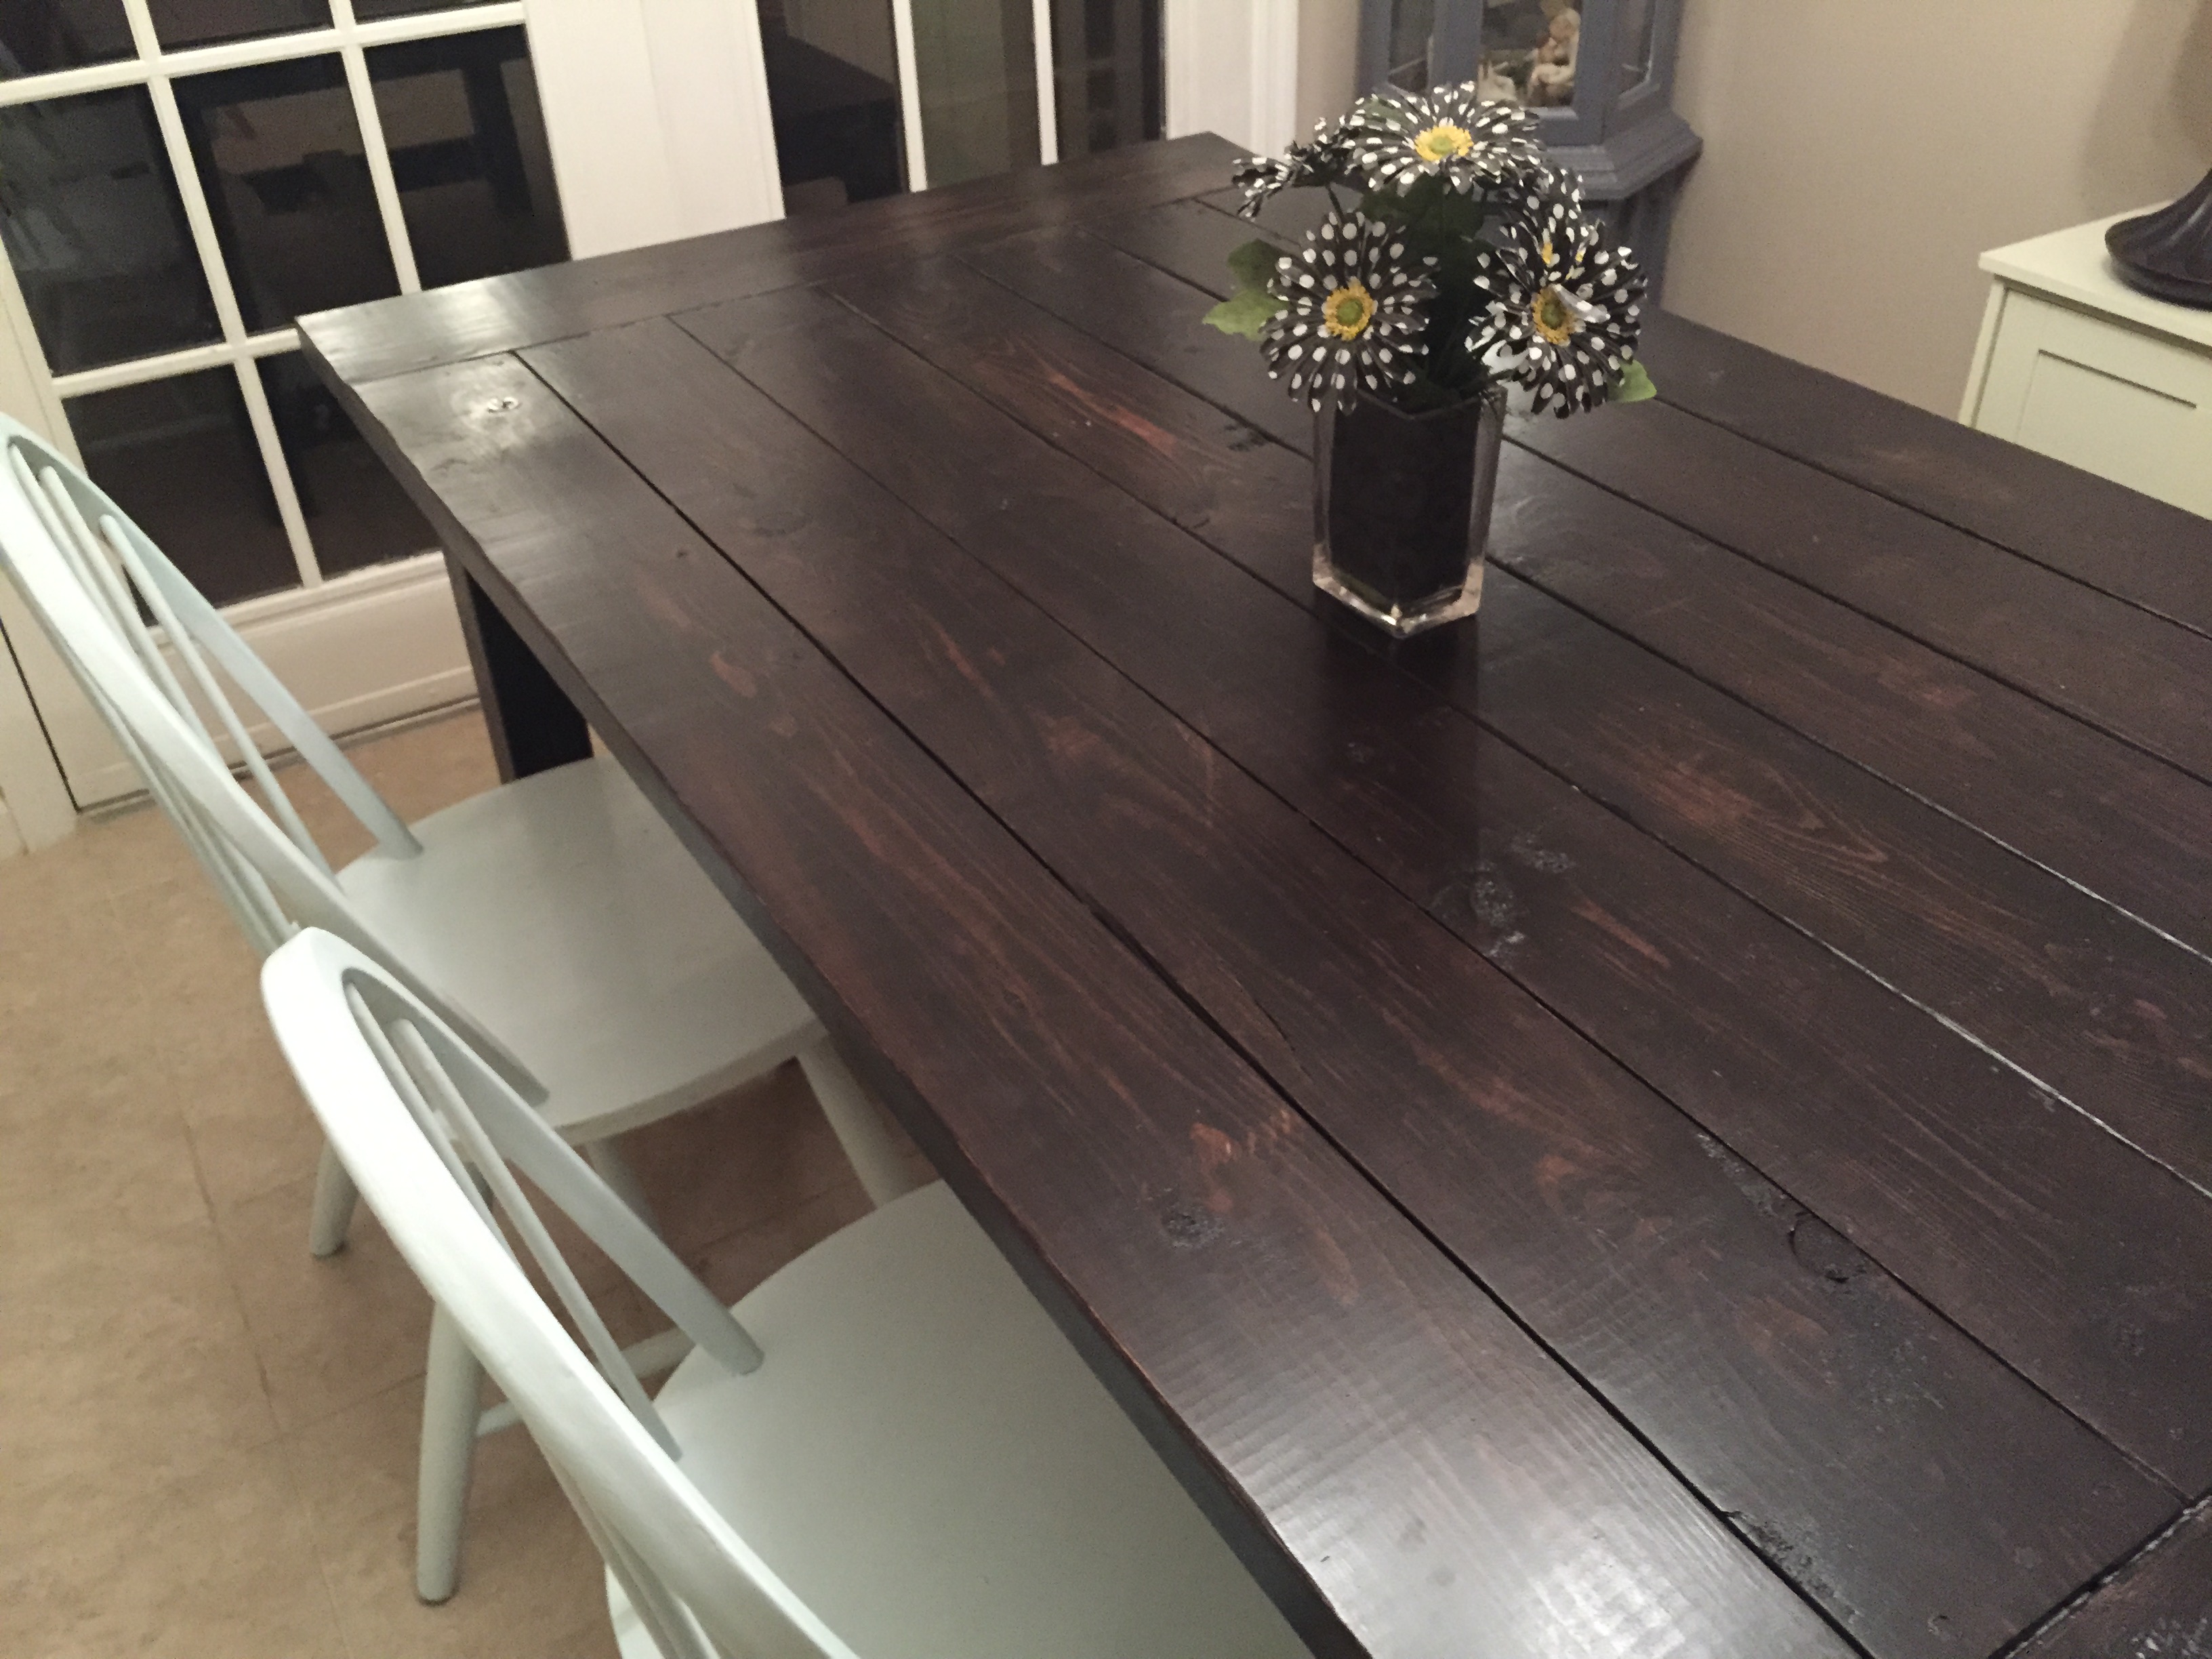
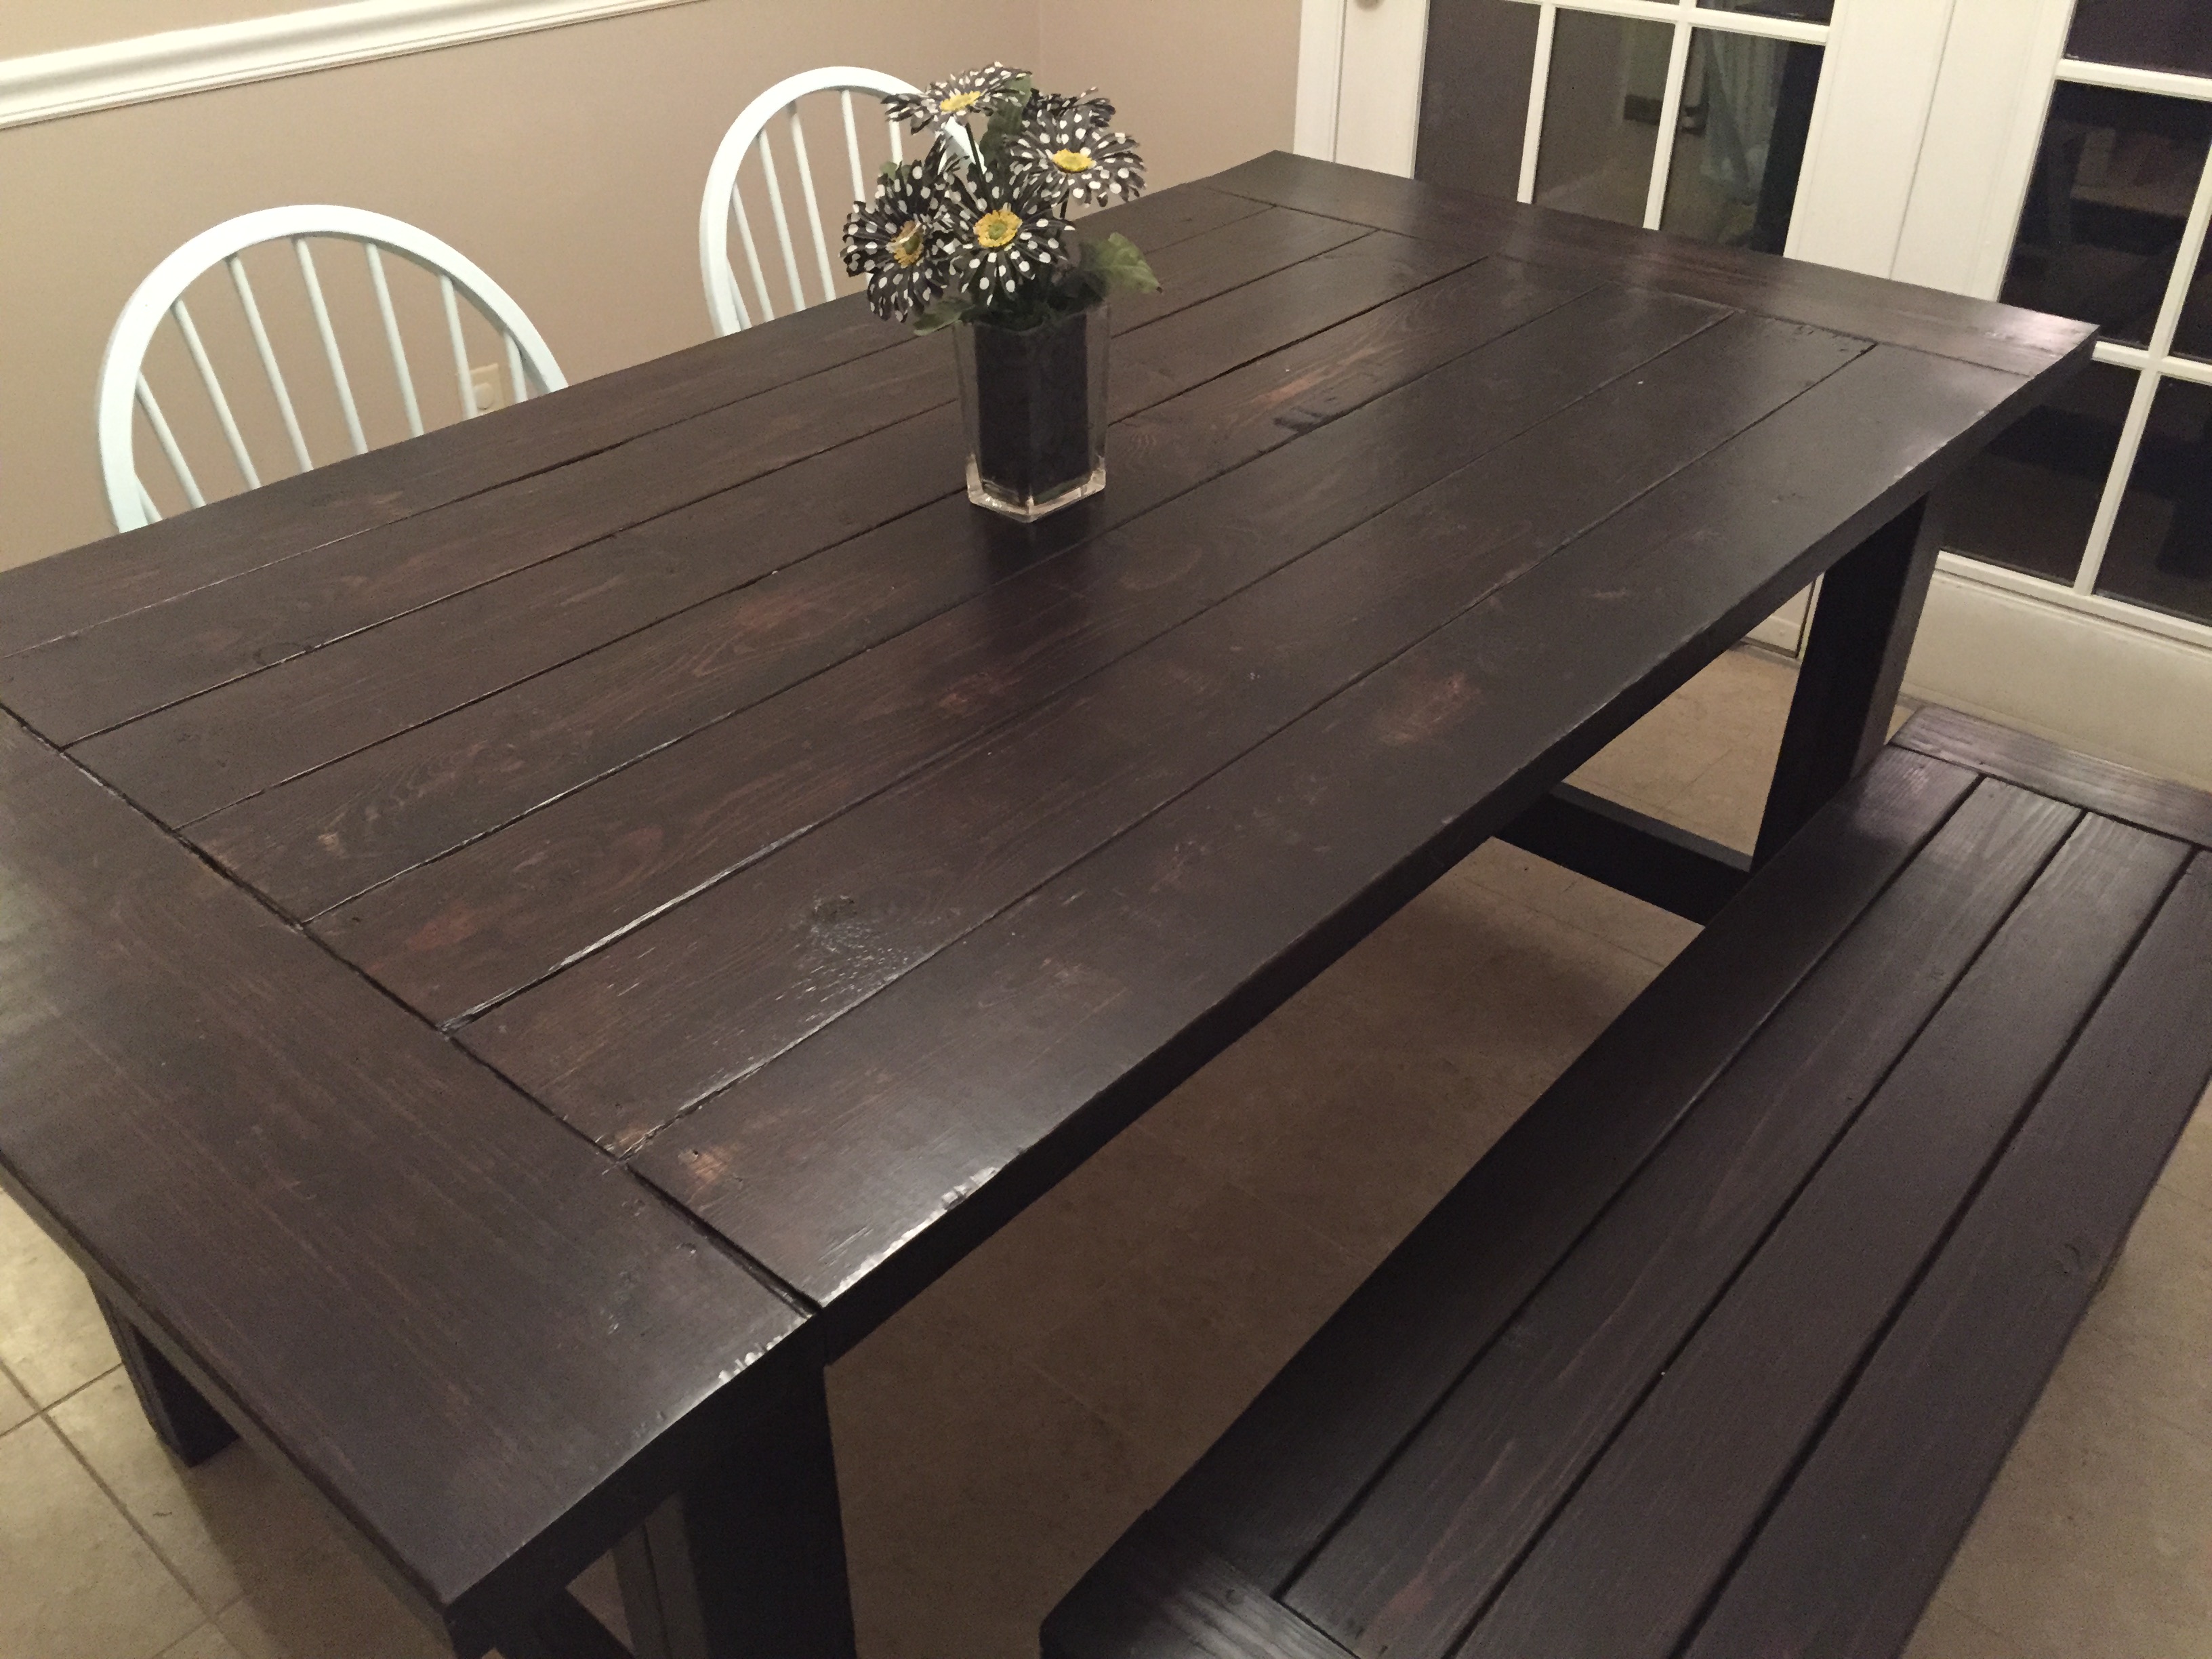
My first real furniture DIY project. My wife has been asking for a farmhouse table for a couple of years and I found Ana's site 3 weeks ago. By reading the plans the project seemed simple enough to give it a try. I modified the plans to shorten the table to 72" to fit in our dining room. I bought lumber from Lowe's and lumber costs for the table was approx $65 and the bench was right around $20. My wife loves it and I have had multiple requests to make more tables for other family members. The project took a week to complete working a few hours each evening after work. Stained with Rust-Oleum Ultimate in Kona and 4 coats of a Rust-Oleum Polyurethane in Satin finish. A big thanks to Ana for the free plans and for my new hobby of furniture making! *EDIT* The table and bench are not as dark as the pictures show.

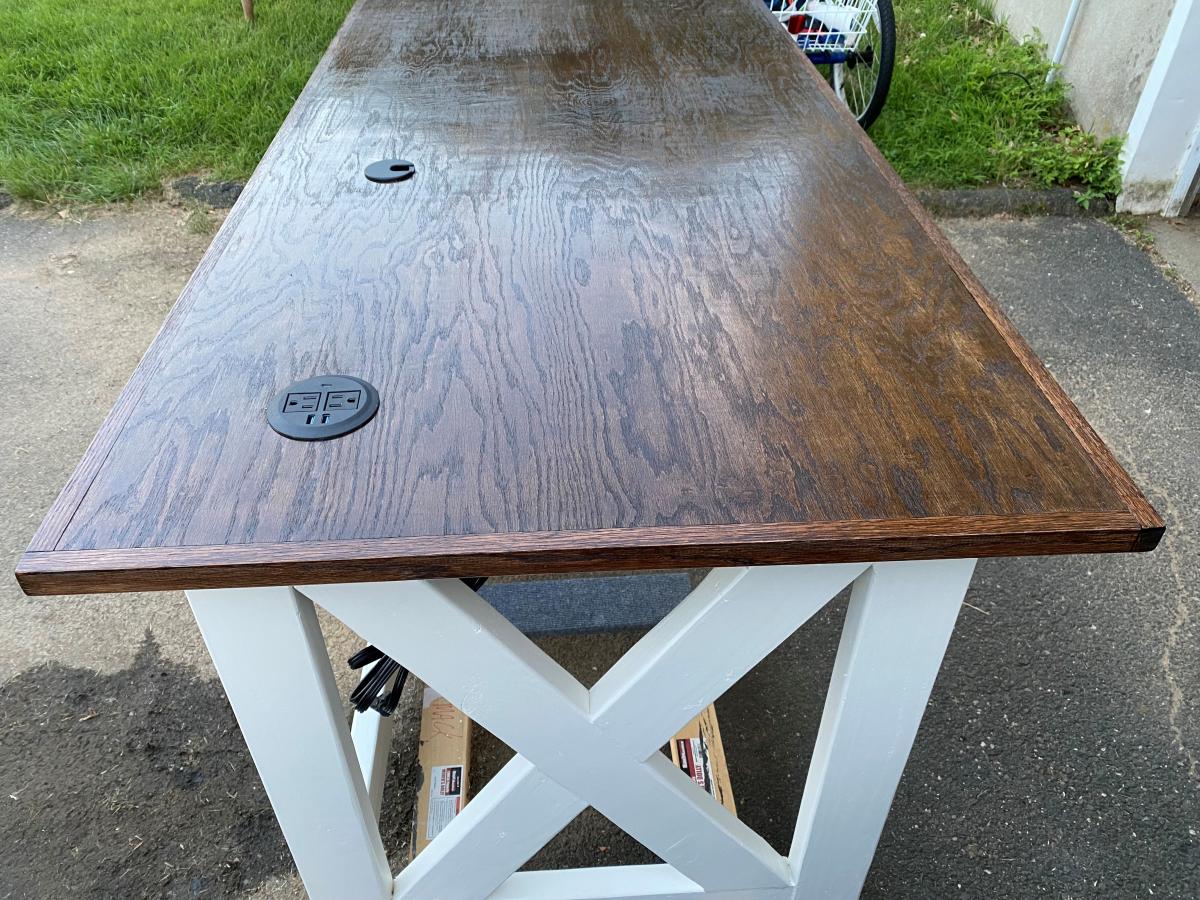
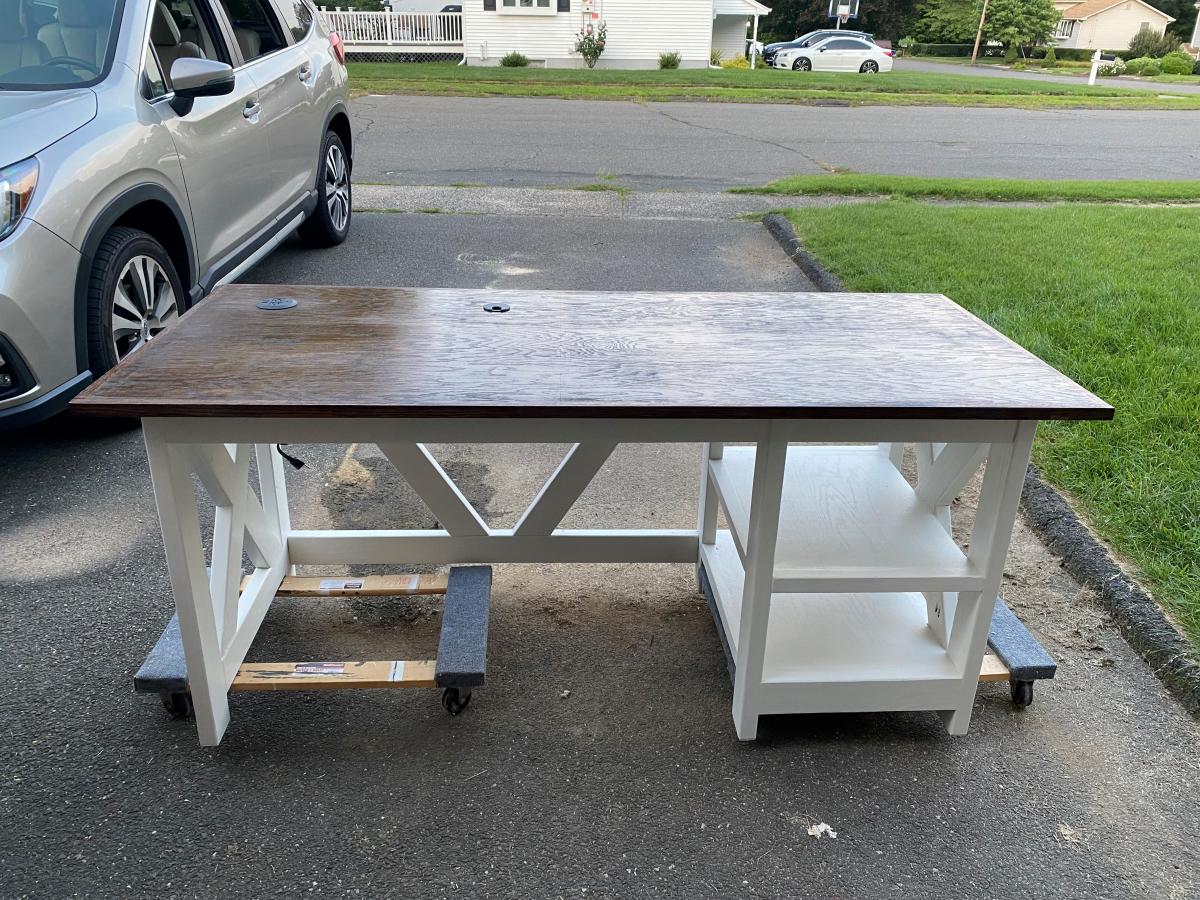
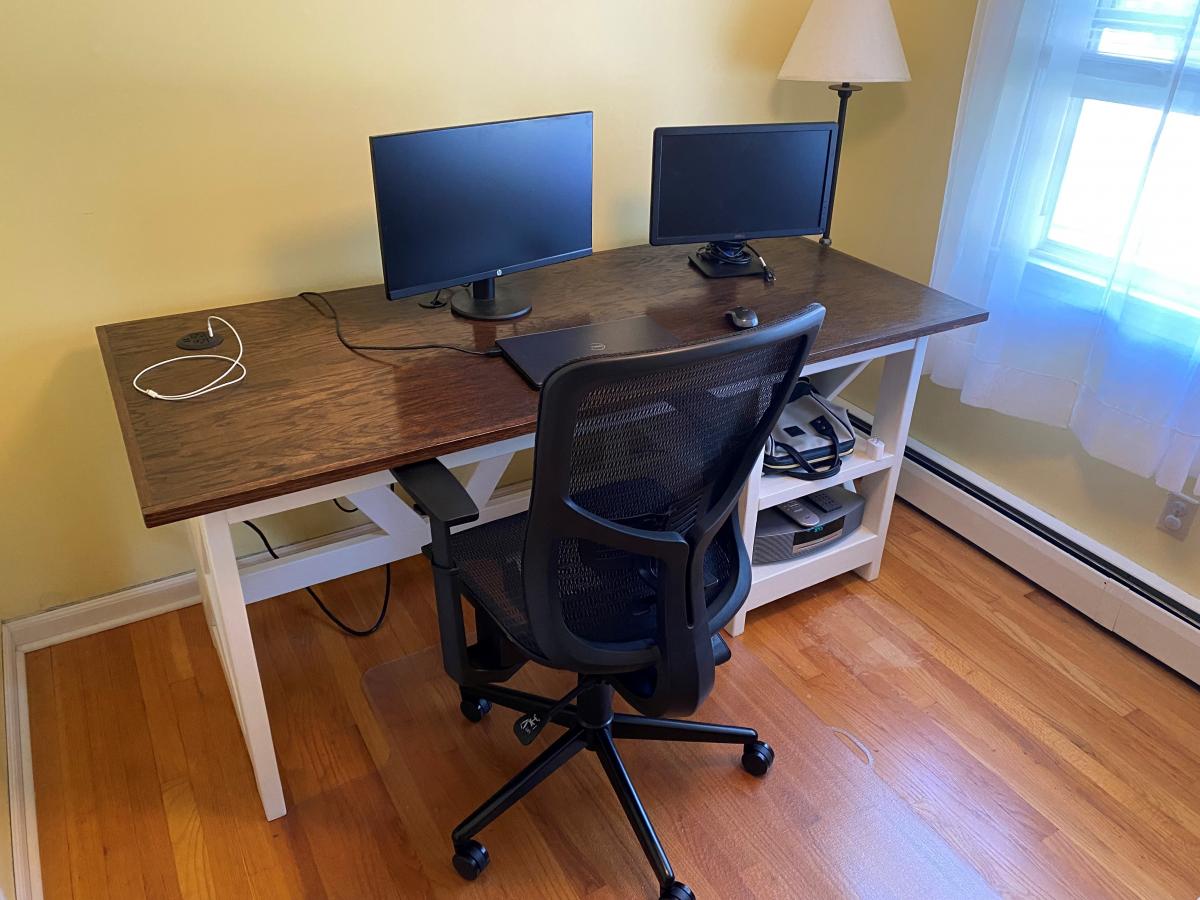
My wife needed a desk to work at home from and nothing on the retail market interested us, so I offered to build one. I followed the plans for a Farmhouse Desk, but with a change for the top. I chose a pre-sanded 3/4" red oak top and trim to cover the plywood edges. We didn't want the lips or edges that may show up using the planned 1x6" planks. The desktop measures 31.5 x 71.5" which is large, but allows for a lot of work to be accomplished. I added a grommet hole for the wires and a 3 1/8" hole for a desktop outlet with 2 USB's, 1 USB-C and two regular outlets. I also added a 9-input power strip / surge protector on the underside of the desk that the desktop outlet plugs in to. So only the power strip plugs into the wall and everything is surge protected.
It took me 4 weeks and about 25 hours, as I made it around my work schedule and family life.
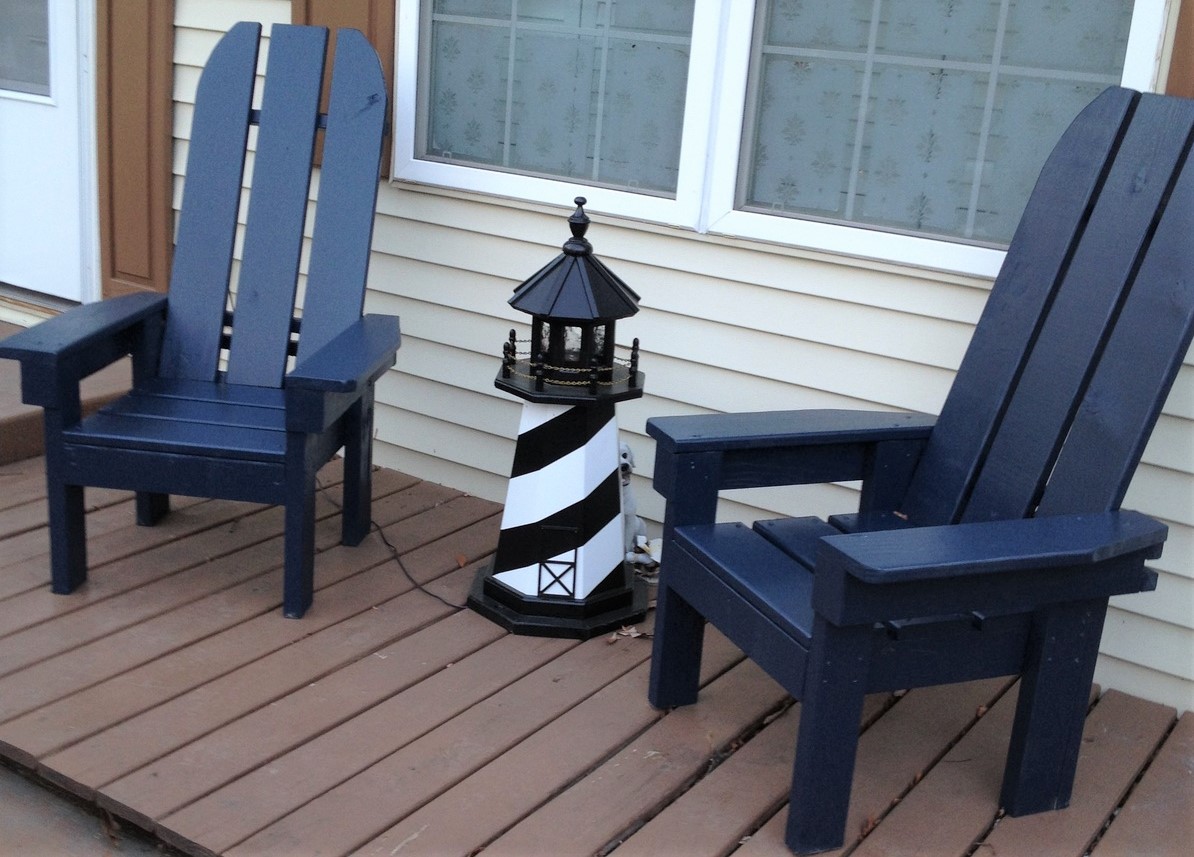
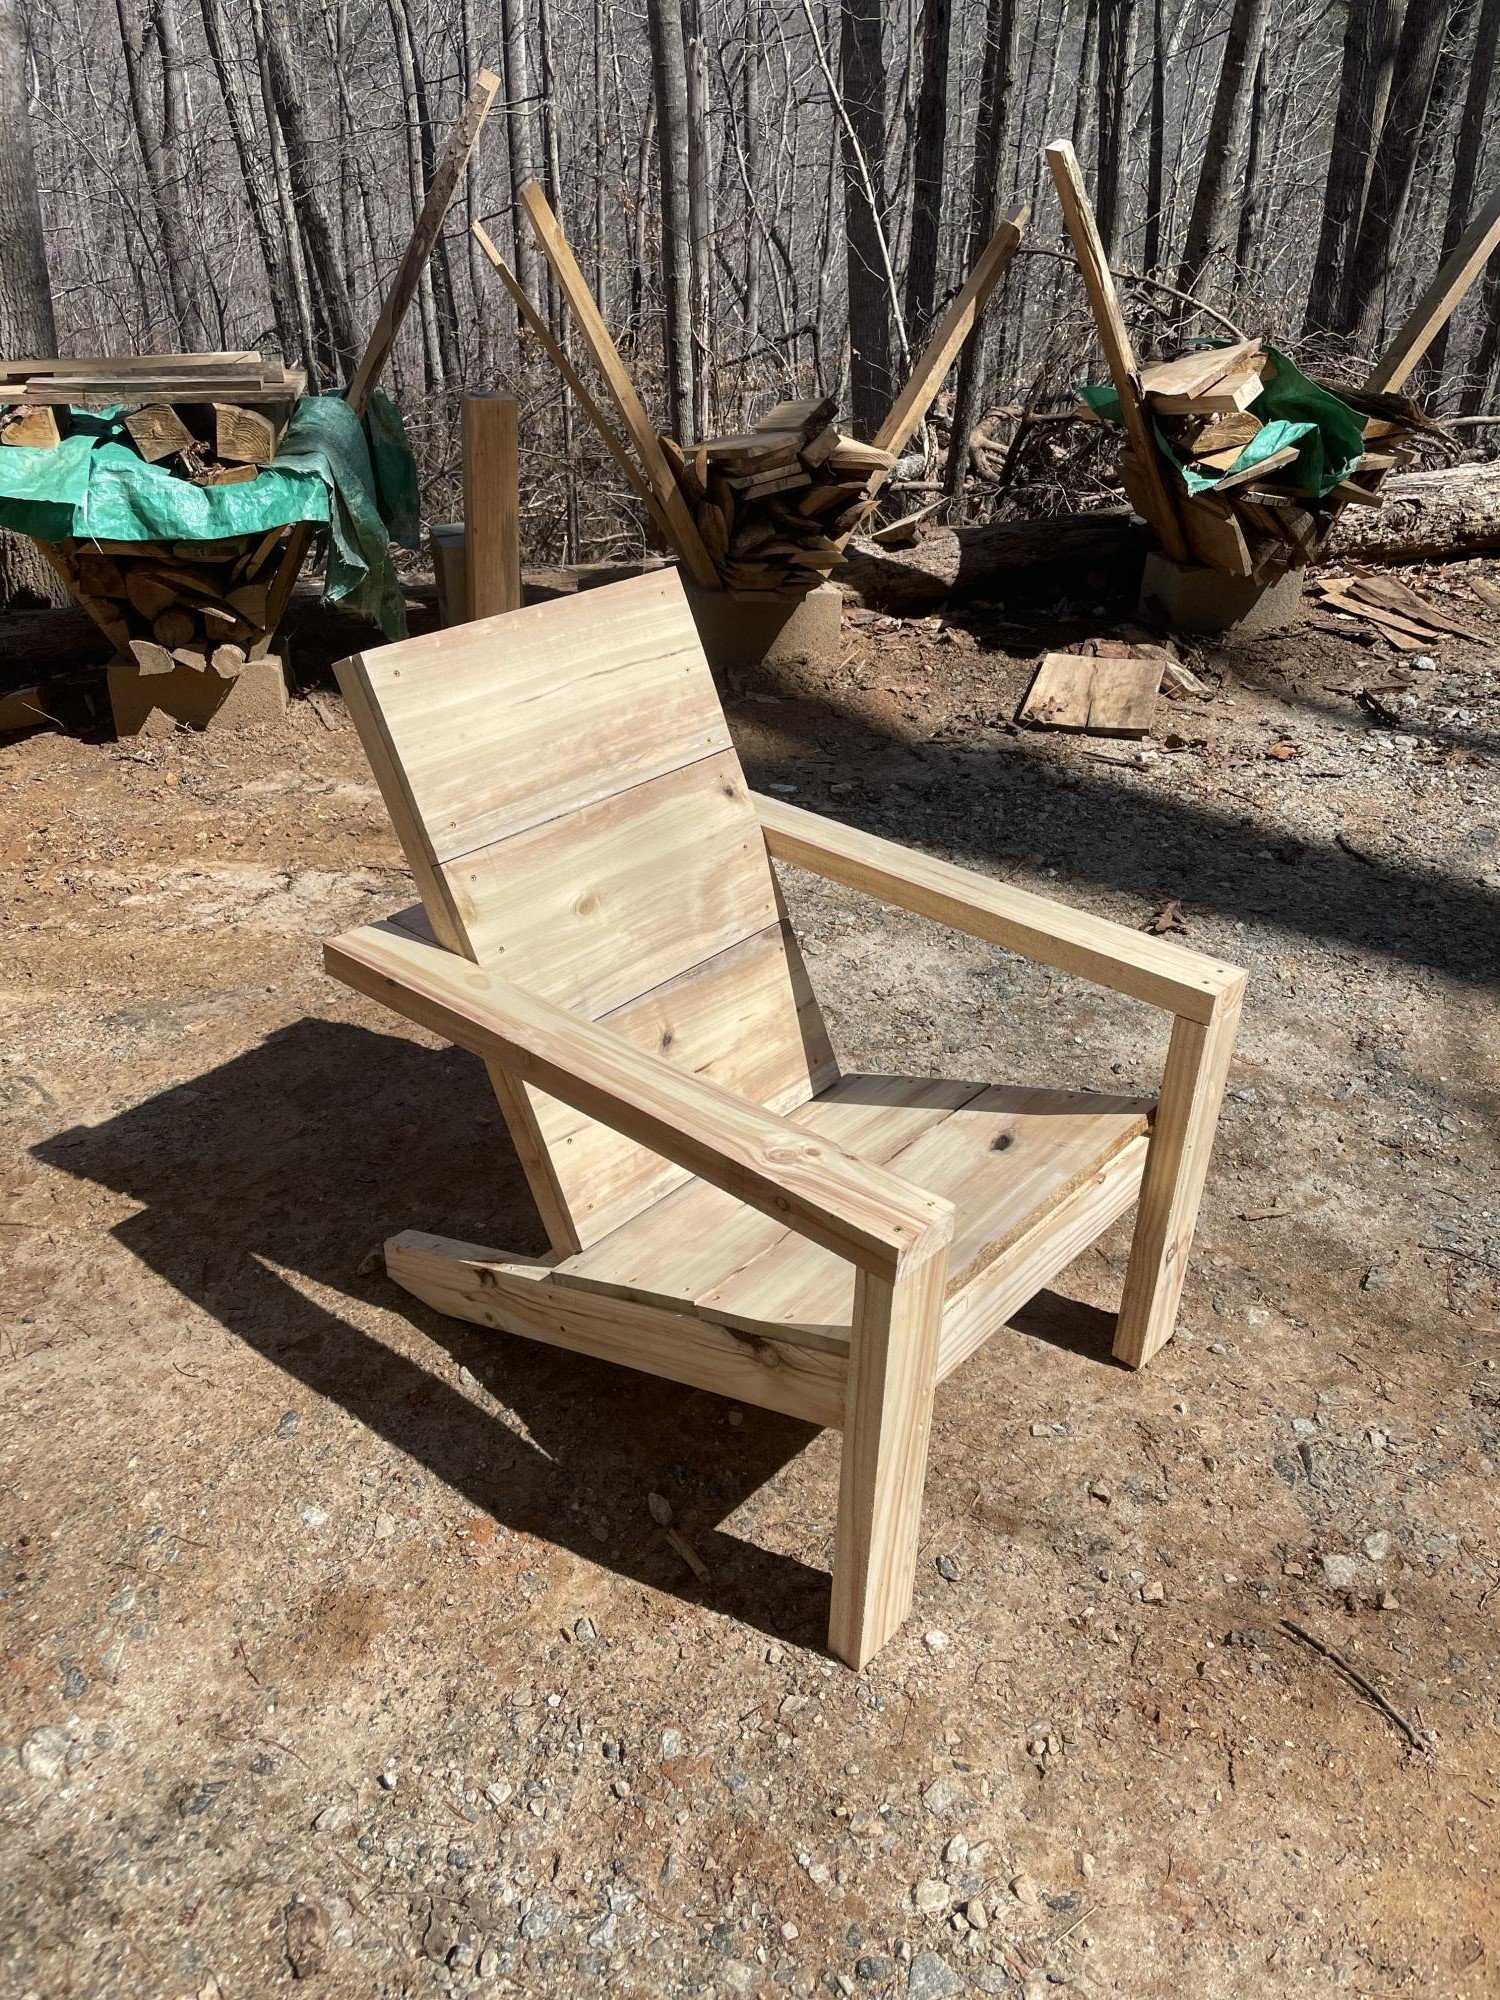
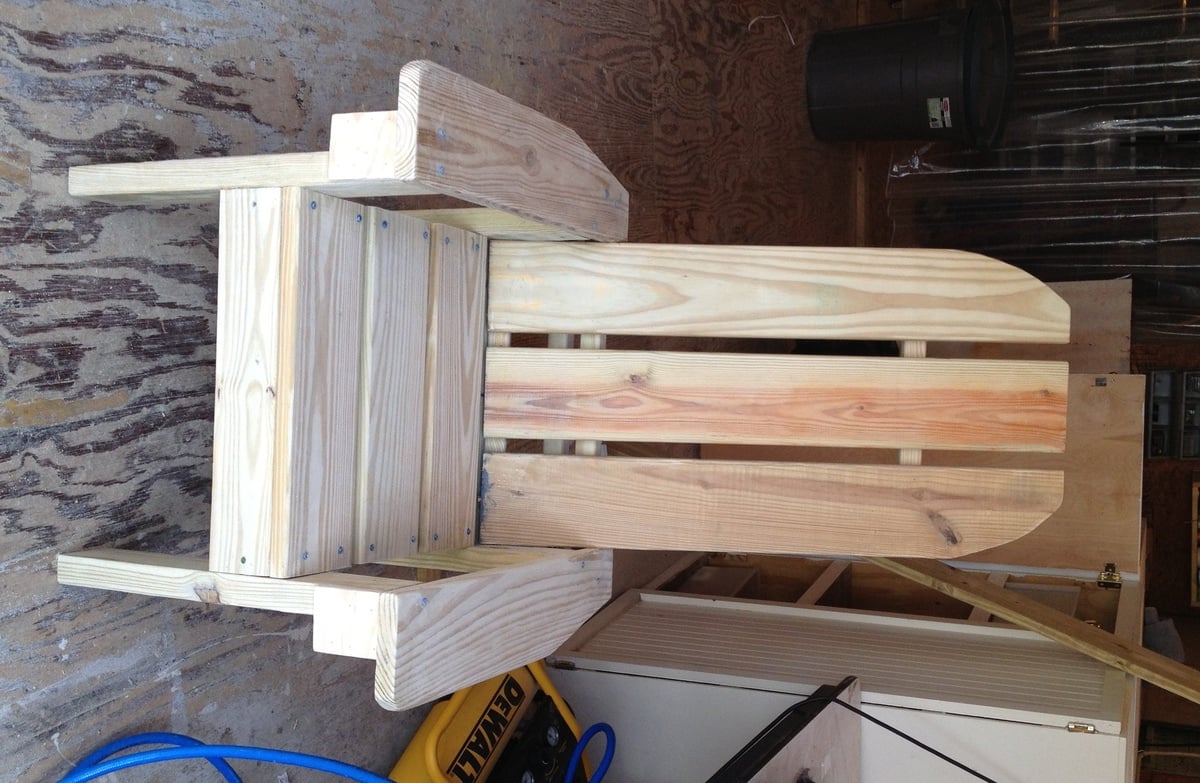
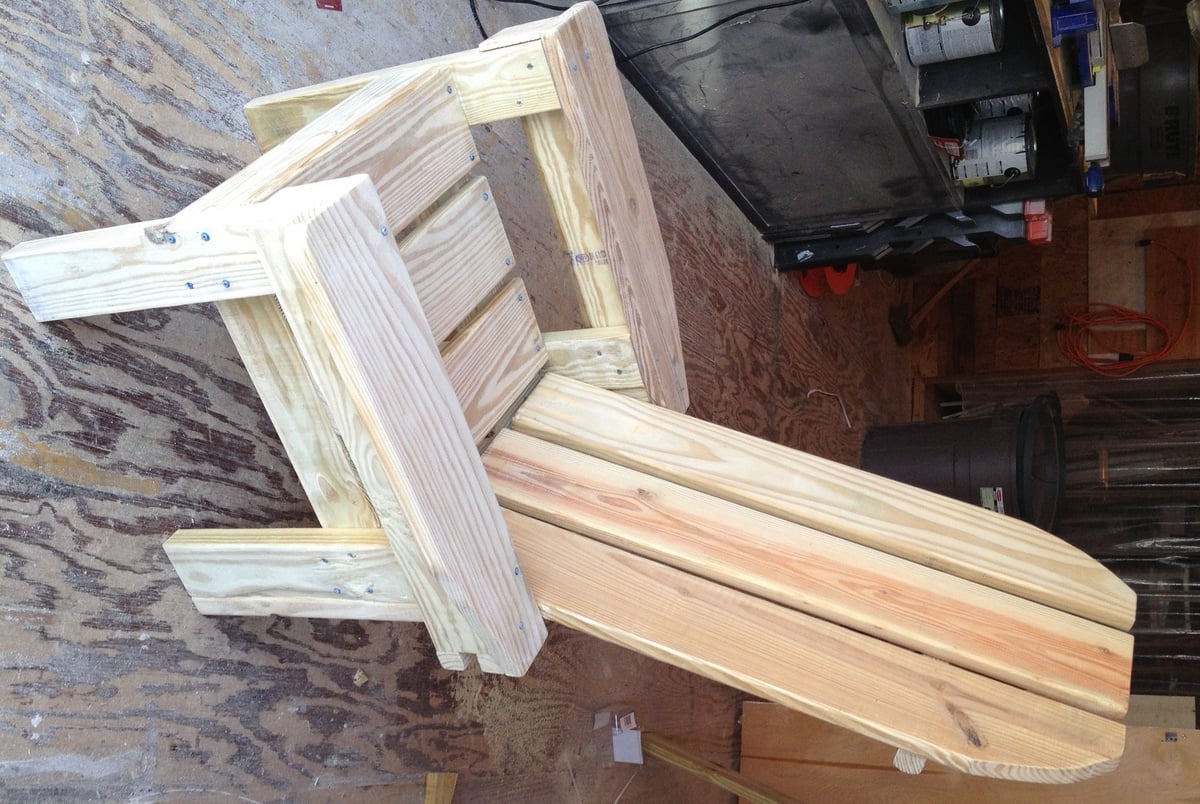
These sturdy chairs are a wonderful replacement for plastic deck chairs! They are nice and heavy, and won't blow over in a storm! This project is a mix of Ana's Adirondack Chairs and the Simple Outdoor Lounge Chair. I combined ideas from the two plans to use the extra lumber we had left over from an outside project from last year. Left-over lumber included some 2x4 for the bottom frames, some 5/4 decking board for the seat, back, and arms, and a few balusters at the back. Most of the lumber was left over, so I only had to spend $20 for 2 boxes of Kreg screws and 2 pc 5/4 x 8 decking board. Finished with some left over exterior latex semi gloss paint. This was a fun weekend project - built the chairs on one day, and finished the sanding and painting the next day. My next project is a little outdoor table to go with them, and I have a few scraps left over to use for that. These chairs have received lots of compliments, and we've given Ana's web site name to several admirers. Ana, thank you for your wonderful plans!

Sun, 09/28/2014 - 18:15
Hi Mepaganjr,
I used the plan for the Simple Outdoor Lounge Chair
http://ana-white.com/2010/05/plans/simple-outdoor-lounge-chair
as my guide for the seat part, and the slant of the back,
and used Ana's Adirondack Chair
http://ana-white.com/2010/05/furniture-plans-adirondack-chair-ana.html
as the inspiration for the tall chair back and front legs. I did several adjustments to fit the mixture of sizes of 2x and 5/4 scrap wood that I had available. I traced a paint can lid to make the curve on the top of the chair backs.
A great plan that has a similar seat and legs is the Adult Adirondack Chair, which is in Ana's book, The Handbuilt Home, on page 174. That's a great plan because it only uses six 1x4's an one 1x2. If I hadn't been using up the mixed scrap lumber, I would have used the Adult Adirondack Chair plan.
Happy building! :) Joanne
I enjoyed building this project for my wife. The plans are easy to follow. I decided to trim the desk by adding 1x3 boards along the sides, and widened the shelves on the bottom with additional 1x3 boards. I also found an old chair and stained it to match the desk.
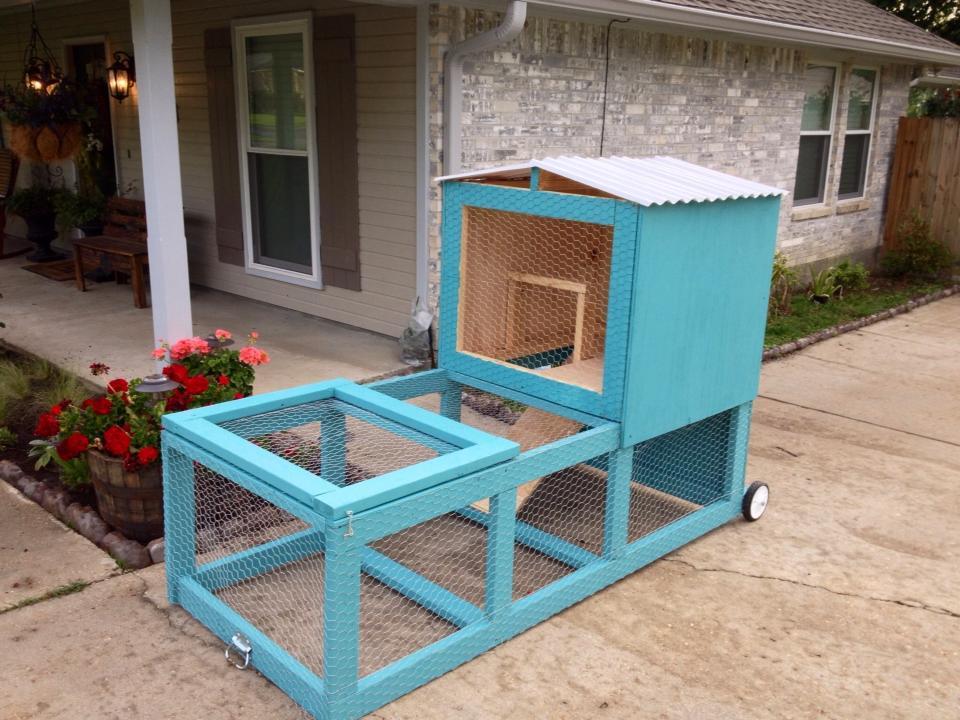
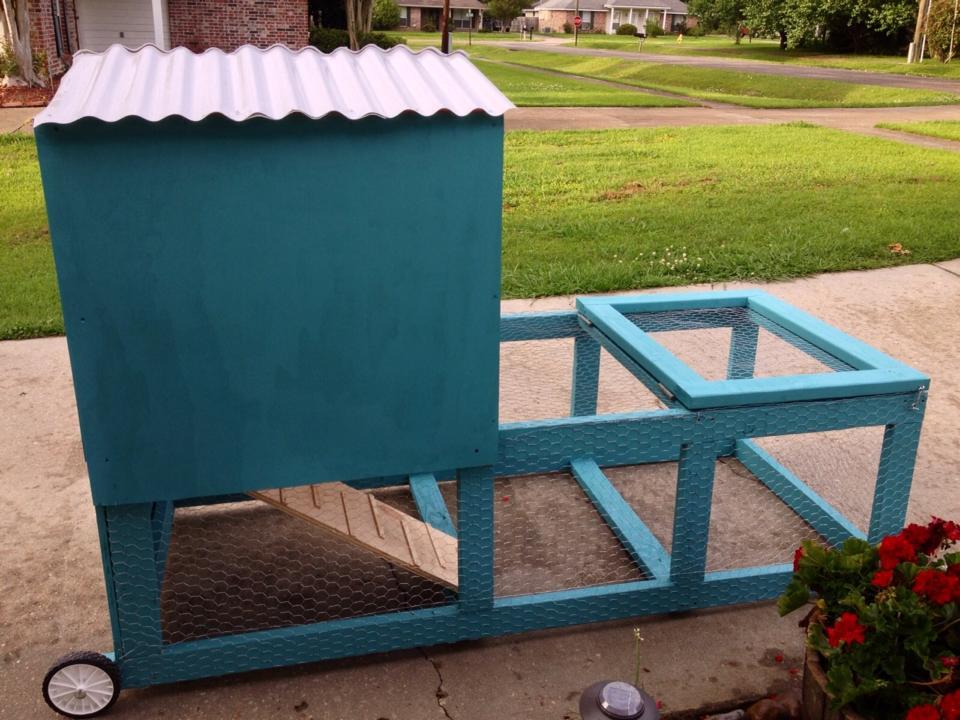
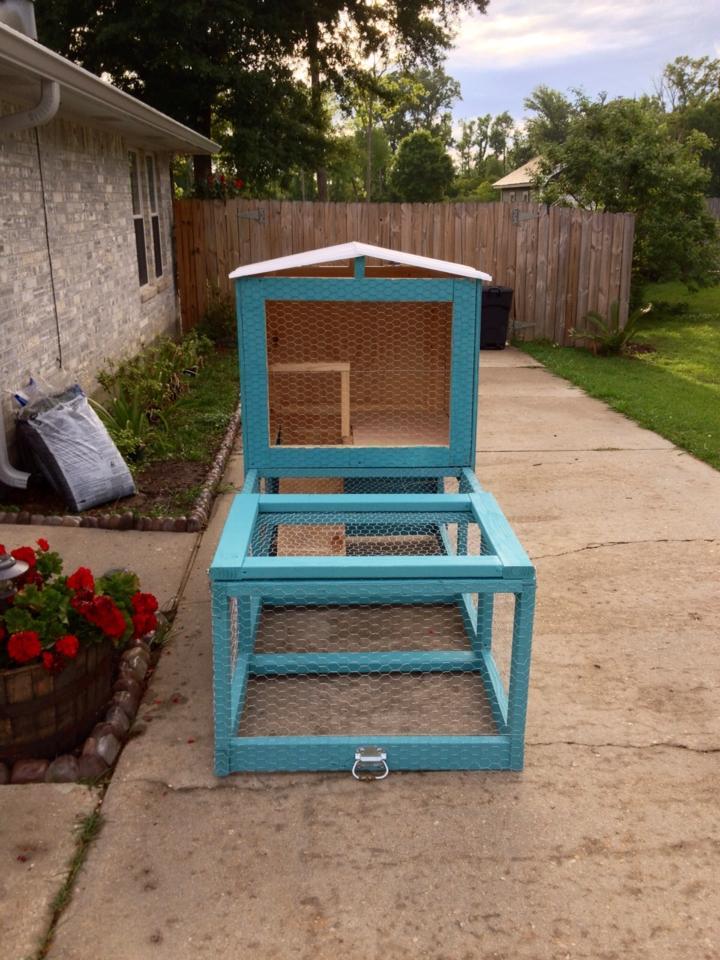
A friend of mine got two baby chicks and needed something for them to live in. She also wanted to be able to move it around the yard so they could have freah grass to be on. It uses 2x4s, 3/4 plywood, chicken wire, and plastic roofing. It was a fun build.
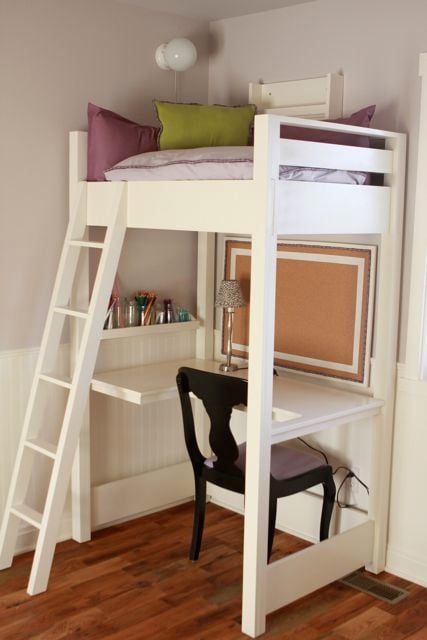
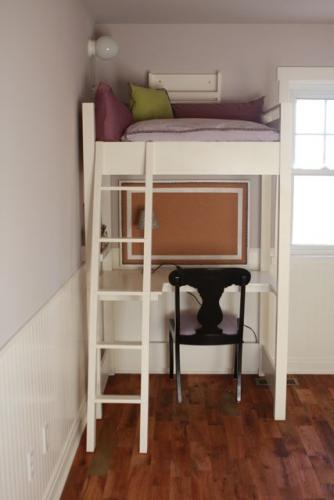
This project is a modified version of Ana's loft bed. We shortened it and made it a bit more narrow to fit our space and because we only needed a place for our eight year old daughter to read and work, not a place to sleep. We also added a desk to the bottom, making it a full-service work station for our elementary school girl!

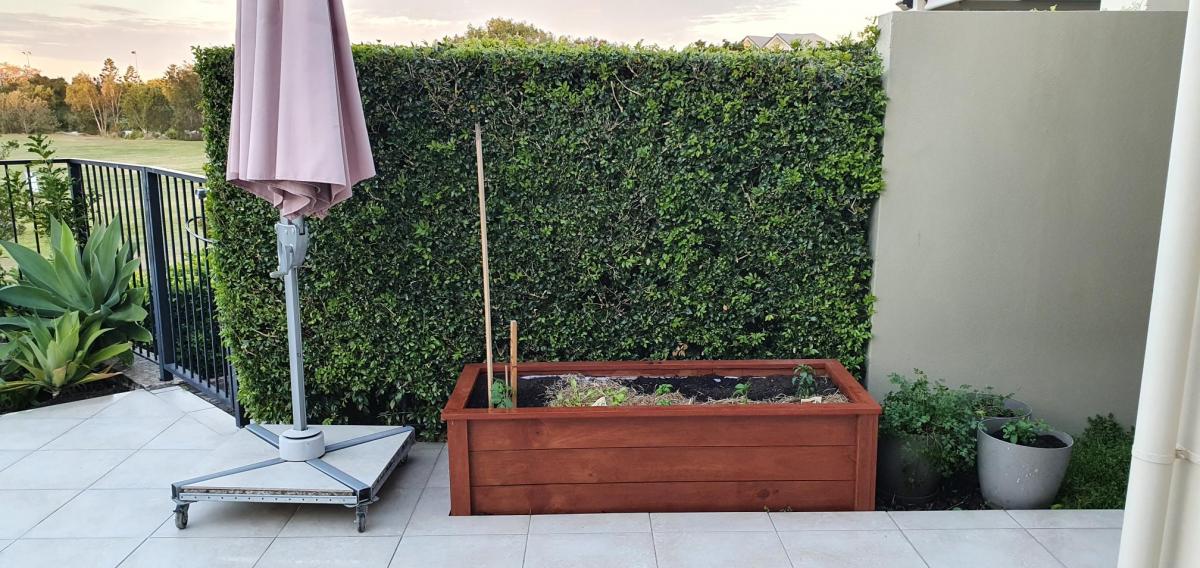
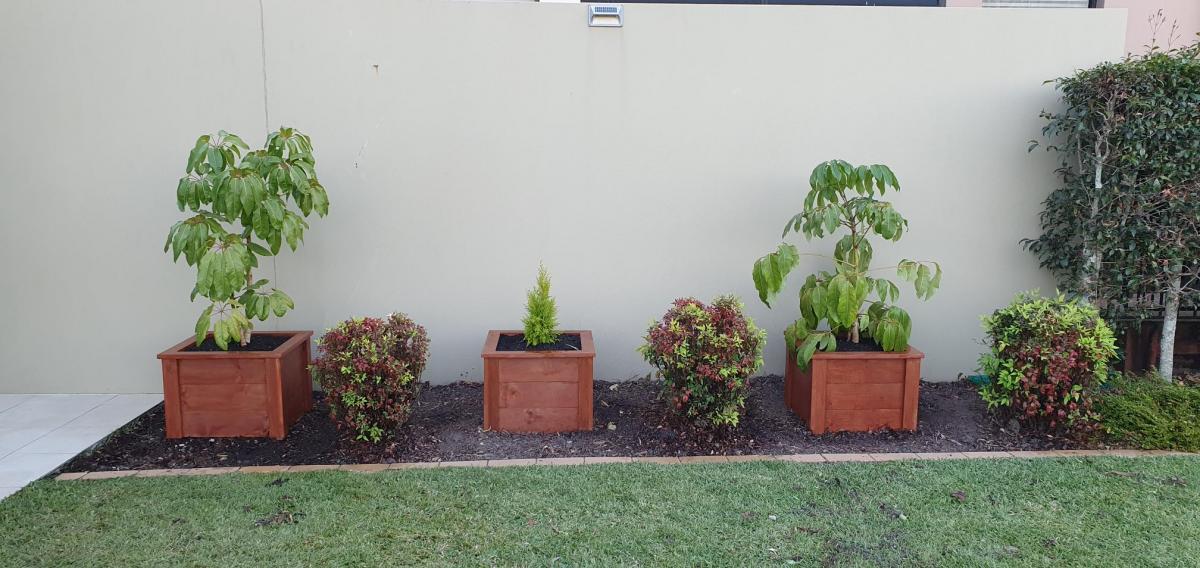
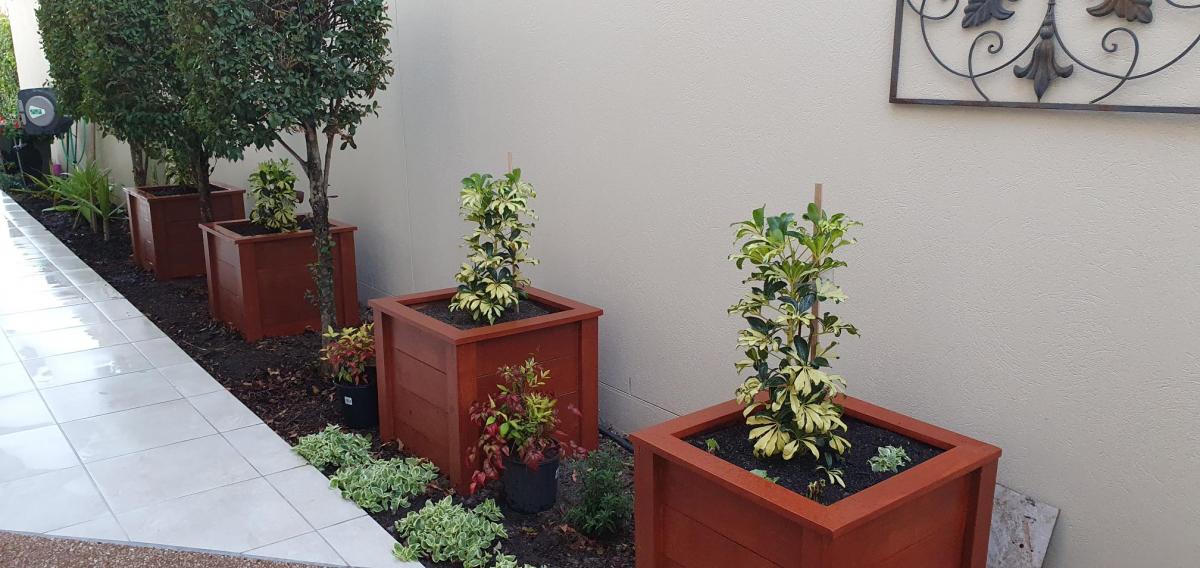
Greeting from from Queensland, Australia.
I decided to make a couple of wooden planter boxes for our garden at home, after watching Ana's video on the “Easy Build DIY Planter Box” made from cedar and painted white. I downloaded the plans, and then converted the measurements to metric. I did make a couple of alterations from what was shown in the video. Whilst I do not have a workshop at home, I attend a local "Men's Shed" where there is a large range of woodworking machinery available to use. Firstly, I used rough sawn treated pine 150mm x 25mm boards, which I dressed and cut down to size. The dressed timber looked great once I stained the boxes. Secondly, I have made the boxes without legs, so that they sit directly in the garden, and are filled with potting mix soil.
After making the first 2 planter boxes, my wife asked if I could make another couple. After that we decided another 3 planter boxes in a different part of the garden might be nice, so I made these the same. Then I made a longer planter box of the same style for vegetables and herbs.
Thanks so much, Ana, for the great plans and video, as well as the inspiration. Mind you, my planter boxes took a lot longer to build than the time you indicated in your video, but that is fine.
Cheers Noel
Wed, 10/06/2021 - 10:10
WOW, love them mods and how you were able to convert to metric! Thank you for sharing!