Community Brag Posts

$235 Weatherly Pergola

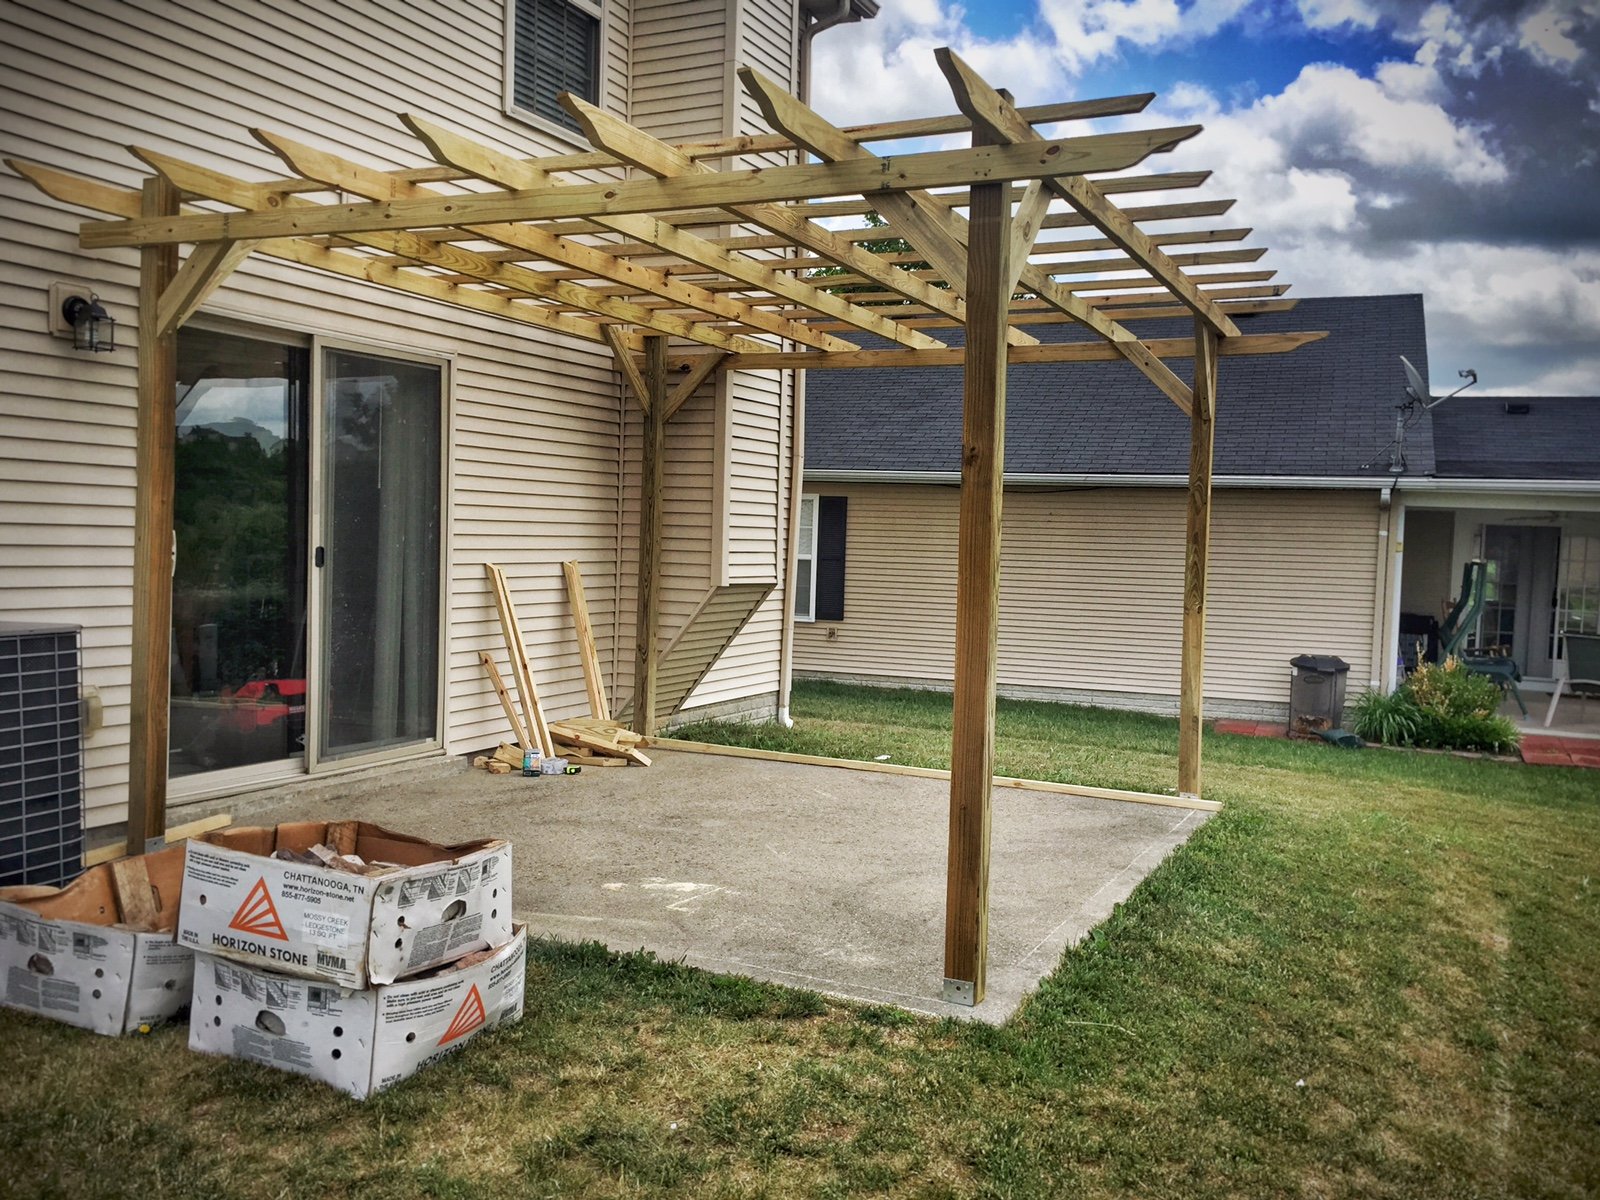
This is the first time I've ever taken on a project of this scale. The pergola is 12 x 11, and I was able to get it all done for $235 by having Lowe's price match a lumber yard in the next town over. I skipped out on the fancy base covers because I'll eventually make those pretty with limestone stacking rock - and because the lumber for those alone would cost about $121.
Once the treated lumber seasons, I'll stain it a darker color.

Built from Plan(s)
Estimated Cost
$235
Estimated Time Investment
Weekend Project (10-20 Hours)
Recommended Skill Level
Beginner

Comments

weatherly sofa

Love this sofa! Shown primed and in the process of painting a chocolate brown now. Super easy to make!

Built from Plan(s)
Estimated Cost
$35
Estimated Time Investment
Weekend Project (10-20 Hours)
Recommended Skill Level
Beginner

Curved Bench

Submitted by stevez8420 on Sat, 08/08/2015 - 13:41

I followed your idea but i think my bench is a touch smaller. I decided to add arm rests on each end, I kept the top beverage ledge or "Bever-ledge" as I call it and ofcourse I added rope lighting along the underside. This was my first ever DIY project.

Estimated Cost
150
Estimated Time Investment
Weekend Project (10-20 Hours)
Finish Used
I used a Cedar Tone semi-transparent finish which turned out a little more orange than i though but it still looks good!
Recommended Skill Level
Intermediate

Craft Paper Holder

I made this in a few minutes. The kids were too excited to try it out; they didn't want me to fill and paint it. I made it out of scrap wood.

Built from Plan(s)
Estimated Cost
$1.00
Estimated Time Investment
An Hour or Two (0-2 Hours)
Finish Used
The kids grabbed it before I could finish it :)
Recommended Skill Level
Starter Project

DIY Barn Door and Hardware for around $80!

I really wanted to put a barn door in my husband's home office, but have you looked at the prices of the kits?  No way was I going to spend that for a door.  So I decided to fabricate it myself.  For the rail hardware- I used a 72" steel rod, copper pipe fittings, and lag screws.  For the door hardware, I used 12"ish, long pieces of steel, pulleys, and carriage bolts.

The door itself is made from plywood siding, 1 x 4's, 1 x 6's, and 1 x 3's.  The entire door and hardware cost around $80 to make myself.  It's functional and looks amazing!  The entire tutorial is up on my blog!

Estimated Cost
$80
Estimated Time Investment
Day Project (6-9 Hours)
Finish Used
white paint
Recommended Skill Level
Beginner

Comments

Fireplace with hidden Mantle storage and side bookshelves

Submitted by ibseenu on Thu, 12/01/2022 - 14:30

Thank you Ana for you Fireplace design as it was exactly what I needed! We’ve lived in our house for 3 years now and I’ve wanted a fireplace ever since. Your plan was perfect and with a few modifications I made it come to life. My 9yr daughter as I was almost done building thought there should be a shelf for books and movies below the fire place. It gave me the idea of adding storage on the sides. I had already had the idea of the mantle storage and just used a floating shelf idea and made that. This was a lot of fun!! It took me a little over a week to build. But can’t wait to build something else for our house… like the mudroom!

Amy

Comments

jtemperley

Sun, 01/08/2023 - 19:02

That looks awesome! My husband and I are planning on doing this as well. I do have a question, as I see you have carpet just like us. Did you cut out the carpet where you built out, and if so how did you go about that, or did you just build on top of it?

Book Ledges { $10 Ledge Plan }

Submitted by Shorty on Fri, 10/25/2013 - 14:58

We used a pocket hole jig to build the ledges (to practice using our pocket hole jig), and loved how easy it was to put these together. We made each ledge 32" so we only had to use 1 1x2 and 2 1x4.

Turns out these ledges work perfectly to "house" or baby's books (and a couple of our own in the mean time). Love this build –and so much cheaper than buying (or building) a bookshelf!

Built from Plan(s)
Estimated Cost
$20
Estimated Time Investment
Afternoon Project (3-6 Hours)
Finish Used
Behr's Swiss Coffee in Satin
Recommended Skill Level
Starter Project

Bedroom Remodel

Submitted by Anonymous (not verified) on Thu, 01/21/2016 - 18:35

We had 2 empty closets in our 100 year old home. The custom shelves took a day to build and have worked amazingly for our organization.

Built from Plan(s)
Estimated Cost
$200
Estimated Time Investment
Weekend Project (10-20 Hours)
Recommended Skill Level
Starter Project

Pool supplies storage shed

Submitted by Anonymous (not verified) on Sun, 06/25/2023 - 18:50

I was looking for a shed to keep pool towels and other deck and pool items. This shed hit every feature I was looking
for. My husband loved the plans. He's always saying he can build anything with a measured drawing and a
cut list. The only thing we changed was the roofing material. we were given some metal roofing by a friend.

Built from Plan(s)

Comments

Rolling Workbench with "Drill Holders"

Submitted by Joni on Sun, 03/18/2012 - 11:03

Given that I work out of my garage, I desperately needed a rolling workbench in order to roll out, make the sawdust mess, and roll back in. I had already made Michaela's island for another purpose inside my house, and I loved the sturdiness of the 4x4 posts as legs. I had industrial-type locking castors, but they only screwed in with a threaded post. Thanks to my engineer dad, he determined the best way to attach a screw-in castor to the bottom of the 4x4 (and did all that work for me!).

The size is modified from Michaela's original plan to include a 3 1/2" overhang all the way around for easy clamping (and top is 6' x 2.5'). I also cut a 2' piece of PVC pipe into 3 sections and attached for my drill storage. I put full-extension glides on the drawers and made some dividers from scrap wood.

Built from Plan(s)
Estimated Time Investment
Week Long Project (20 Hours or More)
Finish Used
4 coats of Spar Urethane
Recommended Skill Level
Intermediate

Comments

birdsandsoap

Sun, 03/18/2012 - 13:29

This is beautiful. If anything you create ON this table looks nearly as beautiful as the table itself, you have found a new profession. Good job!

The Gíaffe TV Stand

Submitted by Anonymous (not verified) on Thu, 02/06/2020 - 09:55

The Gíaffe Free Standing TV Mount. Handcrafted and engineered to use its center mass to deliver strength and balance for tv sizes 30-60". Display your television without detracting from your home's decor. The Gíaffe Free Standing TV Mount is the perfect solution and its rich finish will be perfect for any house/office room.

Estimated Cost
$109
Estimated Time Investment
Day Project (6-9 Hours)
Finish Used
Stain - Dark Walnut - Varathane - 2 Coats
Finish - Water Based Polyurethane - Varathane - 3 Coats
Recommended Skill Level
Intermediate

Comments

Tall Dresser

Submitted by Anonymous (not verified) on Wed, 12/13/2023 - 16:41

A Christmas gift for my G- kid!!!!

Built from Plan(s)

Comments

Truss Table

Submitted by Anonymous (not verified) on Mon, 01/08/2024 - 10:12

Our 4x4 Truss Beam Table made by my husband for our new house. Stain is Minwax slate gel stain.


Built from Plan(s)

Comments

Modern Slat Top Outdoor Bench

Submitted by TxDork76 on Wed, 04/23/2014 - 20:59

This was a super easy and fun bench to make.

I ended up having enough 2x4 and 1x4 scraps for the legs and only had to pick up a a couple of 2x4s.

TIP: Others pointed said that you should paint slats before assembly... I highly recommend it as well. It was a bit of a pain trying to get between the slats to prime and paint though would likely be easier w/ a sprayer..

Finished it with some oops paint in a nice color and a 3 coats of spray urethane.

Great beginner project for sure. It may take a couple of days to finish but most of that time is spent waiting for paint/urethane to dry between coats :)

Estimated Time Investment
Day Project (6-9 Hours)
Finish Used
2 coats primer, 3 coats Exterior latex paint, 3 coats spray urathane
Recommended Skill Level
Starter Project

Under Sink Shelf

Submitted by Anonymous (not verified) on Mon, 02/05/2024 - 09:03

We live in an old house with lots of windows in the kitchen but not much storage space. Having previously tackled a kitchen island with the help of ana-white.com, I knew that the Under Sink Kitchen Organizer Shelf would be a much simpler project. We already had the tools and screws, so I picked up a couple of 3-foot 1x8s for about $7. The organizer is 20 inches high, 15 inches wide, and 7-1/4 inches deep. The shelf is only about 6-1/2 inches deep because I used 1x8 for the back, but it works.

AP - Play Kitchen

Submitted by Anonymous (not verified) on Sun, 05/31/2020 - 19:20

Loved the plans from the site Ana! I got inspired seeing all the lovely play kitchens that everyone had created! Thought I'd share the one I've made for my little one as well, she loves it!

Garden Enclosure

Submitted by Anonymous (not verified) on Thu, 06/04/2020 - 17:29

My chickens took over my garden area and being the voracious raptors they are, I needed to build a garden enclosure to keep my veggies safe. I modified a little, making my beds deeper. I also had to stretch chicken wire over the top to keep the great flyers out. I also used it as a way to organize my garden tools (which is possible because I live in Southern California with moderate temperatures and little rain. Thanks for the plans! Yvonne

Built from Plan(s)
Estimated Cost
500
Estimated Time Investment
Weekend Project (10-20 Hours)
Finish Used
Deck on the outside. Clear coat on the inside. I also added chalkboard paint on the inside so I could fill in what I’m growing and erase it after.
Recommended Skill Level
Beginner

Crib for Baby #3

Submitted by Anonymous (not verified) on Mon, 10/17/2016 - 20:05

     My husband and father-in-law built this crib over many weekends. They decided against using pine since it is soft. Instead they used maple and the materials cost far more than the $50-100 estimate. The finished project is beautiful and is lovingly referred to as the bomb shelter because it is so sturdy and heavy. 

     They made it so the mattress could be raised and lowered as well as easily converted into a toddler bed. They used the crib mattress as a starting point to adjust the plans to ensure there would be no gaps between the sides of the crib and the mattress. 

      They used a router to put a dado at the top and bottom of the sides so the slats fit into the slot instead of just butting against the top of the rail in order to minimize the number of nail holes and create a nicer fit. They used one solid piece of maple plywood at the ends of the crib because there is a lot of temperature variation where we live resulting in a lot of expansion and contraction and they wanted to make sure that didn't cause any gaps.  

Estimated Cost
$450
Estimated Time Investment
Week Long Project (20 Hours or More)
Finish Used
Minwax Water Based Wood Stain - Slate (white tint base). After the maple was well sanded the pores in the wood got clogged up and it didn't stain well. It took a lot of coats. It would have worked better on a more porous wood. We were concerned about the finish being baby safe so we went with a water based stain.
Recommended Skill Level
Advanced