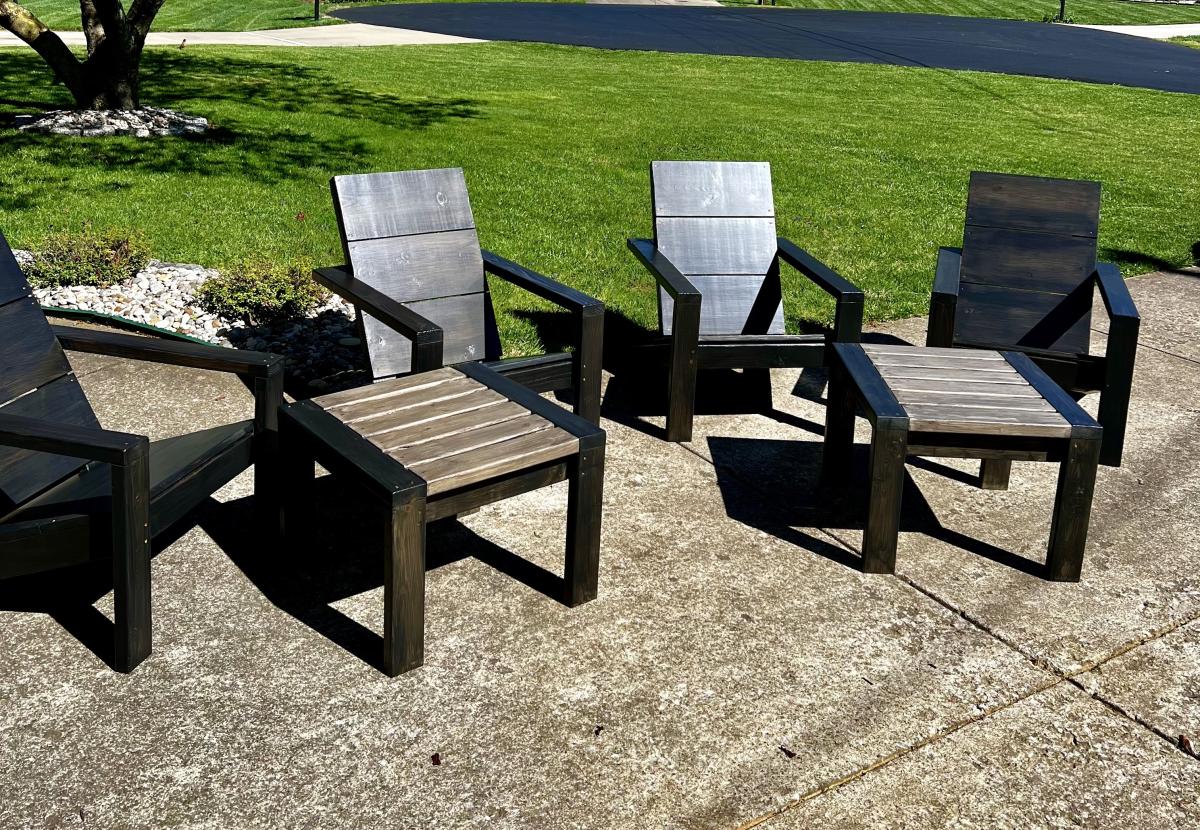
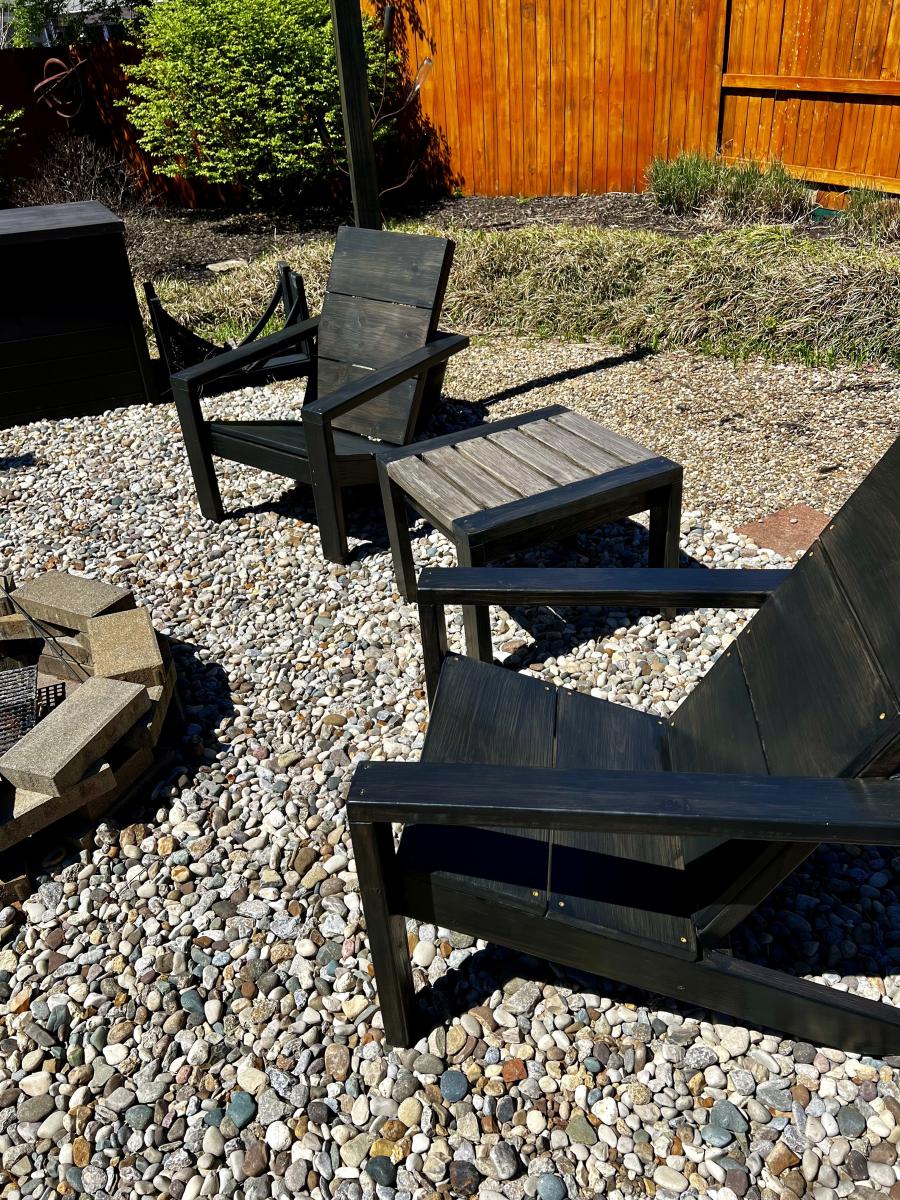
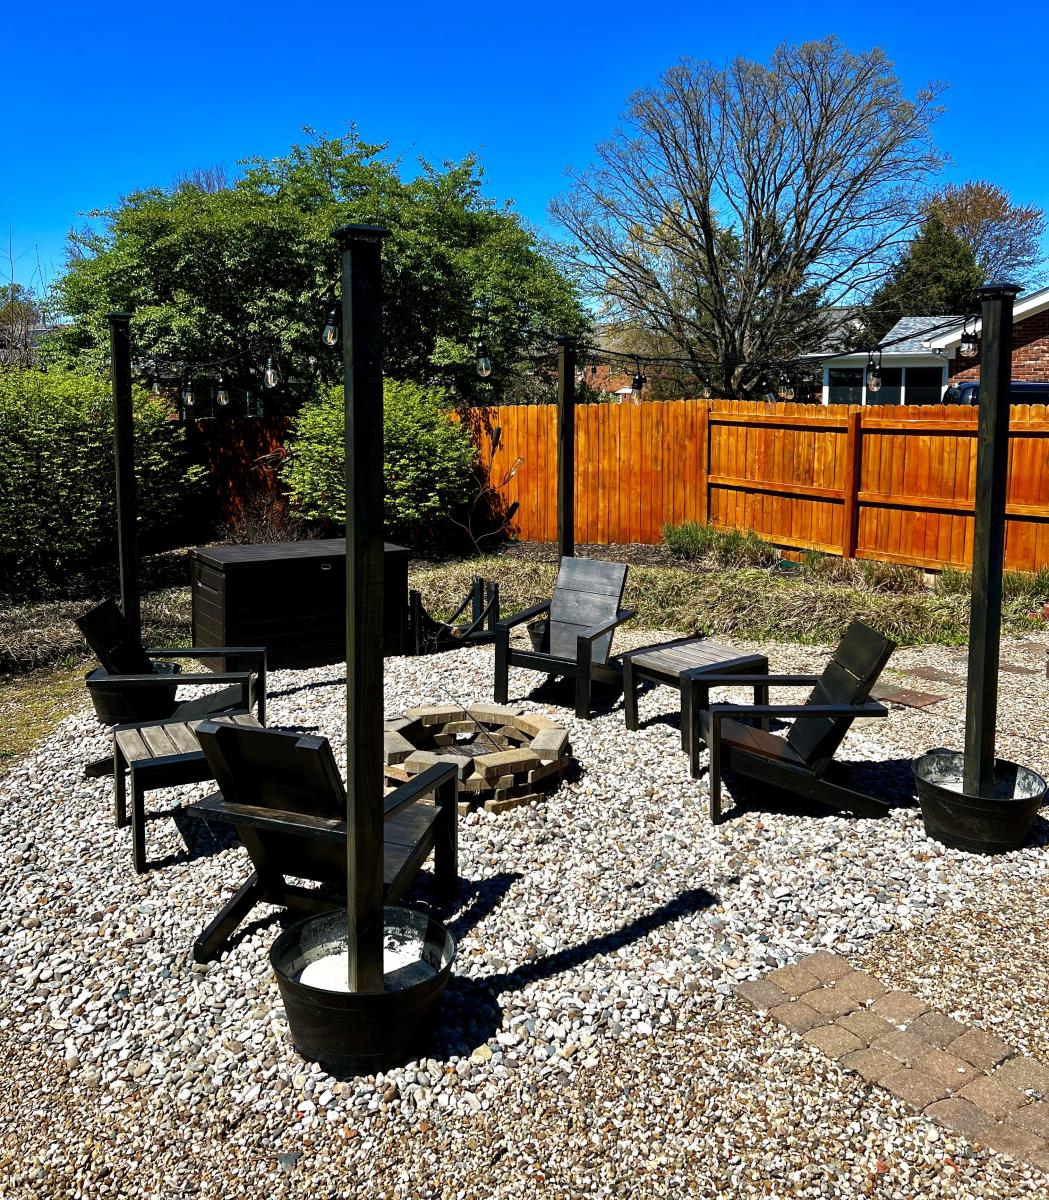
Adirondack Chairs and Side Tables for Firepit
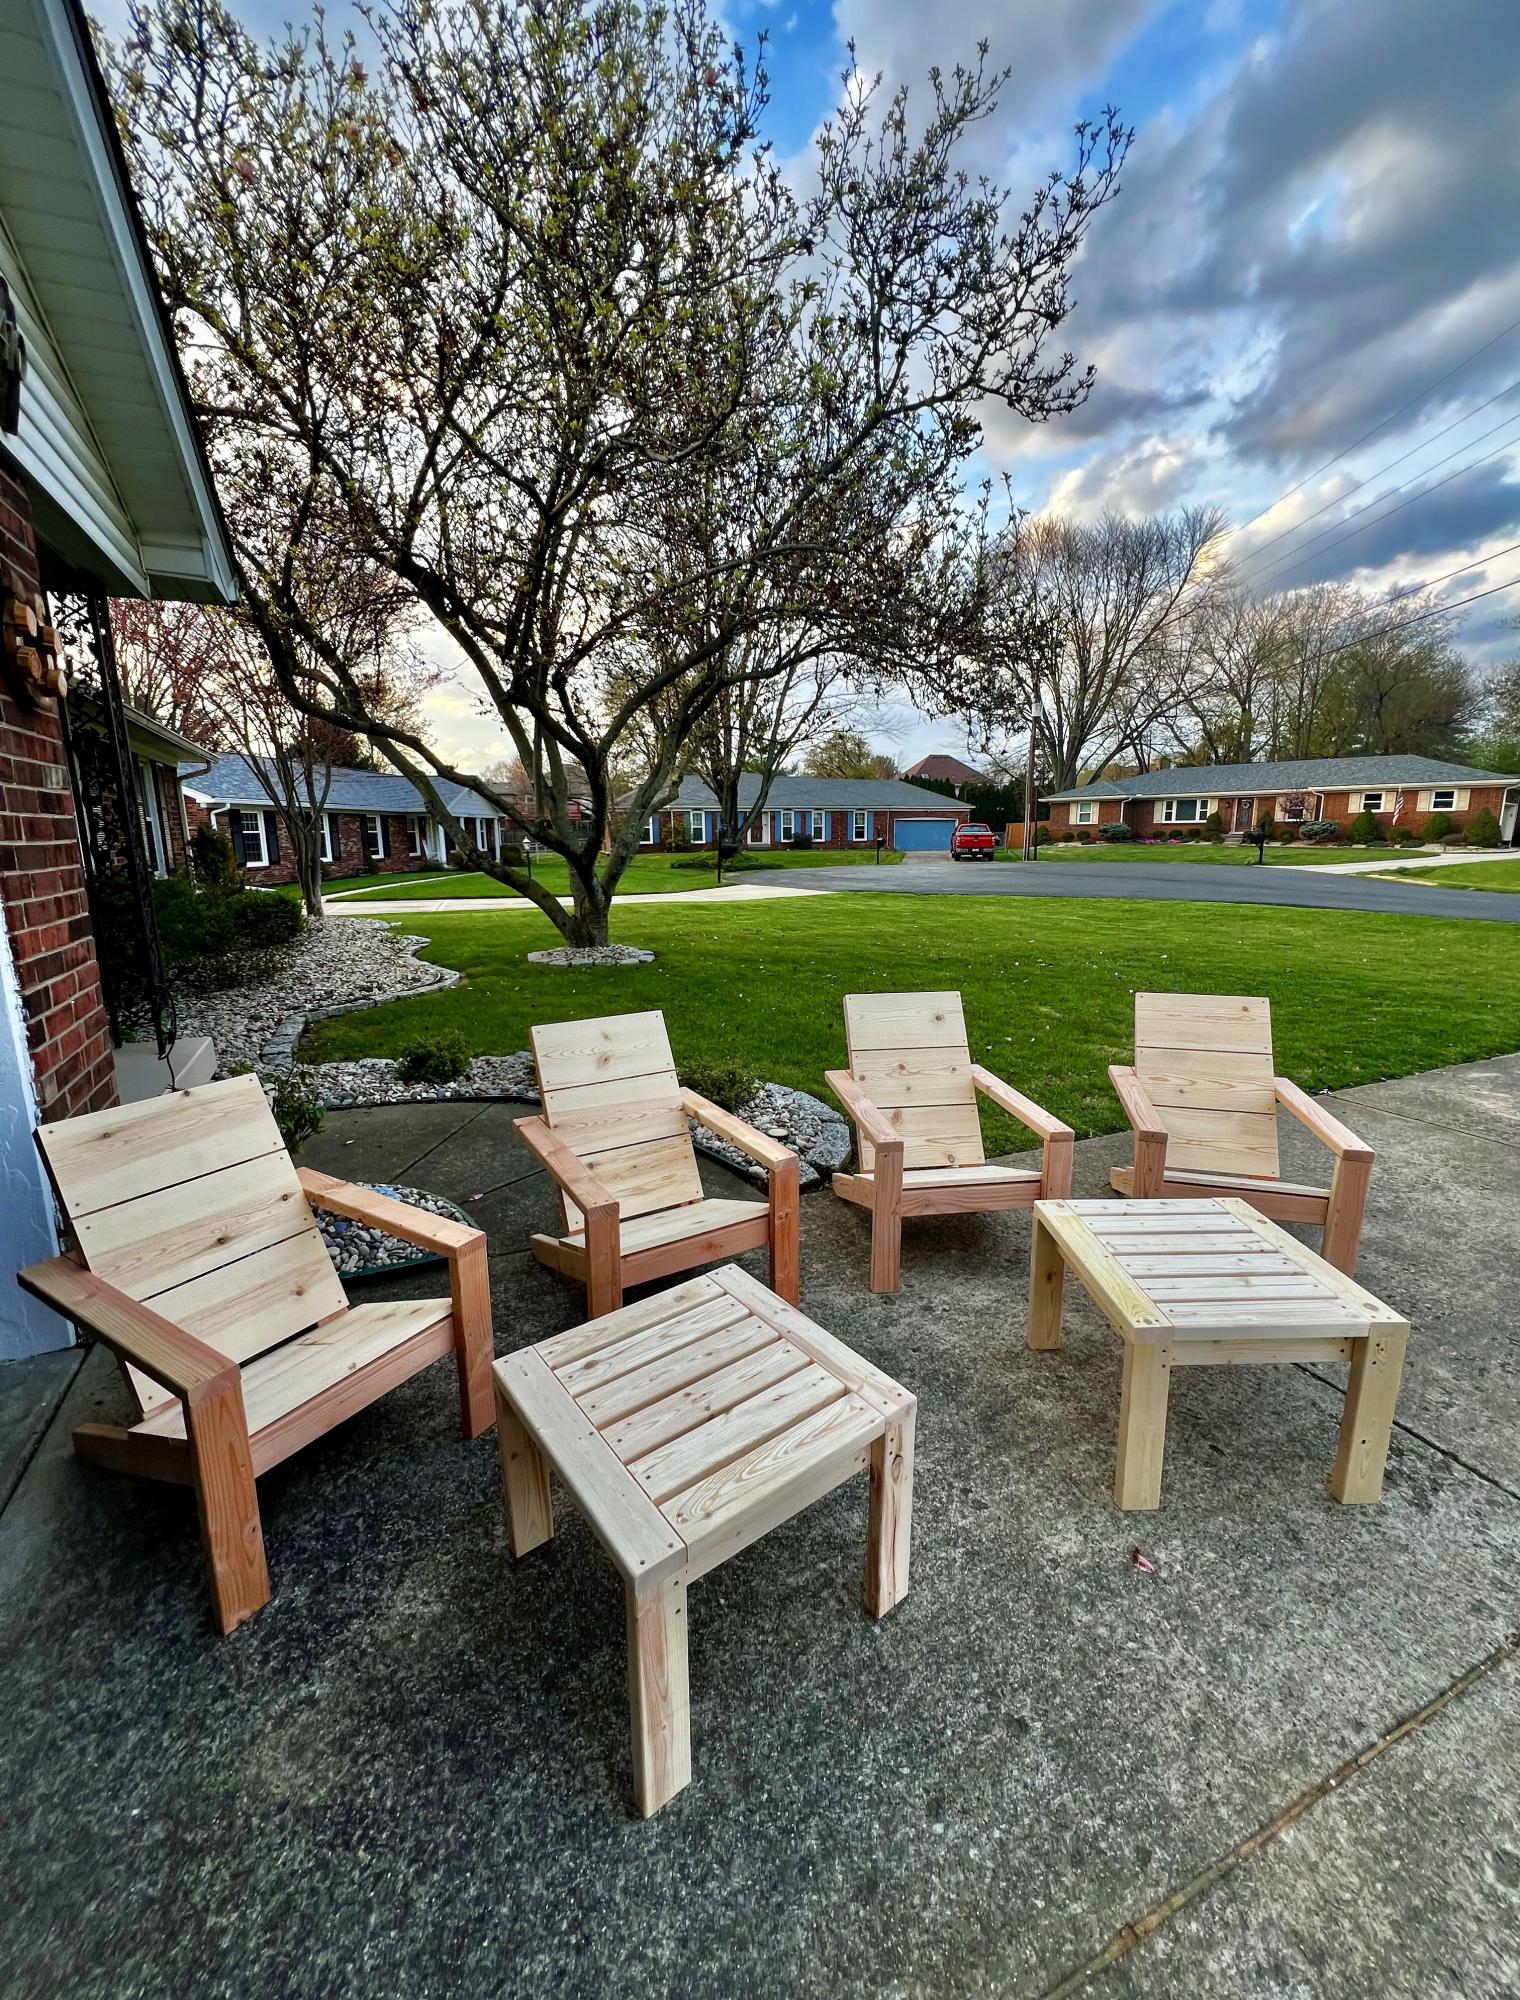
We needed a new fire pit area for the back yard. Your Adirondack chair and side table designs were a perfect fit.
Built from Plan(s)
We needed a new fire pit area for the back yard. Your Adirondack chair and side table designs were a perfect fit.
Part of a huge order I did for outdoor furniture. Love how they turned out! Thank you!
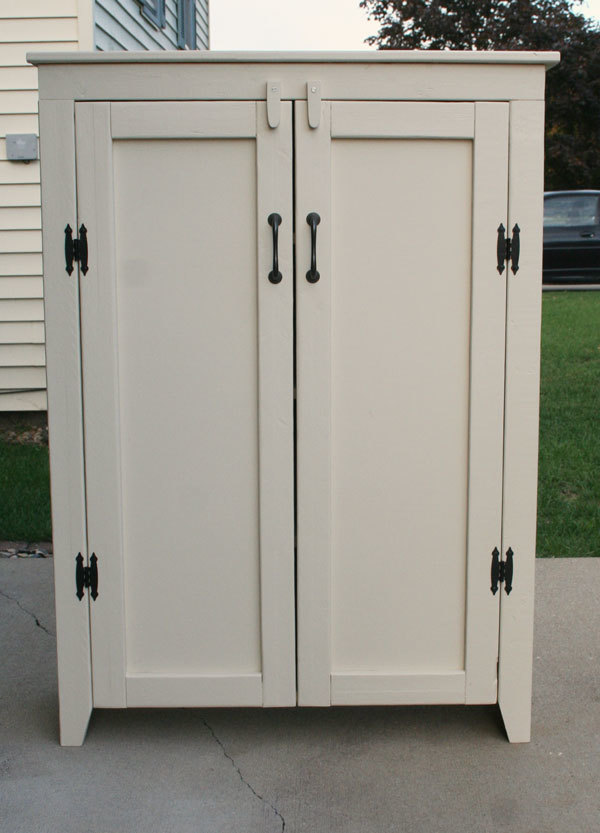
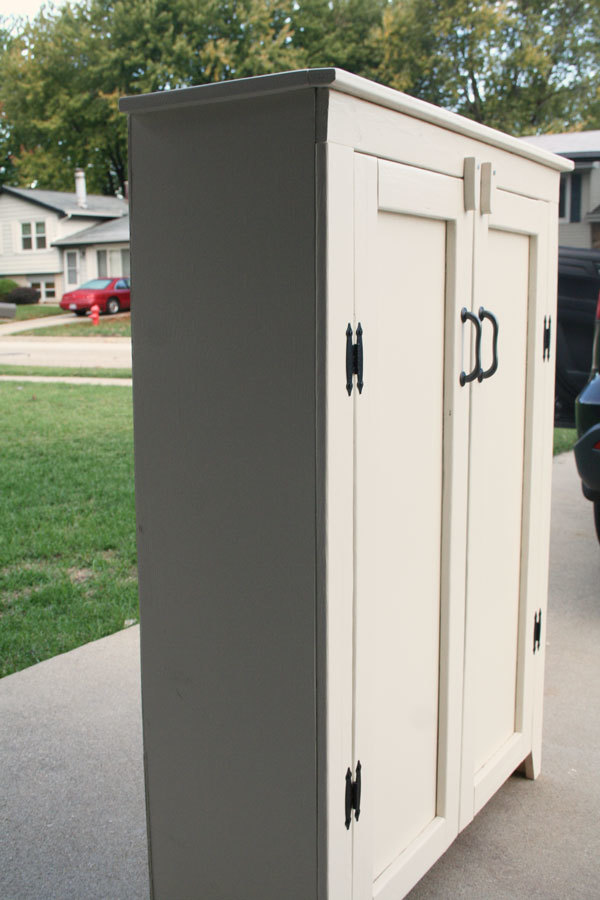
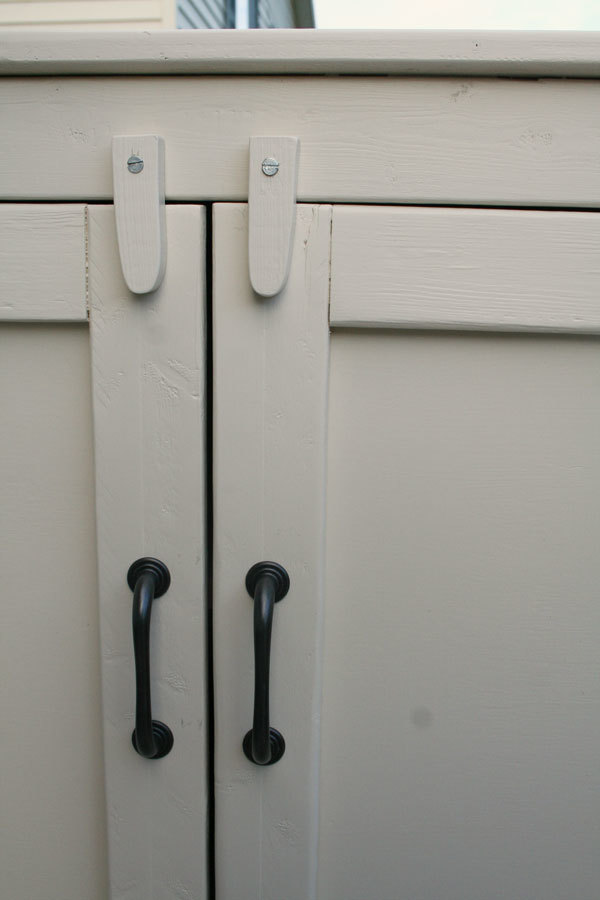
This project was built by my husband, for our daughter who needed some storage for her card-making and scrapbooking supplies. I had the easy part of doing the painting and purchasing the hardware. The hinges and handles are from Home Depot. It is a challenge to find good lumber at our big box stores. That was probably the most difficult part of the build...dealing with warped wood. This piece is suited for the primitive and rustic look so it didn't matter that the wood had some dings and splintering from the edges. Everything was sanded well and these marks just added to the character. He did encounter some problems with drilling the 1 and 1/4" kreg screws into the frame of the door. The wood wanted to split. Also, the plans called for magnetic closures but we could not determine how those would be installed as the shelves do not reach to the doors. So we cut some wooden swinging closures and attached them to the top of the cabinet. They seem to work well. One modification if he builds this again (and our other daughters are now putting in their orders!) would be to add a wooden support down the center front so that the doors would have something to close against. The way it is now, the doors could be pushed inward and put a lot of stress on the hinges. We were very pleased at how this project turned out! Thank you for the plans.

Tue, 10/09/2012 - 13:20
I like the way that came out and I agree its hard to get good wood at the big box stores it took me a while to go through the stacks they had there to find straight pieces. The other thing I had an issue with was the 1 1/4"
Kreg screws as well but if you dont over drive them it generally will not crack the wood. Just be gentle and if it still does turn the clutch down on the drill that will help as well.
Thu, 10/11/2012 - 18:11
Lawson4450,
Thank you for your comment, and for the advice on the Kreg screws!
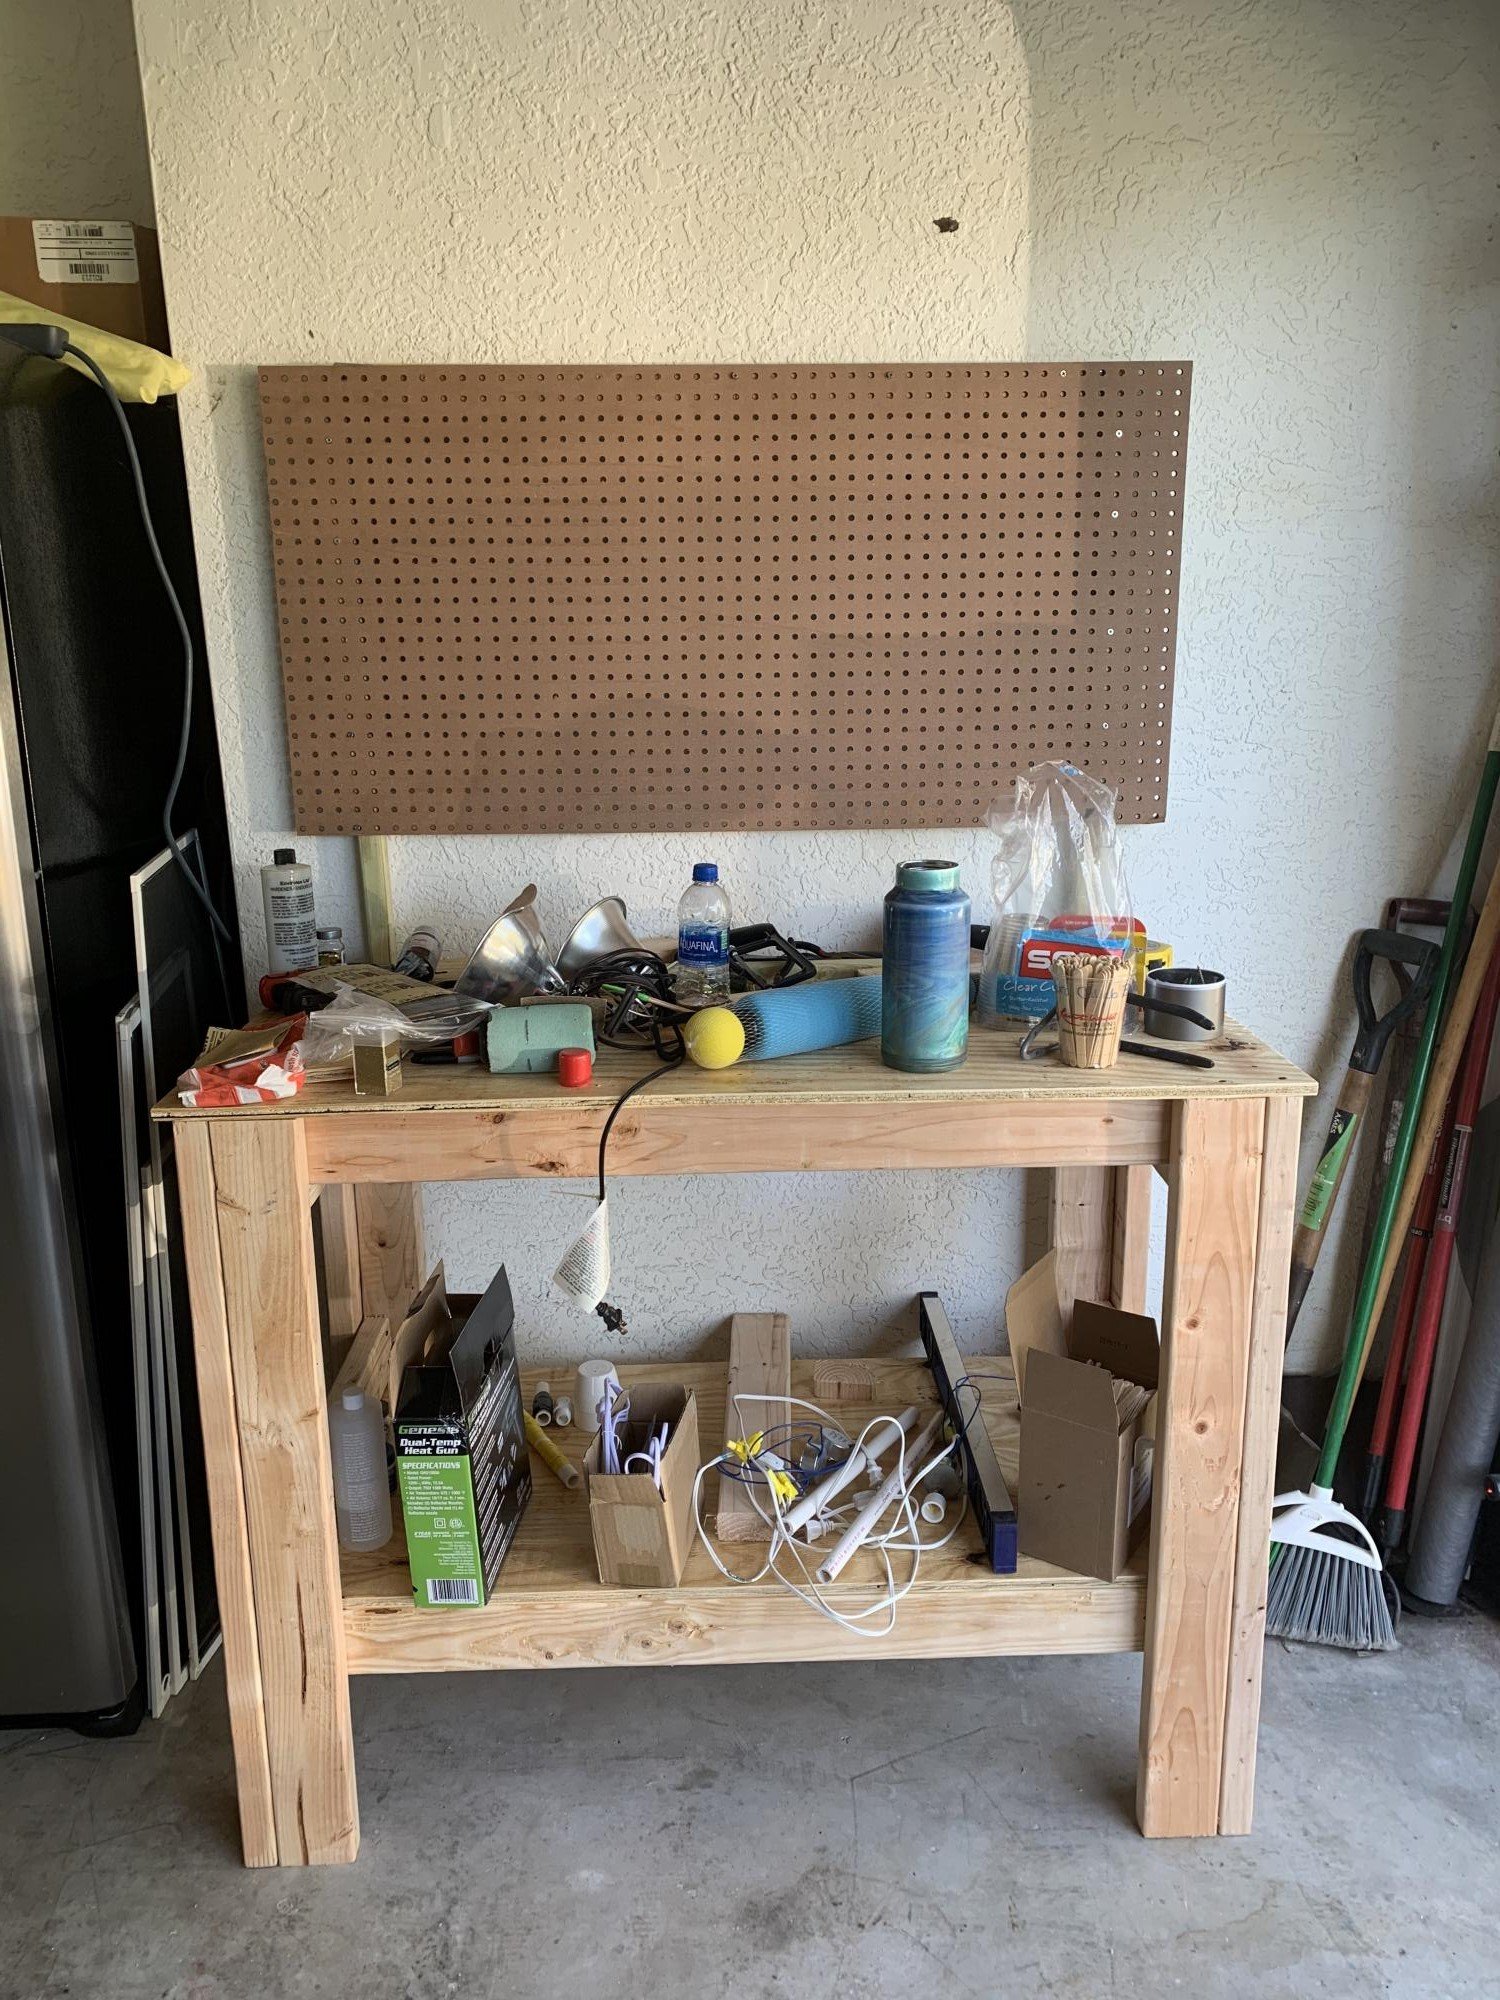
We are in the process of cleaning up our garage, so that future building projects are easier to do! One thing my husband also built was a small workbench, with a lower shelf to store the Kreg jig, screws, etc on. It comes in handy as we always know where to at least find the Kreg stuff! We should also keep some notes on the shelf, too, to refer to when the wood cracks, etc.
-Ann
Wed, 10/10/2012 - 10:37
You could solve the door not reaching the shelves problem by installing the magnetic closures on the underside of the top piece so it would also act as a stopper for the doors so they don't swing to the inside. I think that's what Ana meant in the plans. Kinda like this:
Thu, 10/11/2012 - 18:04
Aisha,
Thank you for the photo of the magnetic closure. That makes a lot of sense! We could still add those, and also leave the swinging locks in place, too.
-Ann
Sat, 10/13/2012 - 10:43
I am the lucky receiver of this jelly cabinet. It is exactly what I had in mind when I was on the hunt for one. I was so pleasantly surprised when my parents came to visit and showed me my early birthday present in their trunk! :)
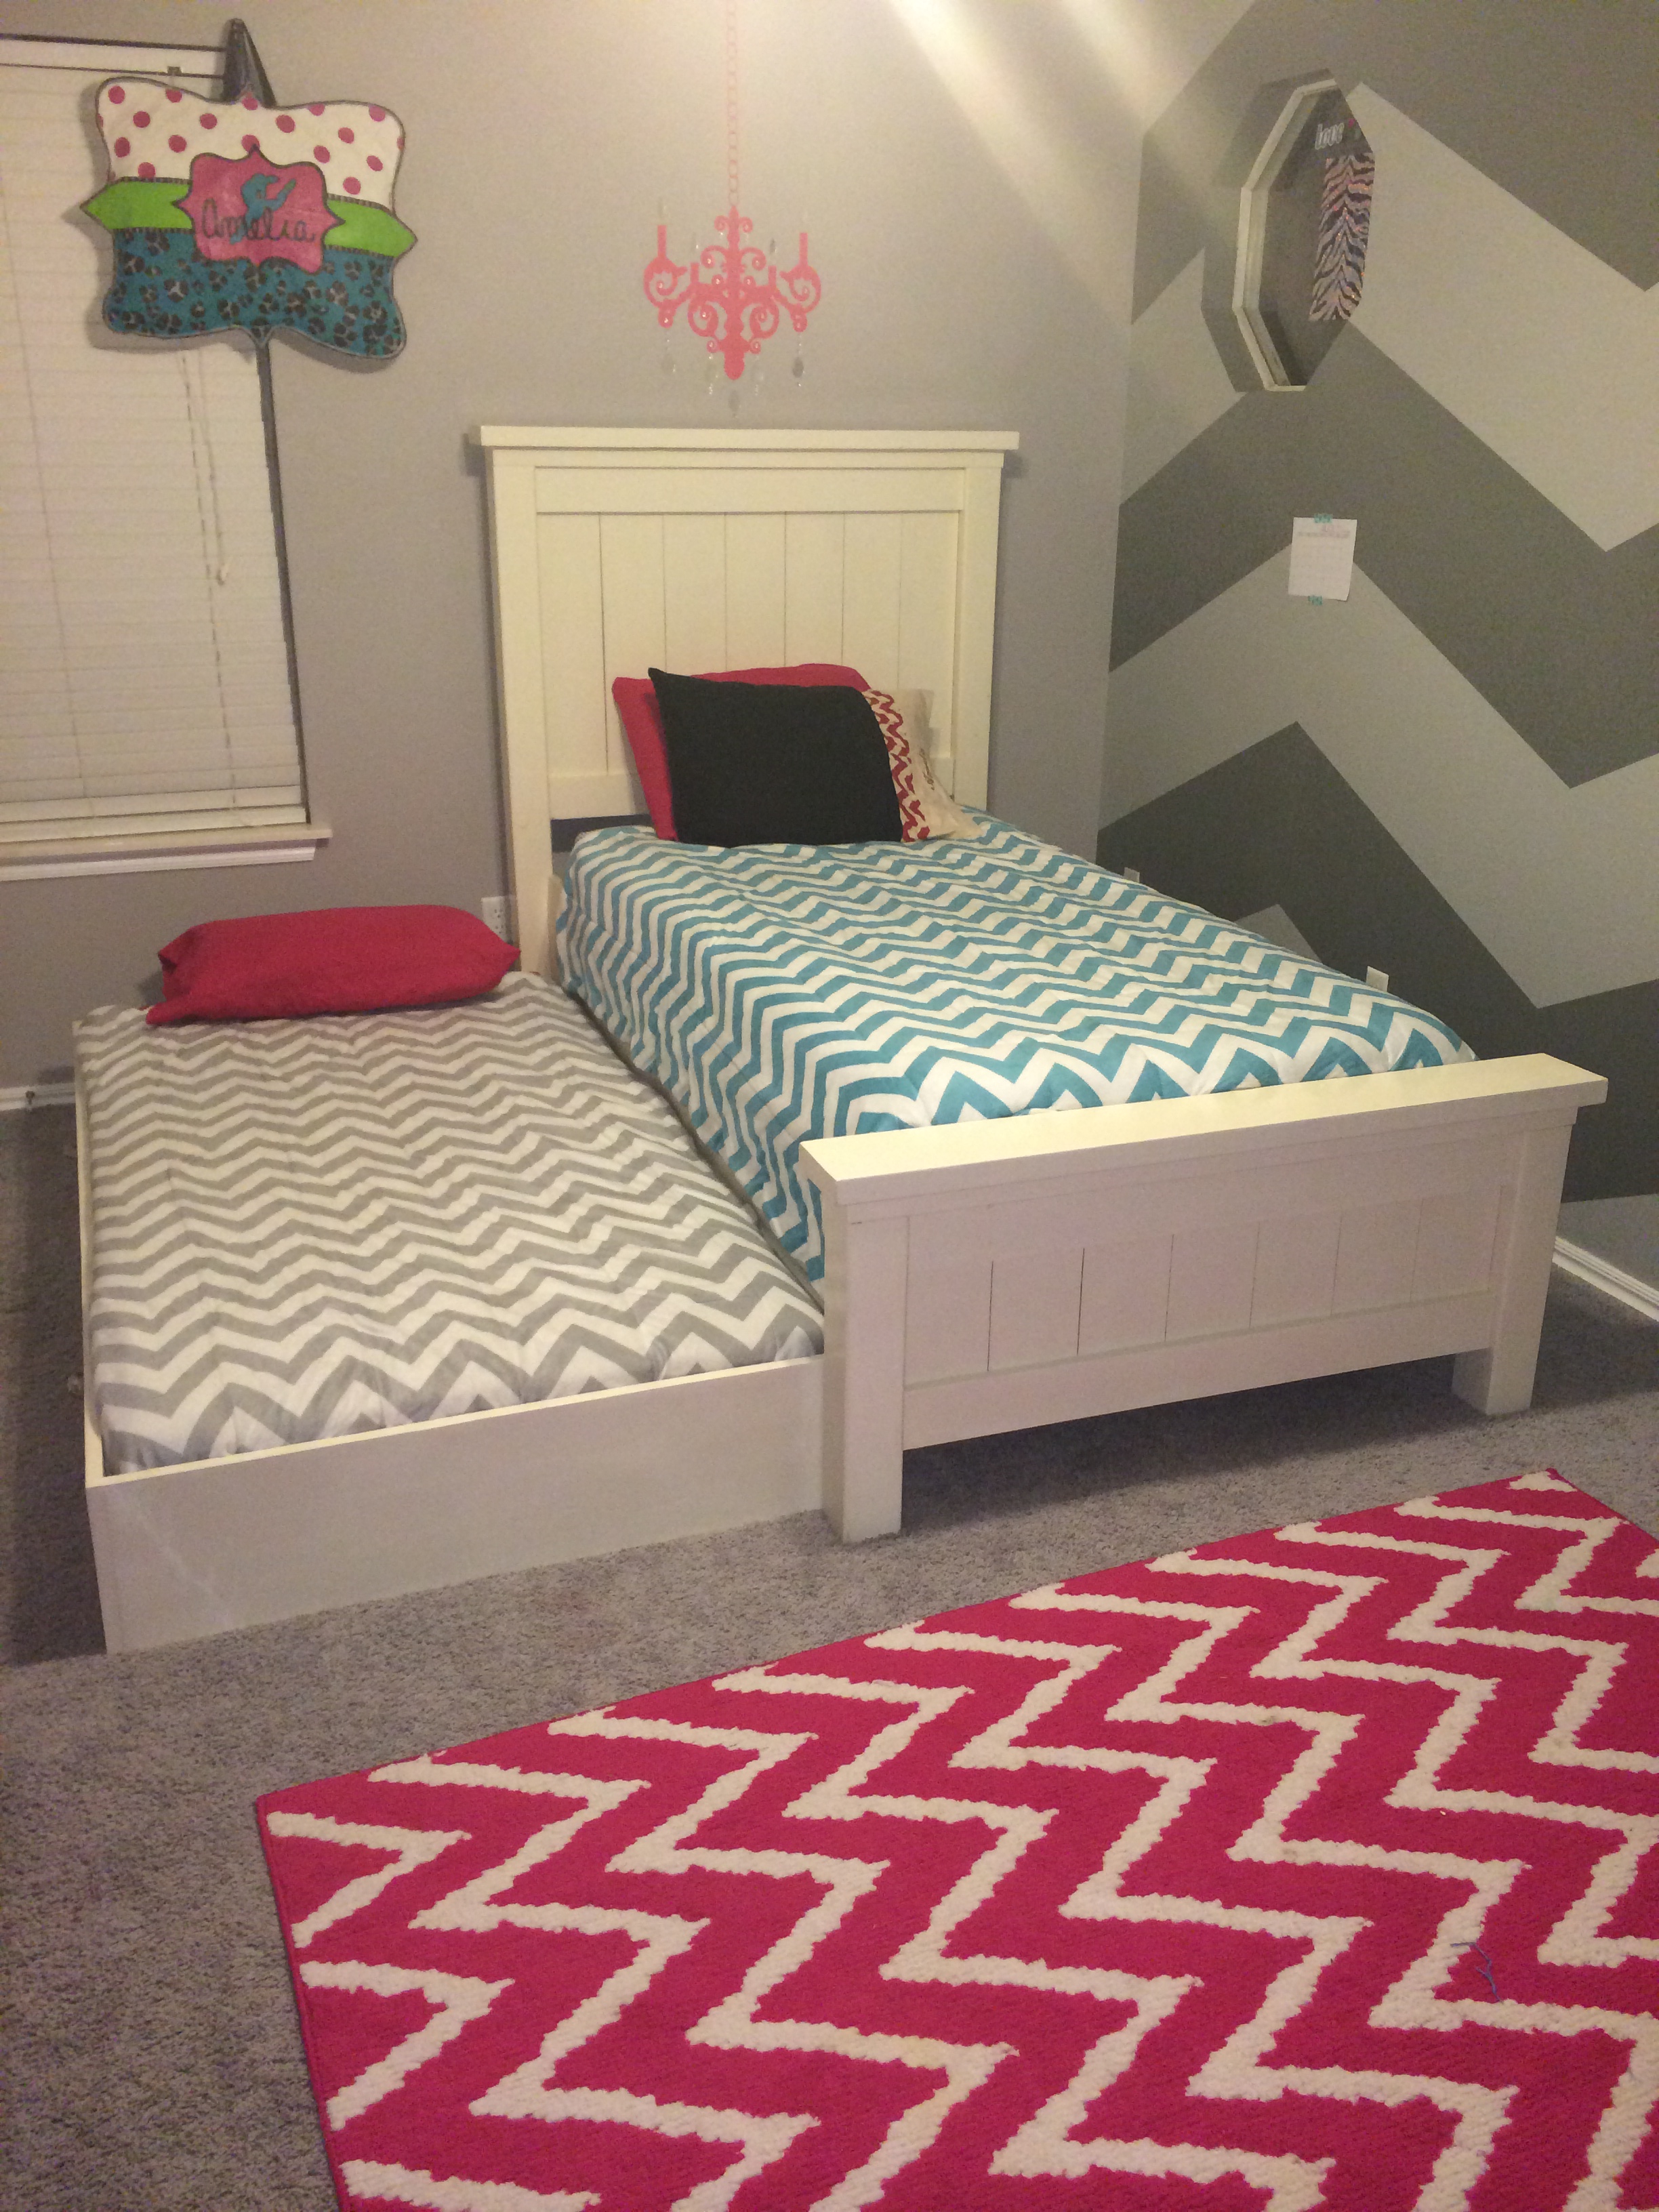
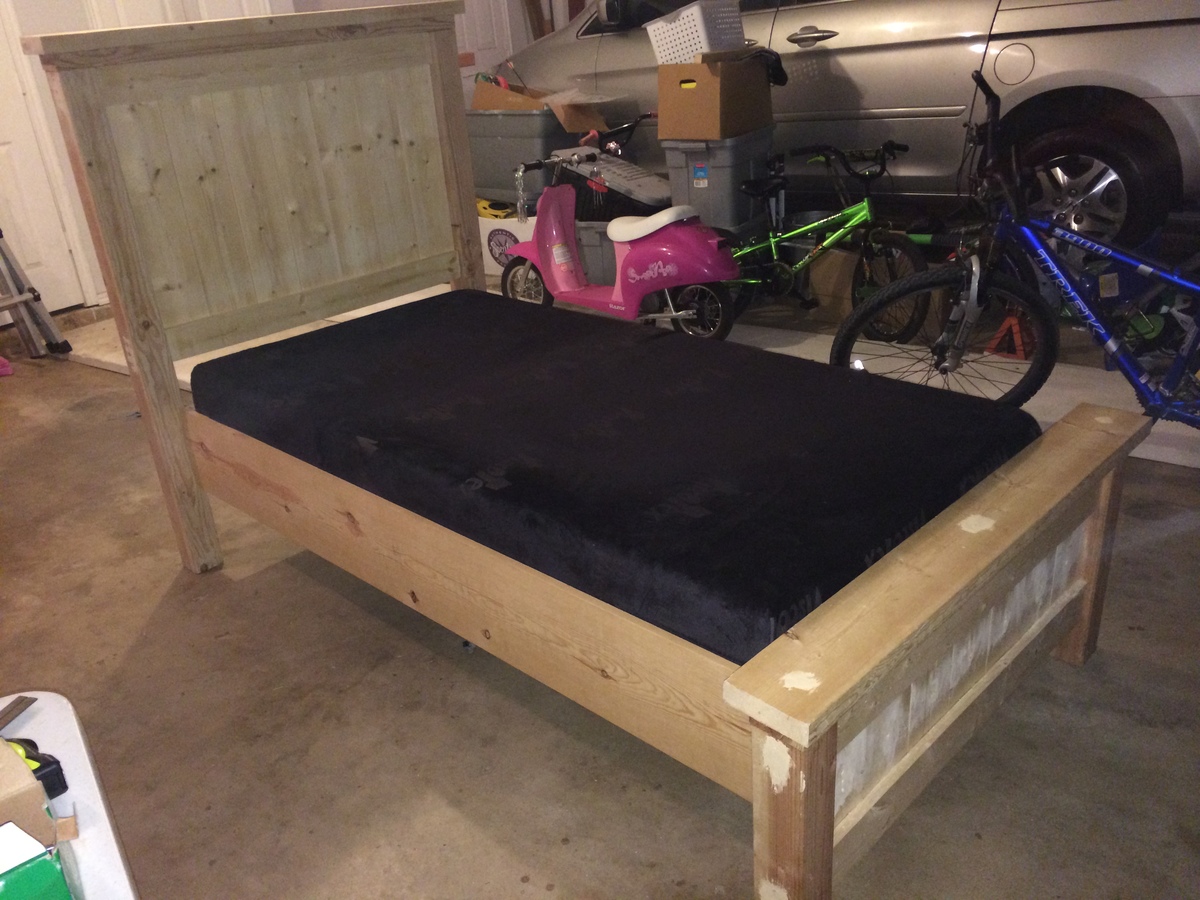
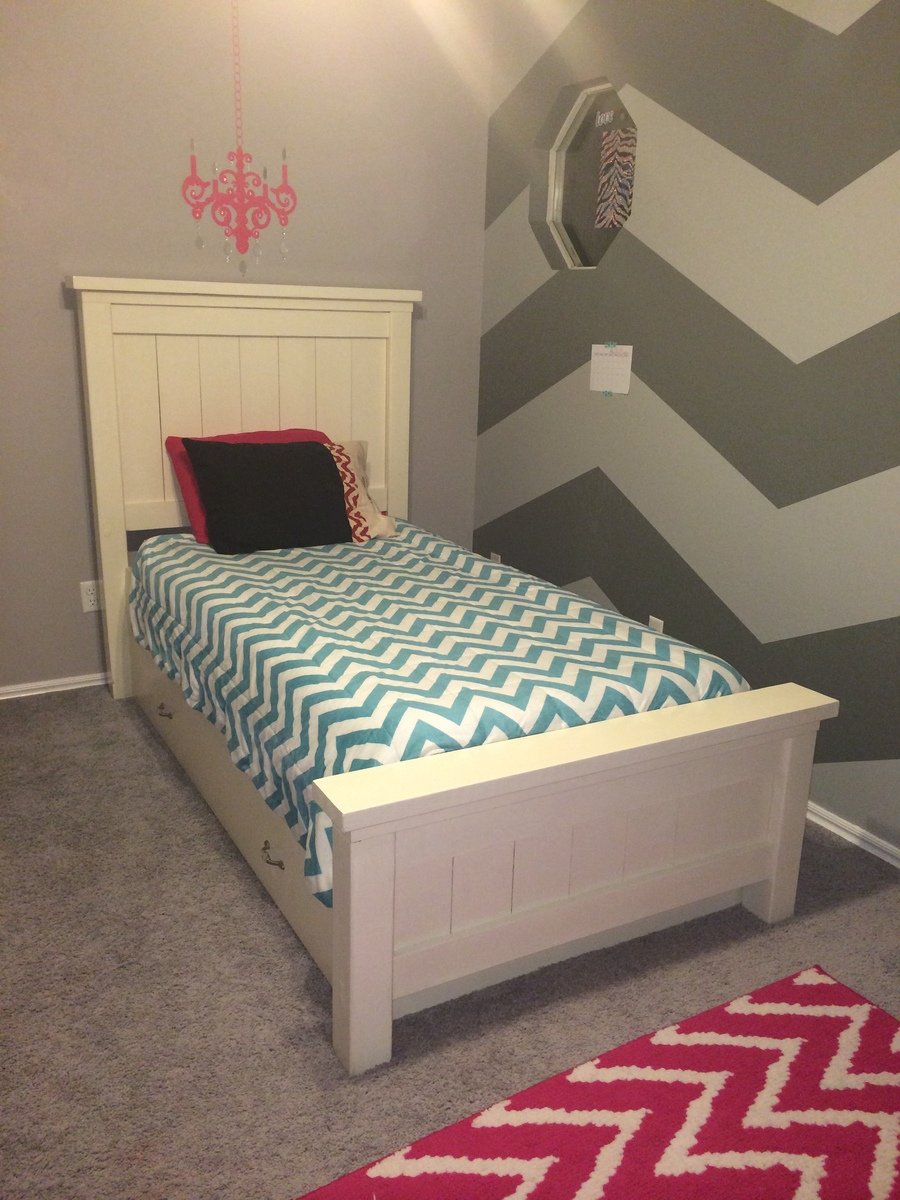
We made the traditional Twin Farmhouse bed using Ana's plans. We did modify the height of the headboard and foot board in case we decide to move the bed to under her window.
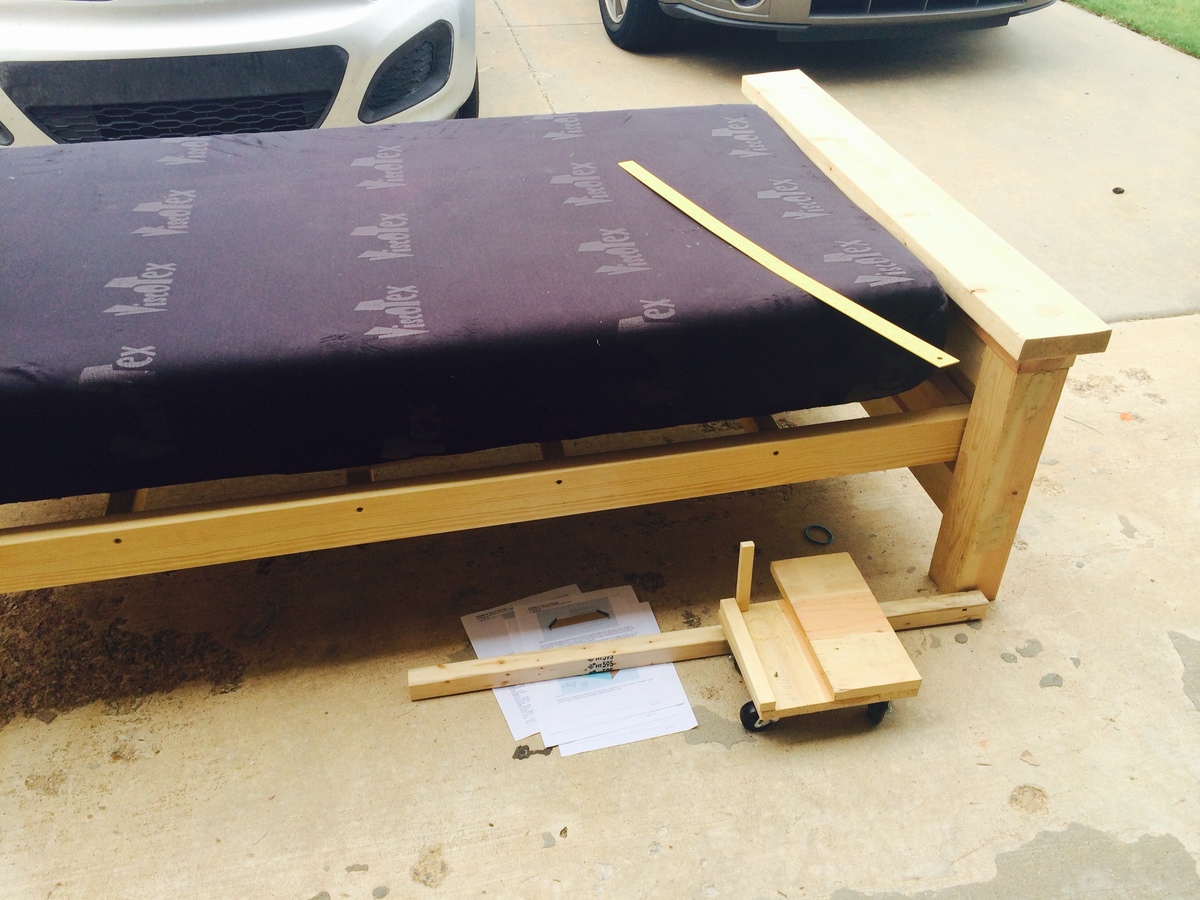
I was very particular about the sizing and placements of the sideboard/trundle. I did not want a big gap between the mattress and the trundle. Also, did not want the actual bed mattress to sit down too far into the 1X10 and look like a crib.
Very happy with the results. Thanks so much, Ana!!!
Mon, 08/18/2014 - 05:01
This looks great! I see you have carpet (as do I) did you use caster wheels? It looks like it's resting on the floor. I want t build but, I'm concerned about the ease of sliding. Tips appreciated.
Thanks in advance.
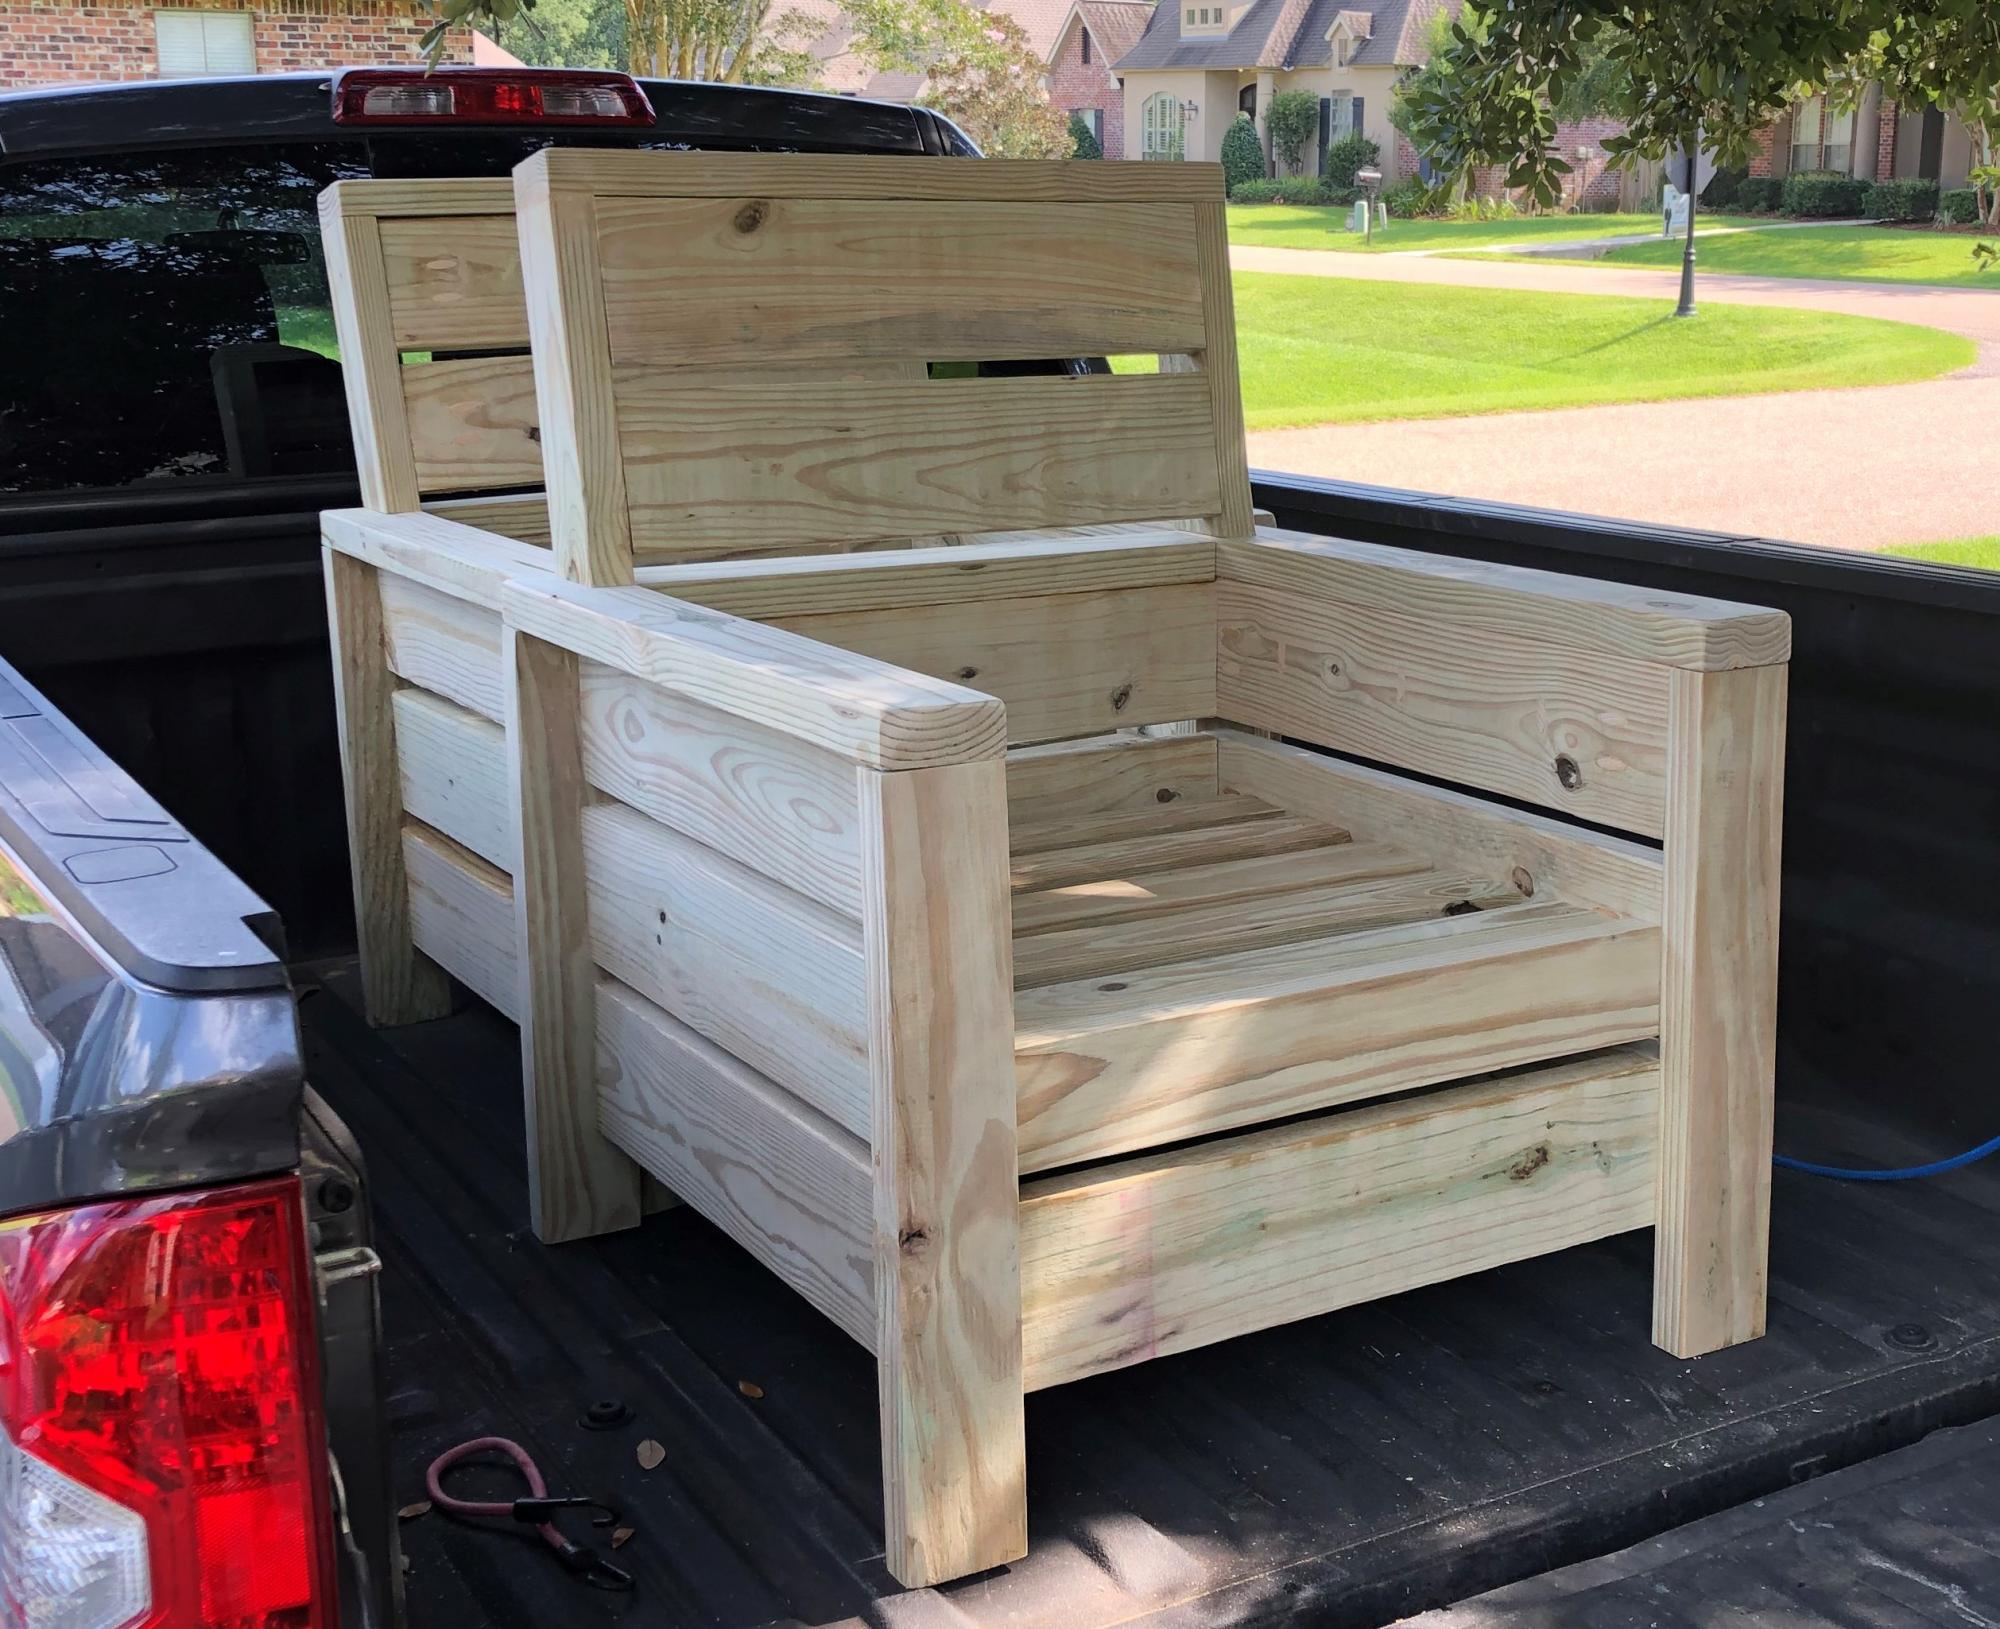
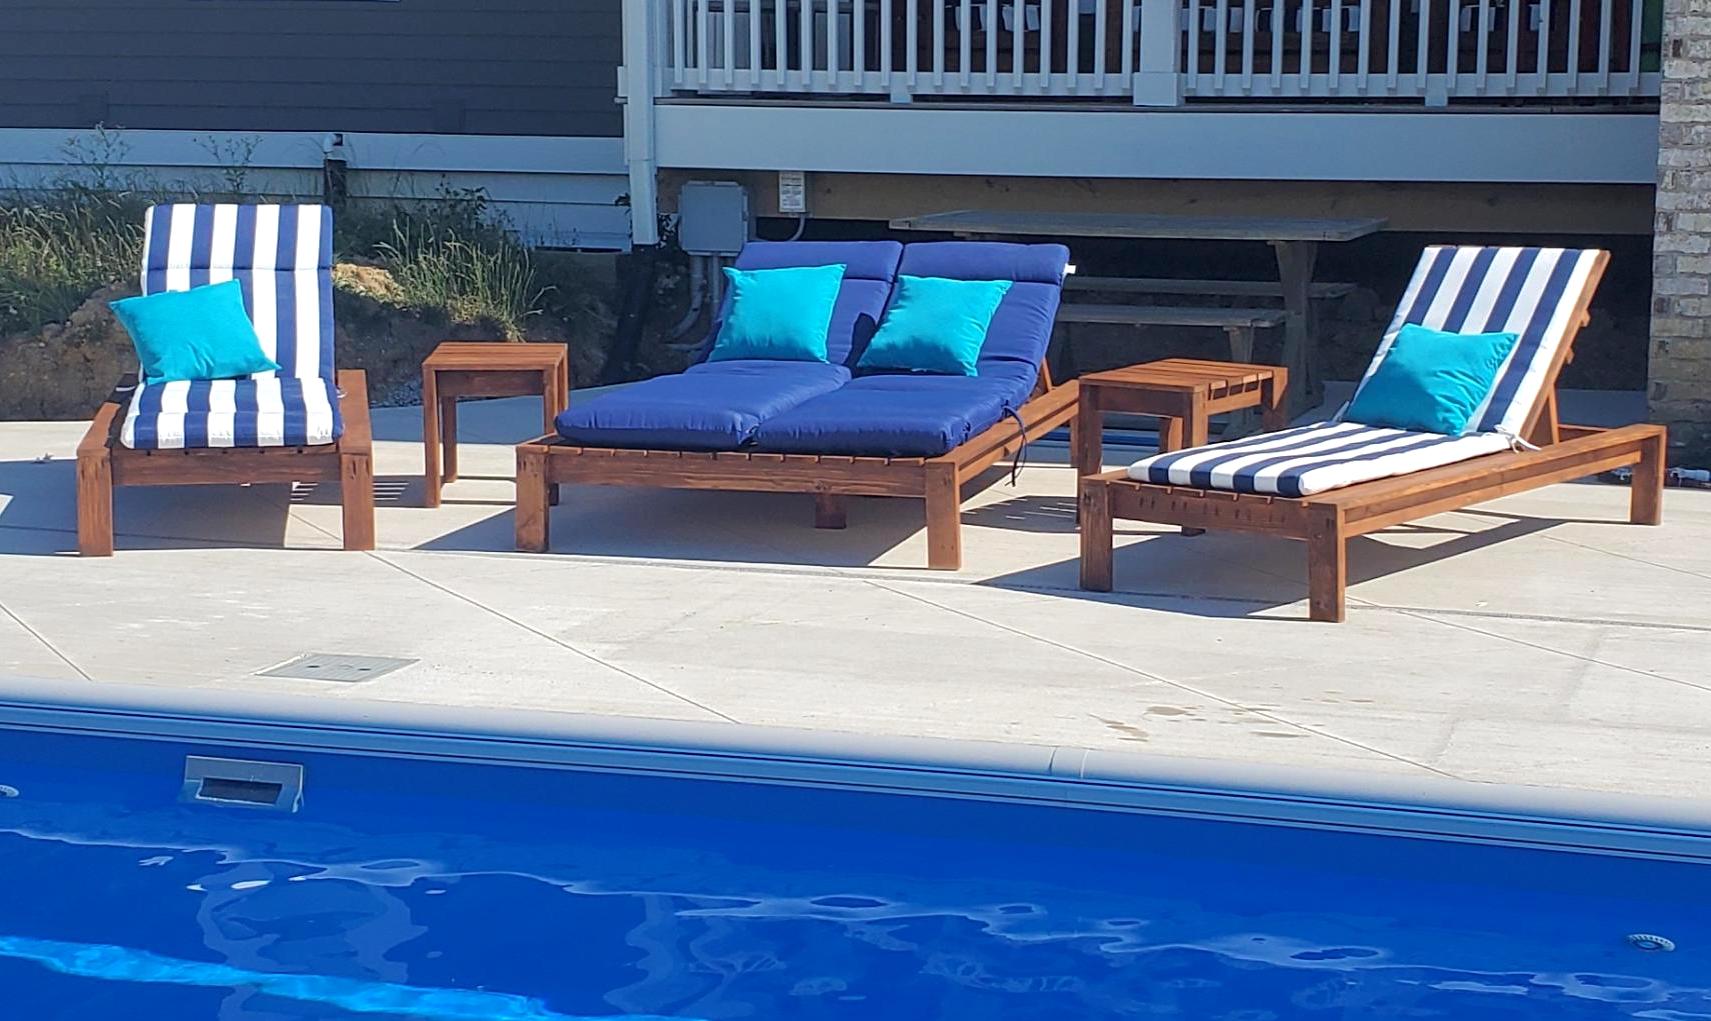
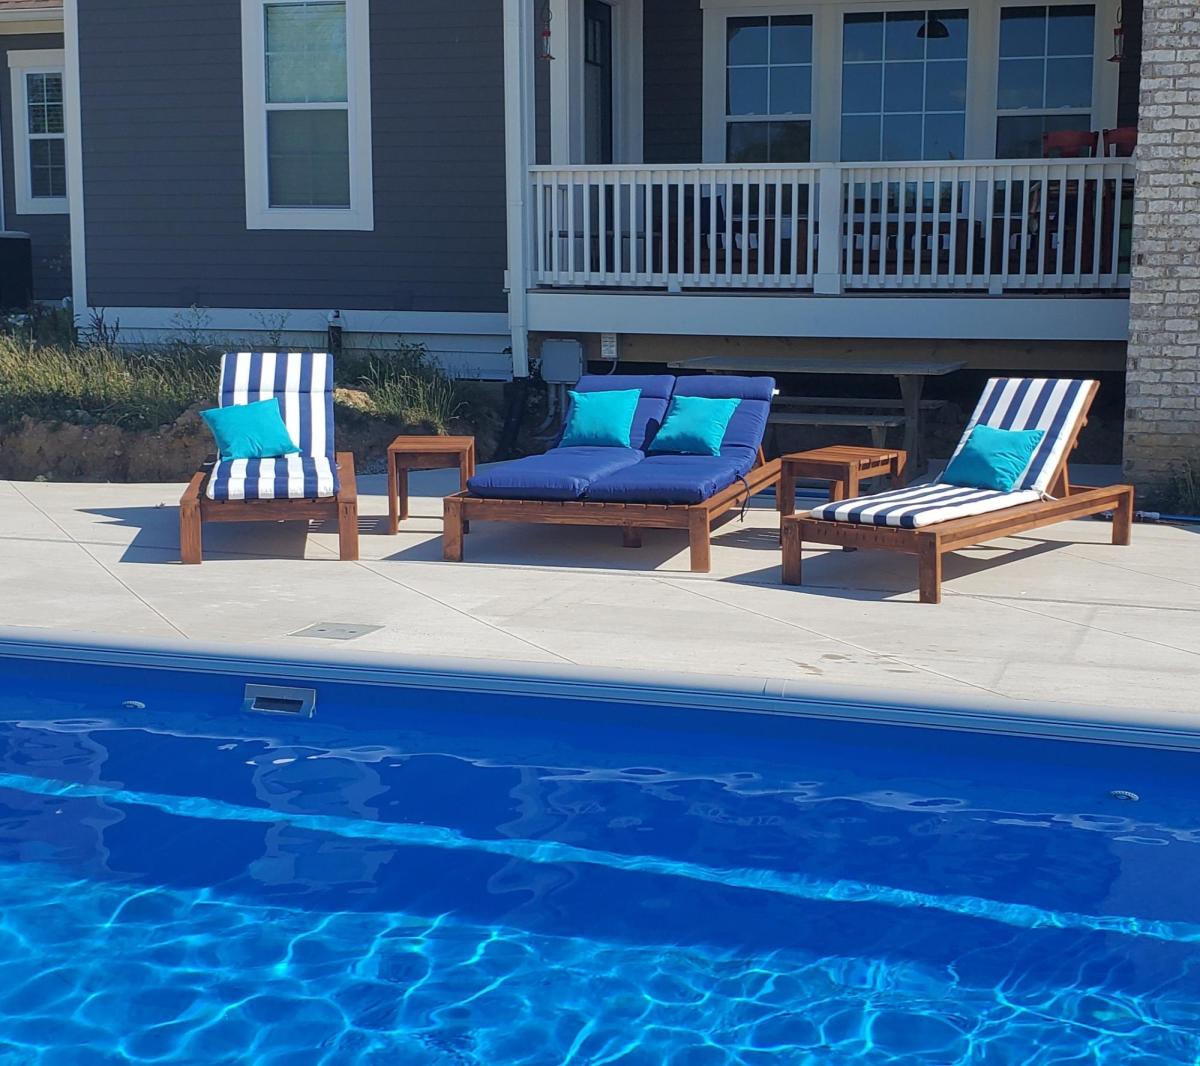
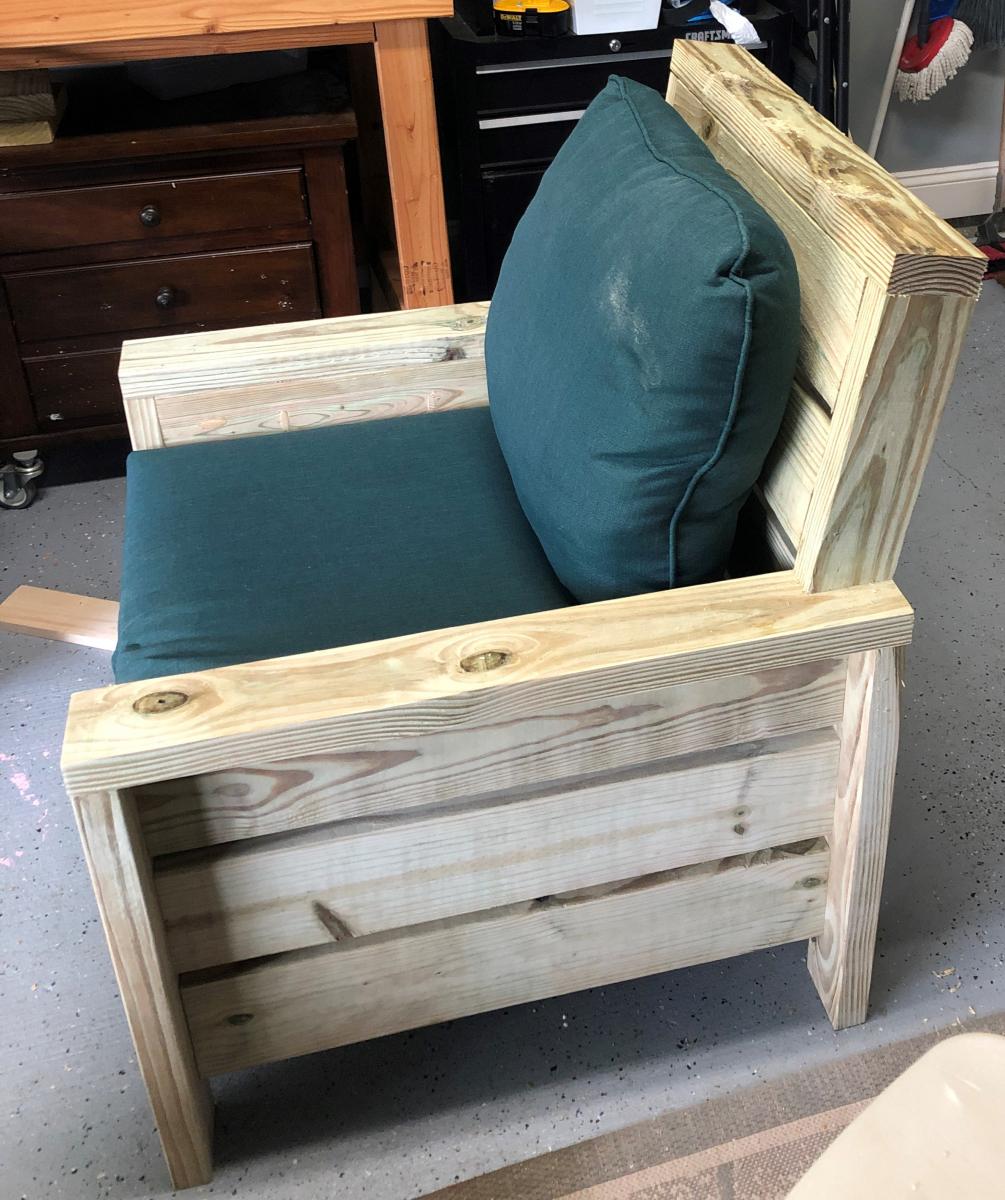
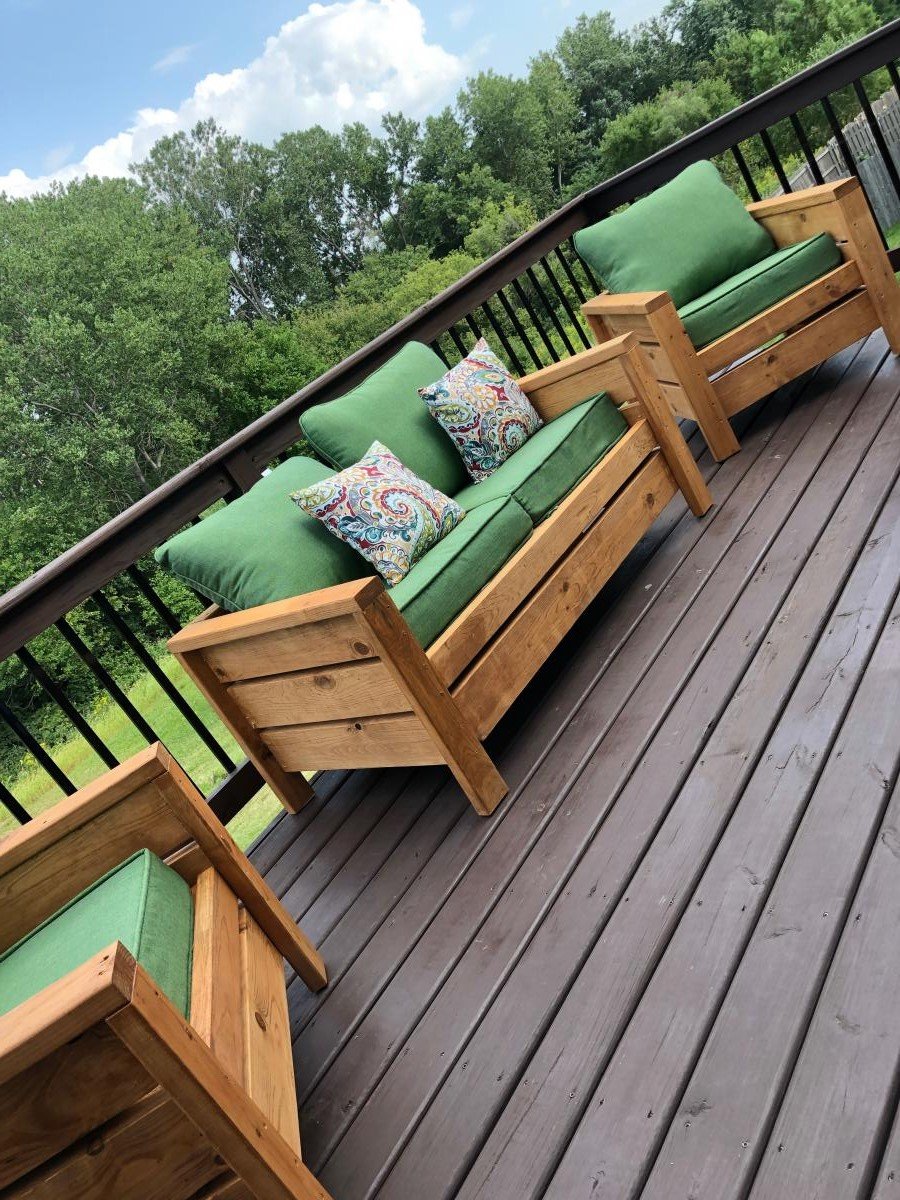
Per request of my wife, I opted to add a backrest to the chair. I feel as though my backrest design keeps with the style of the original build. I accomplished this by cutting the 2x4 vertical arms of the backrest at 13 inches with a 10 deg miter cut at the base. This allows you to keep with the 3/4" on the 2x6 backrest slats. I finished it off with a 2x4 top plate. I'd also note that I made slight modifications to the plans to accommodate 24" cushions.
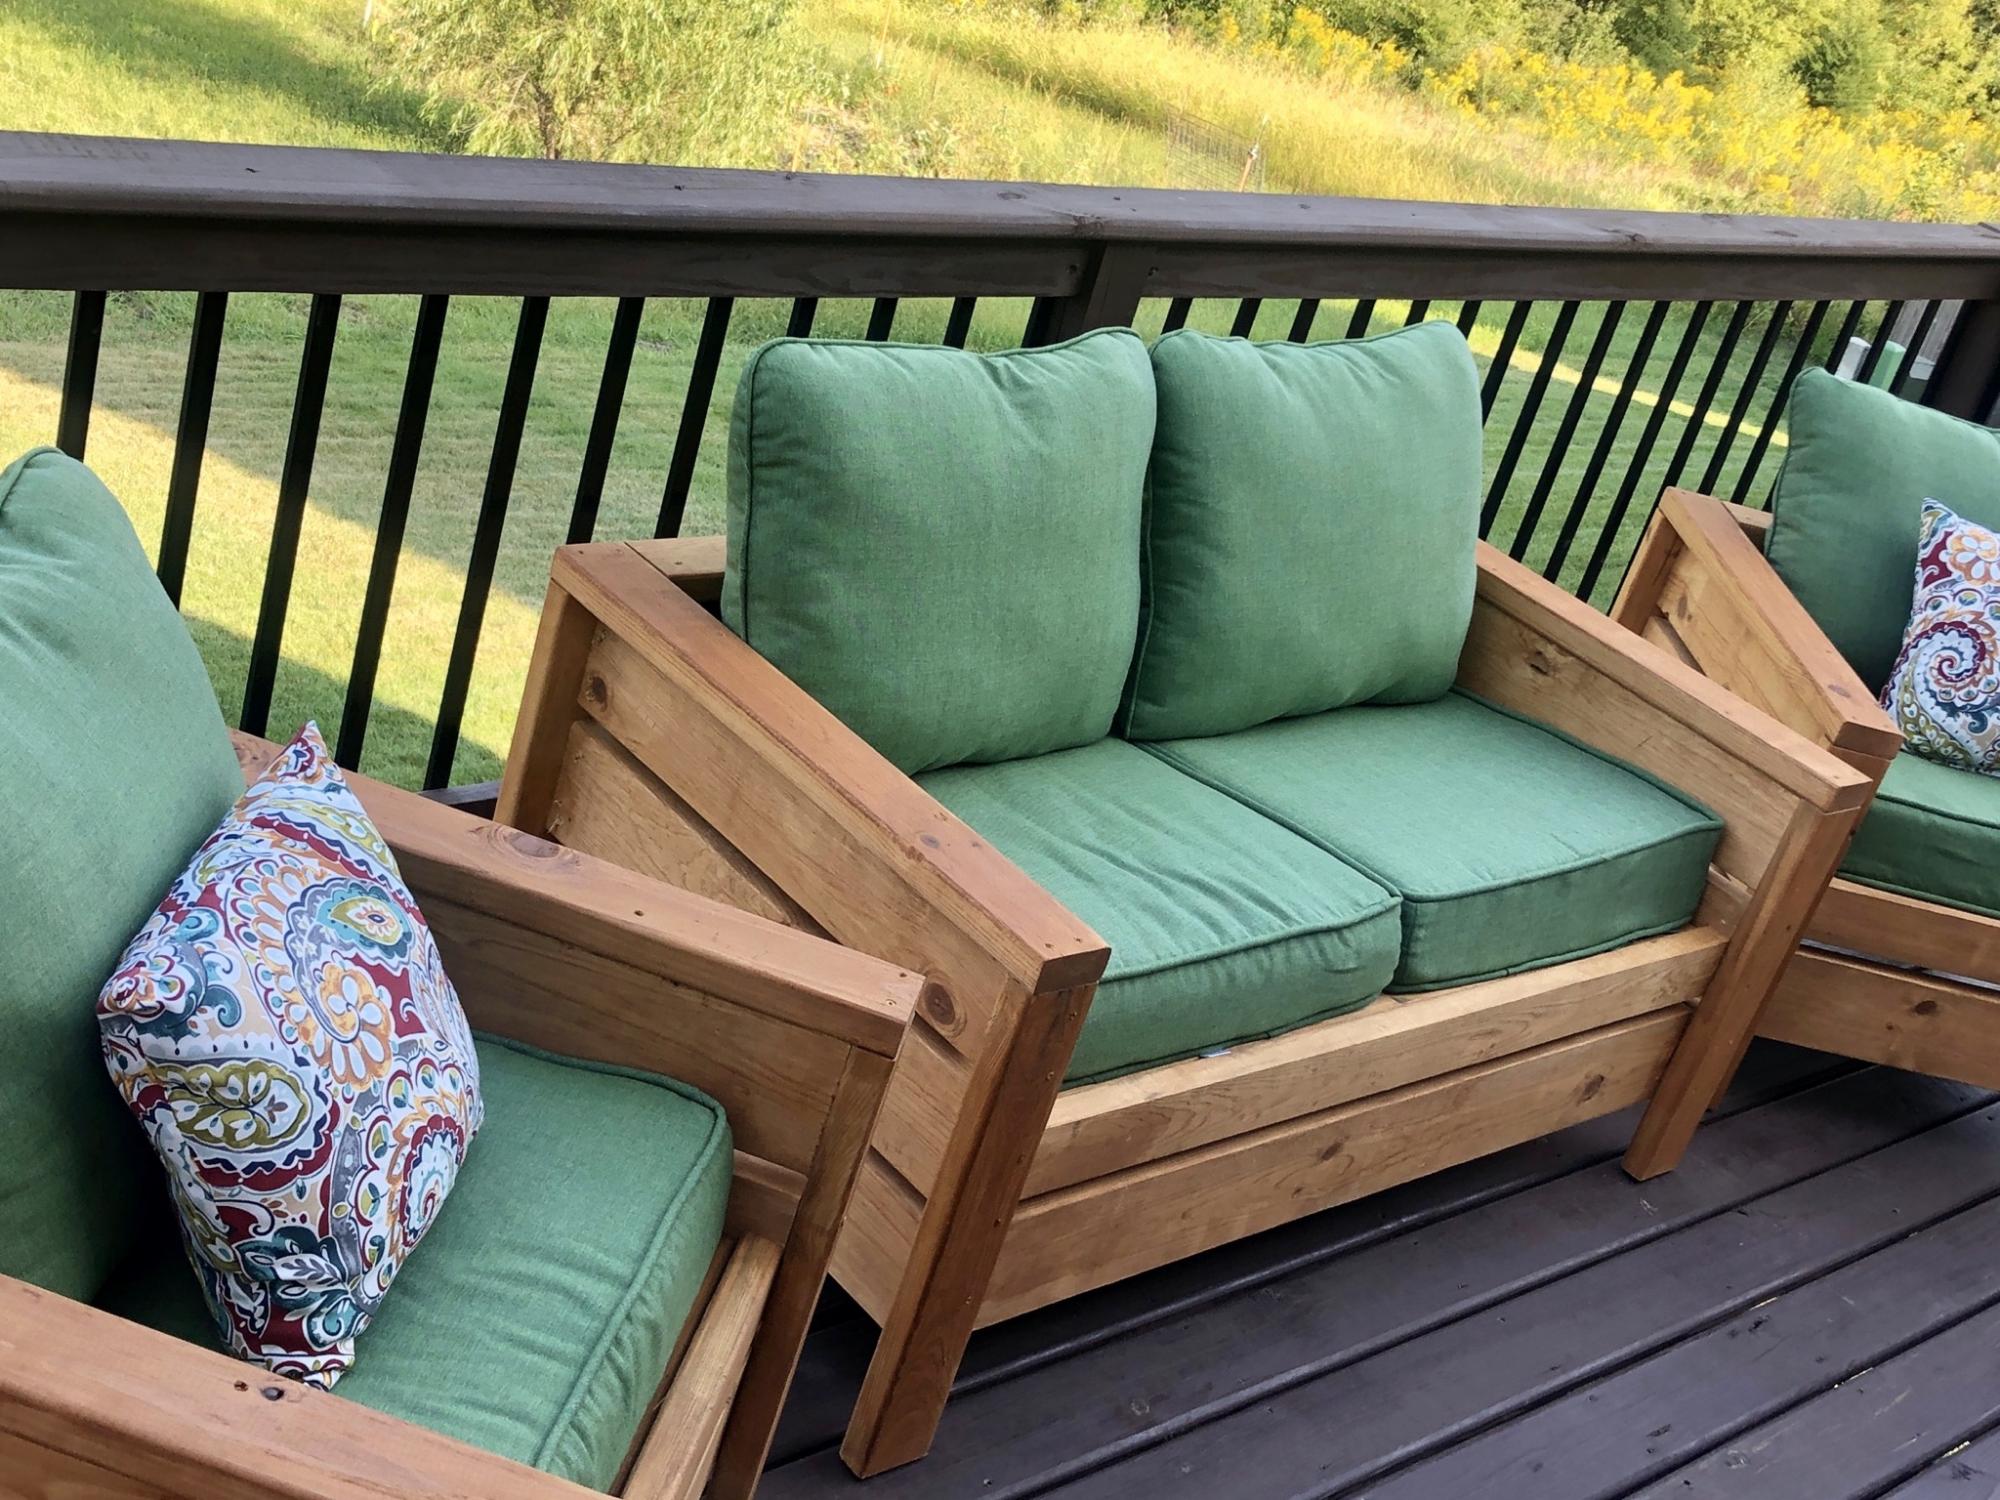
Built this over the weekend for my girlfriends sister. It was a great project and the whole family was able to work together on it, sanding and waterproofing it before assembling. The loveseat plans need a little tweaking. We ran ran the slats the same direction as the chair plans call for so we added a middle support for extra stability. We also pitched the seating down towards the back by 5* to make a more natural sitting position.
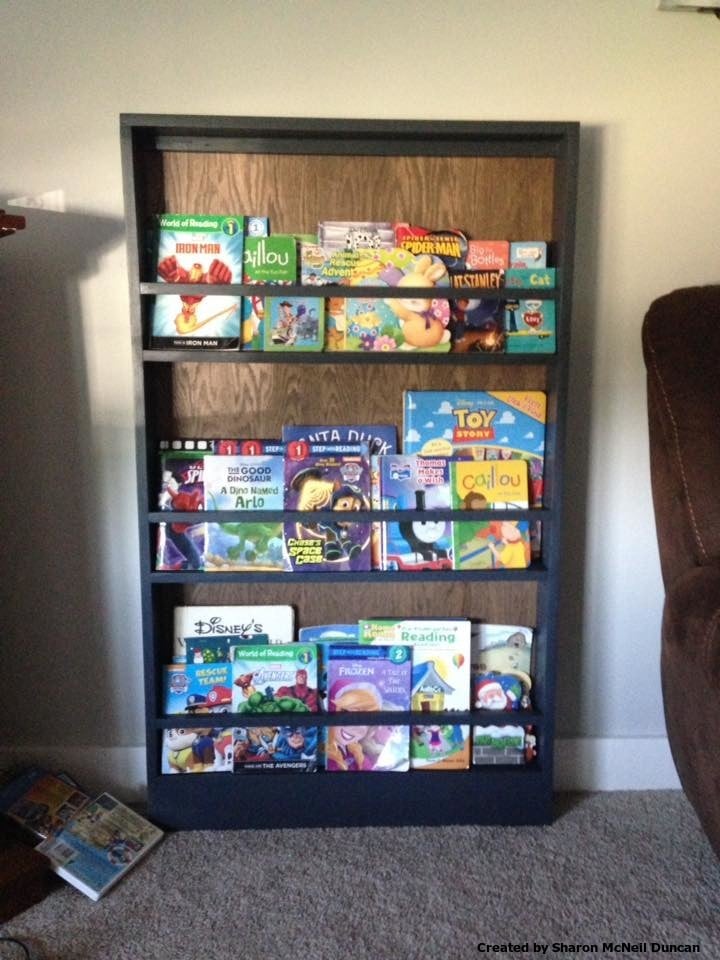
I needed a book display rack for my boys so I built this one from the plate rack plans and modified it to suit the size I needed. I actually used all scrap lumber from previous projects, so the cost was minimal.
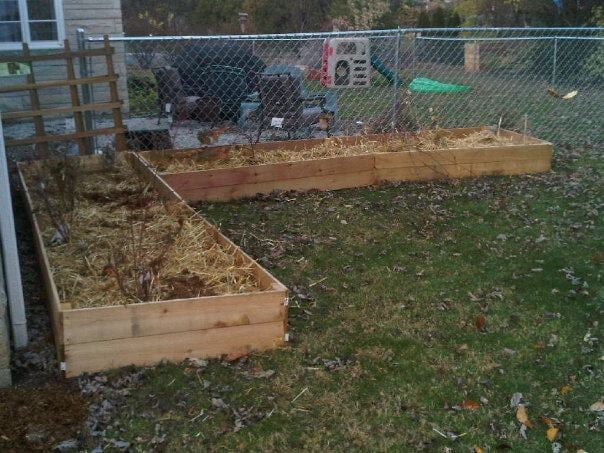
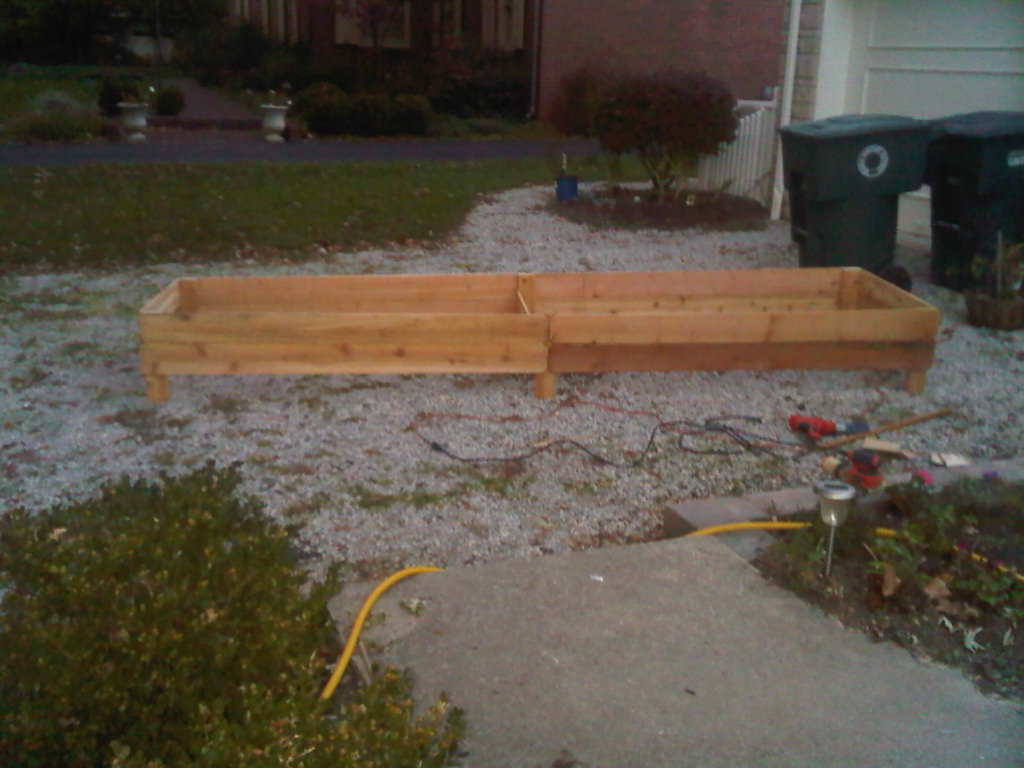
I used the same cedar fence boards, but for a large berry patch made with minimal cuts. The end boards are 1/2 the length of the long side boards. I made them 2 fence widths high - about 11 inches. Each bed is nearly 12 feet long. I joined the dogeared ends of 2 boards in the center, making a diamond cut out pattern that looked good. In order to support the tall sides, I used cedar 2x4x8 boards. Use 18-24 inch posts on each corner and at the center joint. I cut an additional board in half, affixing it to the center posts, to brace the long sides and add stability. Each box is approximately 3 feet wide, 12 feet long, and 11 inches tall. You'll need 8 fence posts for the long sides, 2 for the short sides, and 1/2 for the brace - you could use a different piece of wood for this, but the cedar fence posts are such a deal. You'll also need approximately 9 feet of cedar 2x4 for the corner posts - I bought 8 foot lengths and cut each into 2 foot posts for stability. The cost was around I'll add 2x4 posts in the spring and put a trellis behind the raspberries. If the birds start to steal my blueberries, I'll add metal or wooden corner posts that will support fruit netting. We're planting strawberries around the base of the larger fruit bushes. The 11 inch sides should keep rabbits from invading. If they are persistent, I'll add a few inches of chicken wire around the top edge. This made the equivalent square footage of 4 of Ana's original $10 beds.
Fri, 12/07/2012 - 17:57
This was similar to the construction I used for a compost bin - will post that next!
Sun, 12/09/2012 - 10:40
I'm putting together several L-shaped raised beds out of 6x6s with the internal walls being 2x6s. This gives me encouragement. I really like the look of this! Thanks.
Sun, 12/09/2012 - 10:42
I'm putting together several L-shaped raised beds out of 6x6s with the internal walls being 2x6s. This gives me encouragement. I really like the look of this! Thanks.
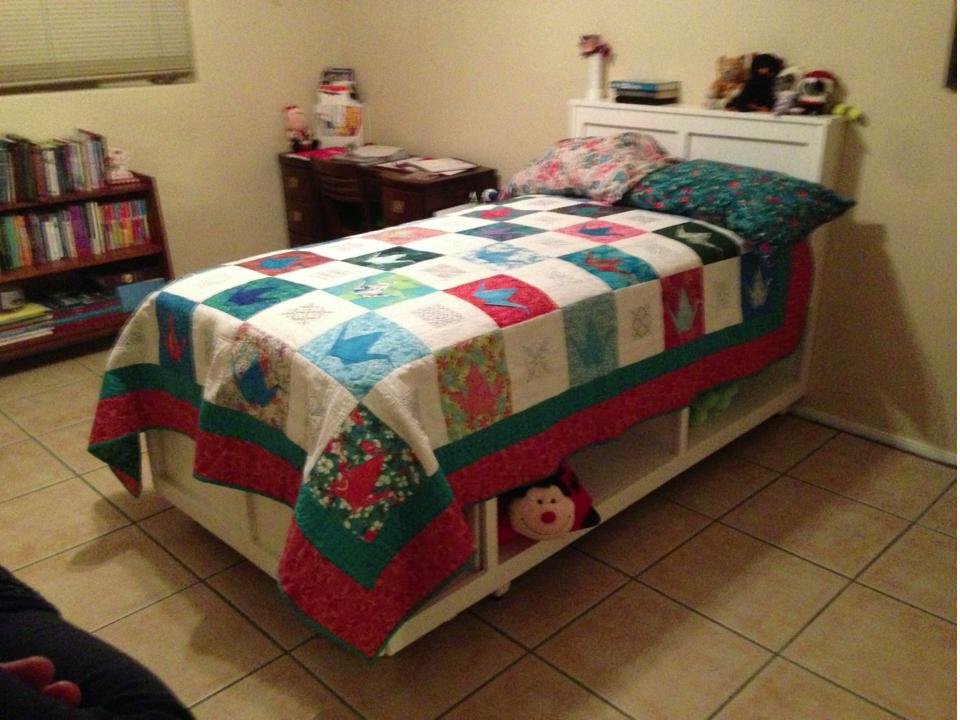
Our daughter was in desperate need of storage in her room, so we decided to build her a storage bed. This was our first build, and we had many issues that we've chalked up to "learning curve," but we're pleased with the end result anyway.
We used the Twin Storage Bed plans to start, but we modified the end box so that the sides would have all open storage, and we could build a low footboard. We liked the low footboard on the Farmhouse Bed, but our daughter did not want the crown on the footboard, so we worked up a simpler design. We kept the 3-box design of the Twin Storage Bed instead of just making the two side boxes longer so that the end box has deep storage (we kept the center divider for support, but the storage is 19" deep). The footboard is low enough that it doesn't extend over the mattress (our daughter's request), but it still gives the bed a finished look and keeps the mattress from sliding off.
When we built the two side boxes and the end box, we made the mistake of cutting all of the pieces at once, before assembly. When we went to assemble, we discovered that many of the boards had issues (warps, the boards were not the same width all the way through, our cuts weren't straight -- we had trouble figuring out how to get straight cuts with the circular saw at first). We didn't have money to buy all new wood and start over, so we went ahead and assembled the boxes, and I spent two weekends fixing as best I could (lots of filler and sanding). The boxes ended up being somewhat different heights, so even though each box was level on its own, we were going to have a problem getting them all the same height together. So, we decided to add feet with leveling footers. We also ordered a set of bowed slats from Ikea to help make sure the bed would be level and comfortable.
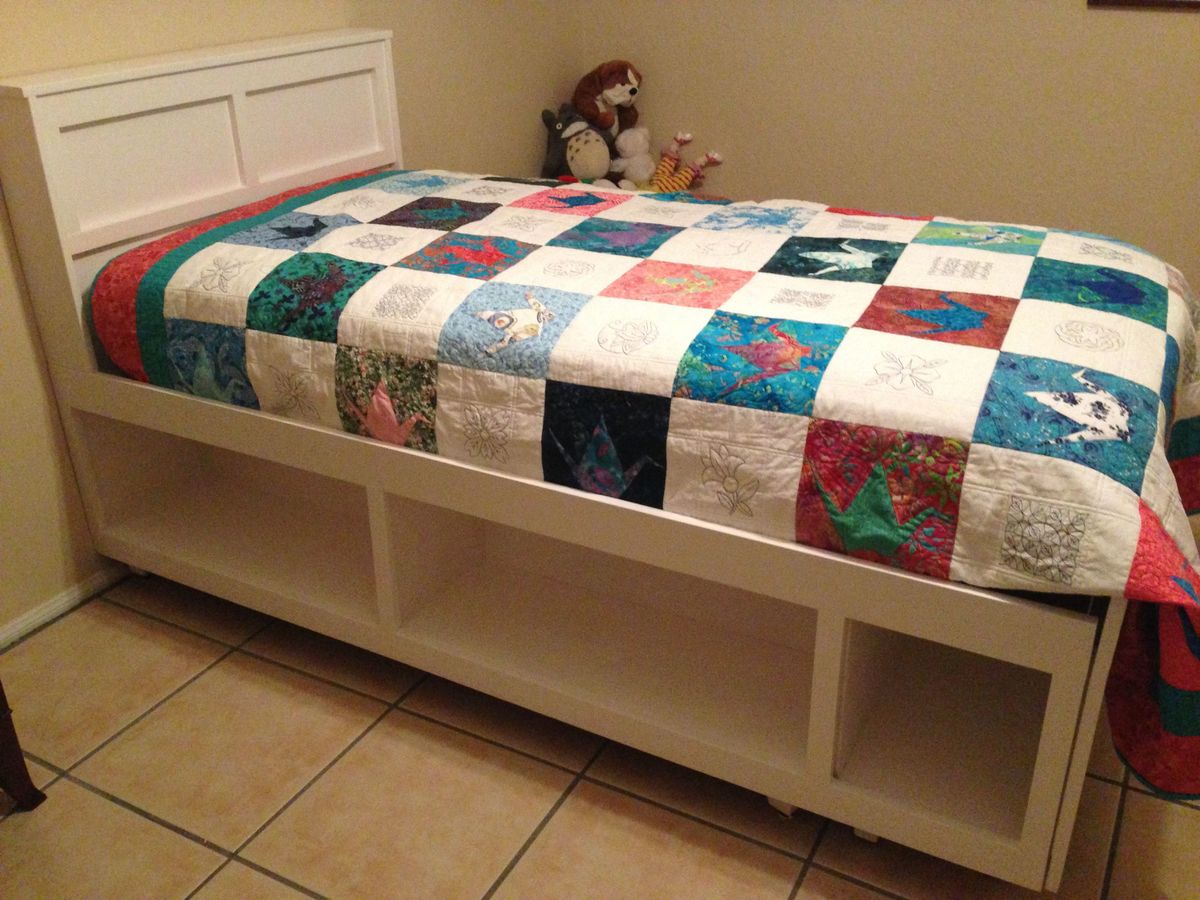
The storage cubbies all turned out the right size on the inside despite our assembly troubles, so we can fit 12 fabric storage cubes in the cubbies.
We added trim to the side boxes to give it a finished look and to help keep the mattress from sliding off the bed. To make it possible to move the bed later, we decided to build the trim on the side boxes and slide the end box into place. We attached the boxes together using L brackets.
The footboard is made out of plywood, trimmed with 1X6 at the top, 1X3 on the bottom trim, and and 1X2 vertical trim.
The side trim is made out of 1X4 for the top trim centered (2" overhang below and 2" raised above the side of the box), 1X3 horizontal trim for the bottom of the box (top edge of the bottom trim is flush with the bottom of the cubbies), and 1X2 trim for the vertical pieces.
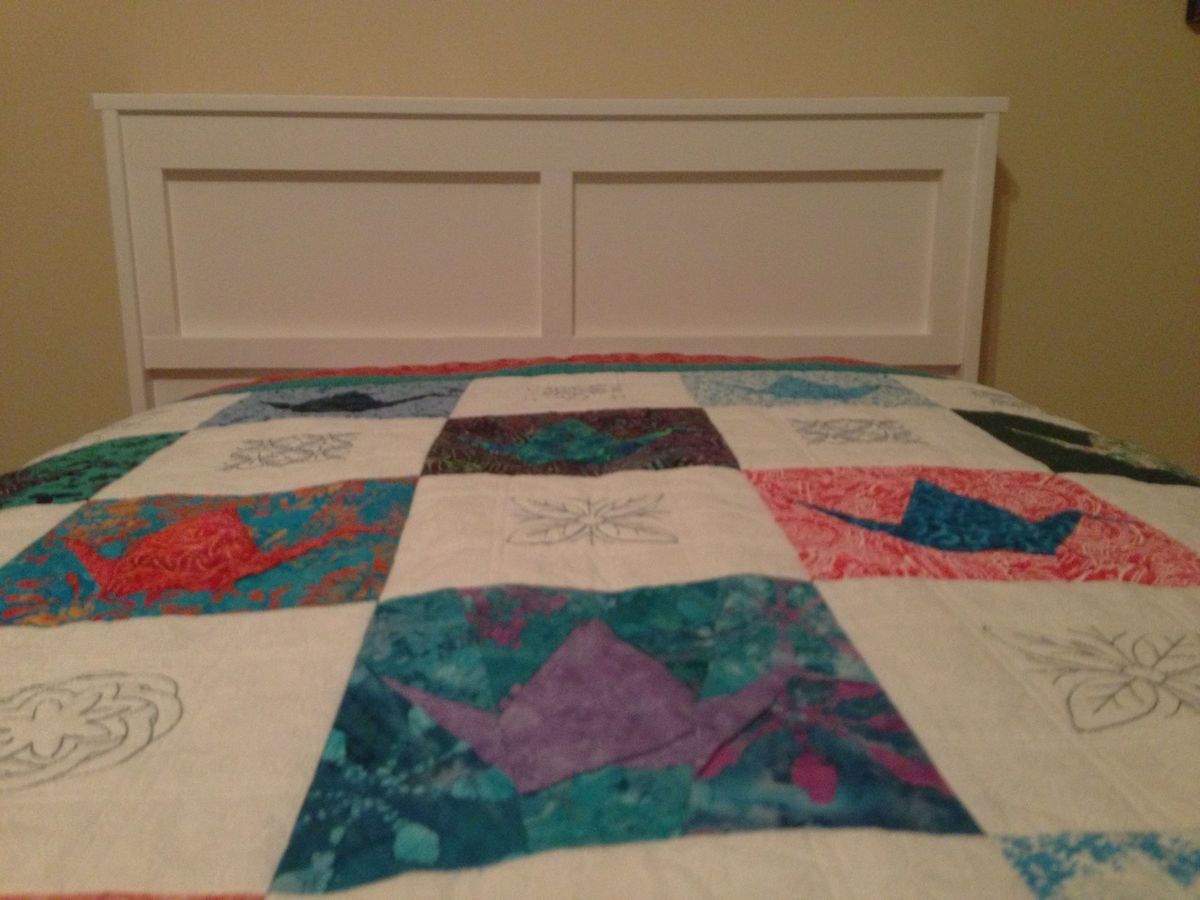
The headboard was our own creation. Our daughter did not want a large headboard, so we wanted to make something that was just enough to keep her pillows from sliding off the bed and to provide a ledge to put her glasses and book. When we first tried the mattress on the bed, there was a 5" gap between the head of the mattress and the wall, so we built a headboard "box" that sits on and is attached to the two side boxes. The mattress now fits without gaps so that the pillows won't slip off the head of the bed.


I tried to post photos of my progression of work, but couldn't get them to post. The instructions to build this were simple and easy to follow. I was able to construct this by myself in about 4 hours total. I am getting ready to make a 2nd for my craft shed. Thank you for sharing this!
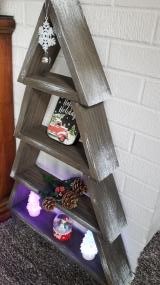
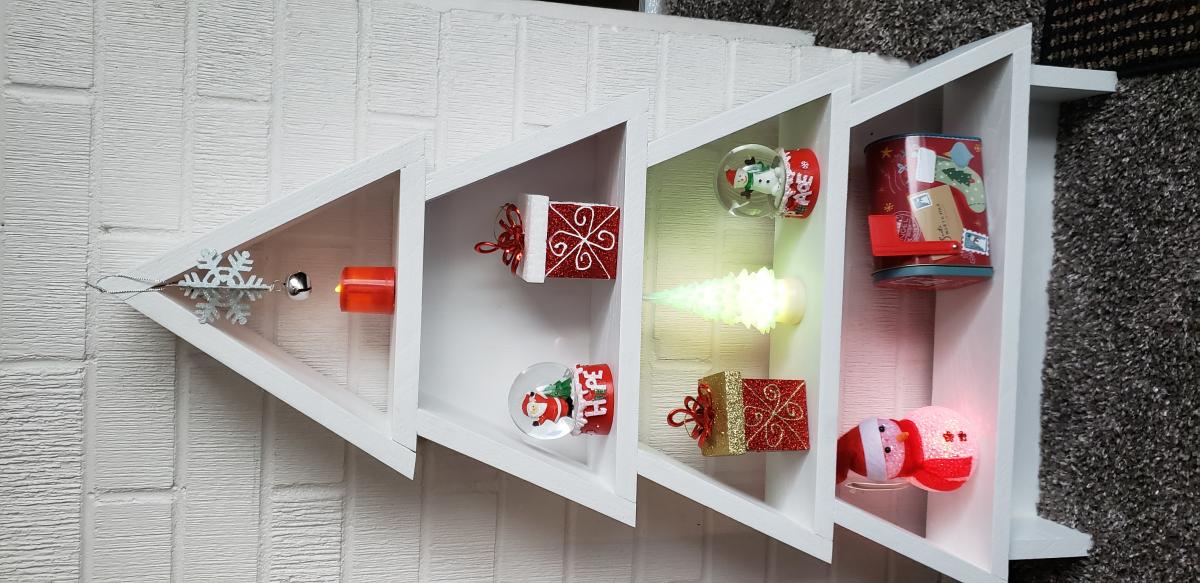
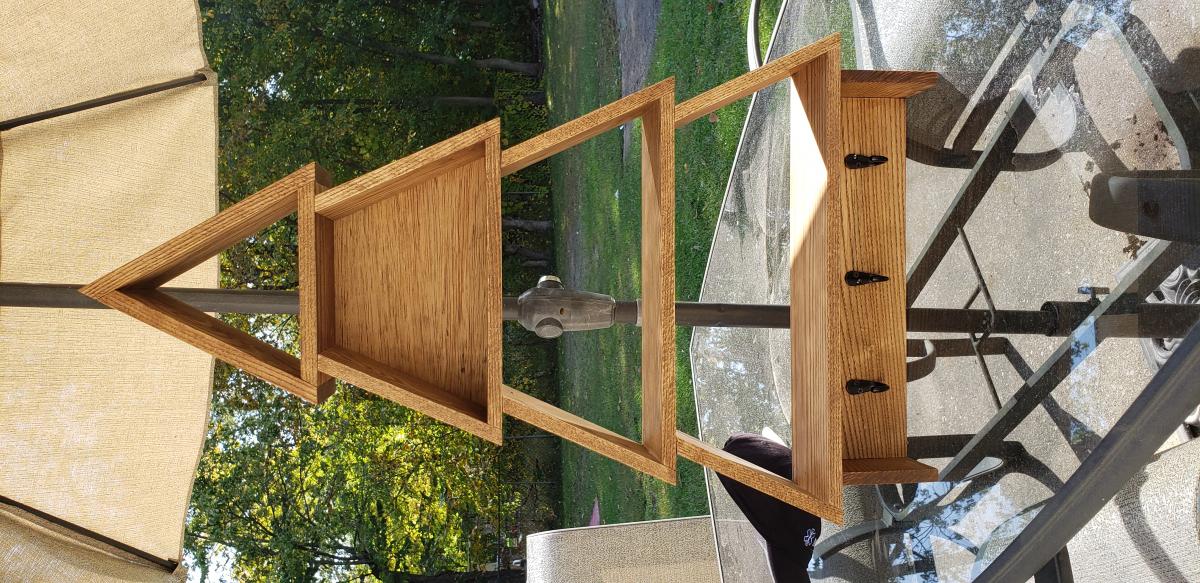
I am new to woodworking and saw your plans for this Christmas tree shelf and I had to try it! I made a few with ash and maple wood, but then I came across some barn wood and loved how much it resembled natural tree bark. I decided that it would look even better with snow accents. I thought you would enjoy seeing a twist on the original plans.
Sun, 10/11/2020 - 17:51
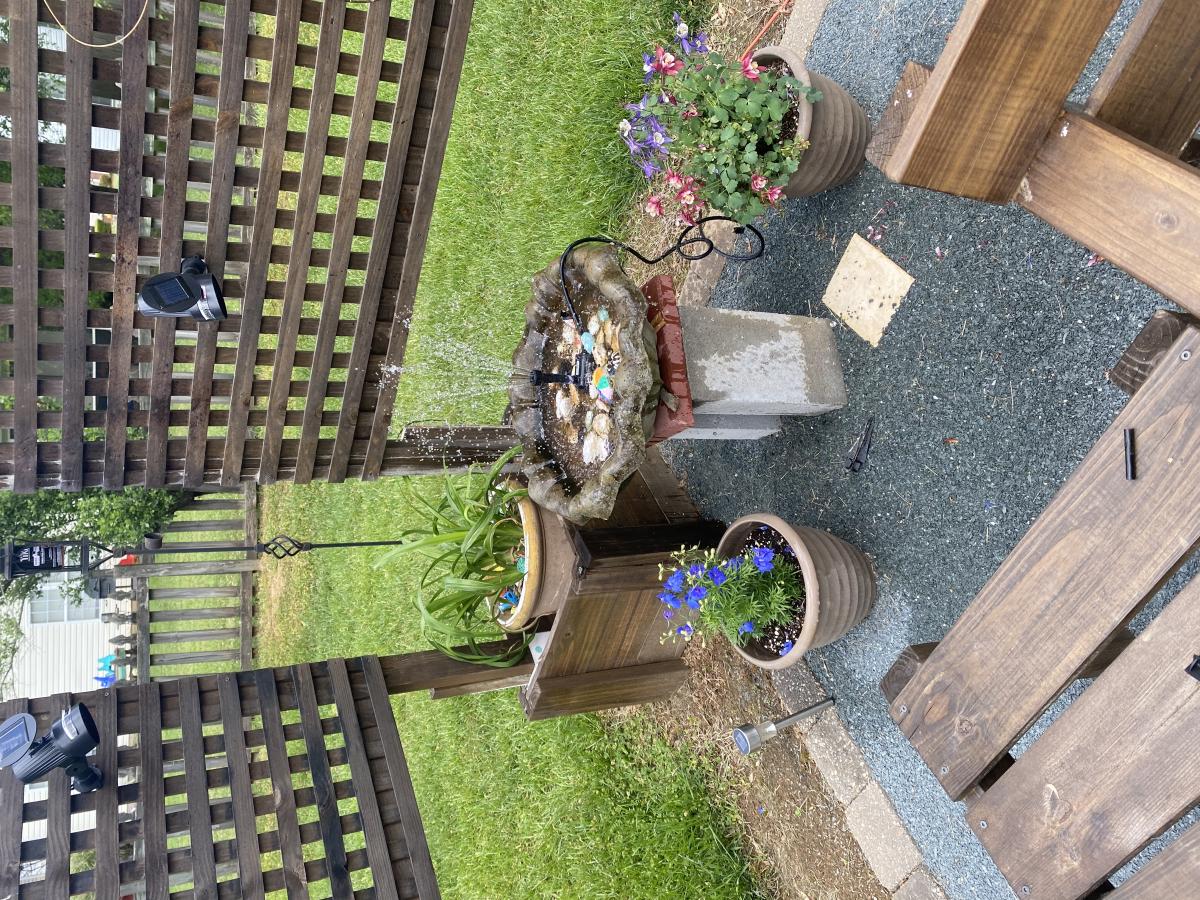
I uploaded these pics and I have no idea why they are sideways?!
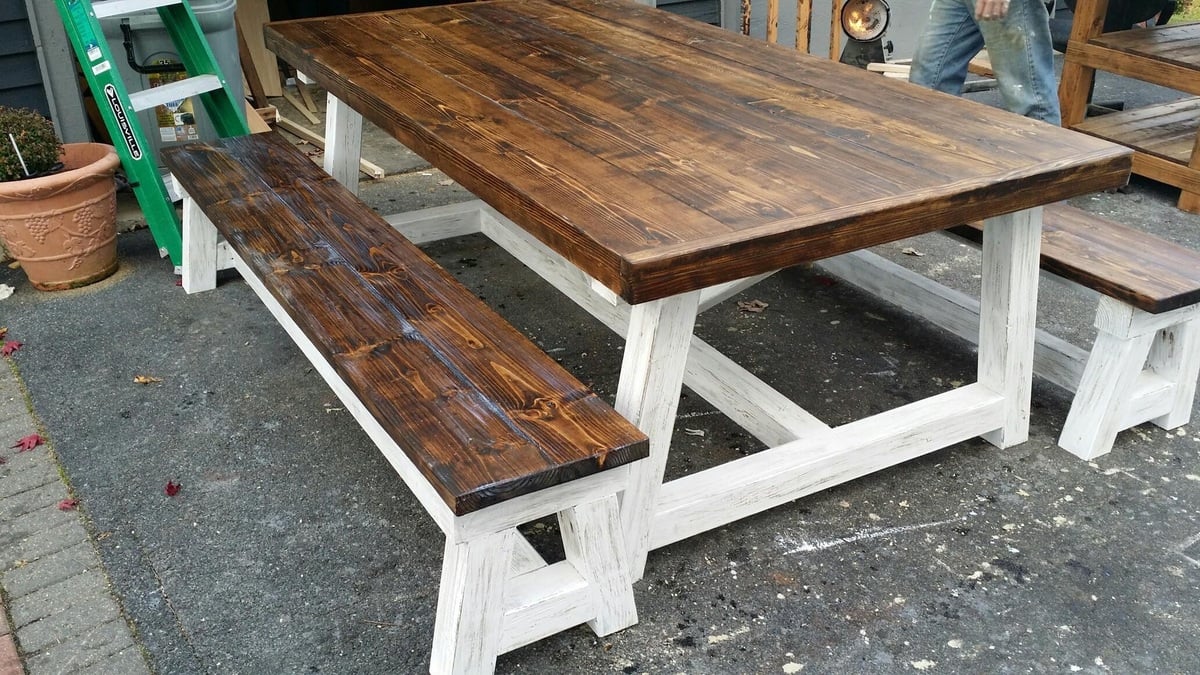
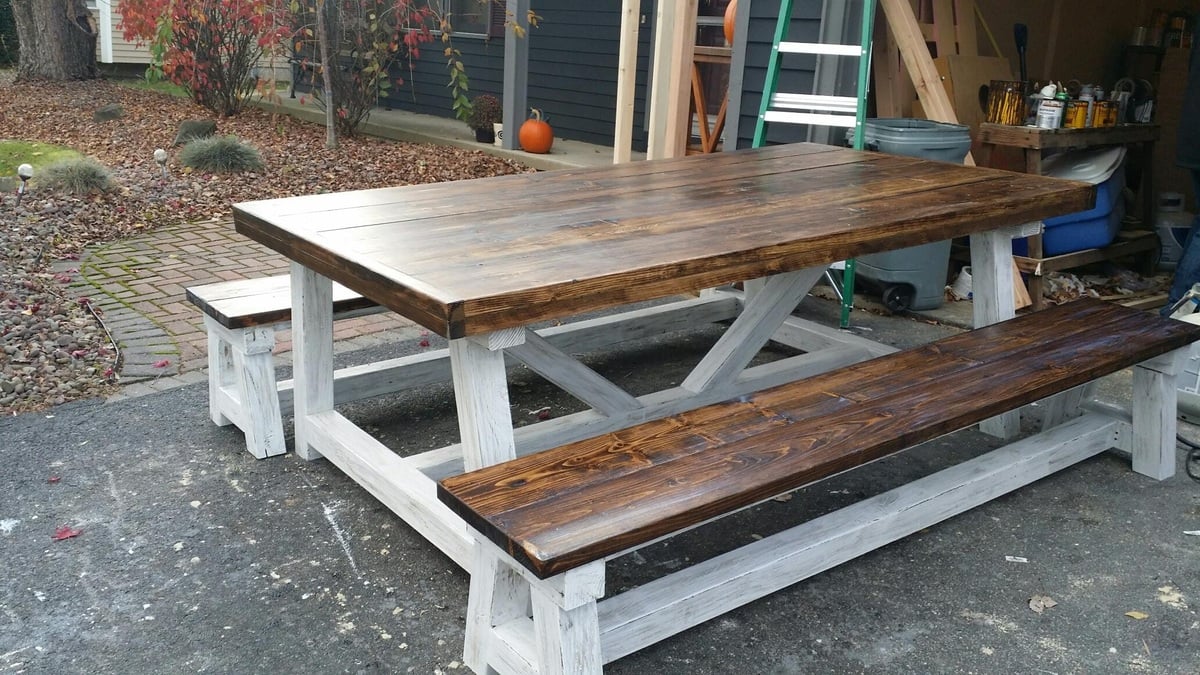
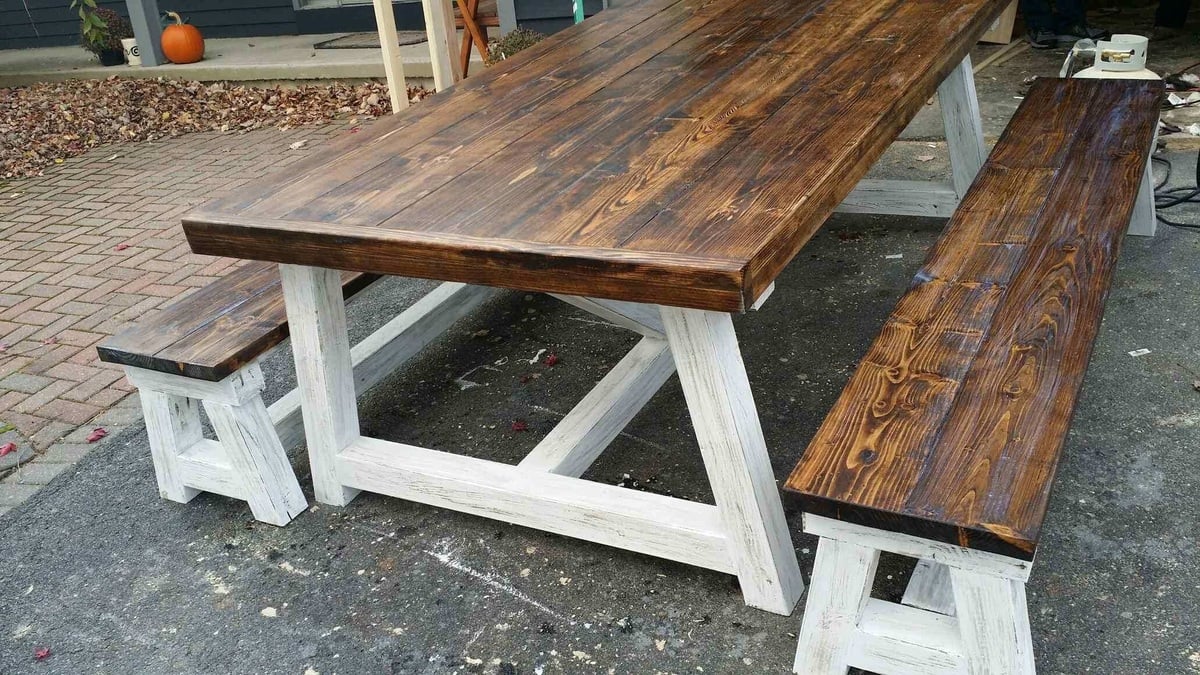
4c4 truss with dark walnut top 4" thick, base stained dark walnut with white wash and shabby etching.

Tue, 11/18/2014 - 04:55
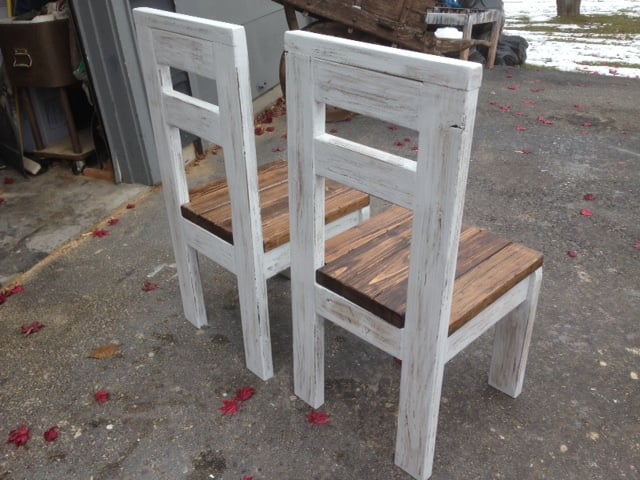
I know right, i think looks even more amazing when seen in person. I did 2 chairs to match as well. which i will load up now. :0)
Sun, 05/10/2015 - 16:23
Did you frame in the while thing with 2x4 to get it looking so thick?
Tue, 01/10/2017 - 06:22
How did you get it so thick? Is this doubling up the 2X4's to make it double the thickness?
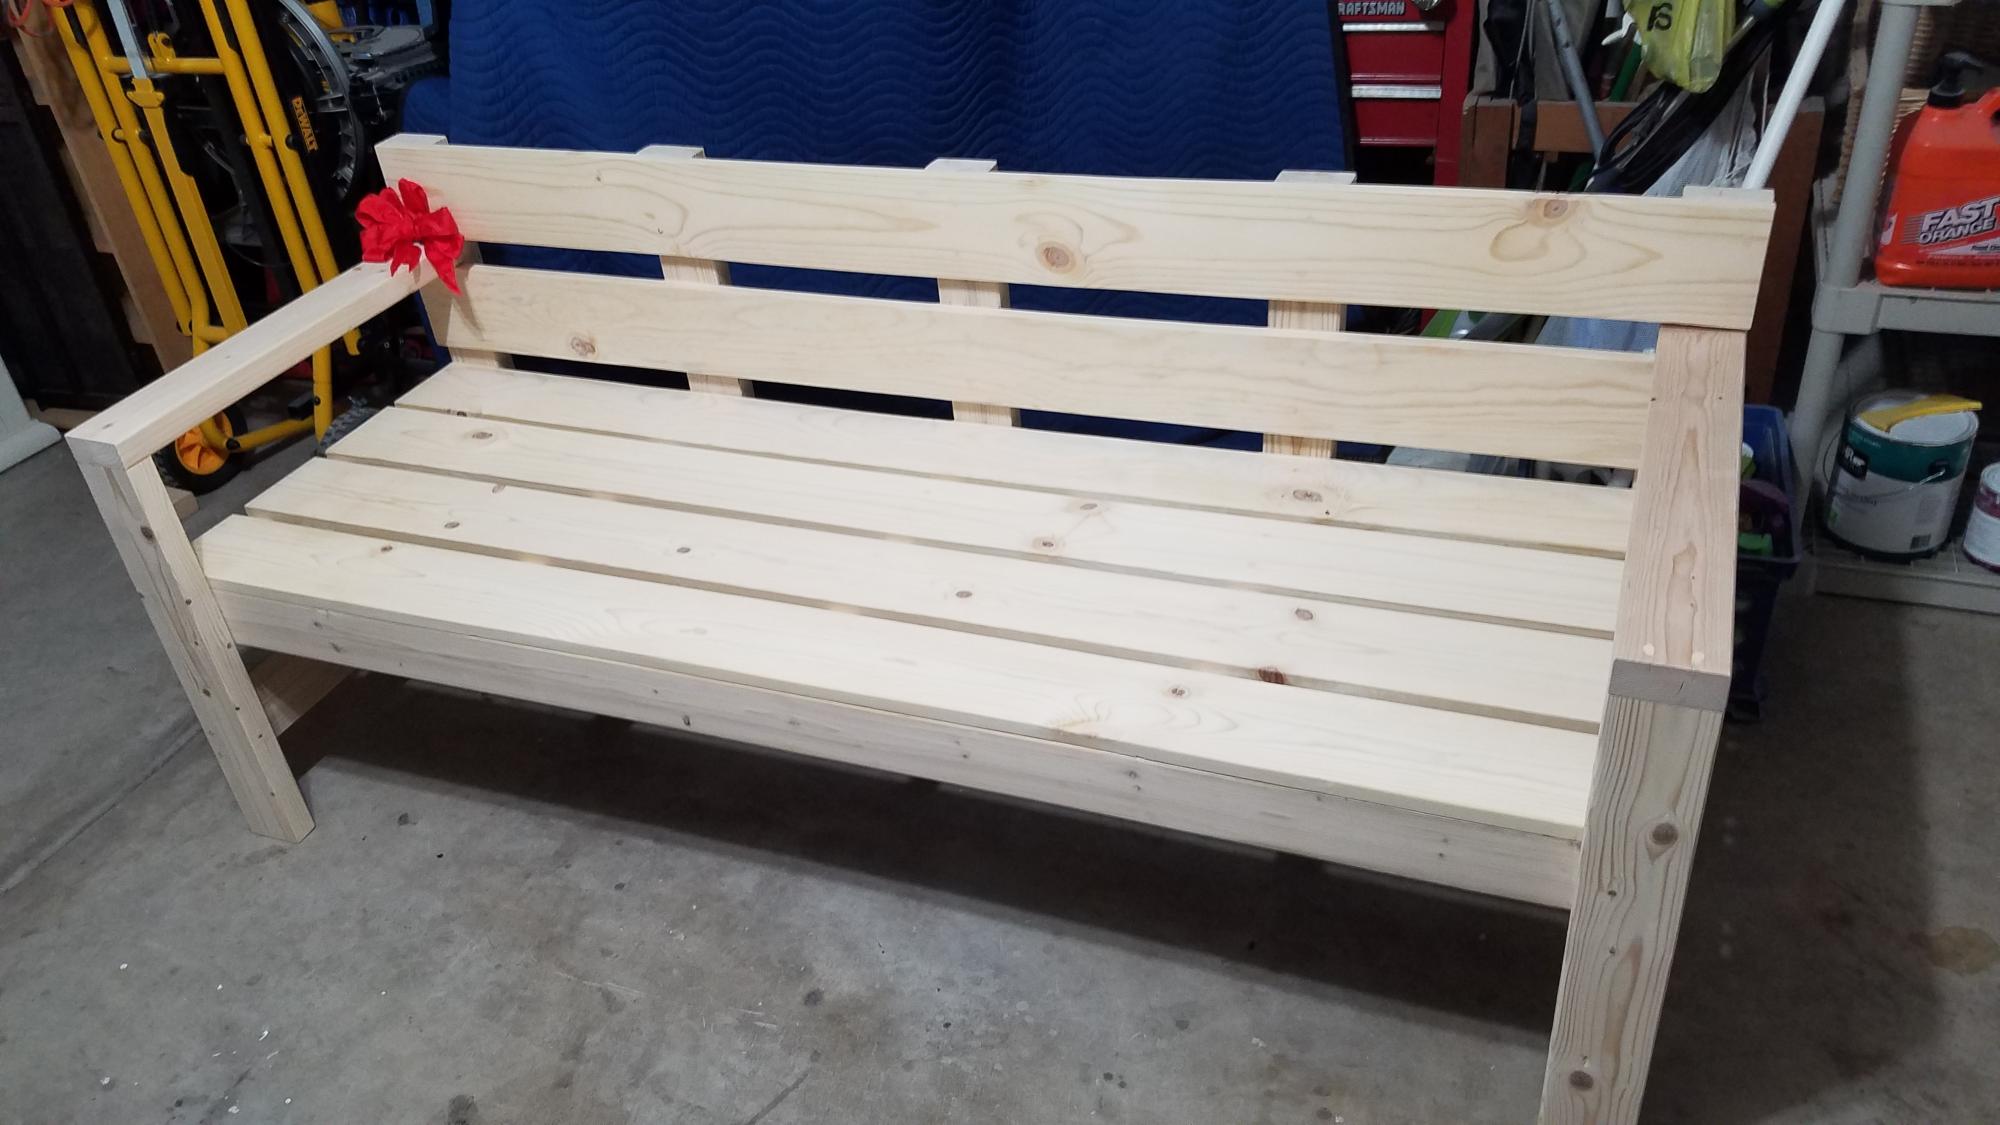
A first for me in many years, over 40+. Not really since basic wood shop projects in Middle School. Anyway, my son (and daughter in-law, but she doesn't know) had asked for a backyard patio bench for Christmas this year (2020) so what could go wrong. Anyway, the plans are straight forward in this design. He saw the picture of a stained version on YouTube and said that would be perfect. The project took me three late afternoons/evenings as my day job took priority. After making all the cuts and beginning assembly I could really see this coming together nicely once the four legs were attached. Between wood fill and sanding I asked what finish they preferred and was told he would finish that part. So I sanded the exterior on it and glad for having him finish the coatings as I was just finished it that point on Christmas Eve Day. The red bow is also first for me.
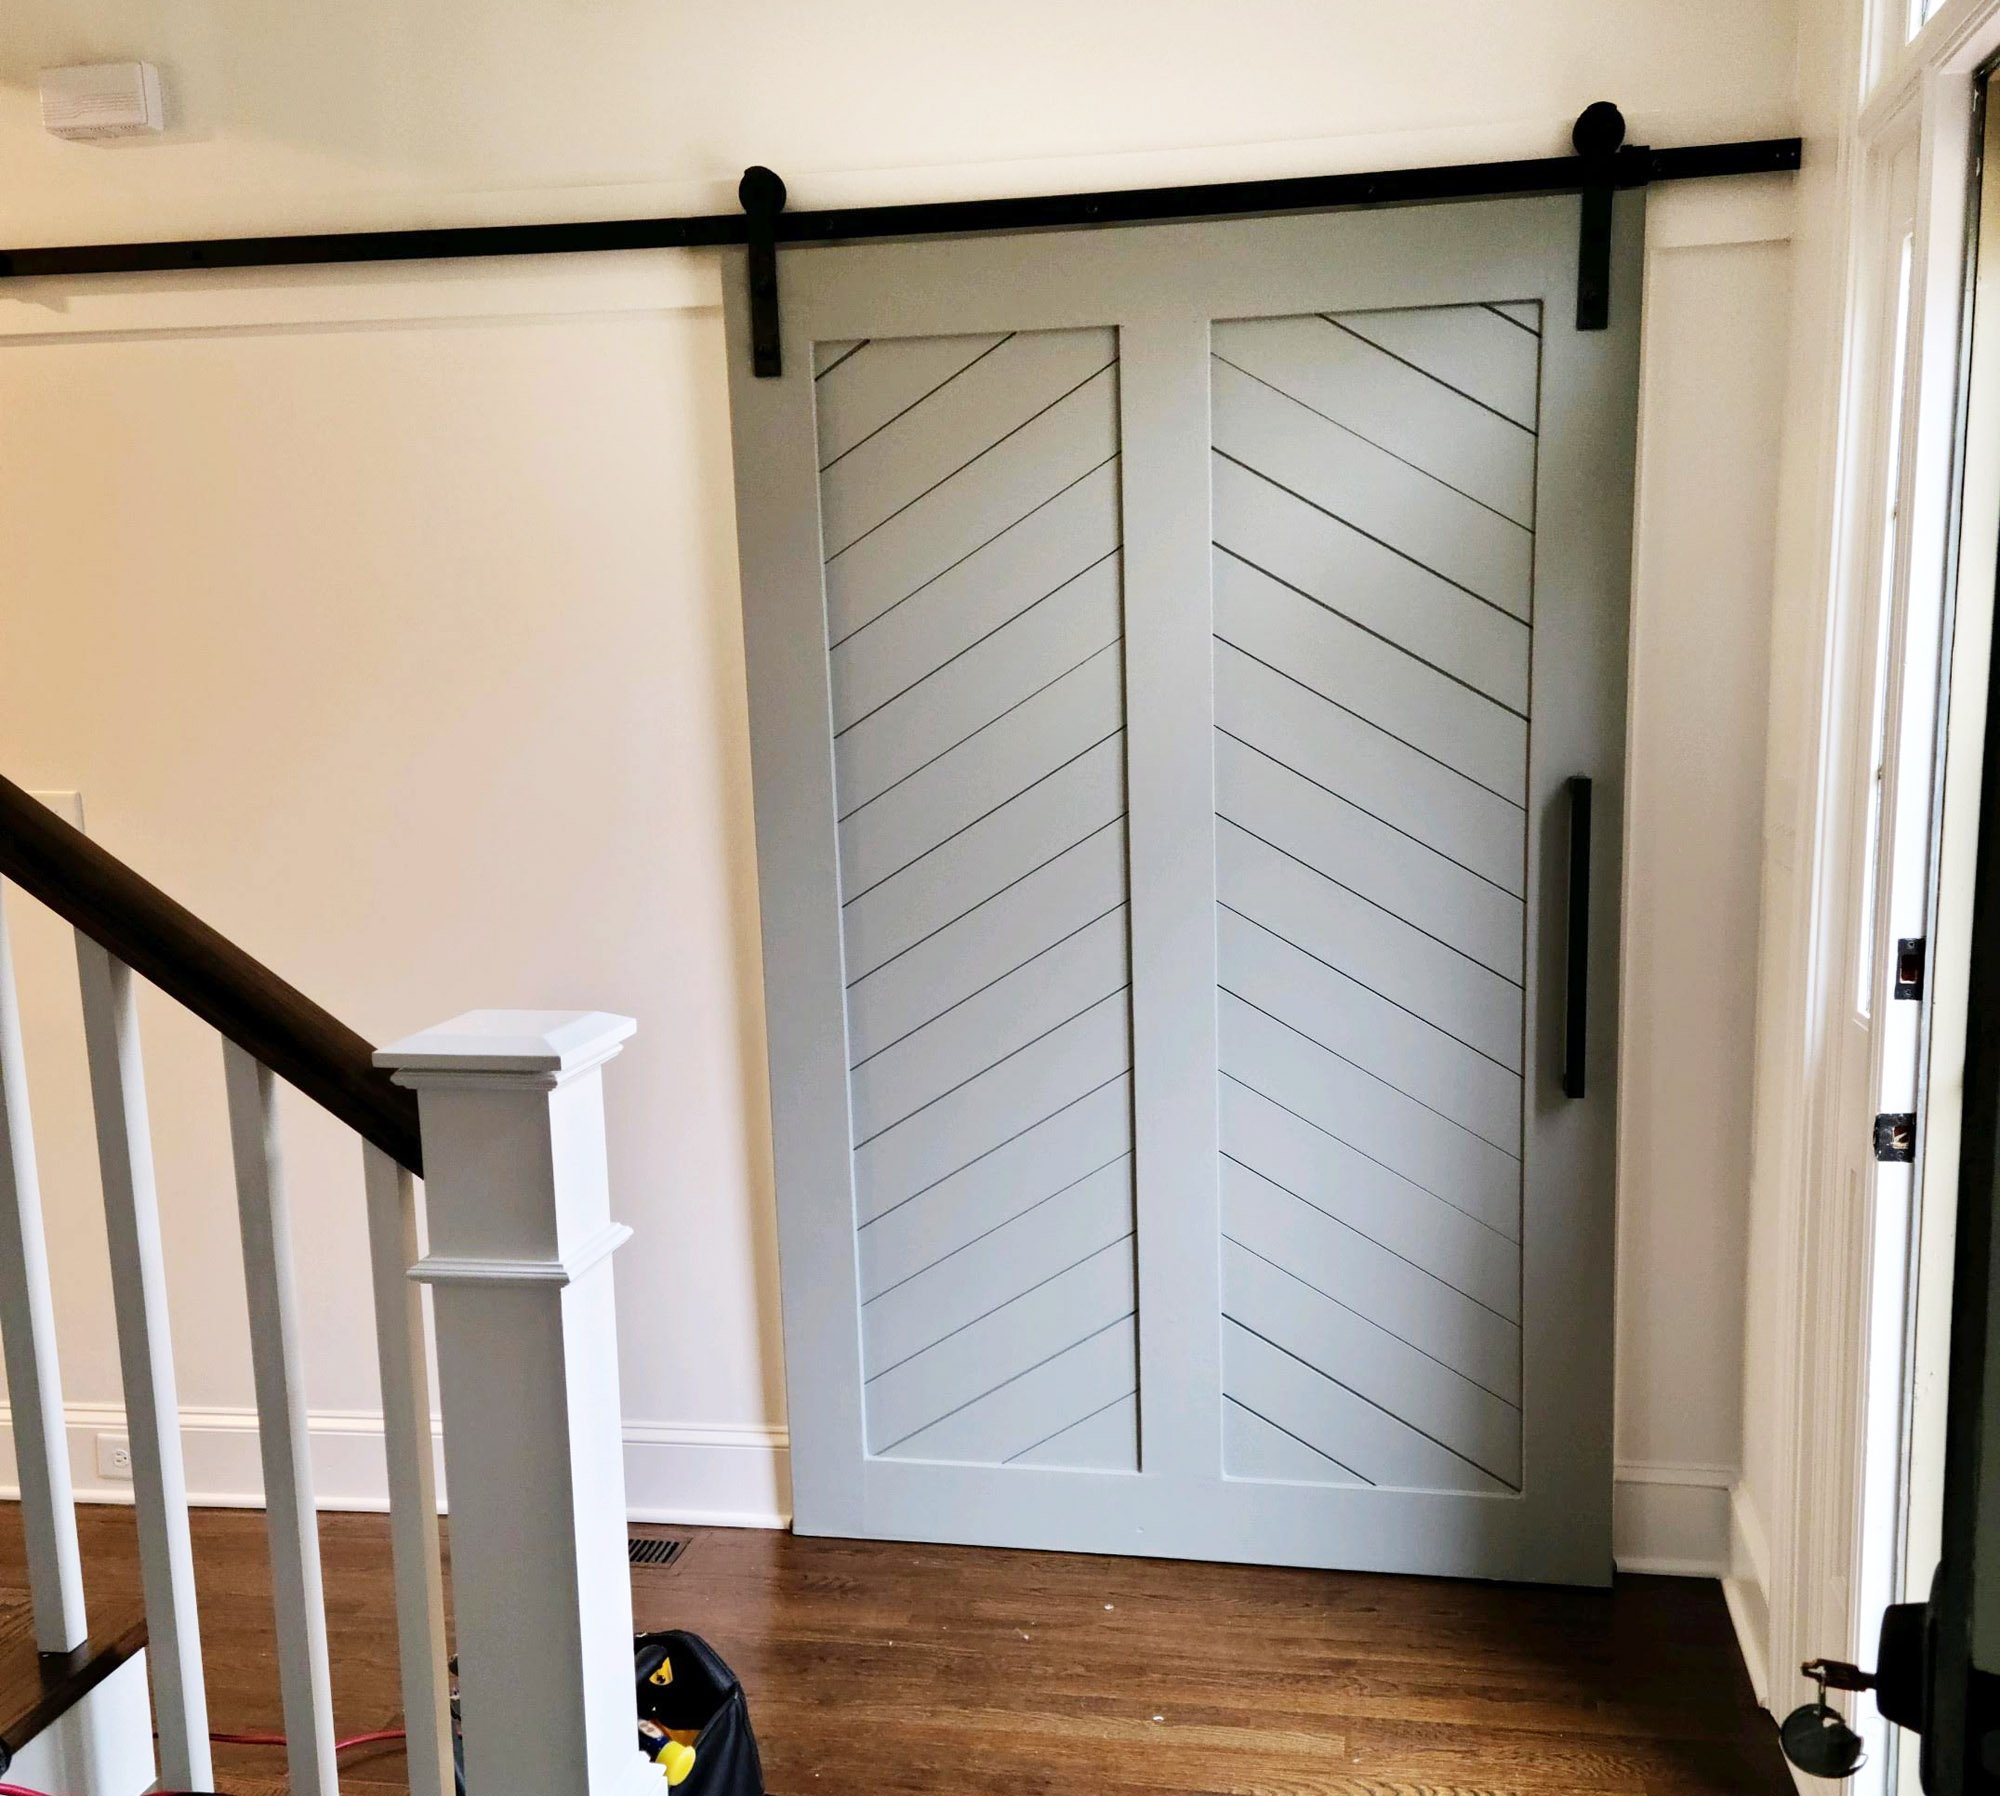
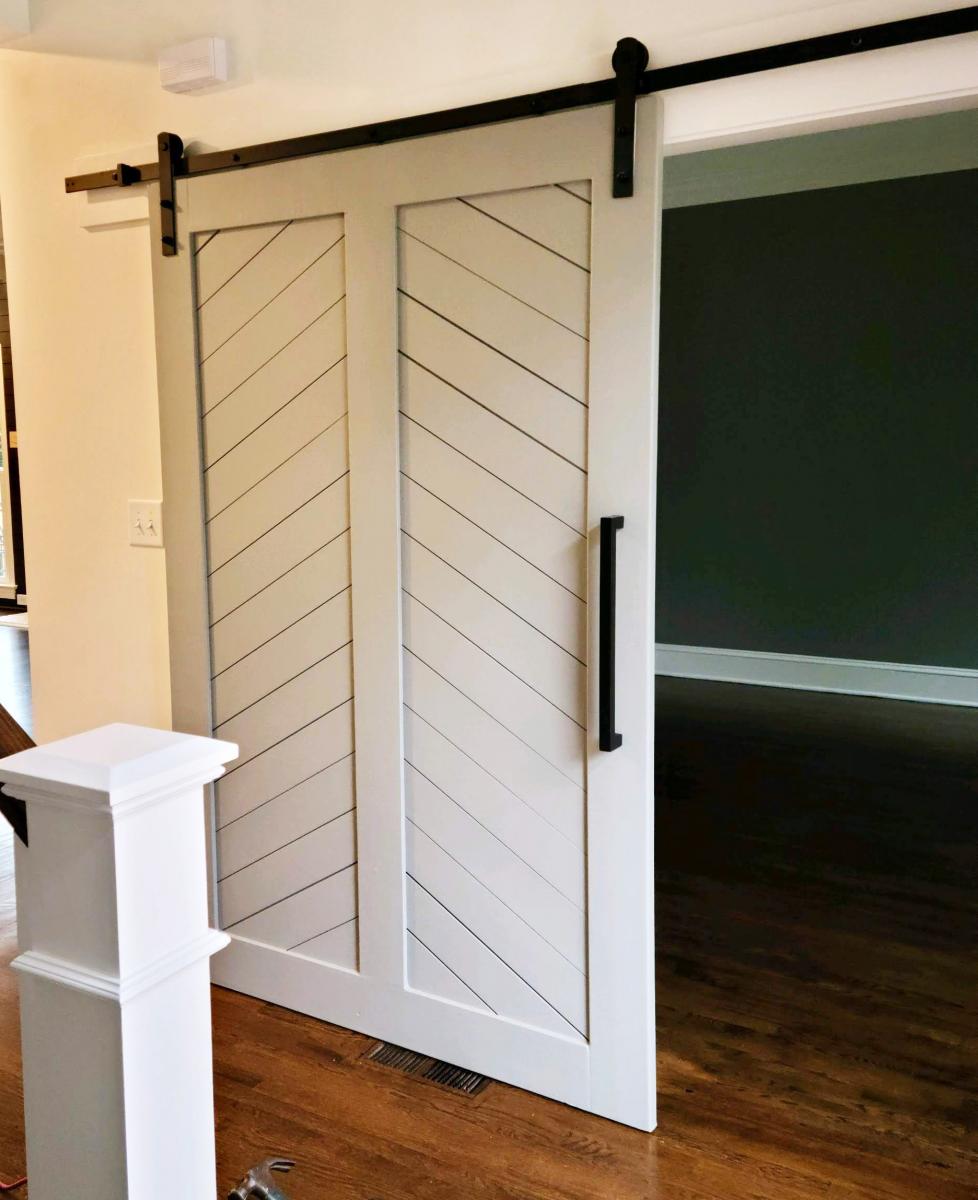
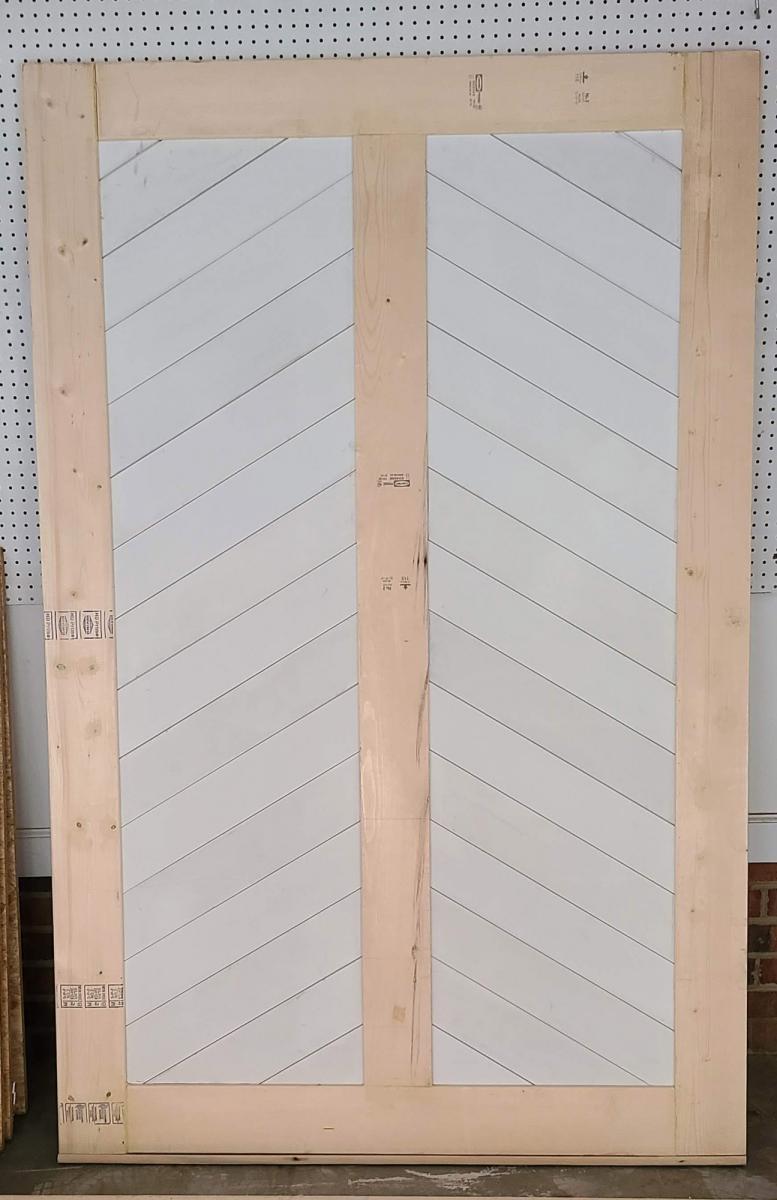
This sliding barn door was built with pre-primed shiplap 1x6s and 2x6 boards. It took a little over a day to build, sand and finish. It's definitely a sizeable piece, measuring 83x54".
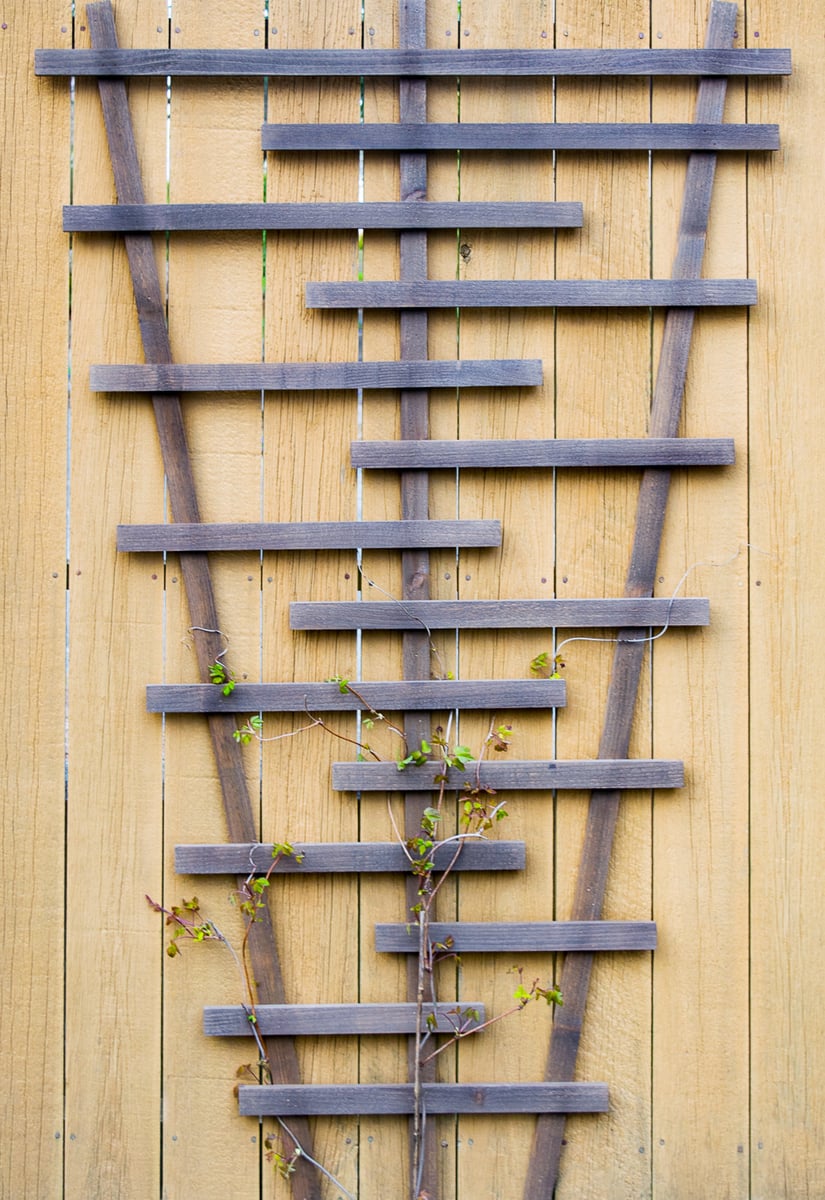
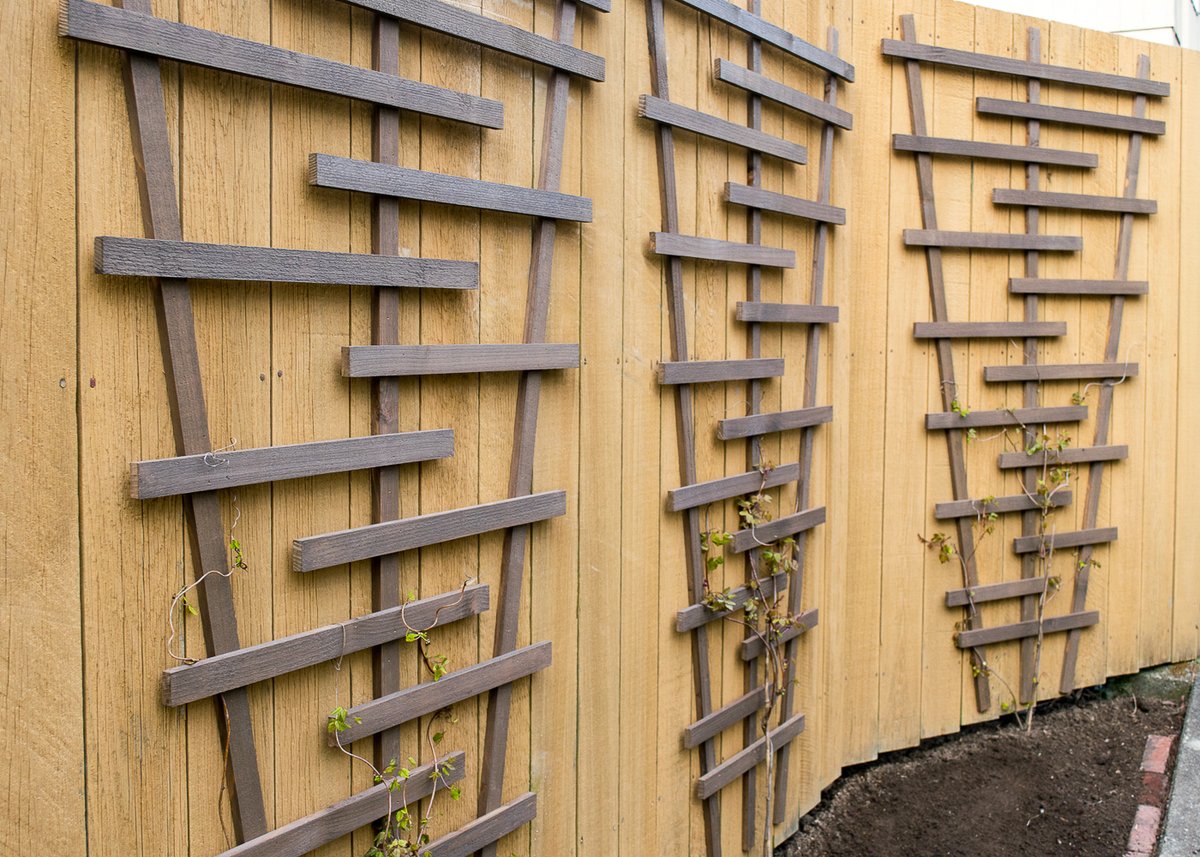
I made this garden trellis with cheap 6' cedar fence pickets ripped down to 1 1/2" strips. Get the free plans and tutorial at The Handyman's Daughter!

This was born out of the need for more counter space in our galley kitchen. We don't have the space to add an island. Especially around the holidays, it would be great to have extra space for making cookies, serving big meals, etc. I used Ana's Small Kitchen Island Prep Cart plans for inspiration. I adapted the dimensions to fit at the end of our counters when not in use and added a drop leaf to give us almost 4 additional feet of butcher block counter top when we need it. I used scrap lumber that I had for the cabinet and had an extra drawer handle that matches our kitchen cabinets but bought the butcher block, locking casters, drawer slide and hardware for the legs. Also, the weight of the butcher block makes it want to tip when it's away from the cabinet with the drop leaf down so I added a lead counter weight inside the drawer.


Tue, 04/27/2021 - 18:09
I am so interested in doing this, but would like more details on how the drop leaf was constructed. Would it be possible to get more information?

In reply to I am so interested in doing… by haartd
Sat, 07/24/2021 - 16:59
Sure! I used a 4 foot butcher block and cut it down. The horizontal part is 13 1/2" and the drop leaf part is 32 1/8" attached with a piano hinge. The legs need to be cut and hinged to fit when folded up. This one is made so that the drop leaf fits right under the overhang of the kitchen countertop that it is next to so it's snug against the cabinet and not an issue but, if you want it to be freestanding, the weight of the butcher block will pull it over if you don't weight the cabinet down with something as well. I got a 5 pound lead bar from Amazon in case we need to use it somewhere else. I hope that helps! Let me know if you have any other questions.
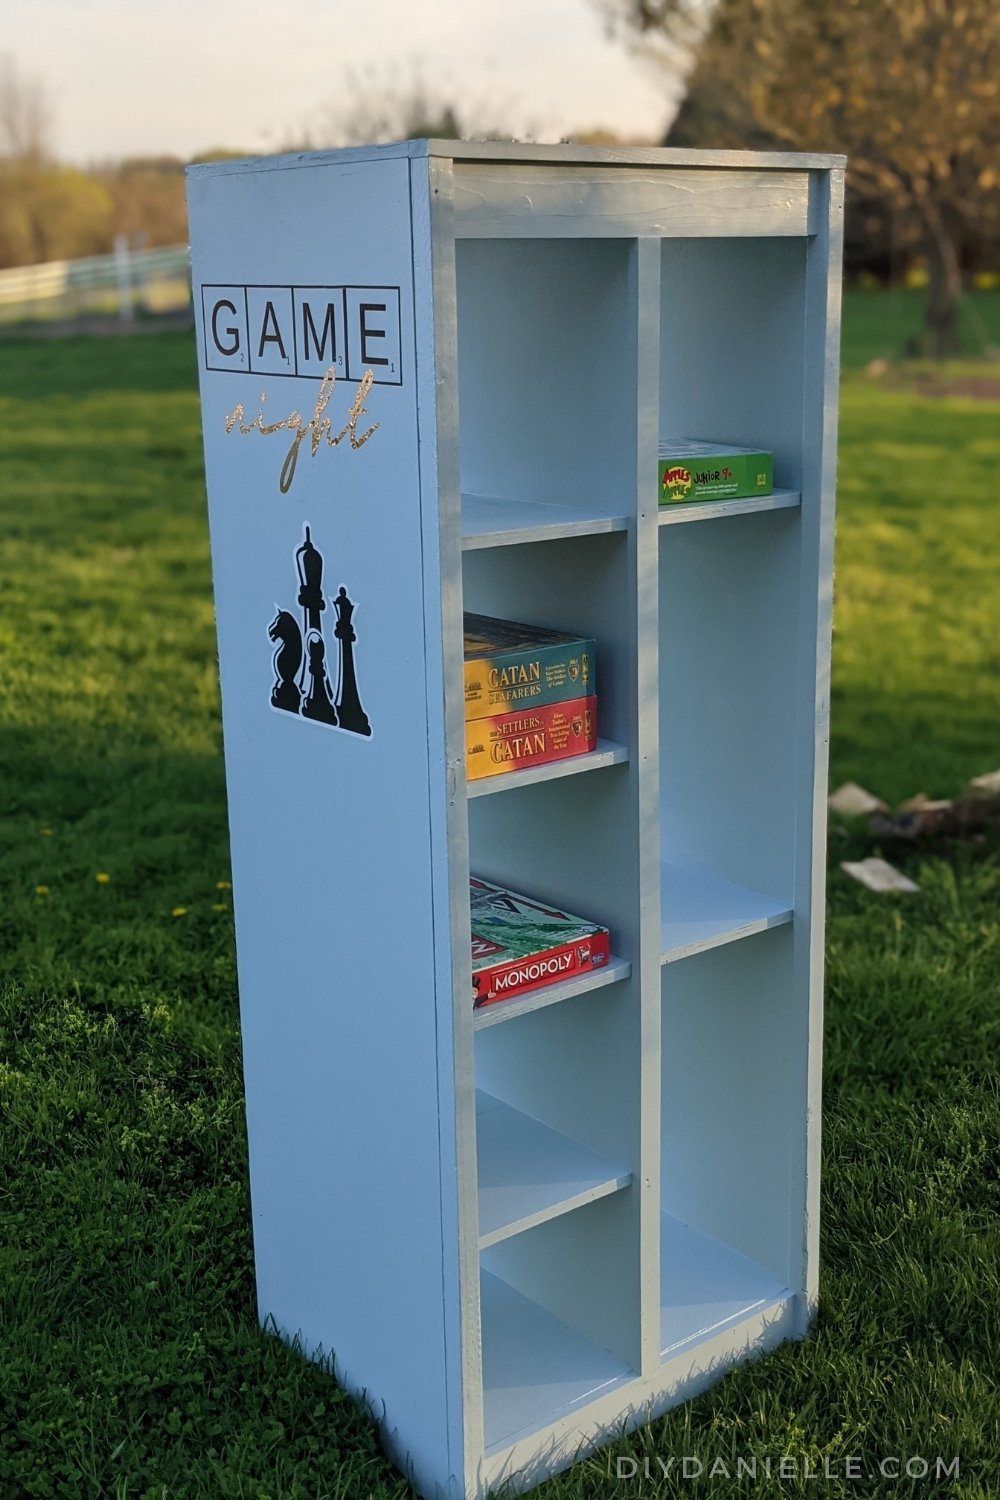
We tweaked the Ana White Barn Door bookcase plan for a bathroom linen closet, made it a hair too wide (it was soooo close), and decided to use this for board games instead. It's PERFECT for storing long games like Monopoly, as well as puzzles, cards, and more. I decorated it with vinyl cut with my Cricut to give it that "game night" feel.
The project ended up being fairly time consuming because painting the shelf took a lot of time... if I did it again, I'd probably use a paint sprayer. I just don't have a great space for spraying furniture builds.
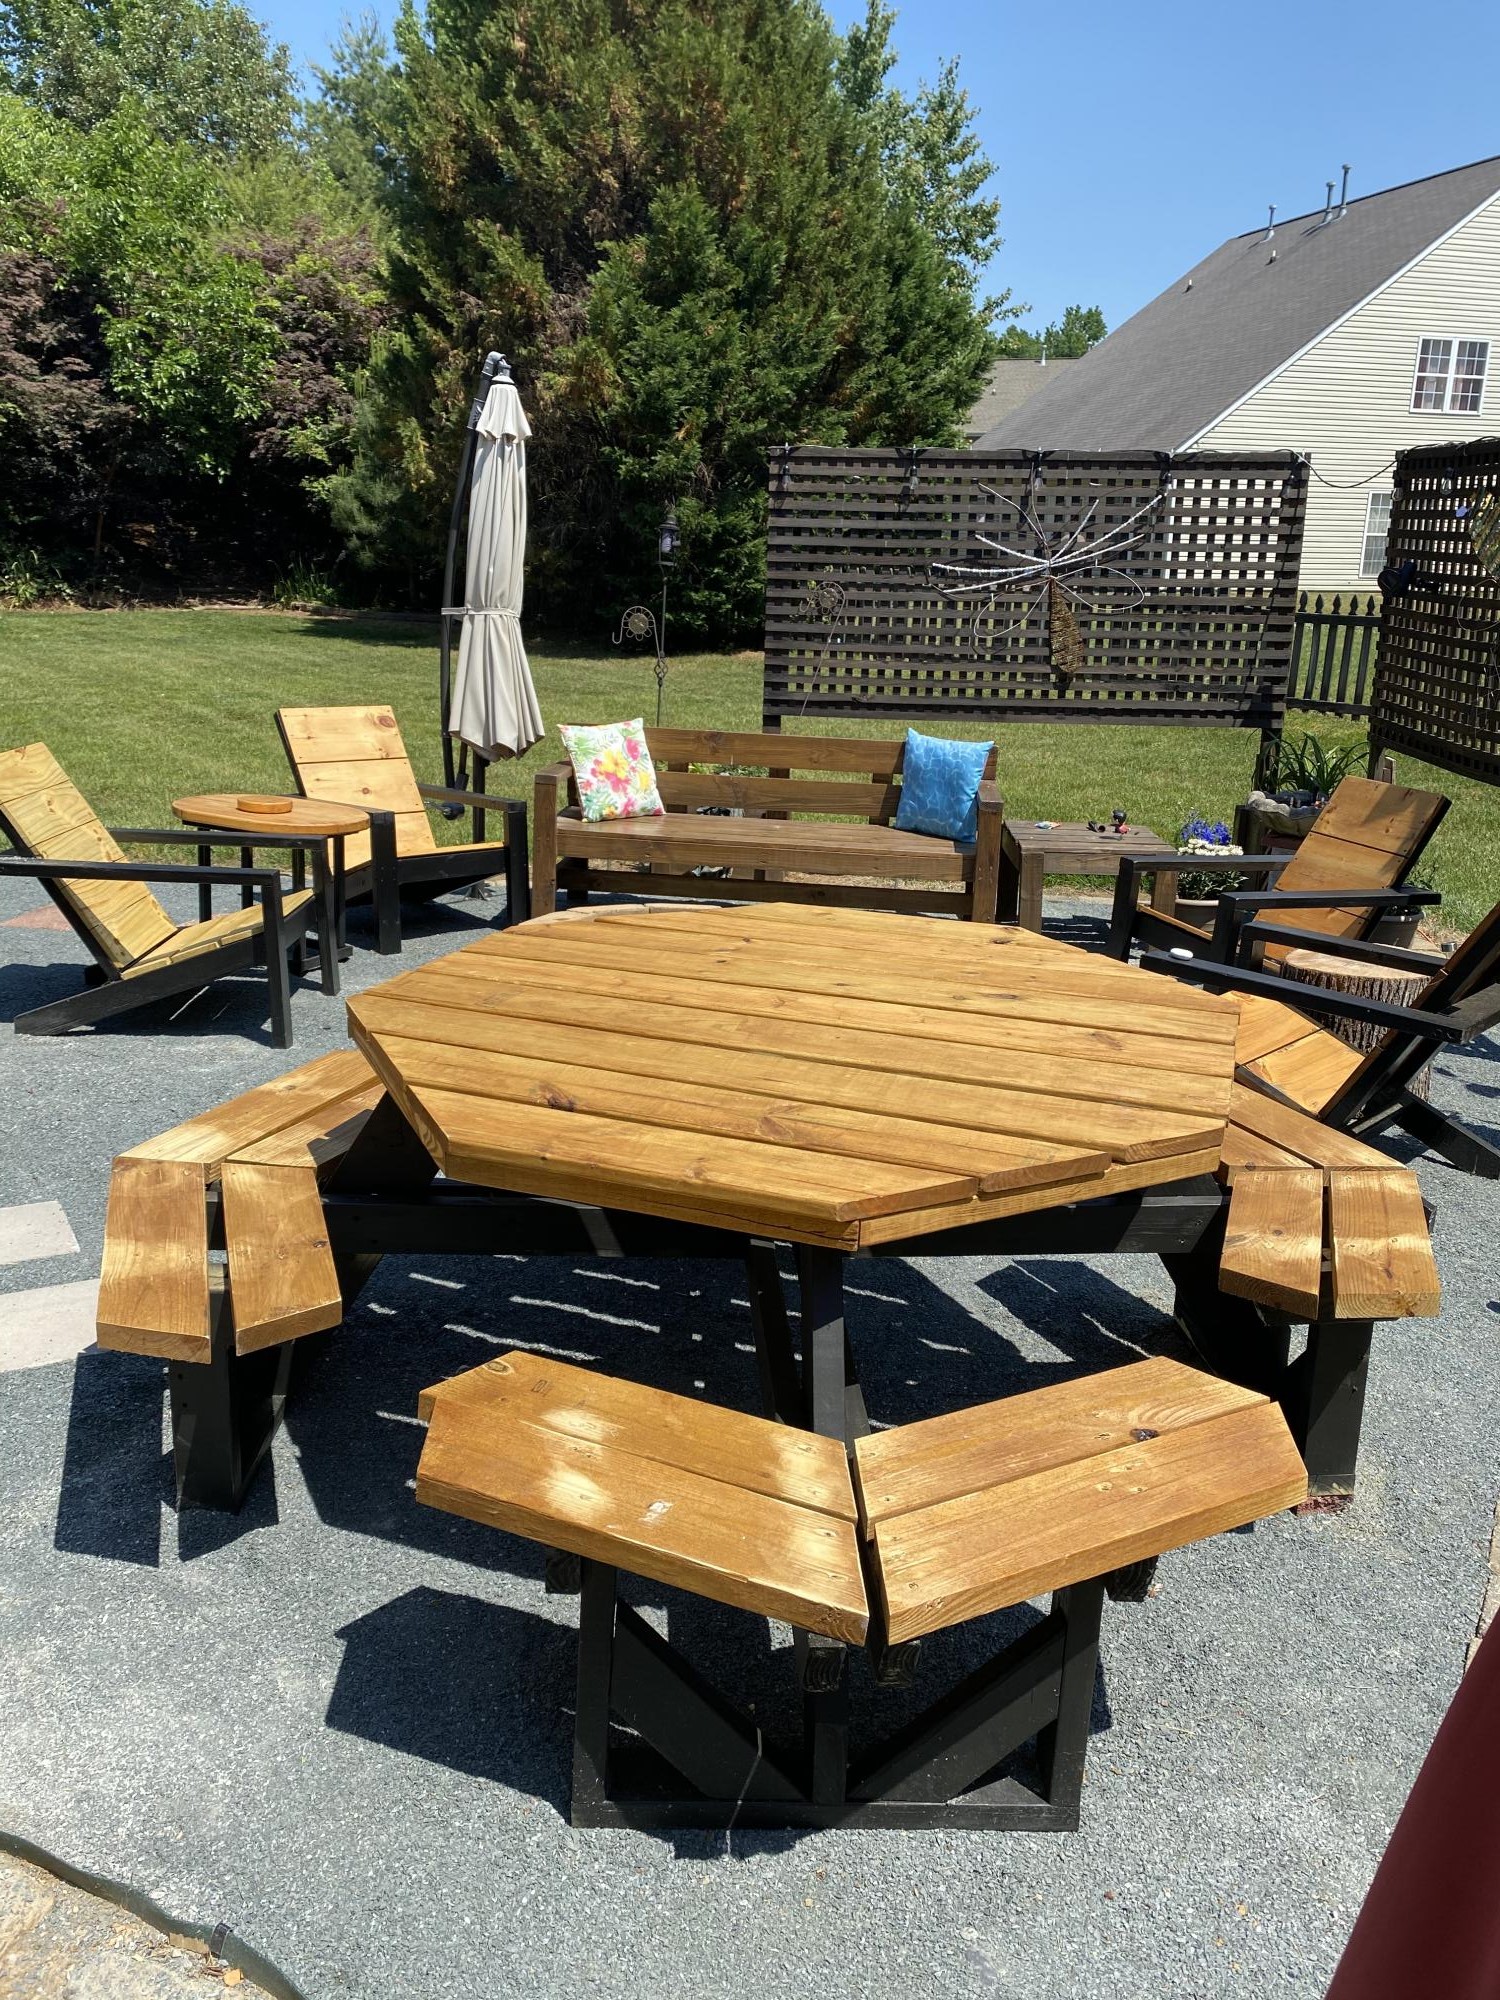
I started this backyard project at the beginning of the Pandemic. I used Ana’s plans for the Adirondacks and the picnic table and the bench.
Thanks for your ideas ams inspiration!!!!
Sincerely
Spencer Friedlander
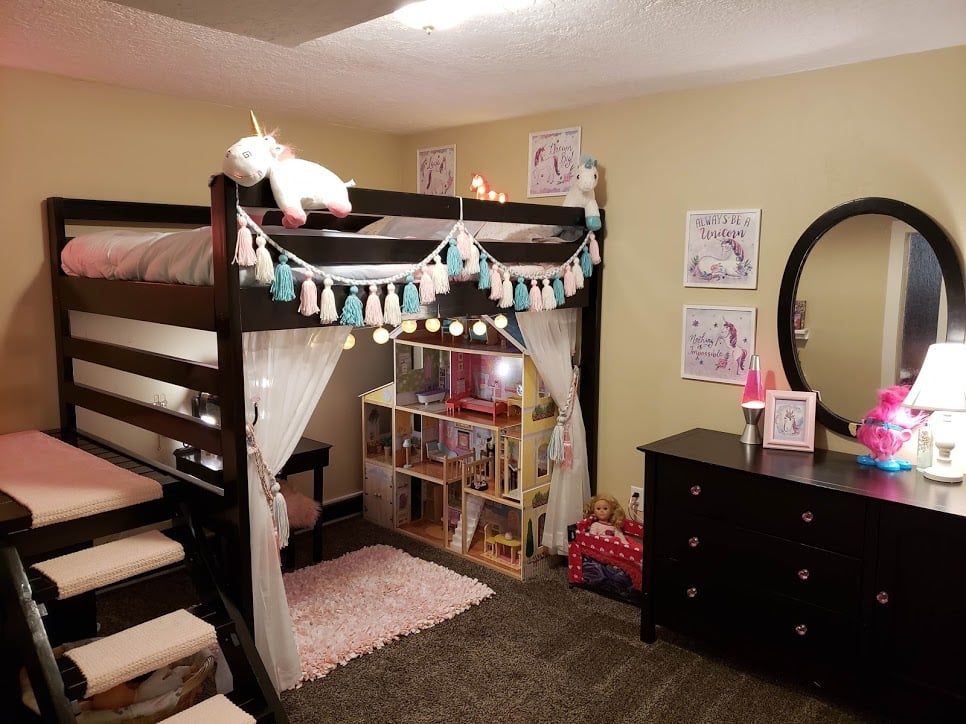
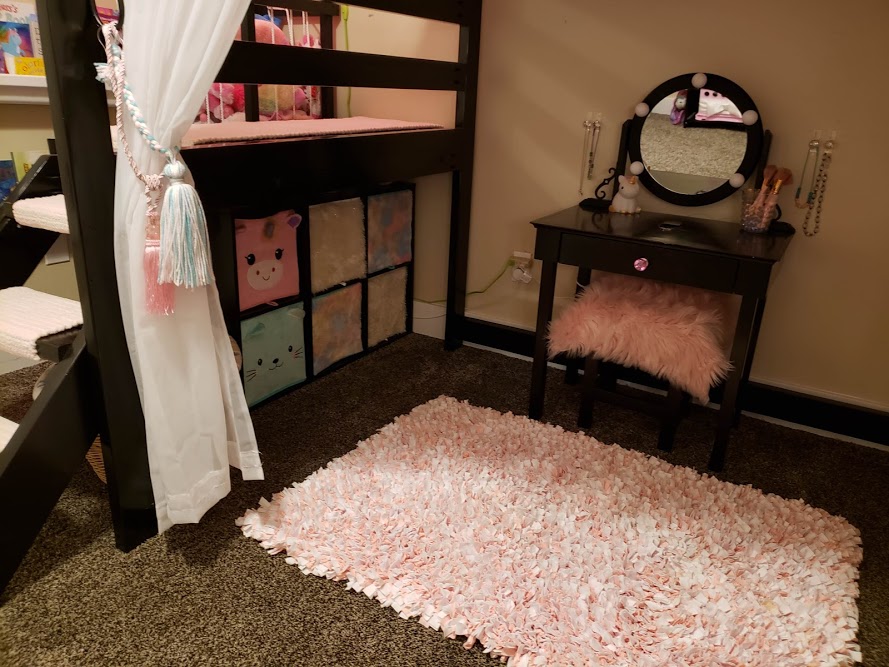
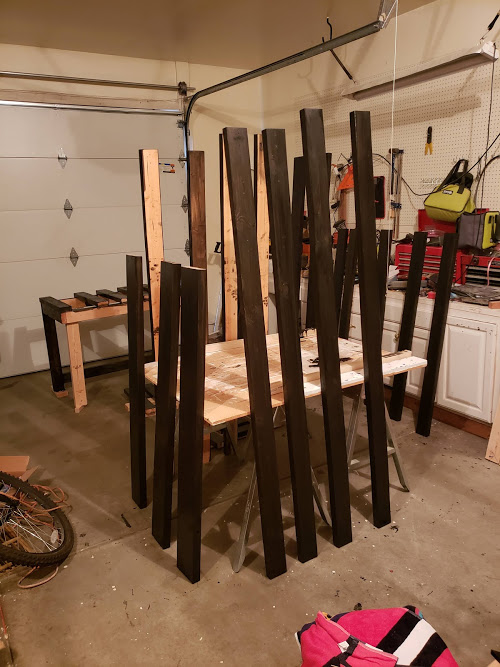
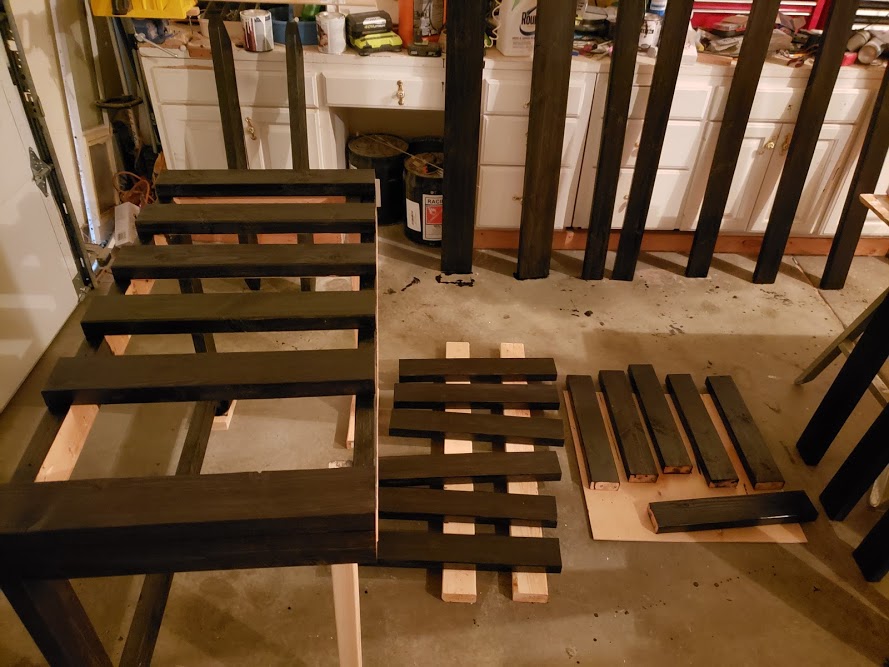
I may have spoiled my Grand-daughter a bit too much and her room was really full of stuff. I decided that I should just go ahead and spoil her a little more by building her a new bed for her birthday. I used the Camp Loft Bed plan but did modify it to fit her full size mattress and raised the height just a bit to make sure that her doll house would fit underneath. I am so happy with how it turned out! I love that I can fit her toy bins underneath the stairs where they are out of the way and how much more room she has to actually play. I used some really fat yarn and crocheted the little stair runners so it is nice and soft on her feet going up and down the stairs. This project did take longer then some of the others that I have done but I do also work a full time job. I had the bed actually built and put together in a weekend but then took it all apart for staining and finishing which took a long time. There were a lot of pieces to stain with multiple sides and coats to get the coverage I wanted so it would match her other furniture. I also did 3 coats of topcoat on each piece. Looking back if I had to do this over again I would have used 4x4's for the legs/bed posts. She is only 6 right now but as she gets older I will probably switch those so that it is a little more sturdy as she gets bigger.


I made the bulk of this bed from 2 sheets of OSB to make it cheaper. The headboard is from salvaged pallets and scrap studs from a construction site. Baskets or drawers forthcoming. Easy plans to follow.
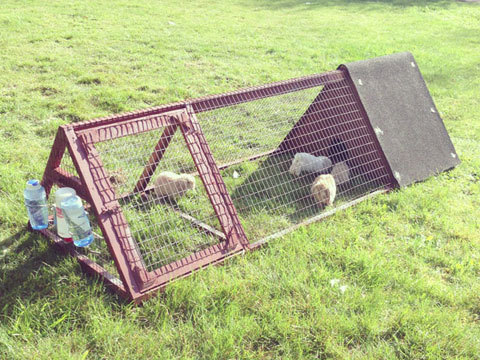
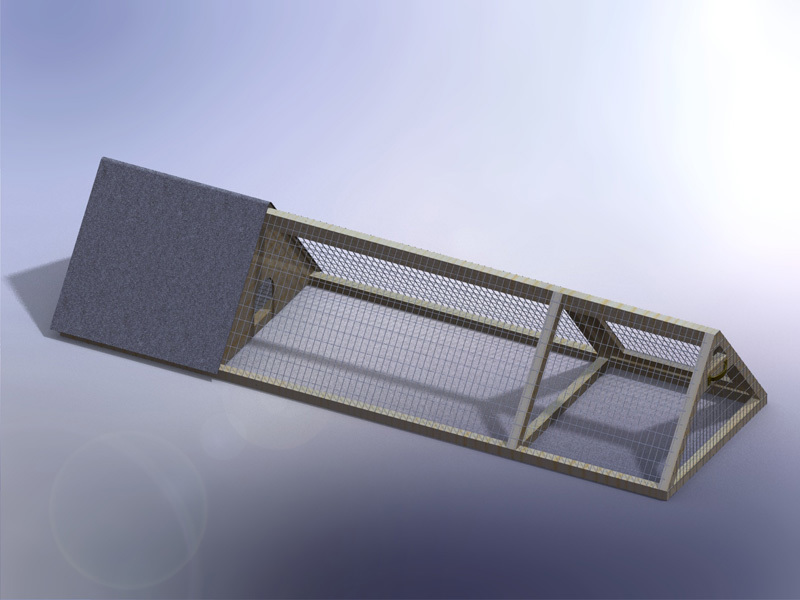
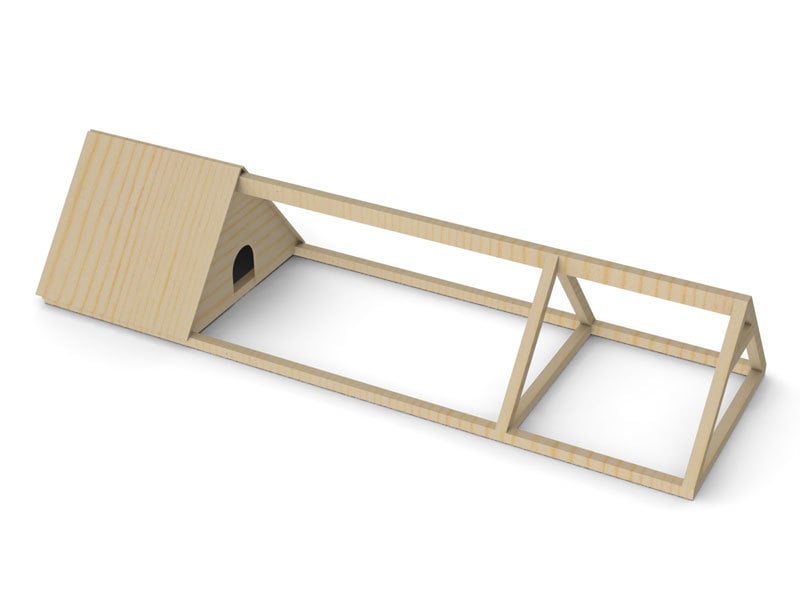
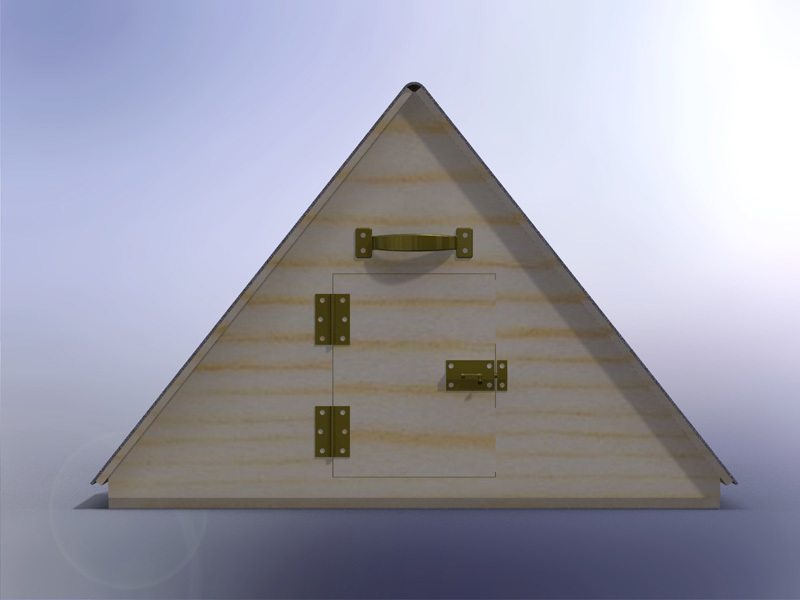
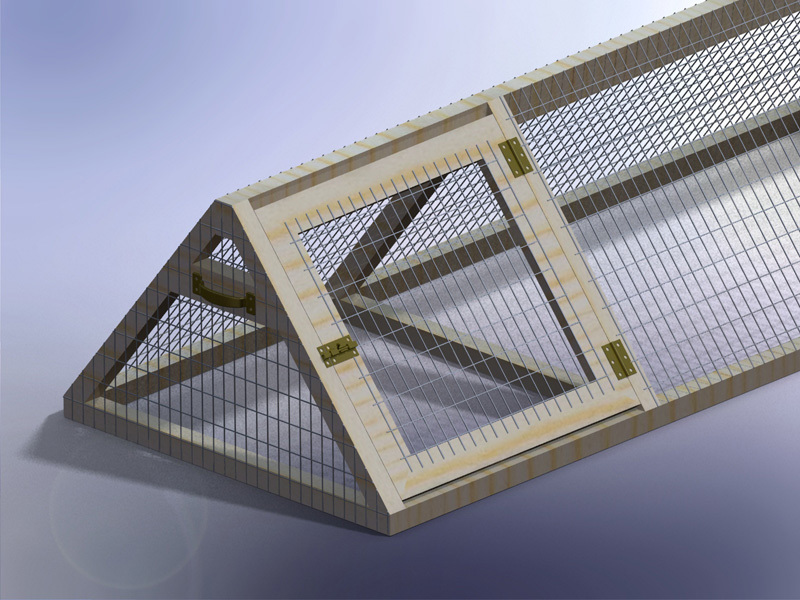
This is a rabbit hutch I created for my kids 5 rabbits. The thing that makes this hutch really nice is if you have a large lawn you can just move the hutch a little bit every day and the lawn gets mowed, fertilized and you don't have to worry about cleaning up all the rabbit droppings. I also mounted a rabbit feeder on the inside of the house door to keep the food dry, which has worked really well.
Here is a short blog of all the steps in its construction:
http://design.medeek.com/gallery/RH3080_COPALIS_2013/RH3080_COPALIS_201…

Sun, 05/05/2013 - 01:52
I apologize I haven't got the completed planset up for this project yet but I will try to get it up in the next couple of weeks as well as a very complete materials list. You will need to go to a farm/feed store to get the correct 1"x2" wire and 1/2"x1" wire for the floor. Do not go to Home Depot and use the cow wire they have or the hardware cloth for the floor, neither of which are the correct choice. Home Depot has the lumber but not the wire. If you have any questions or even improvements to my design I would be interested in hearing from you.
Sun, 09/13/2015 - 19:18
Finally got around to uploading the plans. I still need to create a material list for this plan but the basics are there now. We've had rabbits in it for about a year but recently we've tried some guinea pigs and it works great for that as well. The guinea pigs can pretty much live off just the grass and dandelions but you do need to move it daily to give them plenty to eat.
