Community Brag Posts

Playhouse Loft Bed With Stairs And Slide, Playhouse Loft Bed, Loft Bed

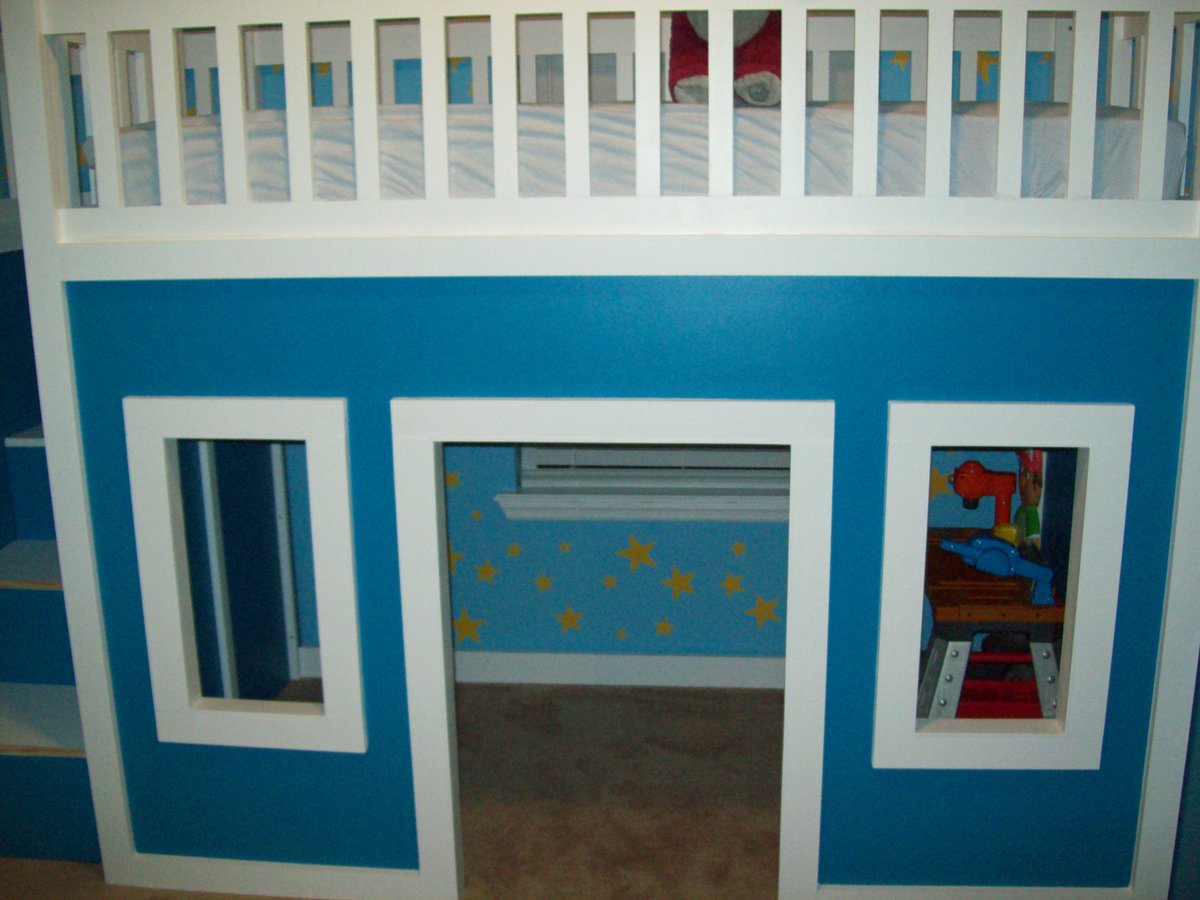
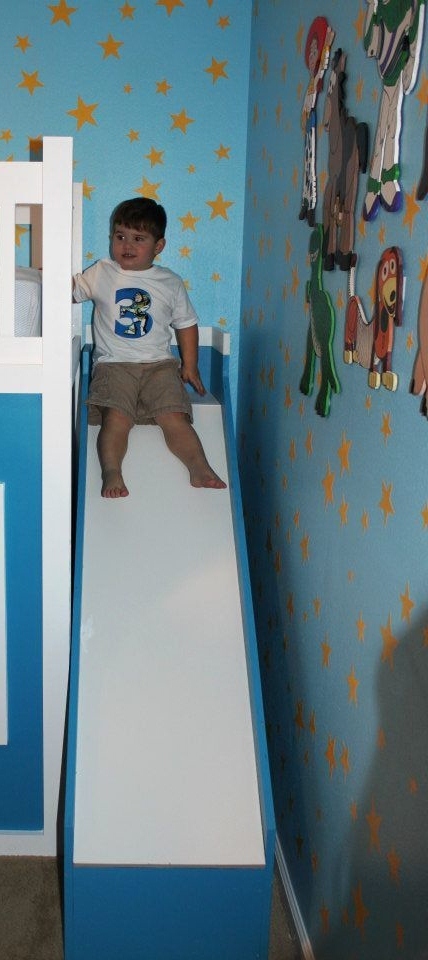
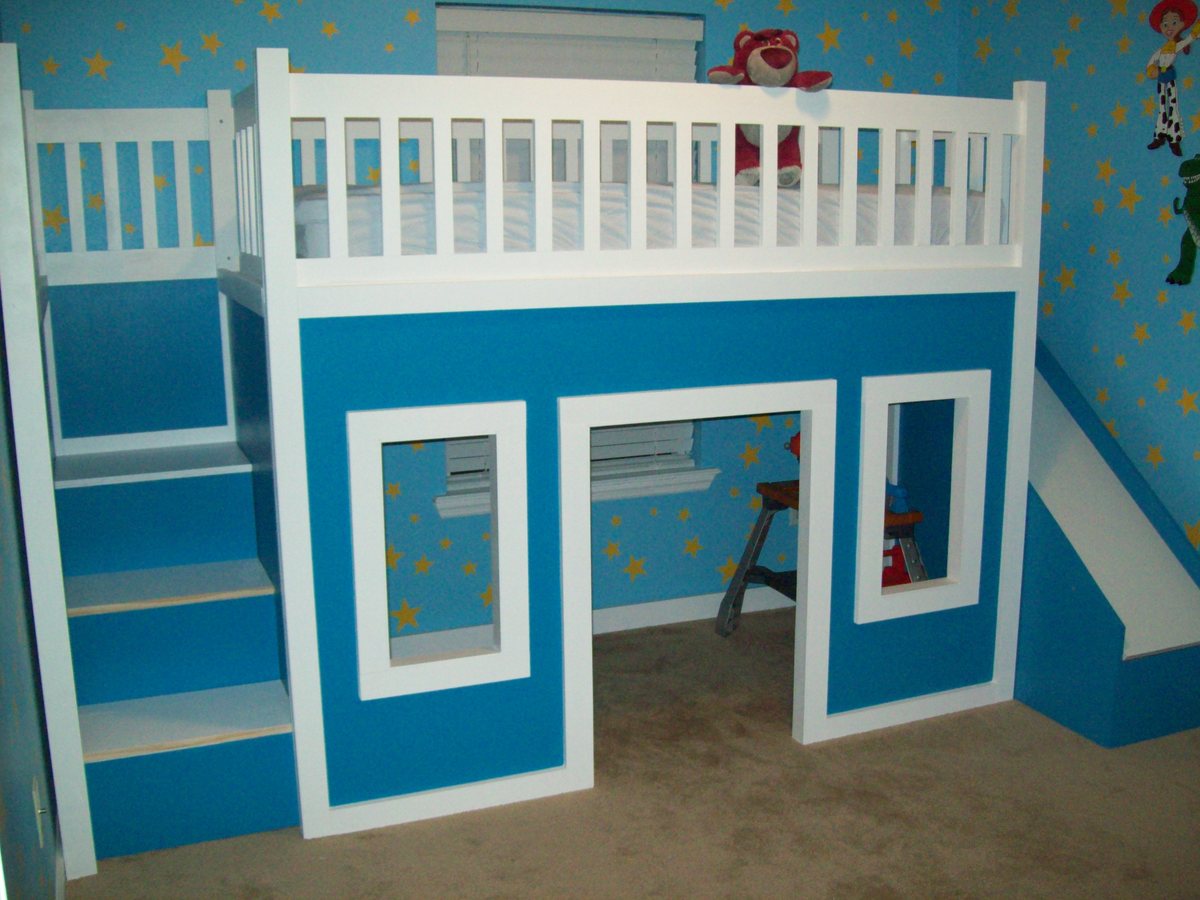
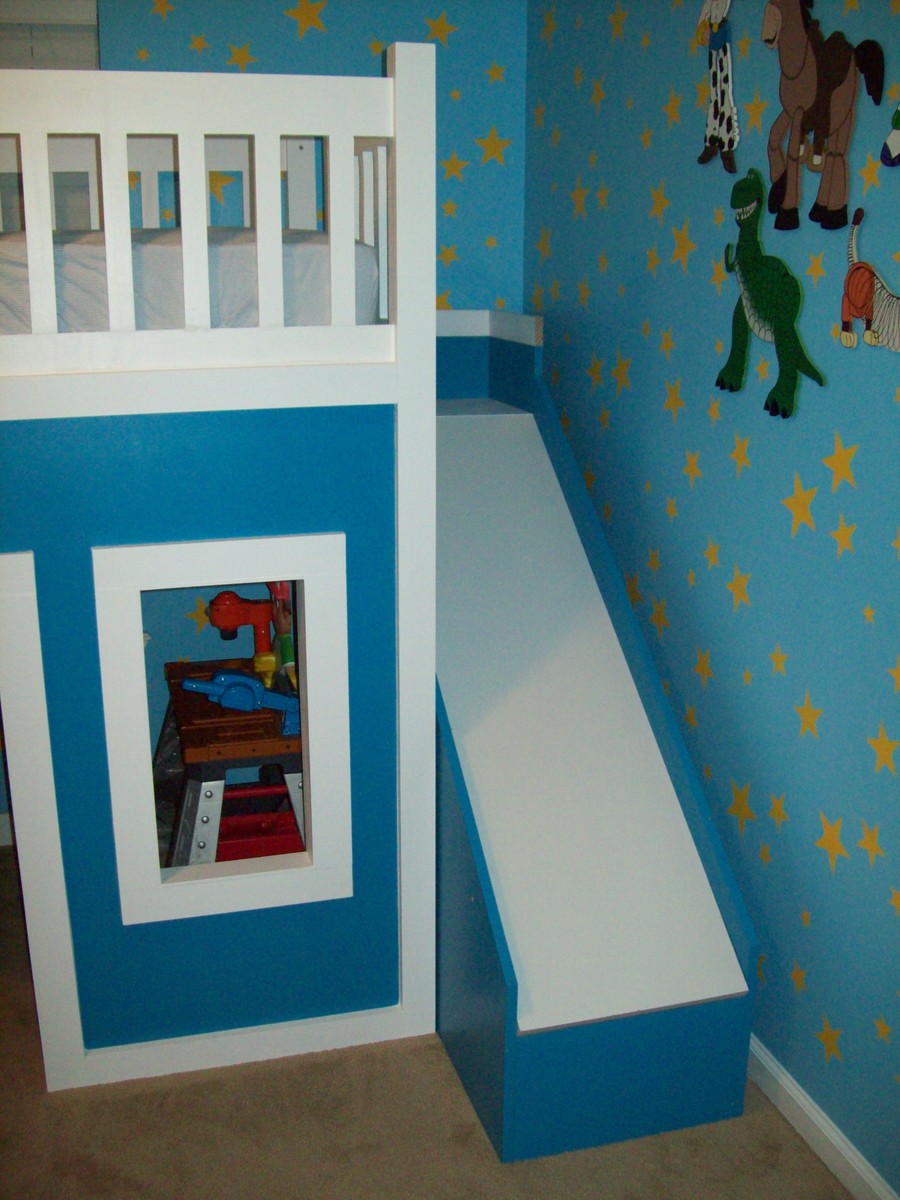
My son was about to turn 3 and I really wanted to redesign his bedroom as a birthday surprise. We went with a Toy Story themed room, he just loves Toy Story. I started off by painting the walls blue with yellow stars like Andy's room in the movie. I added some custom painted art work and then it was off to find a cool playhouse bed. My husband and I were shopping around and we could never really find what we were looking for in the store. So we decided to build one ourselves using plans from this website. I used the playhouse loft bed and the playhouse loft bed stair plans, for the bed and the stairs. I used the castle loft bed plan as inspiration for the slide. The project took us about 5 weeks from start to finish. We both have full time jobs and we did most of the work on the weekends. I looked at each plan very carefully and made notes. I had to modify the stair plans slightly to fit the space where we wanted to put the bed. The stairs look narrow, but they work just fine. My husband and I can both use them to get up in the bed. The stairs feature hinged stair tread with built in storage. We built them like that at first, but then later decided to make them stationary stair treads, with plywood. I didn't like the way the hinges looked and the top stair was so deep that I was worried my son would fall in there and get stuck. The storage idea was neat, but his safety was more important to me. The bed turned out really nice and VERY sturdy. Both my husband and I are able to get up there with my son (not at the same time). Another modification that I made was instead of slats to hold on the mattress, I used a piece of plywood. I wanted the roof in the playhouse to look finished, and I didn't want to see his bedding hanging down from the slats. I painted the top of the plywood white, where the mattress goes to blend in with the slats, and the other side was painted blue to match the walls inside the playhouse. I did modify the playhouse front facade to have 2 windows and one door. I like the symmetrical look. The total project cost about $400. I used birch plywood and select pine boards, and about 6 quarts of paint. I noticed AFTER we had finished the bed using the birch plywood, that Home Depot had cabinet grade plywood on a random end cap, that was just as nice for $12 less a sheet. If I could do it all over again, I would definitely use that!. I wanted the paint to have a nice smooth finish, without having to do a lot of sanding or patching. We had Home Depot cut the plywood to the dimensions we needed. I had my husband cut the rest of the wood dimensions listed in the plans, and then I painted all of them before we put the pieces together. I used a small roller and self priming paint. The paint finish looks great. After assembling the bed I can not imagine what I would have gone through trying to paint it after the fact. The slide was a bit tricky, I looked at the plan for the castle loft bed and attempted to use those dimensions, and for the most part they worked. But when we went to assemble the slide, we did end up recutting some of the wood to different dimensions. I used a piece of the melamine coated closet shelf material for the slide. It is already finished in white and its nice and slick, like a slide should be! I hate MDF, but for this it seemed the best fit. We cut the top edge at an angle to meet up with the slide platform. PLEASE BE CAREFUL with this material. After it was angle cut the edge was razor sharp and I sliced my fingers up. Once it was installed it butted up perfectly to the slide platform, and the edge was hidden and not a danger. But use caution during the install. Clamps are your friend! We used Kreg clamps for everything. They kept the wood in place while we were screwing the parts together. The coolest thing that my husband came up with was clamping two identical pieces for plywood together, and drawing the template for the slide support walls. Then he used his circular saw to cut them out. We ended up with two mirror image pieces. They looked awesome. I left them clamped together when I sanded the edges as well. We really didn't have any building experience other, than building tables and chairs for children, We got the deluxe Kreg jig kit and a miter saw on Craigslist for $50 each and they were both practically brand new. This was the first time we had ever used a Kreg jig and we are both addicted. That thing is the bomb. We locked my son out of his room for a week while we assembled everything. We had the big reveal at his birthday party and all of the guests were excited to see it after seeing my facebook teaser posts of our progress. There were 8 kids up there at one time and the bed did not budge. They all enjoyed the slide. I did the planning and paint and my husband did an awesome job making all of the cuts and sanding everything. We are both very proud of the final product. My son love his new big boy bed. DISCLAIMER: This bed is not recommended for a child under 6 years old. My son is mature for his age and we monitor him carefully.
Estimated Cost
$500
Estimated Time Investment
Week Long Project (20 Hours or More)
Finish Used
BEHR PAINT IN BRIGHT WHITE AND RIVIERA PARADISE SATIN FINISH
Recommended Skill Level
Beginner

Comments

krissy2696

Wed, 07/06/2016 - 10:05

Hi, my husband is building this bed for my 6 yr old daughter, but in purple blue and white. We adding the slide too. May I ask what size bedroom you guys have for your son, and did the bed fit well? Did you have to make any adjustments for it to fit in the bedroom?  Thanks in advance! Your bed looks great! I hope ours turns out as good.

Christine N in PA

Floating media cabinet

Submitted by Chriss45 on Tue, 02/28/2017 - 18:29

I felt a floating cabinet would make the room more spacious and wanted to showcase my brick wall so I designed and built this media cabinet.

Estimated Cost
300 dollars
Estimated Time Investment
Day Project (6-9 Hours)
Finish Used
I stained the plywood with walnut then finished with a satin poly. I lightly sanded the reclaimed barn wood the applied satin poly. I purchased the barn door hardware off Amazon.
Recommended Skill Level
Intermediate

Comments

My Laundry Station

Submitted by Anonymous (not verified) on Mon, 03/06/2017 - 18:09

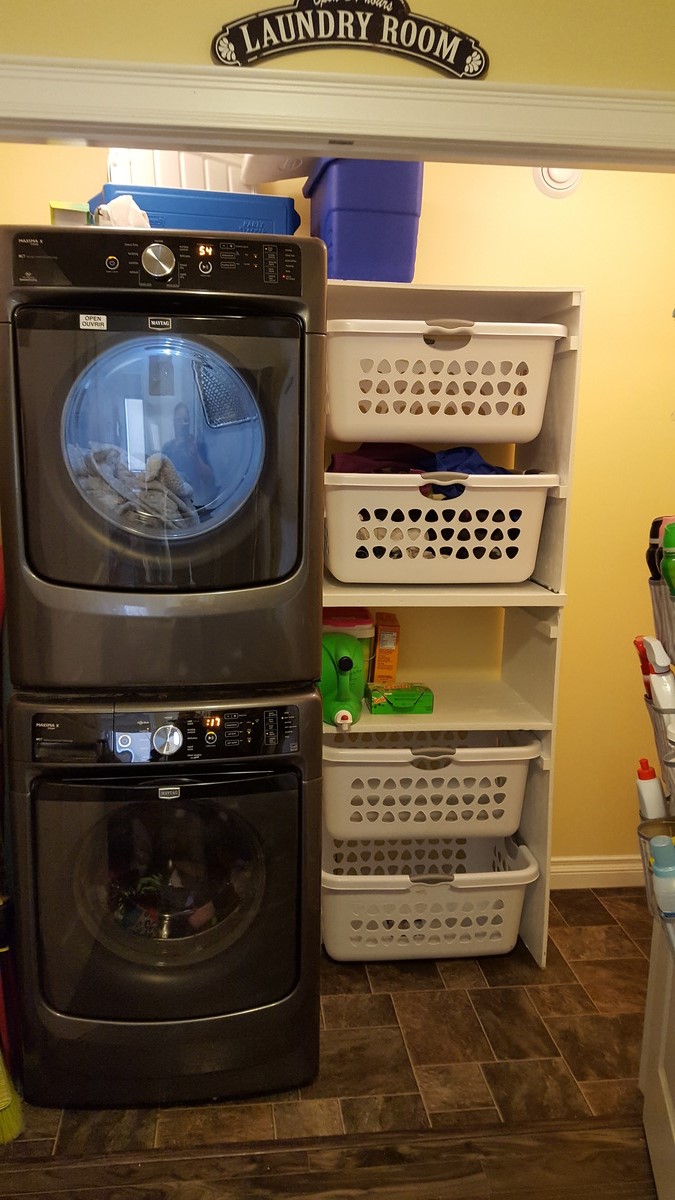
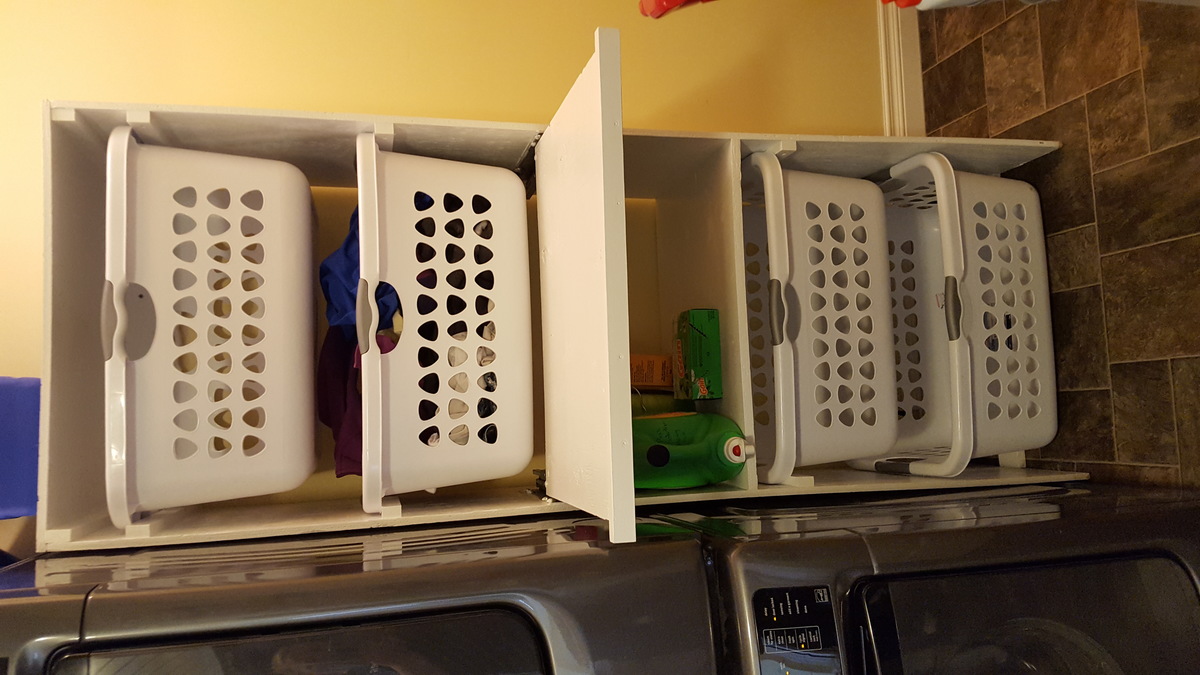
I love Ana's original design and it was a great inspiration. I needed to add more baskets so I adjusted it a little. I had some drawer slides sitting around so I added a pull out shelf to fold on as well.

Built from Plan(s)
Estimated Time Investment
Afternoon Project (3-6 Hours)
Finish Used
Primer and paint
Recommended Skill Level
Beginner

Ava's Play Kitchen

Submitted by tcalford on Wed, 12/31/2014 - 09:10

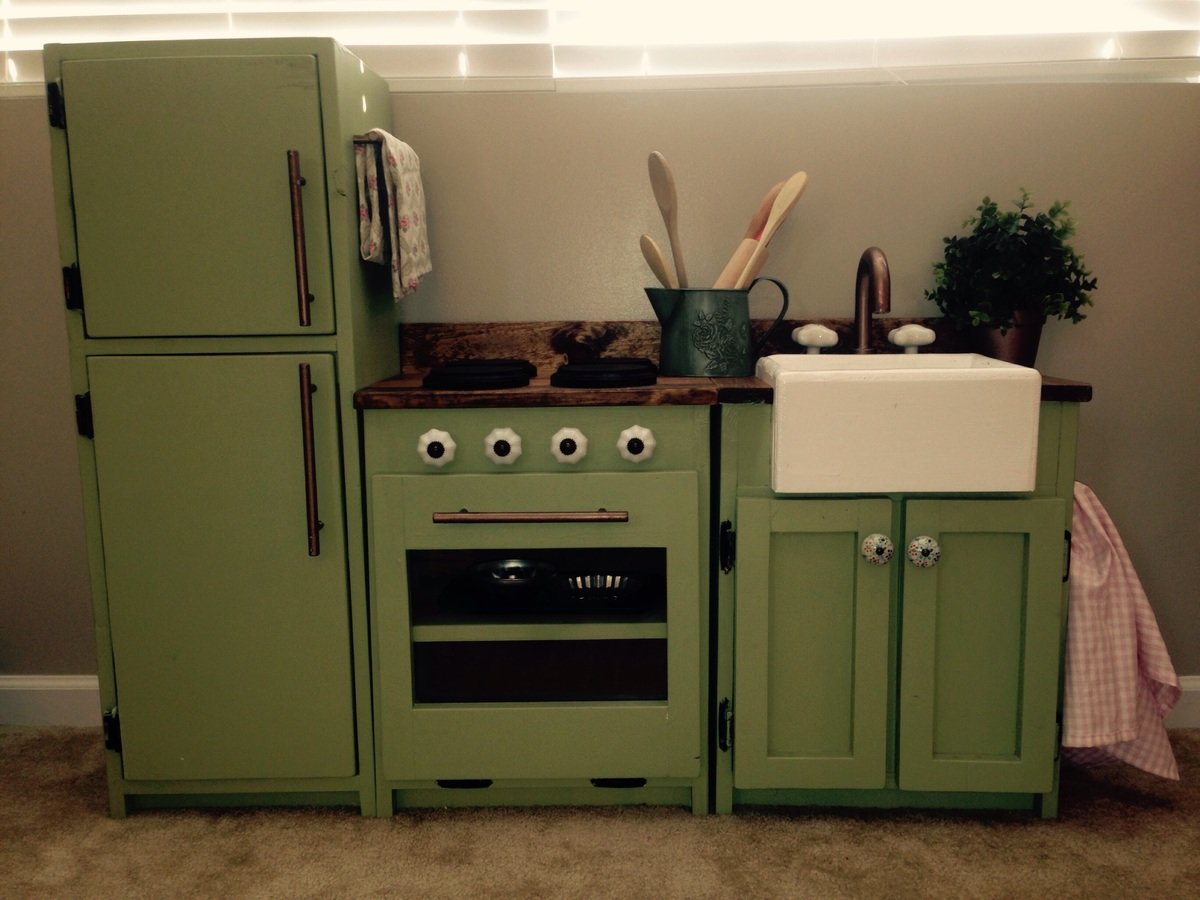
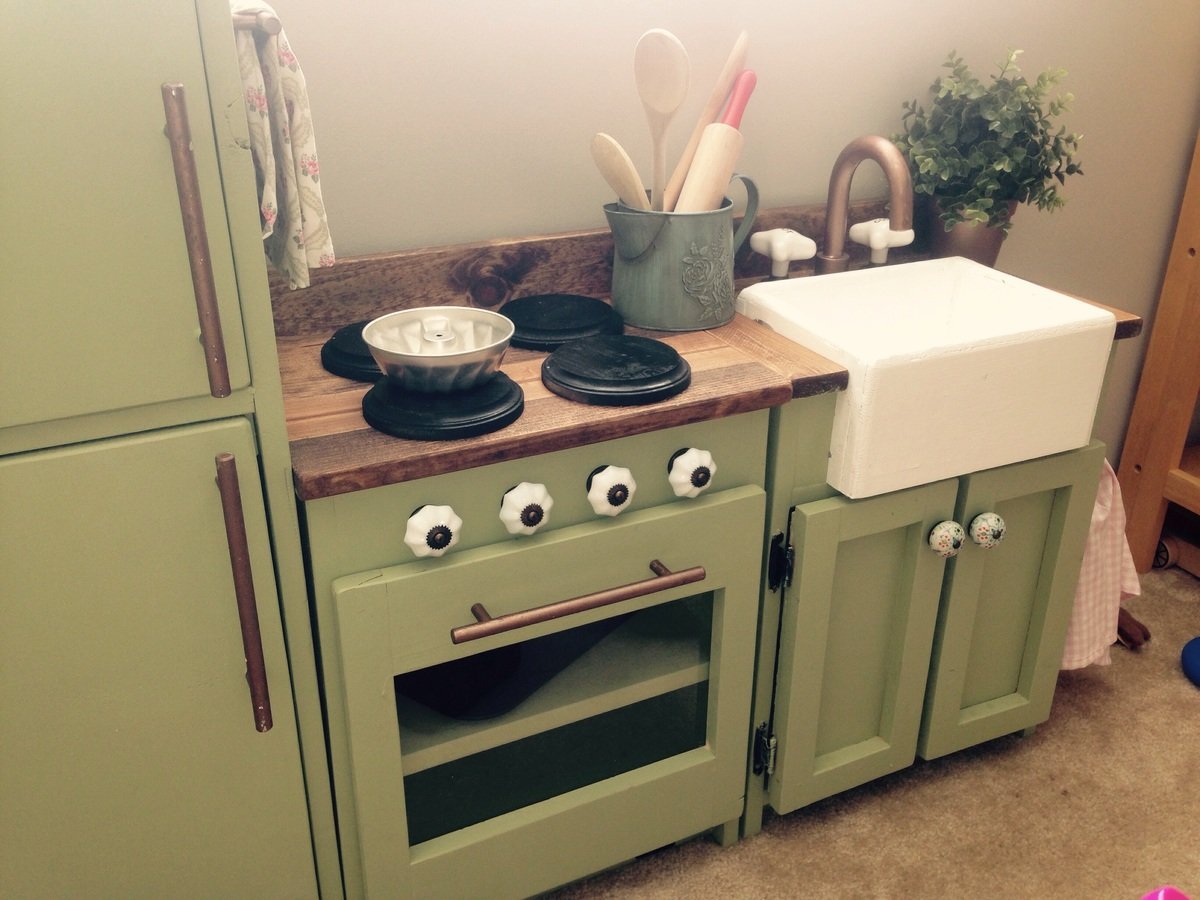
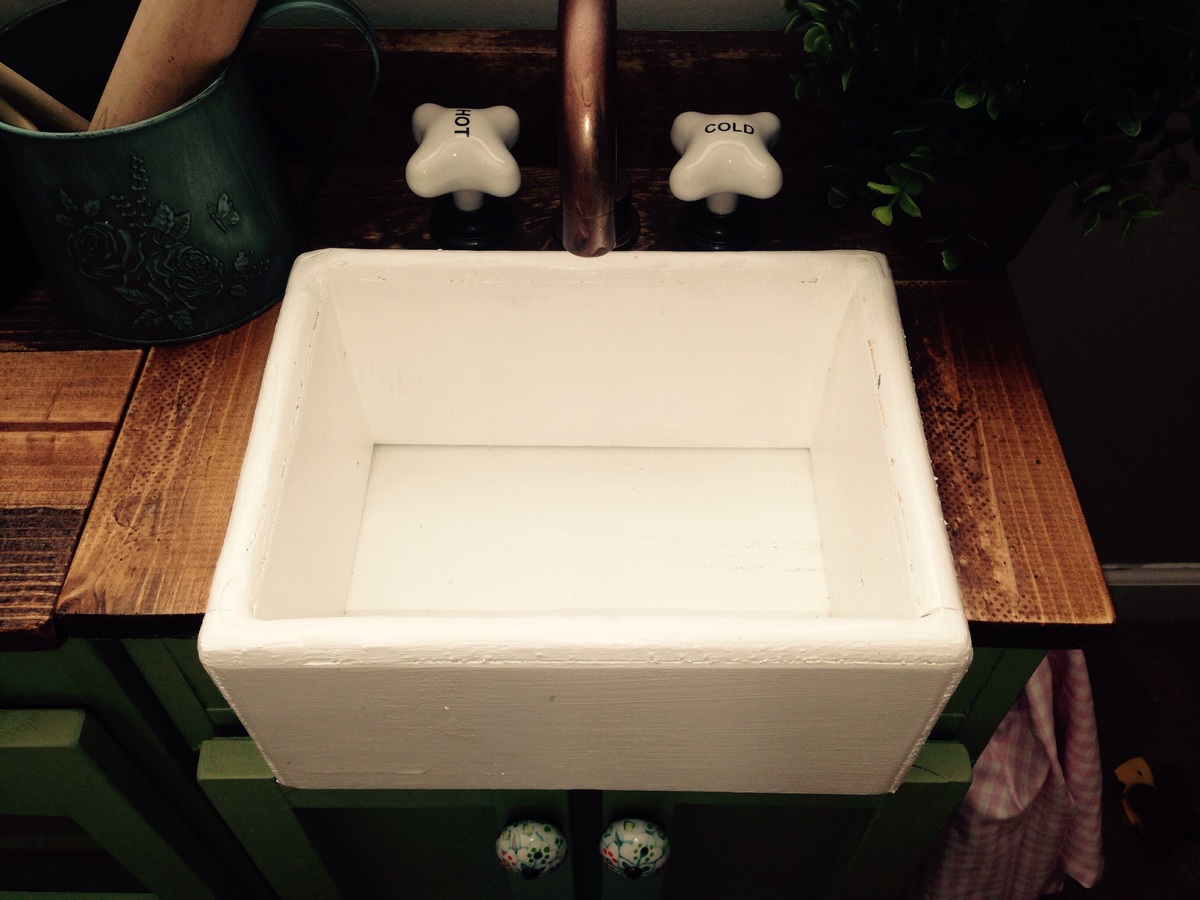
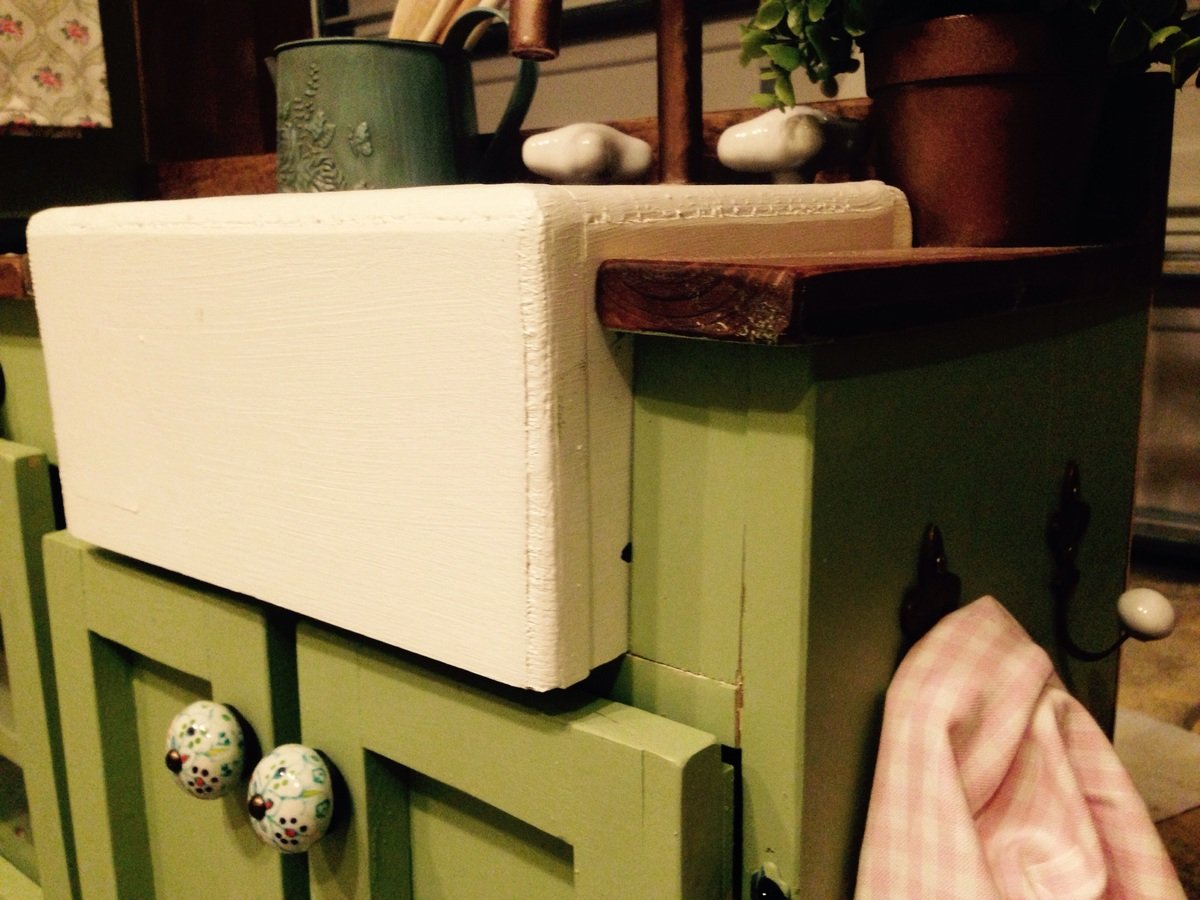
We really wanted to give our 2 year old a play kitchen for Christmas. We also didn't want to spend the money on the likes of the Pottery Barn set, and weweren't sold on the lesser-expensive options. Fortunately, a quick internet search led me to Ana White's website and plans for this play kitchen. As someone who has never built anything before, the plans seemed very doable. All of the brag posts were also inspirational and sold me on starting this project. I worked on this an hour or so after work for a couple of weeks, and then a few longer nights running up to Christmas Eve (always a bit of a procrastinator!). As neither my wife or I know how to sew, we decided to turn the space underneath the sink into a cabinet. The paint color was left over from painting our kitchen and family room, and we decided to stain the stove and counter tops. Overall, we are very pleased and proud with how this turned out, and our 2 year old loves playing with the set!

Estimated Time Investment
Weekend Project (10-20 Hours)
Recommended Skill Level
Beginner

Comments

JoanneS

Wed, 12/31/2014 - 13:15

This looks awesome! Love all the details and the green color with the stained counter. Great job!

Large Old English Style Farmhouse Dining Table

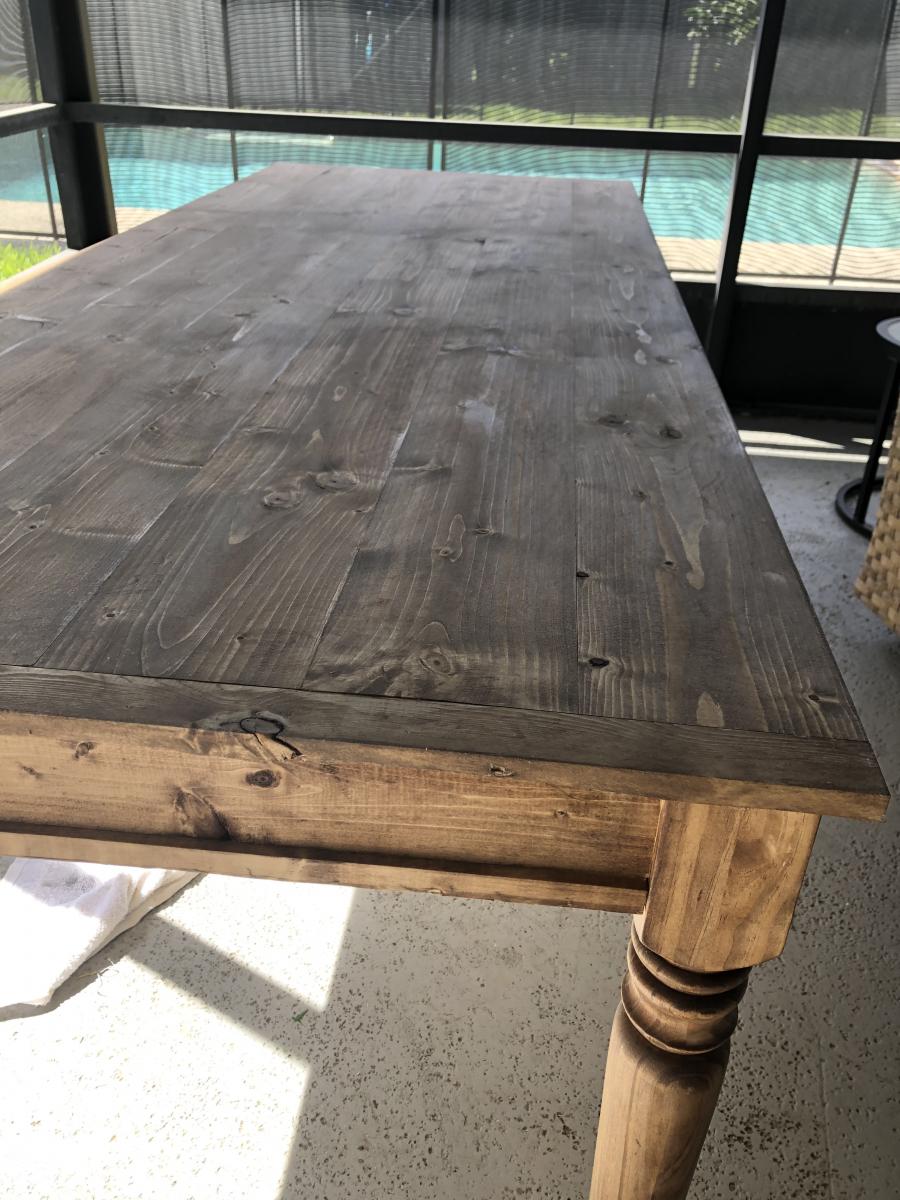
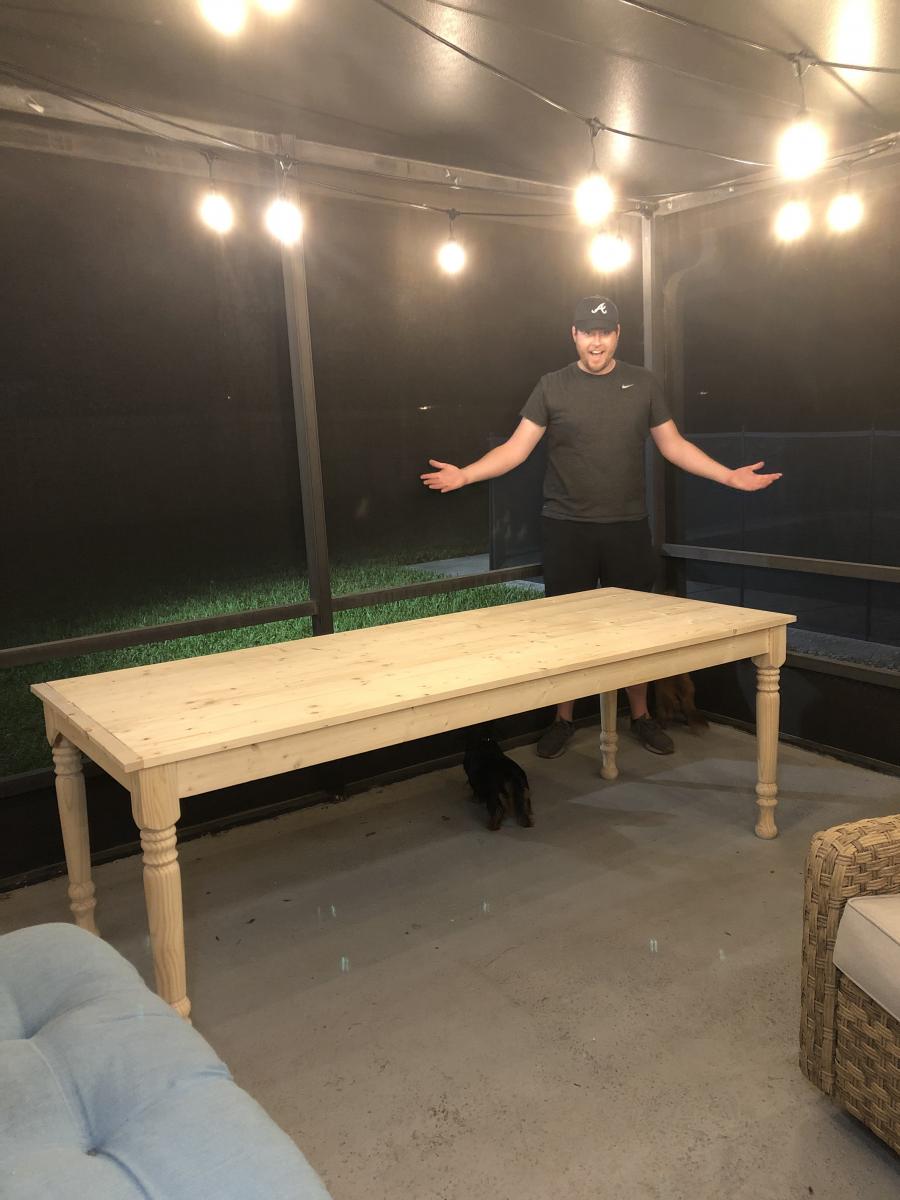
My wife and I were wanting a large outdoor farmhouse table that looked stylish, and like it could have been bought at Pottery Barn or another high-end furniture store. We found this plan that Ana white had made "Small Old English Style Farmhouse Dining Table". We often host groups from our church and will have 15-20 people on our patio or around our pool area, so we needed a bigger table... I just made some modifications to make it longer (7ft) in length to better fit our space and allow for more people to sit.

To make this plan longer, I simply adjusted the cut-list on the long 1x2s, 1x4s, and 1x6; and added a crossbar to prevent the longer tabletop from sagging. I also added the diagonal corner struts to make the table a little sturdier.

Adjusted Shopping List:
4 - 1x2 @ 8ft
5 - 1x4 @ 8 ft
6 - 1x6 @ 8ft
Waterproof 1 1/4" Kreg screws (for outdoor use)
Minwax Weathered Oak
Minwax Vintage Grey

Adjusted Cut-List
• 2 - 1x2 @ 26.5"
• 2 - 1x2 @ 76.5"
• 2 - 1x2 @ ~33.25"
• 2 - 1x4 @ 26.5"
• 2 - 1x4 @ 76.5"
• 4 - 1x4 @ 7.25" w/ 45º miter (diagonal corner supports)
• 1 - 1x4 @ ~28" (Crossbar - I forget the exact measurement)
• 6 - 1x6 @ 82"

For seating we just bought some inexpensive farmhouse weather resistant chairs from Walmart:
https://www.walmart.com/ip/Yaheetech-Metal-Dinning-Chairs-Stackable-Cof…

Estimated Cost
$170
Estimated Time Investment
Day Project (6-9 Hours)
Finish Used
Minwax Early American (base), Minwax Weathered Grey (2nd coat)
(See more on outdoor use of stains: https://ana-white.com/blog/2019/05/outdoor-wood-furniture-finishing-secrets)
Recommended Skill Level
Beginner

Comments

Laundry Room Floating Shelves and Cubby

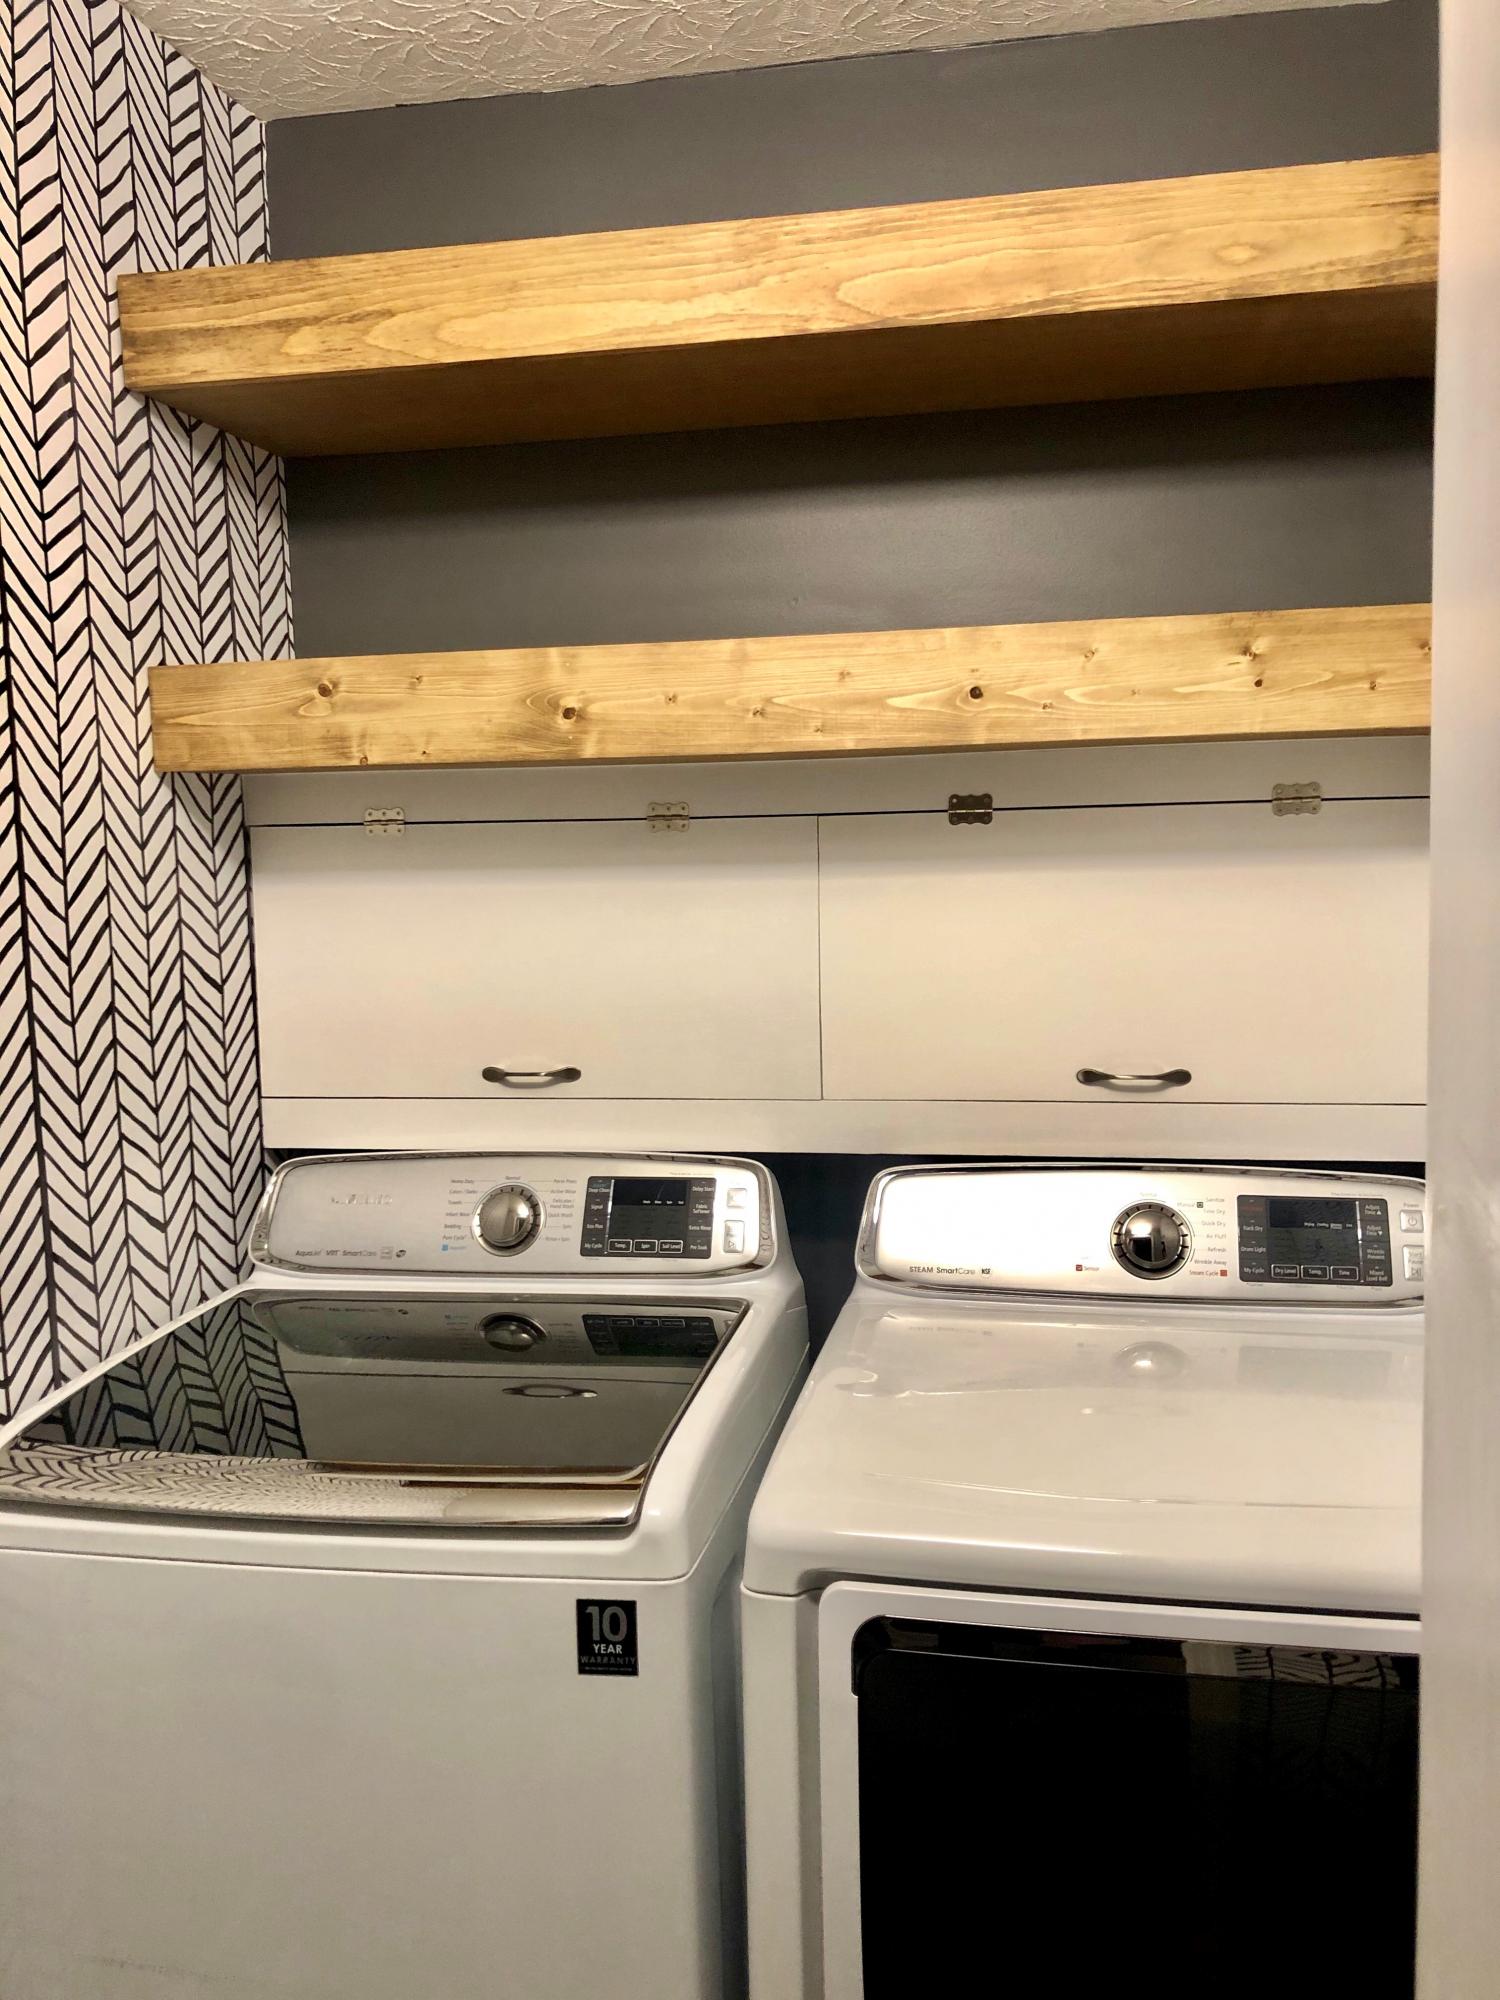
I have a tiny laundry room closet, but this remodel made a world of difference. The shelves were too high to reach routinely, so I didn't add Ana's hidden pull outs. But the cubby is a lifesaver and hides all the unsightly cleaning supplies perfectly. Now to decorate!

Estimated Cost
$100 covid wood cost
Estimated Time Investment
Afternoon Project (3-6 Hours)
Finish Used
Minwax Special Walnut
Recommended Skill Level
Beginner

Comments

zannej

Tue, 12/05/2023 - 19:58

These look great! I'm thinking of doing something like this, although I might add a louvered panel on one of the doors since I plan to use an AAV. There is an atmospheric vent not too far away but trying to route a pipe would be too much of a pita. The doors could hide the water supply lines & hose as well as keep stuff from falling behind the machines. I do have to be mindful that I need to be able to open them and not have them obstructed though.

ryobi workbench by ana white

Submitted by Anonymous (not verified) on Wed, 05/03/2017 - 00:41

I built this new workbench for my garage to accomodate my table and miter saw and to add some stowaway storage and I cant tell you how much I love it, especially with being able to pull the tables out to make an outfeed for the tablesaw. I altered theplans a bit to shorten the entire length by nearly 1.5 feet and instead of the board mounted tool space I added my bench vise to this gap and use shelved underneath for storage. The plan was simple to follow and allowed me to build a bench that all of my neighbors talk about now! Thanks so much Ana!

Estimated Cost
250.00
Estimated Time Investment
Weekend Project (10-20 Hours)
Finish Used
a couple coats of tung oil
Recommended Skill Level
Beginner

Maple Stool

Submitted by lostime on Sat, 03/21/2015 - 16:14

Ripped a 2x4 down the middle for the legs and bottom rungs, so custom 2x2s.  1x2s for the mid and top.  Biscuit jointed and edge glued 12x12 Hard Maple Top.  Glue and pocket hole joinery. 

Built from Plan(s)
Estimated Cost
maybe $20
Estimated Time Investment
An Hour or Two (0-2 Hours)
Finish Used
Brown Spray Paint for the legs. Clear Shellac for the top.
Recommended Skill Level
Beginner

Comments

Farm table for my sister

Submitted by Anonymous (not verified) on Mon, 10/04/2021 - 14:09

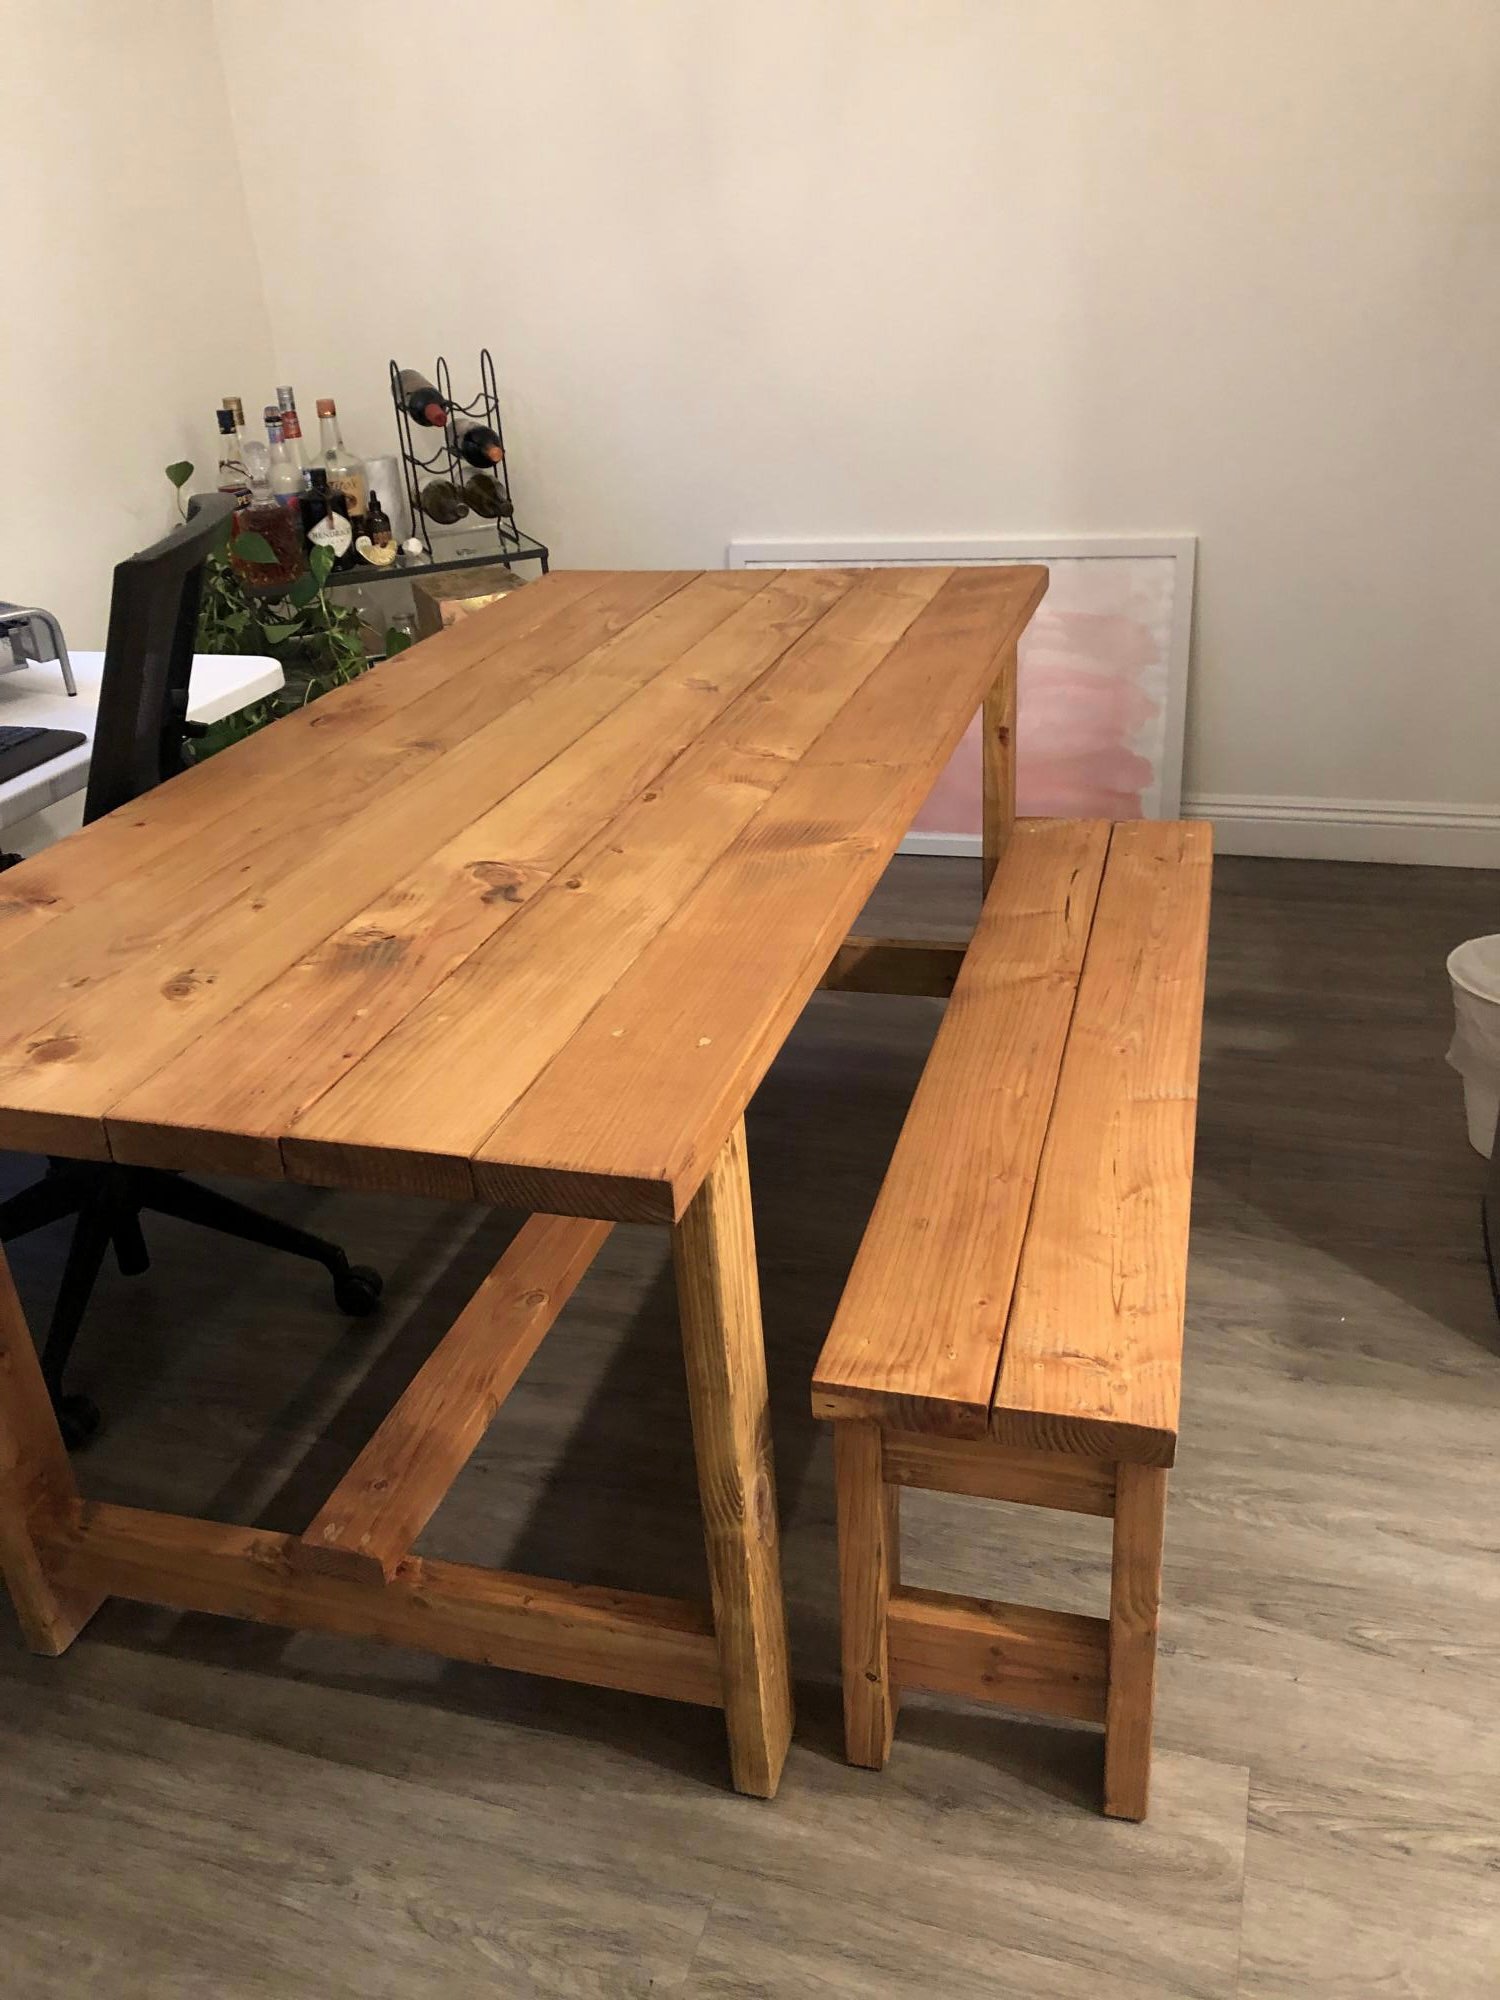
So my sister moved back to Southern California from New York. She found a great place but needed a table. I made one table and one bench. My sister then found two chairs for the other side. This is the second or third thing I have made/built from Ana’s site. Thank you for making me feel more manly with great instruction. I also built this pre Covid-19 when lumber was not so expensive.

Comments

Our Thanksgiving Family Project

Submitted by loniwolfe on Wed, 03/09/2011 - 16:50

My husband, step father and I built these Thanksgiving weekend (2010) and my mom got us a half bushel of oysters to snack on and made awesome steamed mussels with bread for dinner. This was a very fun family weekend.

I modifyed the plans a little to make the arms angle in a bit instead of being straight boards and also created the curved front. Then after building the first chair, Pat decided to make the second chair's back rest taller and cut angles to match the arms.

I picked intermediate because of needing a miter saw for all the different angles needed for getting the front right.
Also, It took one day for each chair

Built from Plan(s)
Estimated Time Investment
Weekend Project (10-20 Hours)
Finish Used
To my knowledge, Pat has not yet stained them, but once he does I will take more pics and find out what he used!
Recommended Skill Level
Intermediate

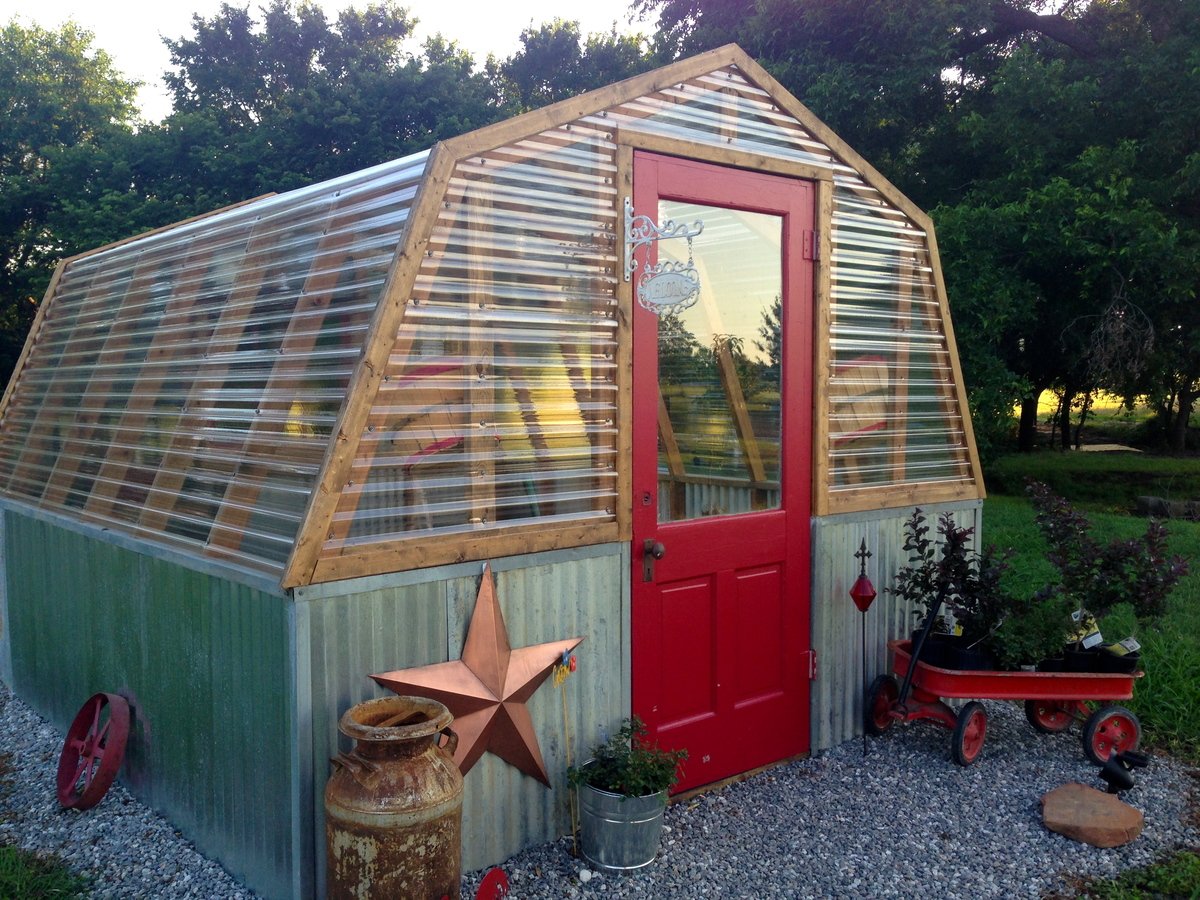
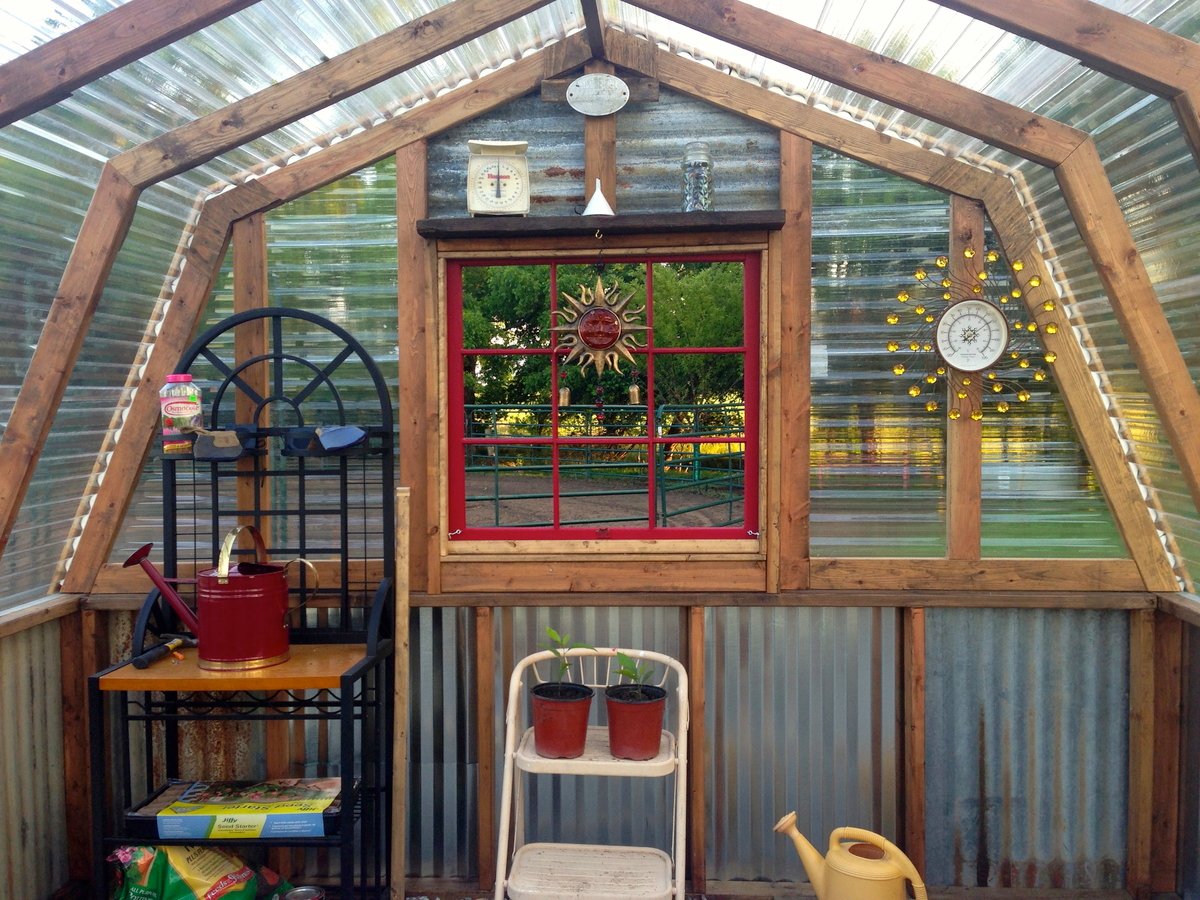
Our Greenhouse:)

Submitted by lmckinney on Thu, 06/06/2013 - 19:43

Your plans made this project so much easier. We love it and have gotten a lot of compliments for it.

Estimated Cost
1000.00
Recommended Skill Level
Intermediate

Comments

Joni

Fri, 06/07/2013 - 12:42

This is amazing! All of your finishing touches make this really special. I love every detail.

Kirsten.dehart

Sun, 05/01/2016 - 17:43

Do the gable style roofs and greenhouse panels hold up in a climate for heavy snow loads??


Thanks!

Sandbox (plus stage and puppet theatre)

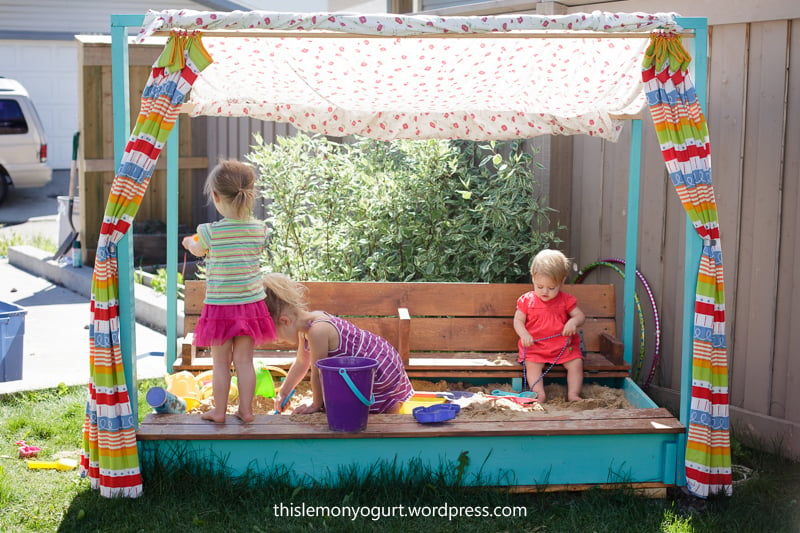
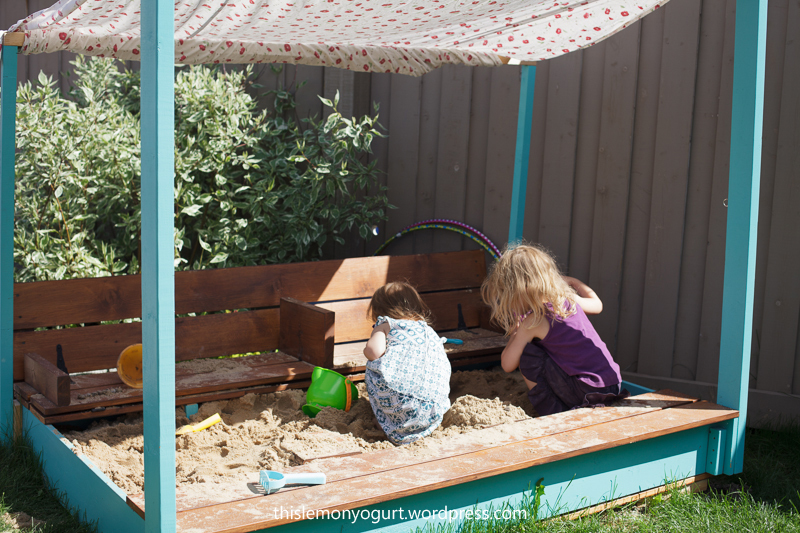
I started with the original plans for the sandbox with the benches, and then just sort of took off with the modifications.

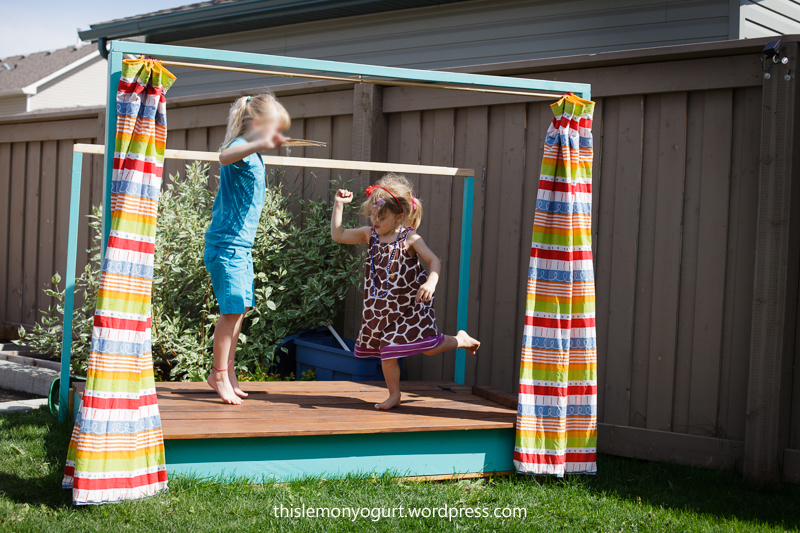
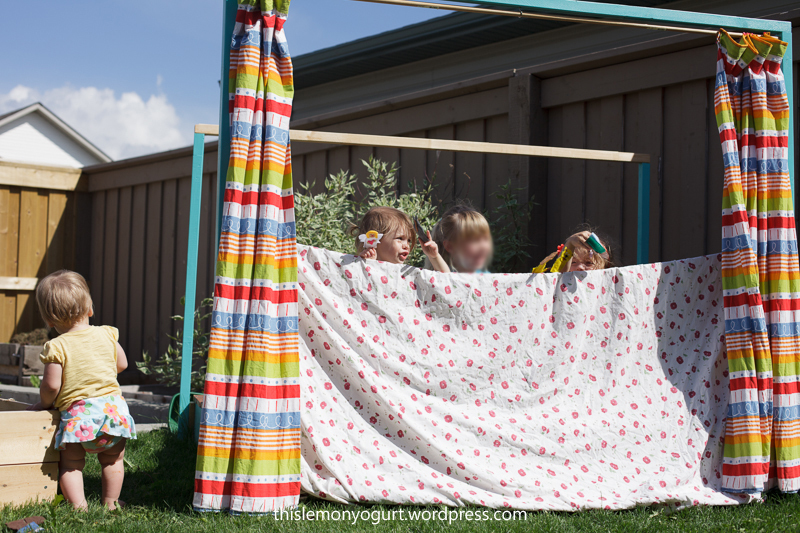
When it's open, it's a 4'x6' sandbox with a bench on one side and a canopy overhead. When it's closed, it's a stage complete with curtains, or can also convert into a puppet theatre.

I had to make several adjustments to the original plan to allow for enough support for the stage to be walked (and danced) on, including an extra armrest in the bench, and a few blocks built up from the base of the sand area. I also used 1x6 boards for the top instead of 1x4, to cover the entire 4' with only the one bench.

Thanks so much for the plans, my girls love it! (and thanks to KnittingEmily for posting the plans for the 6' sandbox, which gave me a jumping off point for the sizing I used.)

The story of how I built it can be found here:
http://www.thislemonyogurt.com/a-box-of-sand/

Built from Plan(s)
Estimated Time Investment
Weekend Project (10-20 Hours)
Recommended Skill Level
Beginner

Comments

Lasso the Moon

Fri, 06/28/2013 - 07:51

Oh, this must seem magical to those little ones. It looks like so much fun. Great job!
Anna

Our Chicken Coop (Aka Dollywood)

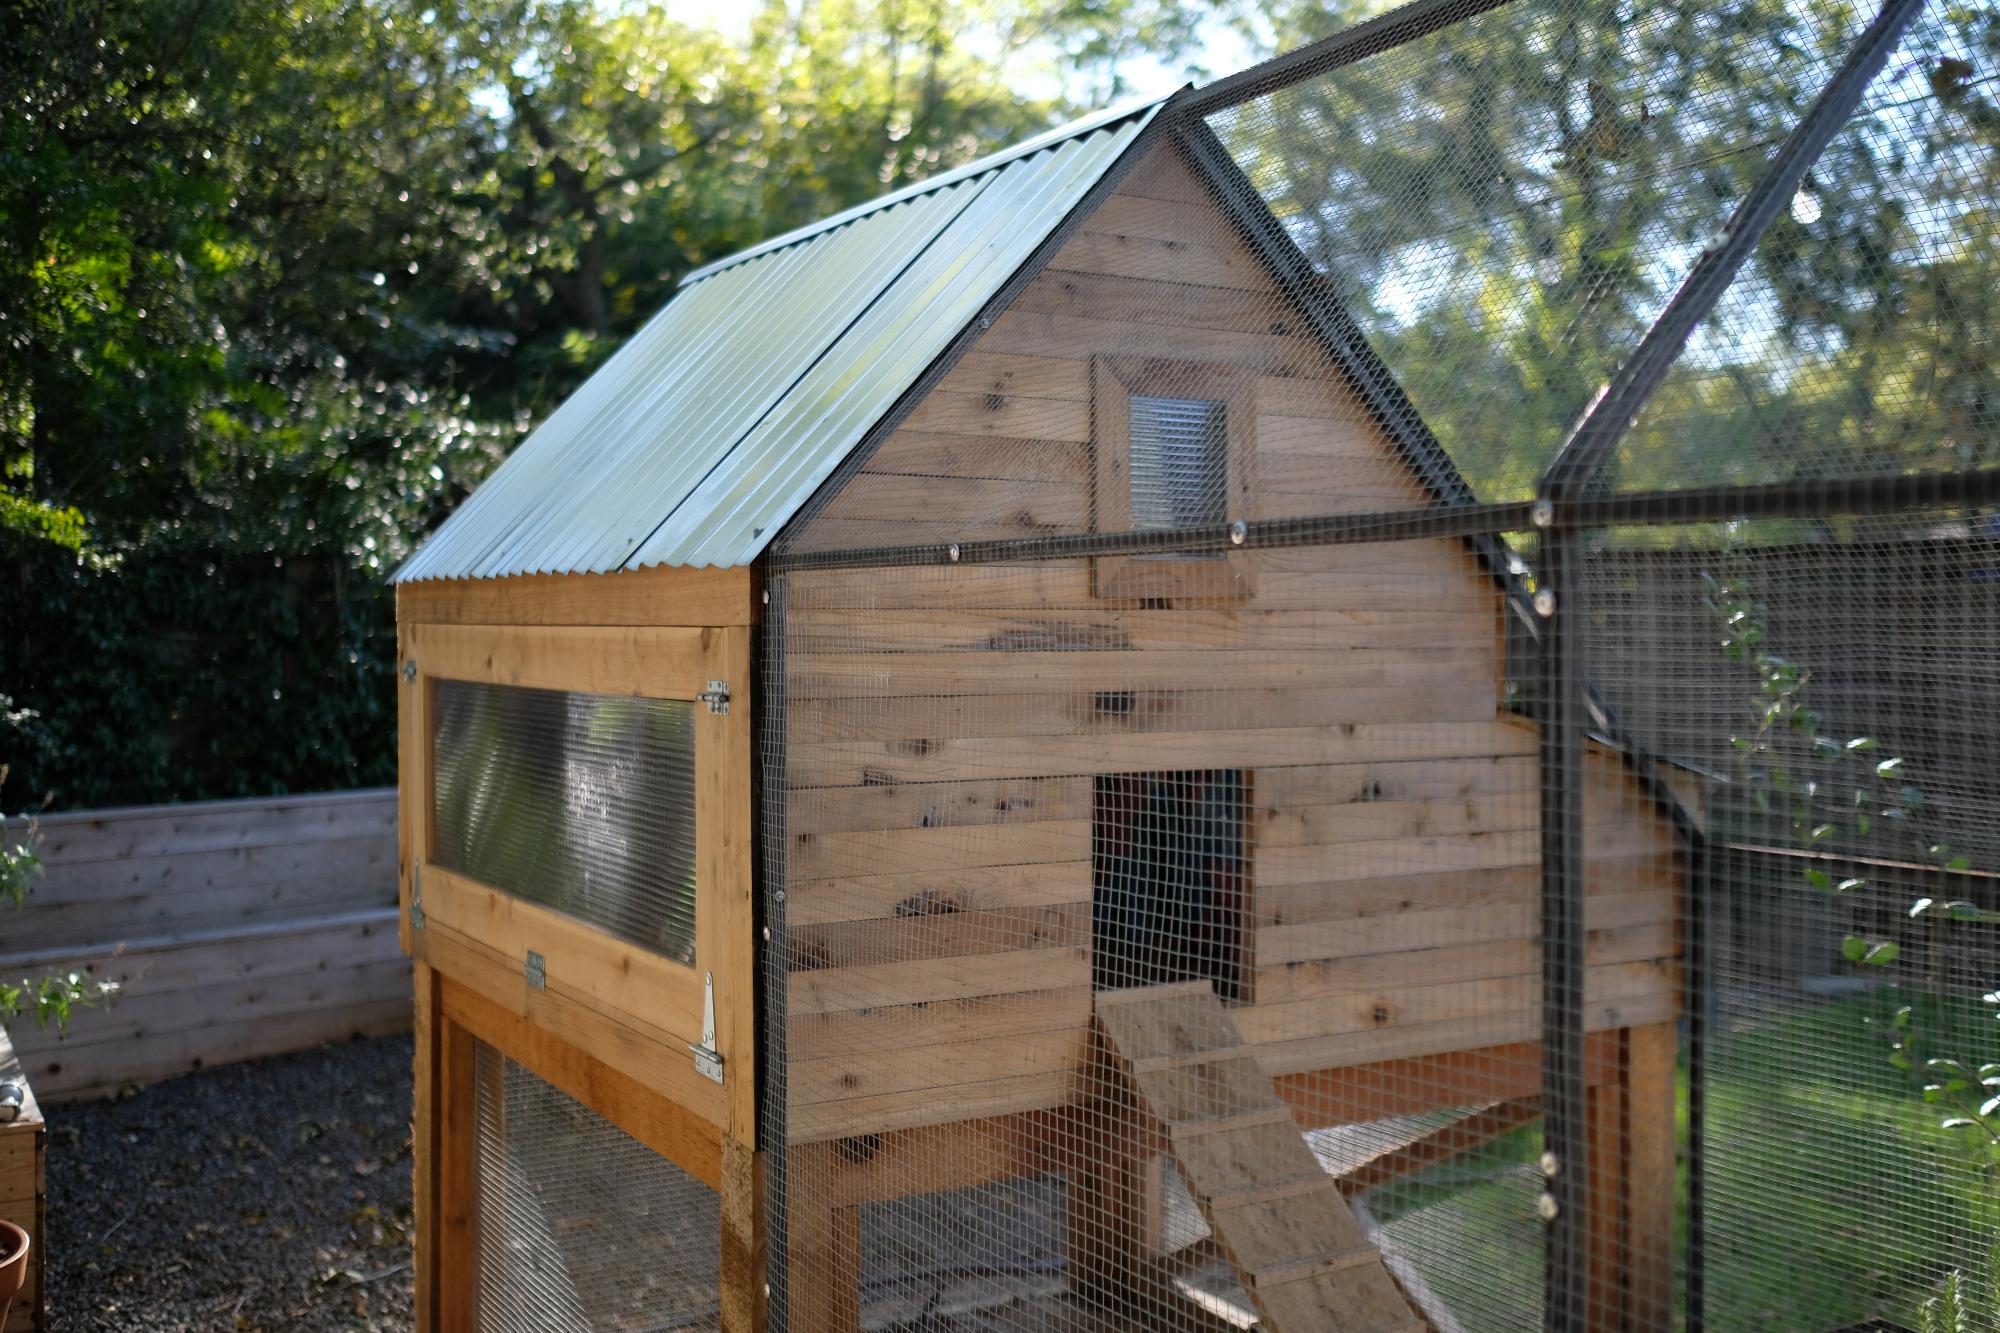
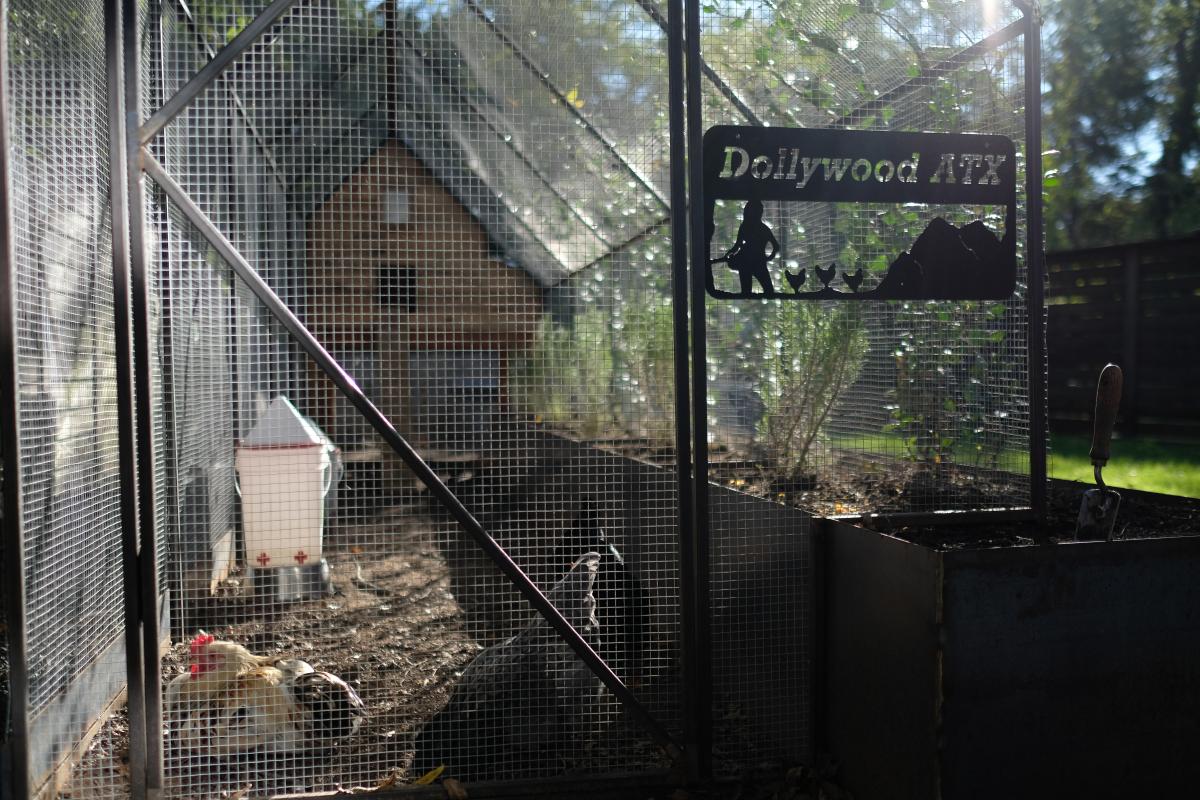
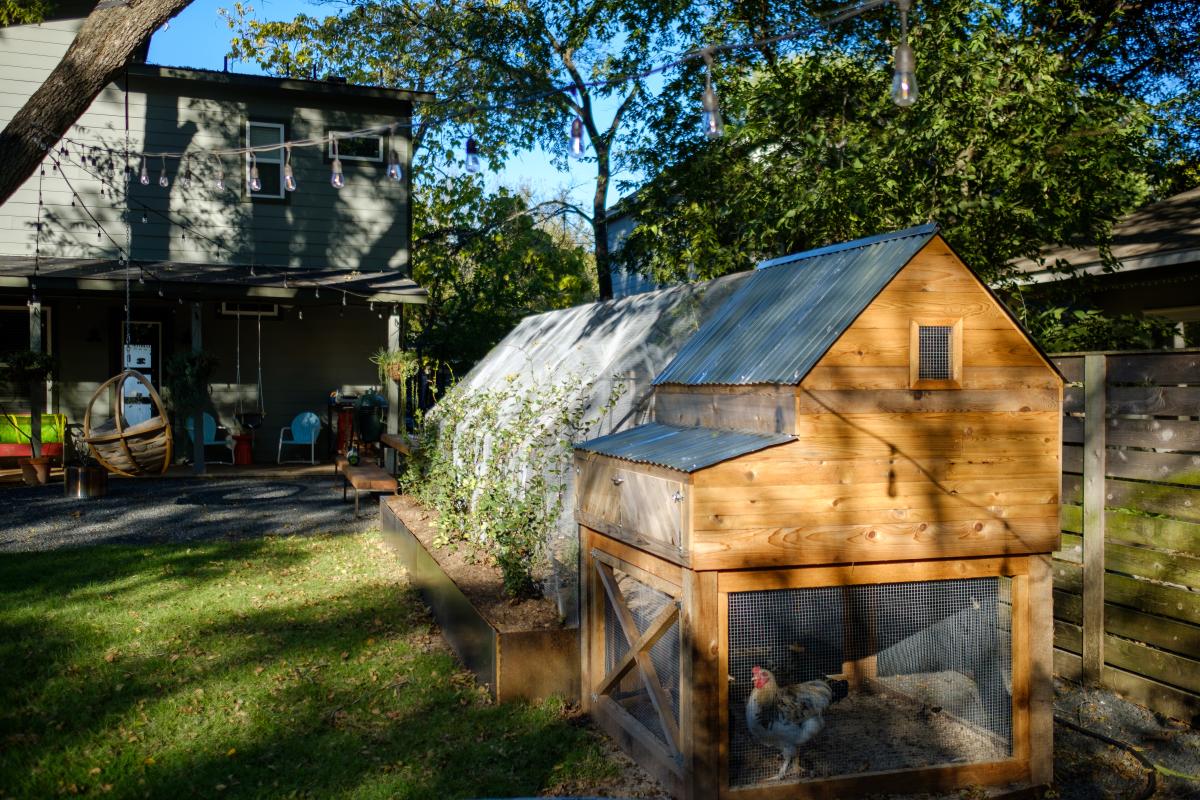
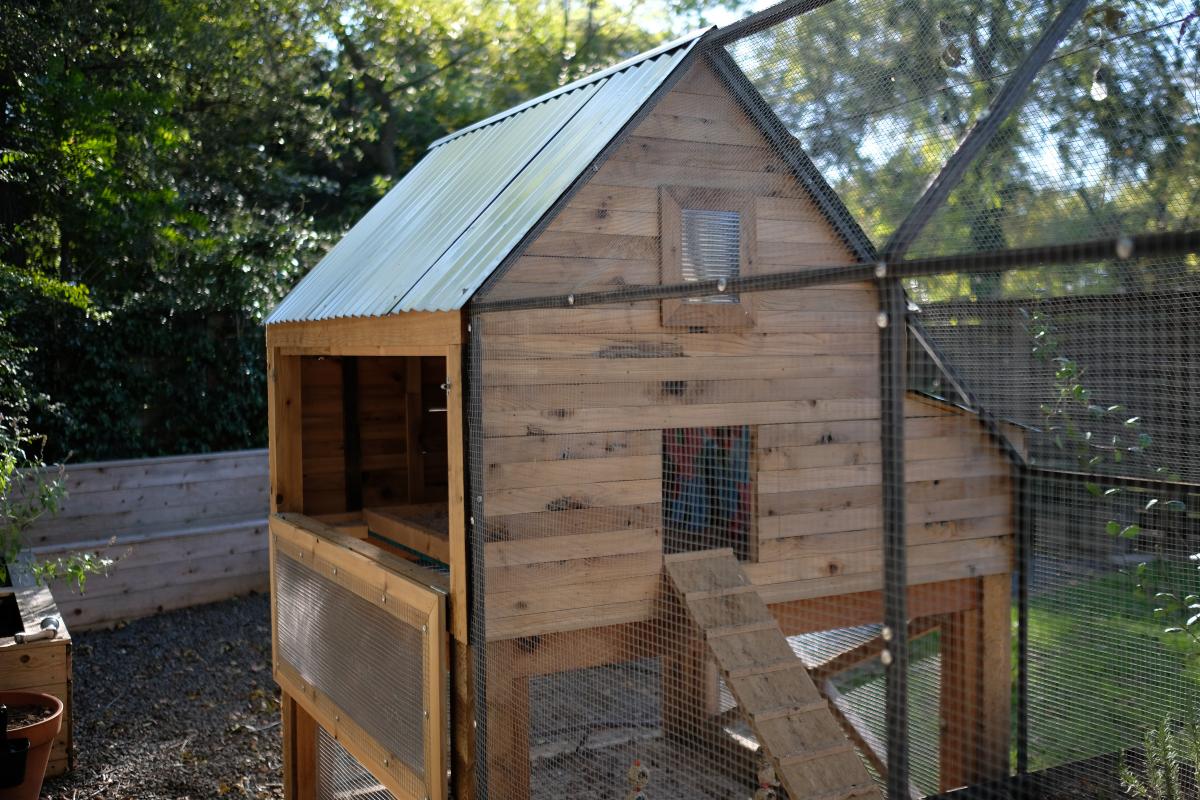
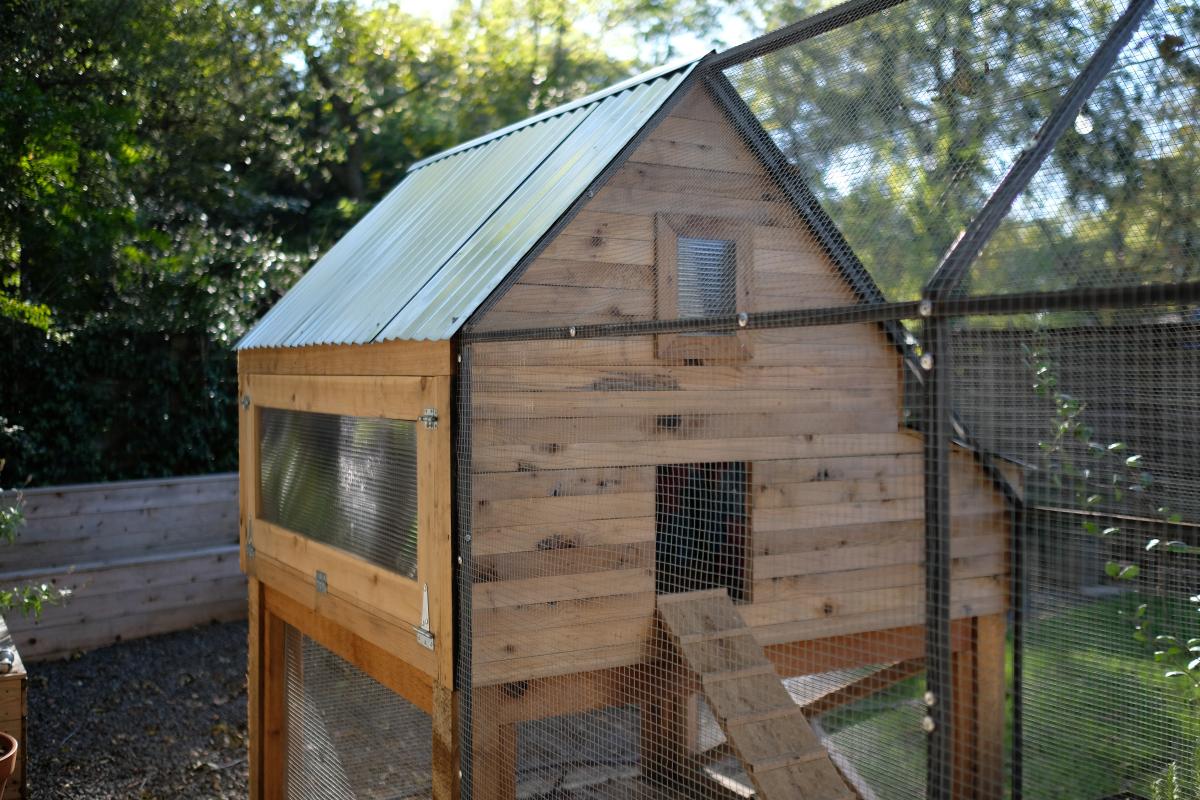
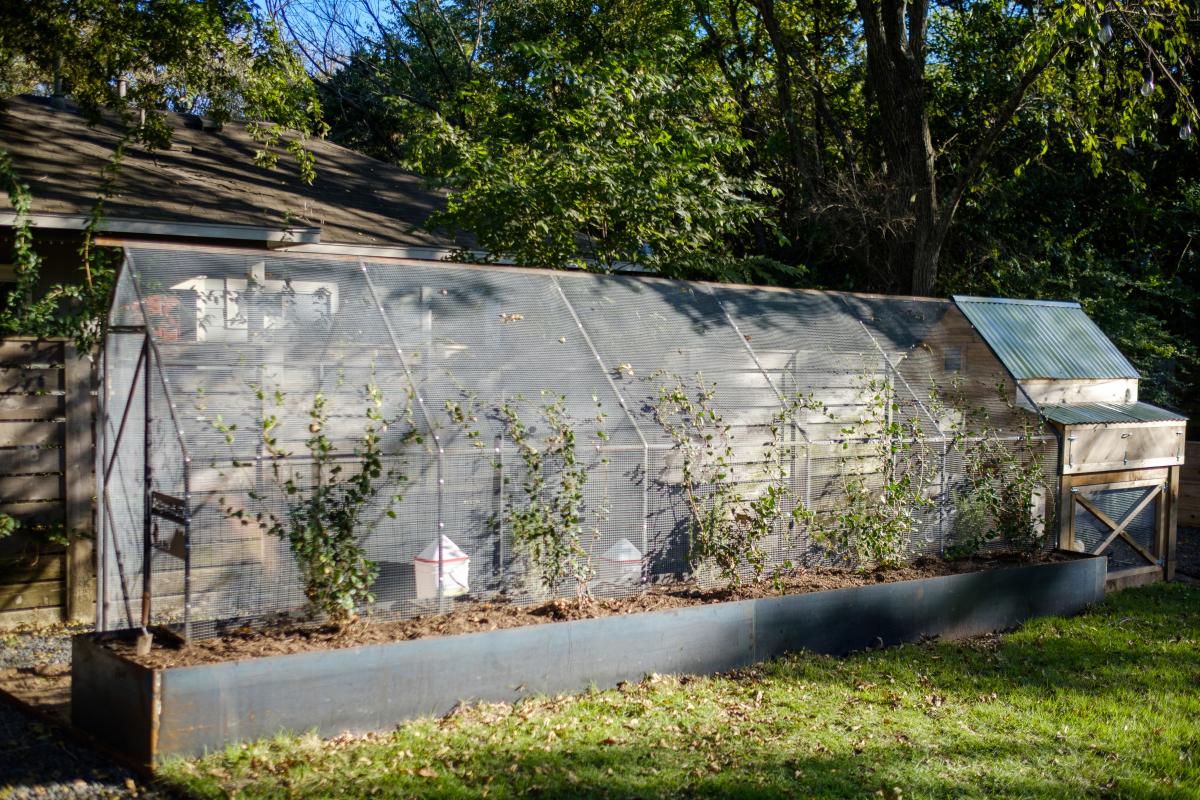
When we became accidental chicken owners, we had to build a coop fast. I found the plans for Ana’s replica of the Williams Sonoma chicken coop and got to work. They were very easy to follow and easy to modify to fit our own needs and aesthetic. We decided to enlarge the coop and remove the planter in the original plans to accommodate more chickens while keeping the original footprint. Instead of plywood, we used cedar reclaimed from an old fence we had recently replaced. We also enlarged the rear door to make clean-out as easy as possible. I cut pieces of polycarbonate to fit inside the door and windows to winterize the coop when temps drop below freezing. The run is designed to follow the shape of the coop and is large enough to give our 5 chickens plenty of space to roam when they aren’t free ranging in the yard. The planter box runs the length of the chicken run, providing plants to munch on inside and shady vines that will eventually cover the outside.

Comments

Outdoor Sectional

Submitted by Anonymous (not verified) on Wed, 06/08/2022 - 12:31

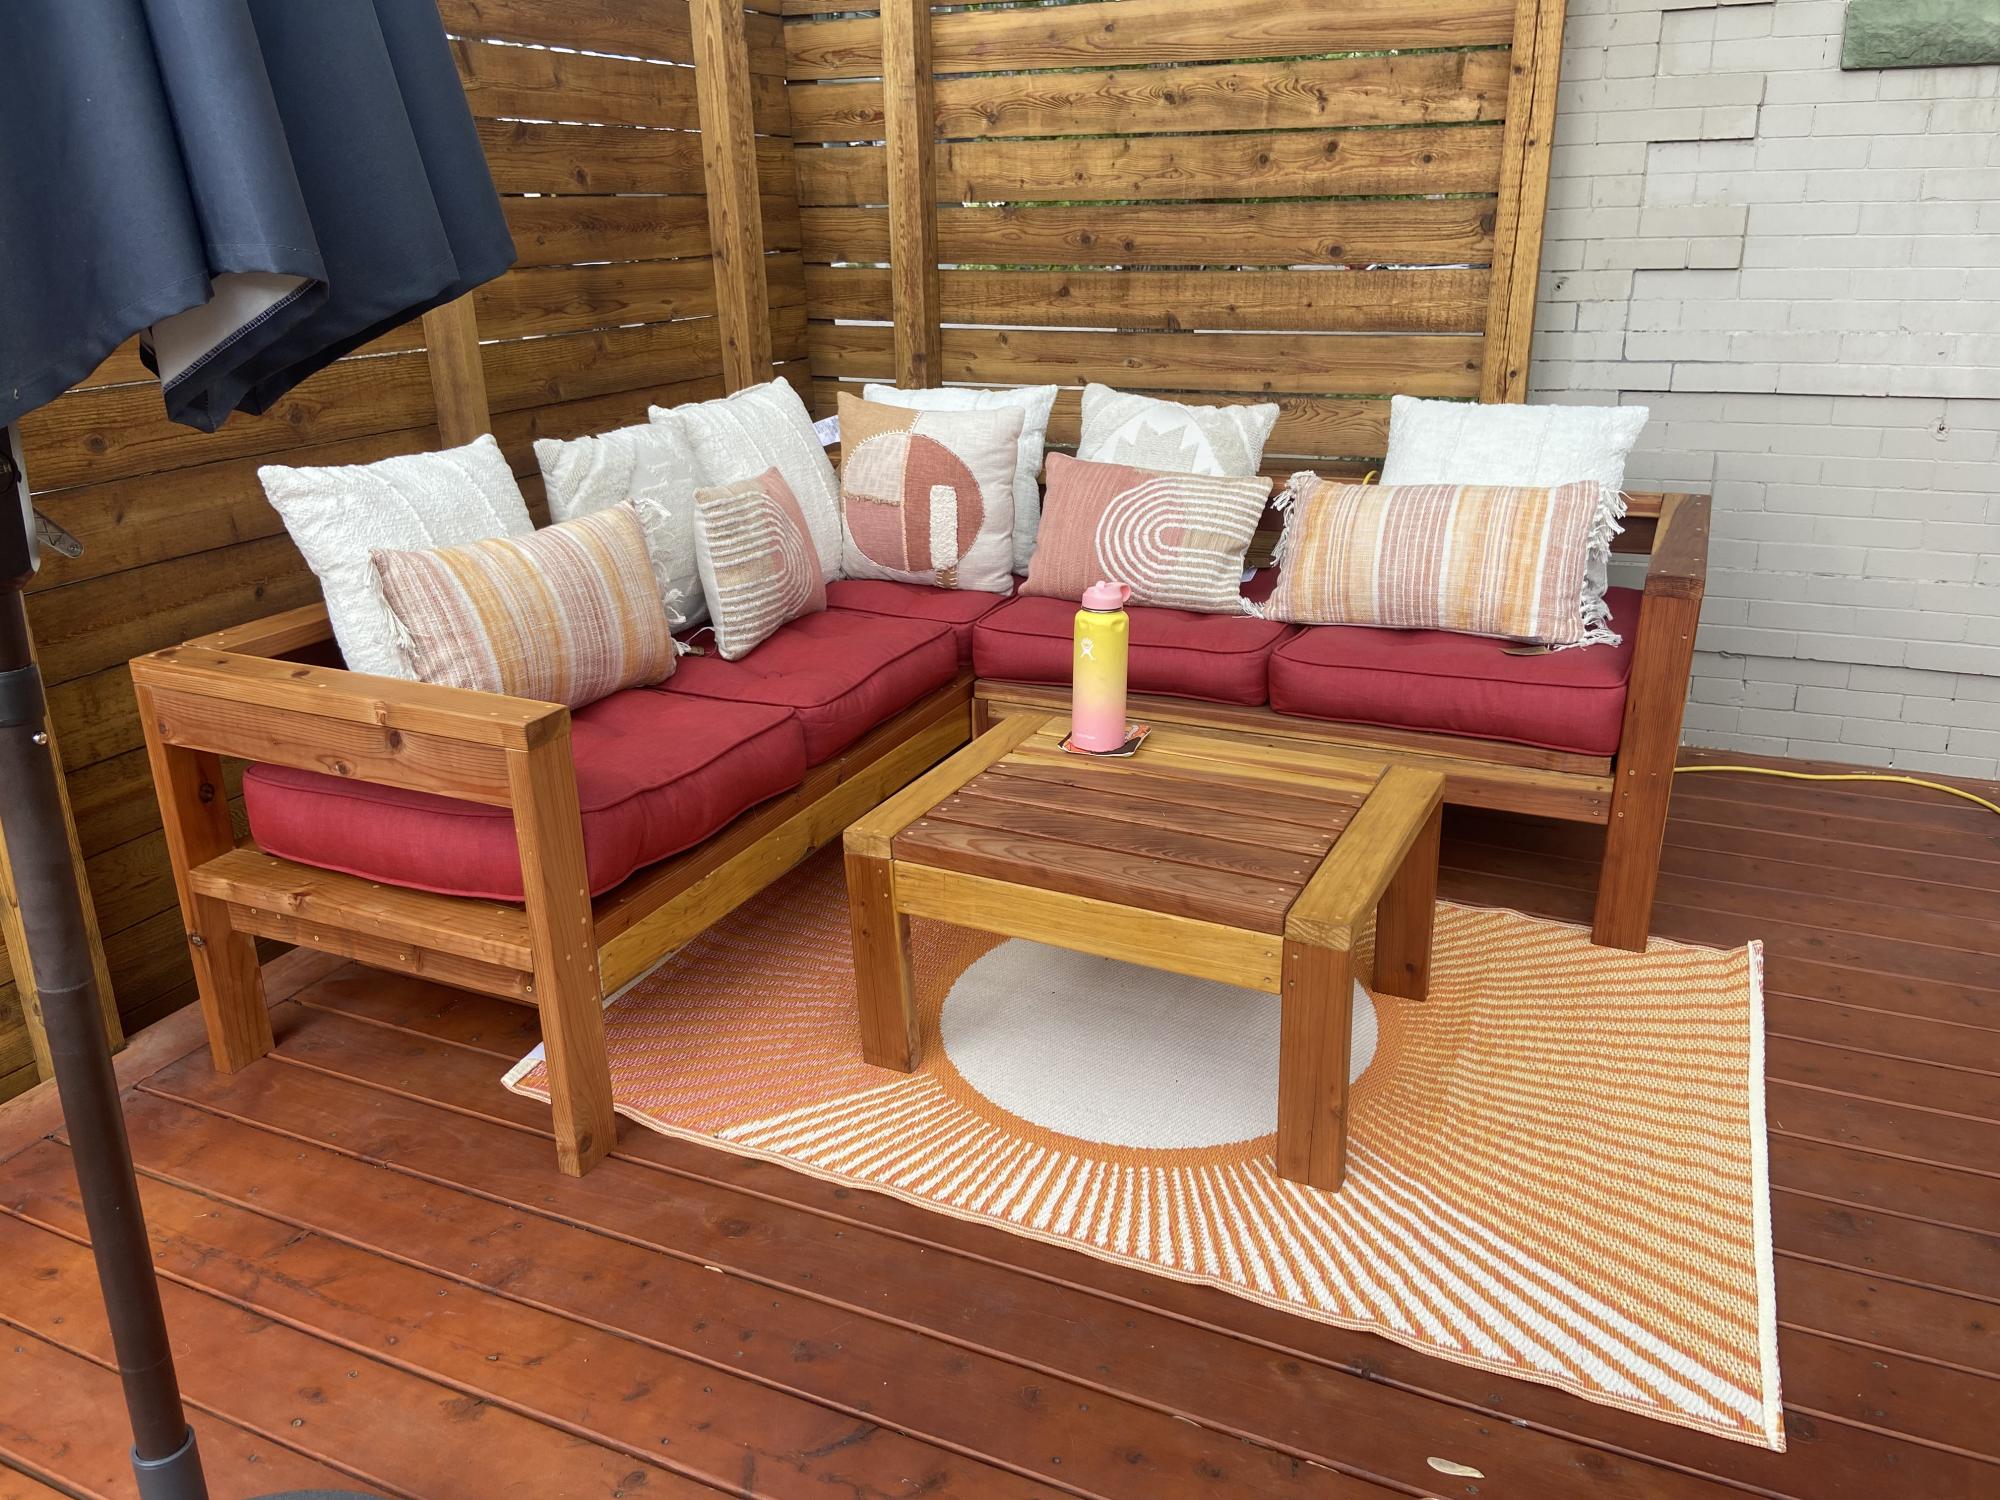
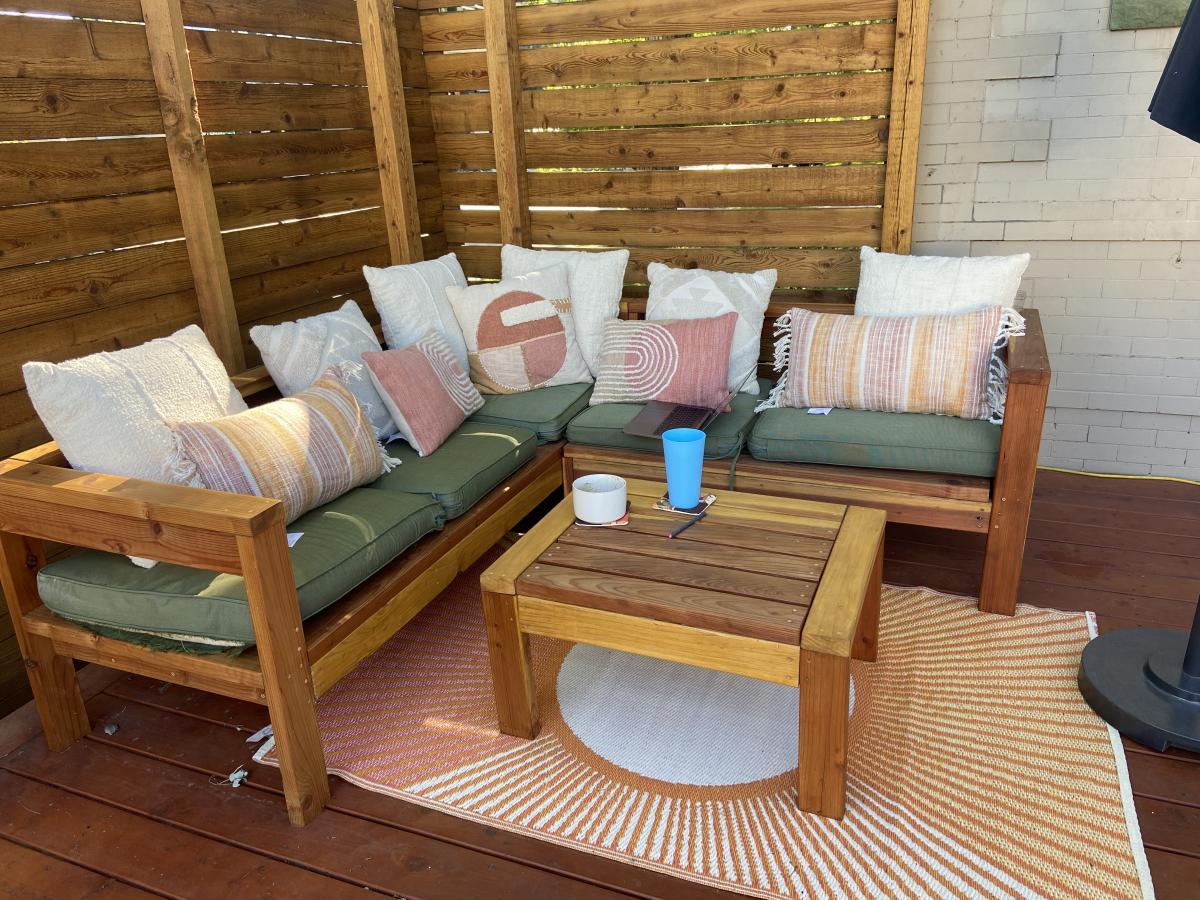
I built the two piece sectional + table and adjusted the sizing so the lengths of the sectionals pieces are the same.

Turned out amazing. So much fun building this and I can’t wait for my next project!

Comments

Seasonal And Holiday

Simple Outdoor Bench

Submitted by moldah on Wed, 01/11/2012 - 14:57

About a year ago, I stumbled across your site, I was a lurker for awhile, finally joined, and can finally post the projects I have done so far. This was my second build from your site. It works perfectly on the front porch.

Built from Plan(s)
Estimated Time Investment
Weekend Project (10-20 Hours)
Finish Used
Cherrywood by Minwax
Recommended Skill Level
Beginner

Comments

moldah

Fri, 01/13/2012 - 15:44

Thank you very much, I can't wait to start my next project, new night stands to match the bed. Yep, I'm hooked :)

Paul Ferrario (not verified)

Thu, 05/31/2012 - 14:59

I really like this plan - re the wood choices and finish: How is the wood, especially the white wood, holding up against the elements? Great job on this btw.
Thanks
Paul

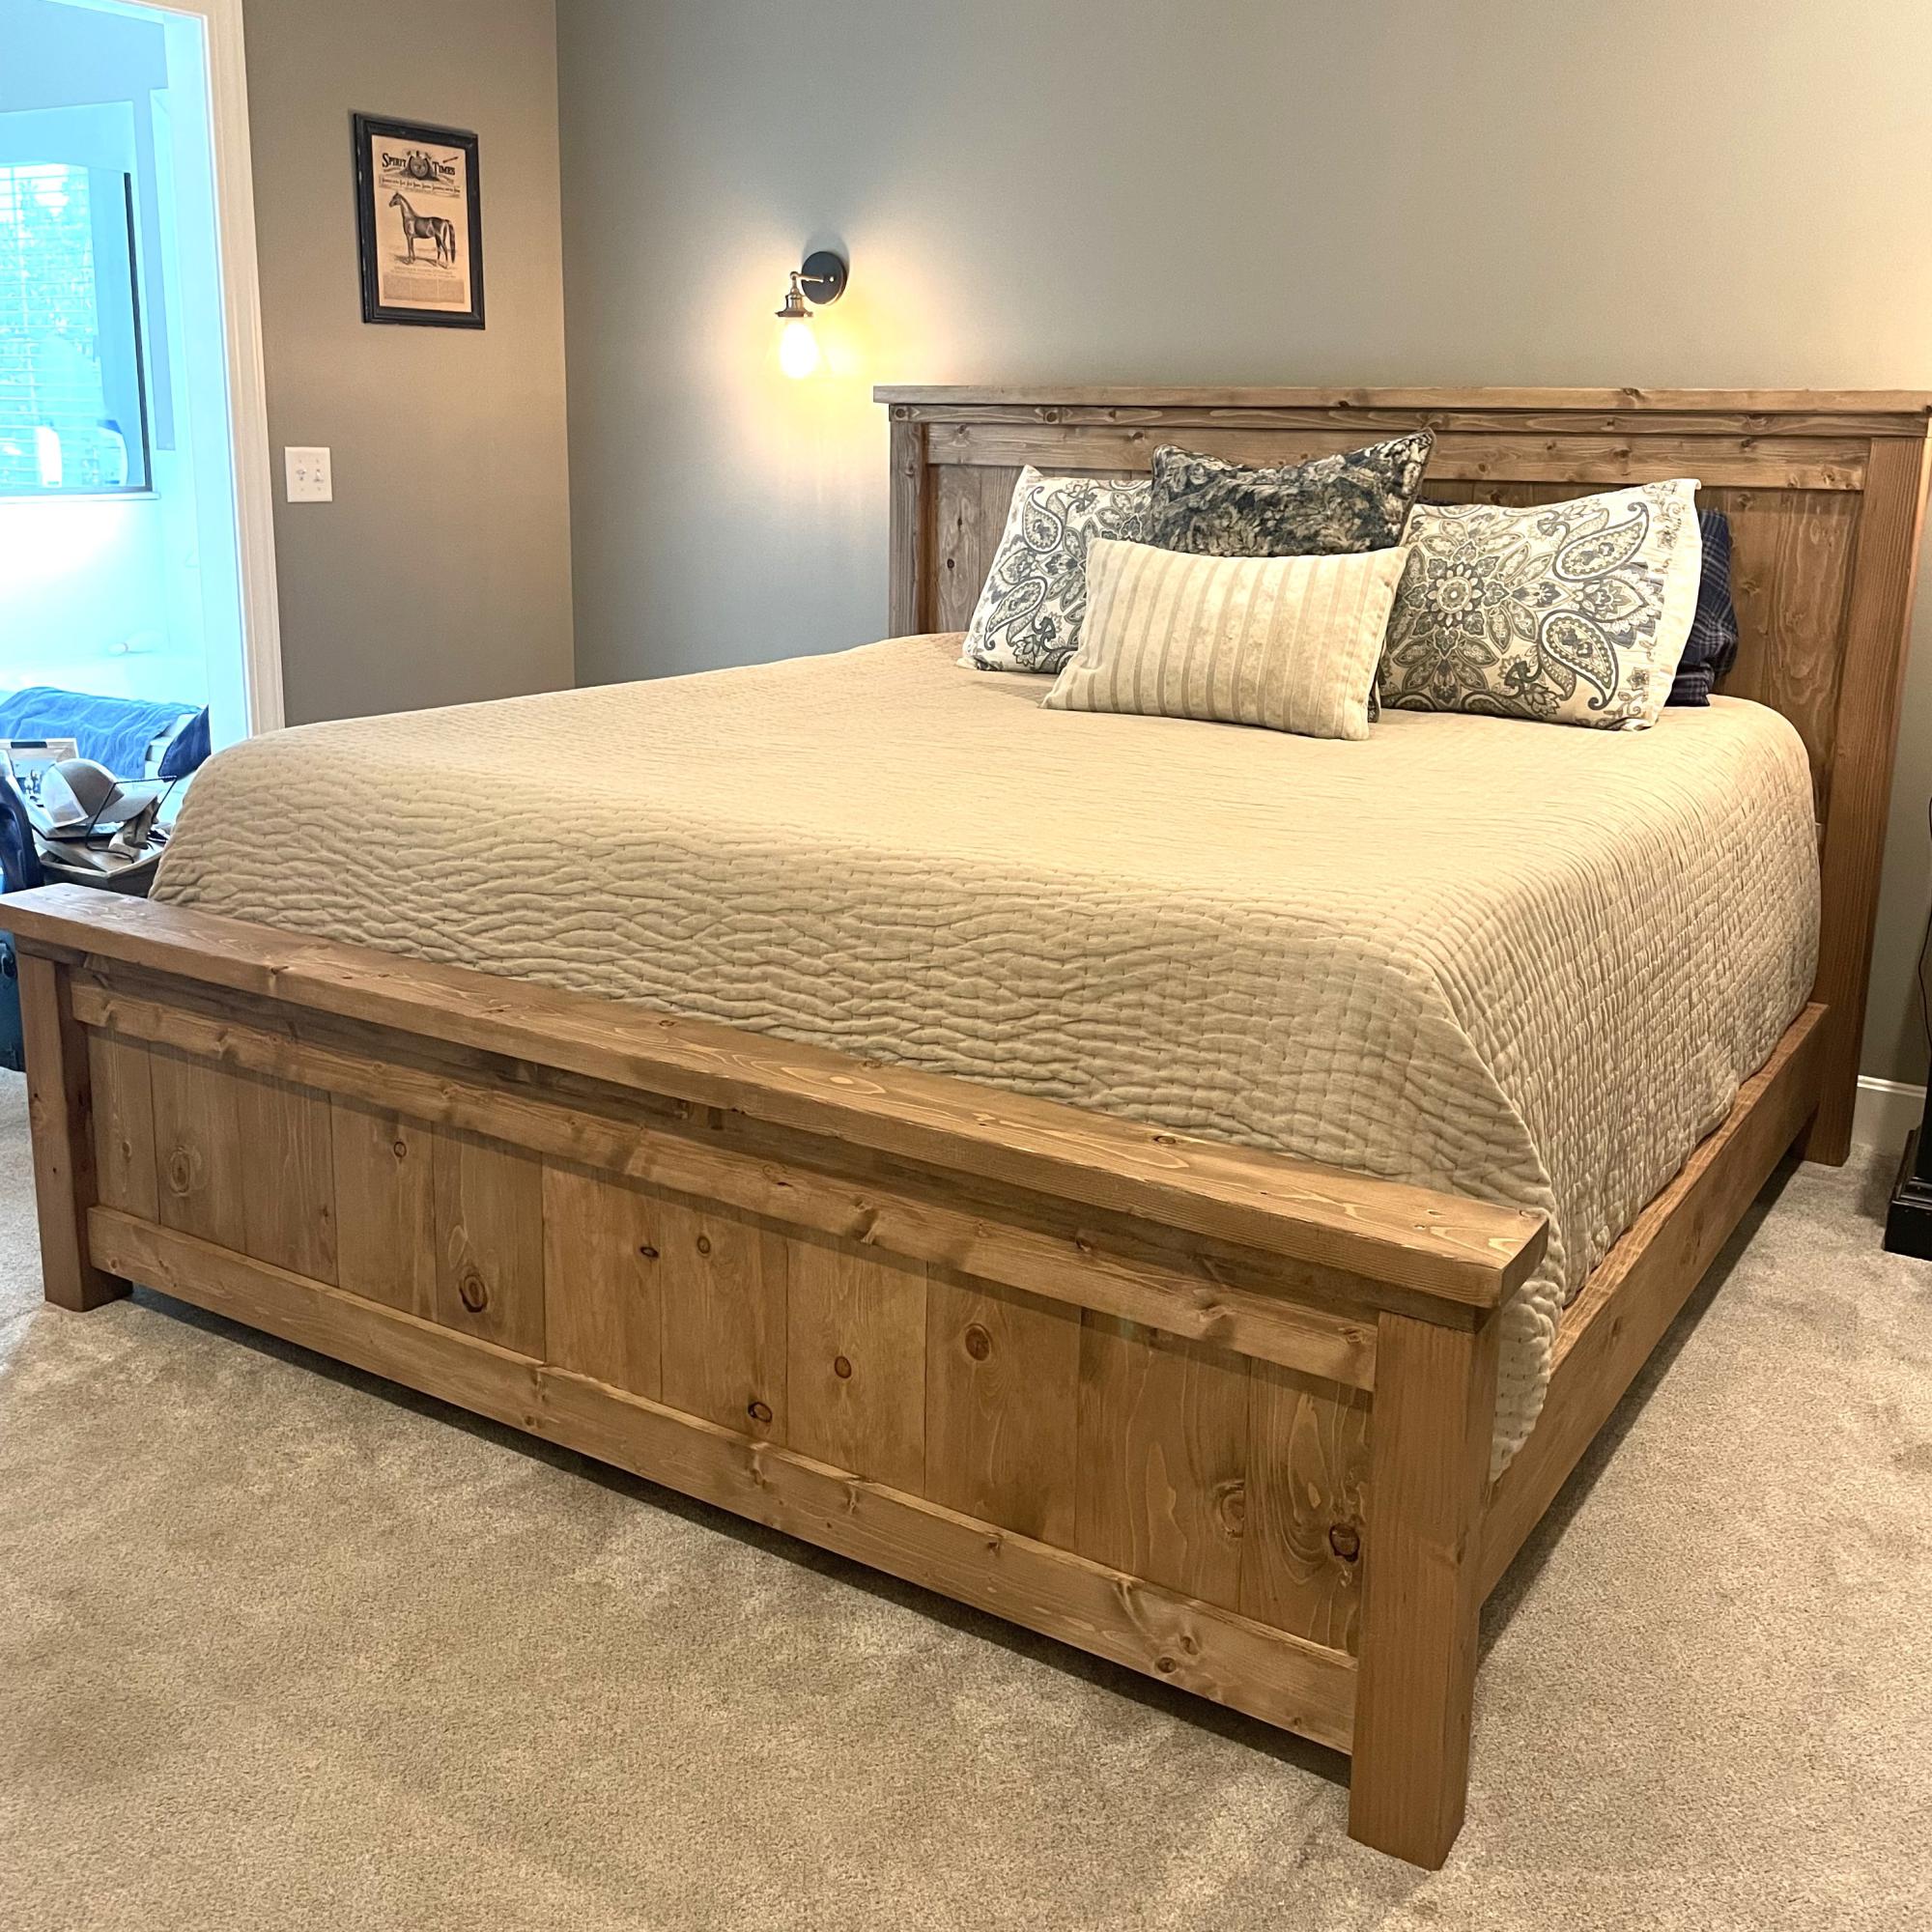
DIY Farmhouse Bed wth Boxspring

Submitted by Anonymous (not verified) on Sun, 07/16/2023 - 10:49

Wood = Pine
Finish = Minwax Special Walnut (after Pre-Stain)

This was a pretty straight forward build, but nice to have an extra set of hands. On the top board of the head/footboard, a countersink bit was used to recess the screw heads (otherwise, all fasteners in the plan are concealed). Then a mixture of glue/sawdust was used to smooth over the countersink hole. The whole project was sanded starting with 60 working up to 220.

We followed the plan, and in the photo this is the height of the bed with box springs and mattress. The bed feels sturdy and comfortable. It was a fun project and my first shot at interior furniture.


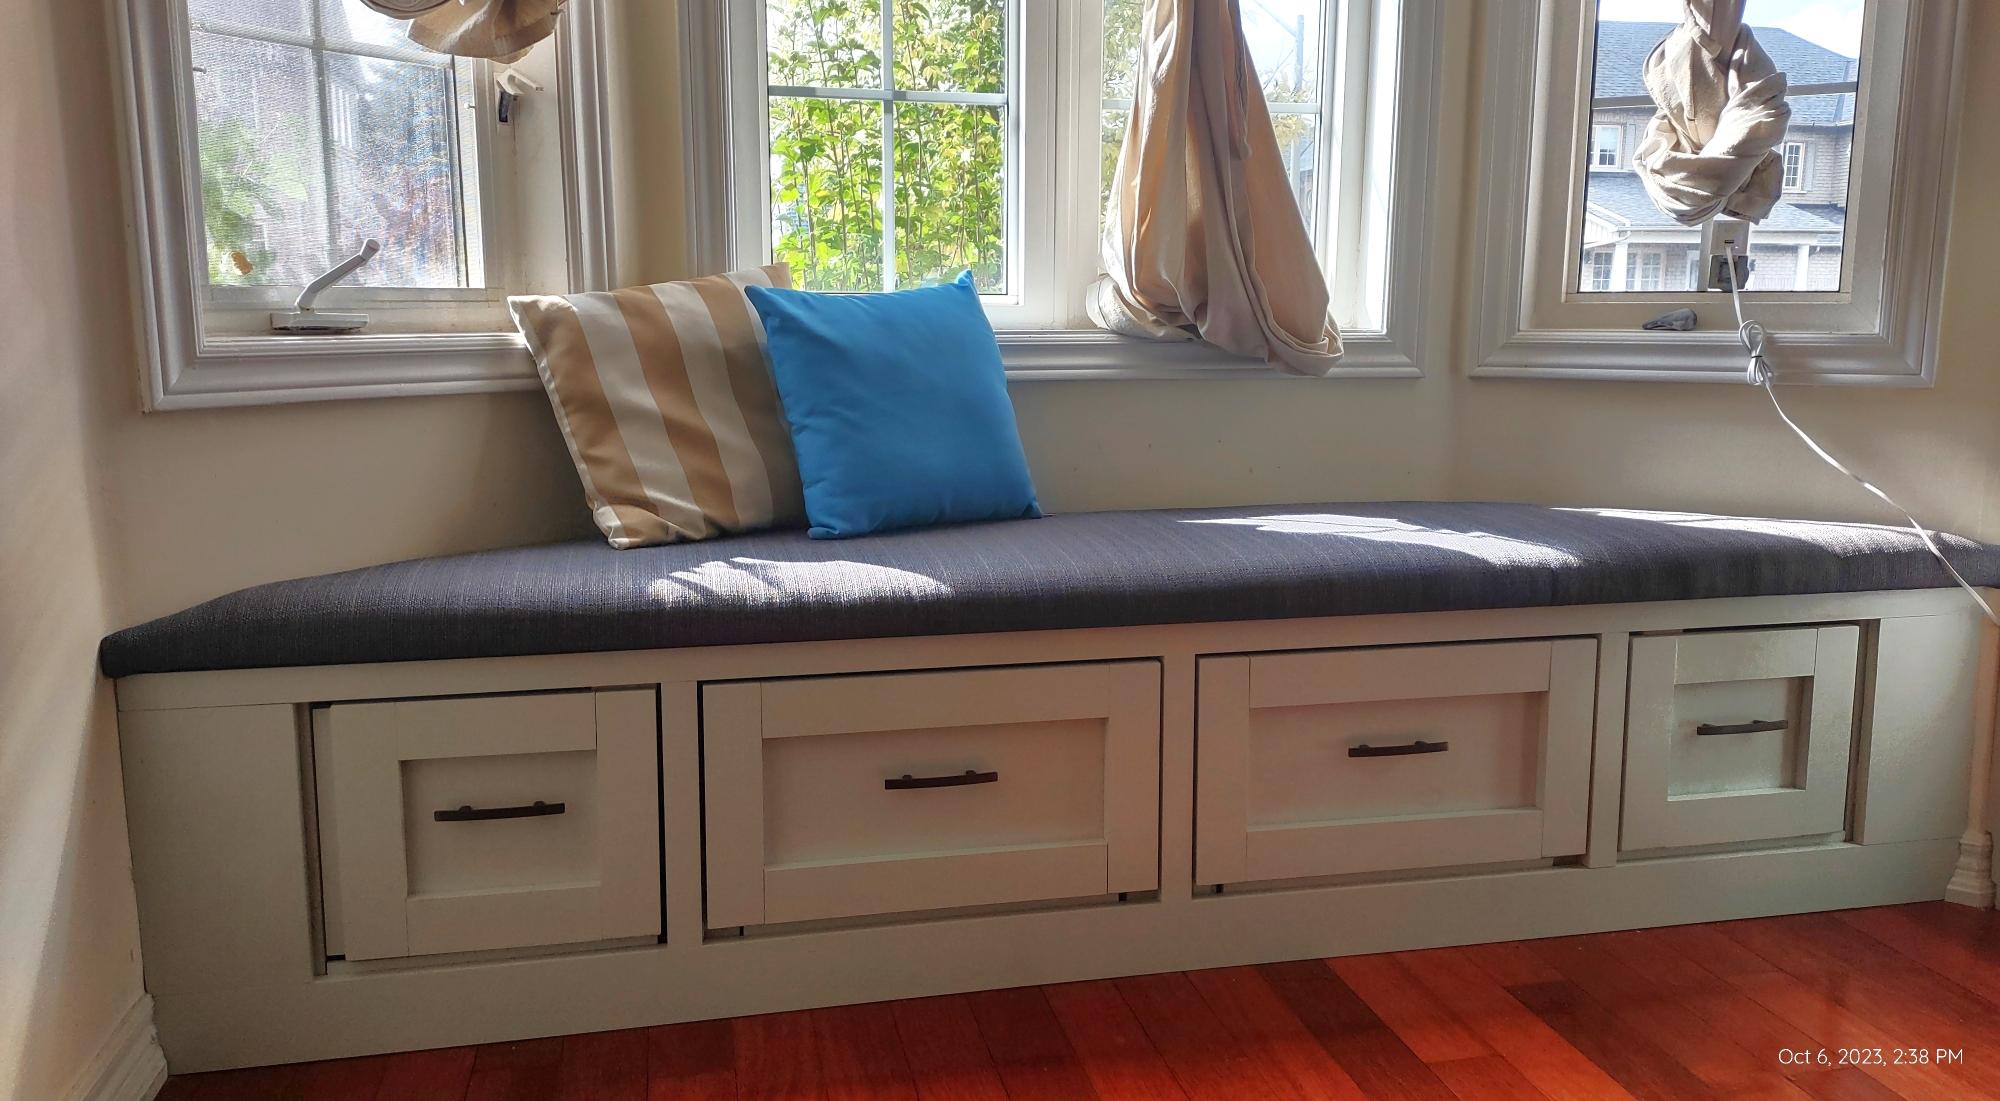
Bay Window Drawer Bench

Submitted by Anonymous (not verified) on Mon, 10/23/2023 - 09:22

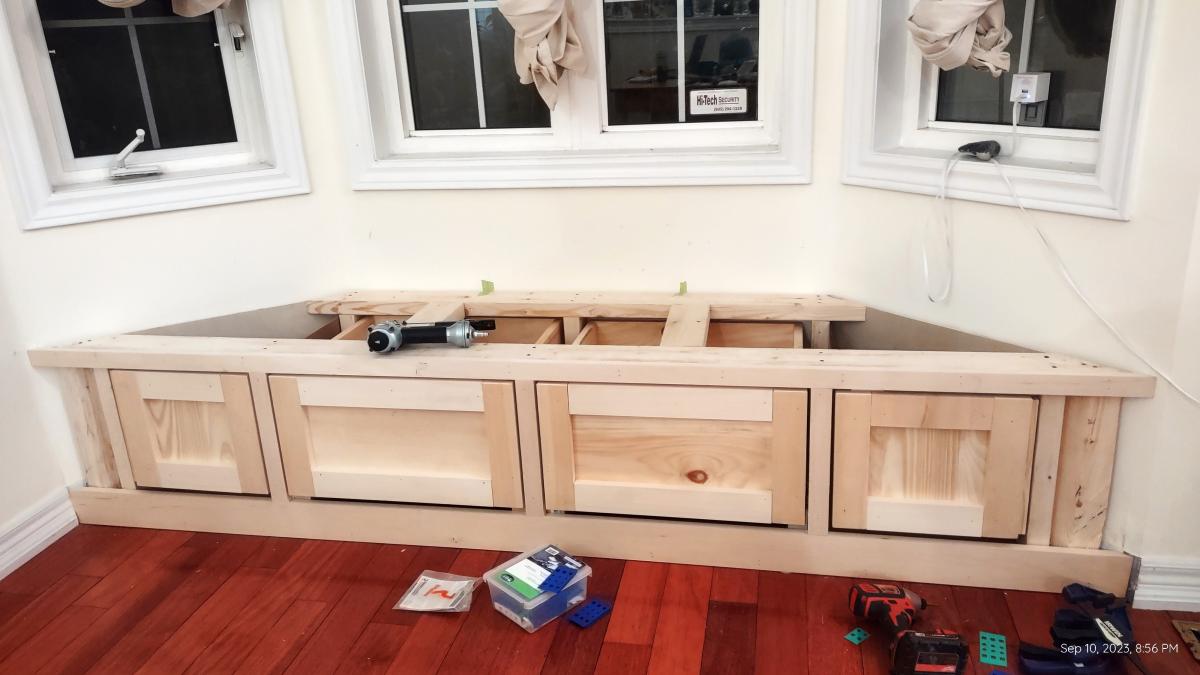
This is inspired by mud room bench with drawer. Apparently I had to make quite some modifications as this is for a bay window bench with trapezoid shape instead of a rectangular. In the middle are 2 drawers, at both ends are corner cabinets. Ana's design worked beautifully as the foundation of my project.

Built from Plan(s)

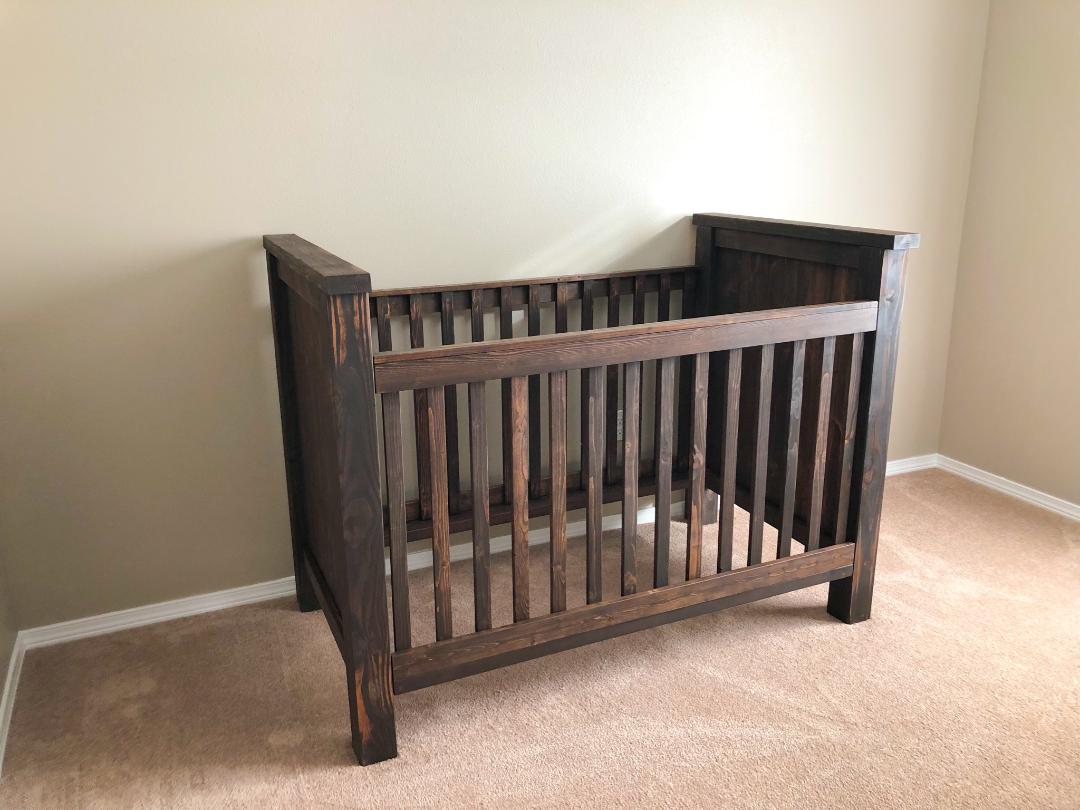
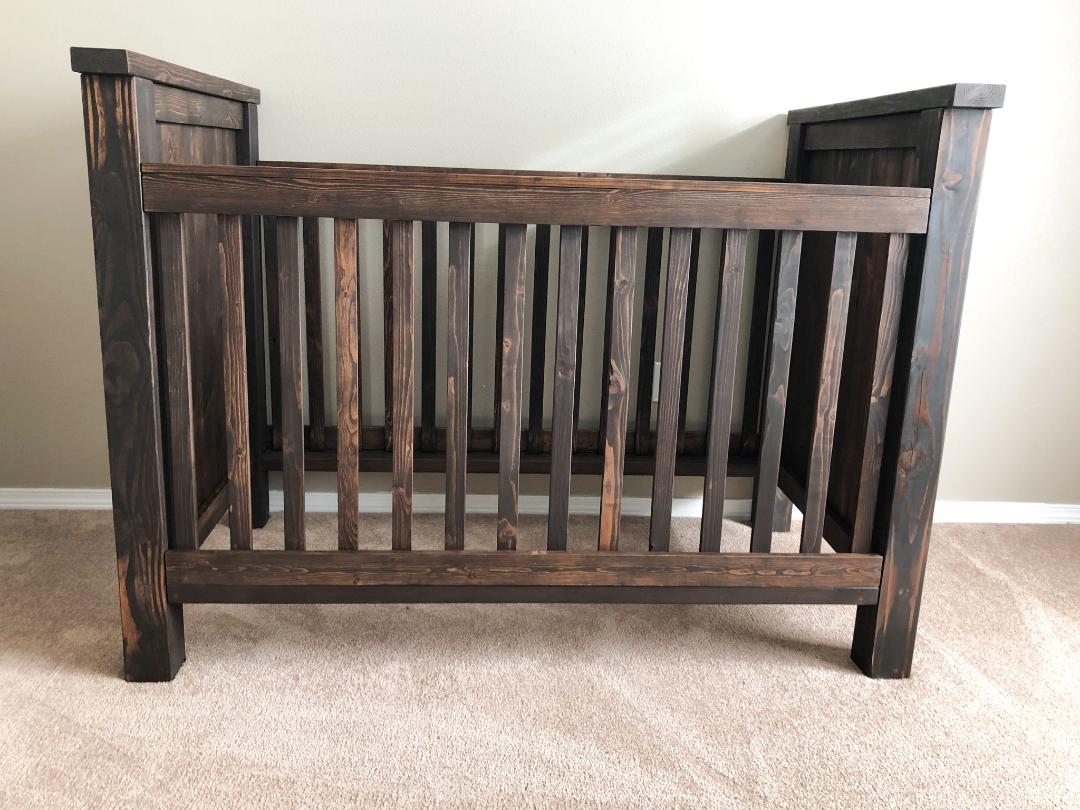
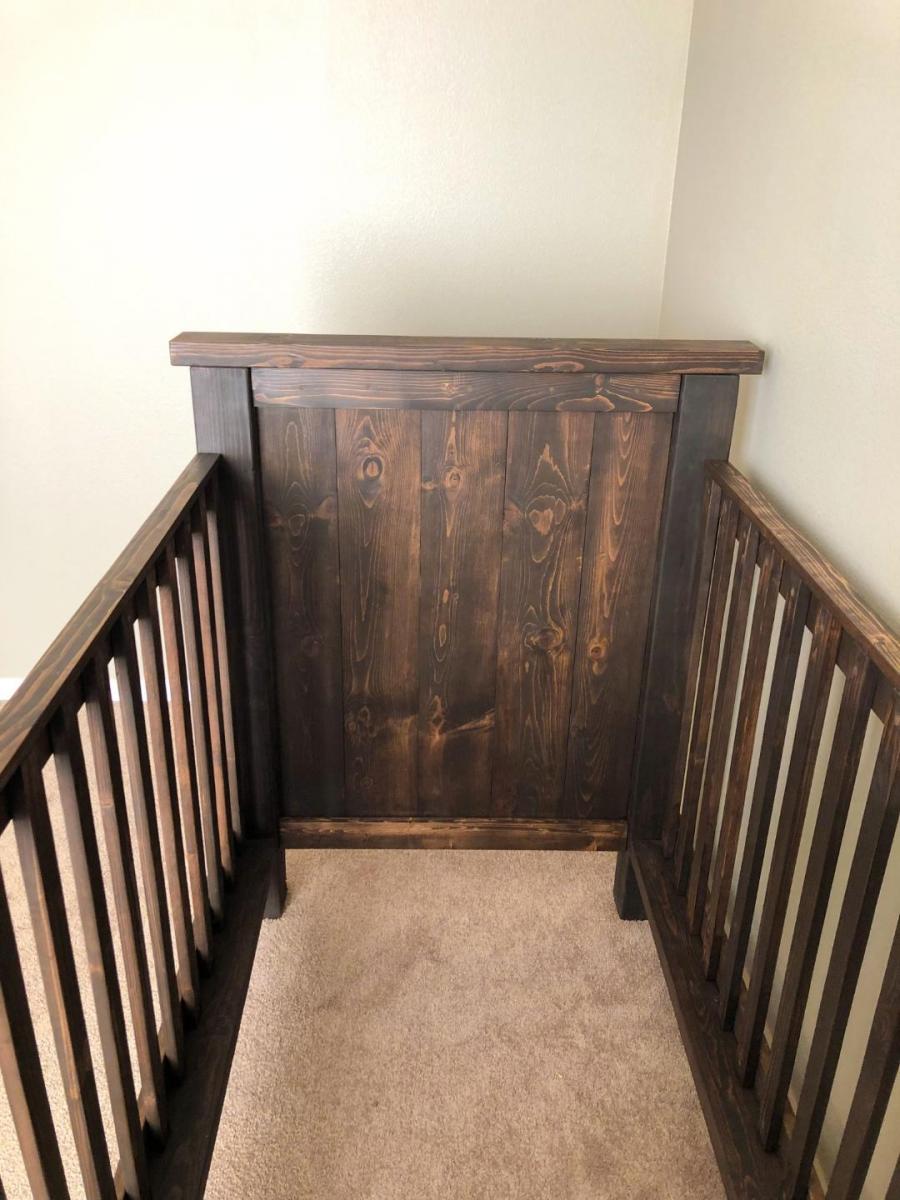
DIY Stinctly Made Crib

Submitted by Anonymous (not verified) on Thu, 03/26/2020 - 10:15

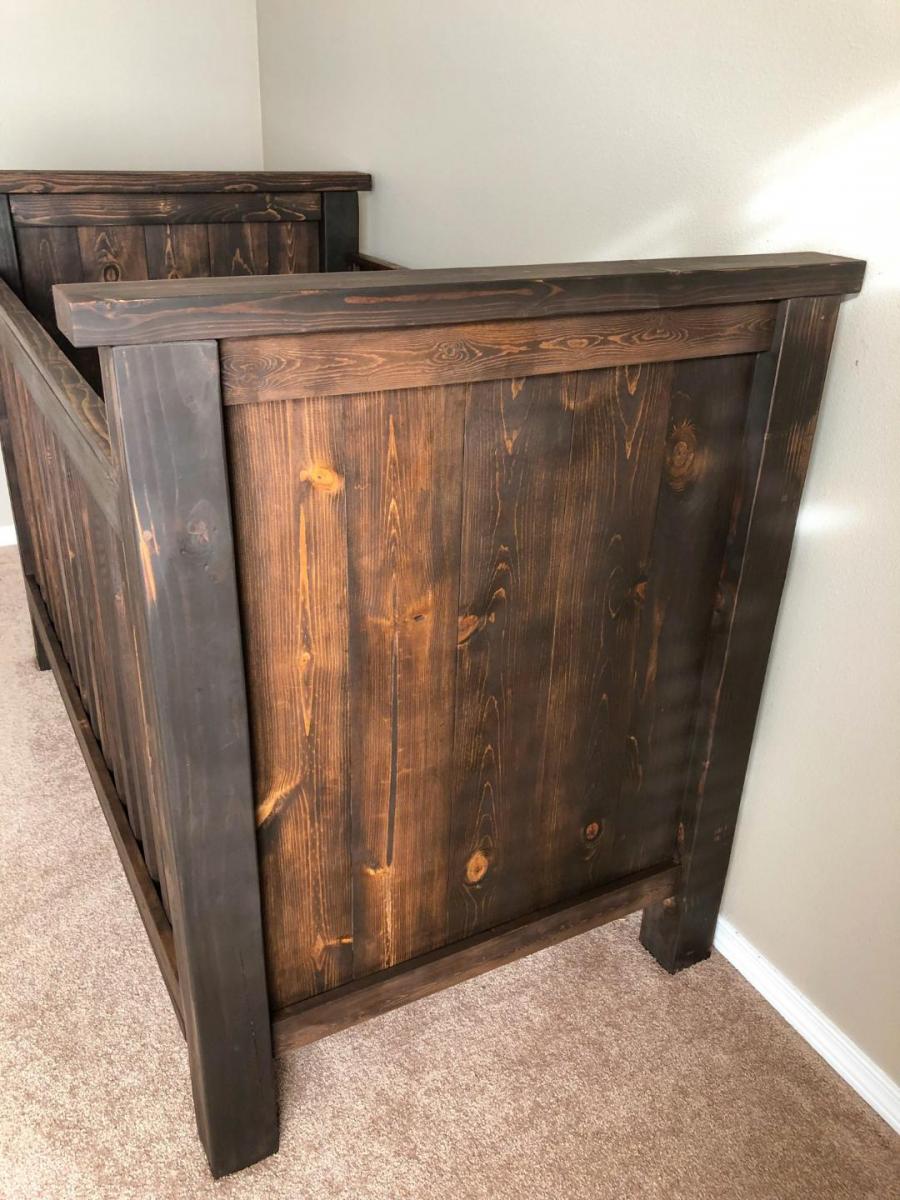
While I found the plans a little difficult to follow as there were steps left out, missing measurements, and misinformation, it was an easy project and I'm so glad I made it. Even at 21 weeks pregnant it was totally doable alone. The only thing I needed my husband for was to hold the side rails at the correct height.

Estimated Time Investment
Week Long Project (20 Hours or More)
Finish Used
Kona by Varathane
Recommended Skill Level
Beginner

Laundry Pedestal

Submitted by Kamoanui on Tue, 06/30/2020 - 09:42

This was quick build. First time for us using trim, so we wasted a few feet getting the angles right. We attached the legs directly to the frame, and did not use the metal brackets. We also did not build the floor frame. We measured how high/wide the laundry baskets ($3/piece at Target!) were, and made it to fit them. We added a piece of rubber mat to the top (bought at Lowe's). A few weeks later we helped our daughter and son in law build one for their new house!

Estimated Cost
$40
Estimated Time Investment
Afternoon Project (3-6 Hours)
Finish Used
White satin paint
Recommended Skill Level
Beginner