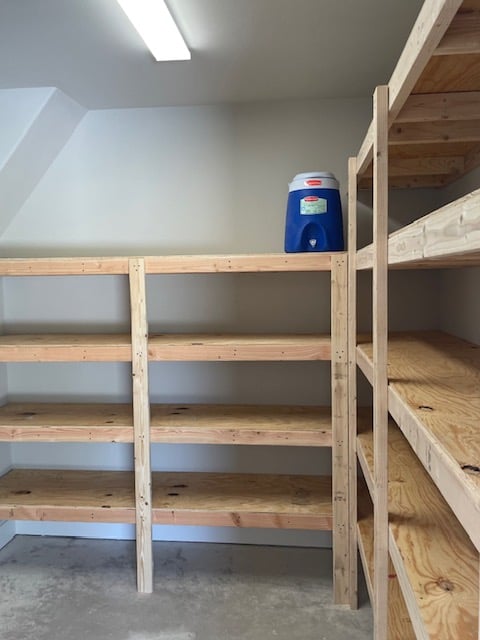
Garage Shelves Galore - by Jared Starky
This one plan can facilitate many outcomes.
Built and shared by Jared Starkey
Built from Plan(s)

I made these modern Adirondack chairs for our business in Anchorage. GREAT and easy to build design by Ana - we upgraded the arms to tapered 2x6 and they're awesome!


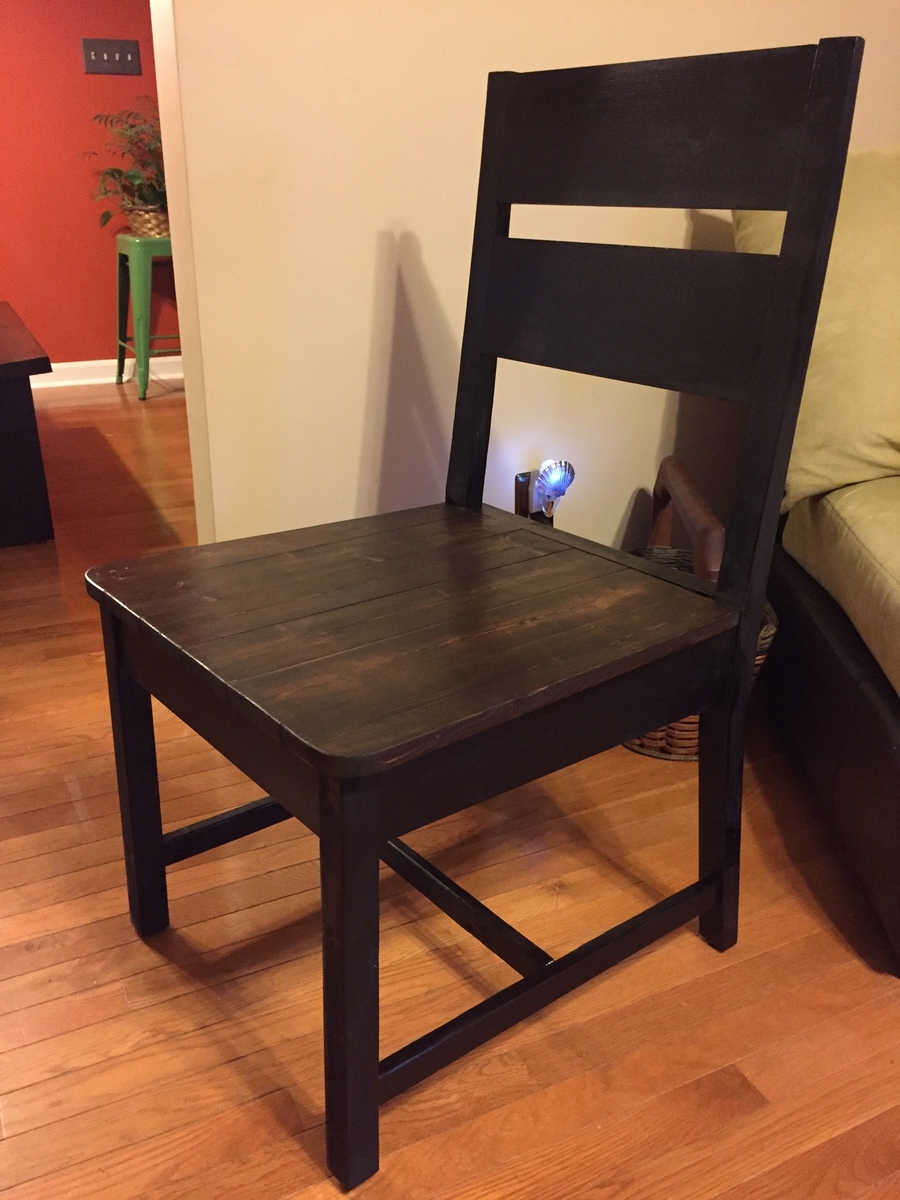
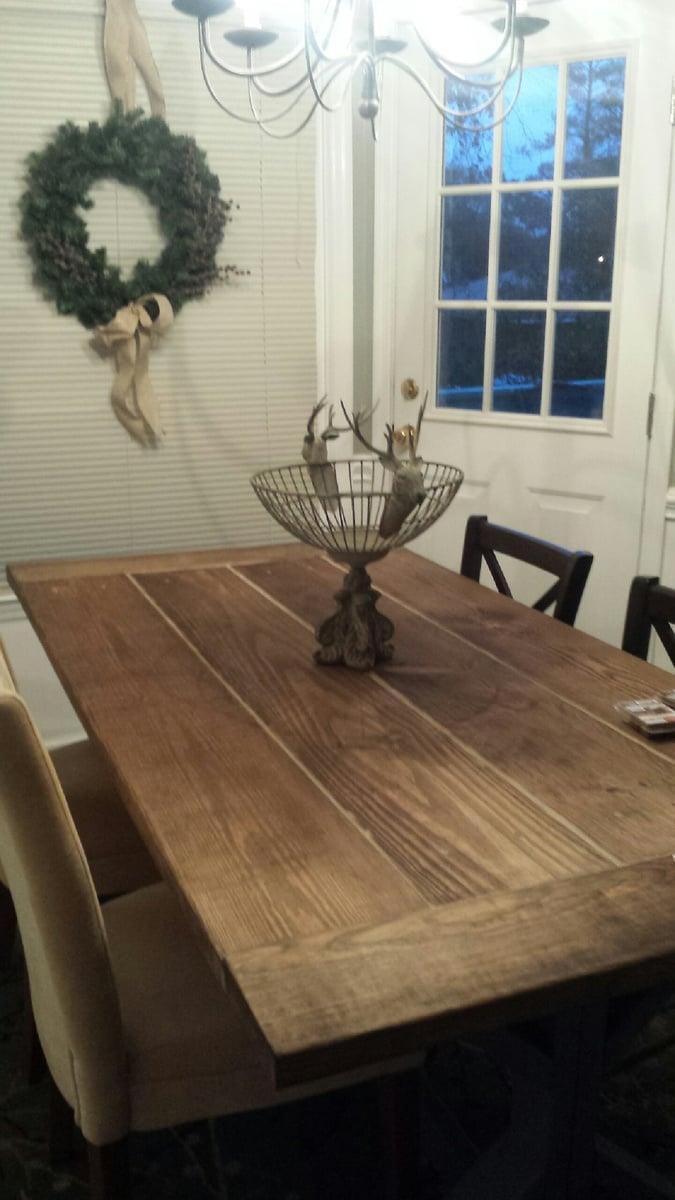
This was my first attempt at making furniture...but it turned out GREAT! My fiance was about to buy a VERY similar dining room set for $1300 before I stopped her and insisted that I could build it myself, finish it to match our kitchen/dining room, and save a TON of money!

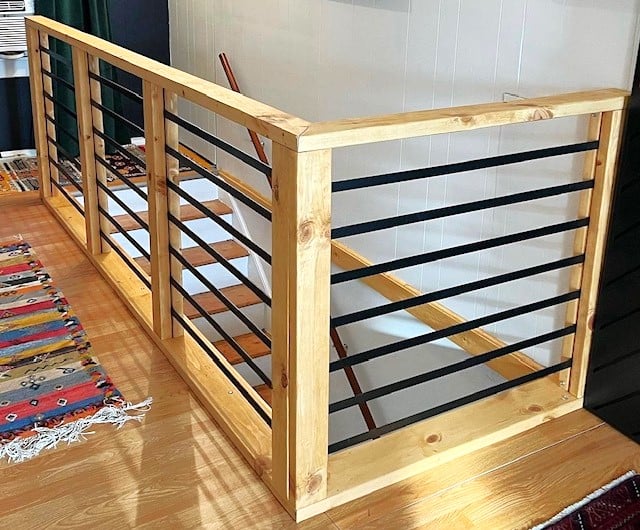
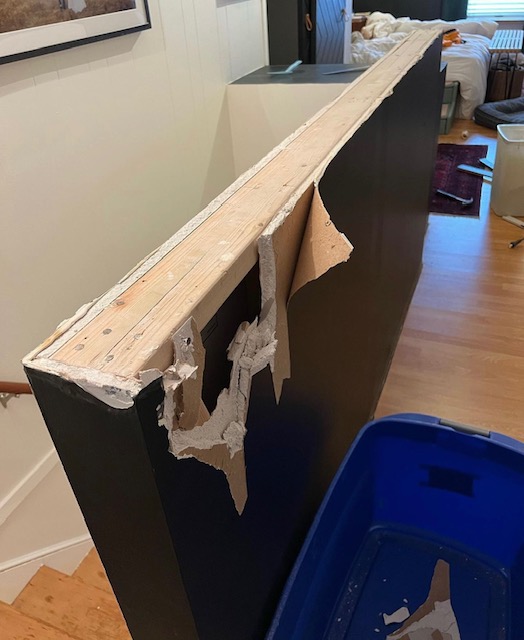
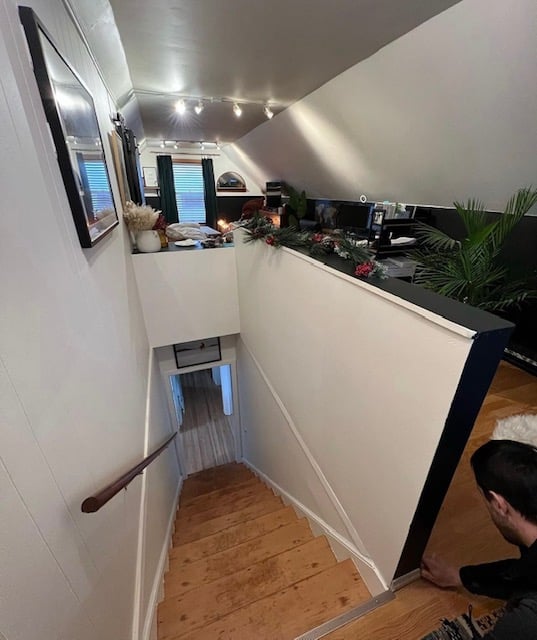
Amazing stair railing upgrade shared by Sara and Chris!
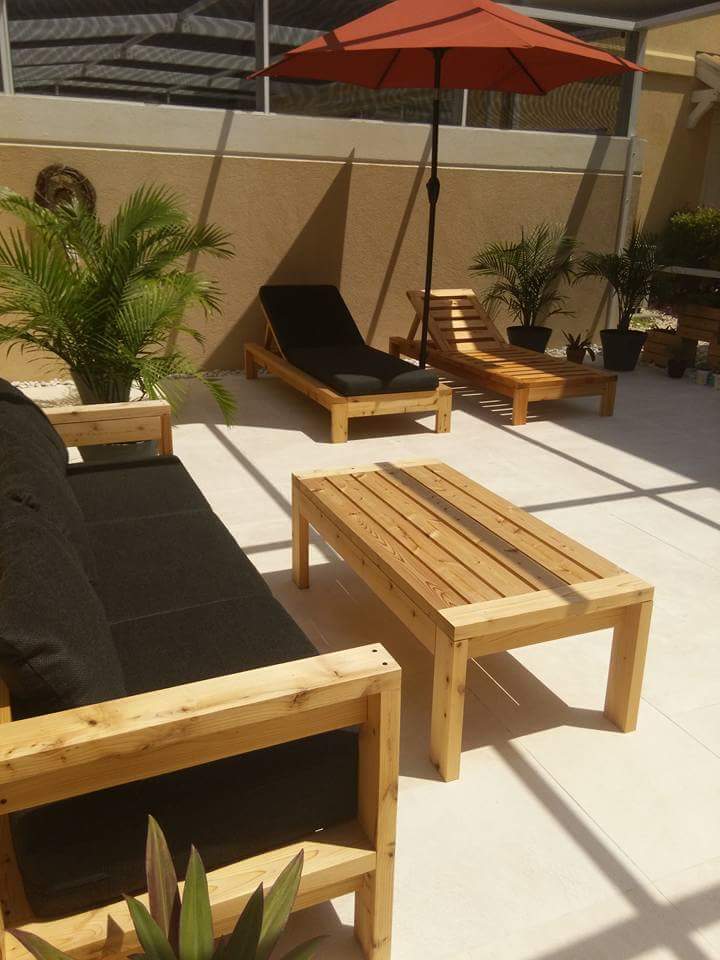
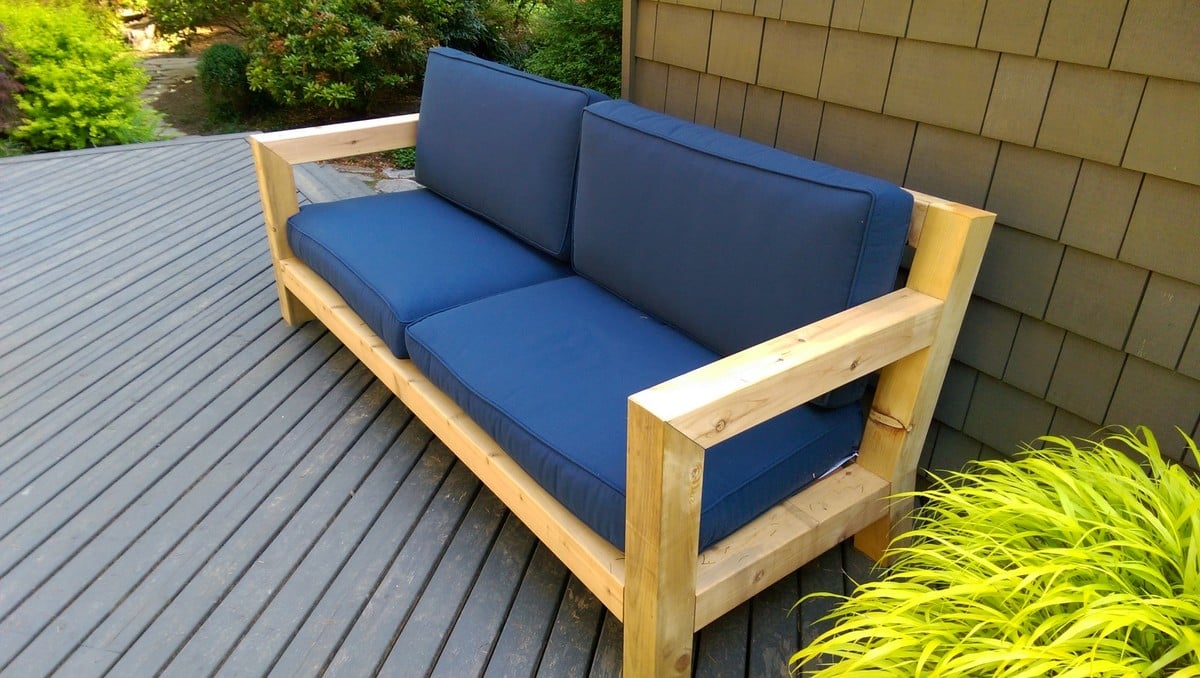
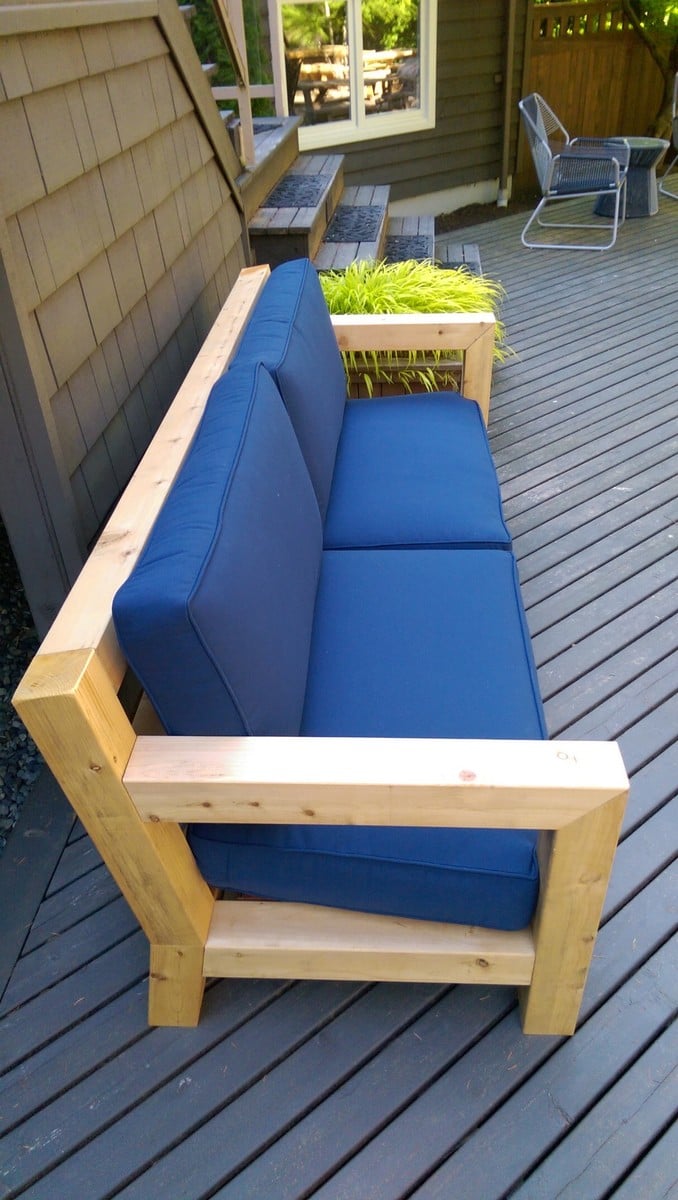
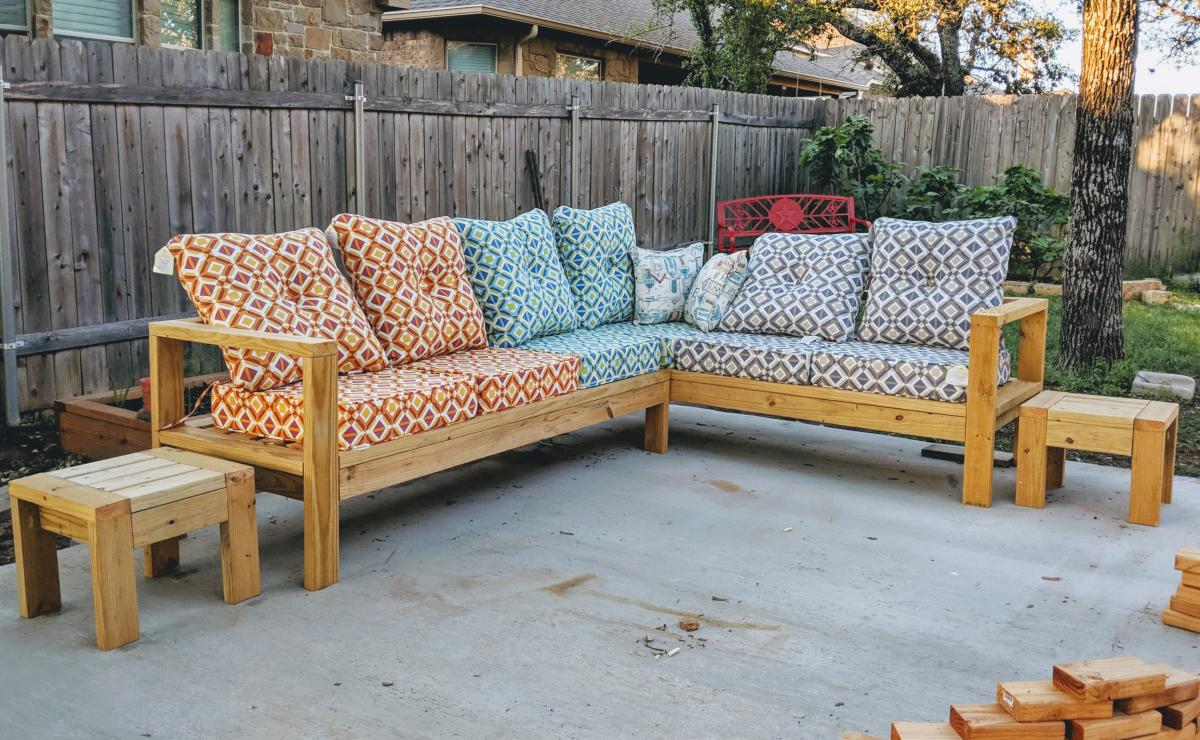
Just finished this beauty, entirely made with 2x4, plans were modify to match our outdoor sofa and coffee table. I think our best looking project so far ;) Thank you for inspiring me to build !!!

In reply to Very nice! by Ana White Admin
Tue, 03/01/2016 - 18:13
Little by little I am transforming my ugly concrete patio with no view in Zen garden...
Tue, 03/01/2016 - 18:15
Little by little I am transforming my ugly concrete patio with no view in a Zen garden...
Tue, 03/01/2016 - 18:16
Little by little I am transforming my ugly concrete patio with no view in a Zen garden...
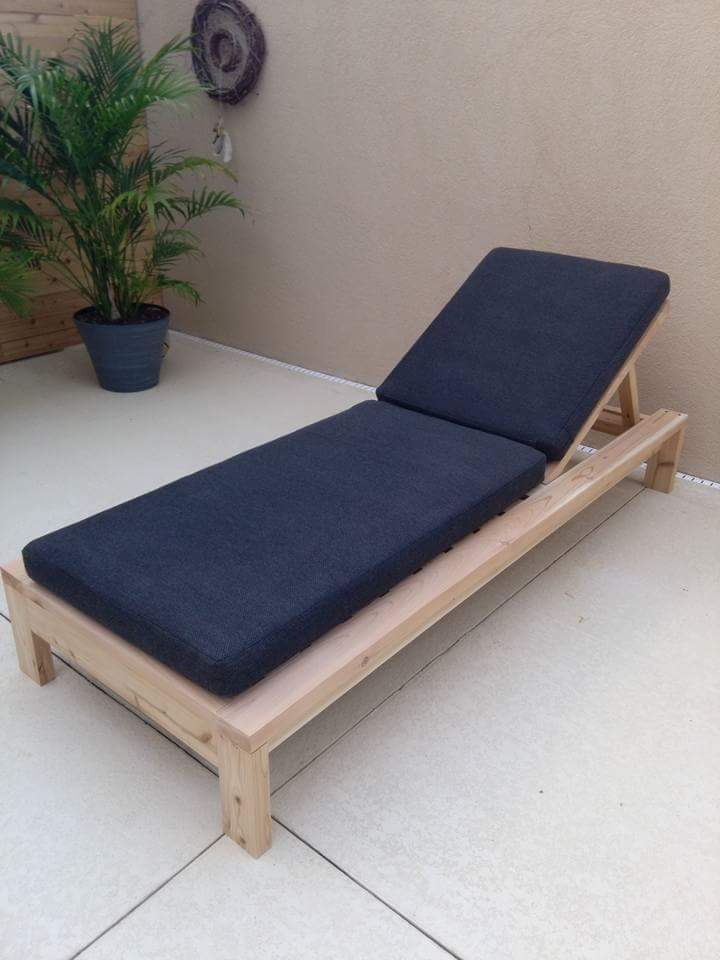
I modified the plans slightly, reducing the overall seating depth by 1.5" so I could use 8' lumber with minimal waste, and make 2 cushions out of one 54" width of fabric. I also tweaked the design to make a chaise lounge on one side. I used bargain priced sunbrella fabric (has a few imperfections) and recycled soda bottle fill for the cushions to keep cost lower. Building the wooden part was quick and easy (took an afternoon including two trips to the store), but this was my first sewing project so the total project time reflects my learning curve making and stuffing cushions.
Tue, 04/05/2016 - 06:45
This looks like a very lovely place to relax, can't believe that was your first sewing project!
Wed, 04/06/2016 - 06:34
This looks really great! You have inspired me to stop procrastinating and get started on our outdoor sectional. Every time I think about doing it the building part seems fun but, I'm overwhelmed by the task/cost of the cushions. I'm interested in learning more about the fill you used. Where did you find it and what was the approximate cost? Thanks and great work!
Wed, 06/29/2016 - 20:25
Whoops - sorry about that. This looks amazing, and the detail on the fabric is quite fantastic. I have been wanting to replace some old furniture that is falling apart, and this would really be a wonderful addition to the outdoor space. Kudos on the great work.
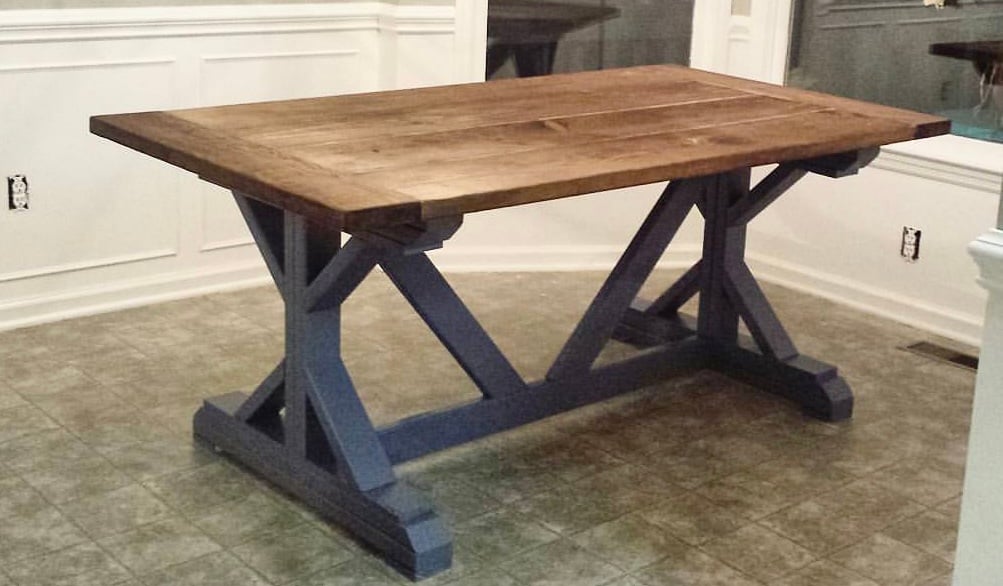
I modified this plan just a little on the ends, and I can not tell you how pleased I am with it! I did run into some issues with lining the boards up properly due to imperfections (and not laying the boards out ahead of time in the store because I was rushing at closing time), but in the end, I decided to add a wood filler in between the boards and everyone just raves over it. I could not imagine it having come out better. I would not do it any other way.
Thank you Ana!!
PS... I have a wonderful idea for a loft bed, but the plans are not provided. I know you would do it justice.. how do I submit the photo????
Tue, 07/30/2019 - 08:01
Jeff,
I do apologize for not having seen your comment! I will work on plans as soon as possible and let you know when they are available. Thank you! :)
Sat, 05/30/2020 - 07:34
I also liked this table but never found the plans for it. I did find a very similar table with plans at:
https://www.shanty-2-chic.com/2012/06/fancy-x-farmhouse-table.html
Looks like just the bottom of the legs are different...
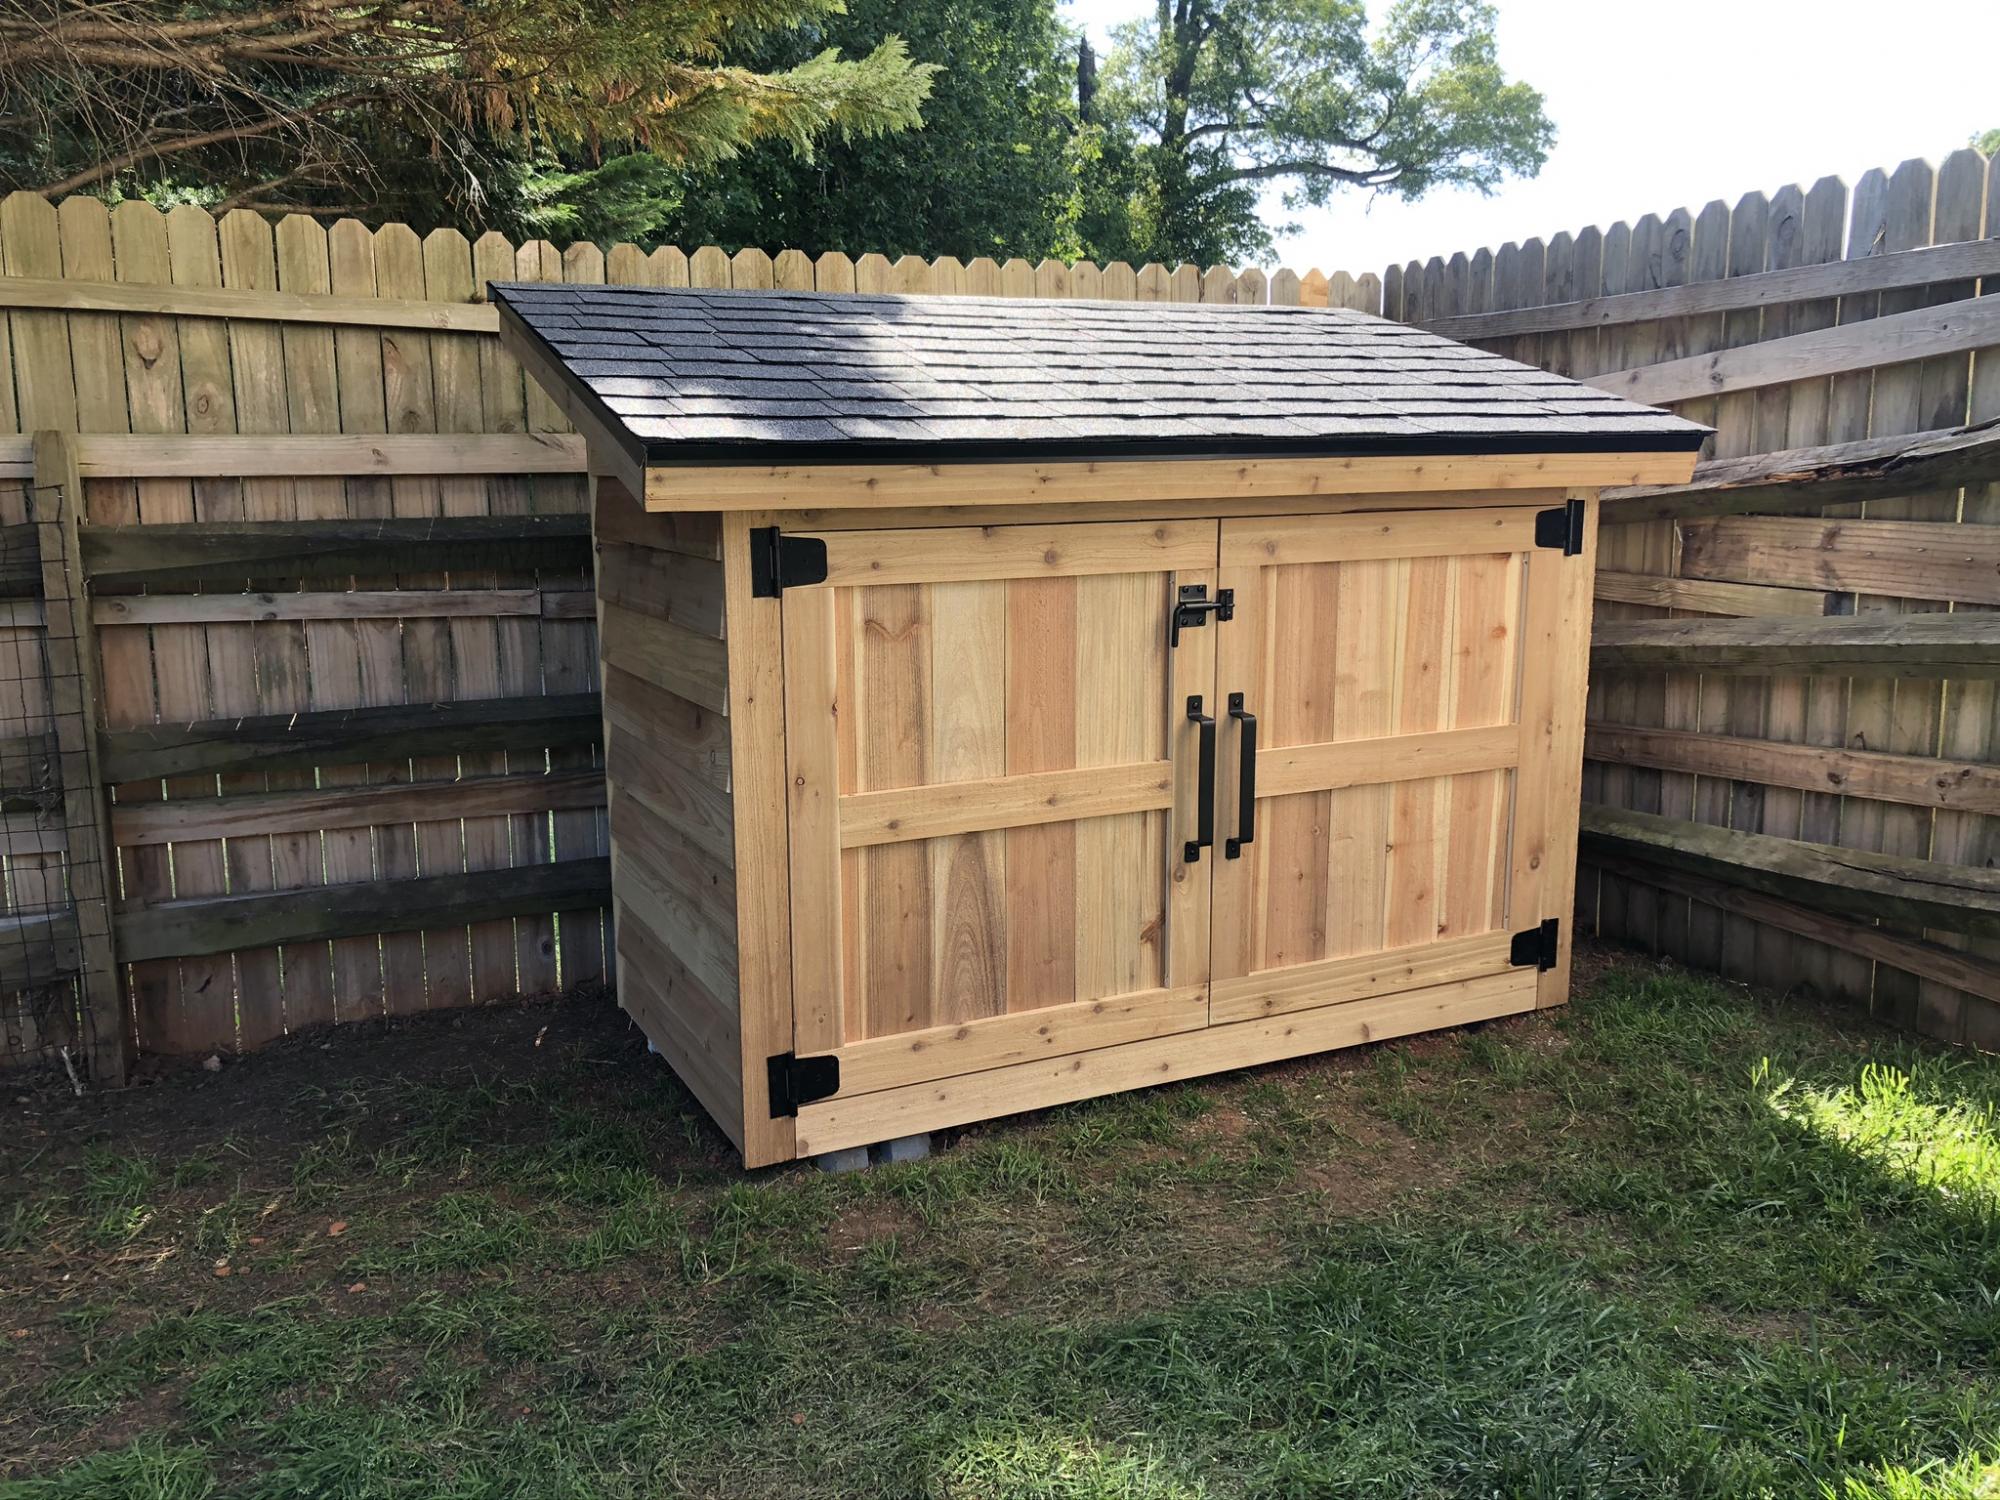
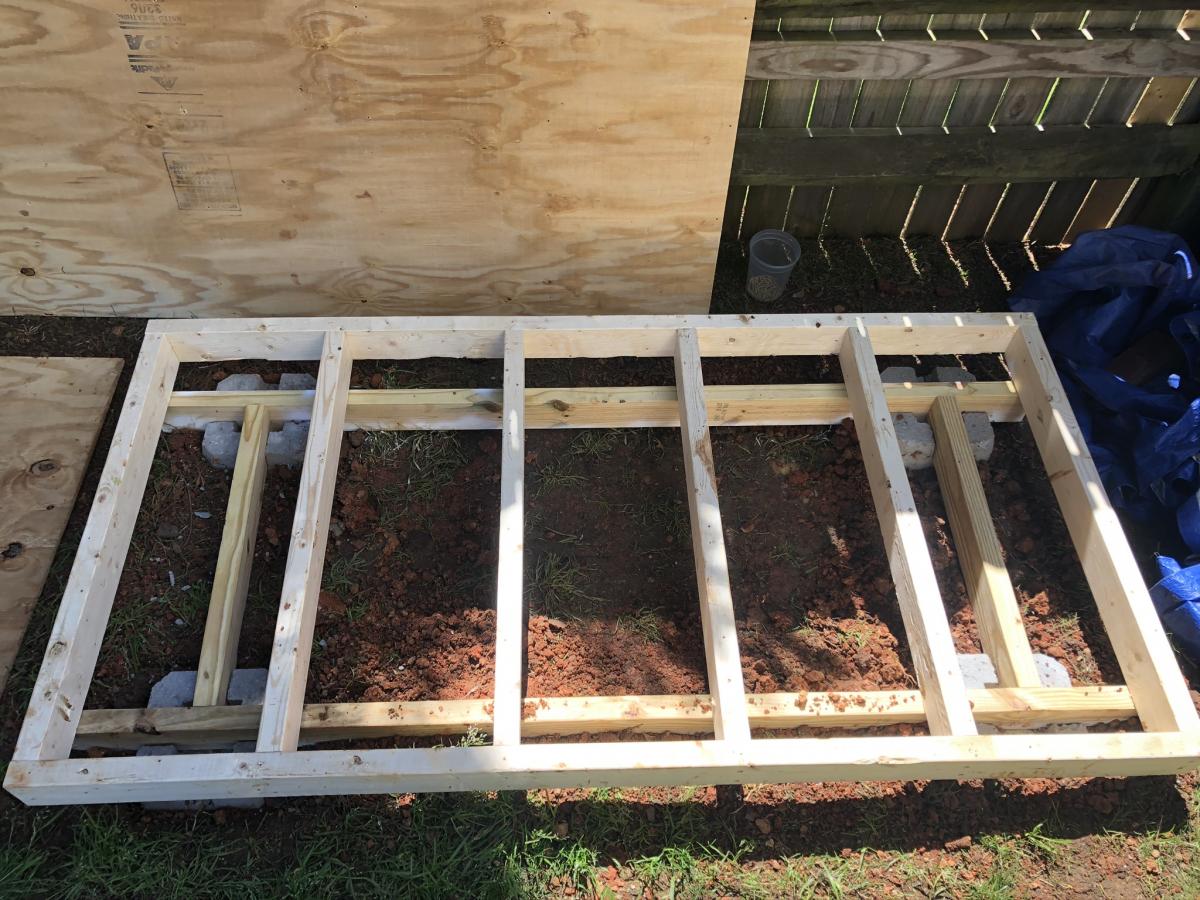
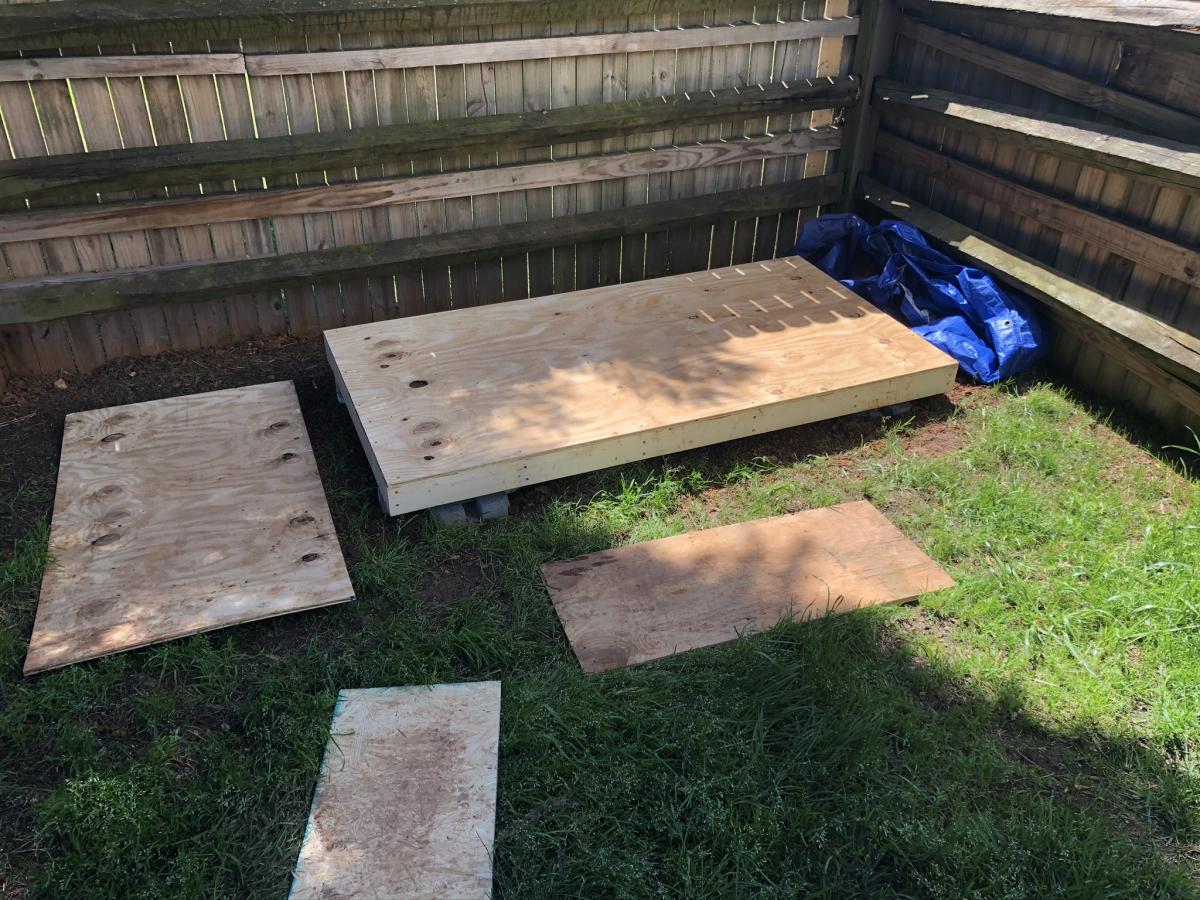
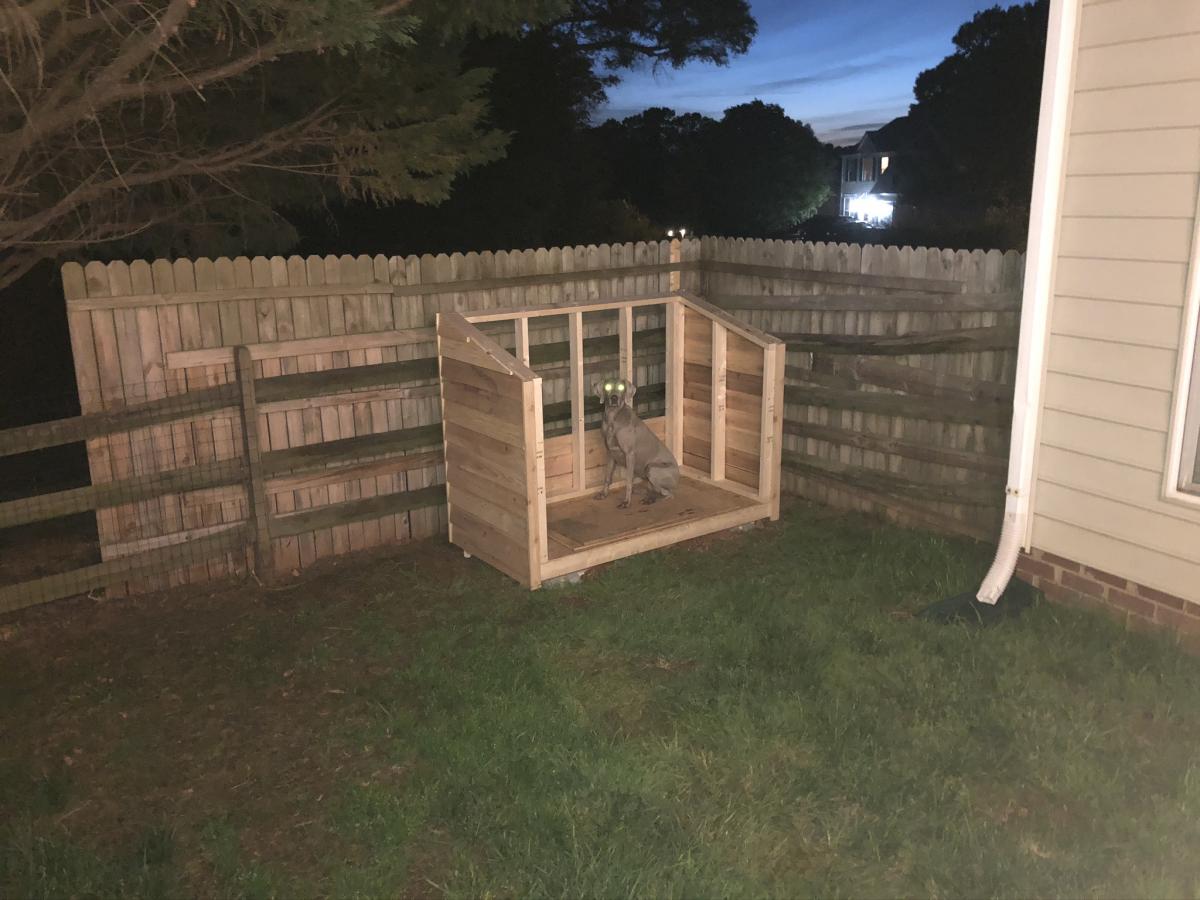
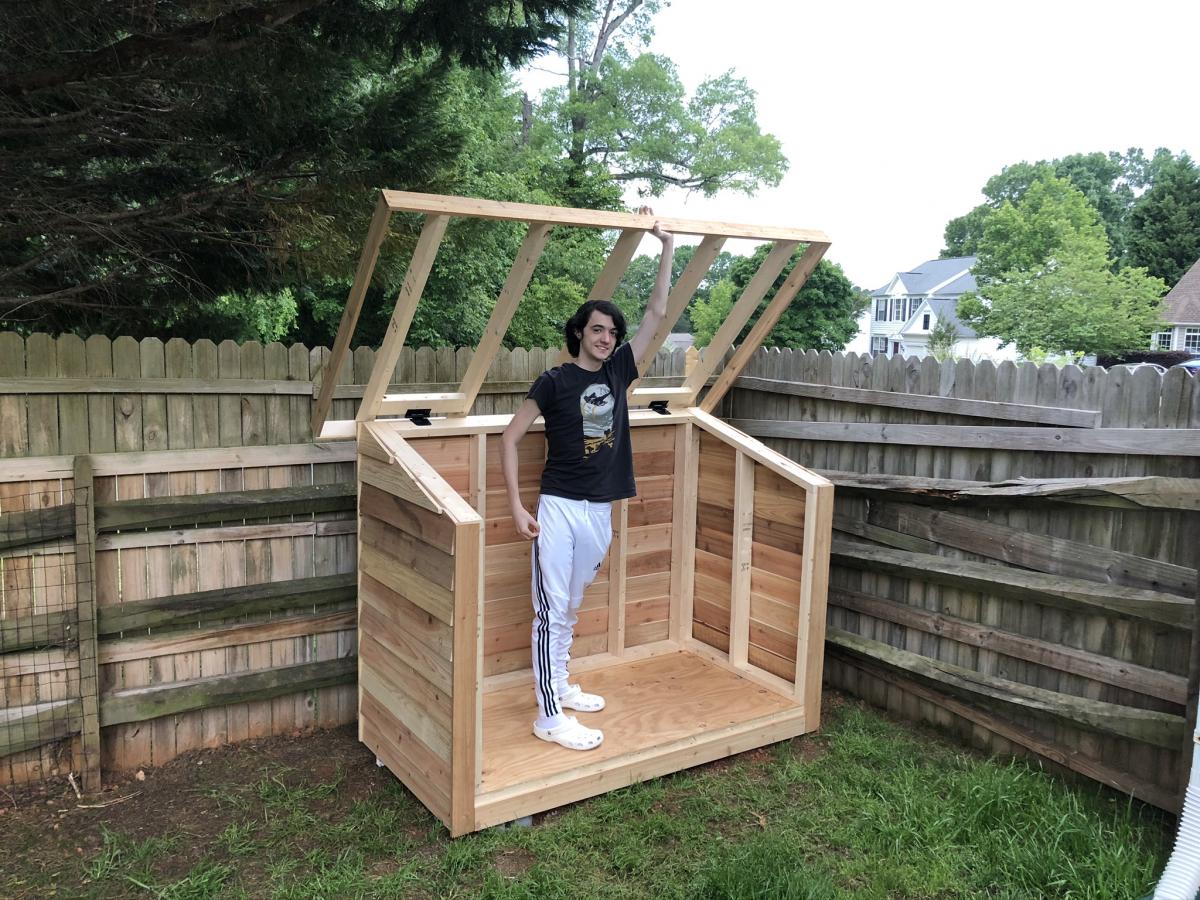
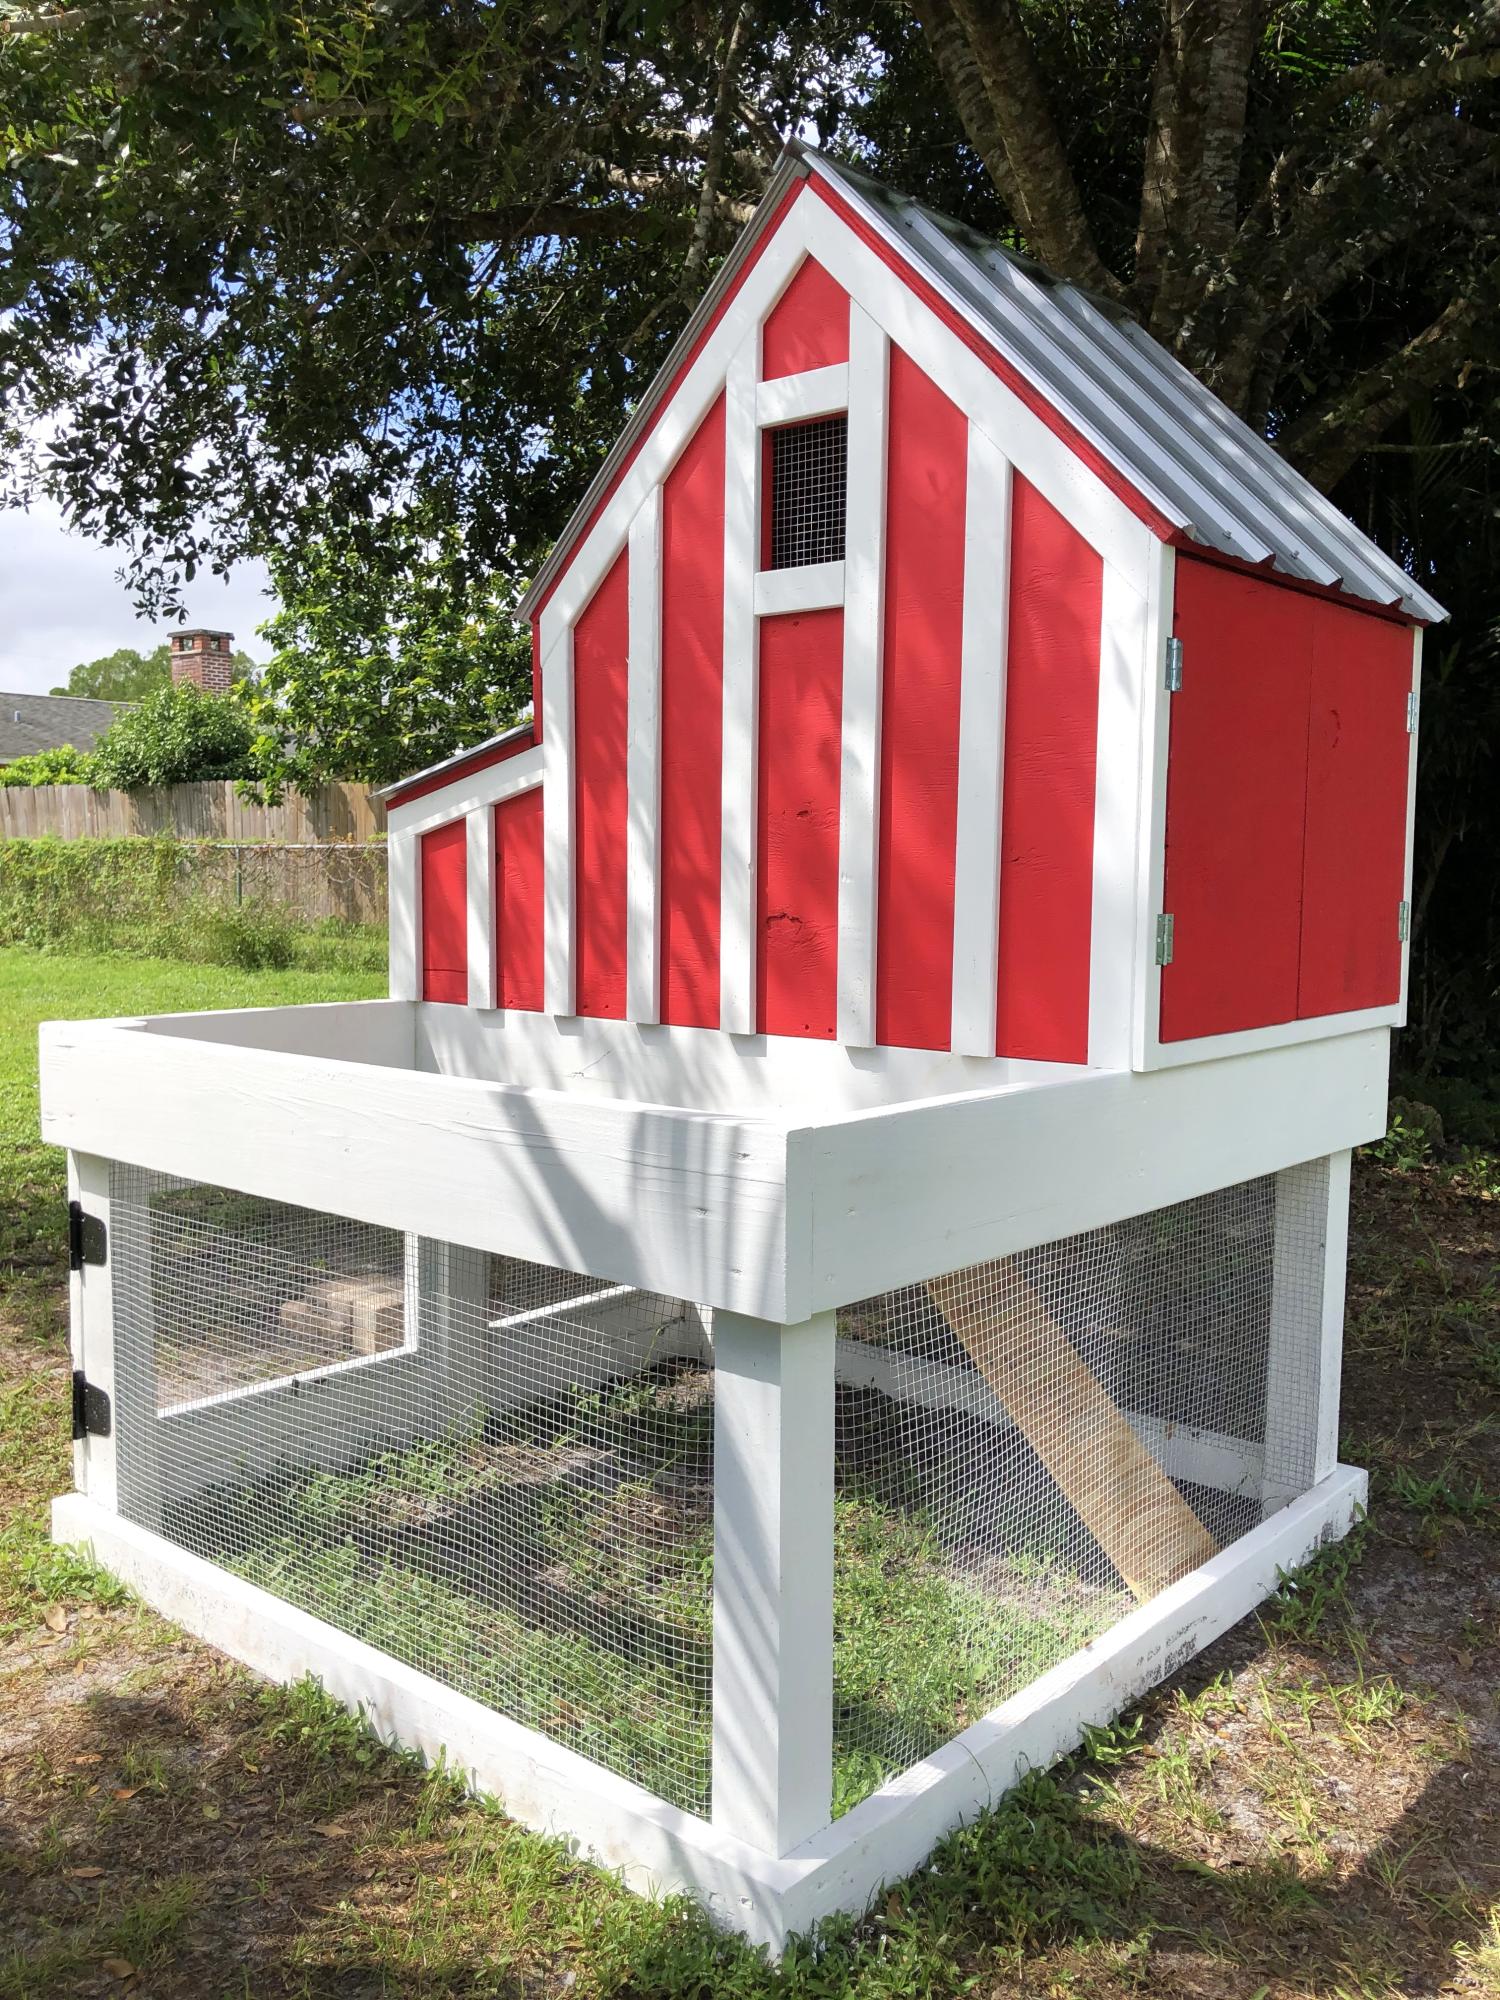
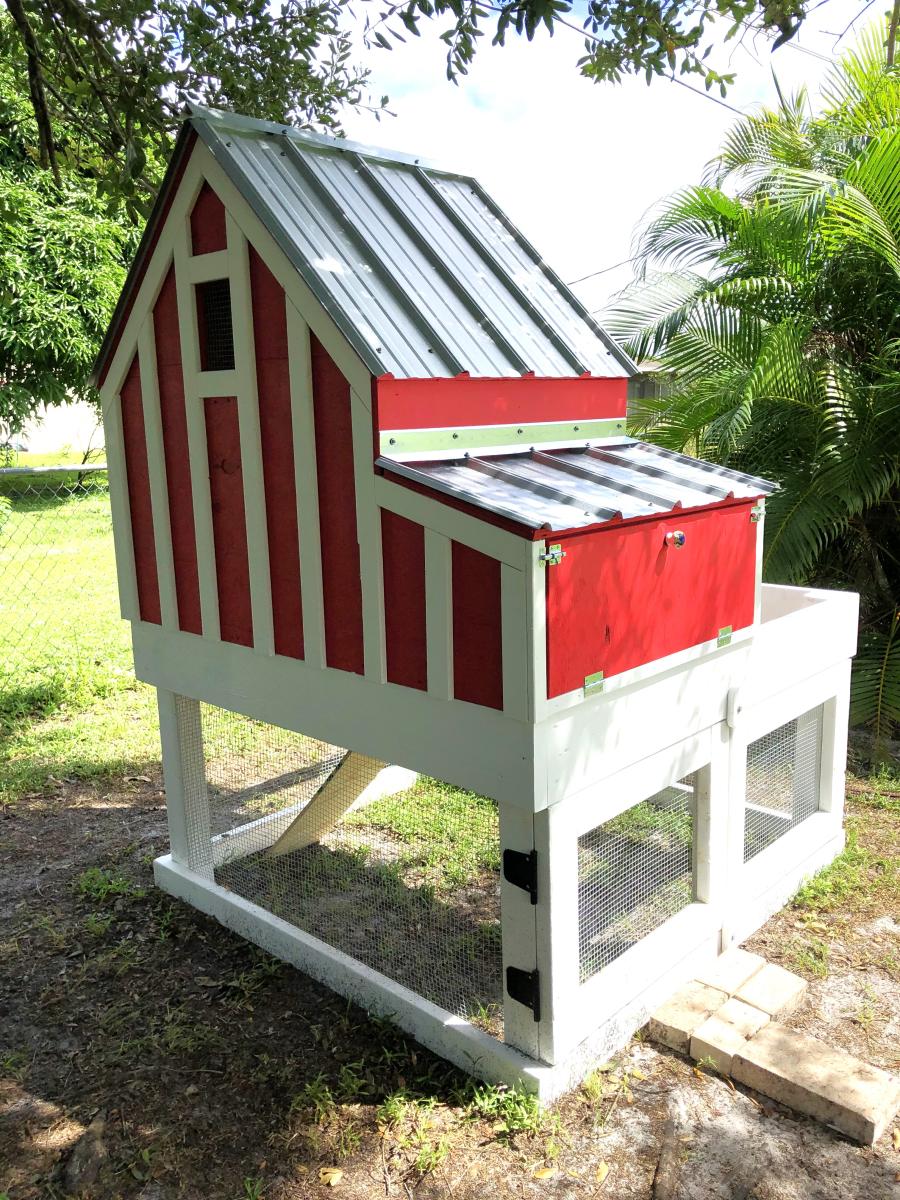
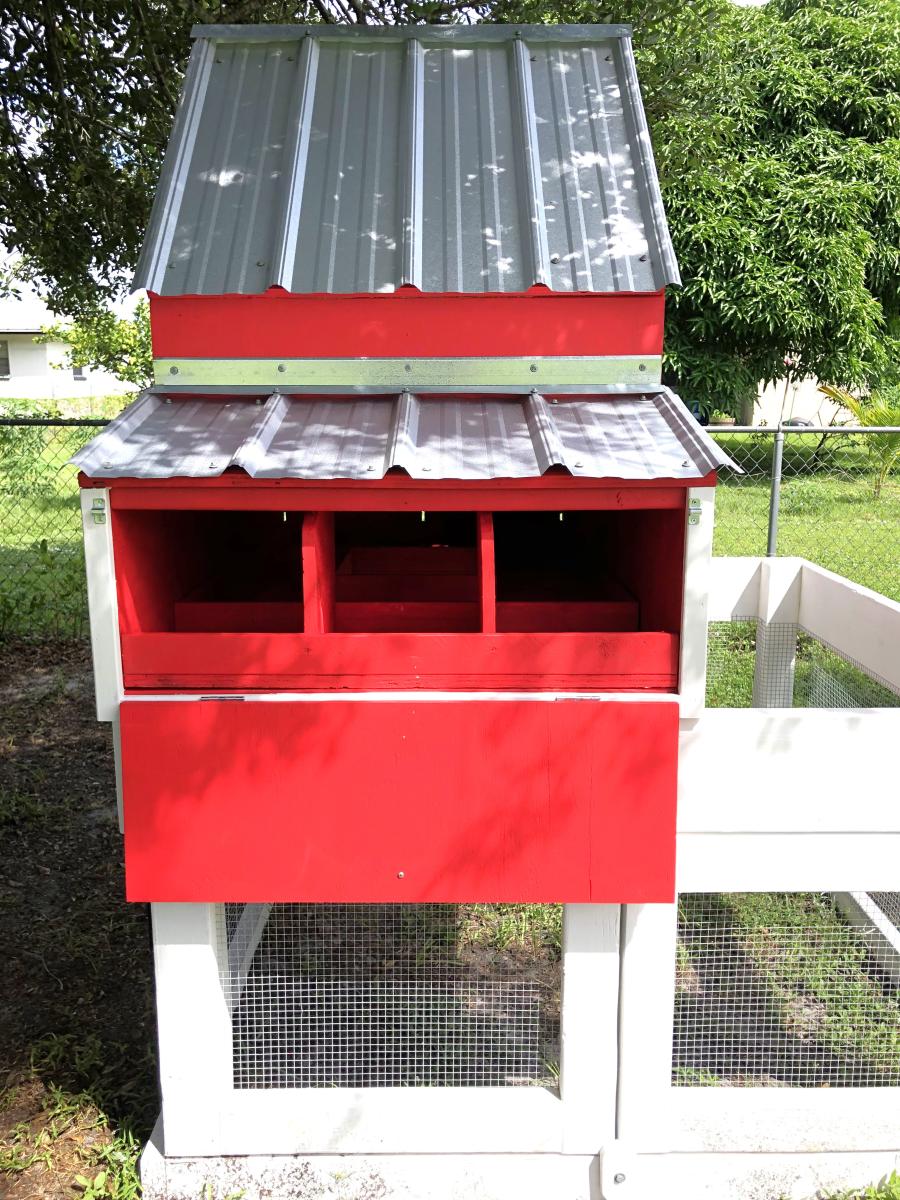
We wanted a shorter version, so that it would hide behind this fence. I just needed somewhere to store lawnmower, wheelbarrow, and a few yard supplies. I started putting the roof on hinges, but the gas struts couldn't support the 170 pound roof. So it's fixed in place (stronger structure anyway). That's why I went with 2x4's for the framed walls instead of 2x2's.

Thu, 06/11/2020 - 17:15
Very Nice modification. Two thumbs up! May I please ask you for the dimensions of the shed?
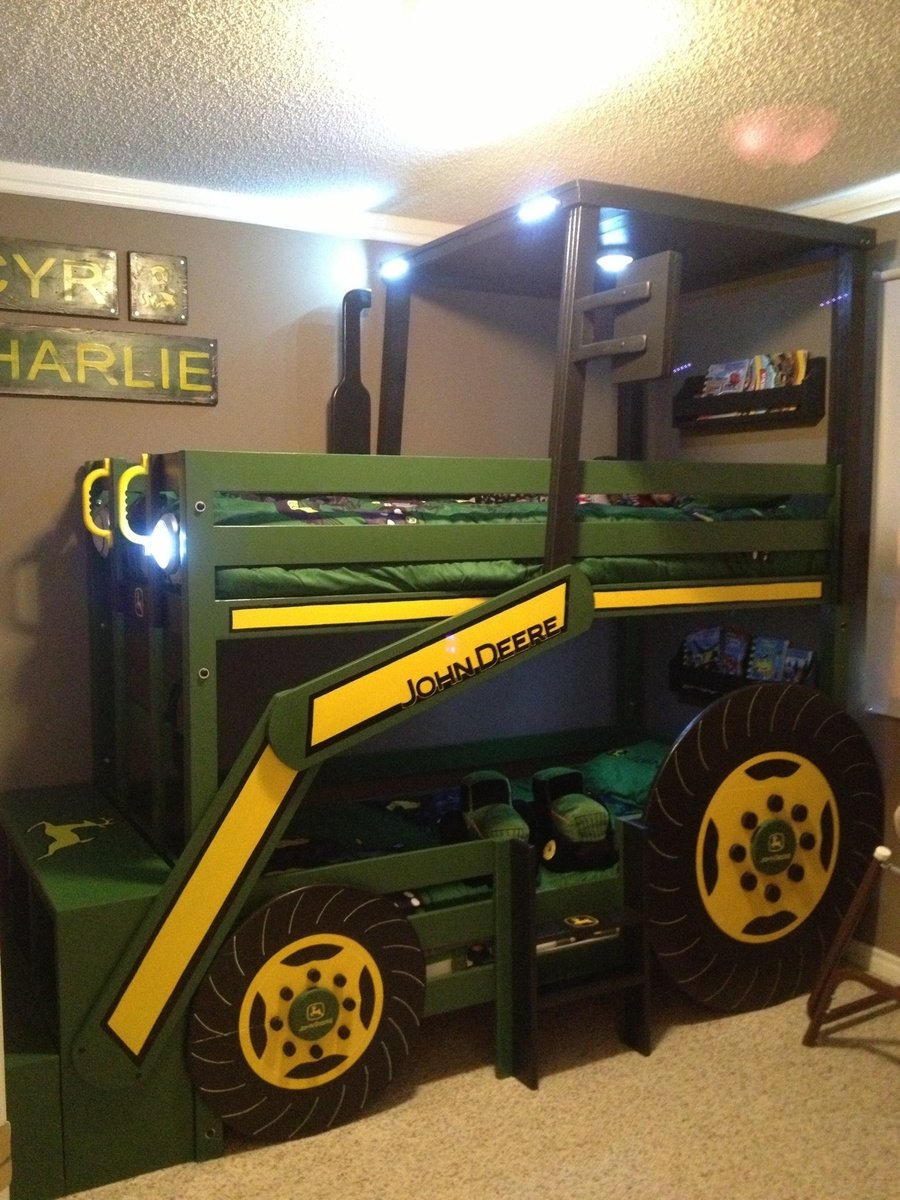
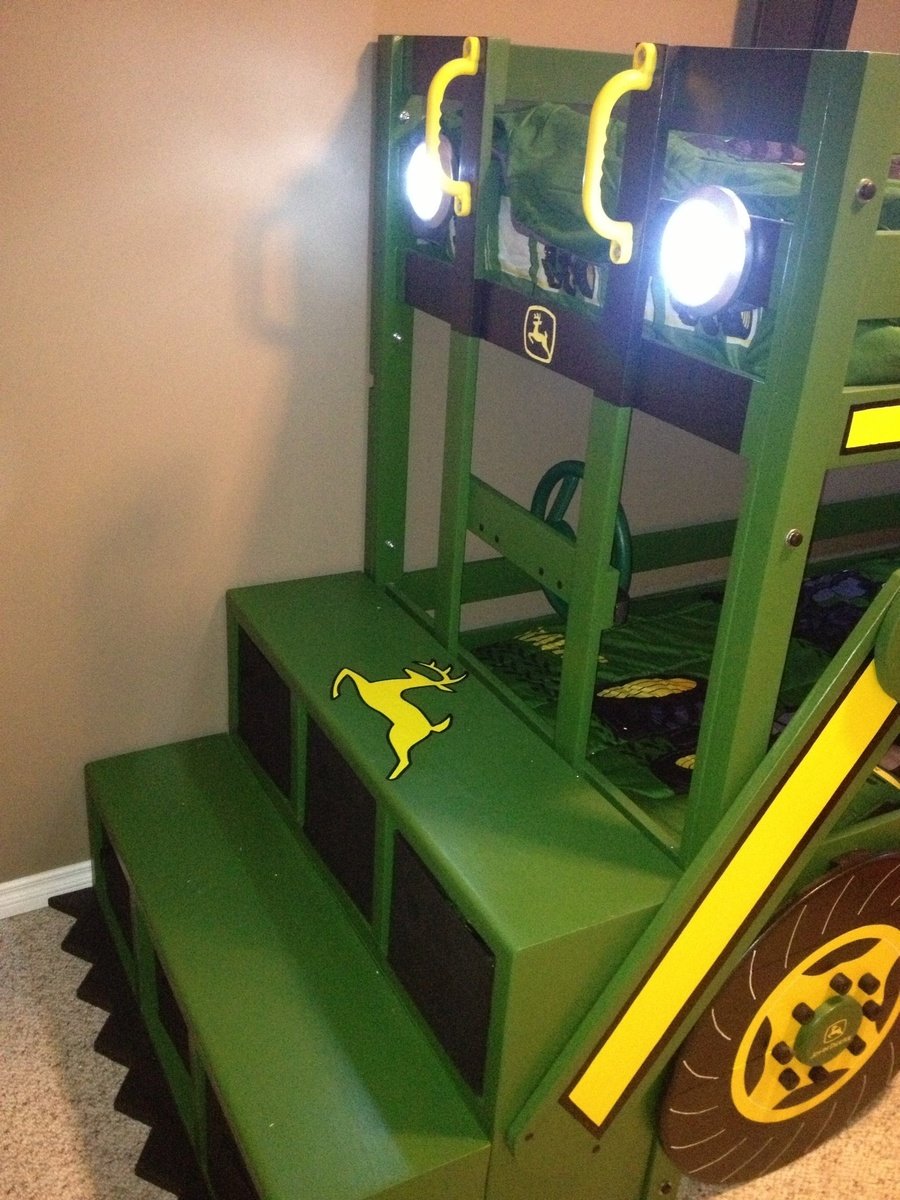
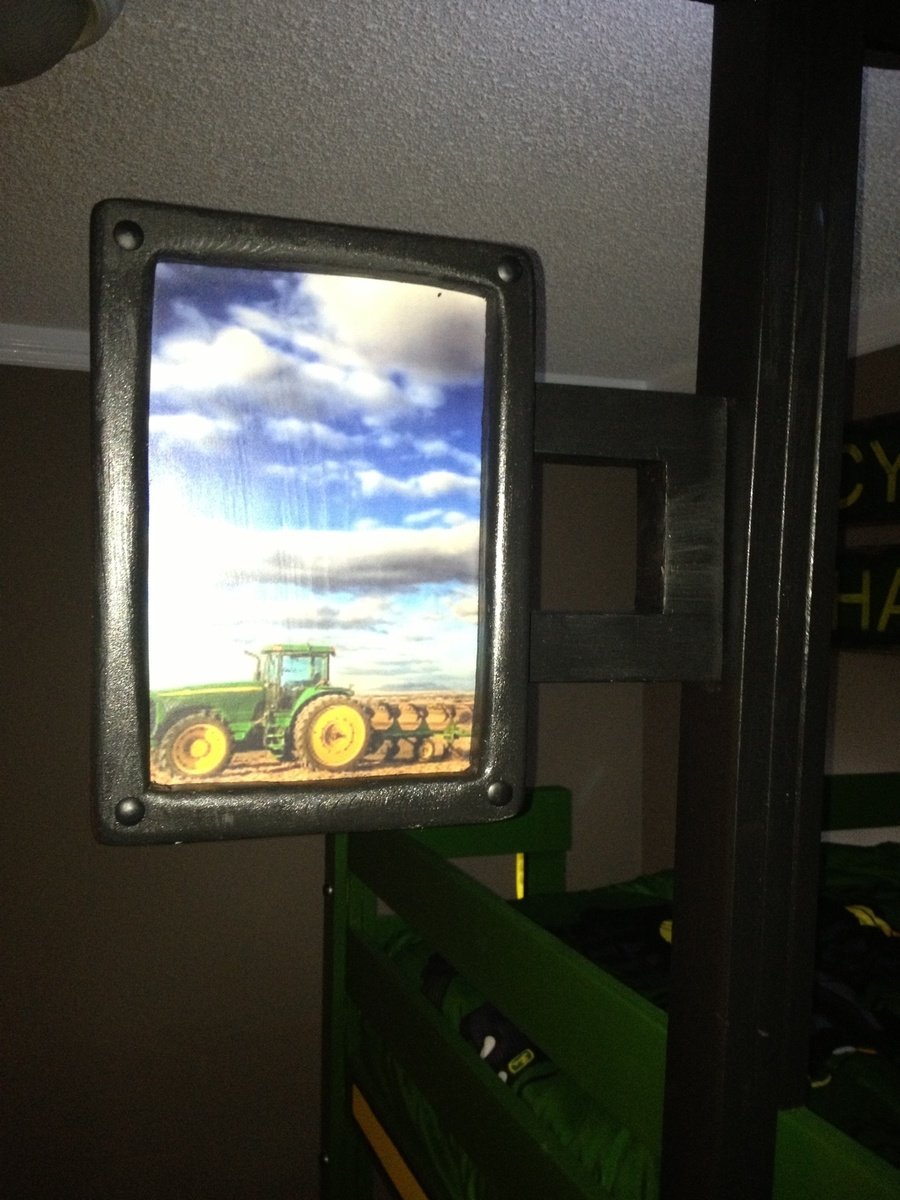
With another baby boy arriving in August, my one and three year olds are moving to a "big boy" room. My oldest decided he wanted a bunk bed and as they both are obsessed with tractors, when I saw the "John Deere Tractor Bunk Bed" plan, I was sold.
We would be needing a twin sized bunk bed though not a toddler. I used the classic bunk bed plans and simply modified them to suit our needs. I moved the ladder to the front, added a rail on the bottom bunk and added a small ladder to the side for my one year old to climb into the bottom bunk.
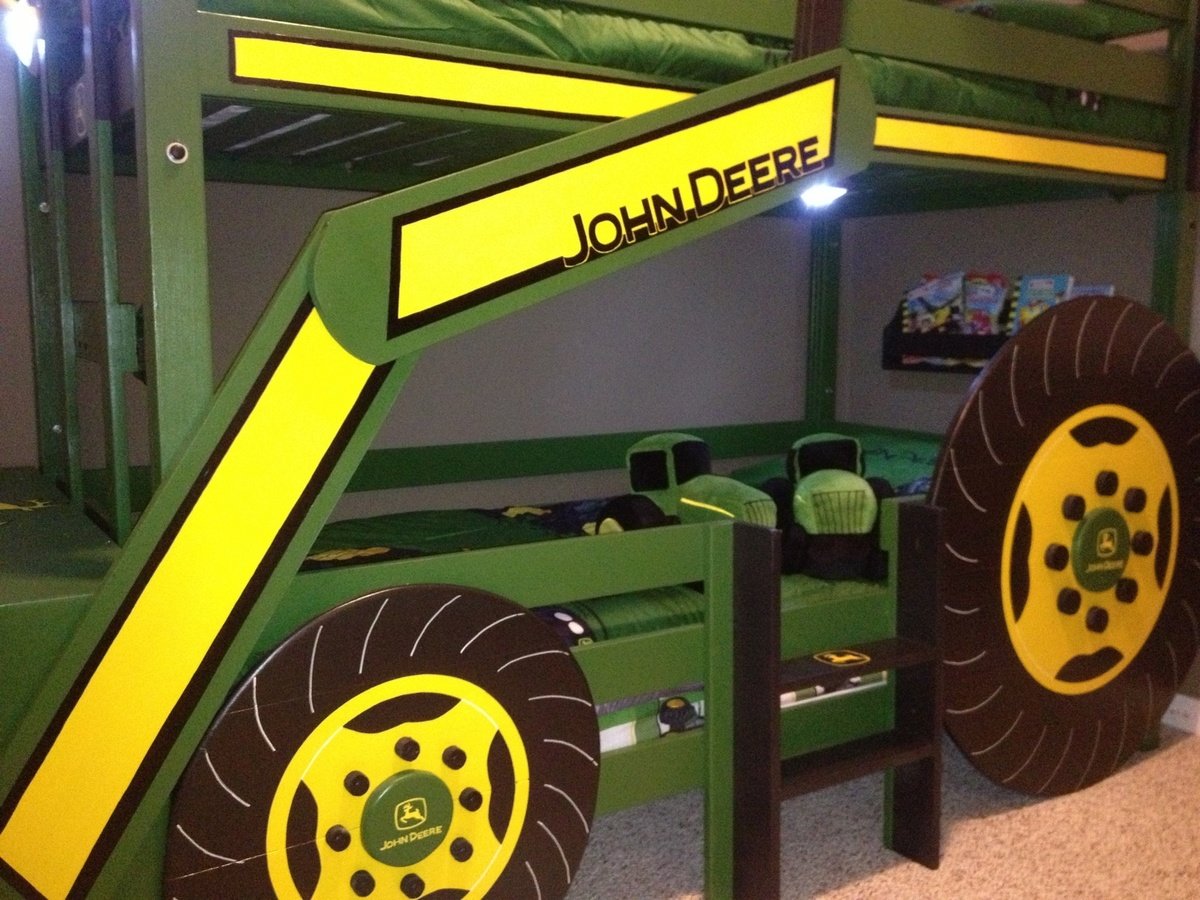
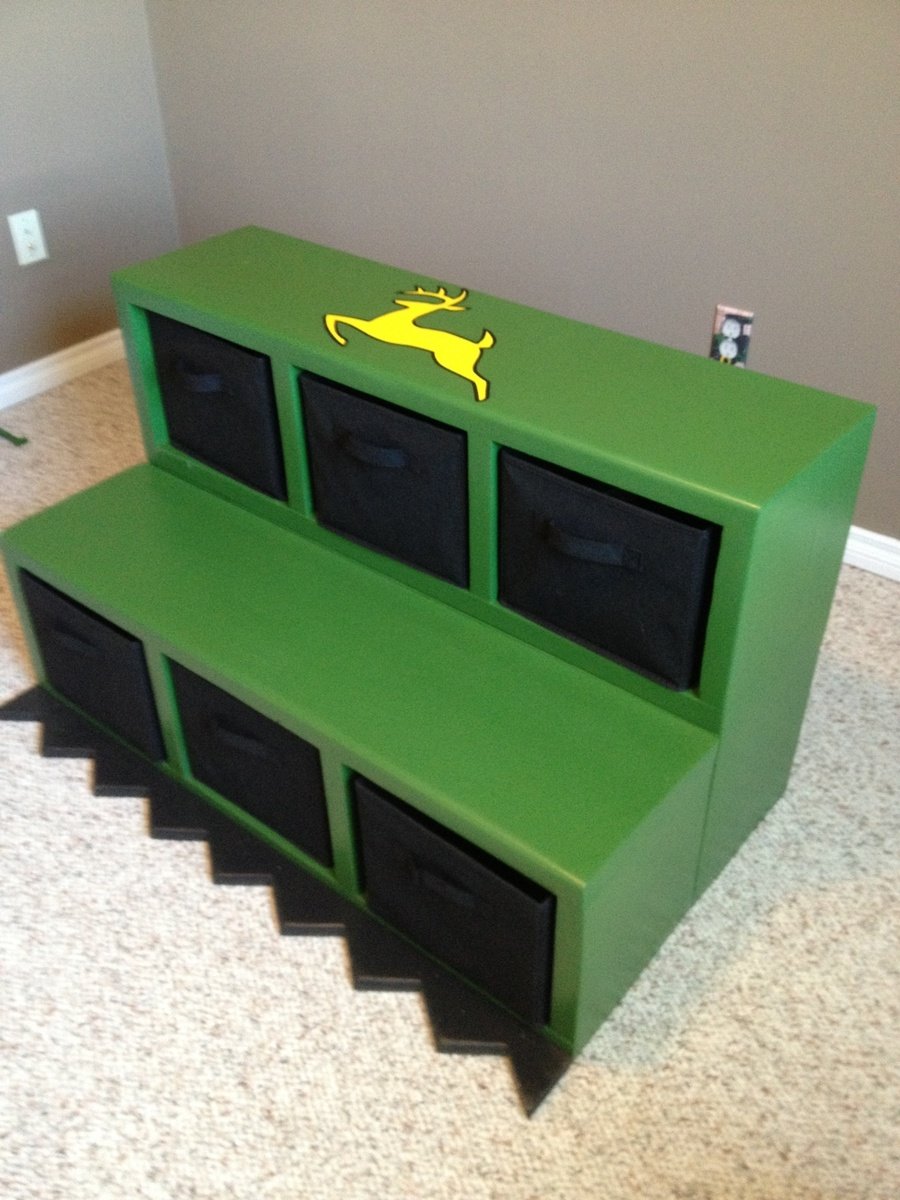
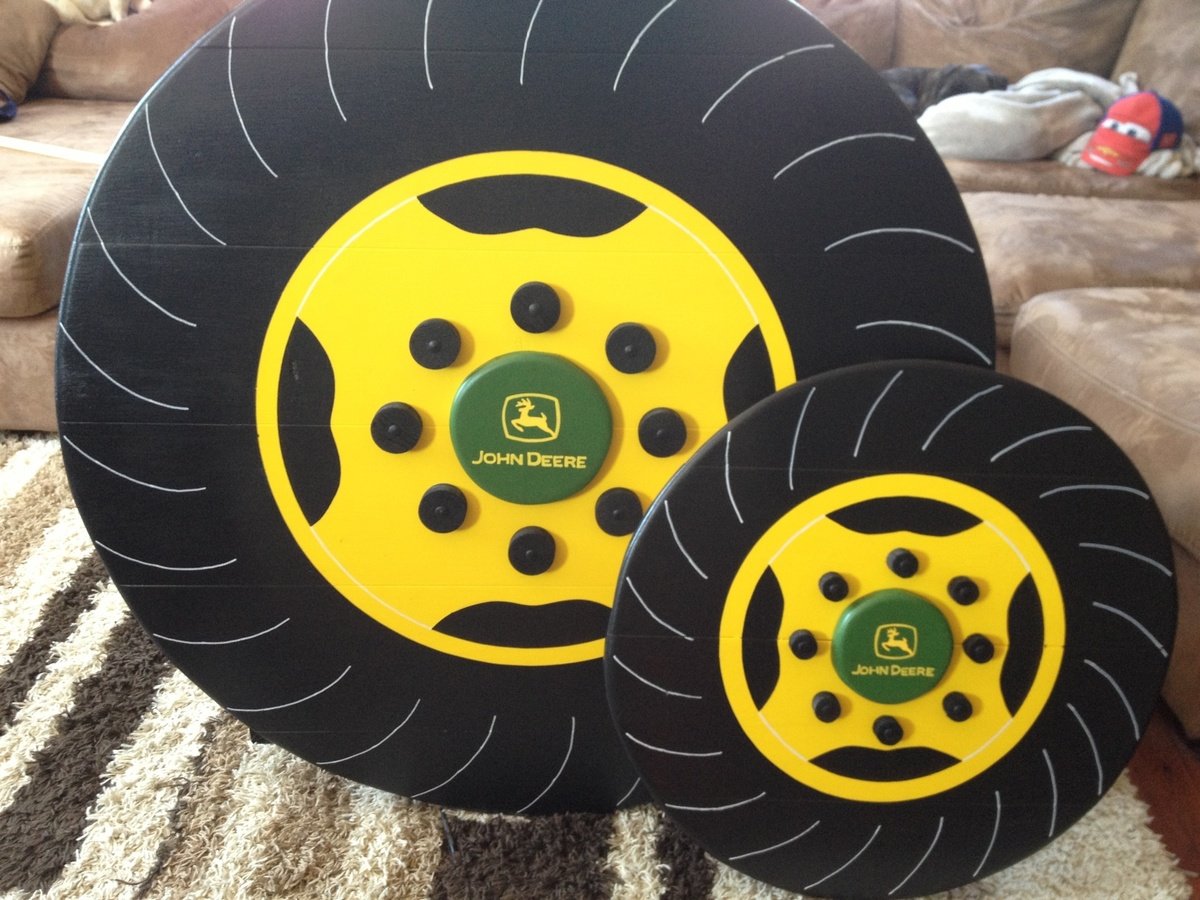
Once the the frame of the bed was complete, I added the tractor accessories. A couple of storage cubby shelves with fabric baskets for toy tractors which act as stairs up to the ladder and make the tractor bucket at the front. Also, the wheels which are made from joined 1x6s as I find plywood hard to sand and paint to the quality of finish I like. A cab & roof from 1x4s framed together. A side mirror that I decoupaged a picture of another tractor on. I used push lights for the headlights as well as a reading light above each bed (they're on timers so they'll turn themselves off). A steering wheel (play equipment access from toys r us). Also, I built and mounted by the head of both beds a "flat wall book holder" so they would have somewhere to store a few books.
My boys and I are fairly new to building so I spent a lot of time planning and measuring to ensure it would all come together in the end. It paid off because it all went smoothly (even with "help" from my boys). It's not perfect but they're very happy with the result. We also built a John Deere themed "Just my size closet" and even finished with over a month to spare before the new baby arrives! :)
Just want to say a quick thank you to Ana both for the amazing plans and also the inspiration to take on these projects. The time spent with my boys building as well as the resulting treasures are priceless and I would have never realized what we were capable of had I not stumbled upon your website and been so inspired by you and everything you've accomplished. Thank you!
Thu, 10/09/2014 - 14:12
I am new to this and I was wondering were to find the measurements for the twin size bed? I would love to make this for my boys!!
Mon, 10/20/2014 - 13:10
HI! You did an amazing job with this! Is there any way you can post the plans or send them to me? Thanks in advance.
Mon, 11/03/2014 - 07:48
Sorry for the slow response to those requesting plans. For main structure of the bunk bed, I used Ana's "Classic Bunk Bed" plans. For all of the add-ons, I made up my own plans. I'm pretty low tech so unfortunately they're just pencil & paper plans but I'd be happy to scan and email them to you if you're interested. Just message me and I'll send them your way. :)
Fri, 11/21/2014 - 13:26
Can you please email me your plans? [email protected]. Thanks!
Thu, 07/09/2015 - 19:48
I was just wondering if you by chance got three bunk bed plans?? If so would you be willing too send them my way??? [email protected] thanks so much
Thu, 05/26/2016 - 14:54
I know that it has been a while, but did you ever get plans for this bed? If so, will you please forward them to me at [email protected]? Thank you!

In reply to Plans please! by kerrihicken
Sun, 02/12/2017 - 07:36
if you recieved plans for this can you please forward them to me [email protected]
Fri, 01/02/2015 - 12:36
If you wouldn't mind sharing with me also I would love a copy. Email ... [email protected] This is by far the BEST tractor bed I have seen online! You did an awesome job!!!!! Hopefully I can recreate!!!!
Mon, 01/05/2015 - 08:44
I love this! You did an amazing job! Could you please send the plans to [email protected]
Thank you so much!!
Wed, 01/28/2015 - 14:08
Hi Veronica, Well done fantastic job! Two little men who want to move in together because of a new addition on the way. Their request though is a John Deere Bunk Bed! would be grateful if you could forward on your plans if you have time, Kindest regards.
In reply to Plan Request by Veronica P
Thu, 01/29/2015 - 07:18
Hi, I would love to get a copy of the plans used to make this bunk bed for my grand kids. Have two grandkids and a third one due the middle of February so got to get a bed made quickly for them to have a great bed to sleep in when staying with nana and pa. Plans can be emailed to me at [email protected] 731-415-9666. Thanks Diana
Mon, 02/02/2015 - 07:31
This looks so great. Could I get a copy of your plans? Thanks [email protected]
Mon, 02/09/2015 - 21:06
I would love to receive a copy of of the Plans for the John Deere bunk bed. My email is [email protected]
Tue, 03/03/2015 - 10:43
Can you please email me the plans. I have a 4yr old that is obsessed with John Deere. We would like to make this for his birthday. [email protected]
Thu, 03/05/2015 - 22:31
Just love the whole thing very beautiful & I was wondering if you could send me the plans for the whole set up. My email is [email protected] thanks
Mon, 04/06/2015 - 21:04
Hi Veronica, like everyone else i love your plans, could you possibly email them to me? Thanks in advance.
Thu, 05/28/2015 - 10:35
Please send me the plans for the John Deere Bunk Bed. I love it.
Fri, 05/29/2015 - 09:06
Please send me your plans for the John Deere Bunk Bed in the twin size. [email protected]
Sun, 05/31/2015 - 23:36
Will you please email me the plans for the John Deere tractor bunk bed? Thank you. You did awesome
Tue, 06/09/2015 - 08:06
Hi! Can you please forward me your plans for the john deere tractor bed to [email protected]?
Thank you so much and awesome idea!

In reply to Plan Request by Veronica P
Fri, 06/12/2015 - 19:31
Please, please email these plans to me! My son will love this!!!! Email is [email protected]. Thank you!!!
Thu, 06/18/2015 - 14:04
Thanks for being willing to share your plans. Your tractor bed is amazing. I have 2 boys who would LOVE a bed like this. Could you please send your plans to [email protected]?
Thank you so much
Sun, 09/06/2015 - 10:06
Dear Veronica,
Our grandson, 6 years old, will absolutely adore this bed. He loved riding on Grandpa's real JD tractor. Please send me your plans for the attachments. They are just darling and I could not do any better. Thanks for your generosity!
Fri, 01/15/2016 - 10:52
Can you please send me your plans? i am stumped on the arms of the tractor
Wed, 07/13/2016 - 12:12
Veronica P this bunk bed is amazing! Could you email me your low tech paper and pencil plans please? :) [email protected]
Fri, 09/13/2019 - 21:11
Hi Veronica. My 3 year old just loves the tractor bunk bed. I was wondering if you would mind sending me the plans you have. It would be greatly appreciated. My email is [email protected]
Thanks in advance
Wed, 10/16/2019 - 17:56
If you're still sharing, we would love a copy of your add-ons plans.
Thanks,
MyMaw and PawPaw
Sun, 08/23/2020 - 11:32
What an awesome build! We would love a copy of your plans if you could please share. Thanks!
[email protected]
Mon, 12/15/2014 - 20:19
Would you please email me these plans for your bunk bed? Thanks A lot!!! email to [email protected]
Thu, 05/26/2016 - 15:00
Hi! I know that it has been a while, but I see a message where Veronica says she emailed you the plans. If you still have them, will you please send them to [email protected]. Thank you!
Tue, 12/16/2014 - 19:22
Is there any way I could have email plans? [email protected] . Thank you.
Sun, 12/21/2014 - 00:35
Please email the plans for this to [email protected]
Thank you in advance!
Tue, 12/23/2014 - 07:33
Hi Veronica! I would love an email of the plans to make this bed. My sons thinks it is out of this world!!! Thanks for all you effort and wonderful job.
Sat, 12/27/2014 - 15:12
Would you please consider emailing the plans to me? We have started this for my son today and would love your insight on some measurements. Such a wonderful idea, thank you for sharing! [email protected]
Tue, 01/06/2015 - 08:21
Hello all. I've tried emailing plans to all those who've requested them. I had some trouble attaching the files as they were large so if you didn't receive them, please let me know and I can resend. Thanks
Tue, 01/06/2015 - 11:53
Hi Veronica. I did not receive an email. Woul you have time to try again? If you email me your address I can send you my fax number if that's easier too. Thank you so much! I can not tell you how much I appreciate your dedication to this! [email protected]
Sun, 11/01/2015 - 16:58
Hi
I didnt receive any plans. couldyou send methem please
Thanks
Jason

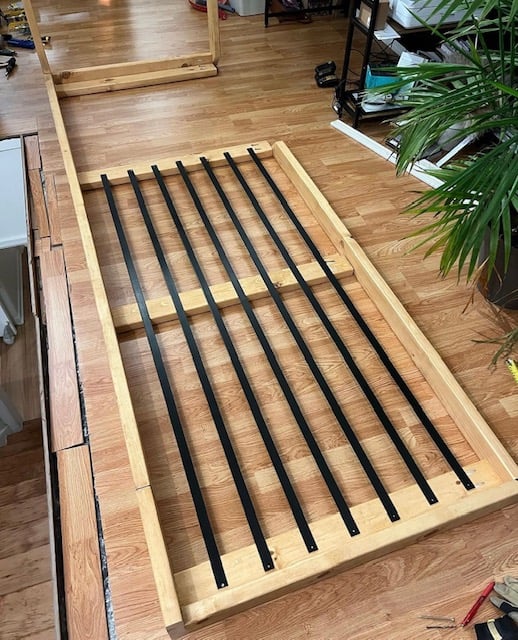
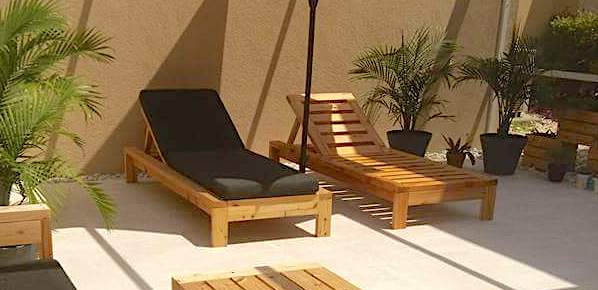
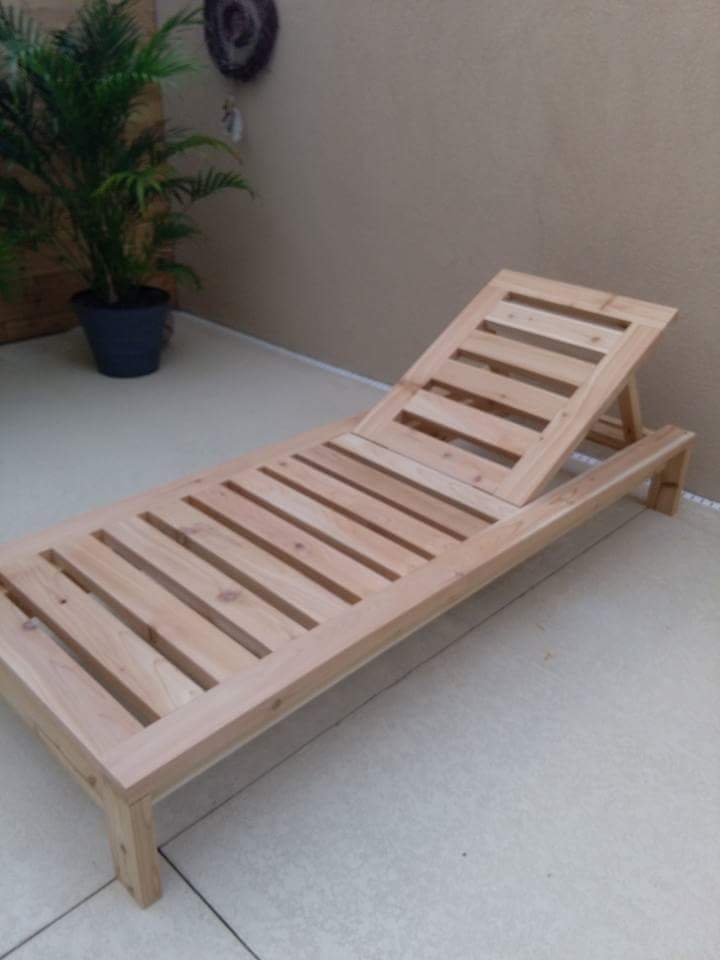
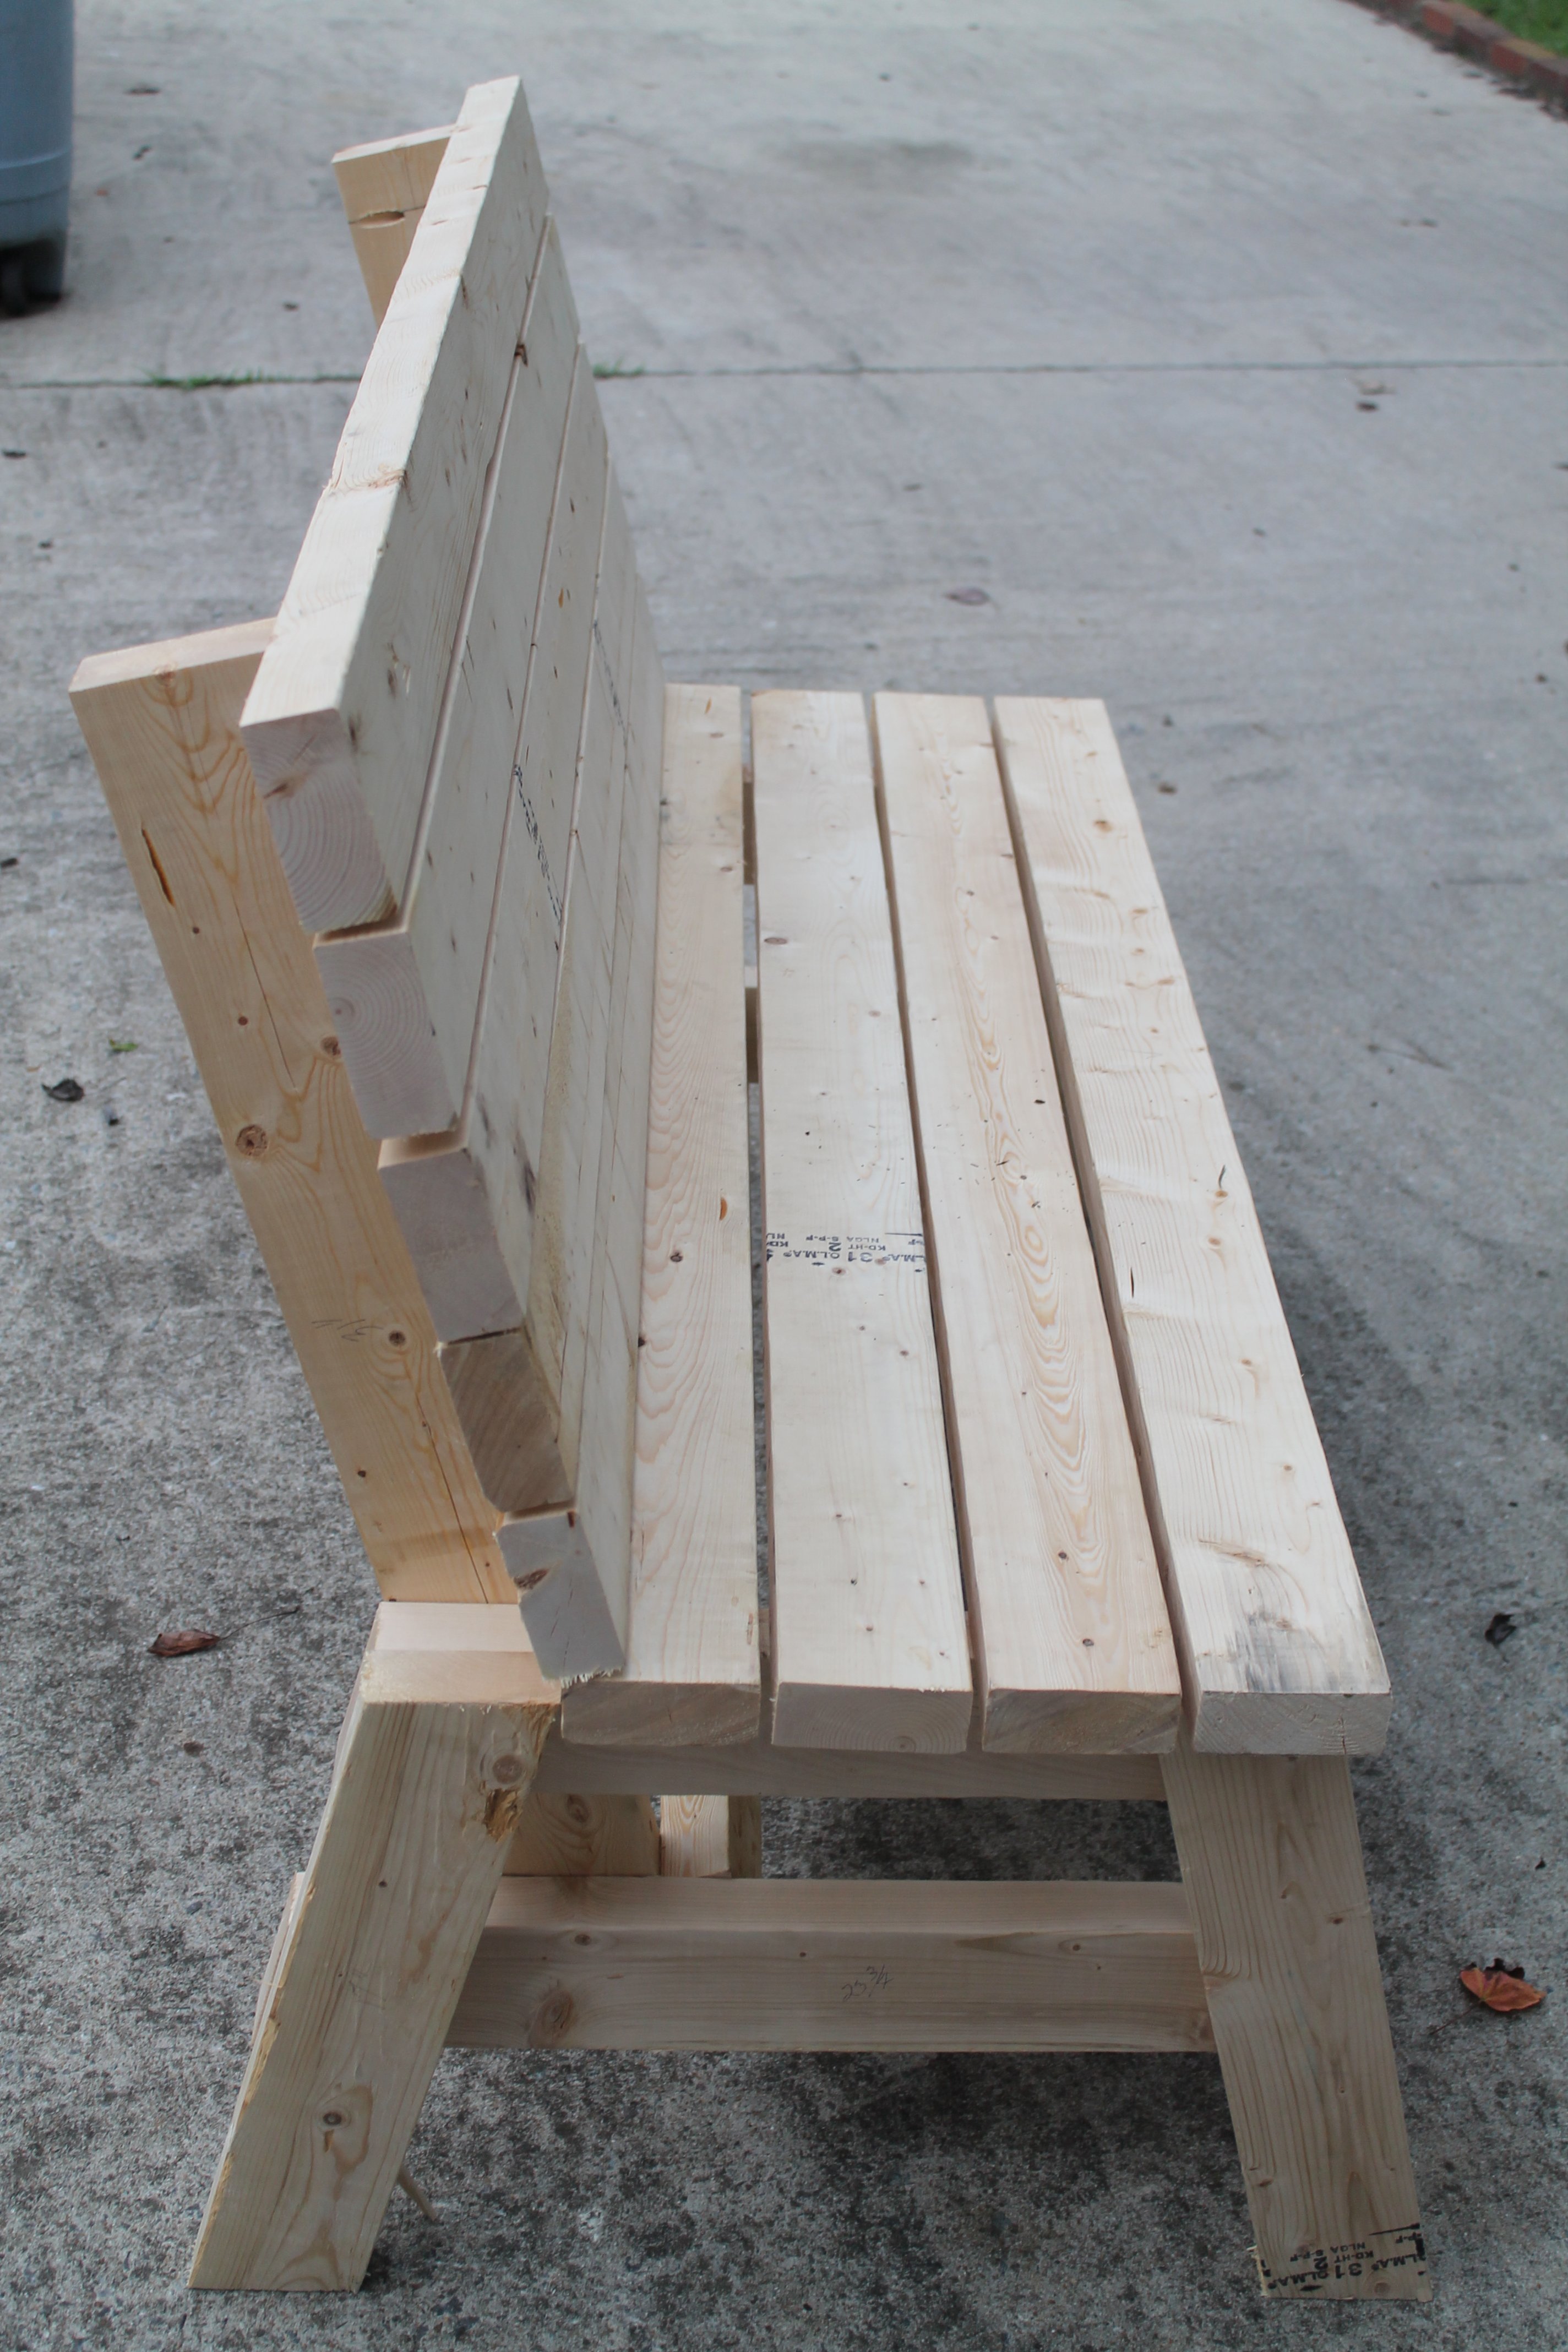
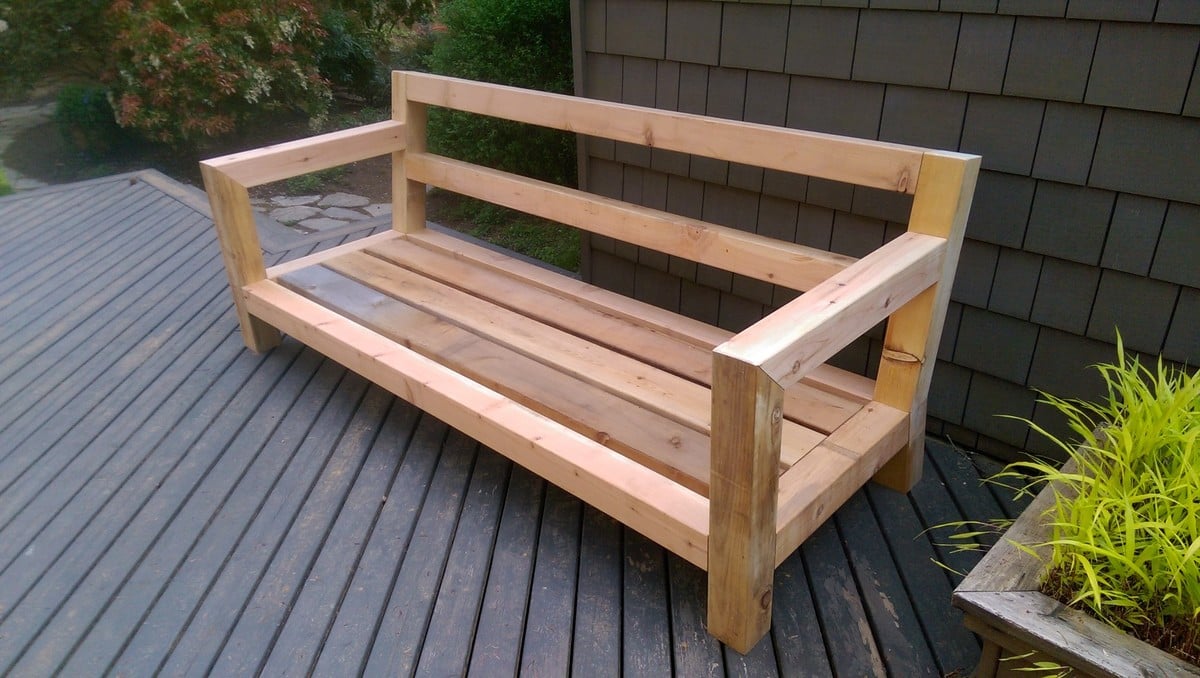
I made this in an afternoon. Loved this project. It is made with 2x4's using a Kregs Jig and mitre saw (plus additional tools like a drill and square). This was my frist time using the Kregs Jig and I am sold!!
The free plans were taken from another website. They are very detailed and there is even a video (I recommend it as he gives a great tip for making sure the back stays equal/level to each other before putting the back on). Even though you can build this by yourself, I did have help for the heavier sides once they were assembled. I plan to build the additional side table soon and finish them both with sanding and staining when the weather seems less iffy for rain.
If you are looking for a good beginner project that doesn't take forever or have complicated steps, this is your project.
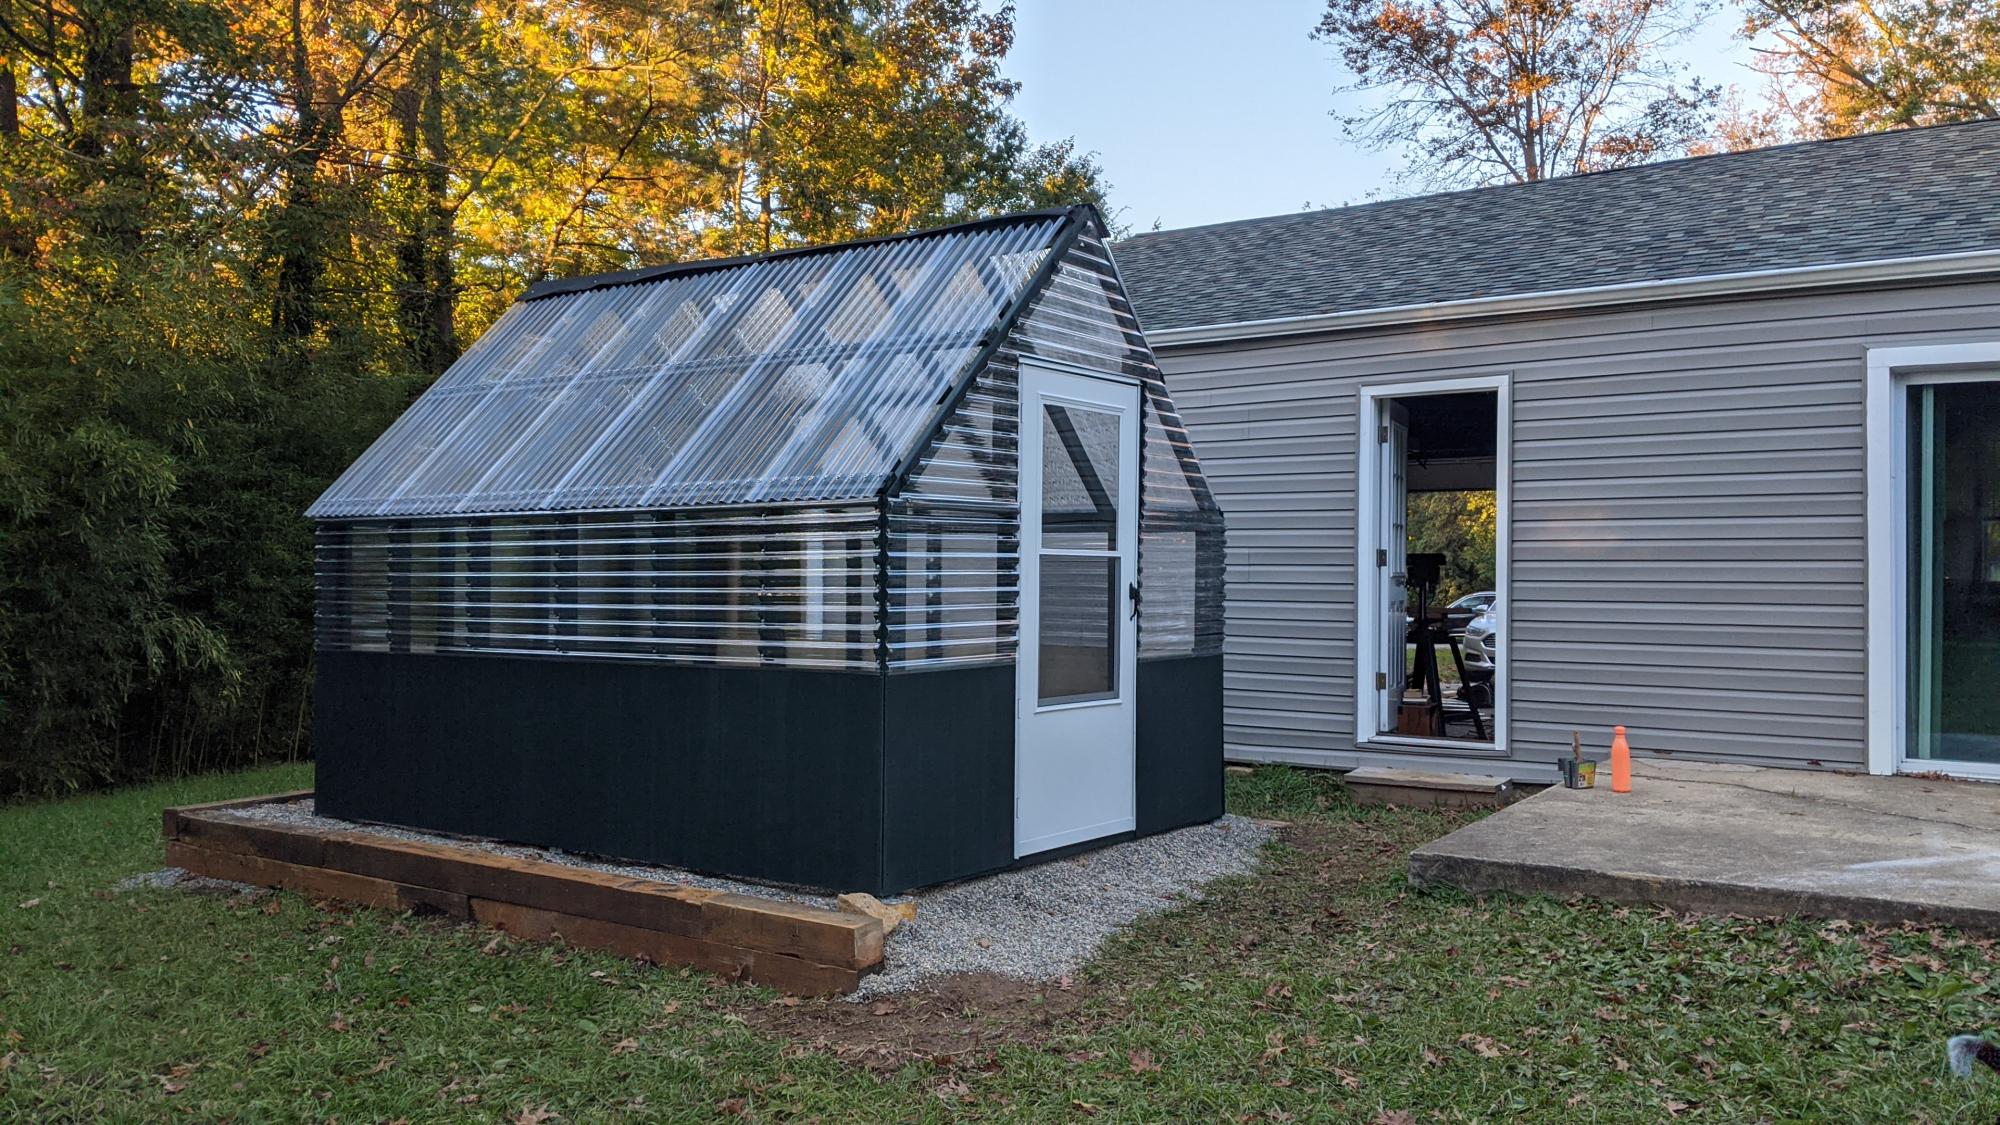
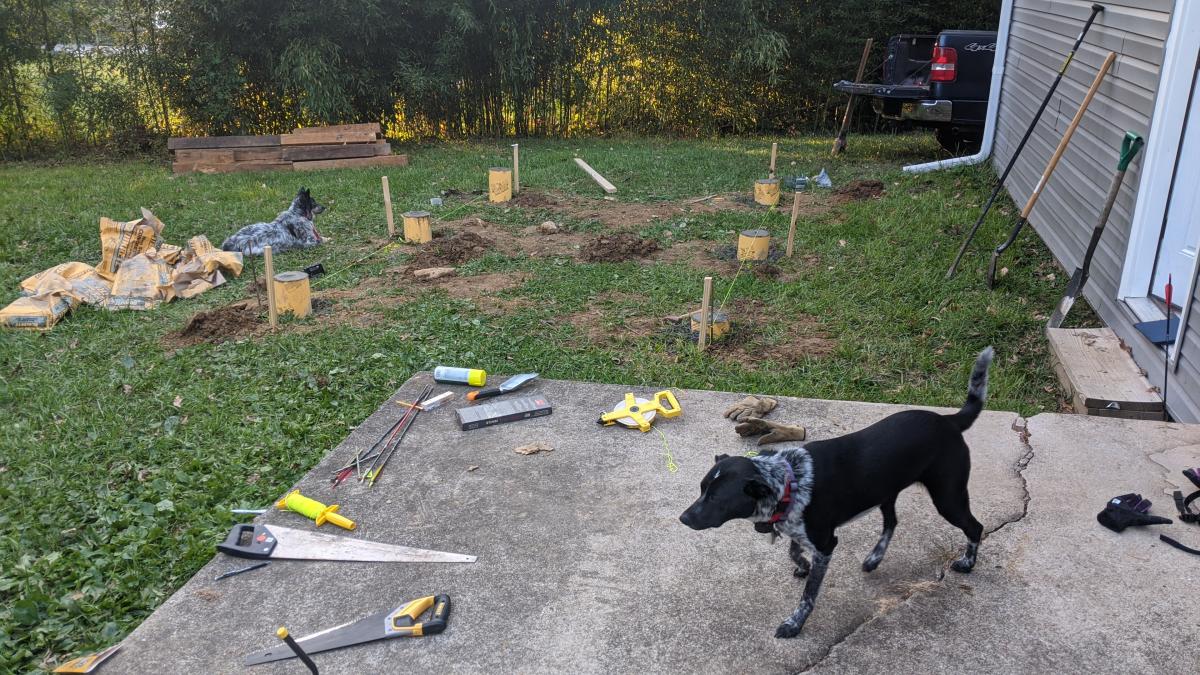
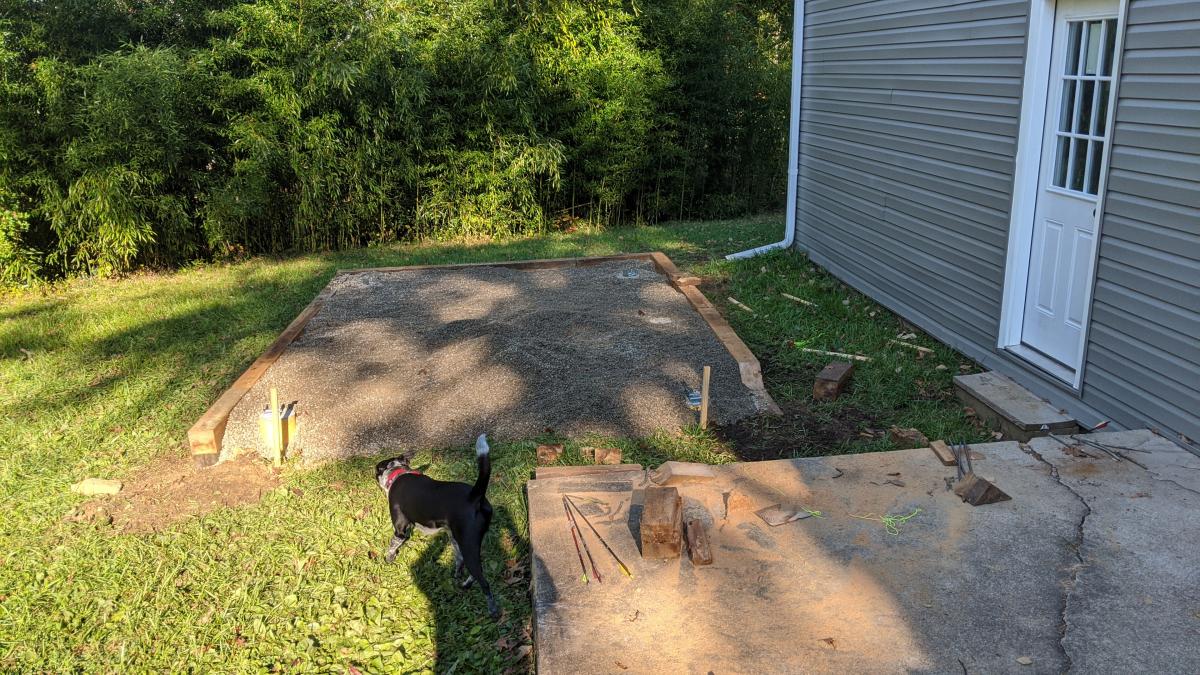
With the help of friends and family, we managed to build this greenhouse rather easily. We had to start with the foundation since the spot we chose was not an even grade. We did this by filling sono tubes with cement and leveling each off so the greenhouse would have a solid place to sit. We then built out a frame around the outside of the cement tubes with some reclaimed 6x6's. After that, we filled the space with 5 tons of river rock and then got to work! After the foundation was ready putting the rest of the house together was a piece of cake. The frame was so easy to put together. We had a few minor kinks to work out here and there, I won't say this house came out 100% perfectly, BUT I am so happy with the end results. We chose to paint it a deep green color as a final touch. So far we just moved a few potted plants from our deck to the greenhouse for the winter. It has been working very well to keep the plants cozy during the colder days we've had. Eventually, I plan to build a potting station, shelving, and most likely a garden bed for winter harvests.


Mon, 11/09/2020 - 09:52
The foundation looks great the greenhouse looks amazing! I'm sure fun was had building it too:) Thanks for sharing.
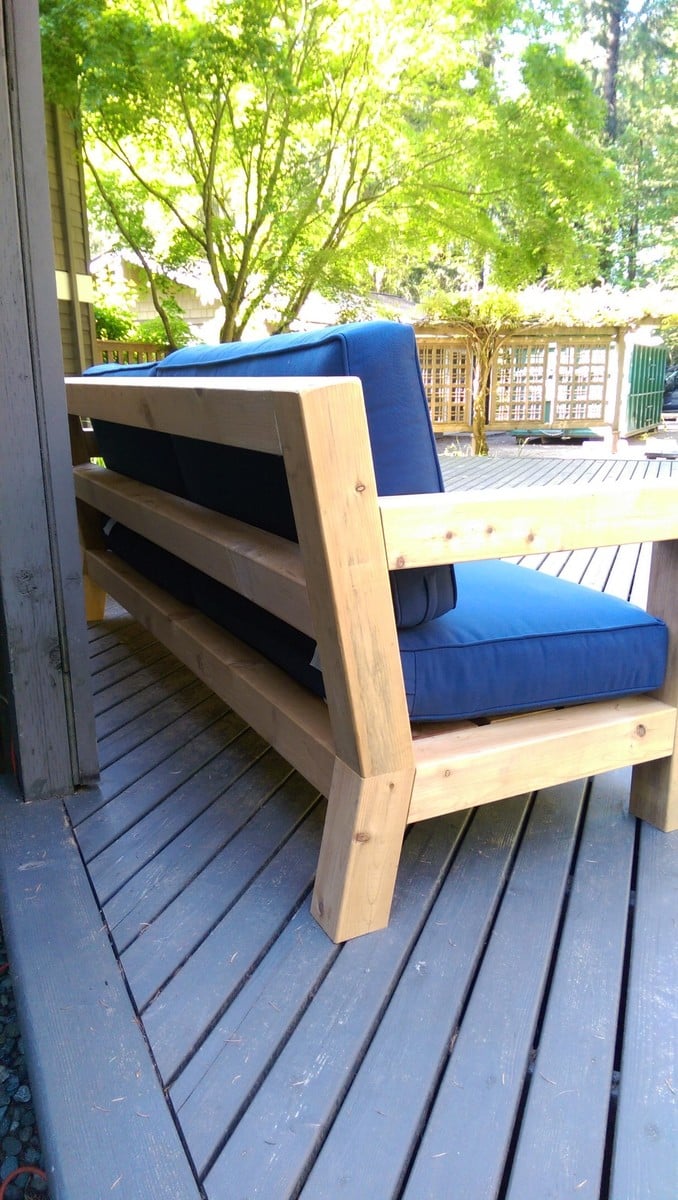
I was in love with the RH Merida set because of its clean lines and modern style. Also, the plan seemed simple enough that I could re-create it without a pattern. The only thing that I did not like about it is the lack of arms. I really like to have a place to put my arm or my beverage :) - so I added arms to the design.

Thu, 05/30/2019 - 18:45
It’s beautiful! Do you have a set of plans that you might be willing to share?
Wed, 05/20/2020 - 10:45
This is Awesome. I'm halfway in the middle as i thought I could complete without plans. Do you have any plans could share. Please....
Fri, 06/19/2020 - 15:54
were you able to get plans? I would LOVE plans too! we want to try and re-create this and would prefer NOT to get stuck!
Fri, 06/19/2020 - 15:55
Would LOVE to get plans, would even pay for them! Found rough drawings online but they are chicken scratch and hard to interpret!

Thank you! You've helped me look like a true carpenter who knows what he's doing! My whole family is impressed with my woodwork lately, and now I'm addicted. I've done your seesaw, bar table and stools plus the treehouse in 2 weeks. Thank you for sharing your plans!


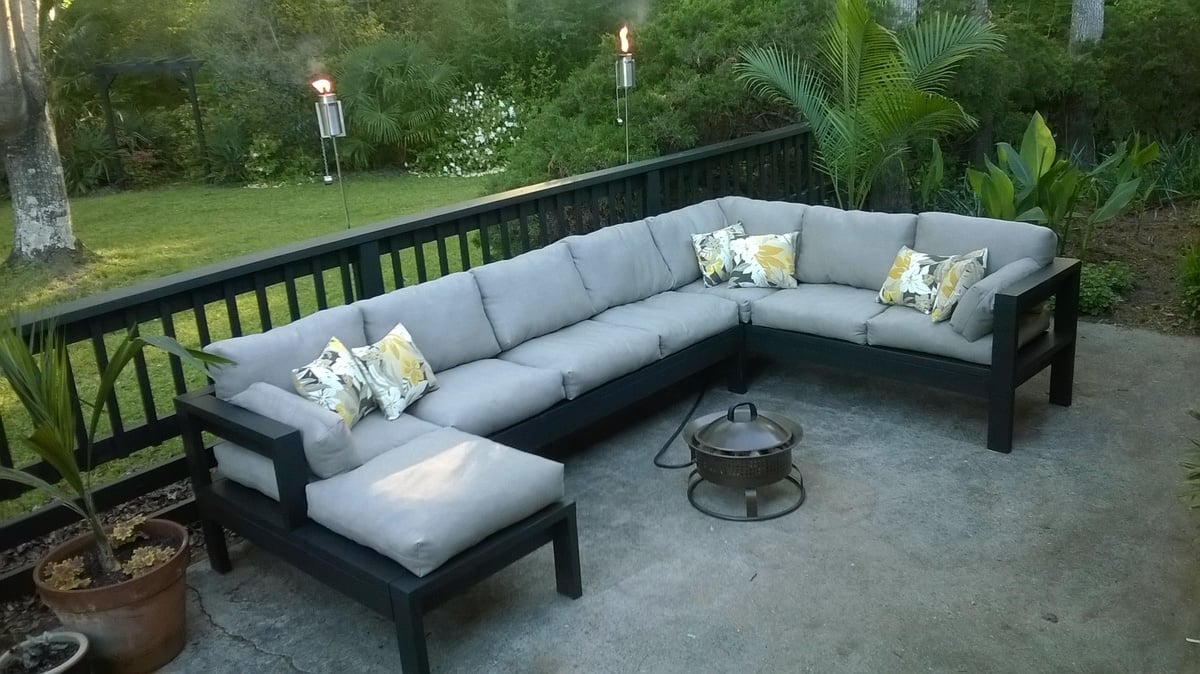
My first Ana White project. My friend Shelley and I are RN's, and she got me hooked on woodworking. I started with cushions from Lowes ( in the sizes that you recommended)to see if I loved the sectional for a few years. I loved it so much I decided to have custom Sunbrella fabric ones made. Even though the custom ones were more expensive, it has been worth it. They go perfect with my California Mission style home. Now I want to add the armless one and make it a U-shape. I did add a piece at the bottom back of each sofa to hold the cushions in. The seat cushions would slide out the back when sitting on the sofa. I made the coffee table to match. Our family loves it!
Ana, I want to say how inspirational you have been to me over some years. I think my first project found on your website was a chicken coop. More recently I have built the large garage workbench system with 2 rollout workbench/storage units (still in progress). In the past few weeks I have built the Adirondack chairs. The Adirondack chairs spurred me to continue building a “park like” setting in my small backyard. This includes a park bench (to match the Adirondack chairs), a park style grill, and a water fall. The waterfall is fairly simple (now that I have done it once - ha).
Ken Moody - Babcock Ranch, Florida
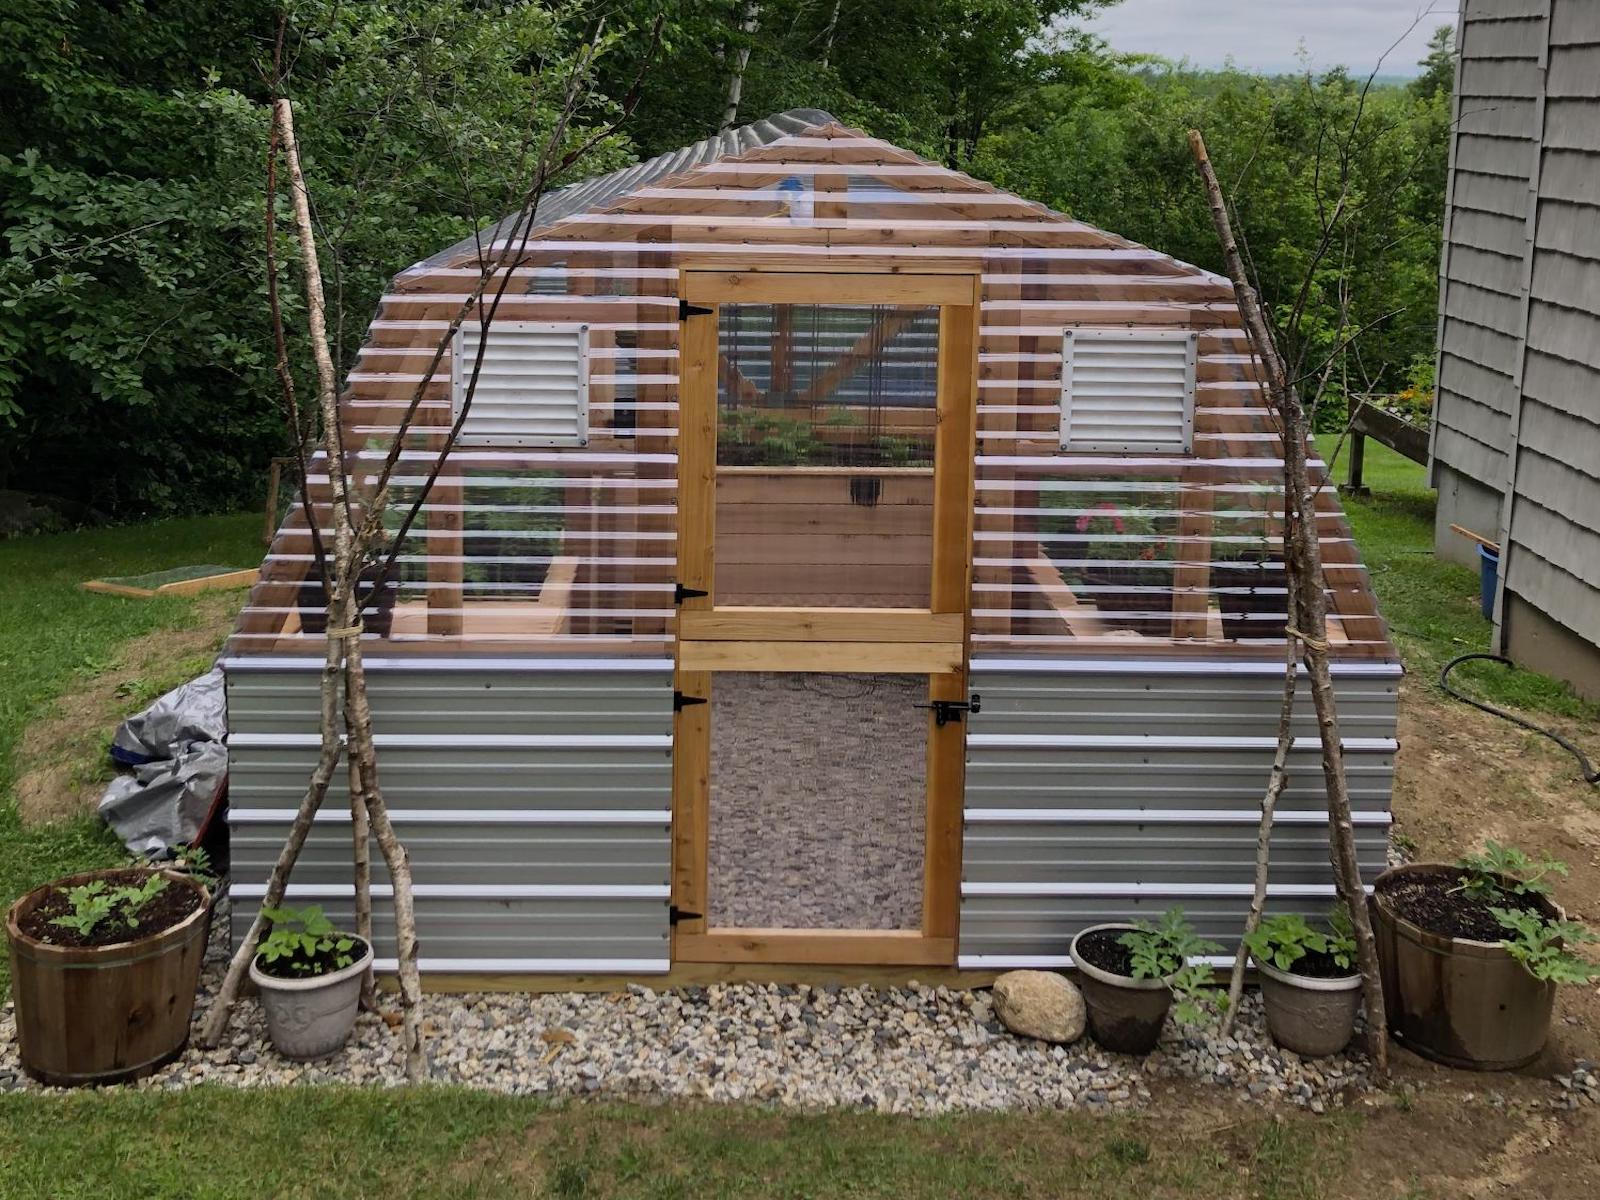
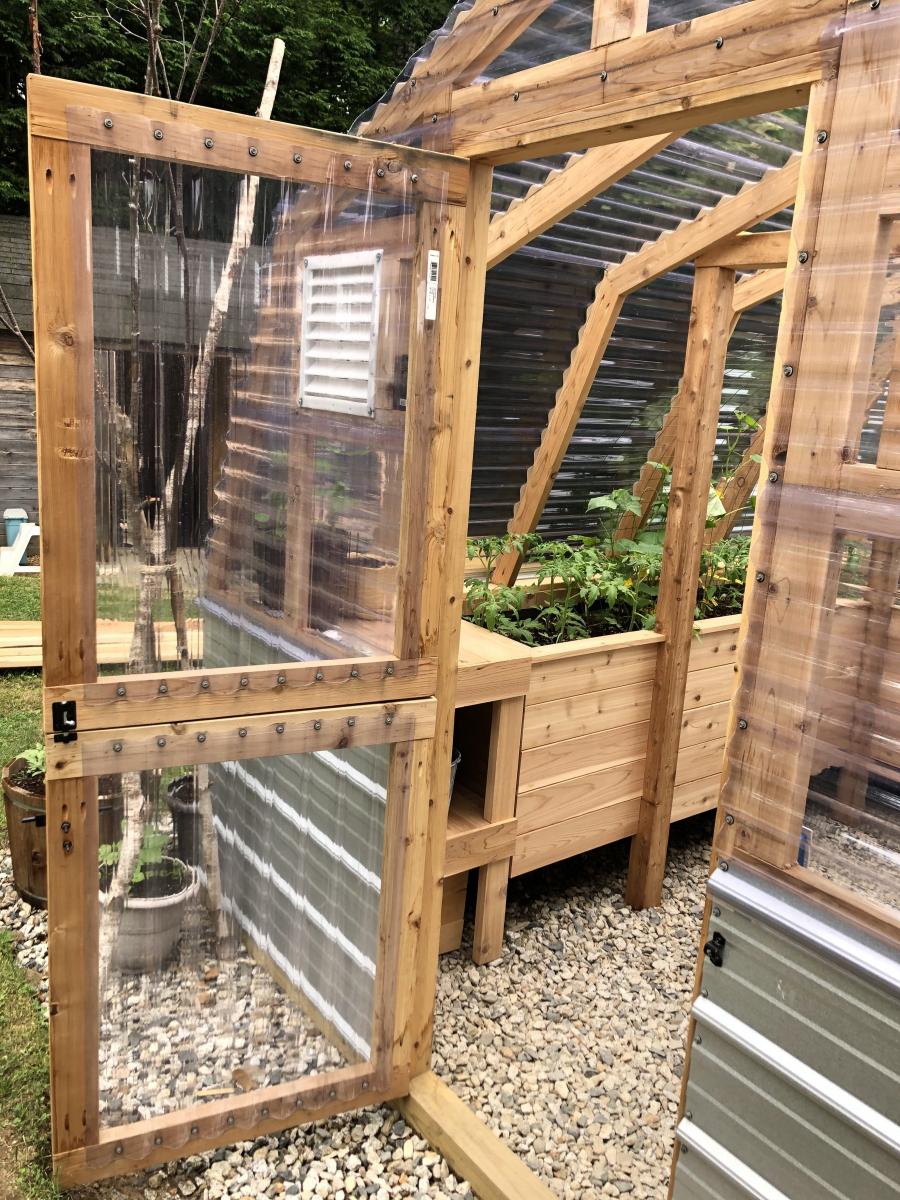
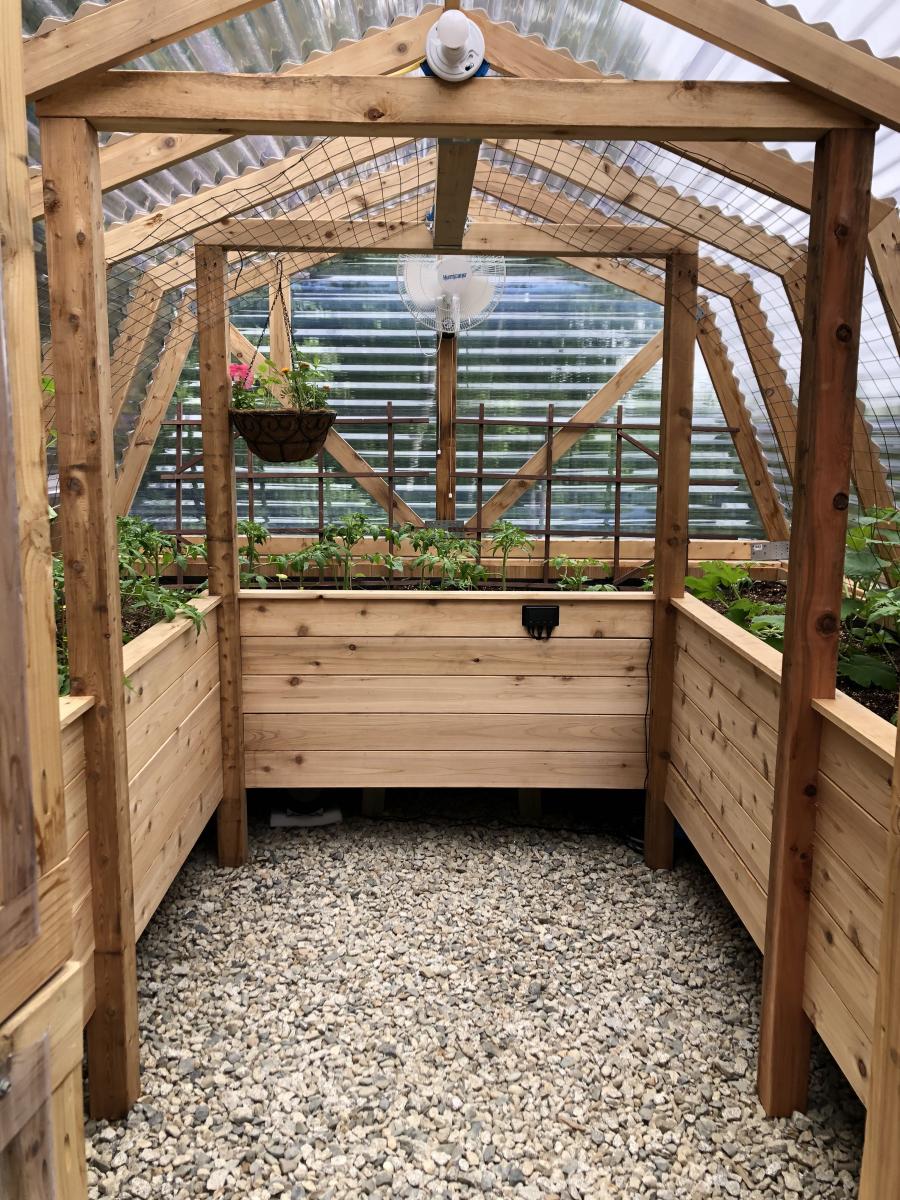
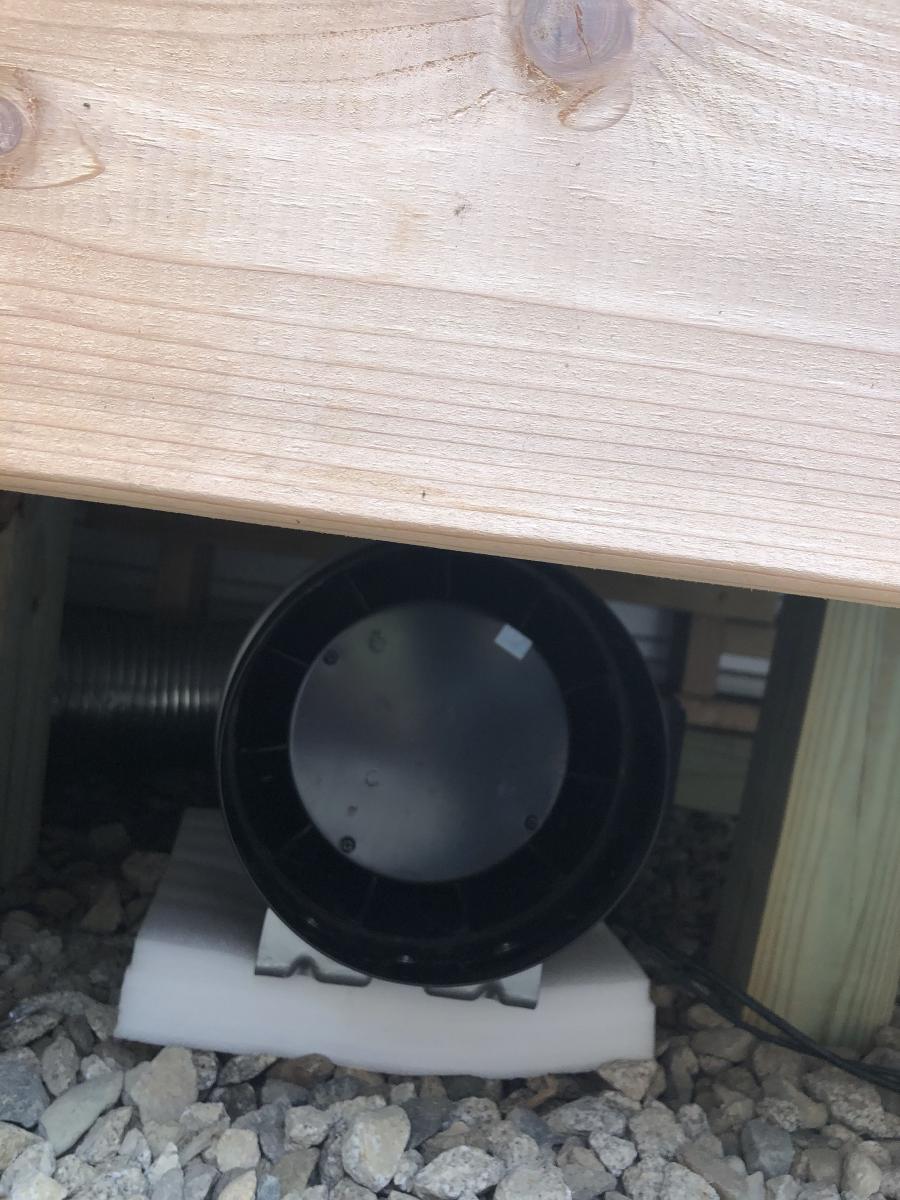
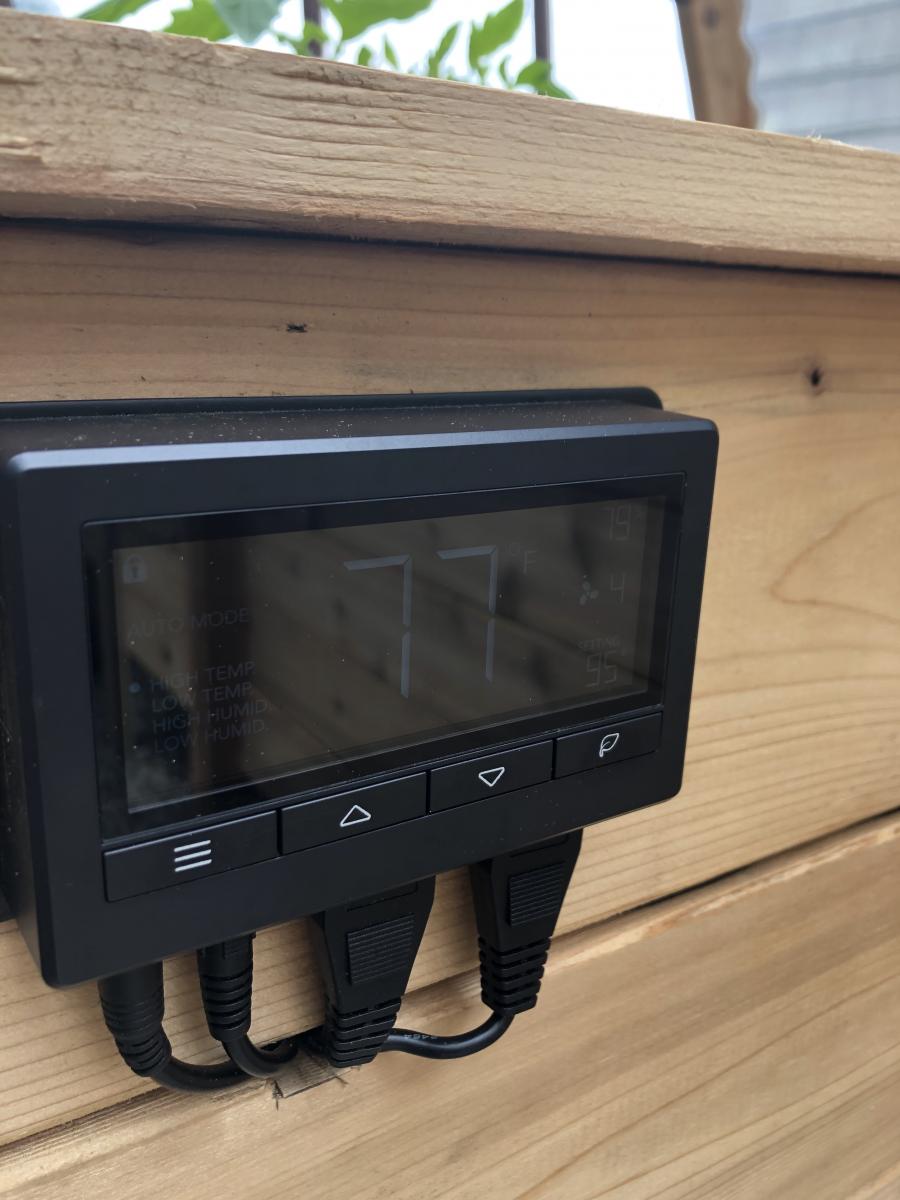
We loved this greenhouse plan from AnaWhite and wanted to be able to grow in 3 seasons so we modified the design to include humidity & temperature control & 18" deep elevated cedar beds inside with 4x4 posts for support and trellis option. We added electricity in order to have a lighted workspace and the ability to put in a circulating fan to control mold and fungus. We added 2 work tables (2x2') on the inside of the door left and right side door in order to do seed trays & store supplies. This was a wonderful project for my husband and my plants inside are doing incredibly well compared to my outside garden beds here in zone 5. Products used:
Foundation
We had a landscape company come and scape/dig a platform and then fill/compact with crushed rock
My husband then used rebar driven into a 4x4 frame in order to secure the frame to the ground and create a base upon which to build the greenhouse
Active ventilation
AC Infinity Cloudline T8 Inline duct fan
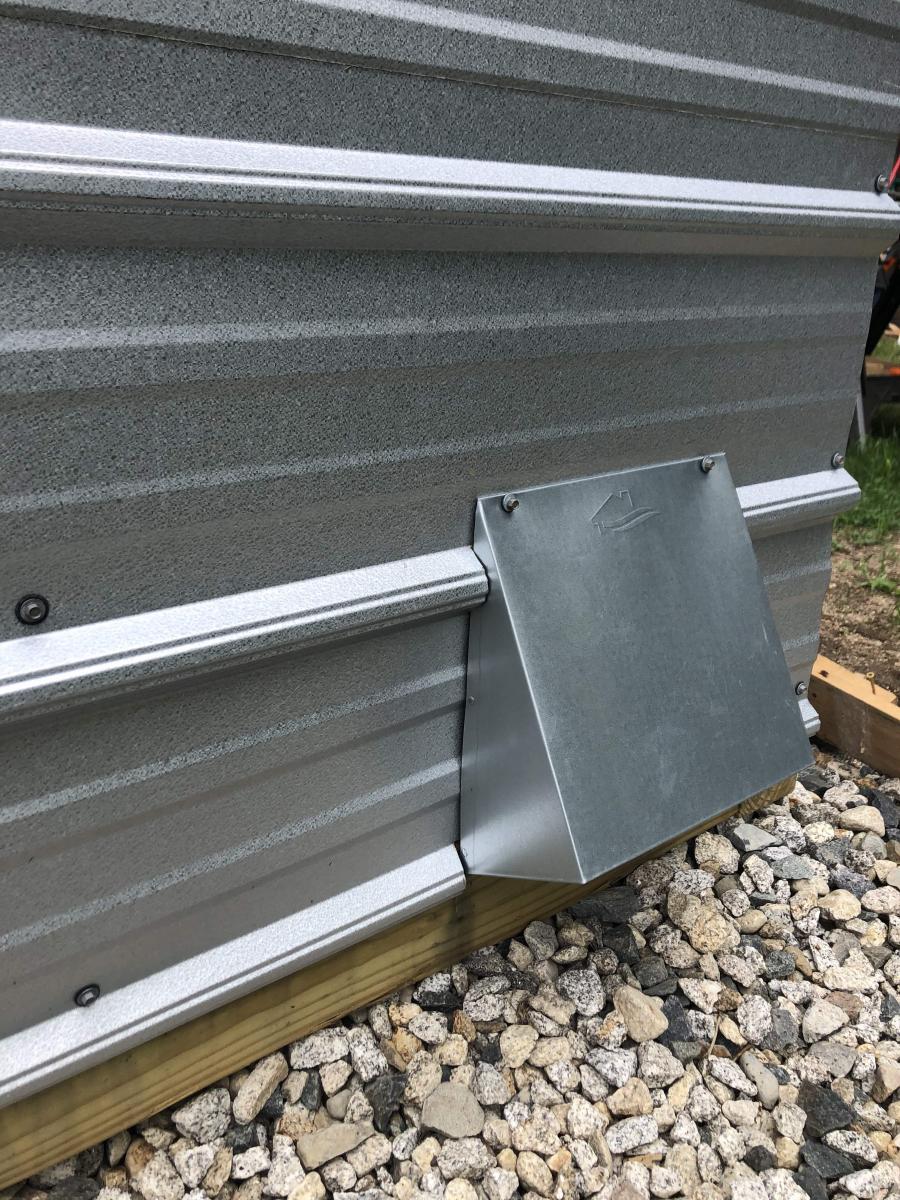
Air king range hood wall cap 8" on the bottom outside of the greenhouse wall for air intake + flex 8" duct to the fan itself
Shelter logic autovent automatic shelter vent kits (1 on each side of the front wall) in order to allow air intake from the bottom back of the greenhouse under the elevated beds to flow to the front of the greenhouse and out
Circulating fan- Hurricane wall mount fan 16" - this fan has 3 speeds with tilt function and small mounting bracket
Soil - sourced 3 yards of 50/50 loam/compost from local landscaping supply
60% loam
30% organic compost
10% organic topsoil + perlite
Soil beds
-cedar frame 2 feet wide along sides, 3 feet wide on the back wall
-galvanized metal roofing with holes drilled into it for drainage
-landscape cloth lined
Wed, 09/09/2020 - 13:09
Thanks for that update! I was wondering how to vent this project, as Green houses need the ventilation. Good to know dollar amount also. Great photos.
Wed, 09/09/2020 - 13:09
Thanks for that update! I was wondering how to vent this project, as Green houses need the ventilation. Good to know dollar amount also. Great photos.
Wed, 09/09/2020 - 13:09
Thanks for that update! I was wondering how to vent this project, as Green houses need the ventilation. Good to know dollar amount also. Great photos.
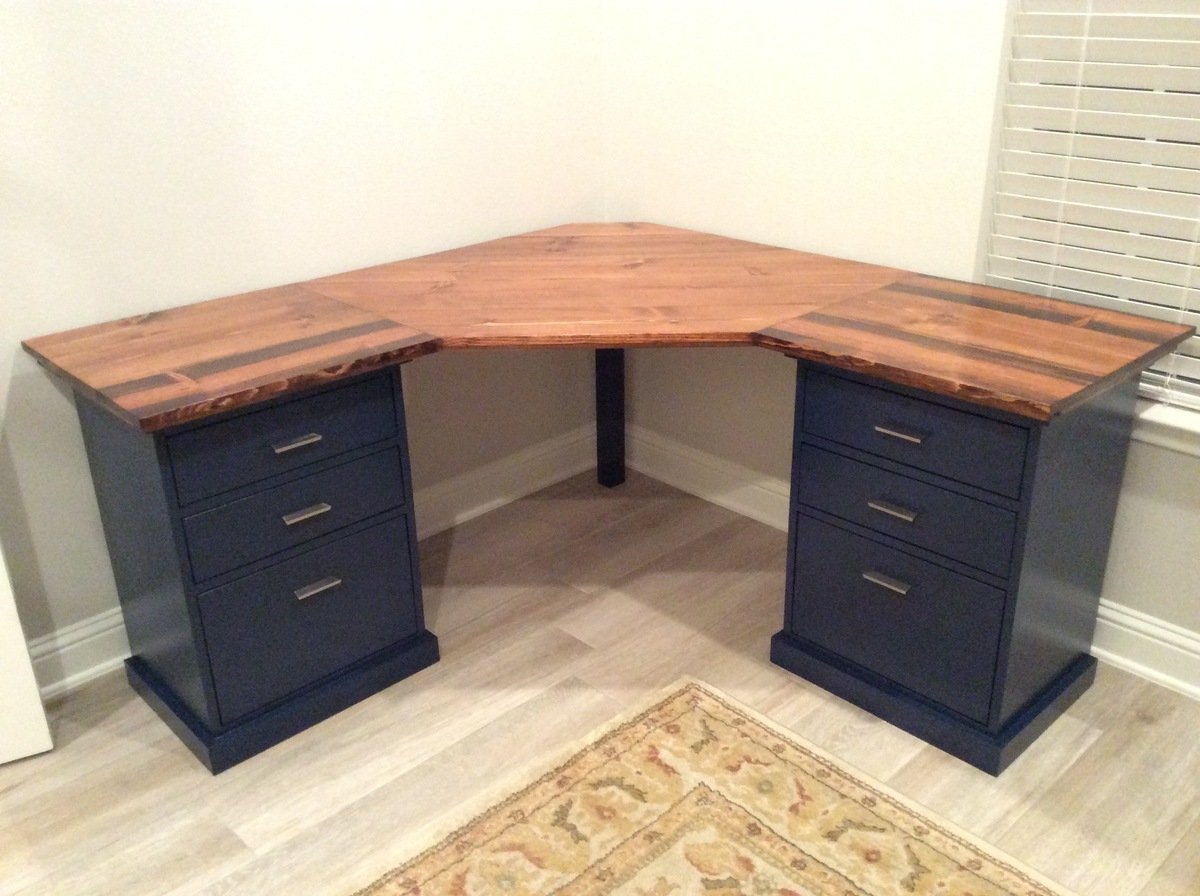
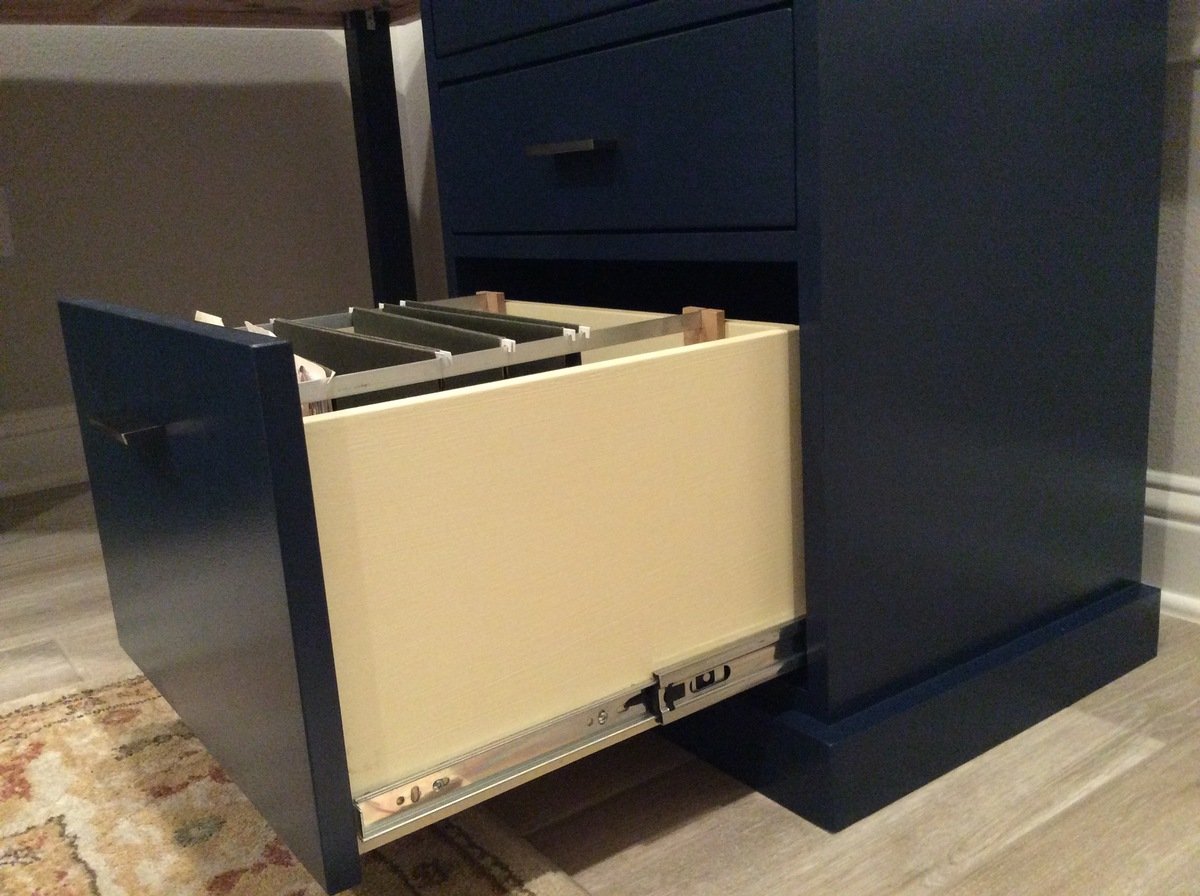
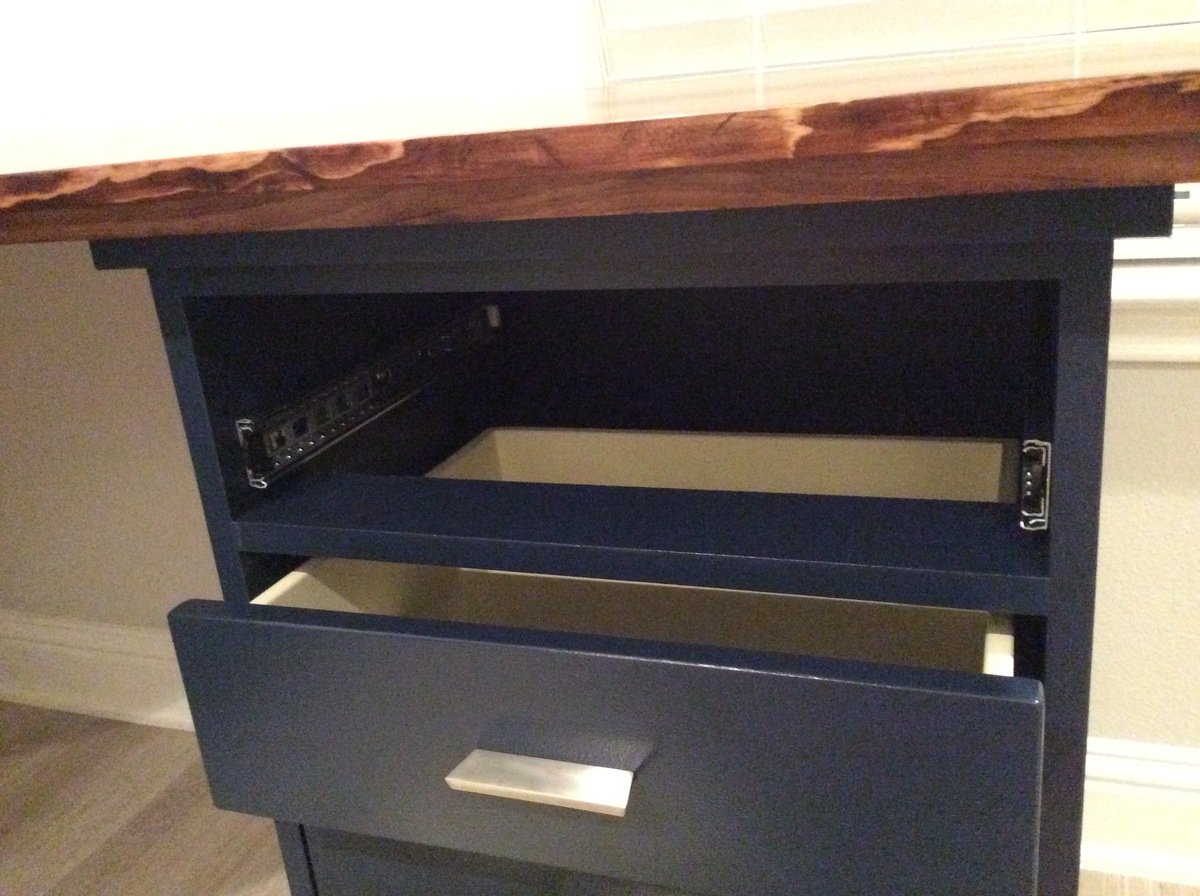
I followed the plans pretty closely. I added dividers to make 3 drawer units but I didn't find it necessary to have the top shelf go all the way to the back since it would never function as a shelf. I used scrap pieces for that and they weren't big enough to be full shelves.
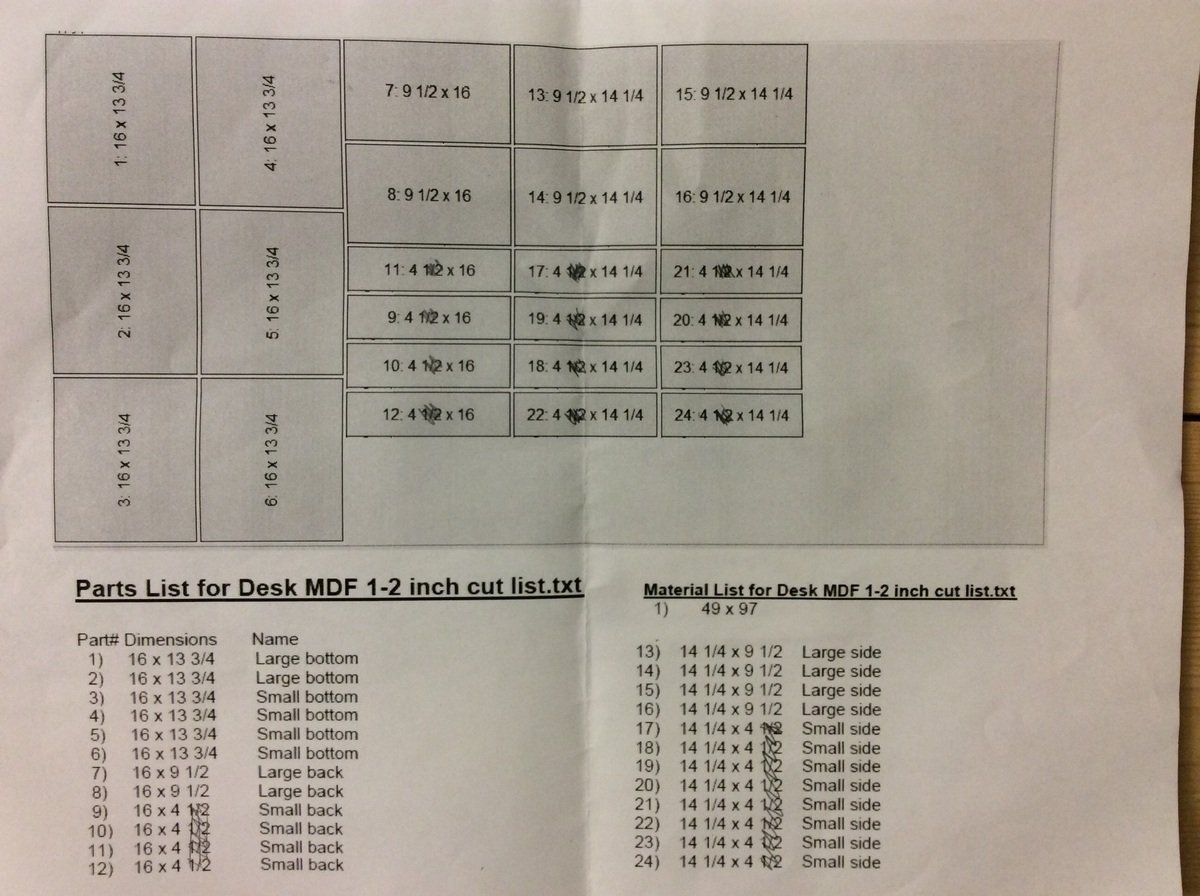
I used 1/2" MDF for the bottom, sides, and backs of the drawers to cut down on weight, cost, and general bulkiness. I used this free app called Cut List to figure out the easiest way to have the guys at Home Depot cut all the drawer panels after I learned I'm not that good with a circular saw. I used a hack saw to cut aluminum bars for hanging files and used scrap wood to make the little brackets to hold the bars upright in the drawer. The full extension drawer slides are functionally and asthetically better but it would have been so much easier to put in basic bottom mount slides.
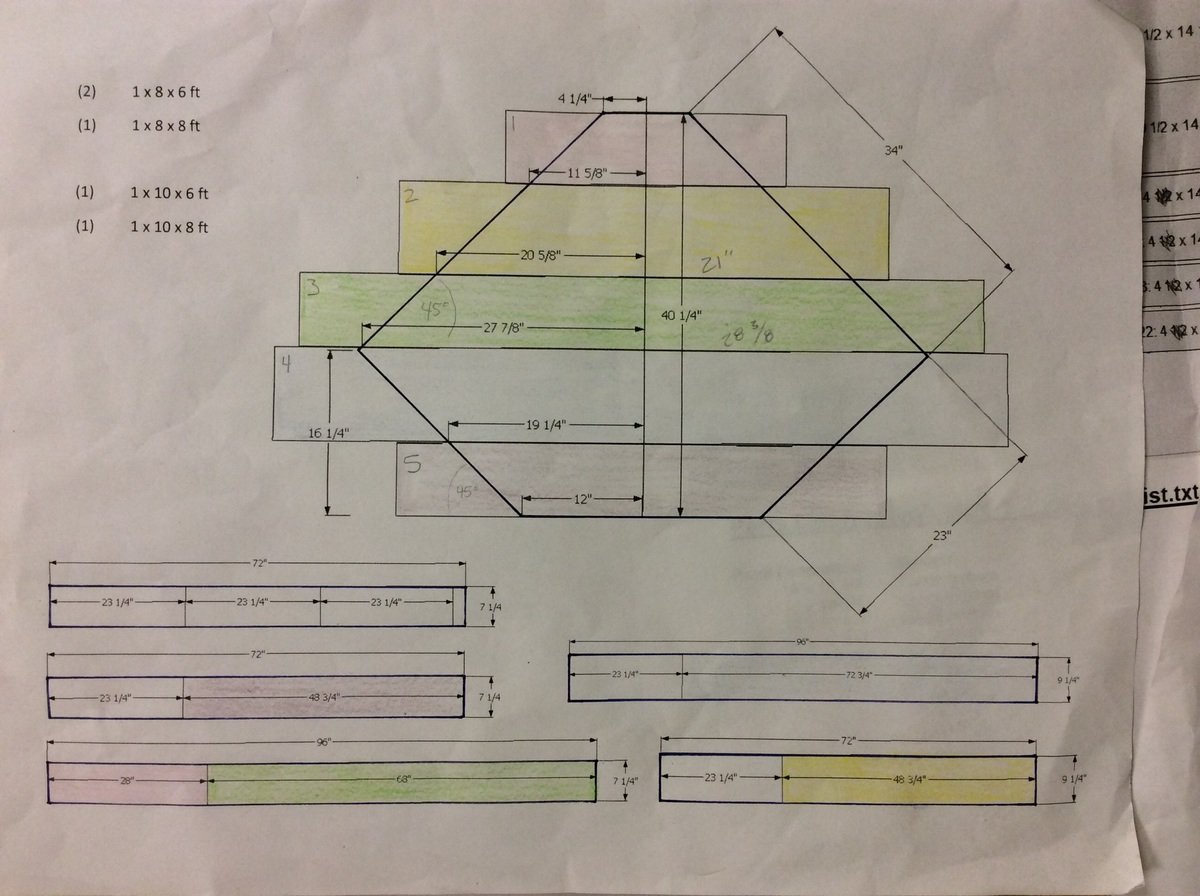
I wanted a wood grain top and ended up with common pine boards over more expensive poplar or oak and I would use pine again without hesitation. I used Google SketchUp to figure out the widths of boards I needed to make the top with minimal cuts. Then joined them with glue and mending plates and sanded the hell out of them. I altered the dimensions slightly to make it the same size desktop as the Bedford desk. My two wing sections are 23" x 23" but I should have made them 23" deep by more like 24" or 25" long. I had to hack the bottom bracing to make a spot for the drawer units to slide into. If you alter the dimensions make sure you can secure a brace between the main body and the wing of the desktop and still have room for the brace at the edge of the wing.
My cost includes things like a Kreg jig, saw blade, clamps, paint brushes etc. so you may be able to do this for less. I could have gone with a middle of the line paint I think. This project was a beast for me because a) I'm not a furniture maker b) I don't own a table saw which would have been amazing c) I picked the hardest way to make the desktop and d) I modified some of the dimensions from the basic plans. I worked on this thing for weeks (granted sometimes I didn't touch it for several days or a week). But it was a fun and rewarding project.


Tue, 08/27/2019 - 19:28
This is AMAZING!!! I'm so sad I did not see this earlier. Thank you so much for sending in pics!
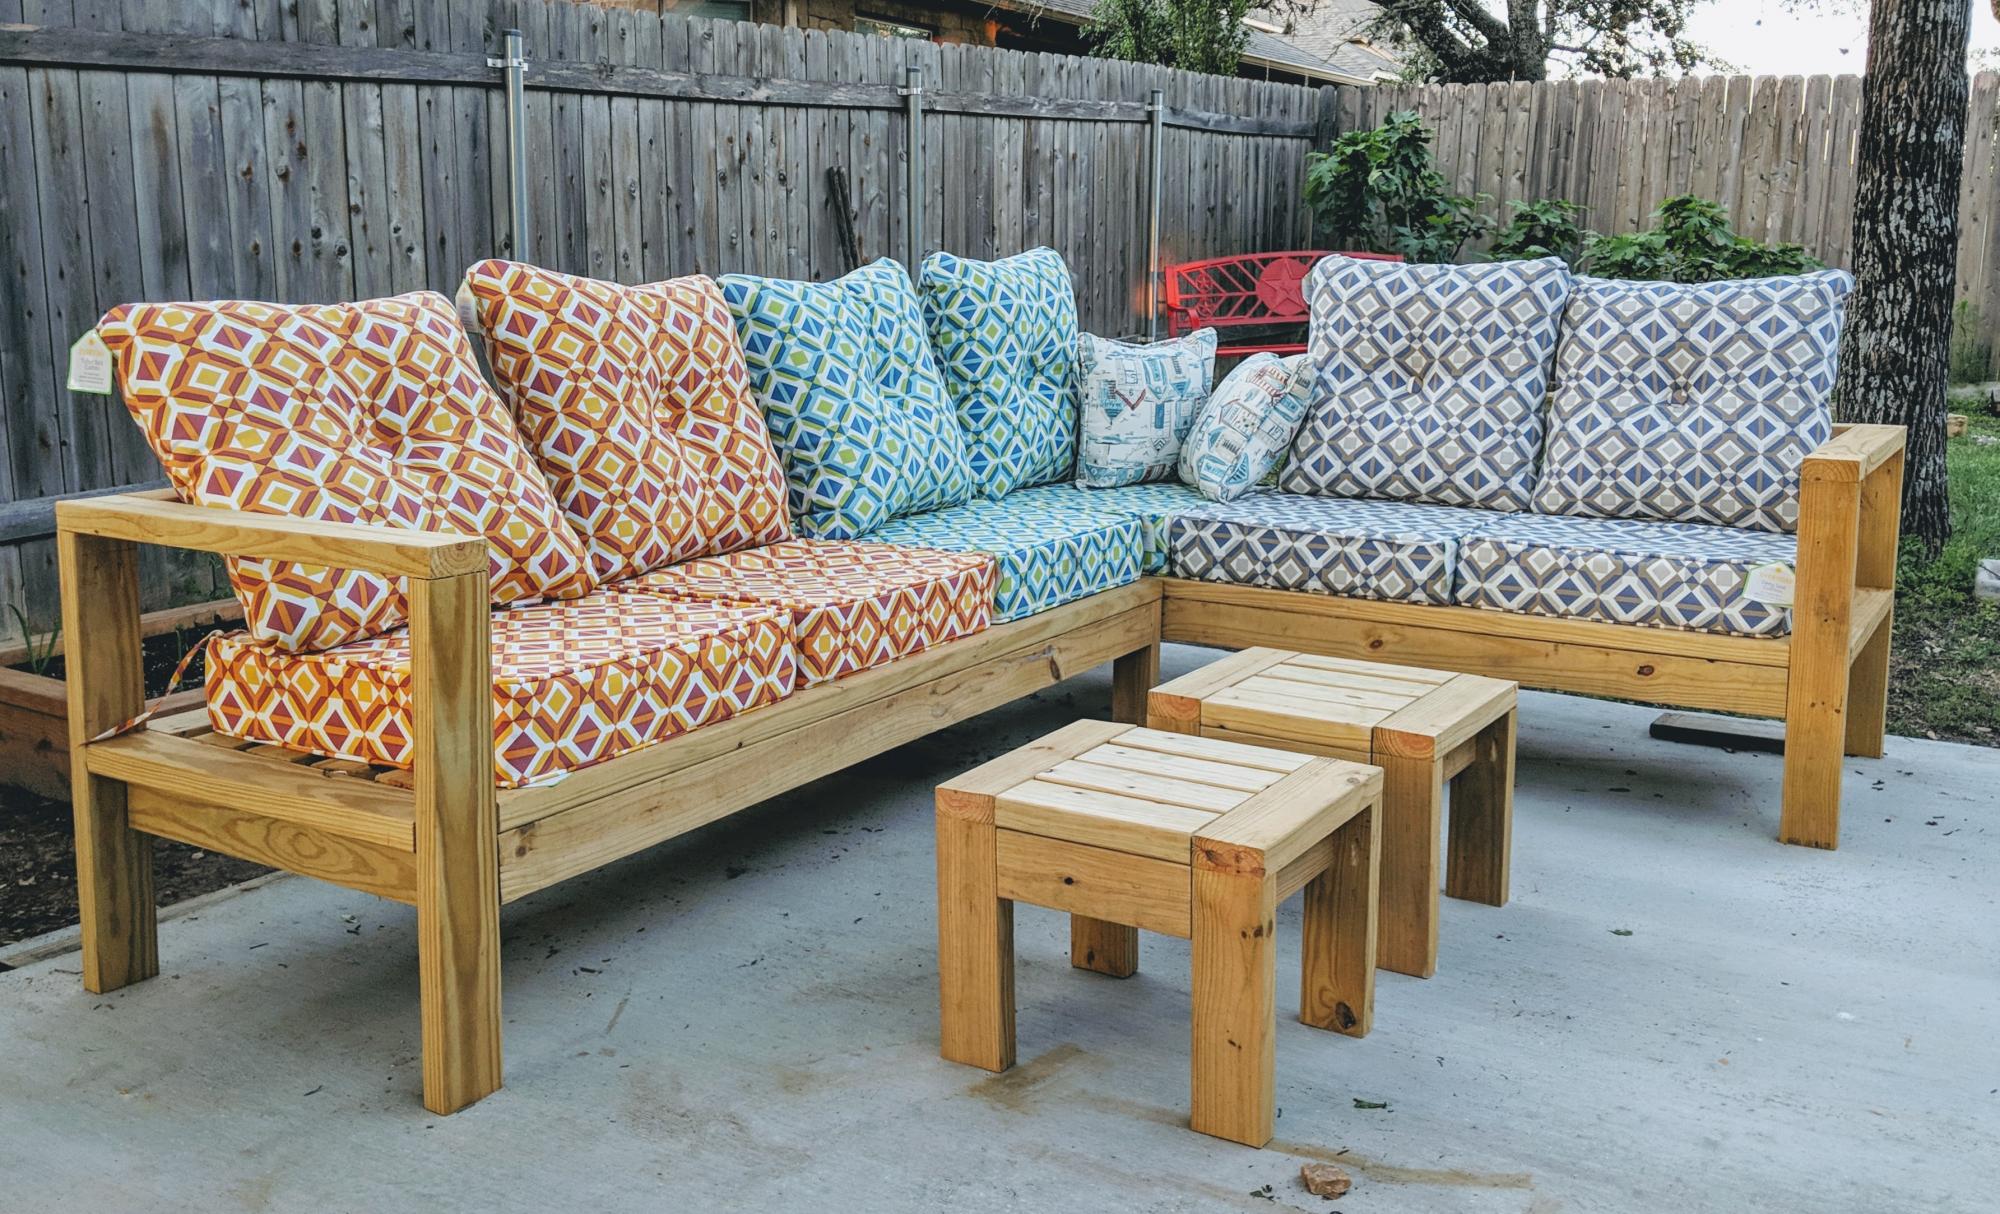
I reduced the size of the 2x4 coffee table to make 2 end tables. They can be used as additional seating when needed.

I built a big kids see saw using 2x6's all around with a 2x8 seat. The center post is 30"h.


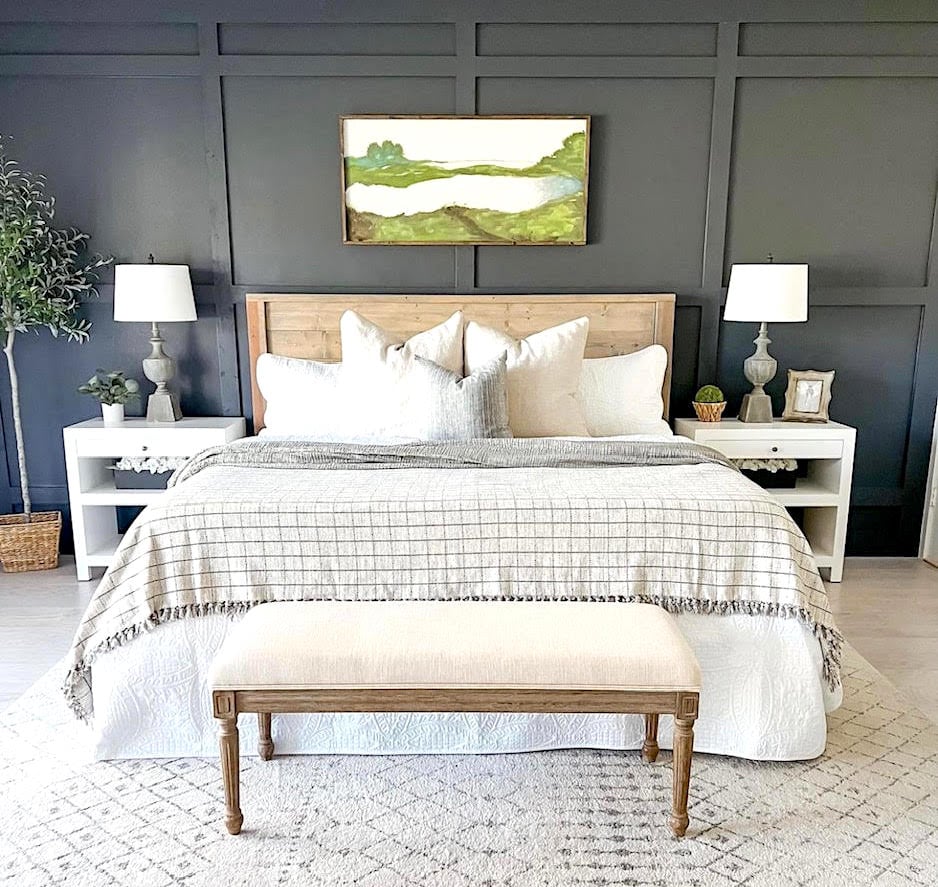
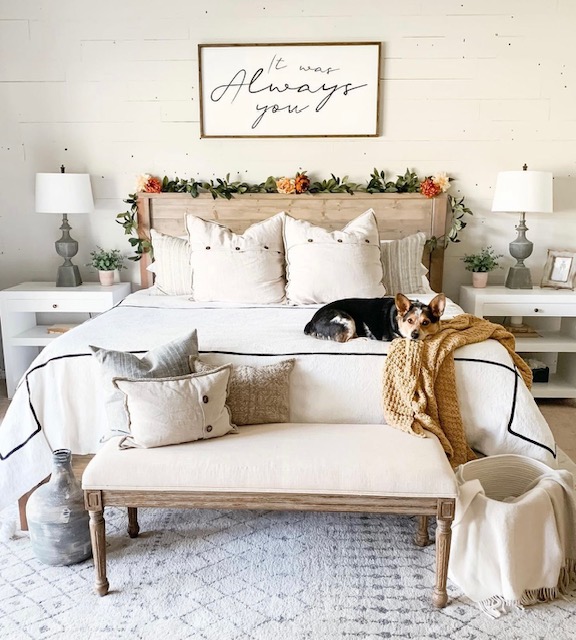
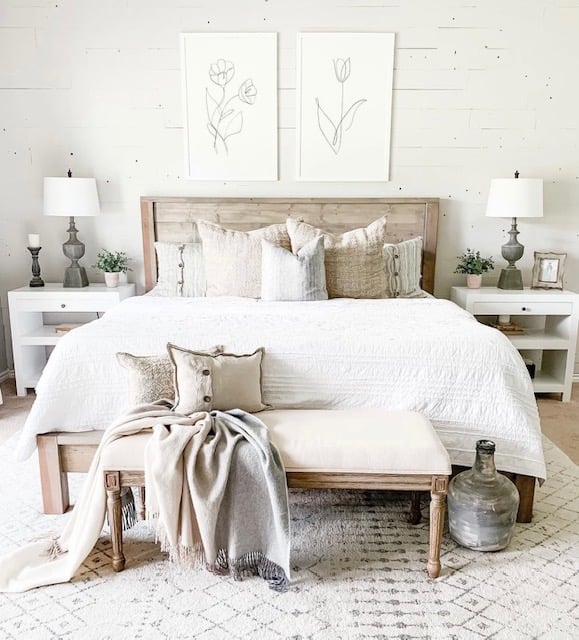
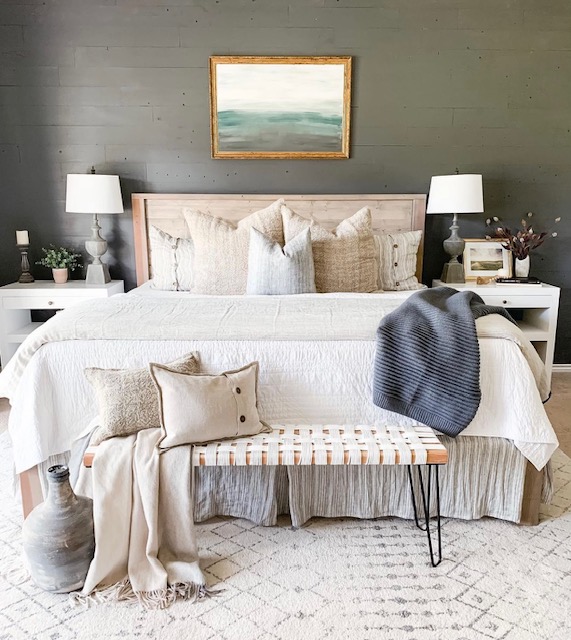
Same bed, so many beautiful options!
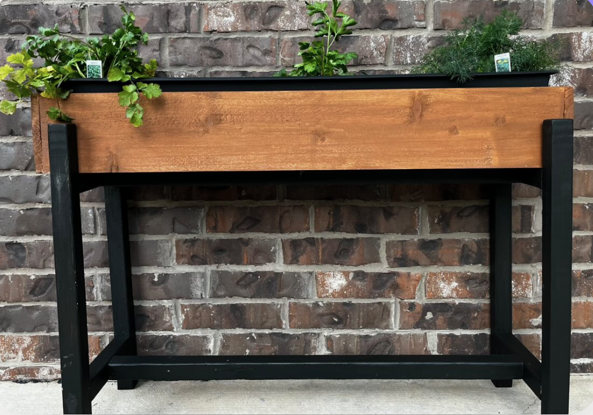
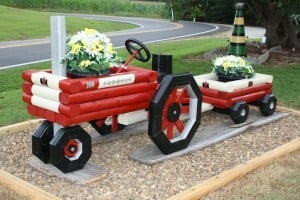
"Here's a pic of the planter I made! I modified it to fit a 36" planter. I LOVE it. Thanks!!"