Kitchen Island
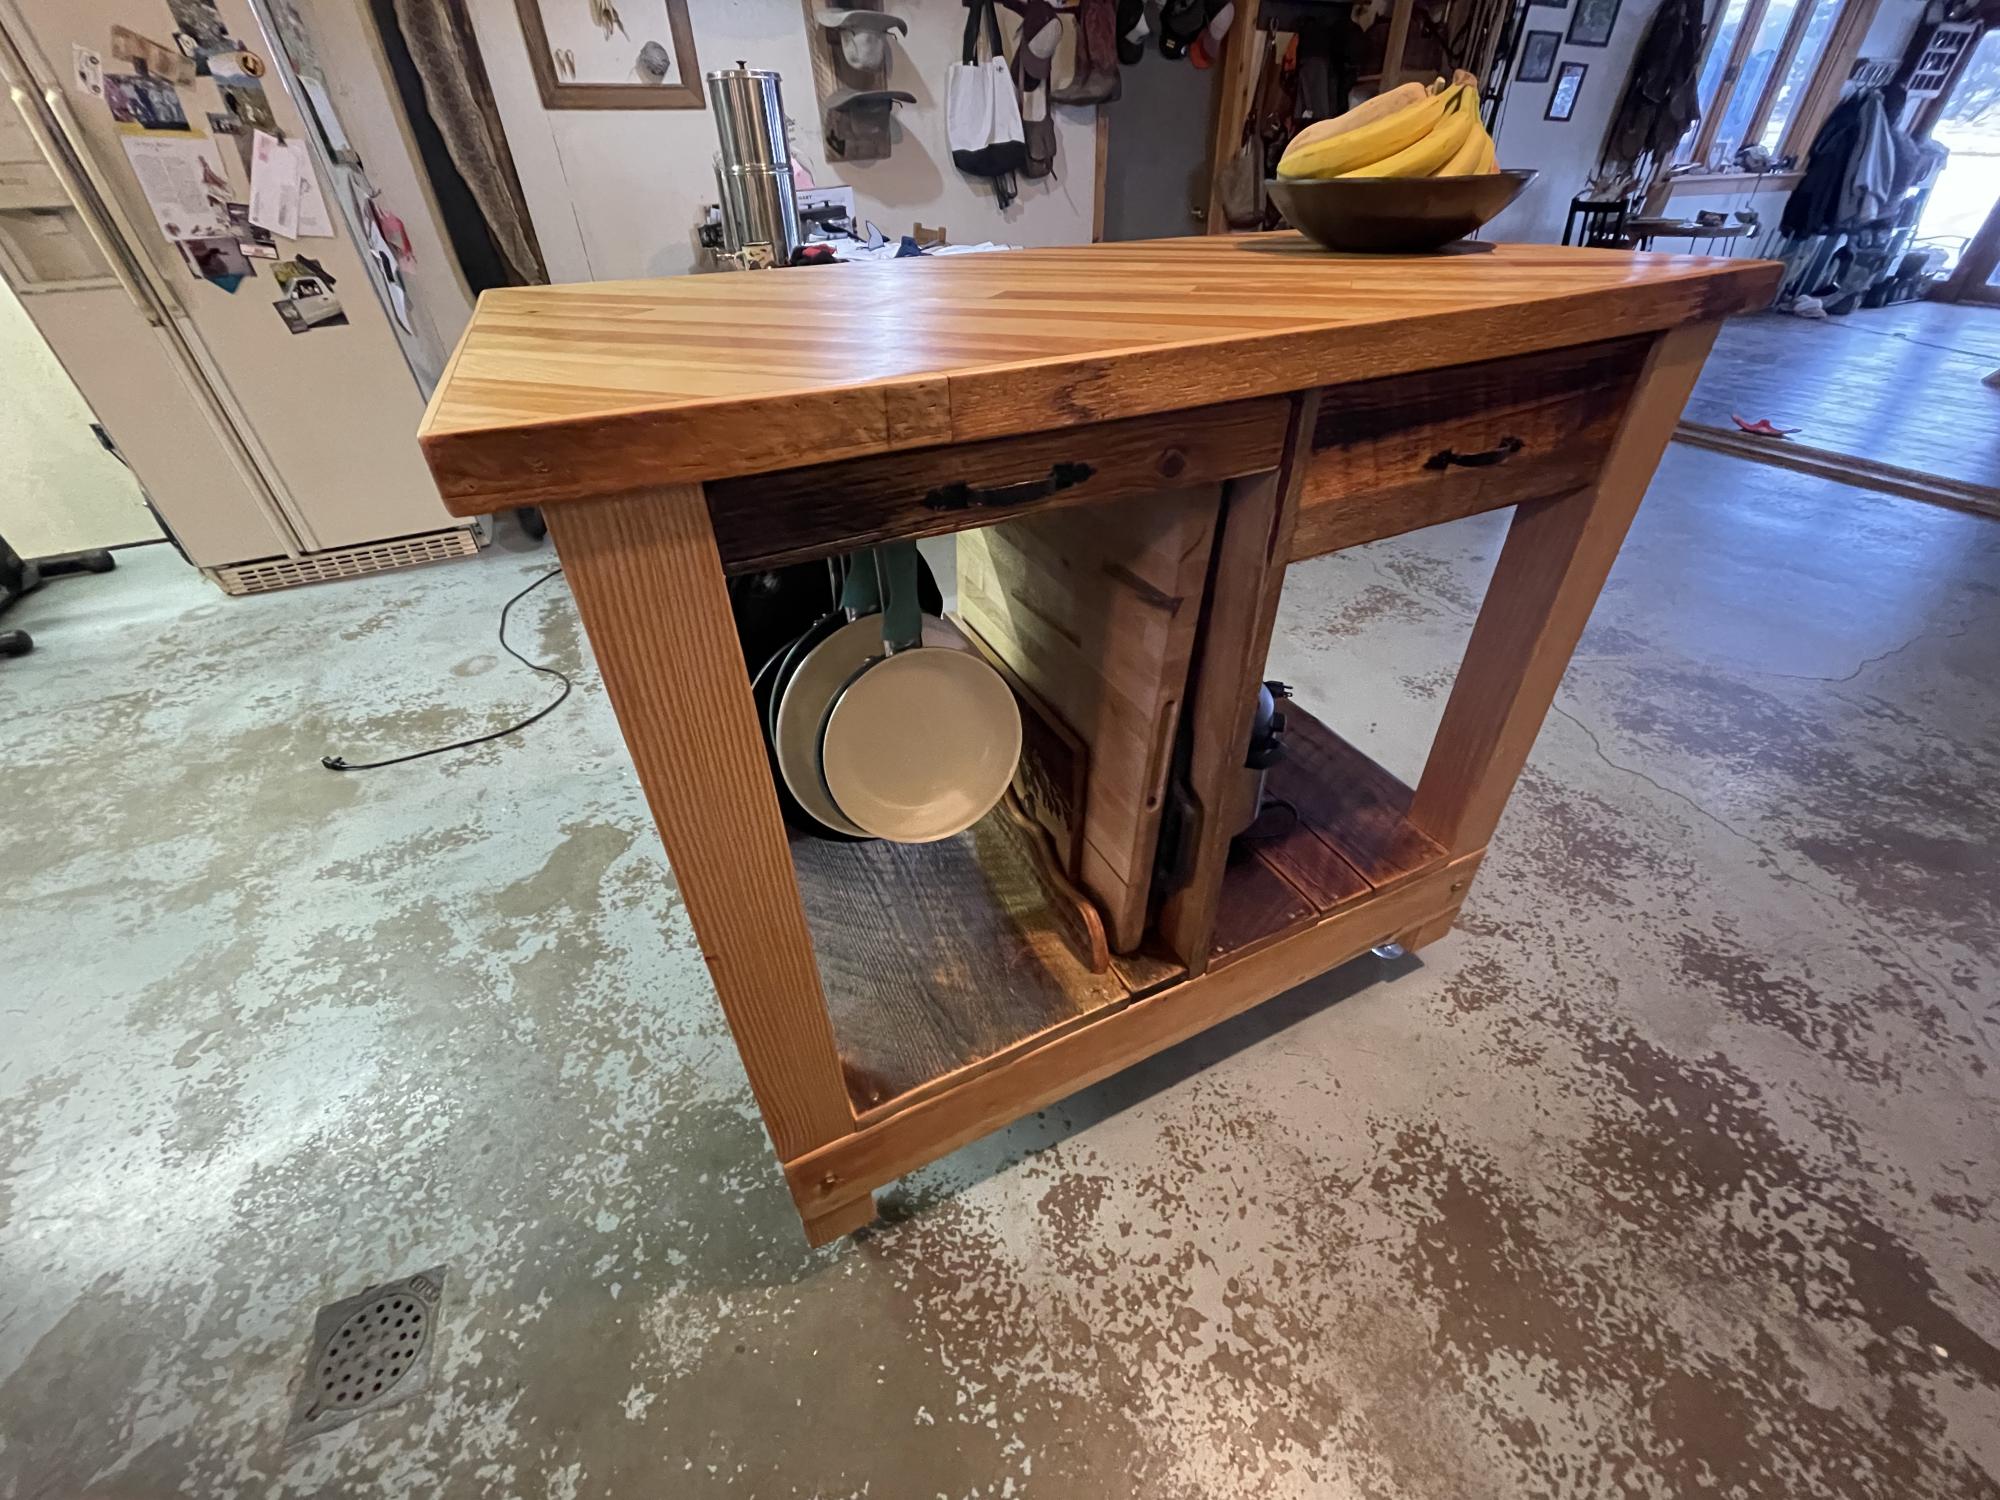
Inspired by Ana’s island plans with a few of my own tweaks.
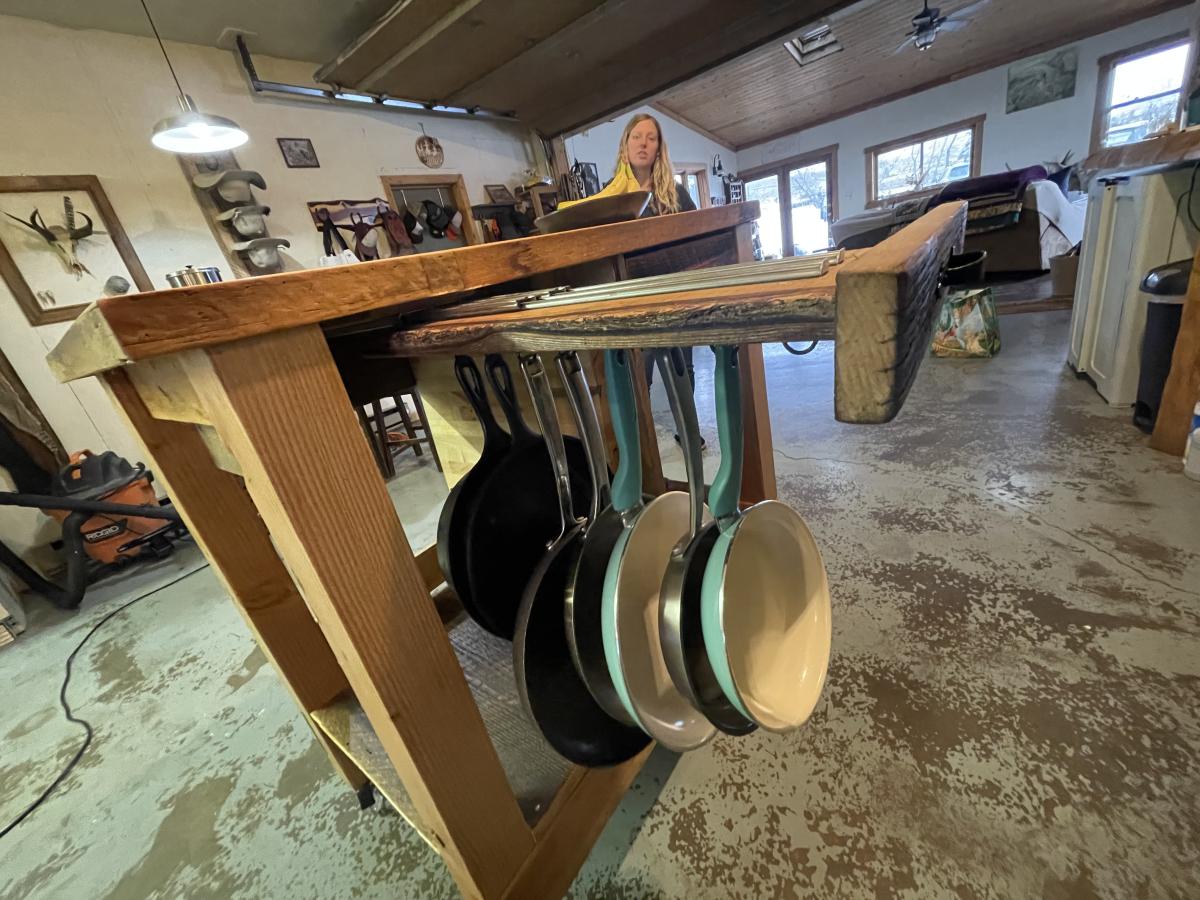
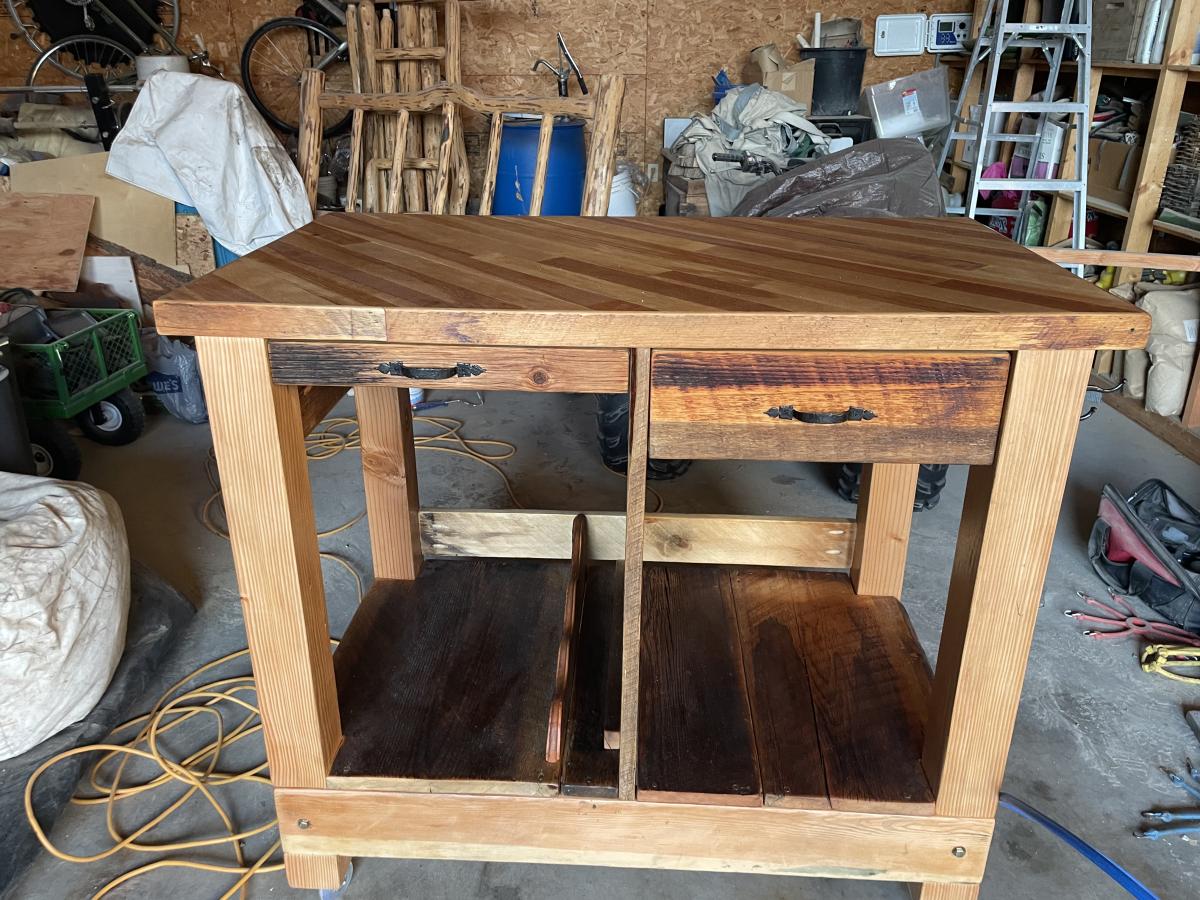
Inspired by Ana’s island plans with a few of my own tweaks.
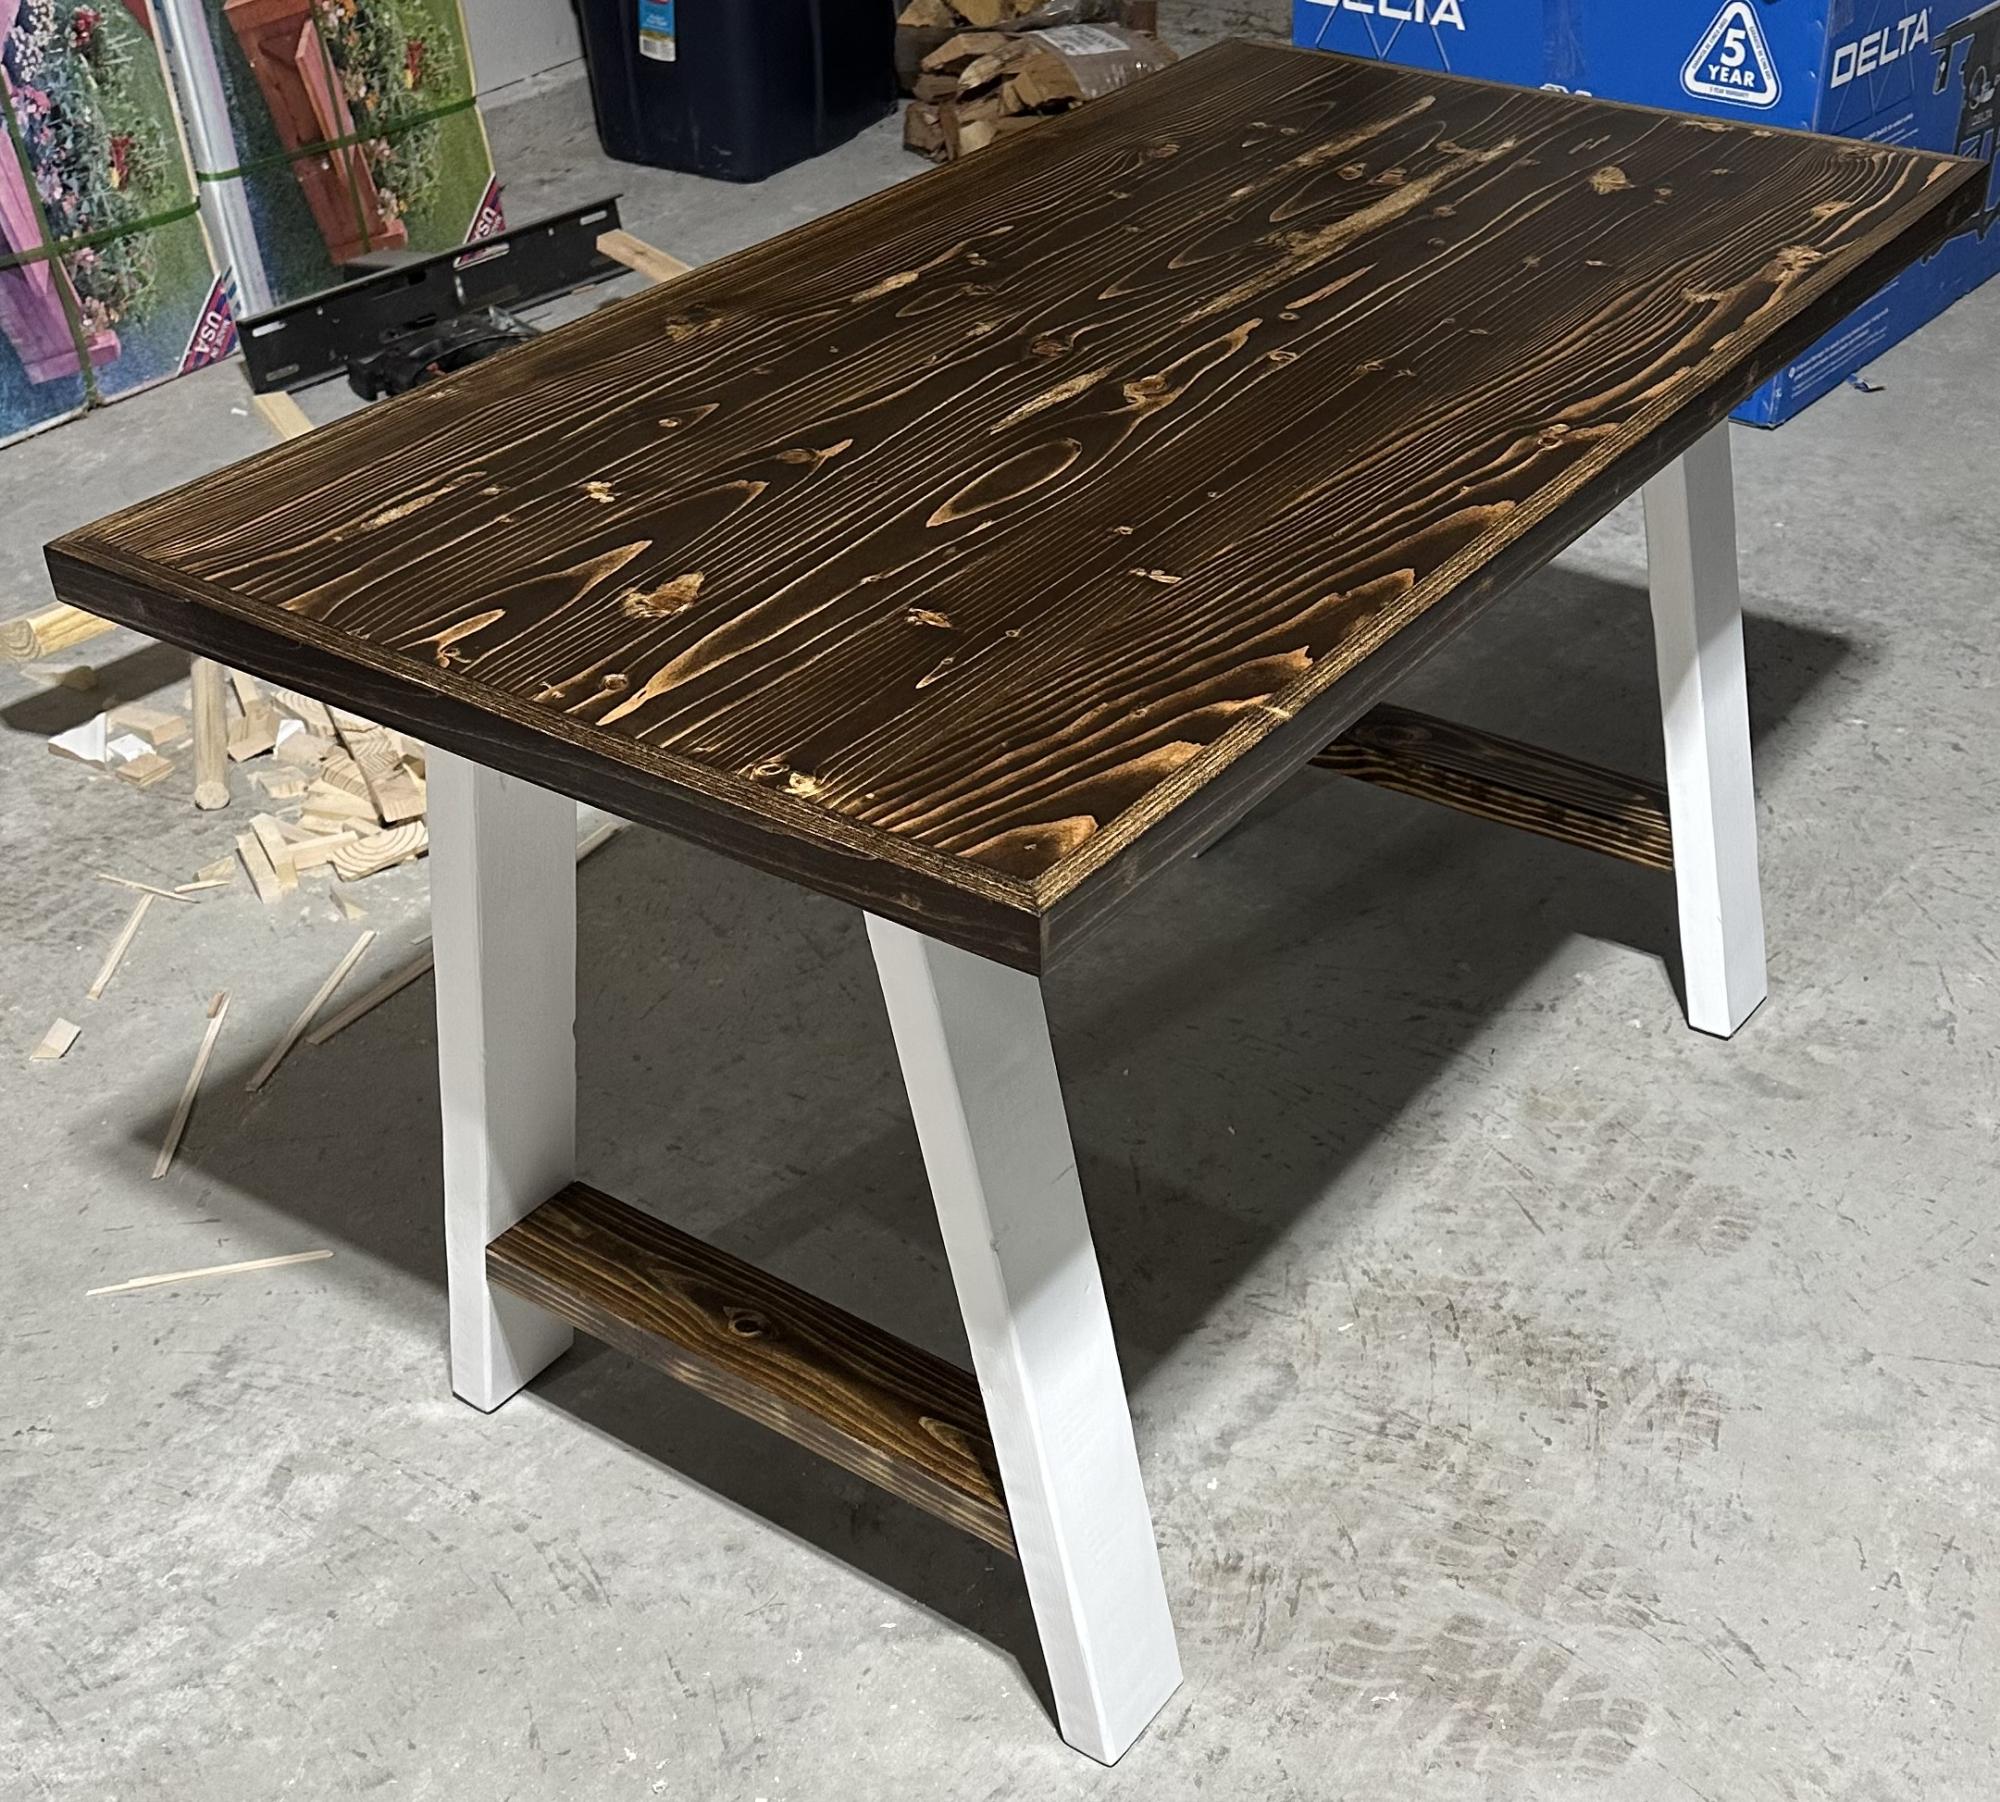
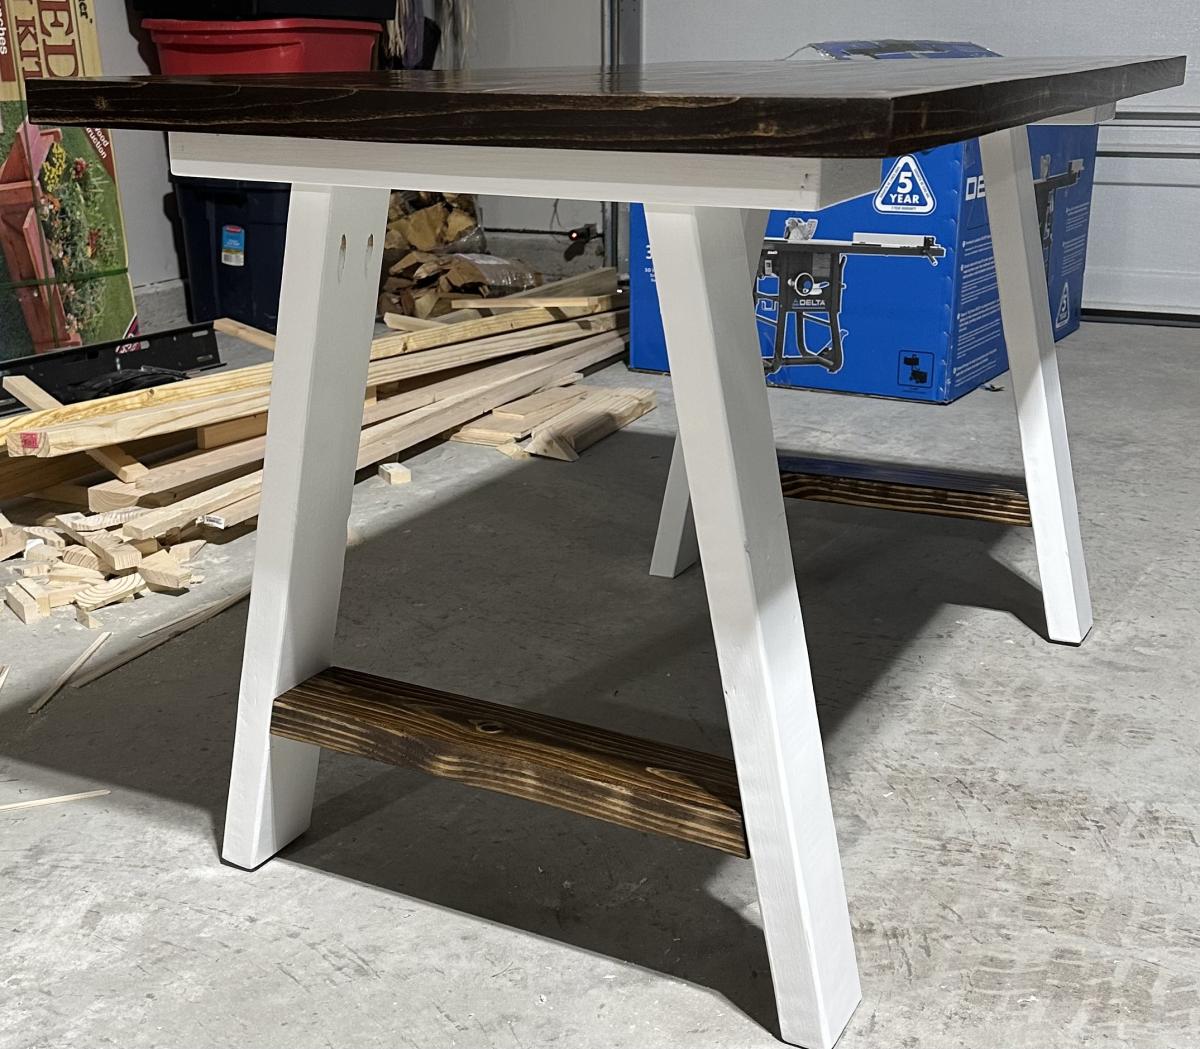
Started with simple small trestle desk idea. Decided to edge glue the top. Finished with poly and paste wax. Didn’t turn out too bad for the first project.
Mon, 05/08/2023 - 09:47
The two tone finish looks awesome, can't wait to see what you build next! Way to go:)
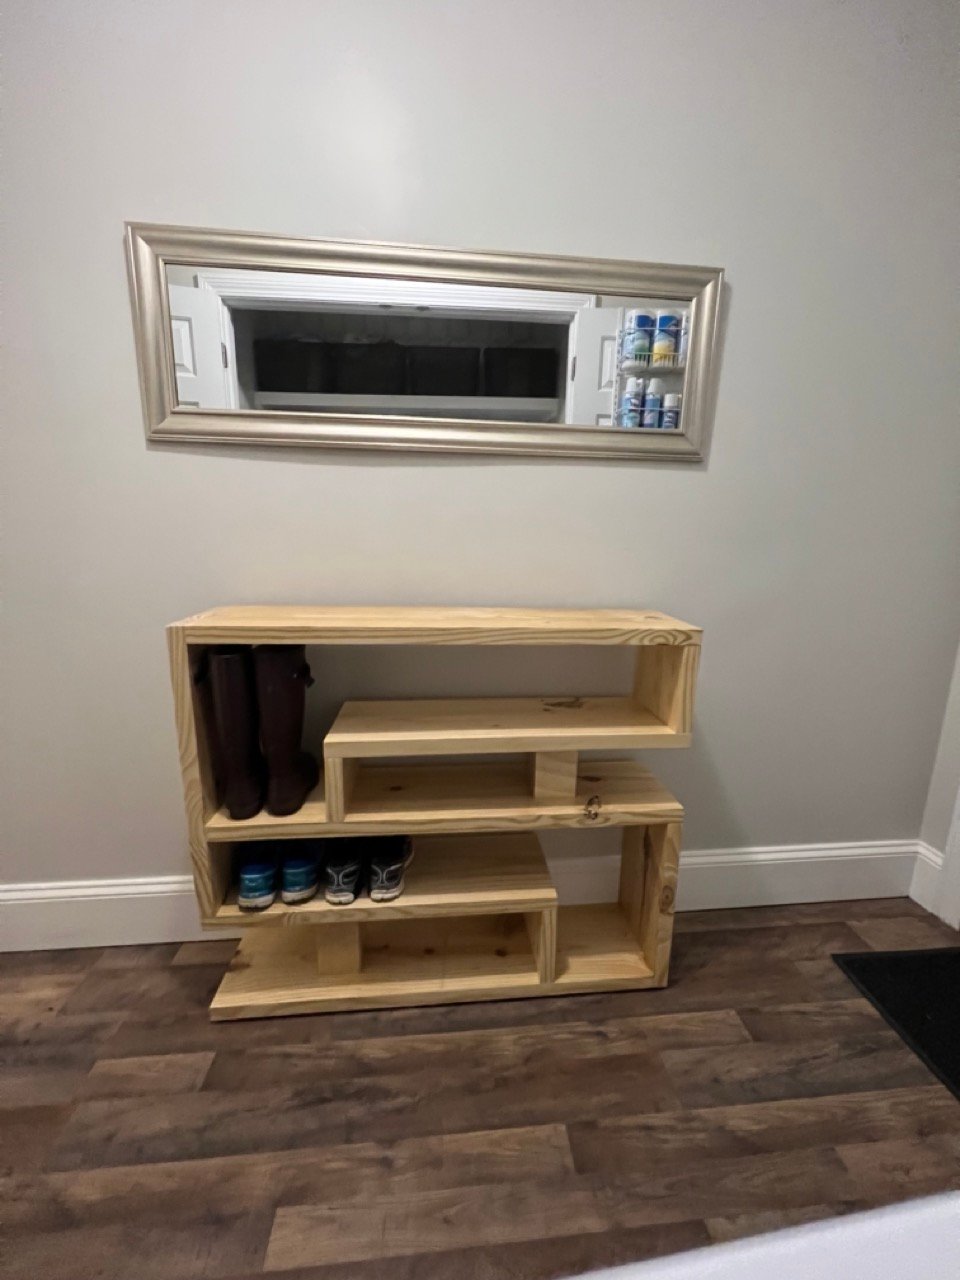
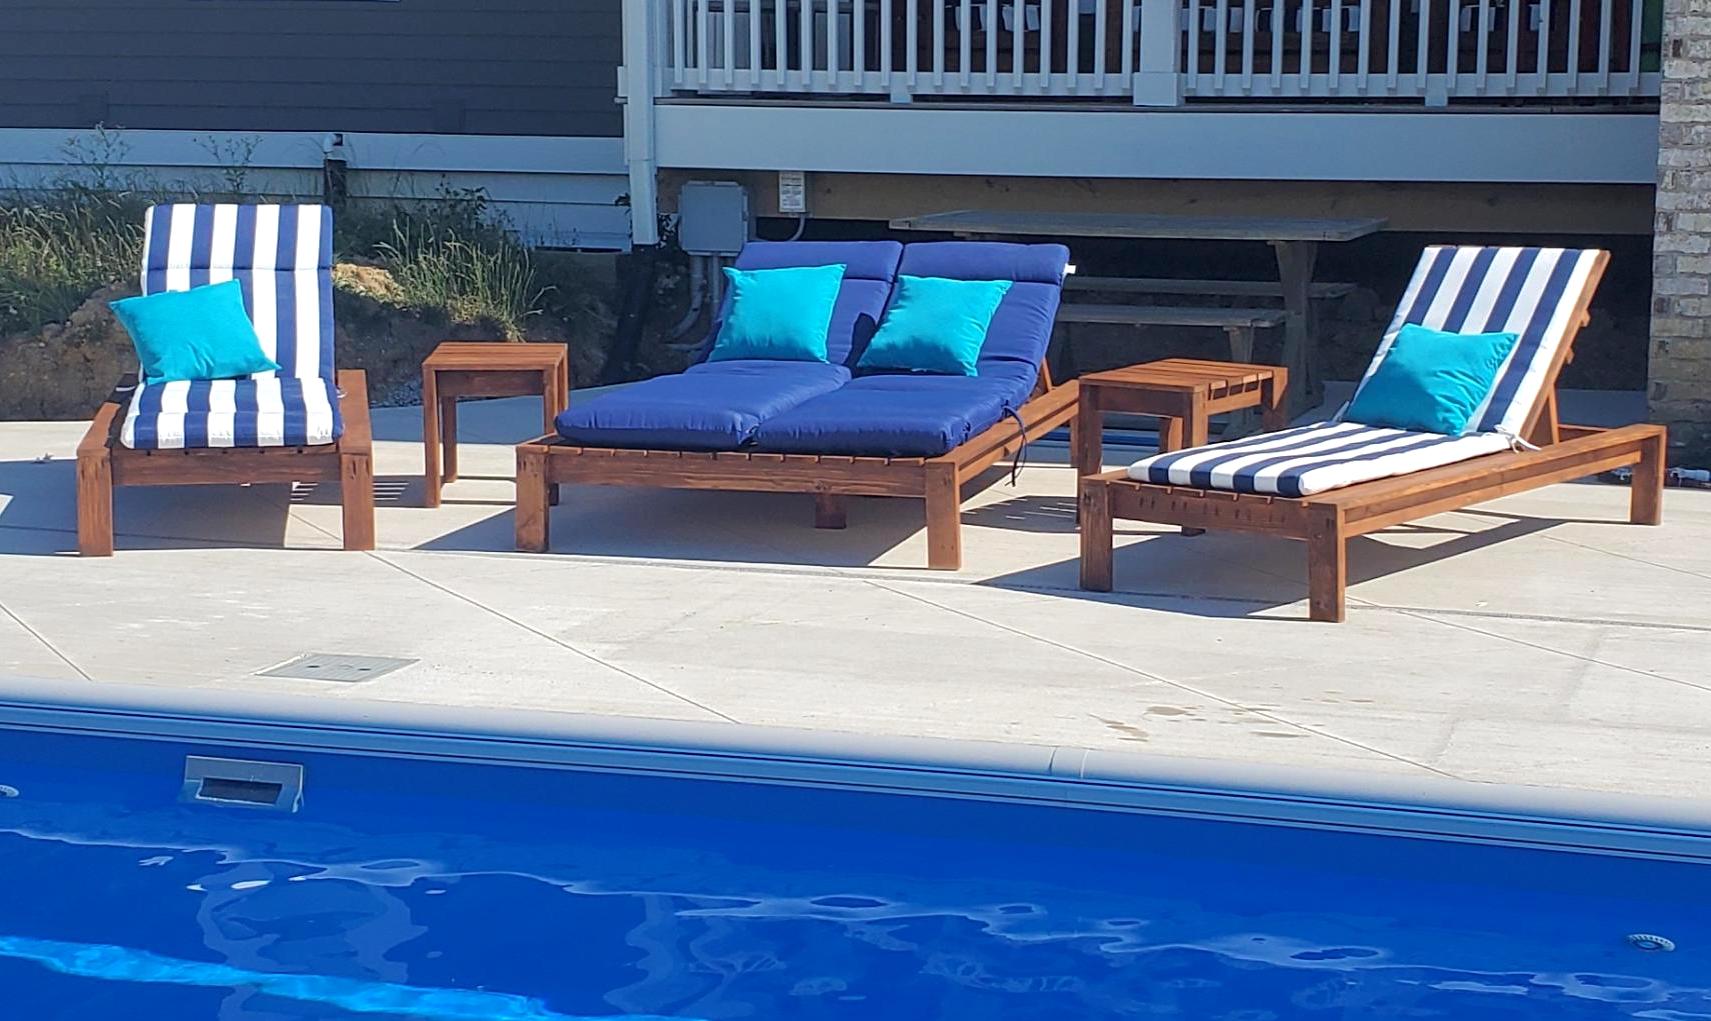
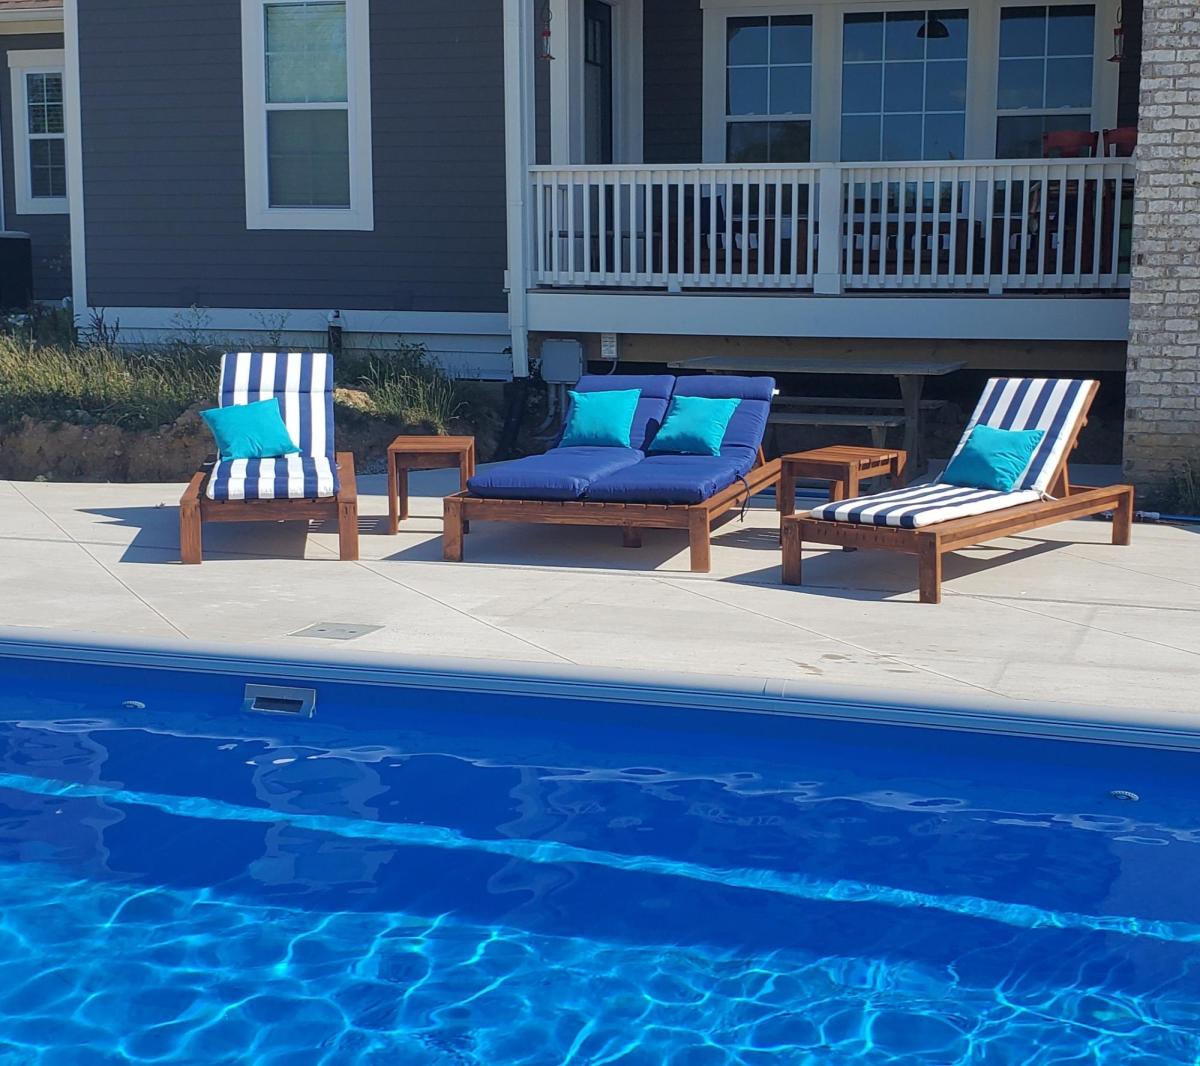
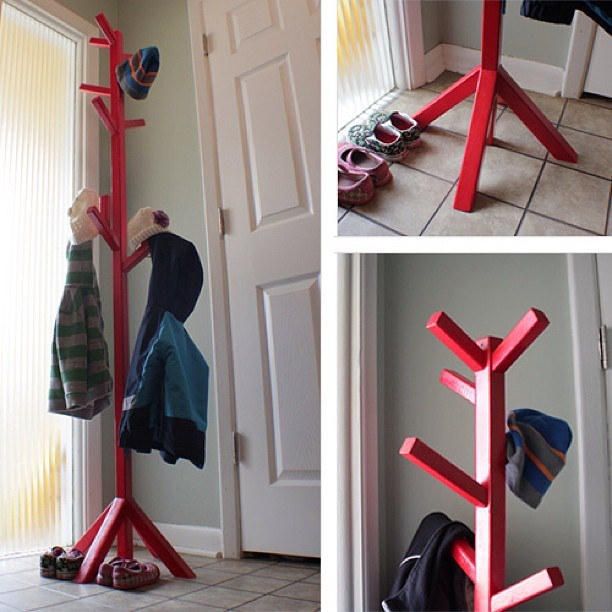
I adapted the plan for the Shoe Rack Bench to give it multiple levels and allow it to serve as an entryway table in addition to a shoe rack. I used 2 x 10's for the project.
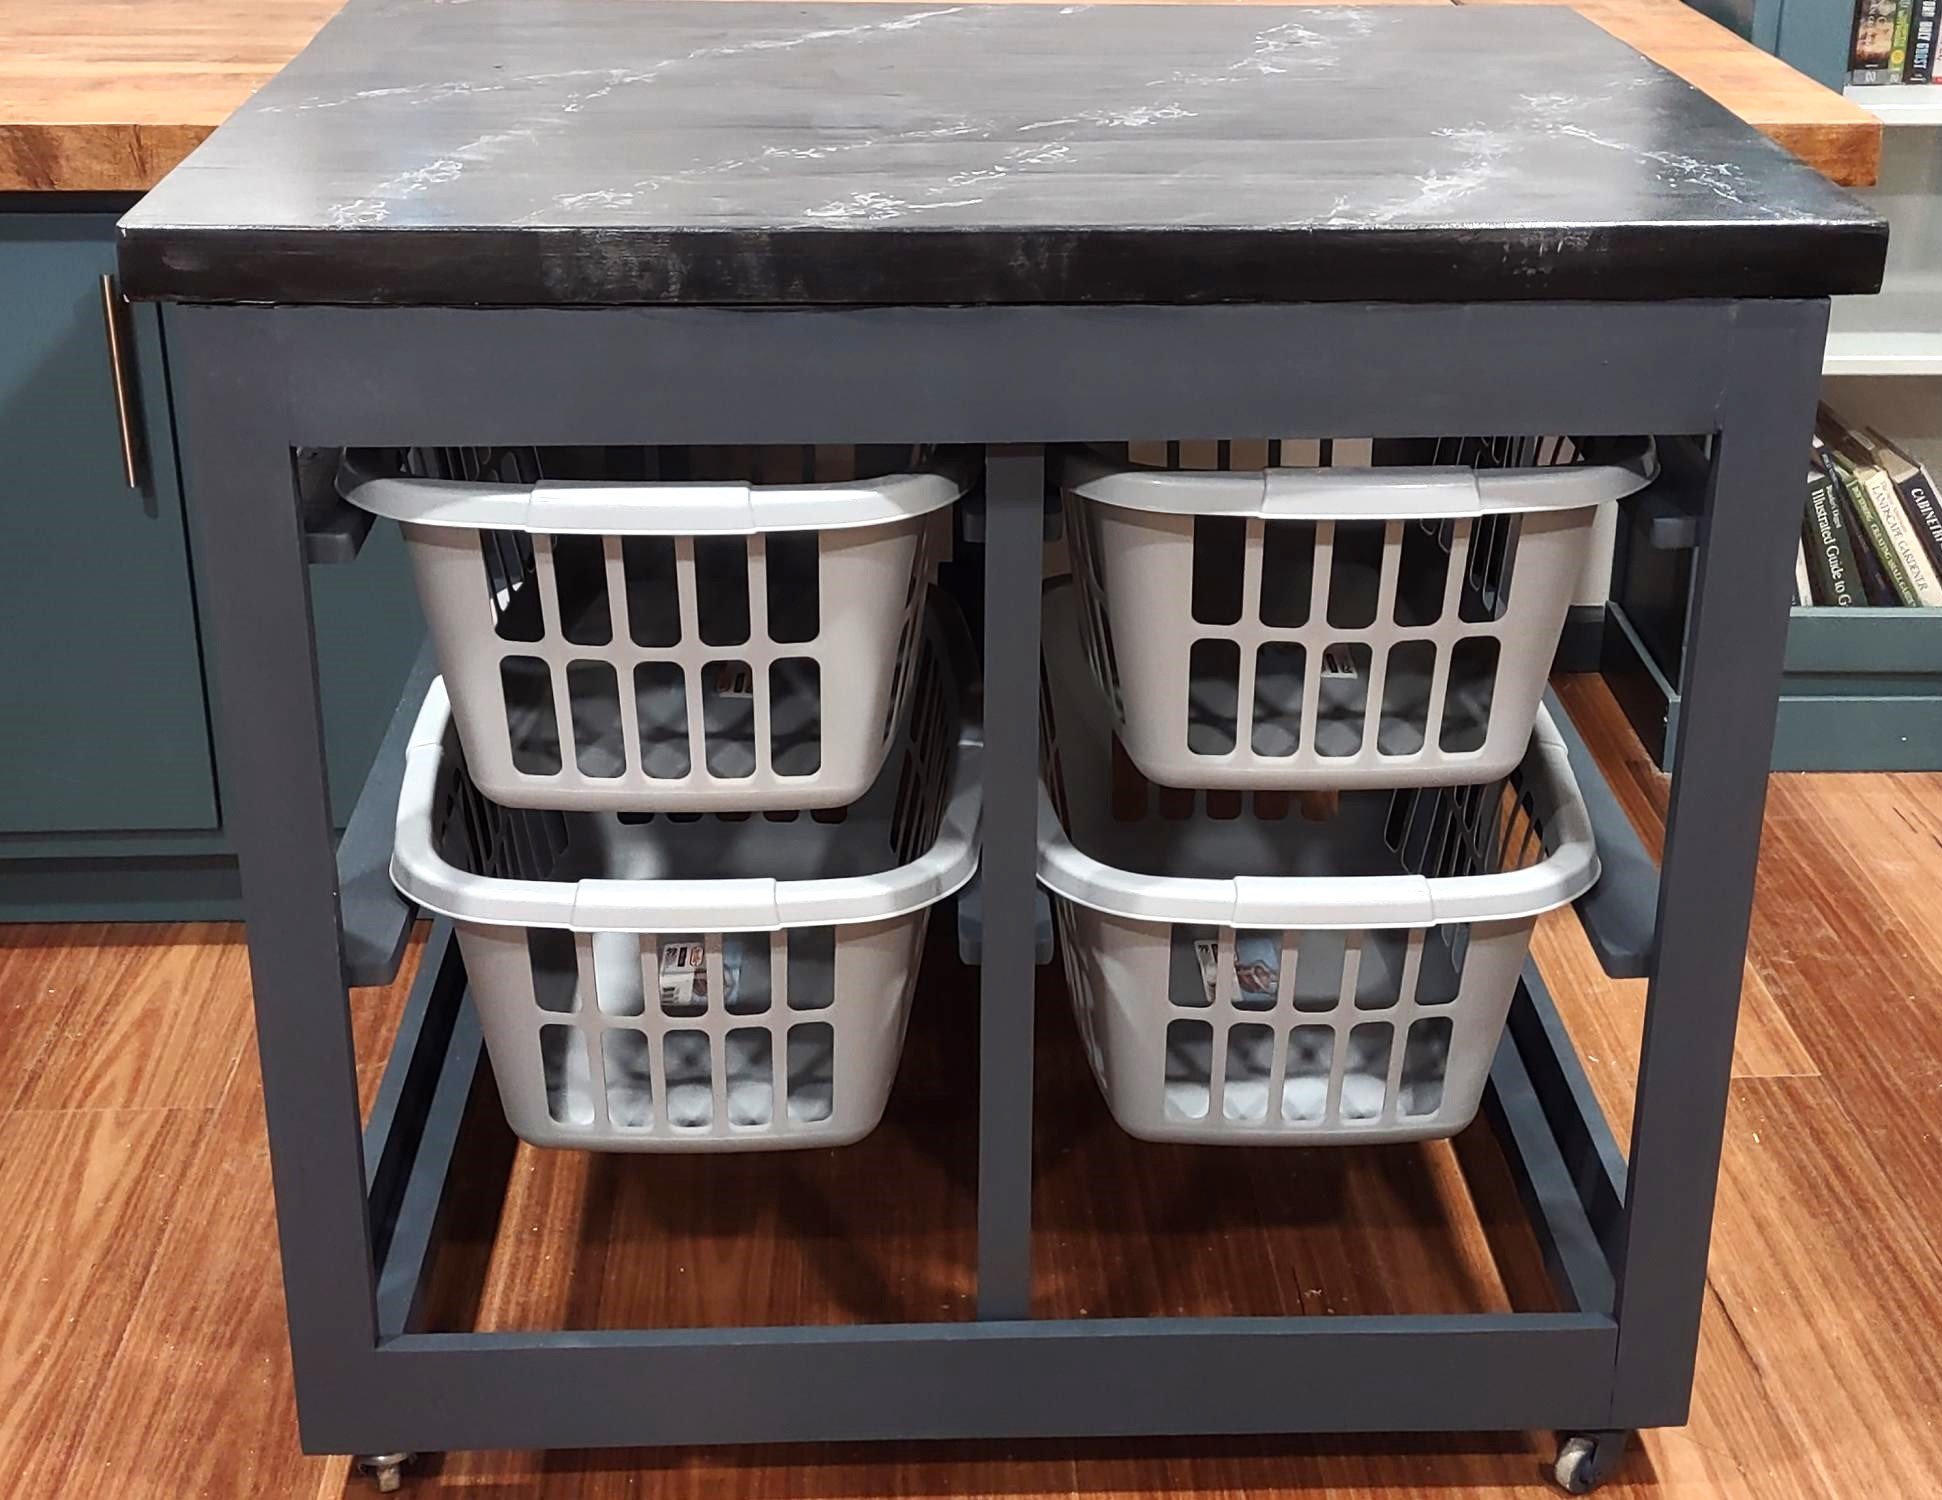
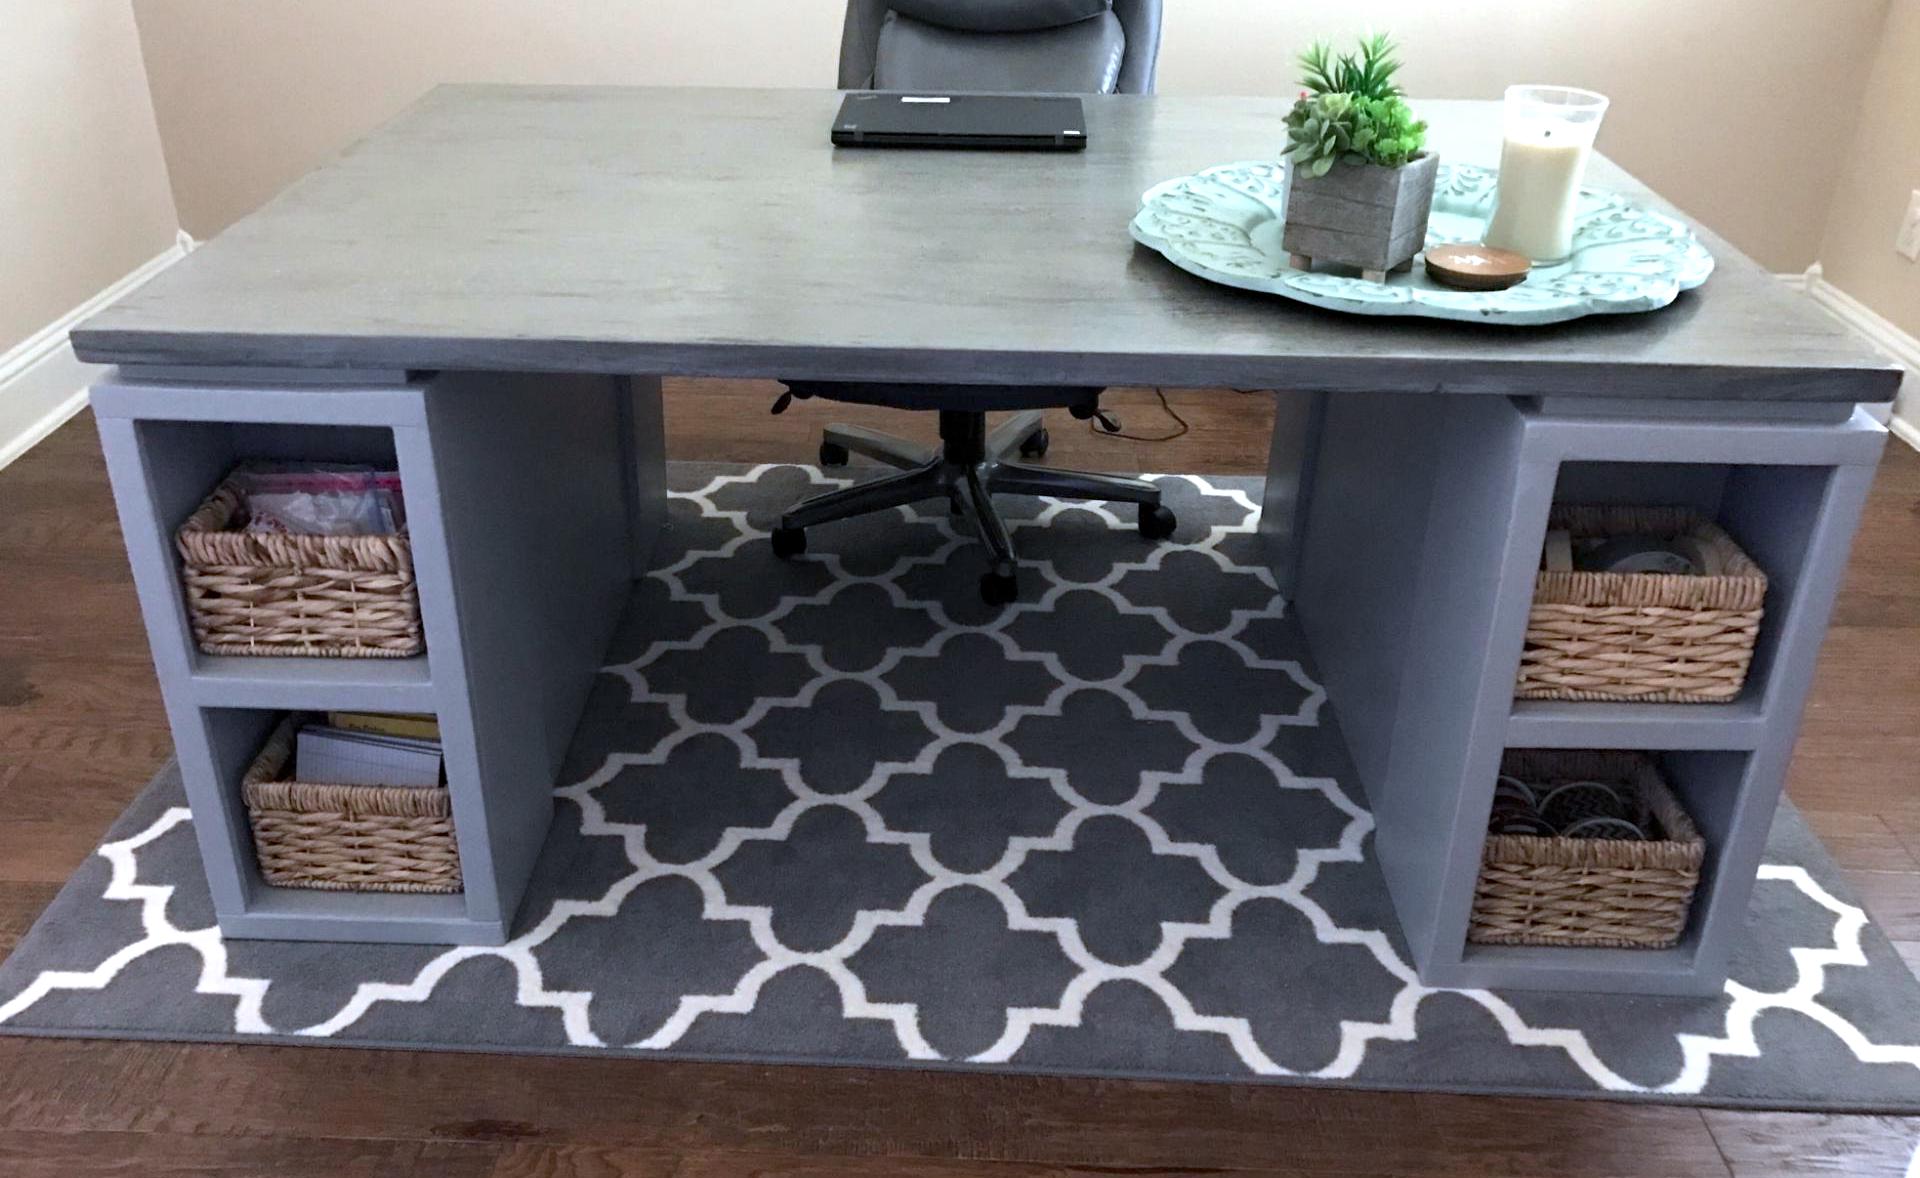
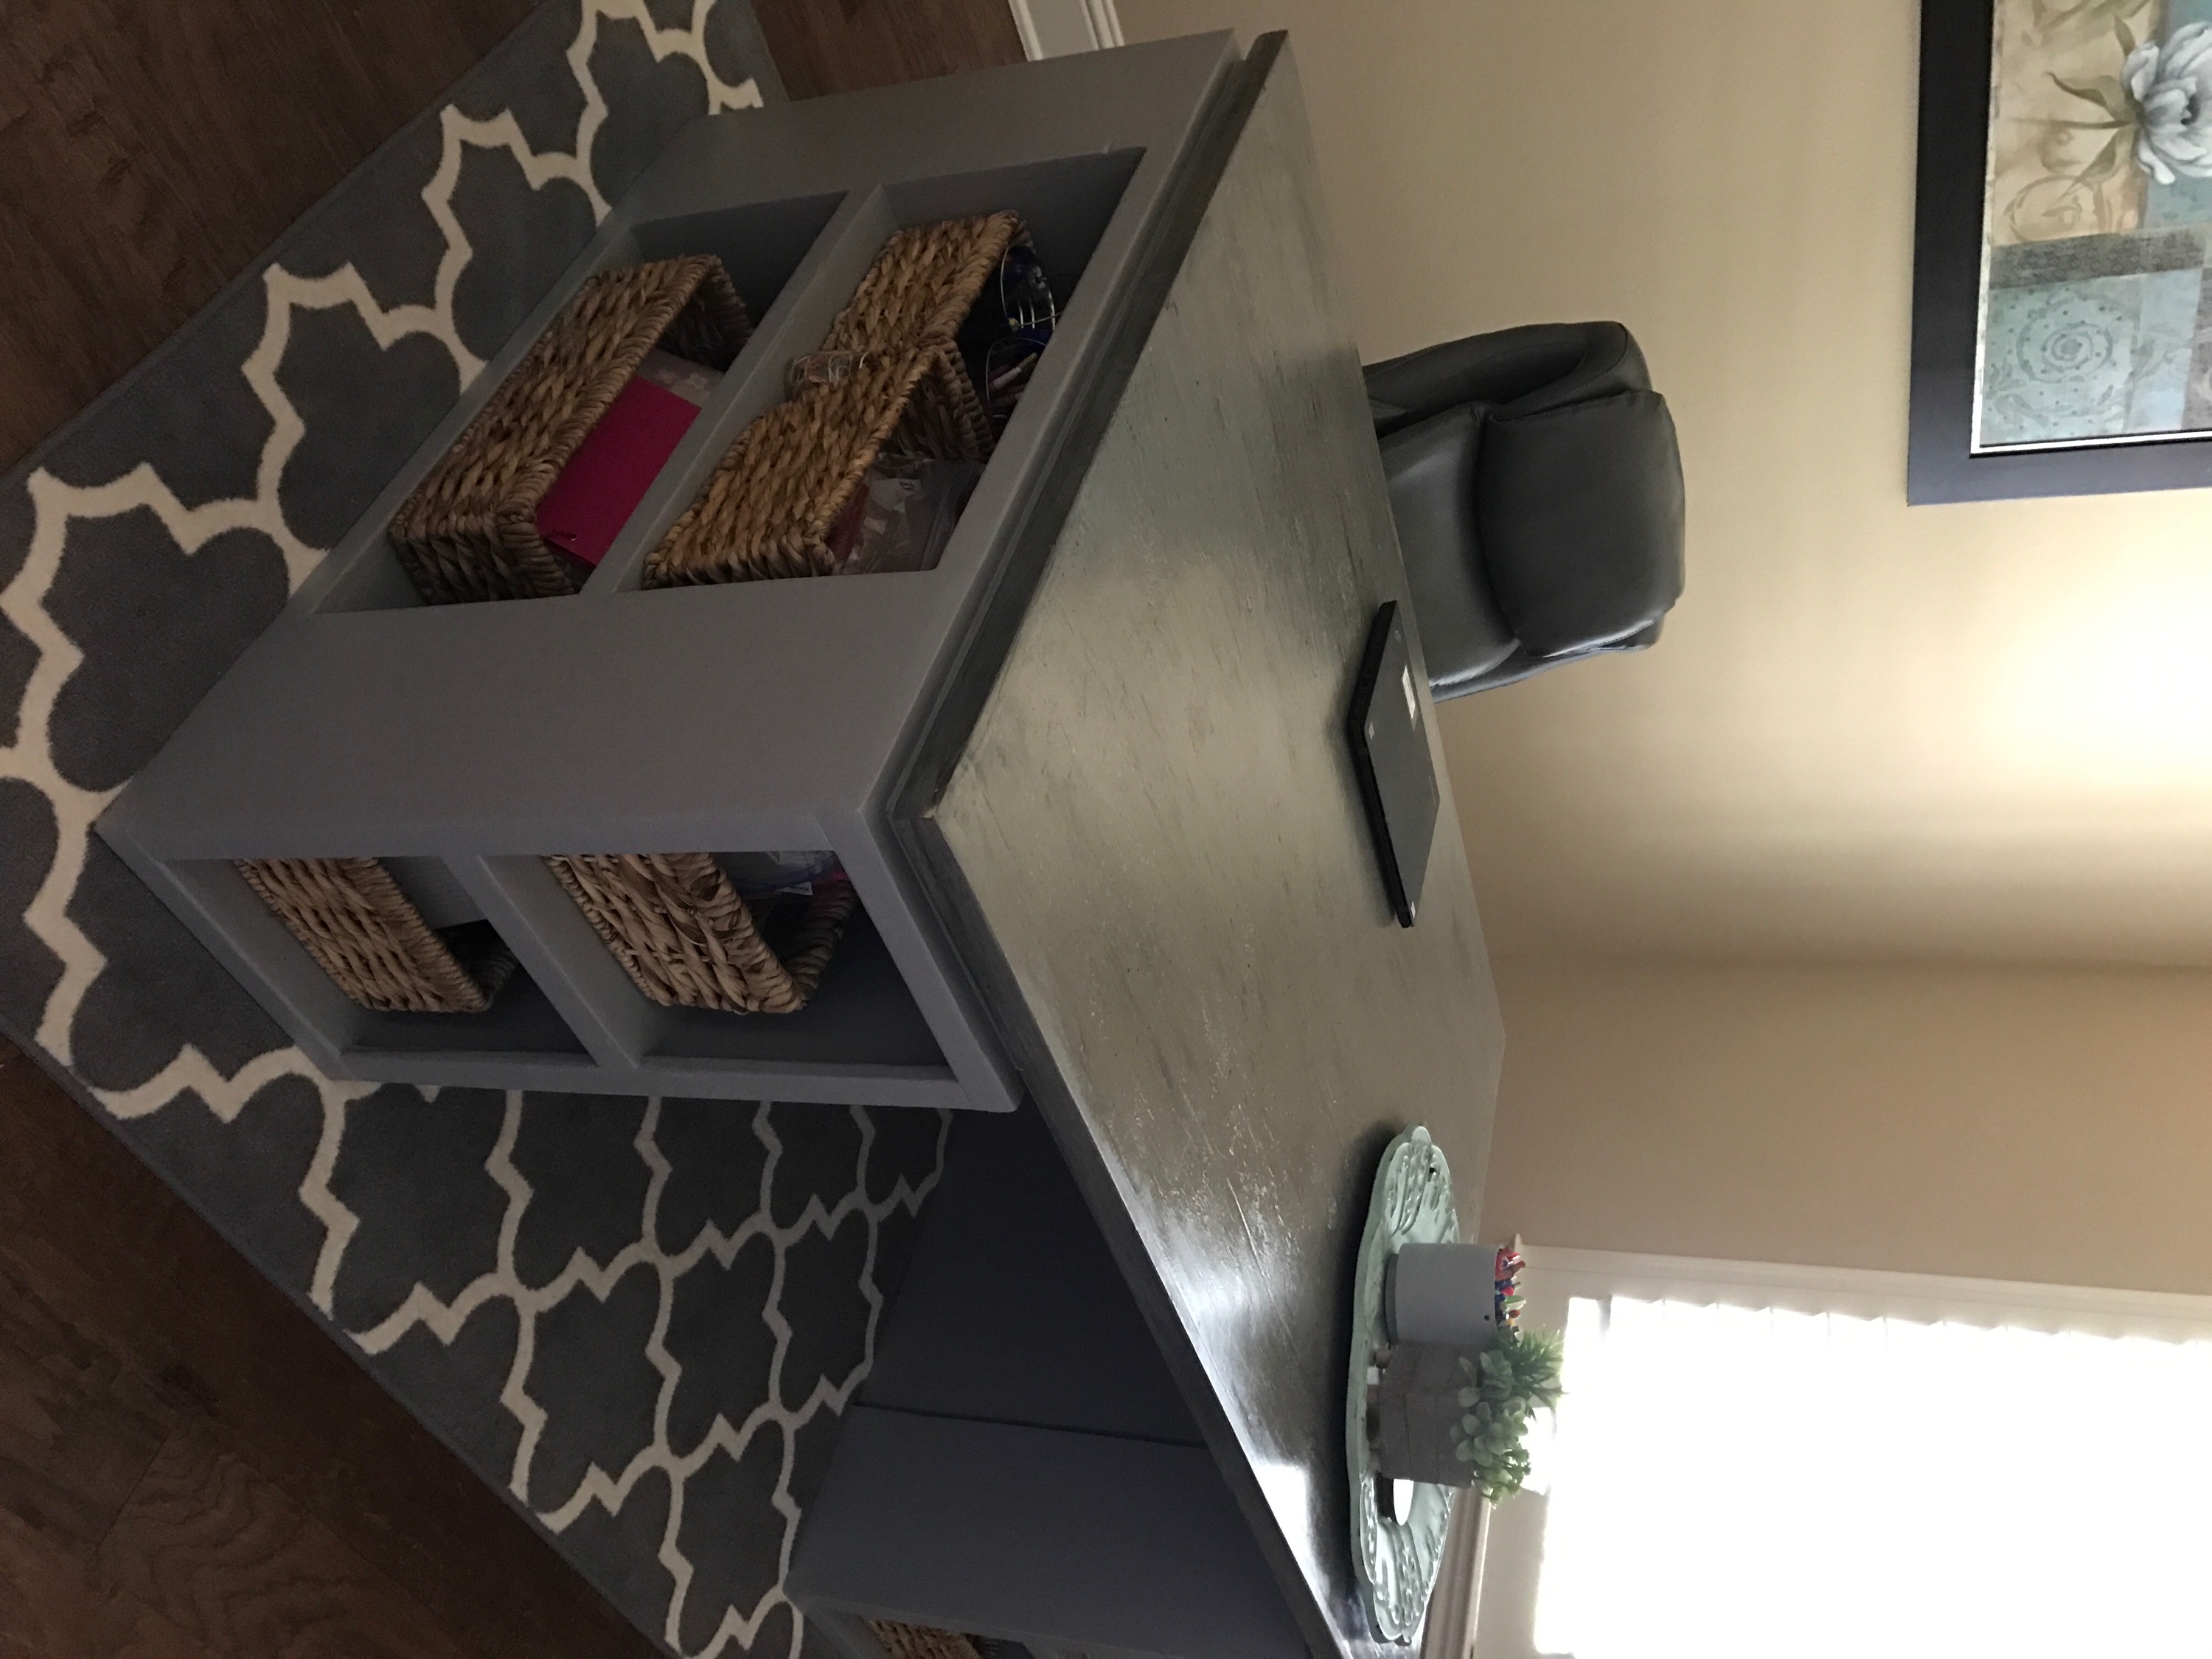
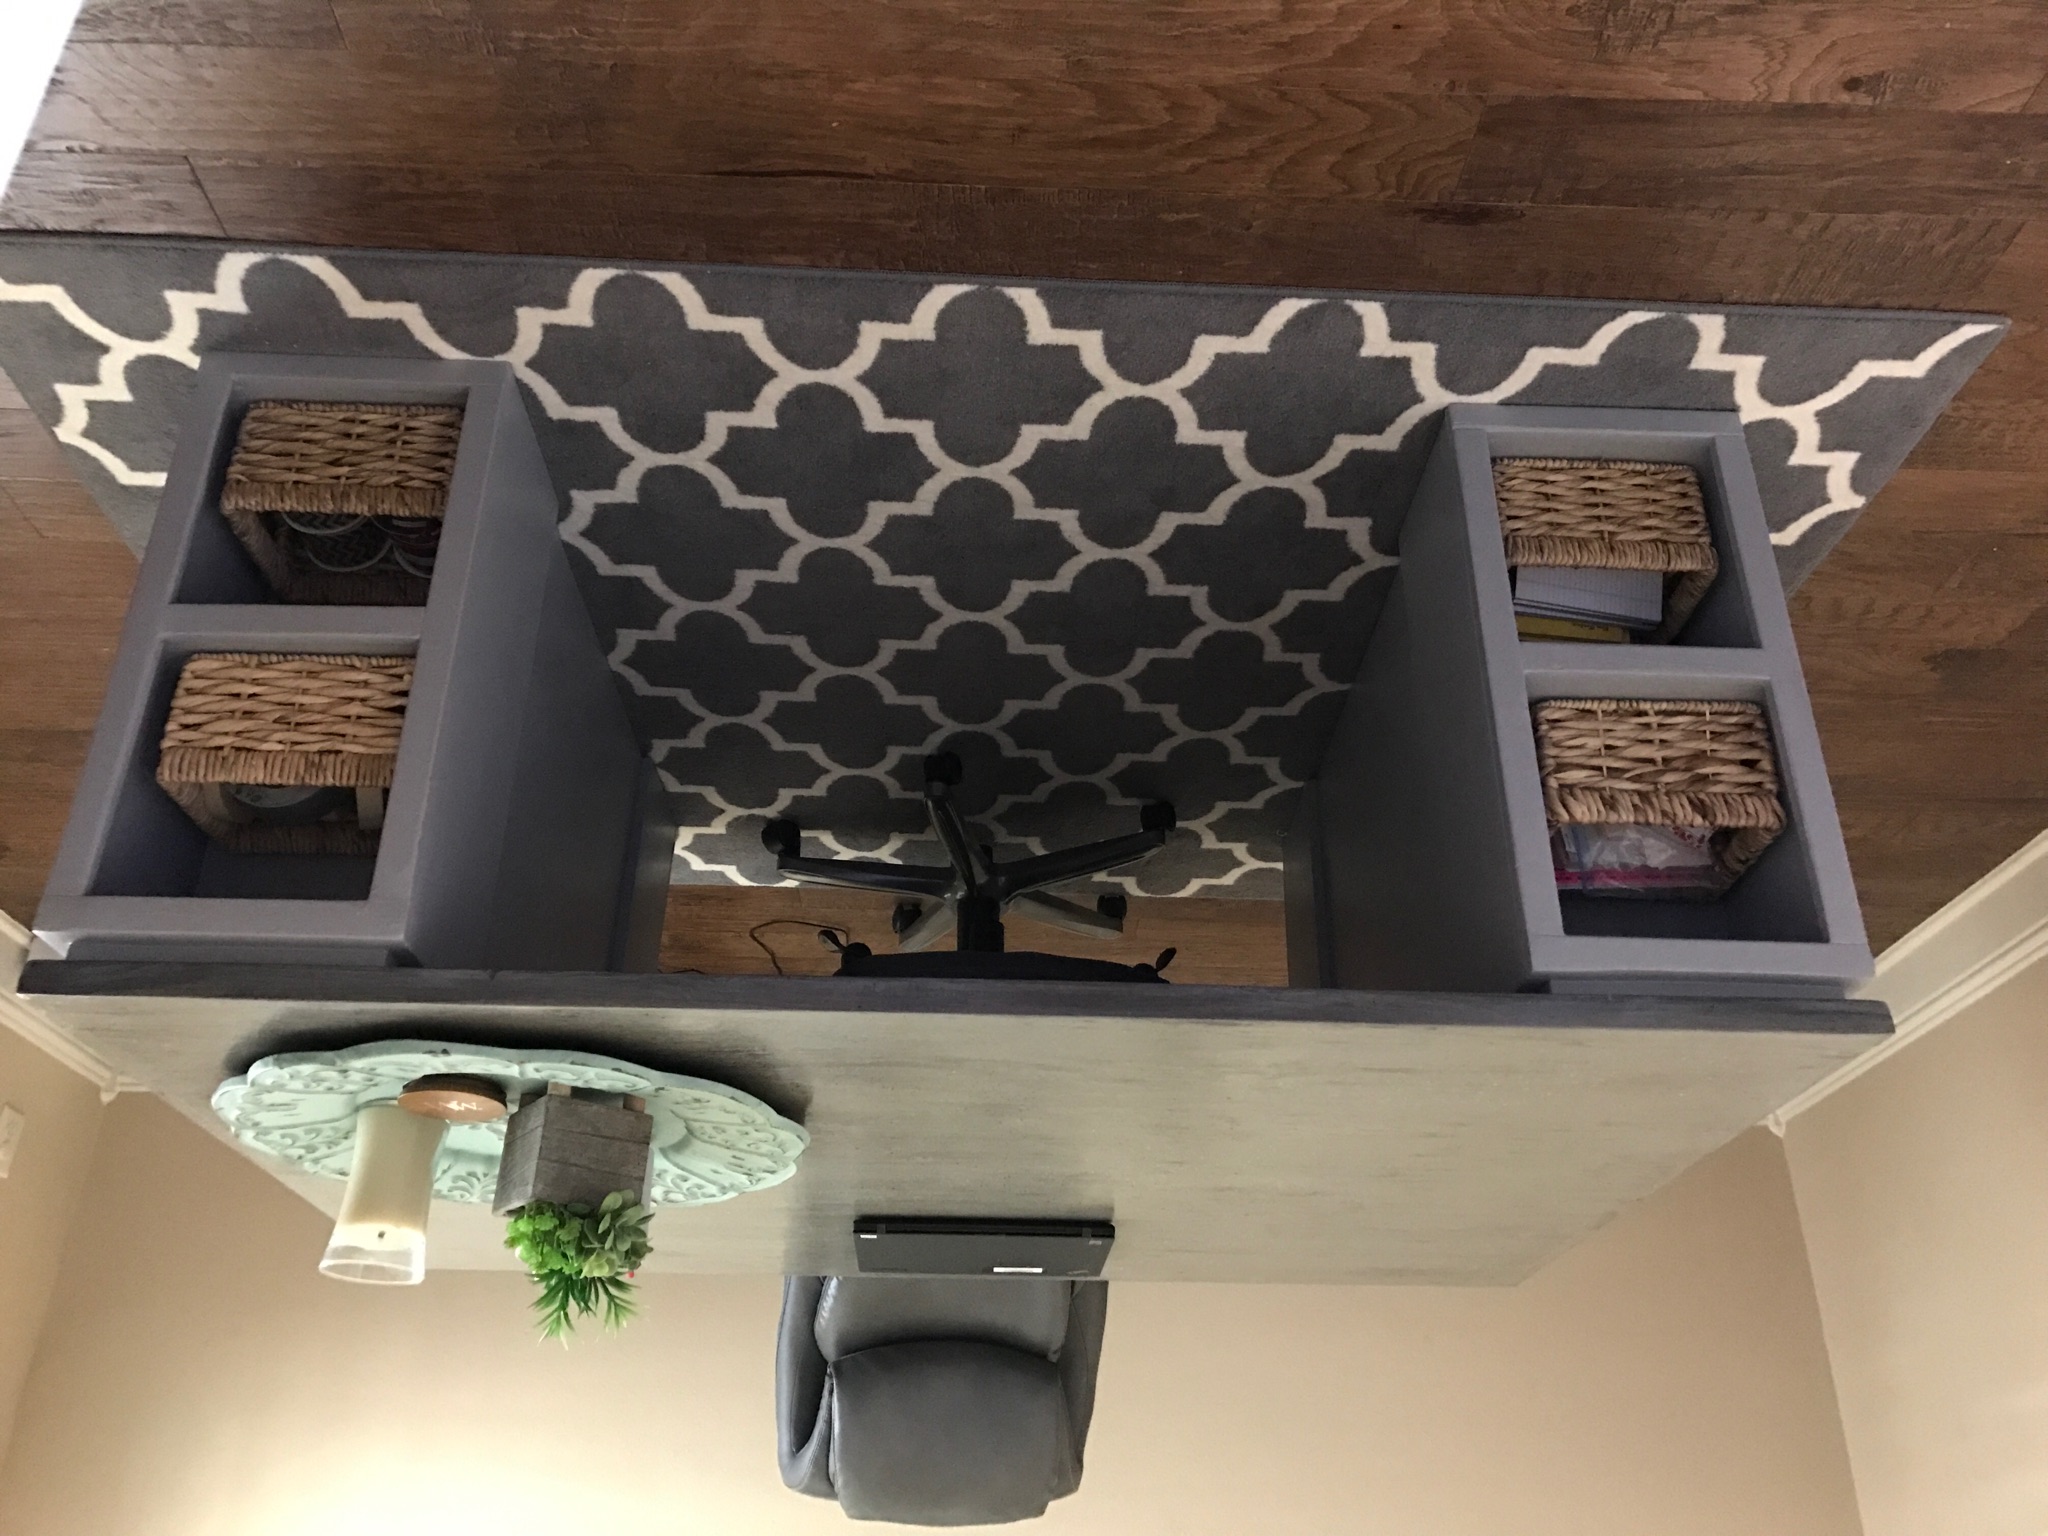
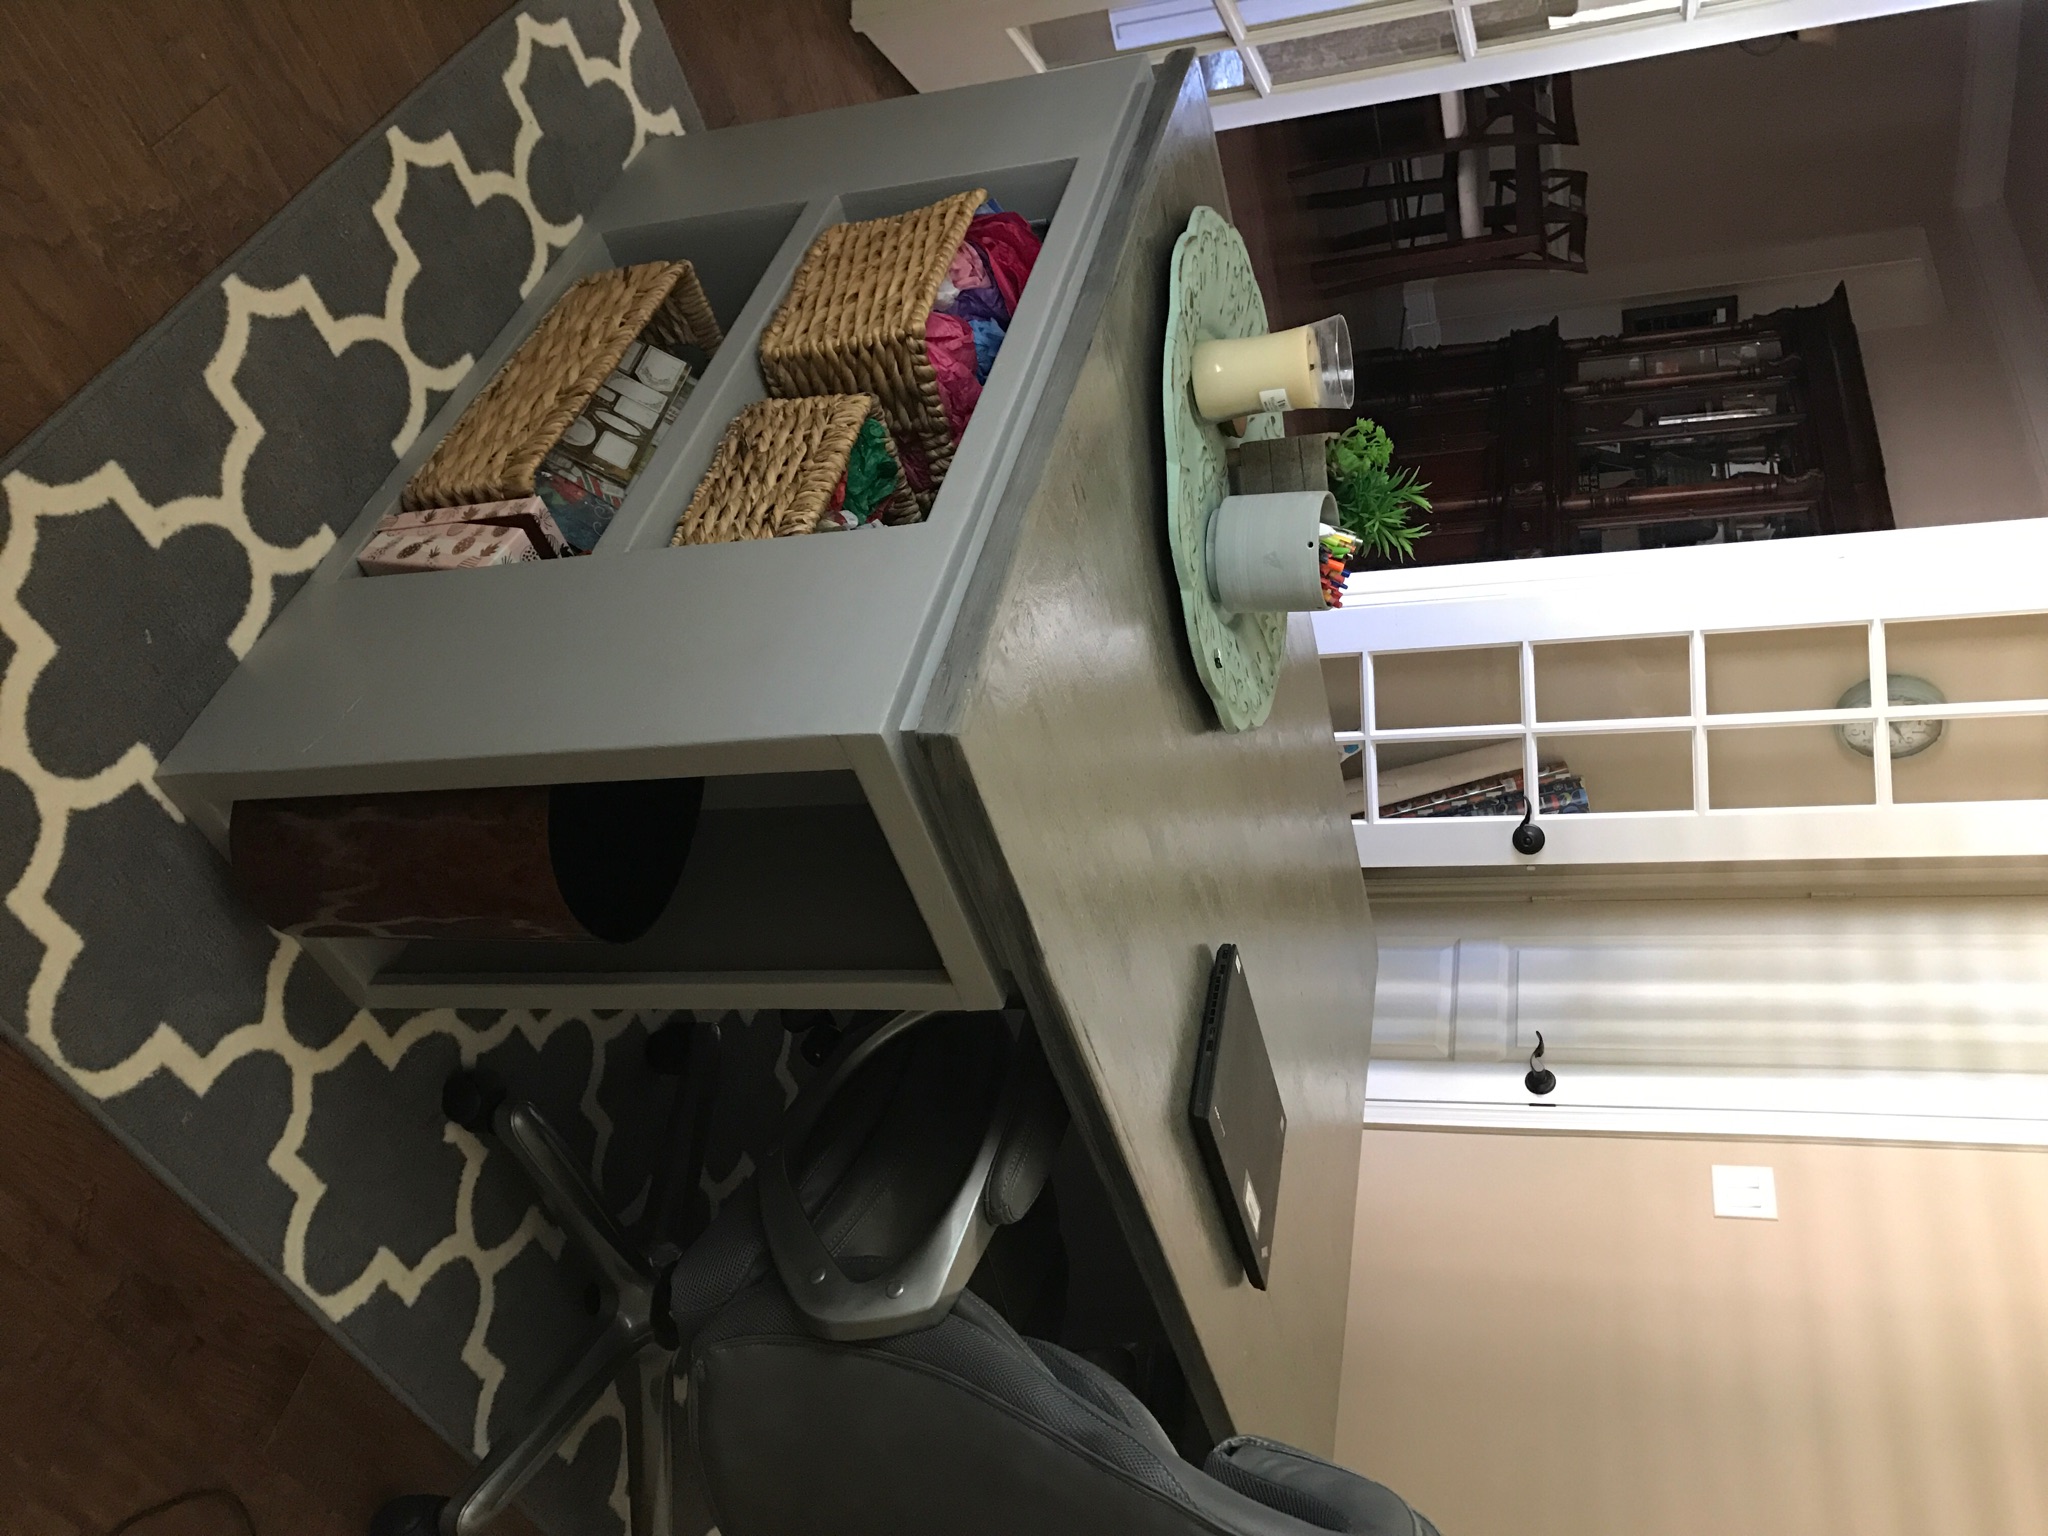
I combined the features I liked from both of these. I was able to snag some wood table tops at auction ($5.00 ea) that I painted to look like stone.
Mon, 05/22/2023 - 15:33
Superb job, the top looks super cool! Thank you for sharing.
Mon, 05/22/2023 - 15:33
Superb job, the top looks super cool! Thank you for sharing.

I built this picnic table from pallets and 2/4 it’s my first one nothing fantastic but I’m still learning.
Karen
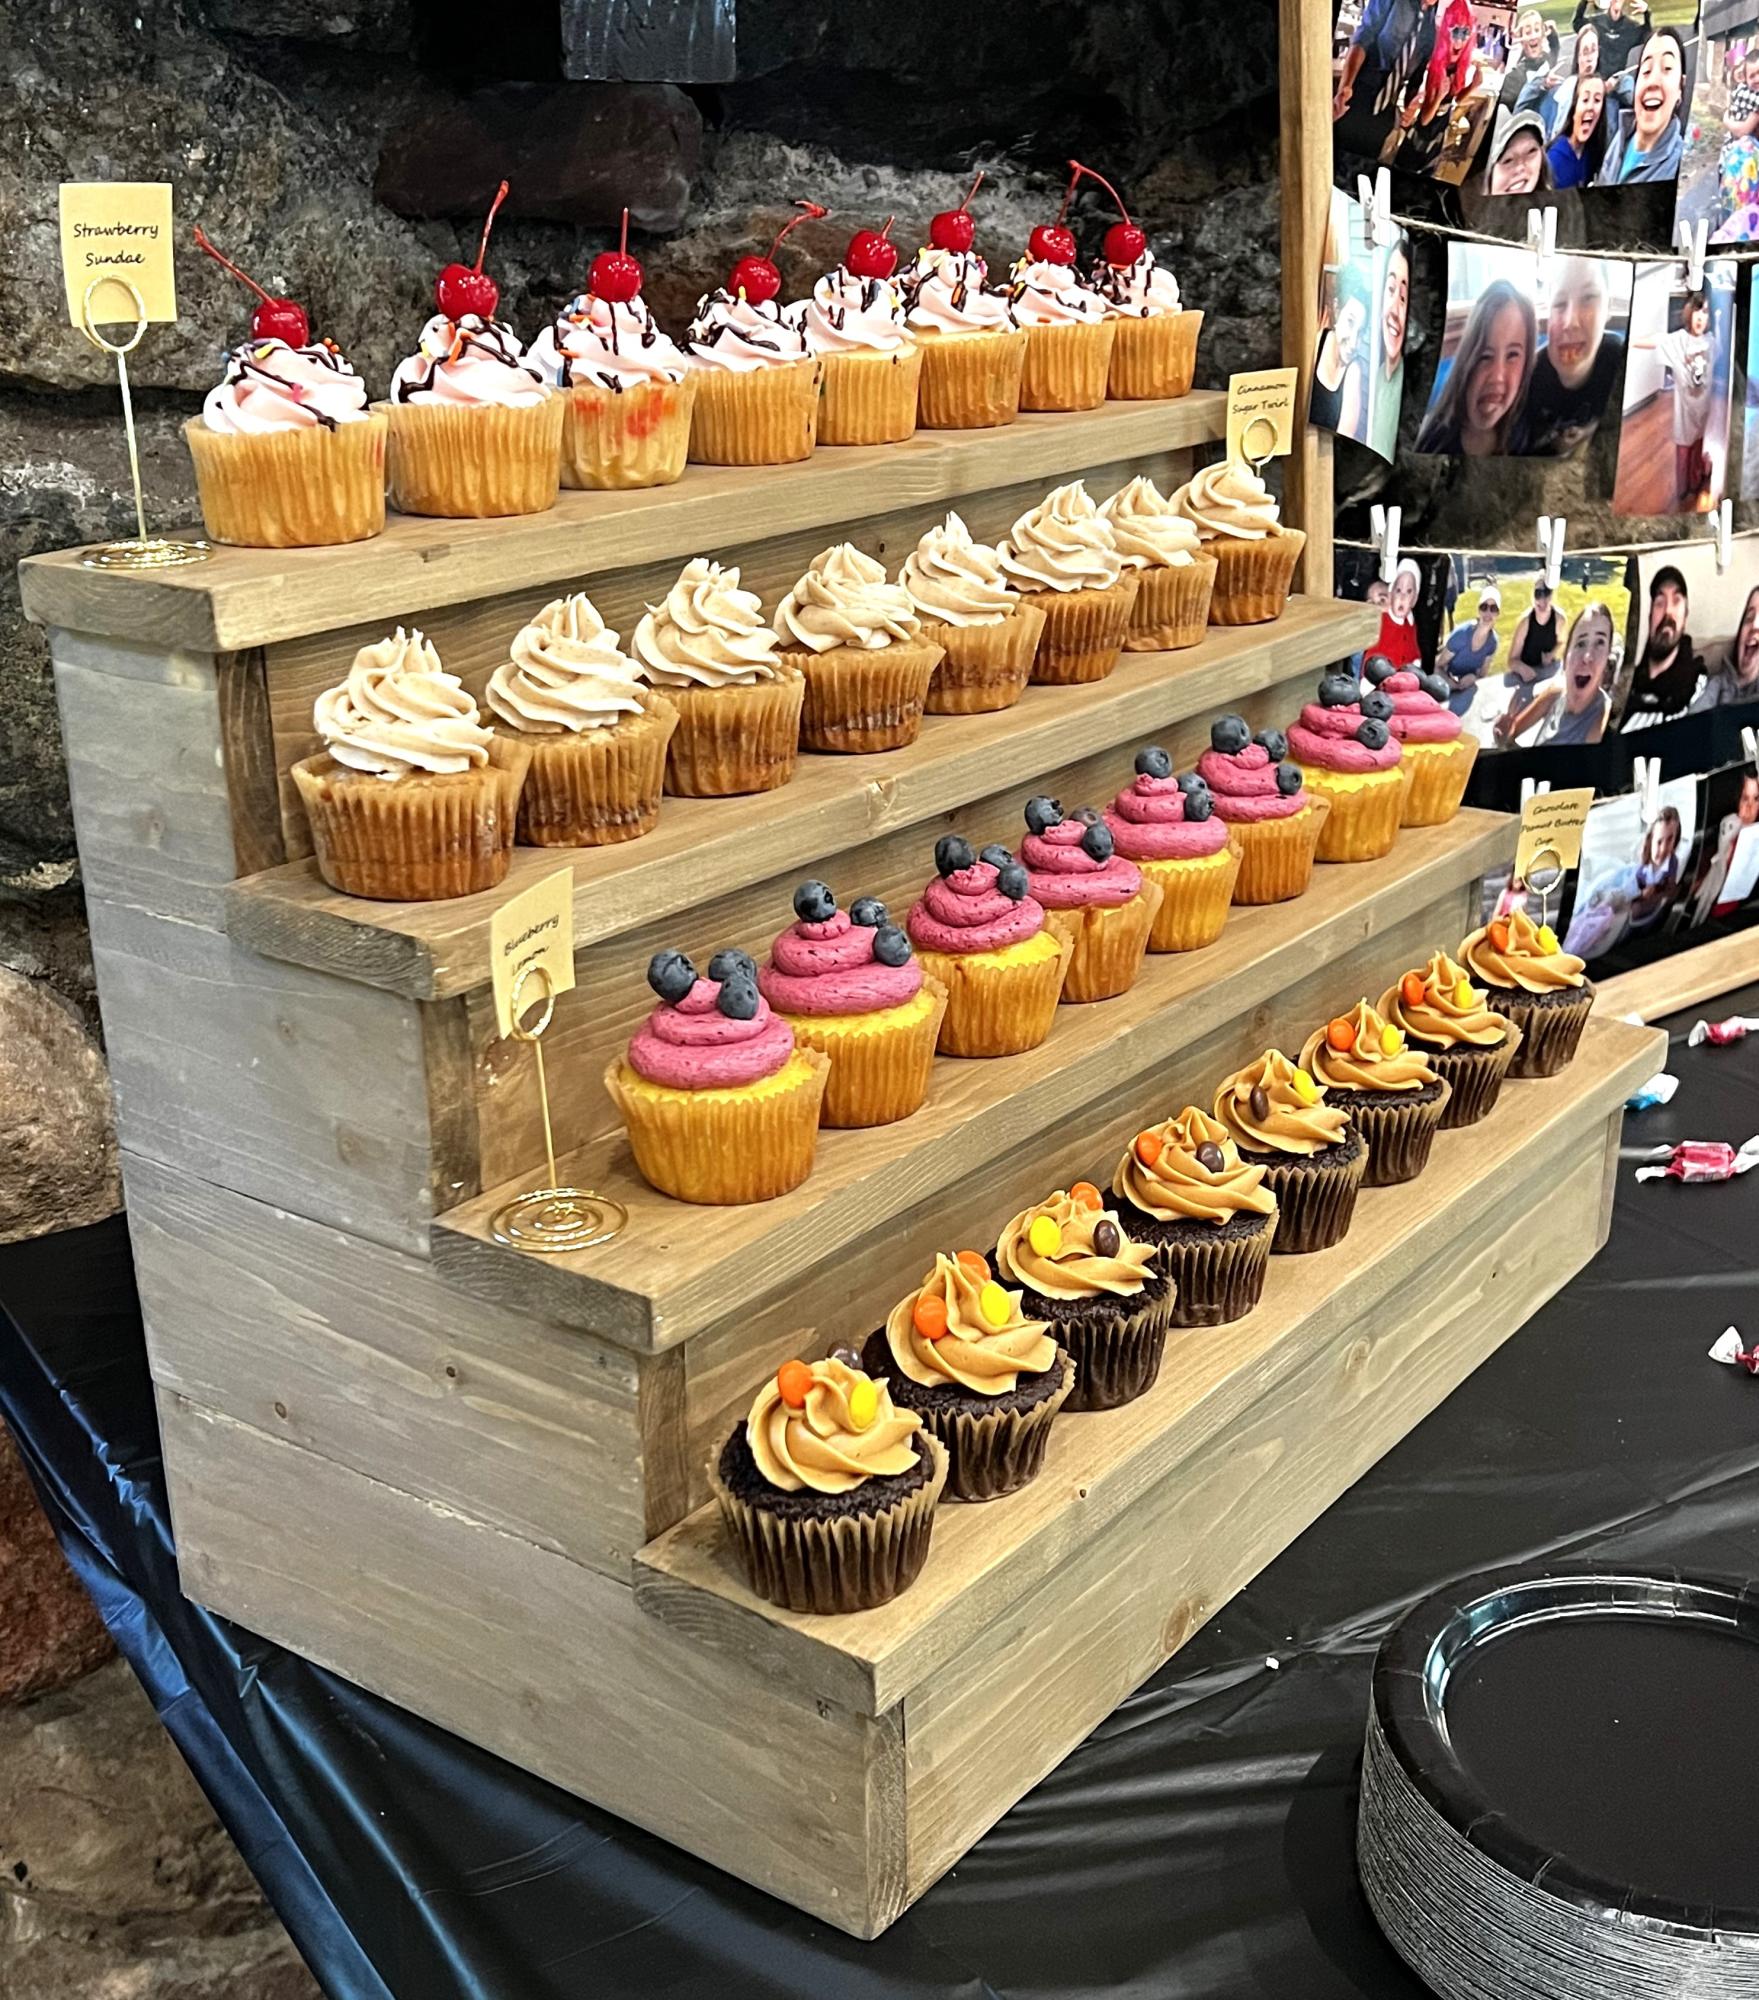
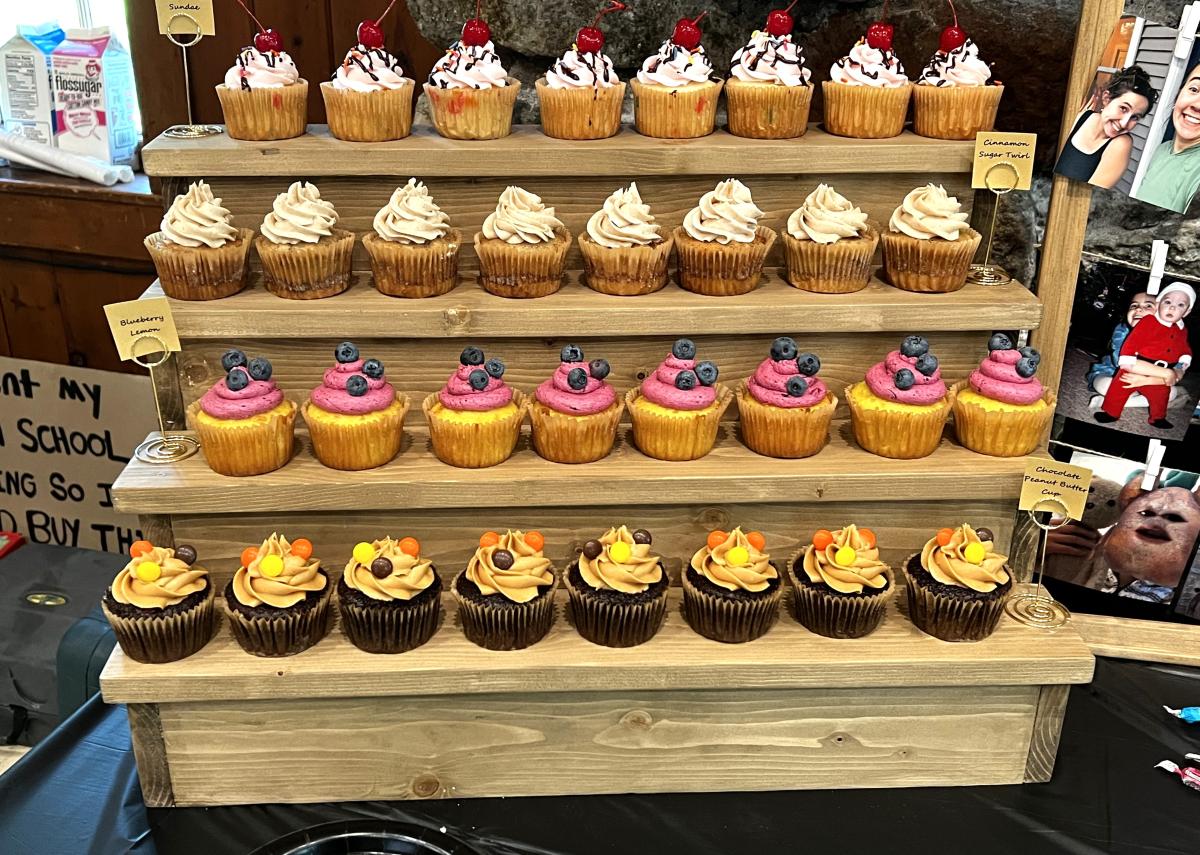
Cupcakes for my daughter’s graduation party displayed beautifully on Ana White’s stand I built.
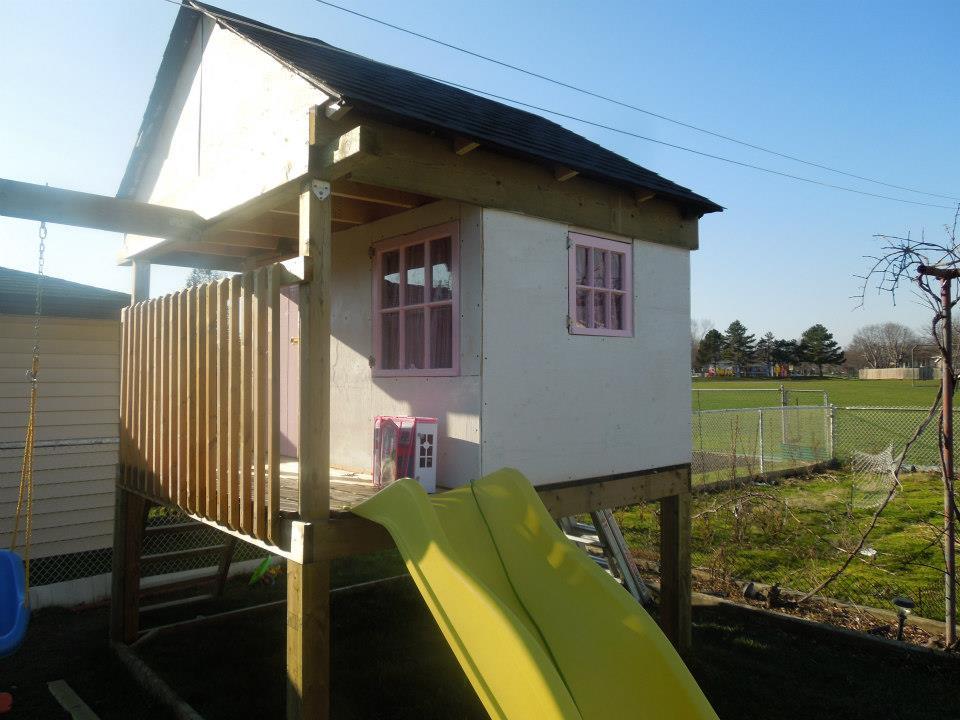
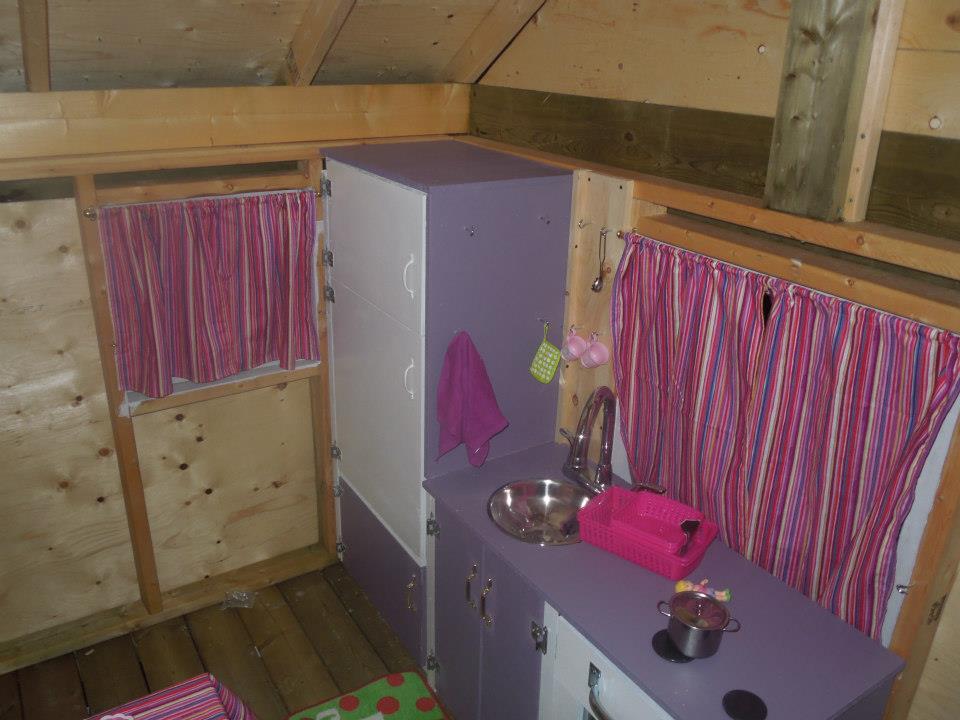
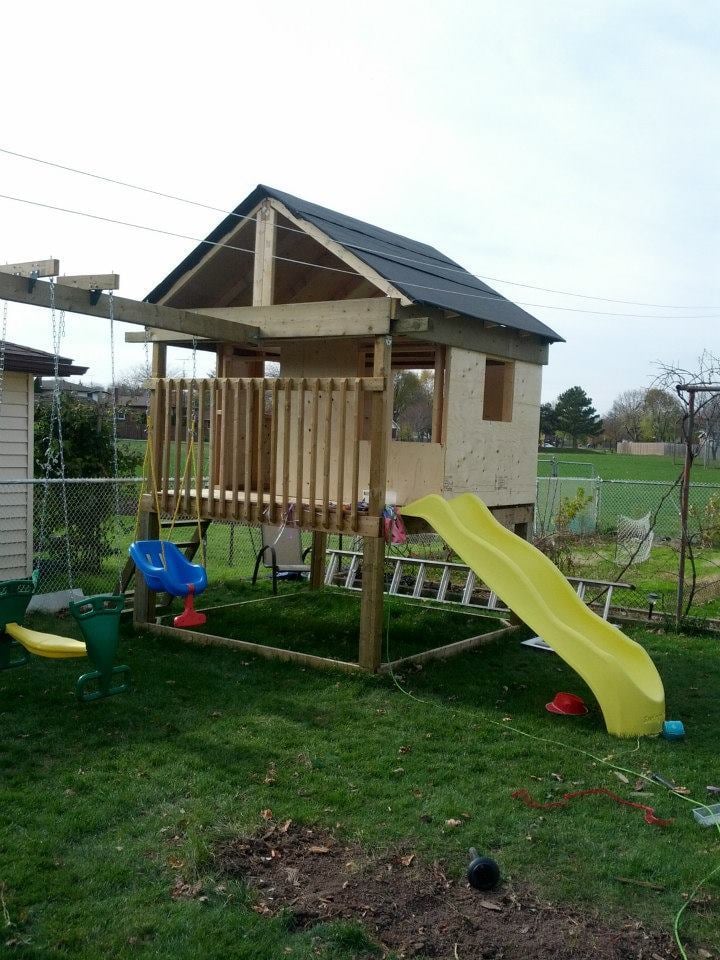
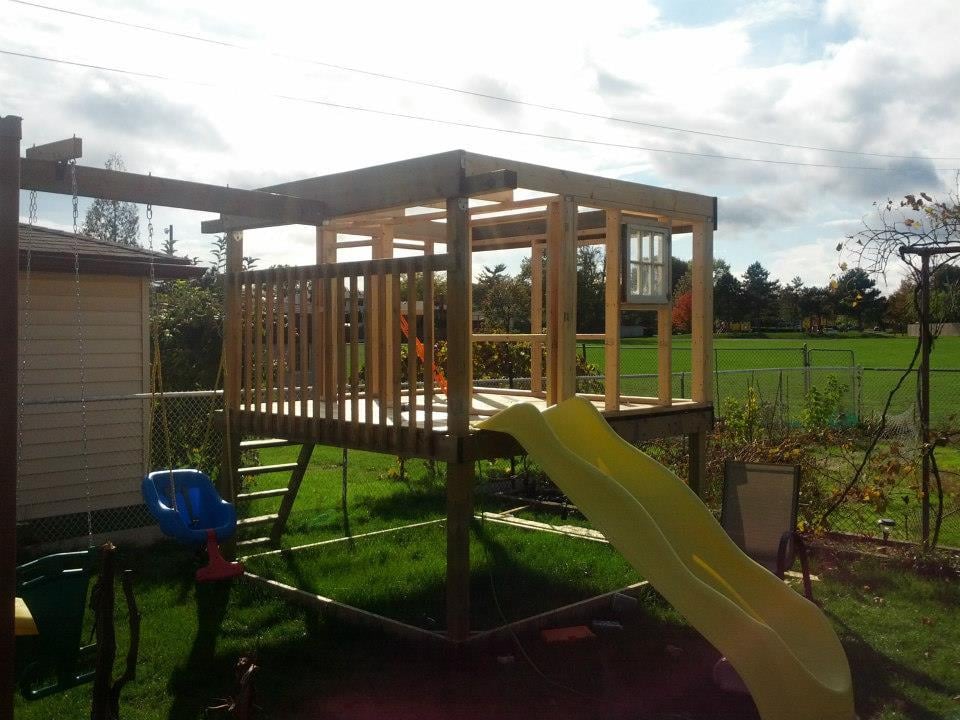
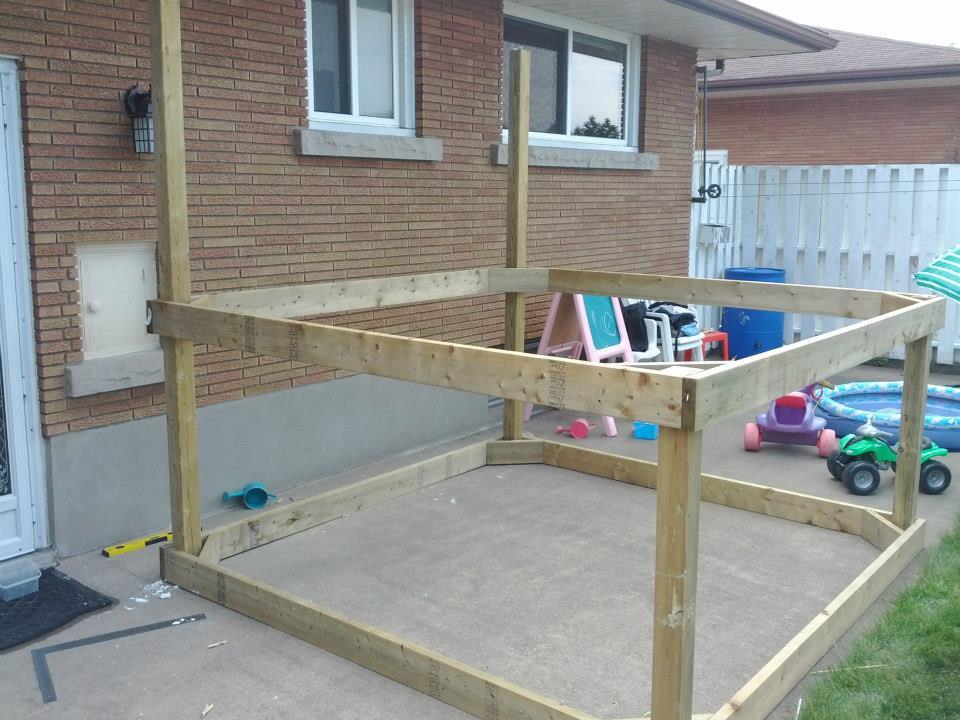
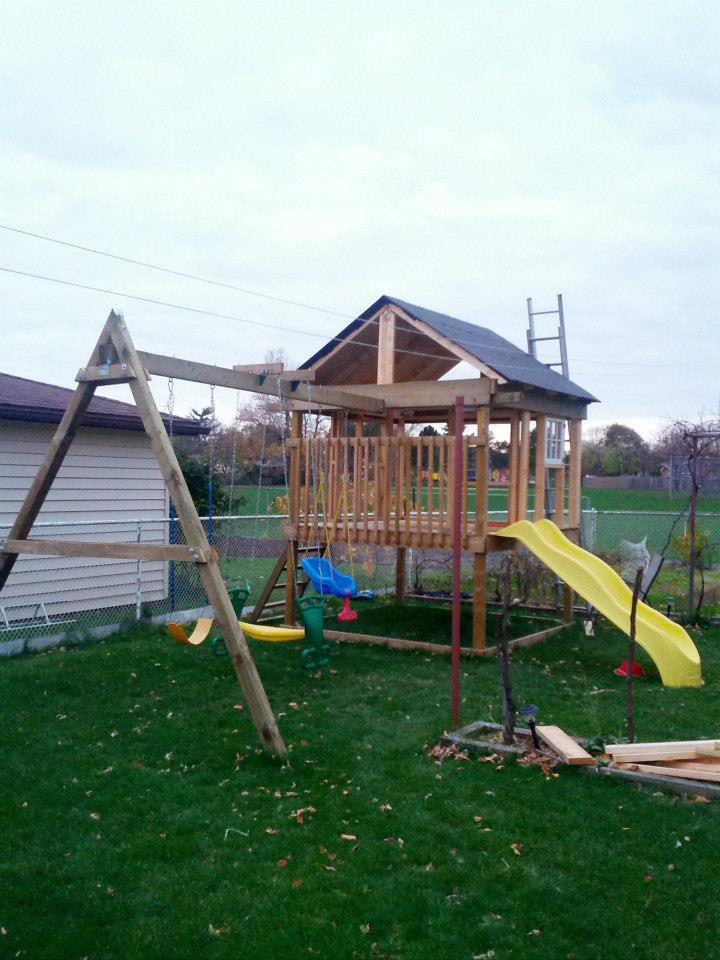
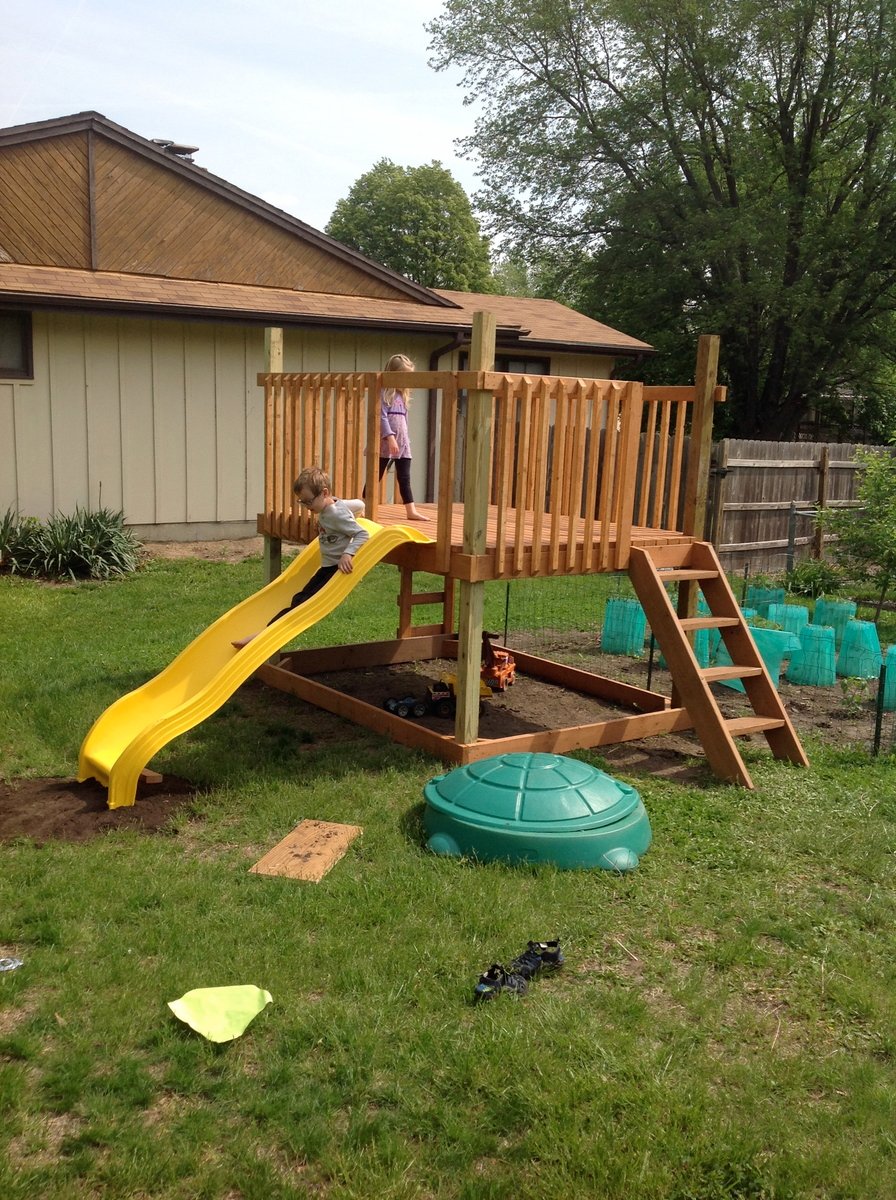
I combined a few different plans here, mostly the Playhouse deck, swingset.
I haven't finished it yet, this spring I want to finish the exterior as it's just primed plywood right now. Still going to add a window above the balcony (there is a loft up there).
I insulated the roof/ceiling and will insulate the walls when we finish it. In the bottom we'll be putting in a sandbox with a cover that folds up into benches.
It was a fun project and should give our girls many years of fun.
This is a plan that My 16 year old son chose to do for a project to fulfill a goal to learn some woodworking skills during our unexpected downtime from School.
Mom is thrilled with the new space.
He adjusted different sizes based on what lumber we already had. He used 1x7’s and routed a 45deg on the edges to give the tongue and groove look. Posts are 4x5 and top railing is 2x7.

Sun, 04/19/2020 - 17:42
Amazing, what a fine young man you are raising!!
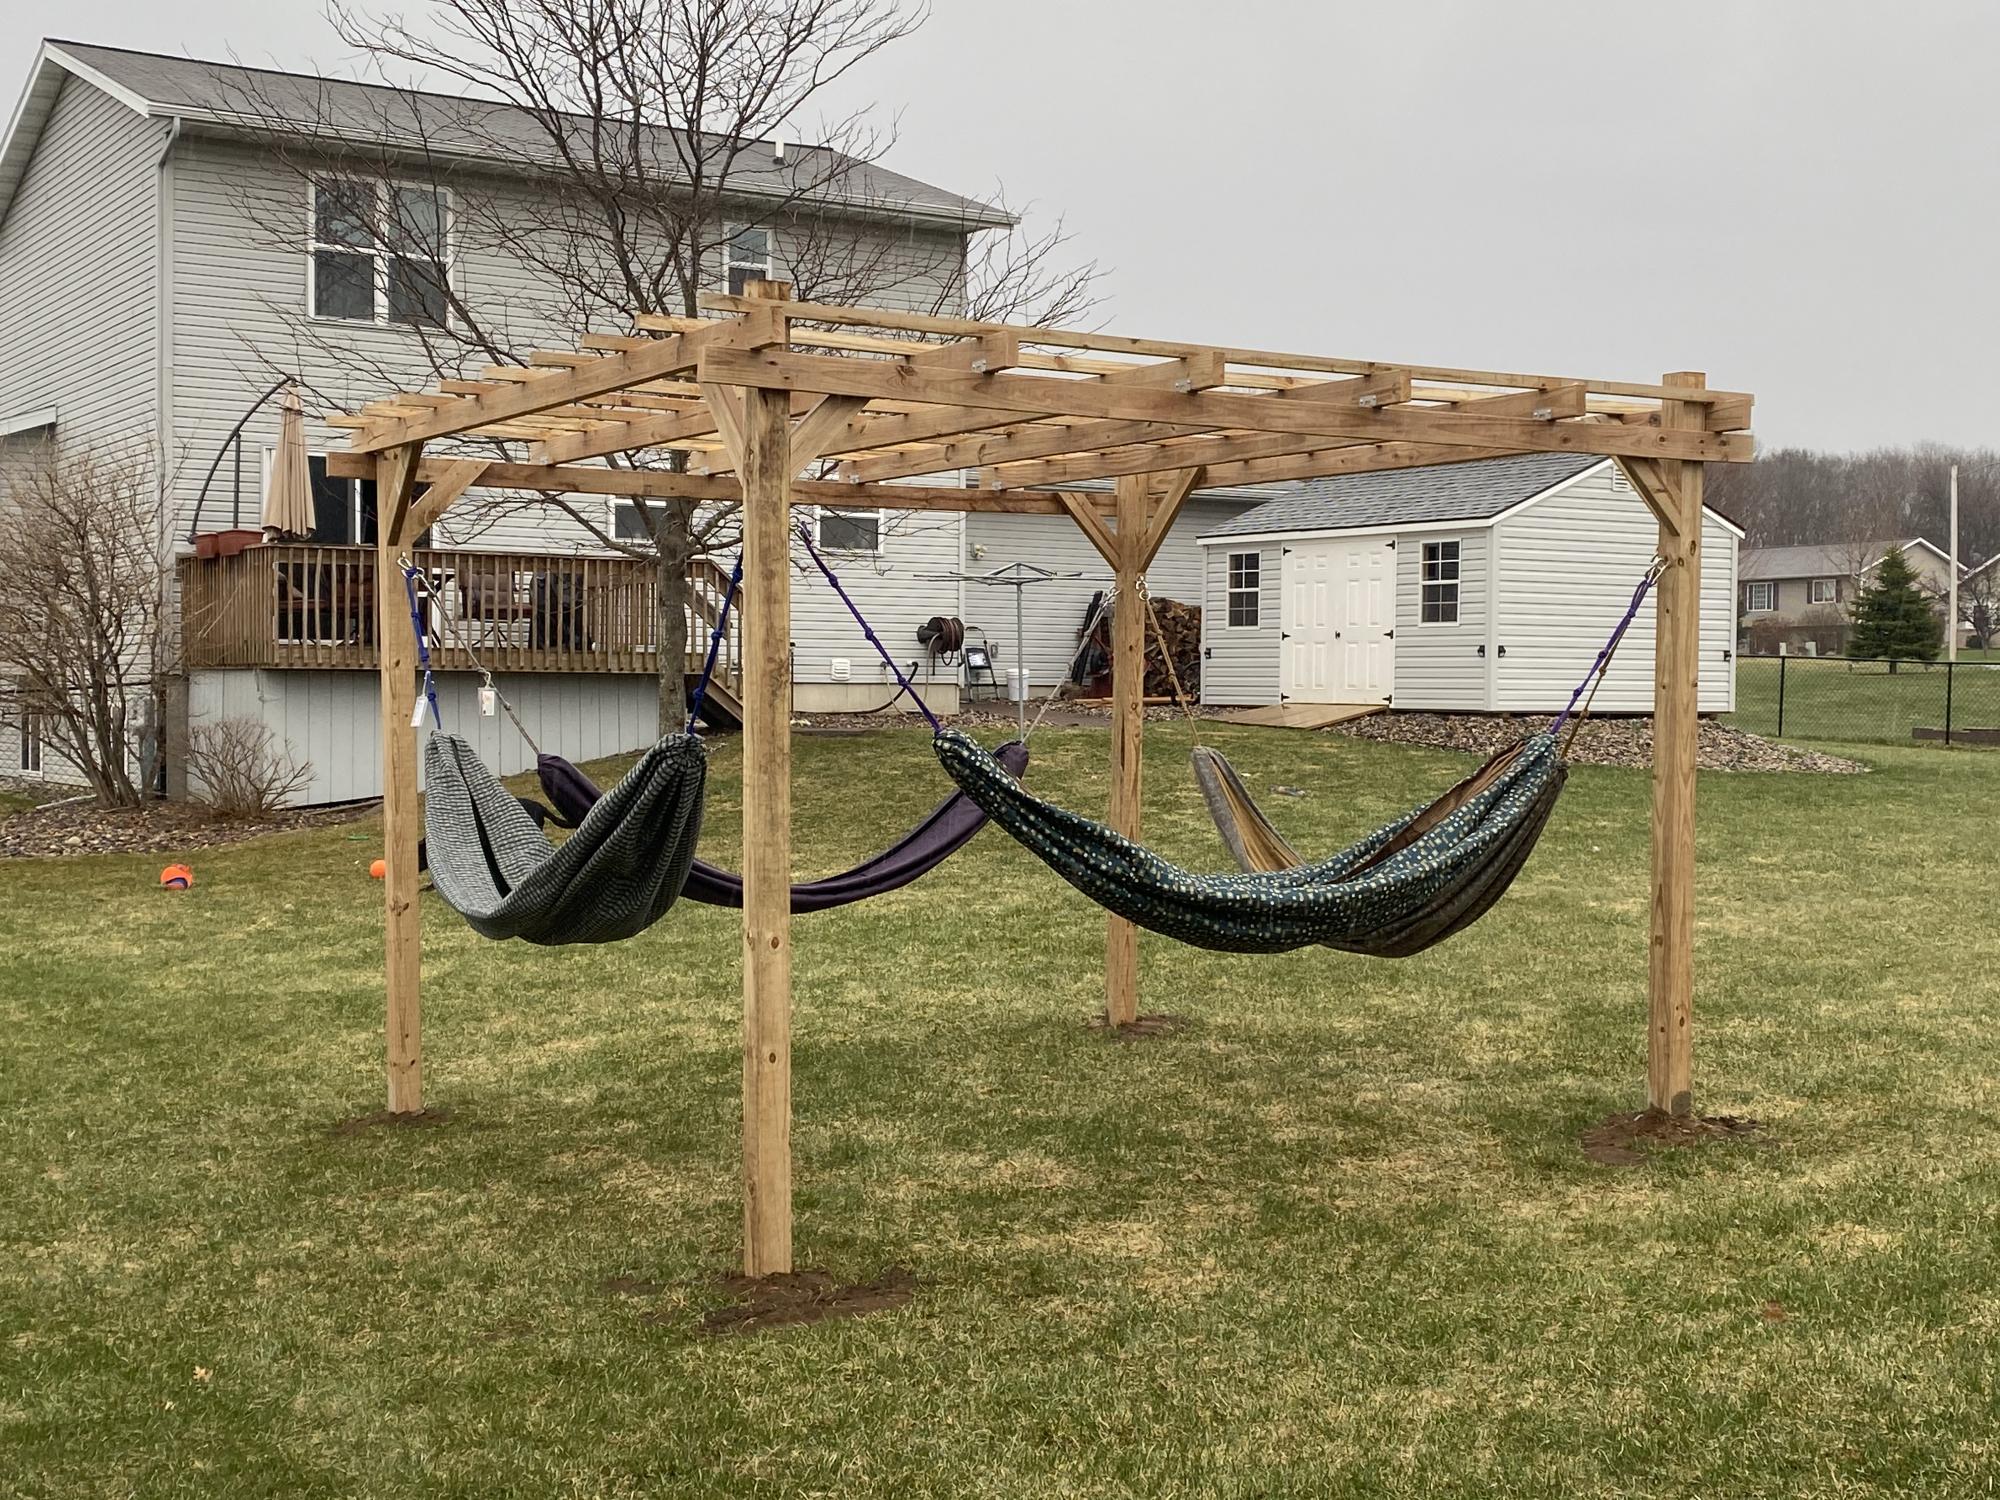
I've wanted a place to hang our hammocks for a few years now. We have some really nice hammocks from a local artisan. This past weekend, we built the framing with intentions of making it a pergola at a later time. With encouragement of my son & boyfriend, we decided to add the pergola on Sunday. I liked this plan because it wasn't as complicated or expensive as a lot of other plans out there that use 2x6s instead of 2x4s. Adding the angle brackets really solidified the whole structure. I'm so thrilled with this project! Unfortunately, today (Monday), it's raining, so I can't go hang out there.
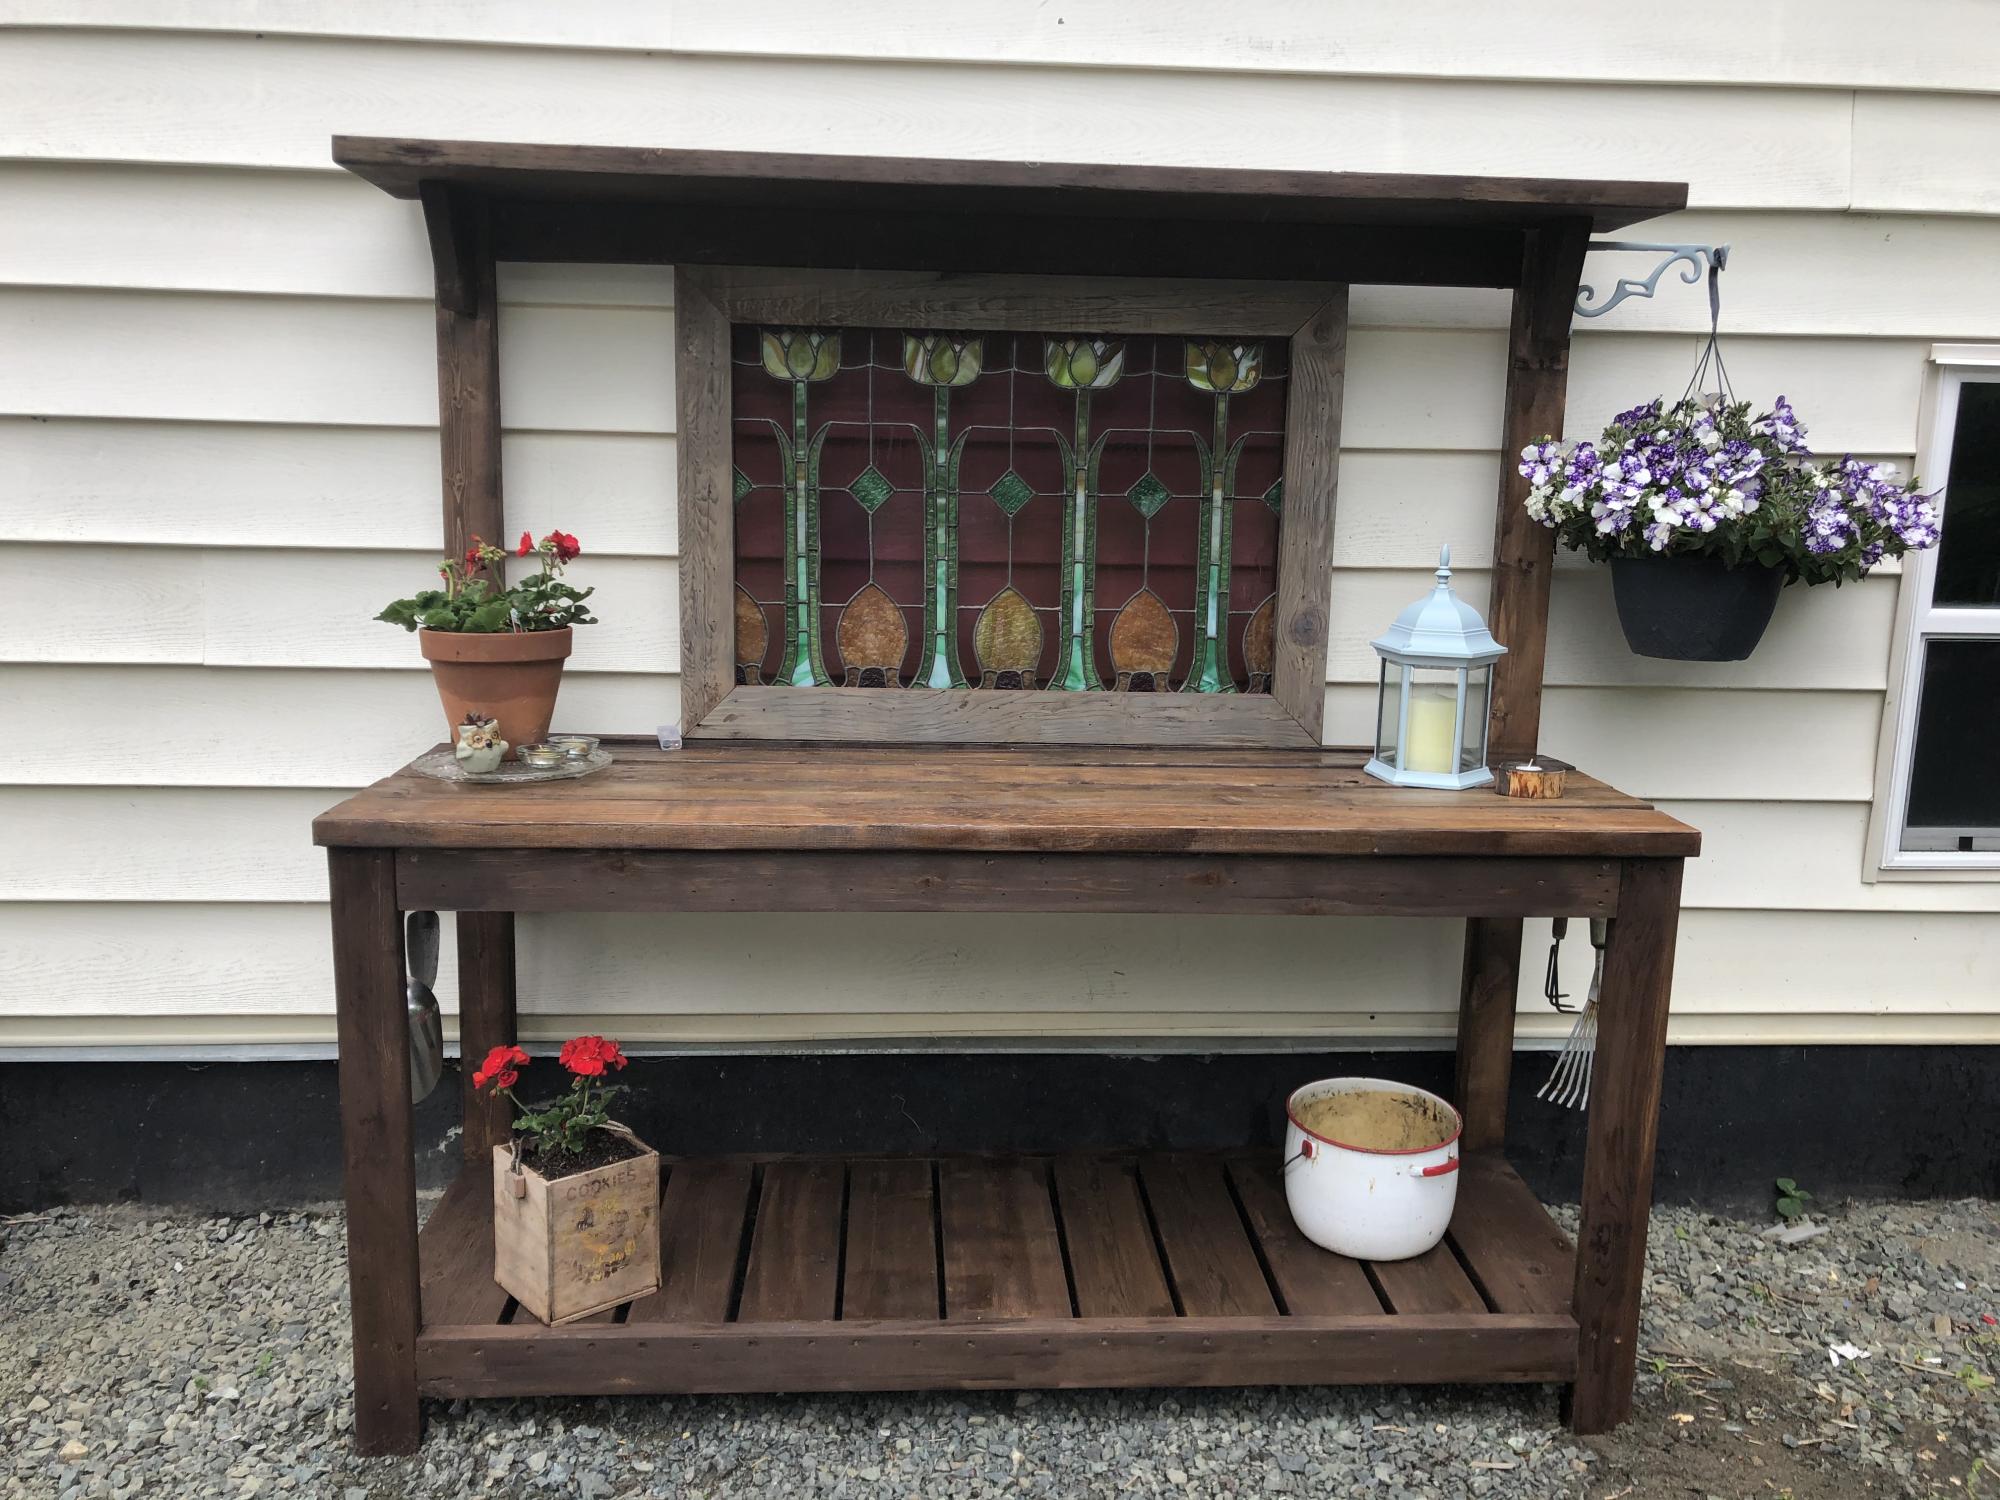
We had a pile of old wood and an old fence in the backyard that I wanted to repurpose. I had a spot along my house in the back yard that was empty, that really needed something. Thanks to Ana's "Farmhouse Potting Bench" tutorial and plans, we got inspired. We changed the measurements to make sure we could incorporate an old stained glass window that I've had, just waiting for a purpose. We also changed the measurements to accommodate the different sizes of wood that we had on hand. Our project took a much longer time, because of all the measurement changes and wrapping our head around how to mount the window, but it was worth it. We're really happy with how it turned out.
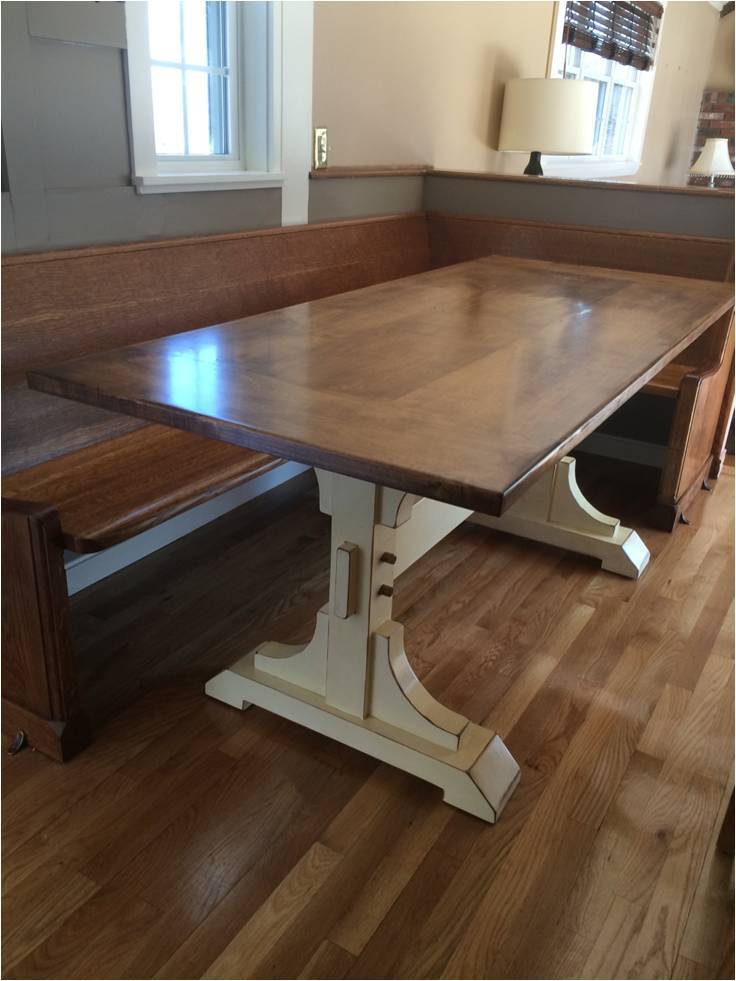
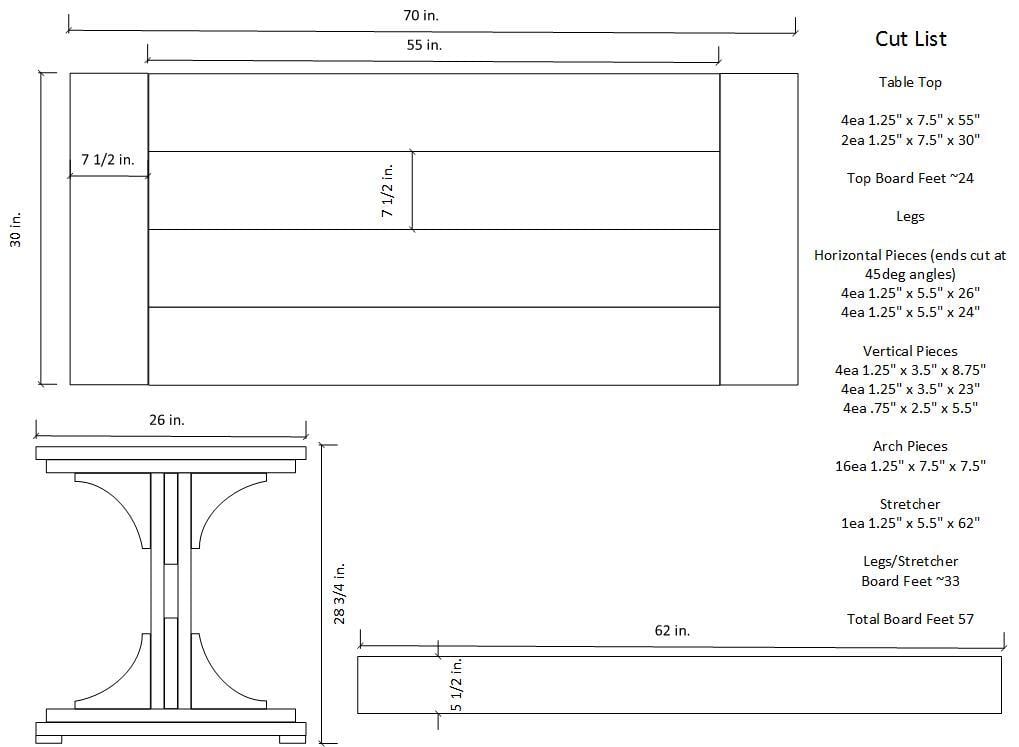
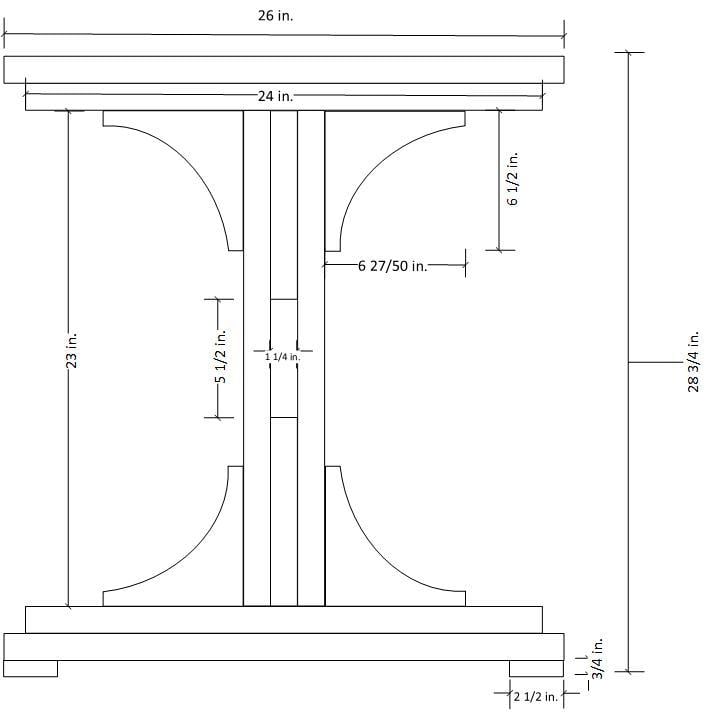
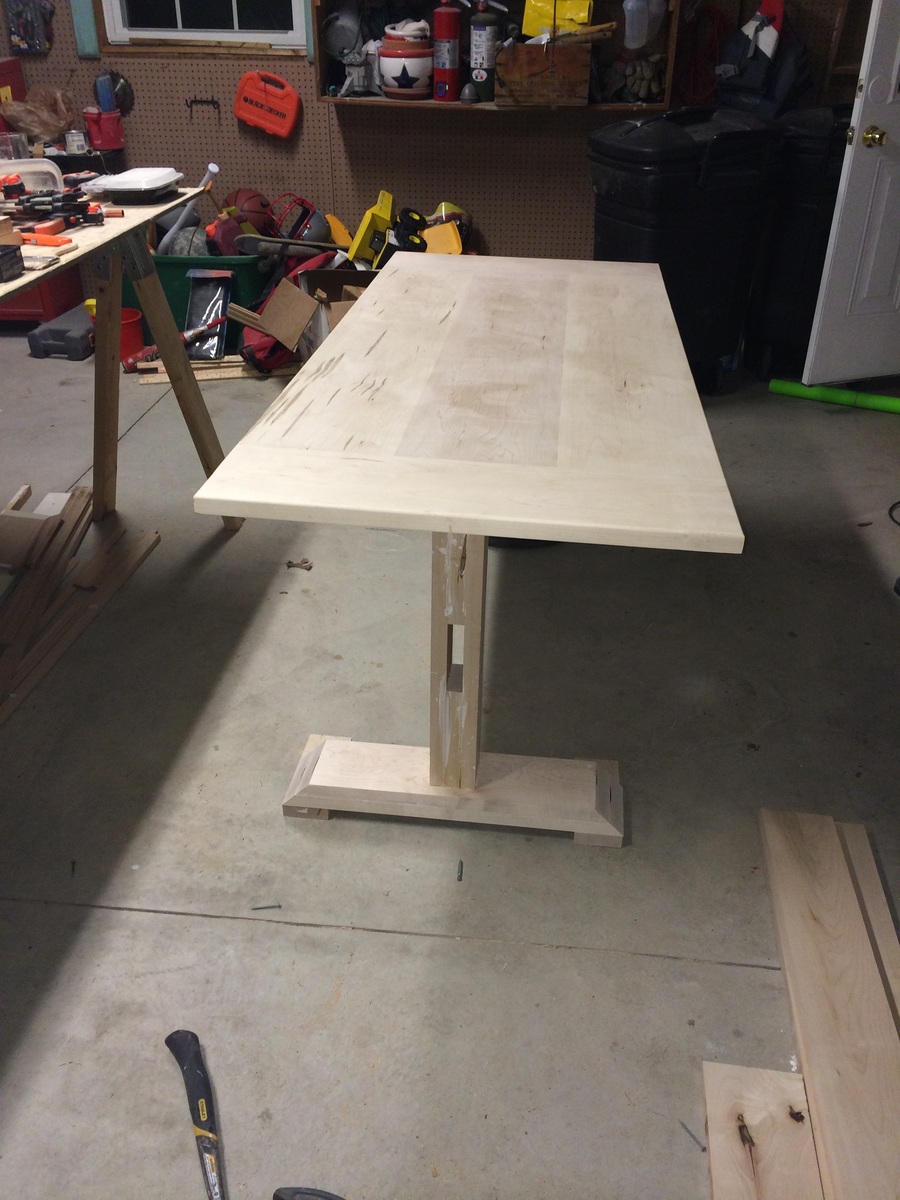
Farmhouse table made from distressed (worm hole) maple.
My neighbor was able to get me the 5/4 distressed maple for about $2/bd ft - I ended up buying 100 board feet and had plenty leftover. The finished board feet for this project was about 60 if I remember correctly. So the $200 was the bulk of the expense. The only other costs were sand paper, I bought a Kreg Jig, screws, Minwax Marker, paint, stain and urethane (much of which I already had).
It came out better than I anticipated. The antique white finish was not difficult at all.
Tip - When following the instructions for the finish here, I applied the first coat of urethane with a brush almost immediately after applying the Minwax marker to all of the sanded edges. I did this in haste, but ended up with some unexpected results that really added a nice touch. The stain from the marker incorporated a bit into the urethane as I brushed it giving it an antique, yellow hue. At first I thought I made a big mistake, but it turned out to add a really nice look.
Mon, 05/19/2014 - 07:29
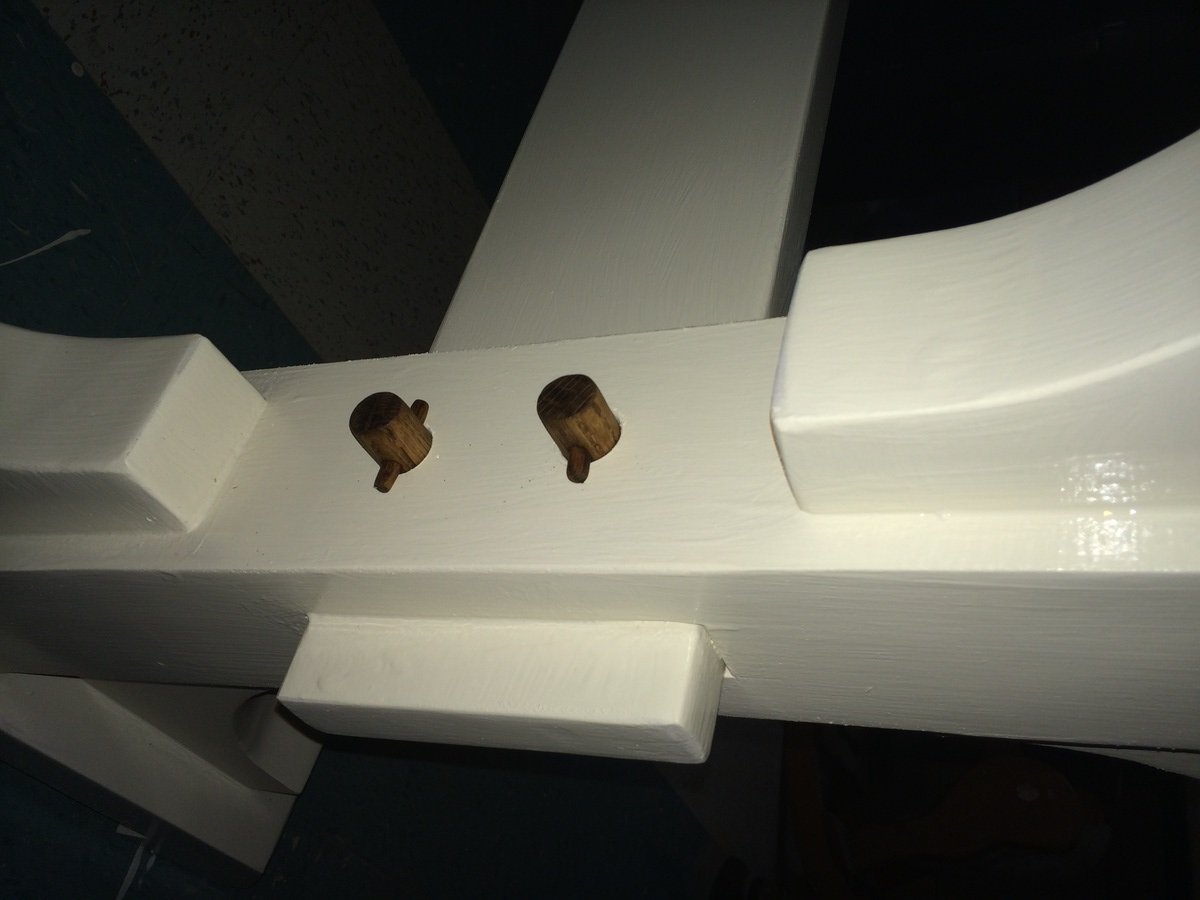
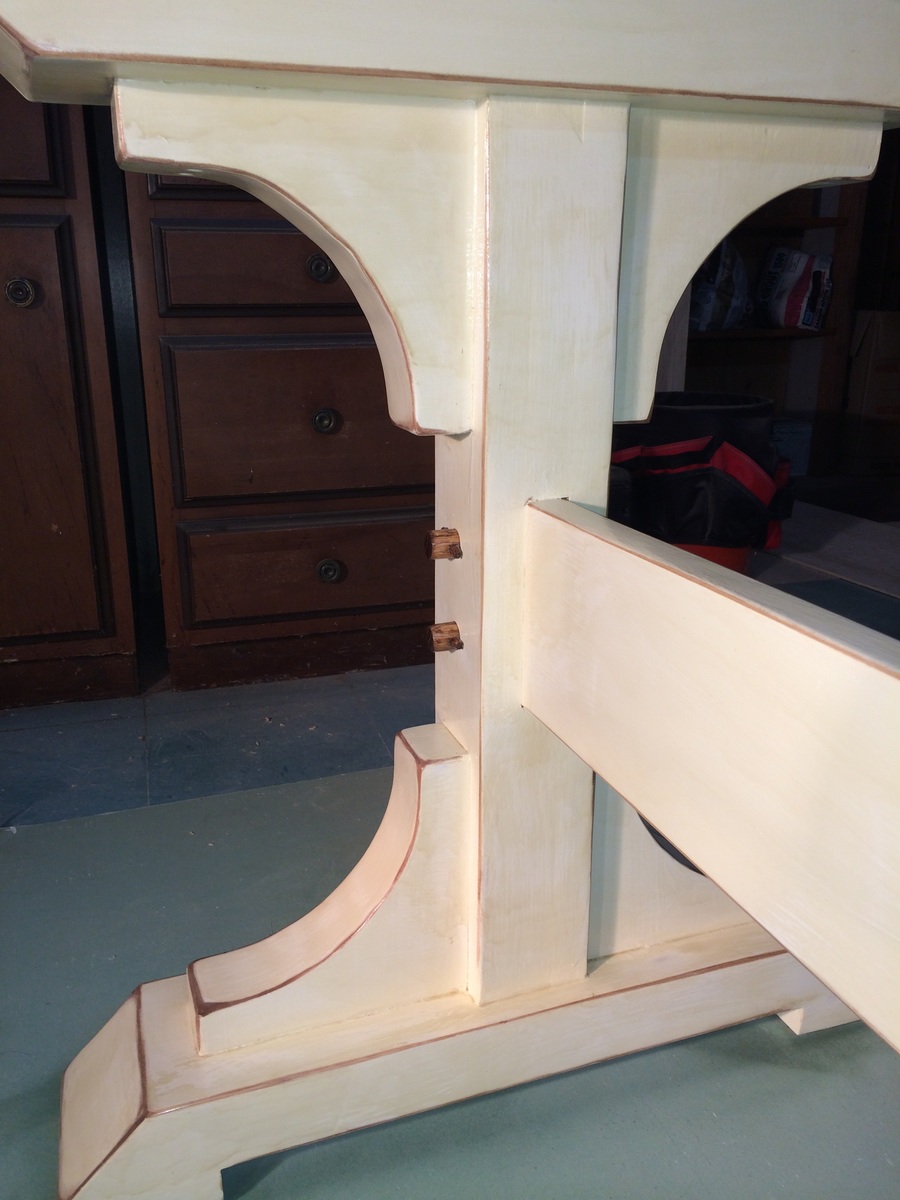
CSaintD - The top can be removed as I did not glue it. I set 3 dowels on top of each of the 2 legs so that the top would always lign up correctly if disassembled and reasembled. The stretcher could be removed, but would probably cause some damage to the finish as it was a tight fight when I finished it. The stretcher would be removed by removing the dowel pegs that I fabricated on each leg.

In reply to Disassembly by g82martin
Mon, 05/19/2014 - 08:21
Thanks. I really like the dowel pegs on the legs/stretcher. Very nice top finishing as well. Did you square the boards to get them to be so smooth when joined?
Mon, 05/19/2014 - 08:26
I cheated a bit on the top. My neighbor who got me the wood works in a furniture reupholsery shop. He planed and joined the boards for me, which saved me a good amount of time. I'm confident I could have done this at home with my table saw, miter saw and hand plane, but what he did in 2 hours probably would have taken me 10.
Fri, 08/05/2016 - 20:35
Love the dowels you added! Planning on building this exact table pretty close to your dimensions and have a very long church pew as well! Trying to decide between L-ing my pew and cutting to straigjy 6'. Do you mind sharing the dimensions of your pew? And how did you miter the pew?
Tue, 01/21/2020 - 09:40
Beautiful table. I love the pegs added to the legs and stretcher, they add a historic detail lost in a lot of today's building techniques
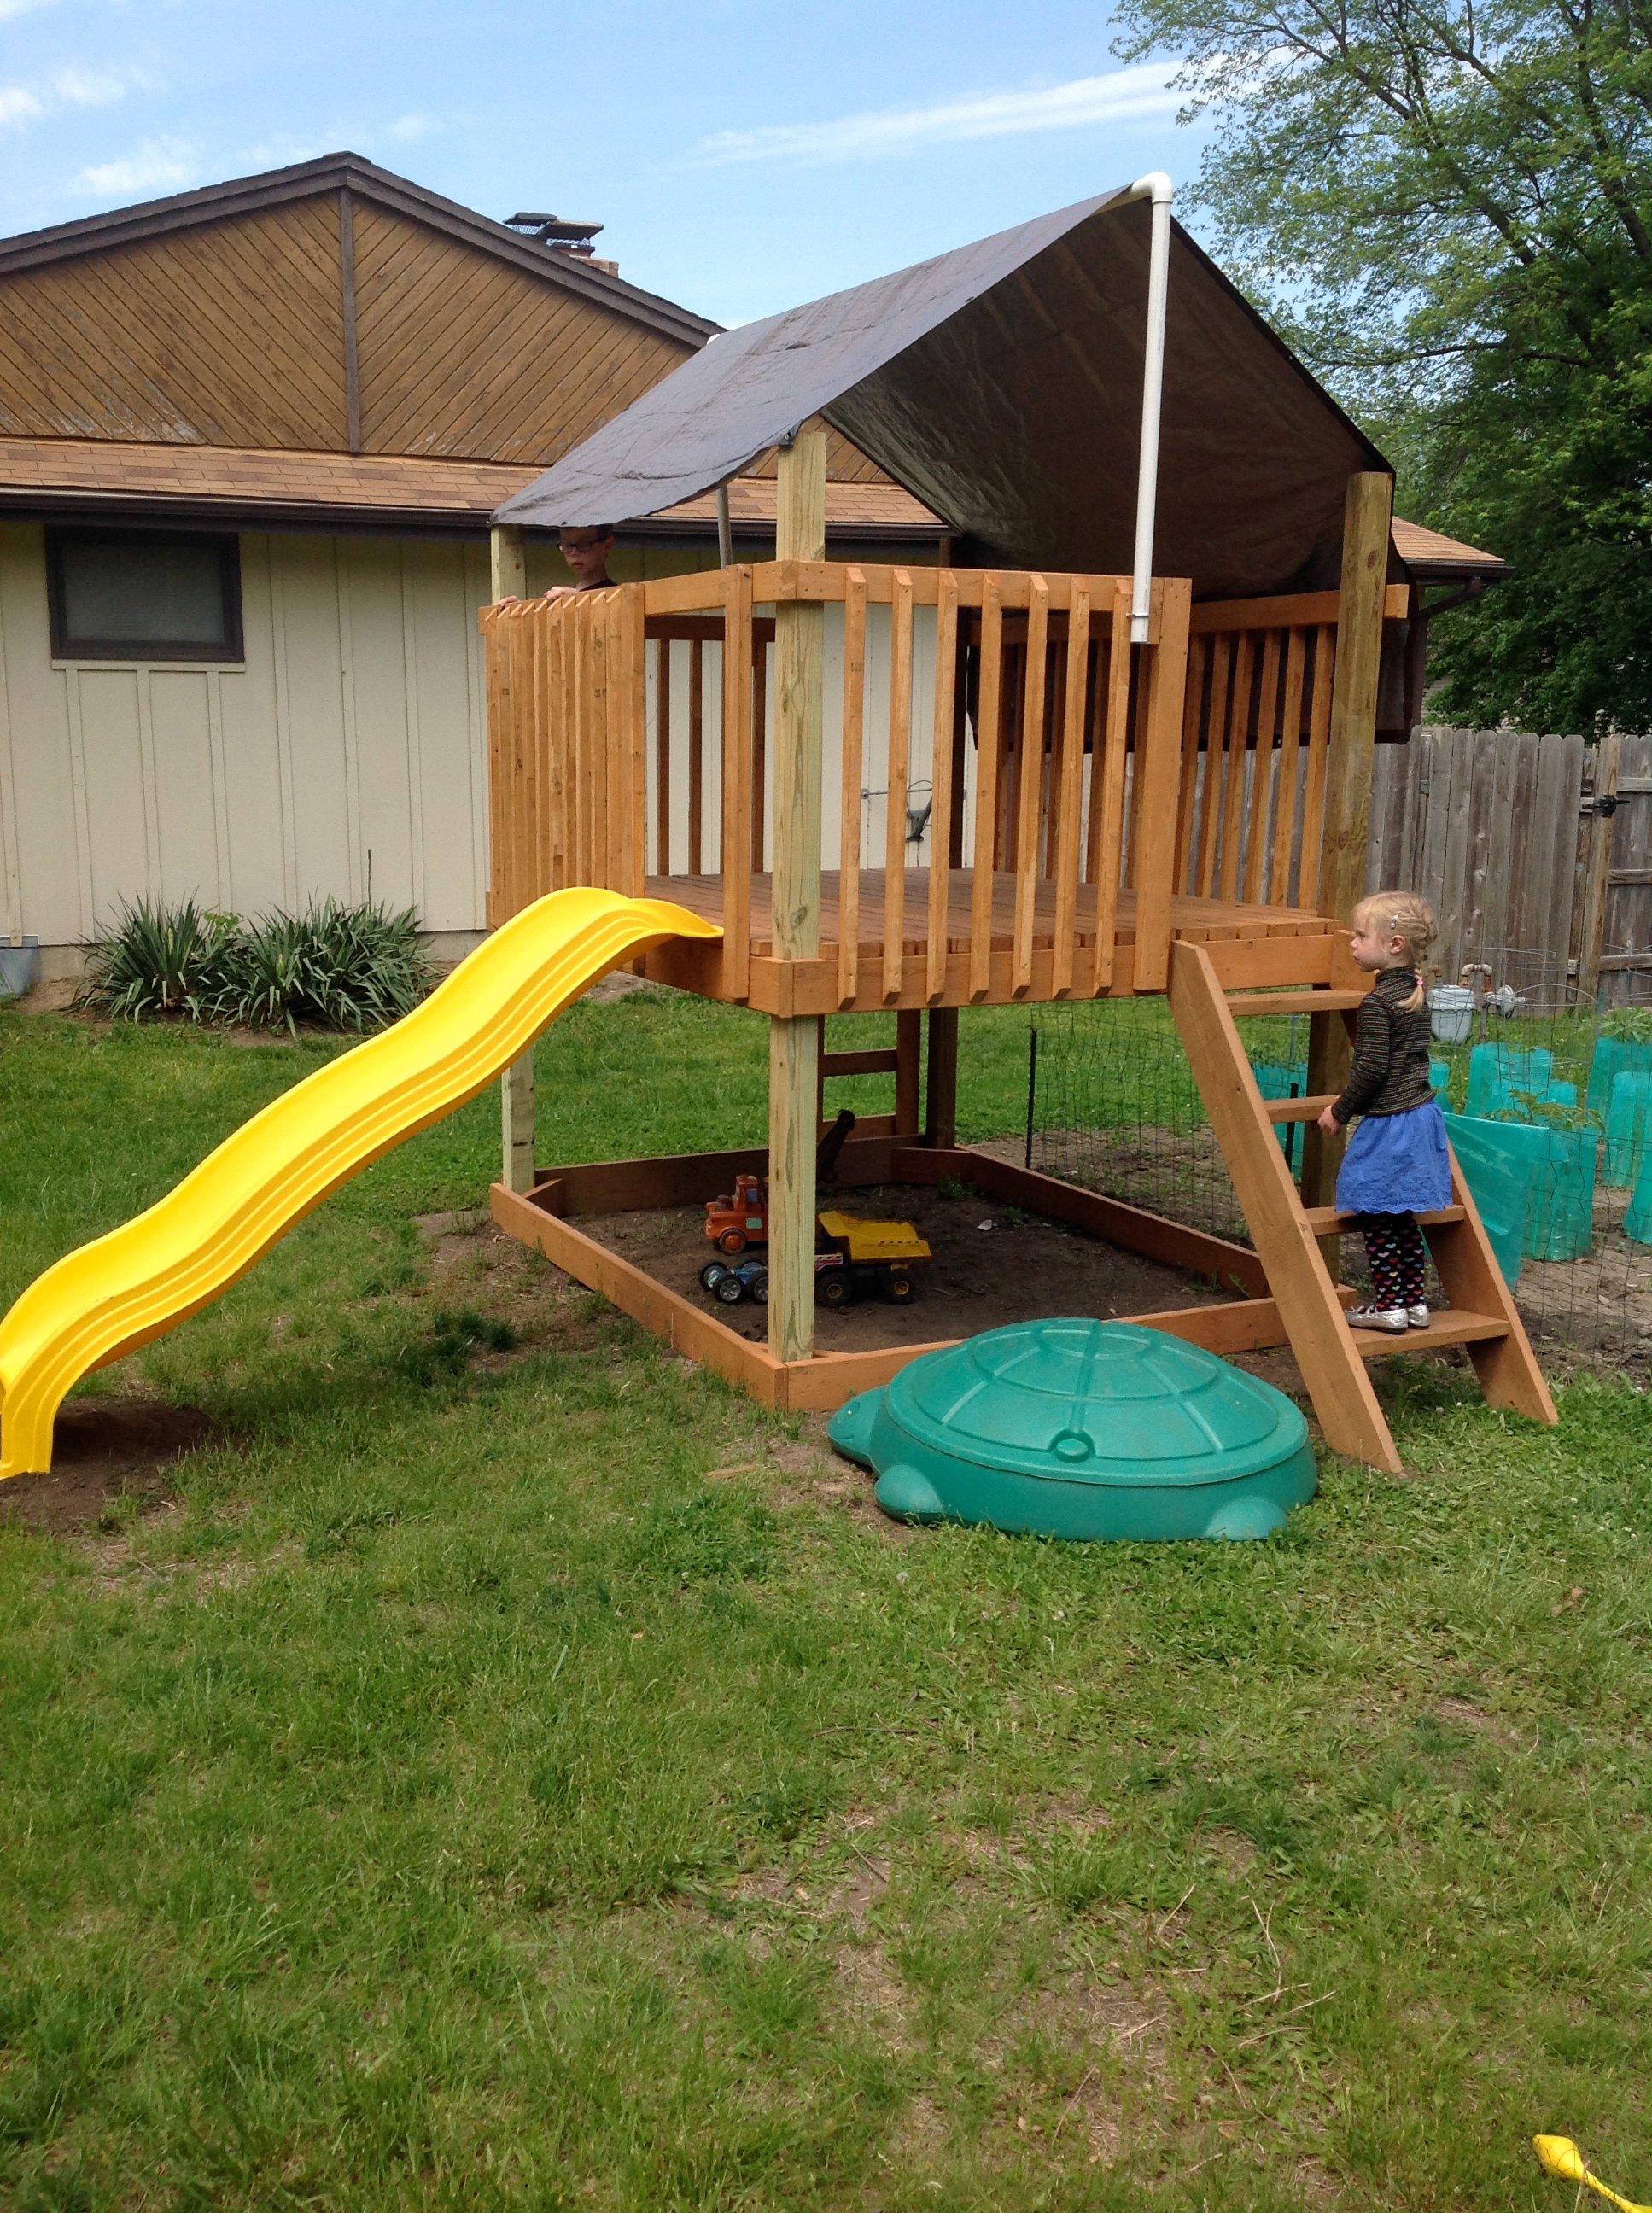
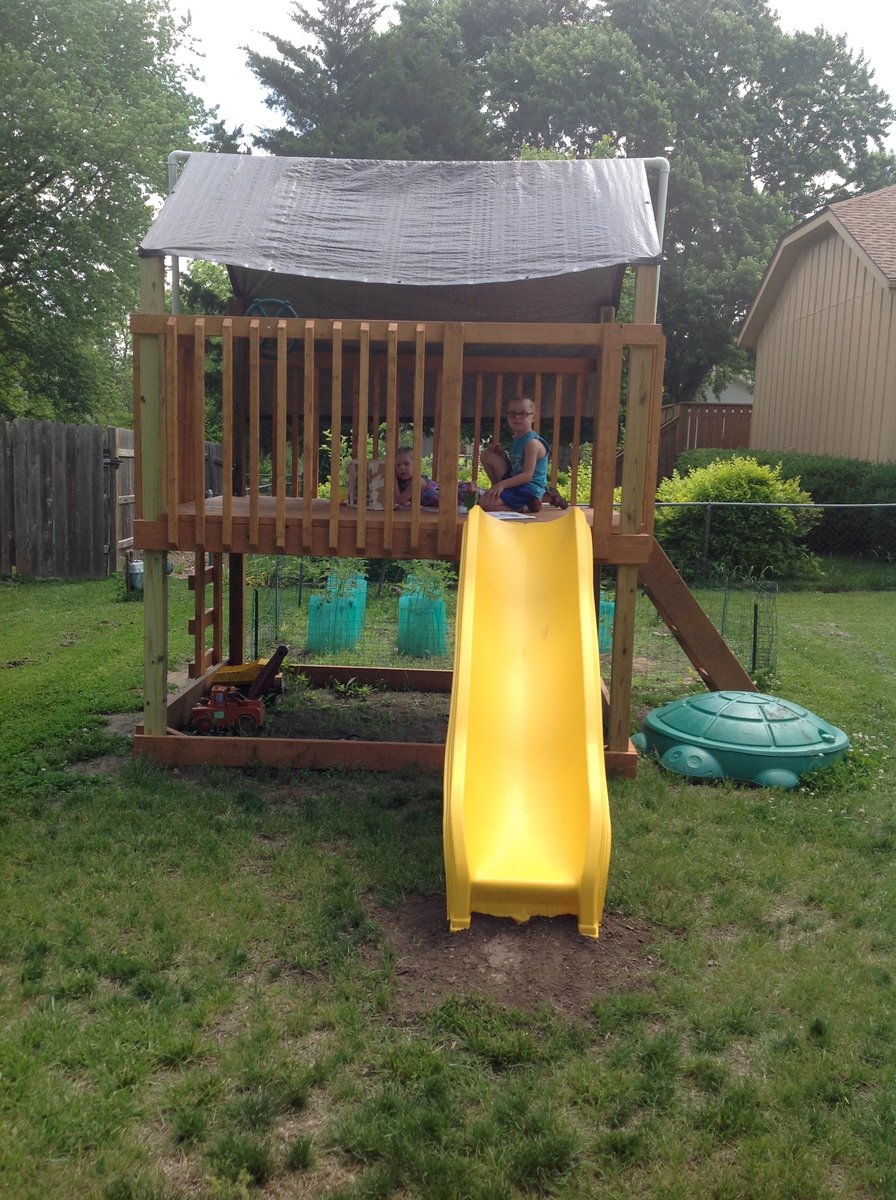
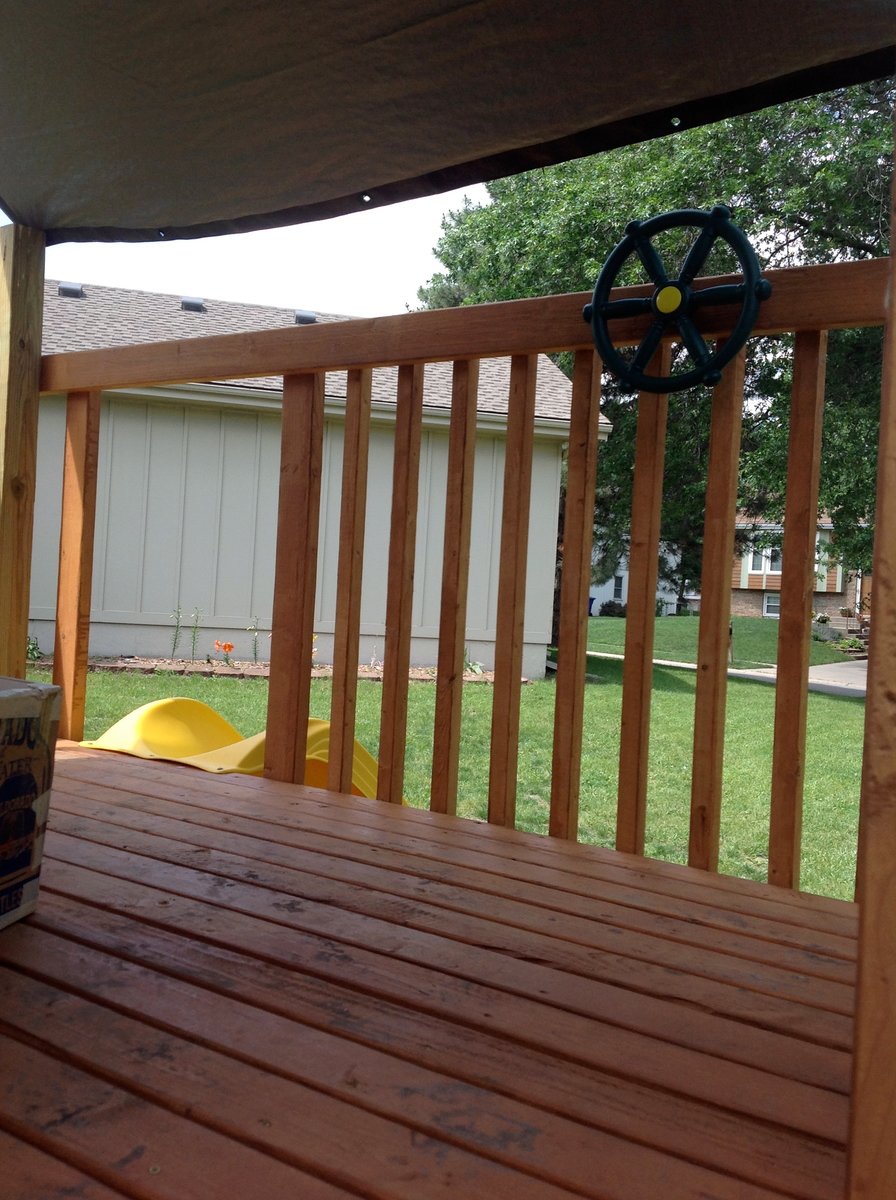
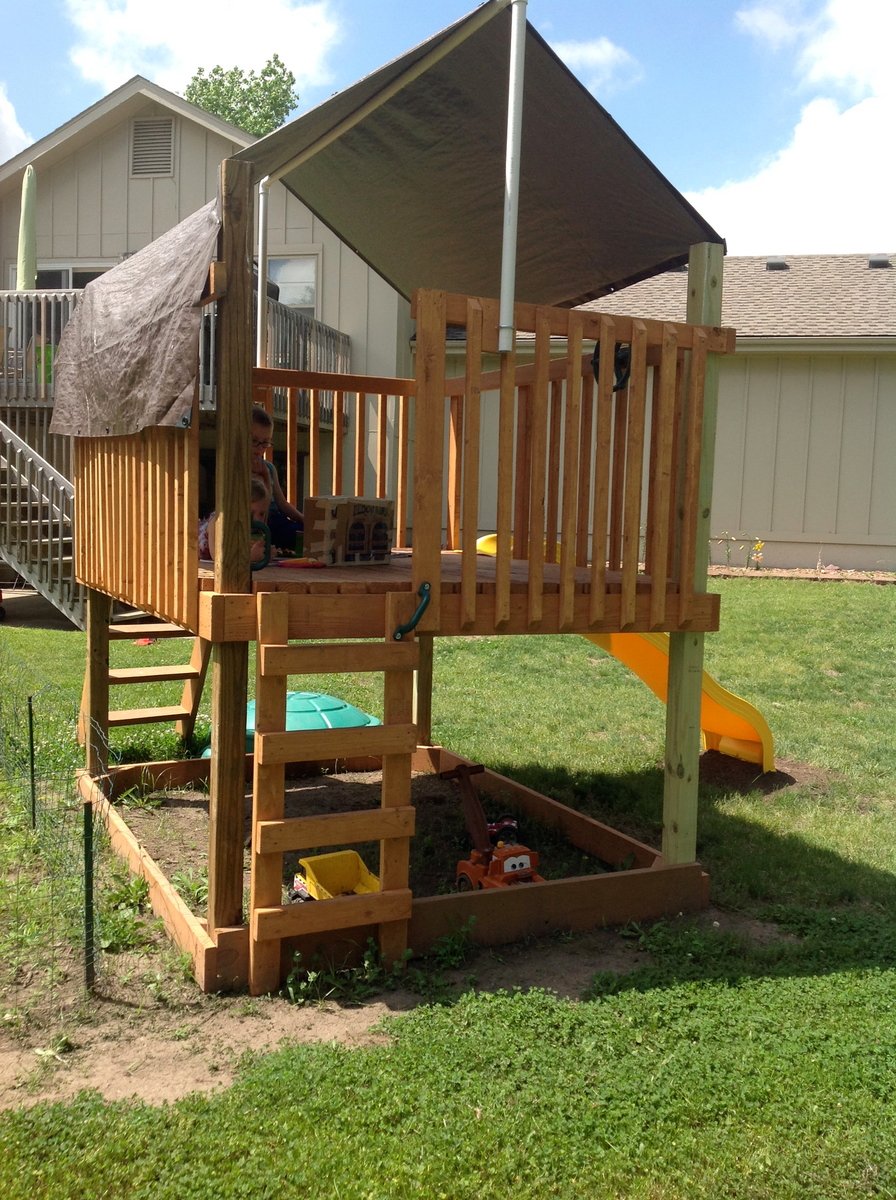
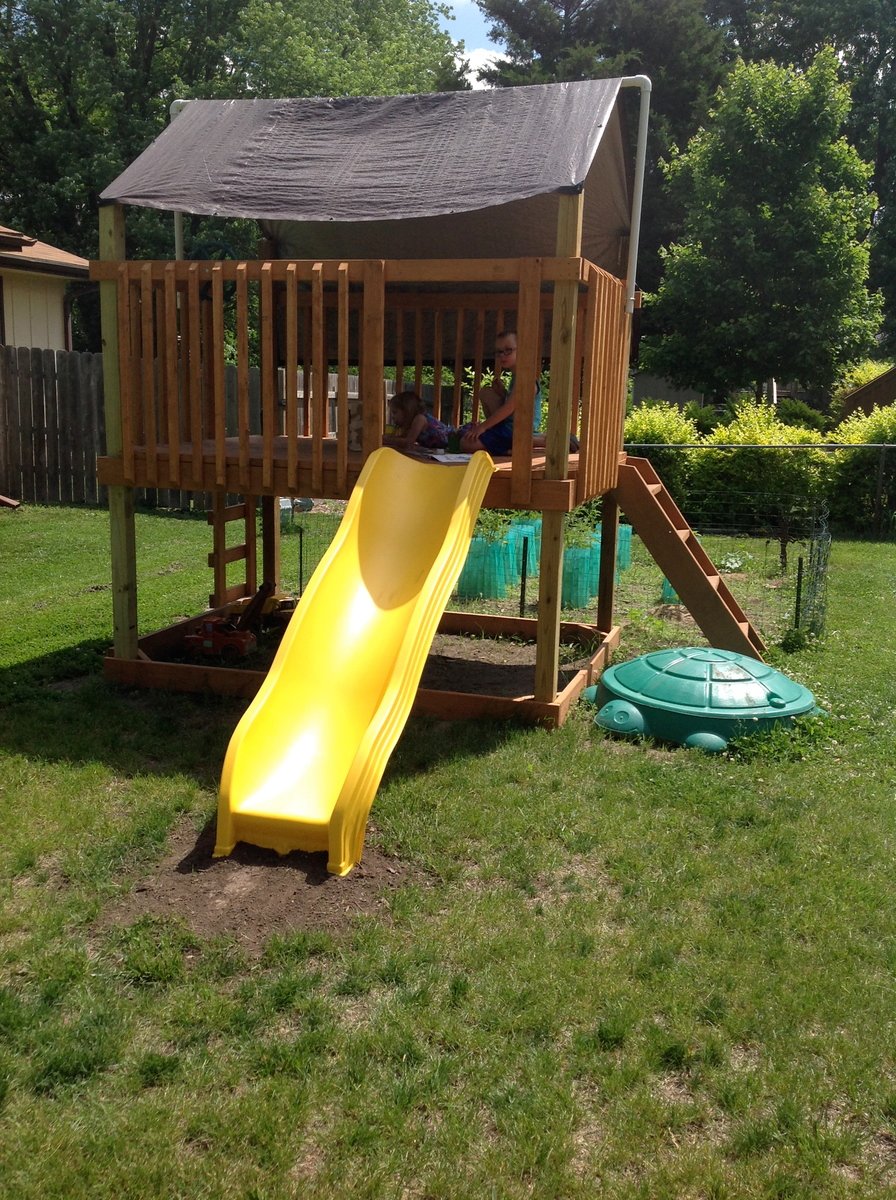
I wanted to build a structure for the kids to play in, but not include a playhouse. I used the playhouse deck design and made it slightly smaller (6 feet by 8 feet). The "roof" is removable to provide shade when it's sunny. It's just PVC and a tarp - pretty simple, but it does the job. I used treated posts and untreated lumber for the rest of it. I painted everything in my garage before assembling it. Once all of the wood at been painted, but came together pretty quickly!
Part of a huge order I did for outdoor furniture. Love how they turned out! Thank you!
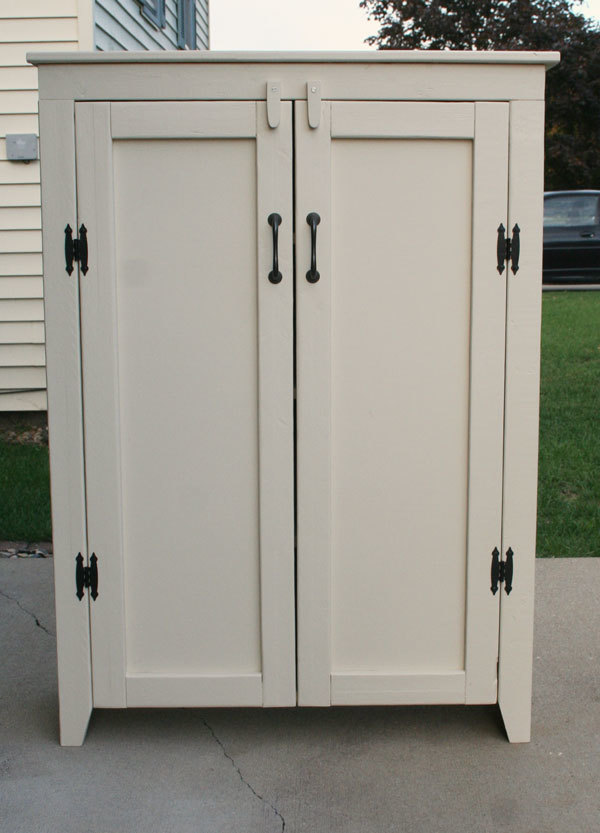
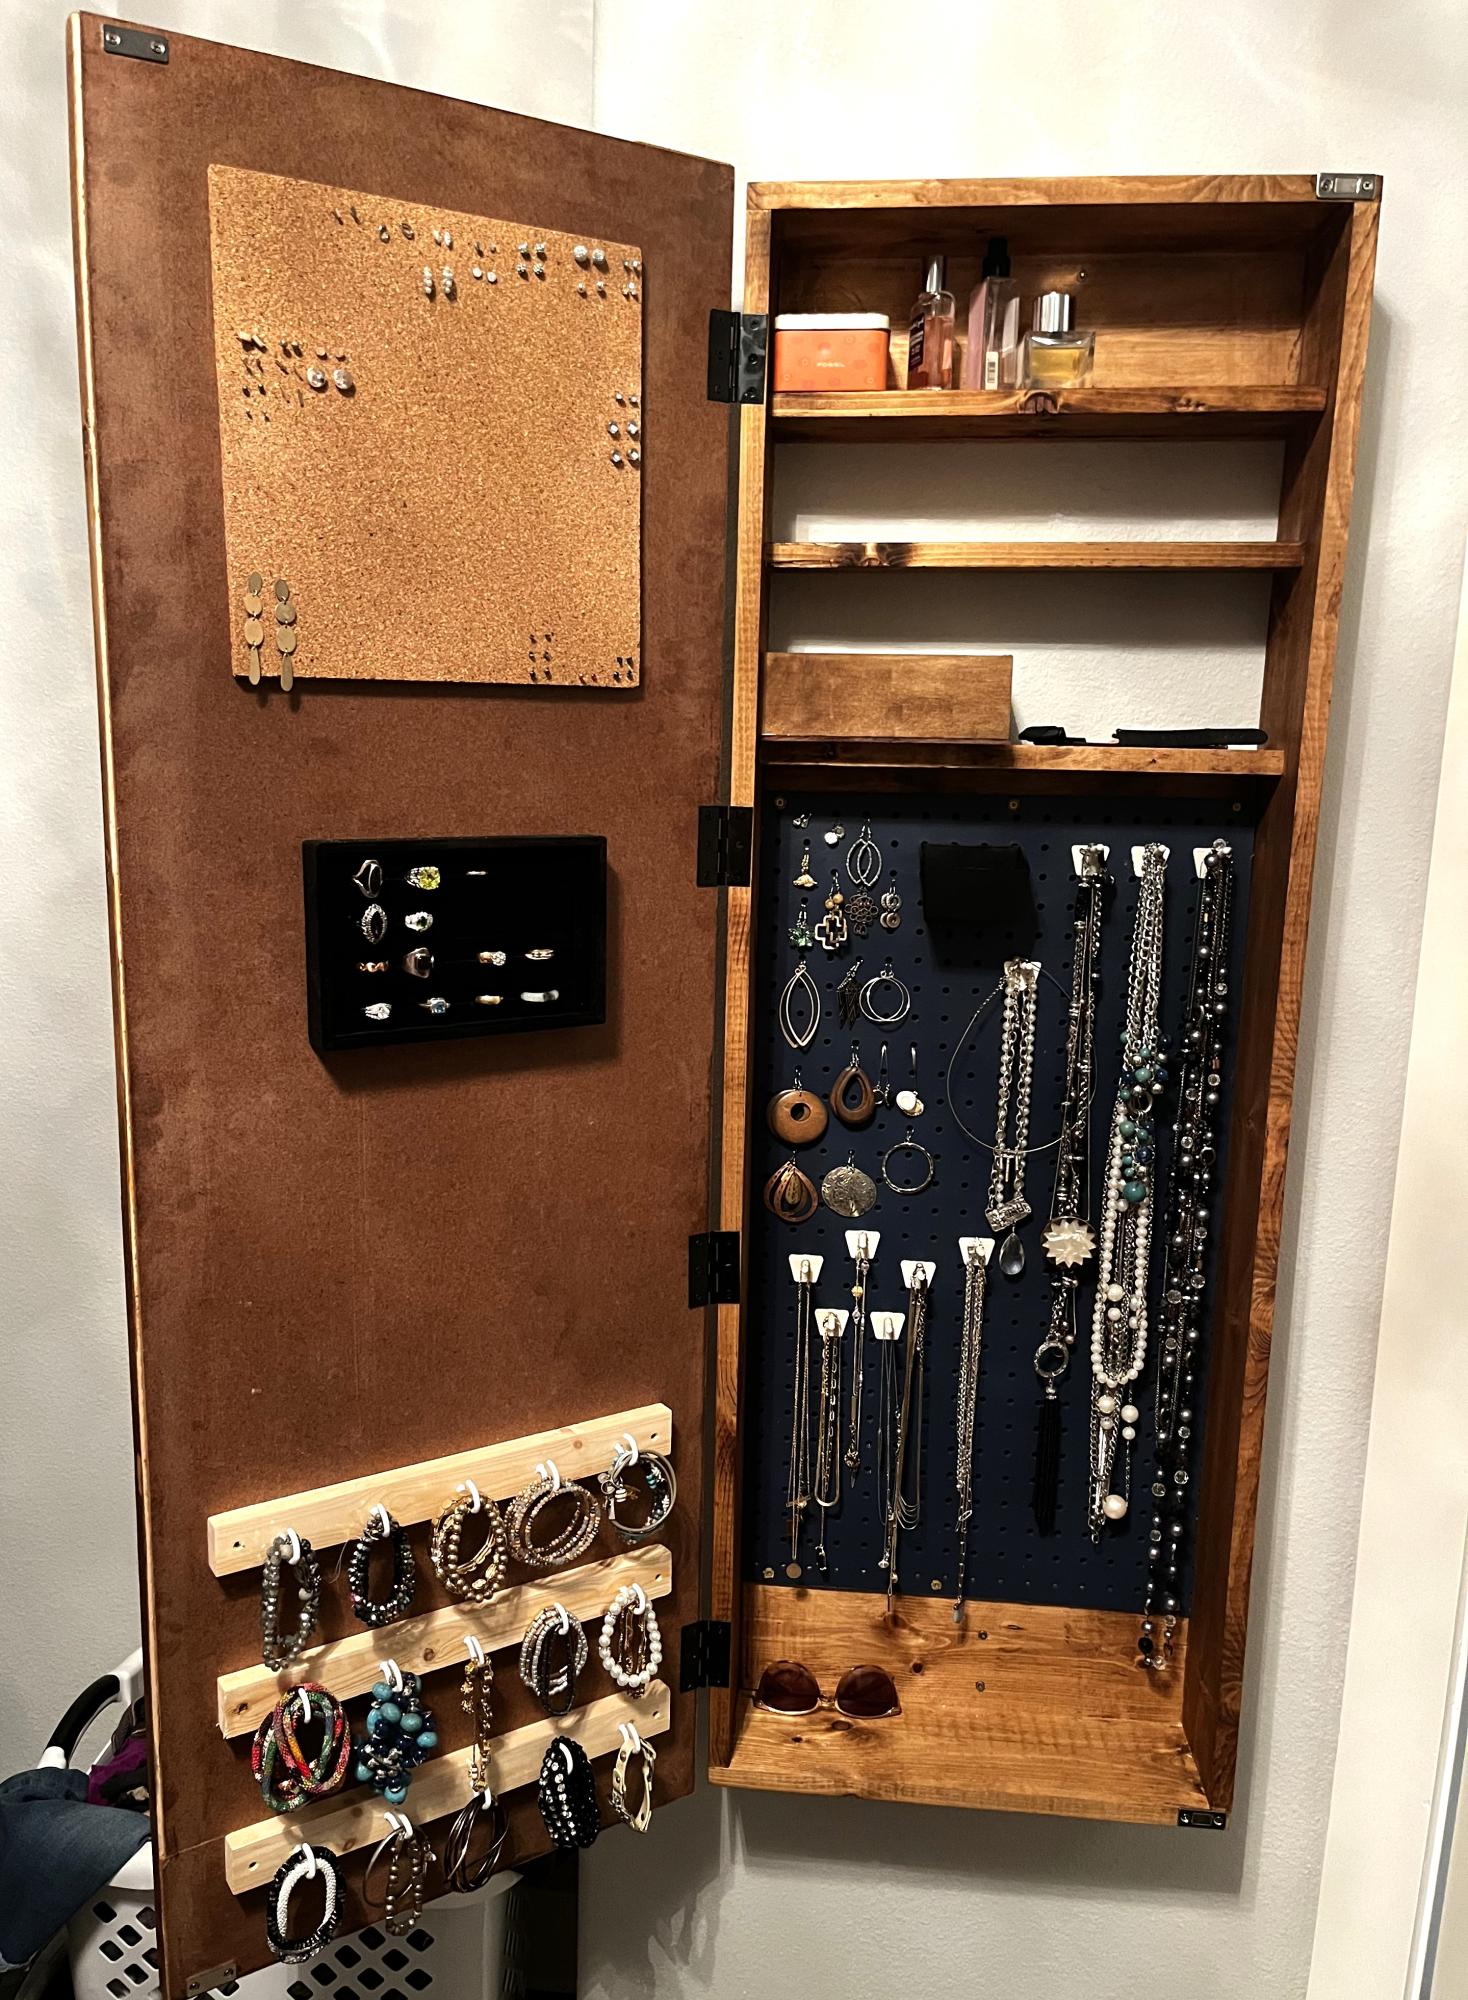
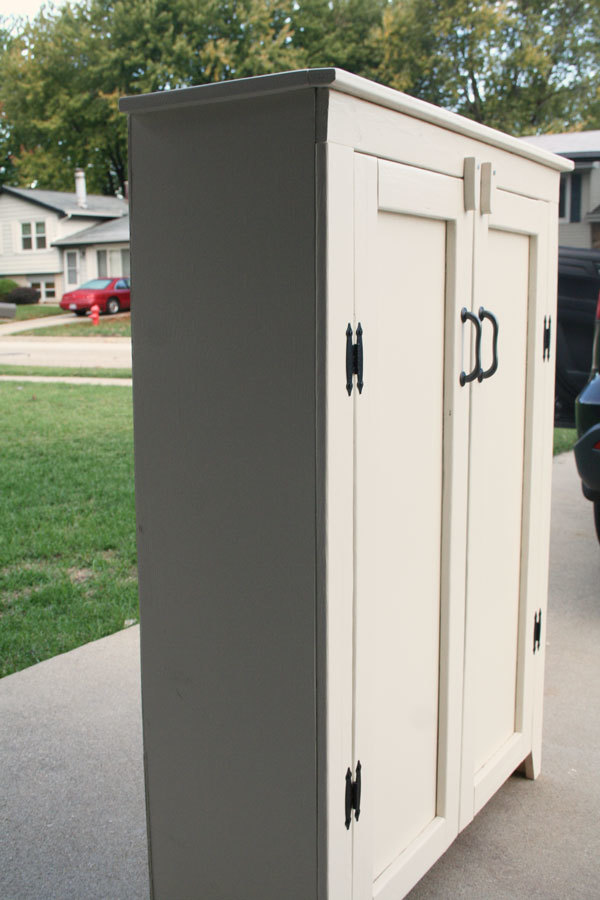
This project was built by my husband, for our daughter who needed some storage for her card-making and scrapbooking supplies. I had the easy part of doing the painting and purchasing the hardware. The hinges and handles are from Home Depot. It is a challenge to find good lumber at our big box stores. That was probably the most difficult part of the build...dealing with warped wood. This piece is suited for the primitive and rustic look so it didn't matter that the wood had some dings and splintering from the edges. Everything was sanded well and these marks just added to the character. He did encounter some problems with drilling the 1 and 1/4" kreg screws into the frame of the door. The wood wanted to split. Also, the plans called for magnetic closures but we could not determine how those would be installed as the shelves do not reach to the doors. So we cut some wooden swinging closures and attached them to the top of the cabinet. They seem to work well. One modification if he builds this again (and our other daughters are now putting in their orders!) would be to add a wooden support down the center front so that the doors would have something to close against. The way it is now, the doors could be pushed inward and put a lot of stress on the hinges. We were very pleased at how this project turned out! Thank you for the plans.

Tue, 10/09/2012 - 13:20
I like the way that came out and I agree its hard to get good wood at the big box stores it took me a while to go through the stacks they had there to find straight pieces. The other thing I had an issue with was the 1 1/4"
Kreg screws as well but if you dont over drive them it generally will not crack the wood. Just be gentle and if it still does turn the clutch down on the drill that will help as well.
Thu, 10/11/2012 - 18:11
Lawson4450,
Thank you for your comment, and for the advice on the Kreg screws!
We are in the process of cleaning up our garage, so that future building projects are easier to do! One thing my husband also built was a small workbench, with a lower shelf to store the Kreg jig, screws, etc on. It comes in handy as we always know where to at least find the Kreg stuff! We should also keep some notes on the shelf, too, to refer to when the wood cracks, etc.
-Ann
Wed, 10/10/2012 - 10:37
You could solve the door not reaching the shelves problem by installing the magnetic closures on the underside of the top piece so it would also act as a stopper for the doors so they don't swing to the inside. I think that's what Ana meant in the plans. Kinda like this:
Thu, 10/11/2012 - 18:04
Aisha,
Thank you for the photo of the magnetic closure. That makes a lot of sense! We could still add those, and also leave the swinging locks in place, too.
-Ann
Sat, 10/13/2012 - 10:43
I am the lucky receiver of this jelly cabinet. It is exactly what I had in mind when I was on the hunt for one. I was so pleasantly surprised when my parents came to visit and showed me my early birthday present in their trunk! :)
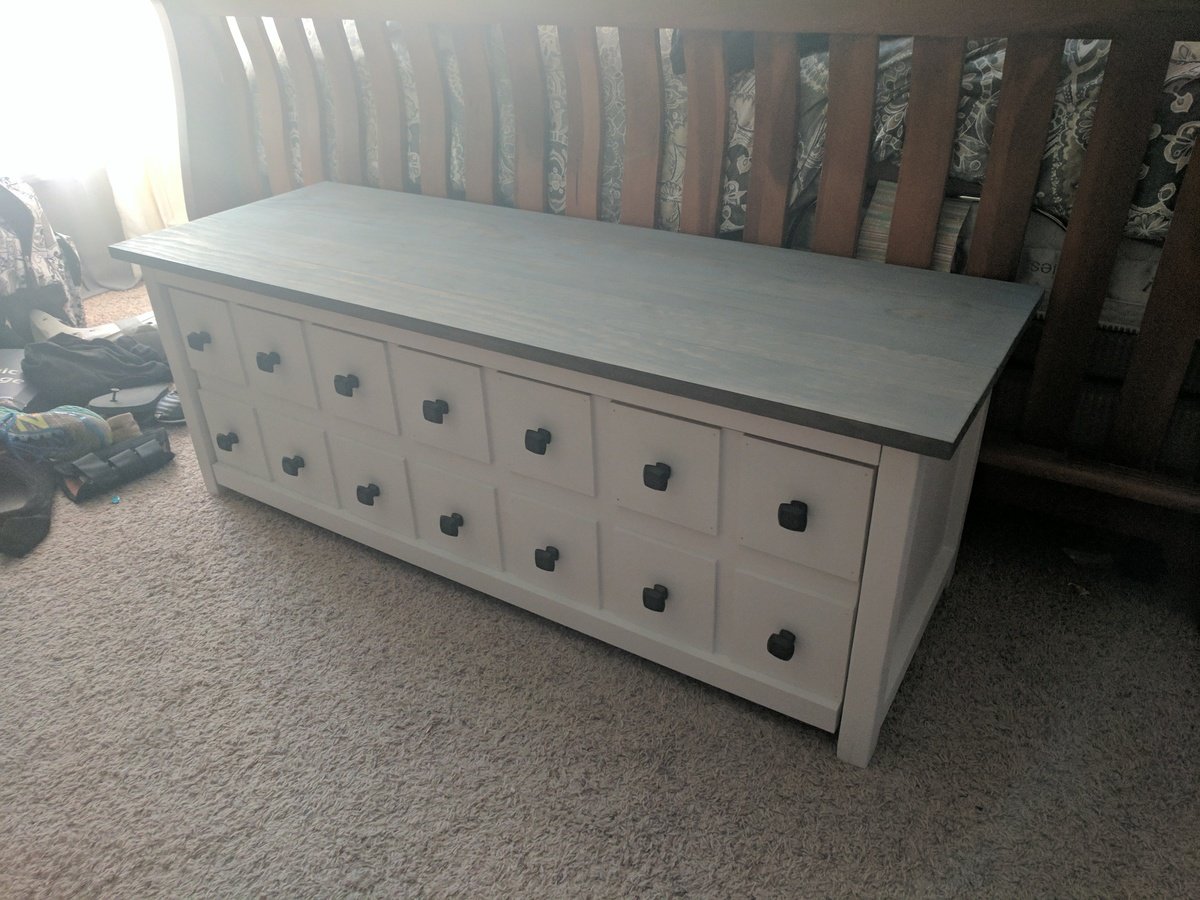
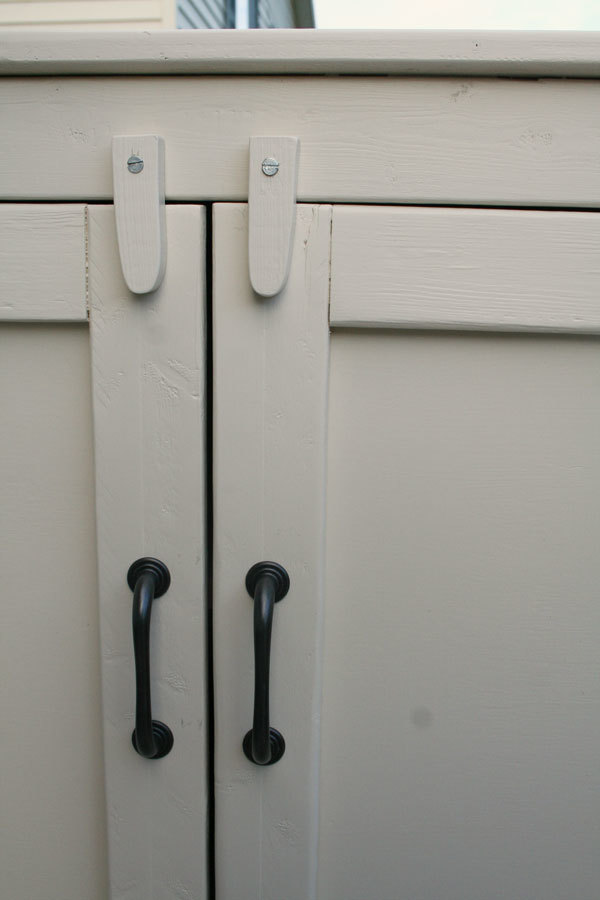
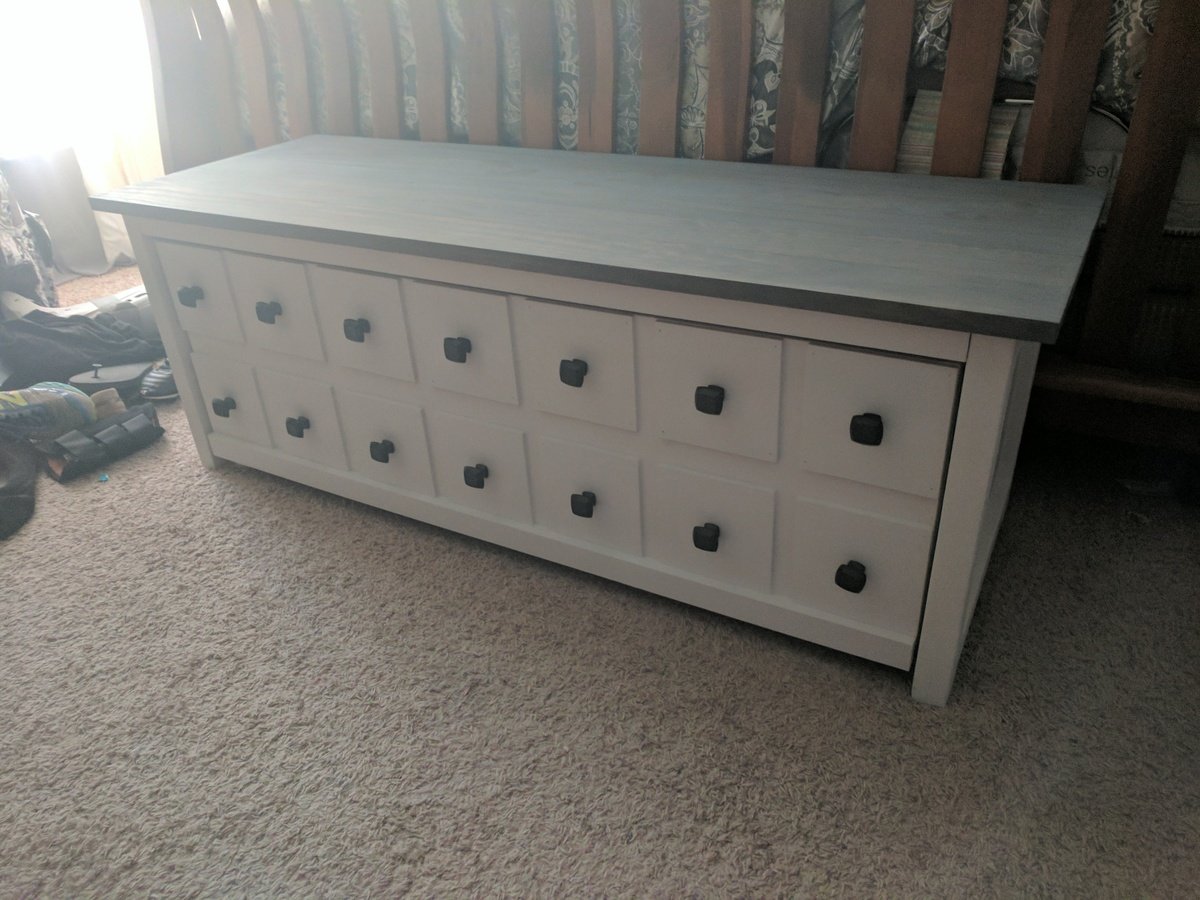
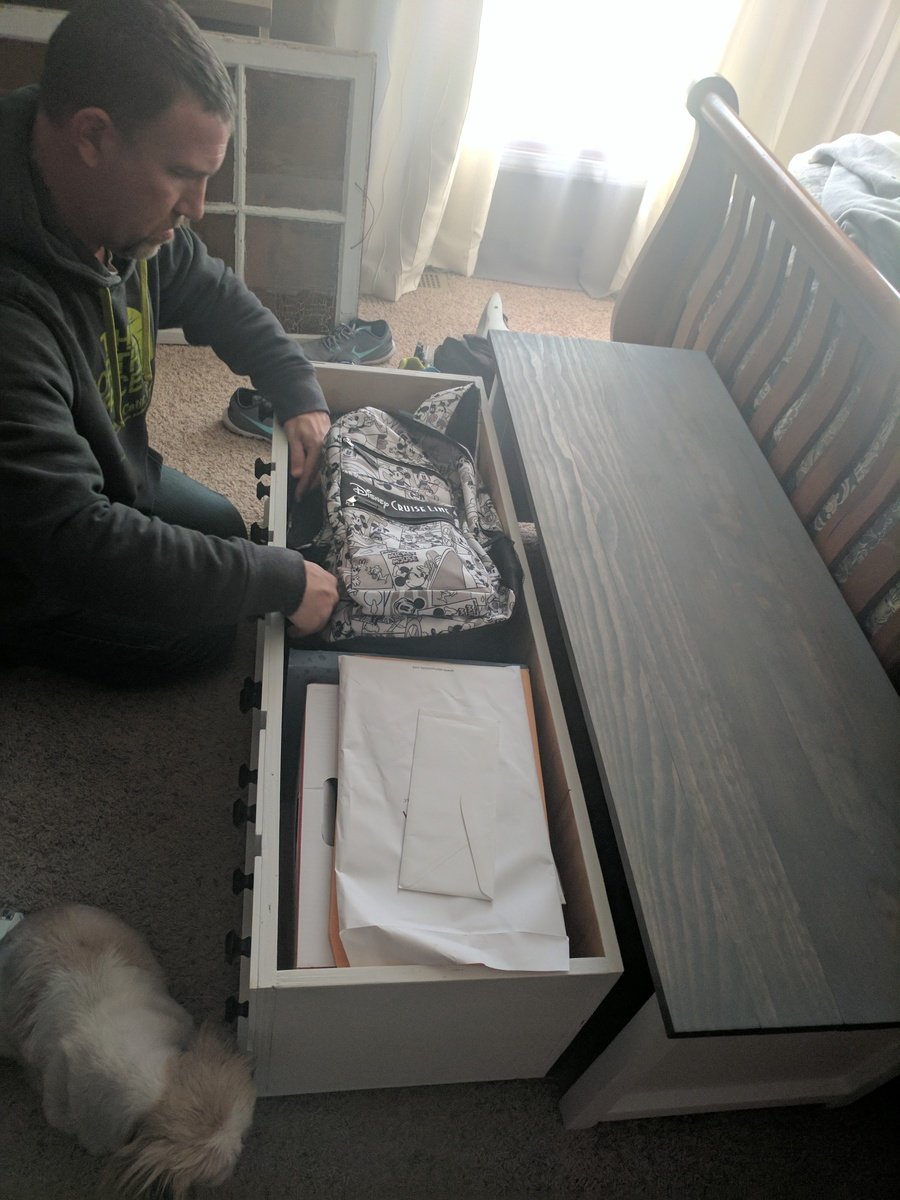
I changed up the dimensions to make a storage bench for the end of our bed. I wanted something different and couldn't be happier with the way it turned out. I stained it with weathered grey, then a coat of golden oak and then another of weathered grey. And painted the box with linen white chalk paint. I love the black knobs with the grey and white!
I only used 2x2s for the legs. I made the seat frame from 1x2s because of the warping I. The 2x2s. It made my life so much easier!

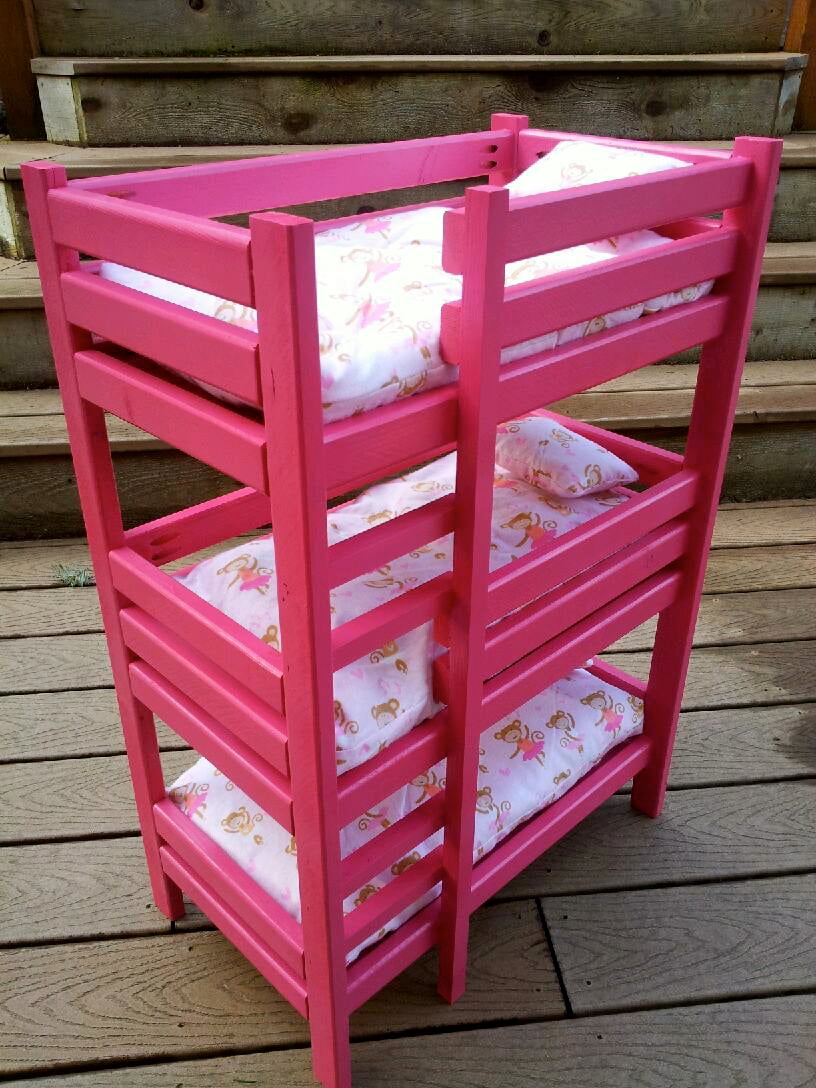
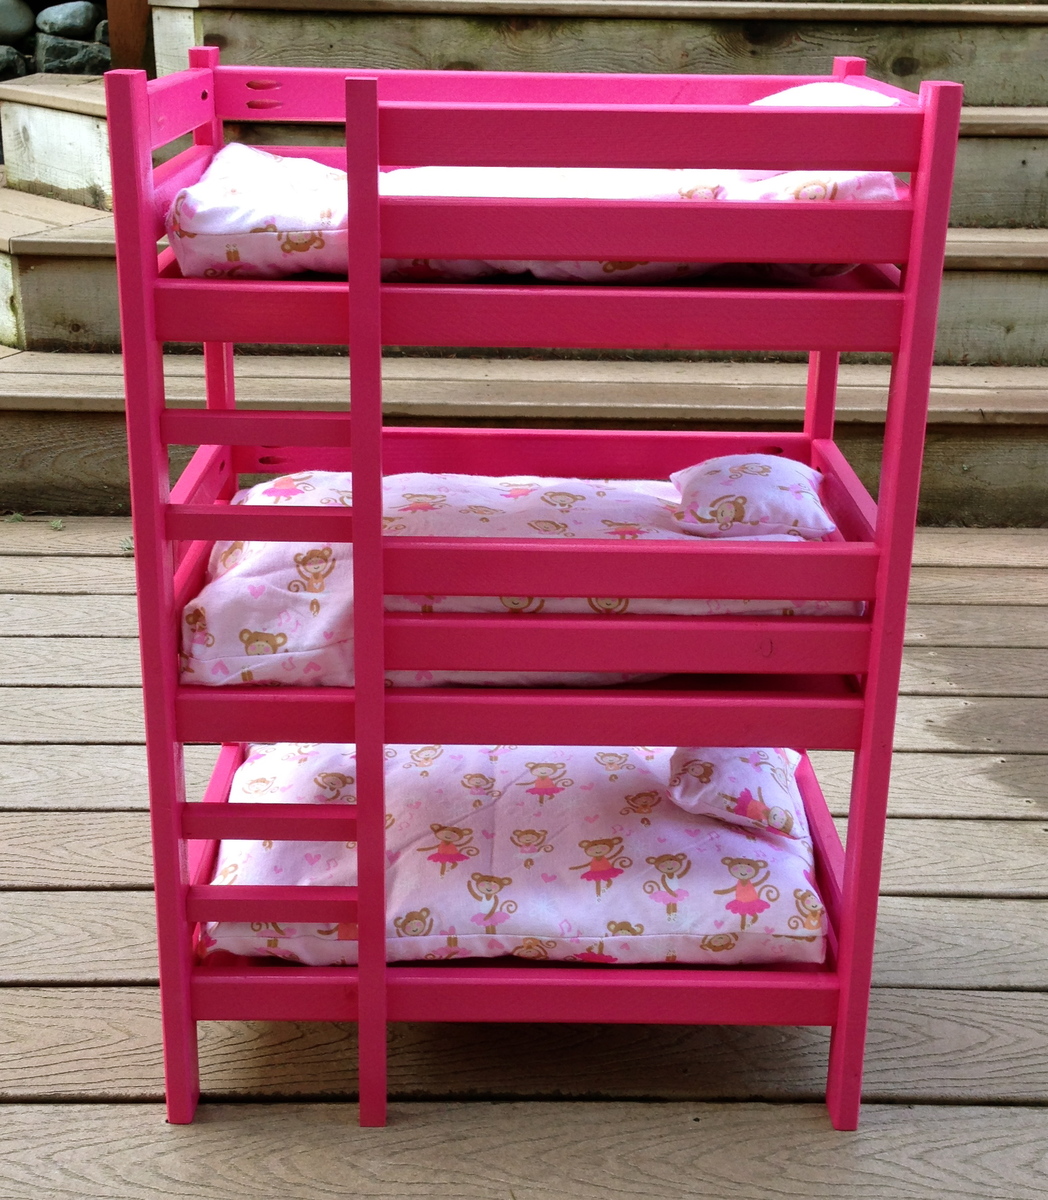
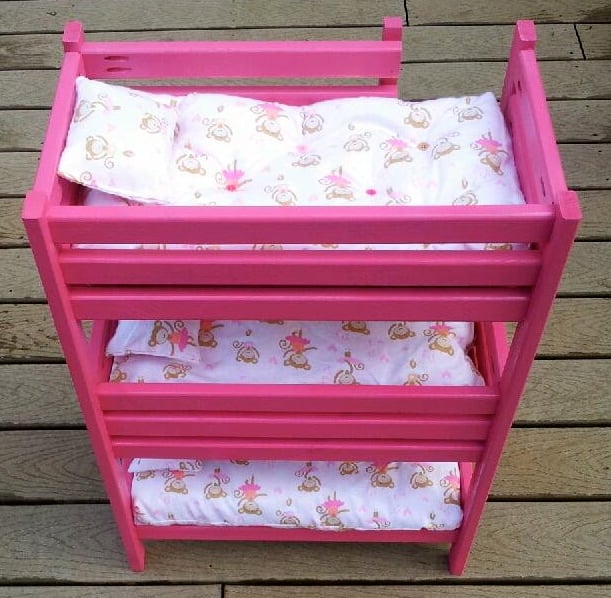
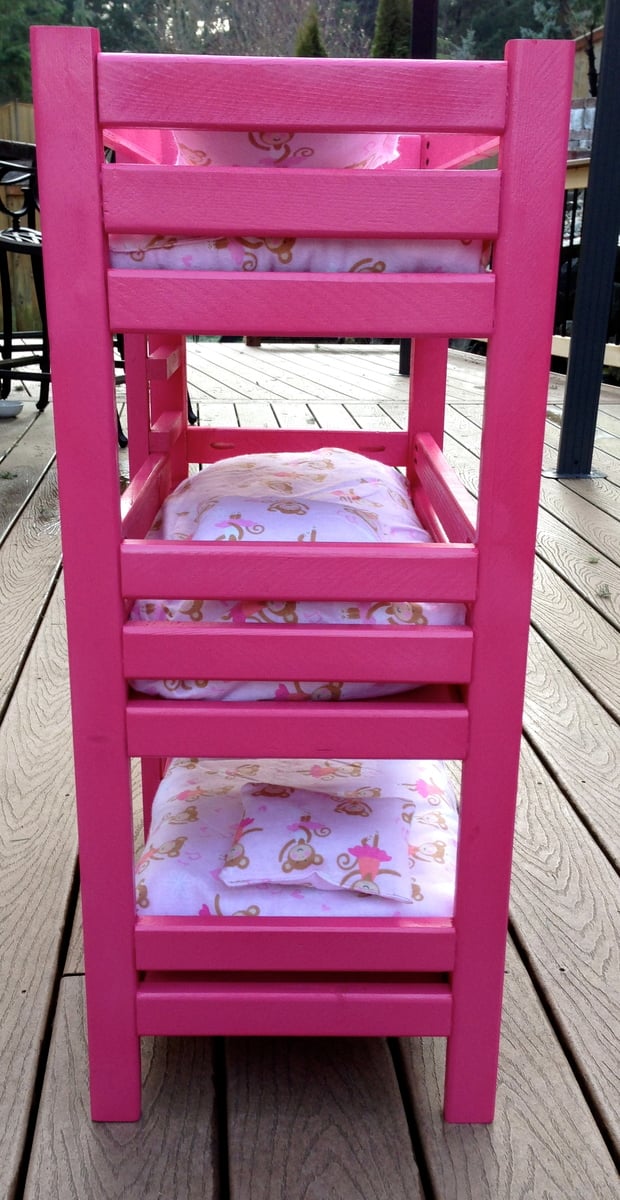
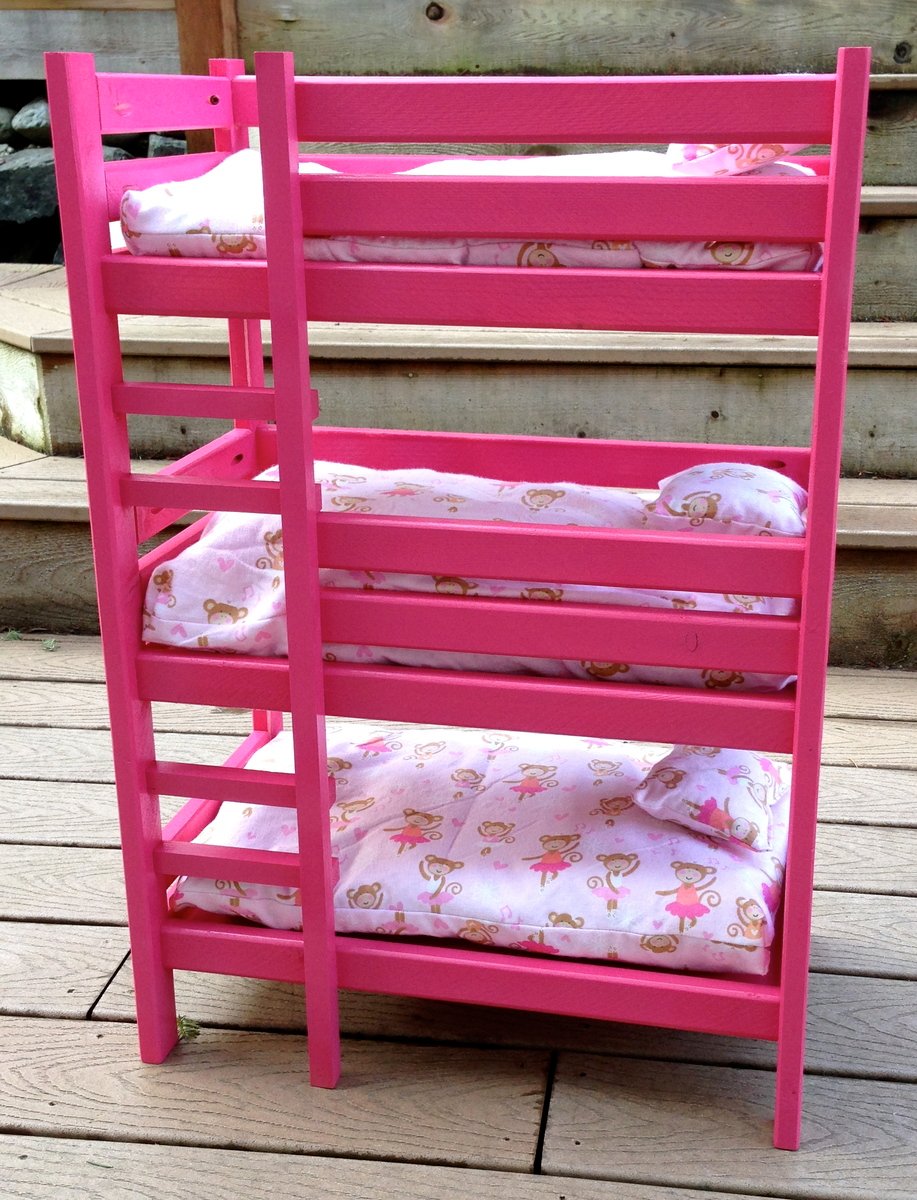
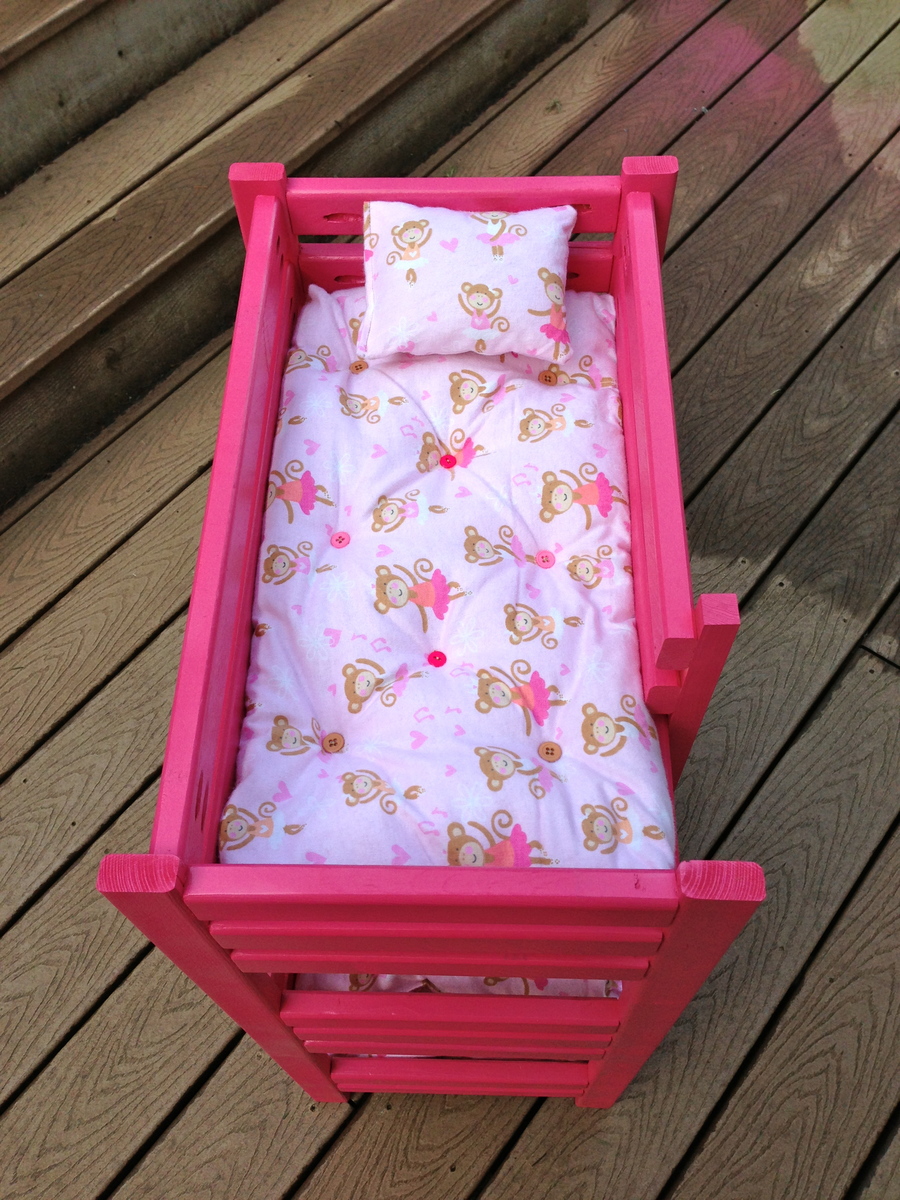
My friend's 7 year old daughter custom ordered this bunk bed! She asked for a bunk bed for her 3 dolls and she even picked the color! I had a lot of fun building it and learned a lot in the process. As usual, finishing took longest. Lucky for me, my hubby likes spray painting :-)
Wed, 02/17/2016 - 17:41
Can you please post the plans for this bunk bed. I want to make it for my daughter to play with her dolls with.
Thank you
Brett
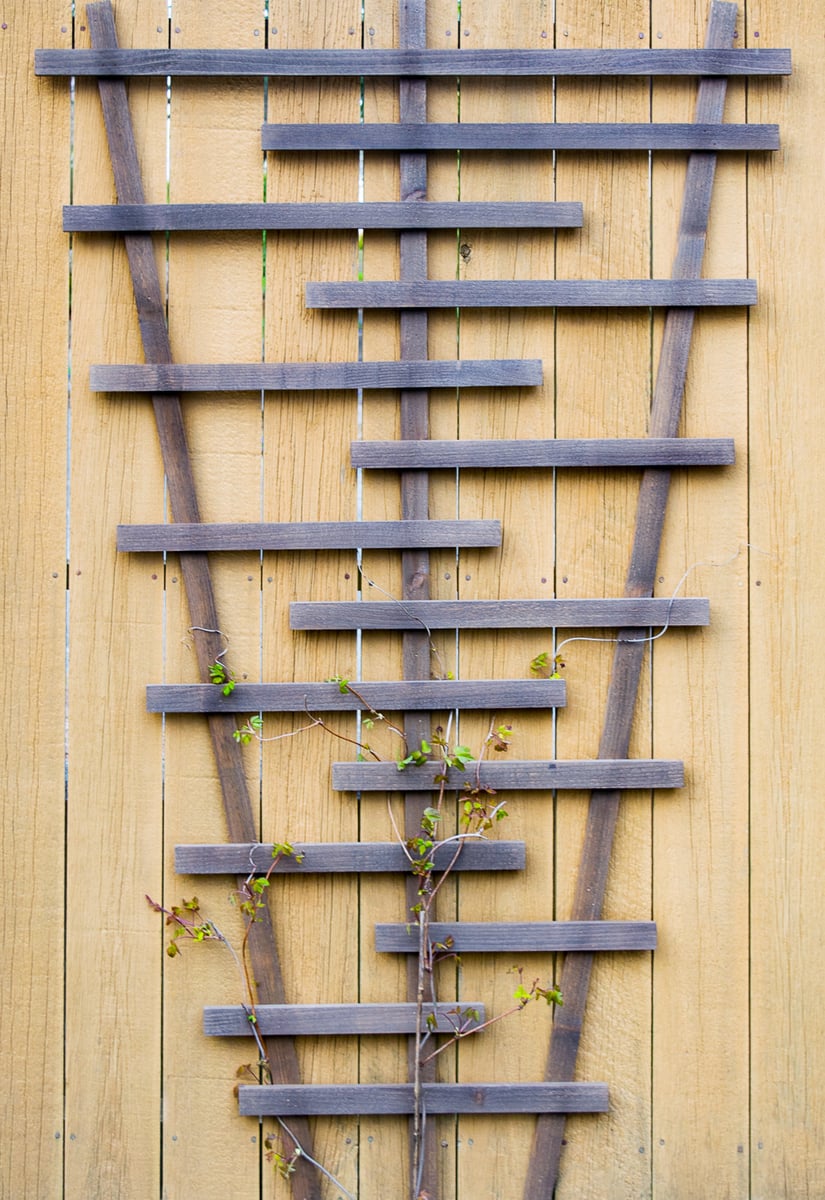
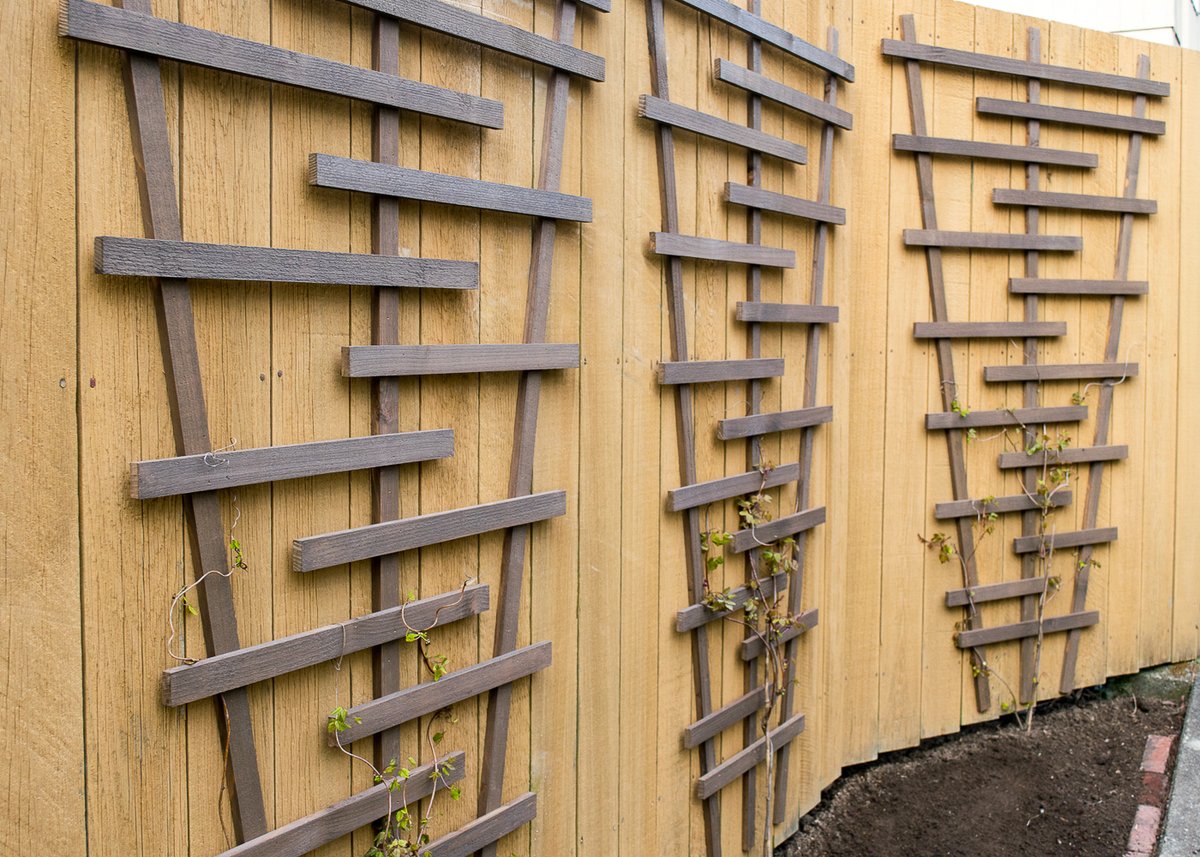
I made this garden trellis with cheap 6' cedar fence pickets ripped down to 1 1/2" strips. Get the free plans and tutorial at The Handyman's Daughter!
I made this for a friend! She has cubbies on all four corners.
Such a great, simple project! Thanks for the plans Ana! I'm doing my best to send people your way via my blog, iliketomakestuff.com

Tue, 03/12/2013 - 22:56
I made Ana's coat tree recently as well, but I painted mine white. I love that high gloss red that you used! It turns your coat tree into an accent piece. :)