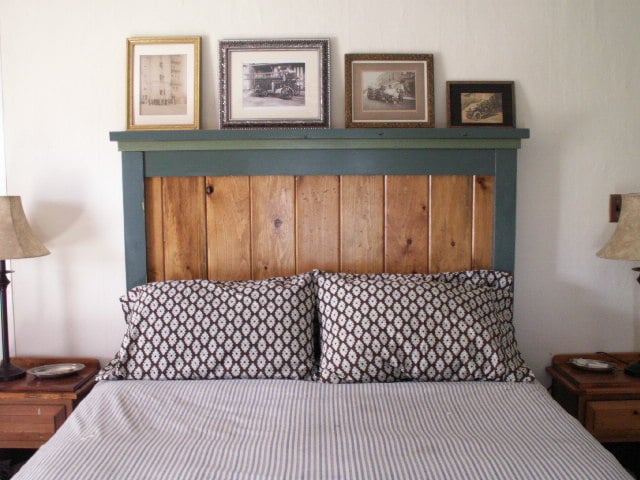
Community Brag Posts

King Farmhouse Bed

Submitted by Webbuzzard on Tue, 01/22/2019 - 15:44

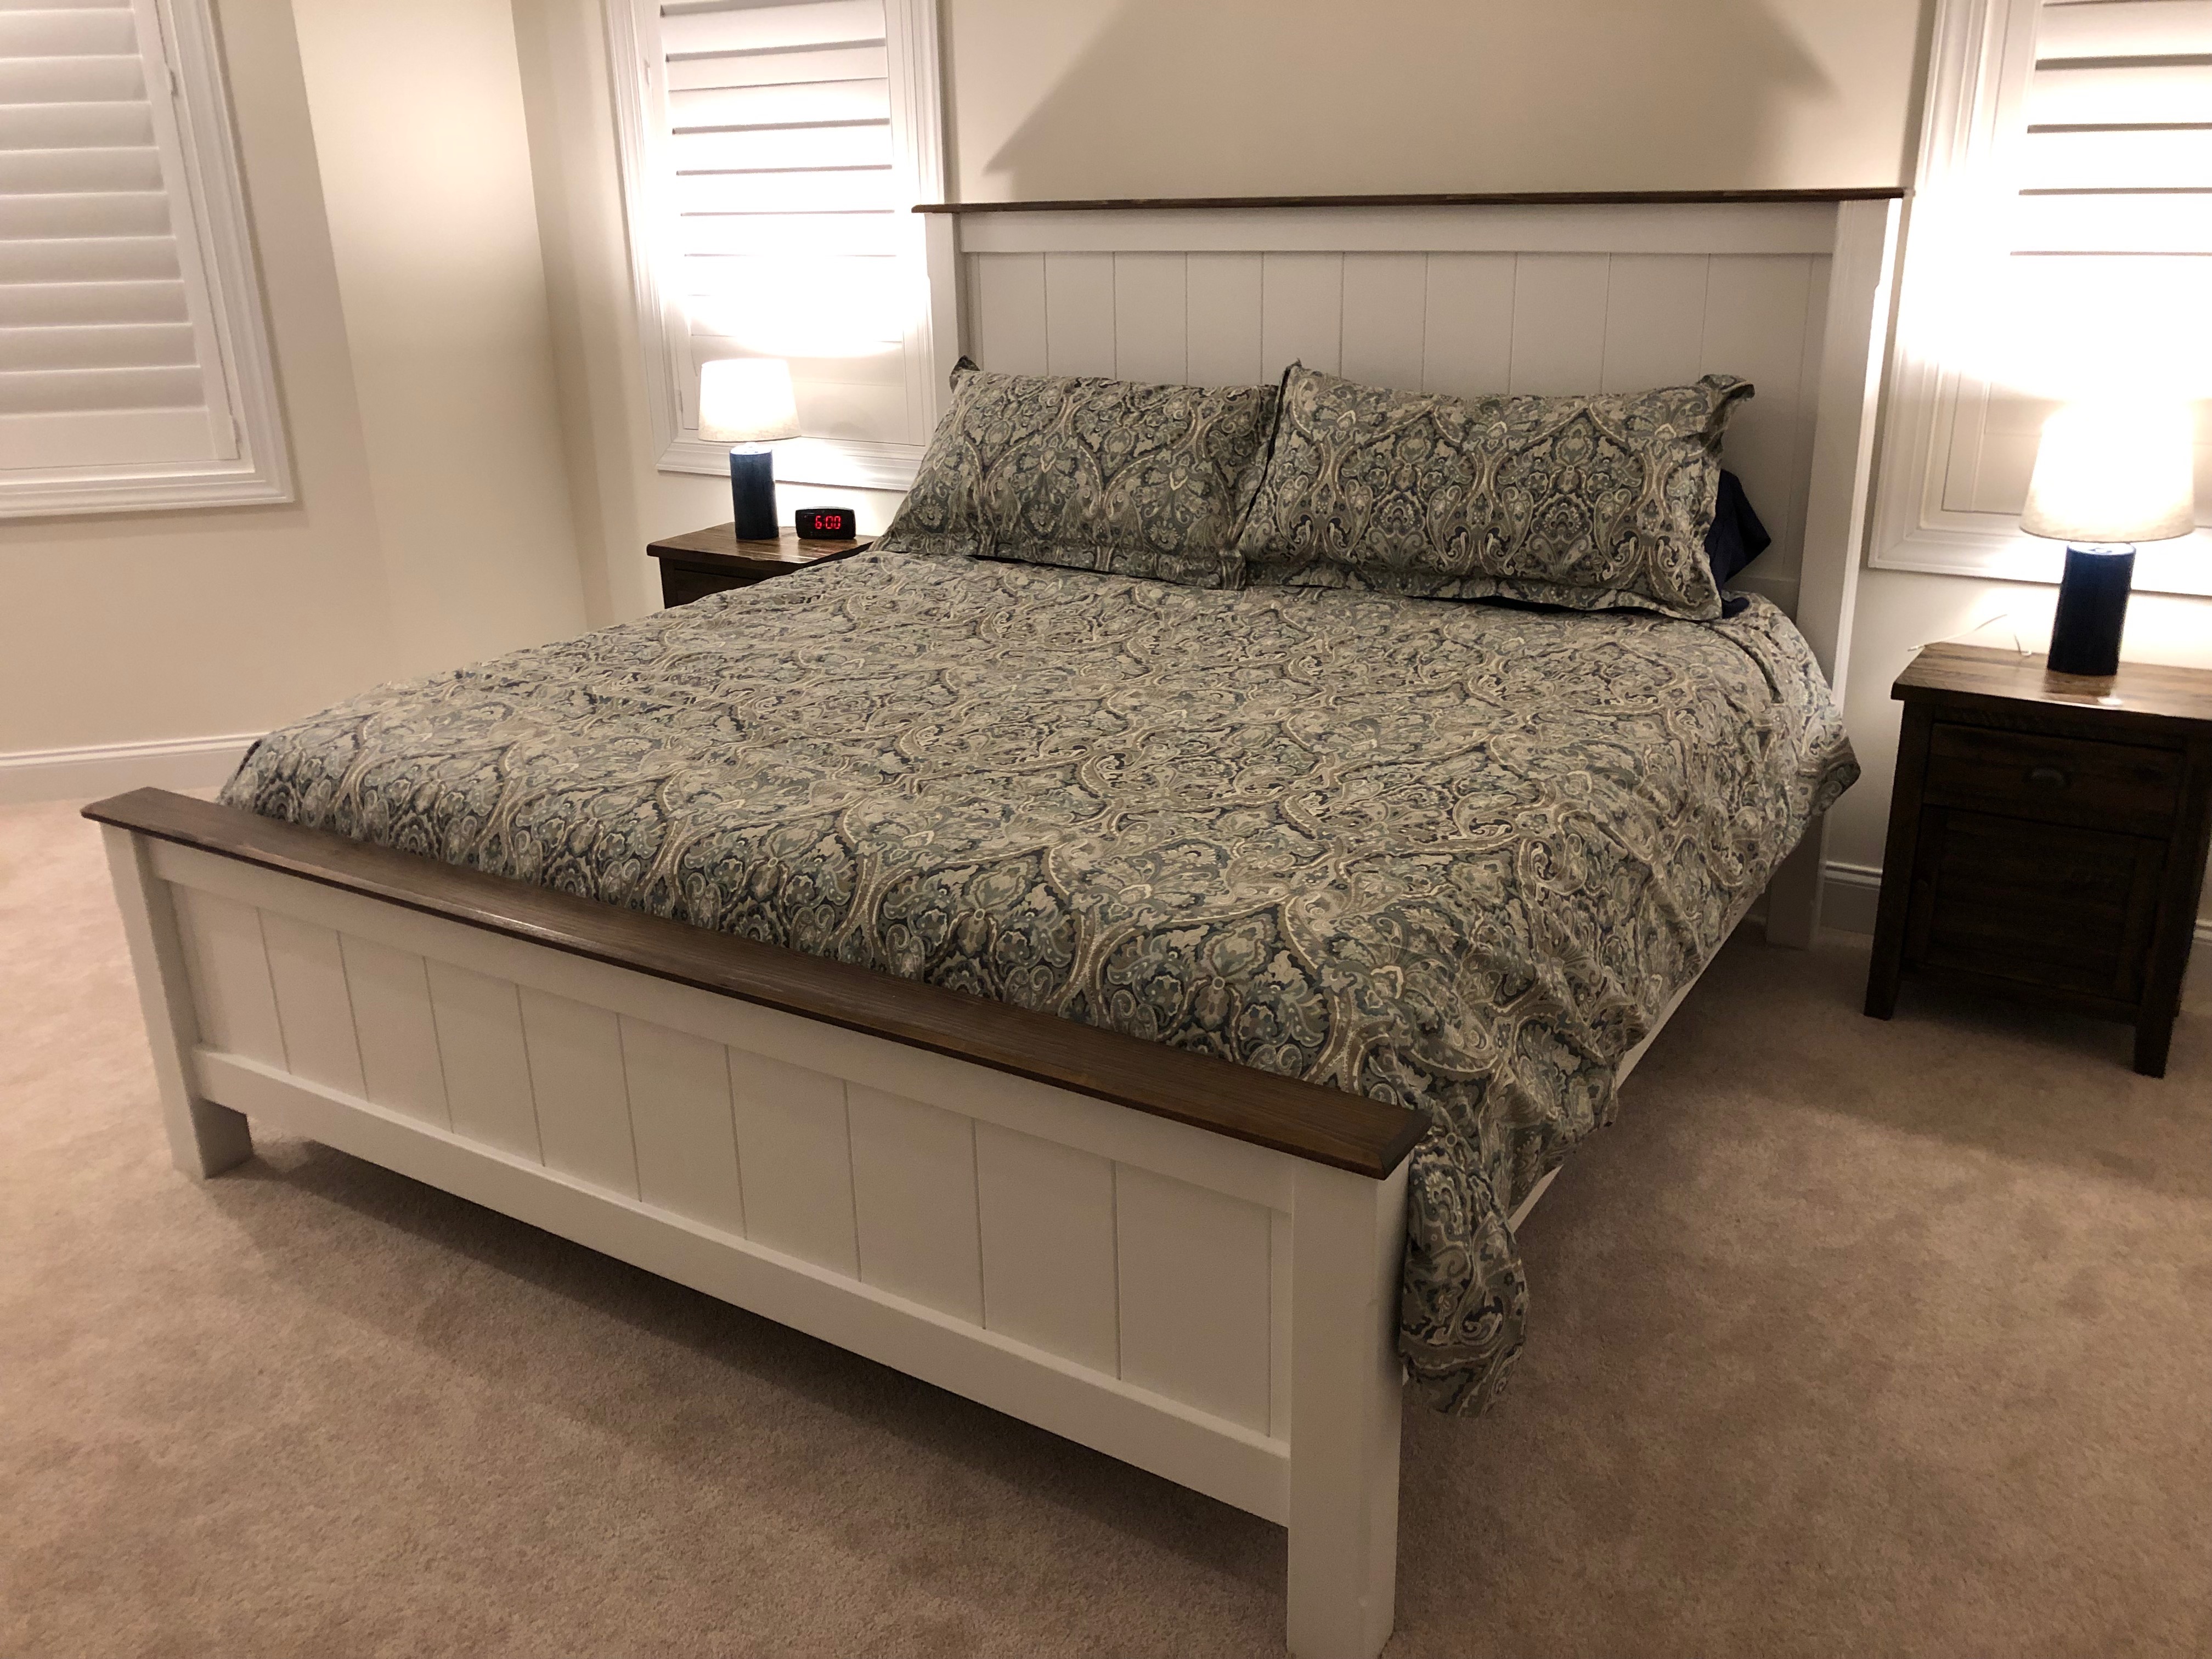
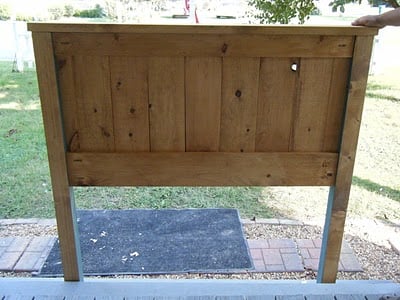
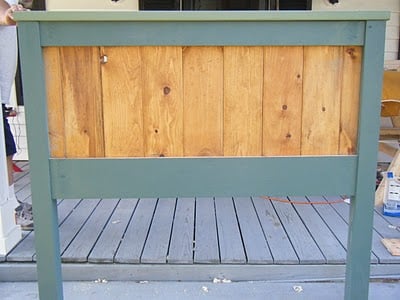
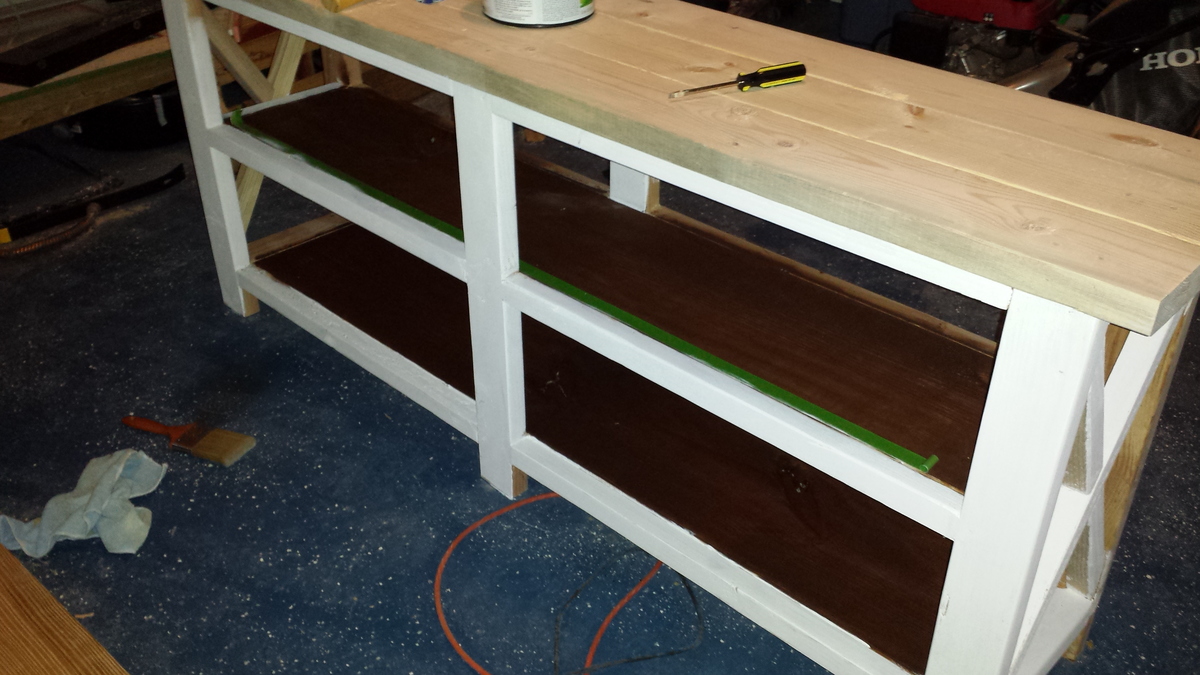
I pretty much followed the original plans.  I added a chamfer on the outside corners of the posts and on the top boards on the head and foot boards.  I also stained these to match the nightstands.  Since I used a foam mattress, i built a platform by gluing/screwing a 2x4 inside the side rails.  Then I set 1x6s on the 2x4 to support the mattress.  

I use the free version of Sketchup to design the bed and estimate materials needed.  

Lessons learned

  • Take extra time to figure out how to connect the side rails to the head and foot boards.  I thought i could use a sliding lock but this wouldn't work for my design.  I improvised using 3x7 tie plates and screwed the two components together.  For the headboard, I lined the 2x4 with the inside headboard post.  For the footboard, I bent the tie plate 90 degrees and screwed the 2x4 to the footboard.  It worked very well.
  • I would recommend chamfering the outside top of the side rails.  I didn't and my wife complains that she  bumps her shins on it. 
  • Top boards are 1x5s, which in my are are only sold at home depot.  The other wood is readily available.

It's not that difficult of a project.  It is time consuming, though.


Estimated Cost
About $150
Estimated Time Investment
Week Long Project (20 Hours or More)
Finish Used
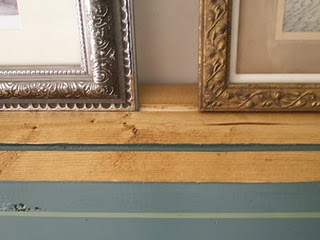
Latex semi-gloss enamel for everything except the top boards which were stained and polyurethaned.
Recommended Skill Level
Beginner

Comments

markswoodprojects

Fri, 10/16/2020 - 13:48

I love the look of your version. Do you have the SketchUp file anywhere that I can download? I would really like to make this version as I love your proportions and the color scheme.

Ten dollar ledges

Submitted by Redbow on Thu, 10/03/2013 - 13:40

Built three 10 dollar ledges of fir for a tall, awkward area over our stairs. 3.5, 4.5, and 6 feet long. Looks great and finally can make use of that space. I initially bought red oak but decided it was too heavy (and too expensive at $90). Still need to putty the screw holes.

Built from Plan(s)
Estimated Time Investment
Afternoon Project (3-6 Hours)
Finish Used
None. I like bare wood.
Recommended Skill Level
Starter Project

Queen Farmhouse Headboard

Submitted by sharon-l on Sat, 10/22/2011 - 04:54

We eventually will build the rest of the bed, but for now we needed a headboard. Hubby helped me with this one, since it was large, I loved having an extra pair of hands. This headboard is reversible, so if our tastes change, we can unbolt it and flip it over to the side that is just stained and polyurethane. Pretty neat! This headboard is extra tall, because we have our bed frame up on risers, and we wanted a picture shelf but didn't want it interfering when we sat up in bed to read or what-not. Hubby used the router to make grooves in the top before we attached it, so our pictures wouldn't be crashing down on our head! Our metal bed frame comes just shy of the outer edge of the legs of the headboard, so when we build the rest of the bed, the side rails will meet the edge exactly. We placed the headboard behind the bed frame to mark where to drill the bolt holes and attached the headboard to the frame with 4 inch long, quarter inch wide bolts with washers and nuts. Two on each side.

Built from Plan(s)
Estimated Cost
$50-$60 just paint and lumber. We had some supplies left over from previous projects, including screws and the ship-lap boards.
Estimated Time Investment
Weekend Project (10-20 Hours)
Finish Used
We painted and distressed the boards, then applied stain to the distressed parts. We coated the entire thing with three coats of polyurethane.
Recommended Skill Level
Intermediate

Comments

Twin Over Queen Loft Mod

This is the nightly sleeper for our 6yo (queen) and 4yo (twin) boys, but we have in-laws who visit from out of town frequently and we also wanted a place to allow them to be comfortable as couples.


To accomodate adult headroom on the queen, I raised the entire loft 7" (72" high) and to fit the queen beneath, I had to lengthen the loft rails by 9" (84" long). To fill the resulting gap, I just used some 39" scraps of 2x4 and 2x6 overlapped to create a 4x10 landing which actually ended up a cool addition since it gives the kids a spot lower than the mattress to make the transition from the ladder to the mattress. It also has given us adults a spot to sit off the mattress while comforting them to sleep when needed, so we don't end up waking them when we leave.


I based the height of the queen legs (made four of them) off the size of a standard storage tote, which was ~13". We can fit 12-16 totes of clothes or other random storage under the bed as a result. The queen frame was just a simple 64"x84" rectangle out of 2x6s with 7 2x4s used as crossbeams to hold the mattress.


Note on the mattresses - these 8" memory foam mattresses are just as comfortable as our expensive name brand king mattress, but MUCH cheaper!

https://www.walmart.com/ip/Mainstays-8-inch-Memory-Foam-Mattress-Multiple-Sizes/47826185


Despite raising the loft, I kept the height of the stair platform the same, but just added a second 'ladder' rung to get up to the loft (refer back to the 4x10 landing spot on the loft). To keep with the using available storage space theme, instead of attaching the stairs permanently, I used 1"x4" hinges to that we could swing the stairs up and put 4 more storage totes under there. (However, we quickly found that the kids liked that area as a 'fort', so we've left it open for their use.)


In the picture, you'll note there are four treads/steps on the stairs because I thought to myself "little feet, little steps" would be better. I soon learned that the littles are more than capable of using adult sized steps while adults nearly killed themselves coming down the little feet, little steps. As such, I ended up removing one of the middle steps and moving the new singular middle to a spot between the other two. Much better, stay with 3 steps.


While the queen can stand alone, I still attached it to the 'legs' of the loft so that our rambunctious boys didn't 'sweep the leg' and bring the whole thing down on themselves while under it.


Estimated Cost
Only need an additional 8 2x4s and 6 2x6s from the original plan.
Estimated Time Investment
Week Long Project (20 Hours or More)
Finish Used
Actually no stain on this. Instead, used a Benzo torch and burned every board to produce the grain patterns seen. Just sealed it with a standard clear poly to lock in that grain and protect the wood a little.
Recommended Skill Level
Intermediate

Truck Shelf

Submitted by DMax2010 on Thu, 01/21/2016 - 15:26

Loved making this shelf!

Built from Plan(s)
Estimated Cost
Under 10.00
Estimated Time Investment
Afternoon Project (3-6 Hours)
Finish Used
Minwax express color in Indigo, Minwax express color in Walnut
Recommended Skill Level
Beginner

Adirondack chairs

Submitted by Anonymous (not verified) on Fri, 05/05/2023 - 08:06

So I followed the plan except I tried to use more pocket hole screws. I managed to use them for all parts except the seat and back. Looking at them I see how I can use them for those areas too ( just a little pre planning next time)
I’m using Behr Wedgwood waterproofing stain and sealer to complete the project.
I love all your plans and can’t wait for my next project.

Comments

Modern Outdoor Storage Bench by Crazy Life with Littles

It’s a miracle I was able to finish this outdoor storage bench considering my kids are on summer break 😂

💡Tip: can’t find cedar pickets at your local stores? Just stain them. No one will ever know 😉 sealed with Thompson’s WaterSeal

by Crazy Life with Littles on Instagram

Seasonal And Holiday

2 X 4 Adirondack Chairs and Tables with a Twist

Submitted by Anonymous (not verified) on Wed, 05/31/2023 - 15:59

I had a bunch of my old skis that I had used as a display wall in my chalet that I needed to do something with, and this was a perfect solution!

Comments

outdoor canopy with curtains

Submitted by Anonymous (not verified) on Sun, 02/21/2016 - 16:51

I gave away my outdoor furniture in need of something for that space.  This plan is perfect with added outdoor matress and Curtains so I can lay down on the summer.

Built from Plan(s)
Estimated Cost
100-150 for bed
250 mattress plus cover
200
Estimated Time Investment
Weekend Project (10-20 Hours)
Finish Used
Chocolate stain.
Strip sunbrella for mattress and high density foam.
Rasberry sunbrella mattress
Recommended Skill Level
Intermediate

Farmhouse doll bed and play cake stand

I enjoyed making these projects for my 6 year old for Christmas. Warning: make cuts as you build. Even though I bought standard board sizes, my finished measurements did not all match cut list. Just keep measuring as you assemble and make cuts and small changes as needed. A 1x3 can be anywhere from 2 1/2 to 2 3/4 wide for example. I finished with primer and two coats of Benjamin Moore Advance semigloss Cloud White on both projects. I used 2 inch high density foam for the mattress. The quilt is pieced from 2 1/2 inch squares. The small pillows are 3 inch square finished. The large pillows are 4x7 approximately. The cake stand is cute enough for a child's play room but also large enough to be borrowed for an adult's dessert table.

Estimated Cost
$60
Estimated Time Investment
Afternoon Project (3-6 Hours)
Finish Used
Semigloss Benjamin Moore Cloud White
Recommended Skill Level
Beginner

DIY Pergola

Submitted by Anonymous (not verified) on Fri, 06/30/2023 - 11:15

I built this pergola in 3 days and added mason jar solar lights.

Vonda Jones

Built from Plan(s)

Wood Closet Shelving

Submitted by Anonymous (not verified) on Mon, 10/14/2019 - 13:57

This was a great build and easy to do.

Built from Plan(s)
Estimated Time Investment
Day Project (6-9 Hours)
Recommended Skill Level
Beginner

Sofa and Long Couch

Submitted by Anonymous (not verified) on Sat, 03/12/2016 - 12:18

So, we basically took the pans for the 2x4 outdoor sofa and extended it for one of the sofas because we wanted 4-across seating. We also finished up the look by adding vertical beams in the arms and a second 2x4 across the top (see photos). Because of the really long couch, I added extra bracing foot to make sure it won't sag.


Once complete, we determined the pillows across the back were a bit too tall, so we adjusted the plans by adding a couple beams and then lengthening it to attach to the back of the arms rather then between the arms. We pocket drilled the beams together and then braced it with 1x4 slats across the back. I also used a 1/4 router bit to soften all the edges. Anna we took your advice and pocket drilled all attachments except the seat slats for a real finished store-bought look. Cost of wood was under $100 because we went with pine. Pillows and seats from At Home put us at about $600 total for the project.

Estimated Cost
All in with umbrella and stand, wood for stand, two couches, pillows, and sand to add weight for the umbrella was under $700.
Estimated Time Investment
Weekend Project (10-20 Hours)
Finish Used
Thompson Water Sealer
Recommended Skill Level
Beginner

Sister's Table

This was the second table I built - it was much improved on my first and was for my sister as a Christmas present. It has 4x4 legs that I notched out with a circular saw for the legs and a spruce top. I modified the length down to 6' for her house but added extensions on the end that make the table up to 9' long when fully extended.

Estimated Cost
100
Estimated Time Investment
Weekend Project (10-20 Hours)
Finish Used
Minwax Dark Walnut with Polyurethane and a epoxy coating on the top to seal all the cracks, as sister has two little kids.
Recommended Skill Level
Beginner

Comments

Playroom Stage!

Submitted by kdins31 on Thu, 01/02/2014 - 09:48

I had a perfect corner in our playroom that was reserved mostly for clutter and always wanted to do something fun with it. The base is made with 2x8"s topped with Handscraped Hickory laminate flooring. Bored holes into the floor and installed 1" diameter color-changing LED decklights. Added theatre-style tracklights, disco ball and other dance floor lighting for extra effect. Of course the stage wouldn't be complete without wireless microphones for karaoke and mic stands hooked up to a small amp and speakers in the ceiling. I made the shelving on the right side with 1/2" black pipe and used leftover 2x12" shelves from an old garage shelving install from 7 years ago! The kids were ecstatic on Christmas morning for the reveal!

Estimated Cost
$125-150 for wood, flooring and moldings. Black pipe is very inexpensive.
Estimated Time Investment
Weekend Project (10-20 Hours)
Finish Used
Send me message if you'd like to know which products I used, e.g. mics, speakers, lights, etc.
Recommended Skill Level
Intermediate

Comments

Garofola2013

Wed, 04/16/2014 - 11:53

I would like to know which products you used...e.g. mics, speakers, lights, etc. We want to do this is in our basement =)

THANKS!

Snix26

Sun, 07/27/2014 - 15:52

This is great! I was just wondering what your dimensions were? I've been looking for something like this to do for my niece but have been struggling to find a plan and figure it out myself LOL.

kdins31

Tue, 08/05/2014 - 05:58

Hello, the back wall is 8' and side wall is 6.5'. The stage comes out about 2.5' on each side then the front is around 7'.

Hope that helps, good luck!

atilley

Tue, 11/18/2014 - 19:37


Great job!! can you tell me where you got the microphones and mic stands for this?


dmbphoenix

Sun, 04/10/2016 - 14:44

Actually, I was wondering ,what lights did you use? I'm working on a very similar project and was curious to the lights your used please.

Mls4460

Wed, 11/13/2019 - 09:53

Do you have the actual plans to build this?

I would love to copy this idea for my 4 year old!

Rustic X Console Table (The Beginning)

Submitted by aDIYguy on Sat, 01/11/2014 - 18:16

This was my first project and love how it turned out. I have gotten compliments on it, but I unfortunately continue to look at the flaws in it and want to build another one. It was a great project though and I am in the middle of building the coffee table and end table as well. Here it is before we added all the odds and ends on to shelves and top

Built from Plan(s)
Estimated Time Investment
Weekend Project (10-20 Hours)
Finish Used
Used rustoleum american walnut for stain and valspar signature ultra white for the paint. Brushed on stain waited a minute and wiped with a rag.
Recommended Skill Level
Beginner

Comments

sojaco

Tue, 01/14/2014 - 08:37

I love how you finished your console table - I'm now wishing I finished mine like that. I think we all see the flaws in our own work, but this looks fantastic and very professional.

sojaco

Tue, 01/14/2014 - 08:37

I love how you finished your console table - I'm now wishing I finished mine like that. I think we all see the flaws in our own work, but this looks fantastic and very professional.

Kitchen Island with Farmhouse Table Top

Submitted by JoanneS on Fri, 03/30/2012 - 17:57

I’ve wanted a new island for awhile but wasn’t quite sure what I wanted it to look like, until I saw Ana’s cabinet plans for the Momplex kitchen! We wanted a fairly large island, so we did two 24” base cabinets “townhouse style” (from Ana’s Kitchen Cabinet Base 101 post) plus we added a little extra space at both ends, so Hubby could install some electrical outlets and we’d still have plenty of room for the drawers. The old island had power already, so he got the outlets wired pretty fast. Behind the doors are some deep pull-out drawers to hold all the stuff you’d usually have to bend down and reach for. Now it’s so convenient! I built a Farmhouse Table top for it and love it! We built flat doors and trimmed them up to match the island sides and back (also matches our pantry and dining room). This project took us about 40 hours to build and finish, and it was so worth it! Ana, you are a rockstar in our house! We now have a real showpiece for our kitchen, thanks to Ana White!

Estimated Cost
$550
Estimated Time Investment
Week Long Project (20 Hours or More)
Finish Used
Cabinet: 3 coats of Ace Royal semi gloss in Crushed Peanut, sanded between coats. Top: 2 coats Minwax Color Express in Walnut (1st coat brushed on, 2nd coat rubbed on), plus 3 coats of Minwax Oil Modified Water Based Polyurethane in Satin (sanded between coats); and on the drawer boxes, 2 coats of Minwax Polycrylic in clear satin (the clear water base poly doesn’t add any color to the natural pine)
Recommended Skill Level
Intermediate

Comments

Brigitte (not verified)

Fri, 03/30/2012 - 21:14

Absolutely stunning! I'm in the process (sooo sooo close to being done) of making a banquette seating area with the creamy colored drawer base and the top stained in walnut. I put the same half round trim on my drawer fronts too. I saw a vanity on display at Lowes with this detail and had to copy it. I love the look! I am also building a trestle table from plans from www.thisoldhouse.com to match. I bought some beautiful matching chairs from Target.com. I can't wait to get it finished. I'm about to go paint the drawers right now. The table components were just primed 15 minutes ago. :-)

JoanneS

Sat, 03/31/2012 - 08:04

Brigitte and Pam, thank you very much for the nice comments! :) I'm having a ball building projects from this site. This is our favorite one so far (we say that every time haha). I have to smile and run my hand across the top whenever I walk past it - I guess when the novelty wears off I'll stop doing that :) Now I'm ready to add those door dampeners to all the cabinet doors in my house (so cool not hearing a slam when you shut them). Brigitte, your project sounds beautiful, can't wait to see the pictures of it!

mebohn

Sat, 03/31/2012 - 18:57

Absolutely gorgeous! I really love the colors. I've never tried the color express stain - and I have to try it now! The top is so seamless. Love it!

JoanneS

Sun, 04/01/2012 - 05:33

Mebohn, thanks very much for the nice comment! You'll love the color express when you try it. Walnut is my favorite and I've used it for lots of projects. I like brushing it on to get a nice dark first coat, and then on this one, rubbed on a 2nd coat (needed to wait an extra hour for the first coat to dry). I used lots of wood glue and Kreg screws to assemble this top (it's 5 pieces of 1x10, 3 across and 1 at each end) and then added 1x4 underneath (around the edges and across the center for attaching) to make it 1 1/2 inches thick. Then a whole lot of sanding :)

guest (not verified)

Tue, 04/10/2012 - 21:37

This is soooo beautiful! And the top is so seamless ans glossy. You should be so proud! Great job!

Mariah Papaya

Sat, 05/26/2012 - 06:25

Wish I had enough room in my kitchen for one of these -- would definitely copycat this! Love it!

JoanneS

Sat, 05/26/2012 - 06:46

Mariah, Thanks very much for the nice comment! I'm really happy with how this turned out. Now I want to re-do all my kitchen cabinets with Ana's plans. :) PS -- I saw your jugsaw puzzle table this morning on the brag board -- super creative!!

Daybed and side tables

Submitted by Anonymous (not verified) on Tue, 12/17/2019 - 06:56

My husband made this for our granddaughter when she comes to visit. Then we saw the side tables, adjusted the height and poof the best room ever!

Estimated Cost
$300.00
Estimated Time Investment
Weekend Project (10-20 Hours)

Wood Shop Storage Solutions...

It seems like organization is always a work in progress especially in my one car garage shop. Honestly it took years to realize what I needed to customize my space in order to organize things. I've built bulky work benches out of 2x4s and plywood. I've rearranged the work space over and over again over the last few years and finally came up with my own system

The miter station is a life saver. I had one of the fancy ones with the foldable wings but didn't like it. The object of it was to be able to fold the wings down for storage but I never did and it caused other space saving problems. Now I can easily store all of my small tools and woodworking knick knacks all in one spot. You can find plans for these if you google miter station, but take my advice and custom make one that fits all of your needs. There's a spot for my vice and speed square too. Things like that make it count.

The router table is probably my favorite tool in the shop. You can do so many things with the router table. I started out with just a top and a base and worked from there. Now everything router is in the cabinet ready to go.

Everything is on wheels. Us military guys and gals have to move around a lot so we have to plan for that. Now everything can just roll up the ramp and in to the truck.

Take some time and think about the efficiency of your shop space. How does everything flow? Or do you even flow at all? I used to woodwork myself in to a bunch of brick walls and now I don't.

Thanks for checking it out
Patrick

Estimated Cost
a lot hah
Recommended Skill Level
Intermediate

Comments

birdsandsoap

Fri, 04/06/2012 - 22:05

wow. This is very impressive. I love how tall the pieces are so you don't have to bend down, I'm always working with my tools on the ground and it is a pain.

I covet your router table.

And the miter station is awesome. I just may copy that! I love how it houses all of your other tools as well. OMG! It even holds your shop vac, and has a handy ledge for pipe clamps?! I would love a simple plan.

I'm really curious about your kreg jig setup on that work table too.... details please.

Well Done!

patrickhosey

Sat, 04/07/2012 - 09:20

You've got to get up off the ground. I did that for a looooong time and my back suffered big time.

The kreg jig is mounted to a piece of plywood. Then I drilled 2 holes in the top corners and hung them on the side of the work table.

The miter station has to be custom made for your shop needs but planning it out is very important. I needed a spot for my vice and a quick spot for my speed square. So I calculated all the space needed for 3 drawers and then just added a few inches. Also measure how high your saw sits and recess your work surface exactly that amount.

Grizzly tools has a good deal on simple router table set ups right now. I'd check that out. Eventually the miter saw will be hooked up to the shop vac. I bought an outlet that automatically turns the vacuum on when I use the saw.

It's just like the other stuff. Start with the face frame and the rest will come to you.

Patrick

claydowling

Sat, 04/07/2012 - 11:49

If working without plans makes you twitch, Startwoodworking.com, Fine Woodworking and Popular Woodworking usually all have plans for shop furniture like this. There are enough variations over the years that you can usually find the features you're looking for if you do some mixing and matching. I know there was a very nice router table plan last year.

For the record, I work more like Patrick unless what I'm building gets complex.

birdsandsoap

Sun, 04/08/2012 - 00:25

Me too! i always seem to get inspired by a plan, and by the end of the project, it's totally different than the original because of all of the adjustments I make. I have never even considered building shop furniture before, these photos are inspiring!

Thanks Clay for the link, I will have to go burn some time on that site as well. Someday (when I don't have a leaky garage) I will have a shop worthy of such beautiful equipment.

Great Job again, Patrick!

redhead_61

Sun, 04/15/2012 - 14:24

Uh, this is amazing. Good thing I can tell your shop vac and scraps bin have DUST on them, or I think you might be lying about this somewhere you actually work :) ! I just got around to finishing my work space table. I am planning on doing some major organizing before the heat of the summer hits, and then maybe a router table like this might make it to the top of my list.

Scott Kershaw (not verified)

Mon, 06/11/2012 - 19:56

Patrick, with the recent release of your Farmhouse Table, I find myself watching it over and over and my jaw is always on the floor by the end. In a way, the flow and the craftsmanship is intoxicating. My family is in the process of moving to a new home and I am mostly looking forward to organizing the garage space. I need a man cave and it needs a miter saw station and a router table.

Did you construct it all with pocket holes? What material is the majority of the carcasses, face frames and drawer fronts?

Thanks for the excellent pictures and marvelous video!

Scott

In reply to by Scott Kershaw (not verified)

patrickhosey

Mon, 06/11/2012 - 22:54

The materials are just standard pine boards from Home Depot. White pine for the face frames and drawers and 3/4 pine plywood for the cabinets. I'm glad you like the video and I really appreciate the nice words. We have some new stuff coming up, so be checking back for the router table plan.

Patrick

Scott Kershaw

Tue, 06/12/2012 - 18:36

Do you use a table saw for any of your projects? What would you estimate the cost of the miter saw station, alone, to be? For some odd reason, nice 3/4" birch plywood is the same cost as 3/4" pine/fir plywood here is Missoula, MT. An 8' x 4' sheet goes for ~$45. Is your switch for the vacuum the Rockler product like in this video: http://www.youtube.com/watch?v=7LmSVvOnxsI ? Sorry for all the questions. Your station is by far the closest to the what my mind has been imagining and what my garage could handle. Thanks!

patrickhosey

Tue, 06/12/2012 - 20:18

I just bought a used Grizzly table saw. It's pretty new to me so I'm all excited about learning on it. For the most part I used a circular saw with a straight edge. Now that I have a table saw, all that should go a lot faster. The switch is very similar to that one, but I bought it from sears a few years back. The miter station is hard to make plans for. Every miter saw is different so the platforms need to be different sizes to match whatever saw you're using. Then you have to keep in mind the size of your shop vac and design it around that as well.

claydowling

Wed, 06/13/2012 - 05:31

Table saws are something that can last fifty years or more without any trouble, so you can get them used pretty readily. You want to buy a good sturdy saw. Locally the used market is dominated by Craftsman/Sears saws. The saws made before 1962 were made by King-Seeley, a company local to me, and those are pretty good saws (I own one and really like it). The ones made after that were made by Emerson Electric, and the owners of those saws have not had such kind things to say about them.

cmm314

Tue, 09/16/2014 - 06:30

Hi Patrick,

I am in the process of desinging a similar miter station, but am curious as to how long your's is?  Some of the recommendations call for a full 8 ft long base, but not sure I have the space in my garage for something like that.  What is the length of yours?

Thanks!


justinjester

Thu, 06/02/2016 - 13:55

Hey Patrick. Thank you for providing so many plans to such beautiful pieces.  I am about to start working on the router station this weekend.  I can't wait to get started.  The reason for the message, could you possibly provide the plans for the miter station you created.  I am a new woodworker and I need plans to be able to create some of these pieces.  I would love to have a garage of similar pieces.  Is that something you could provide?  I would be happy to purchase it from you.  Thank you again for your hard work. - Justin

Back