DIY Shed Chicken Coop
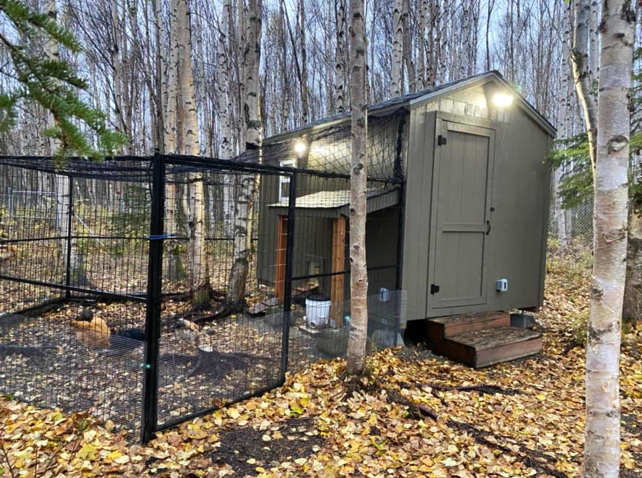
8x12 coop modified from your classic shed plans. 2/3 for the chickens, 1/3 for storage.
by Harmony Munson
Built from Plan(s)
8x12 coop modified from your classic shed plans. 2/3 for the chickens, 1/3 for storage.
by Harmony Munson
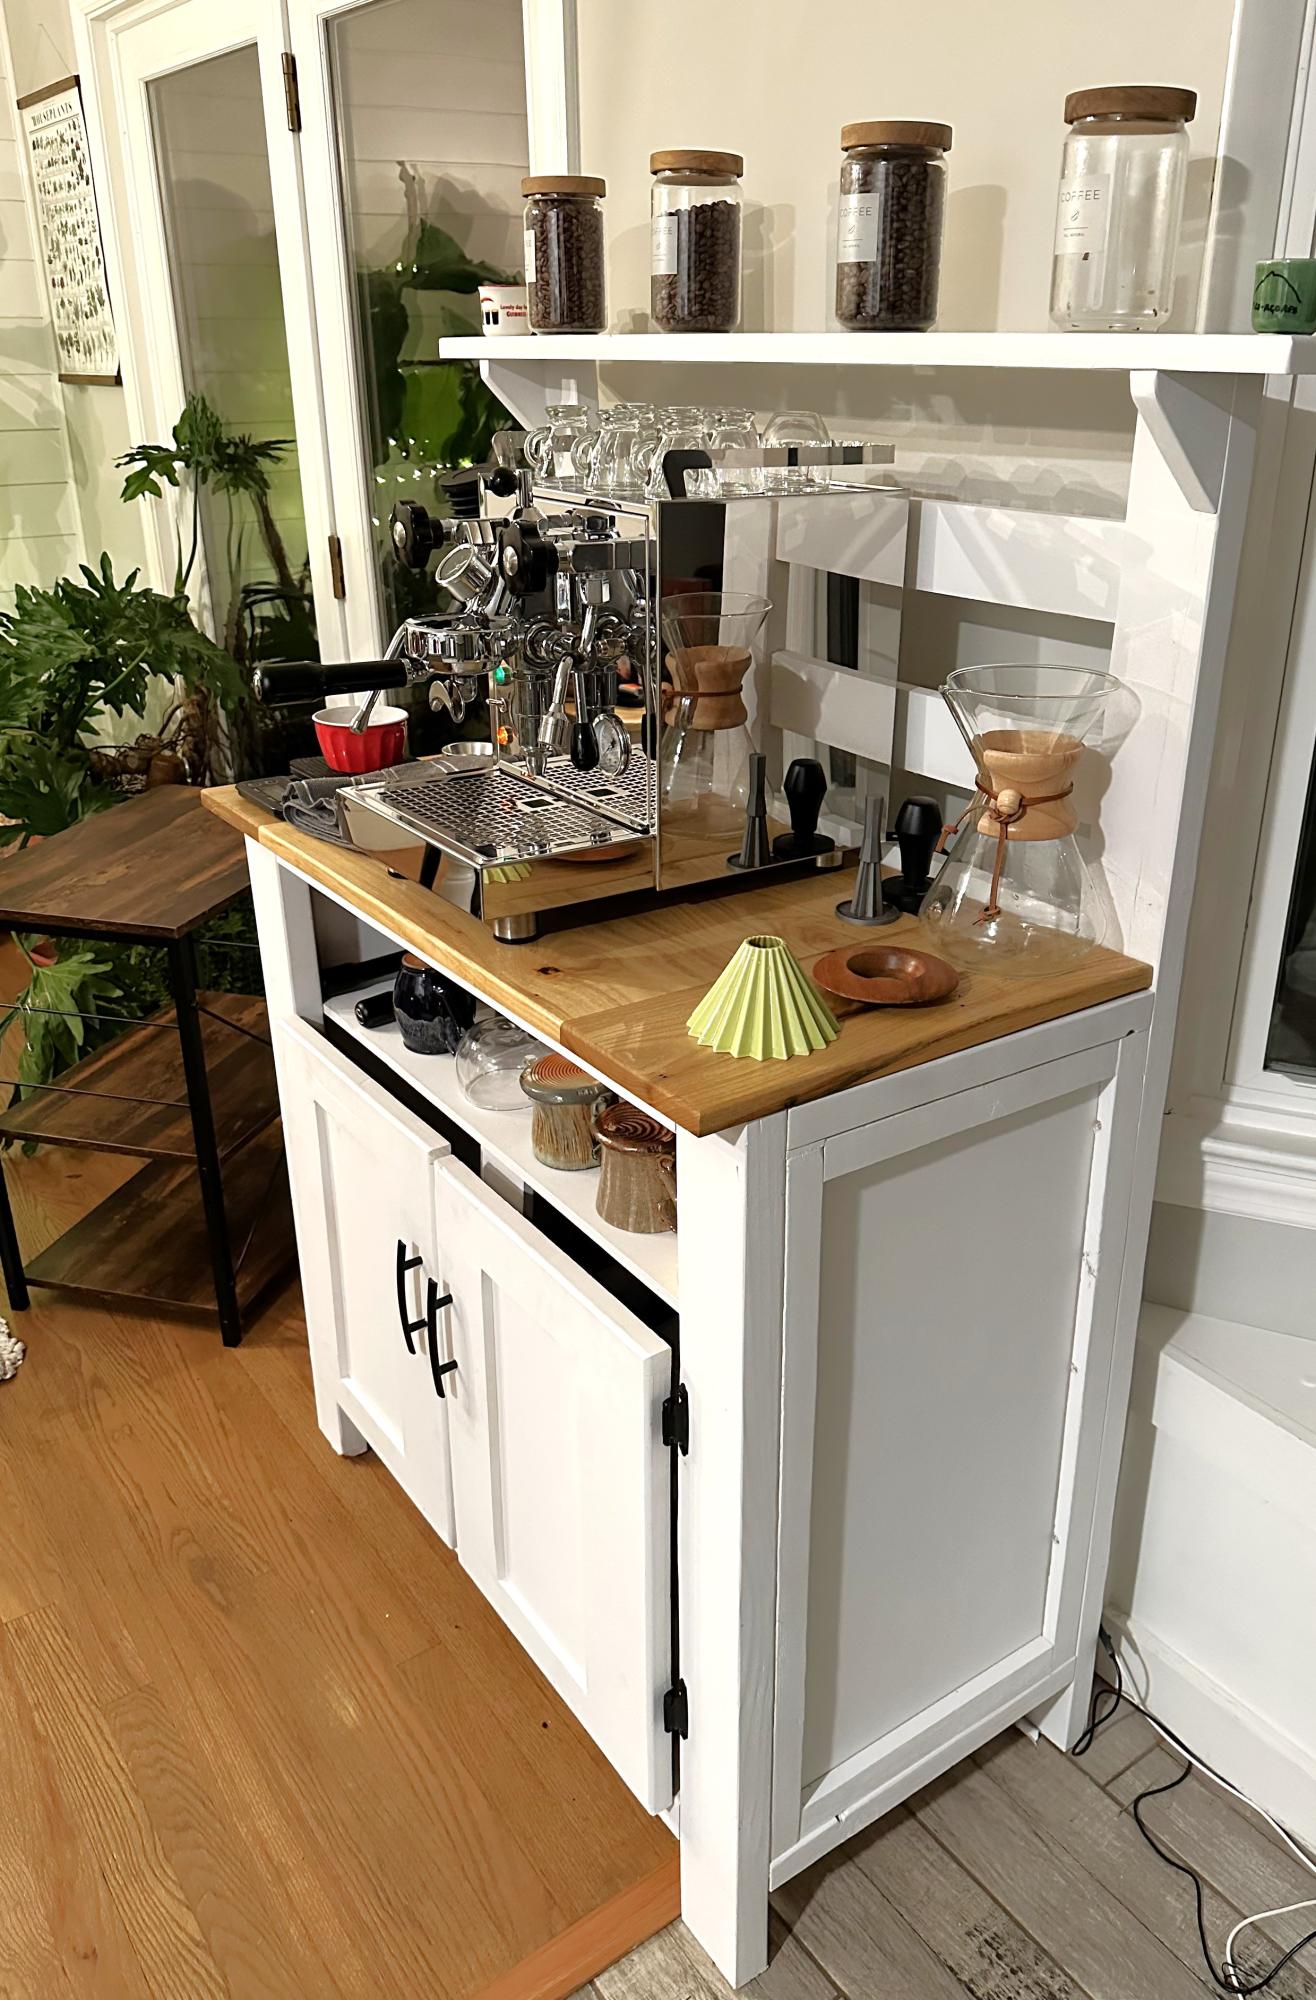
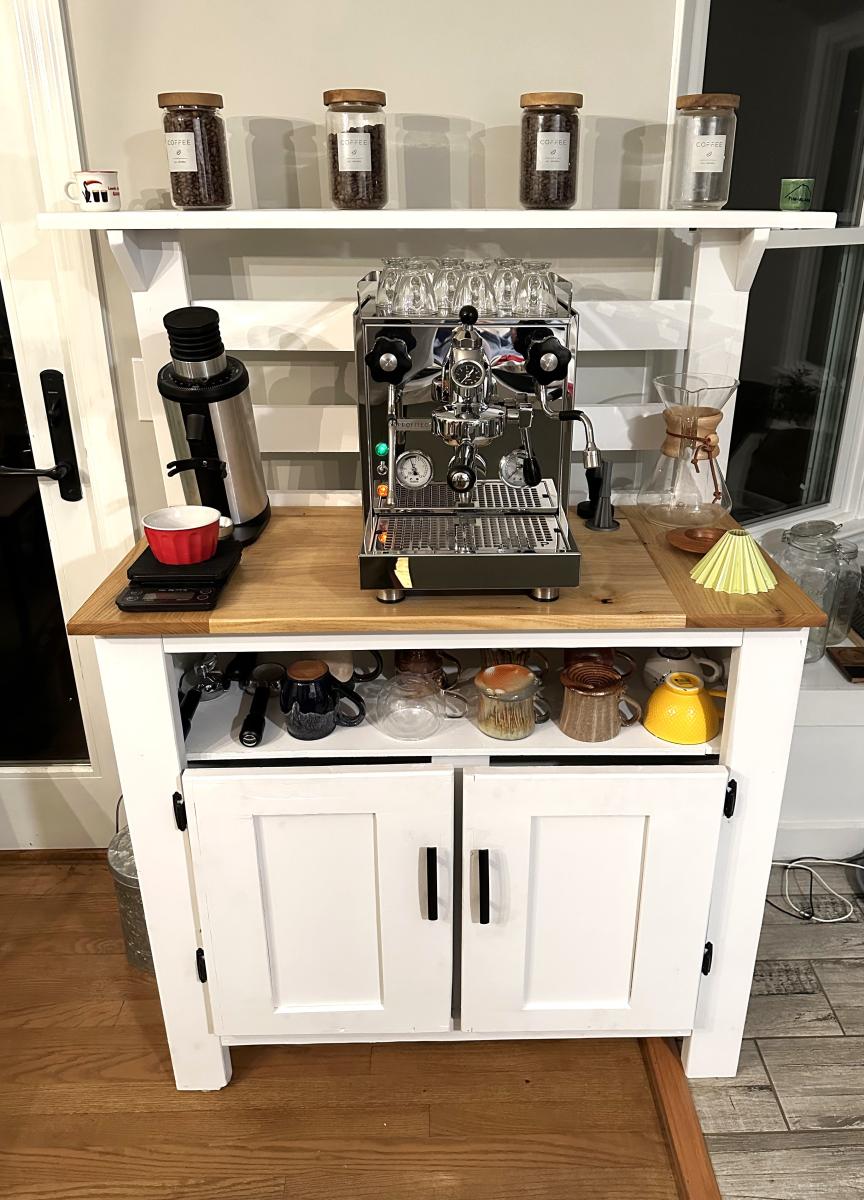
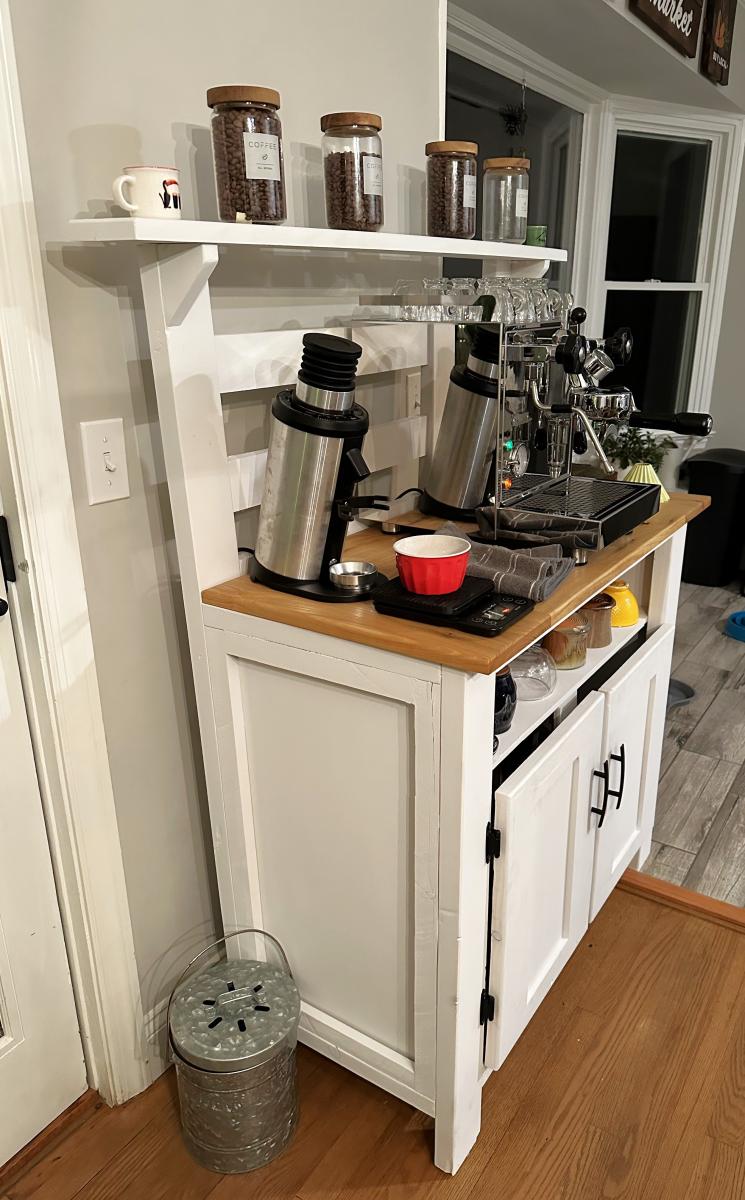
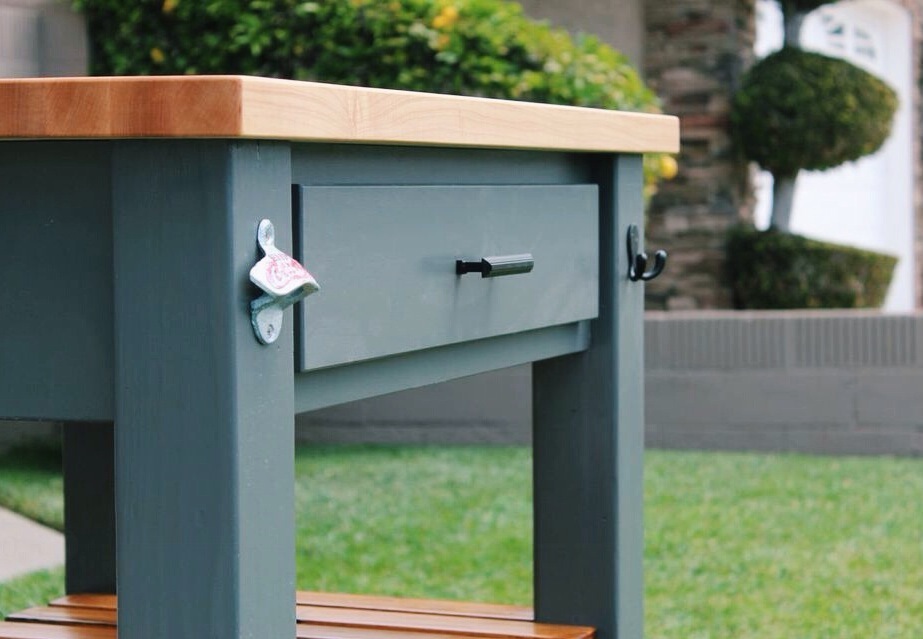
Had a bunch of scrap wood from other projects and random pieces we found in our barn after we moved into our new house so decided to make a new coffee bar to use it up. Modified the Potting Bench plans and pretty happy with how it turned out!
Nate B
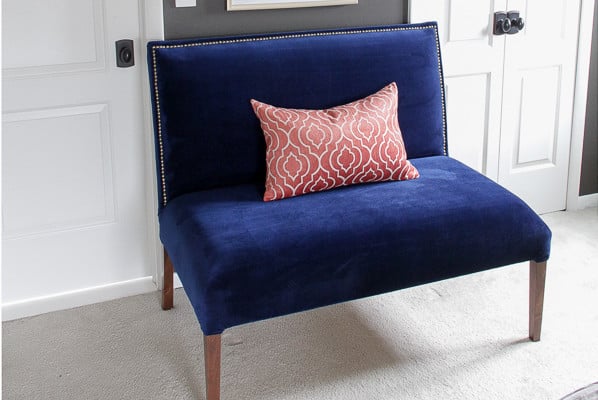
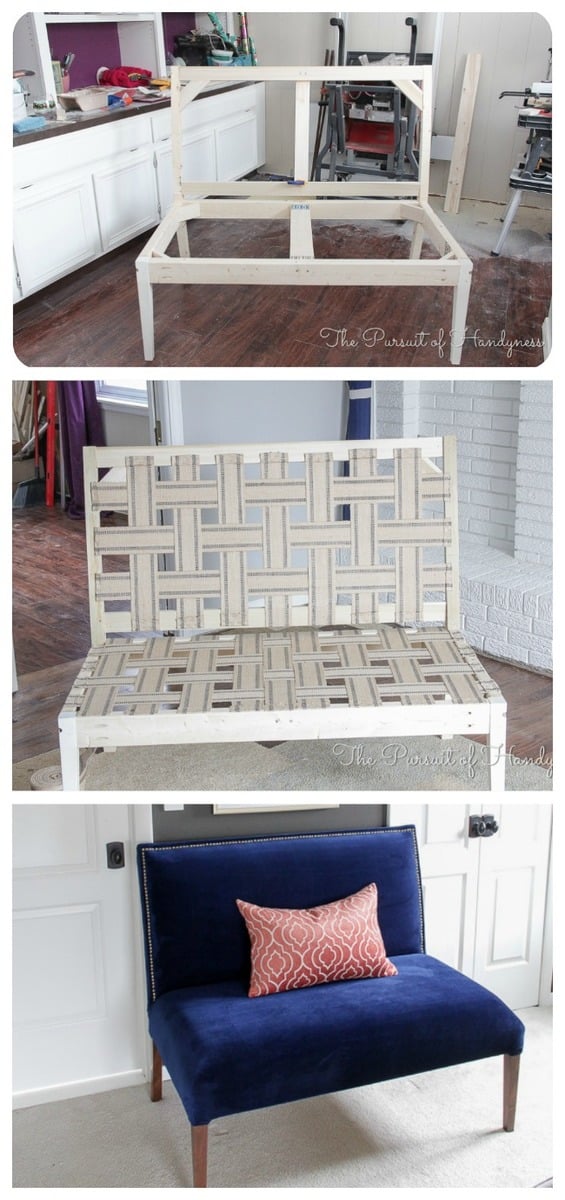
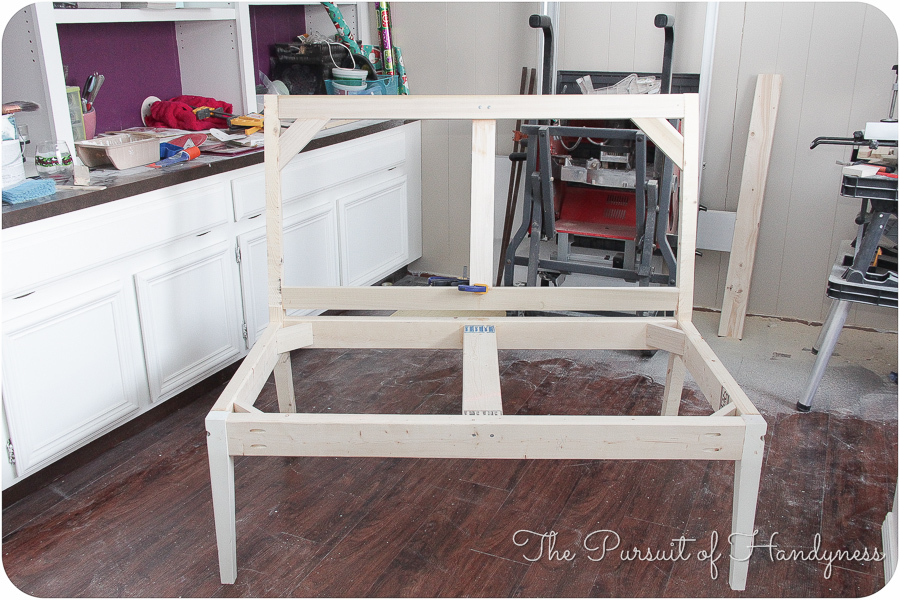
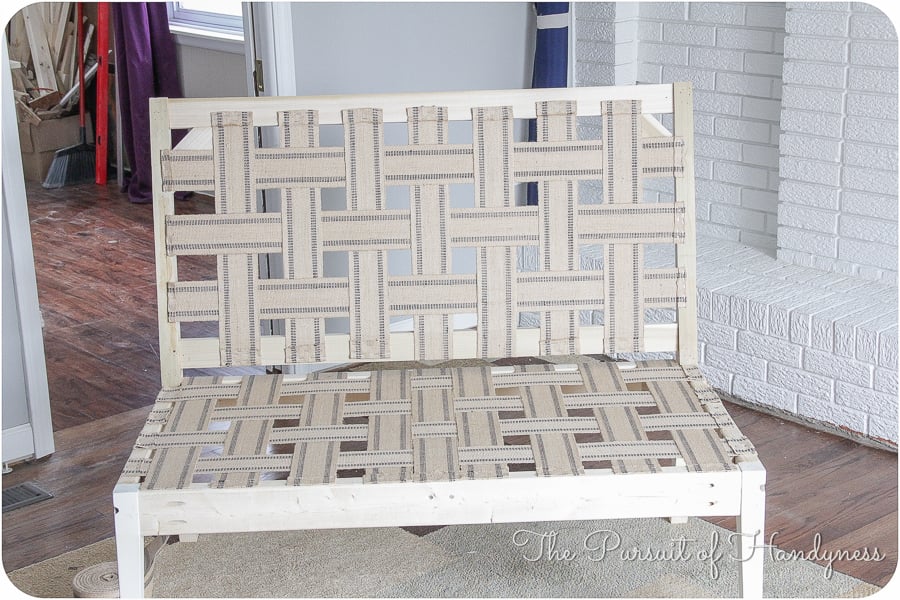
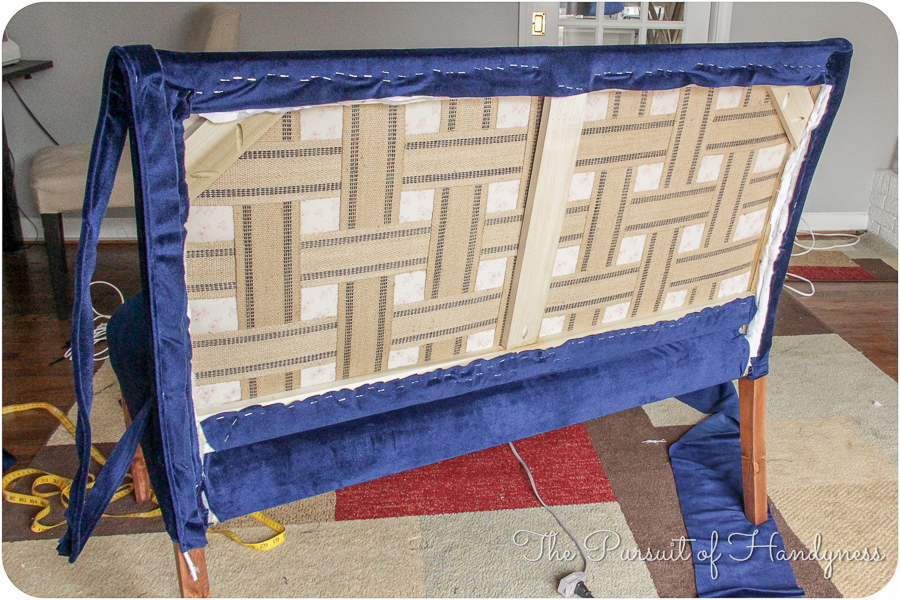
I started off with Ana's plans and kinda went rogue from there. The idea of creating those curved back legs scared me so I thought I'd sacrifice an Ikea dining chair and use it as the legs. When I ruined one of the legs I decided that I'd come too far to back out and that I must continue. I adapted many conventional methods to make the settee but I'm super pleased with the outcome. For the full step by step on how I completed the settee, please check it out here Part 1 Part 2 Part 3
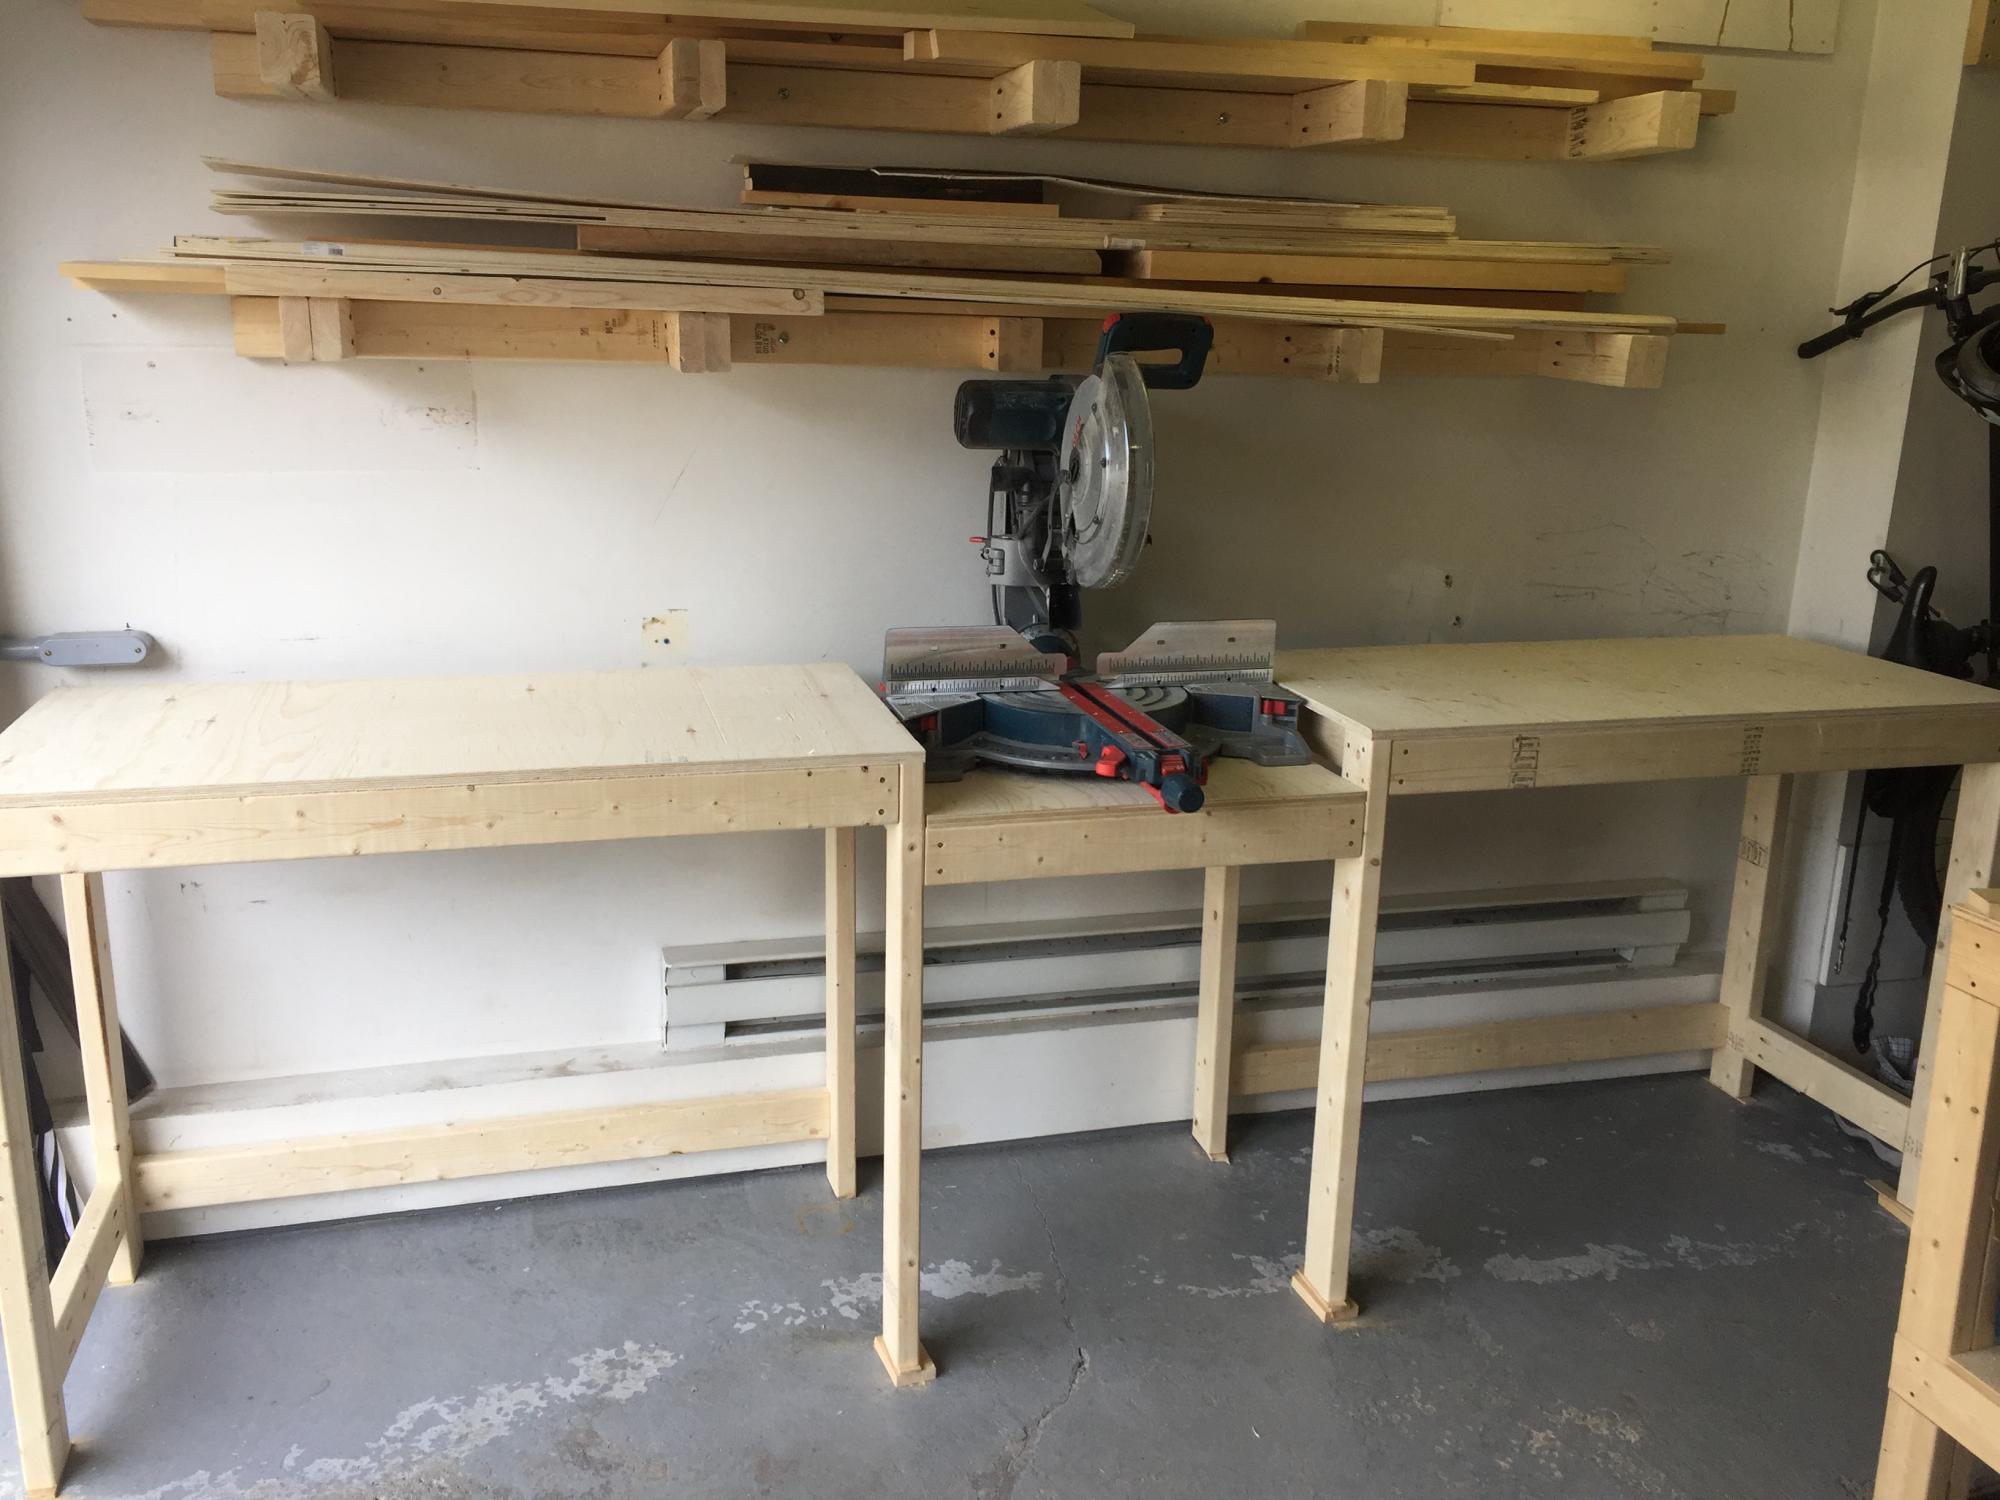
We built this workbench adapting Ana's plans. We did not build the carts yet.
It is very practical! We just love it!
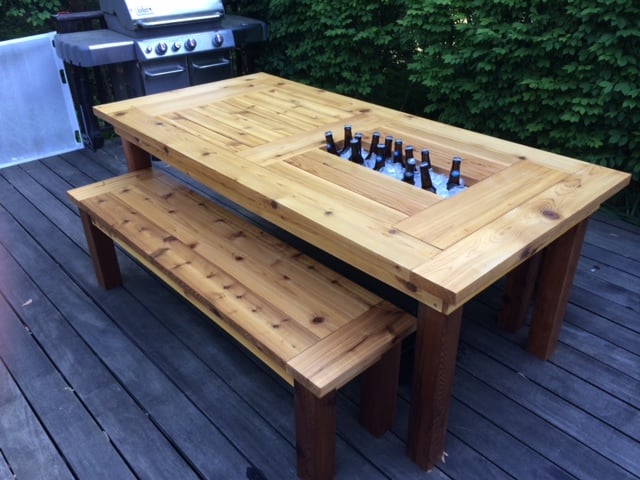
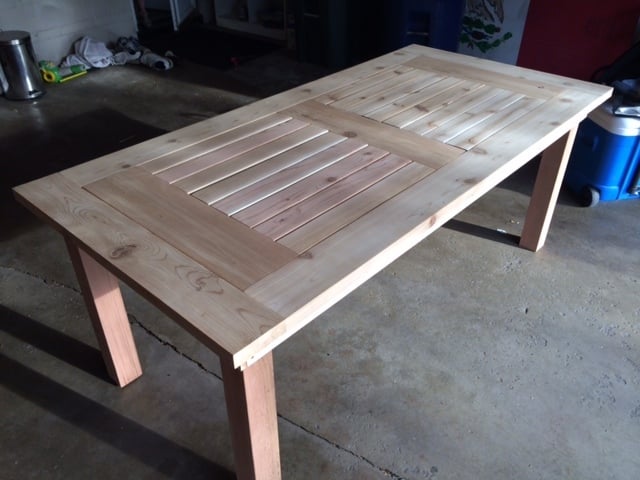
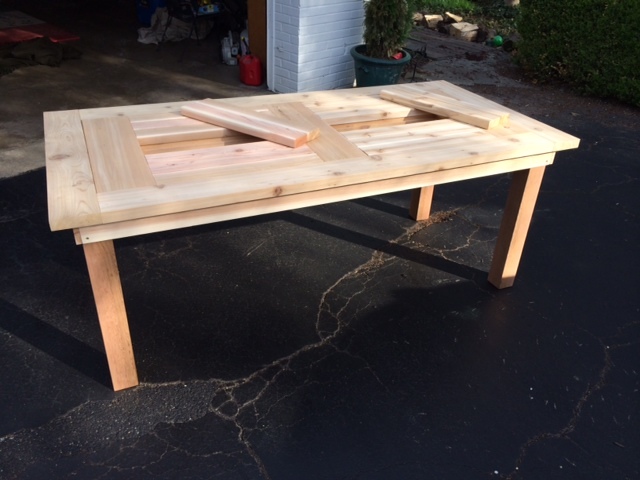
We needed a new patio table for our deck and I loved this design. I made it out of cedar which worked beautifully and made a few small tweaks:
- Needed it longer and wider so added two more 2x4's to the middle and added 2x6 end caps (as another poster had done).
- I did not add the holes to the cooler covers for uniformity, they slide in and out very easily.
- I used 4x4's as the legs and constructed the table skirting around it. This is a very sturdy design.
Built some benches for seating and they worked out great.
Overall I loved this build and it was fairly simple. Stained with Penofin deck stain (red label) and a spar varnish for protection.
Hope you like it!


Thu, 04/24/2014 - 07:43
Thank you! Local lumber yard that had great stuff. I will say though that I had to get some additional pieces from Home Depot and their cedar is fairly nice too. Beware though, they don't have true 1x cedar (at least here in St. Louis) it's more like 1/2 inch think.
Thu, 04/24/2014 - 07:43
Thank you! Local lumber yard that had great stuff. I will say though that I had to get some additional pieces from Home Depot and their cedar is fairly nice too. Beware though, they don't have true 1x cedar (at least here in St. Louis) it's more like 1/2 inch think.
Tue, 07/08/2014 - 20:00
Really well done with the two-tone stain. What particular colors of Penofin did you use? I'm working on a similar build and would like to use your color combination.
Mon, 05/04/2015 - 10:06
Do you happen to have your lumber list? I'm not the greatest with add ons, LOL! If you happen to have a step by step that's even better.
Thanks,
Jennifer
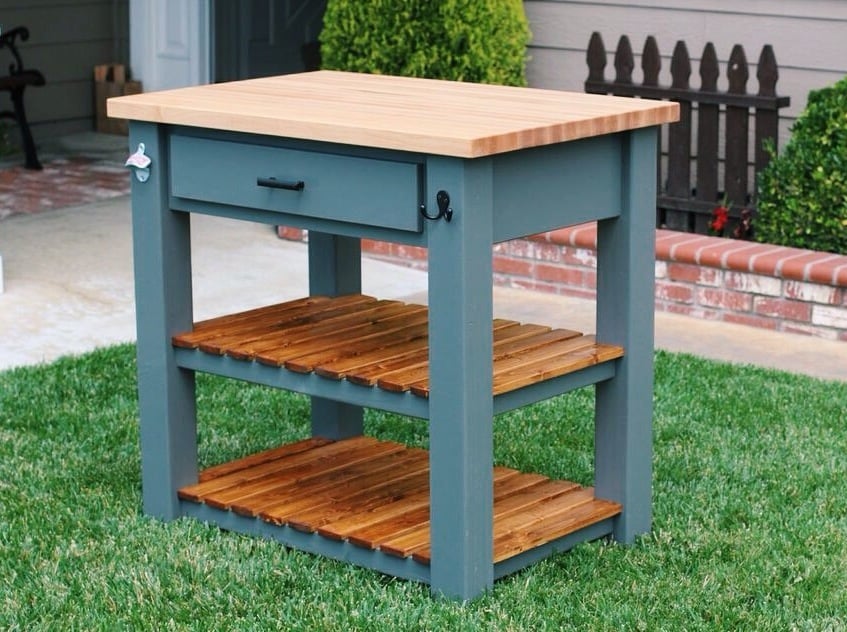
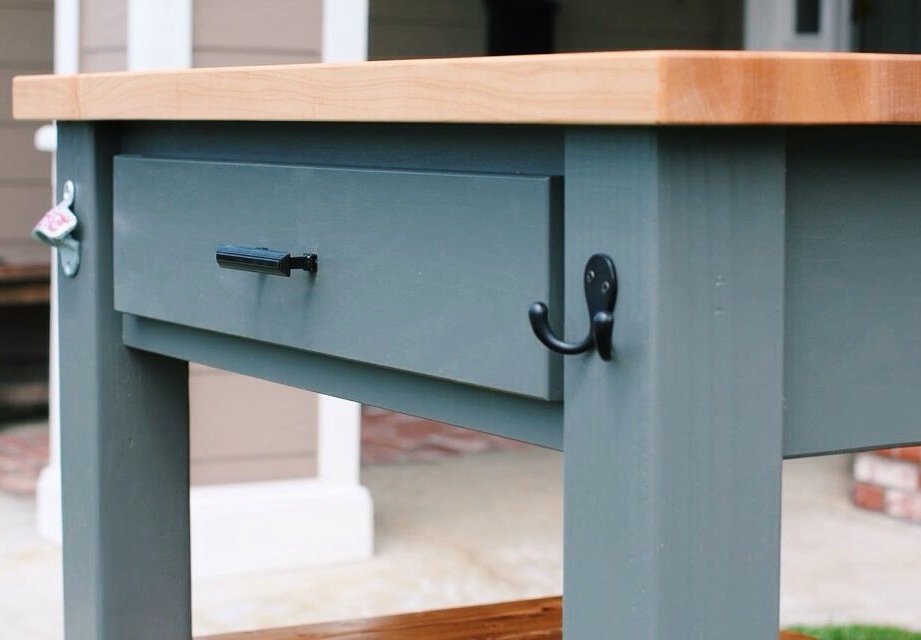
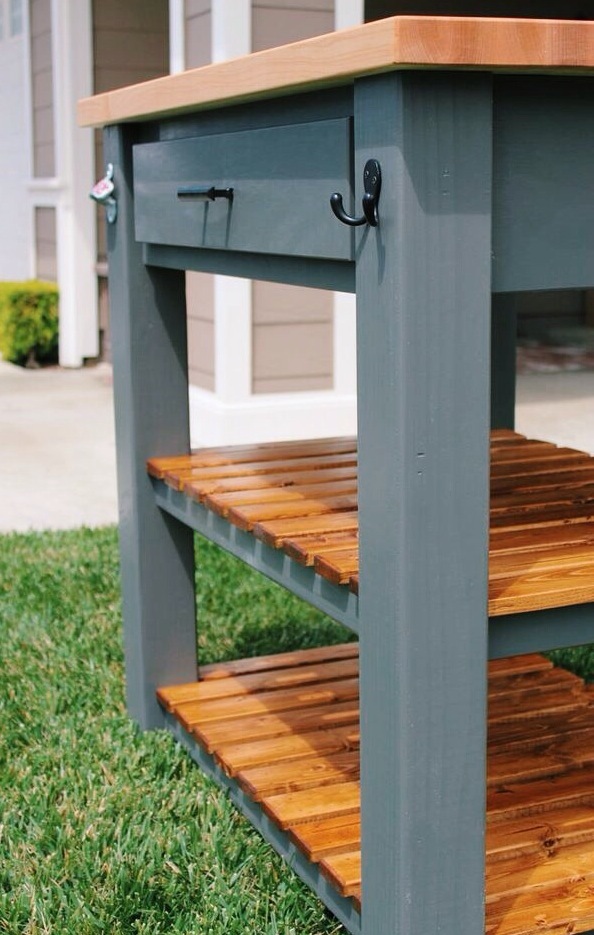
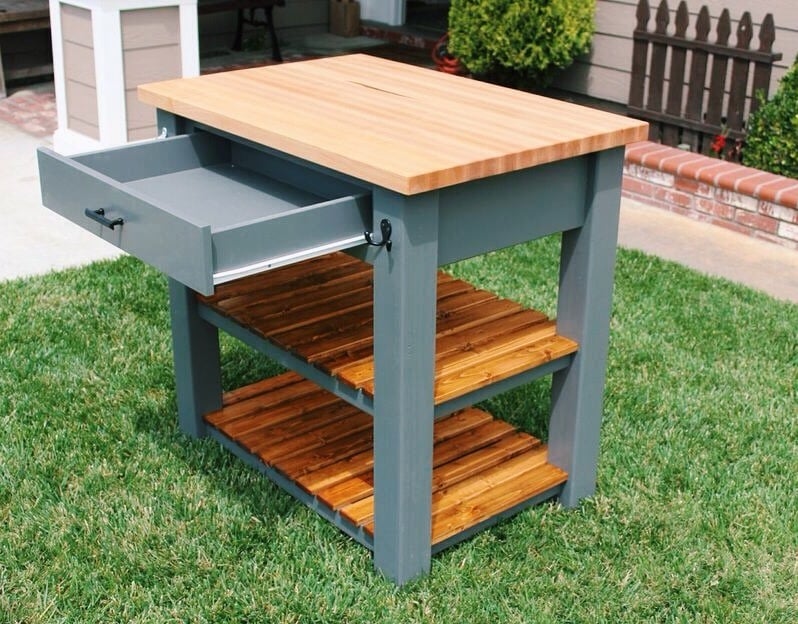
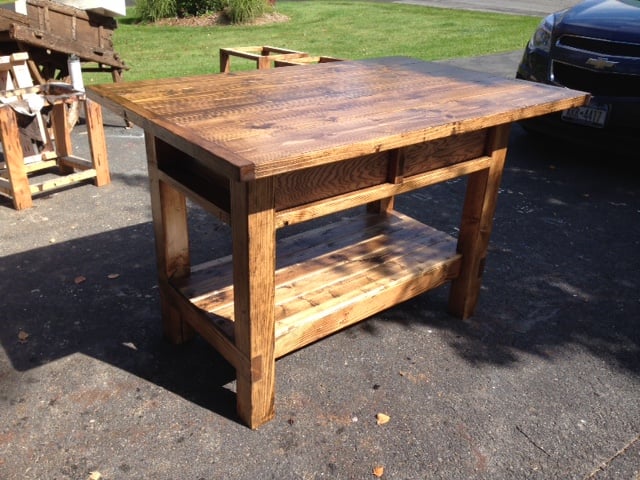
This is a modified butcher block kitchen island built from ana white's plan. Instead of using doug fir (2x4) material for the top, I used hard maple to build an edge grain butcher block top that if knife friendly and food safe. I also altered the dimensions to fit my space.

Sat, 05/10/2014 - 11:05
Yet another beautiful kitchen island. Love the finish and butcher block top on this one! Thanks for sharing!
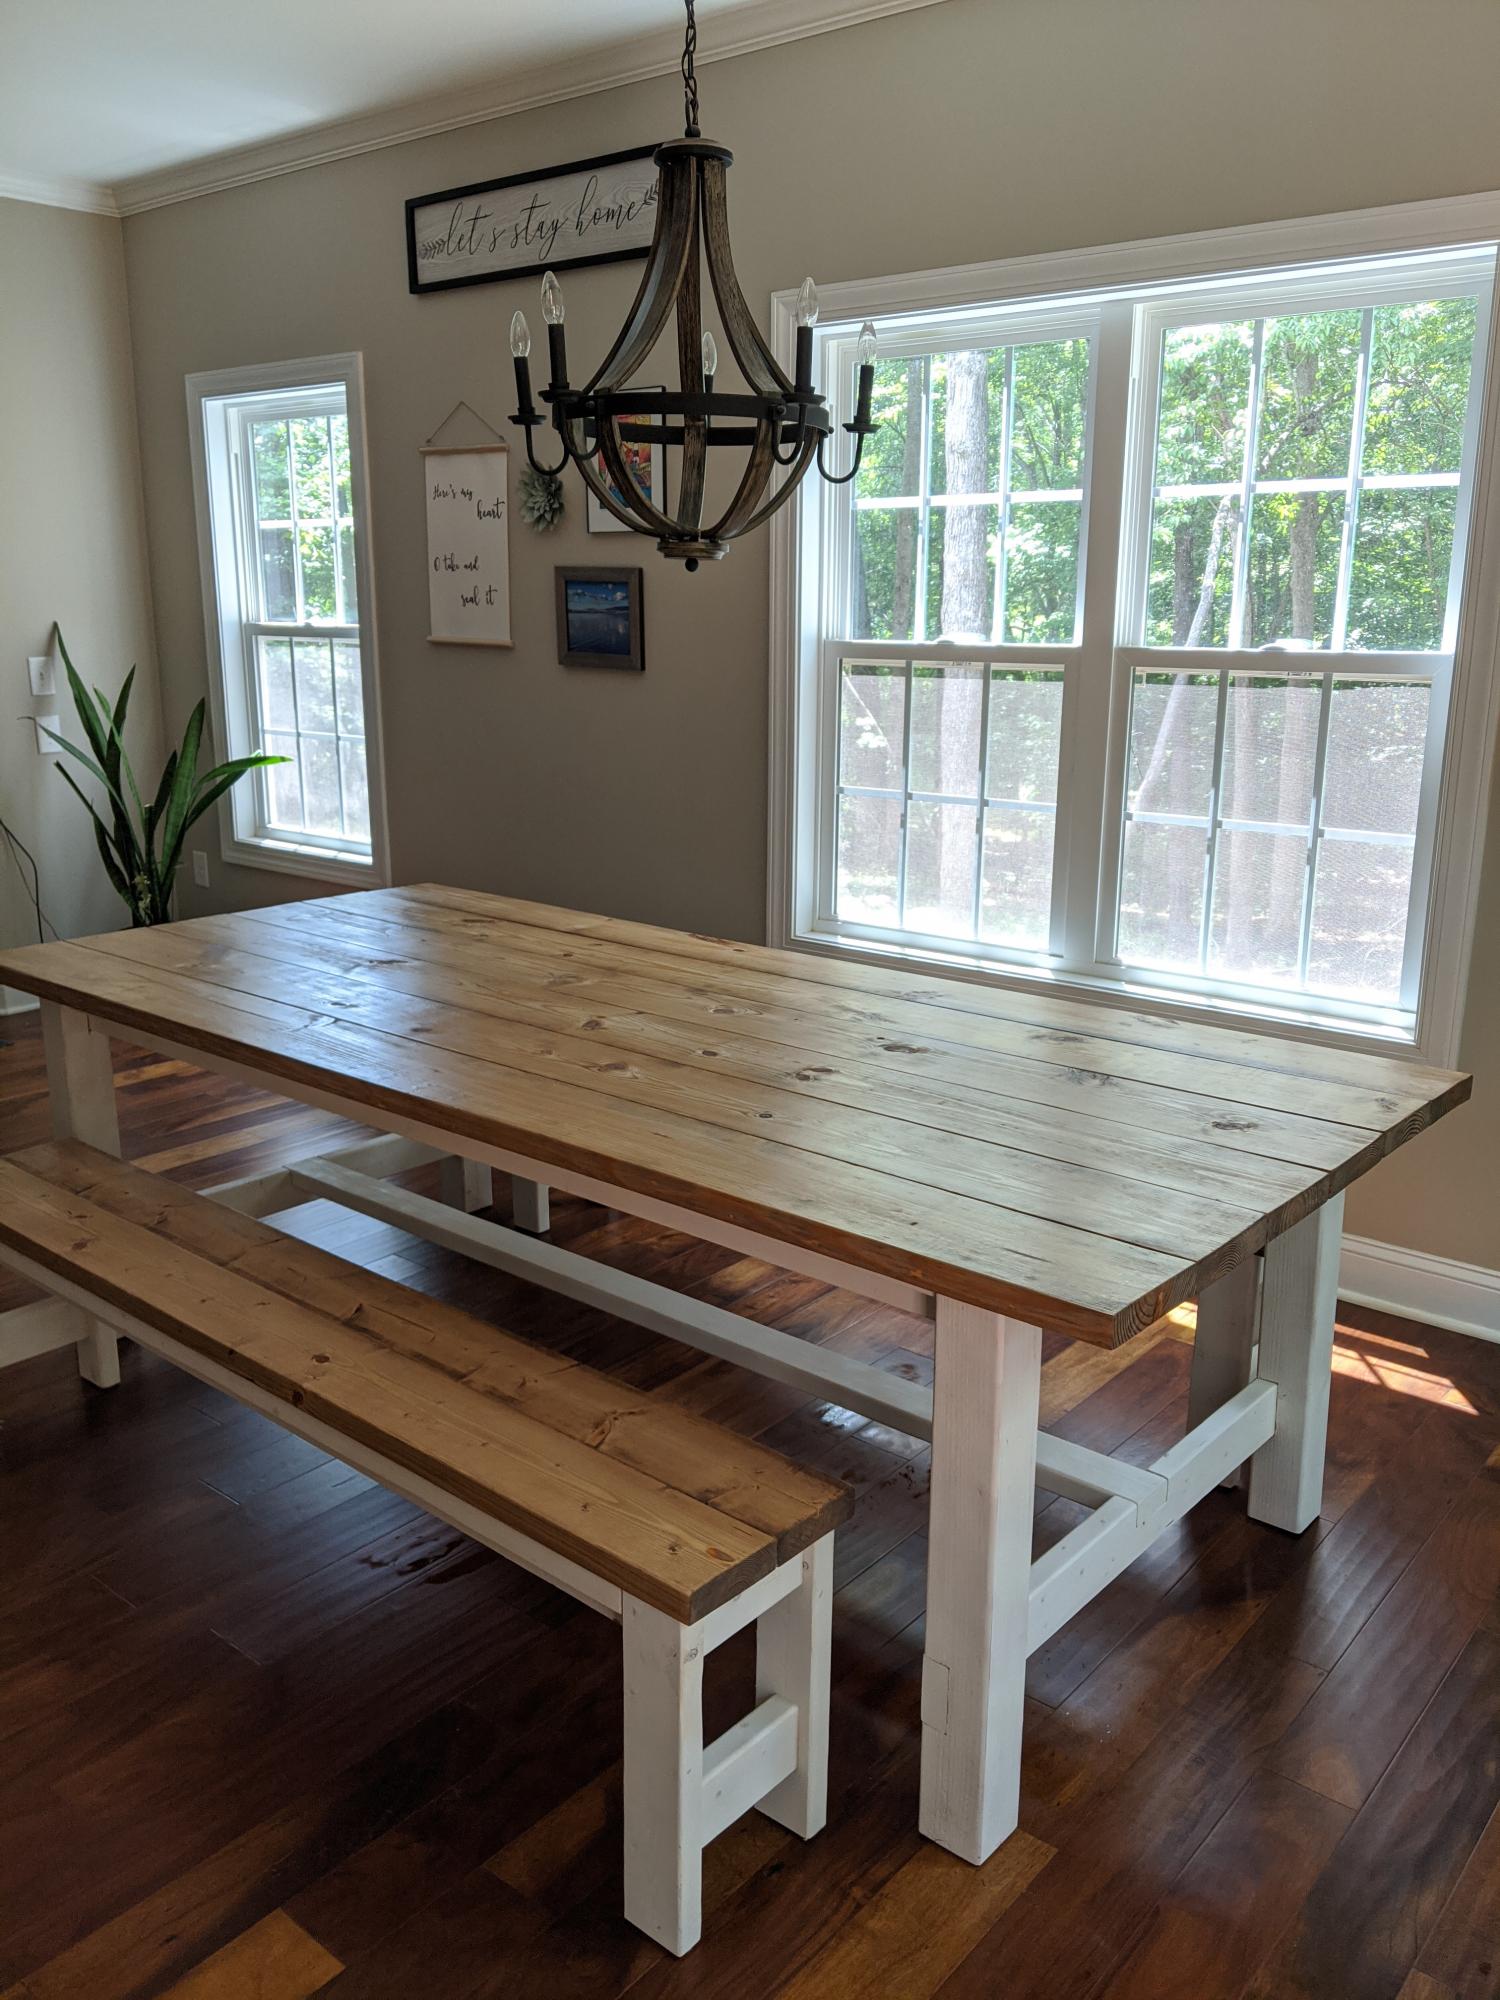
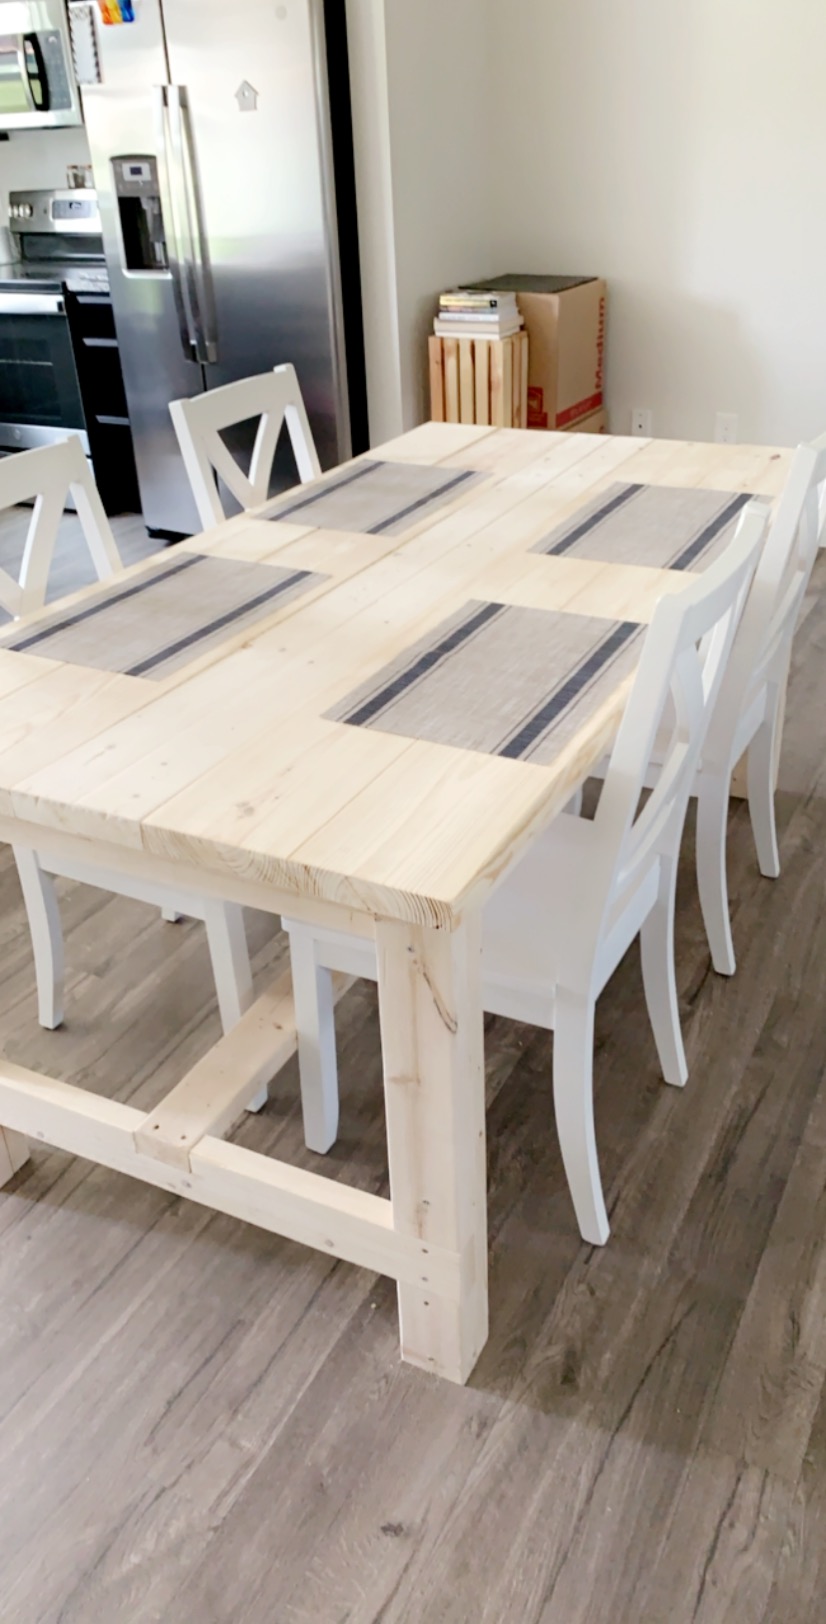
First table build! We modified the plans with no breadboard ends since we live with lots of humidity and wanted to allow the wood movement. We also used 4x4s for the legs. White chalk spray paint legs and custom mix of special walnut and weathered oak stains. We LOVE it!!
Simply fun project, and so Nice in USE! Used pine all the way!
Had to make modifications for size, errors, and personal preference, but we love this table! Still deciding on all white paint or a 2-tone finish. Also- first time using a Kreg jig. What an amazing tool.
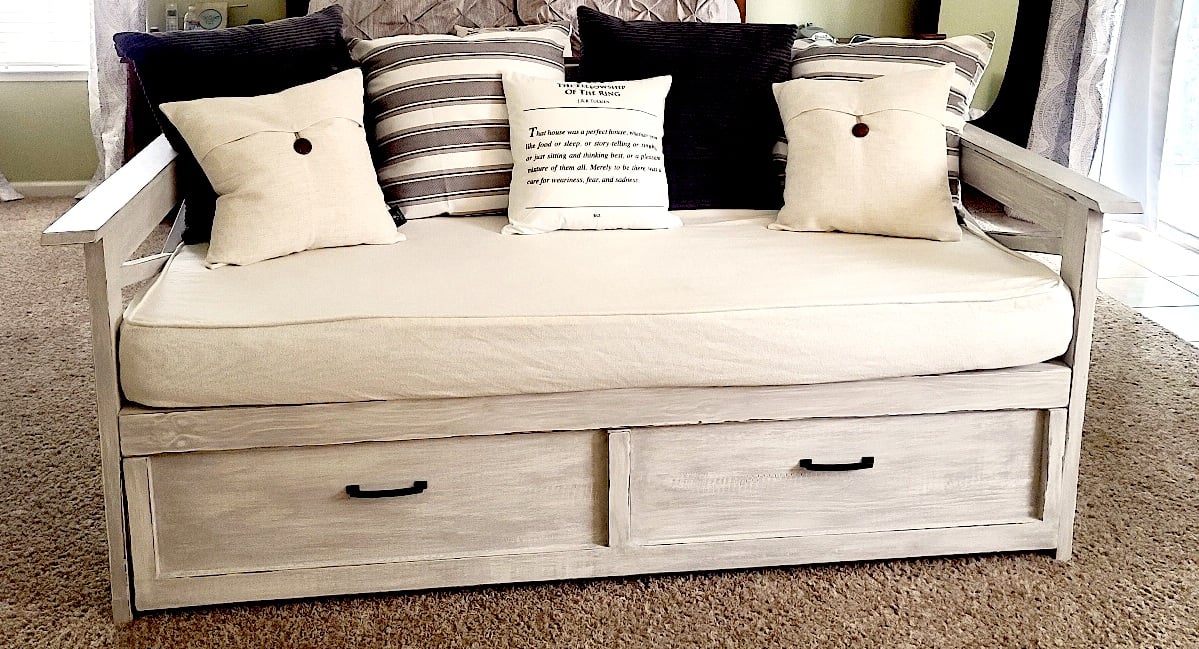
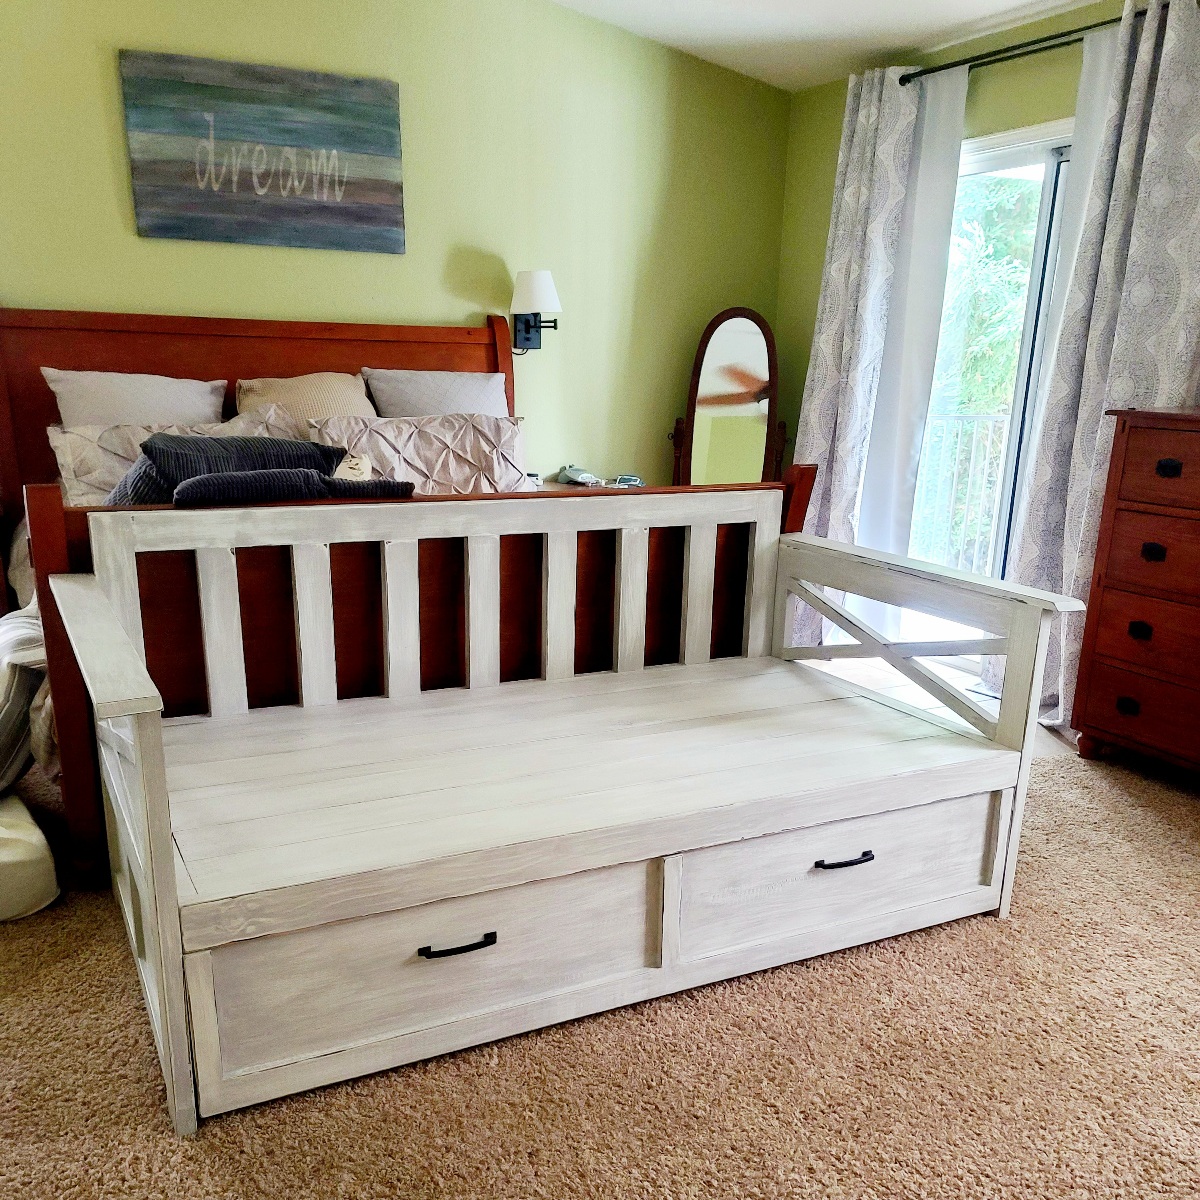
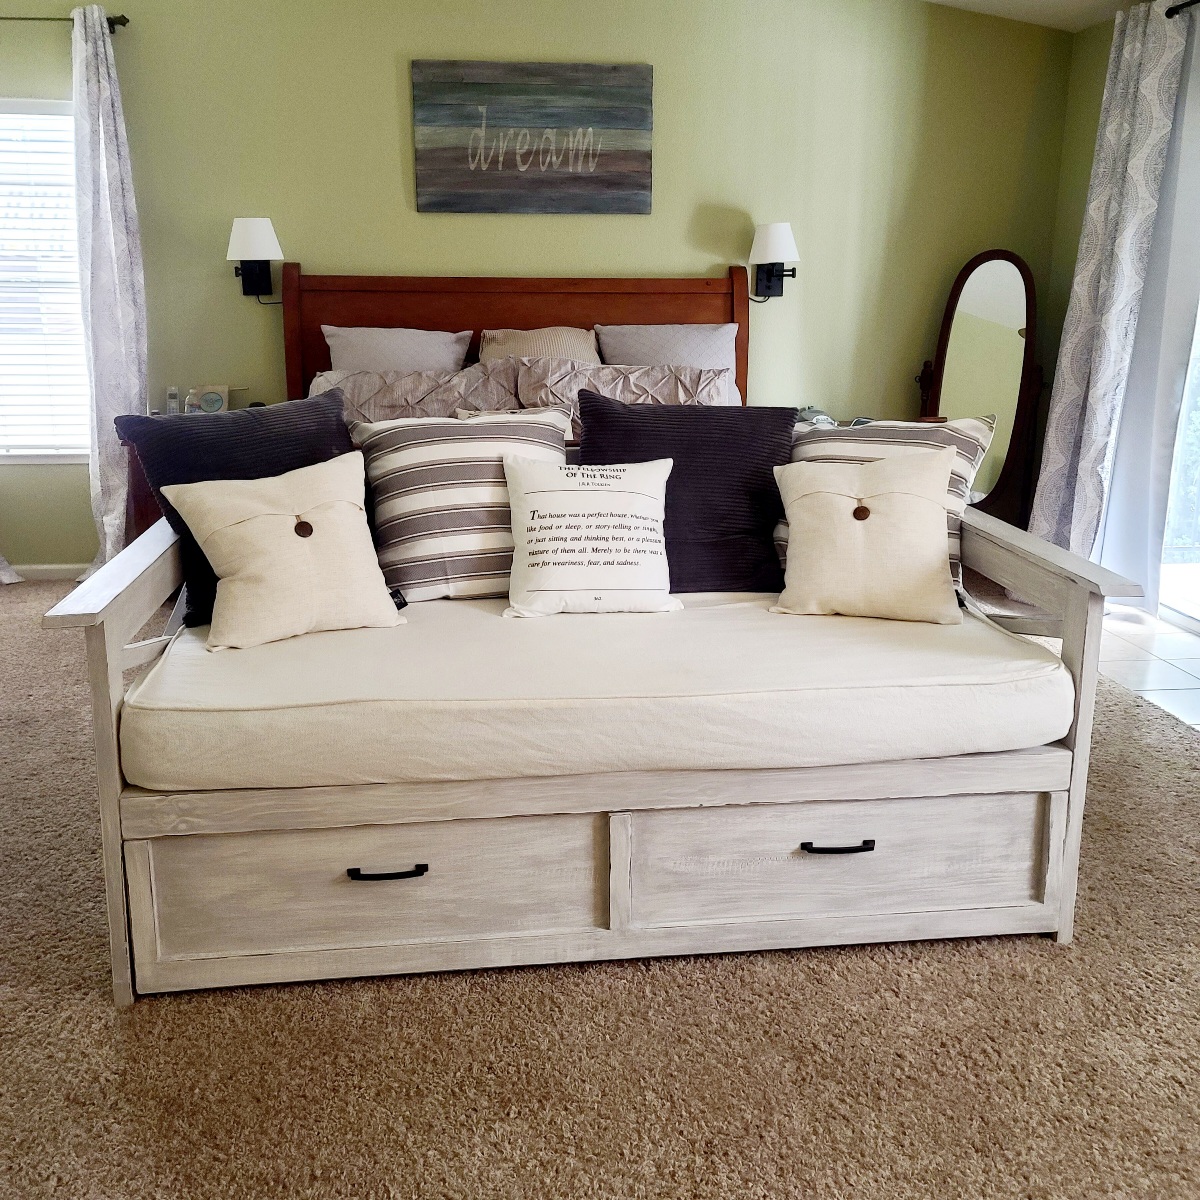
Great plans for a really useful storage daybed! I modified the plans to include a slat back and rustic x sides, as well as changing the Trundle drawers to a single drawer to fit my exercise equipment. I finished the daybed with stain and chalk paint in old white and Paris Grey distressed for the perfect shabby chic look!
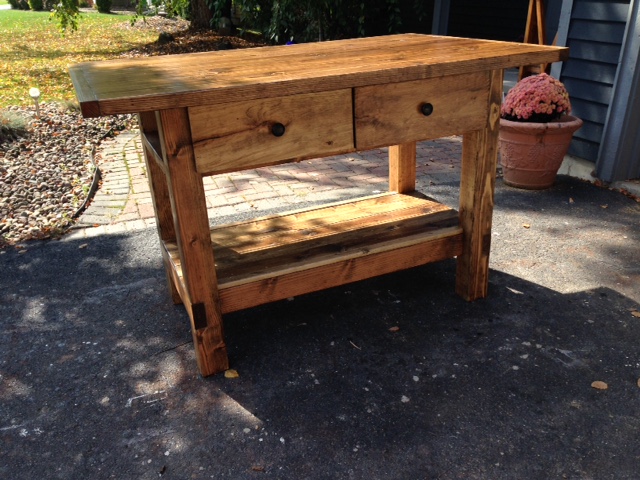
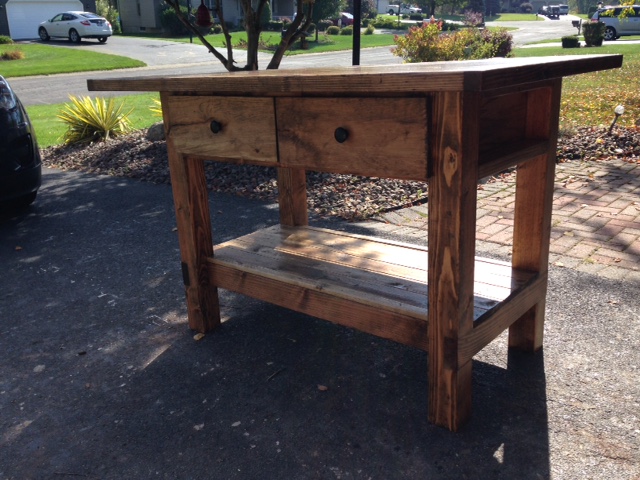
modified a bit to add 2 drawers and only 1 shelf, also make with 6" overhang around for stools or chairs.
Sun, 10/05/2014 - 08:51
Isn't that the best plan? So versatile. I love the look - would love to see a picture after you have the island as part of a kitchen scheme.
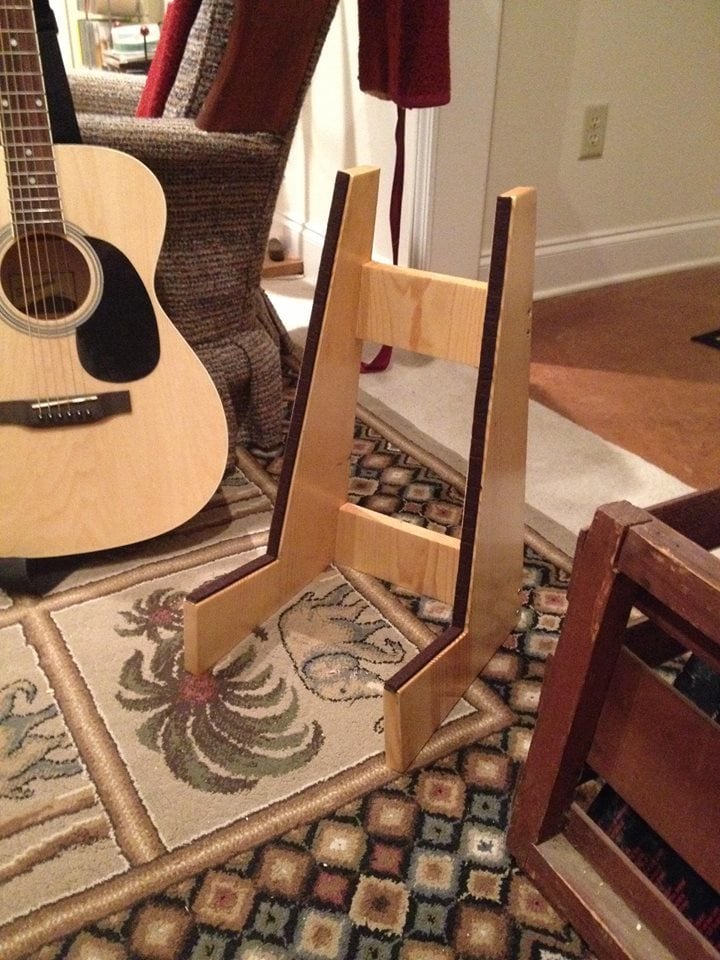
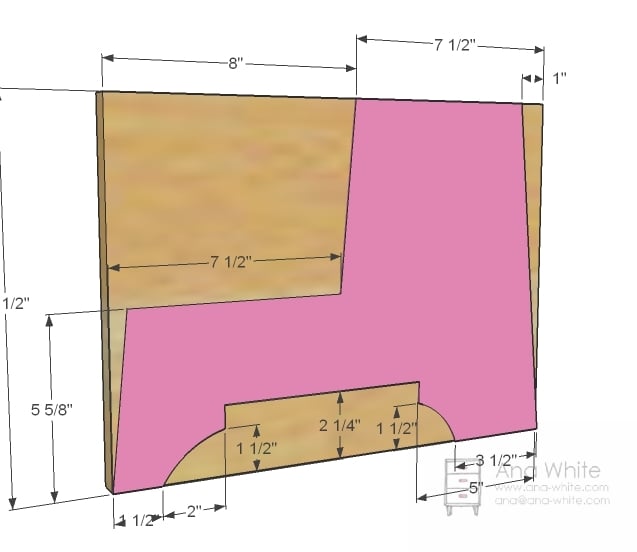
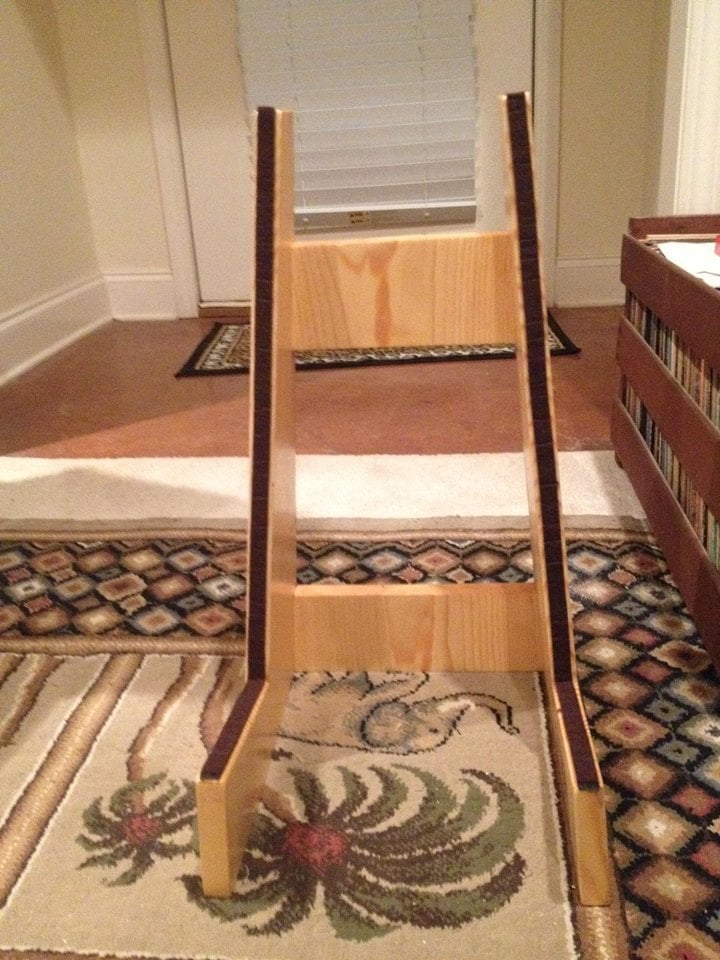
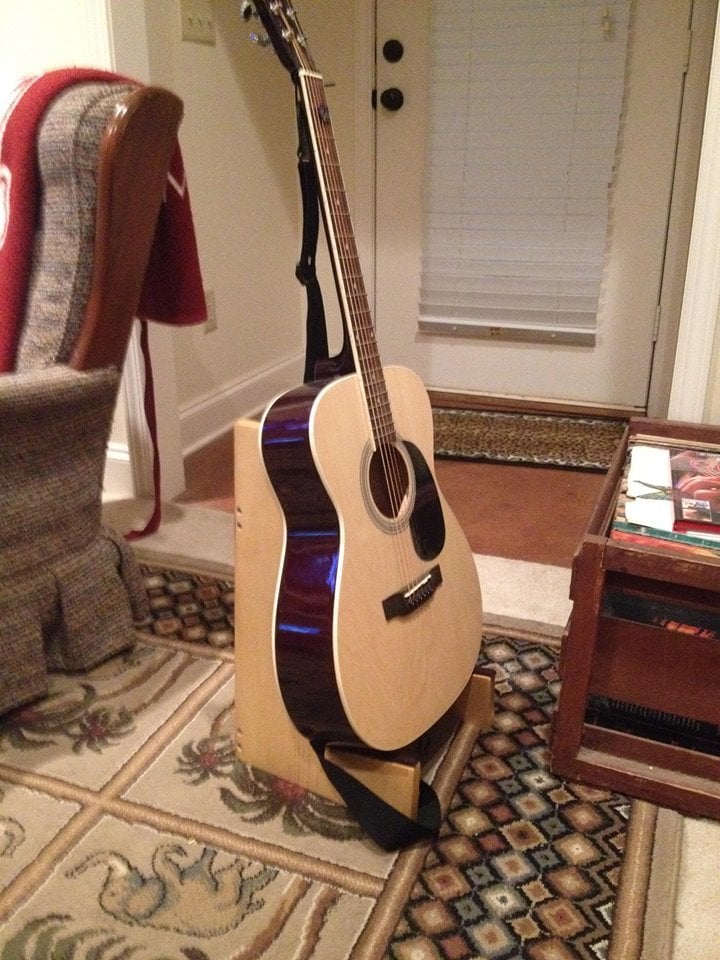
Built this guitar stand basically by using on-hand materials left over from another project. Used 1x12's; 18" tall fir for sides and back braces (cut at 5 degrees on each side). Added felt strips to protect the instrument.
Thu, 05/28/2020 - 17:37
Very nice and well designed. Thanks for some ideas!

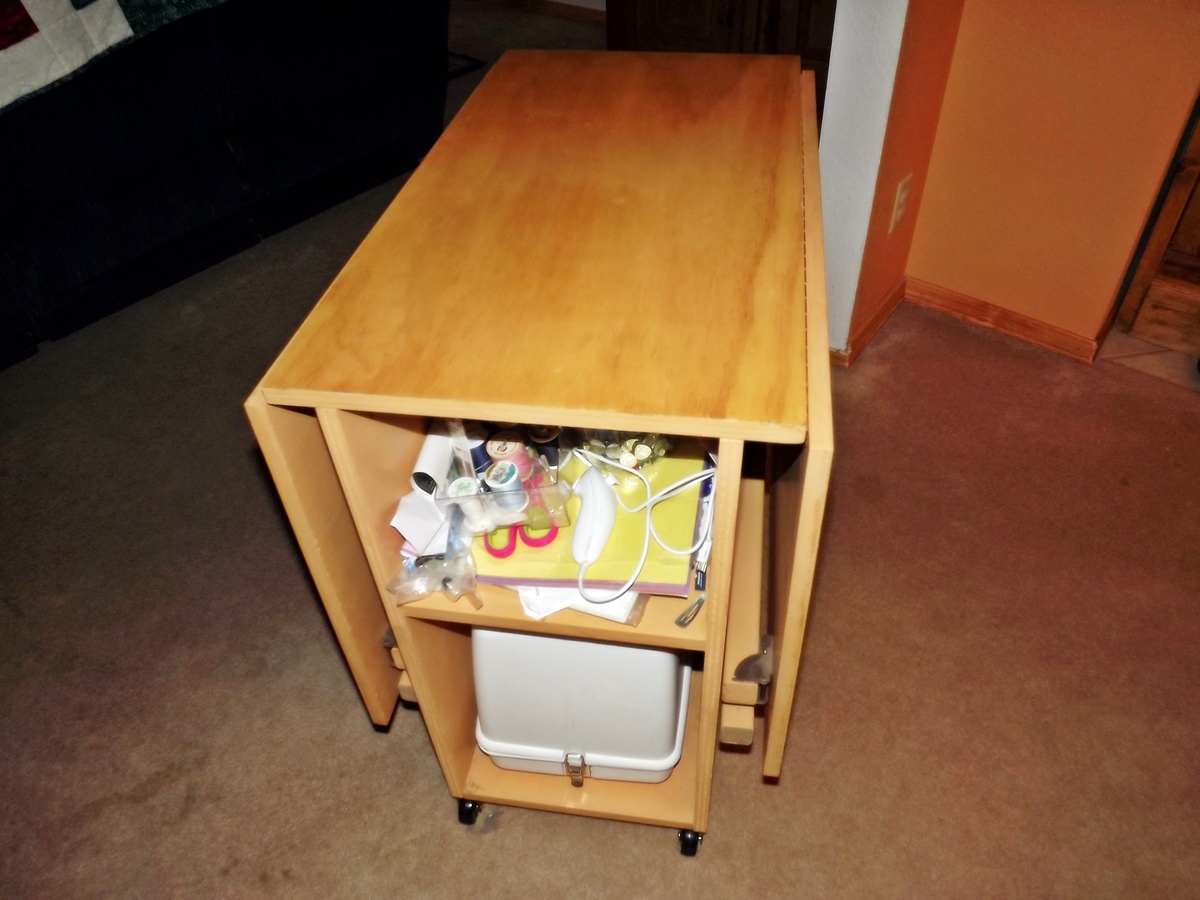
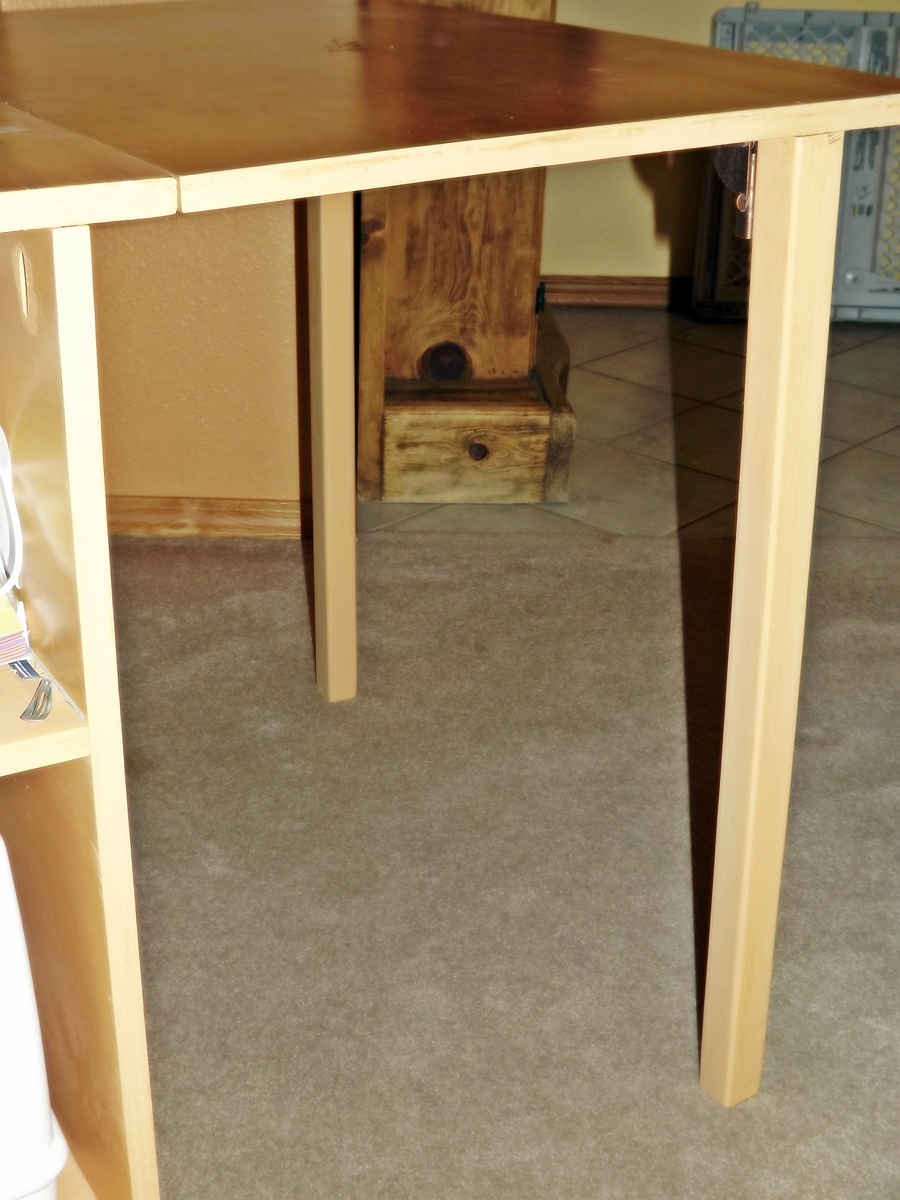
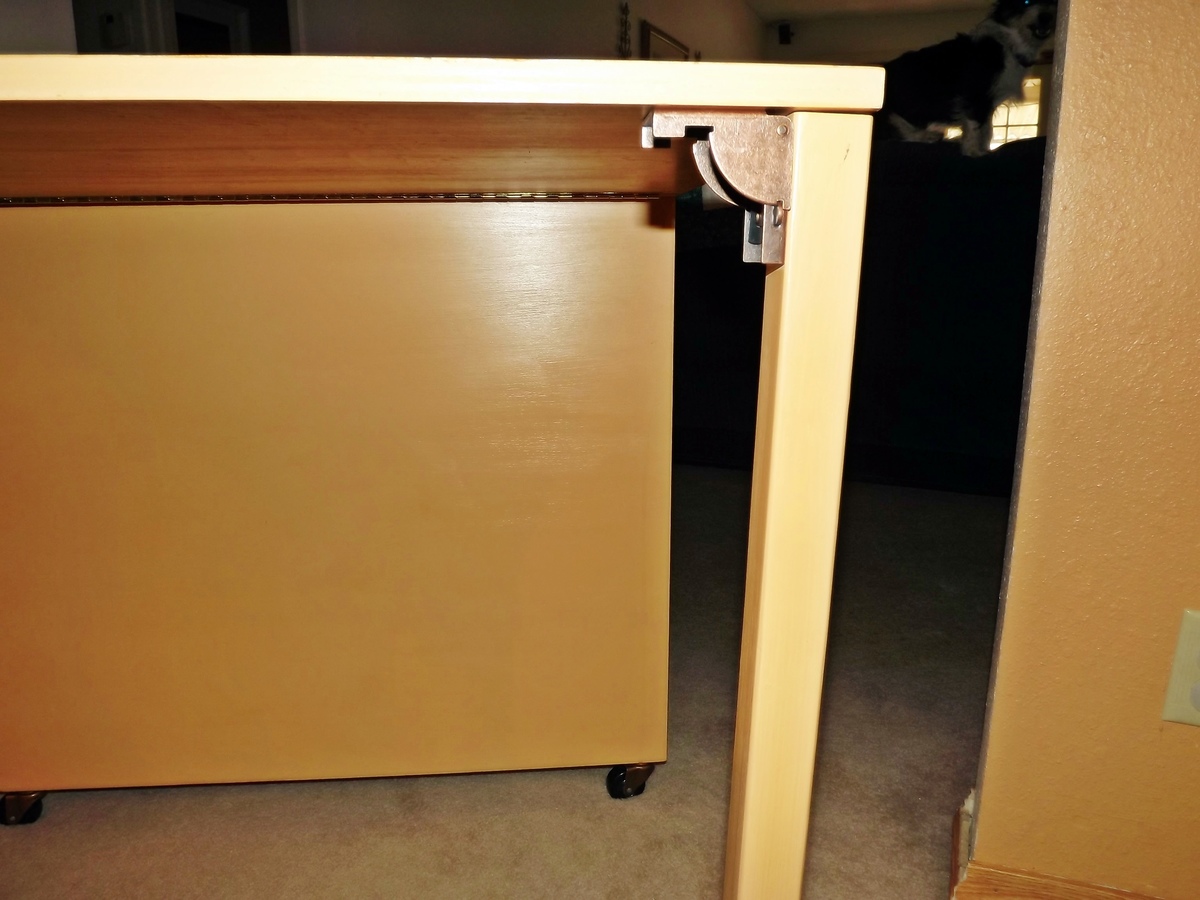
My daughter-in-law needed a compact sewing table, and this plan fit the bill perfectly! I did use 2 x 2 legs instead of 1 x 2s. This makes the table considerably more stable if you plan to use this table with your machine. If you do use the 2 x 2s for legs, you will need to widen your table top dimensions from 15 1/2" to 17" to accommodate the larger diameter of the legs. I also used a piano hinge for each drop leaf. They weren't much more expensive than the hinges listed in the plans, but again, they provide more stability (imho).
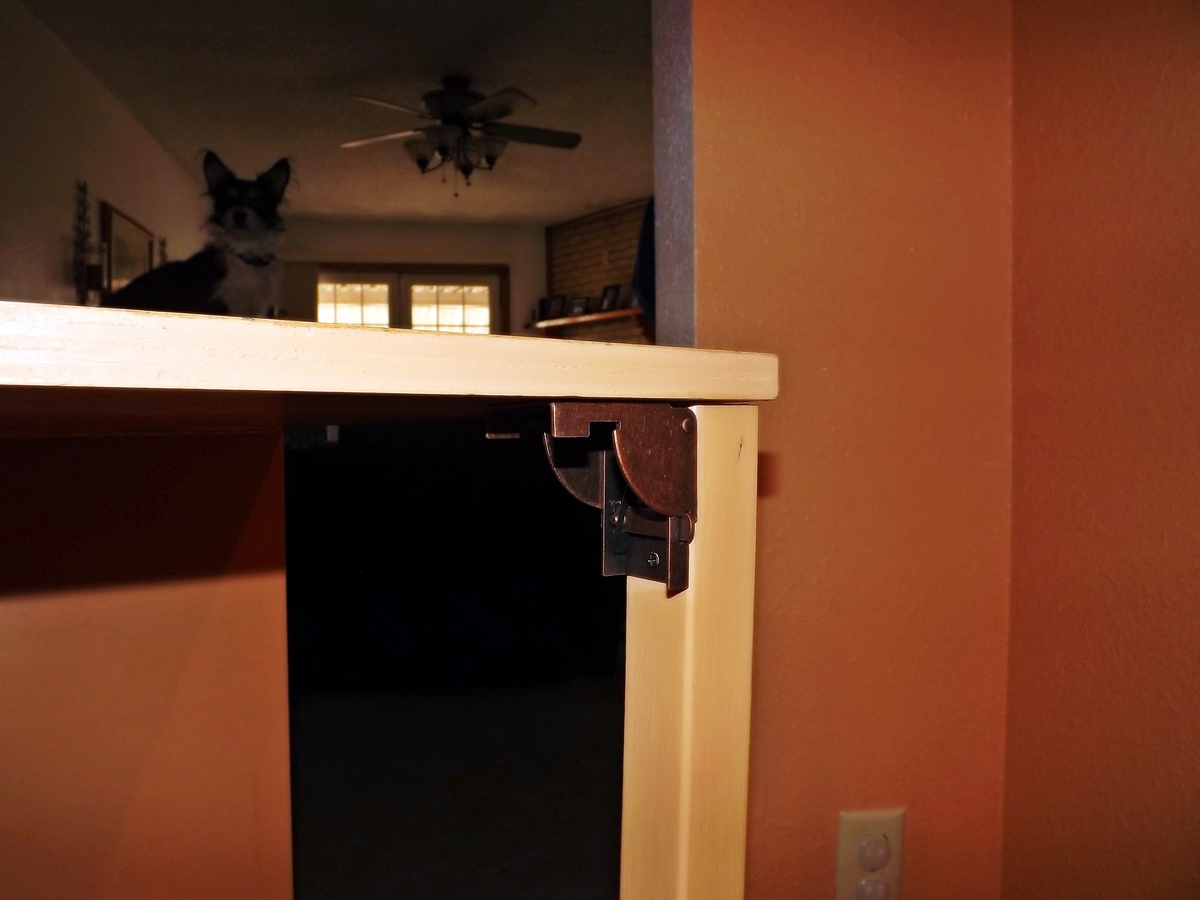
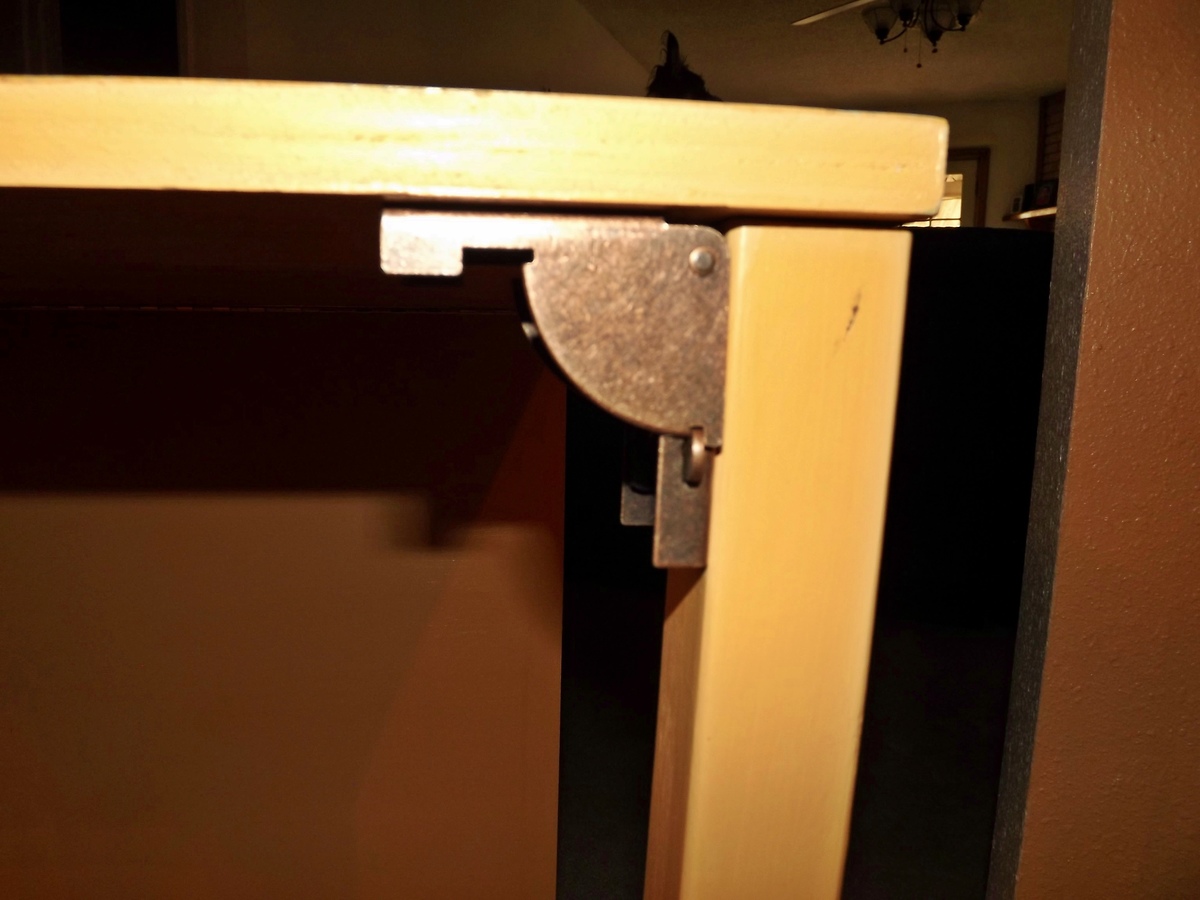
I wanted to show the locking mechanism for the legs in detail. I love these as they hold the legs in place when the drop leaf is down, and they pop into place when the leaf is in use. Called "folding leg fitting" it is part S-149L at $3.65 each at the following link:
http://www.hardwaretree.com/proddetail.php?prod=S-149L
When my daughter-in-law received her gift on Christmas Eve, she wouldn't even let me keep it for another day or two so I could touch-uppaint some spots...she loves it.
Thank you, Ana, for the wonderful plans!!

Sun, 02/03/2013 - 17:45
Great job! I can understand your DIL's unwillingness to part with it even for a short amount of time!

Mon, 02/04/2013 - 07:49
The table for my sewing machine costs almost as much as the machine did! This is a wonderful build. You have a very luck daughter-in-law.

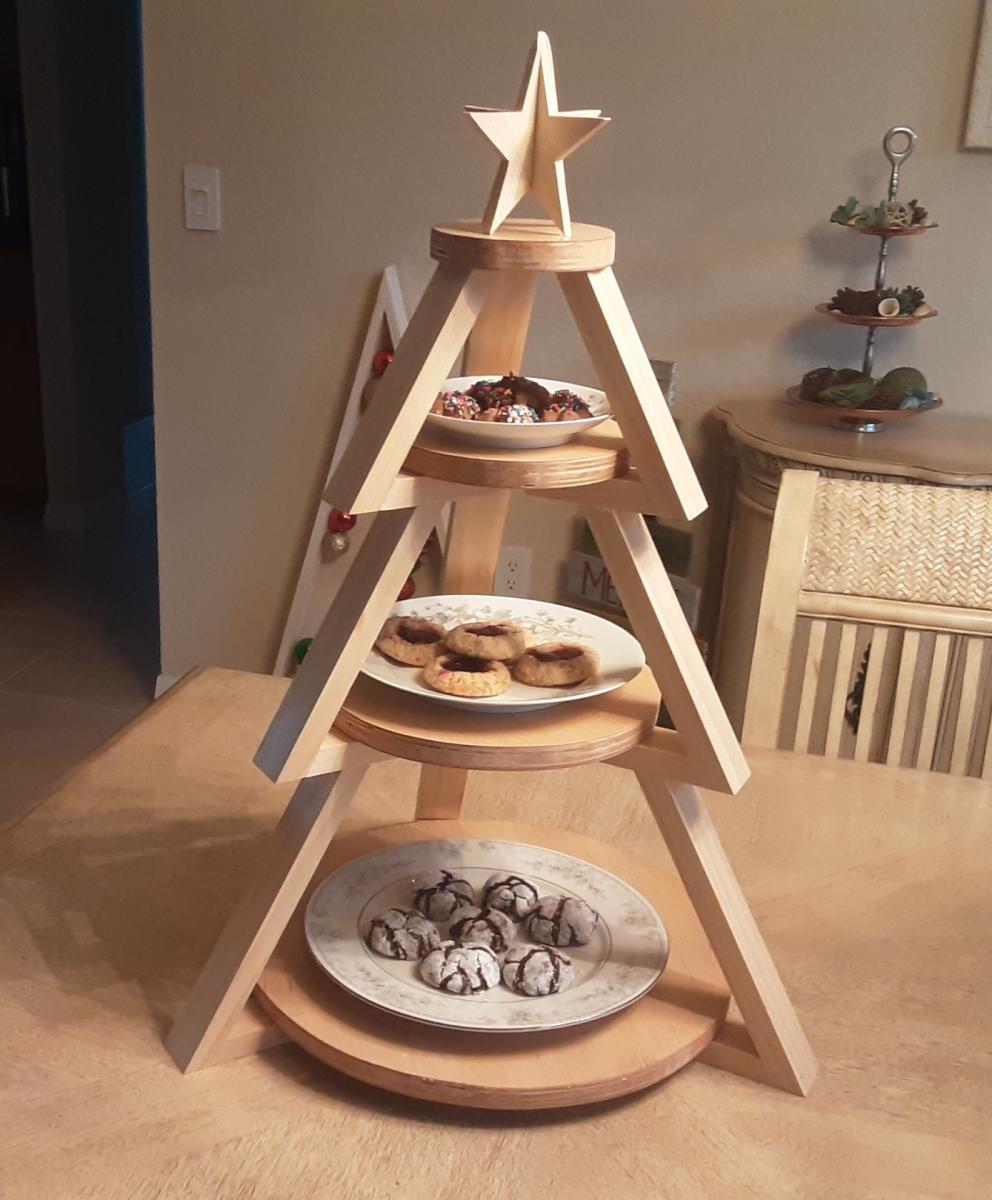
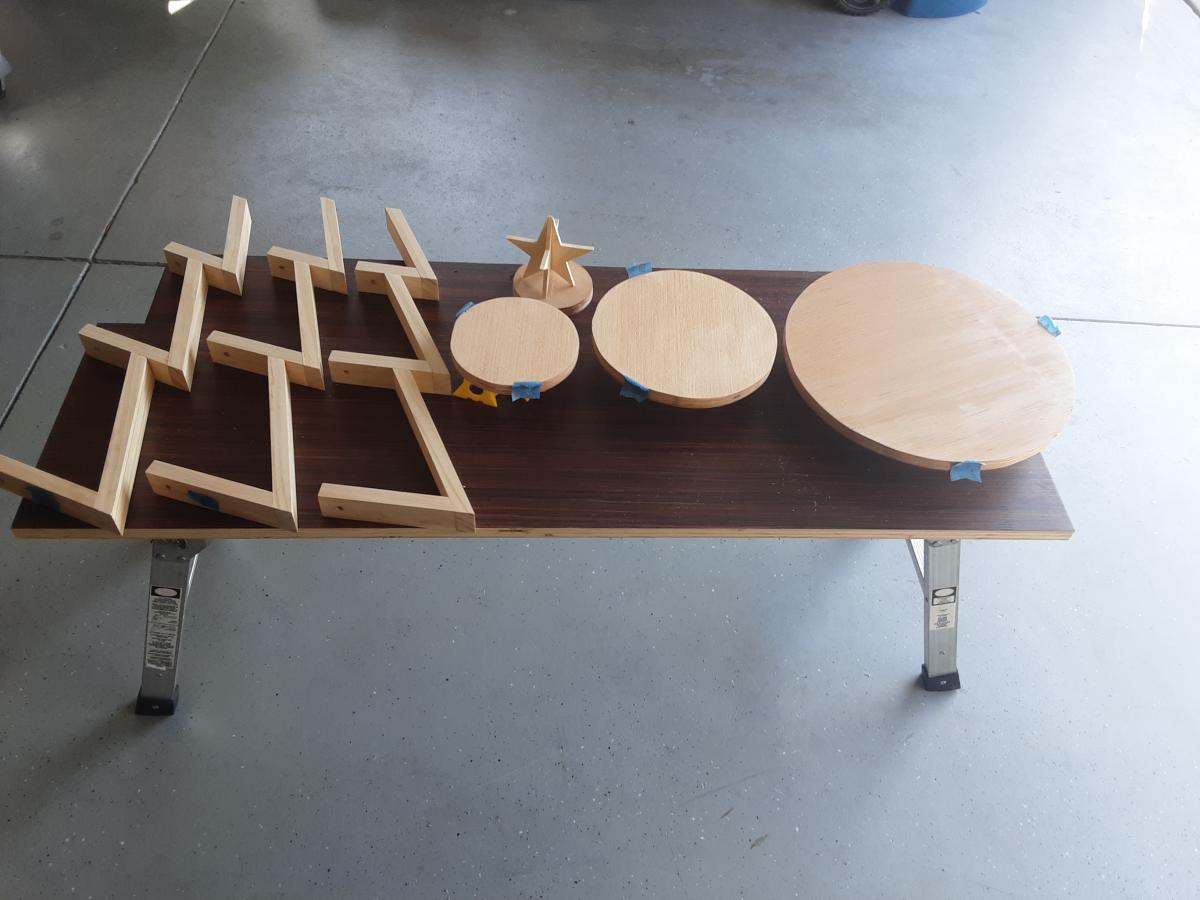
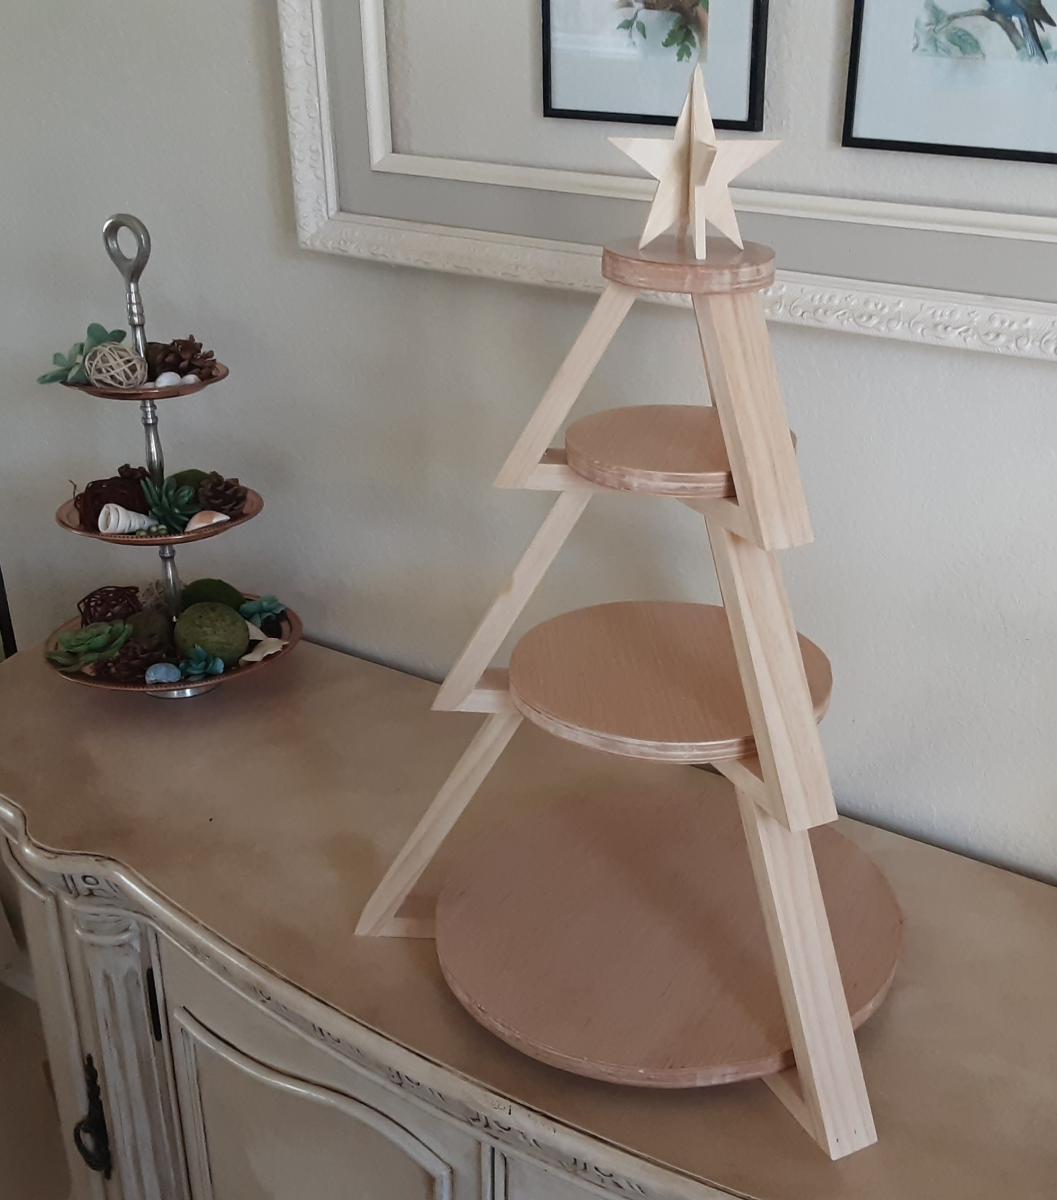
Inspired by Shara of Woodshop Diaries, created this 3 tier tray for displaying cookies for Santa. Added a 3 dimensional star as the topper and simply followed the excellent photos and schematics on Shara's website.
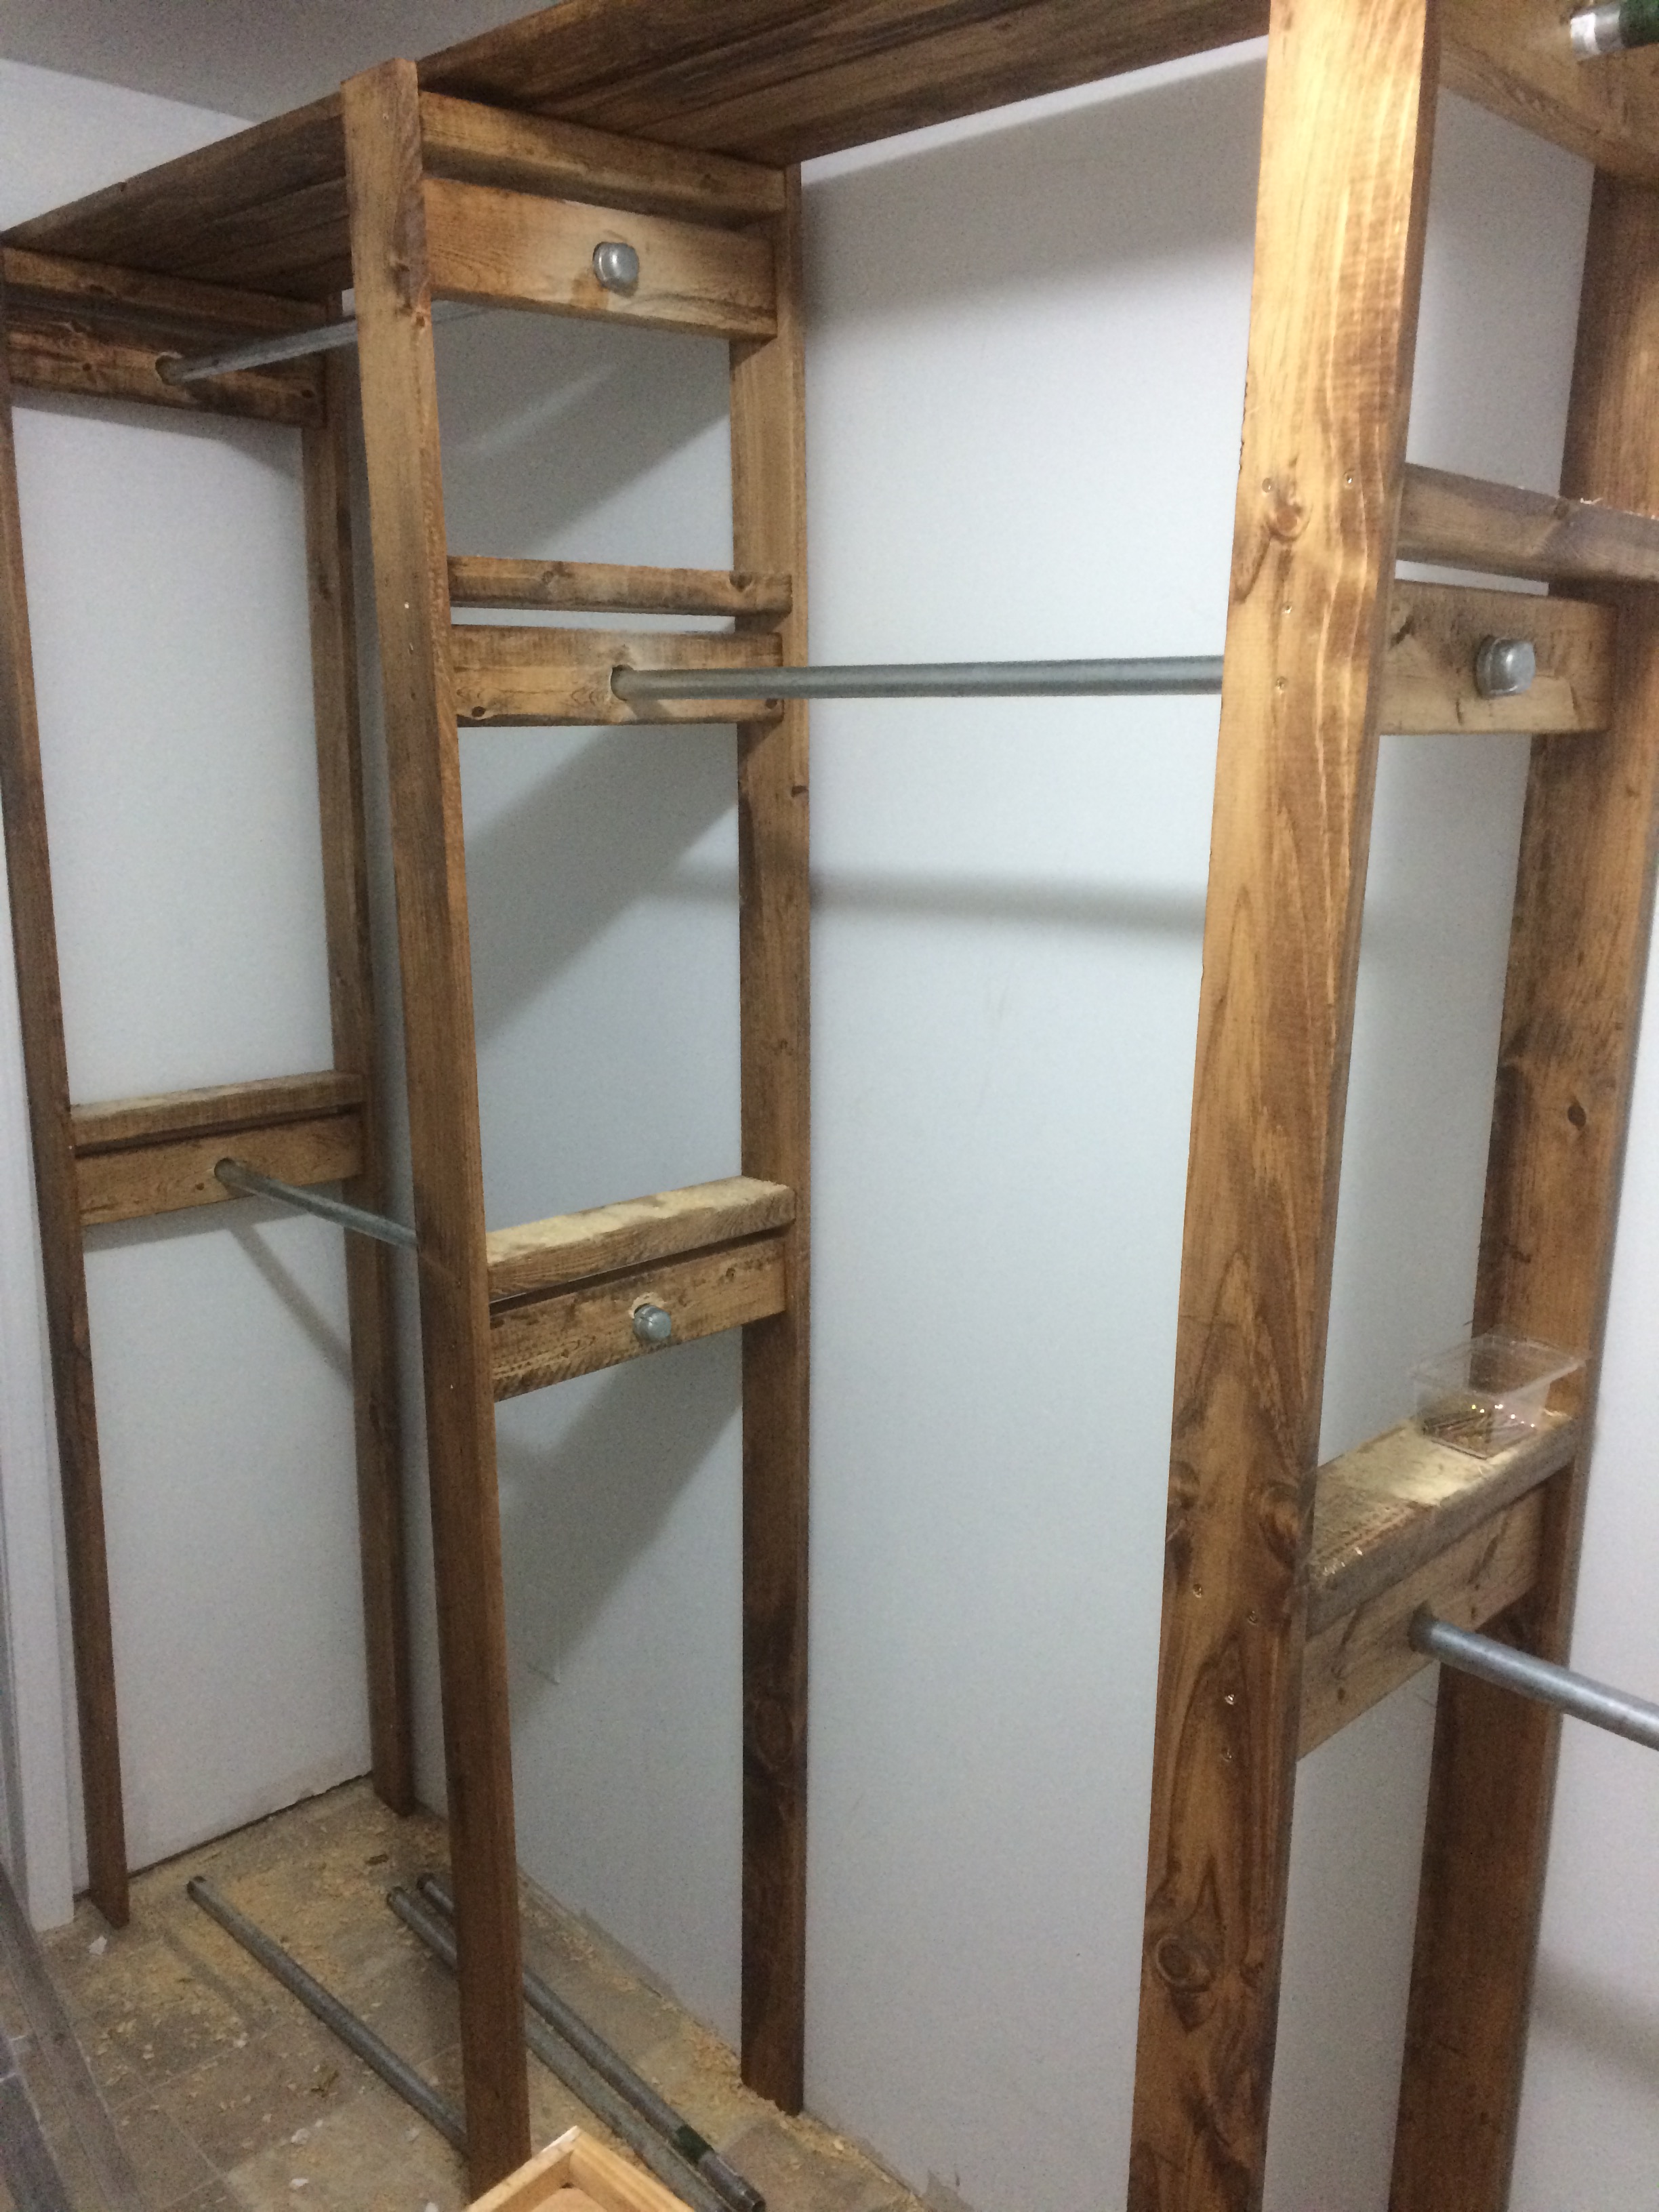
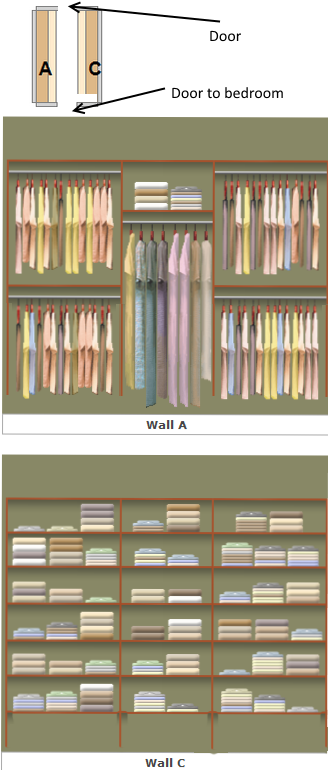
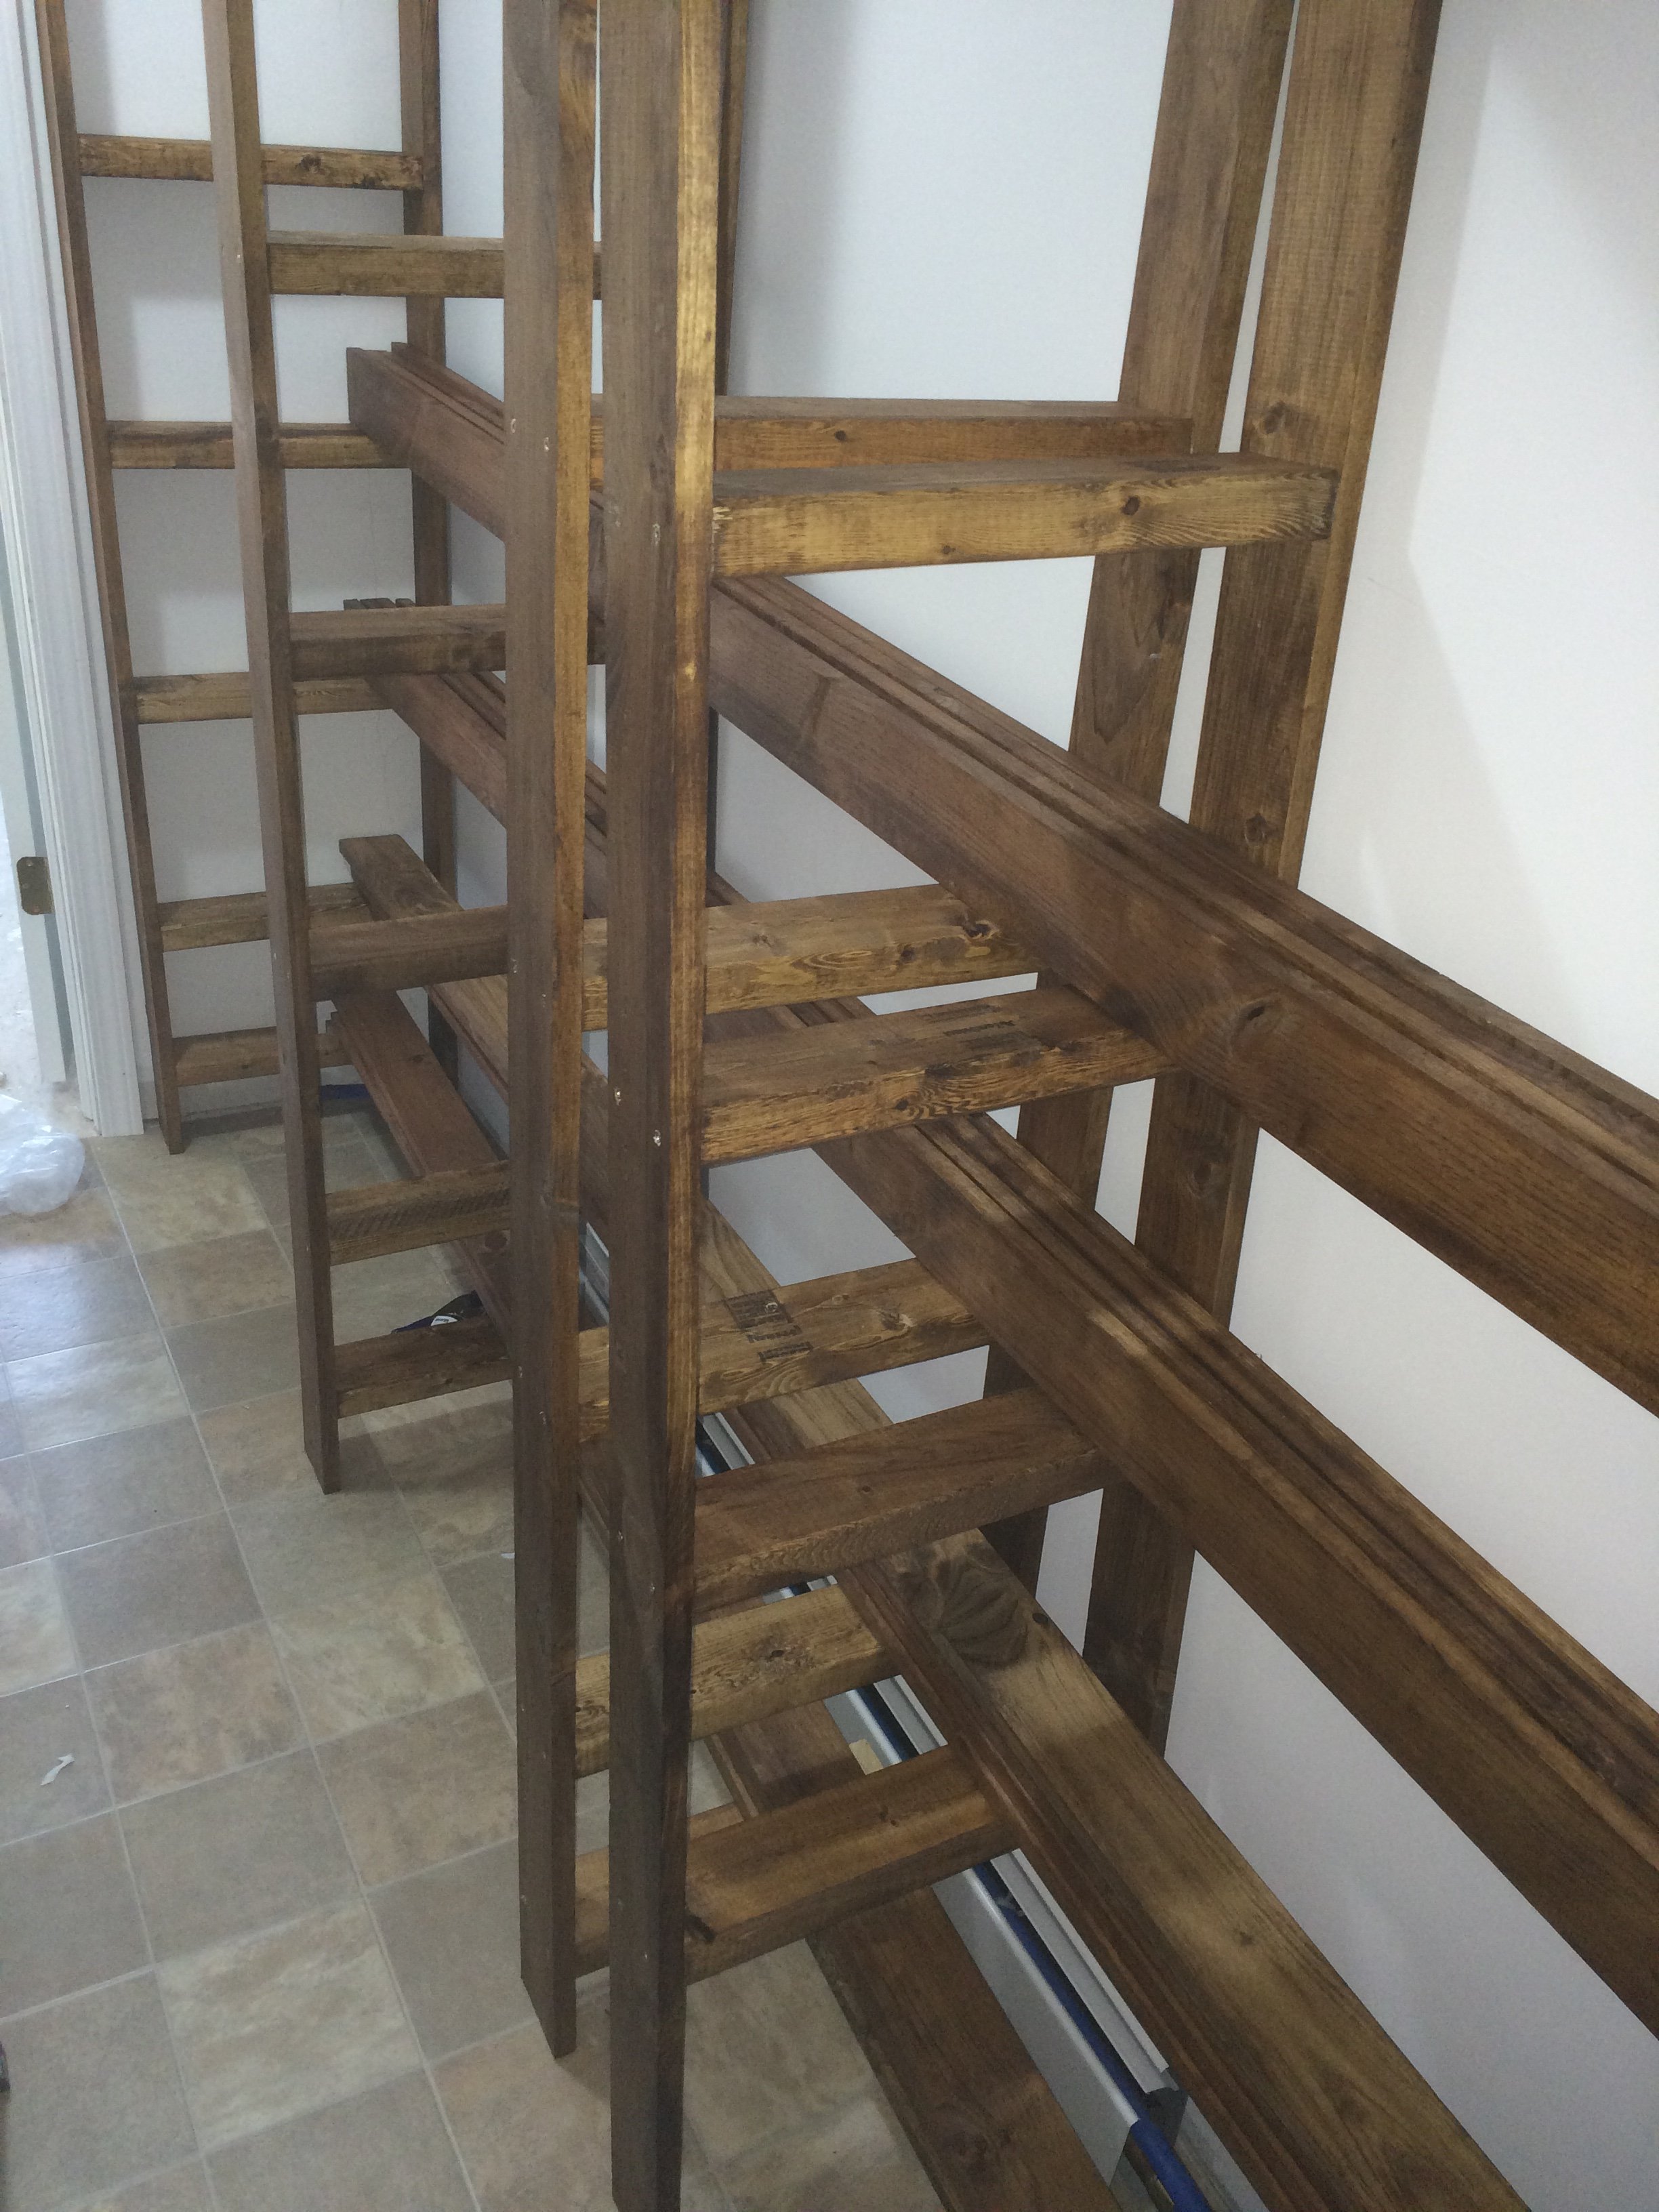
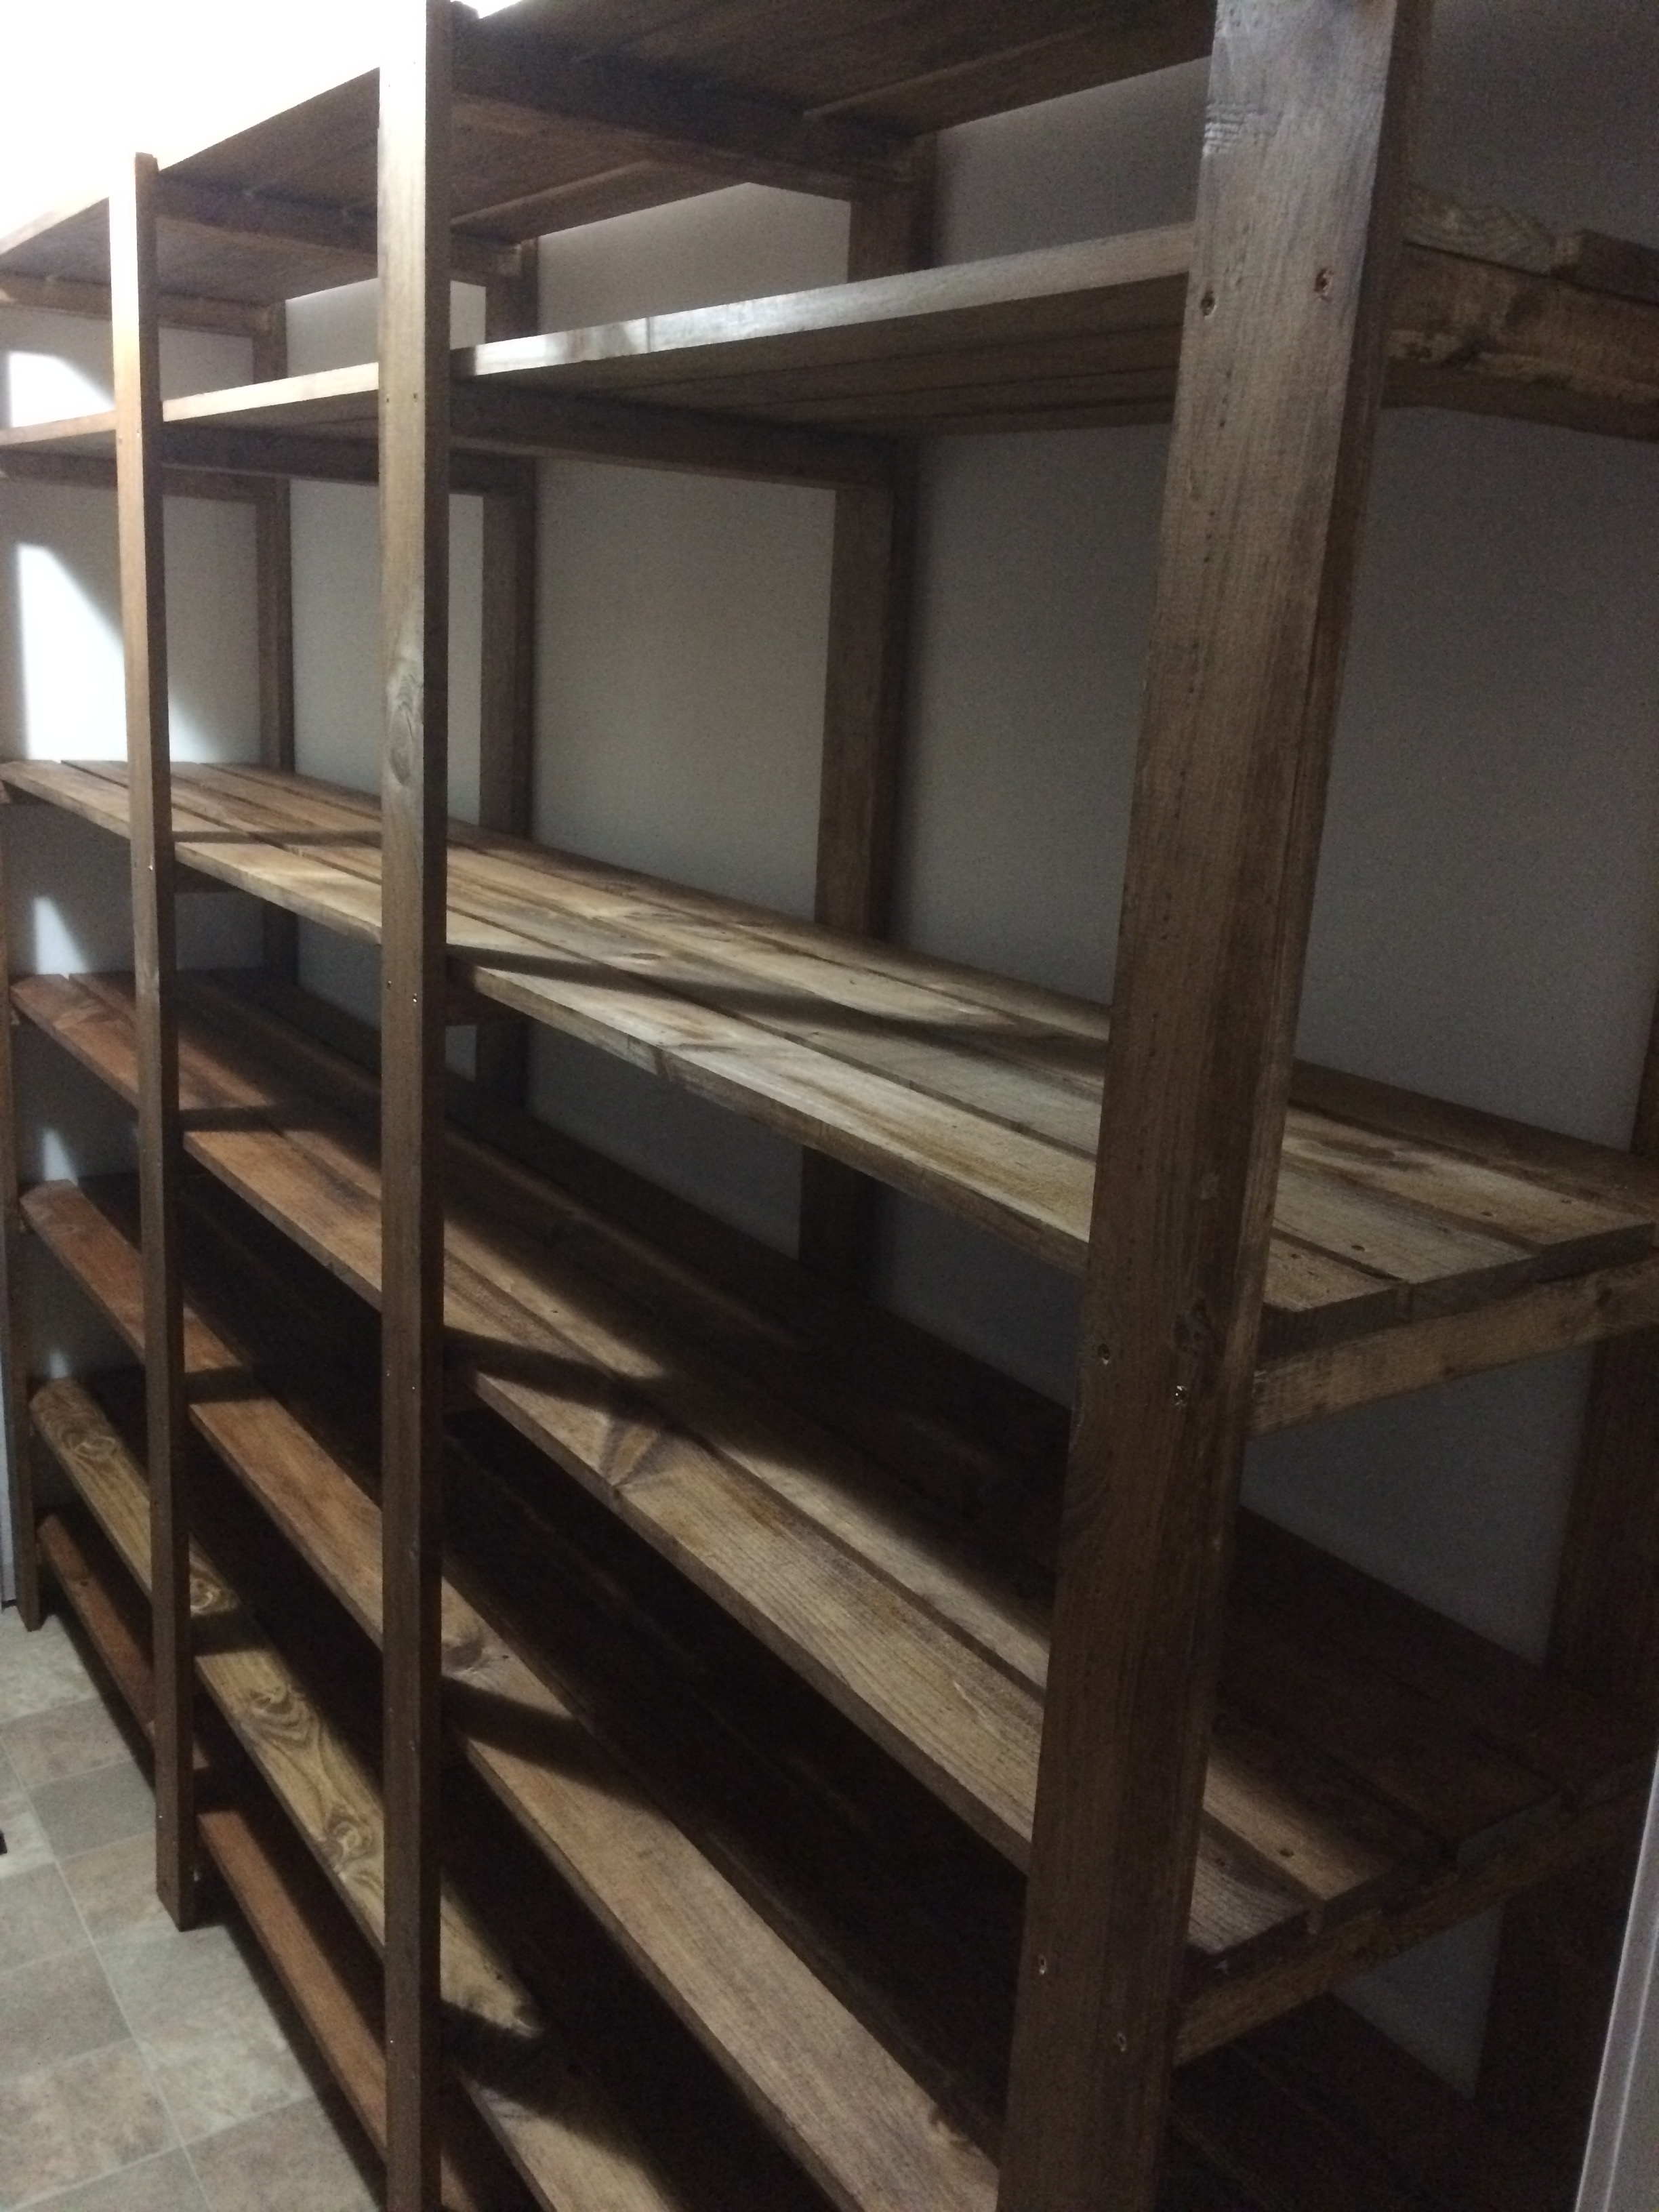
We remodeled our house and now had a new 9x6 master closet to fill. During construction I saw this design on ana-white.com and liked the style, but wanted to customize the layout. I found an online closet designer and played around until I found something my wife and I liked. We ended up with a 9 foot long his/hers double hanging on the ends and a long hanging section in the middle. And on the other side 8 feet of shelving (leaving about a foot for other storage).
I bought the pipe as a 10 foot pipe to be cut and threaded (for free by the store). I did have to change the design a little because the store cannot thread pipe less than 14 inches. So I ended up replacing the short pipes and T's with 2x4s. That made it a little cheaper and I still like the end result.
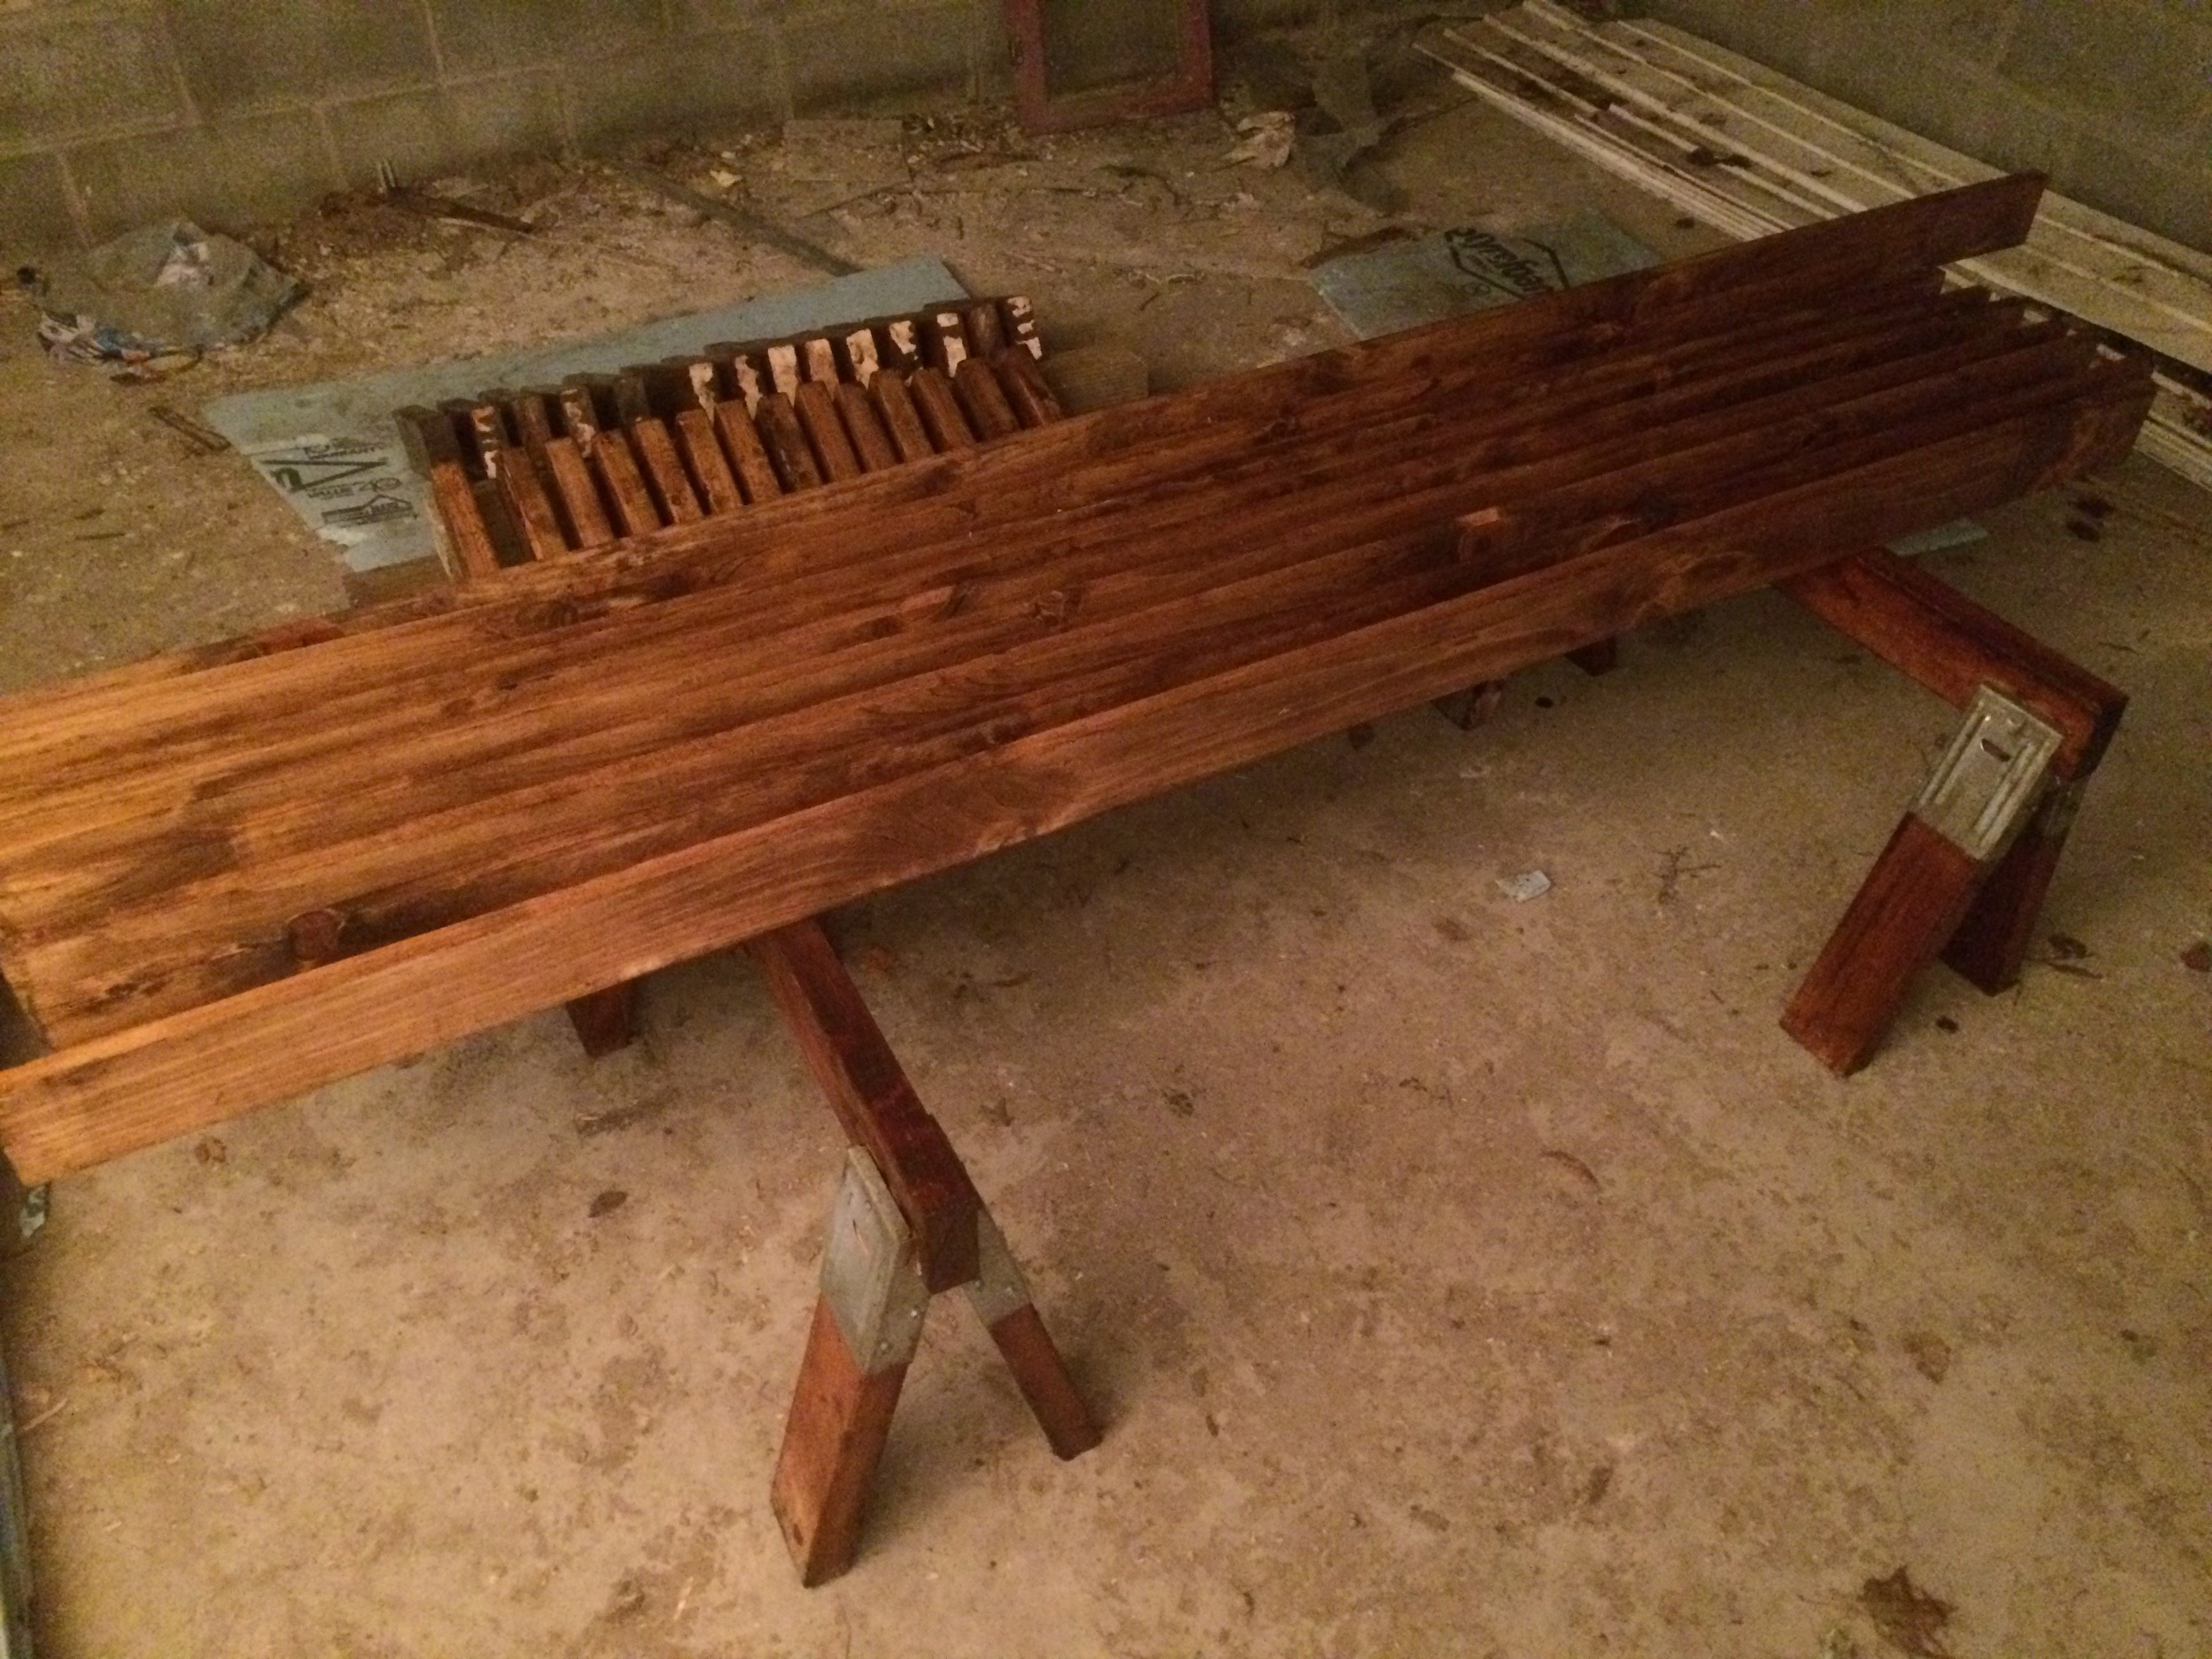
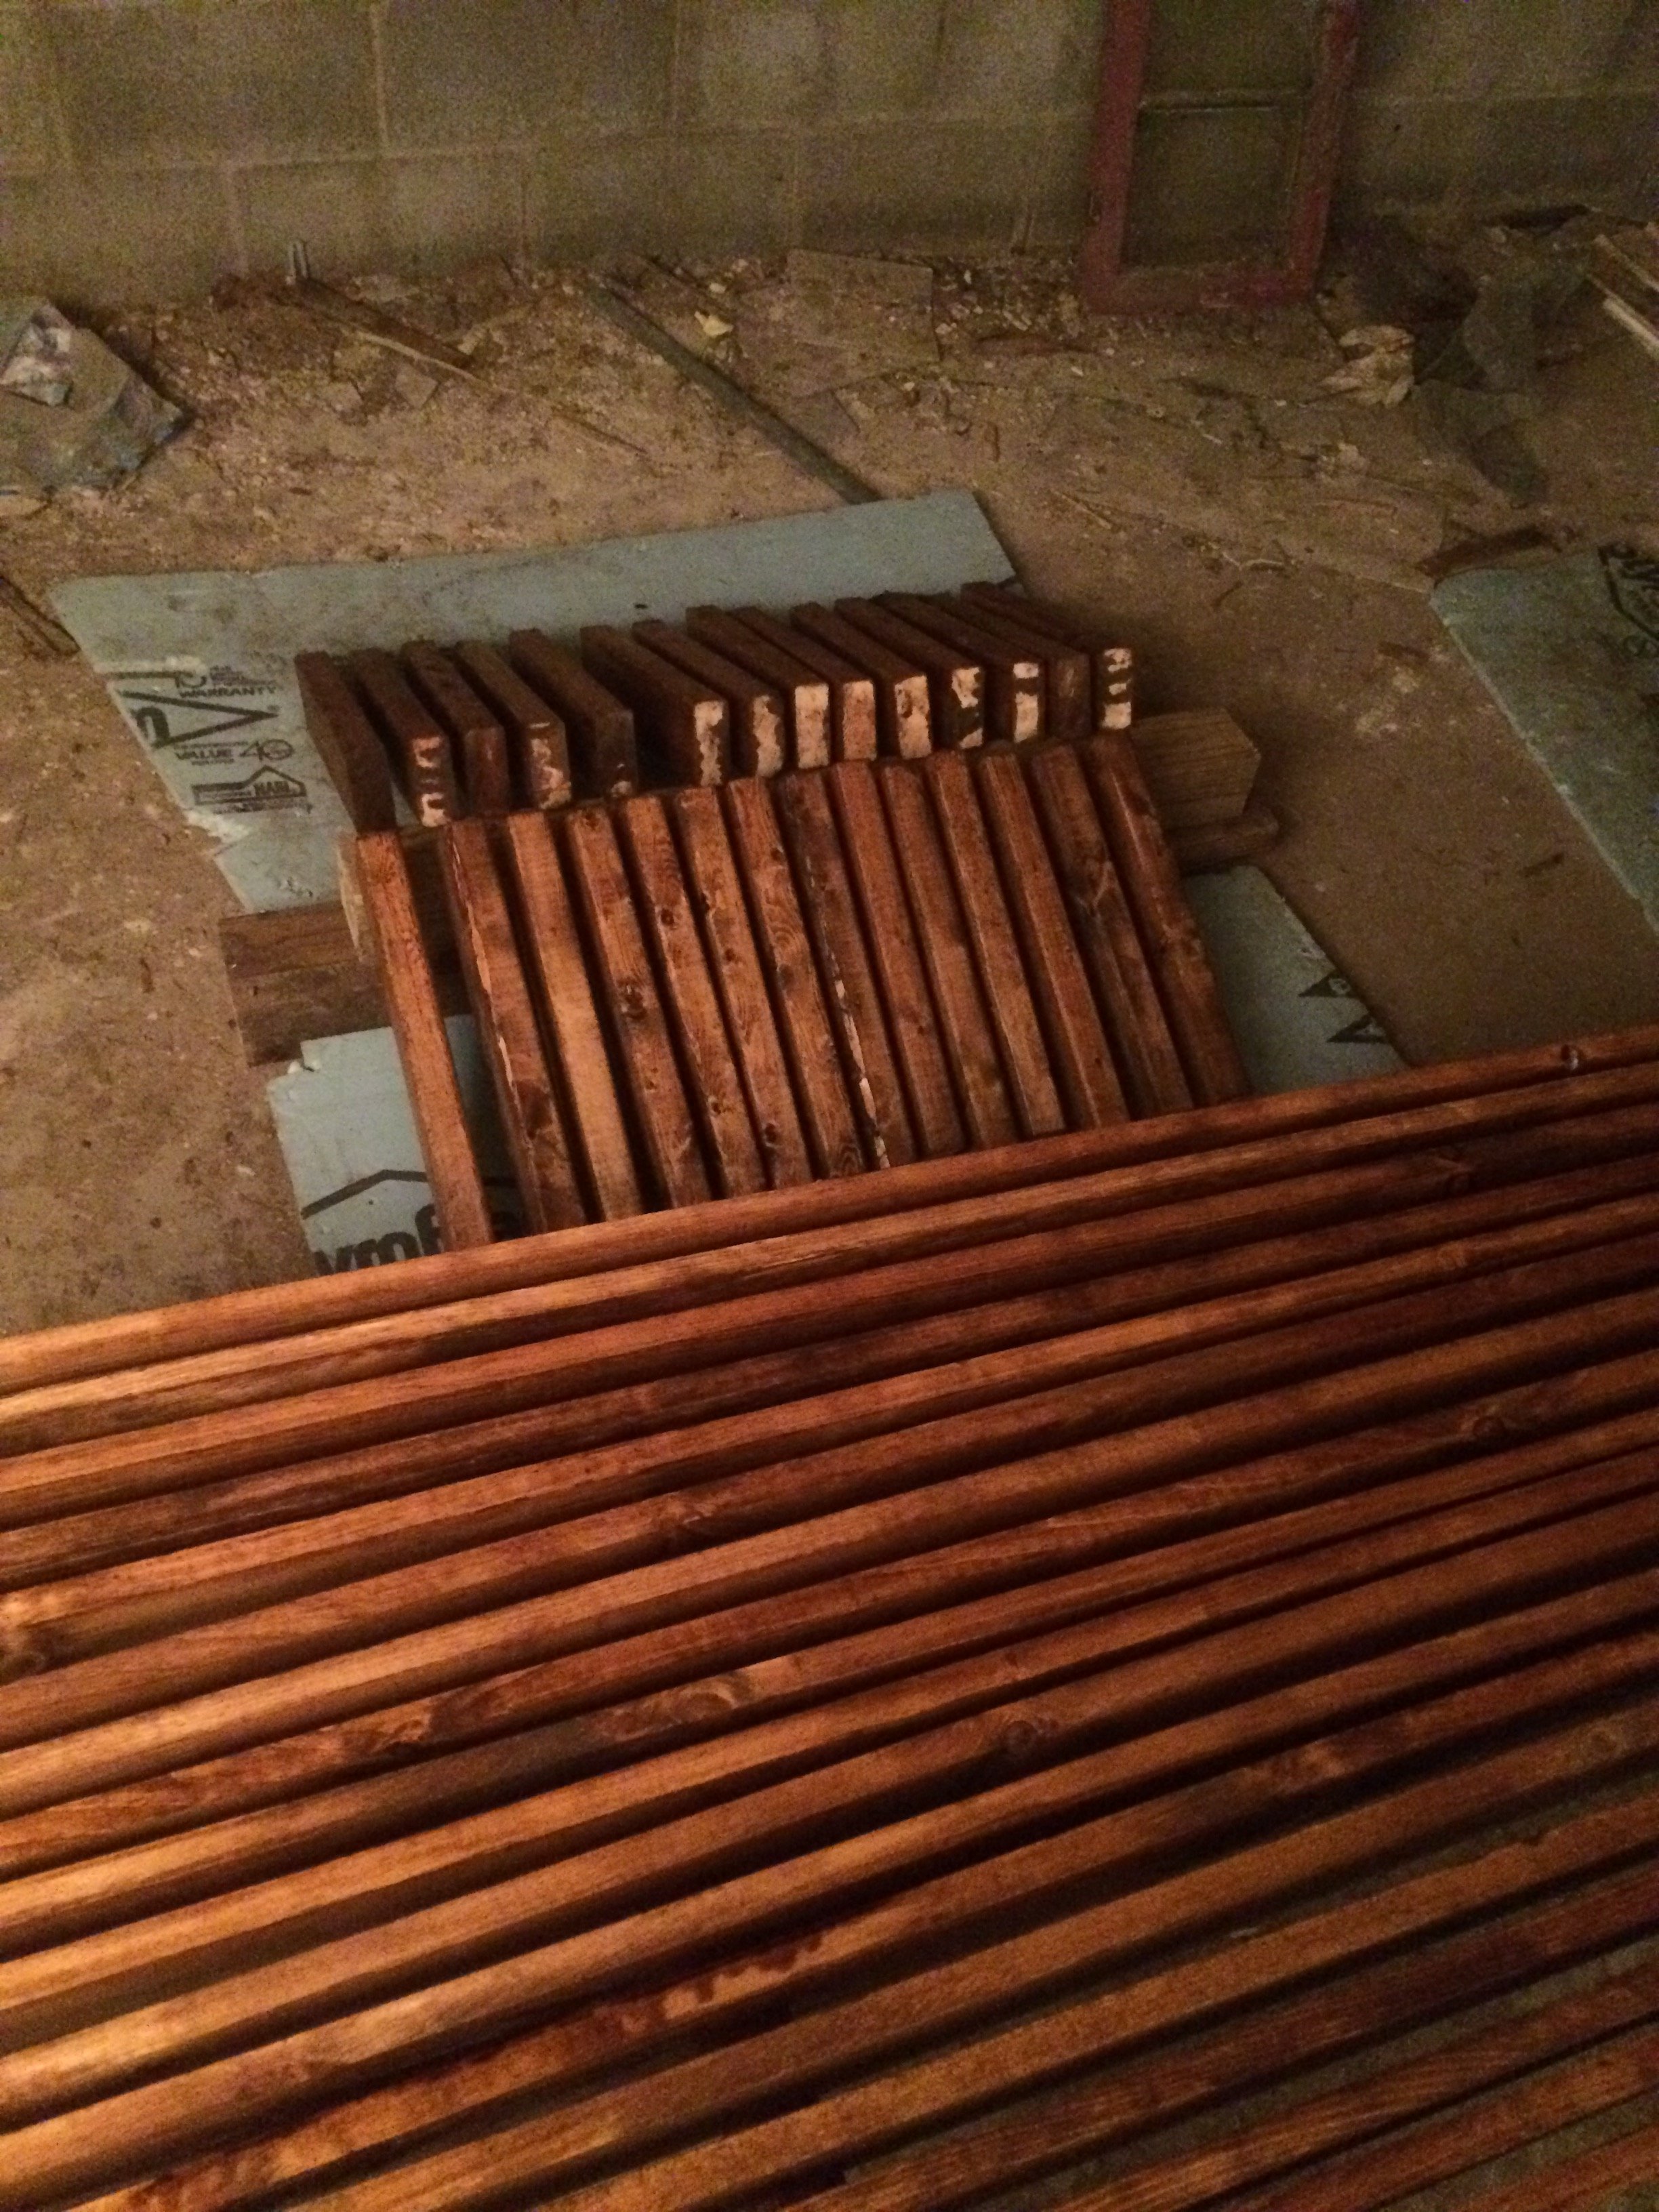
We stained all the wood using Minwax "Early American". This probably accounts for most of the build time.
Then I put together the supports and brought them into the closet to add all the pipes and slats. I started with the wall for hanging. And later did the shelving.
Here's another forum with more pictures of this project:
http://woodworking.formeremortals.net/me-mo-community/#/discussion/866/…
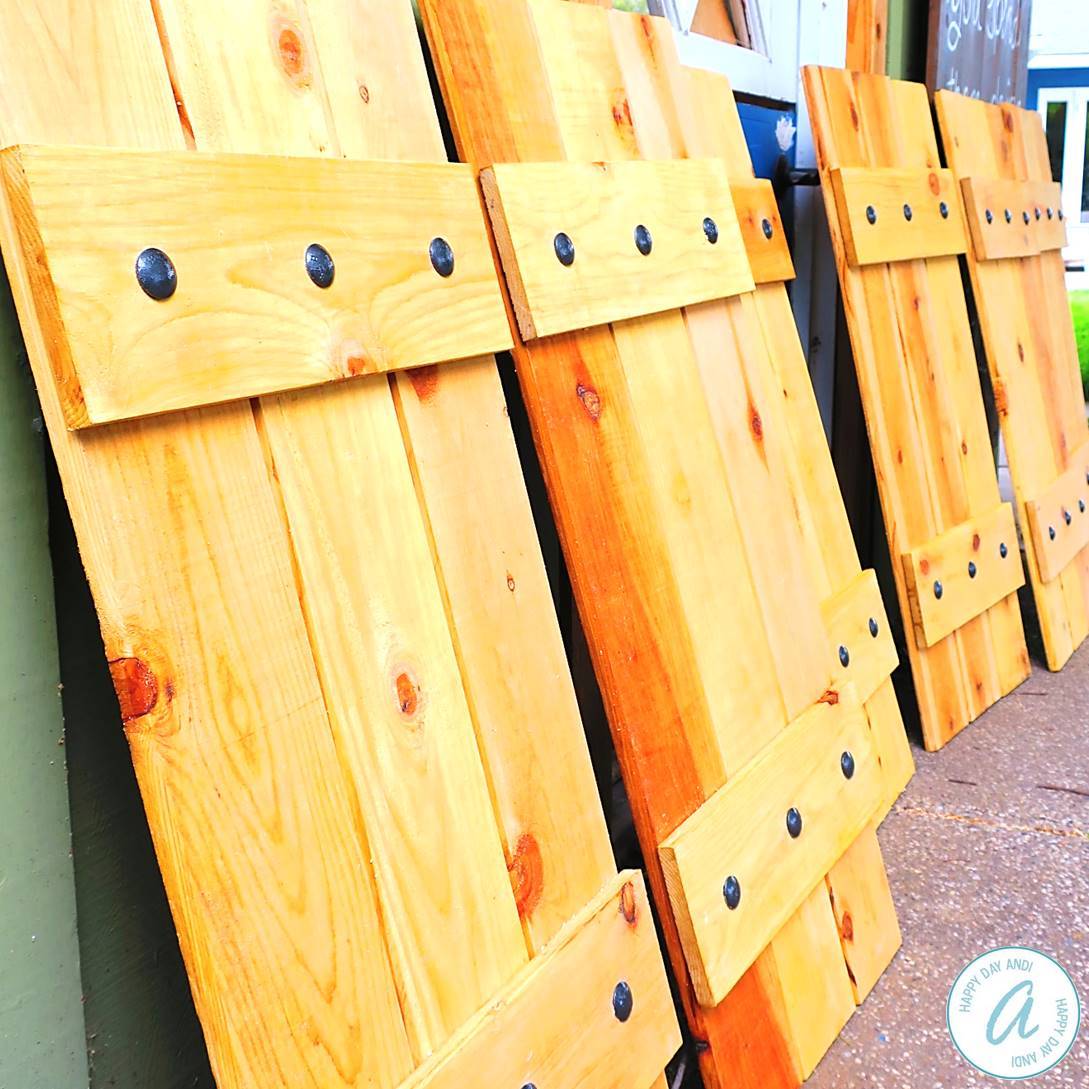
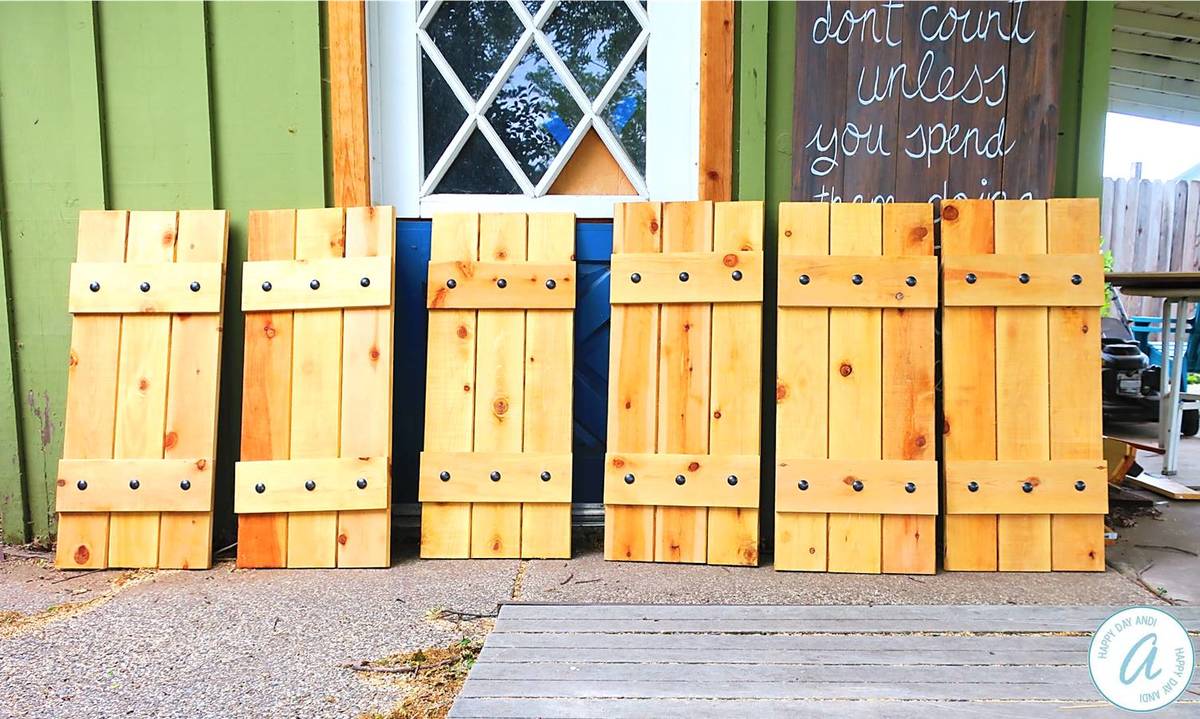
I really wanted to add a layer of depth to the front of our house, and my favorite option was adding new shutters! I used fence boards to keep cost low and to be sure that the wood would stand up to all weather conditions. I protected the wood with an oil-based sealant made for exterior use. I attached the cross braces with chunky screws and painted those black. I love how they turned out!
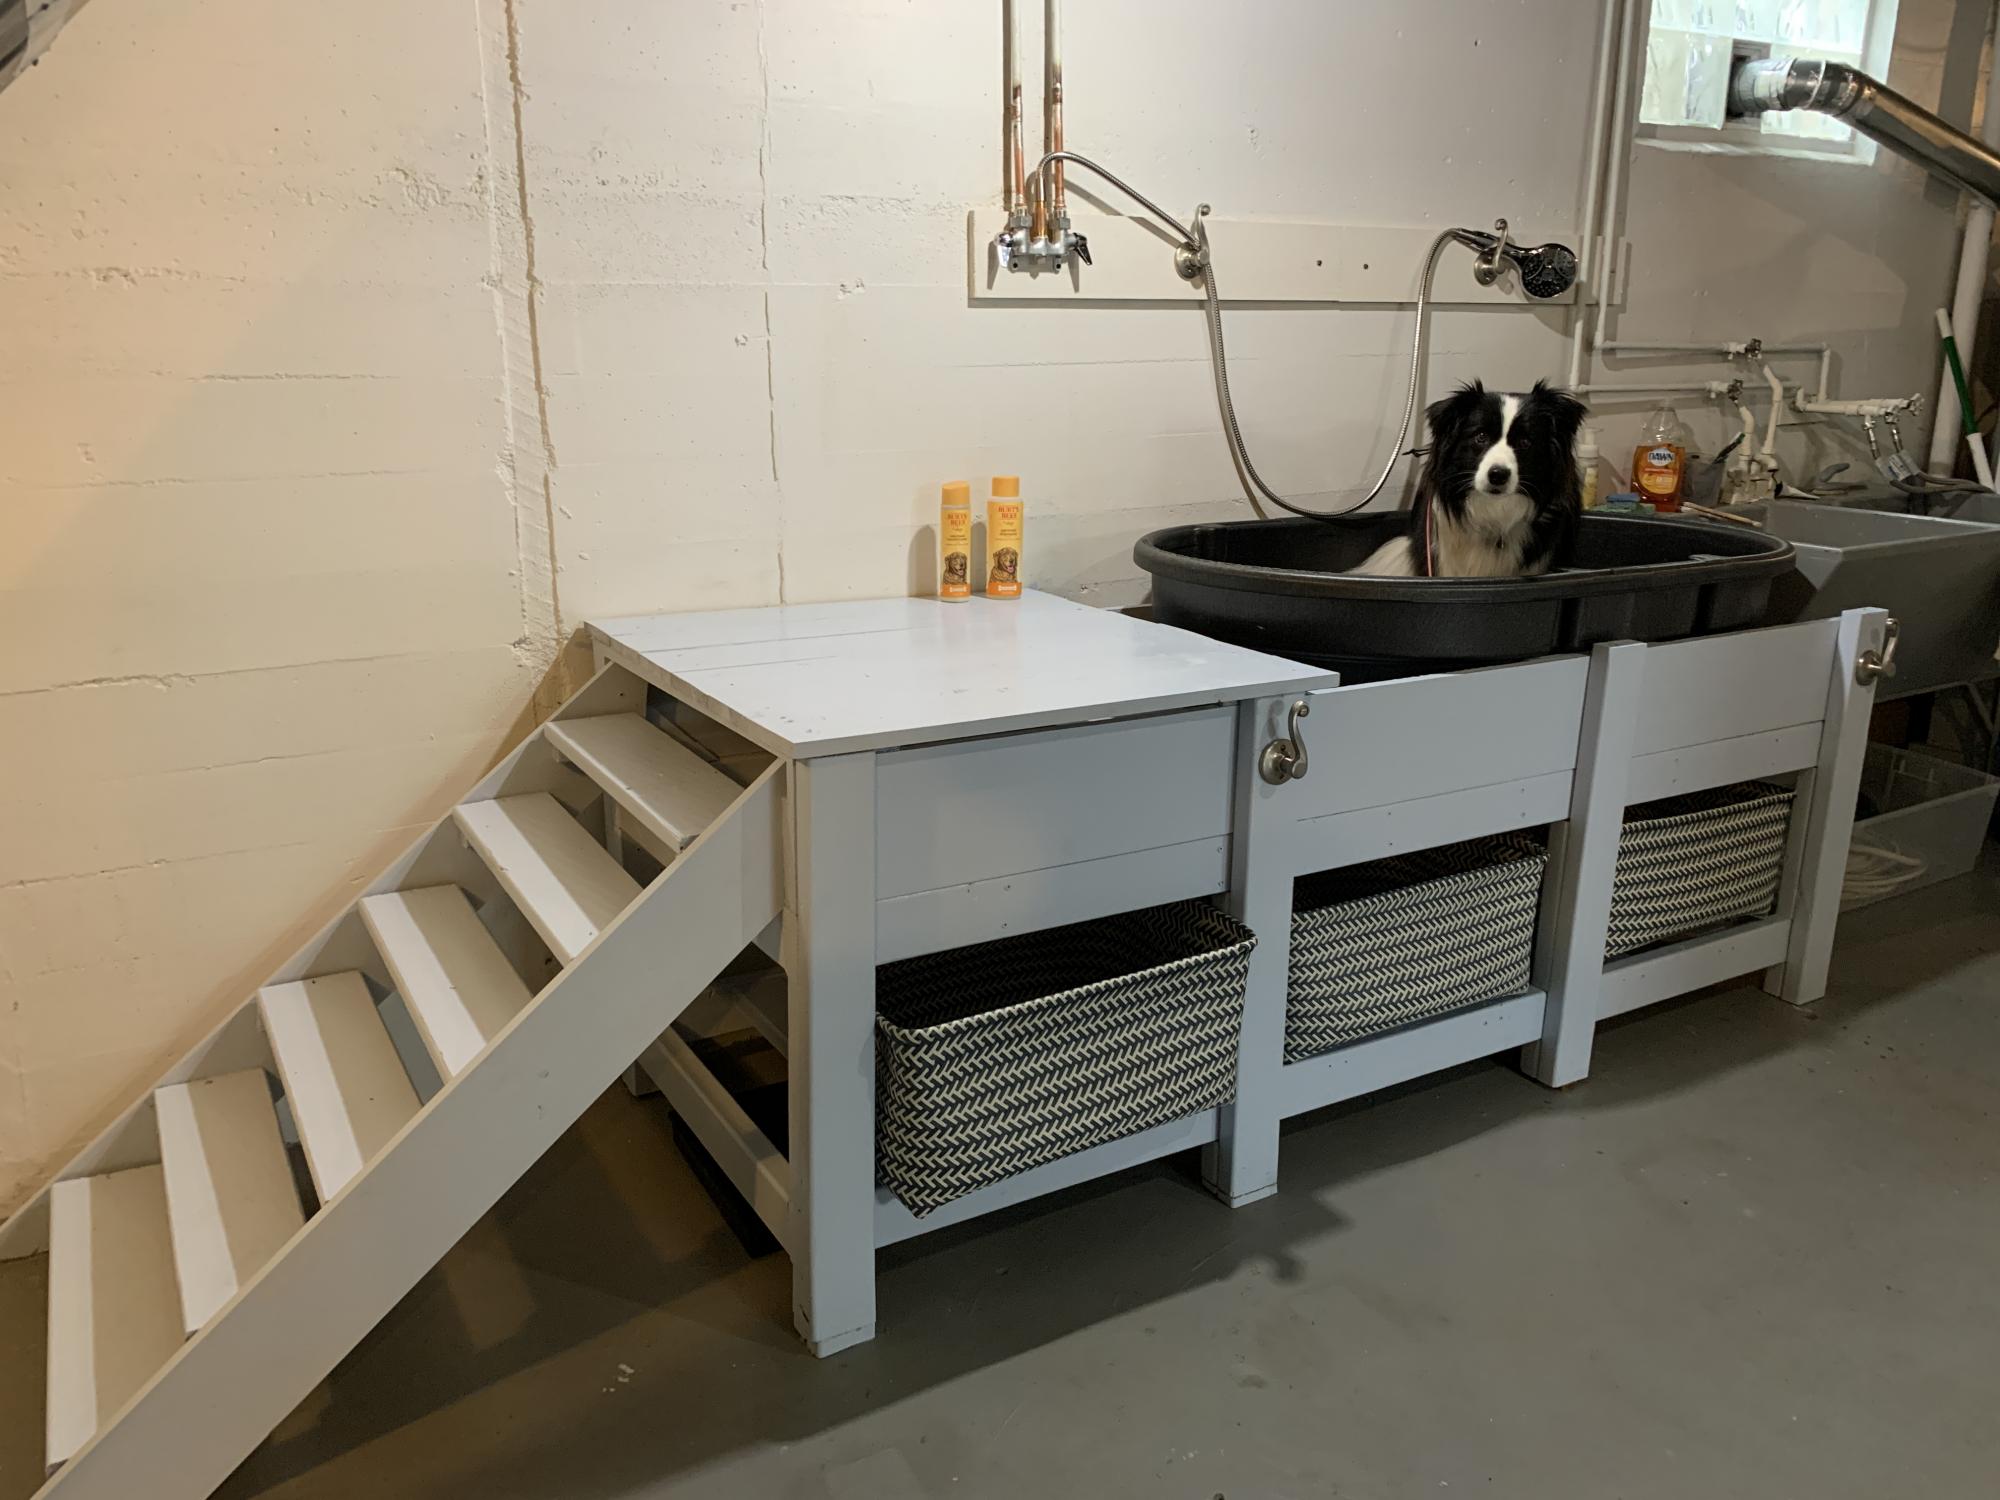
Tego needed a raised dog bath. No, I needed a raised dog bath. Specifically, my knees needed a raised dog bath for Tego. So, after looking at Pinterest and Ana's plans, I decided what I really wanted to do was customize something to fit my needs (and knees) and build it myself. Overly ambitious for a first-time woodworking project, but hey, raise the bar.
I started by reading and rereading Ana's beginner's woodworking guide (very informative). I also learned so many other things along the way. There's a reason, besides looks, you need flat boards (they need to screw together tightly). Unfinished basement floors are so not level (especially near the walls). Screw lengths matter (need shorter ones for thinner boards). The big-box store doesn't make precise cuts (but they can make a lot). Planning for the finishes will save you time (know your basket sizes). Just to name a few.
It's going in an unfinished basement, so I wasn't going to tile and add glass doors. I wanted to keep it relatively simple, basic.
The stairs were the hardest to measure and build (math matters) - and I might re-do. I made the steps smaller, dog-sized, but she finds them awkward. I'd stick with typical riser heights, but it depends on the size of your dog.
Plumbing to link the tub drain to the utility sink drain was the most expensive. Probably I could have done it myself, but I decided not to learn both plumbing and woodworking for one project.
Overall, I'm pleased with the result - and Tego is learning to love it.
Thu, 07/22/2021 - 12:38
Love it, you and Tego are AMAZING! Thank you for sharing your custom build:)
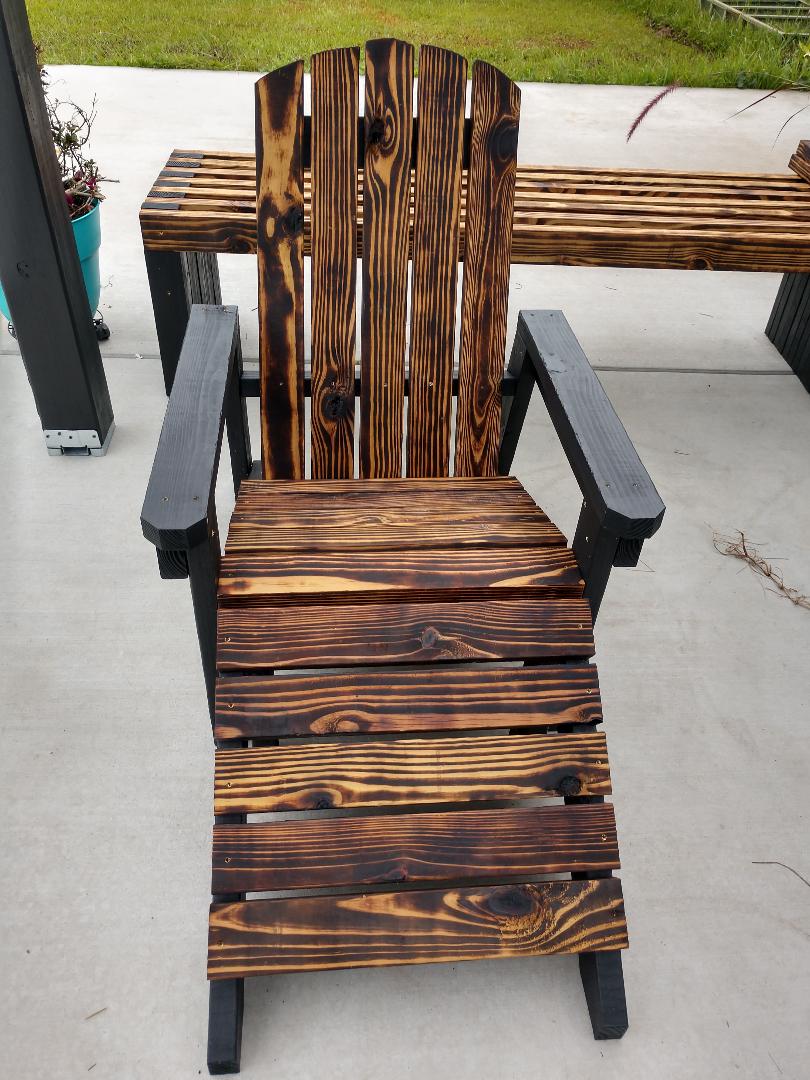
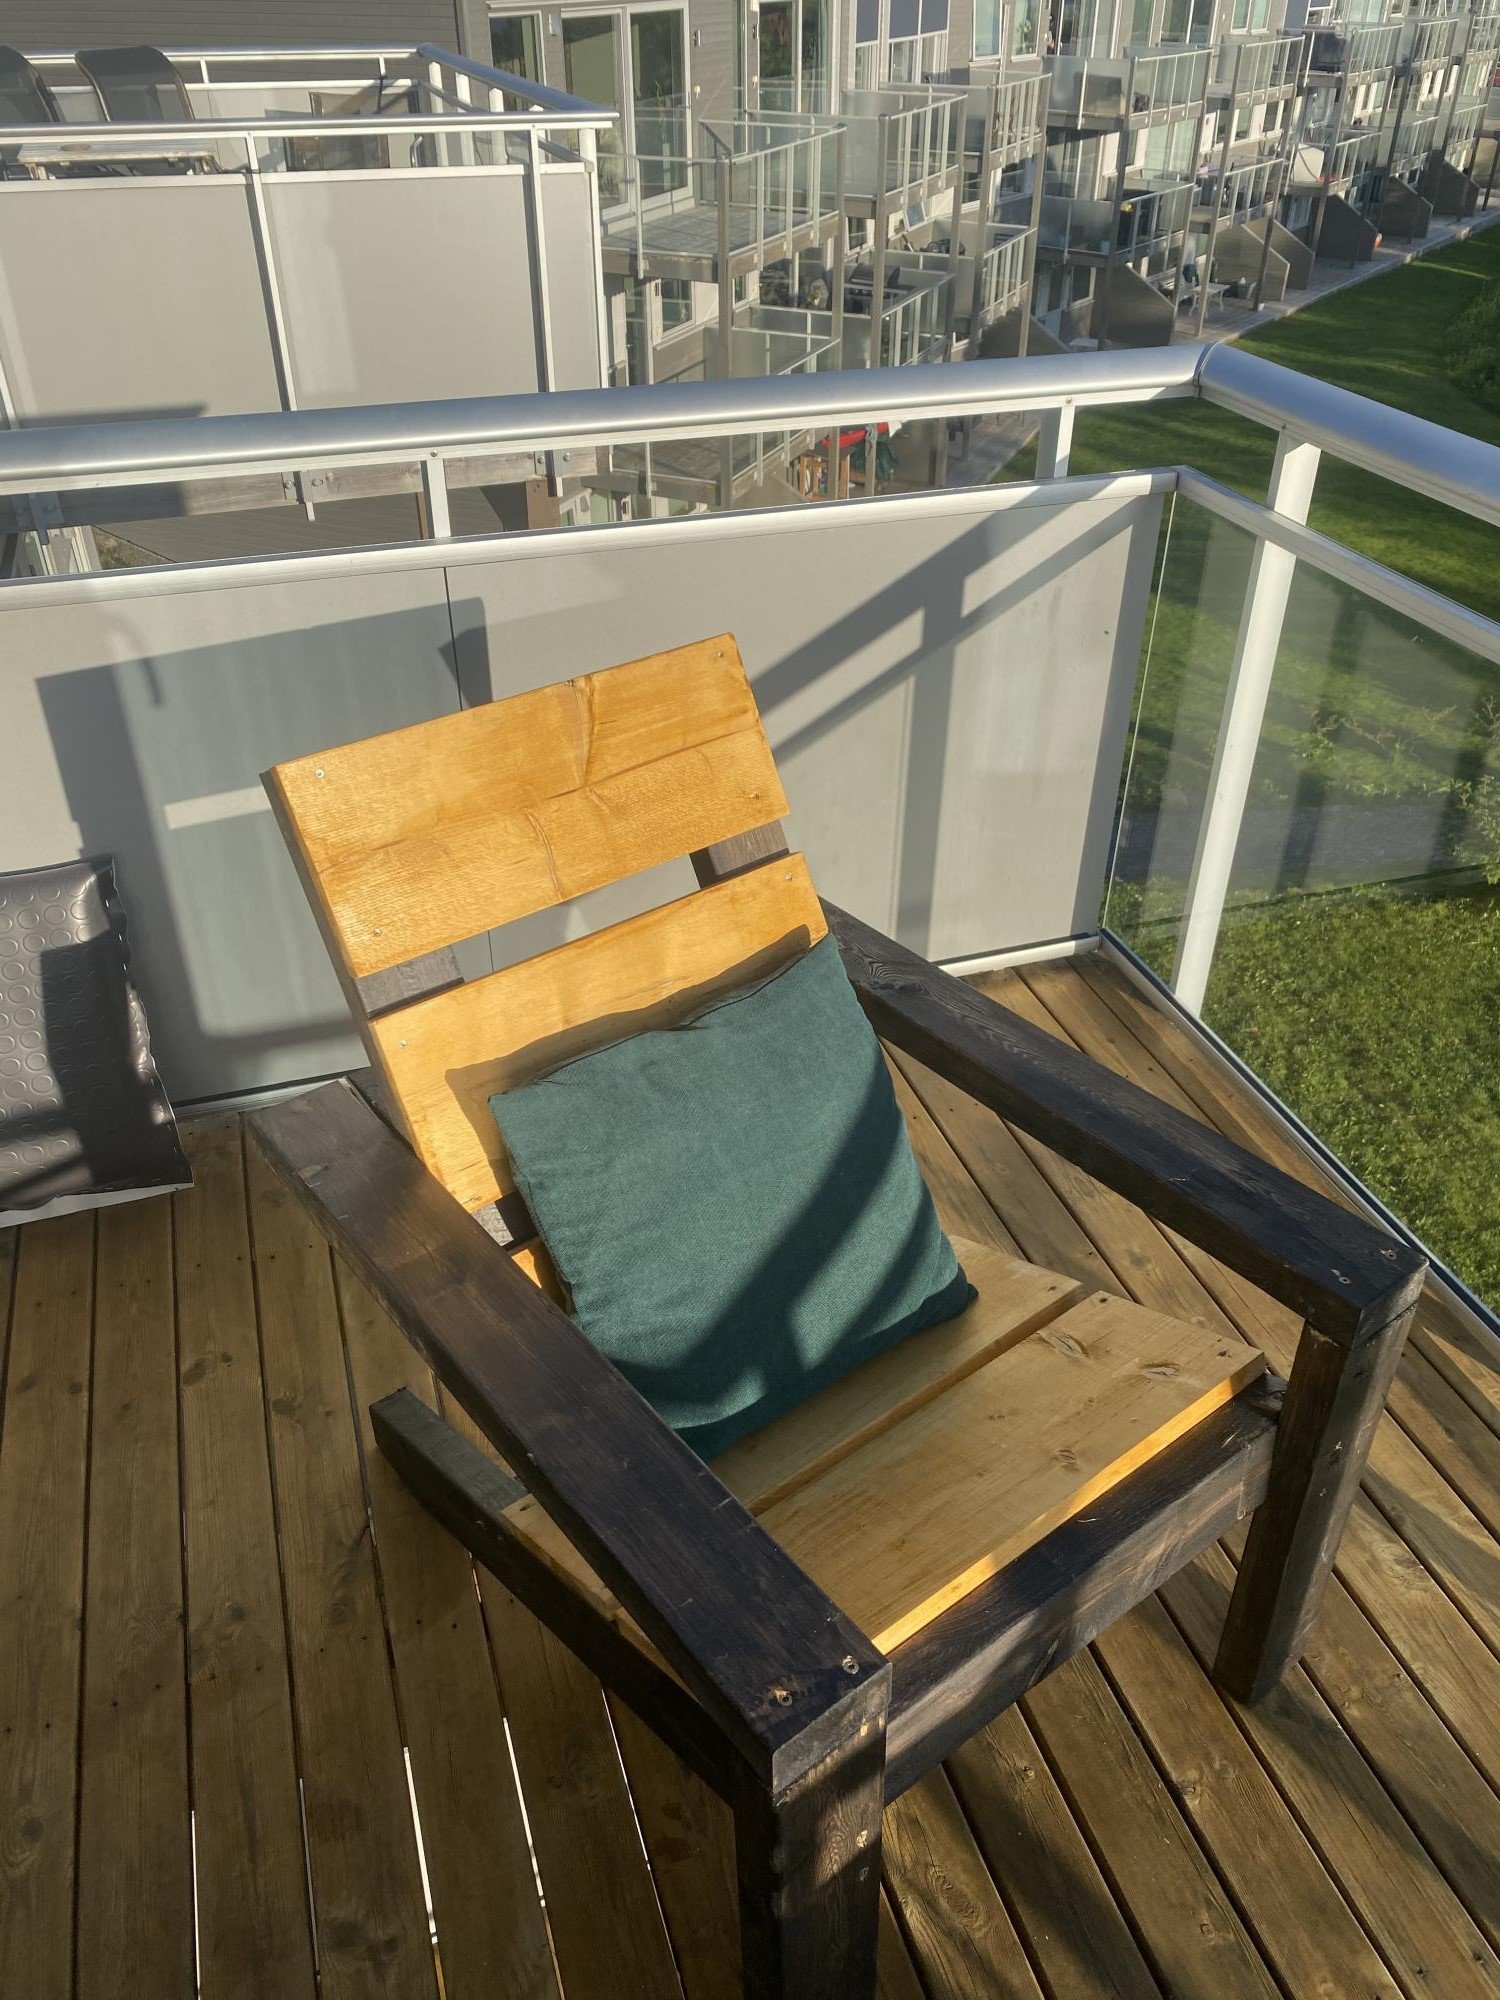
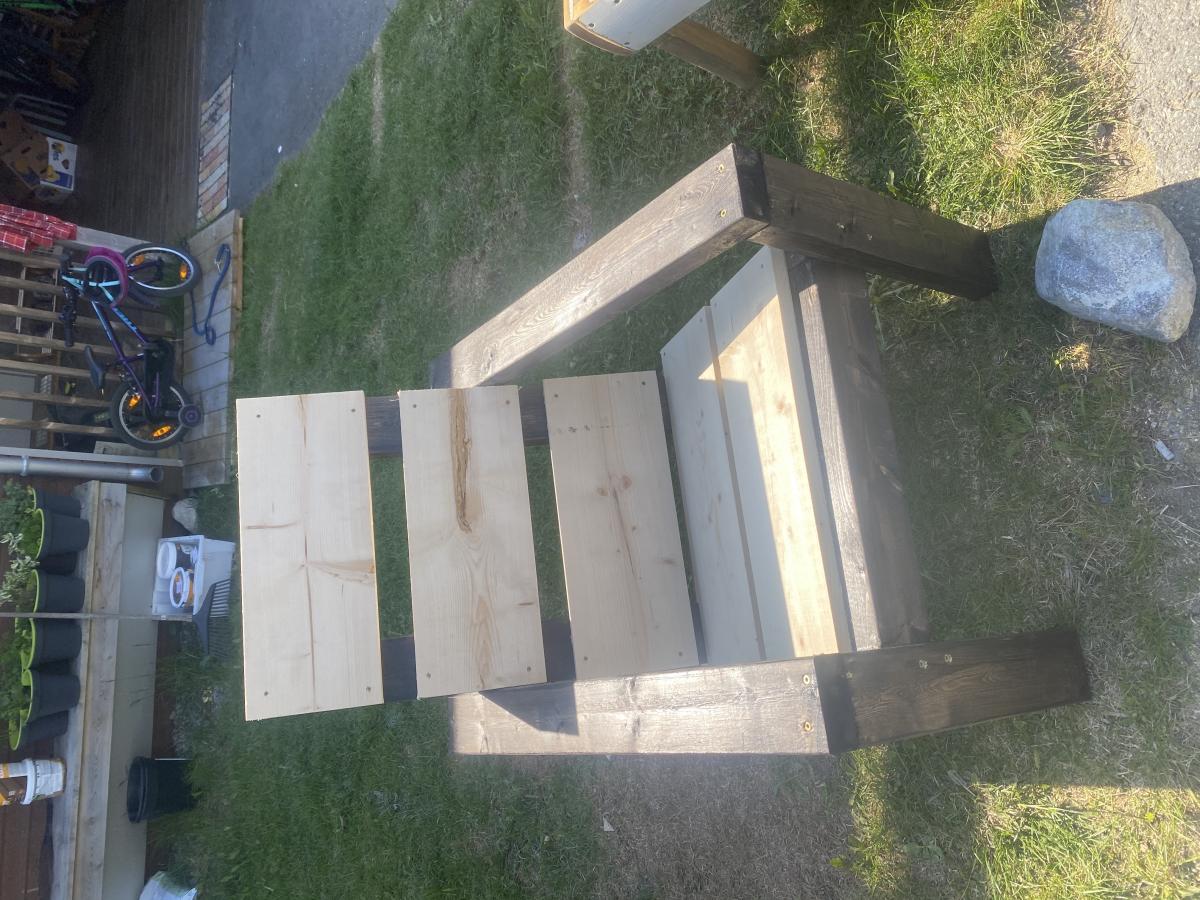
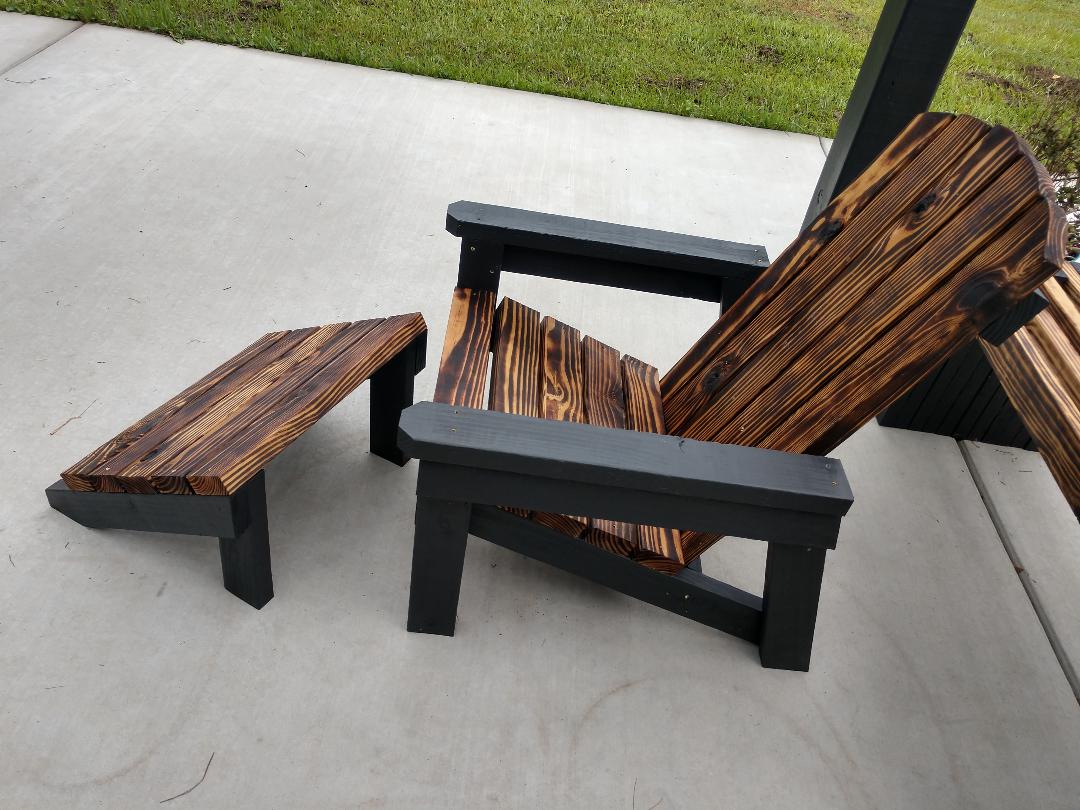
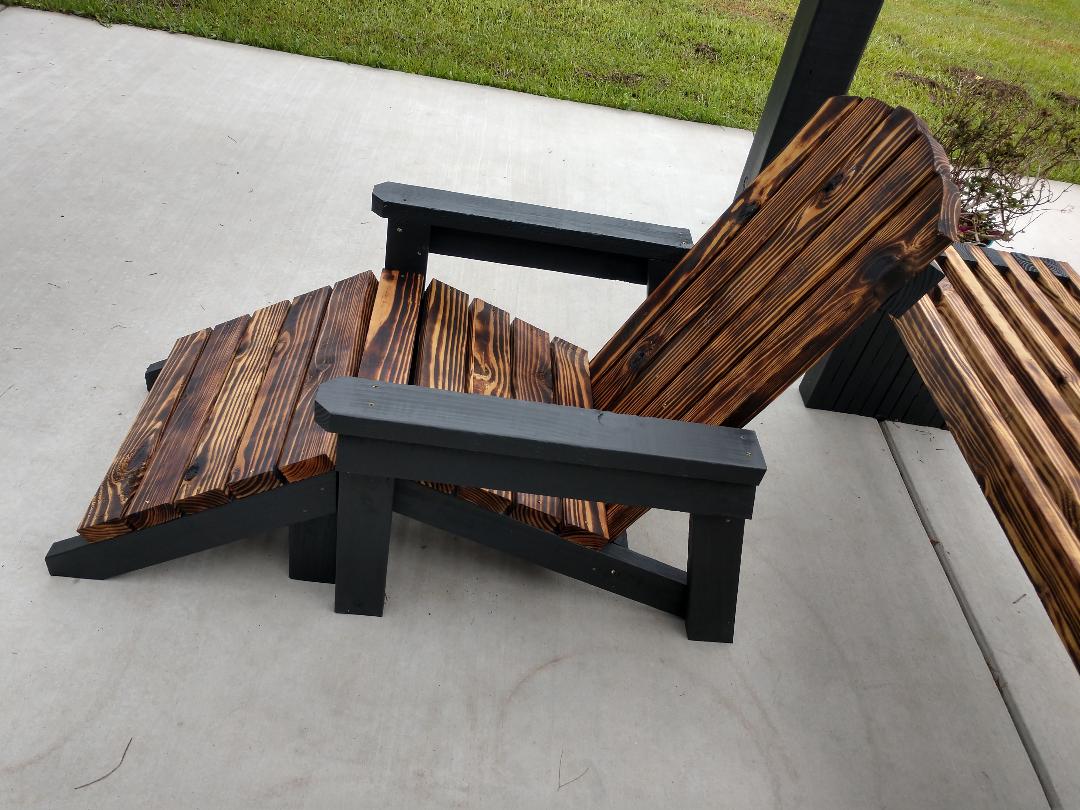
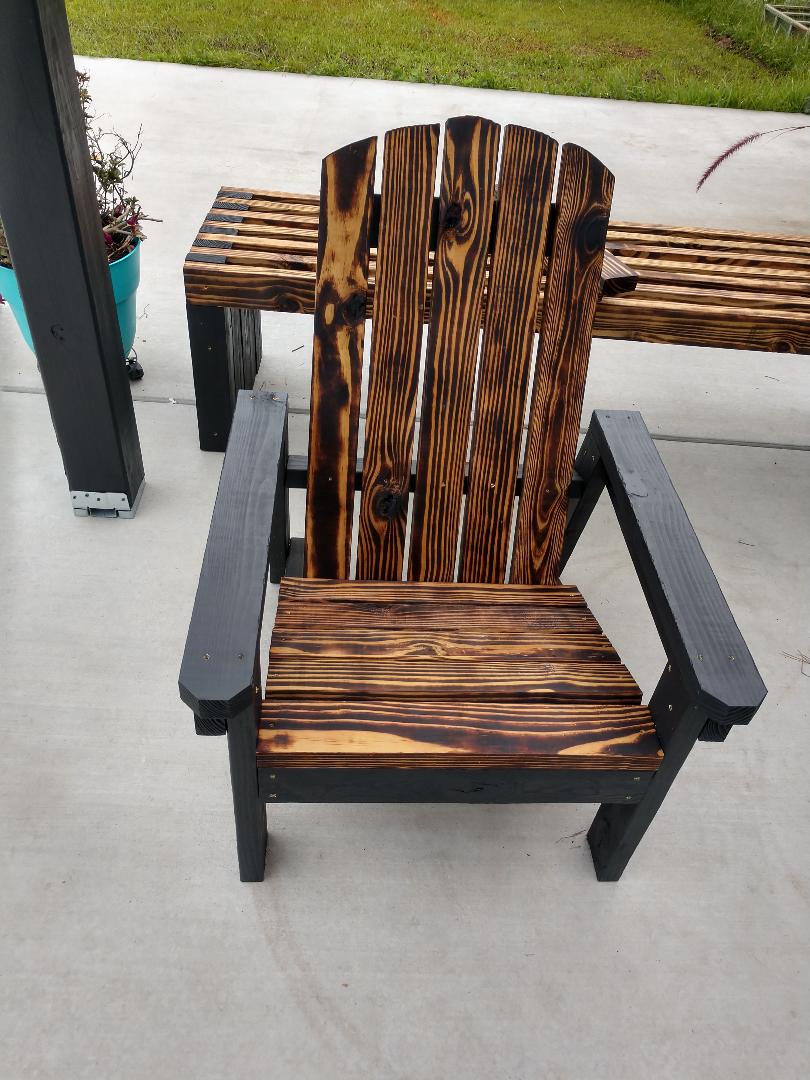
Very easy instructions. I love the way they turned out. I used all 2x4's that I had left over from another project. I burned the top pieces and painted all other pieces. Love your easy instructions. My first time making furniture.
Thanks
Yvette

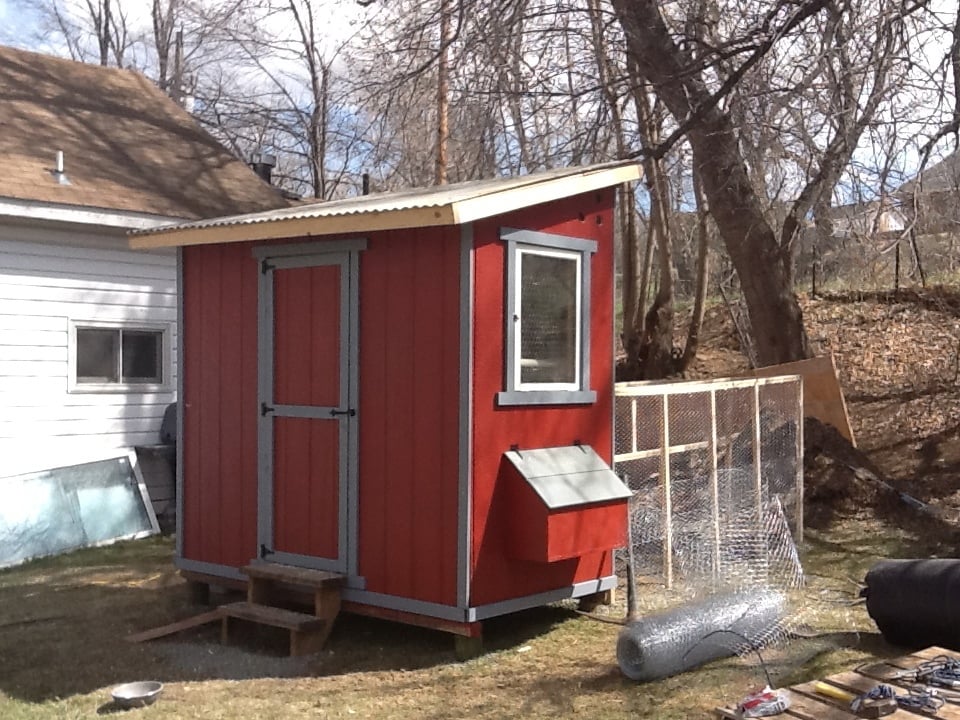
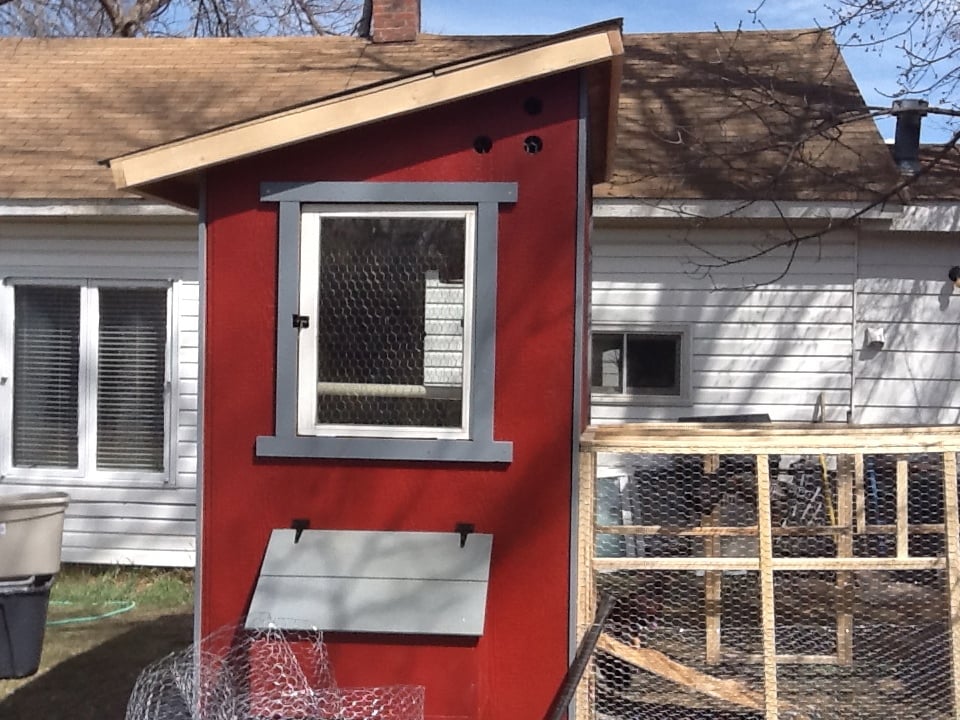
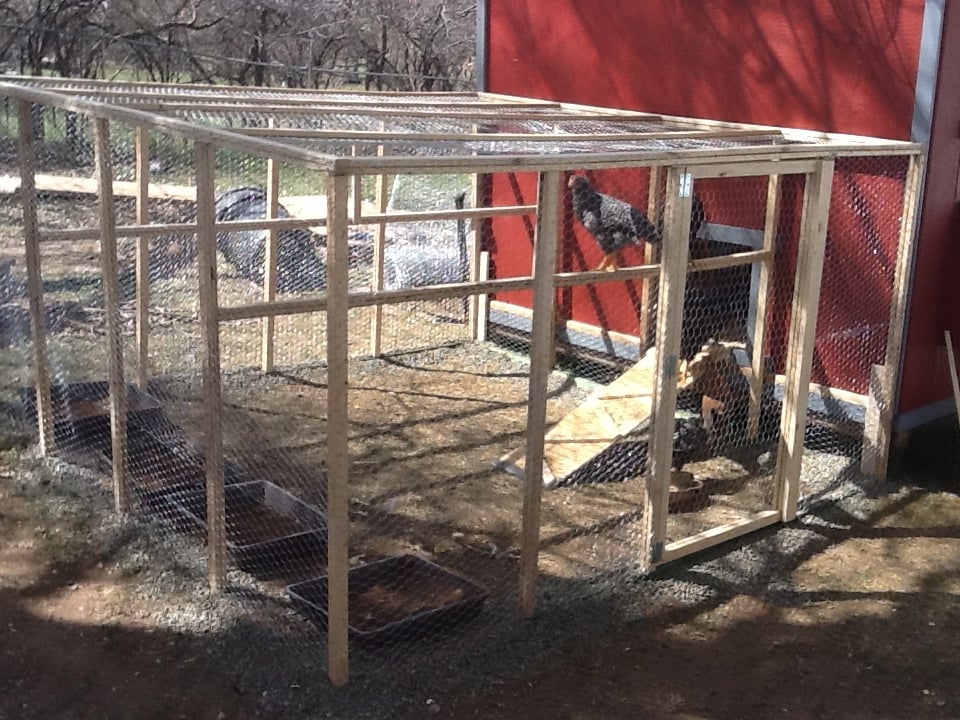
I used the chicken shed plans to create the coop, with a modification to include two nesting boxes, one on each side.
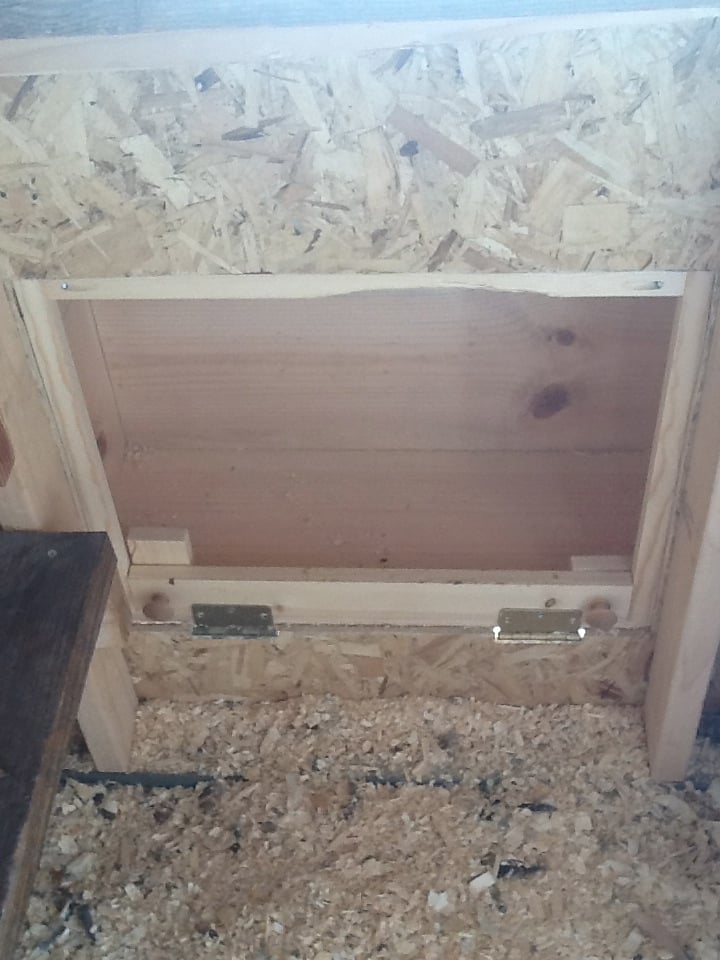
I slightly modified the nesting boxes, using a U shaped frame and added hinges for the front to swing down and the pine shavings to be swept out.
For the siding, we found it easiest to do the tack and trace method. We tacked each full sheet of siding in place and traced the cuts for the window, roof line, doors, and nesting boxes. We then took them down, darkened the lines, cut 'em, and re-hung them. It made it a million times easier, IMHO.
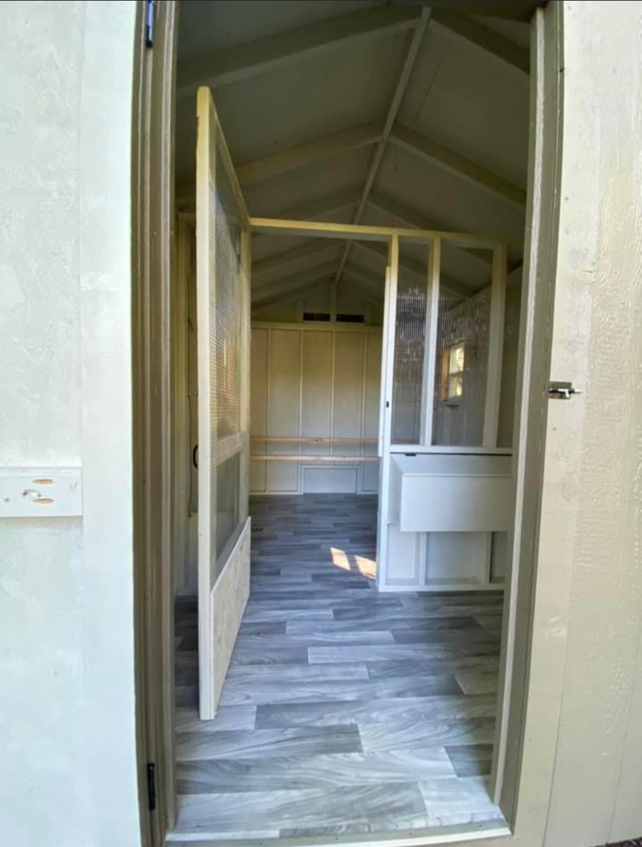
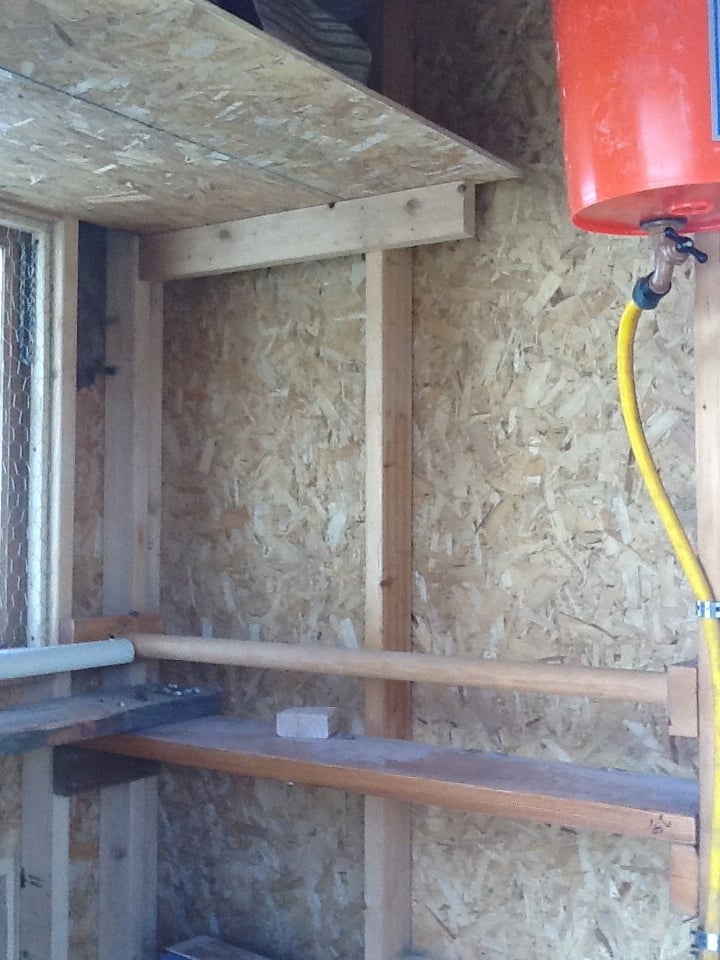
For the inside, I designed several roosting bars with poop platforms. The water is a gravity fed chicken nipple/pvc setup, which I found online.
The food stations, also gravity fed, are (new) sewer pipes with wye connectors.
I used the roof and siding scraps to make shelves for storage inside.
By sourcing reclaimed materials, I built the coop, run, interior, feeding stations (5), and waterer for $550. I only bought 27 pieces of new lumber (15 2x4's and the 12 8 foot long 1x3's)
Even the paint was free! (We have a drop and swap at the haz mat recycling center run by the county. We have gotten 100's of dollars of free paint, stain, and varnish there. I even used a can of free spar varnish to seal the inside of the coop)
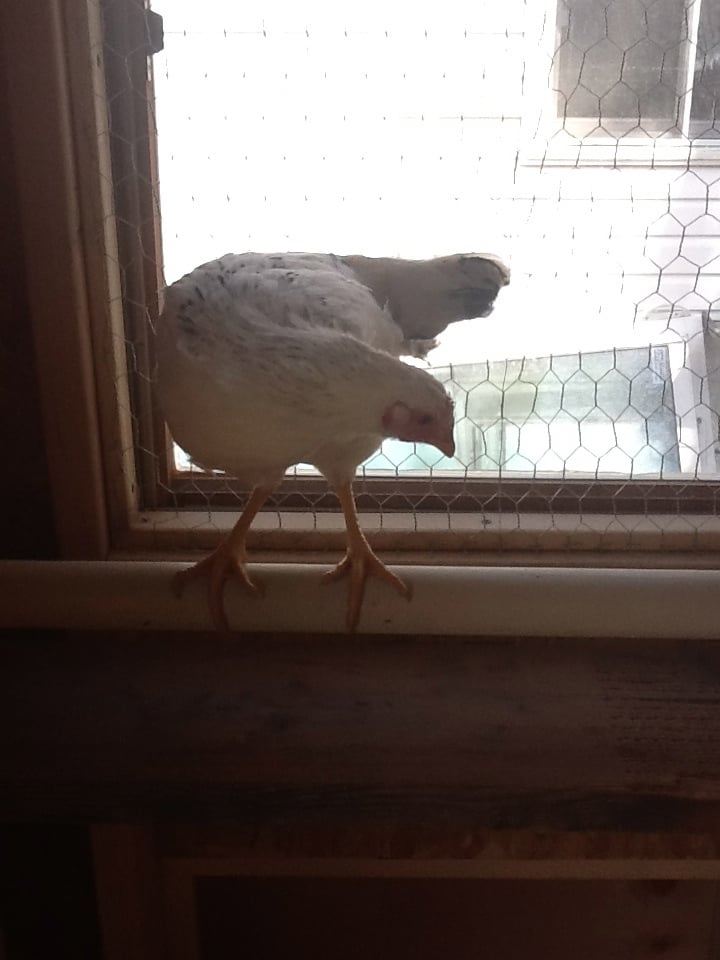
There are still a few pieces of trim to be cut and painted, but the girls are inside eating, drinking, and merry!
I did find that at the Home Depot, if you buy chicken wire, it costs way more then 150 feet x 36 inch "stucco netting". The stucco netting was $54 for 150 feet, and chicken wire is $76 for the same amount. It is the exact same wire.
I built the run out of resourced 1x2 furring strips. They were a pain to work with, very prone to breaking when not supported, but with the entire run costing $25 for wood and $54 (with half a roll left over) for chicken wire, I can handle some extra time and effort.
If anyone has any questions for me, feel free to contact me! I'd love to help!
Mon, 02/06/2023 - 08:12
Hi! Do you still have this coop? It's been about a decade now and wondering how it has held up, if you have any suggestions, or additional pictures of the inside. Thank you!
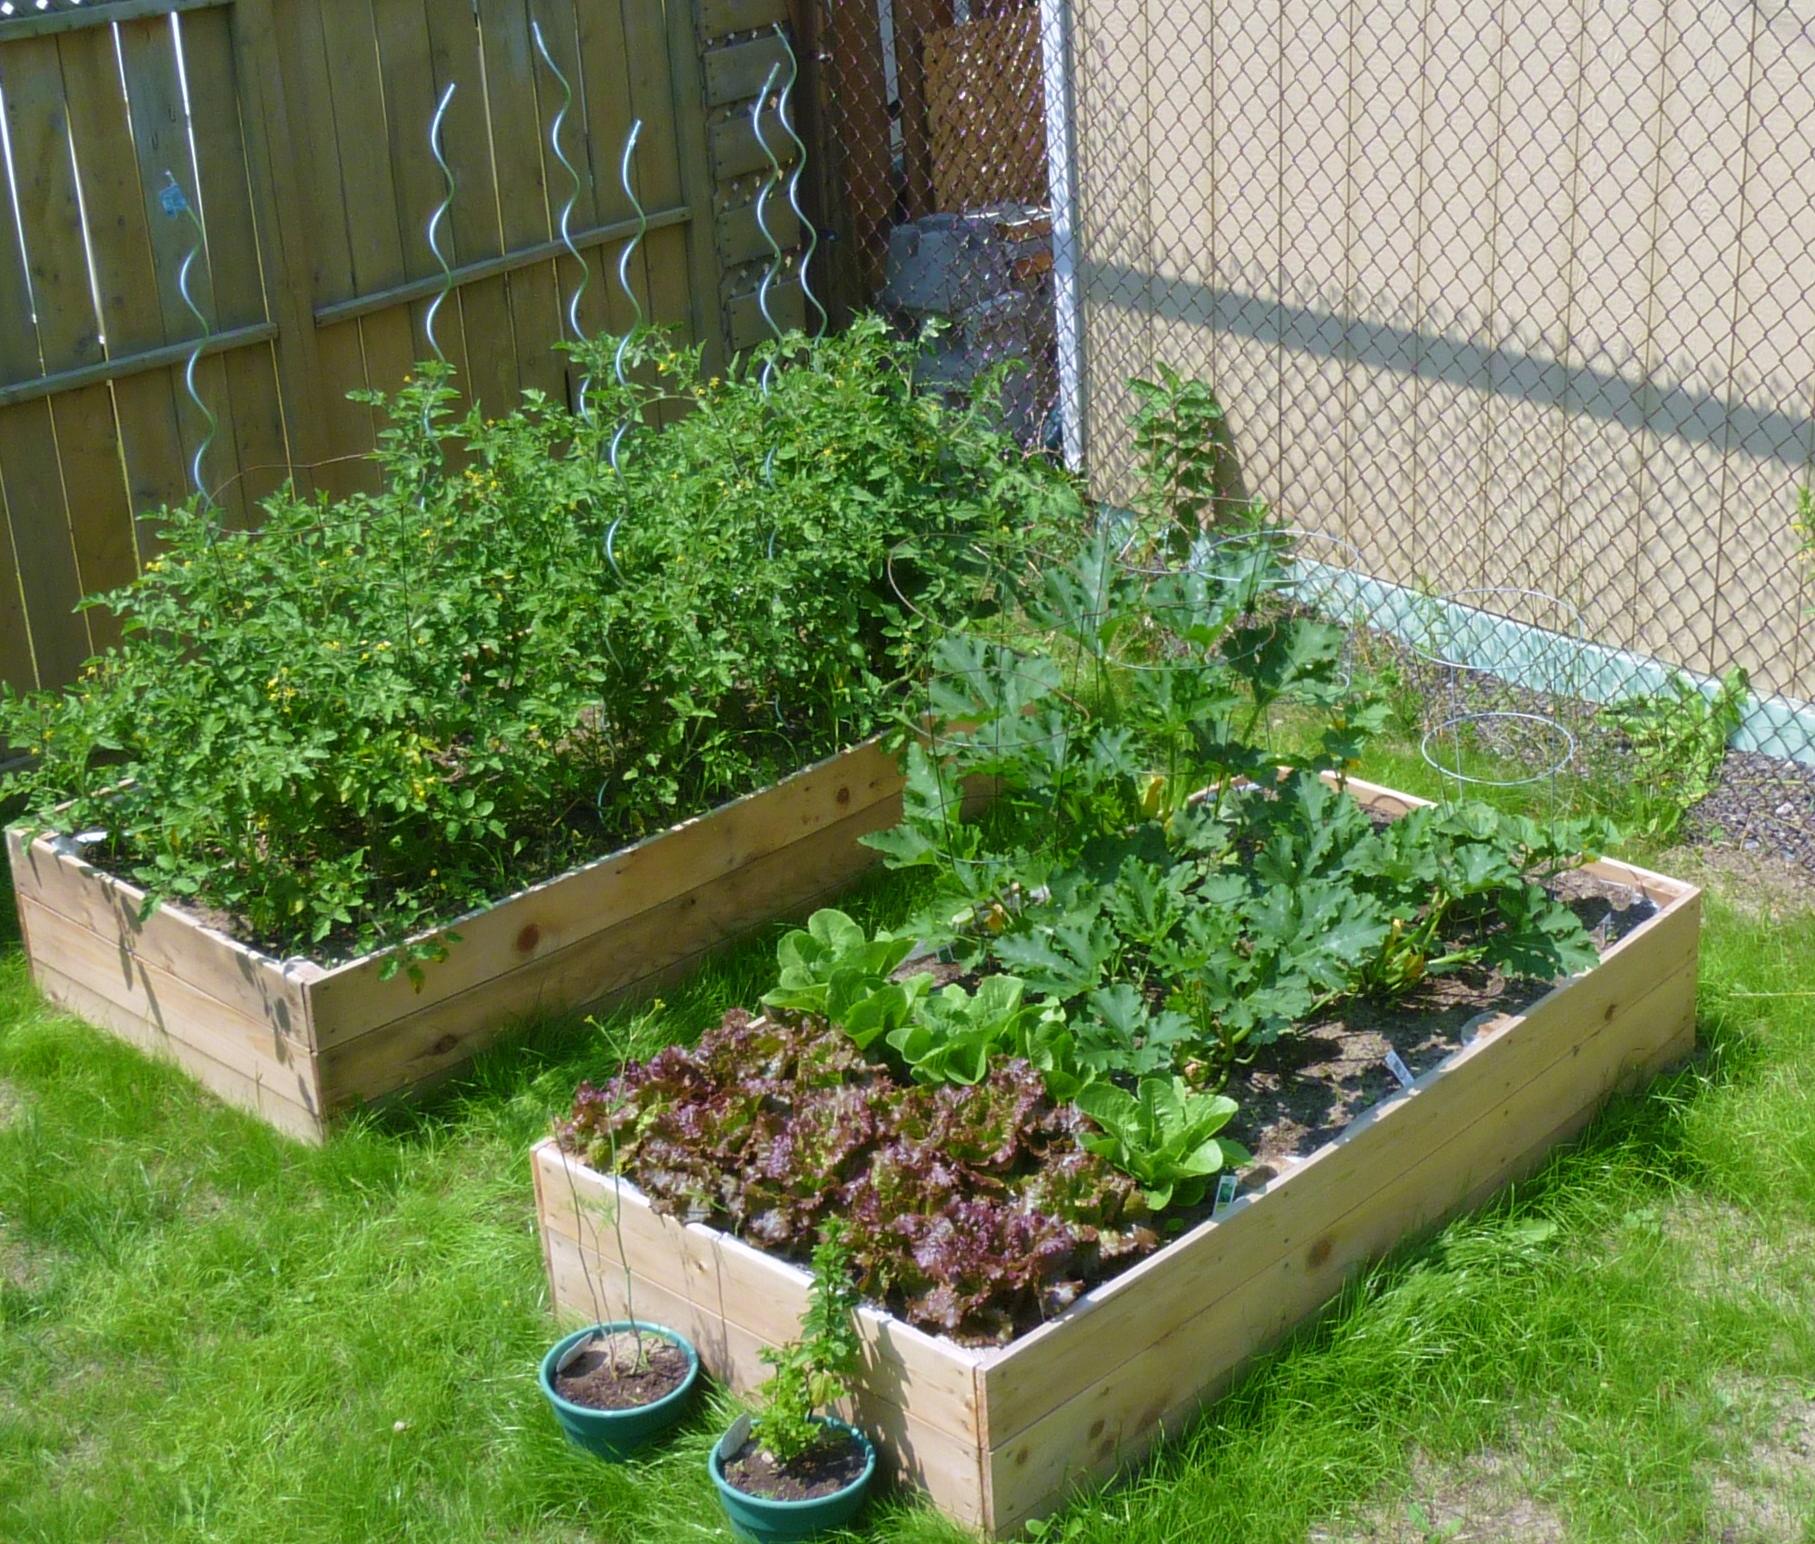
This was my first building project ever! It was so easy to do...the only problem was that we didn't have enough room for all the veggies we wanted to plant in our garden because we only built two! The plan is to build at least two more this summer!
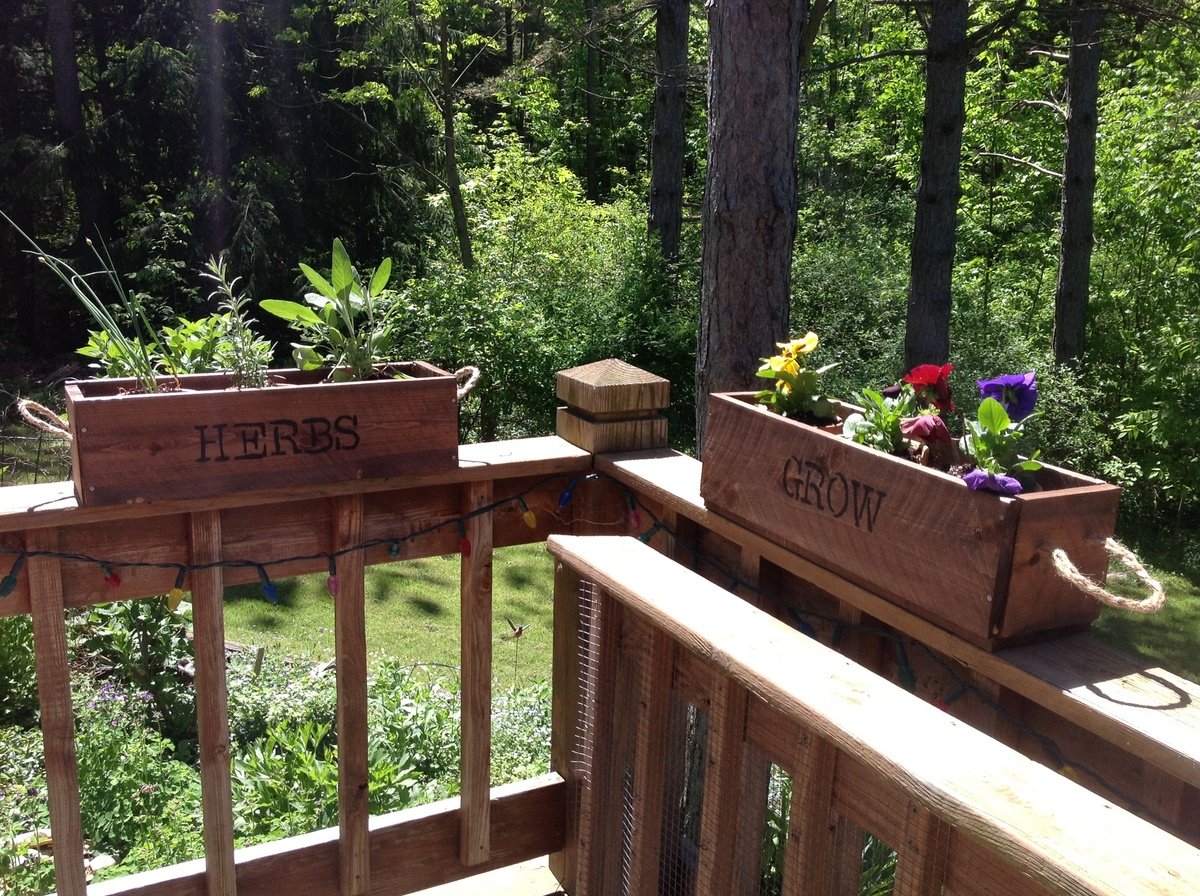
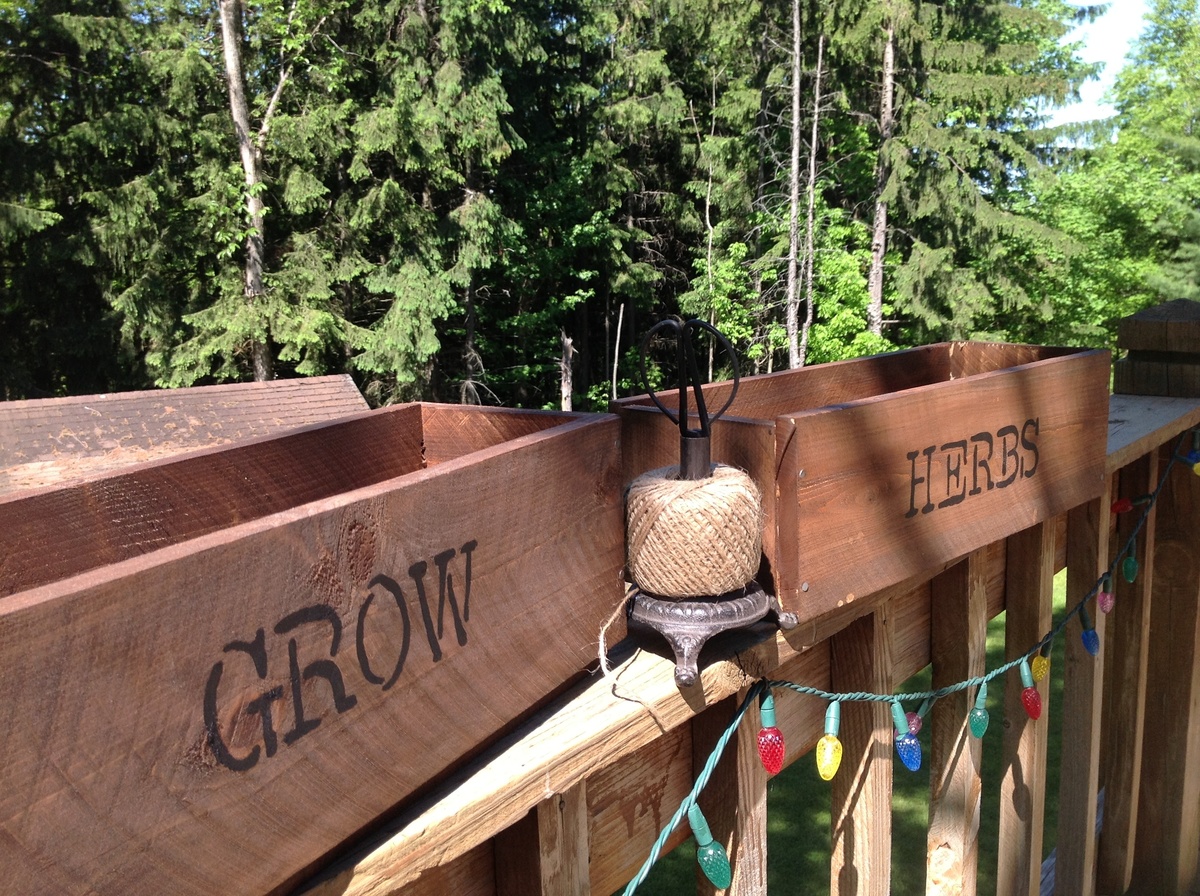
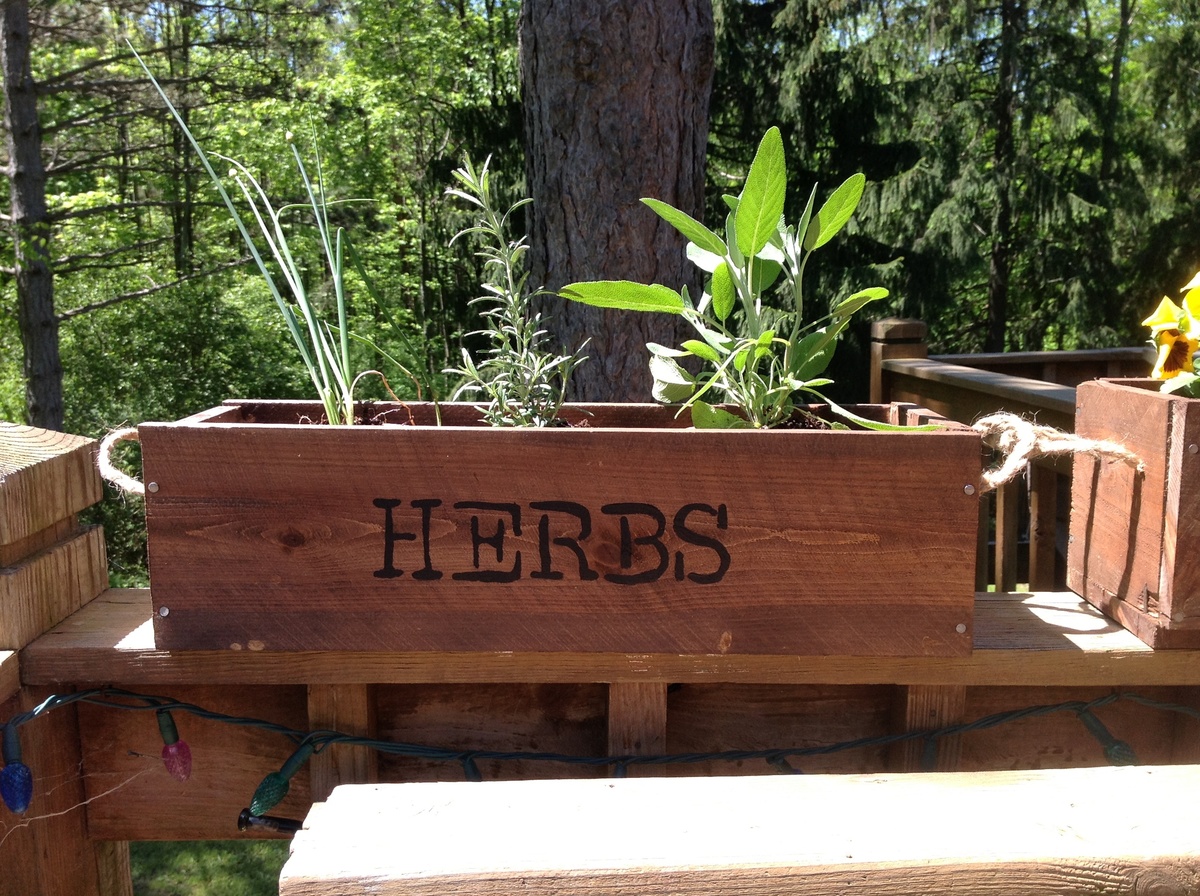
My very first woodworking project. I learned a lot. Most importantly, to watch my cuts more carefully. Also, a good stain and stencil dress up anything. I used braided jute for handles and love them!


Sun, 05/26/2013 - 22:47
I love your herb and flower planters! Now I'm inspired to do some up for my deck as well! Nice job!


Comments
Ana White Admin
Mon, 10/16/2023 - 10:48
Great Coop!
Fabulous job on this project, love the color choice and functionality!
hayley3
Fri, 10/27/2023 - 11:54
Look really roomy plus a…
Look really roomy plus a place for storage in front for feed.