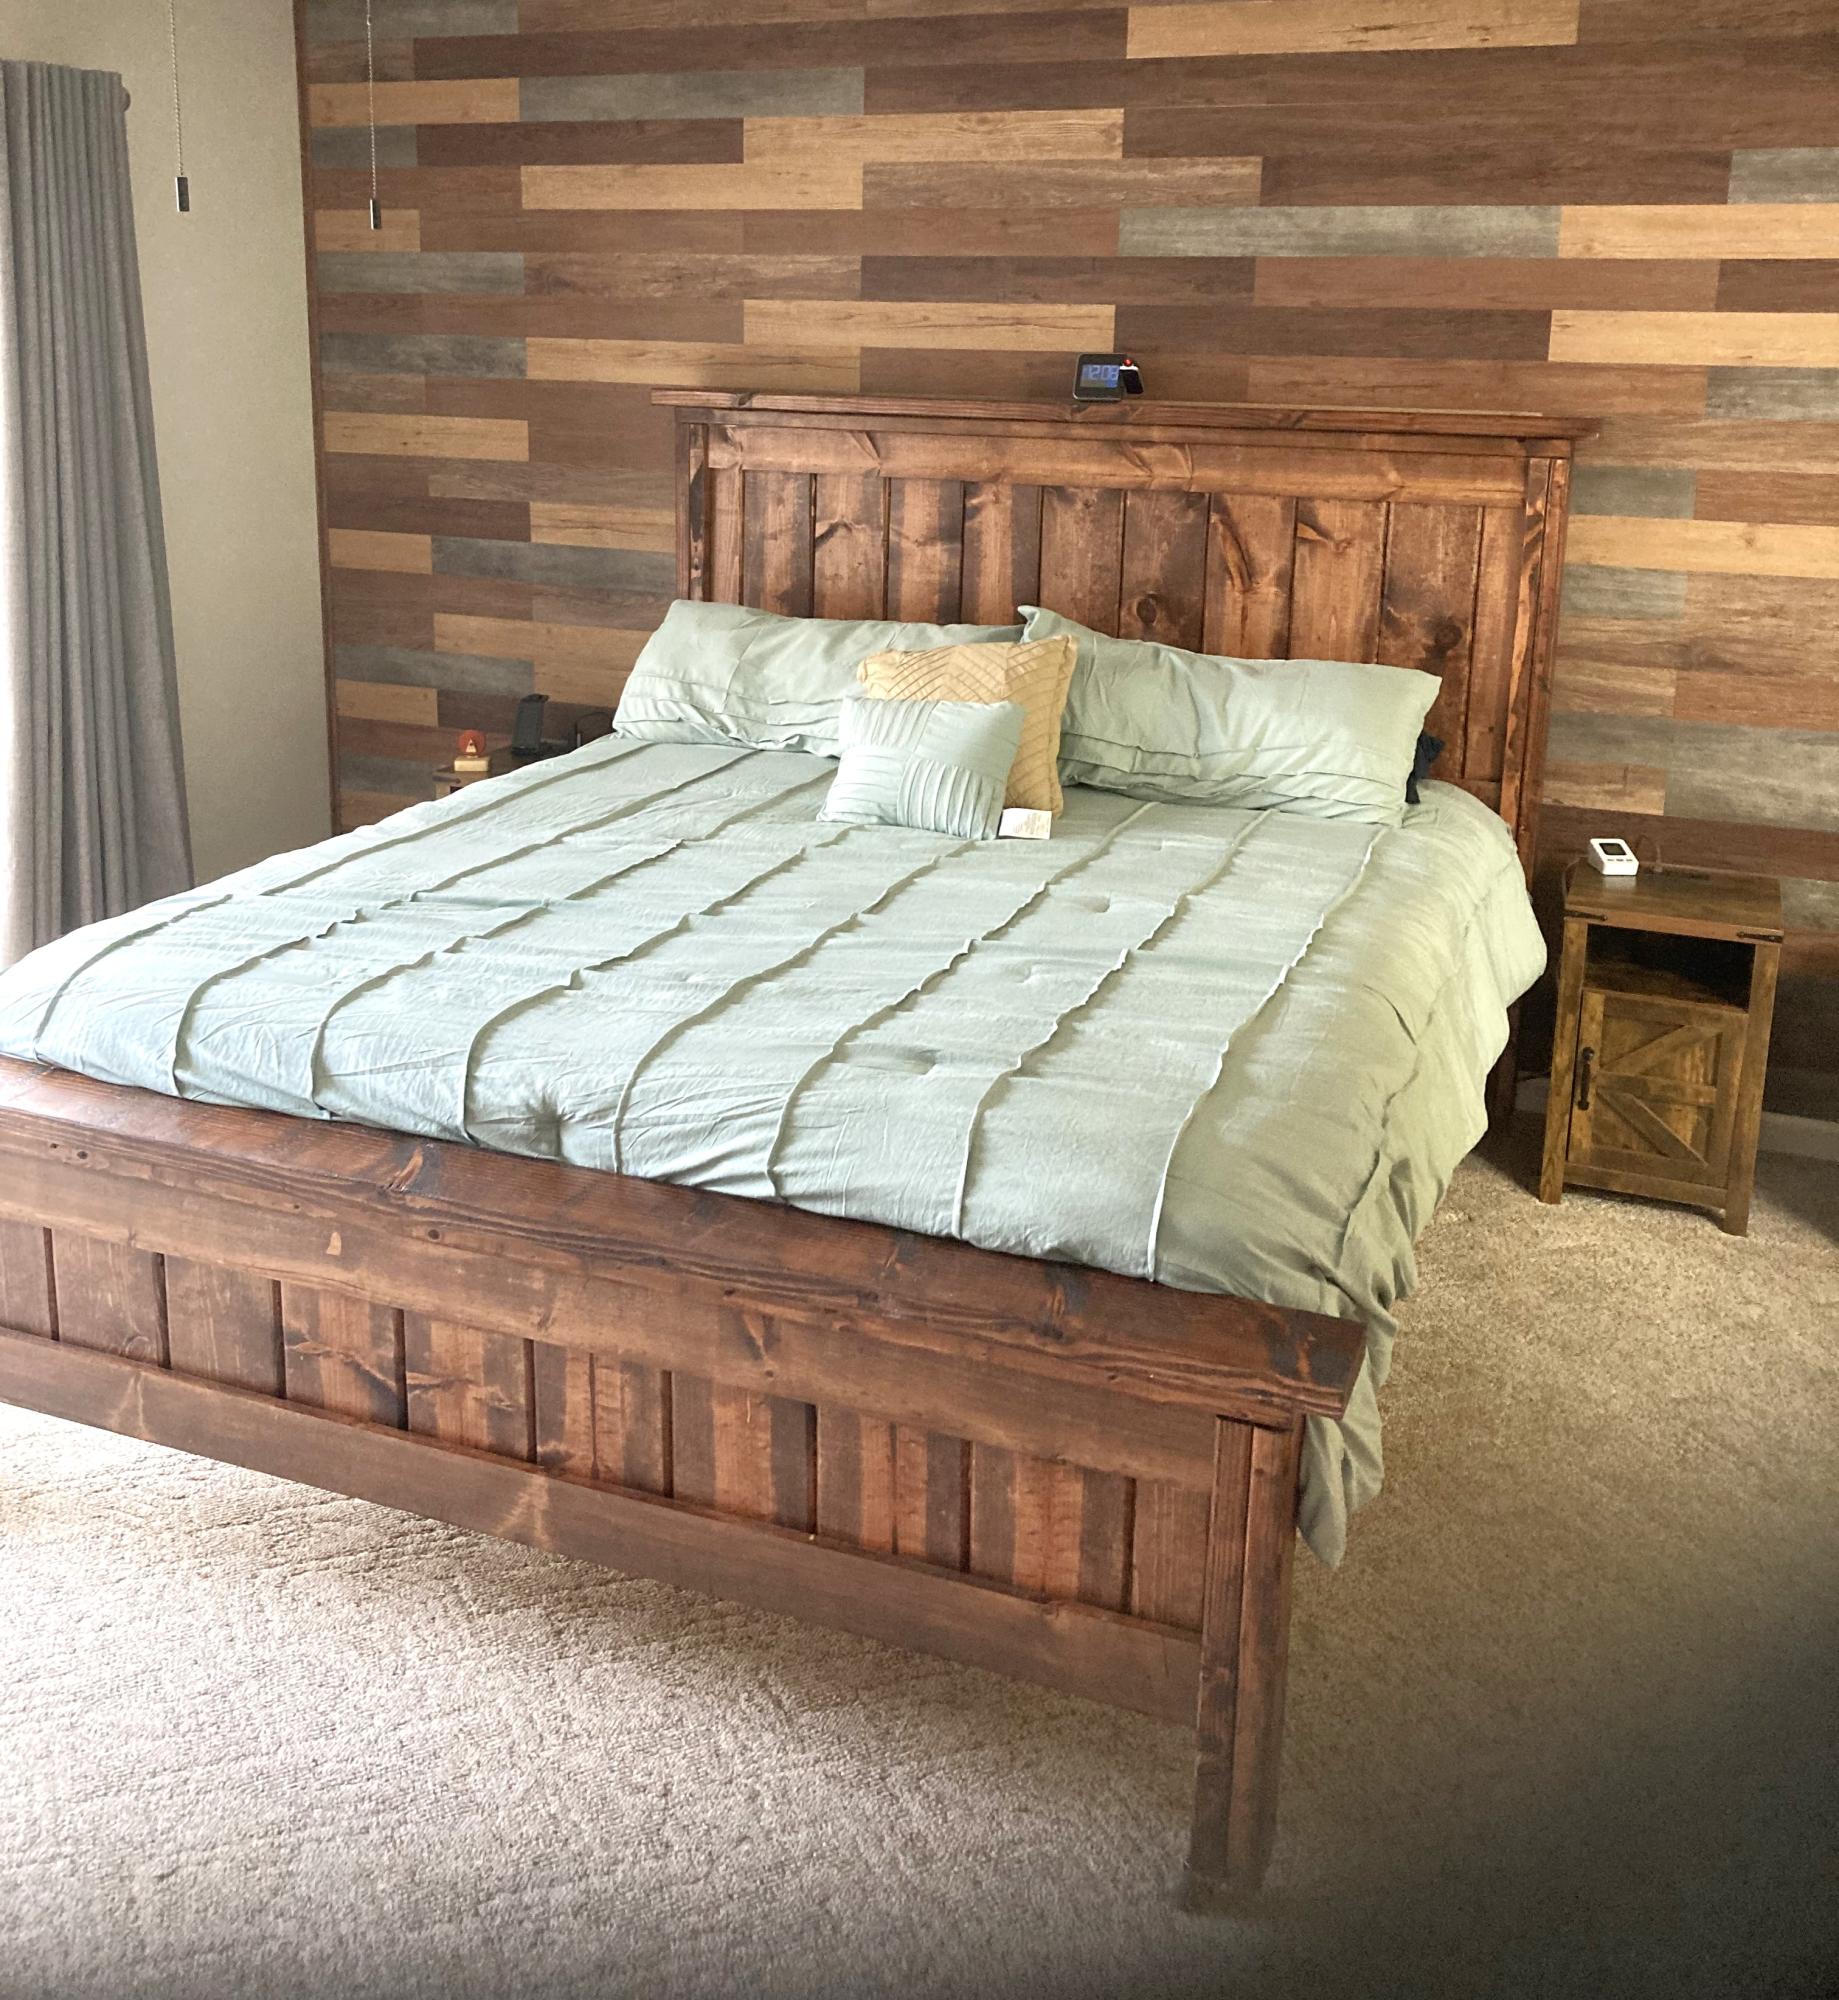
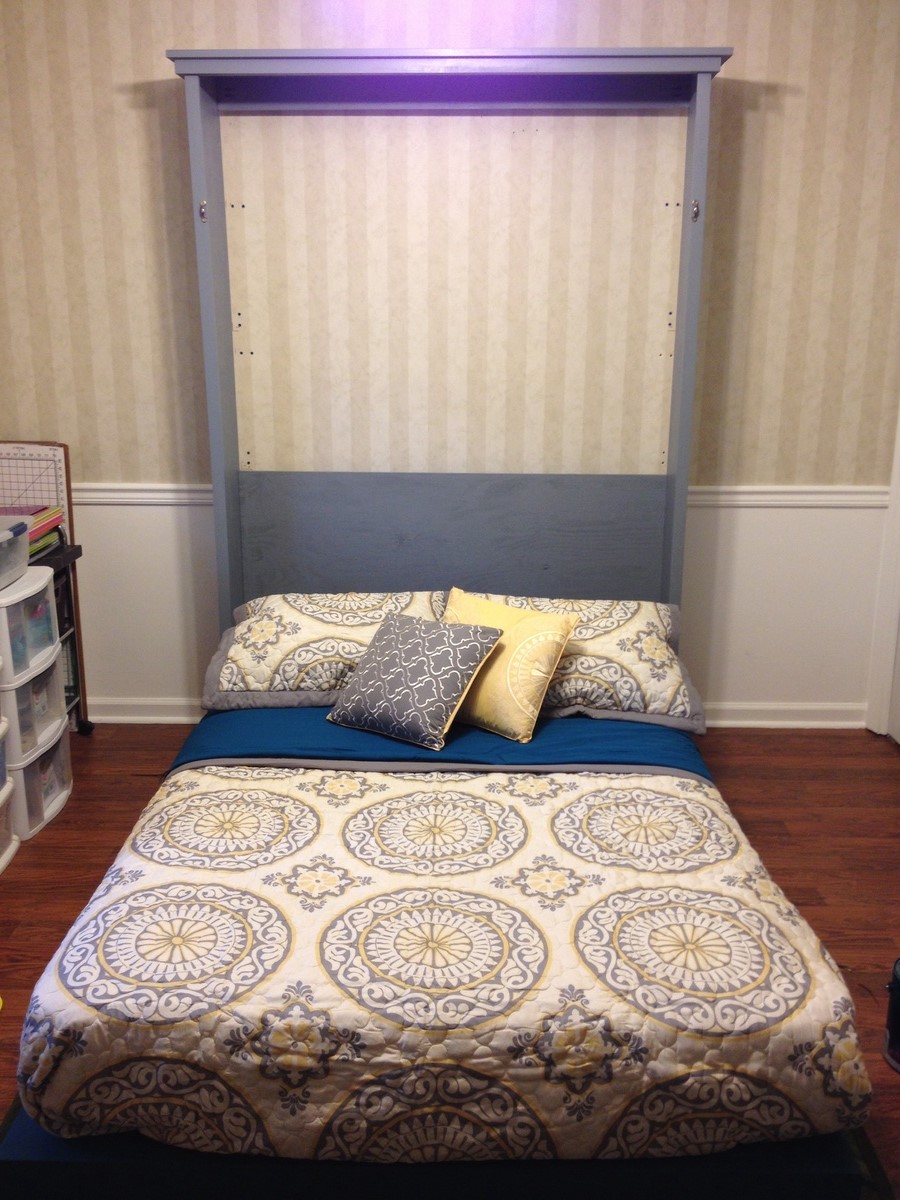
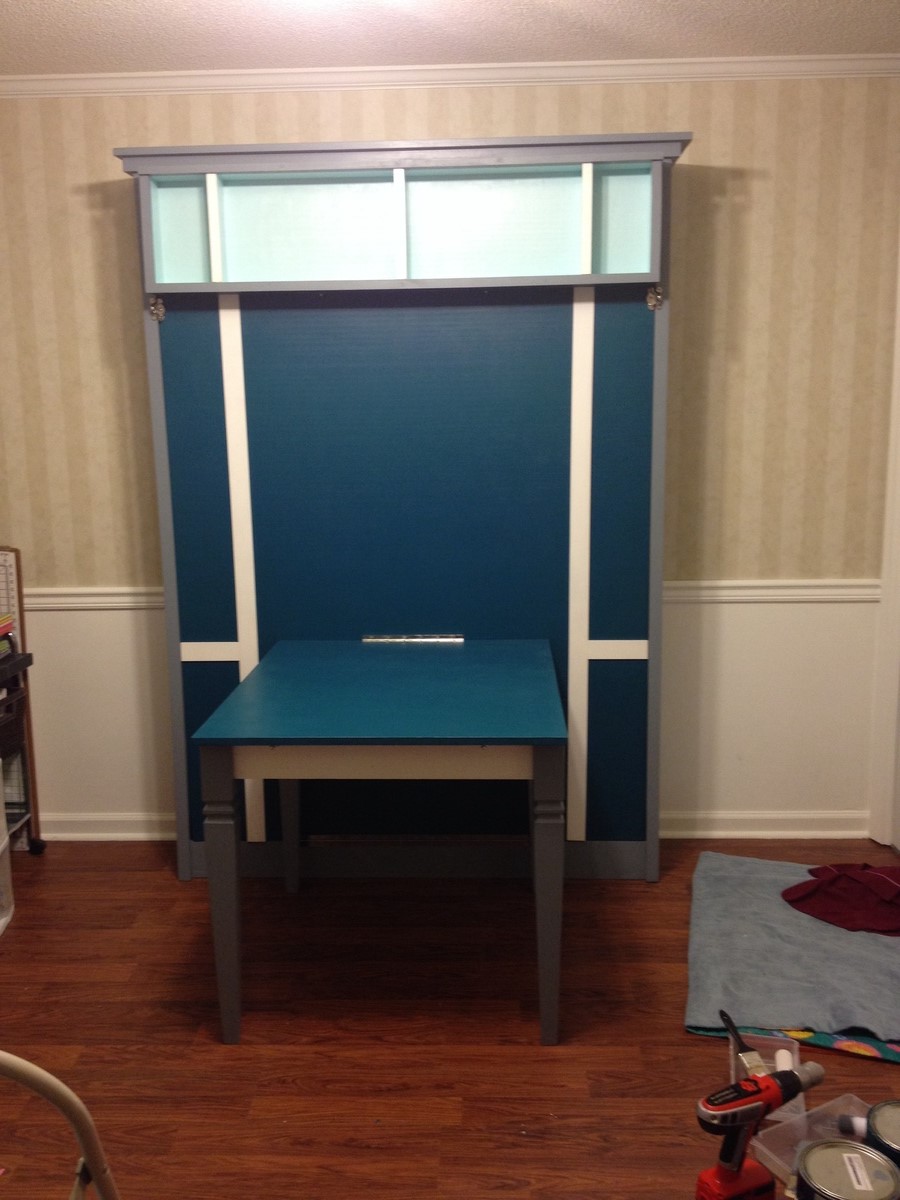
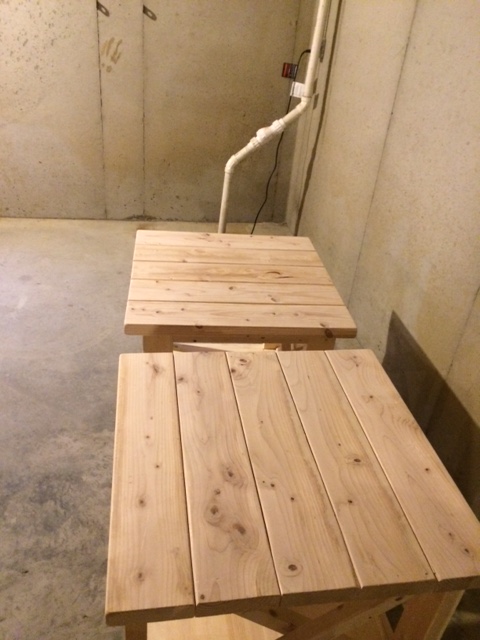
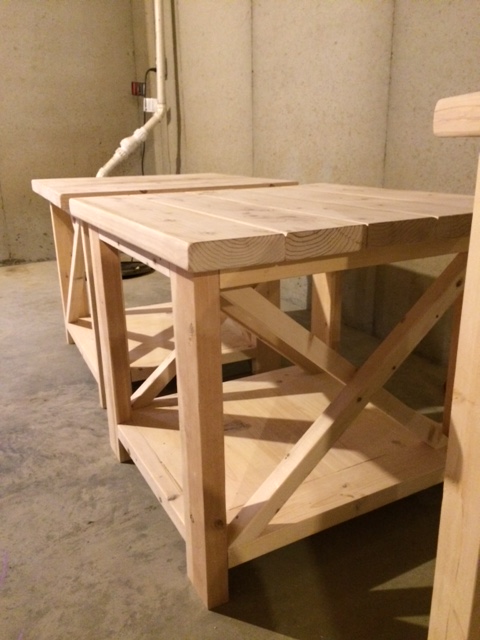
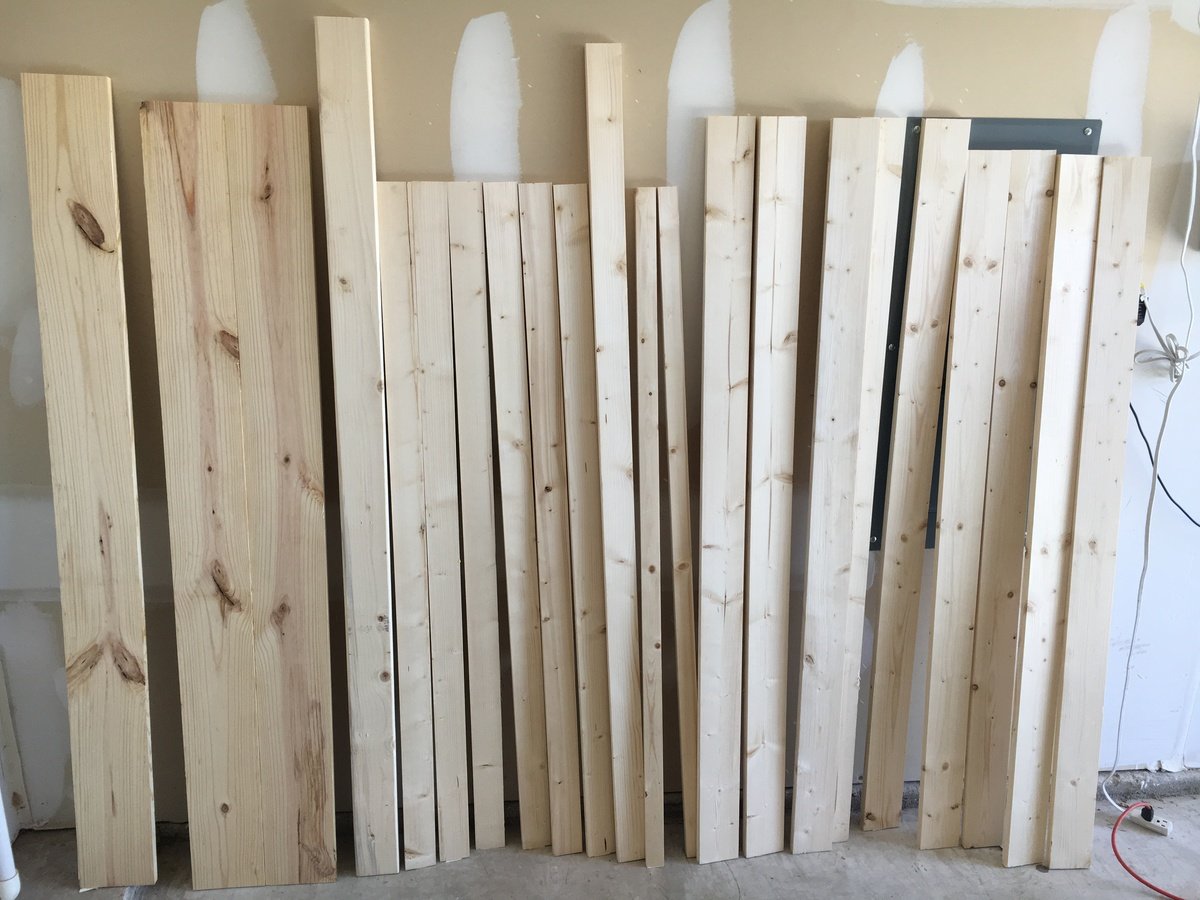
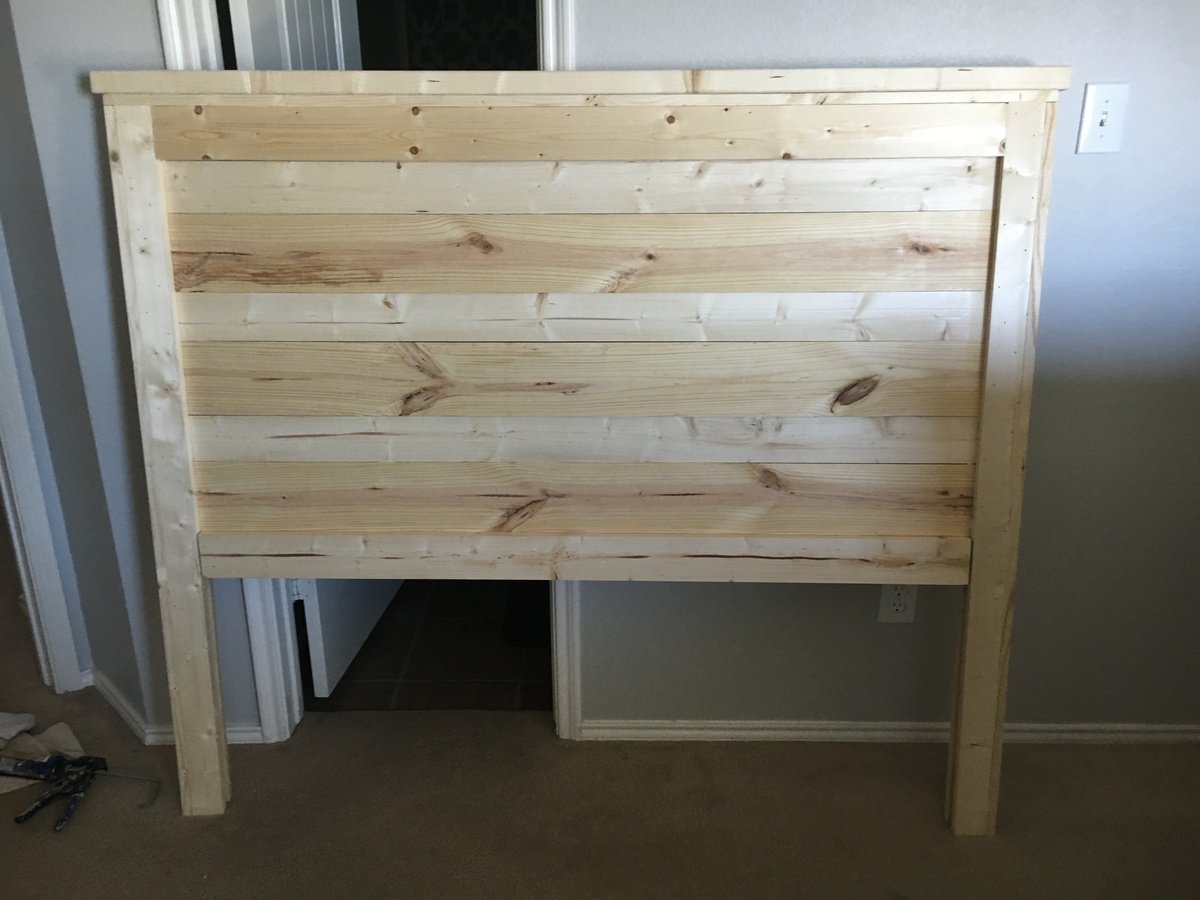
Wood Headboard, Queen Size
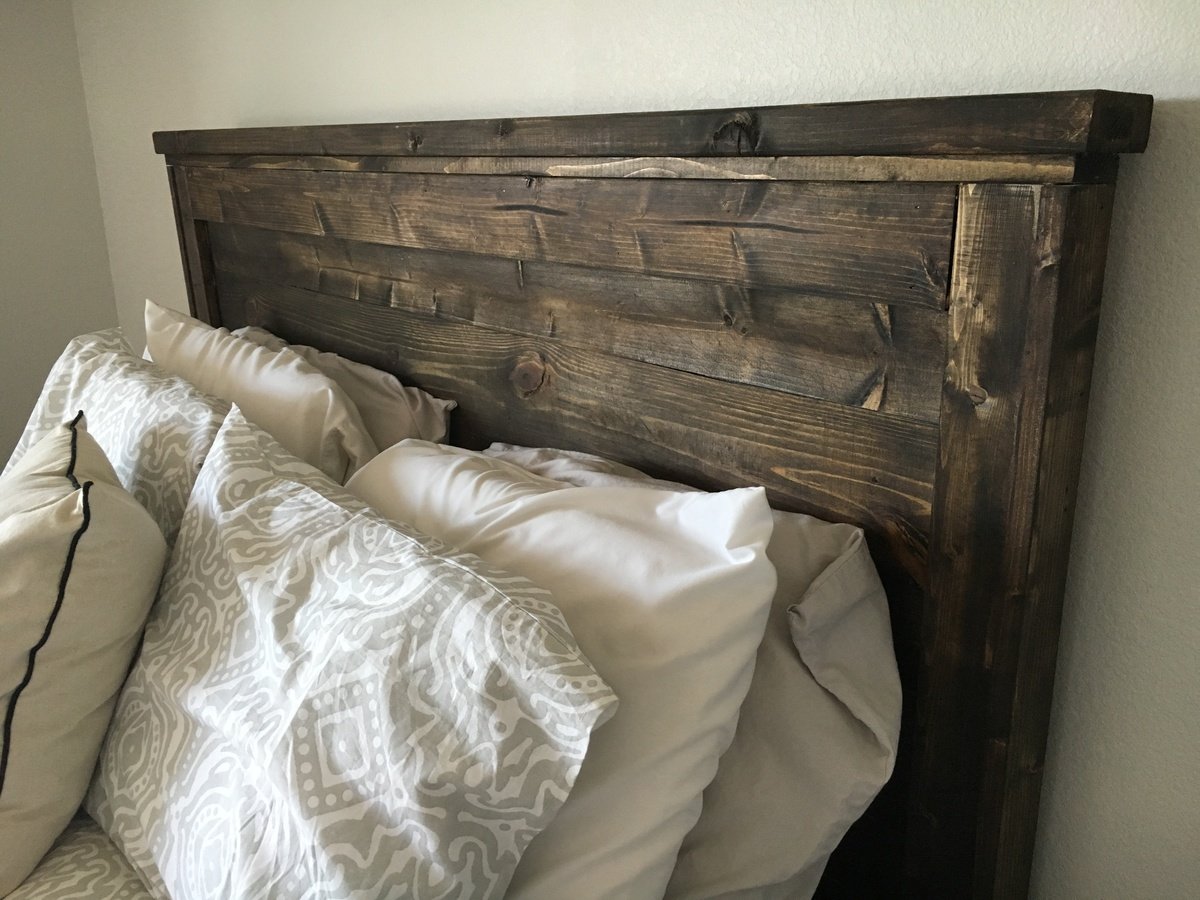
This was my first building project. It was a easy build even for a beginner. Make sure you measure your bed frame and that it will fit into your headboard.
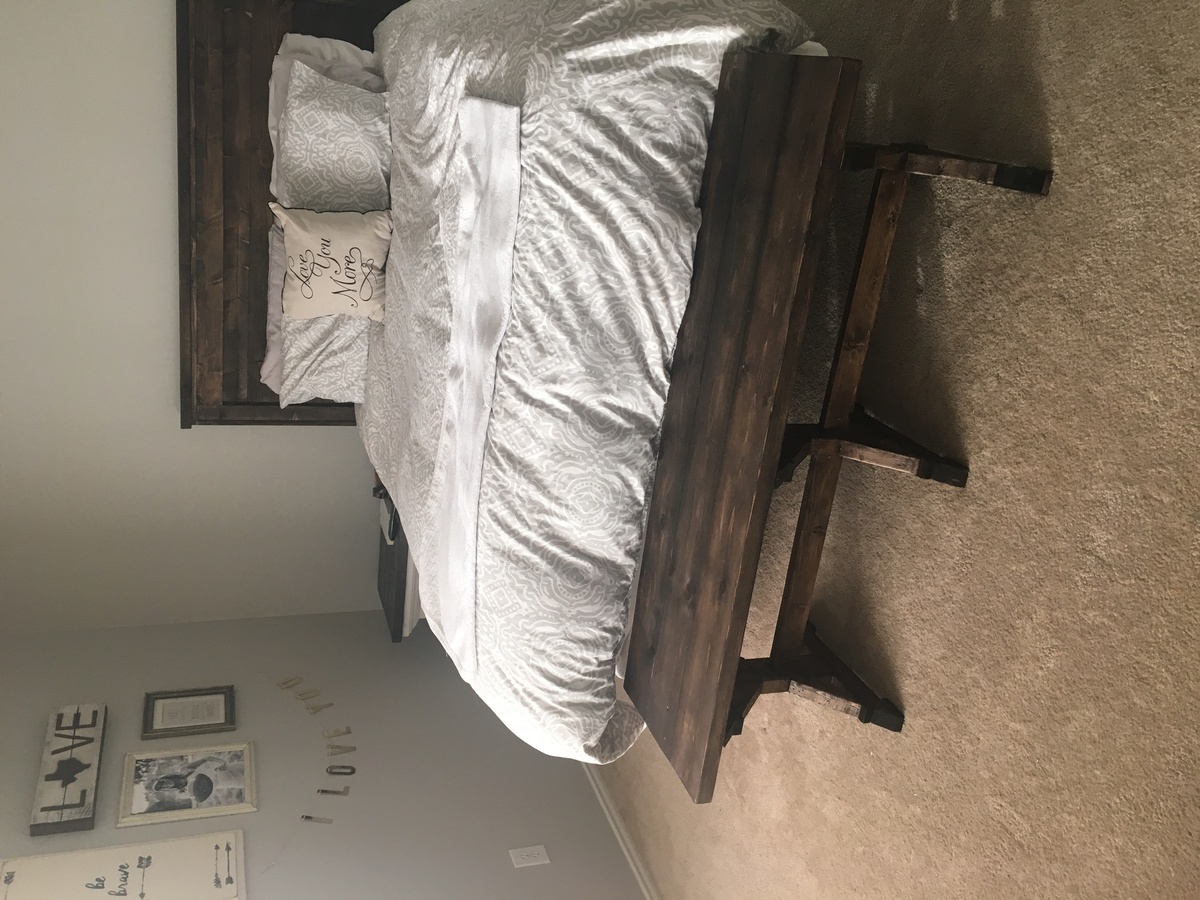
Made it four feet longer for her four chicks. Will be adding automatic feeders and water soon.
Used your plans for a California King! Had to lengthen the bed by 4” to accommodate the comforter.
David Turton
I used 5 5/8 fence pickets I had in the scrap box to give the chairs a wider arm rest. I wanted something wide enough to safely hold a paper plate and drinks.
I planned them, routered the edges and put a coat of oil based polyurethane on them.
The table is just something I put together and the top is a 1.5 inch thick 16x16 concrete paver.
If you like the wide arms, use wood glue and clamps, not nails or screws. Saves you from having to fill them and it looks better too.
Enjoy
And thank you Anna for a great build!
This was my first build from your site! Farmhouse bench.
I was a little confused with the miter saw instructions "bevel cut at a 10 degree angle off center". I had to google to figure out what you meant. In the end the bench looks awsome and I feel very empowered with my tools.
(still need to stain the finished project, bought all the wood and built in 1 day)
Thank you Ana for sharing your plans!! I love your site and I love my Kreg Jig!
Vicki
(Canada)
Wed, 04/15/2020 - 11:38
It looks great and rock solid. I can't find a plan for it. Could you please help me?
Single seater chair to match the sofa
I followed most of the measurements with the Murphy bed with added dimensions for a full sized bed. I also added a shelf to provide support while the bed is down since I brought the platform off the floor. The table is also hinged to the bed platform so that it folds up and locks in place for a center support for the bed.
Fri, 07/25/2014 - 16:06
This is awesome! This is just what I need. I can't see how the table provides center support. Do the table legs come off?
Fri, 07/25/2014 - 16:52
What an awesome project! Love how the added shelf at the top creates the "legs" at the end of the bed when it is lowered (looks like it keeps the bed about 4" off the floor?). Are those window sash locks for closure? Those will keep it in place nice and tight when it's closed. The fold down desk is brilliant also, and love the legs and the colors!
Fri, 01/23/2015 - 14:13
Super job! Can you provide plan details for the table and feet for the off floor design?
Turned an entryway closet into these lockers for my kids. I used the basic ideas in Ana's Smiling Mudroom for my plans. Lockers are just inside the entrance from the garage.
Built the sewing table for my wife Penney. It has a work surface that is 36" x 60" and is 32" high.
Used 3/4" Baltic Birch and used premium pine to add edge banding. Used 1/4" plywood for a back to the sewing table to add strength and I think helps the look of the table. My Kreg Jig was used everywhere possible when assembling the case. Used full length piano hinges with #6 x 5/8" screws to attach the leaves to the table. Made the doors using premium pine with a plywood panel. For the legs, I used folding, locking leg brackets from Lee Valley to attach the 1-1/2" square poplar legs. The casters are 3" double-locking from Woodcraft.
Went a little over budget, but it turned out very nice and she loves it.
Thank you for the easy to follow plans.
We built this bar from two separate sets of plans. One was from Shanty 2 Chic and their outdoor bar. Because I don't like the flat top design and prefer to have two separate levels for bars (one for mixing drinks and one for drinking them), we used a tutorial from Pinterest as well. I essentially looked at pictures and evolved our own take on it. We decided to use 1X12 and 1X4 that I have stocked up. We also had an alder bar rail left over from our own bar that we attached. It fits well through doors and fit perfectly in our minivan for transporting.
We gave this to my husband's cousin and his wife because they were hosting their first New Years Eve party. We are waiting for their instruction as far as shelving on the inside (they are still discussing for how many glasses and whether or not they want a refridgerator/kegorator installed) and the finish.
Built the porch swing and was inspired to build the glider frame by another "Brag Post" Looks great and fits perfectly in my back yard!
Fri, 02/18/2022 - 08:20
Are there any dimensions for the glider part? I have first year agriculture students building this, but we are unsure of the cut list for this. I am sure I can figure it out as the teacher, but with 20 students in the class, it would be better to be able to give them instructions to follow on paper. Thank you!!!
This was a blast to make, we added 2 roooms and a swing but every thing else was the same!
Tue, 02/07/2017 - 08:07
Love your American girl dollhouse, the swing on the side is so fun!!!
Fri, 04/17/2020 - 16:59
Love your house!! I can’t find the actual PLANS, though.):
Fri, 12/04/2020 - 10:07
Do you make this & the exact replica with possibly a garage? I'm looking to buy 1 for my daughter for christmas?
I'm a beginner DIYer and I knew one day I was going to have to make a workbench. I made mine 24x48 so I wanted a little more support to hold up the drop down leaf. I searched your site and found another plan with these gatelegs and knew this is what I wanted. I love the way it came out. What do you think?
Thank You Ana White and The Friendly Home for making the Original! These end tables are a little different because I decided to make an "X" with 2 1x2s on each side (from top to bottom), to give it a little different look and depth. It was pretty easy to make!
Modified the Cherished Bliss plan a bit to include Carriage bolts instead of pocket holes and I notched the top of the legs to make a shelf for the top.
Legs were cut at 18" and the top is 40". The two center 4x4's are connected with two internal (and smaller diameter) carriage bolts and glued together. The end 4x4's are glued and then a 1/2 x 6" carriage bolt with a pre-drilled "Head" hole (using 1" paddle bit).
Very easy to make but this baby is heavy!!!
This is a set of bunk beds that I made for my daughter Alicia for their getaway home at Canadian Lakes, MI. Now their children can invite their friends and have a fun place to sleep.
Fri, 07/19/2013 - 02:37
Wow! This looks absolutely amazing! I like the light and shelf in each bunk too. Spectacular!
Fri, 07/19/2013 - 04:45
Newfey, these are awesome! I've seen pics of this type of bunk over the years, but never anybody attempting them as a DIY from a non-professional, unless you are one? Either way, they certainly look professionally done. Love, love, love!
Fri, 07/19/2013 - 07:56
I am not a professional by any means and have a limited tool supply. My daughter sent me a picture and asked if I could make them for her. It was a big project as their getaway home is 165 miles from where I live. It took quite a few weekends to complete.
Fri, 07/19/2013 - 09:24
That was one of the problems, I had no plans, only the picture as a reference. It was a design as I went along and needless to say I gave a sigh of relief once that I saw the mattresses fit into their places.
Fri, 08/30/2013 - 06:48
I've been viewing pictures of these style bunkbeds for a while. I'm almost certain I could come up with something but most definitely lose my sanity along the way. This would be great in my girls room and you did an awesome job!
Sat, 07/25/2015 - 20:25
Ana I am looking to see if you have actual plans for a quad bunk bed? Also what about a quad corner bunk bed? We are trying to put our 4 girls in one large room and this would really help make it work!
Mon, 07/27/2015 - 21:11
I have been looking for plans for corner (L shaped) bunks. And haven't had much luck. I haven't purchased the following plans so I can't vouch for them but I am considering them:
http://stonebreakerbuilders.com/product/built-in-bunk-bed-plans-4-bed-c…
We made the Tryde Coffe table using 100% reclaimed wood
Sun, 06/26/2011 - 13:38
Also wanted to say I LOVE YURTS!!!! I want one! :) Fantastic idea for accomodation.
Mon, 06/27/2011 - 19:25
How do you like the yurt??? The table looks terrific!
I used the trestle table and benches plans to make a cedar picnic table...
by Joe
Combined several different plans from several different sites, but my mother in law is a master gardener who loves birds and wanted a new bench for her garden. I used 1x4's on the seat slats (instead of 2x4's- added an extra support in frame), made the seat a bit deeper, and I modified the arms to allow somewhere to rest a glass of her southern sweet tea. :) All made from box store non PT lumber and sealed for outdoors. The ideas for the "pickets" on the back and birdhouse came from "MyOutdoorPlans.com"- want to give credit where credit is due.
Outstanding Shiplap Fireplace surround with low mantle by Cruz on IG
Including more photos of the build process
Small space faux fireplace. Thank you for the plans for the faux fireplace. Easy to make and has been used for every holiday.