Community Brag Posts


Rustic Bench (Coffee Table)
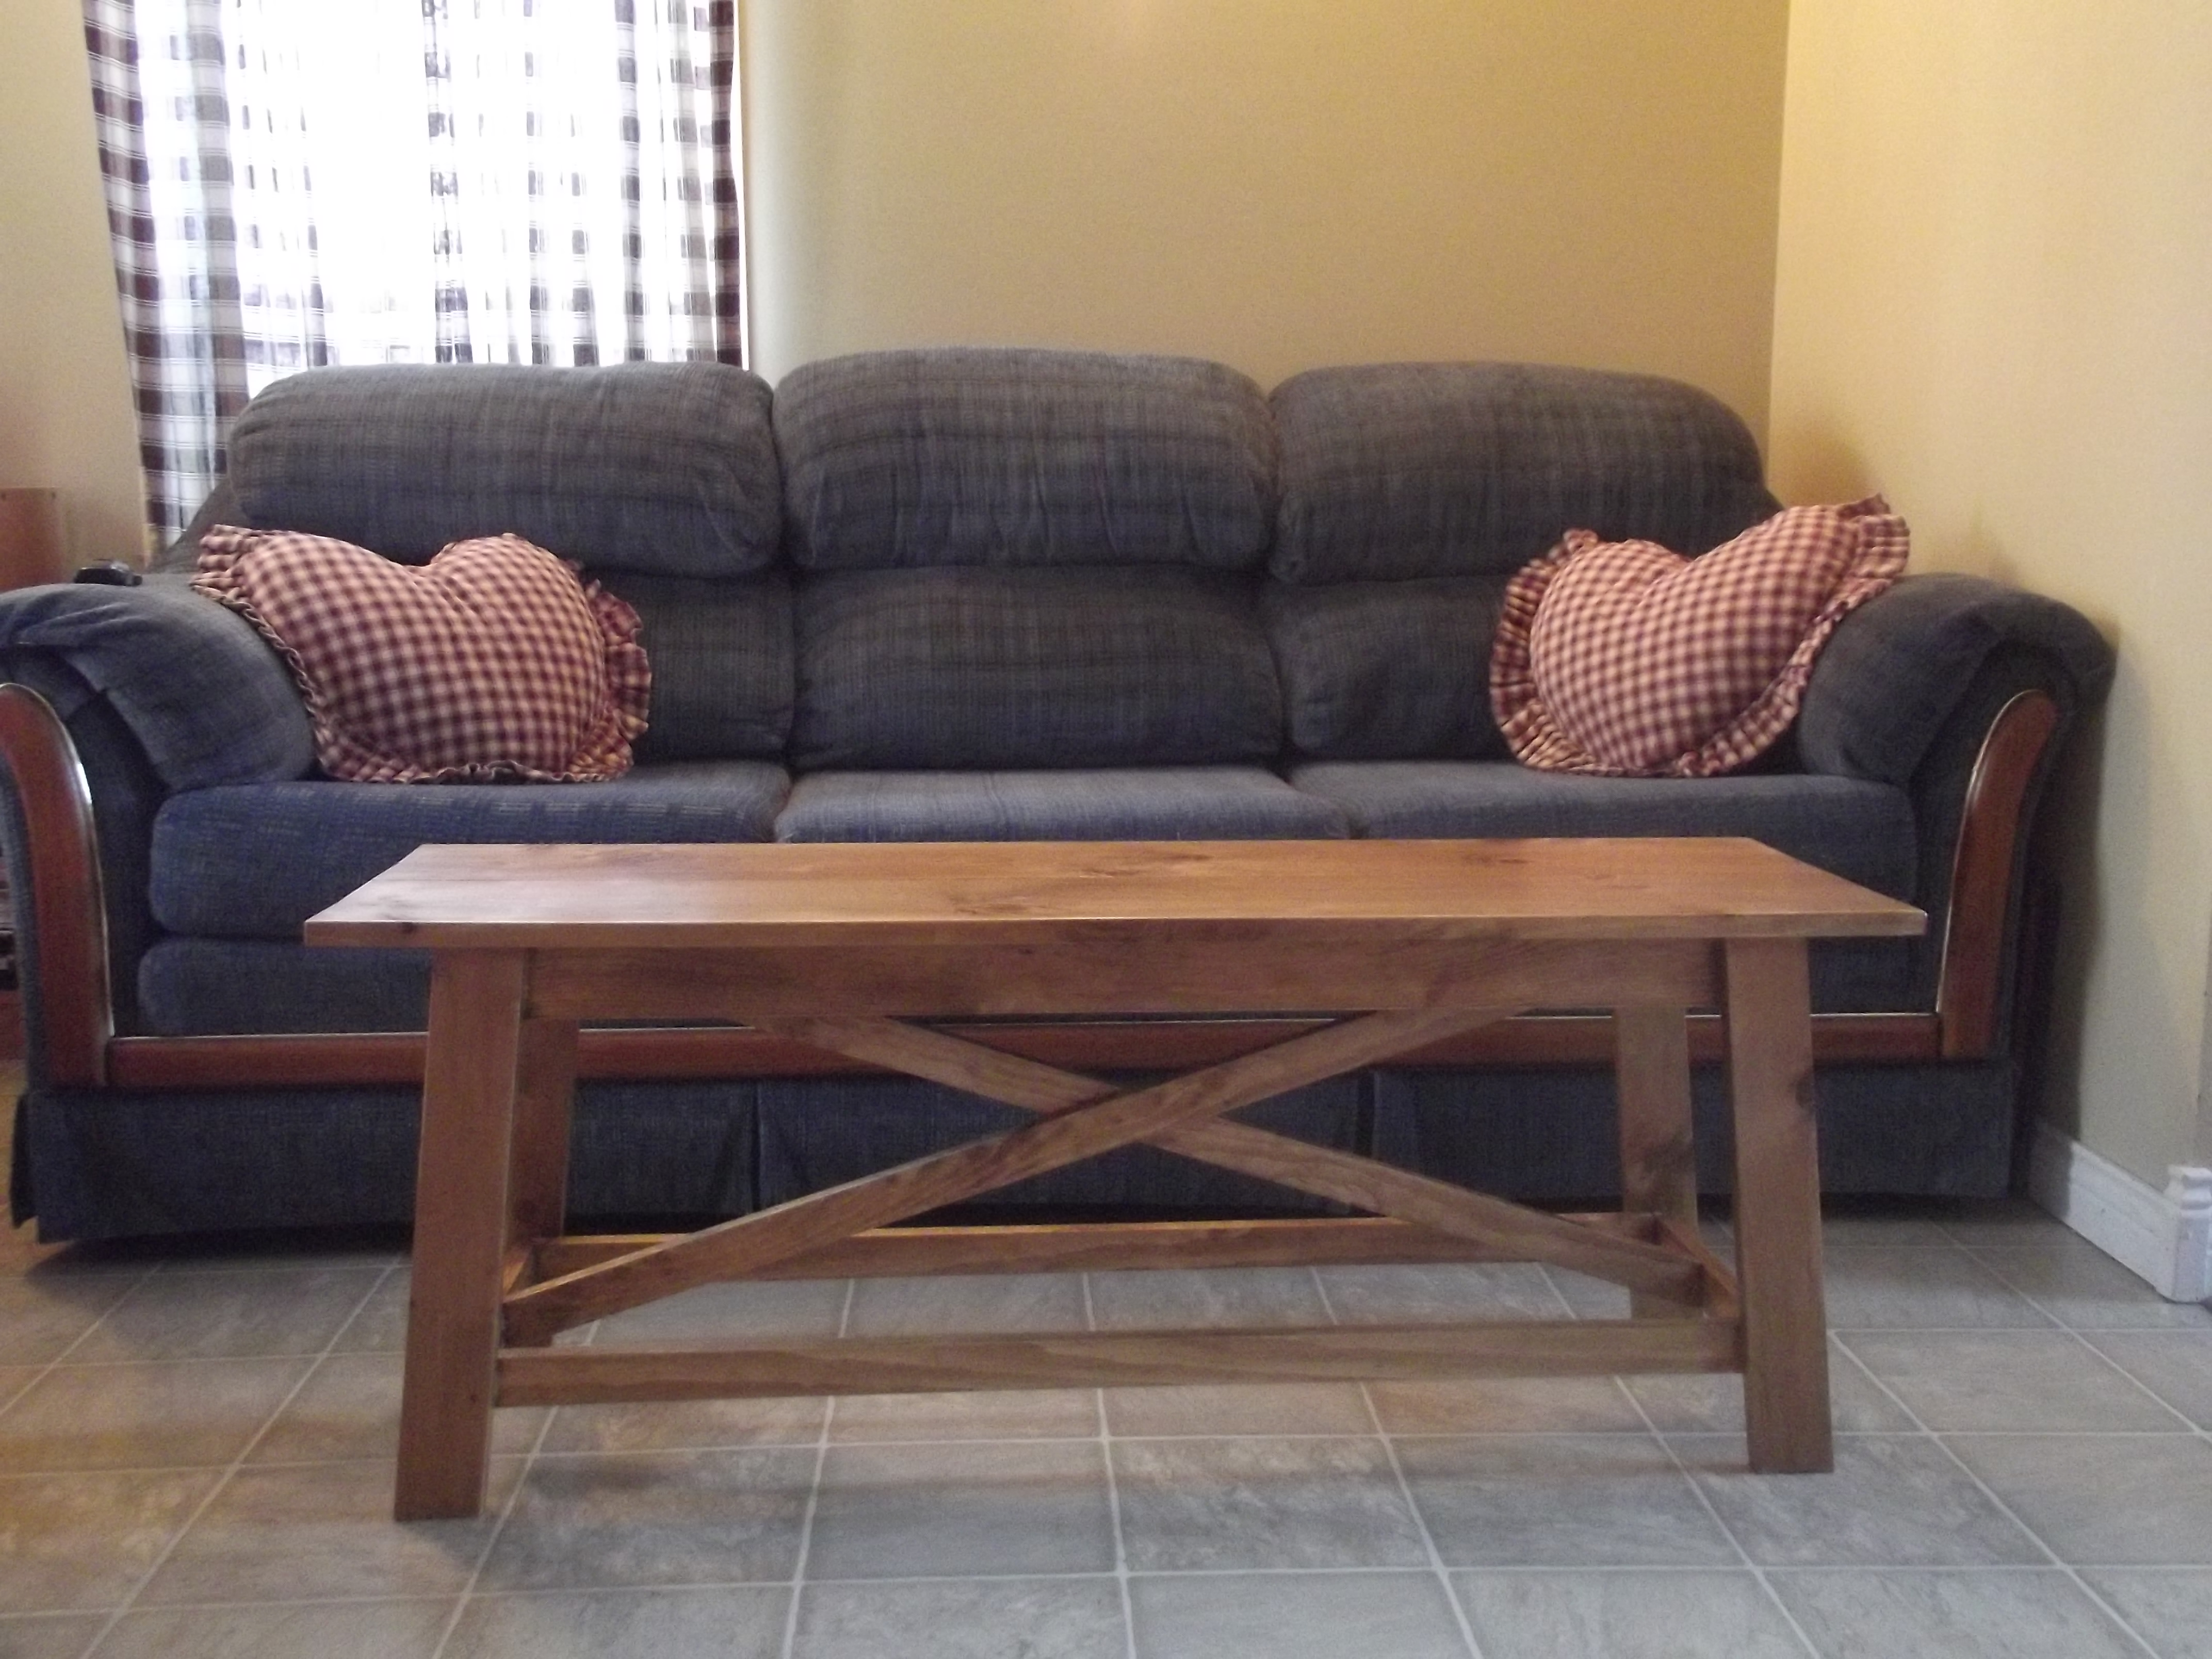
I made this coffee table from Ana's Rustic Bench plans in The Handbuilt Home. I needed something fairly small for my living room and this worked perfectly. I used pine and stained it with Minwax Early American. I finished it with 3 coats of Minwax Polyurethane.
Estimated Time Investment
Afternoon Project (3-6 Hours)
Finish Used
Minwax stain in Early American and Minwax Polyurethane (clear satin)
Recommended Skill Level
Beginner
Comments

Mon, 04/07/2014 - 18:34
This is lovely!!! Thanks for
This is lovely!!! Thanks for getting the book and doing a project from it, love how this bench turned out!
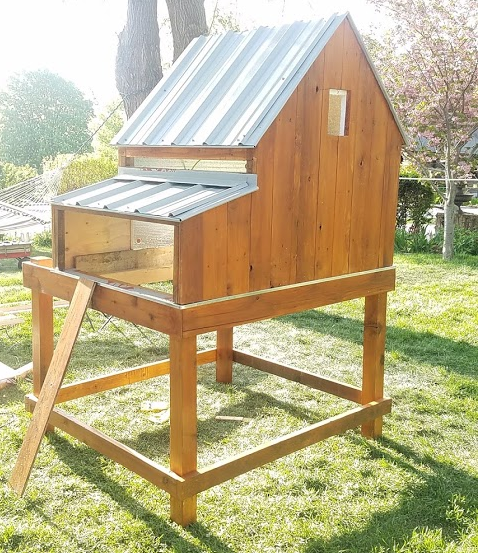
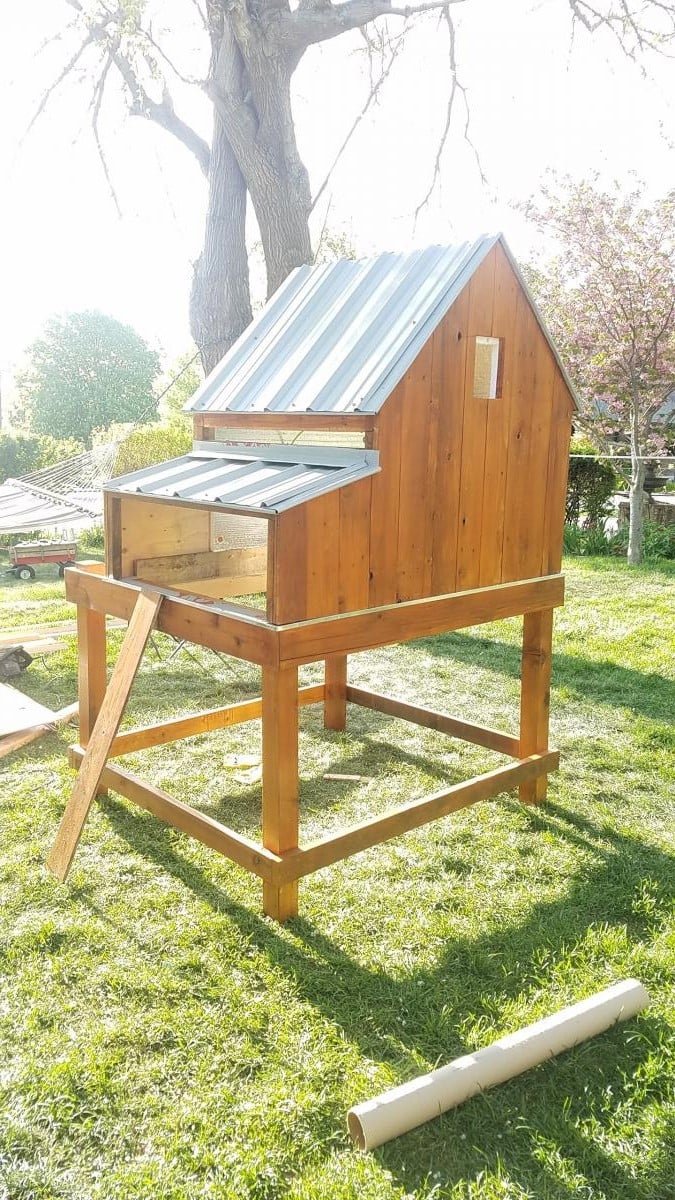
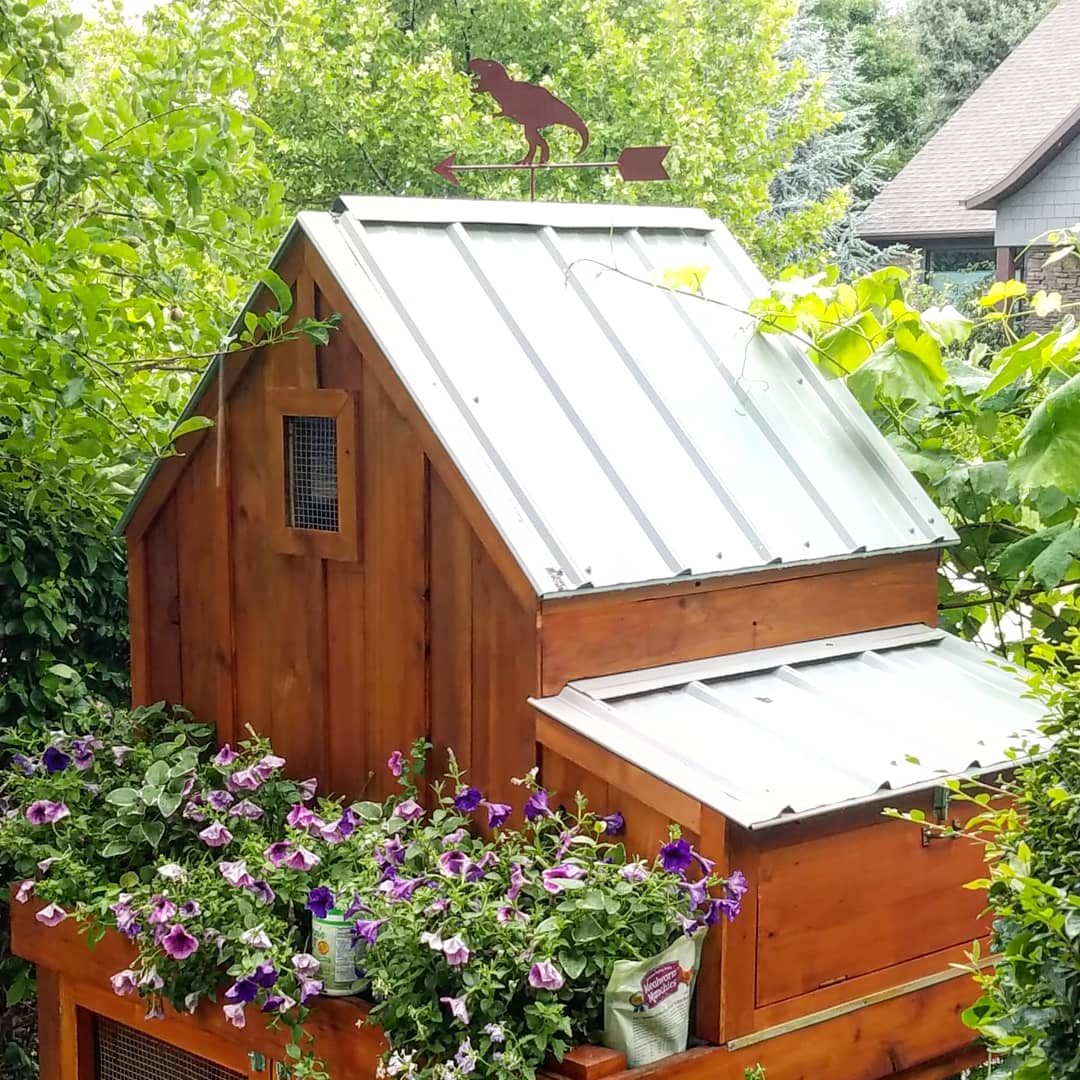
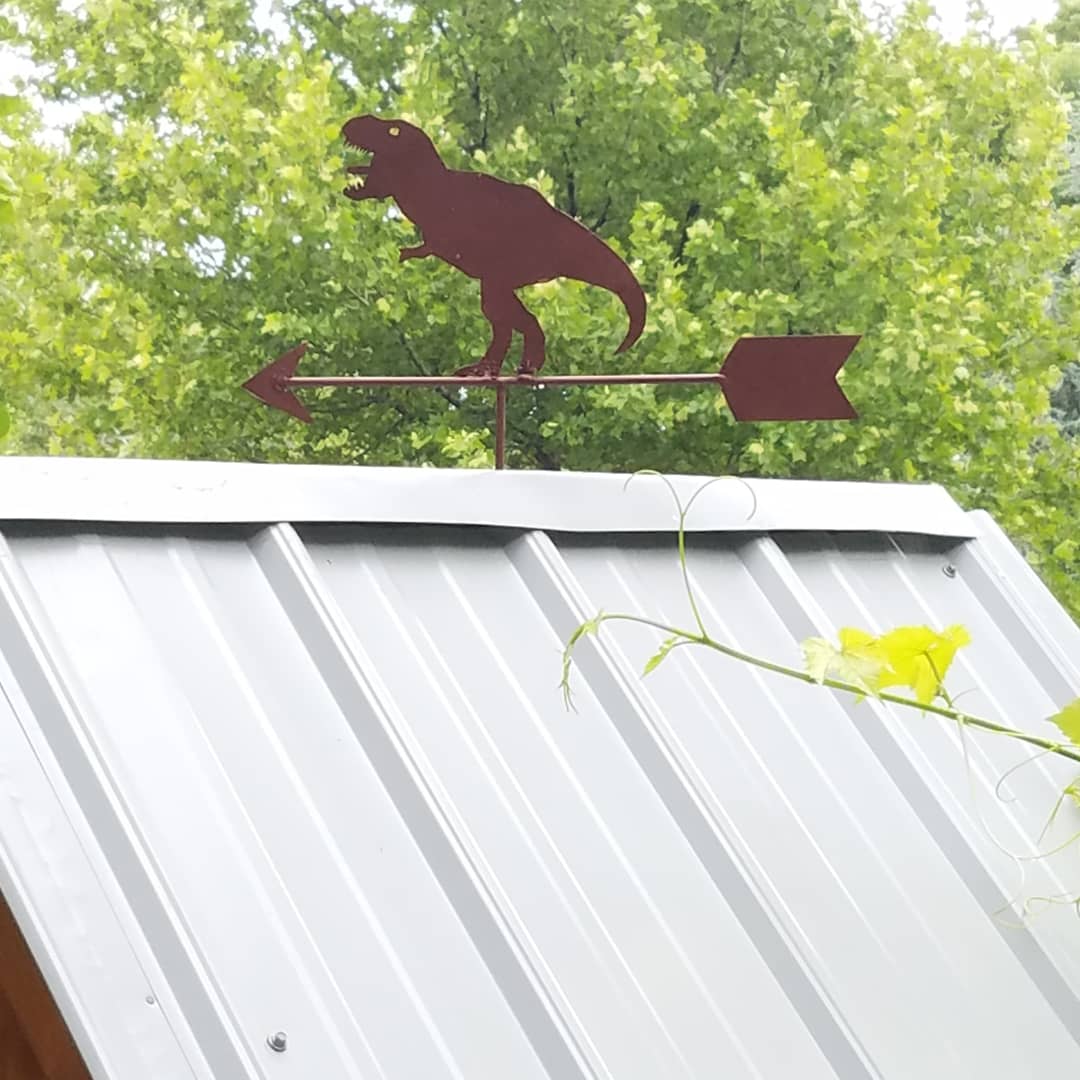
chicken coop
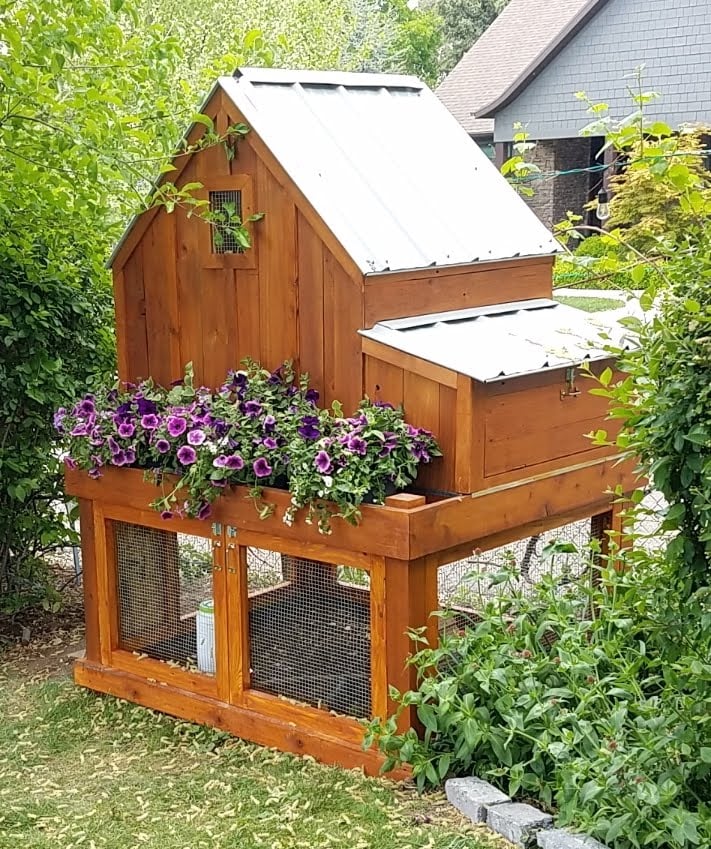
Modified to make the coop bigger and the planter smaller. Added 1" foam insulation on the inside and changed the design to use the "deep litter" method. This means the coop bottom goes all the way to the bottom of the support beam rather than using a removable tray. Added a steel roof with a ridge vent at the top. The chicken run under the coop is lined with buried hardware cloth so no animals can dig under the coop. All hinges are mortised and doors flush mounted. The coop is wired for power for a heat lamp. The planter is lined with a metal tray. The coop can be separated into two pieces so you can move it or rotate the top 180 deg if needed (so you can get to the eggs from the left or right side). Great plans, thanks Ana!

Built from Plan(s)
Estimated Time Investment
Week Long Project (20 Hours or More)
Finish Used
cedar deck stain. Olympic. brand
Recommended Skill Level
Advanced
Comments
Tue, 05/12/2020 - 15:09
Amazing! Thank you so much…
Amazing! Thank you so much for sharing a photo, this is truly beautiful!
Sun, 09/27/2020 - 14:42
Do you have the exact…
Do you have the exact measurements that you used for this one?
Essential Adirondack chair
Like this chair! Changed the 3 1x10's on the back to 4 1x8's ripped down to 6 ¹⁵/¹⁶
Built from Plan(s)
Estimated Cost
40
Estimated Time Investment
An Hour or Two (0-2 Hours)
Comments

Modern Adirondack chairs and a modified bench
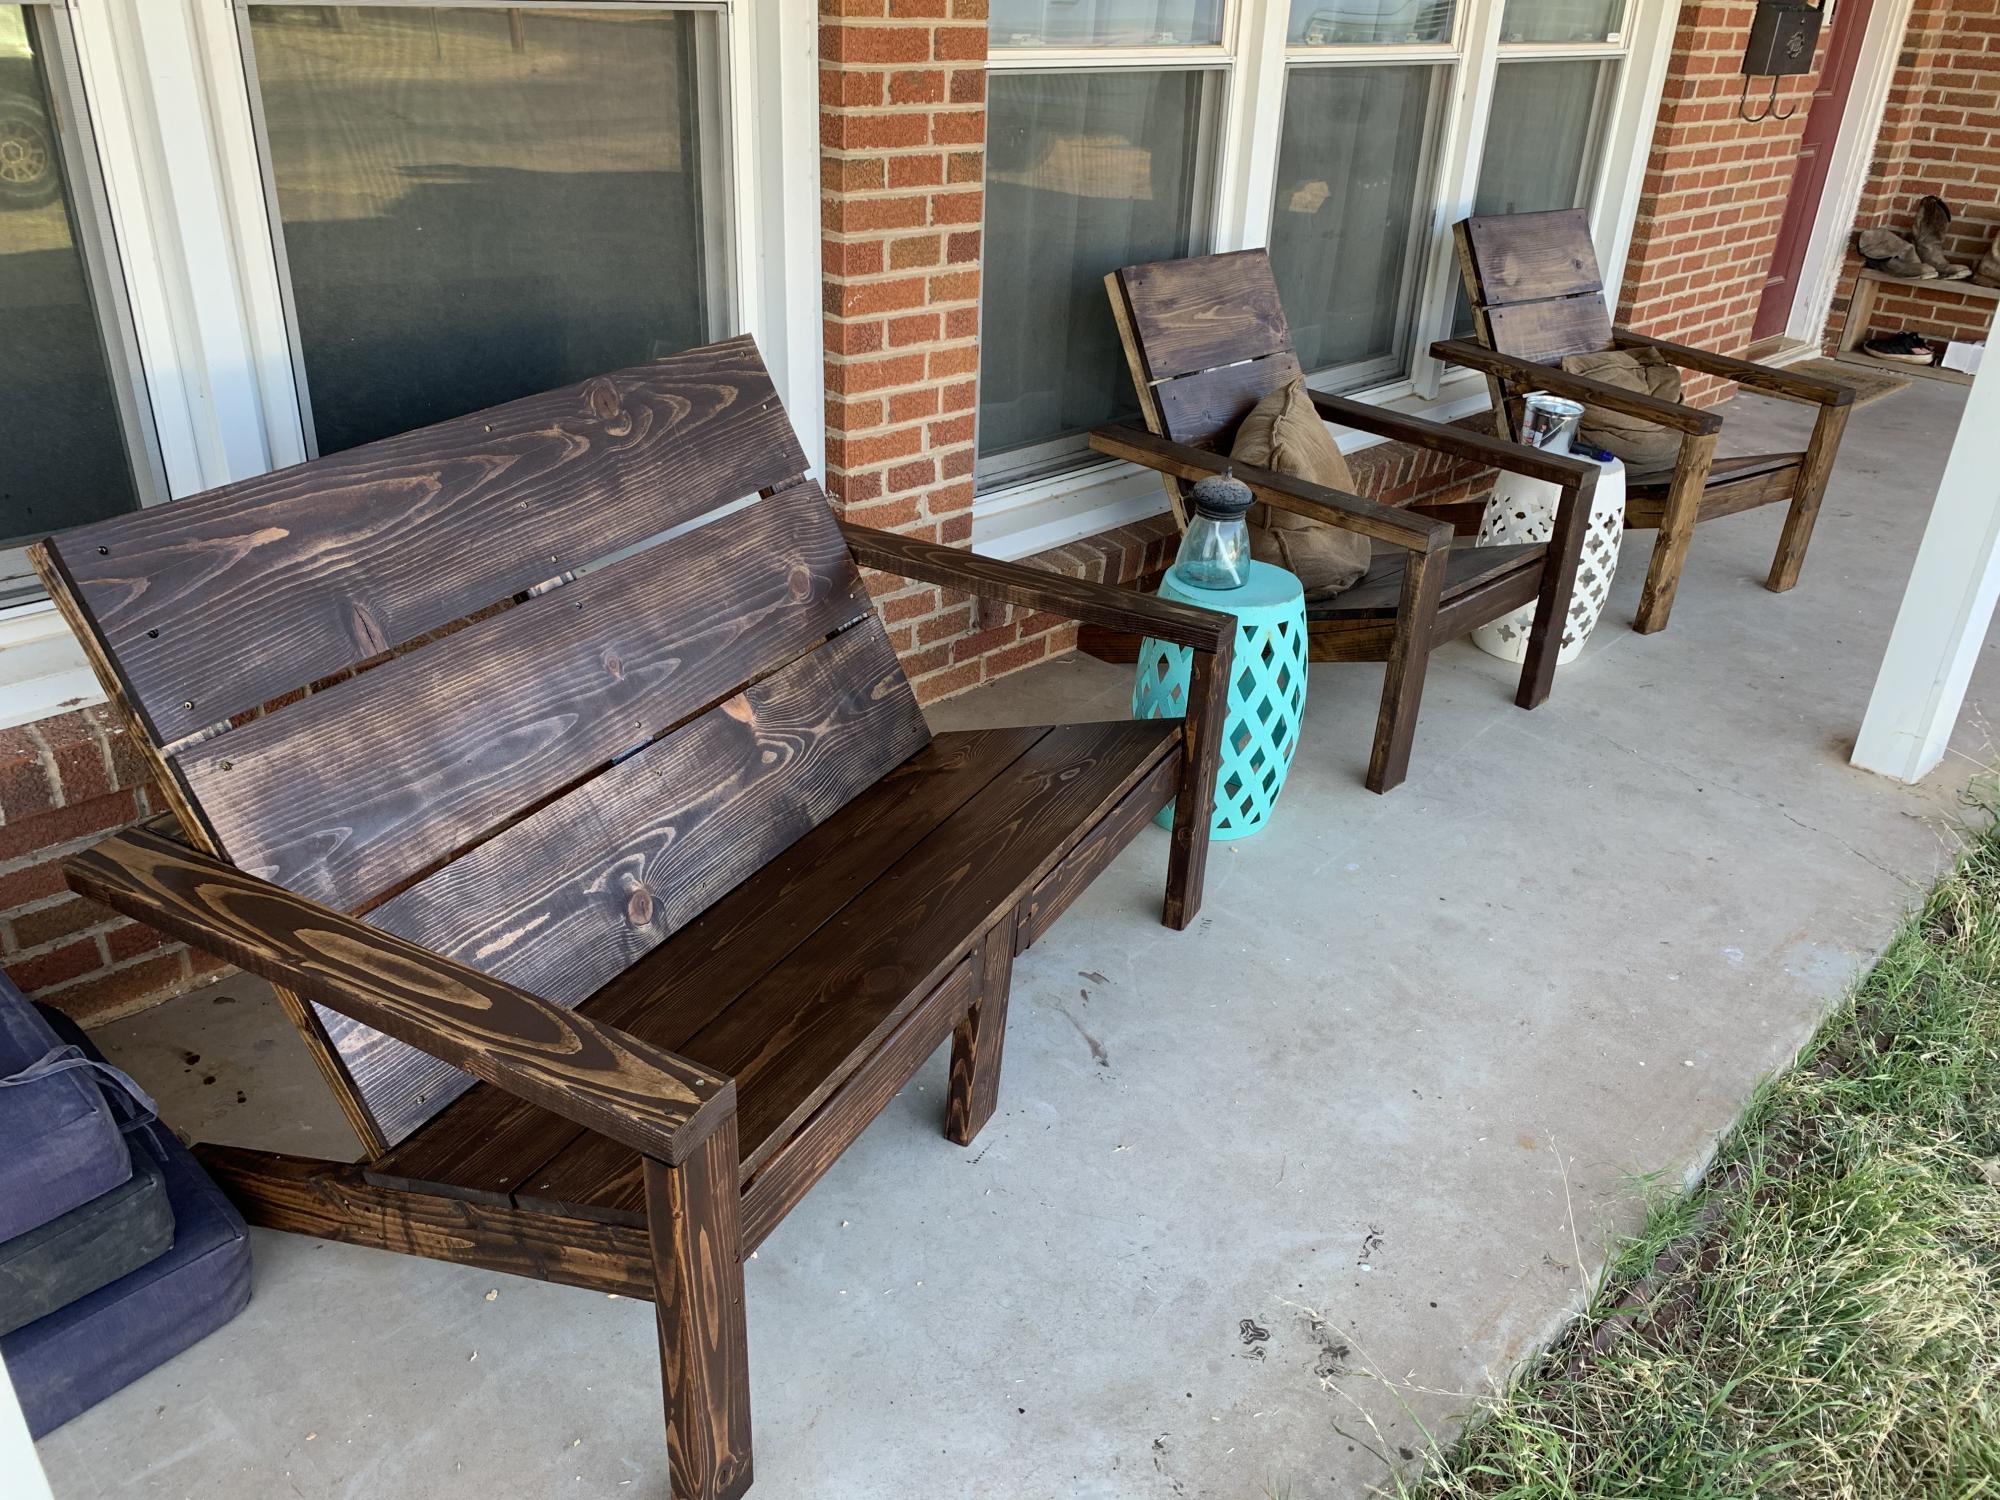
With a little modification, we turned these plans into a bench! We love it!!
Built from Plan(s)
Estimated Cost
$160 for all 3
Estimated Time Investment
Afternoon Project (3-6 Hours)
Finish Used
Dark walnut
Recommended Skill Level
Intermediate
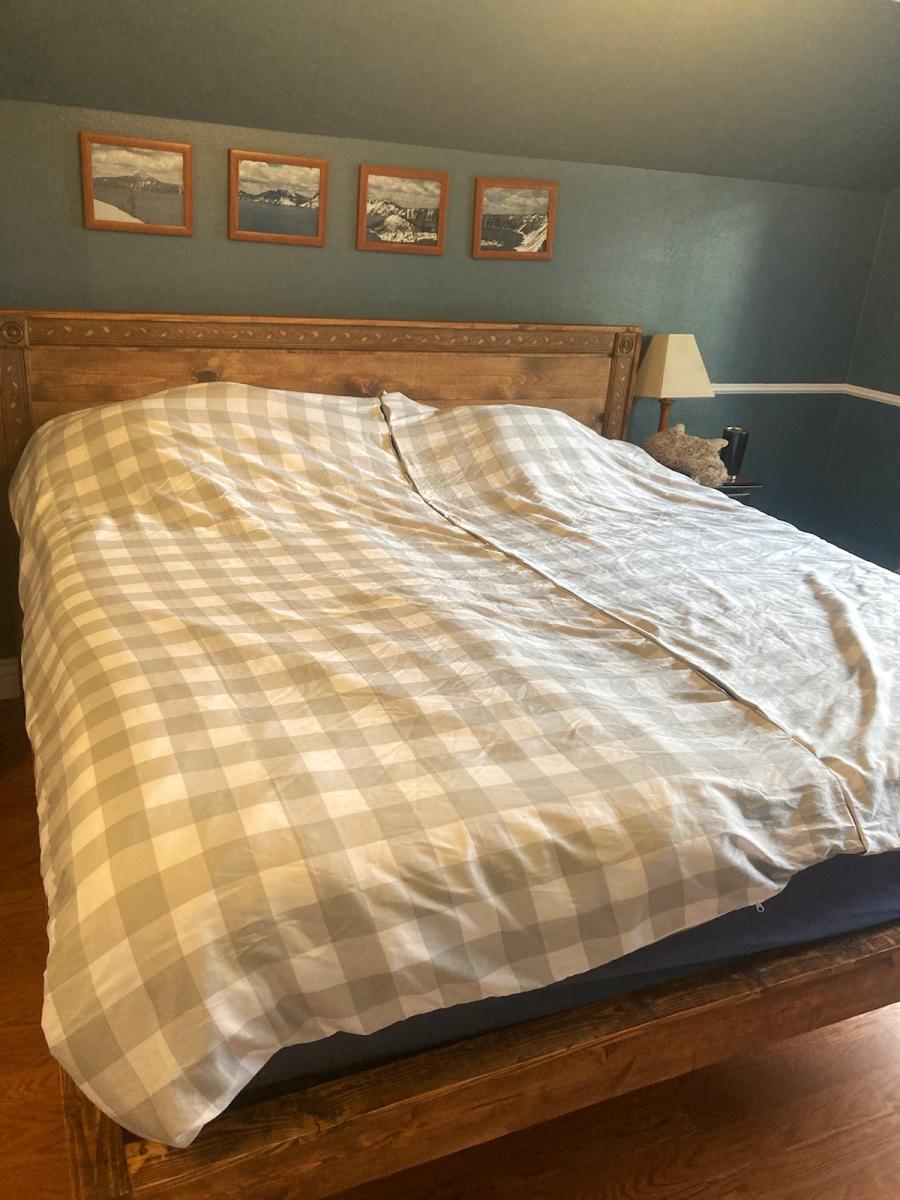
King Size Platform Bed
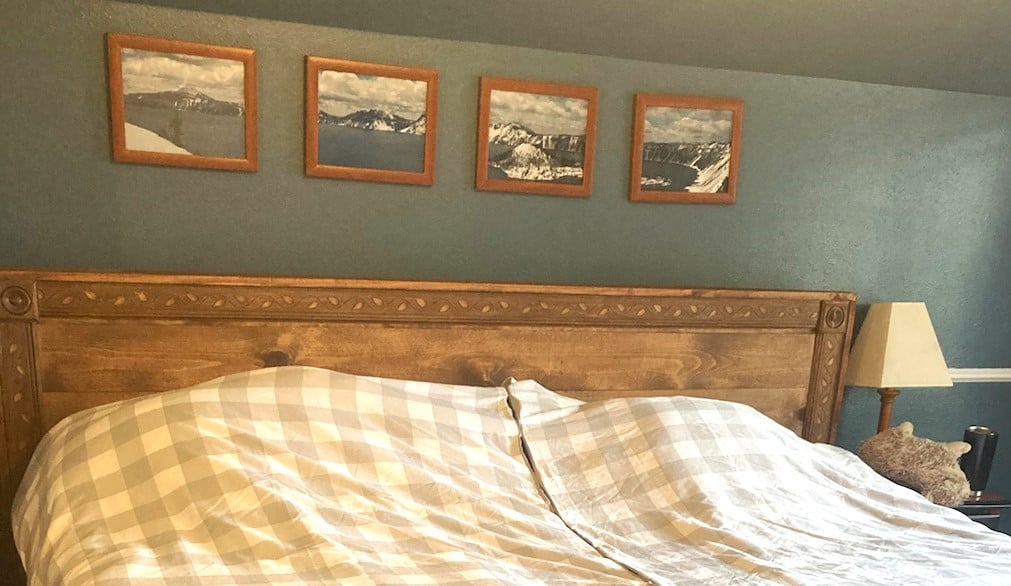
followed your instructions for the "Essential Platform Bed Frame" -- made this as a king. 2x6's for all legs/center supports with mitered corners for a simple added style. only suggestion/modification is the the #of slats you suggested (10) is way too few, I ended up using 15 or more
Also, used the circle-corners instead of mitering because all our doorframes in the house have that type of corner, and then I wouldn't have to "match" the leaf design where the mitered corners meet
Thanks for your guide!
Jake in Spokane
Built from Plan(s)
Water table for 1 year old
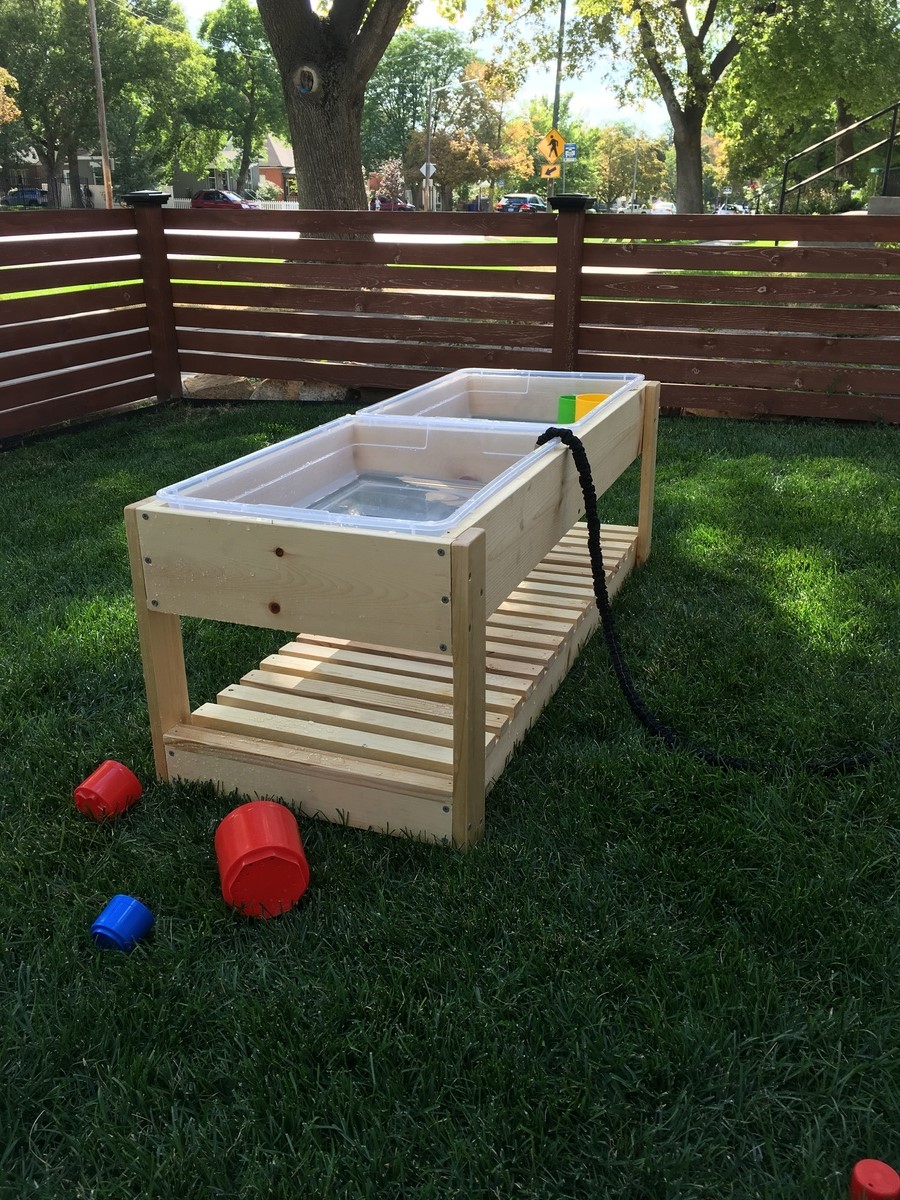
Shortened the legs to 17" and used 1x2s on the shelf because that's what we had on hand. Sealed with Thompson's aerosol clear waterseal.
Built from Plan(s)
Estimated Cost
$38
Estimated Time Investment
Afternoon Project (3-6 Hours)
Finish Used
Thompson aerosol clear waterseal
Recommended Skill Level
Beginner
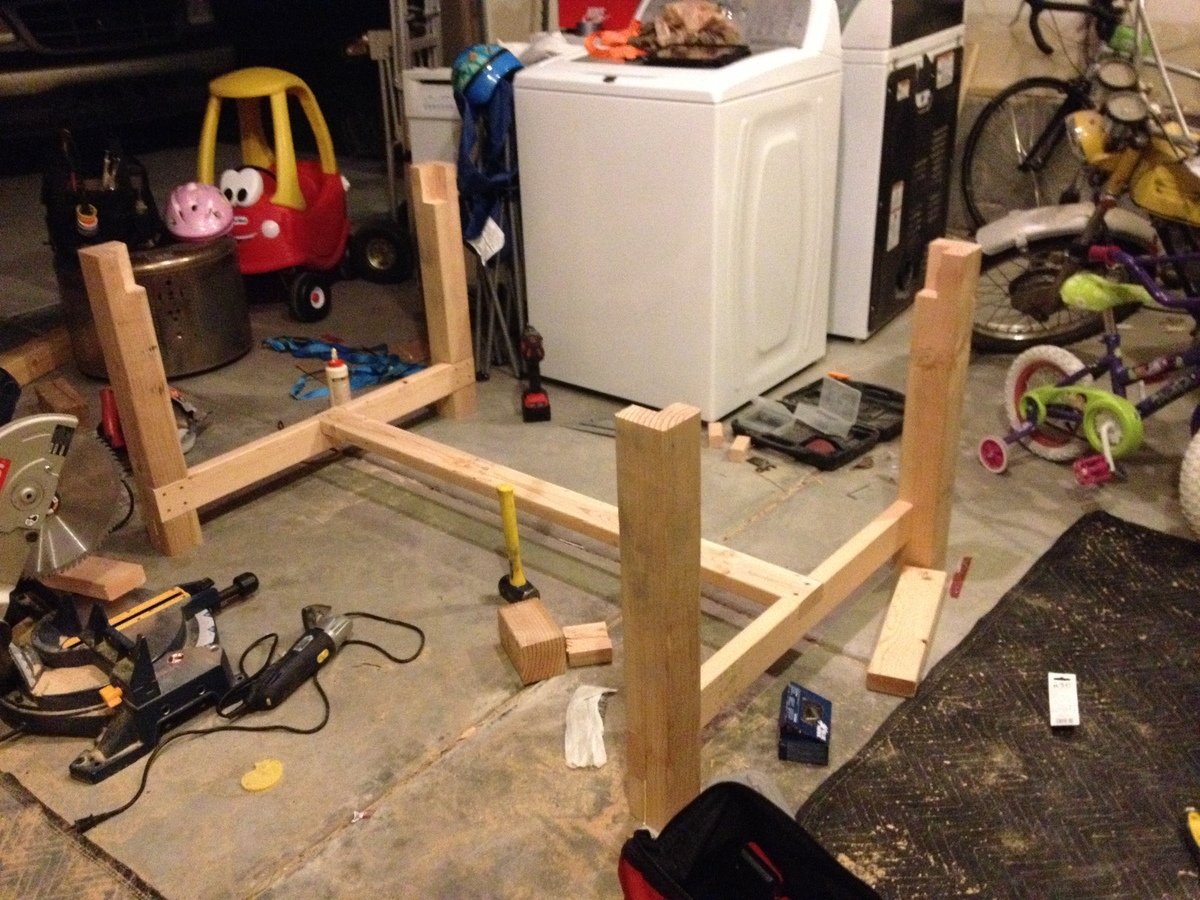
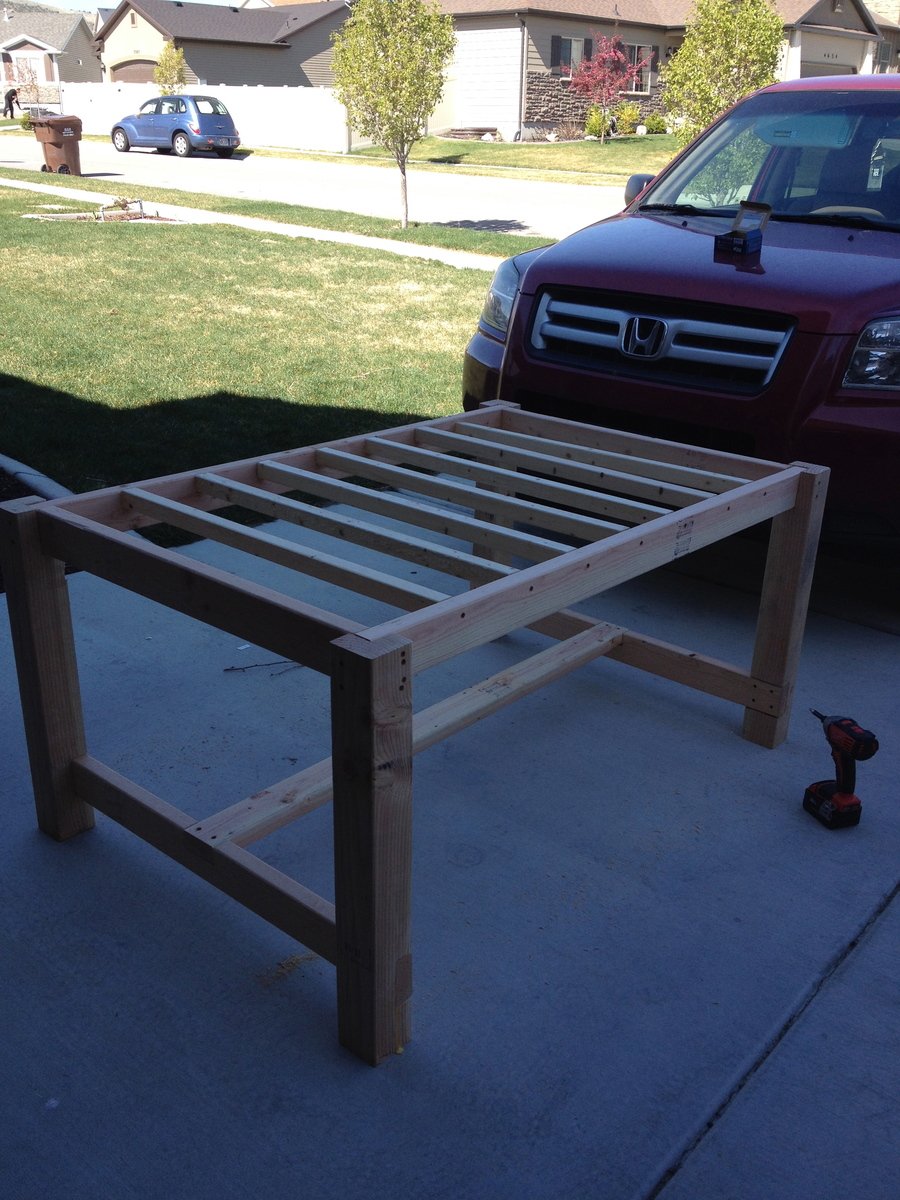
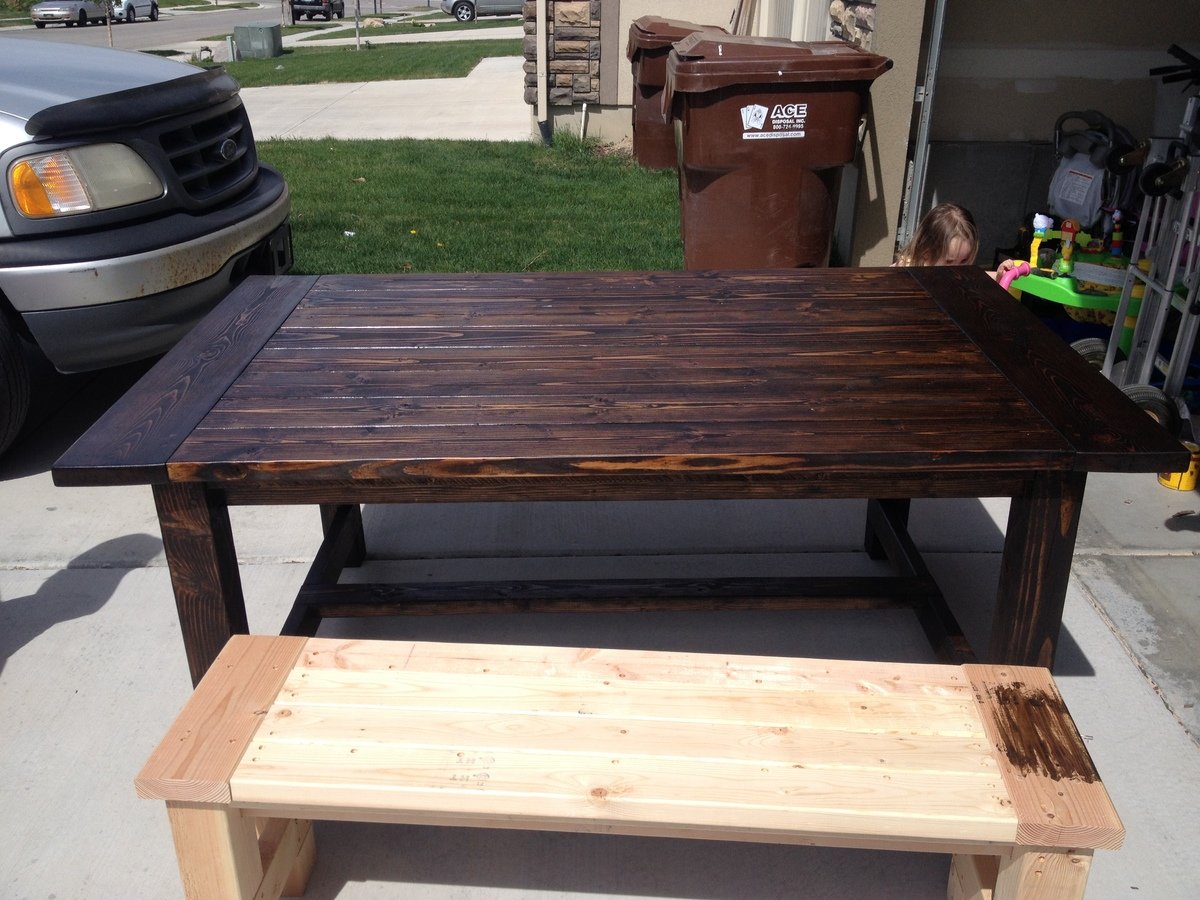
Farmhouse Table and Bench
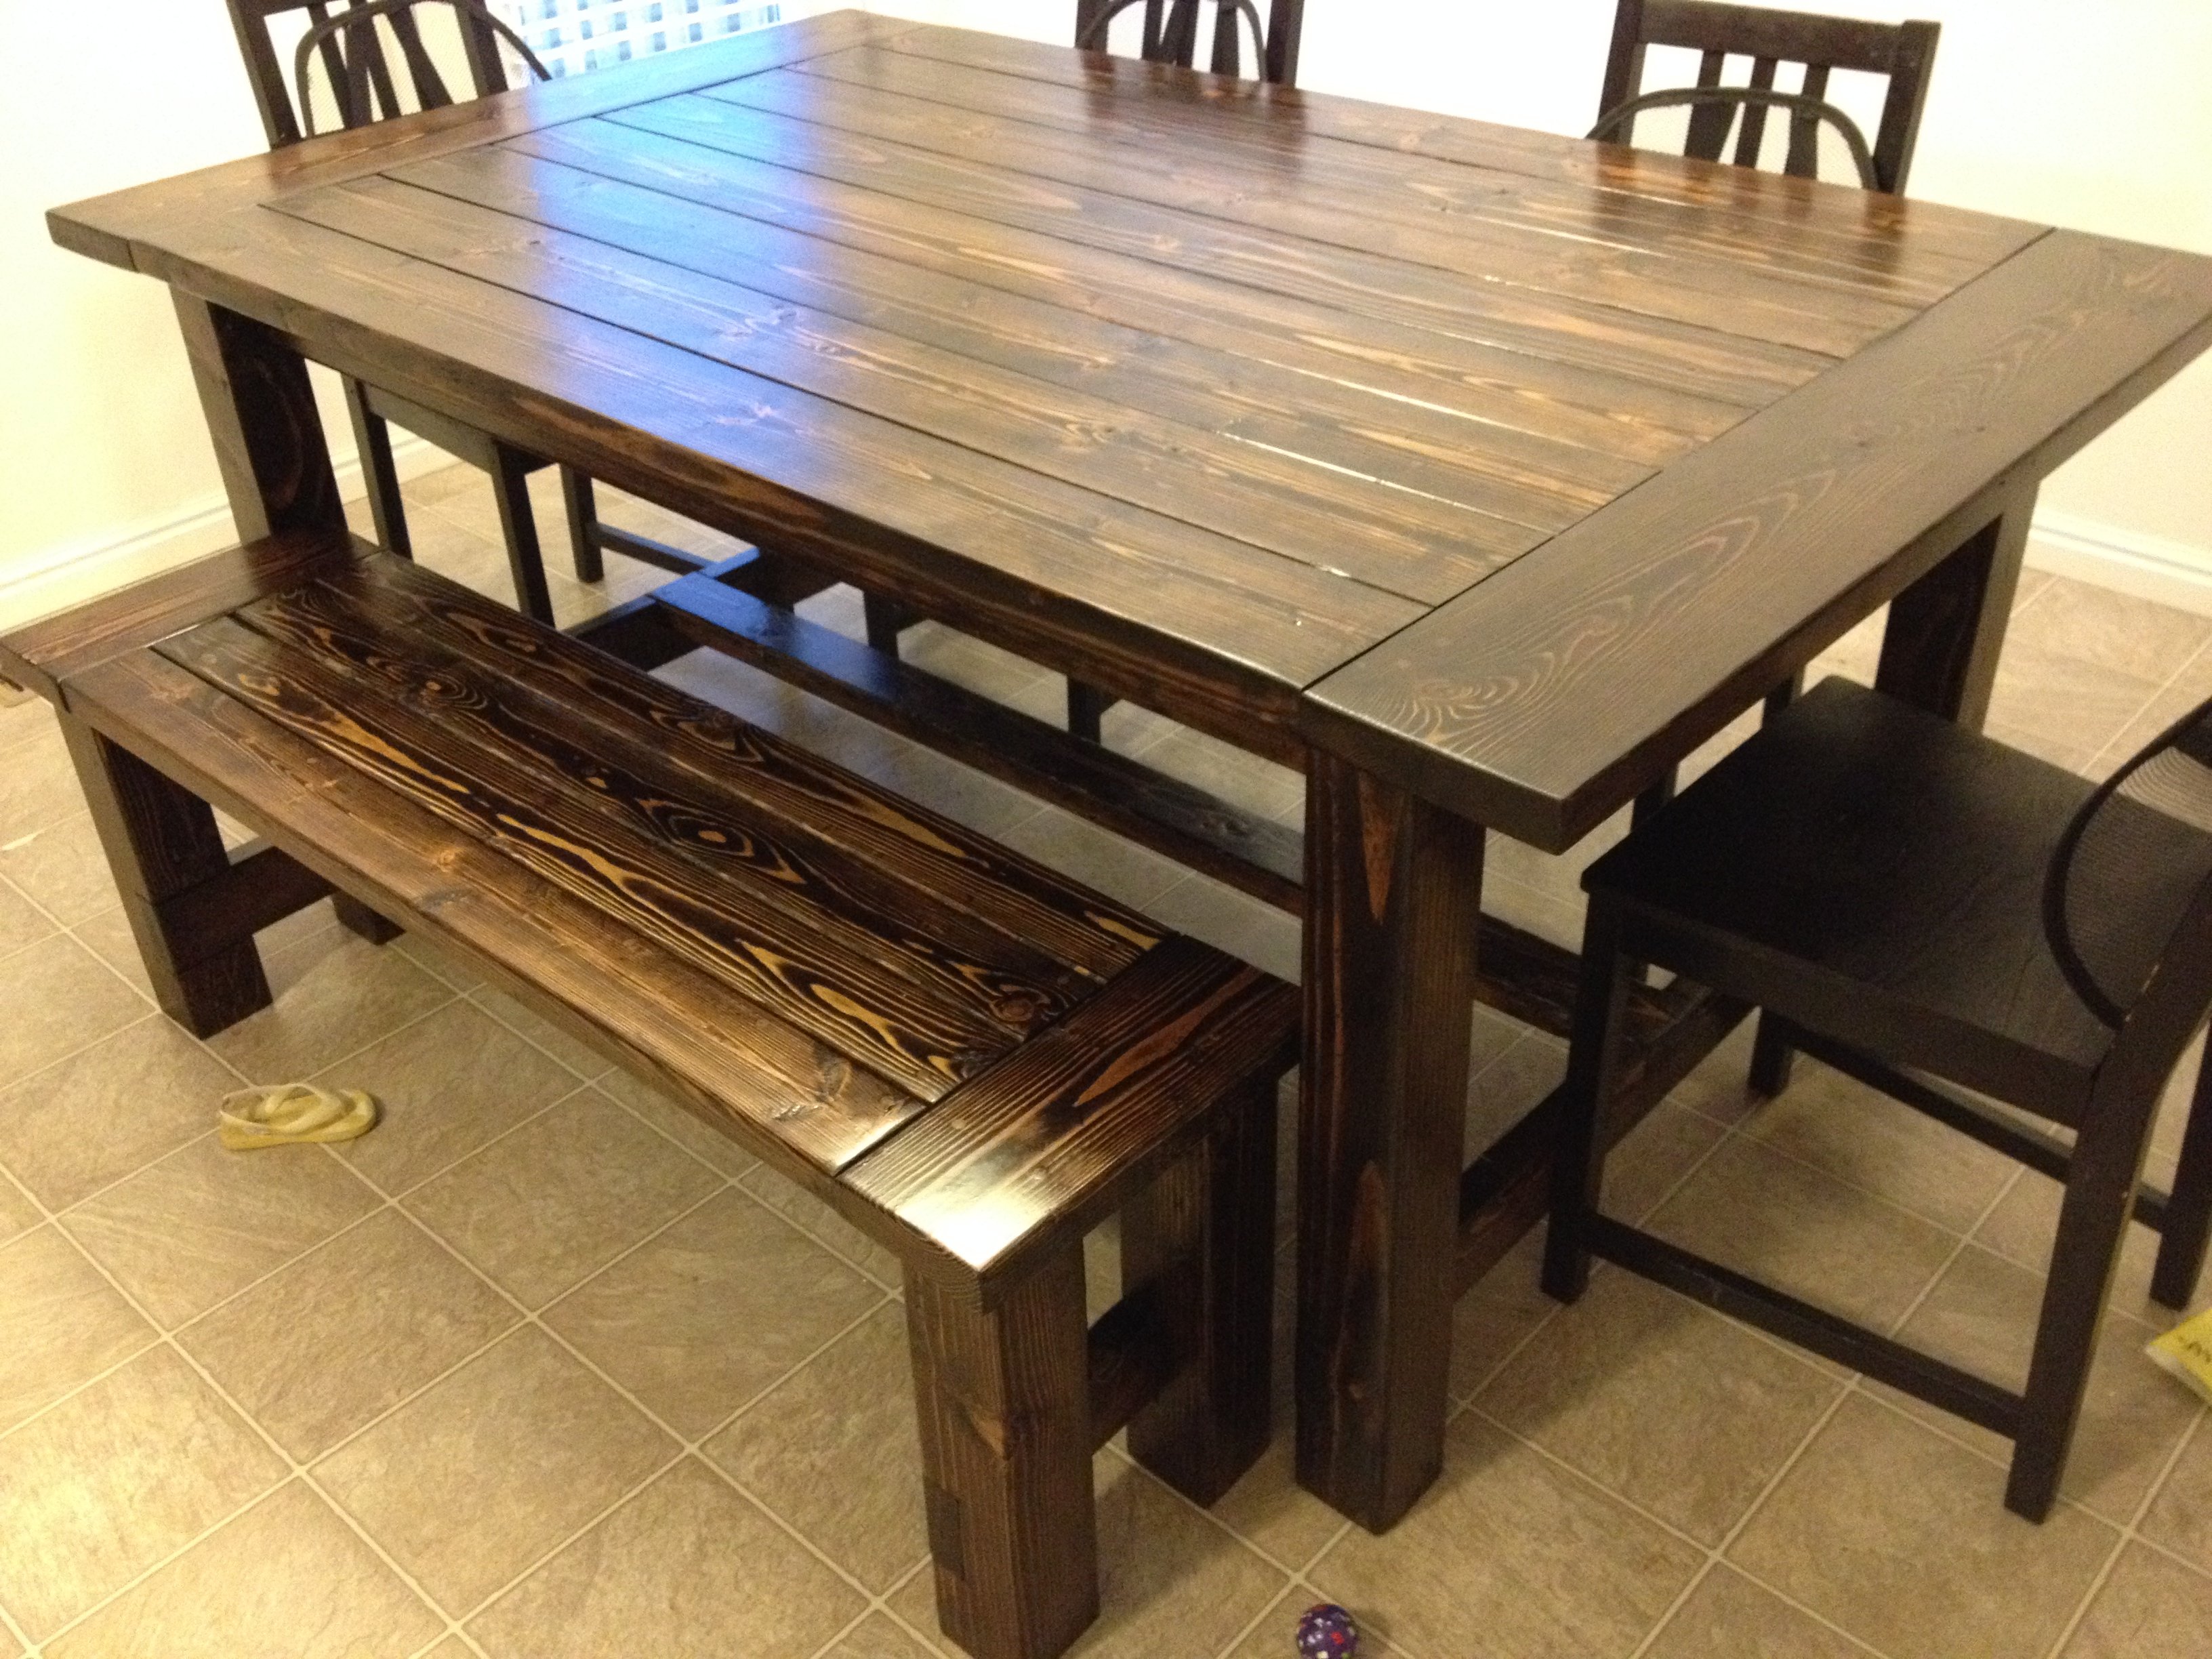
This was our first furniture building project. It took us about 20 hours to complete and we couldn't be more happy with the results. We used 4x4's instead of 2x4's for the legs. We also changed the dimensions of the table so that it was the perfect size for our kitchen. After completing the table we decided to build a bench as well. It is the same plan as the table, just miniaturized. We used Minwax Jacobean stain on the table and then topped with a clear coat. It is a very heavy, sturdy table.

Built from Plan(s)
Estimated Cost
150
Estimated Time Investment
Weekend Project (10-20 Hours)
Finish Used
Minwax Jacobean stain - 1 coat applied with rag, We didn't wipe any of the excess off.
Minwax Fast-Drying Polyurethane in Satin - 3 coats applied with a soft brush, light sanding in-between each coat.
Minwax Fast-Drying Polyurethane in Satin - 3 coats applied with a soft brush, light sanding in-between each coat.
Recommended Skill Level
Starter Project
Raised planter boxes
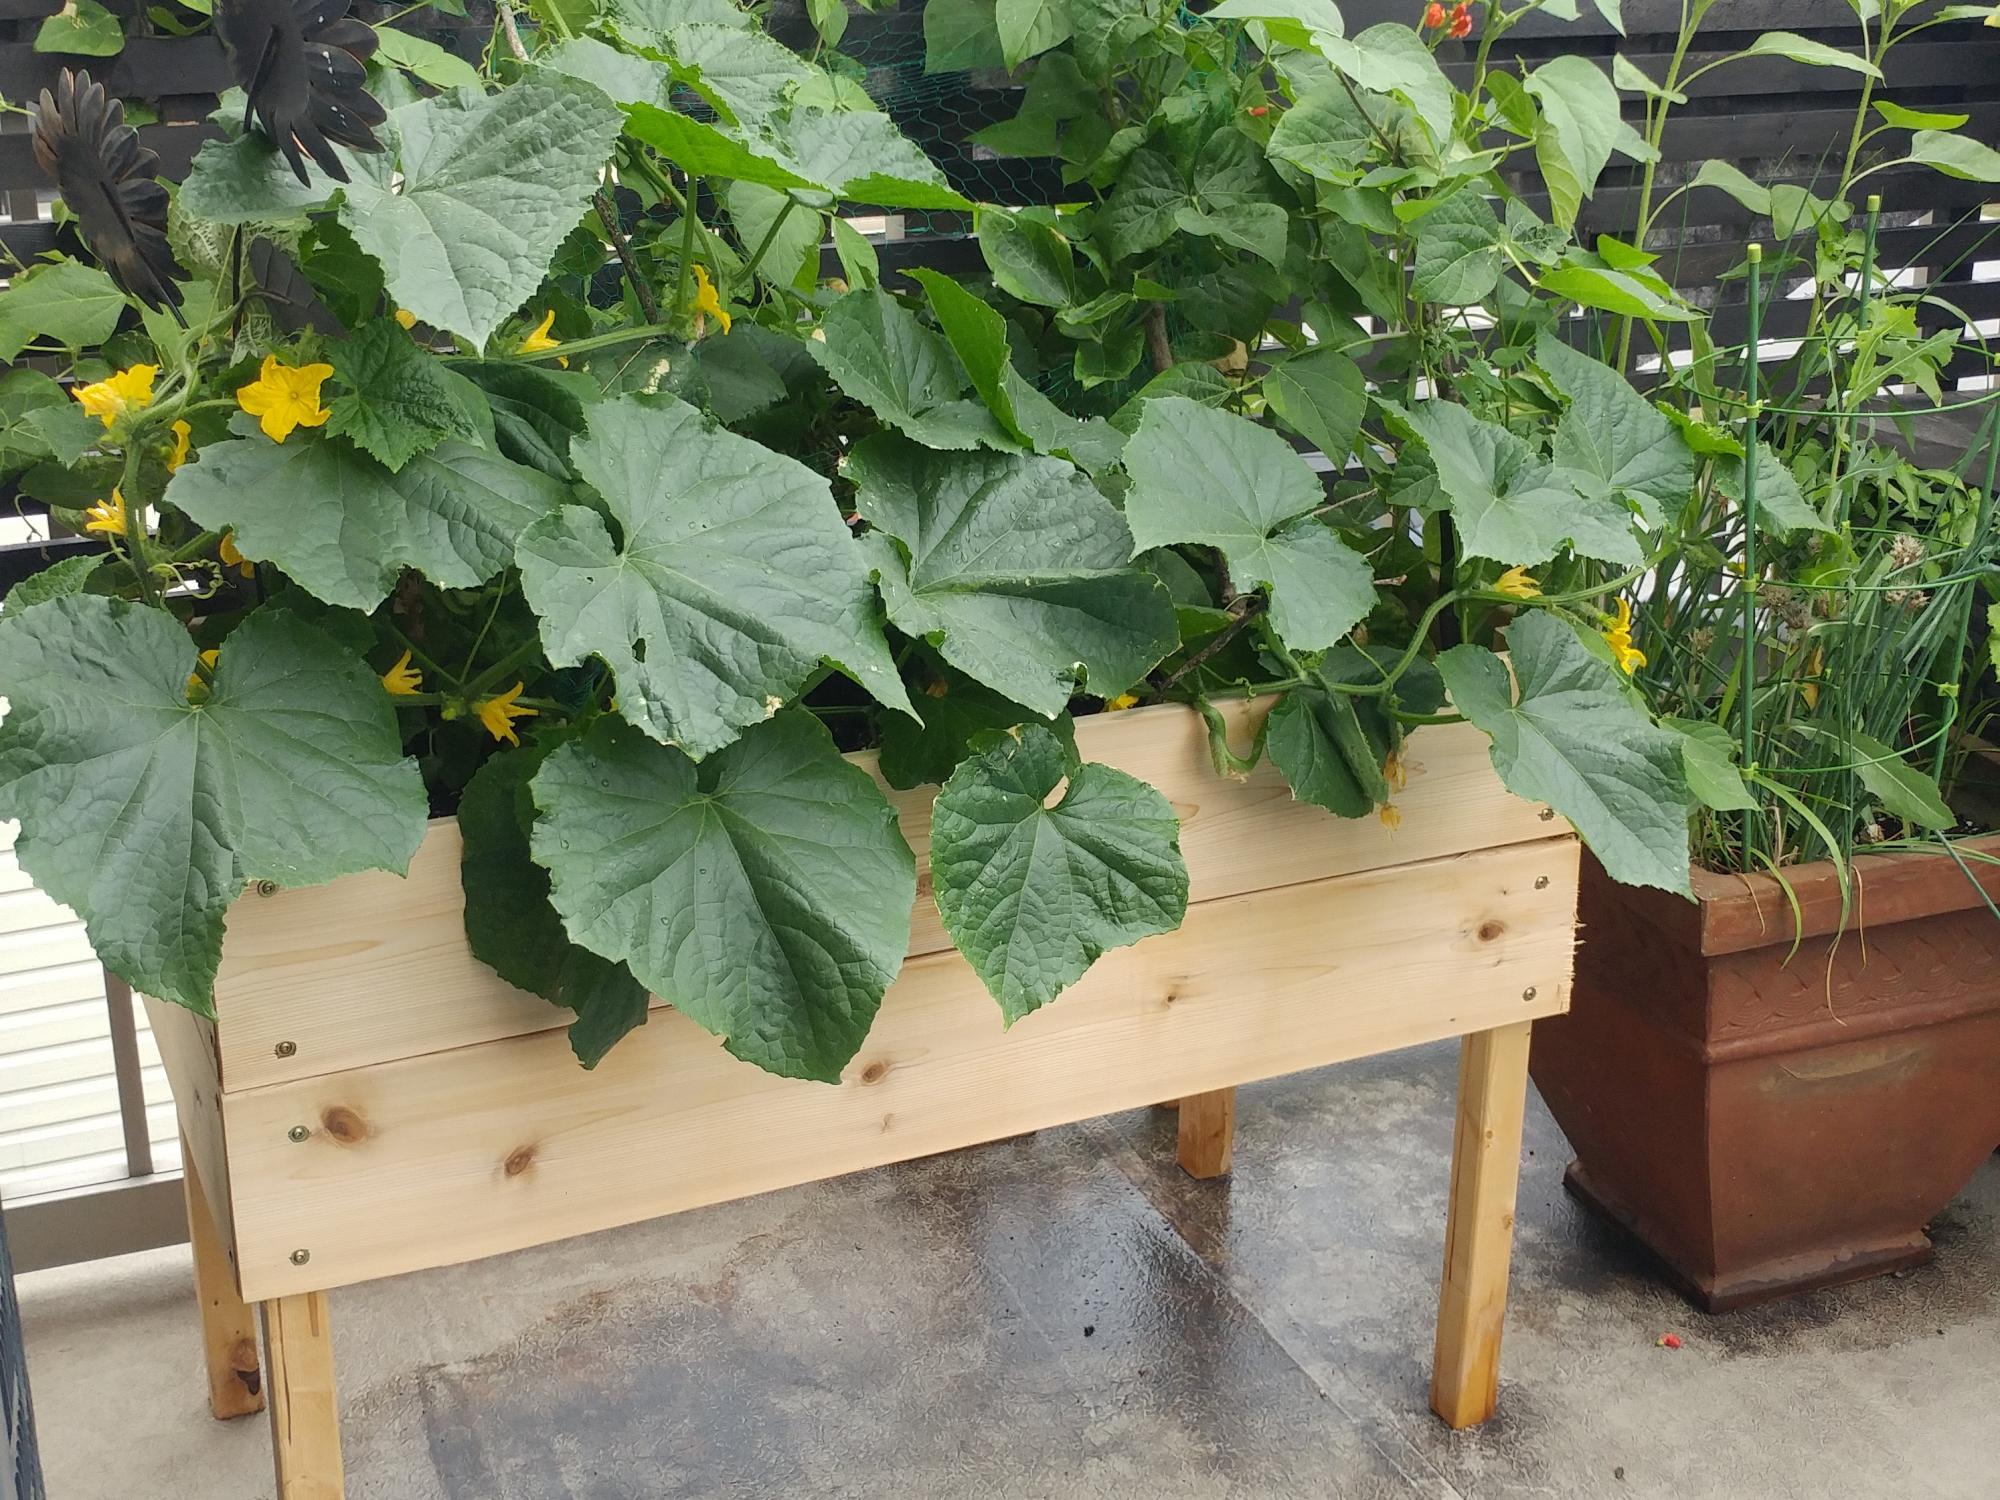
My first ever build! I made two of these planters for my deck. They were easy and the cucumbers and runner beans I grew from seed loved the deep soil in them! They make my little space feel like an oasis.
Built from Plan(s)
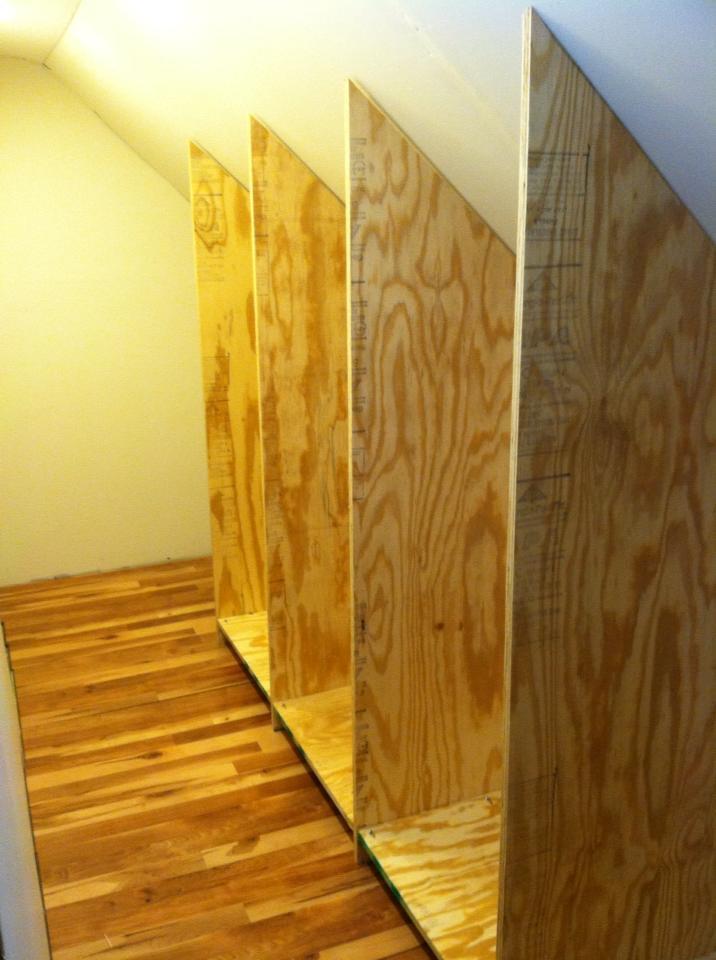
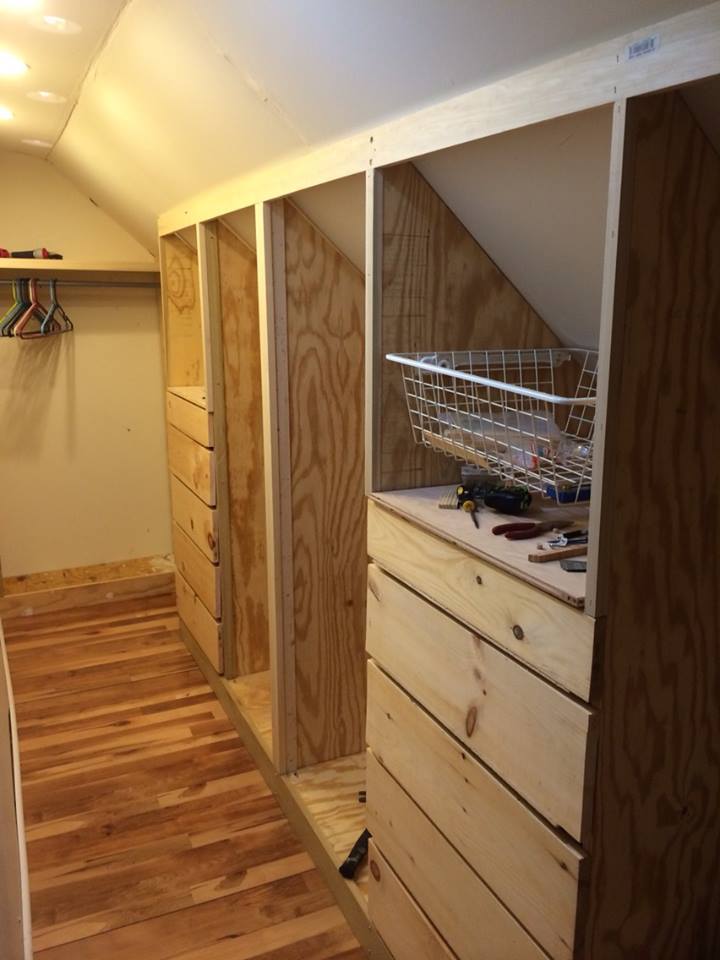
master closet
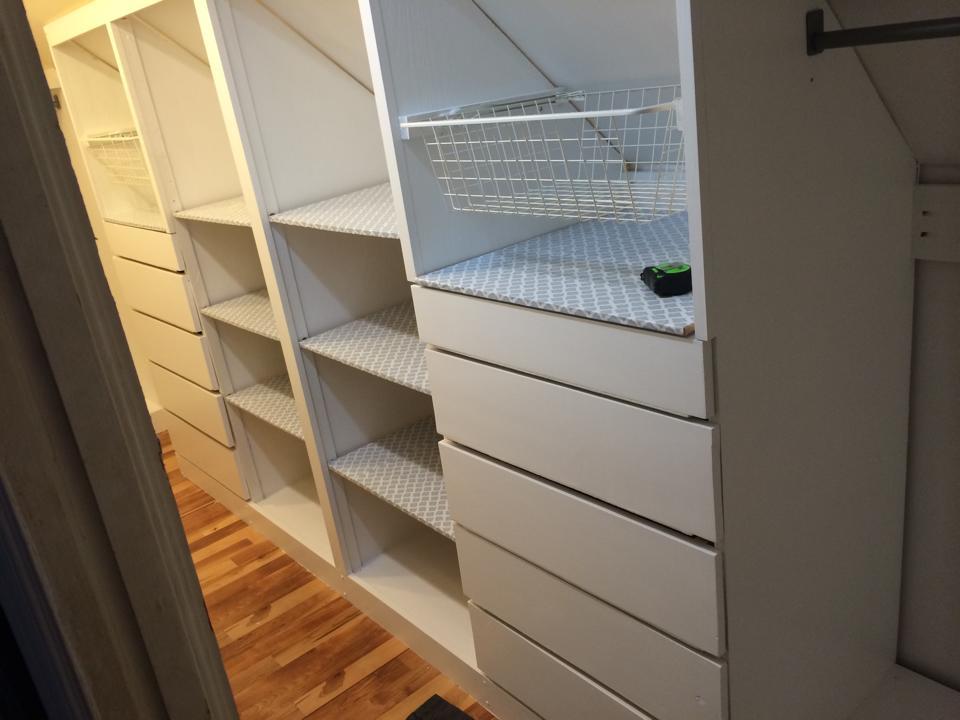
I used the Master Closet system plans with a slight modifcation for the slanted cellings
Built from Plan(s)
Estimated Time Investment
Week Long Project (20 Hours or More)
Recommended Skill Level
Intermediate
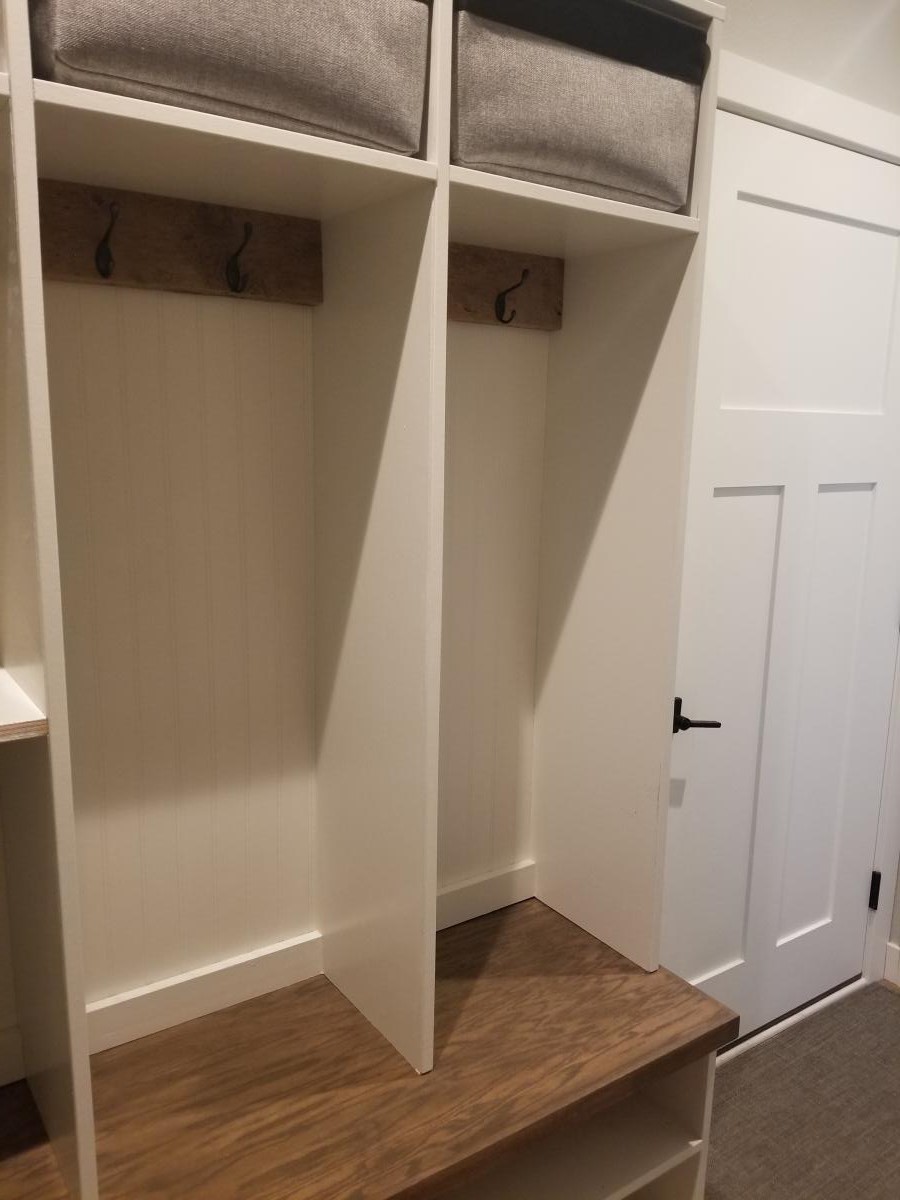
Mudroom Lockers
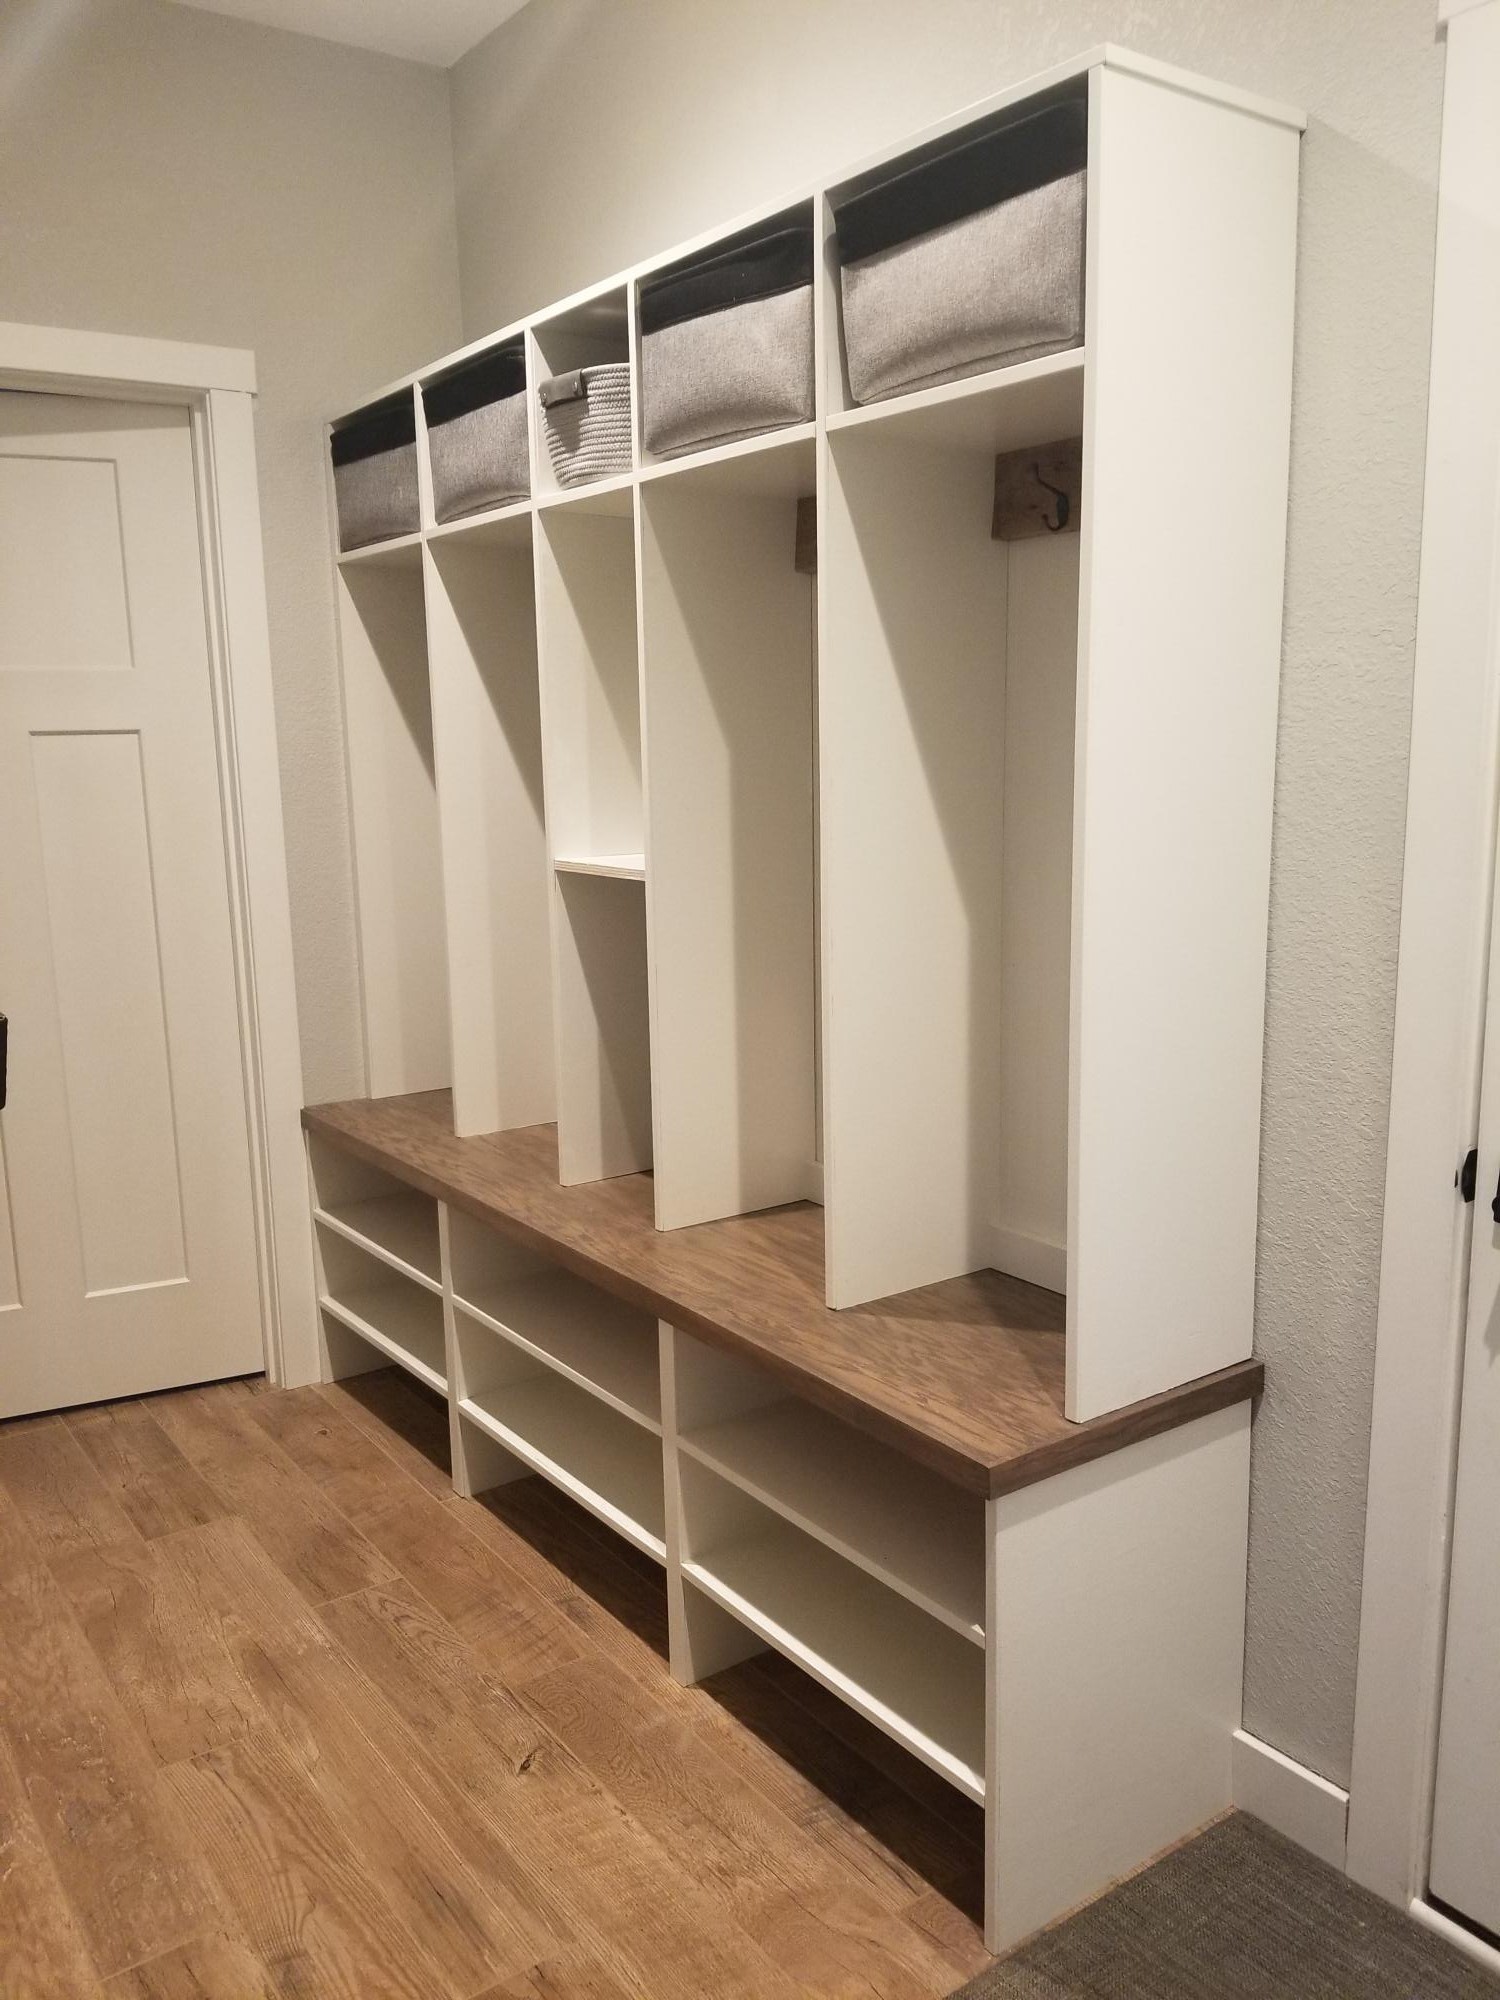
I began by first making 3 cubes of shoe shelves out of 3/4 oak plywood. After assembling I coated with joint compound and sanded smooth to get rid of grooves and grain. The hutch was assembled in 2 sections. I used a router to slide the shelves in so there were no screws visible. I applied primer/paint/ poly in these 5 large sections. The sections were then but in place in my mudroom and connected for installation. The bench top was custom measured to fit as the walls were not perfectly square. The bench top was stained/poly before the hutch was set into place. Paneling was attached to the back of the hutch unit before lifting in place. Barnwood was also installed where the hooks were attached for an added detail. I used 3/4 x 1/4 trim to finish the sides of the plywood and trimmed down mulion for the 1.5 inch sections needed for the bench trim and sides connecting to the wall to hide gaps left from un square walls.
Built from Plan(s)
Estimated Cost
350
Estimated Time Investment
Week Long Project (20 Hours or More)
Finish Used
White: 2 coats of primer, 2 coats of paint, 2 coats of Minwax water based Polycrylic Clear Satin. Custom colormatch paint to match our woodwork for the color.
Bench top: stain Briarsmoke with 2 coats of Minwax water based Polyacrylic Clear Satin.
Bench top: stain Briarsmoke with 2 coats of Minwax water based Polyacrylic Clear Satin.
Recommended Skill Level
Intermediate
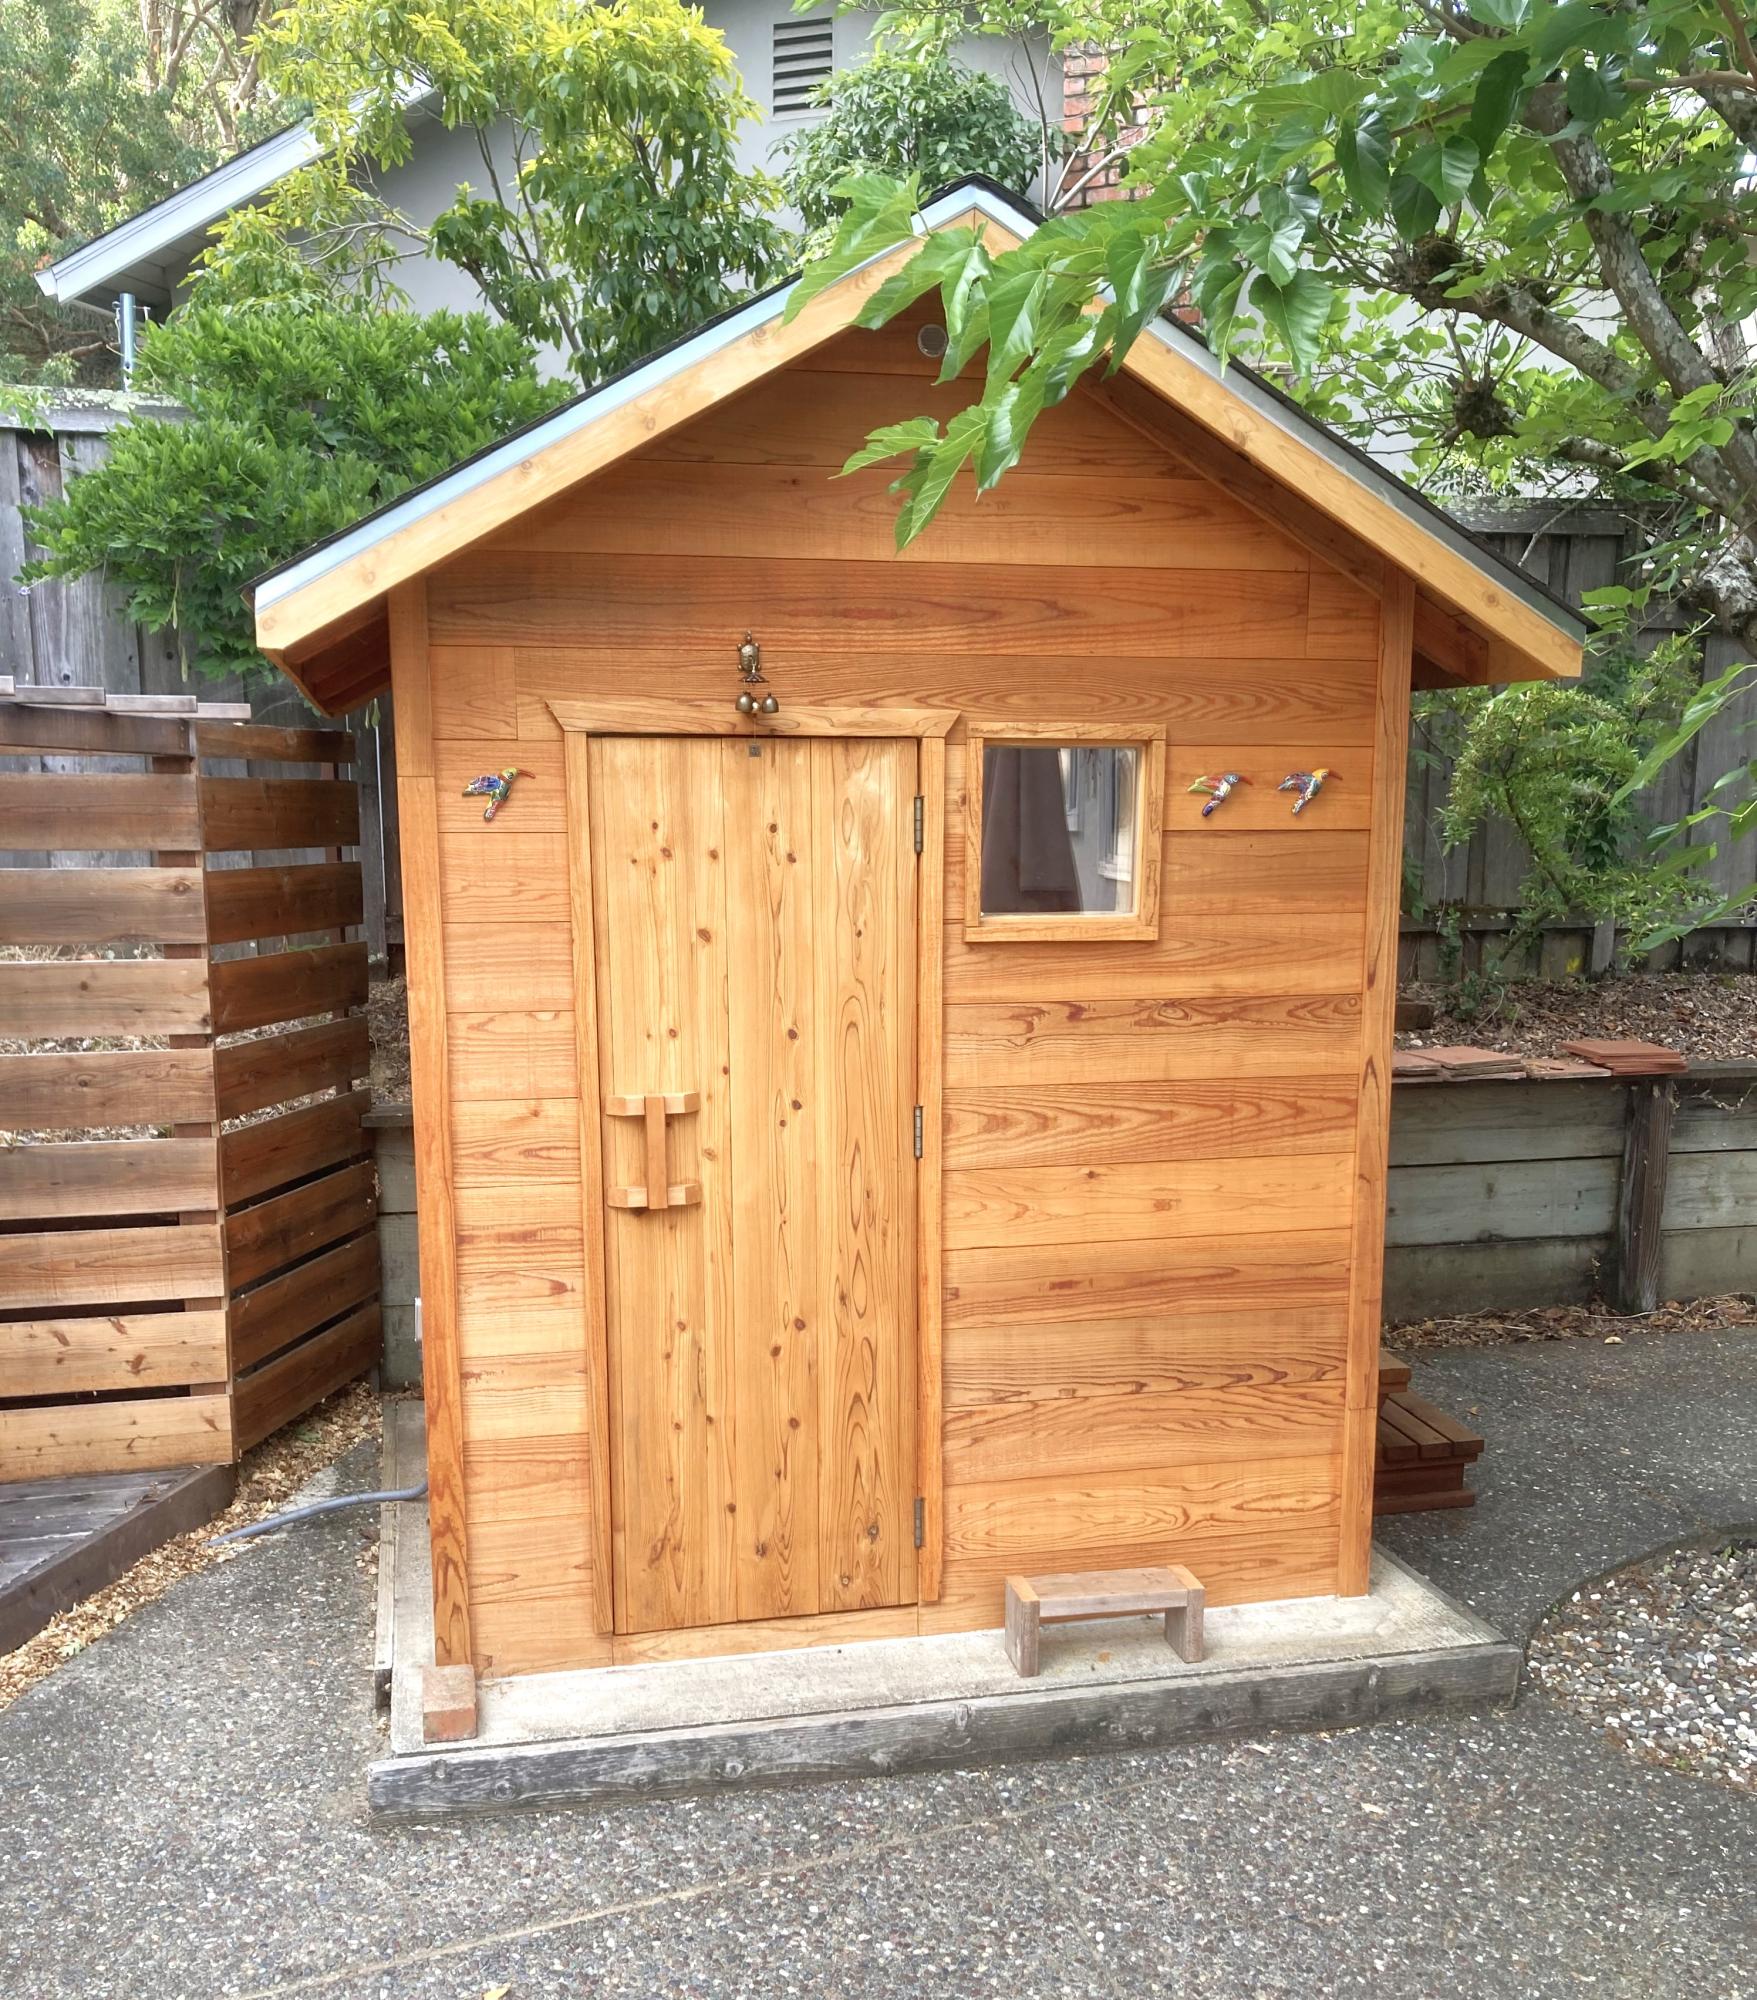
DIY Greenhouse
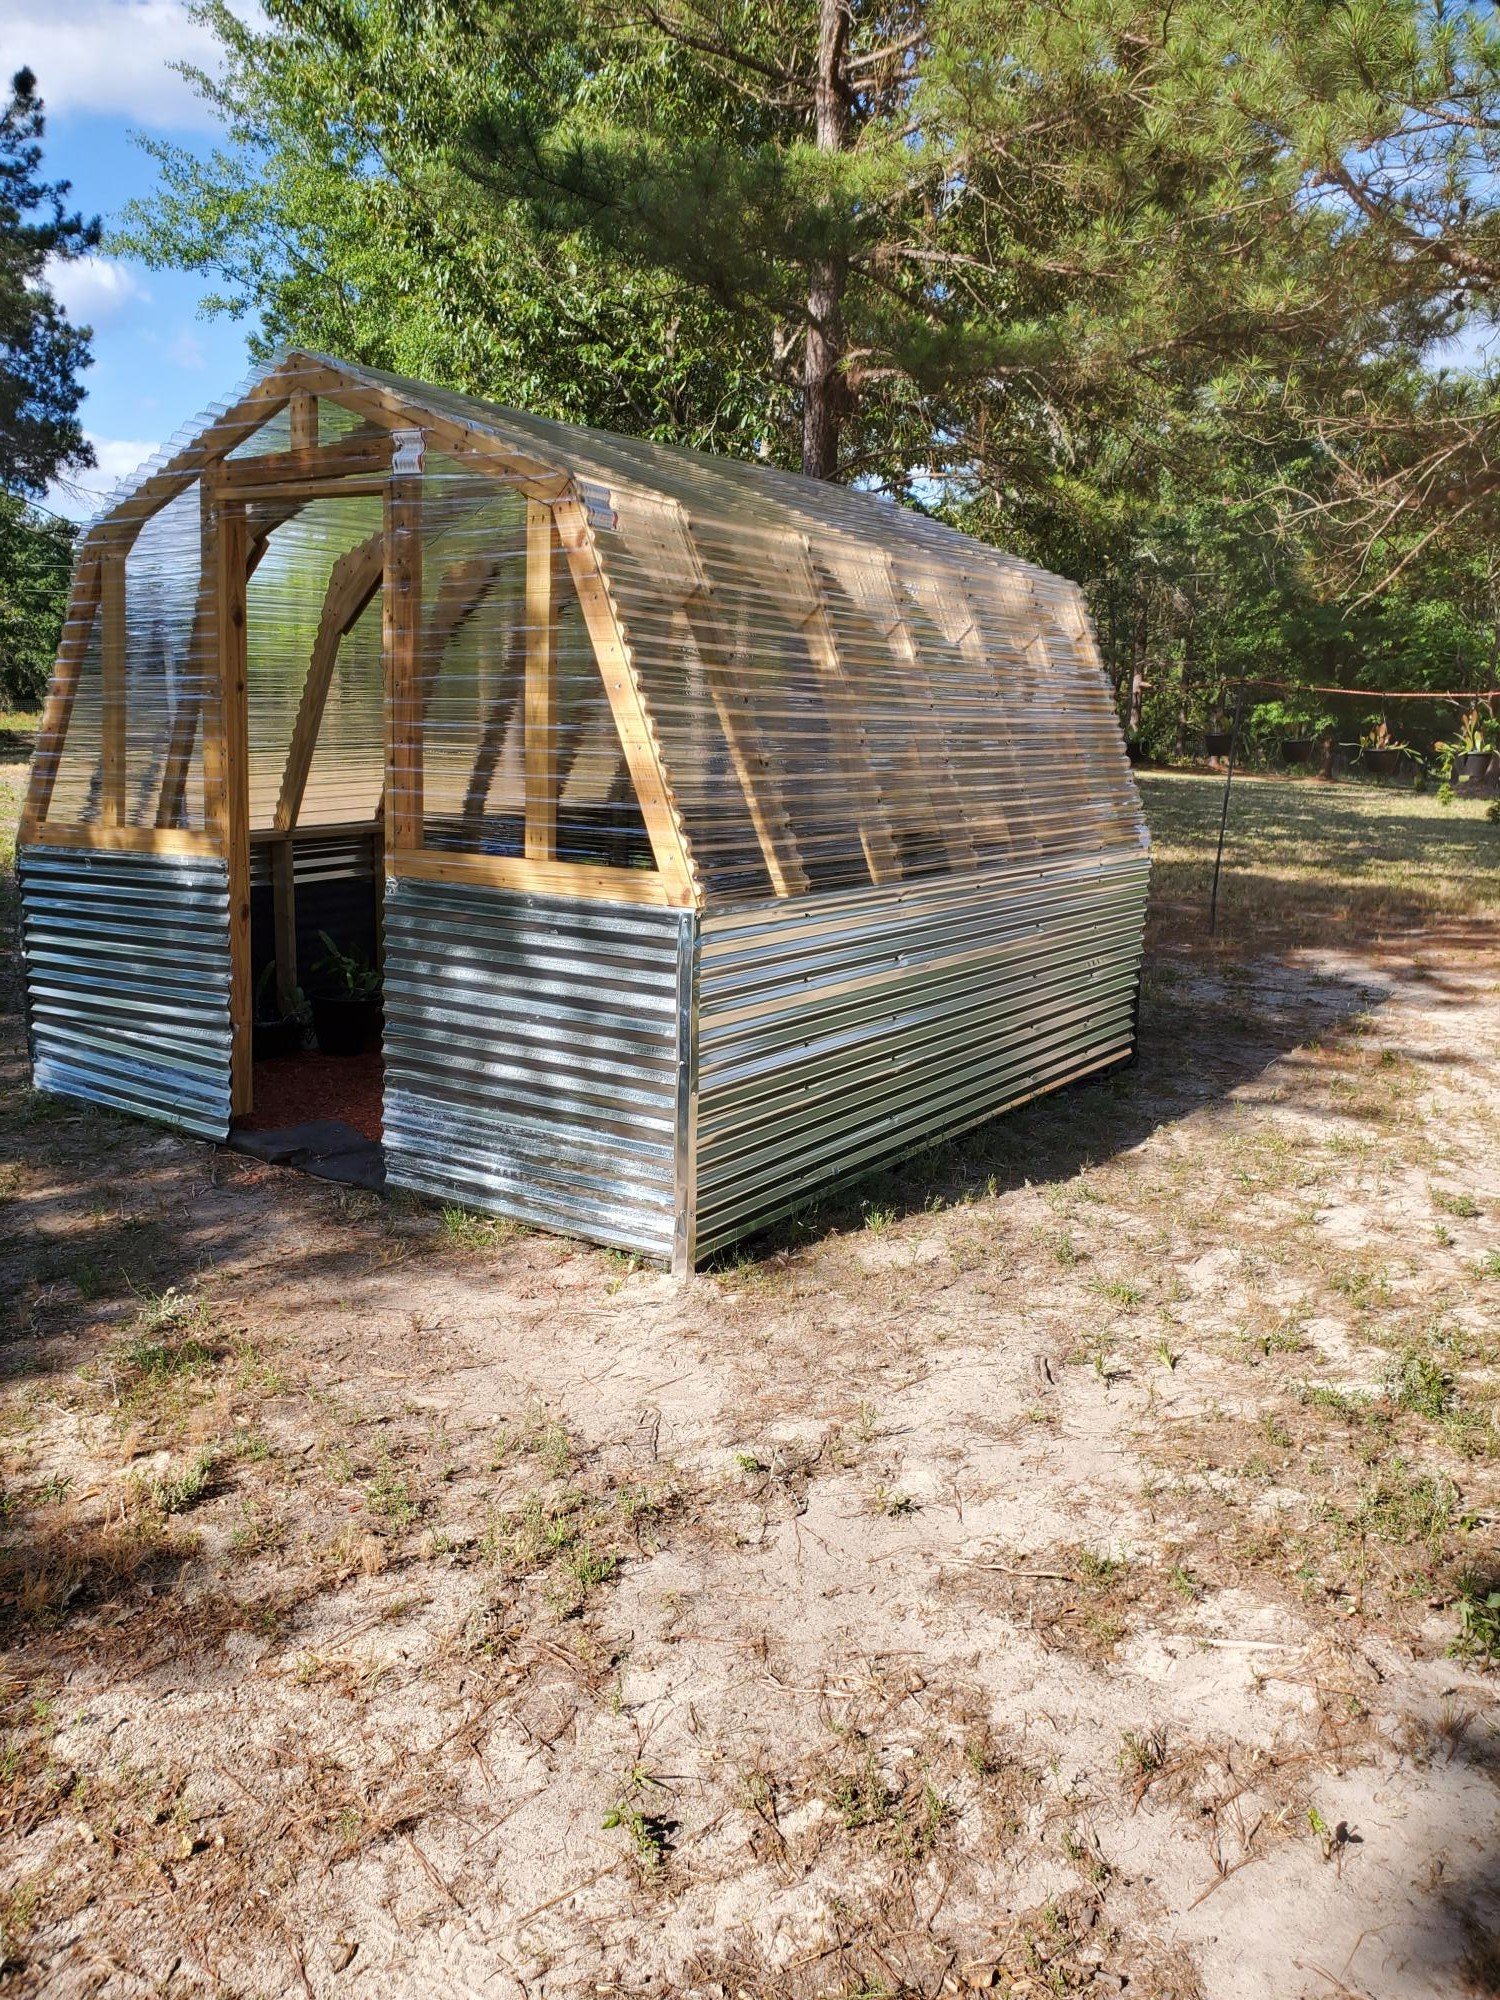
i followed the instructions for the DIY Greenhouse and even though there are a few warts and freckles neither the wife nor the flowers are complaining

Built from Plan(s)
Estimated Cost
$1200.00
Estimated Time Investment
Week Long Project (20 Hours or More)
Comments
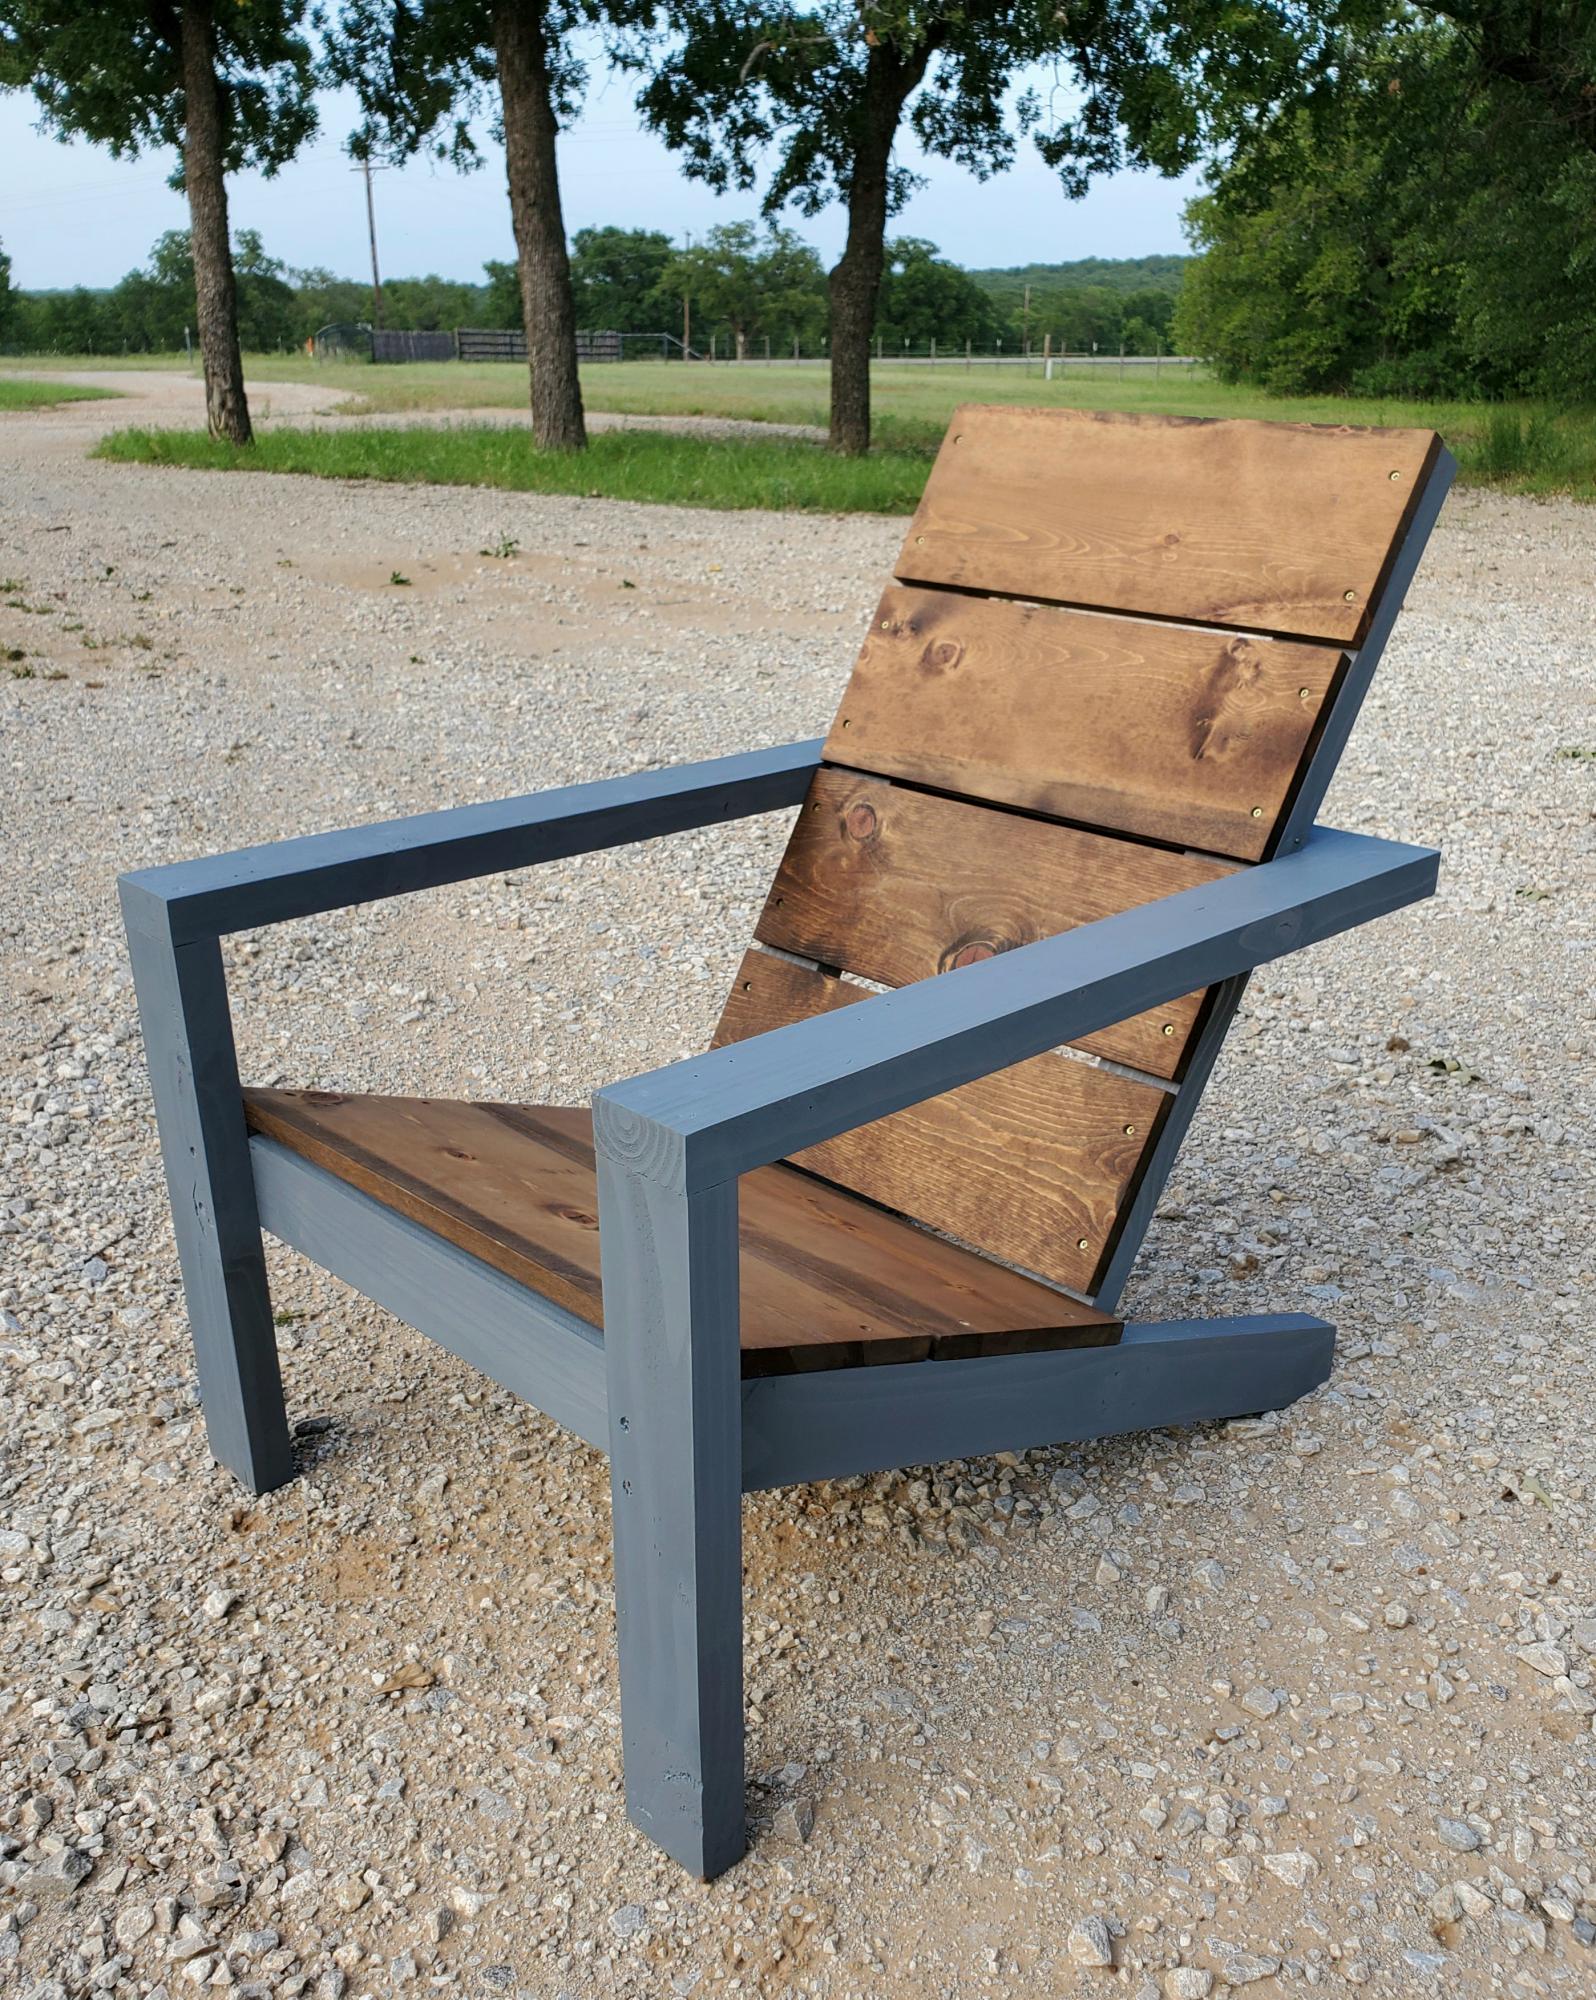
Modern Outdoor Chair with a twist
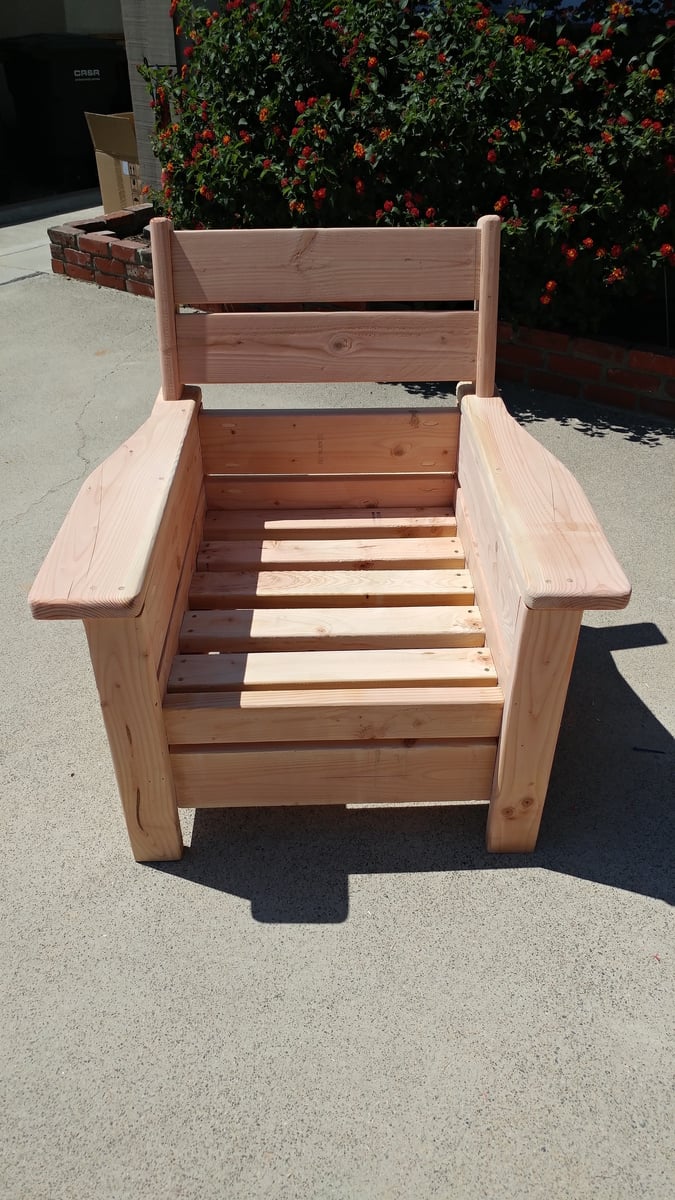
Taken from the Modern Outdoor chair project and added a back. Then decided that I love the andorak style chair arms and thus the Andrmodern chair was born..
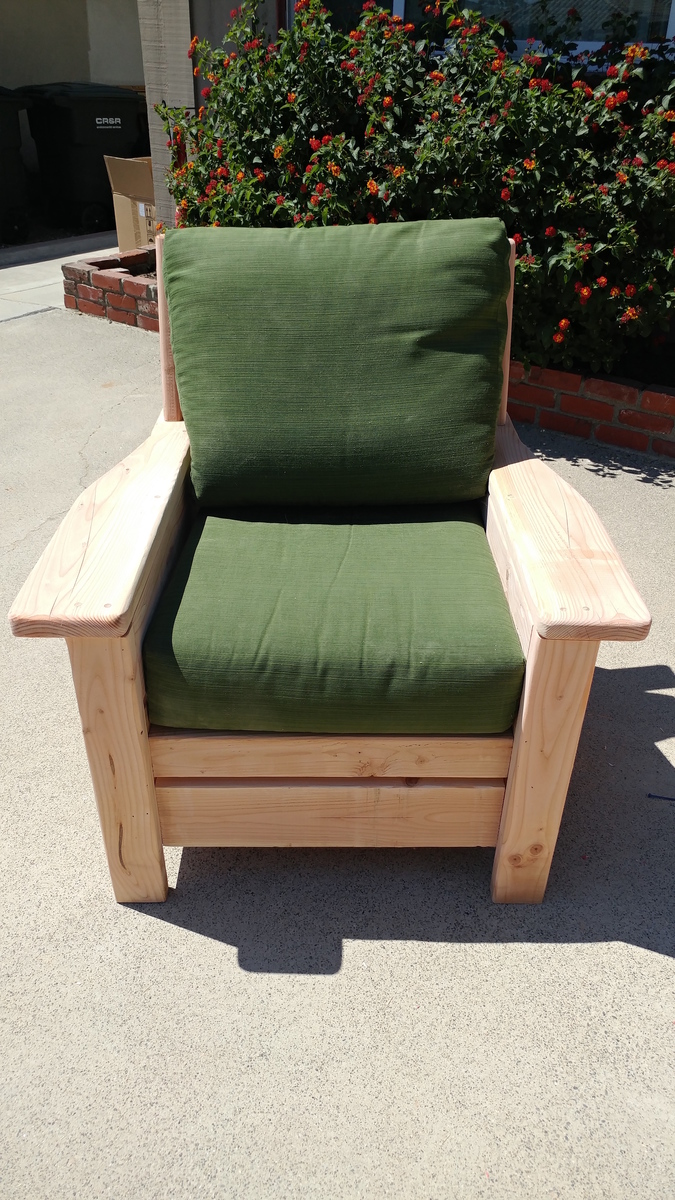
Built from Plan(s)
Estimated Cost
$35.00
Estimated Time Investment
Afternoon Project (3-6 Hours)
Finish Used
Will use the Behr two in one
Recommended Skill Level
Beginner
Comments
Mon, 08/03/2020 - 09:02
I’d love to know how you…
I’d love to know how you made the changes, love it!

Thu, 03/18/2021 - 09:20
Modern outdoor chair with a twist
Could you please share how you added the back and arms to the modern chair plans.
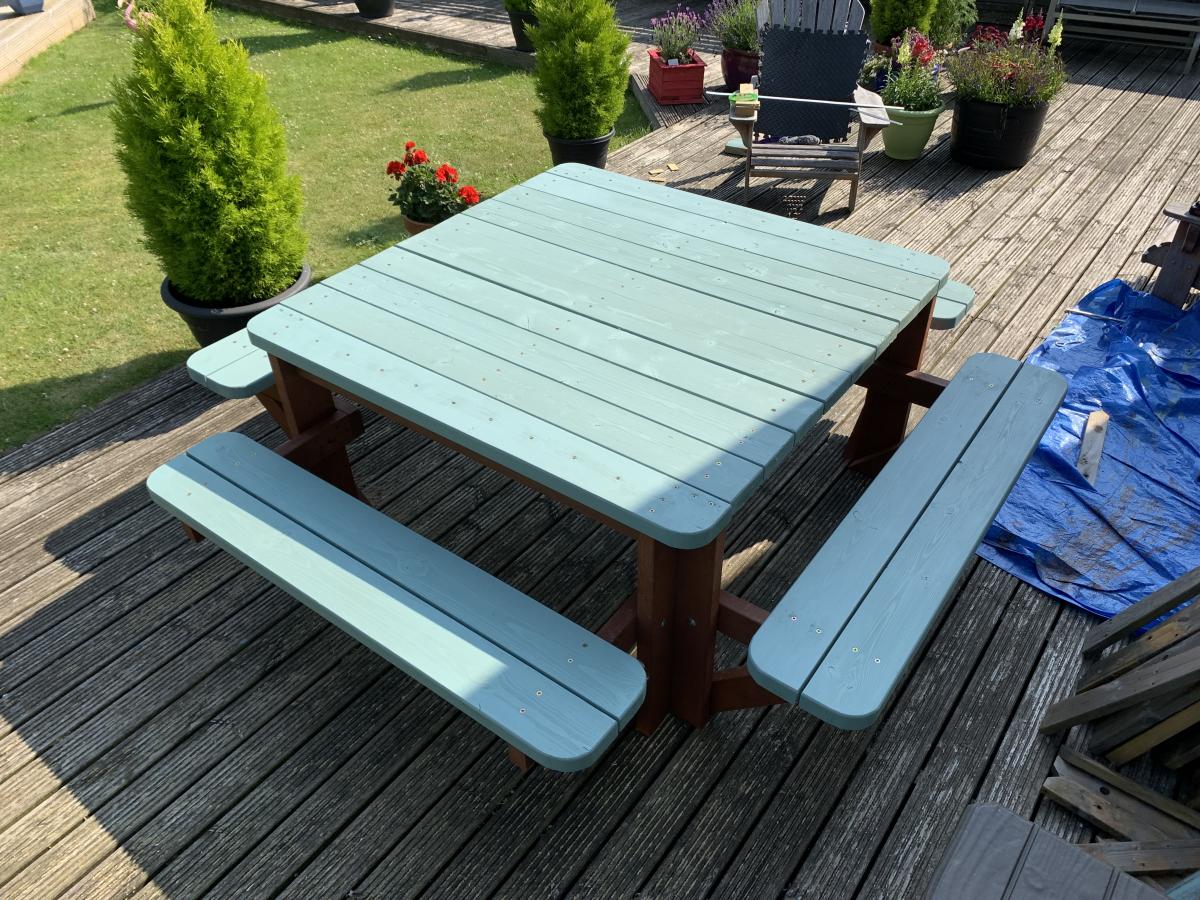
Square Picnic Table
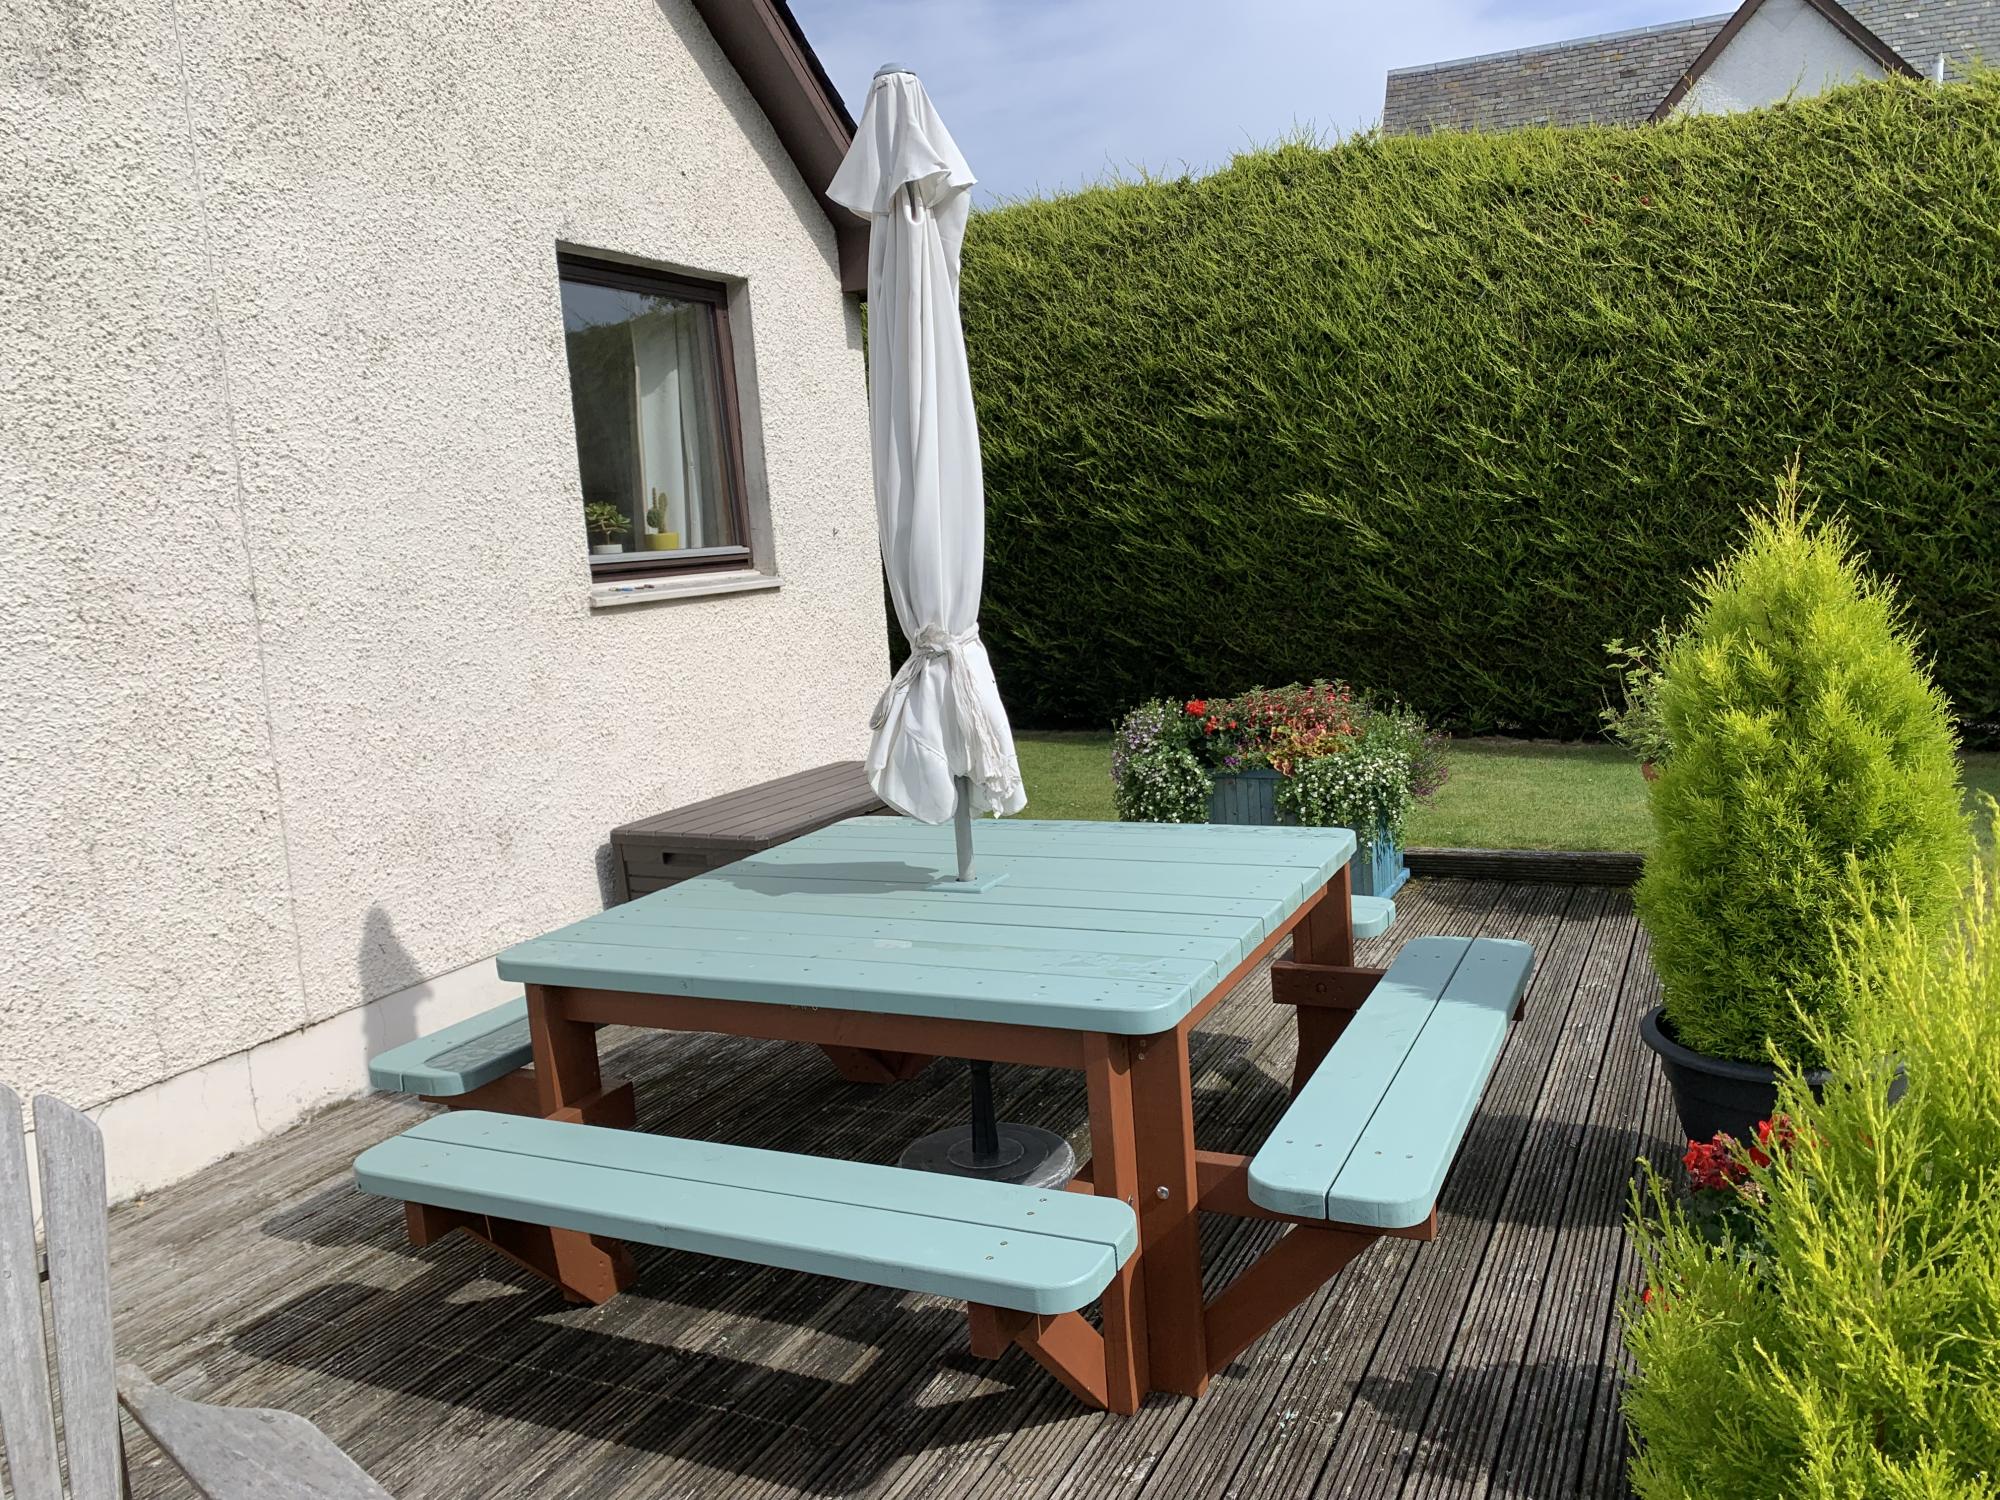
This is a bit larger than Ana’s plan. I added additional support to the table top and added a braced opening for the umbrella. I also went for a more rounded finish by rounding all the corners of the table and benches with my jigsaw and then sanding to create smooth curves.
Built from Plan(s)
Comments
Grillin' and Chillin' - Outdoor Grill Food Prep Station
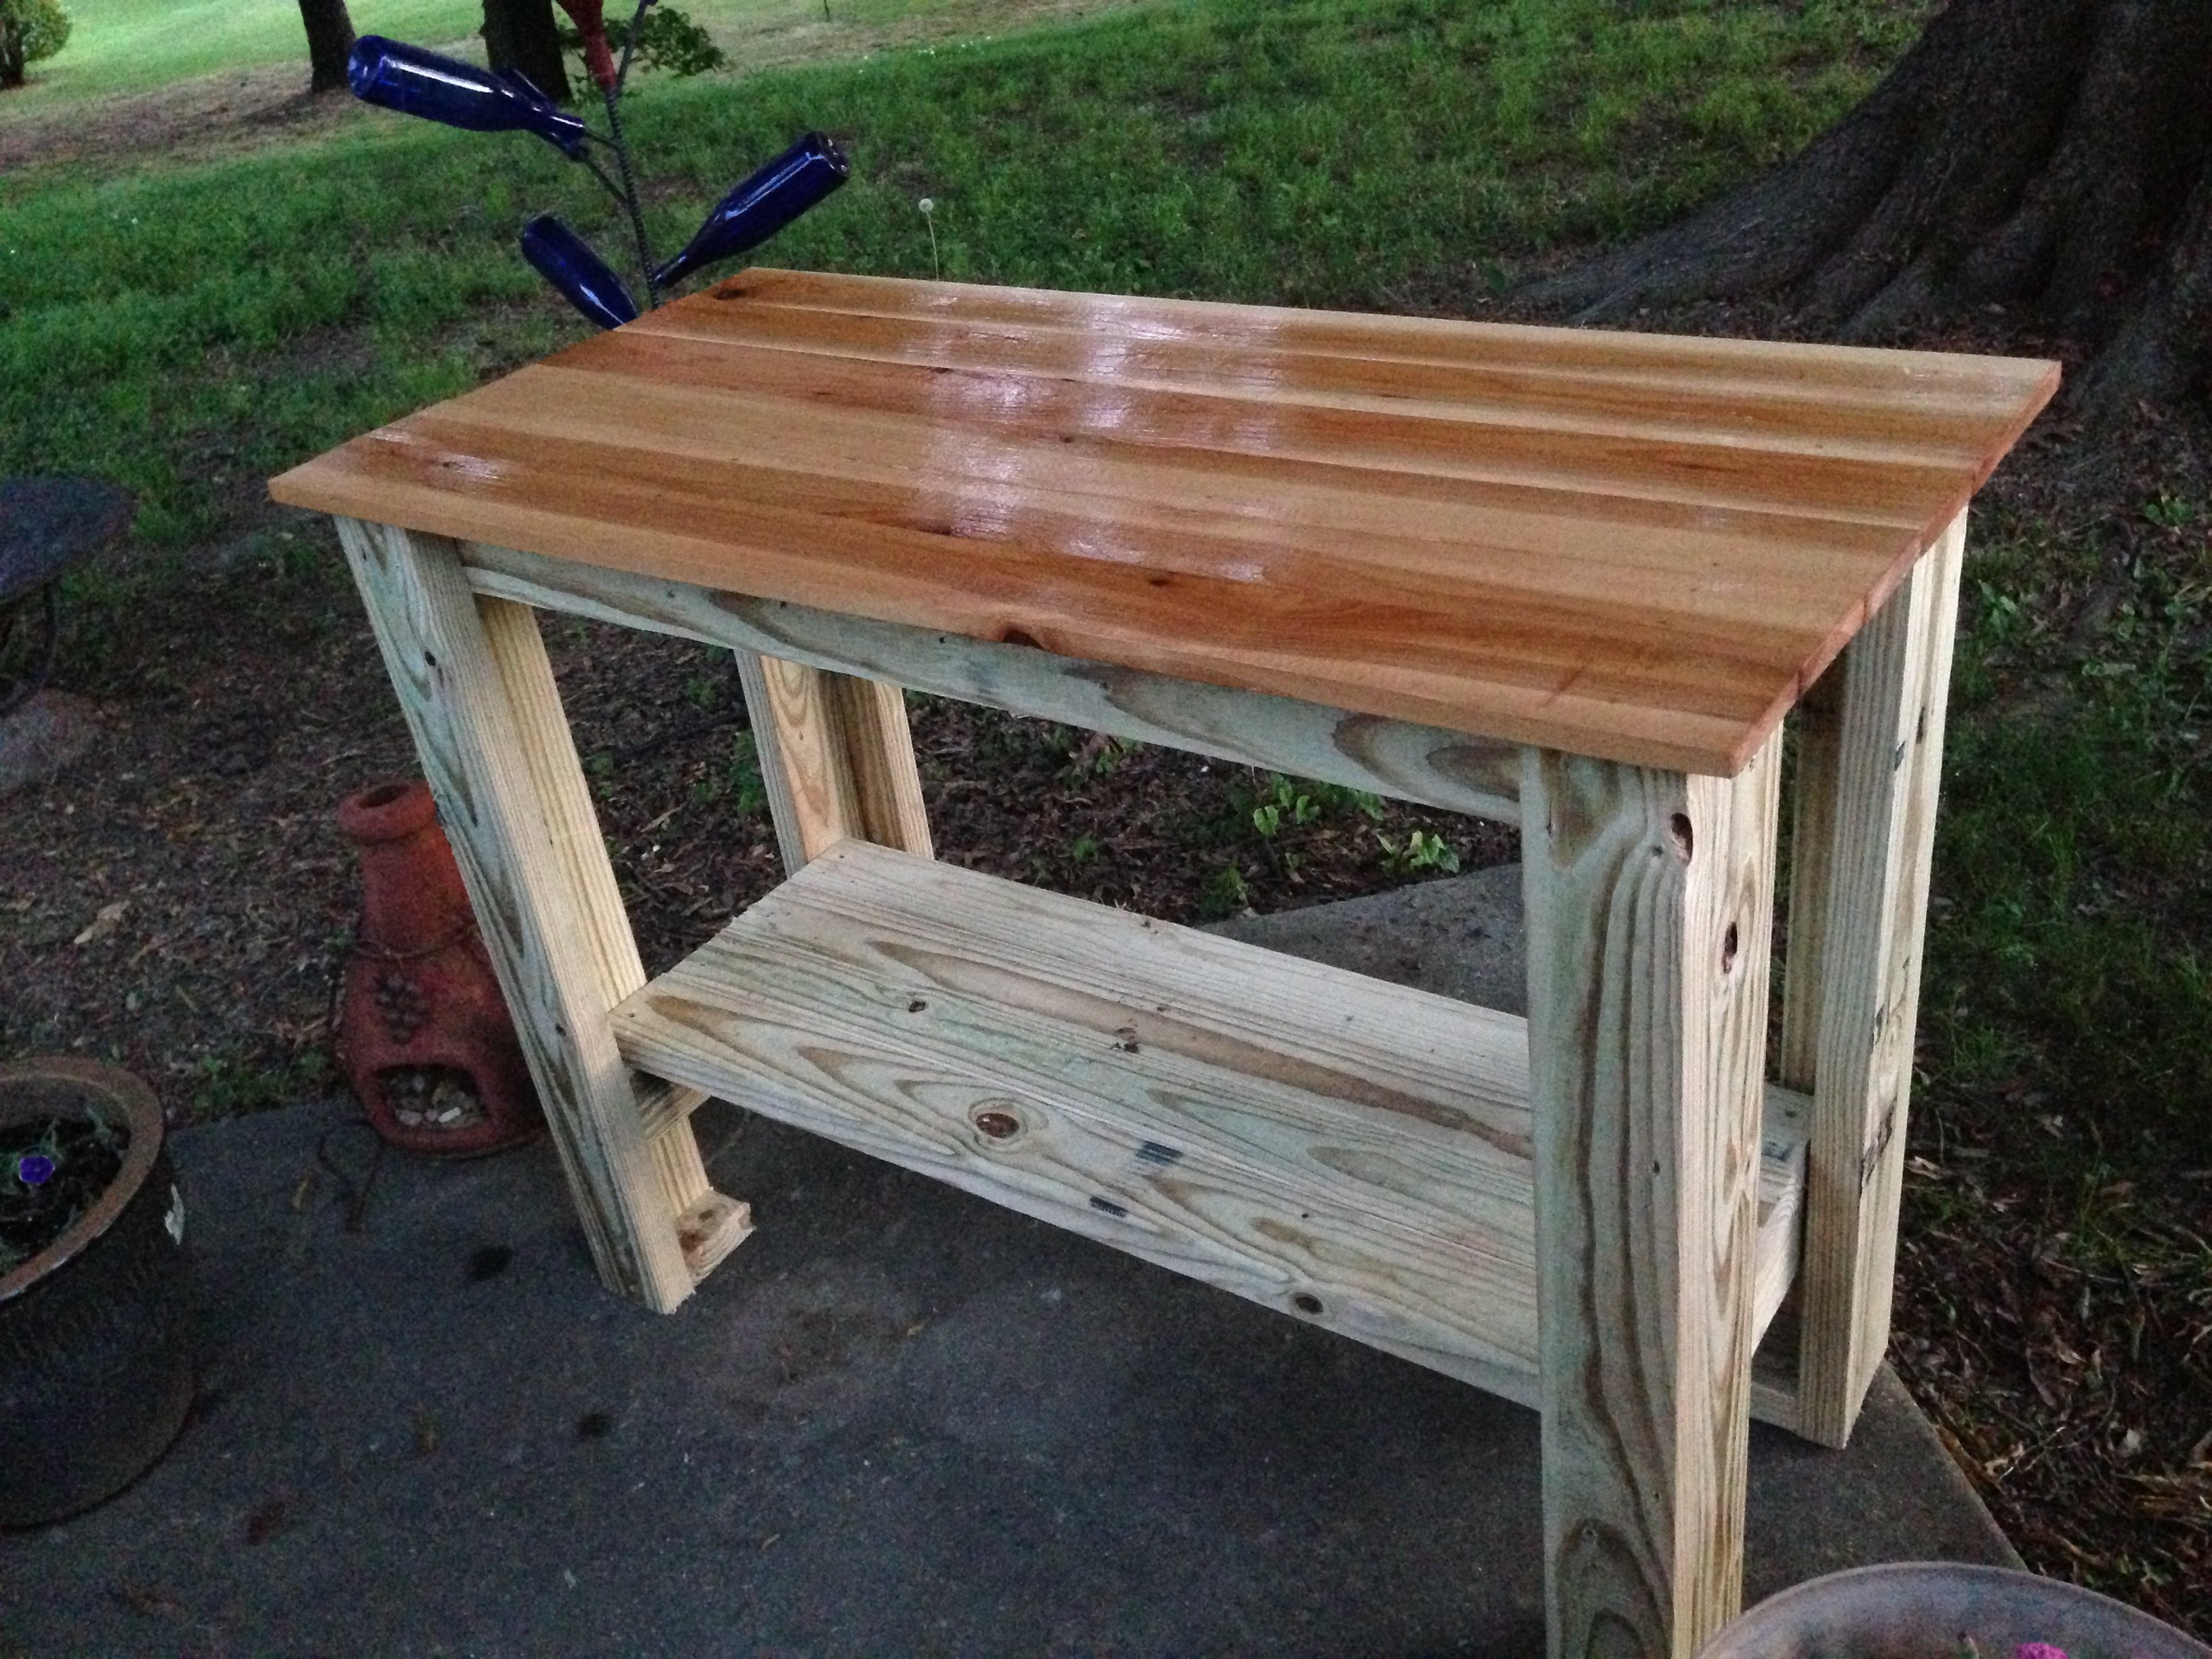
Needed a table for food prep with my grill and found your plans! I used treated lumber for the base and nice cedar planks for the top. The treated lumber had a whiter than usual color which made the base really pop out. I put a nice pecan stain on top and a few coats of poly so the BBQ sauce wouldn't stain it! This was so easy, literally took 2-3 hours to build, stain and poly was done over the next few days. Ready for my next ana-white project. Thanks for posting these plans.
Built from Plan(s)
Estimated Time Investment
Afternoon Project (3-6 Hours)
Finish Used
Simple pecan stain and minwax poly. Brushed on the stain and kept brushing until I got the darkness I wanted
Recommended Skill Level
Starter Project
Comments

Wed, 07/09/2014 - 16:24
Food Prep Table
I was looking on Pinterest and found this table. It was exactly what I was looking for. You inspired me to go out and buy a miter saw and some wood and make the table. It turned out wonderful. It now has a permanent place on my patio and gets used when I grill mostly. I was hoping to be able to upload a photo but don't see the option to do so. Anyway, I want to say thanks for the great plans/instructions.
Laundry Basket Dresser
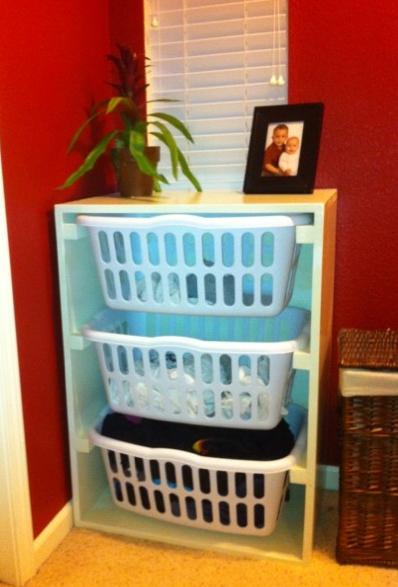
Anything to make Laundry easier and looks good I will build. This is a very simple project that is invaluable to anyone that does laundry. We have it in our master bath to help with separating our laundry.
It is sturdy, functional and is a nice looking piece. The only changes I made was to use 2x2's for the rails instead of the metal L-brackets.
Built from Plan(s)
Estimated Cost
$30
Estimated Time Investment
An Hour or Two (0-2 Hours)
Finish Used
After a good sanding I primed it with Kilz oderless spray primer. Then painted it with some left over Trim Paint we had for our house. Finished it off with two coats of poly in a Satin finish.
Recommended Skill Level
Beginner
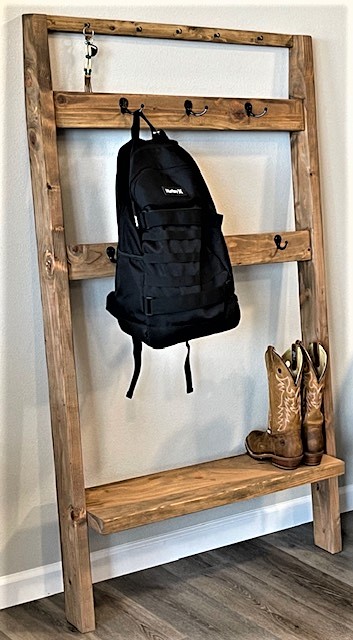
Leaning Hall Tree

I had a small piece of 2x10 left over from this plan's original post, as well as some 2x4's and a scrap 1x2 laying around, so added the top key hook and stained instead of painted. Love how it turned out. I did the top angle a little different too, so it sits a bit closer to the wall, making it awesome for a narrow entryway or space. Easy to modify for whatever the need.
Built from Plan(s)
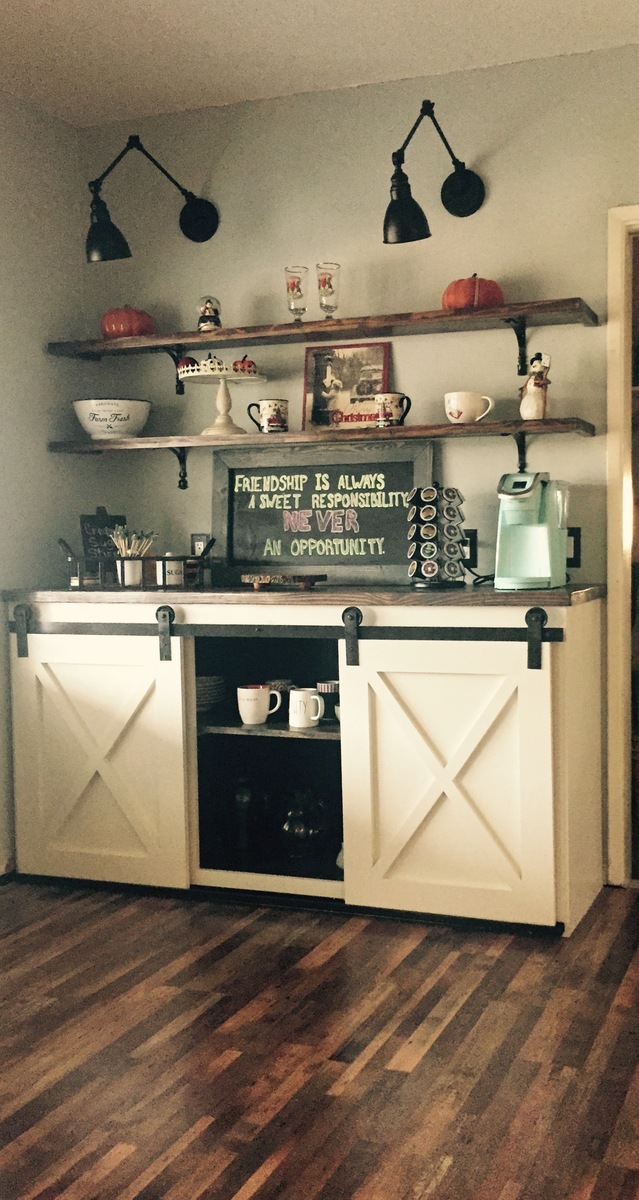
Coffee Bar
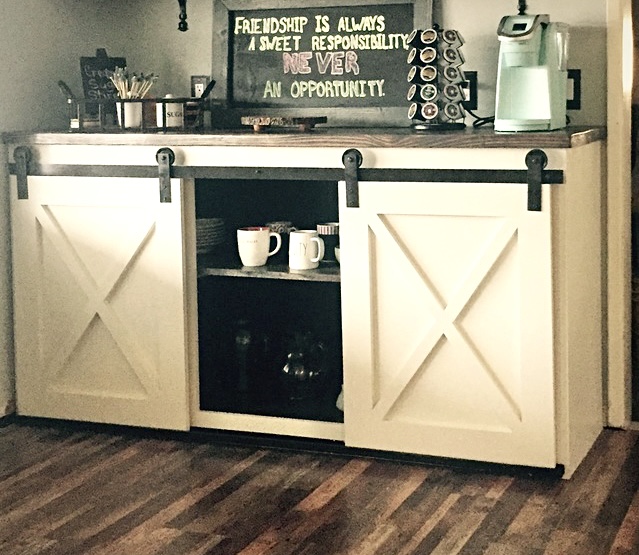
My husband building this using Ana White plans. I just love getting to put a bunch of different items almost as a display. I love this coffee bar and it is now almost the focal point in our dining room. I just love the presence it has in this room.
Built from Plan(s)
Estimated Cost
$200.00
Estimated Time Investment
Weekend Project (10-20 Hours)
Recommended Skill Level
Intermediate
Comments
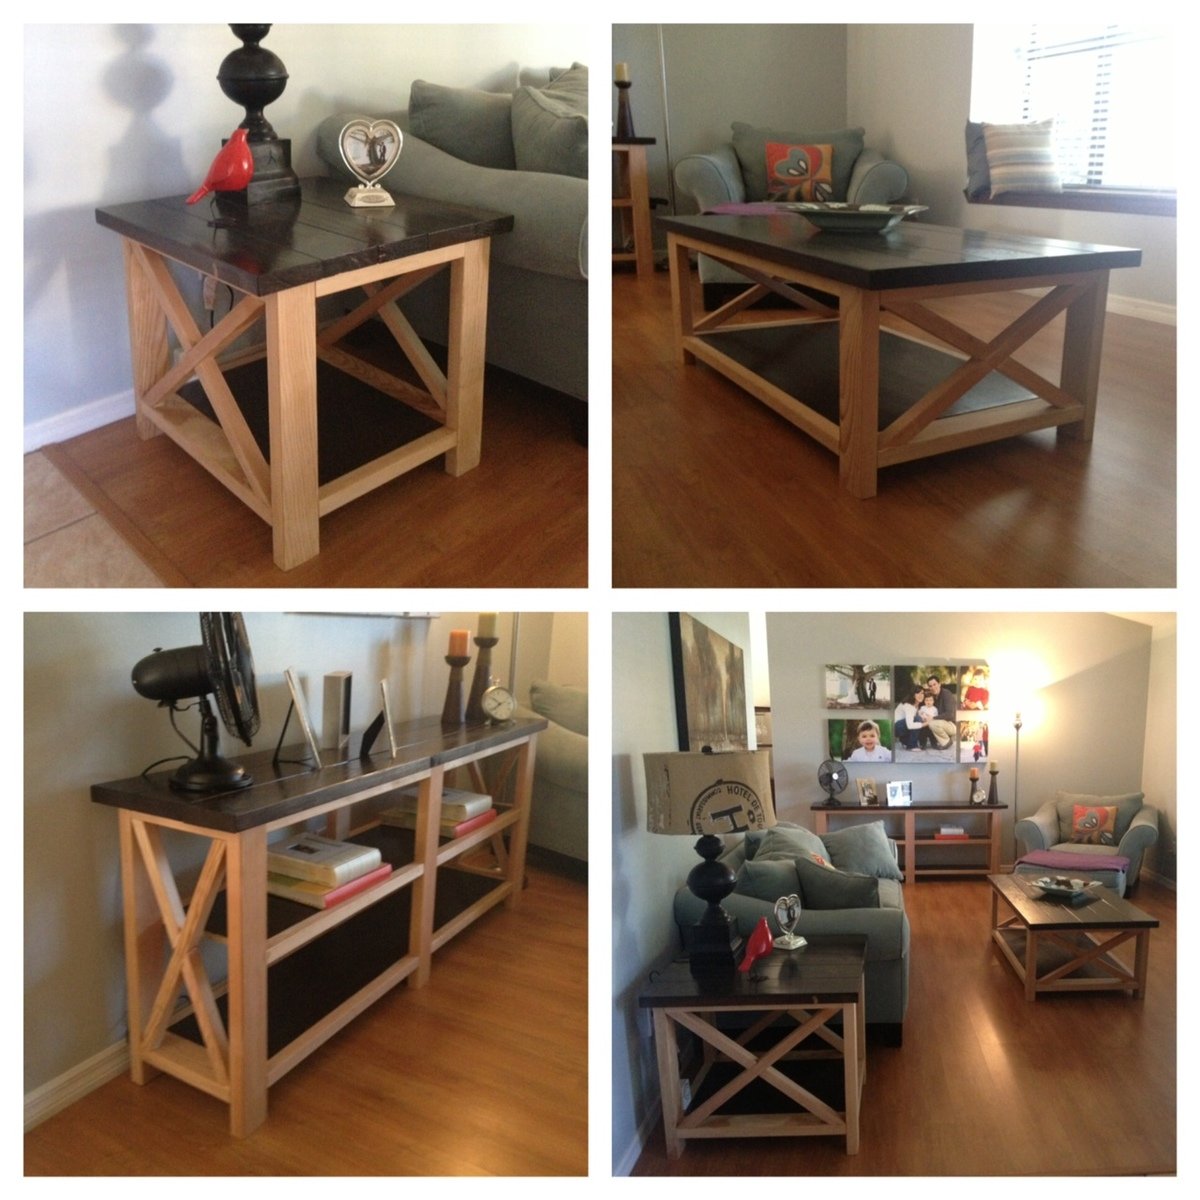
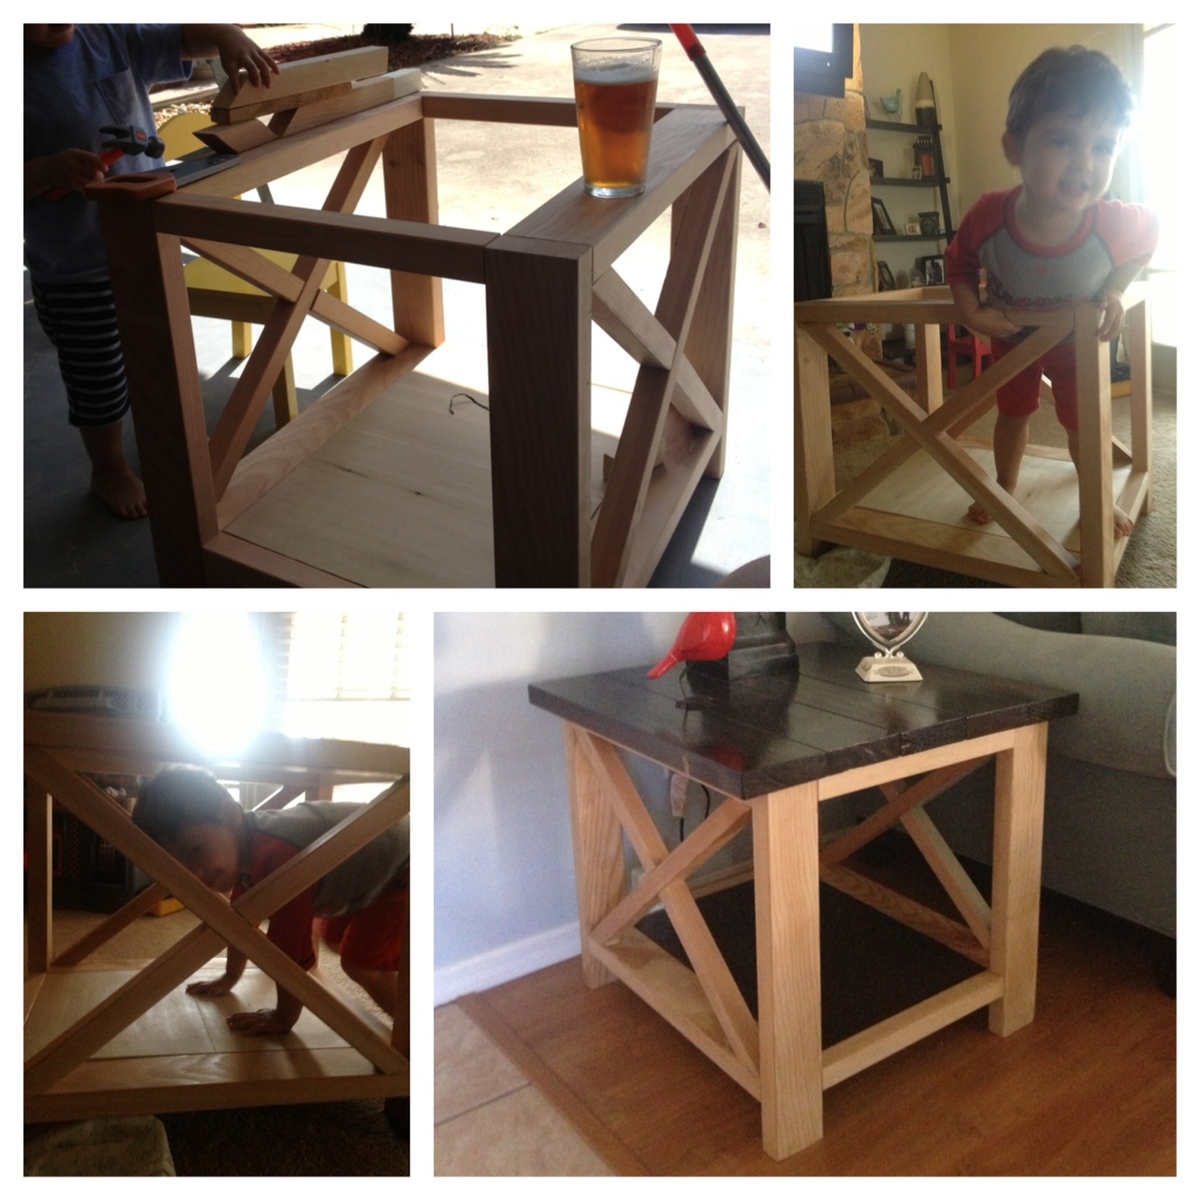
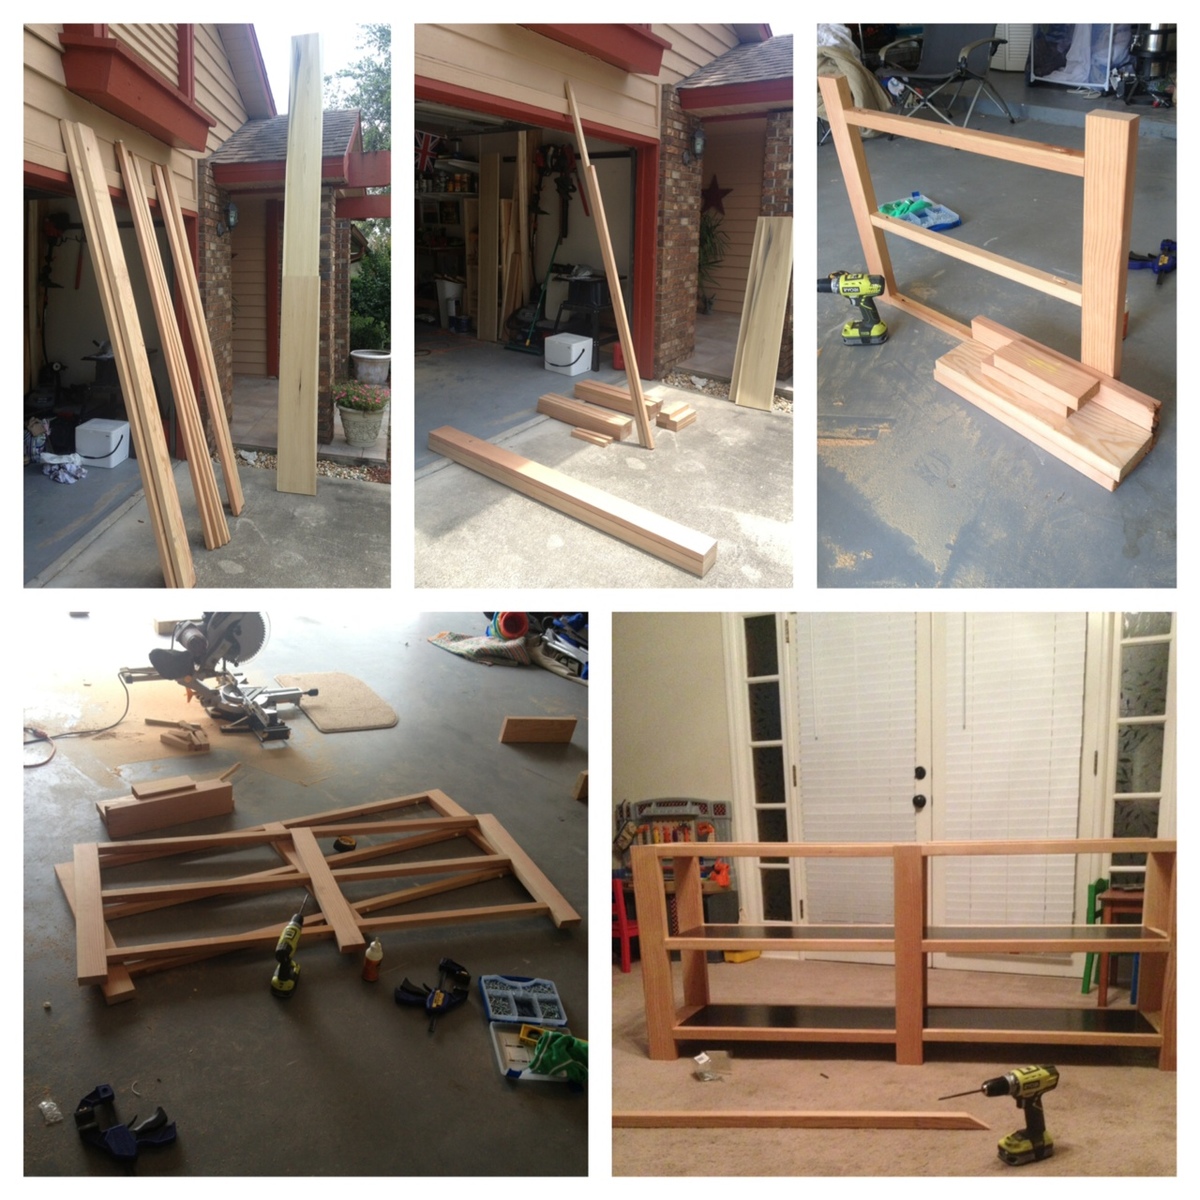
Rustic X Coffee Table, End Table and Console

This was a blast to build. This was all a gift for my wife since the traditional 5th anniversary gift is wood.
The coffee table and console are both awesome! The only thing I would change/modify is the end table, because its kinda big and doesn't really look its part of the set other than the "X". I would maybe take about 2 or 3 inches off all sides or maybe 3 off the sides so its not such a box.
Built from Plan(s)
Estimated Cost
$500
Estimated Time Investment
Week Long Project (20 Hours or More)
Finish Used
Kona on top and shelf (s) with 4 coats of polyurethane. Currently there is nothing on all other parts because I wasn't sure what I was going to do. I think I'm just going to put a few coats of poly on the "naked" parts and call it a day. I thought about painting the other pieces but that would hide the beautiful grain in the Douglas Fir. I don't like the idea of the entire thing being Kona because it looks too dark on the others I've seen on here (for my house only), then I thought about a very light stain but think I settled on it being naked with the poly. I would honestly love to hear what you guys think as I have not touched it yet.
Actually I was thinking it would be nice for Anna to have a section with a "poll" for someone like me who is kinda stuck on a finish to post a picture and have other vote on a few options....thoughts??? Anna??
Actually I was thinking it would be nice for Anna to have a section with a "poll" for someone like me who is kinda stuck on a finish to post a picture and have other vote on a few options....thoughts??? Anna??
Recommended Skill Level
Beginner
Comments

Thu, 06/20/2013 - 07:31
Stain or Poly Poll
I'll start one! Go for the poly. You're absolutely right, it will bring up the beautiful grain, and show off the "X" accents. Nice work, by the way!
Thu, 06/20/2013 - 07:32
Stain or Poly Poll
I'll start one! Go for the poly. You're absolutely right, it will bring up the beautiful grain, and show off the "X" accents. Nice work, by the way!

Thu, 06/20/2013 - 08:39
Yes to the poly!
Beautiful builds! Wow, they look wonderful. What an amazing gift! From the pics, the end table looks fine, too, as the furniture isn't a small scale. I love the two-tone so I say go for just the poly!
Thu, 06/20/2013 - 12:08
Poly is A great choice
I think you did an amazing job :) love the contrast of the two tones. Using poly for the rest would be beautiful. I cant wait to do this project myself.

Thu, 06/20/2013 - 15:47
Love these tables!
What a wonderful gift! These tables are beautiful, great job on this build! I love the two-tone - One more vote for the poly! :)

Fri, 06/21/2013 - 13:04
Poly it is!
I'm going to go with only the Poly over the bare wood. Thanks for the comments and advise! It will be a few weeks due to work and travel but I'll send updated pics once its done.
Sat, 02/24/2018 - 21:18
Poly, or paint white
I like the naked/poly look too. The other option I think would look good would be painting it white. The contrast between the white frame and darker kona top and shelf would be cool.
Northwest Ohio Pergola
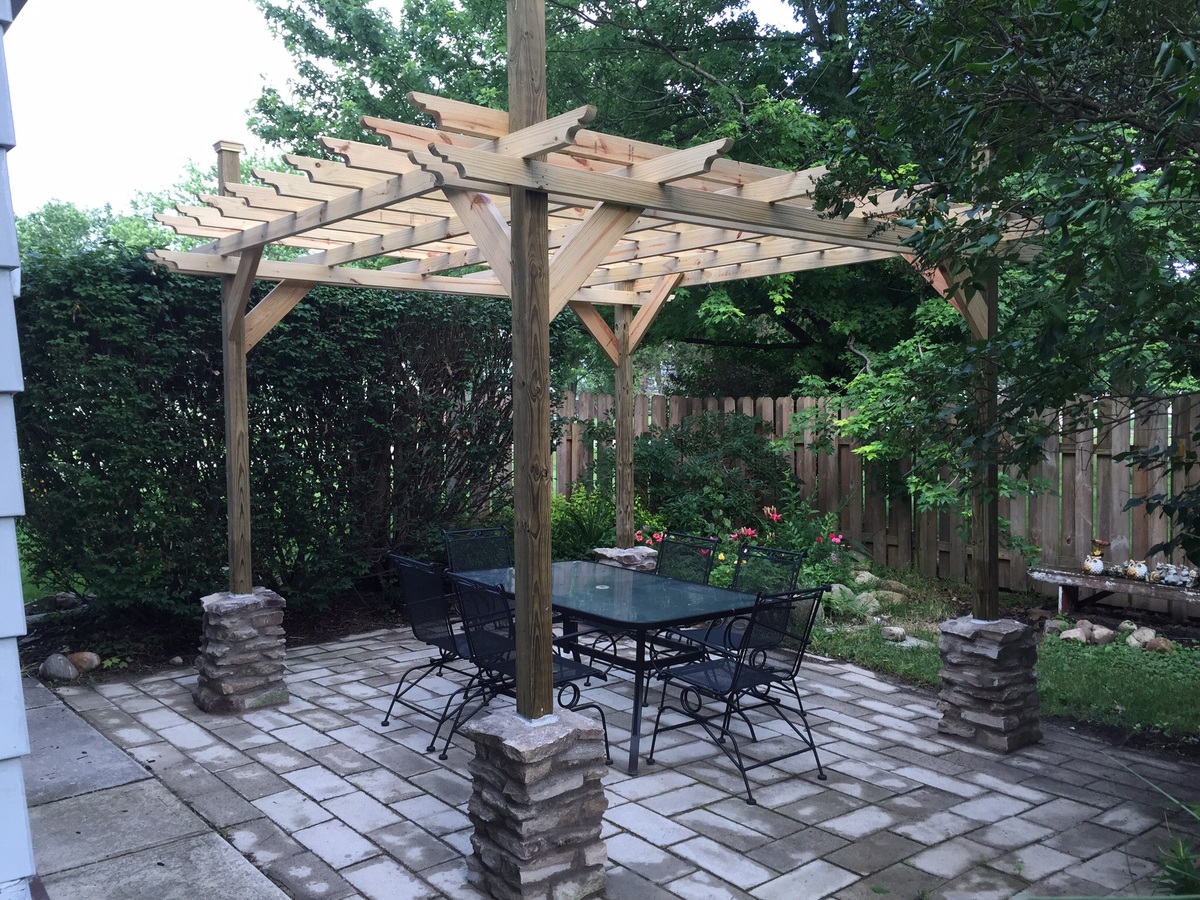
I used flat stone and a masonry circular blade for the base of the corner posts. I also used 2 x 4's for both layers of the top boards. It was a lot of fun to build.
Built from Plan(s)
Estimated Cost
$250.00
Estimated Time Investment
Week Long Project (20 Hours or More)
Finish Used
I will stain and seal in a year
Recommended Skill Level
Intermediate