Loft Bed
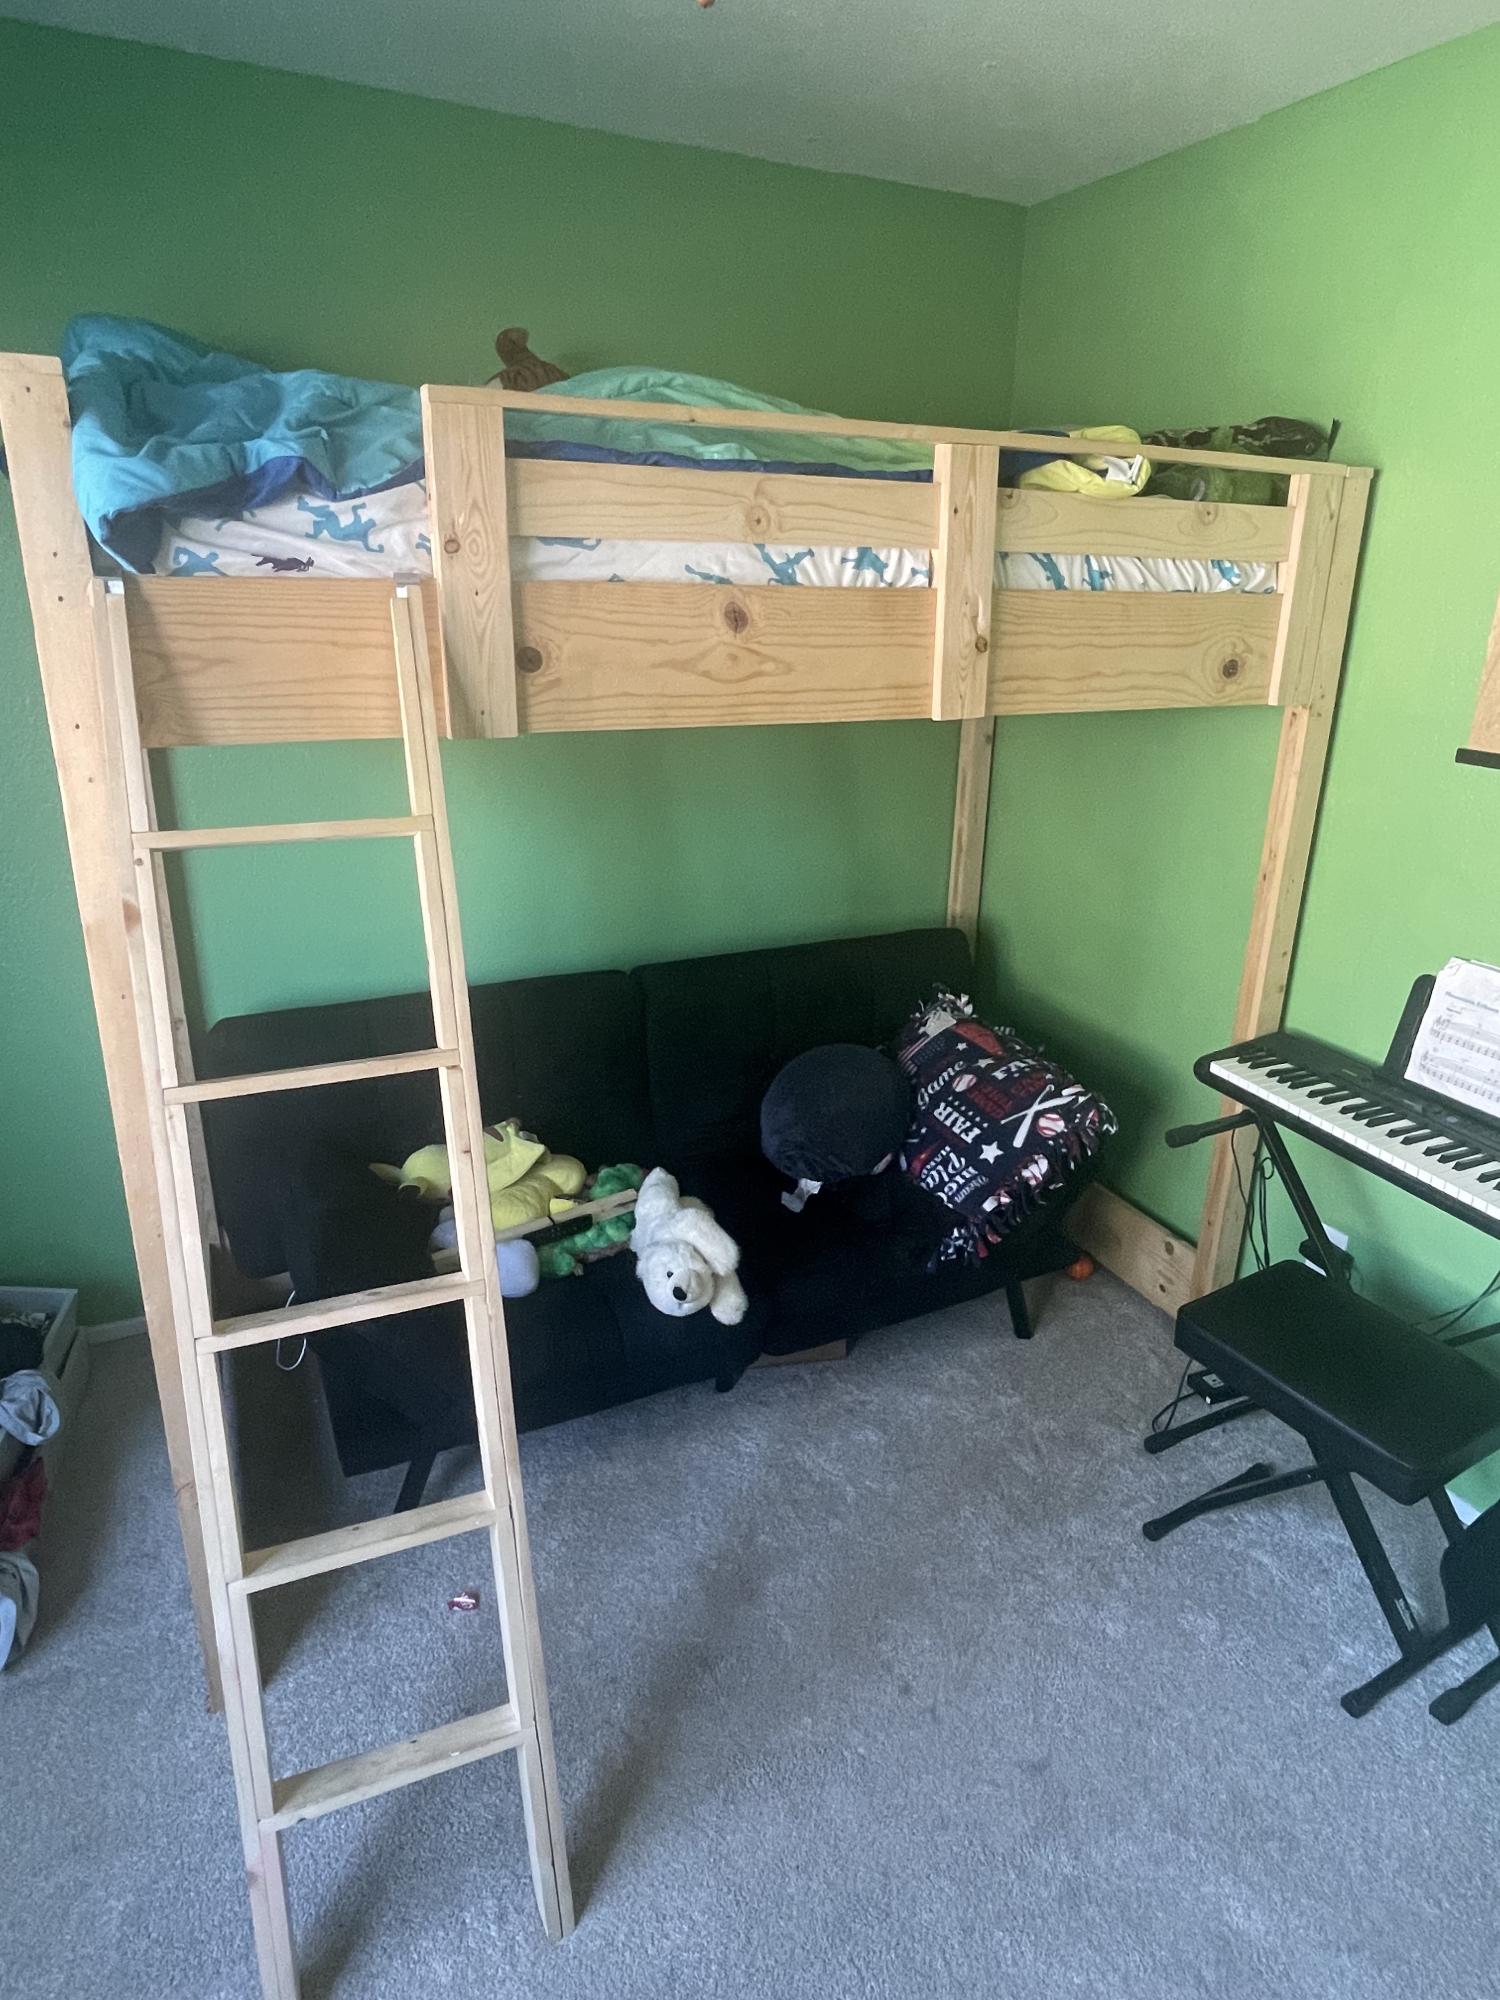
The rooms in our house are not as big as we would like; so, we needed to maximize the space in our son's room. This was an amaze plan and not too difficult to build.
Built from Plan(s)
The rooms in our house are not as big as we would like; so, we needed to maximize the space in our son's room. This was an amaze plan and not too difficult to build.
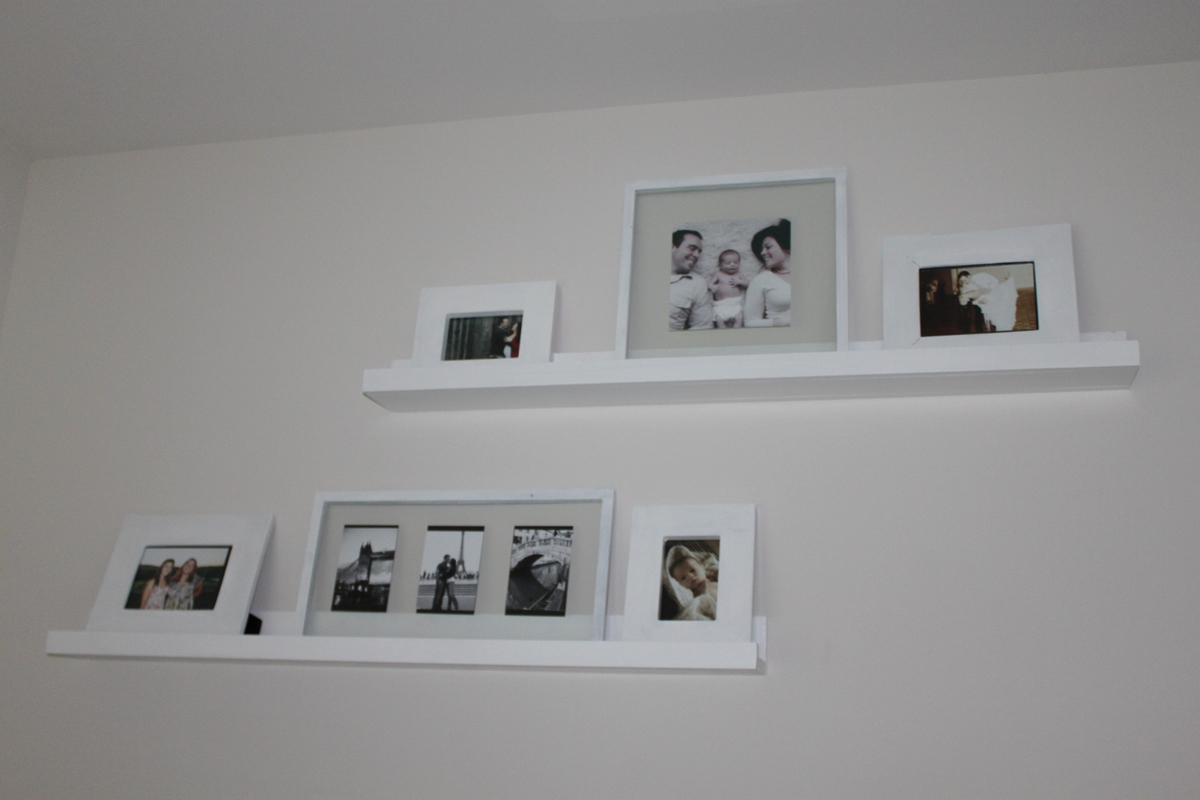
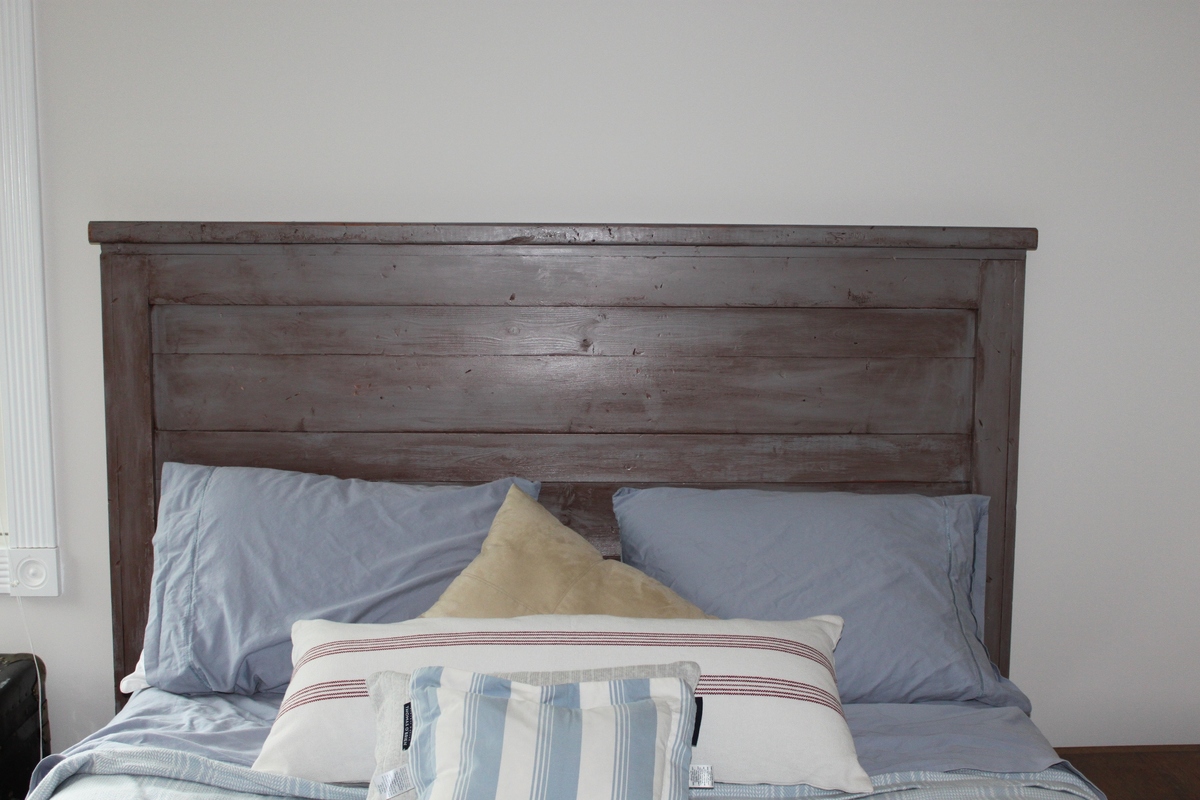
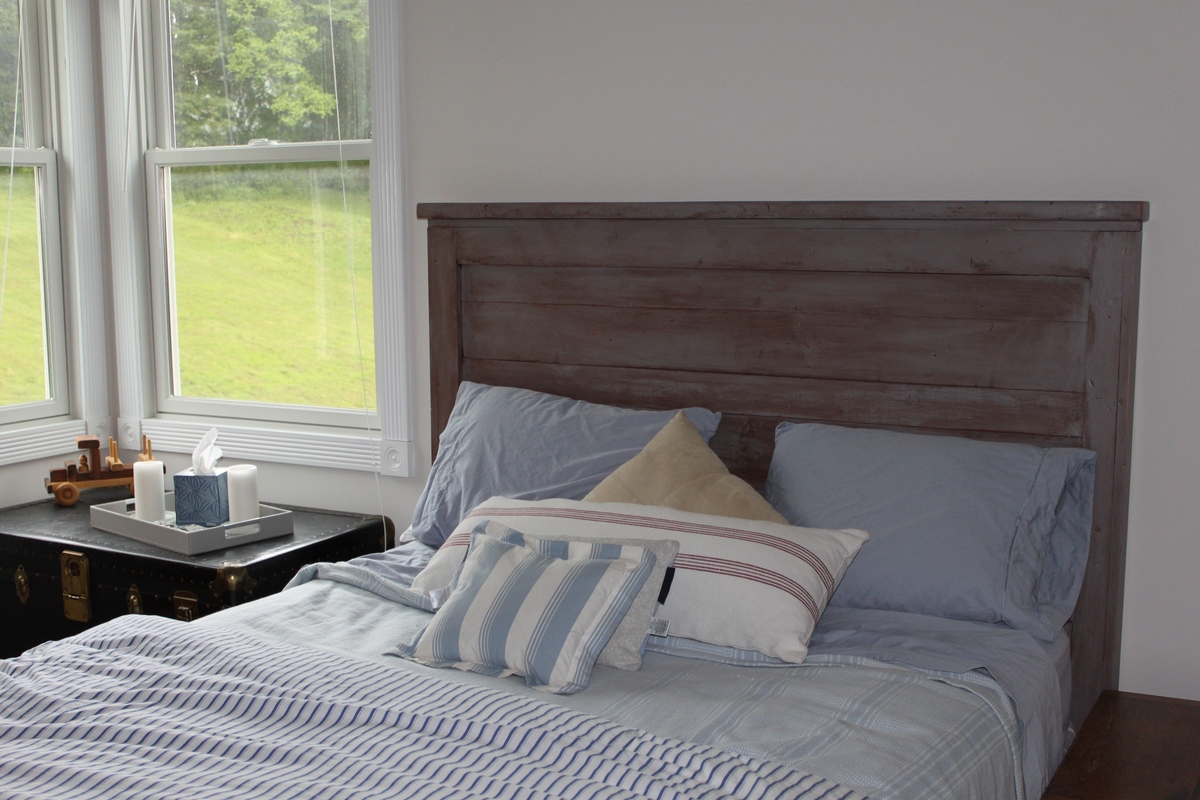
Our guest room had to be ready for some friends coming in town for the week. Before this room had no shelves and worse yet; no head board. Turned this boring room into...well a less boring room. In the picture are my first two projects; the Ten Dollar Ledges and the Reclaimed-wood headboard.

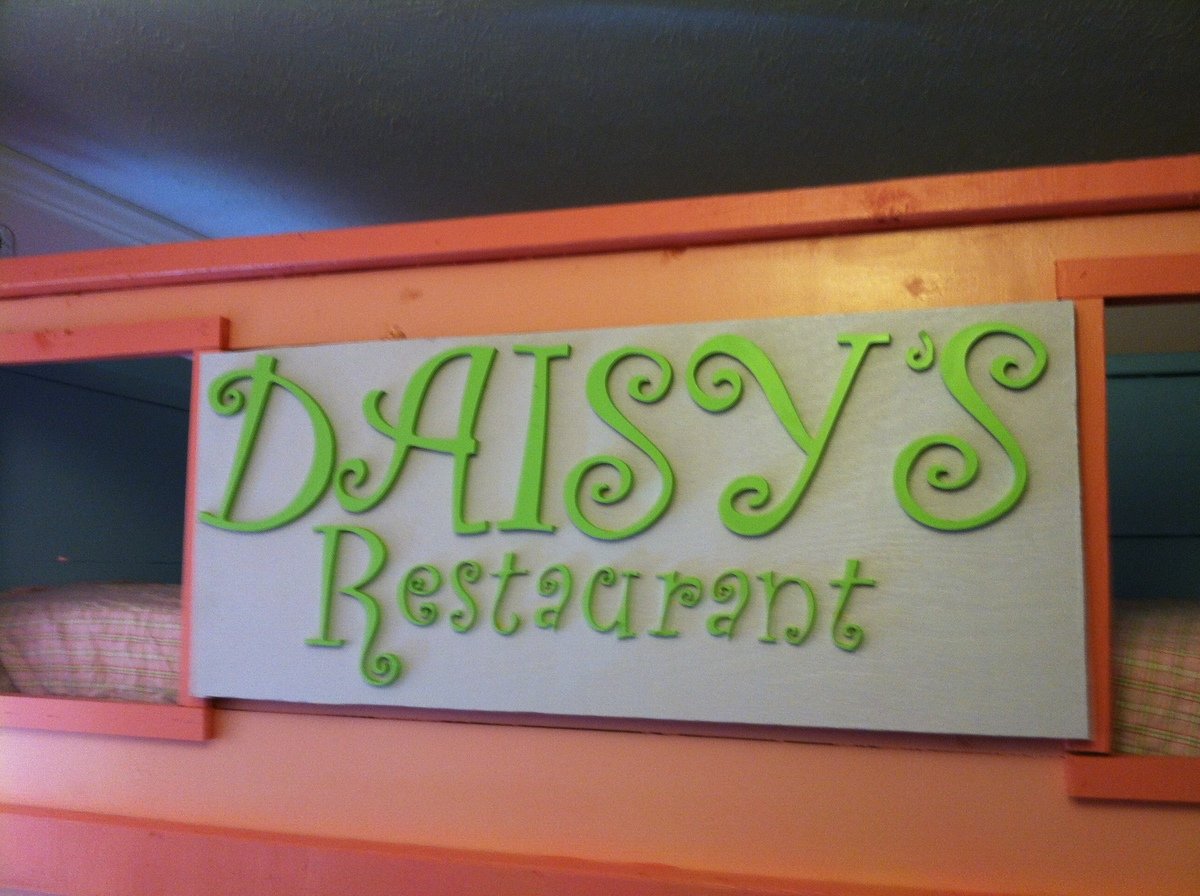
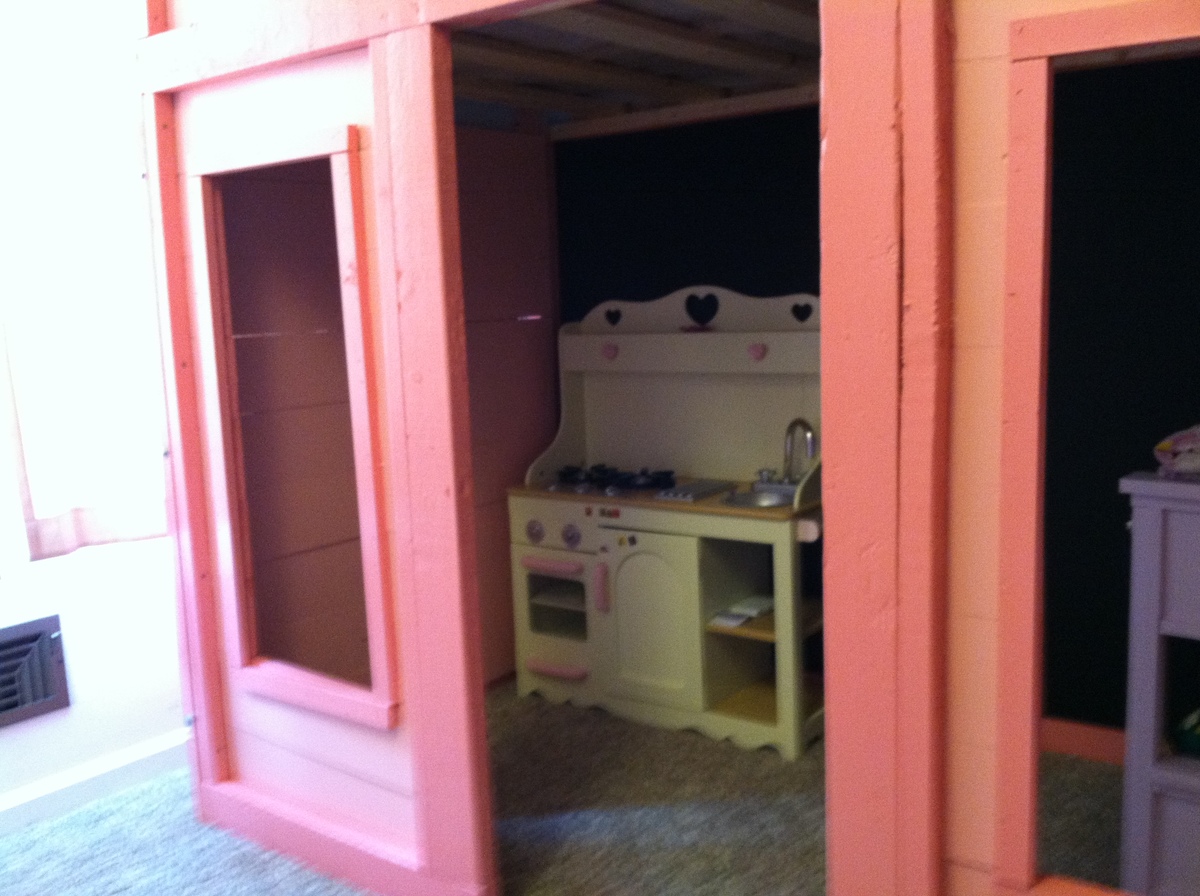
I took the basic plans for the Sweet Pea Bunk Bed and modified them to make a loft bed for my daughter. She dreams of opening her own restaurant when she gets older. The bed is on top and her restaurant is below. I made a chalkboard on the back wall of the bottom section. Curtains will be added sometime in the near future in her restaurant as well. Now she wants a cafe table and chairs as well.

Fri, 07/19/2013 - 00:24
So cute! I love how you made a little restaurant for your daughter! The sign looks totally professional- I can smell something cooking in the easy-bake oven from here!
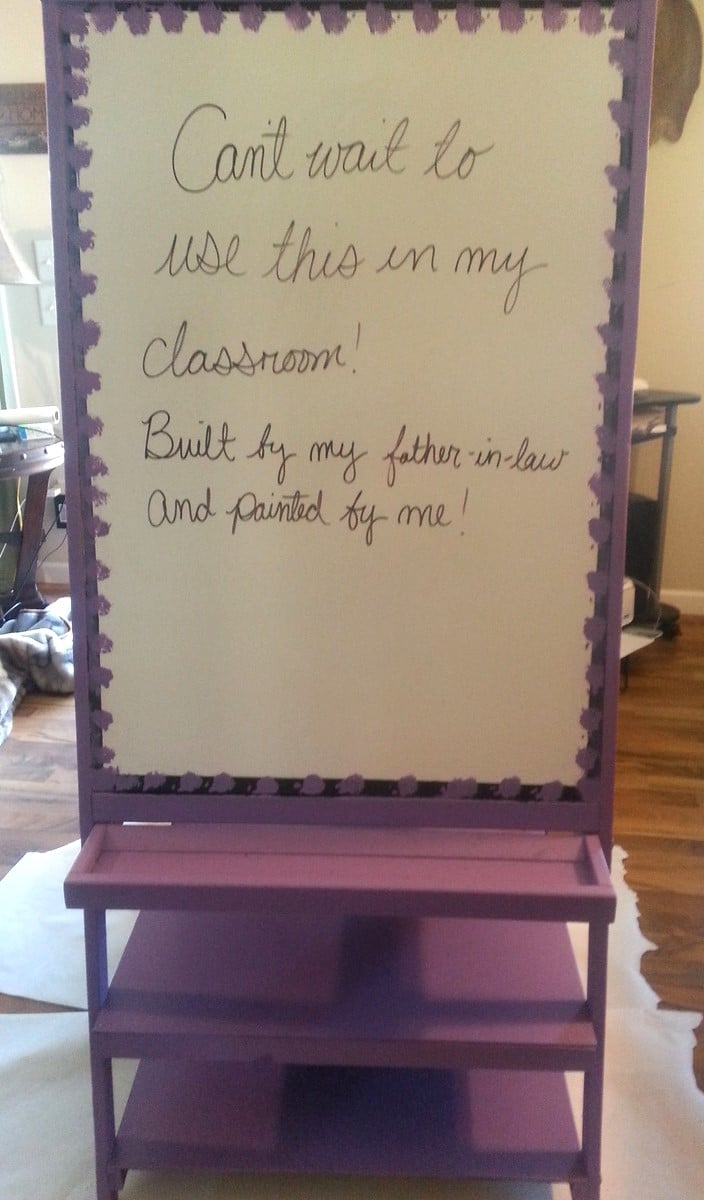
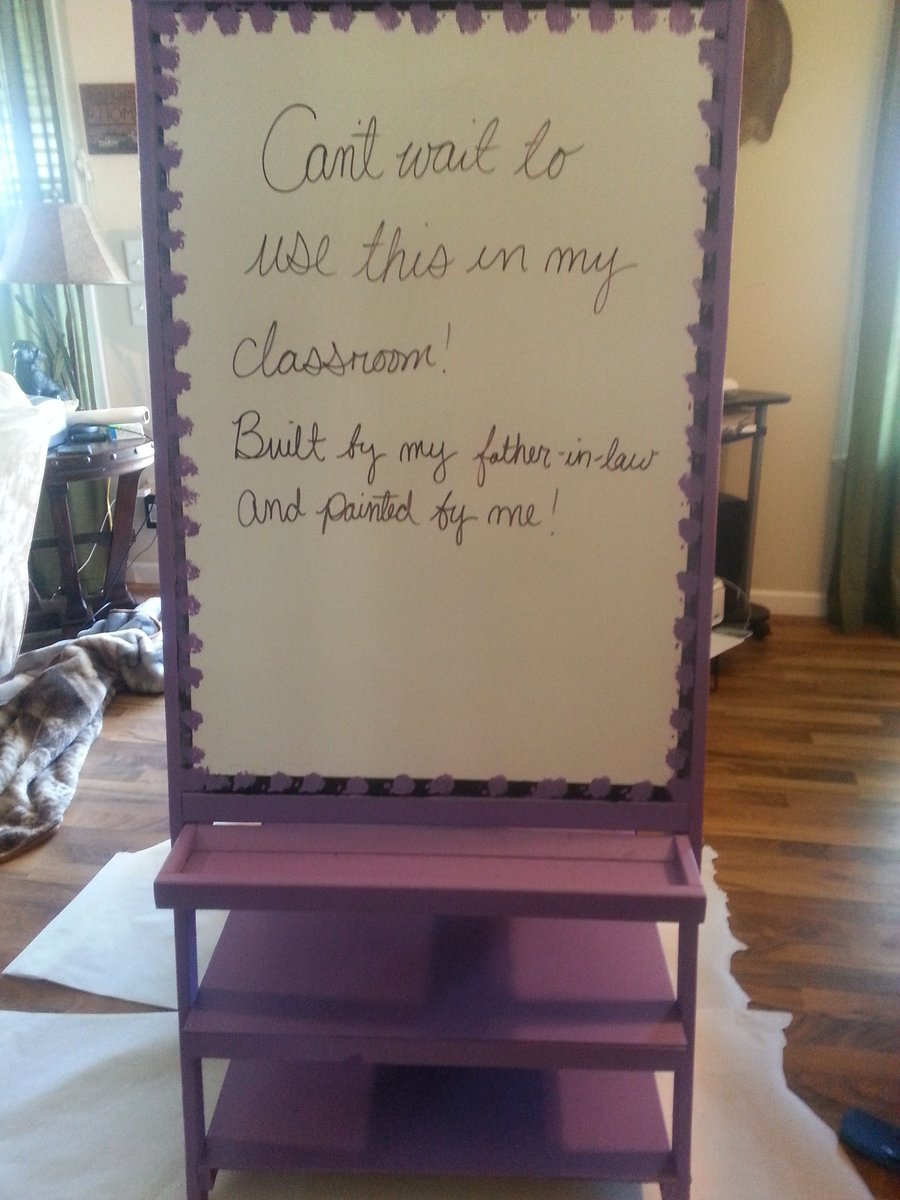
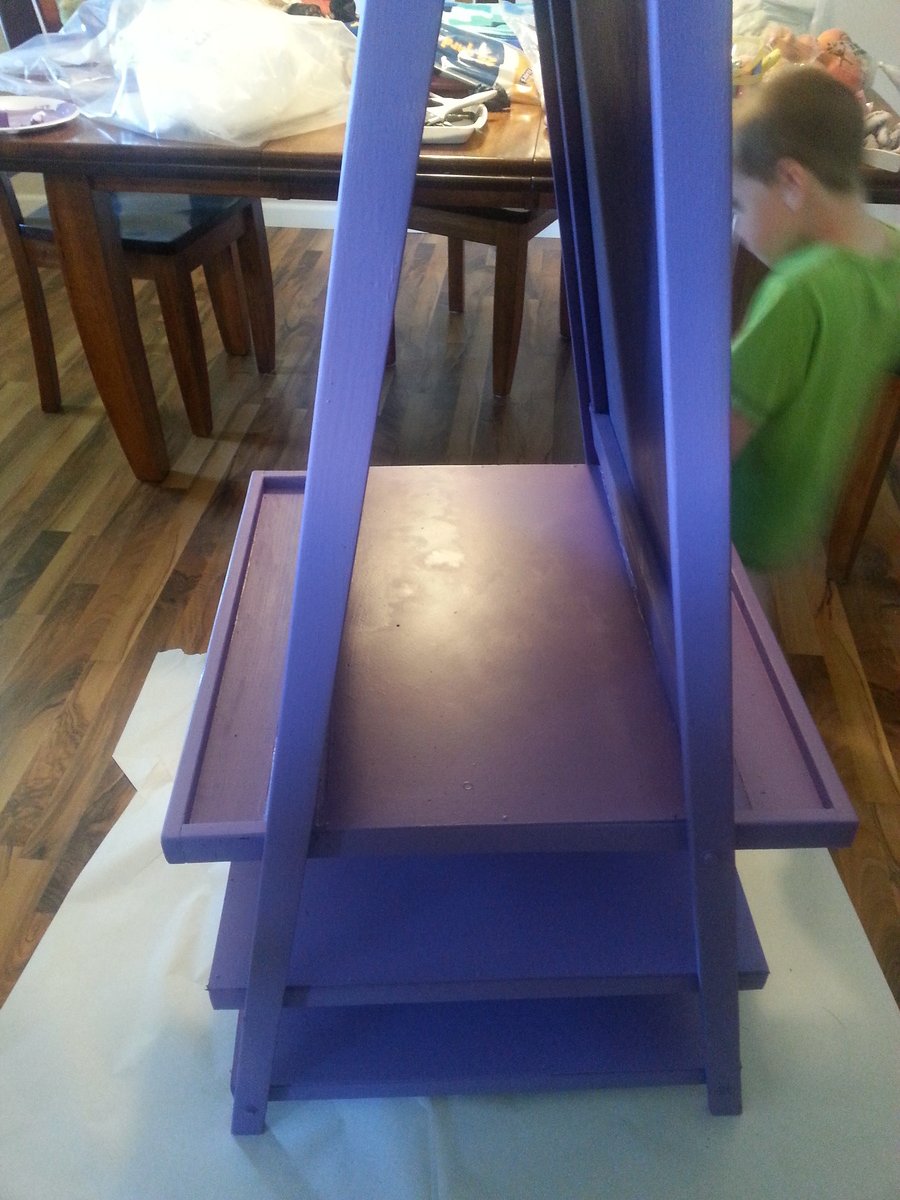
My father-in-law built this for me using Anna White's plans. He tweeked a few things to add somethings I wanted to add. A huge sheet of white board bought from Lowes was used to make both easel sides and the shelves. Once he had it built for me, I painted the lilac paint color onto the wood and whiteboard shelves. The black chalk board side was made by using black chalboard paint. I wanted it to look cute so, I added a black boarder on the white board, and then used a cotton ball with the lilac paint to make the paint blotch style on both sides. I cannot wait to use this in my classroom!

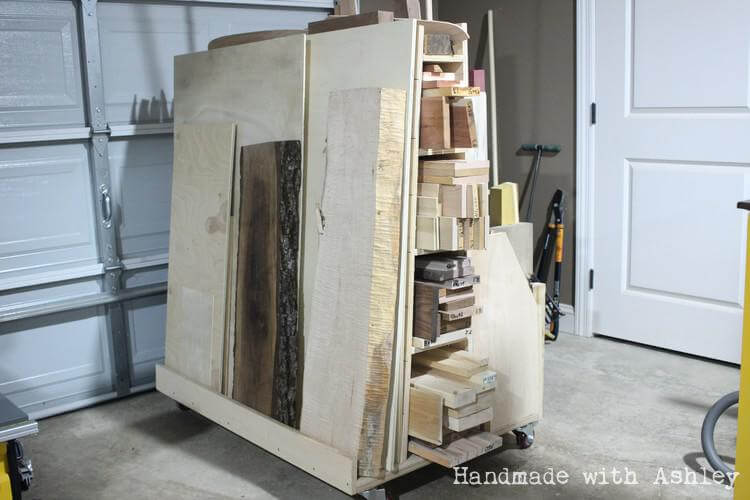
I followed plans from Woodworking for Mere Mortals. Steve Ramsey has a great build video for the project. You can check out the video on his YouTube channel. This lumber cart replaces a previous one that I built a few years ago. My old lumber rack could not store sheet goods and took up too much floor space in my garage. I disassembled the 2x4s from it and hope to recycle them for a future shop project.
For complete build details continue reading my DIY blog here.
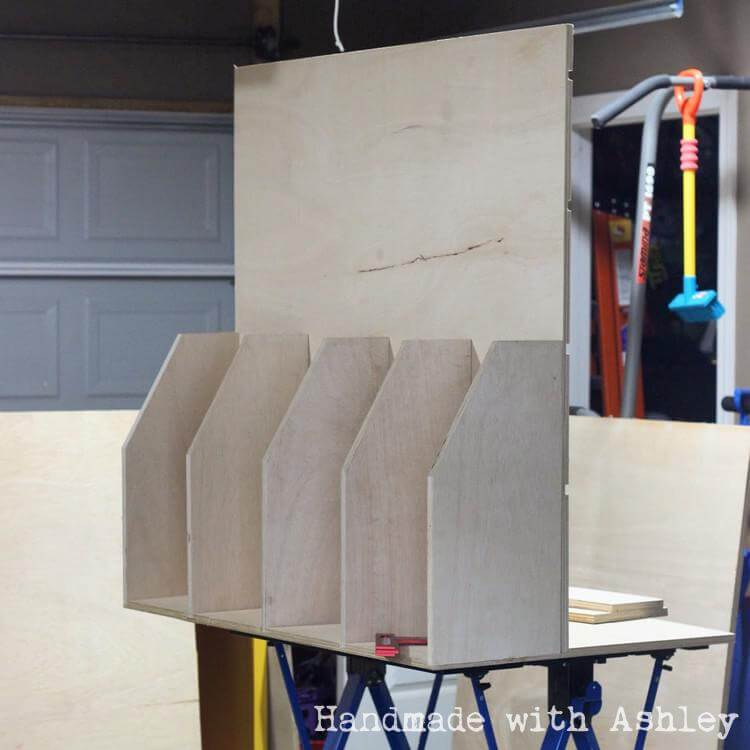
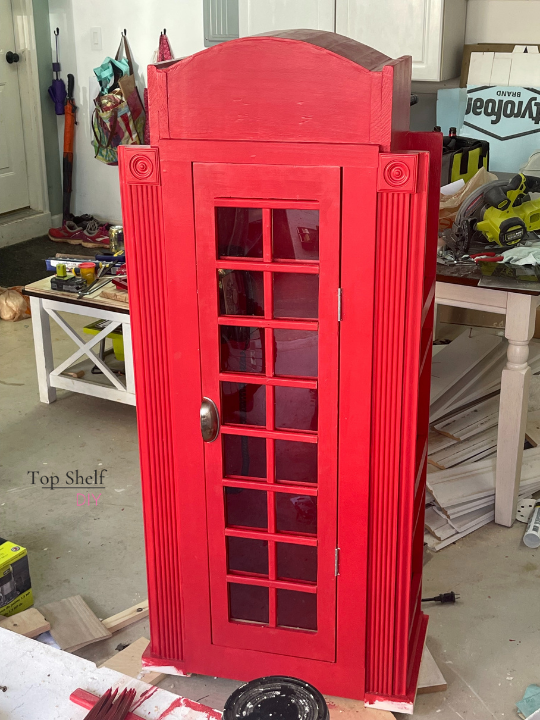
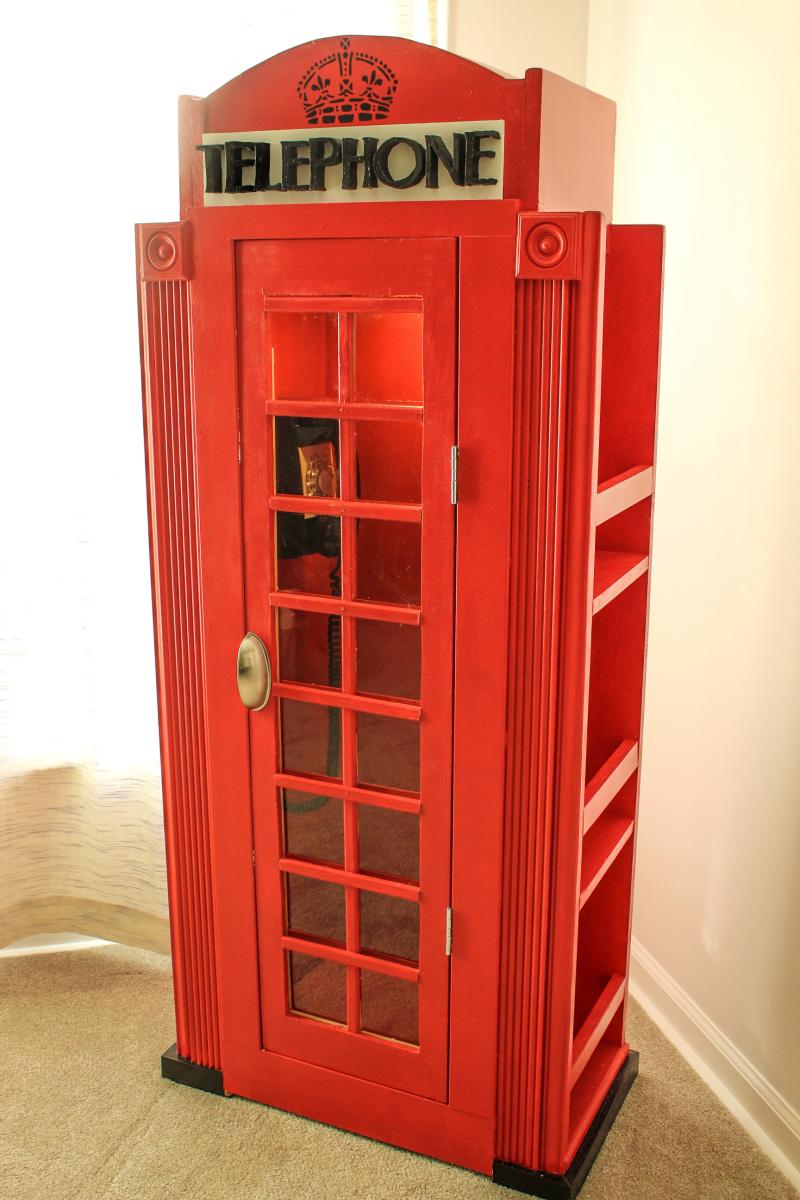
So I wanted to make a bookshelf for a friend who's having a baby. Her husband is British. The invite to her baby shower said, "Bring a book, not a card" so I knew she was going to have a lot of books. I took the gas pump bookshelf plans and added an arched roof, plexiglass door, and some fluted trim to make it look authentic. I found a vintage rotary phone for $20 and added a battery operated puck light to complete the look. My kids loved it!
Sun, 03/06/2022 - 10:14
WOW, that is so special and sweet! It is sure to be cherished for years to come!
This was my second project. I wanted to get practice working with corners so I could do a media cabinet eventually and this was a great starting point. This cabinet is a great addition to our dining area too! My little helpers were never far away :)
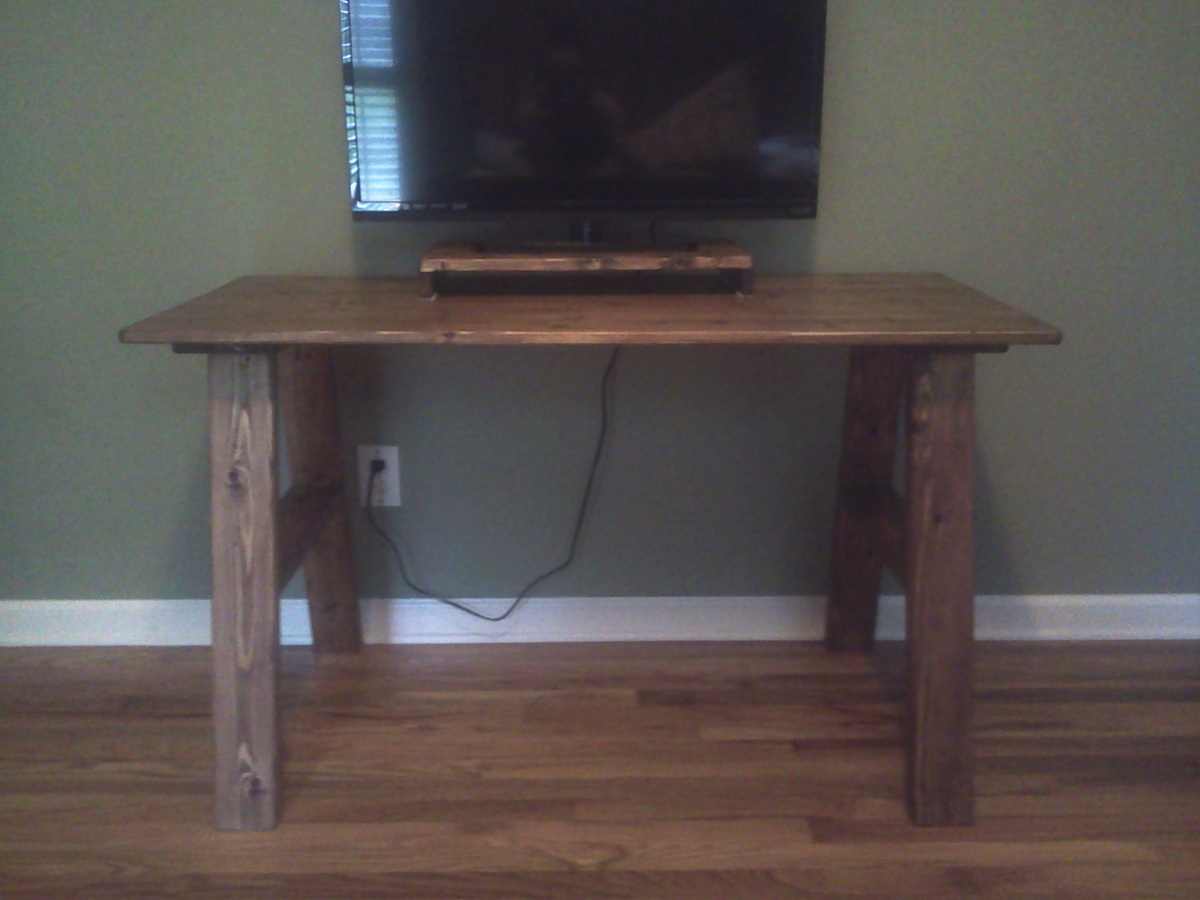
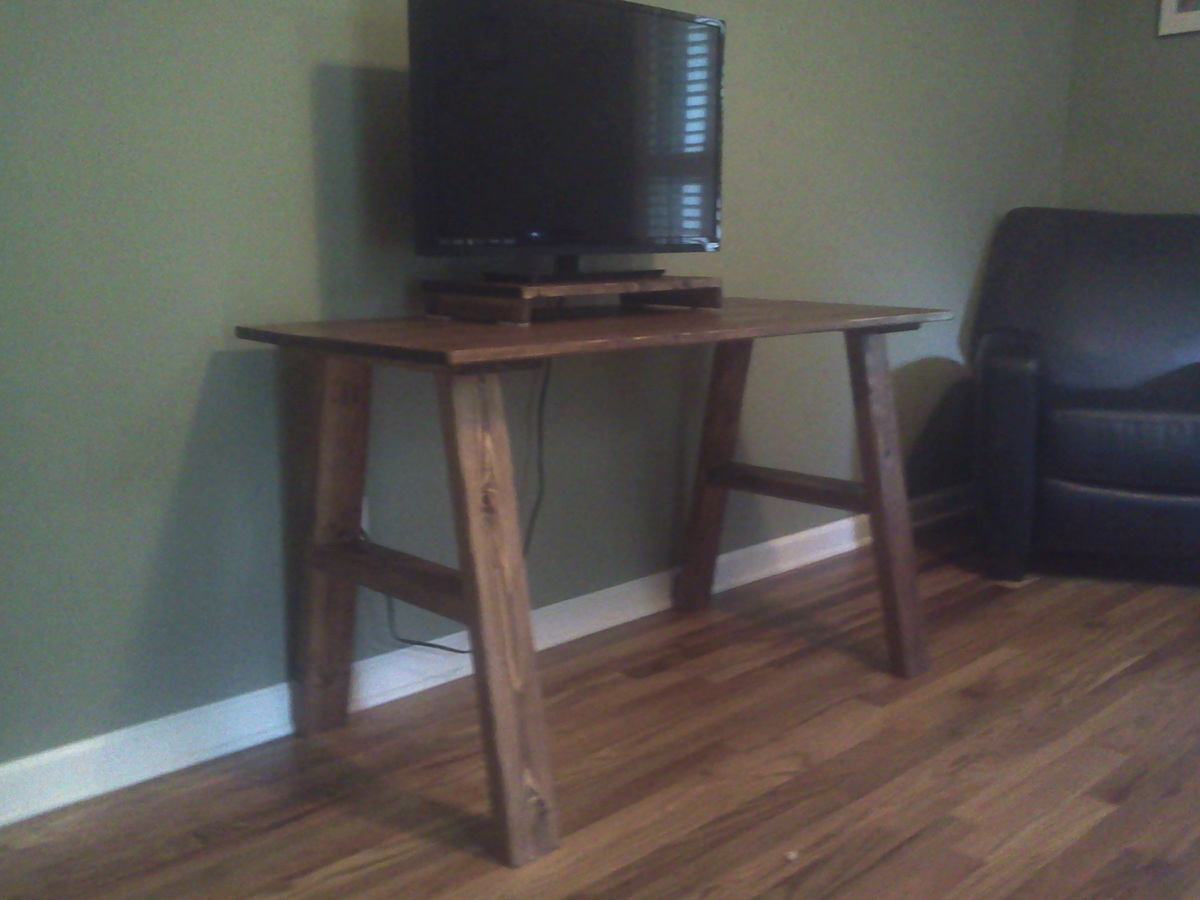
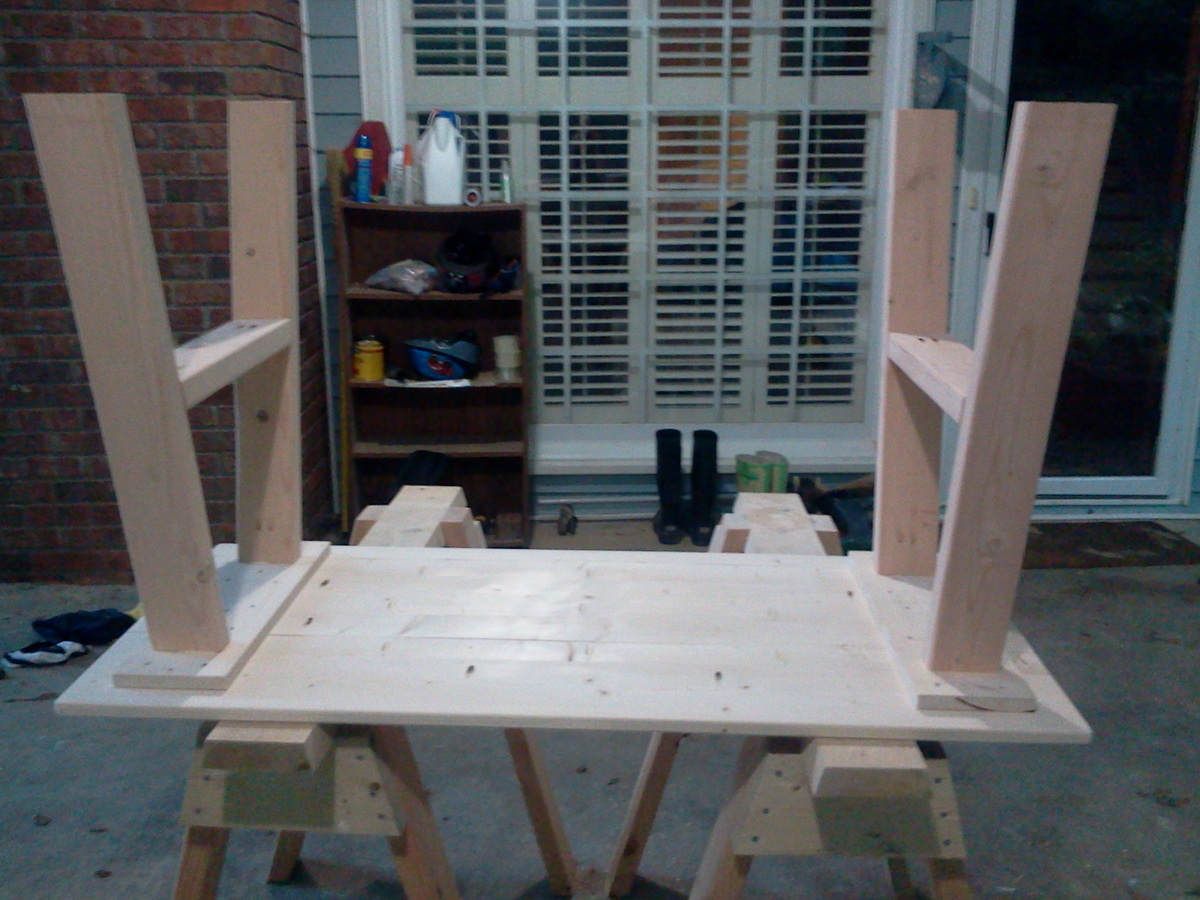
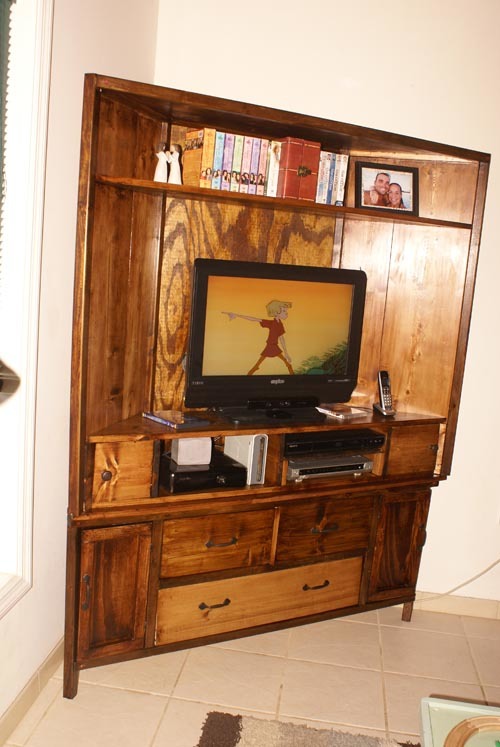
My husband asked me to make a small and inexpensive table for our new TV. I decided to make a desk so it would be able to be used later when we move the TV. Very easy plans. Easy assembly. Great beginner project. I used 1X6 for the top instead of 2X6. It was less expensive and seems to work just fine. I also threw together a small TV stand so the DVD player can go under the TV and not clutter up the table. It's 3 1X4's @ 20 inches. And I made the sides by ripping the leftover 1X4 in half the same width as the top. I spent $30 in wood and have some scraps left over for another project.
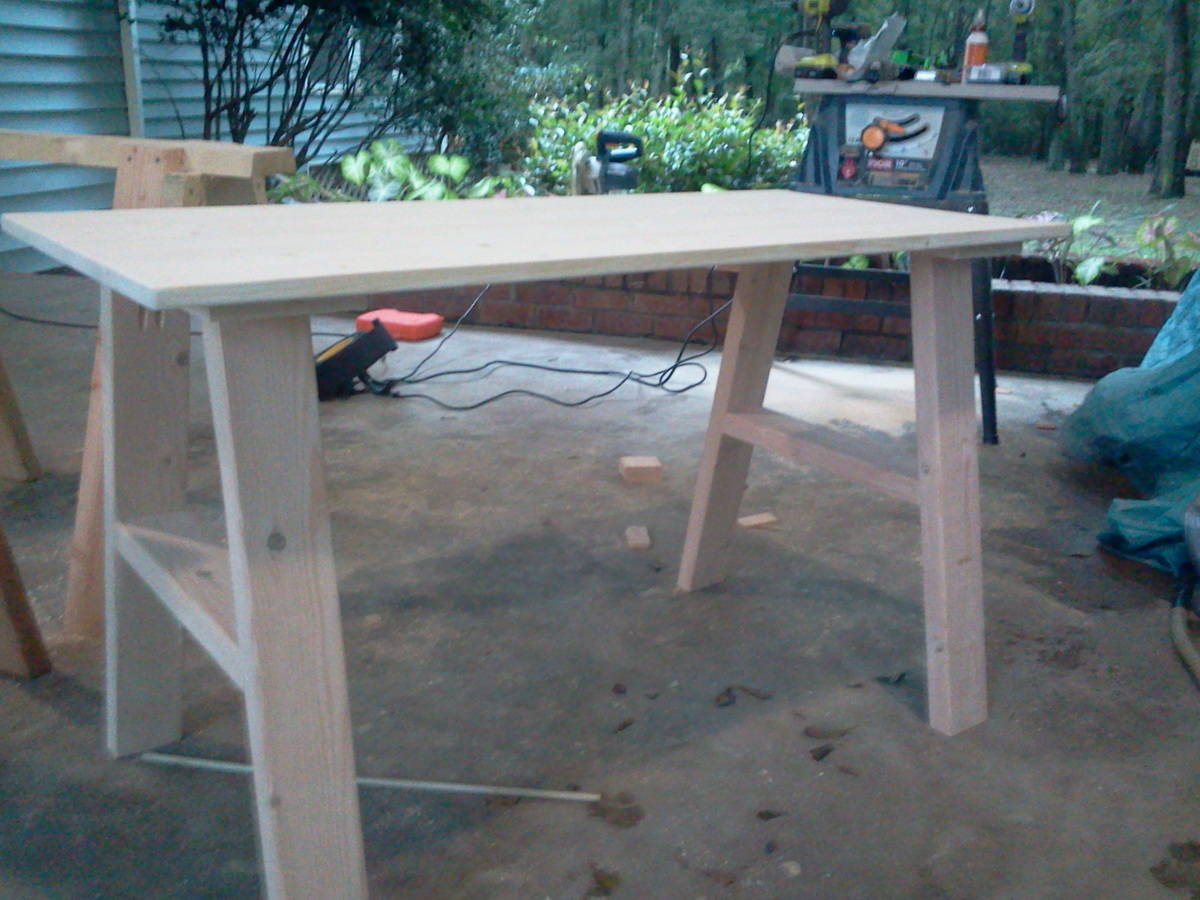

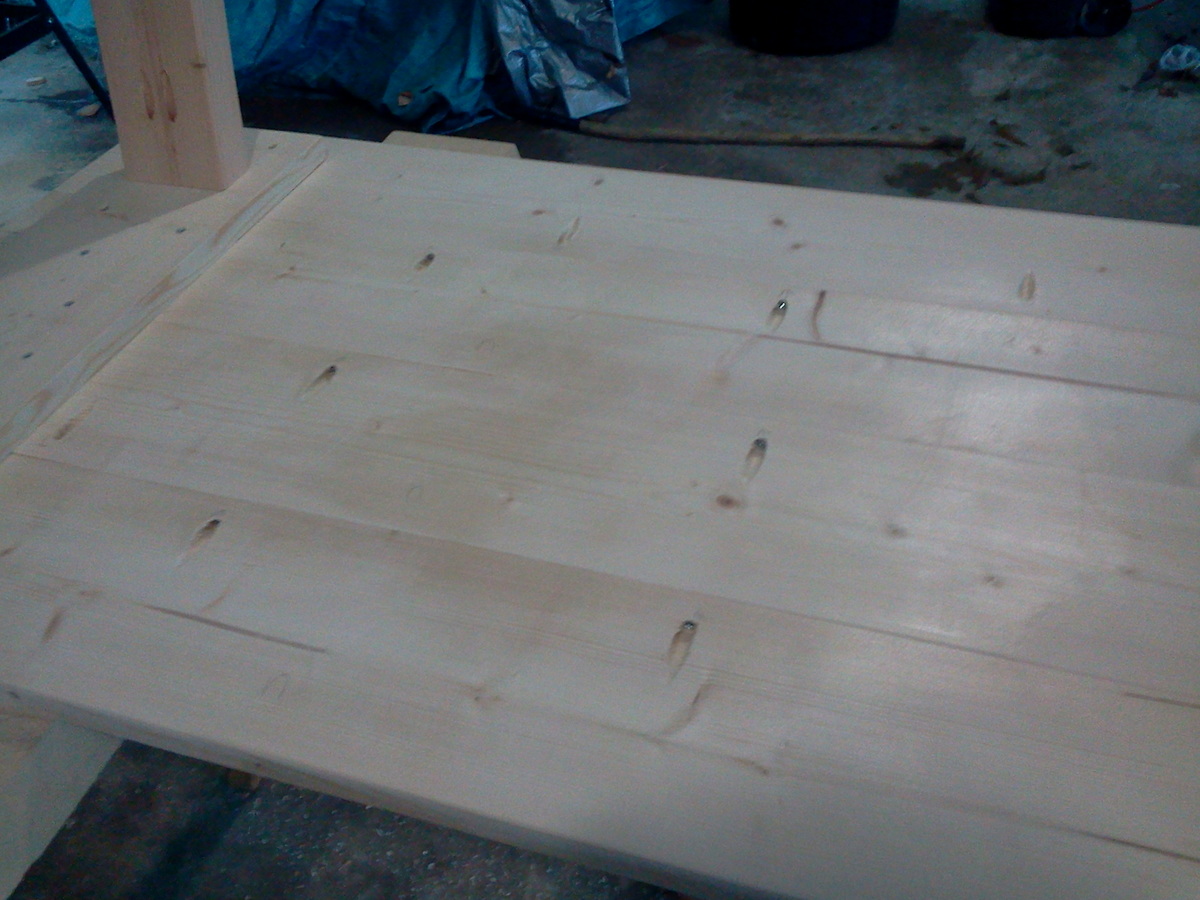
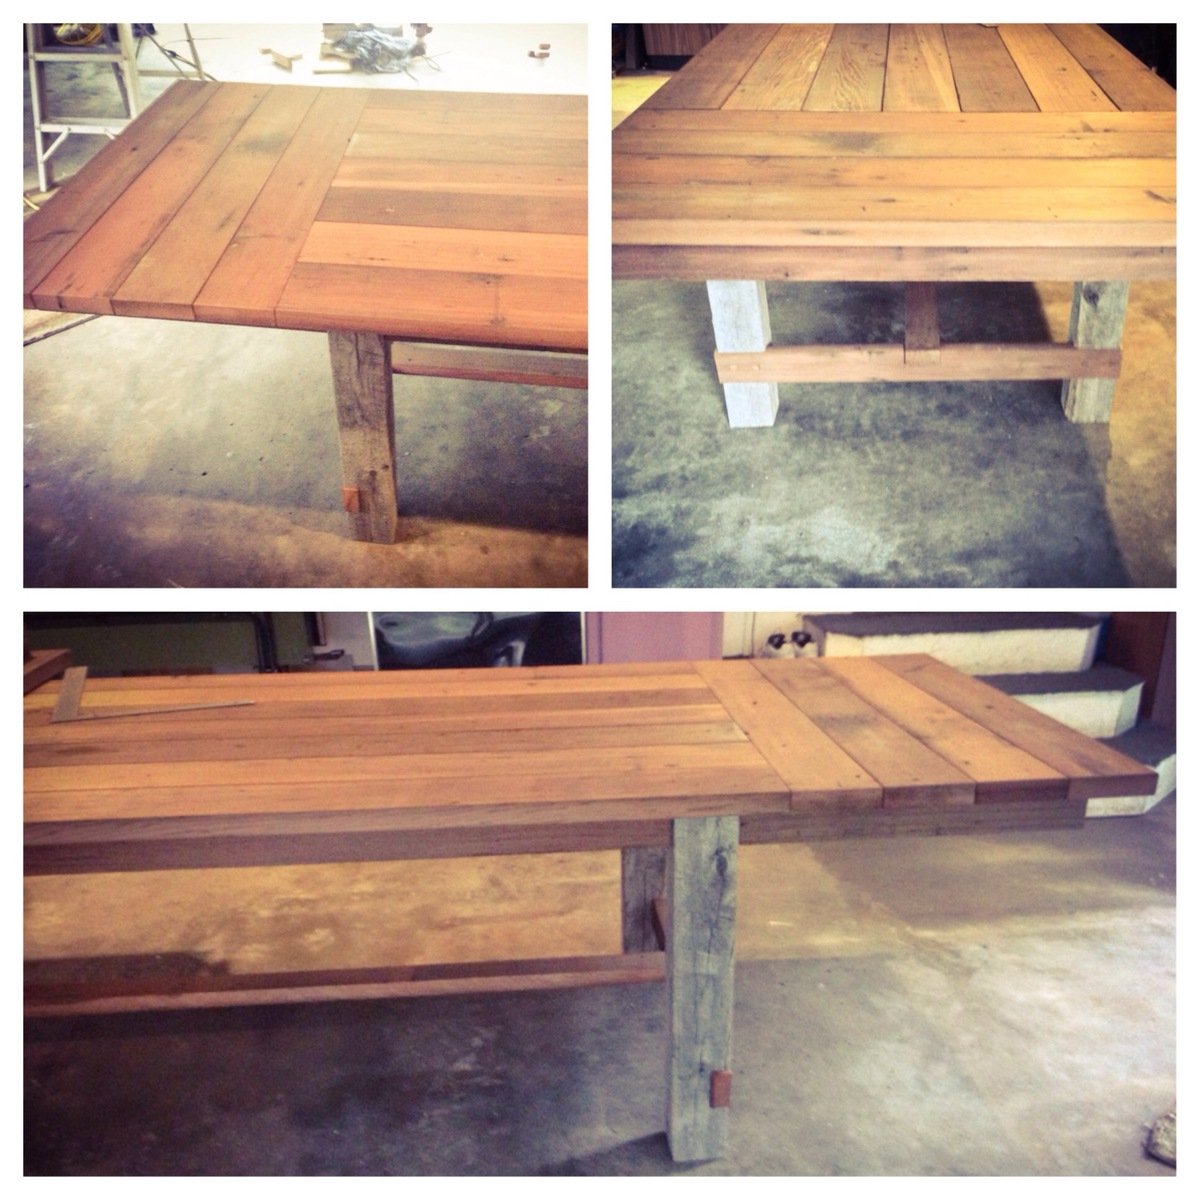
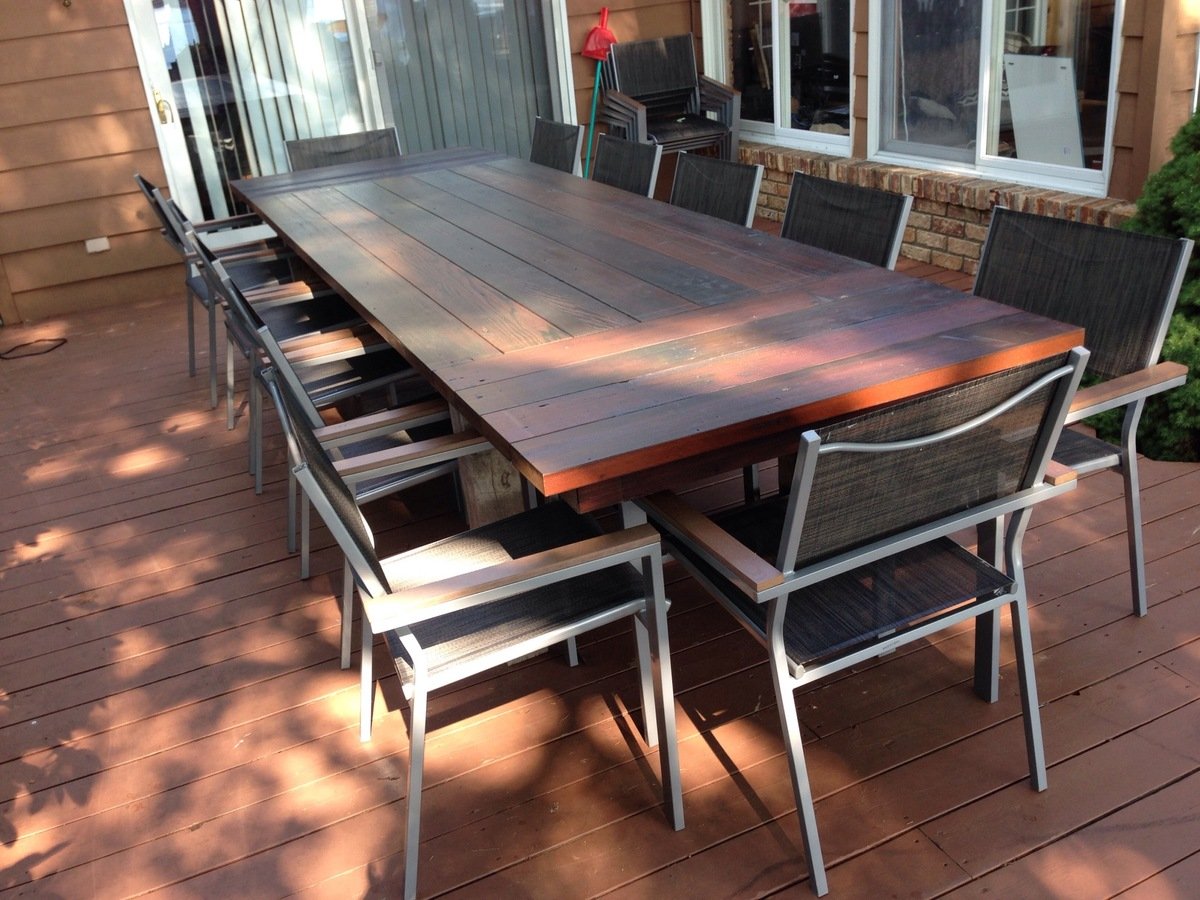
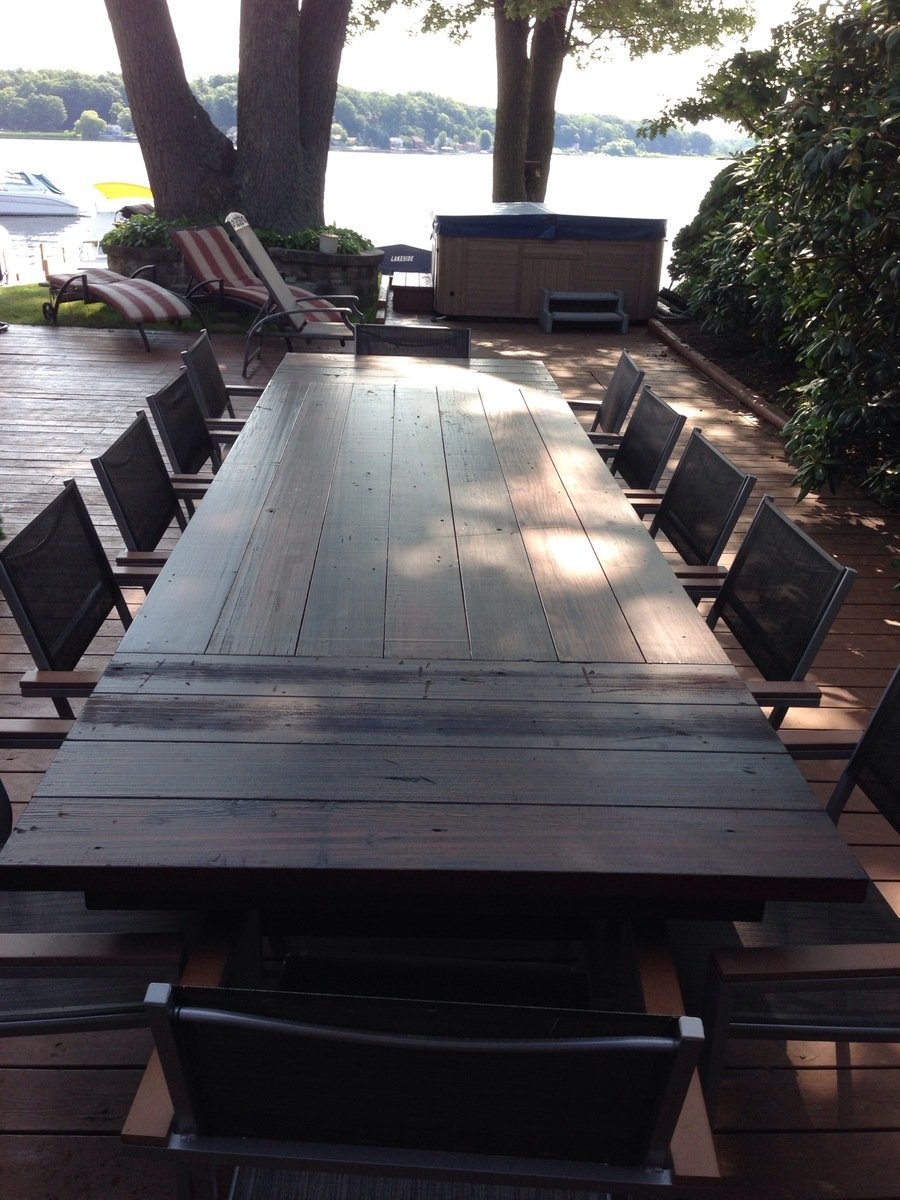
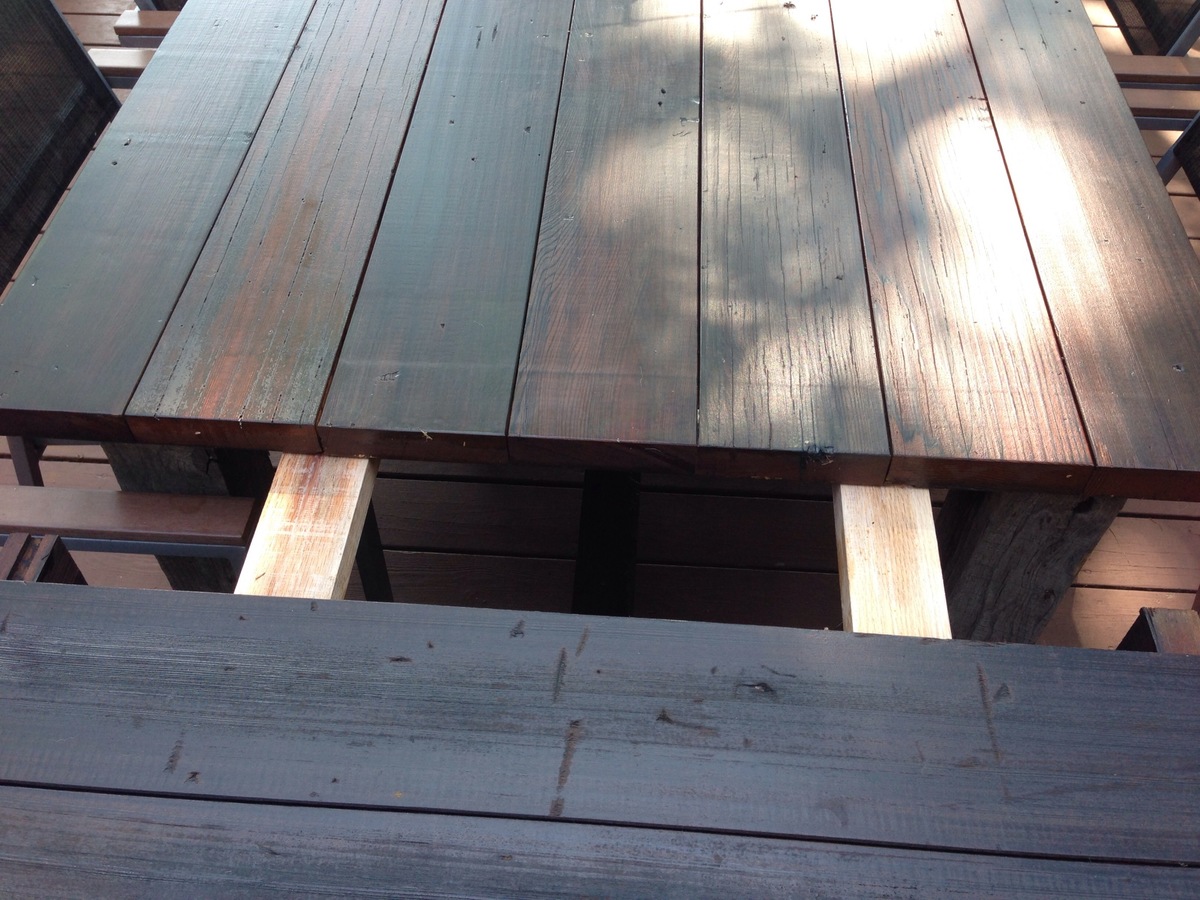
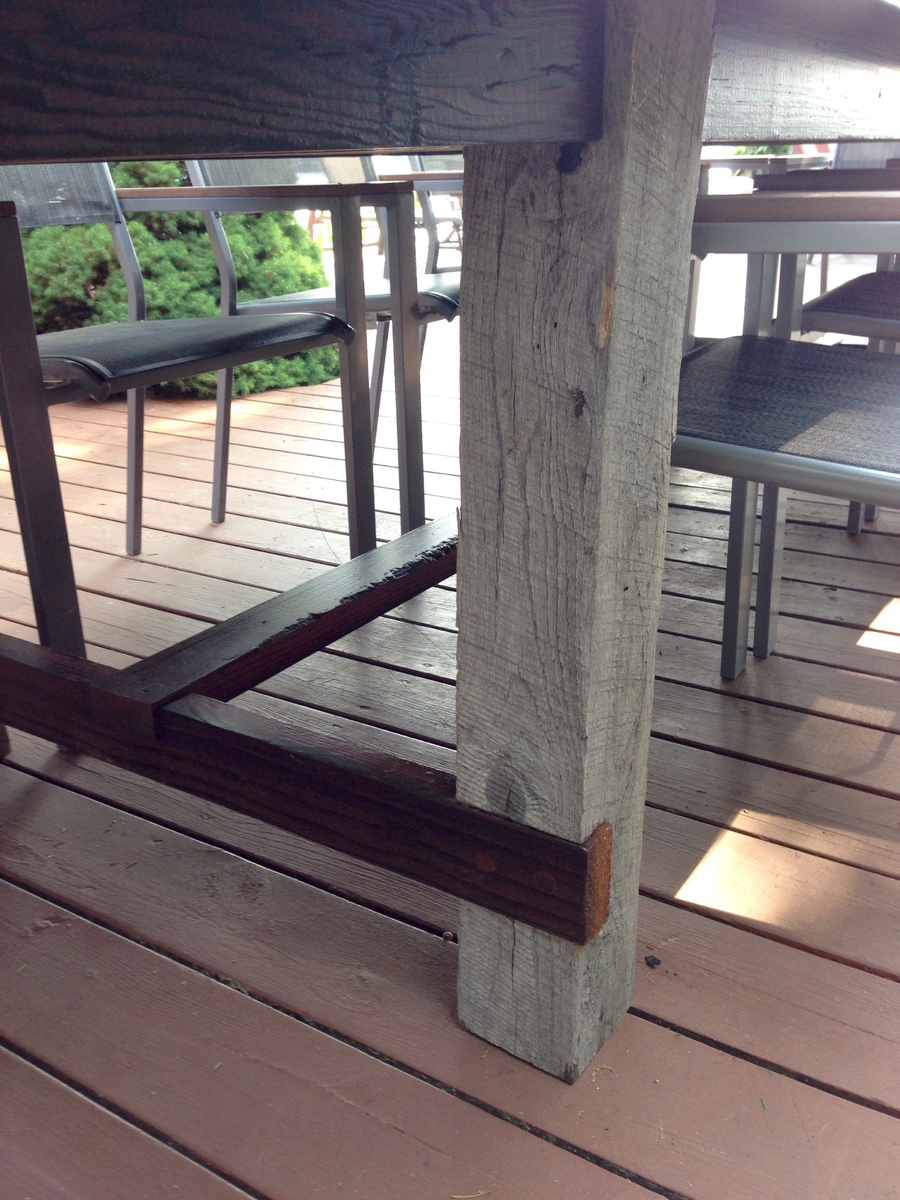
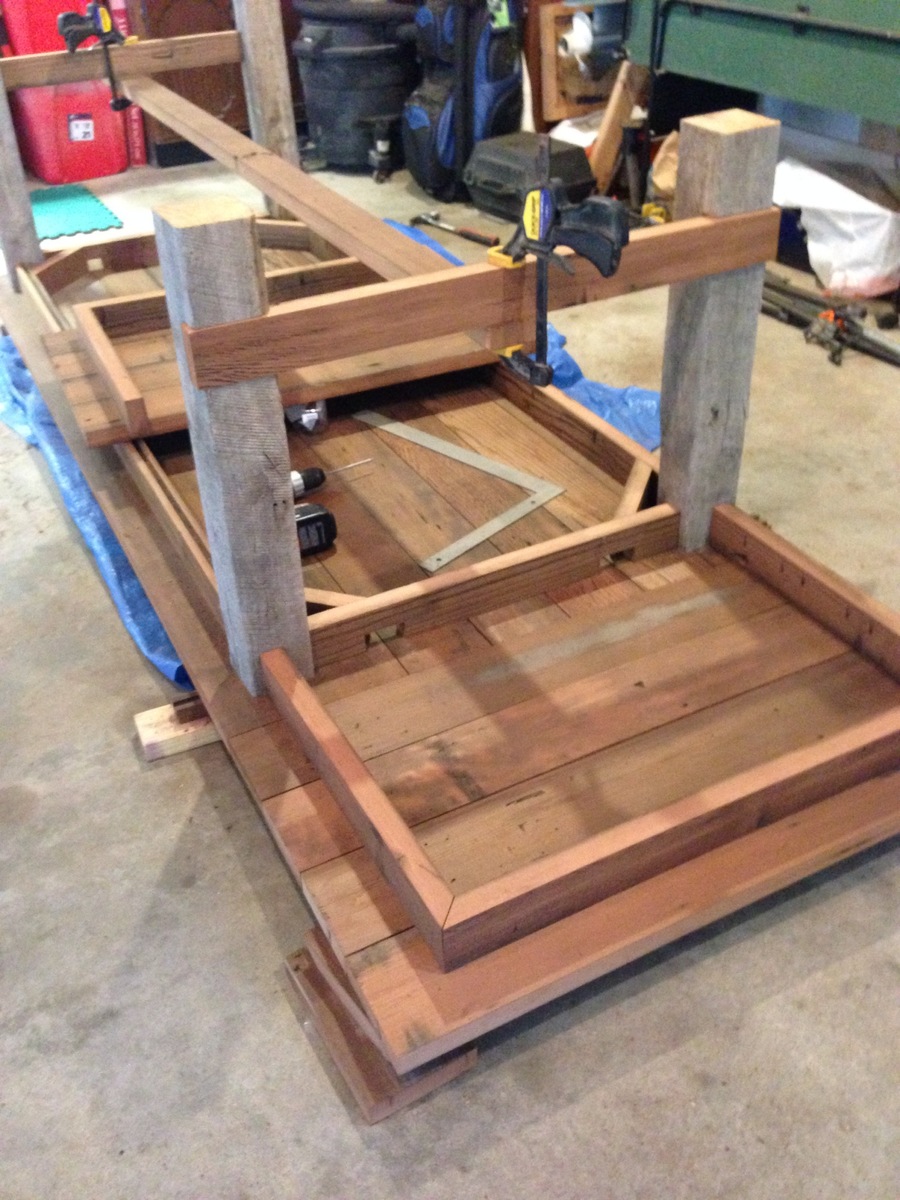
I had no experience building furniture prior to this project but I wanted a 12 ft outdoor table and could not find one. This tables center section is 8 ft and was built roughly following the plans for the farmhouse table. I added two 2 ft extensions at each end making the overall table 12 ft. The extensions included aprons so when installed they look to be part of the table. The extensions just plug into the end apron of the center section with 2x4 oak braces which engage in the apron and under the table approximately 2 ft from end. There is no visual sagging of the extensions. I finished the table with Sikkens DEK finish.
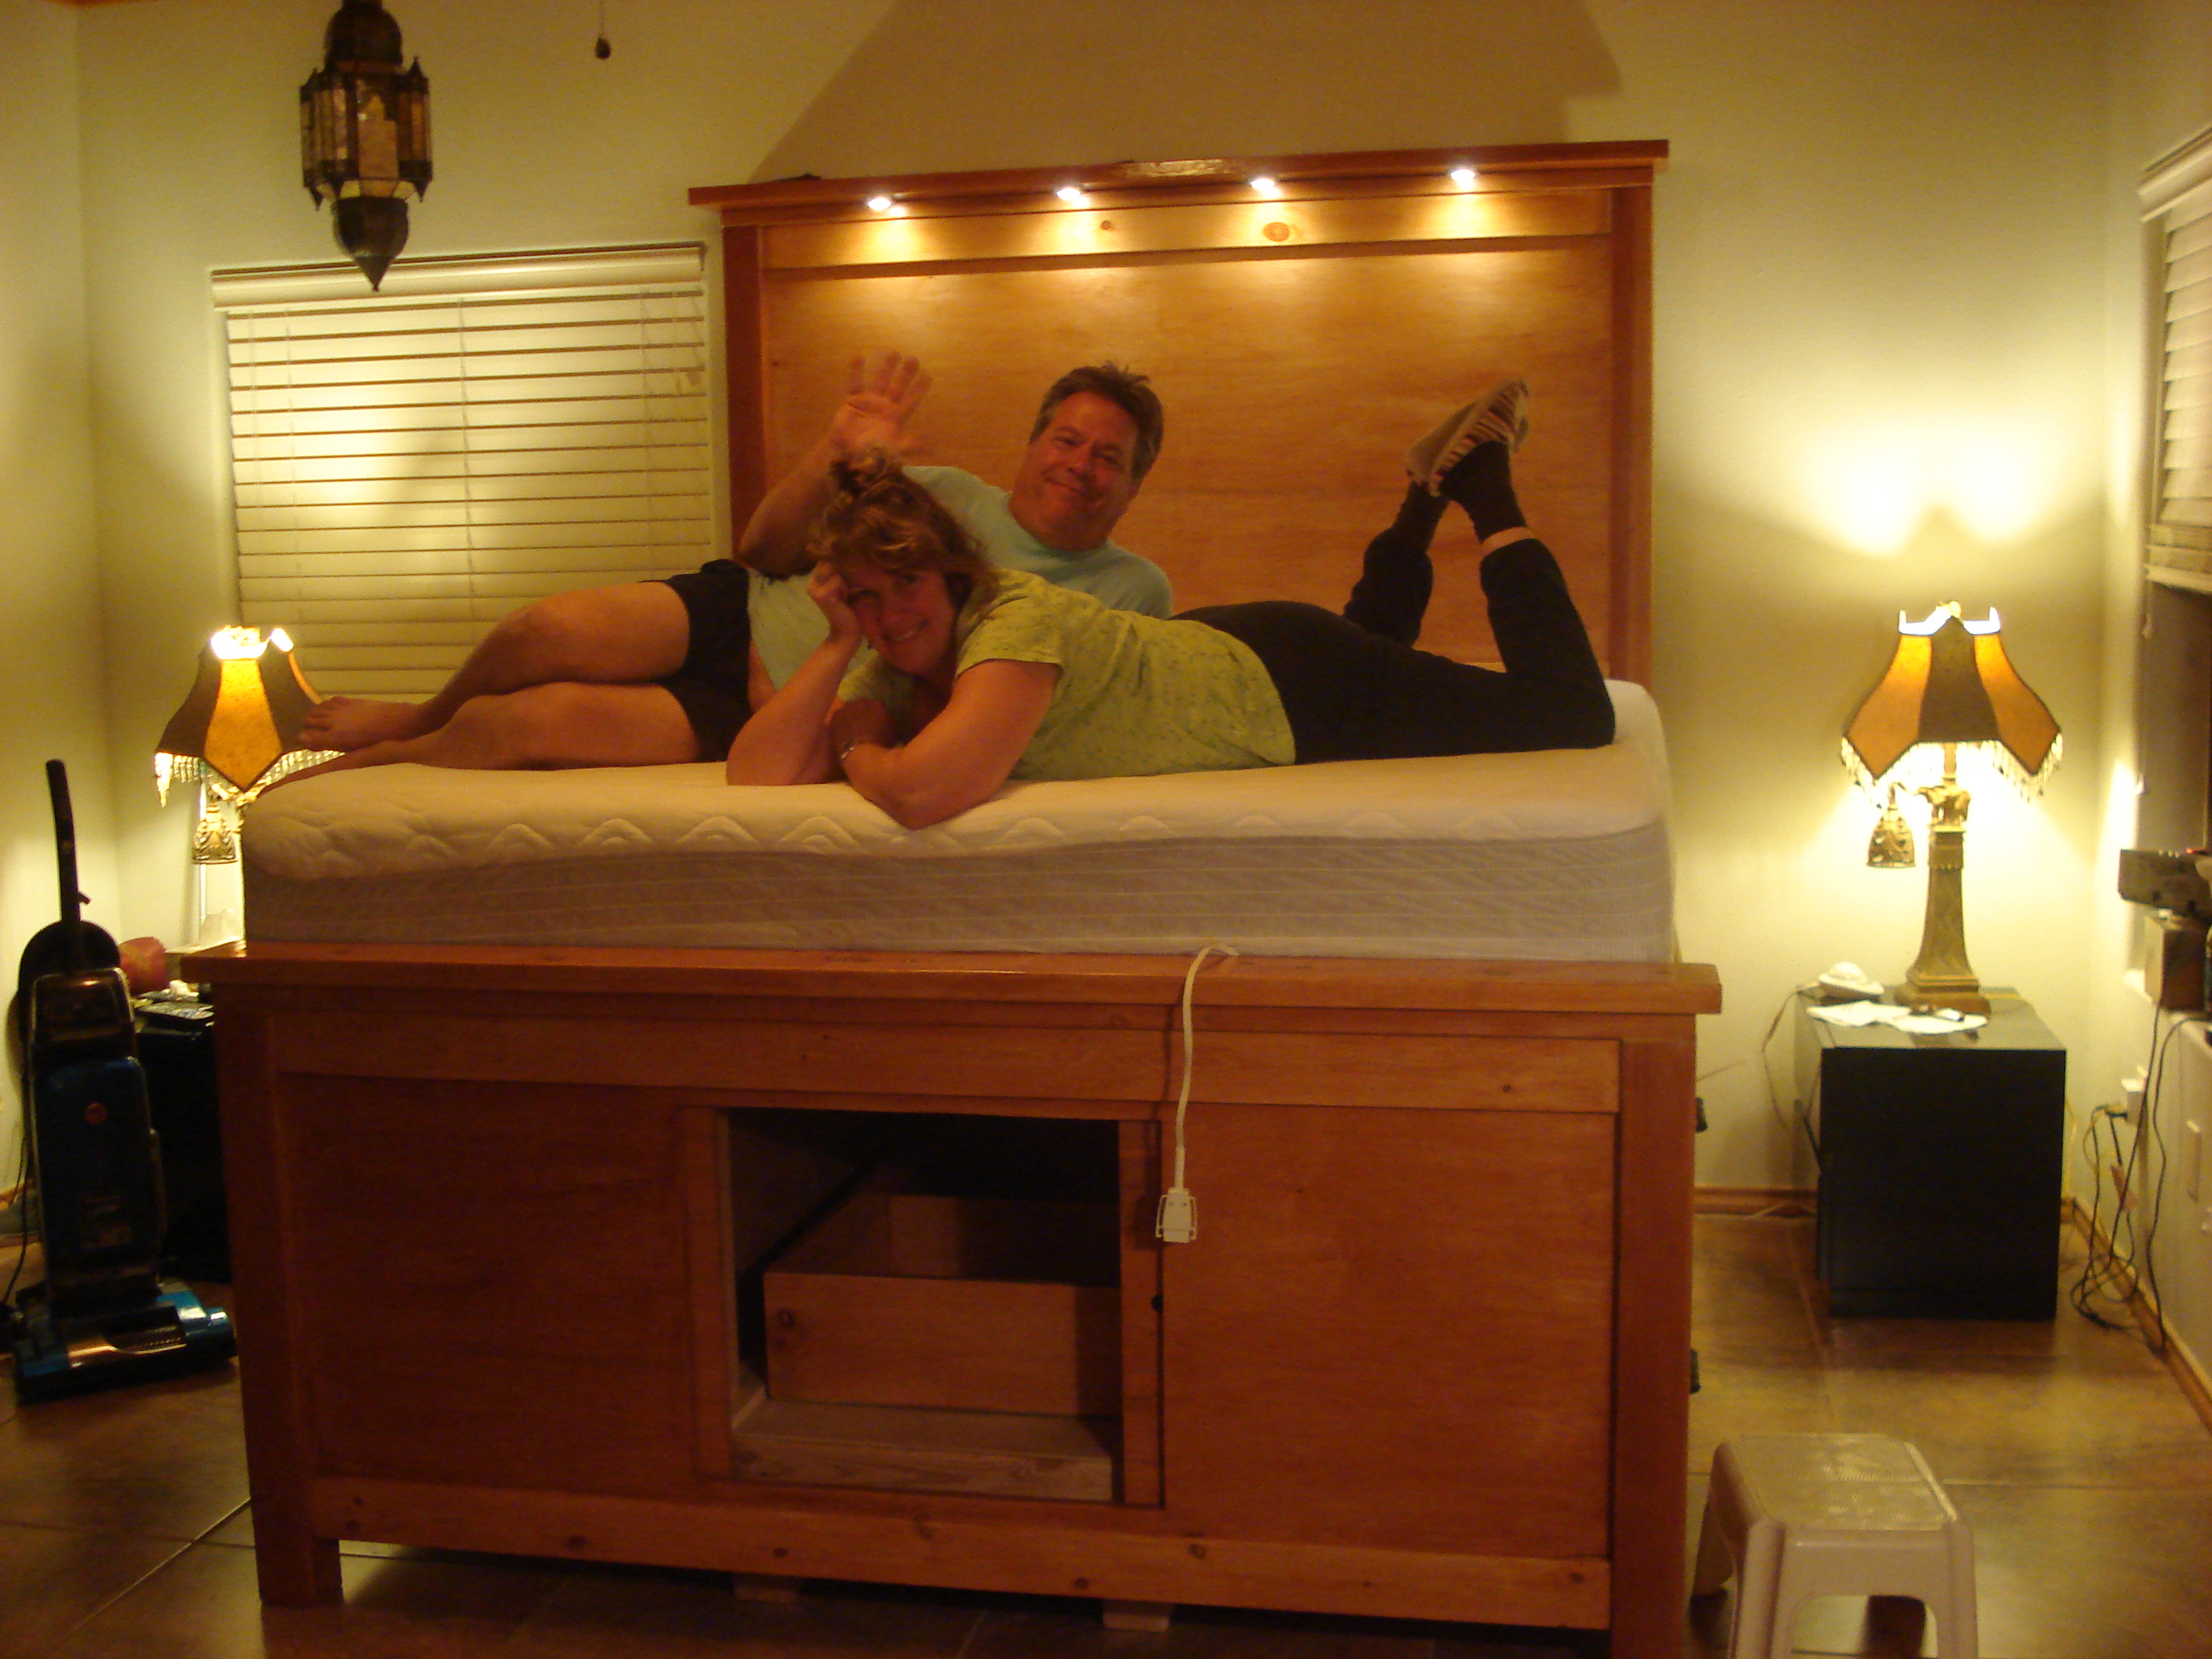
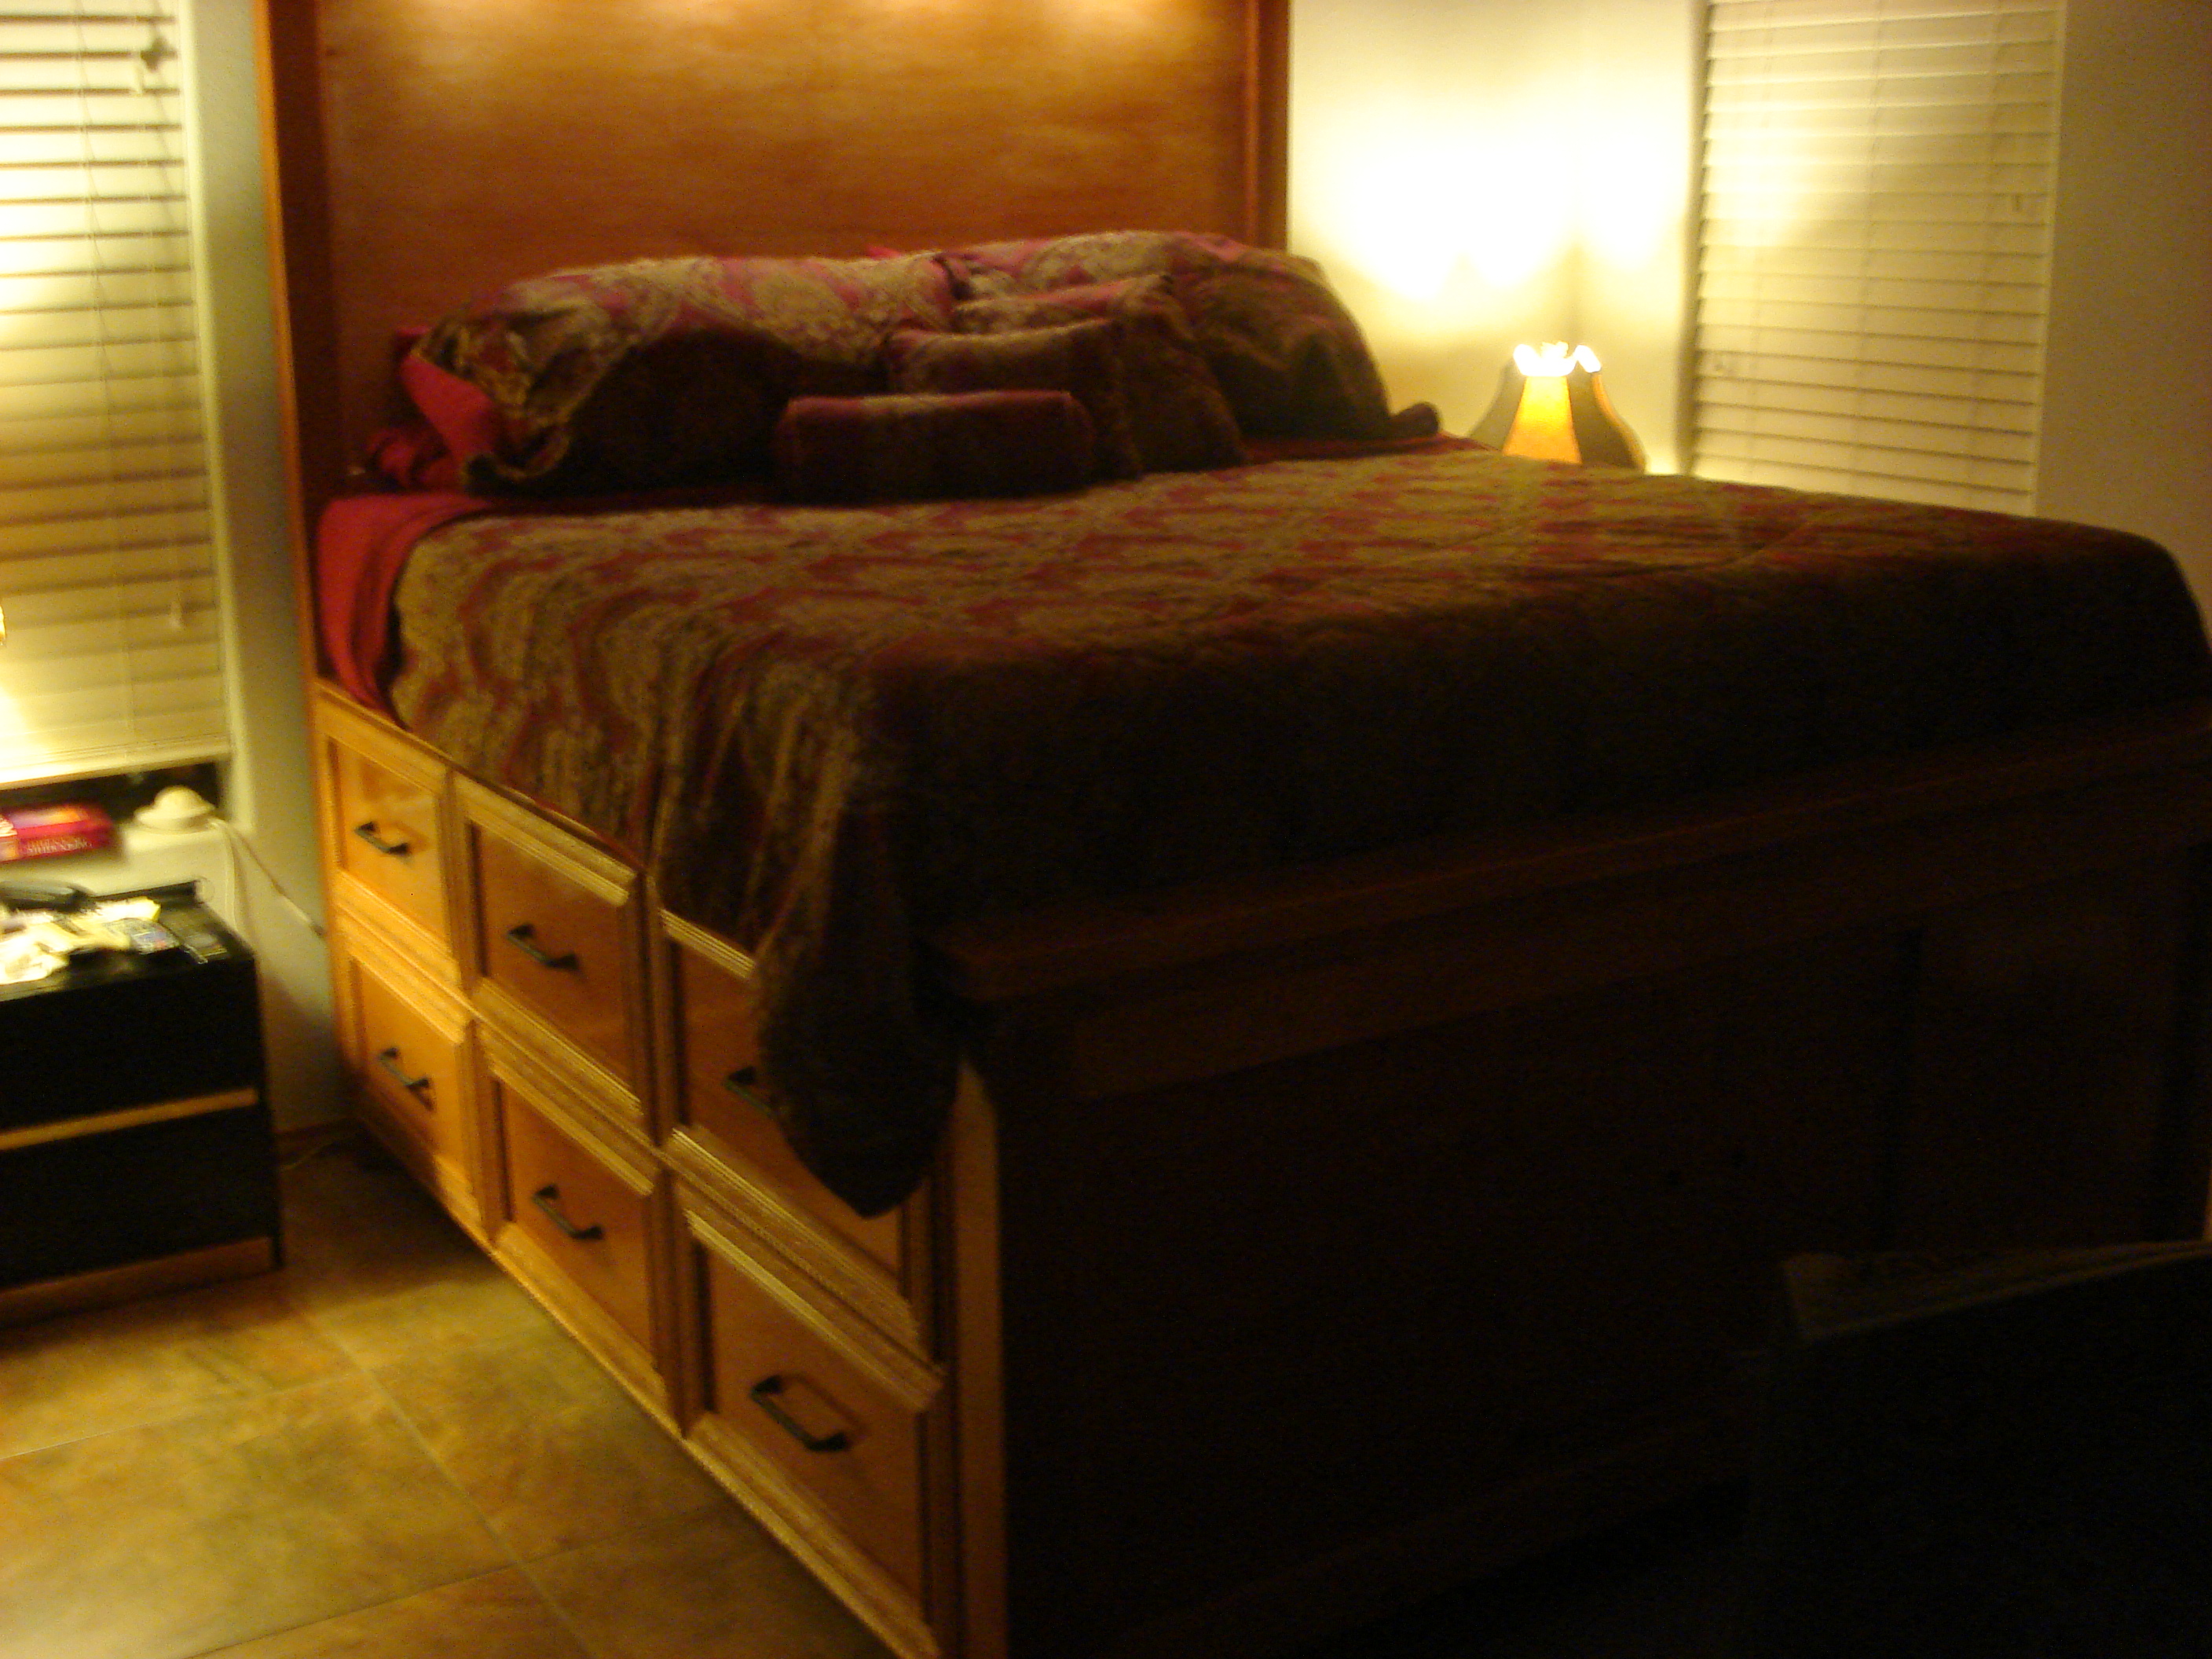
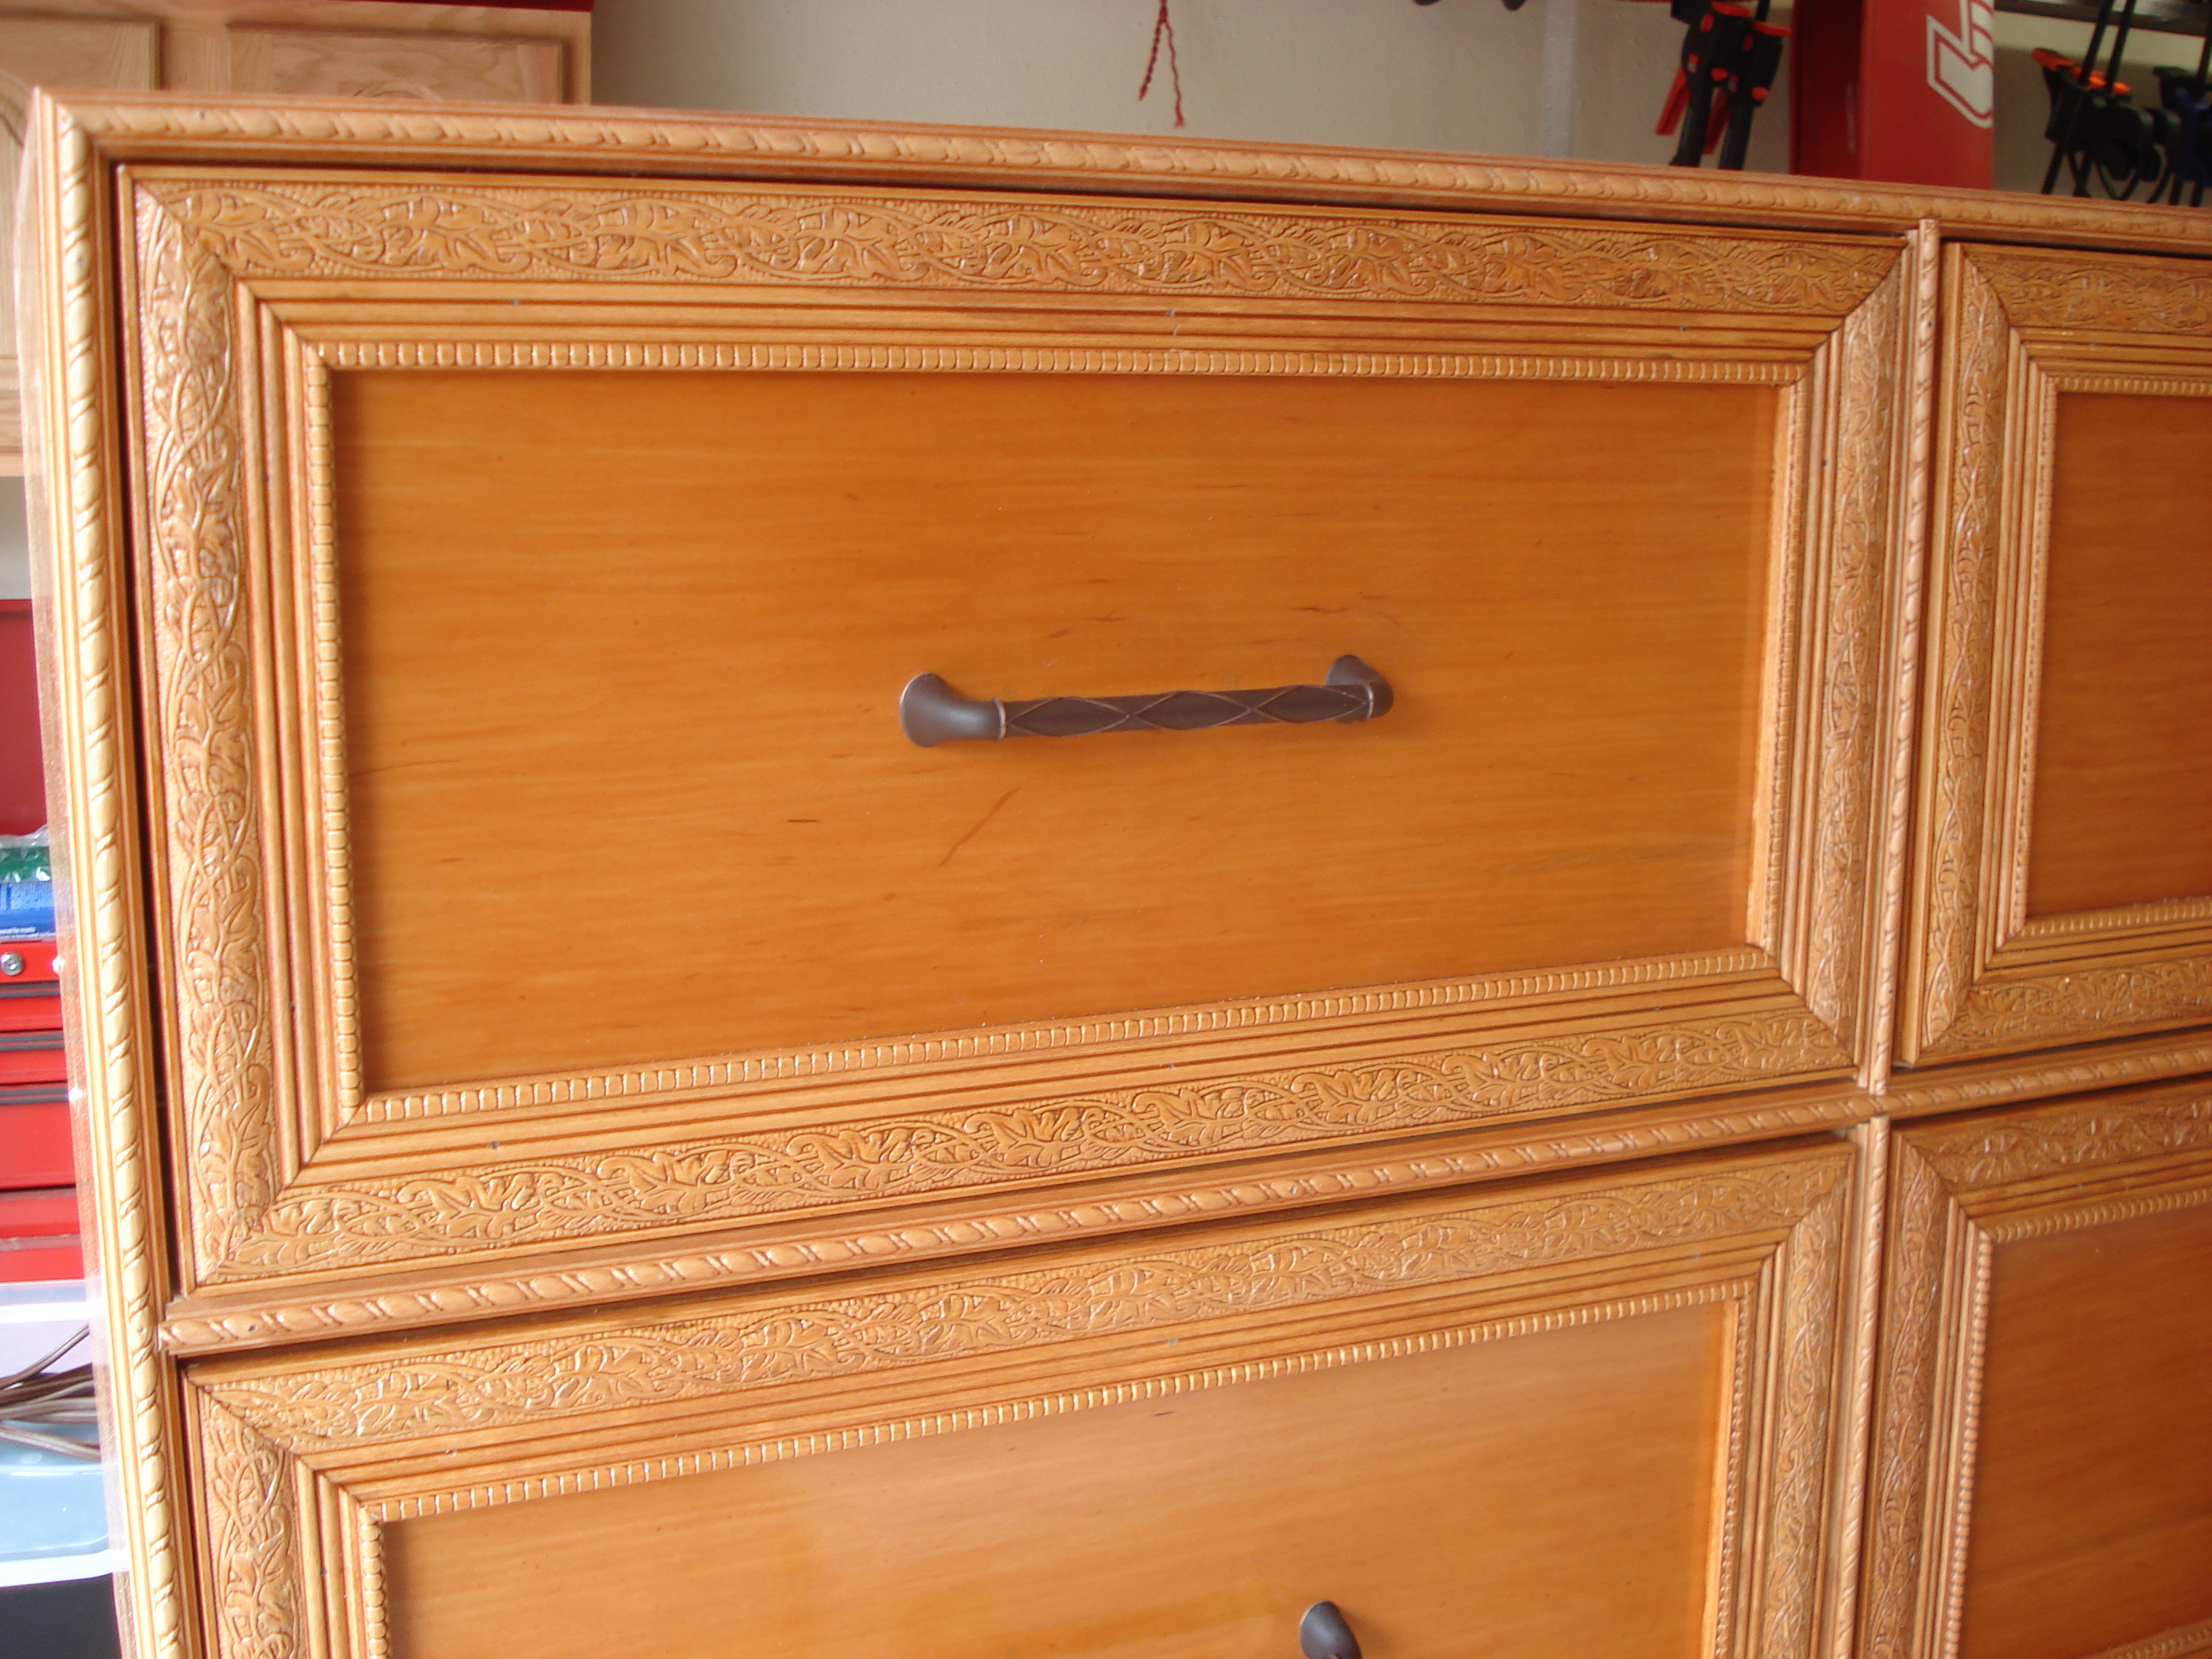
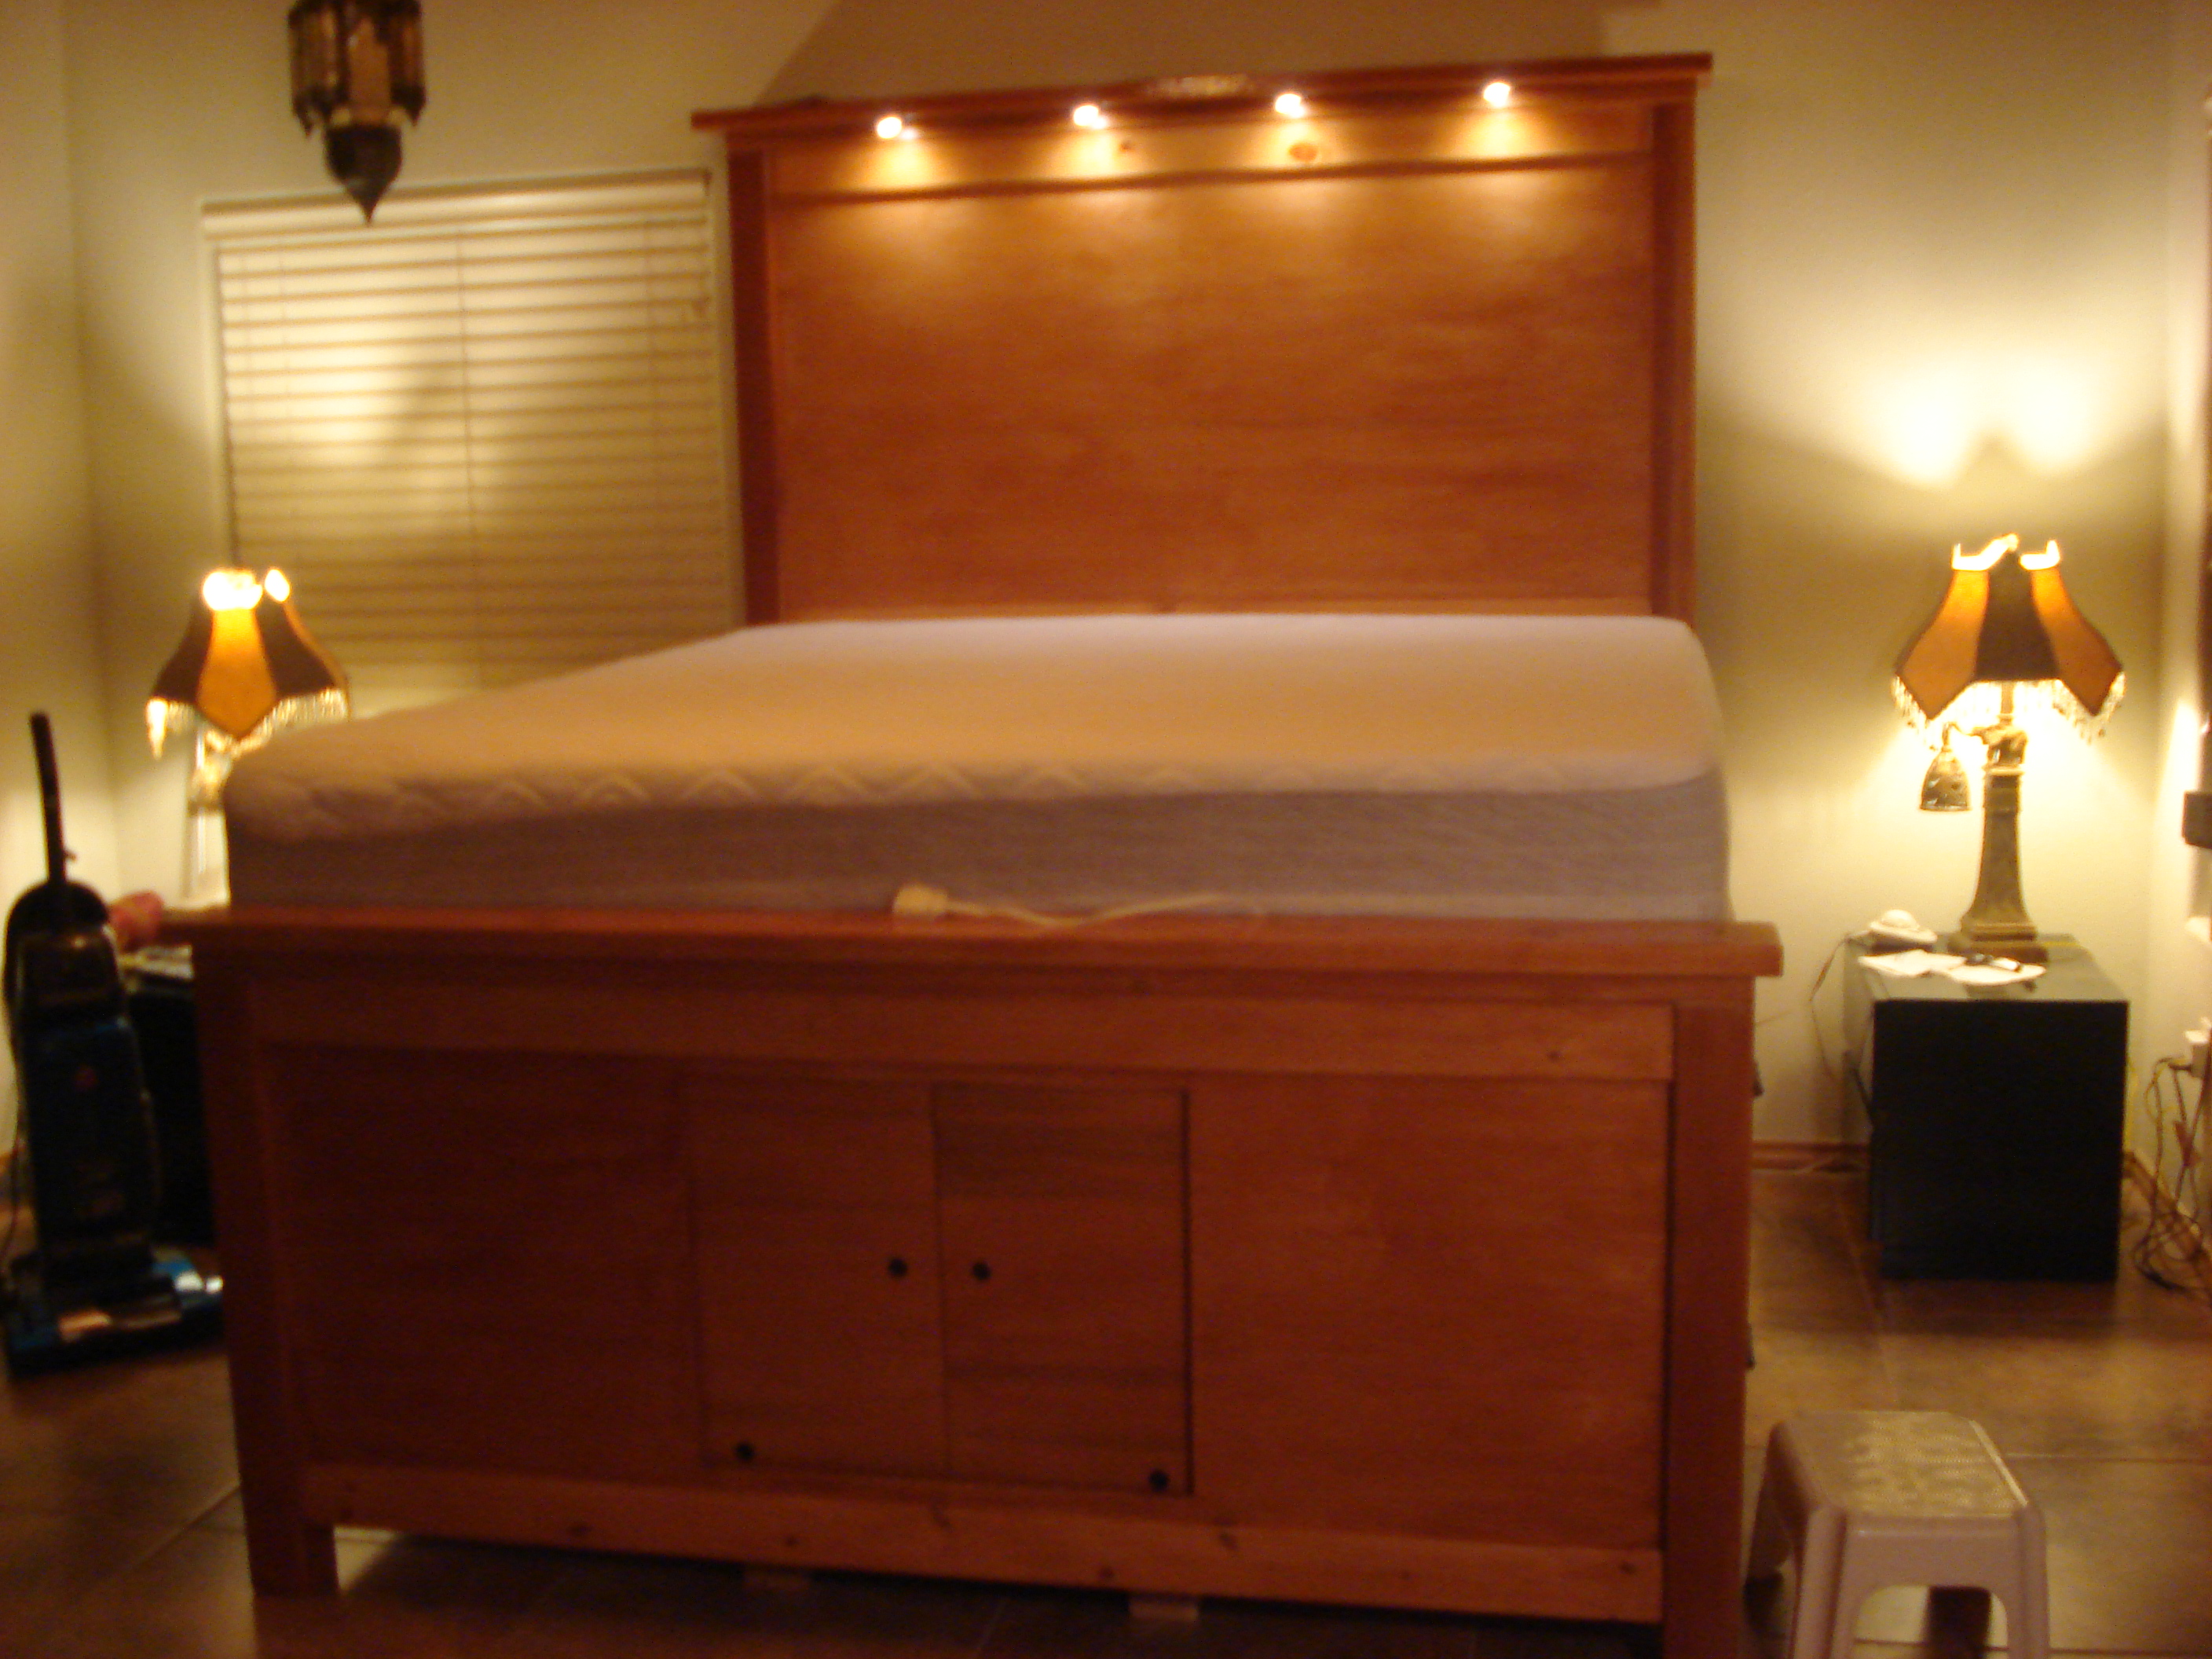
We had bought a house in New Mexico that was sadly lacking for closet space, as well as square footage for furniture. I was looking at Ana White's website, and saw the plans for the Farmhouse storage bed. It was good, but needed some steroids. I got out the calculator, and started upsizing EVERYTHING. What happened was, BEDZILLA!! King sized bed with 12 giant drawers. I also added lighting to the headboard for reading. It was a blast to build, and I was very pleased with, and proud of the finished product.
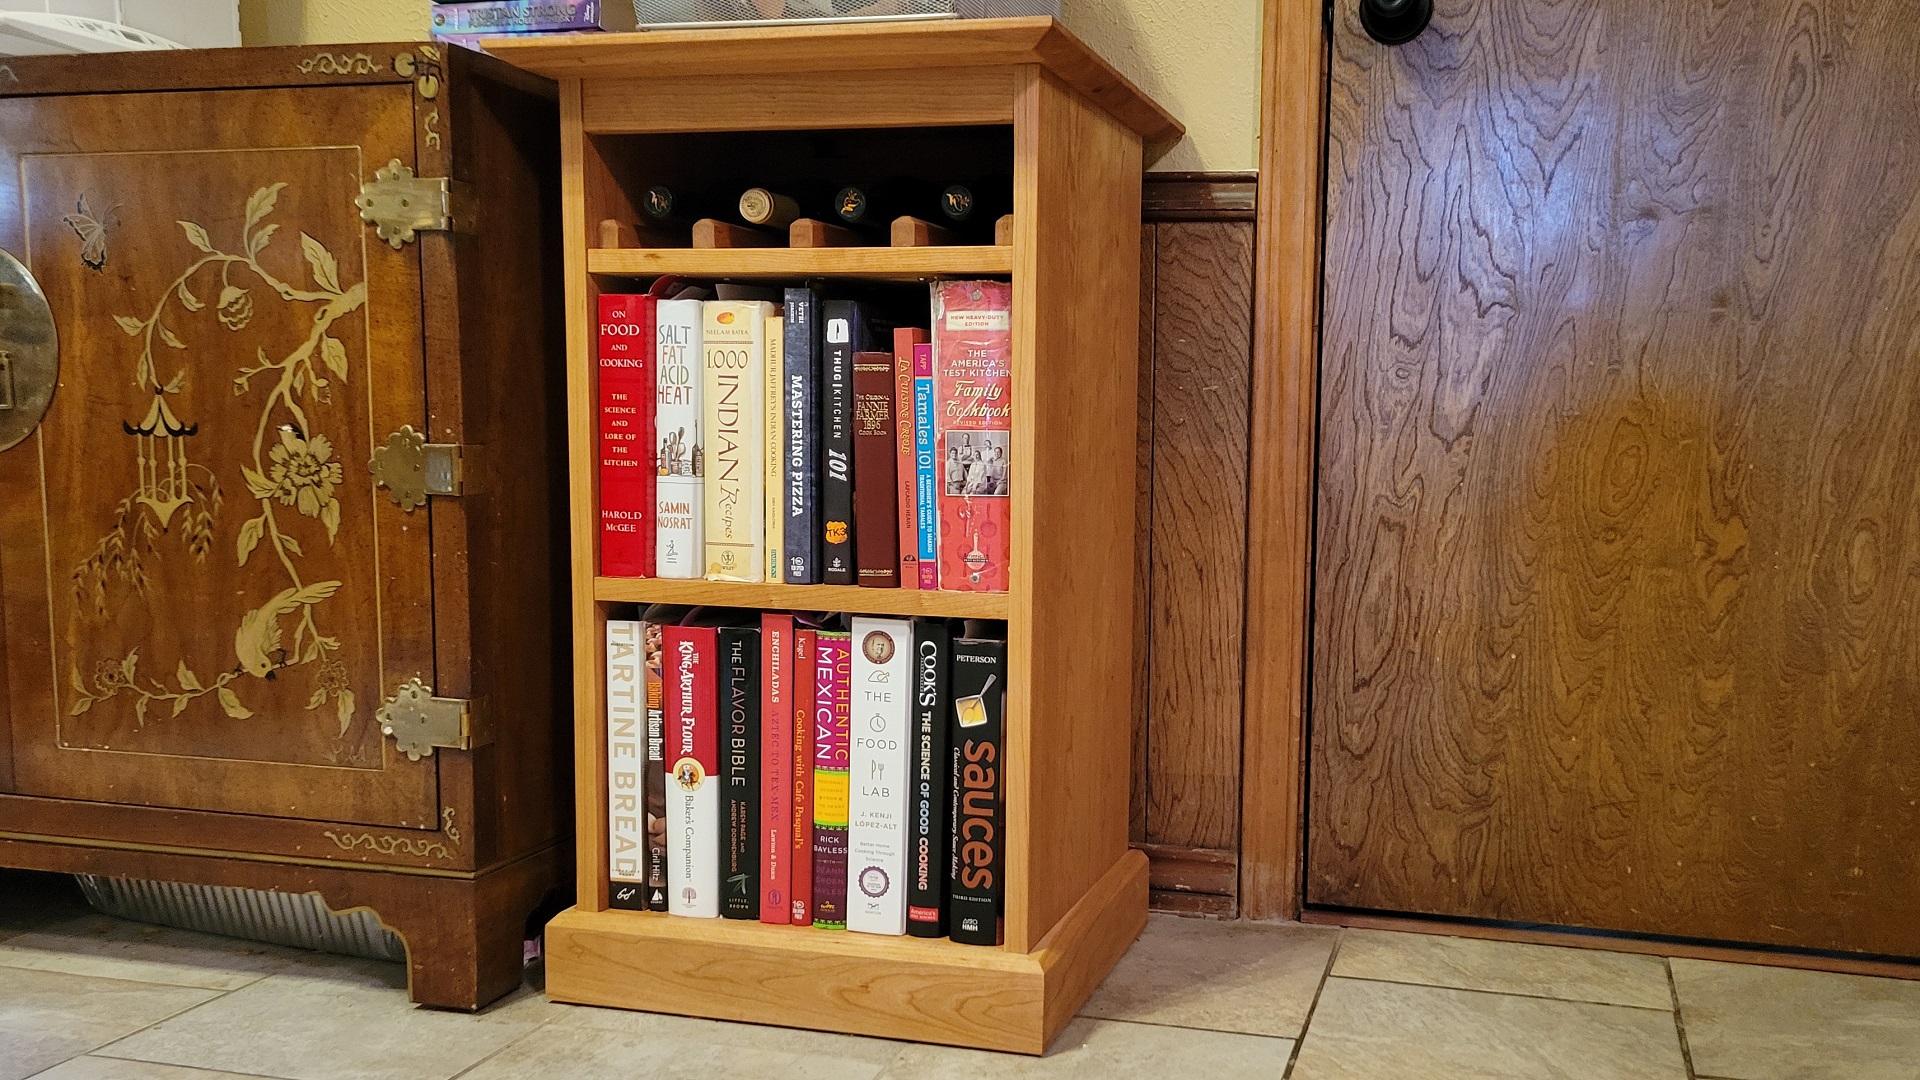
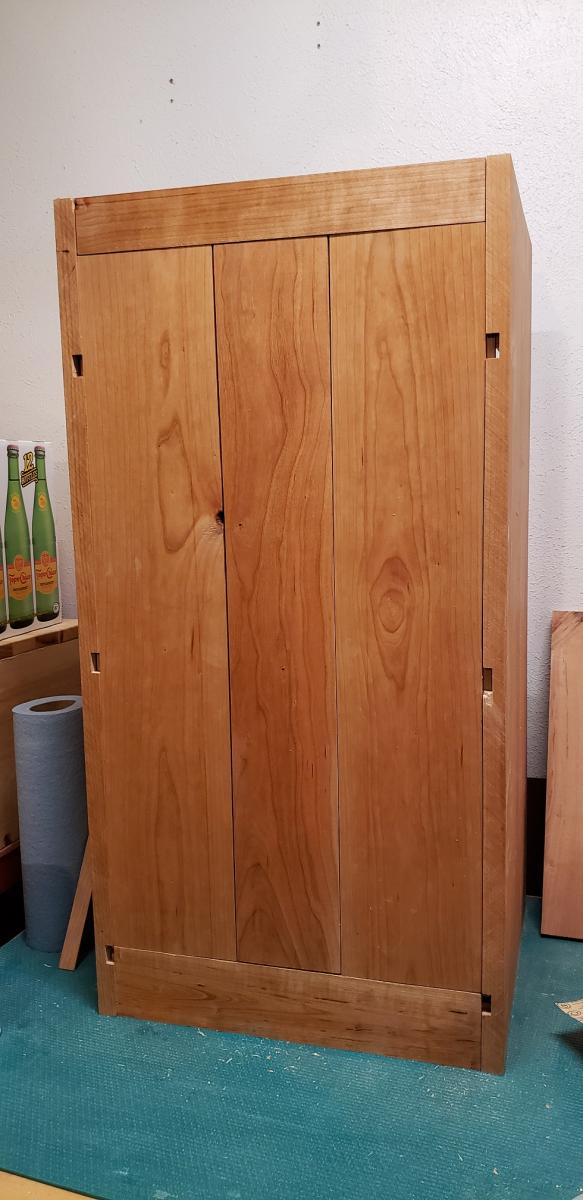
I made a small book case that includes a wine shelf.
It is all solid cherry. I used a shiplap paneling design for the back panel.
It is finished with many coats of natural color Danish Oil.
Here's a video of how I built it:
https://www.youtube.com/watch?v=Hxil44OfJ9M

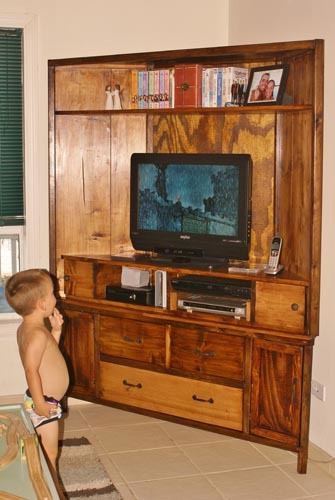
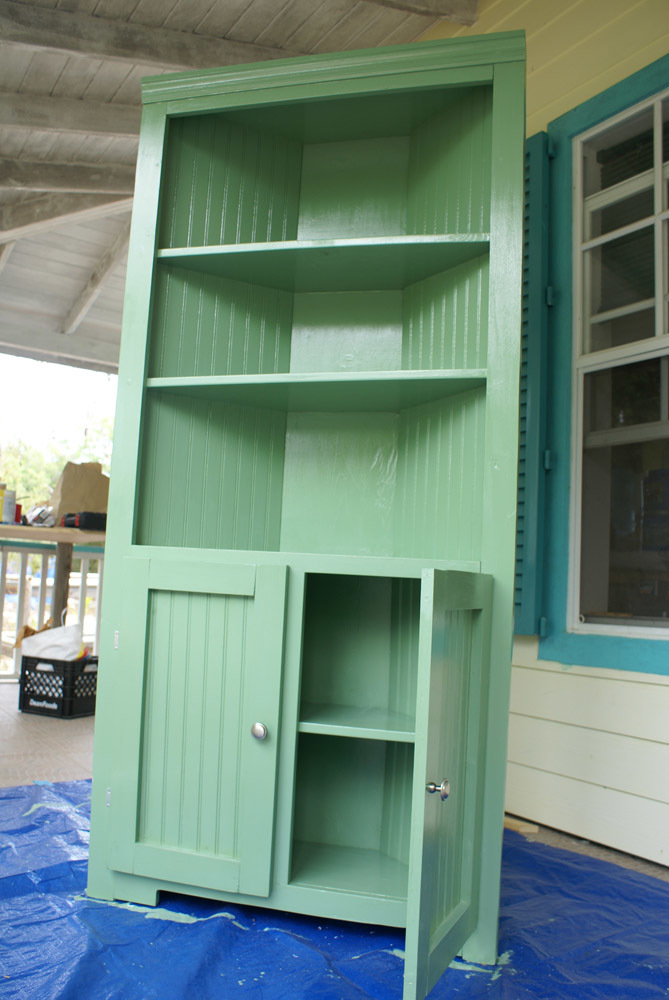
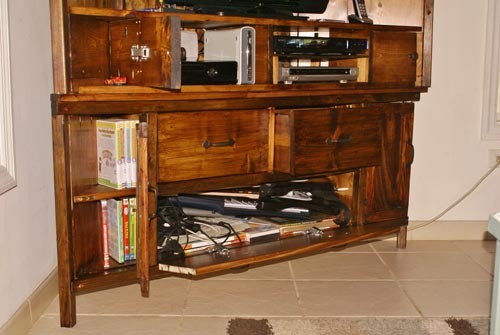
We were in desperate need of a corner media unit. I just know that Ana will post something incredible for this soon, but we just couldn't wait any longer. SO...I 'TRIED' to modify her lovely Cabin Collection Media Console & Hutch. Her plans were great, and I pretty much followed them step-by-step and just modified corners and things to fit my need. I'll emphasize...it is NOT perfect by any means and is probably not 'done-by-the-book', but it hides all of my hubbies gamer items (rockband guitars and keyboard, wires, controllers, games, etc). AND, I built it with growing room for his biggest wish, a new t.v. :)
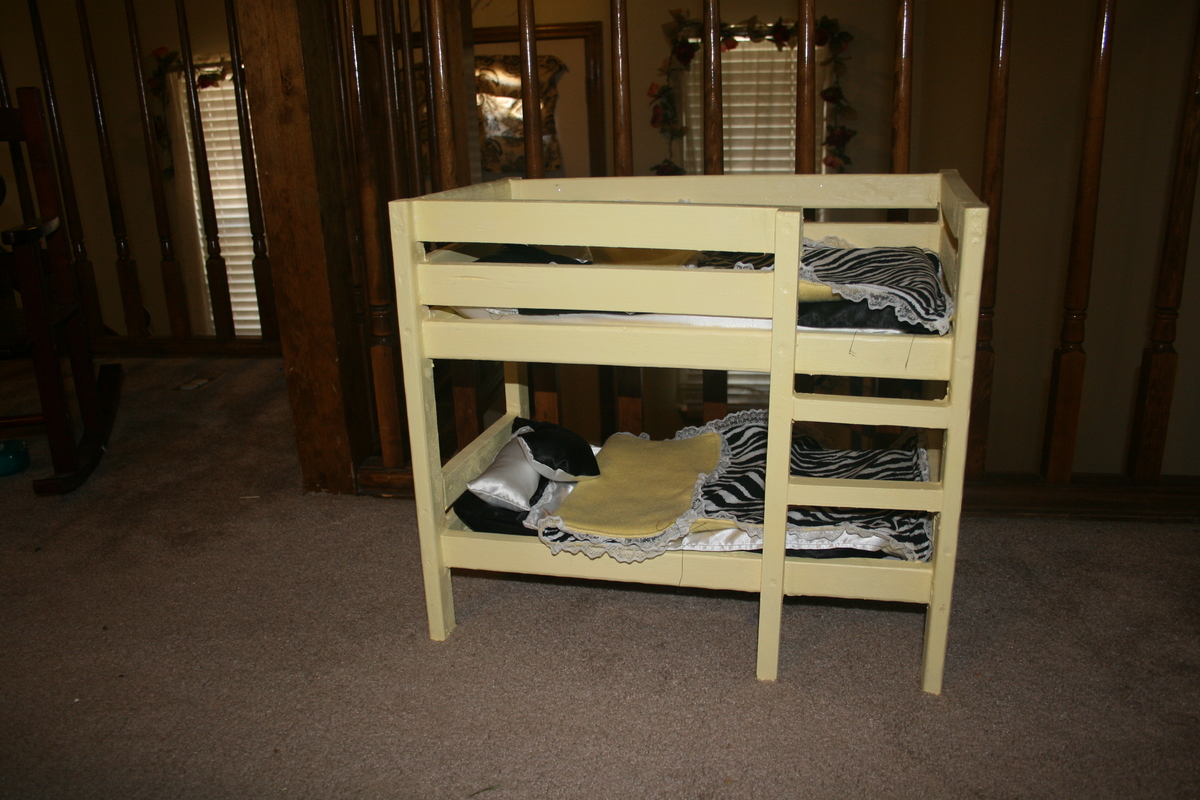
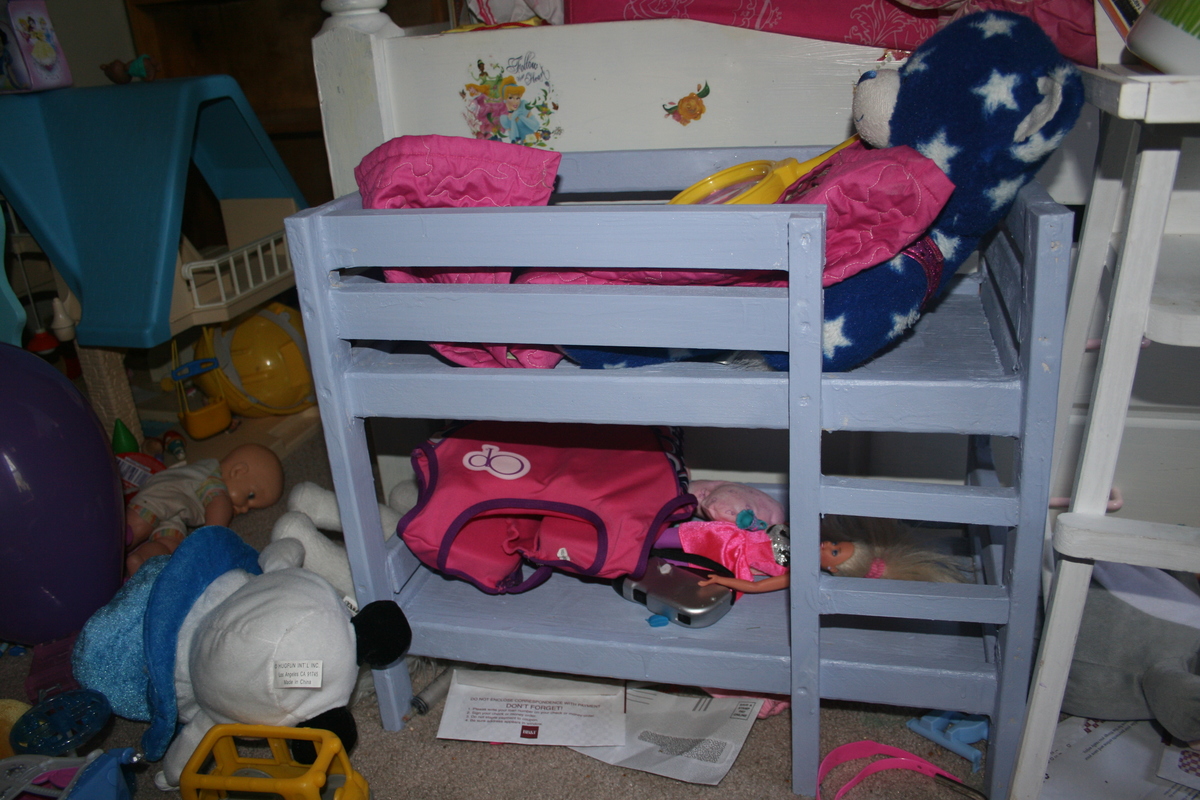
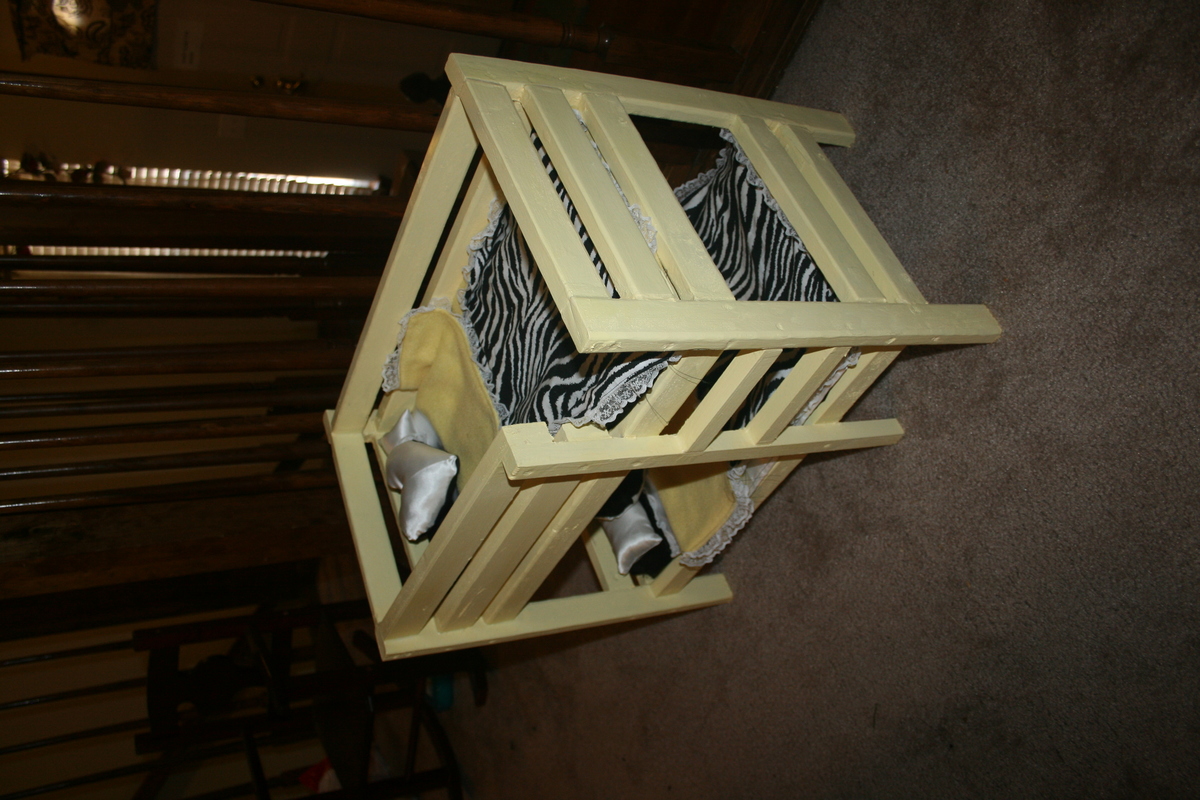
I made these bunk beds for my daughter and her best friend for her best friends birthday. My 4 year old daughter helped putting them together and painting so she got one too:) We used the paint sparkle add-ins from lowes with sample paint colors in each girls' favorite color. I haven't finished the bedding for my daughter's yet, but as you can see, it is working just fine without bedding:)
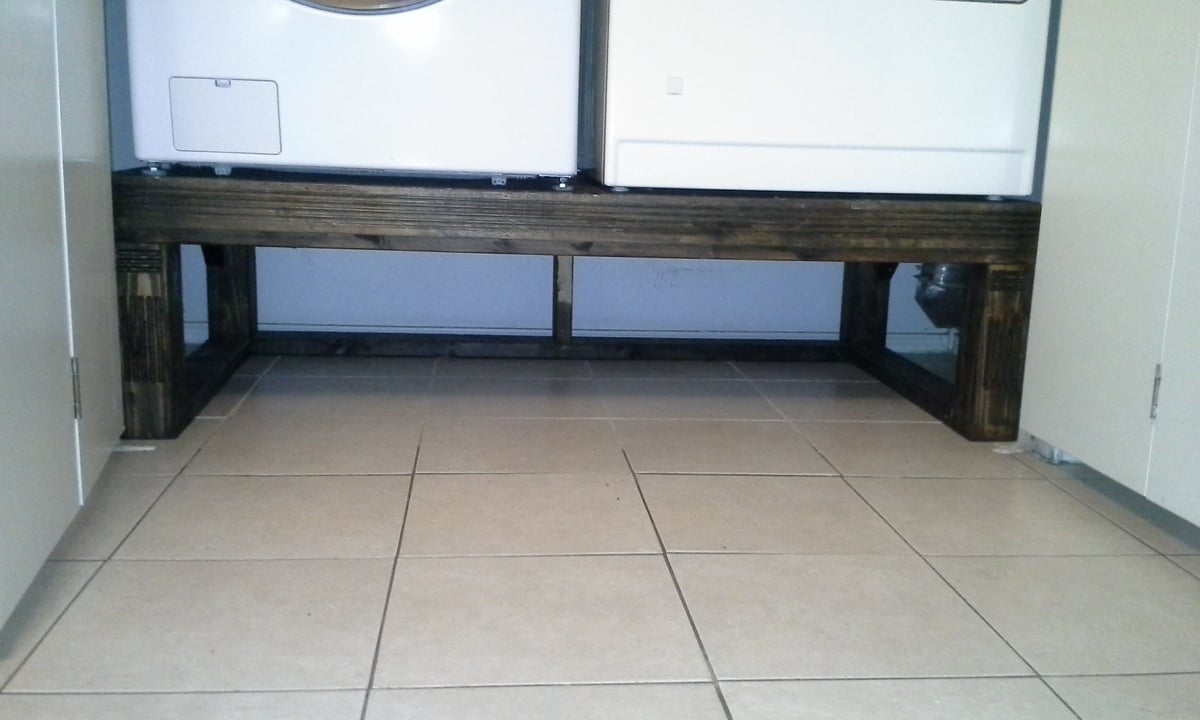
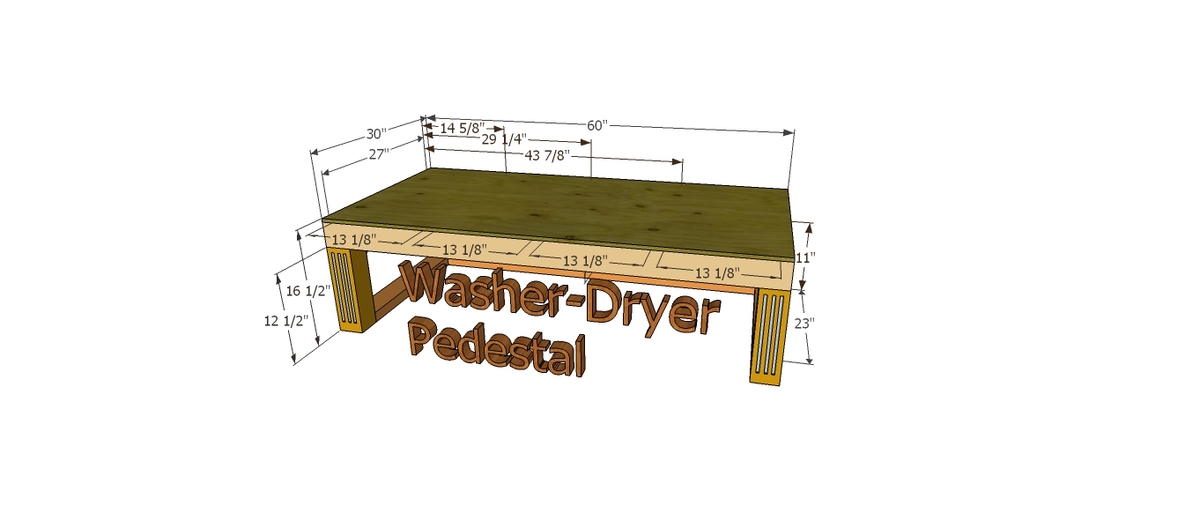
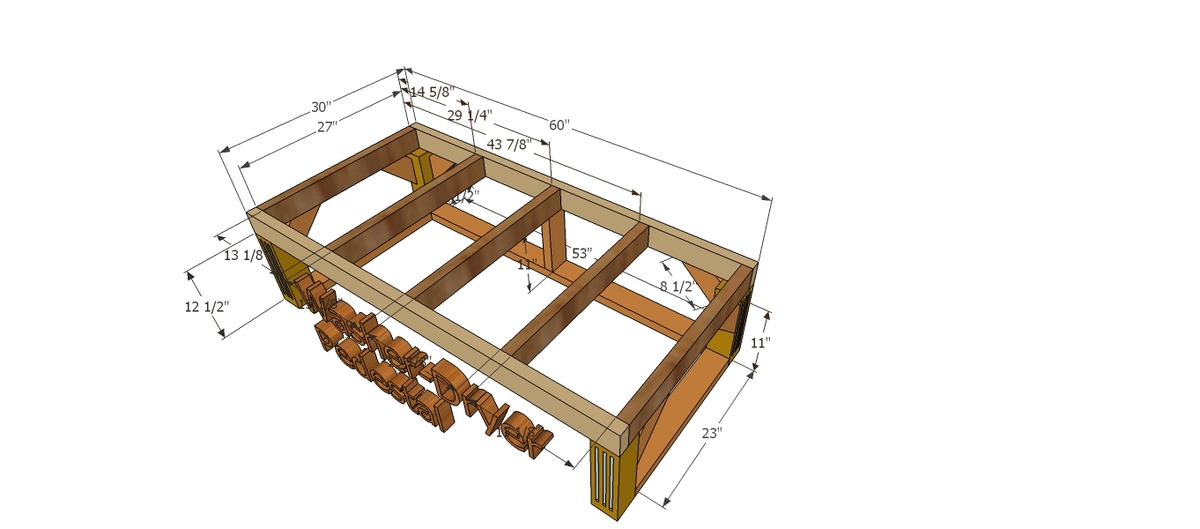
I had worked on this project a while ago, but did not had time to add my brag post. I actually modified the dimensions to fit my needs. I enjoyed making this pedestal along with my son.
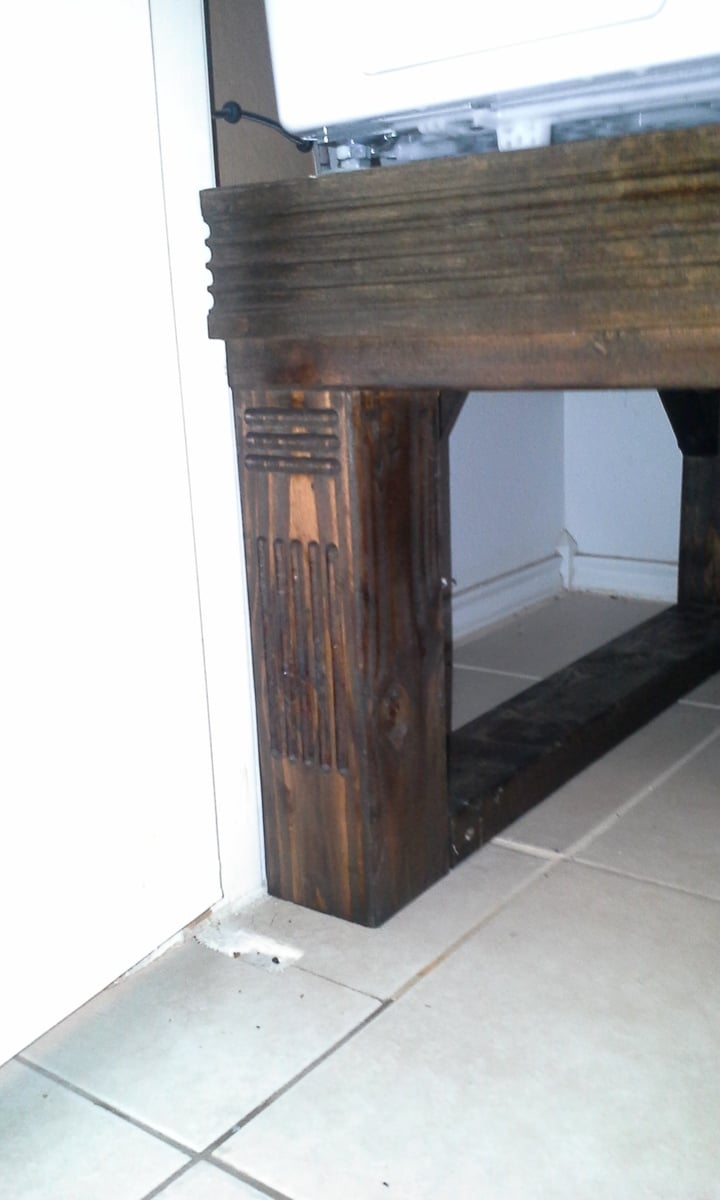
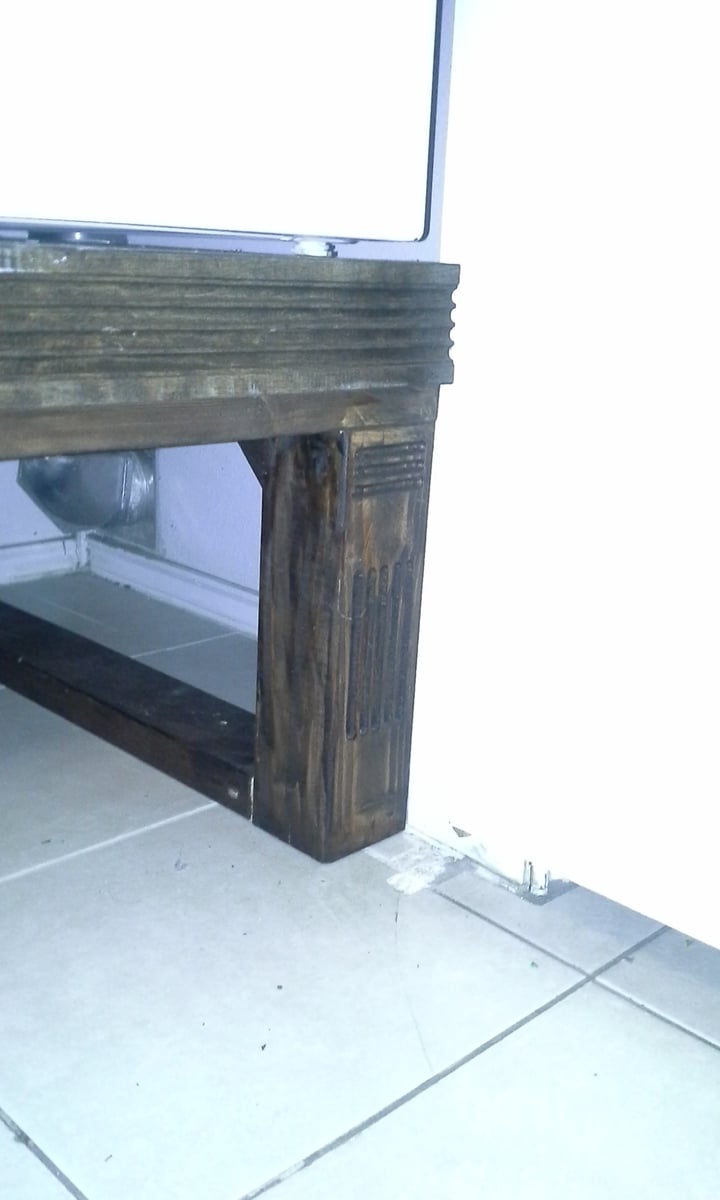
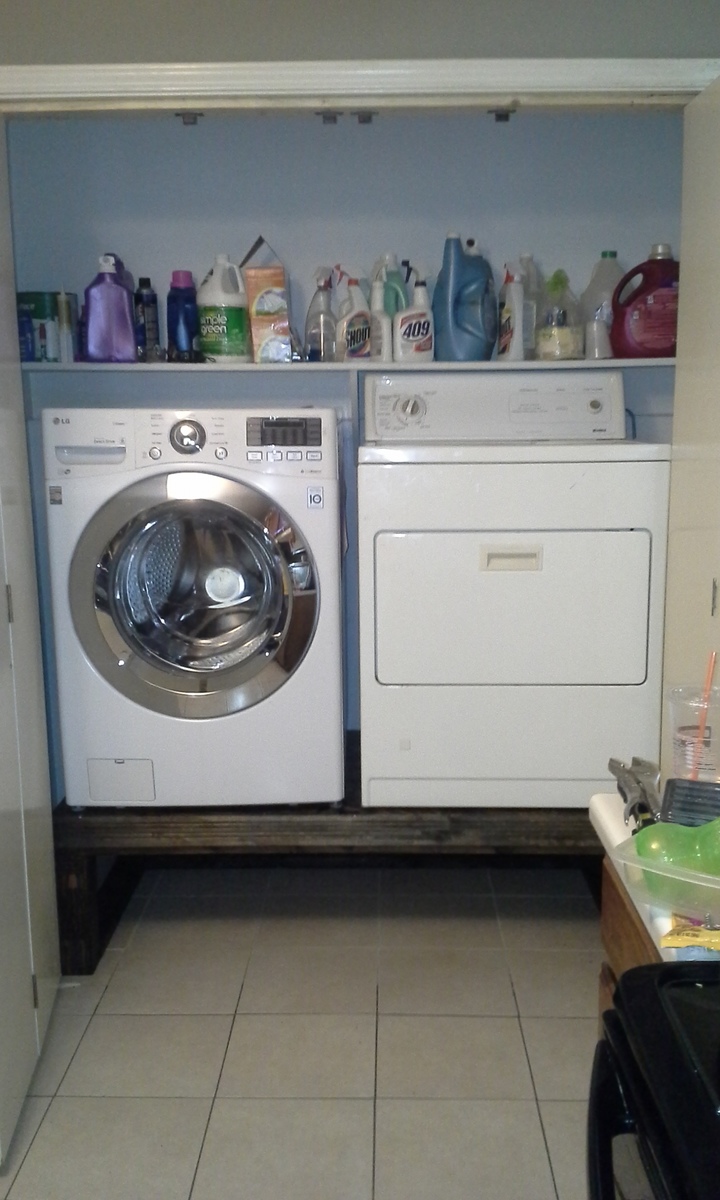
Got this wood from some thick old flooring we laid in a house and brought them to my shop. Cost me about 20-25 dollars for lumber and paint. Everything else I pretty much had on hand. But man I think it turned out really well
This was my very first project last year!
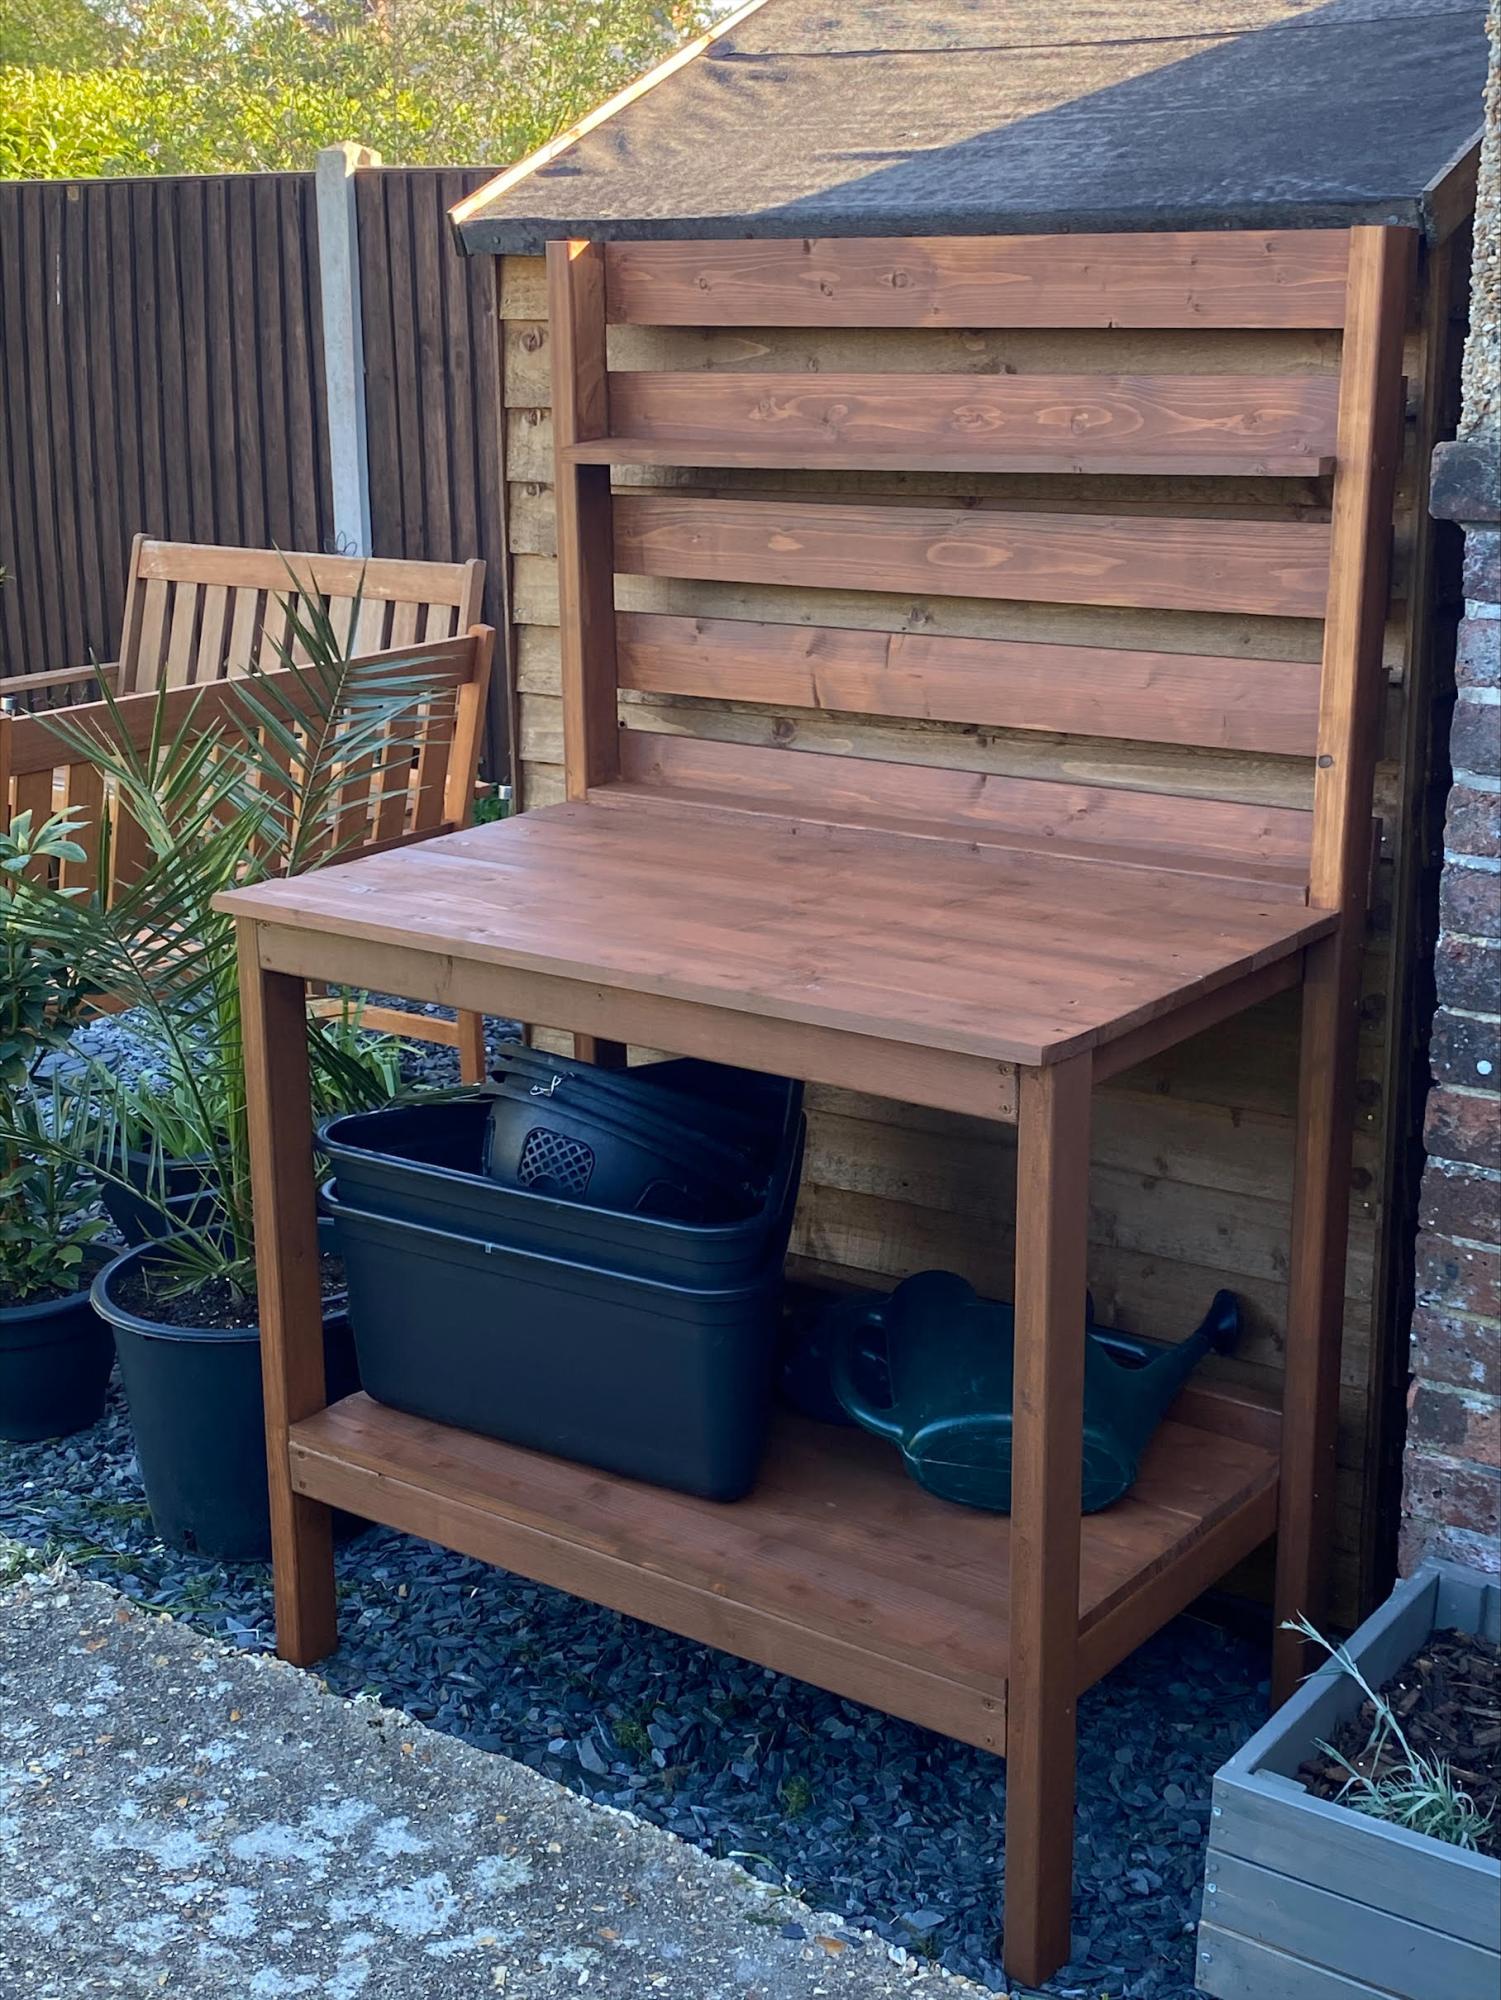
I couldn’t get the 2x4s so I used a different size and it worked out great. Love it so much. So much better than what you can buy for same price as most potting tables are very small.
Thank you as I couldn’t have done this without your plans.
Karen Martin
Age 51
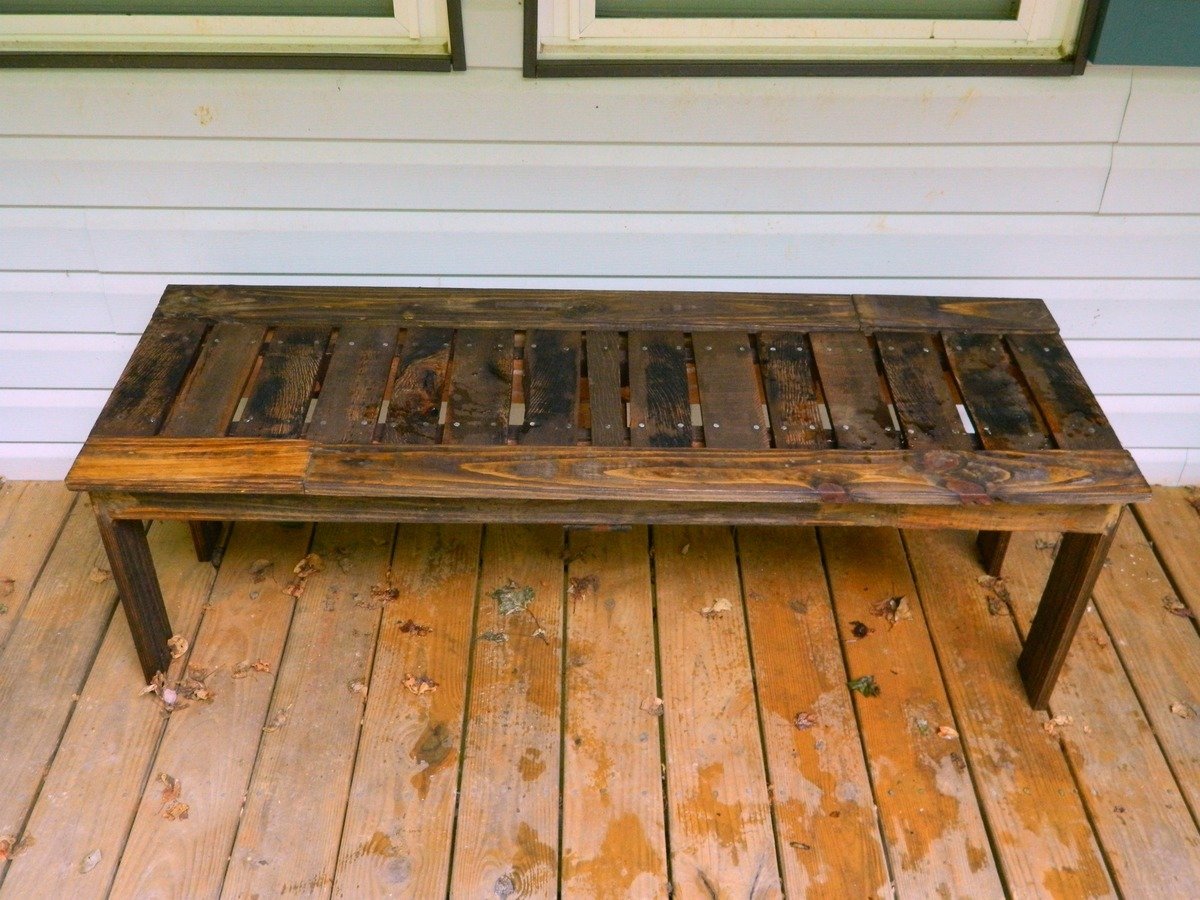
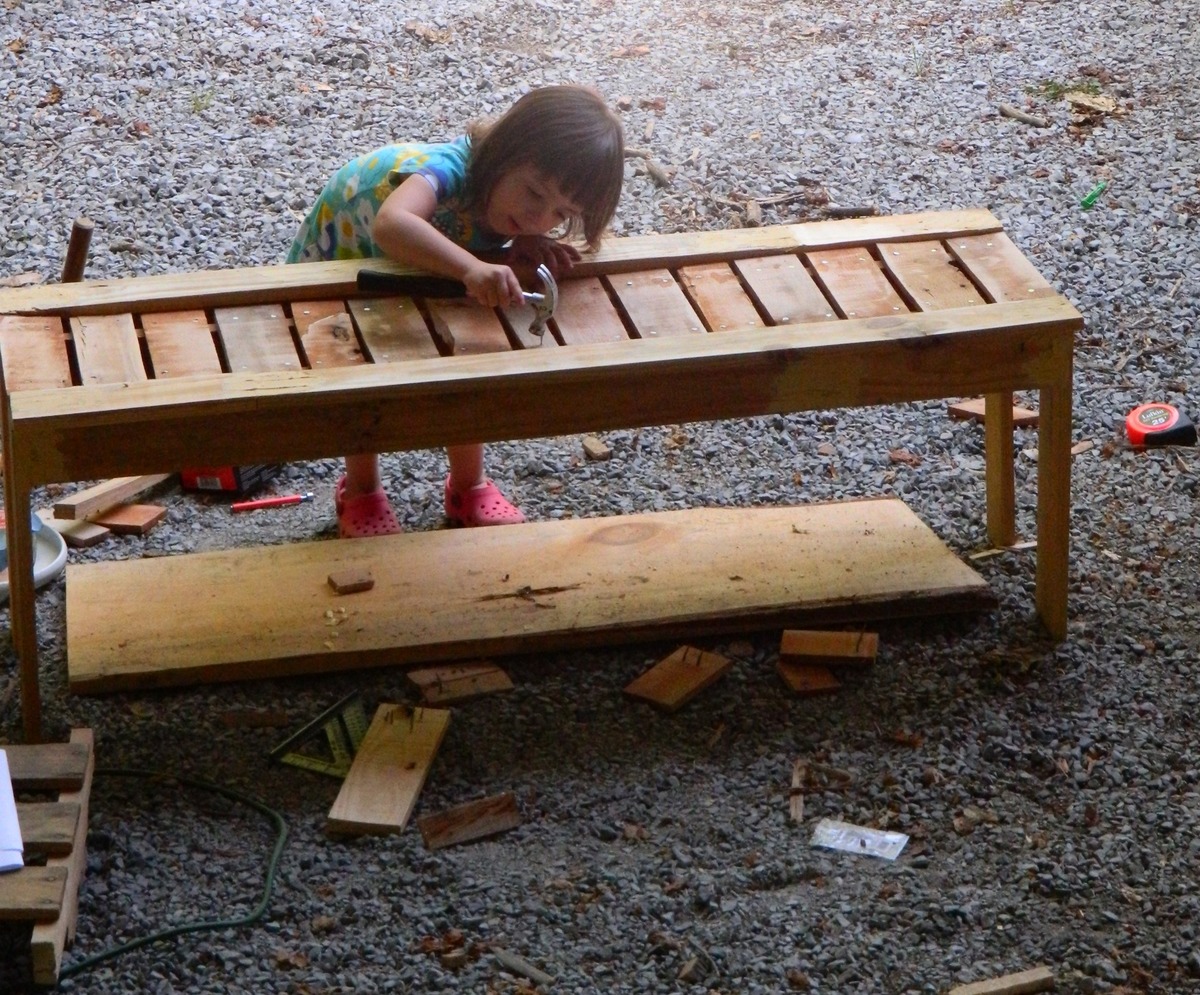
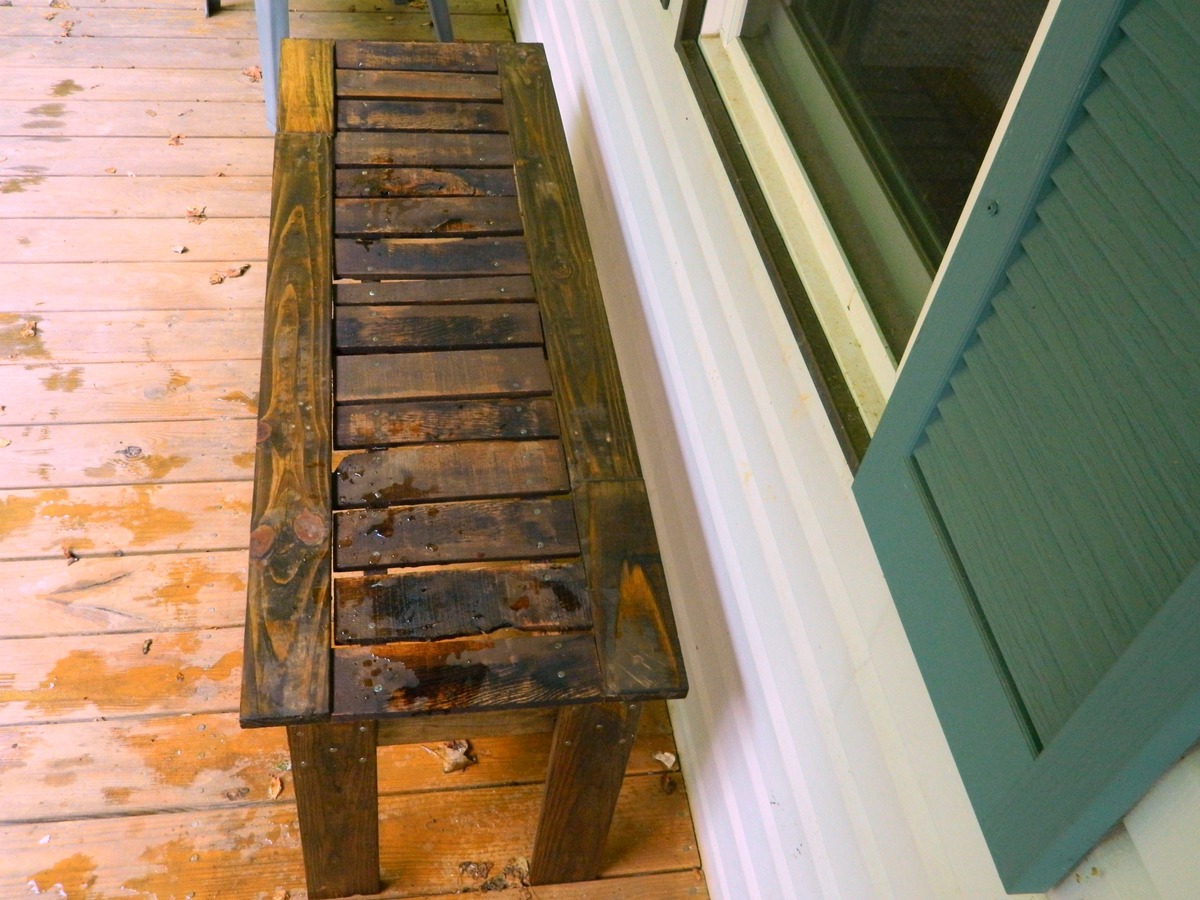
I had some left over wood from pallets and I really liked the look of the simple outdoor bench. One pallet was made out of some type of red colored wood and I decided the slats for the seat would look good in the red colored wood. The rest of the bench was from a lighter colored pallet. I used nails and glue to attach the seat slats so that my daughter could help. She loves to help, but does not like my drill even if she has hearing protection. See more at http://www.makeitlovely.com
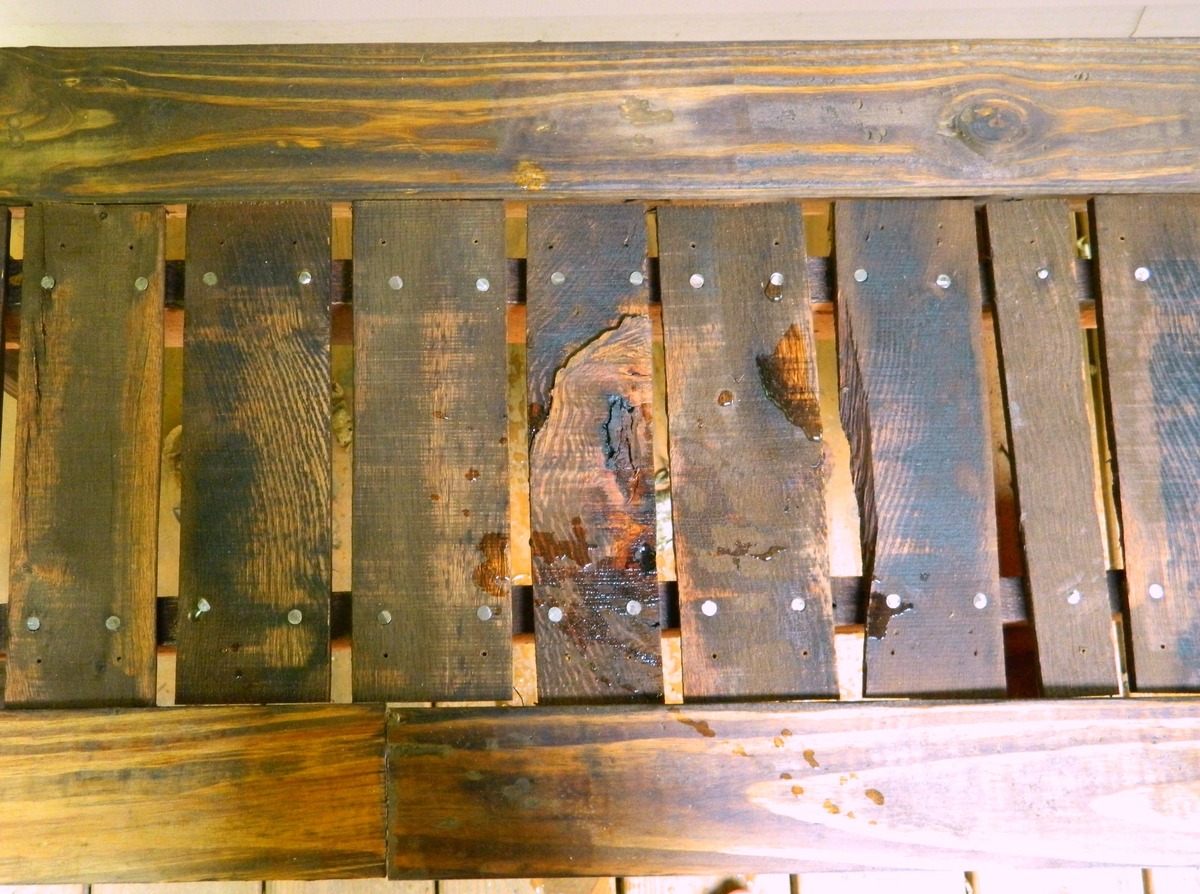
My first DIY project EVER. Not really a brag....but I'm pretty proud of it. Amazing what you can do with a $1 piece of wood and some stain. Some sides are slightly uneven, some nails might be crooked. It has character and I will always remember it as my first! It's liberating to create something beautiful with your own two hands :)

Sun, 07/21/2013 - 23:45
Looks pretty fine to me! I really like your choice of stain, too! Keep building!
Val
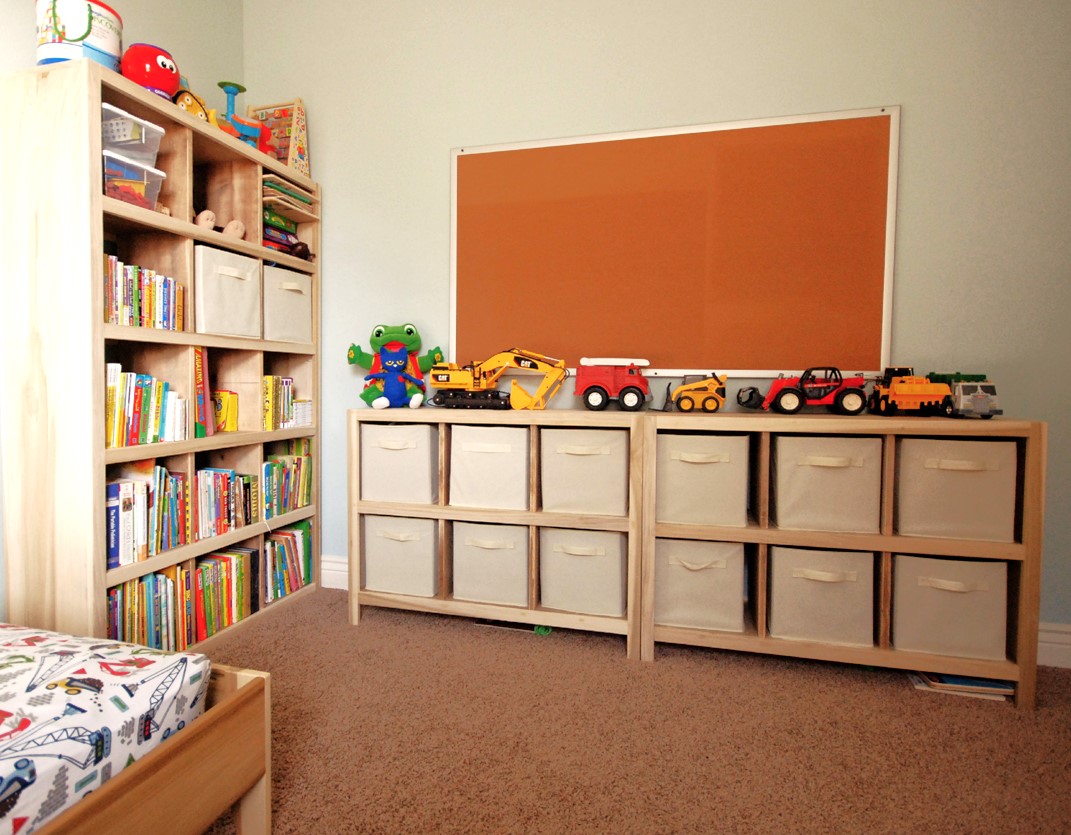
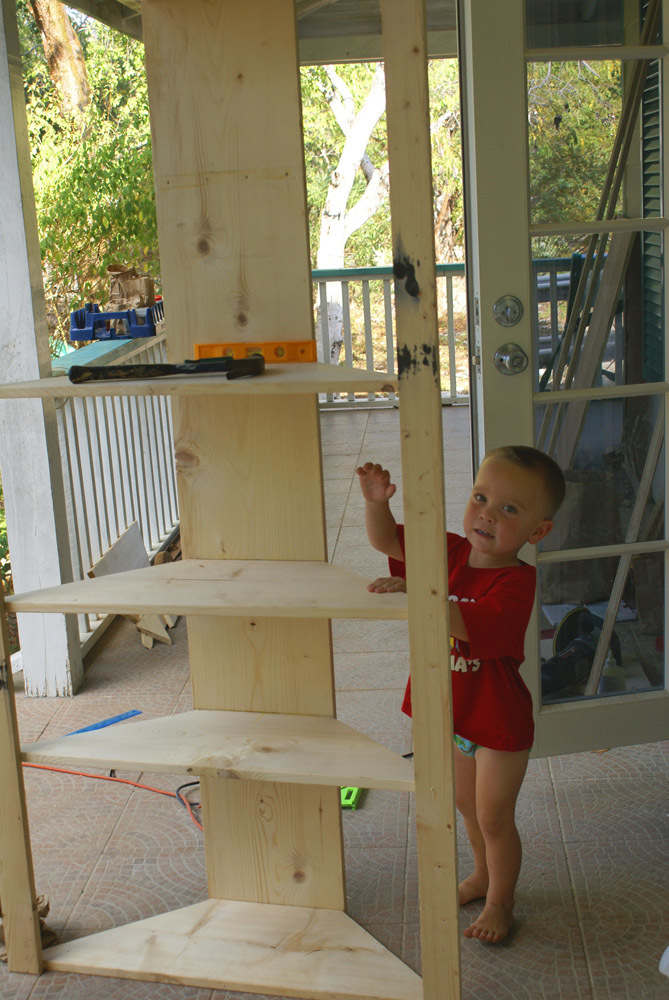
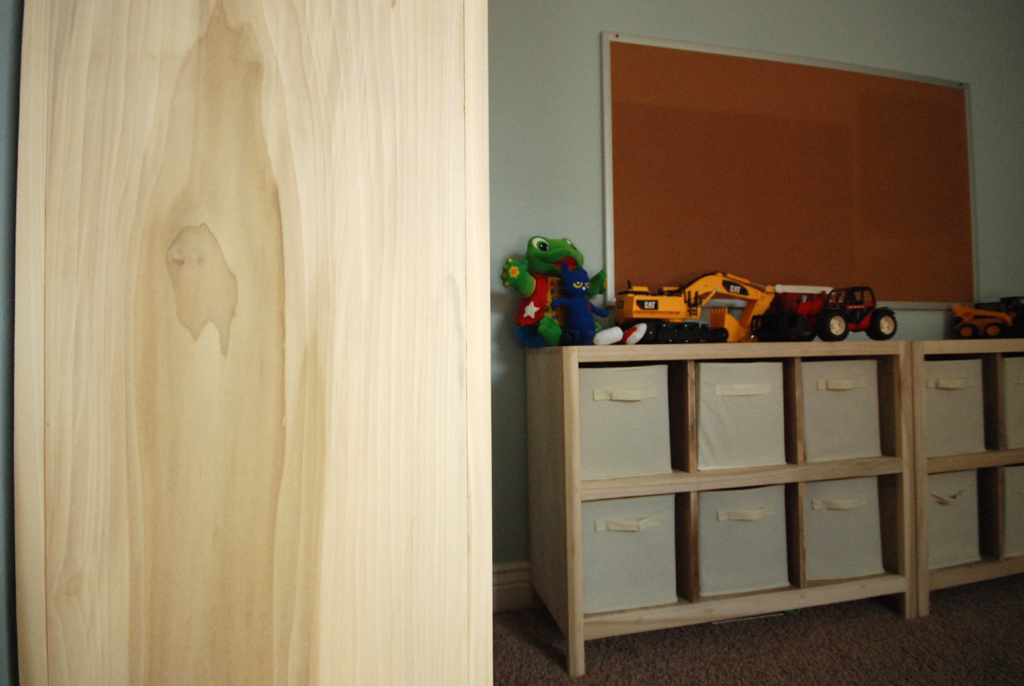
I built this set of cube shelves for my 3 yr old son's room. THANK YOU, ANA! I used poplar as I did not want to paint the wood and I love the irregular pattern of the wood grain. To save money, I used pine for the inner shelves and dividers. I stained it using the oxidized solution (http://www.friendly-home.net/2012/05/oxidized-x-console.html) that Ana recommended from the instructions of the Rustic Console. I added a cup of coffee to the solution to get a darker browner shade and unevenly sanded the wood for the distressed look. It matches the poplar wood more so than keeping the pine wood as is.
I also created a 5-tier version to match the 6 cube shelves but did not include the legs. I thought it would be more stable to keep the lower frame on the ground.
I purchased the storage boxes from Amazon It was around $20 for 6 boxes!
I am ready for the next project!
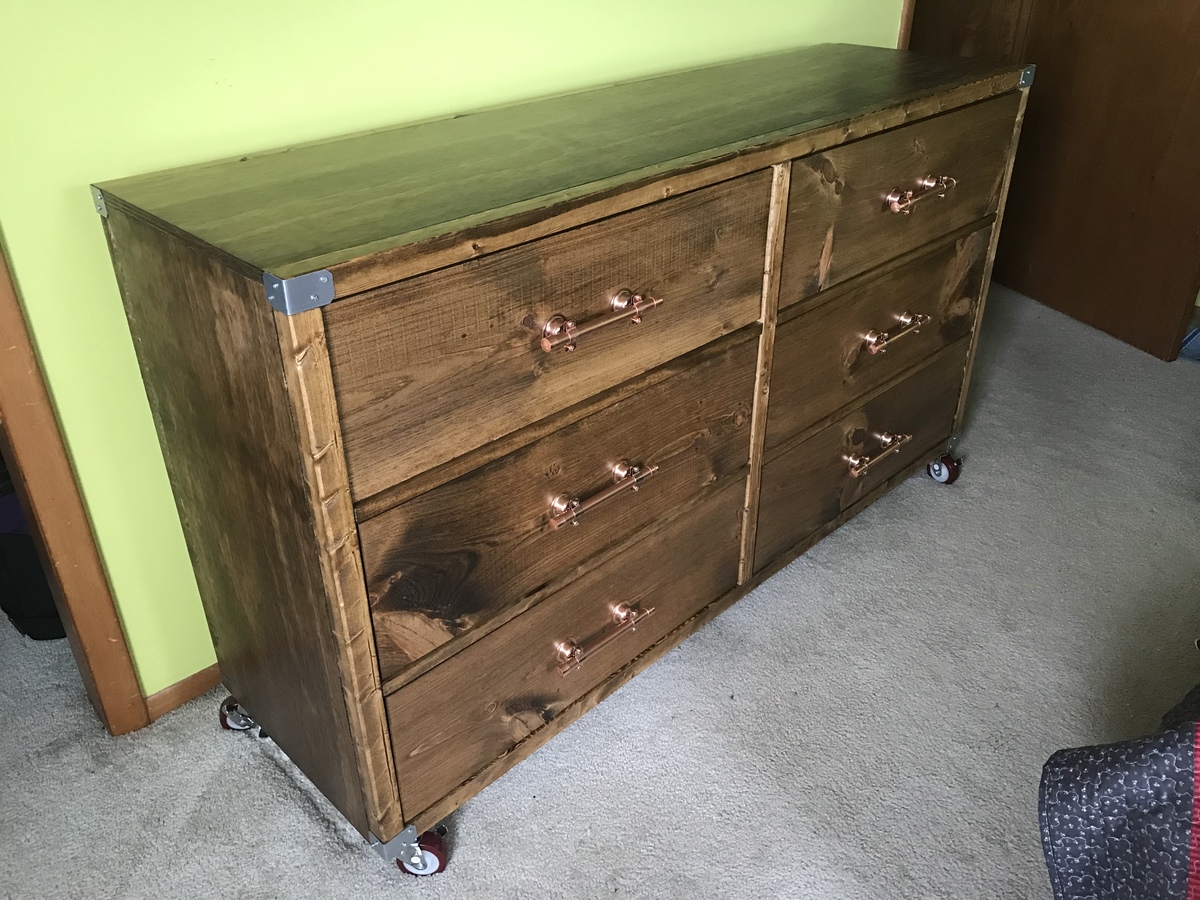
Good project. Learned a lot of new things. Installing the drawer slide is the most challenging
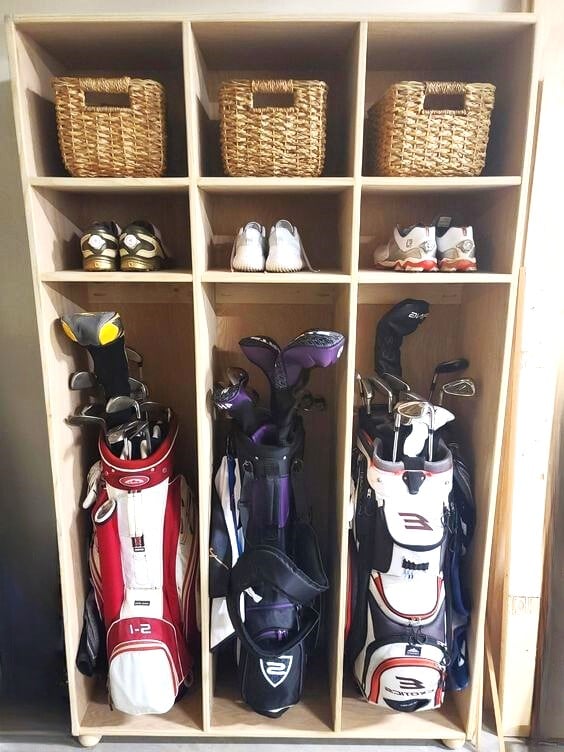
Utilized the plan for the Locker Book Shelf-Full Size and modified it a bit to convert to a golf club locker. Definitely keeps all the clubs, shoes, and accessories organized and eliminates the clutter. My wife loves it, course she added the baskets, which makes it look awesome! Actually this is how I stumbled upon Ana White's website. I was looking high and low for a plan for golf club lockers, and found Ana's website as part of the process. Best google search I've ever done!
Mon, 04/11/2022 - 14:51
WOW, that looks awesome and is the perfect storage solutions for all the golf gear! Thank you for sharing.:)
Comments
Ana White Admin
Thu, 02/10/2022 - 16:36
Perfect solution!
Thanks for sharing, this looks great!