Kitchen Pantry
I took some ideas from an Ana White wine rack I saw and made this Pantry for our kitchen. Pretty happy with how it turned out.
Created but Modified from the plans found on here, my daughter has a great new bed. This bed saved a ton of space in her very small room. PLUS it allowed her to have an area to do her homework and all the art projects she does! Very easy build. Took a day to build and another to paint.
My Dad made a few cutting boards for christmas. I've added a few additional photos and tips on my blog - http://www.woodworkingfourdummies.com/blog/more-cutting-boards.
thanks for looking.
Ian
Tue, 01/13/2015 - 04:28
Hi Ana! Love your site!!!!!! Please tell me, did you use just mineral oil in order to make this non-toxic finish? I guess you would have done some posts including this kind of information, but I can't find it. Regards from Argentina! =)
Thu, 01/15/2015 - 09:45
Only mineral oil was used, it is food safe grade and can be ingested. Mineral oil isn't a durable finish like polyurethane but it is safe.
Built the corner hutch from Ana's super easy plans! LOVE IT!
http://www.ana-white.com/2010/12/plans/corner-cupboard
Made a cutout for my thermostat on the wall. Gotta love building what you need for your space!
Yesterday I built two of these for my wife and I's room, we just moved from Hawaii to Arizona. The plans were clear and simple, and the end product turned out awesome. Next I will tack the dresser/tv stand. Thank you Ana
Fri, 04/19/2013 - 21:09
This nightstand is absolutely stunning!!!! Thank you so much for posting, I love it!
Took a little longer than I anticipated. By far the hardest part was finding straight boards at Home Depot. Used Cedar 4x4s for the post to avoid treated wood. Had to make a few adjustments for our king mattress, but well worth it. Bed and platform came in right at $300 for the wood, screws, paint, etc. Thanks for the plans!
My father-in-law wanted a display case for his shot glasses, but I didn't like the idea of putting that much glass, hanging vertically. So I suggested a coffee table. This is what I came up with. I used 1x4 boards for most of it. ¼" plywood on the bottom, with 2x2 supports underneath, the actual display part is from ½" project panels I had laying around, and the dividers are from ¼" plywood scraps. The legs I picked out from the store (I don't have or need, a lathe). For the top, I used ¼" thick acrylic. I thought about glass, but they have lots of grandkids over all the time, and I didn't want a little hand going through the glass. (Side note on the acrylic, when you cut it, do it by hand, not with a power tool, as the acrylic will heat up and can melt). Other than that, I got a couple hinges and small lock closure for the acrylic, and stained it all. (Sorry for the white background picture, I tried to crop out everything else around the table)
I used the plan for the base idea for my sofa. I decided I'd prefer arms to curl up in and also to add a convertible feature turning an ottoman using the same base plans into an extension option for using the set as a bed or lounge area. Twice the storage, twice the function!
Fri, 07/23/2021 - 19:33
I was planning on building your storage sofa, but when I saw the one with the arms; I thought that I would rather build that one. In the spot where the plans should have been; it refers you to the storage sofa. The problem is; it doesn't tell you what you need for or how to build the arms. If they are somewhere else; could you tell me what heading that they are under.
Sandra Cahoon
I love how this bench turned out! It's one of my favorite builds so far. It's simple but really beautiful to look at. I have a few pictures of the process and the stains I used to finish it up on my blog. Thanks, Ana, for another great plan!
Started with the 3 plank plans from Anna's project, then dremeled the logo.
I've officially stopped stalking and started building! First project a modified spa bench. Still have to stain it, but it already makes the big pile of shoes by the door look neater! I'm a hands-on person and not afraid of power tools (got a band saw for my birthday!) but it's still a challenge building a piece of furniture. I've already learned lots of do's and don't do's for next time!
Thanx a bunch for your site, Ana! It definitely gets the mind plotting great projects to come!
Love this! My husband used this project to help boys learn to use power tools and work with wood. They made one and he did the others. THANK YOU!
Wed, 10/06/2021 - 10:15
Great way to get the kids involved, it looks very nice, organized and functional! Thank you for sharing~
I essentially stuck to the main plan - except to support the wings I used 2X2 boards and standard hinges.
I was worried that there may not be enough space for my Ryobi 10" sliding miter saw because of the slide however, it fits nicely and there is plenty of space.
Thank you for the wonderful plan. This was my first project of this size and I am very happy with the results!
Fri, 05/01/2015 - 08:10
This is great. I am currently getting my Dad's help to turn an old kitchen cabinet into a miter saw cabinet with wings like this. (it was a 1940's solid wood kitchen cabinet we took out of the house when we remodeled). I really like your 2x2 support struts. Have you considered putting a shelf in the middle of your box? It would add extra support and also more room to store stuff.
Sat, 05/02/2015 - 09:09
Good idea. I did consider adding a shelf however I have now decided to use the lower area to store my small router table. I discovered that it would fit in the spot however it leaves not enough room for a shelf.
Mon, 05/18/2020 - 14:12
I know it’s been a while but do you remember the angle you used on the 2x2 supports? I struggle when it comes to cutting angles.
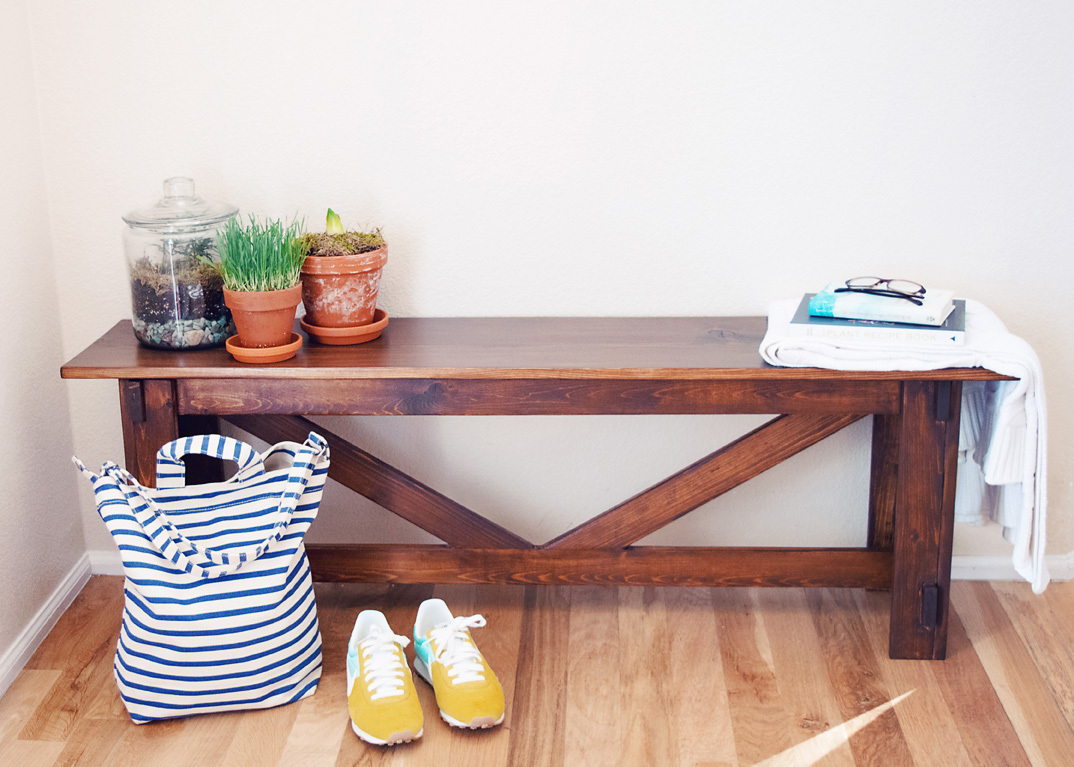
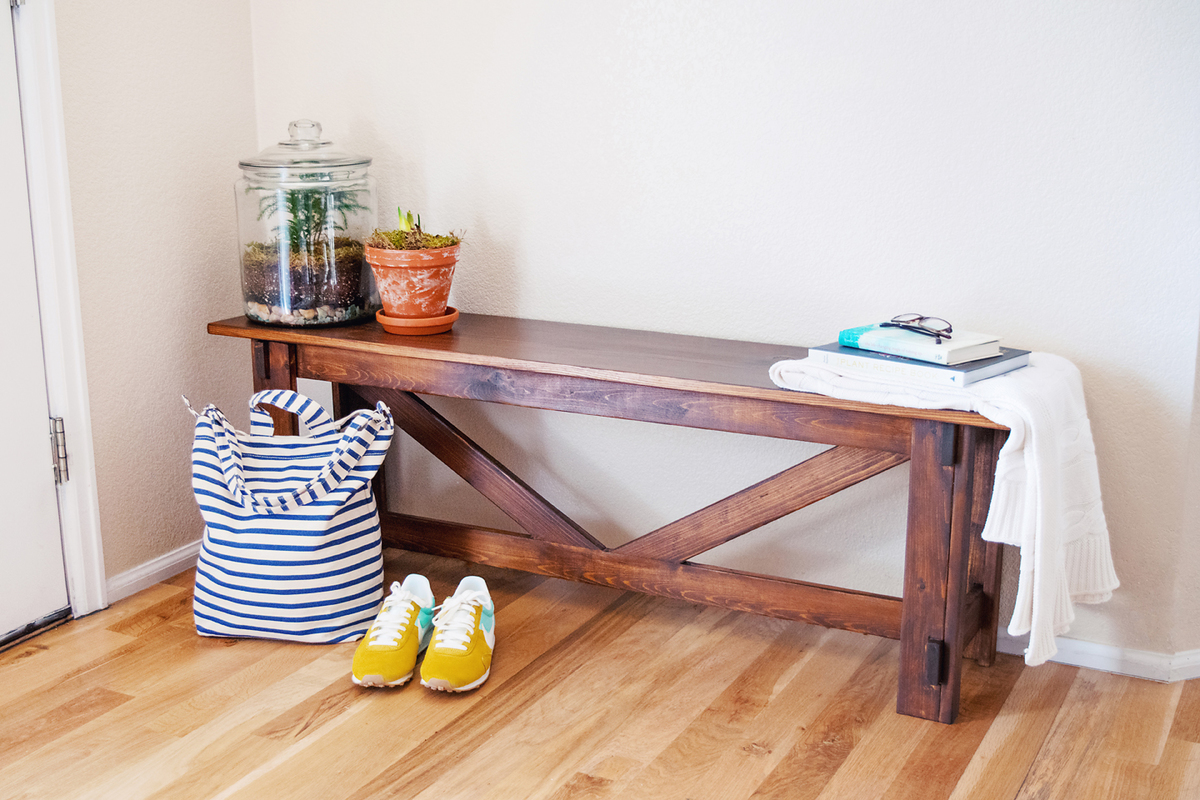
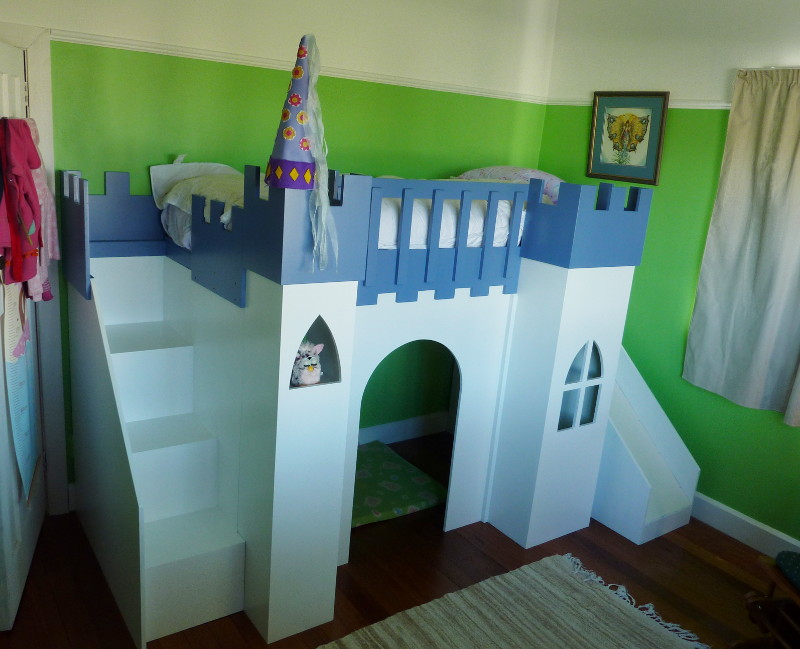
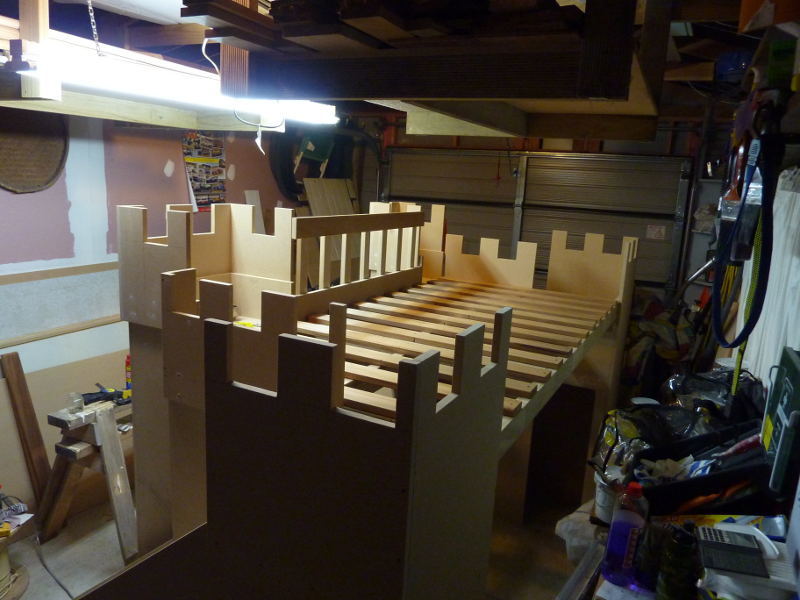
A big thanks to FSMumford for drawing this in Sketchup. I had to re-draw it to take into account metric wood dimensions and bed sizes here in NZ, and also to remove a foot or so from the length.
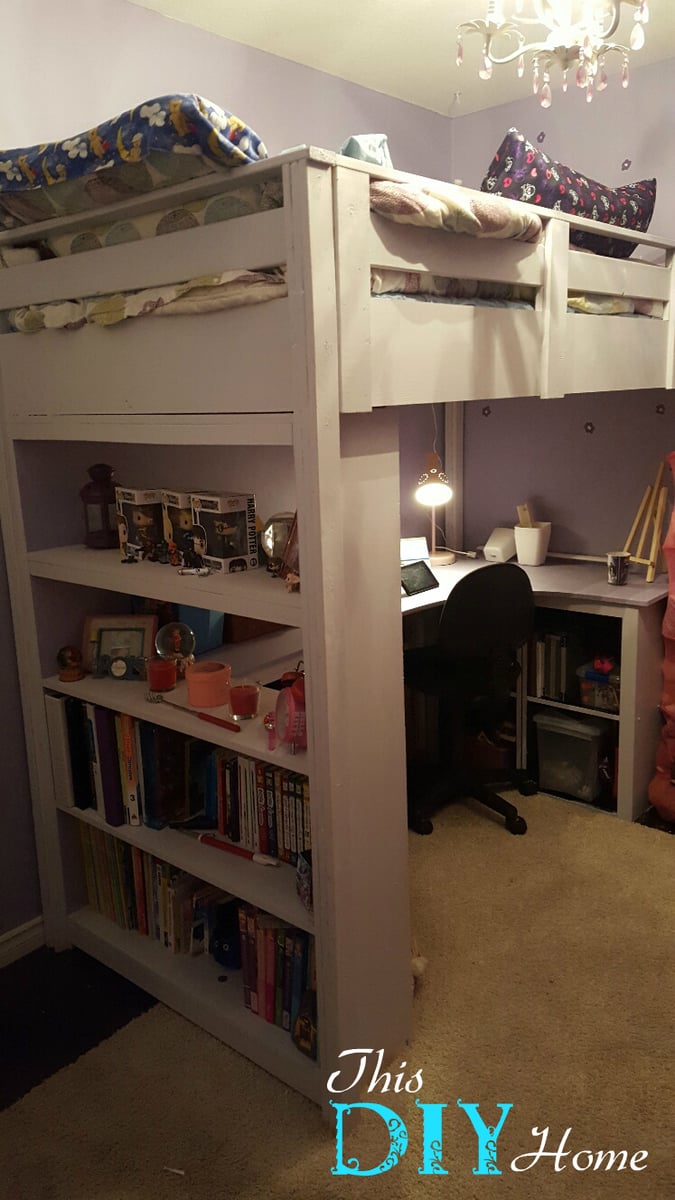
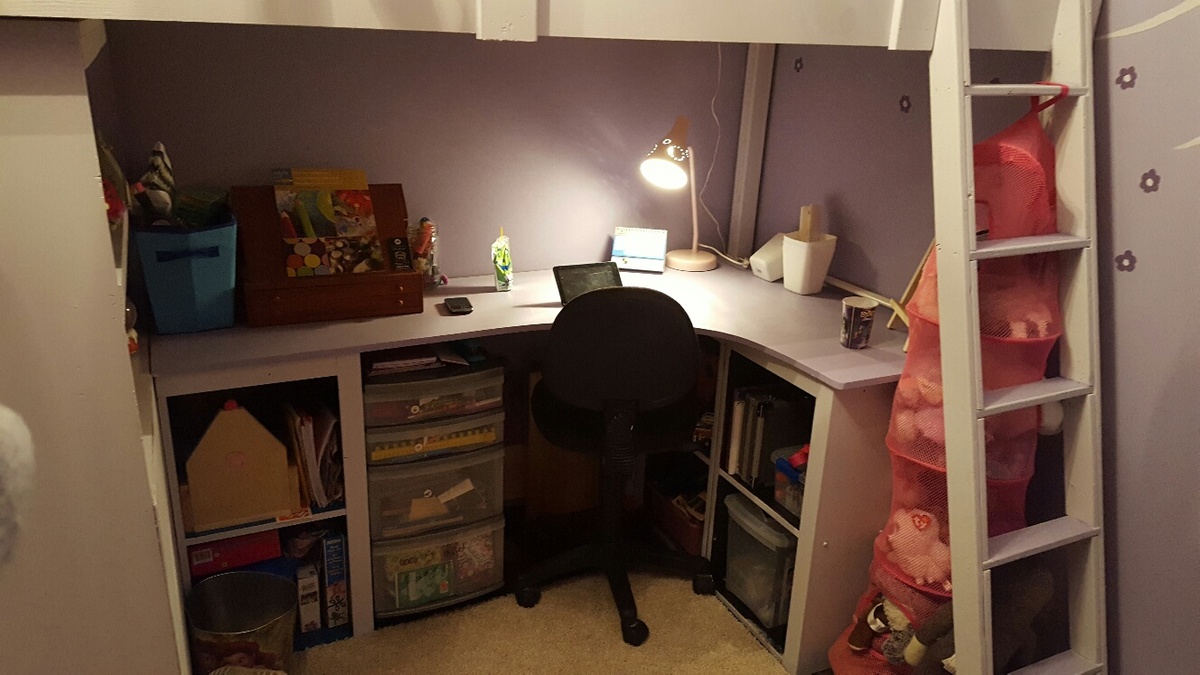
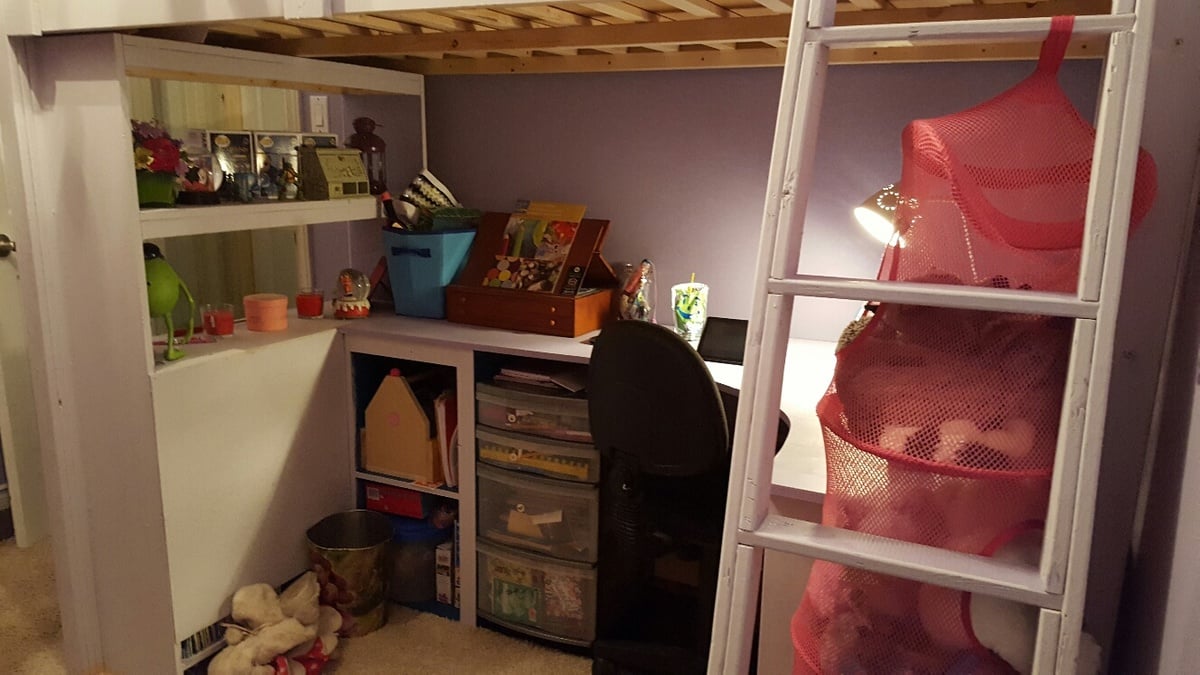
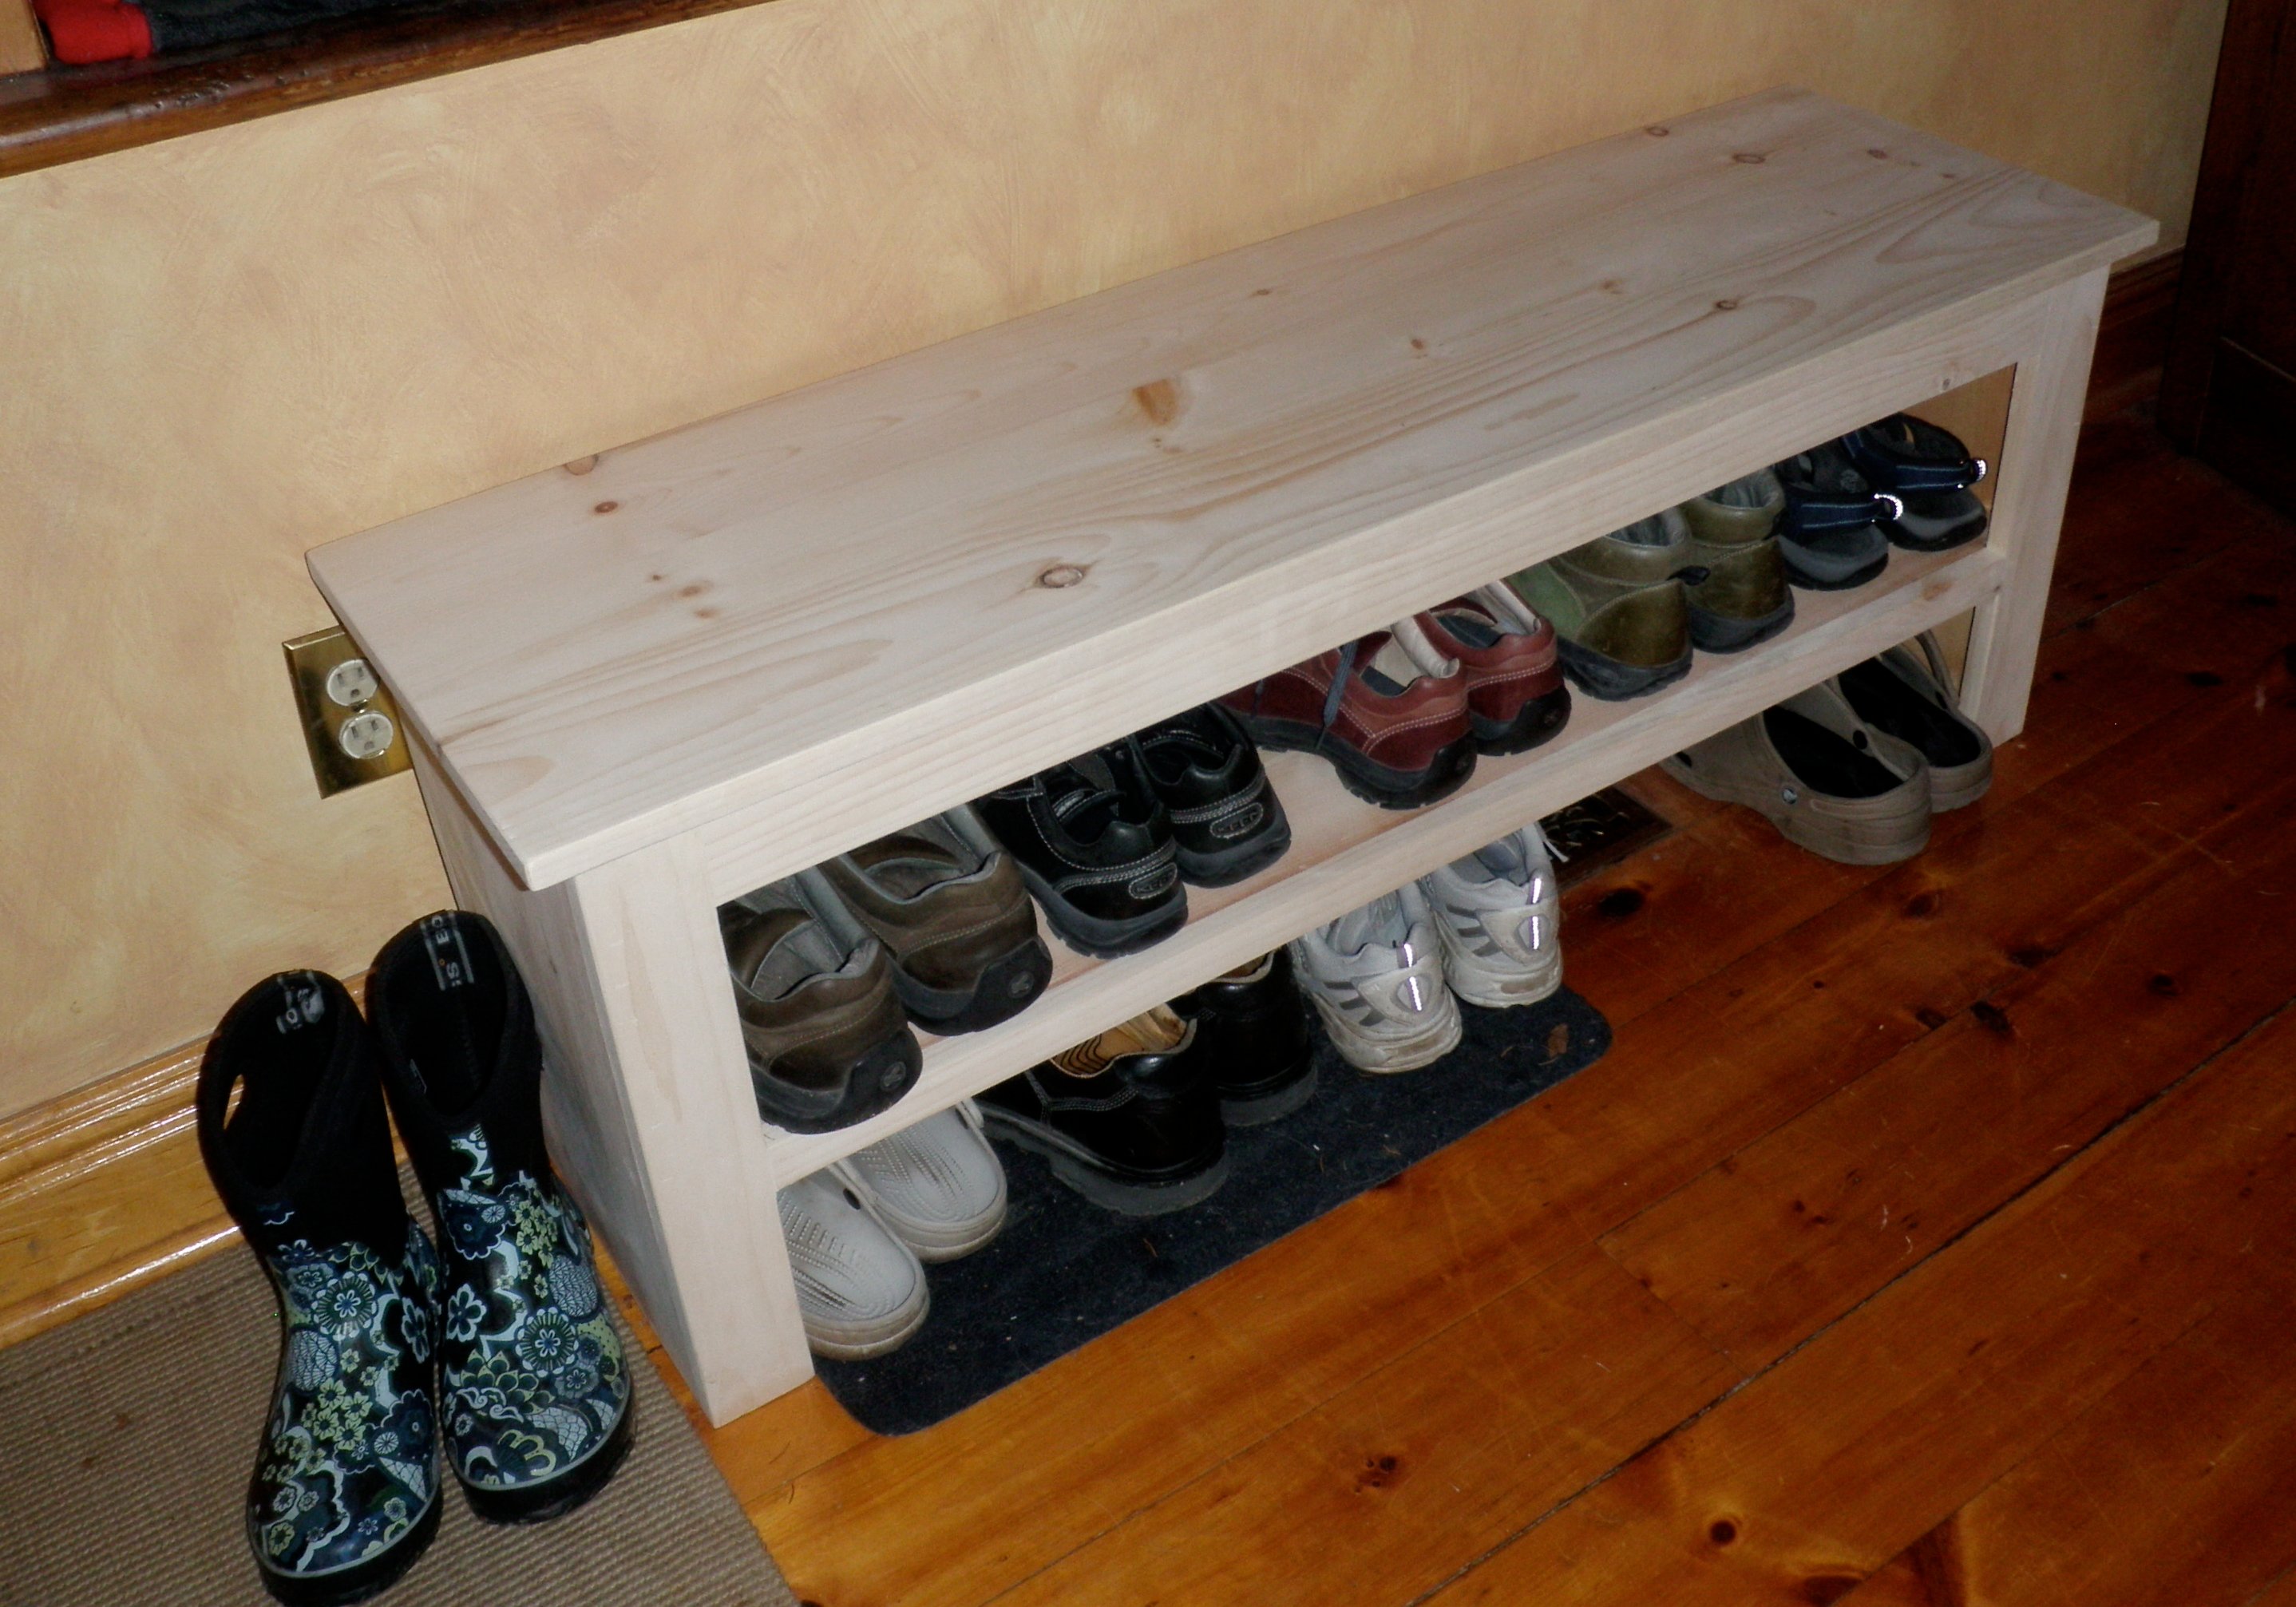
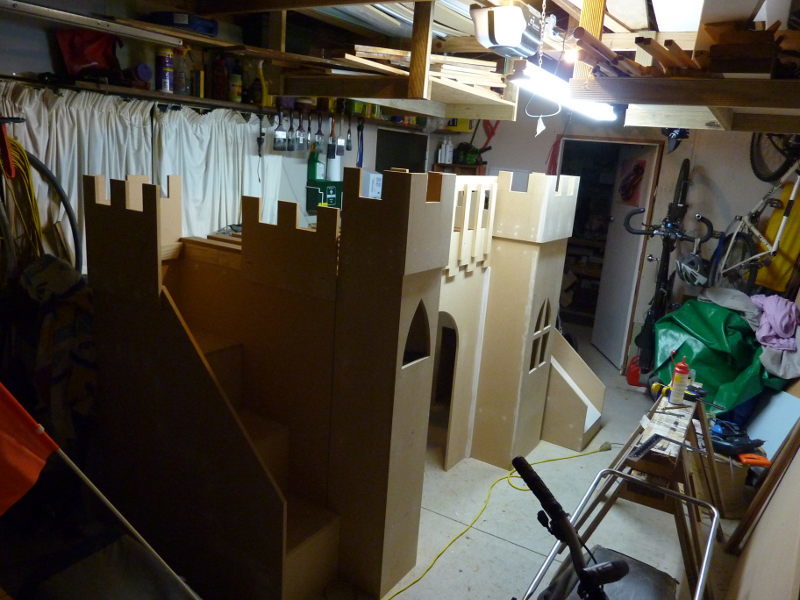
We just gave it to my daughter today, and already I need to make some modifications. I immediately put some vertical grab rails at the top of the steps and slide. The steps are too big for a toddler (she's 3 today) and I didn't take into account how thick a pillow top mattress is! I really needed to make the end guards higher. In fact, were I to make it again, I'd probably make the towers taller and lower the height of the bed by 8-12 inches. While this would lower interior room, it might make the steps a more reasonable height for a littlie. If you're building for a 5 or 6 year old, this may not be an issue. Also, it would make the angle of the slide shallower (it's a bit steep, I reckon). I used 7 sheets of 16mm MDF but if I'd laid them out like FSMumford did in her plans I would have used less. Our (one car) garage is too small and the whole build process, including painting, was a royal pain in the bum. Fun, but a pain. Speaking of painting, next time (riiiiight) I'd try to paint as much as possible before assembling. I built mine in modules but even so it's hard to get a nice coat of paint on the insides of things. Edges of MDF need to be painted and sanded at least twice to look nice. Don't underestimate the time needed to get a good finish - I spent a third of my build time finishing (mostly, again, due to limited space). A narrow foam roller is great for cutting in but doesn't seem to get enough paint on to cover well on larger areas. In places I have three coats and can still see my pencil marks. I used Dulux Aquanamel.
I built this nightstand when my wife and I purchased a new bed. We had to rearrange the bedroom and as such, I no longer had a desk or table on my side of the bed. I wanted something "country" style and after searching through several different plans I found a brag post that fit exactly what I was looking for. Well, technically, I found the original Farmhouse Bedside Table plans and modified them to fit what I needed. It wasn't until after I completed the project that I realized there was a "Mini" version as well. What can I say, I'm not that great as using search. I actually built this over a year ago at this point, and it was the second project I ever built. I learned quite a bit on this project, including the fact your project will only come out as good as your lumber selection! This build actually created my addiction for DIY and woodworking. Thank you Ana!
Mon, 09/14/2020 - 18:41
this is going to be a perfect first project for me and my daughter to tackle!
I needed a shed to get my outdoor and seldomly used equipment out of my gargage. But I needed the shed to be small so it doesn't take up too much space in the back yard and my HOA will not allow it to be taller than my fence. So I needed a small/short shed. I didn't use any plans, but it would probably have been quicker if I had. I did it with free time during a week, but could probably be all completed during a weekend. It was probably a few hundred total. I tried to reuse existing hardware/wood where possible. I'm a cheapskape. Here's my blogpost I did with additional pictures...
https://drowland.wordpress.com/2017/12/22/small-short-storage-shed/
You can see I also added a matching doghouse.
Love my new greenhouse !
I didn't build this shoe dresser because I particularly needed one, but it looked so lovely that I couldn't resist.
- I modified the plans by building 3 bins instead of 2 so it could hold more shoes.
- I decided against the dowel stick and opted for hinges instead, which were surprisingly not too difficult to assemble. I found that I didn't even need the magnets after installing the hinges as the doors stay closed.
- I used 7" chains on both sides of each bin instead of a belt to make it extra sturdy.
- I added two back legs.
Et voila! This is the end result. I'm very pleased.
PS. Those flopping bins are a pain when you're trying to build!! An extra pair of hands is definitely recommended.
Fri, 07/05/2013 - 22:49
Pretty :) Good Job. Now if I only had the space for one thats 10 rows high :P I like the stain color too. Shanty 2 Chic always uses Rust-o-leum. I think its called dark walnut. Dont quote me though. I love the stain and spray paint combo colors they use.
~Melody
In reply to Nice Job by SoCaliforniaMel
Sat, 07/06/2013 - 20:00
Rust-o-leum, that's the one!
Yes, if only every woman could own a 10-row cabinet for all her shoes! :)
It was time for Addison to get a big girl bed. We used the Kentwood design and the trundle bed plans.
Address Sign
We were replacing the floors in our house so we decided to build a closet mud room. We used the plans for the smiling mudroom and altered them slightly. We didn't end up building the partitions because the left and right seats would have been too closed in. We installed bead board on the back wall and used moulding on the shelf and bench. The only hard part was that we had to actually assemble the shelves and bench in the closet because they wouldn't have fit in once built! The Kreg Jig was extremely helpful and well worth the purchase.
Thu, 01/02/2014 - 13:37
I am going to do this in our laundry room which you walk into from the garage - what do you suggest doing when you remove the doors for the current closet? I do not want to install all new trim since that was just done recently, before the mudroom idea came! Thanks!