My mail boss

I made it a little taller and it is all a filing cabinet.
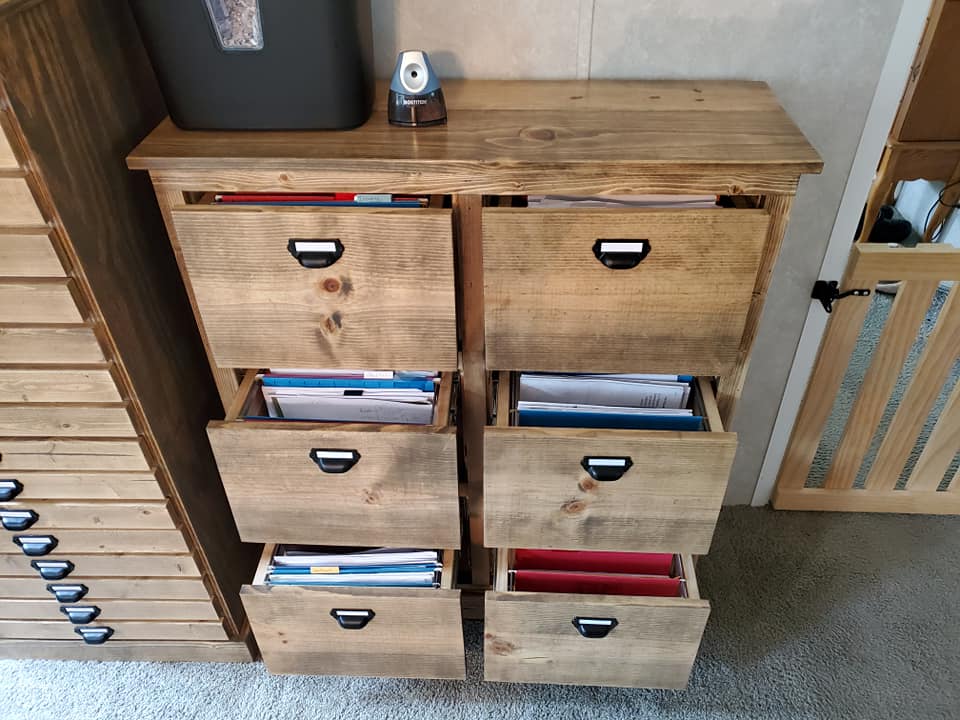

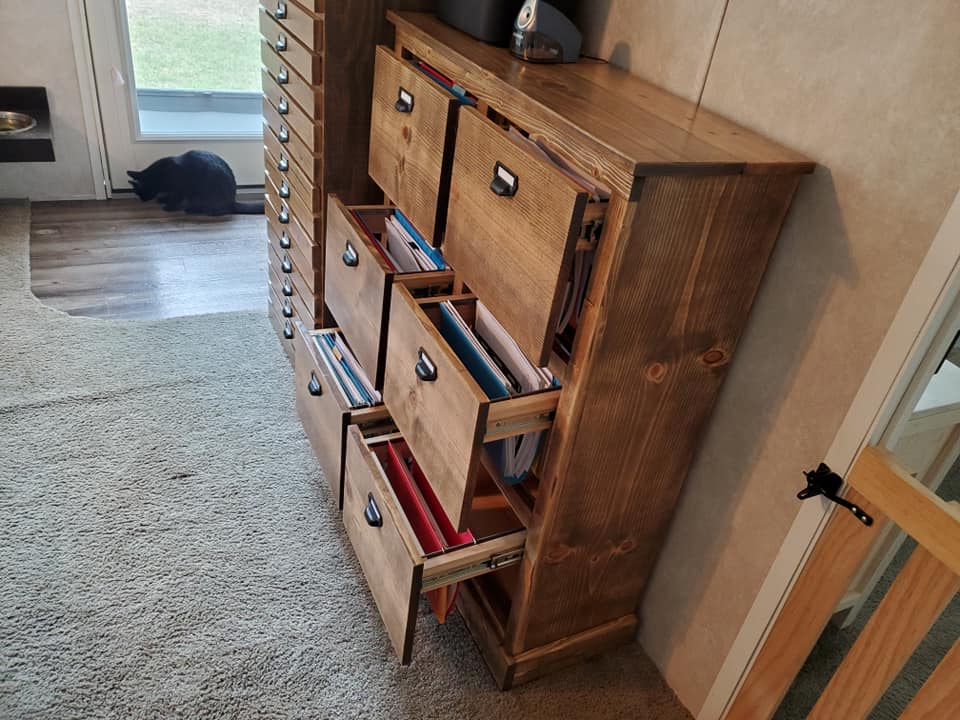
Built from Plan(s)
I made it a little taller and it is all a filing cabinet.
I've made another record cabinet, this time with a nice dark walnut stain. To see more details and plans visit my blog.
http://www.woodworkingfourdummies.com/
Cheers,
Ian
I own a small furniture and home décor company called Inspired By Home and we love Ana White's site! When we saw this mirror top coffee table, we knew we had to have one for our home. Since we have a 3-piece sectional sofa that takes up the majority of the living room space, we knew we needed something that was a little bit smaller so I made some adjustments to these plans. The dimensions for our coffee table are 34"L x 28"W x 21"H. Most coffee table are about 18"H but our sofa sits a little higher and I also have very long legs so I needed something a little bit taller. We also decided not to do a mirror top because A) we didn't have an old mirror we could use, and B) because we are not big fans of having any glass tabletops. I instead went with a rutic look and added a bottom shelf to match.
If you like this, you should check out some of our other designs here.
Thank you, Ana and your team!

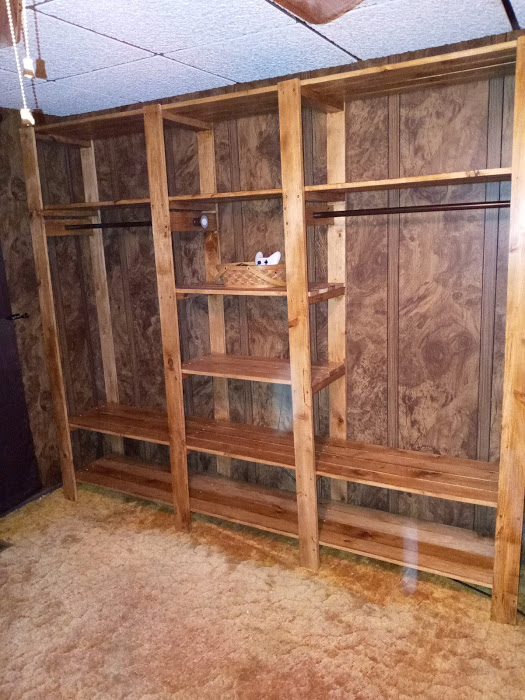
So I was complaining to my wife that our one closet in our bedroom was becoming too cluttered. She asked me to build her one. I told her that if she found the one she wanted me to build, then I would build it. She found this one and so I built it for her. Let me just say that she is very happy with it and it came out very great. I did find a couple of shower curtain rods that were brown to used instead of the iron pipe. It made the whole project cost around $80.
Sat, 11/07/2020 - 11:42
So happy that worked out for you and your wife, thanks for sharing:)
I used the plans provided. I made a small change to the windows and made the bigger.
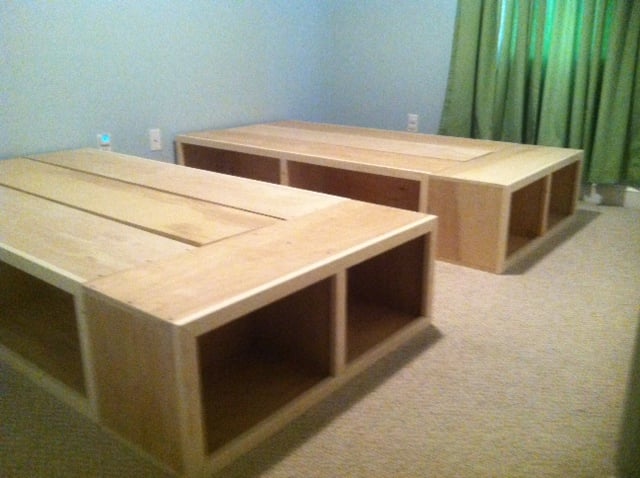
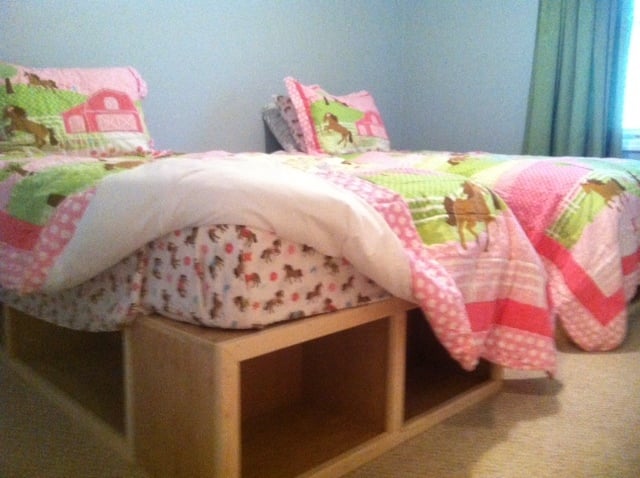
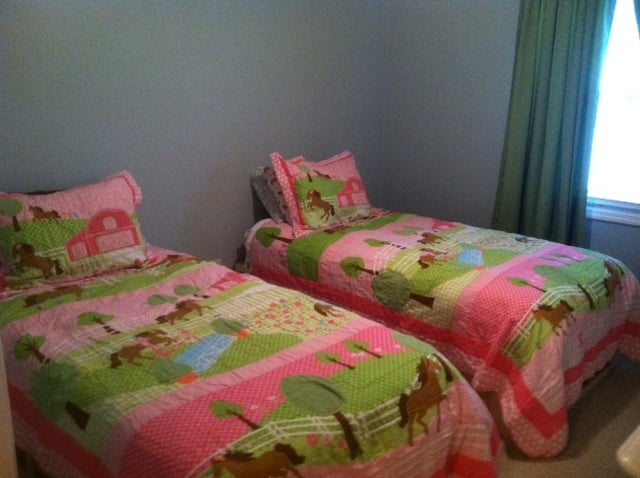
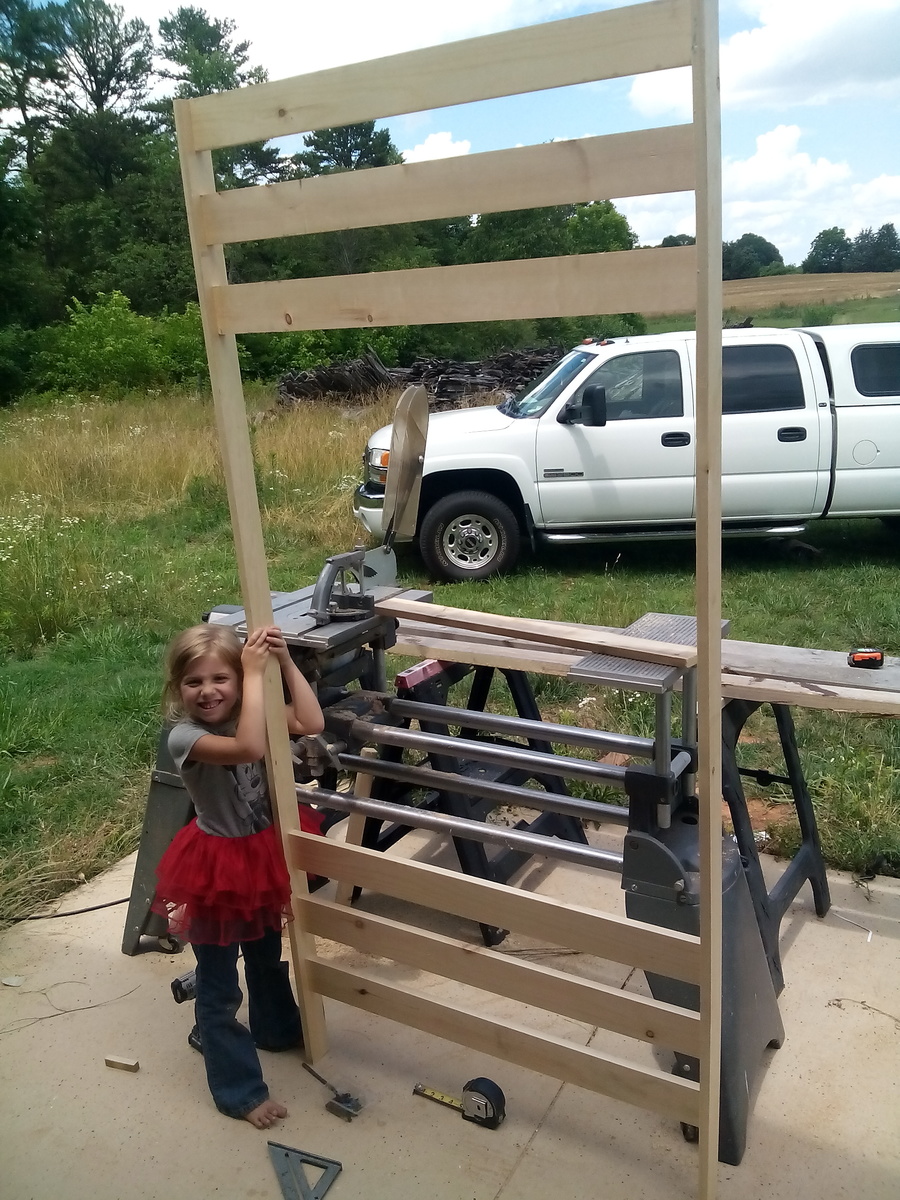
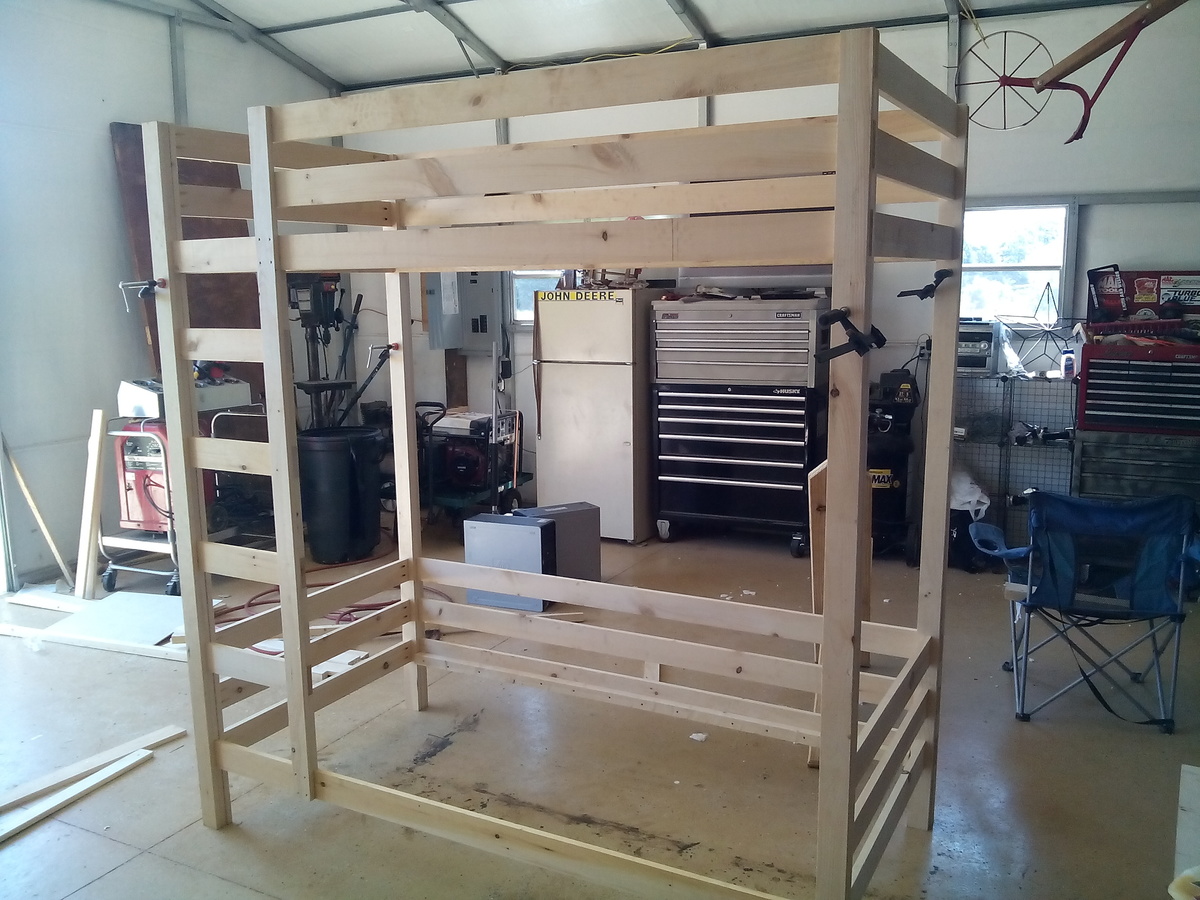
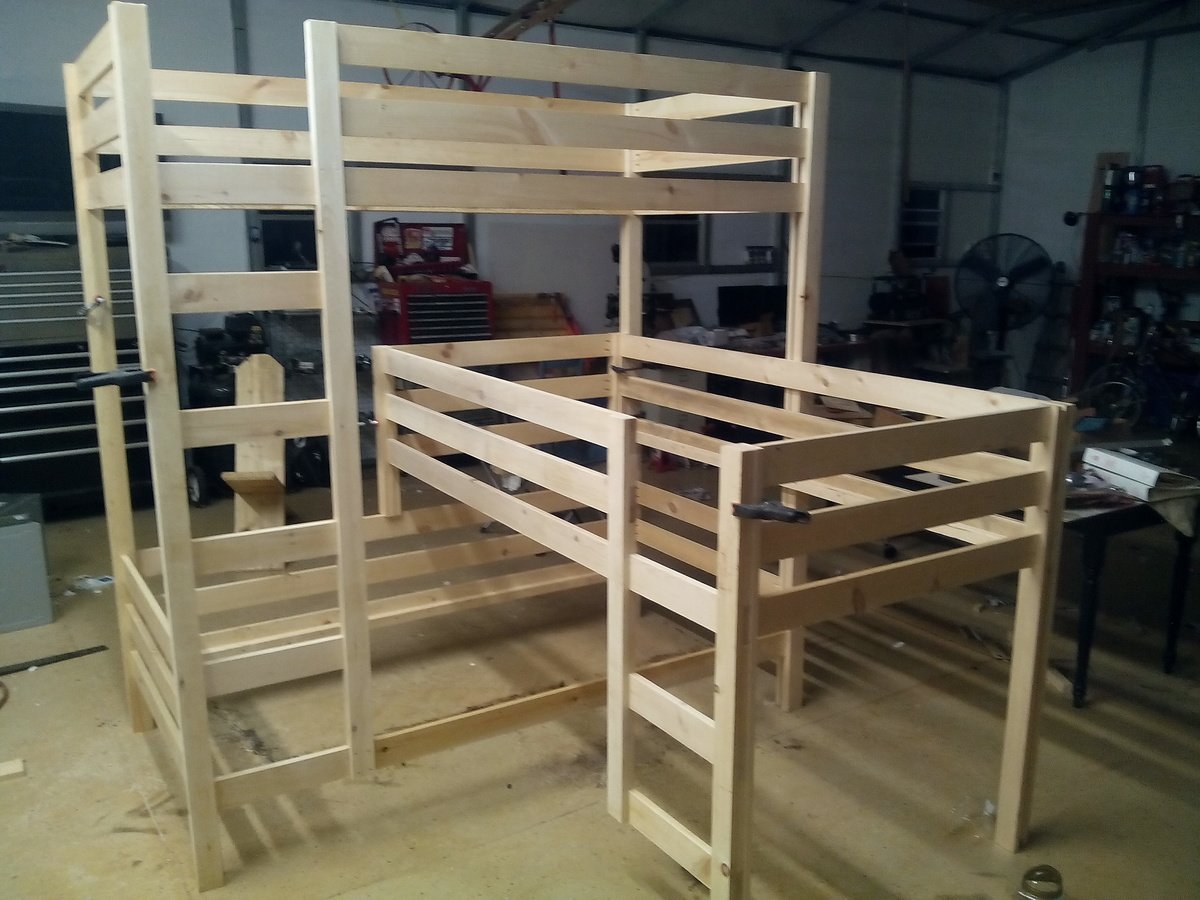
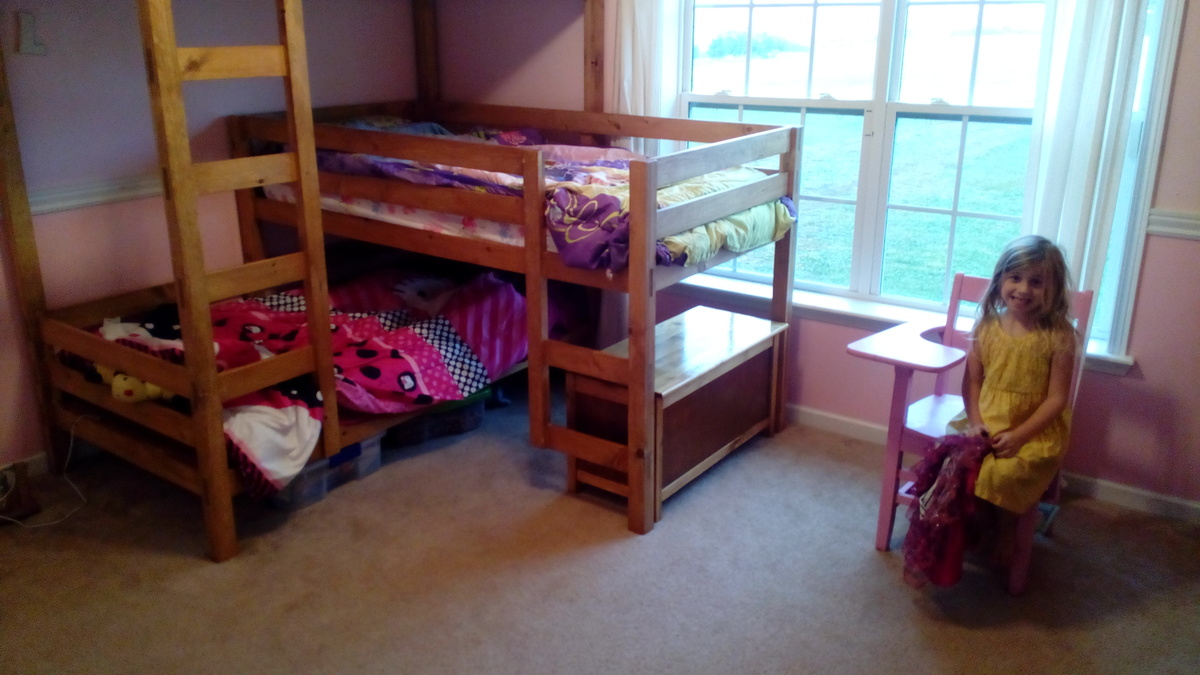
Rather than buying beds for two of our daughters, I wanted to take the opportunity to build them. I really had a great time doing. I used the plans from the Captains Storage beds, but modified it a little.
We ripped two 3/4 inch finished ply into 12in pieces.
That gave us all the sides, ends, and dividers.
The platforms are 12x12 3/4x
The ends are the same only sorter.
Rather than using slats for the middle support I just used the remain ply.
We finished the front with 6ft sections of 1x2 inch furring strips. A good sanding and clean up, and we are good to go!
Thanks for posting the plans! We really enjoyed building the beds and our girls love them!
Fri, 09/20/2013 - 13:14
LOVE this! was looking for something other than the slats that would TRULY hold my polynesian kids, thank you for sharing! :-)
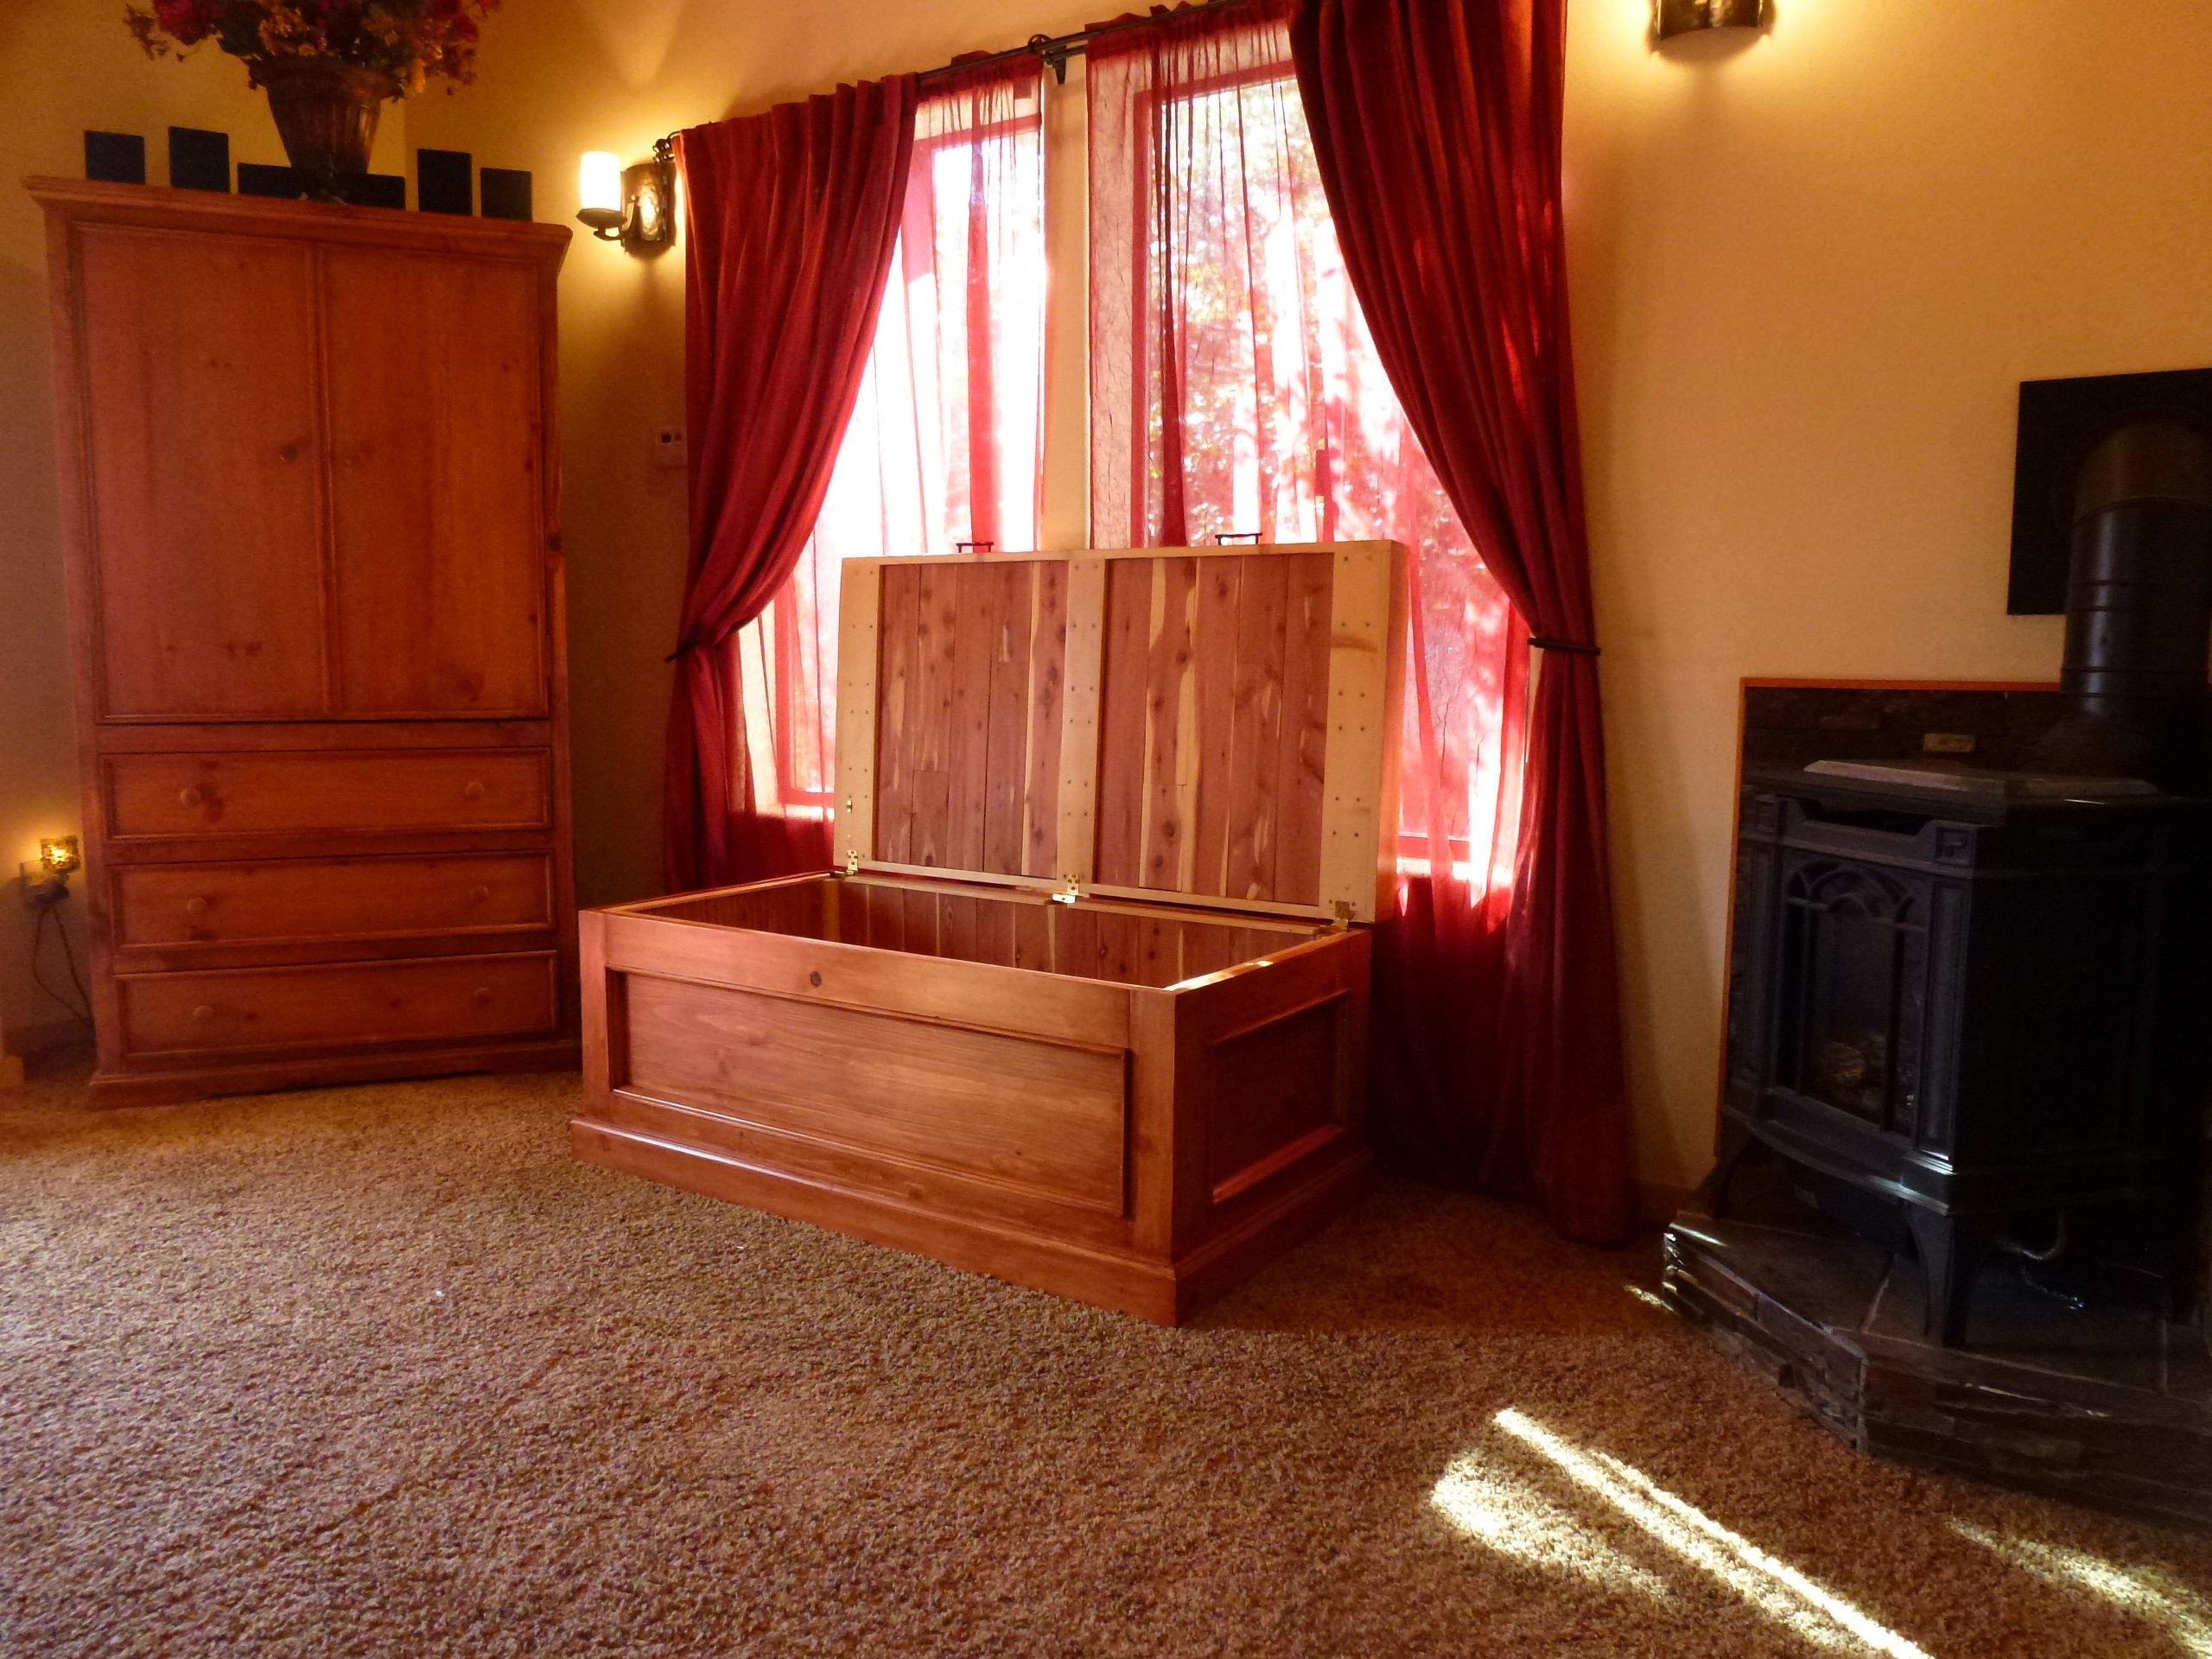
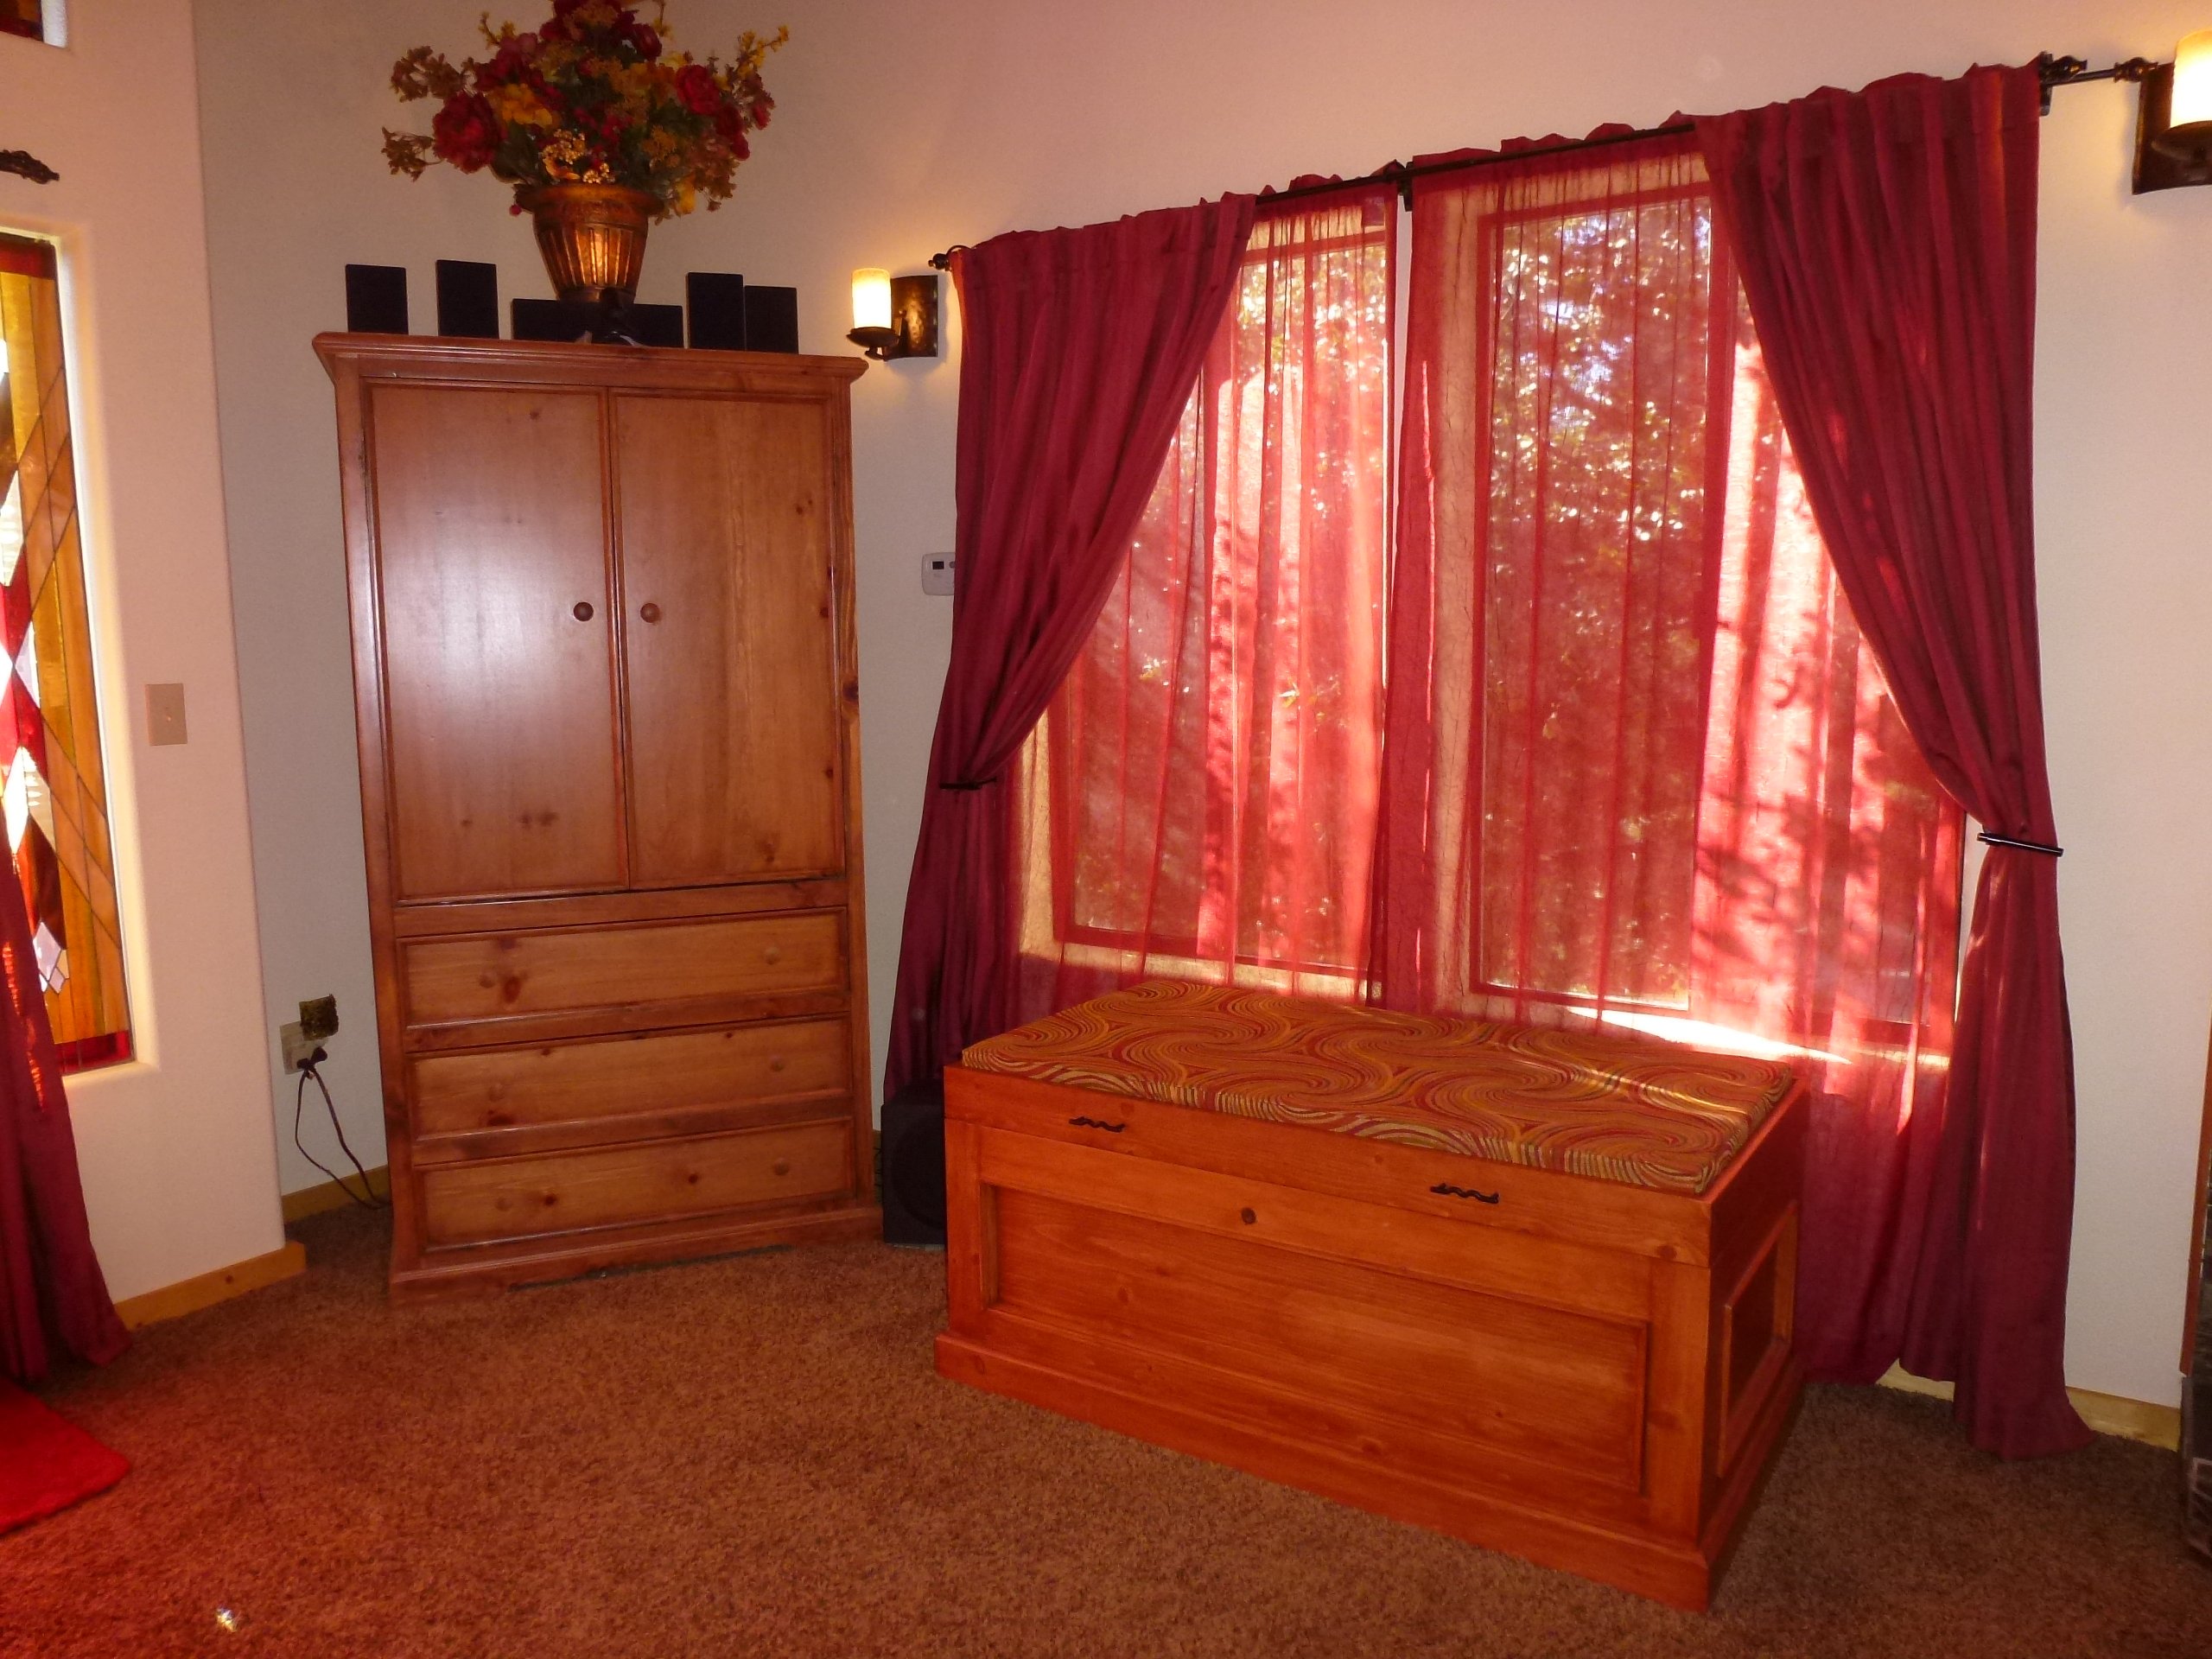
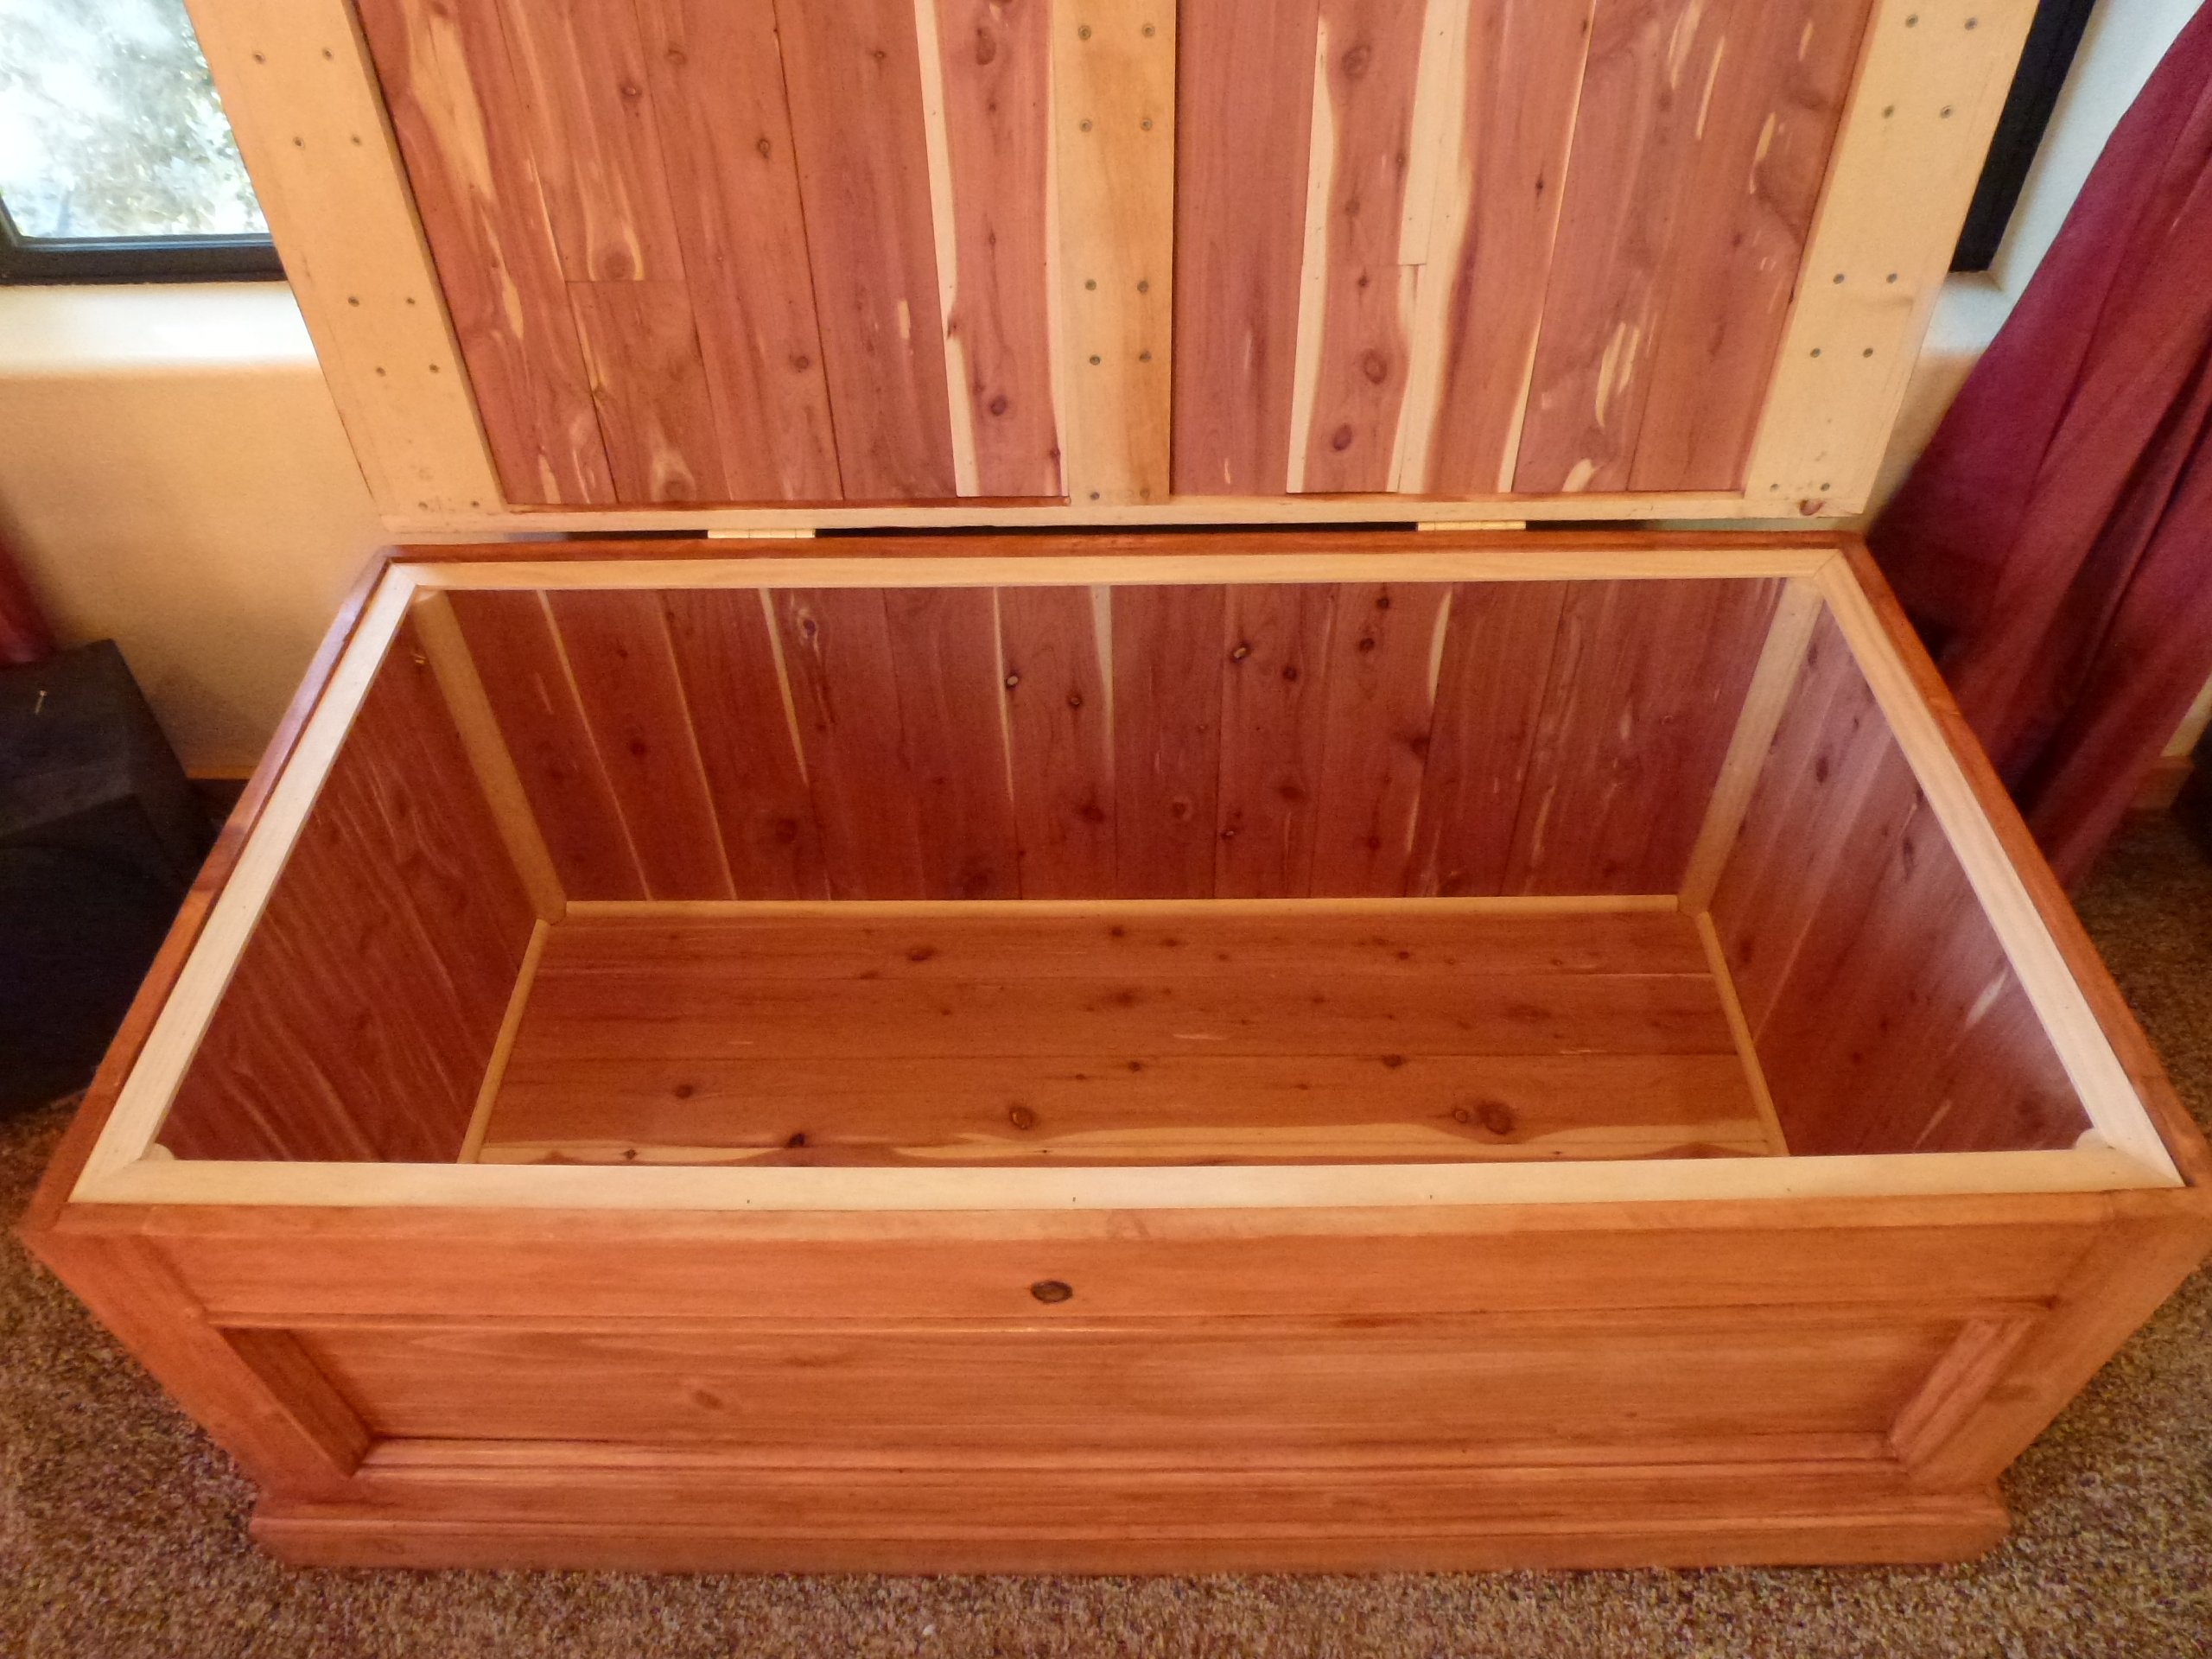
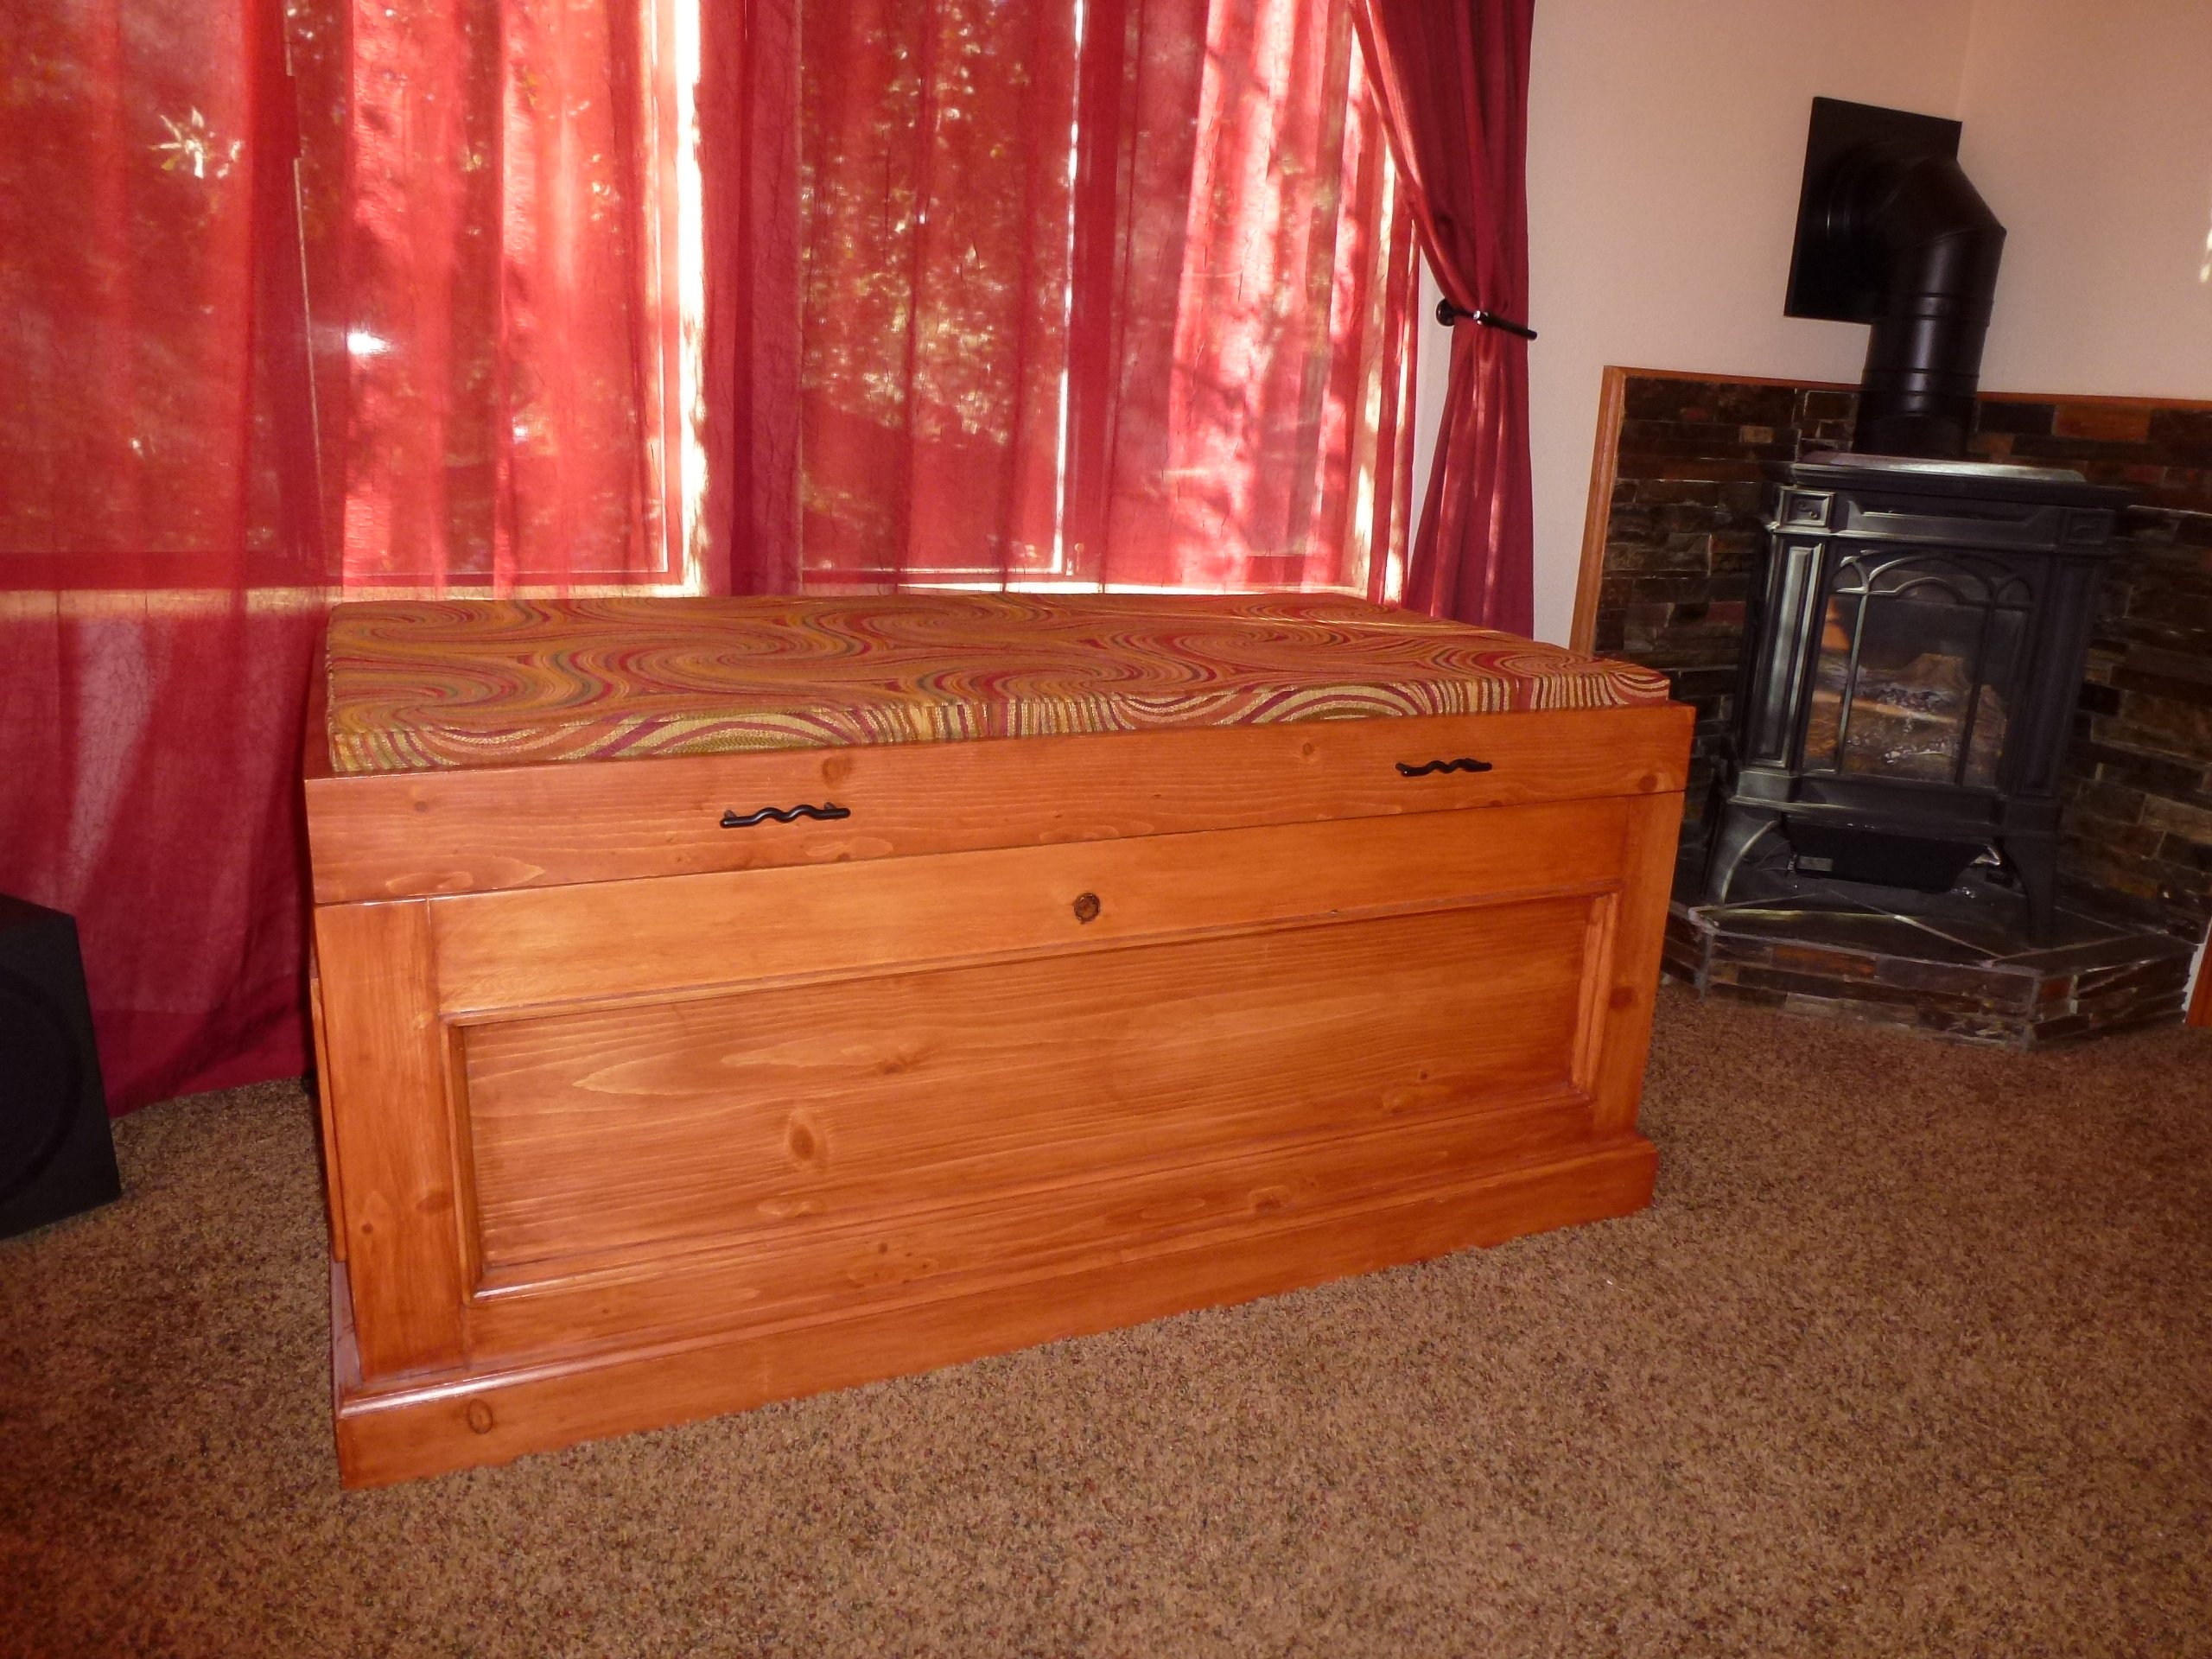
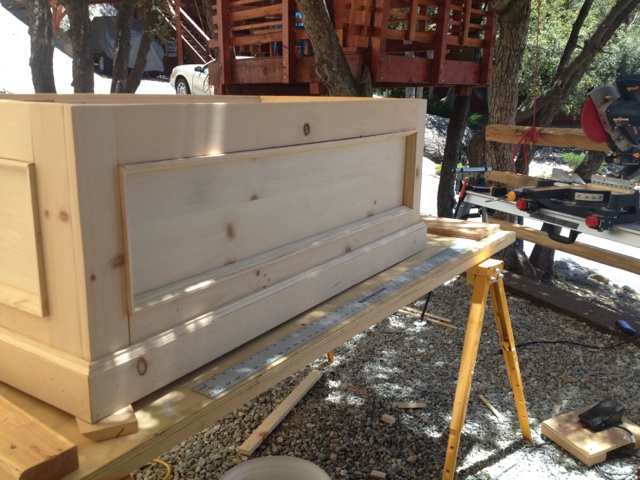
We have considered buying a cedar-lined chest to store blankets, towels, etc. for many years. However, we couldn’t find one that came close to matching the Knotty Pine bedroom set that we had in our master suite.
Hence, our design criteria was quite simple; match the bedroom set and have a chest sturdy enough to support our Beagles as they peer at the squirrels outside the window.
We used plans / ideas from several different chest designs which were readily available on the internet. Most of those plans were using hard woods such as oak. Those plans called for a hard wood framing with ¼” oak plywood for the panels. Since we needed to use Knotty Pine to match the bedroom set, we used 1” Knotty Pine for framing and Knotty Pine ¾ ply w/ Kreg Screws and copious glue to strengthen the construct. We finished it off with locally available 3/8” cedar T.G. planks. It is very heavy and very strong! This project was done entirely w/ Kreg Screws and no router rabbeting for the panels.
We learned the following while doing this project:
· When using soft woods, always put the power sander on the wood before you start the sander. Otherwise, you can get scratching / sander burns that don’t present themselves until staining begins.
· While very strong, ¾” plywood is very heavy!
· When using plywood, it is recommended that you stain both the visible and non-visible sides of each piece where glue is not to be applied. Otherwise the chance for delaminating increases dramatically.
60 hours work and $350 to build.
Mon, 12/15/2014 - 12:40
Beautiful chest. I better get busy and make one.
Aloha!
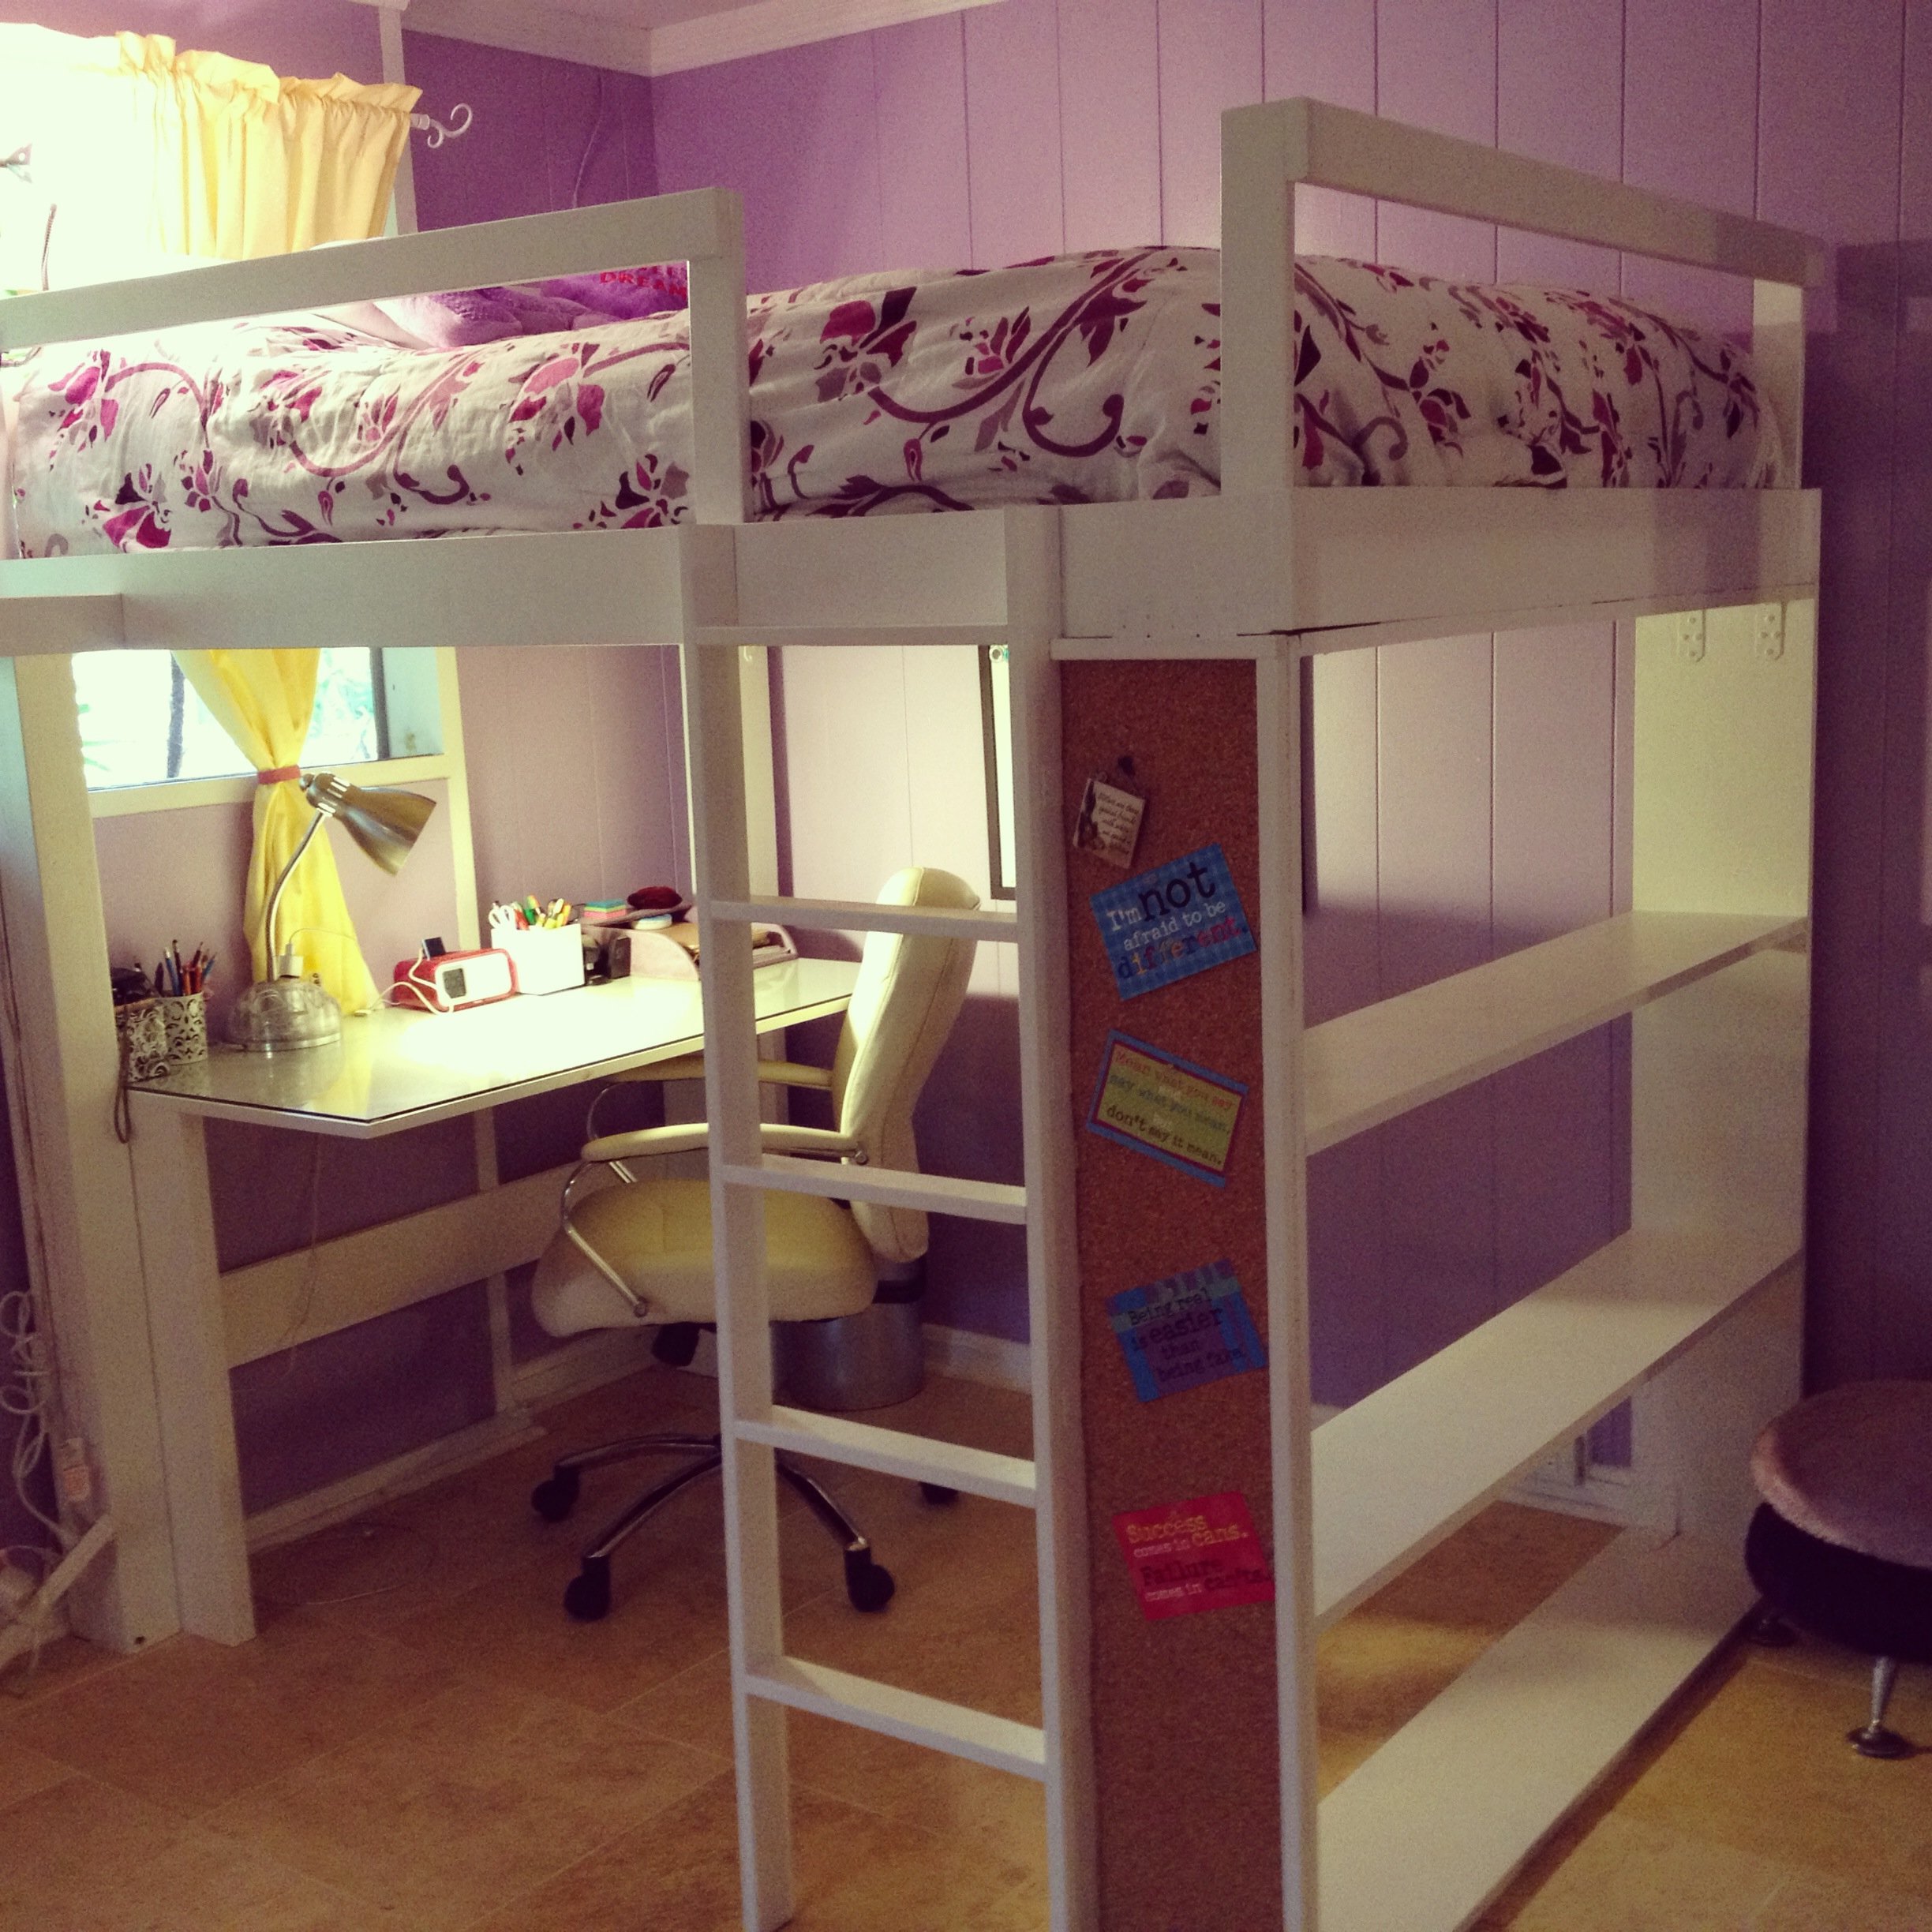
I was inspired by what I saw on Ana's website. My daughter was obsessed with the PB Teen version of the loft bed, so I tweaked the plans here to make it more like the $2500 bed from the catalog!!!!! Yikes and don't even get me started on what the shipping to Hawaii would be....It was well worth the effort! My daughter loves her new loft bed...Now if I can just figure out a way to get the dog to love the high bed!!!
Cheers, Tina
Sat, 06/22/2013 - 02:57
Aloha Tina!
You did a great job! I was wondering, how high is the bed, room and clearance? We also live in Hawaii and my daughter's room is small. Any feedback on what modifications you made would be greatly appreciated! Mahalo!
Tue, 06/25/2013 - 13:35
Hi Dawn,
Yes, my daughter's room has low clearance, so I tweaked the loft bed height.
I determined what top clearance I could maximize that would allow my daughter to sit up in bed comfortably, but it will be tight as she grows. She's 5 feet now...
Then I tweaked the desk area height as well to maximize without too much of a struggle to get into the area.. I hope this reply is helpful..
Floor to ceiling height is 96 inches. desk area has clearance of 56 inches and from the top of the mattress to ceiling has a clearance of 28 inches.
Aloha, Tina
Tue, 12/17/2013 - 16:06
Im having a problem finding the plans for the teen loft bed shown above. any direction would be appreciated! Thanks!
Tue, 12/17/2013 - 16:59
HI! There are no plans for this loft bed.. I used the plans on this site and just literally DIY'ed to fit my needs.. Sorry I know this doesn't help you much…
If you have a specific question, maybe I could help…
Aloha, Tina
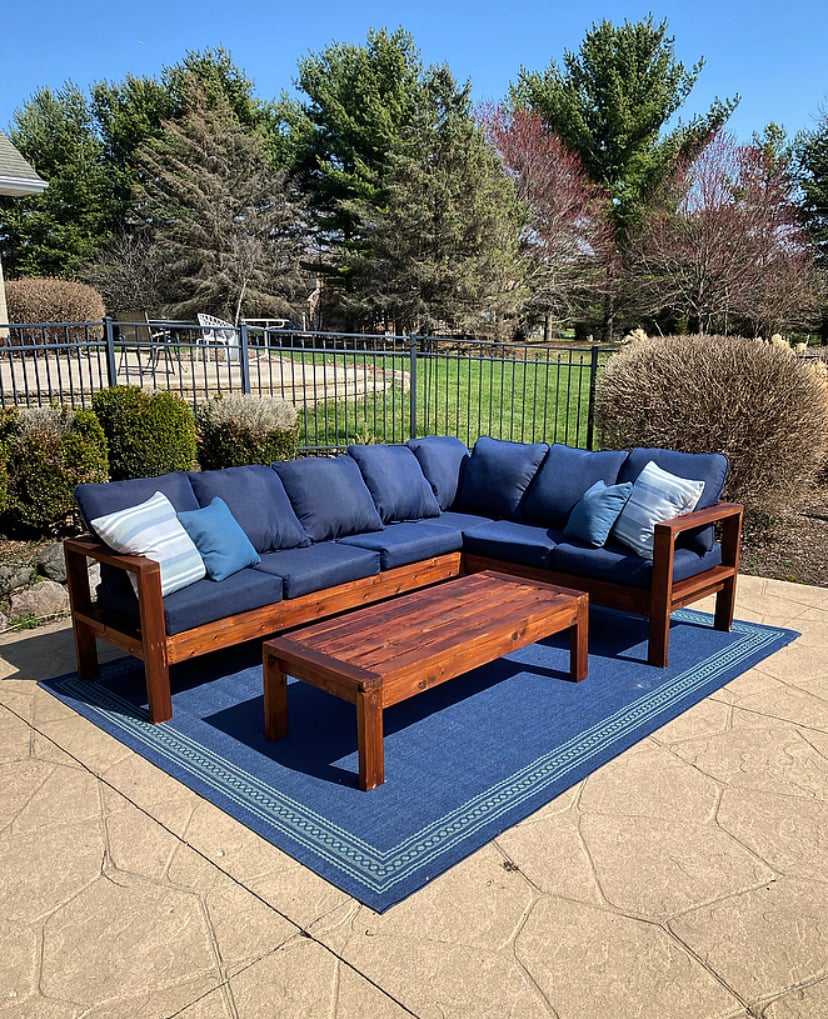
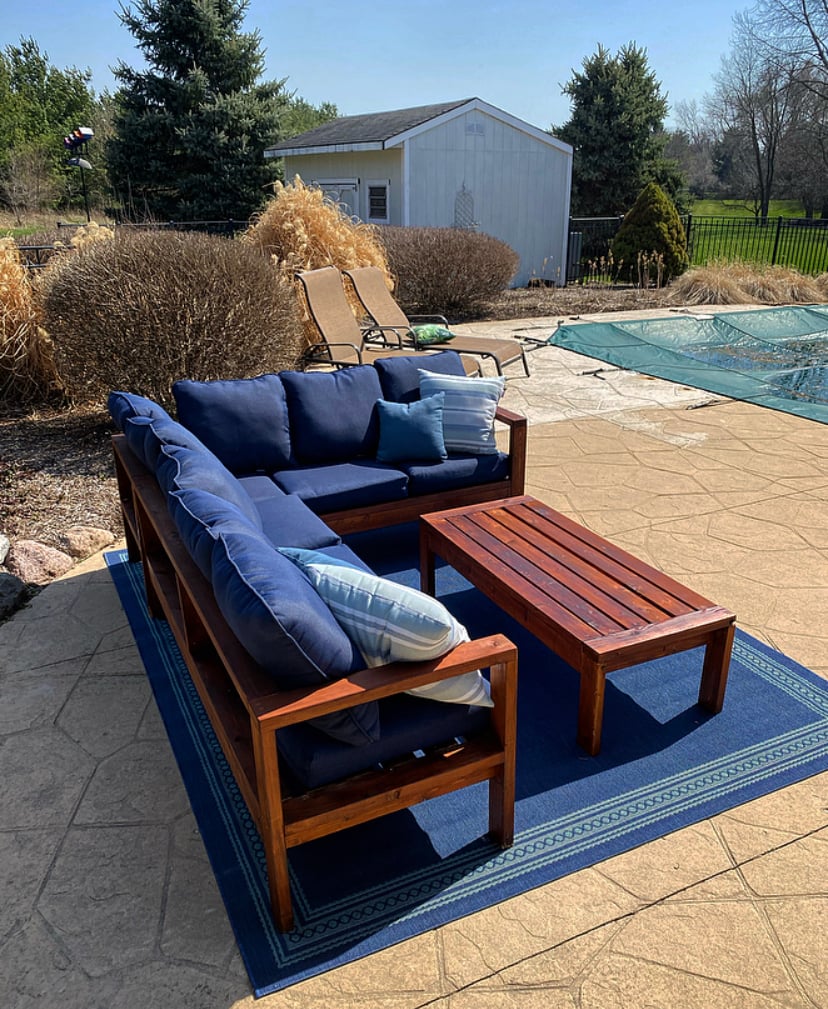
Here’s my new outdoor sitting area by my pool. Built from Ana’s outdoor patio sofa/sectional/coffee table plans! Used cedar for the build, Hampton Bay 24”x24” cushions (Home Depot), and found some outdoor throw pillows from The Great Escape store. Stained the cedar with Cabot’s Jarrah Brown exterior wood stain. Very happy with how it all turned out!

Built from the outdoor coffee table plans.
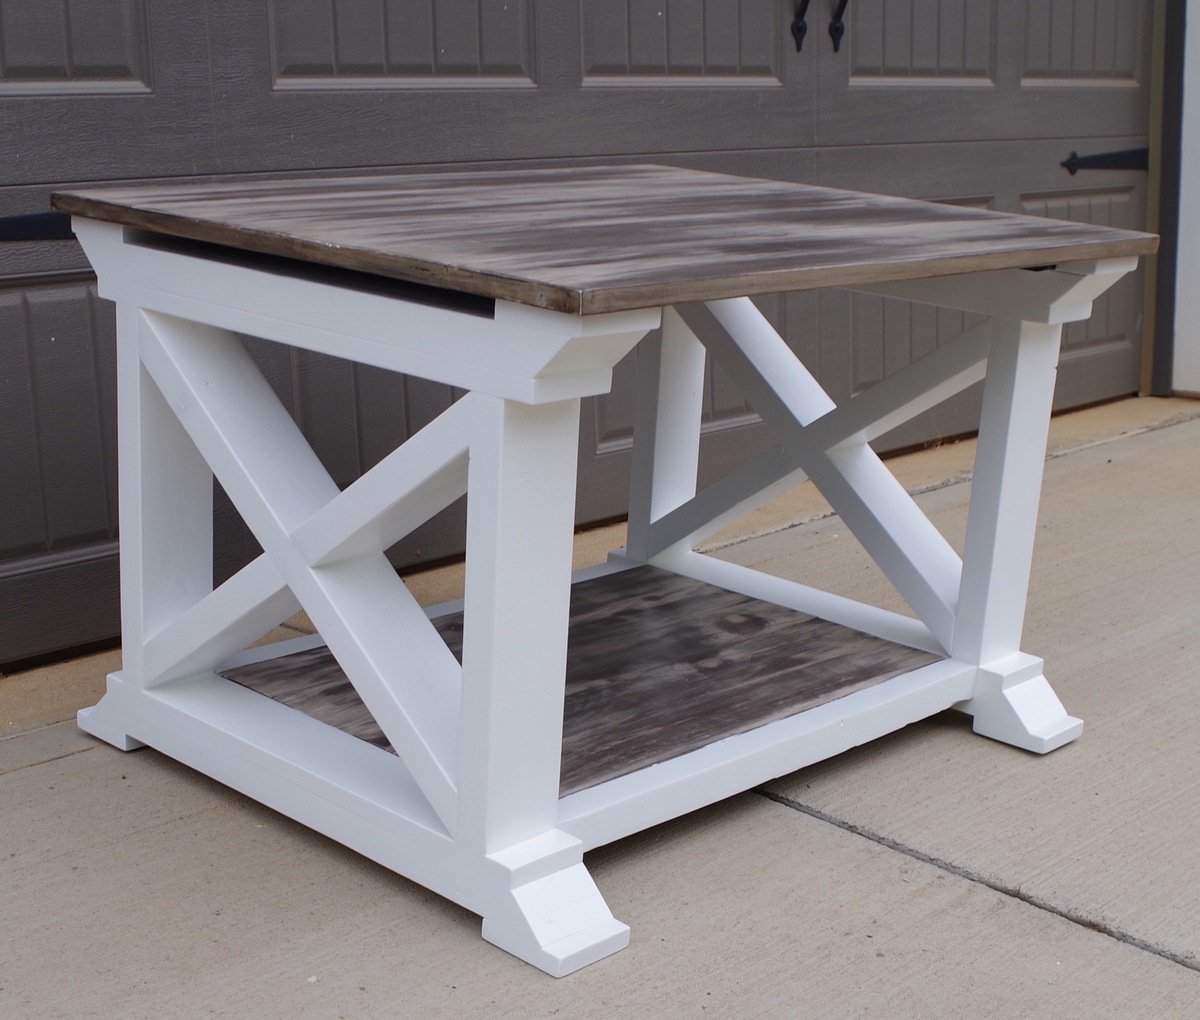
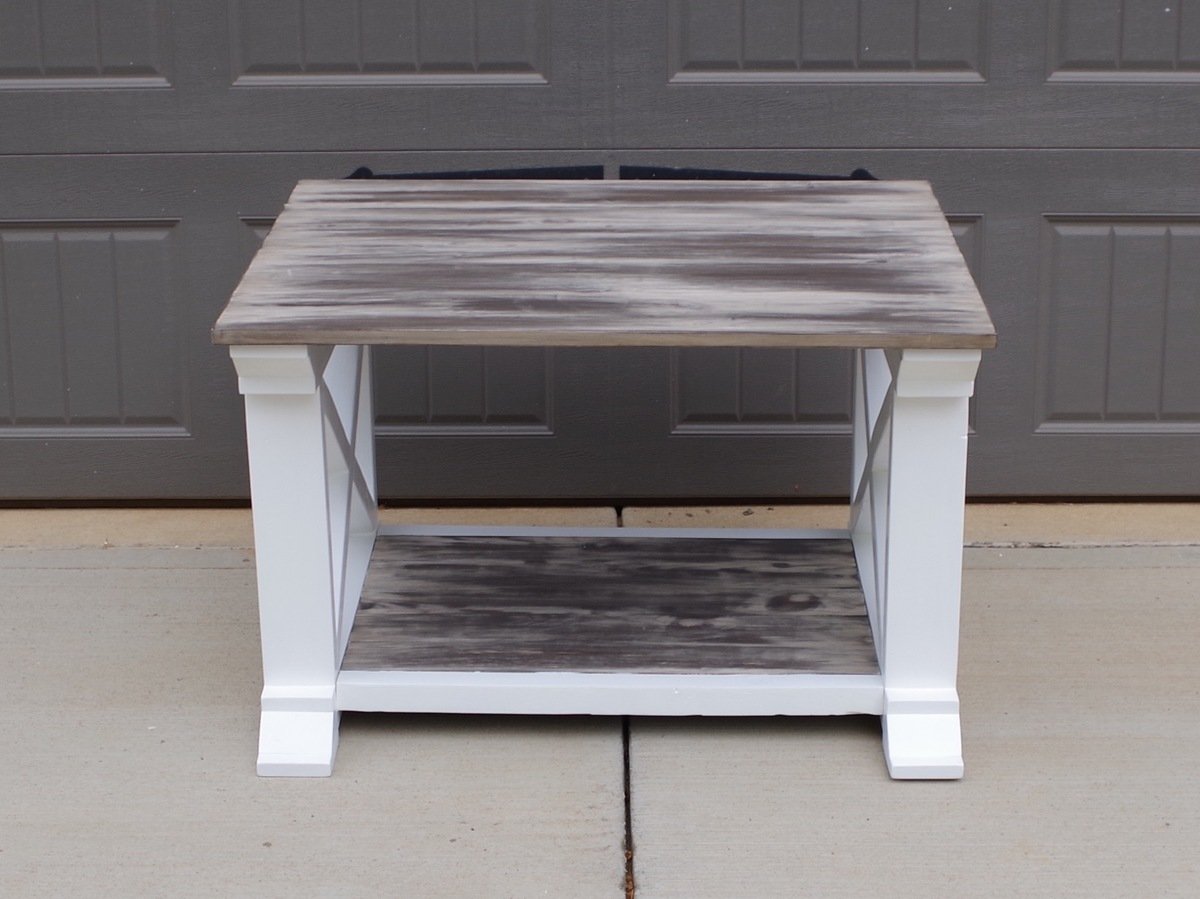
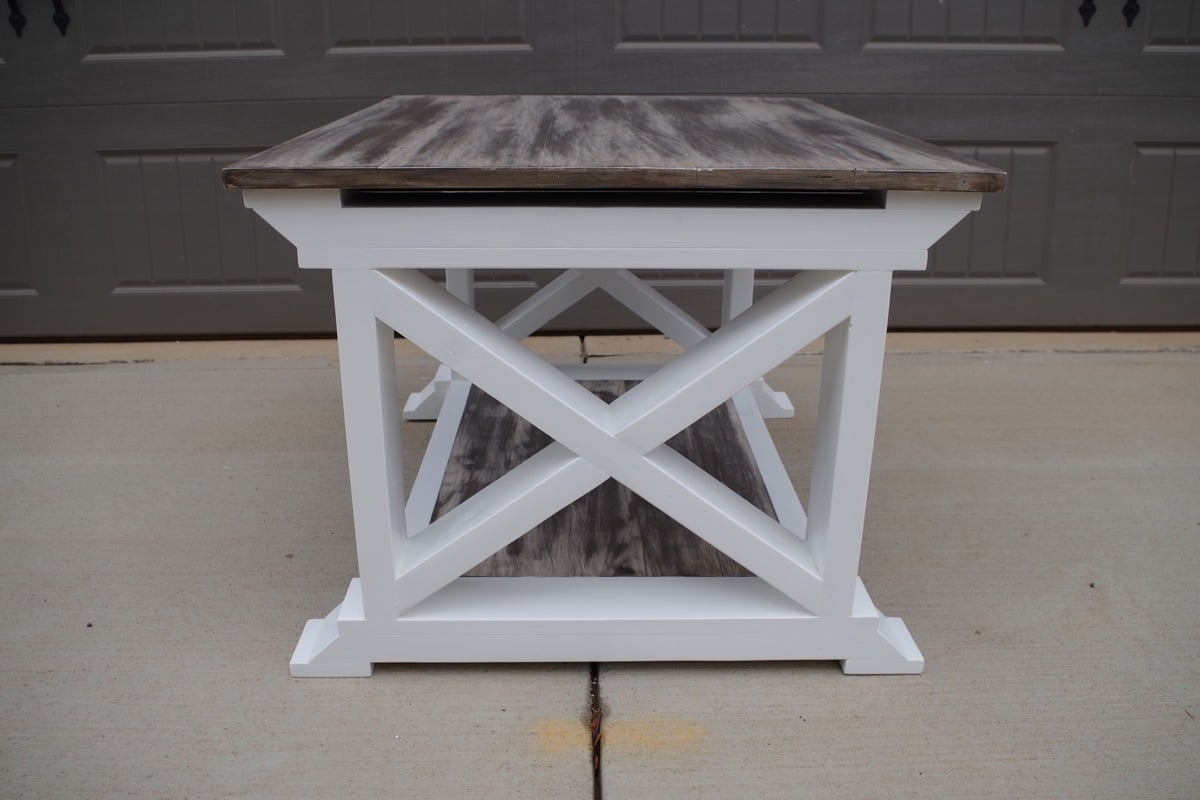
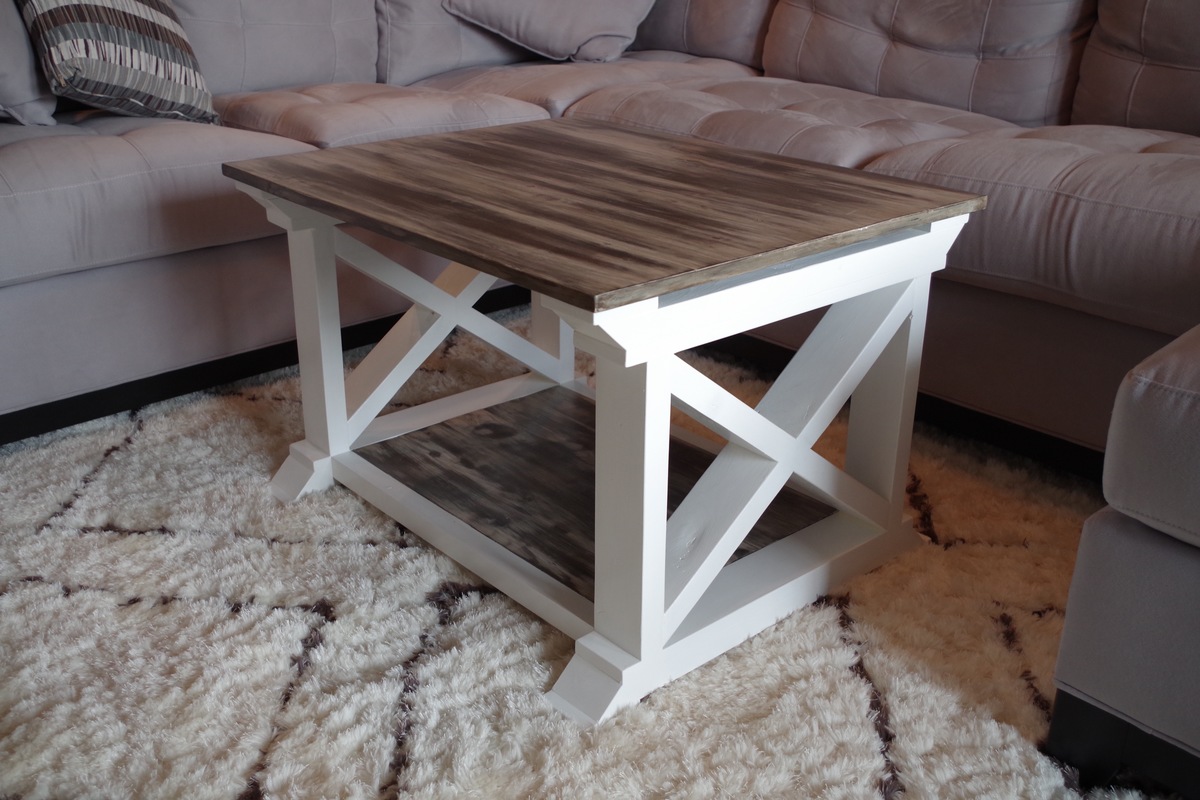
Changed the dimensions up a bit on the coffee table and shrunk them down to make matching end tables.
Changed the top layout and the bottom shelf a little bit.
Thank you for the plans!!!
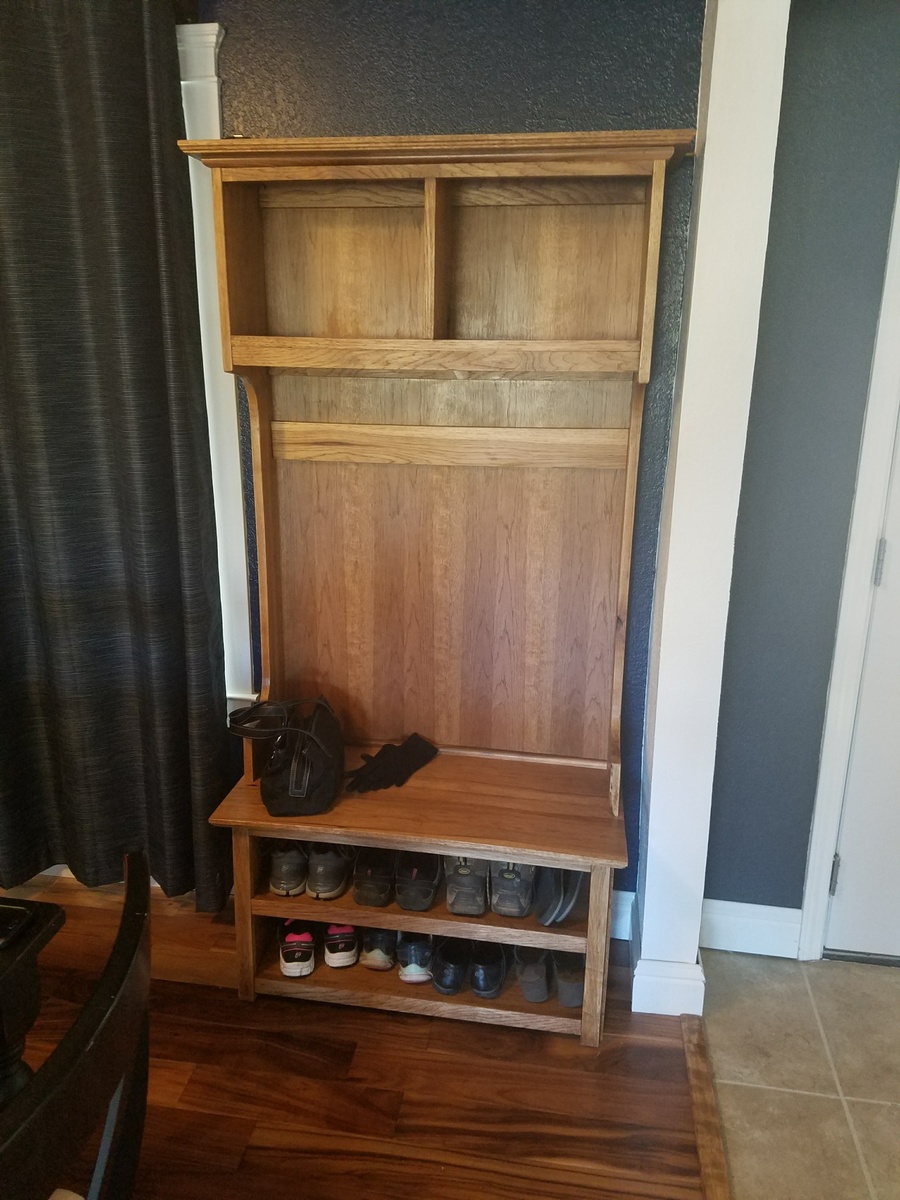
My wife wanted a Hall Tree with a bench to sit on and shoe storage. I used Mimi's Hall Tree plans for the Hall Tree and added the Shoe Rack/Bench for the base. It's all made out of Hickory. I love the multitude of colors in that wood.
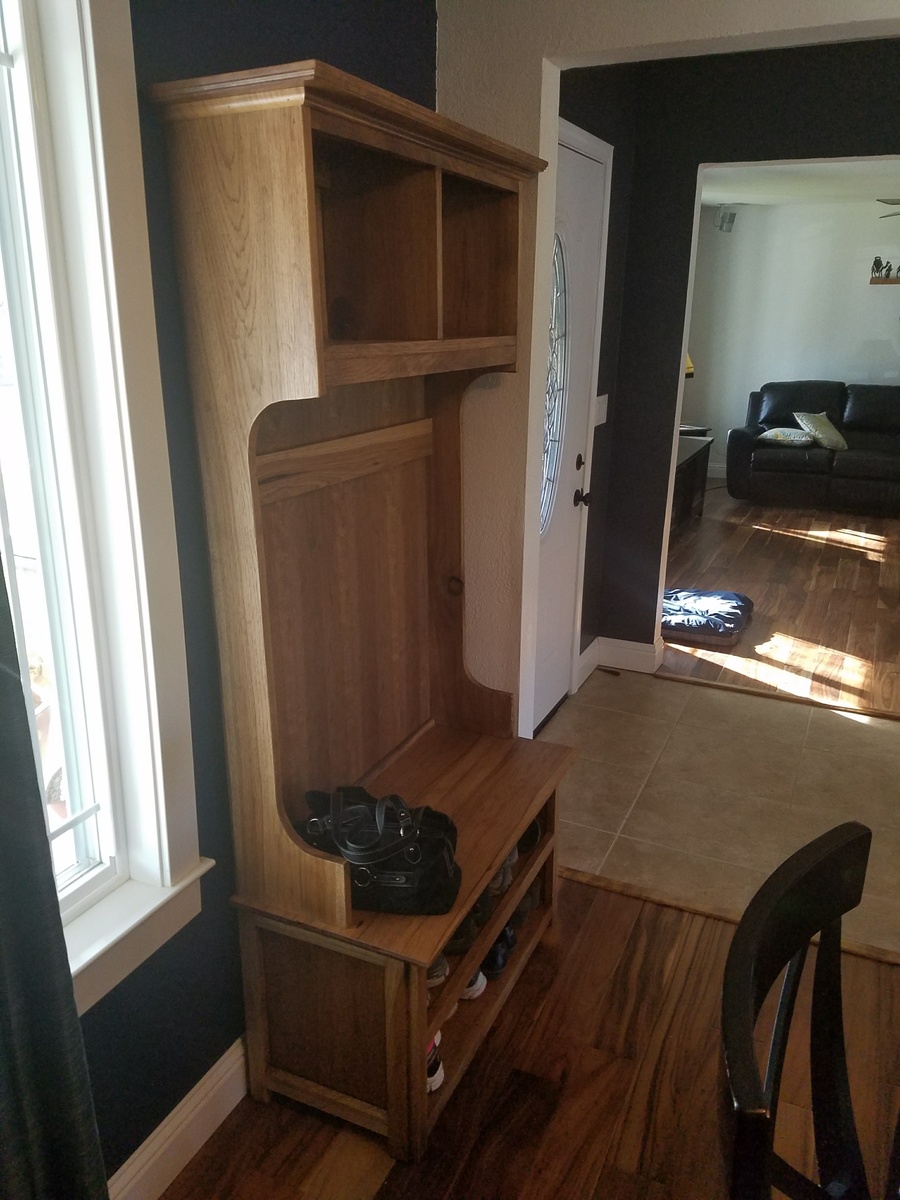
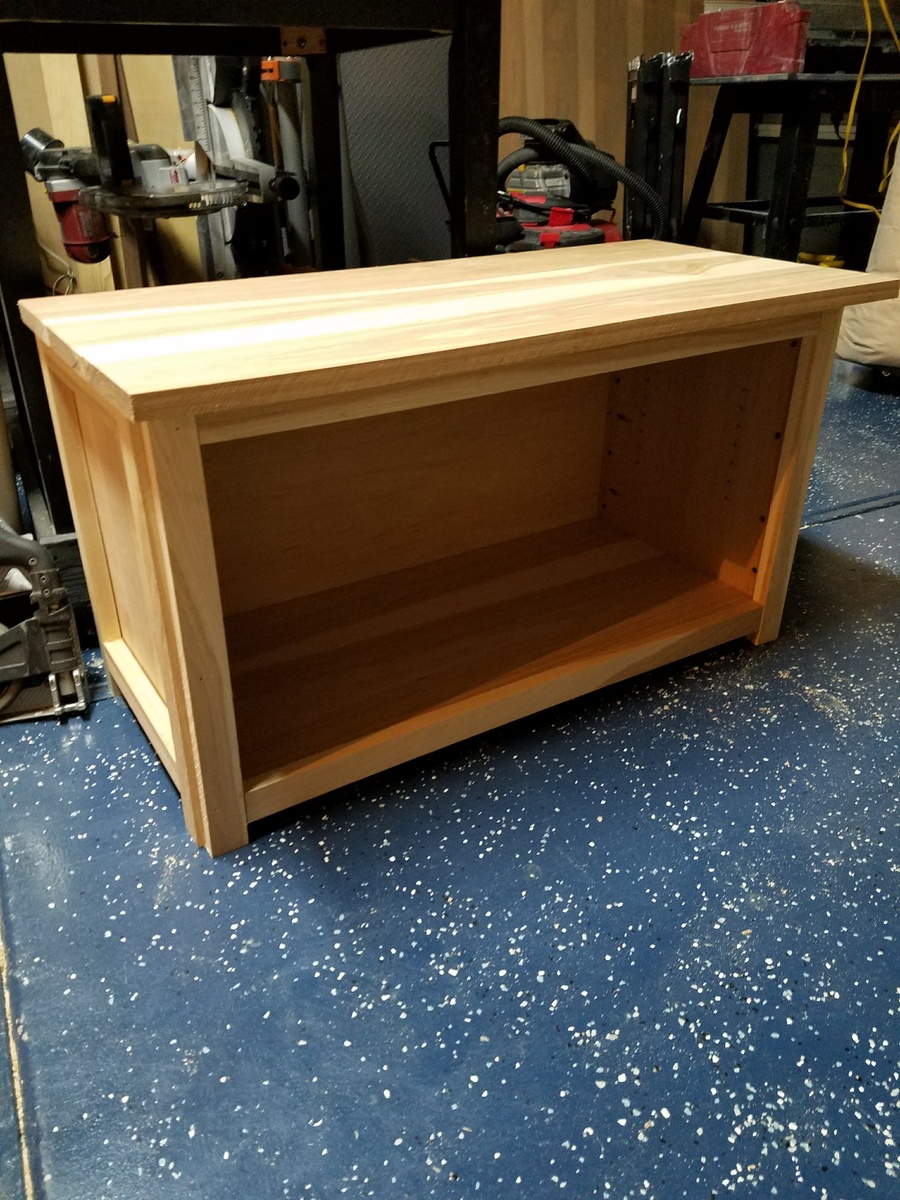
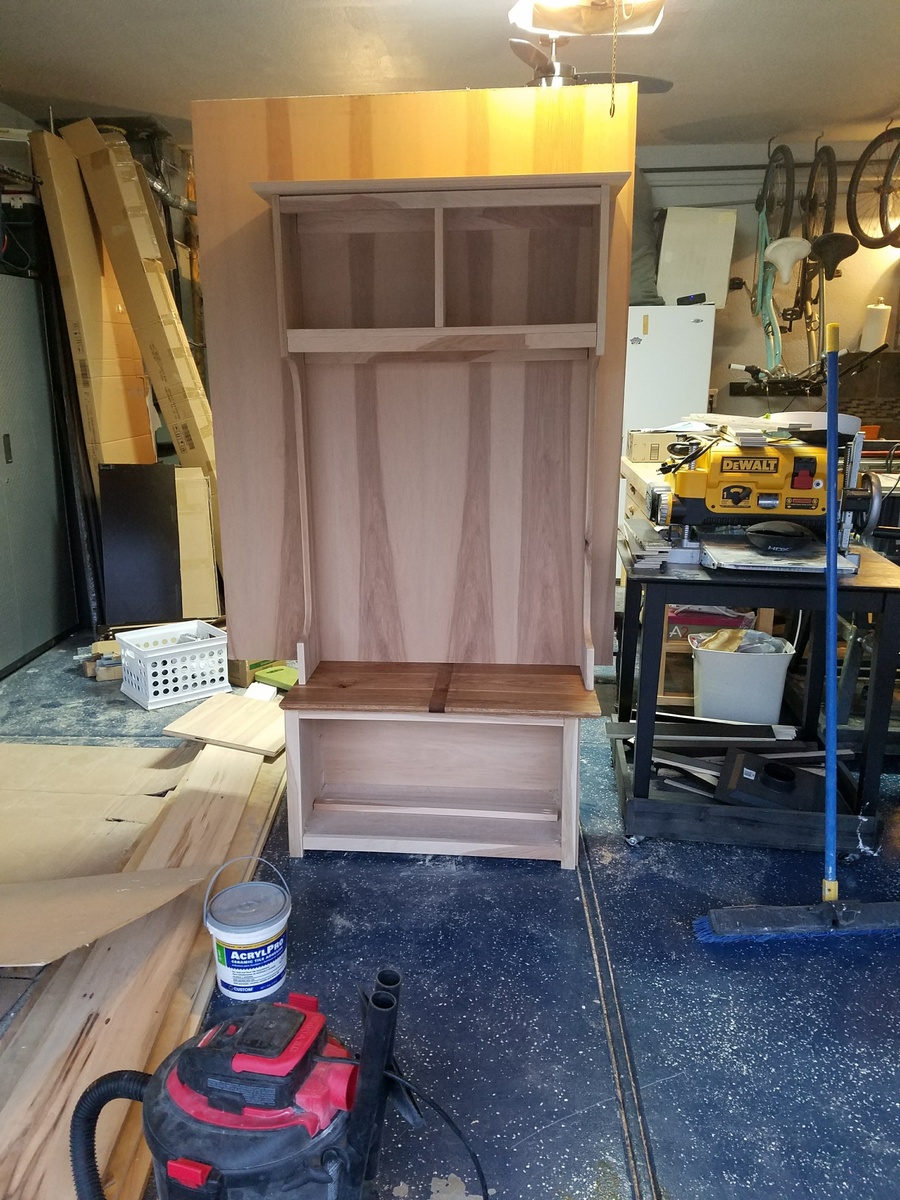
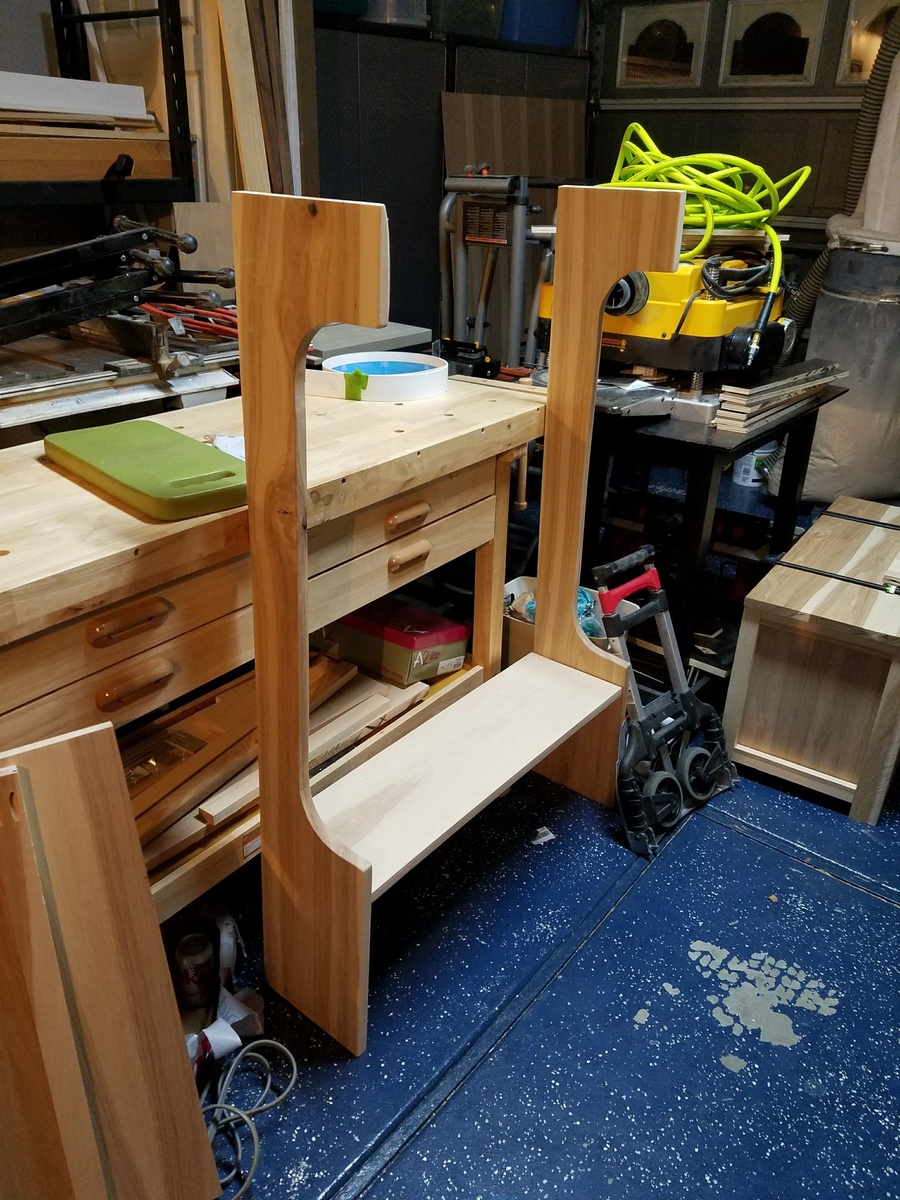
Adjusted the shelves slightly. Love the roll away portion.
Sun, 05/15/2022 - 11:55
This is gorgeous, thank you for sharing! Just shared on our facebook page, we'd love to give credit if you'd like to respond with your name:)

This was my take on your Twin Sleeper Chair. I made it into a full. I used 2x4’s where there was suppose to be 1x4’s because I changed the width. This was a very fun project, my first project actually. Thank you for the plans and idea.


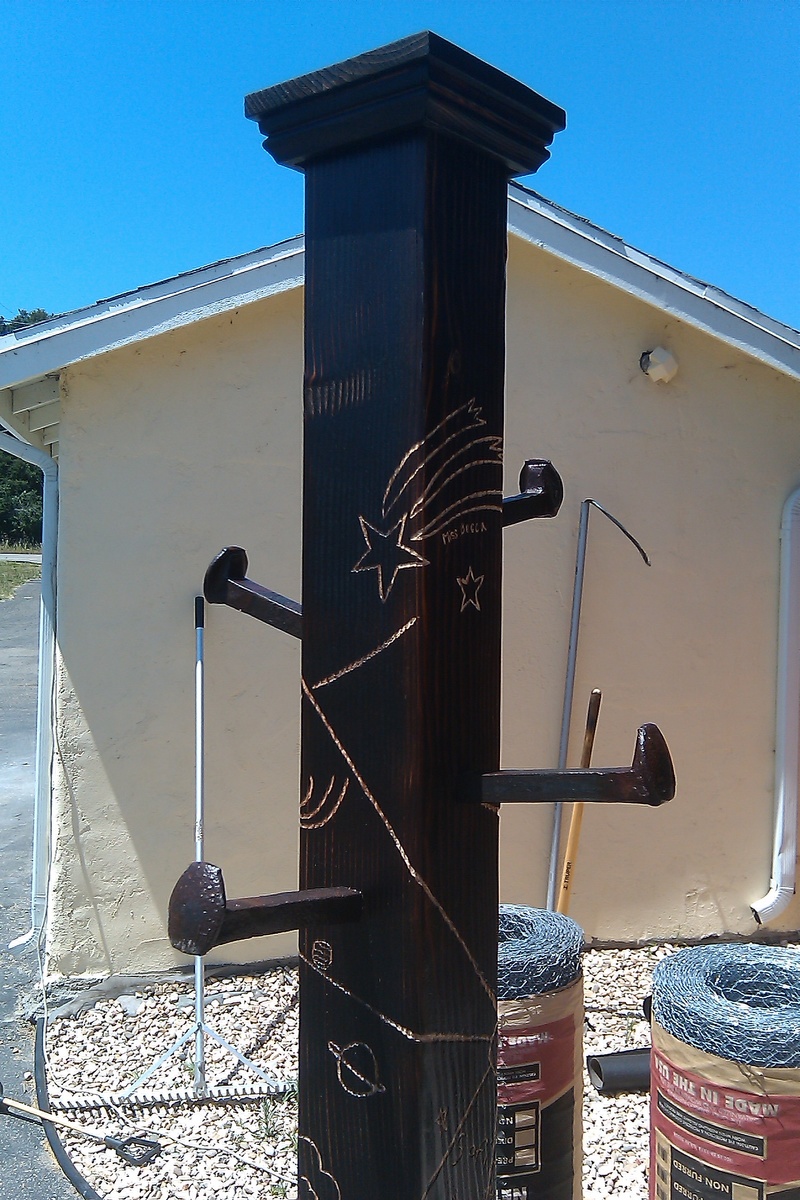
An artsy twist on the typical coat rack. Instead of coat hooks I used railroad ties. Instead of paint, i used a blow torch and burnt it black and for the art.... I used a dremel tool and engraved a classroom of 1st graders artwork into the wood.
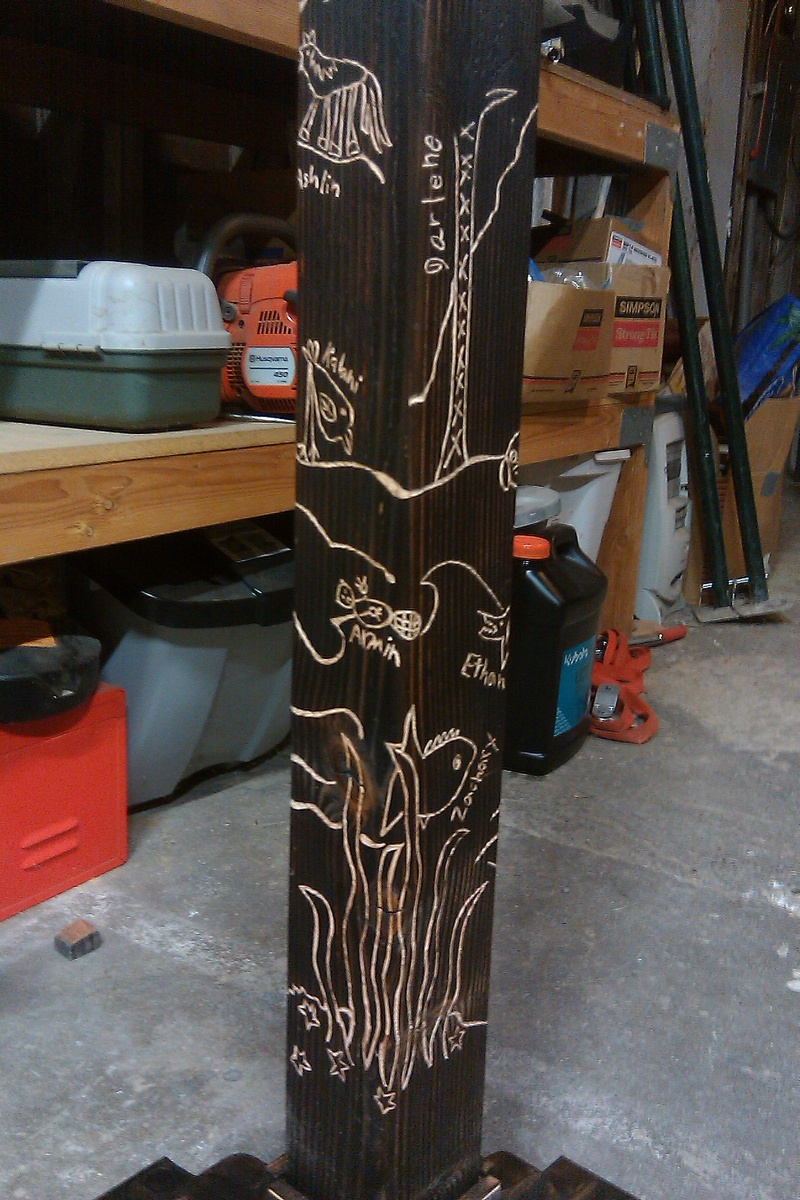
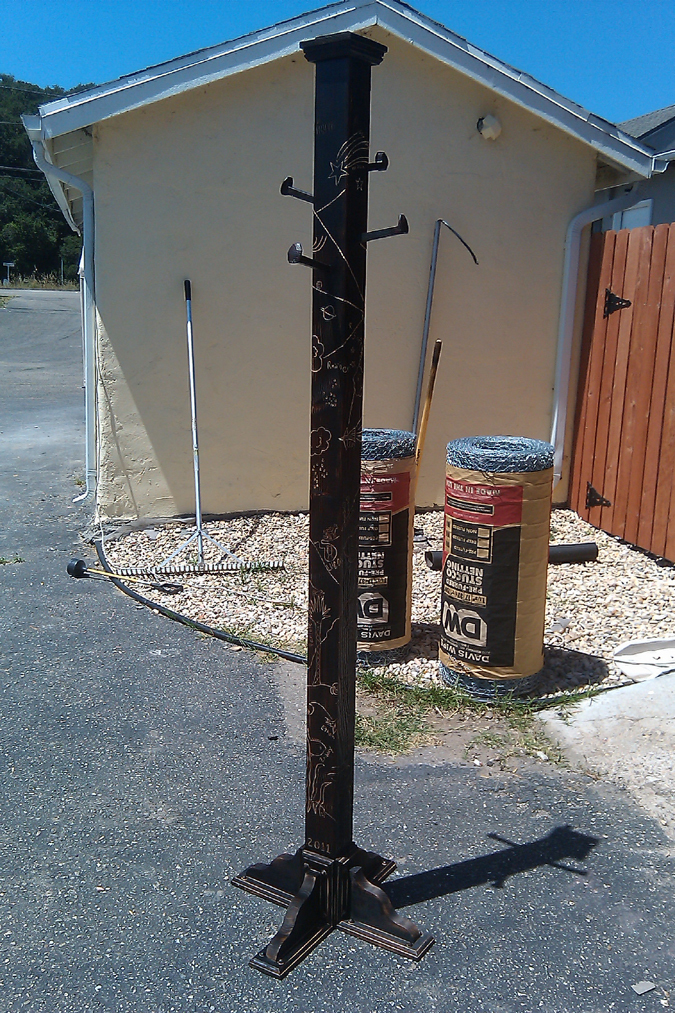

Wed, 08/03/2011 - 16:06
Cool! I love the creative touches you used to make this unique.

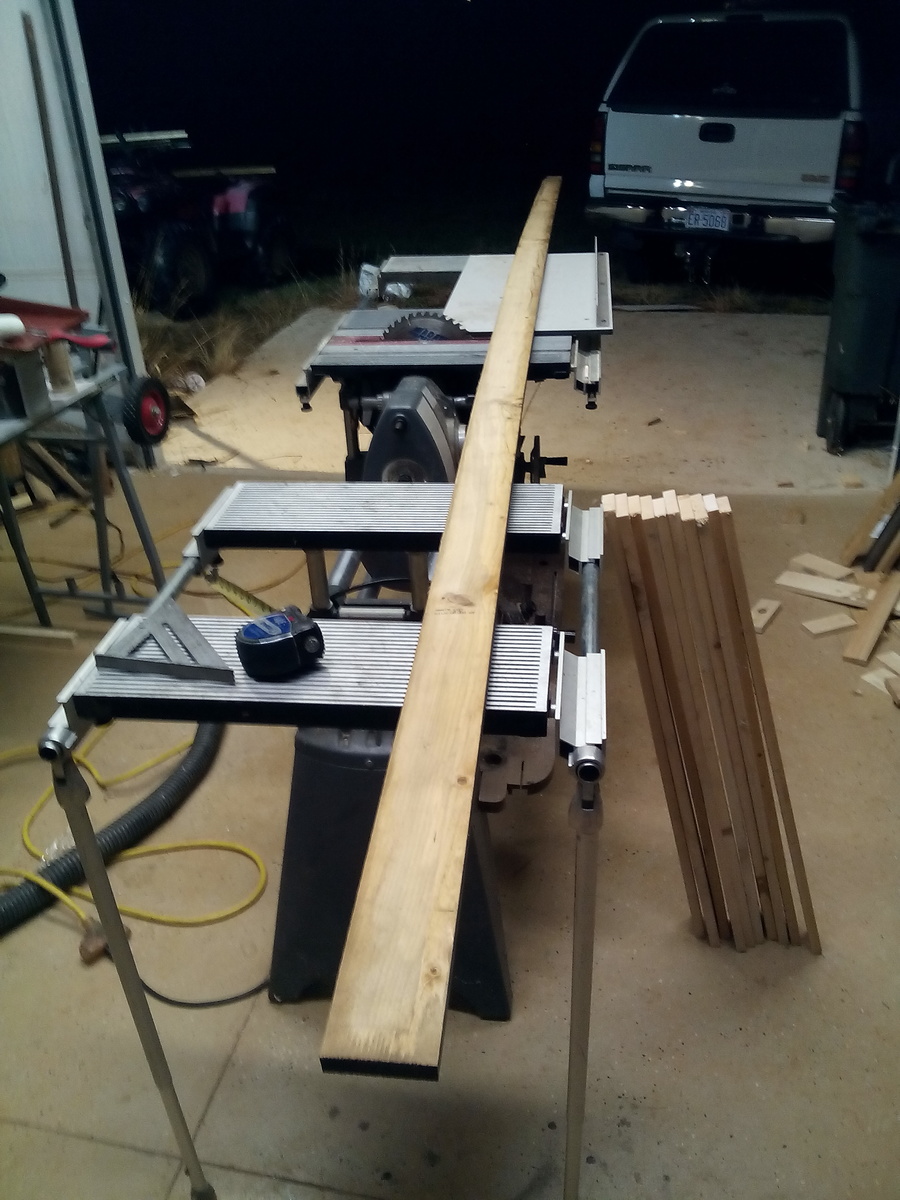
my mailbox was hit by a vehicle so I decided I wanted to do something creative/different but also didn't want to spend much money as it may just get taken out again in the future :)
this is a good project to get kids to help you with
instead of cutting into the concrete easement, I installed 2 post bases & locked them with sleeve anchors. They're sturdy enough but will give if hit again. drilling the holes for the sleeve anchors was the hardest part of the project.
I used a left over 4x4x8 for the posts, scrap 1x4s, 1x2s up the sides (1/2" gap between boards), and a 2x4 scrap to attach the mailbox. I eyeballed the width between posts using the mailbox itself. I left over stain from another project (almost bought a quart of oops paint at HD)
I figure the total cost would have been about $100
It's a super easy project that took about 4hrs. I've already had a couple of neighbors come by to take measurements to try something similar.
FYI: USPS guildlines for installing a curbside mailbox: https://www.usps.com/manage/mailboxes.htm
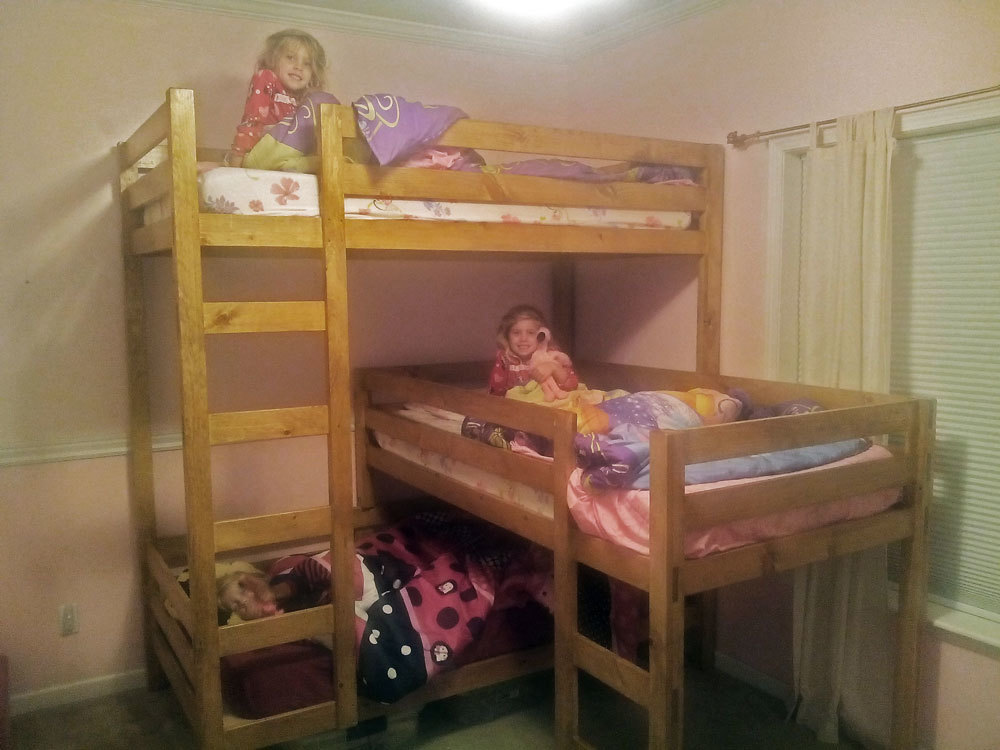
I took the “classic bunk bed” plans and changed them to accommodate my 3 girls. I have 9 ft ceilings so I just stretched the traditional plans out to allow the 3rd bunk to be added. It turned out nice and my girls enjoy it. I also built a matching toy box that is visible in one of the pictures. Please excuse my messy shop. I built this with my 40 year old shopsmith and a kreg jig. Thank you for the plan.
Not my first project but this time, I took picture to add a brag post.
Not in a garage but in a washing room kind of.
Length: 8 feet
depth: 16 inches
I was alone to do it and it is not so easy... better to ask someone to help you
cost: don't remember exactly but there is 8 2*4 @8feet + one complete prenium plywood sheet 1/2. Should be around 75 CAD $
Fri, 11/25/2022 - 12:37
This looks amazing, thank you for posting to the brag board!
Still need a couple more drawers, plus stain and seel, but I just couldn’t wait to post. Took me most of the day (drawers suck), but it was extremely helpful to have the article and visuals to aid. Can’t wait to move on the the next project. I’m slowly becoming obsessed and a “wood whore”
Wed, 02/01/2023 - 09:21
I would be excited too, that looks amazing! I can see some really great projects being built there, thanks for sharing!
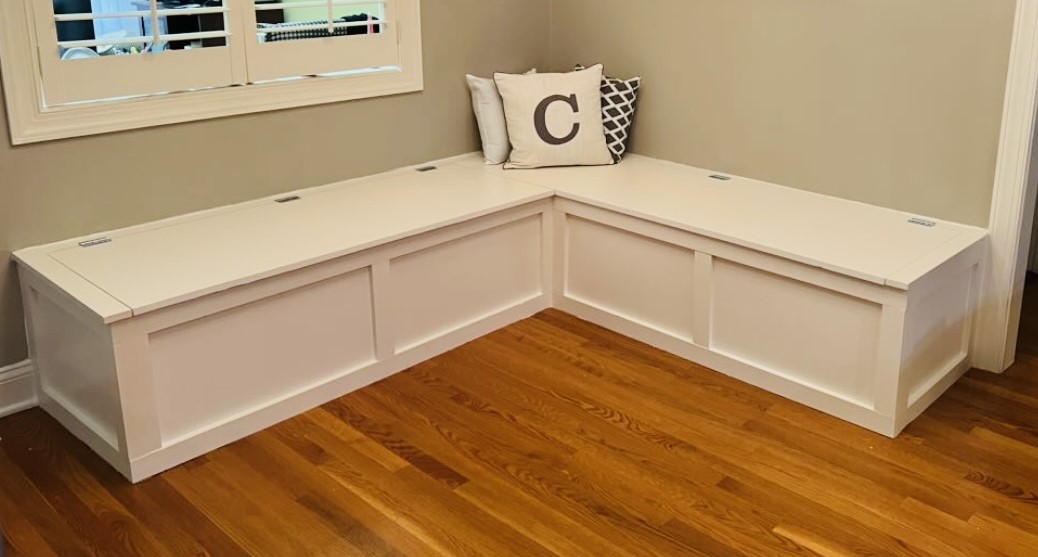
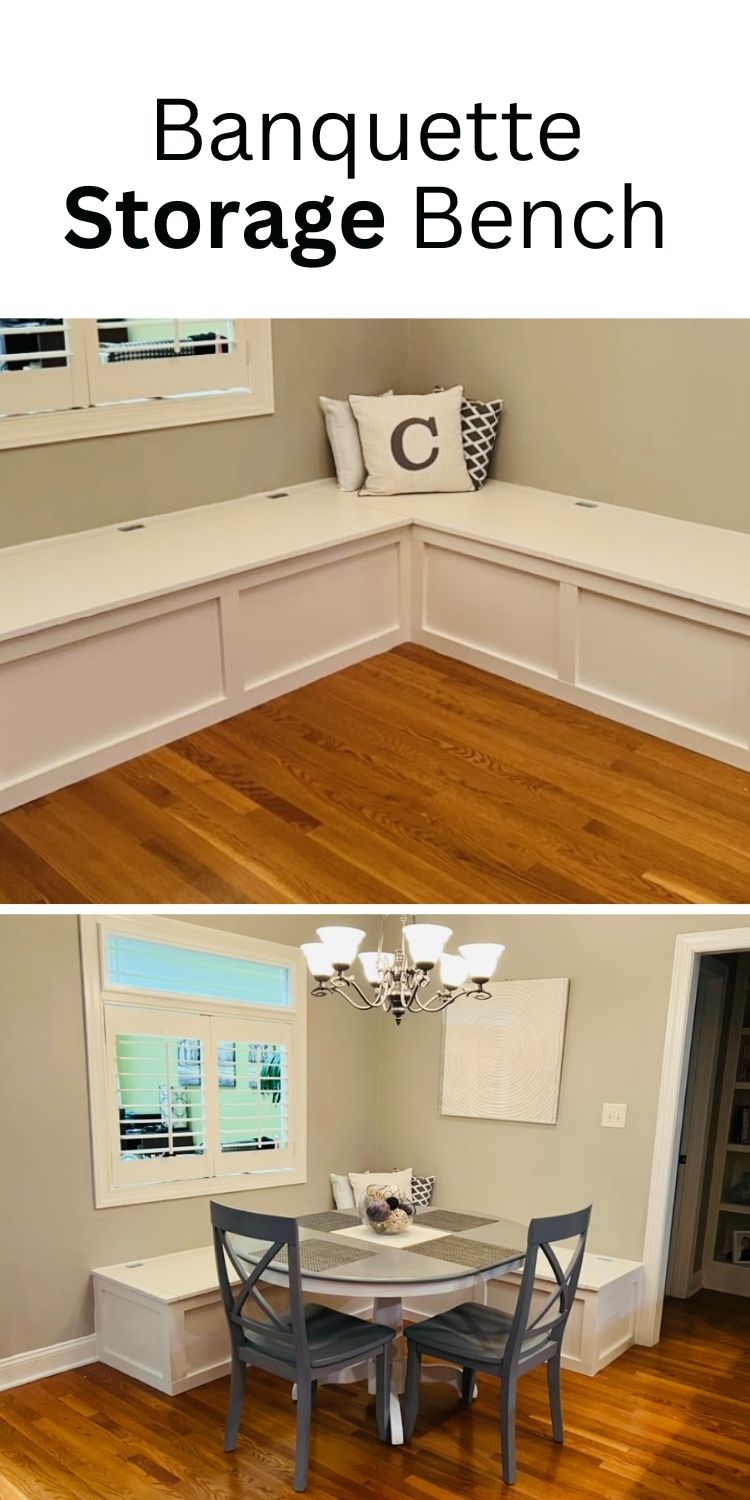
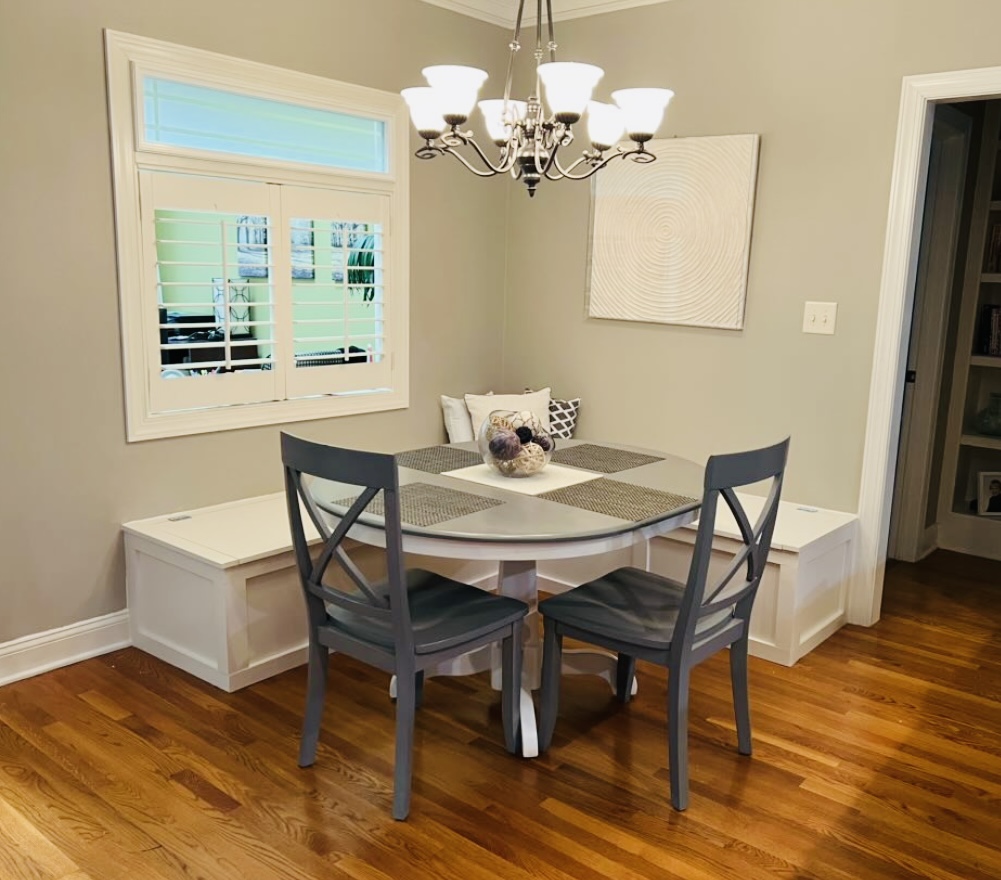
Beautiful banquette storage bench by Catherine Caputo

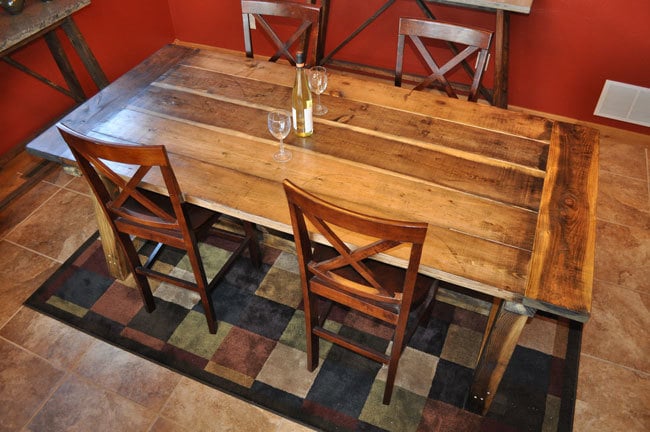
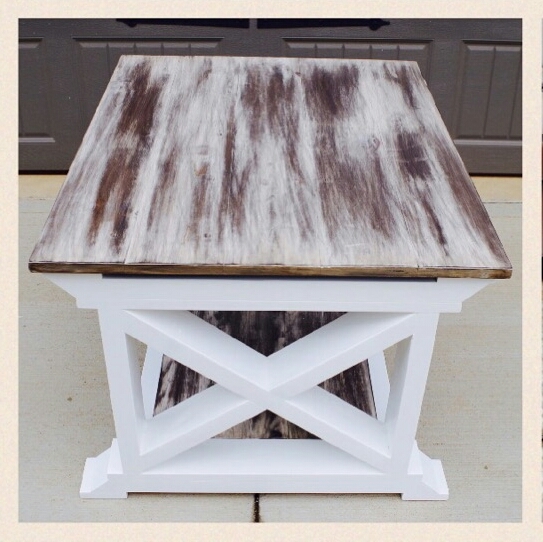
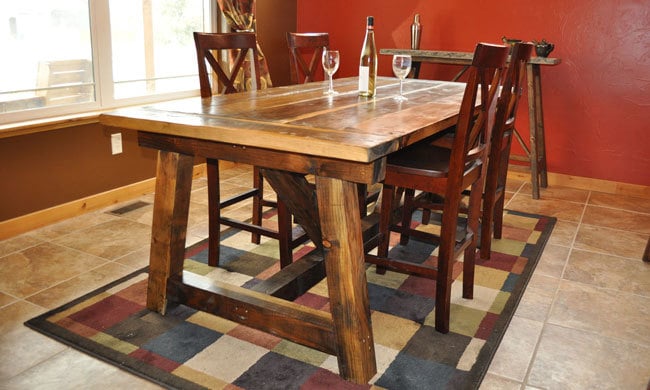
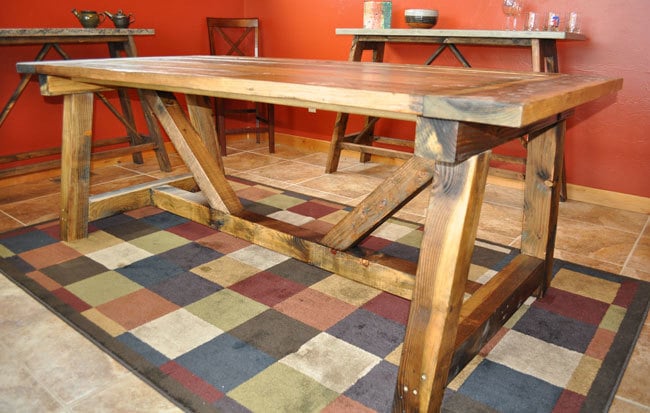
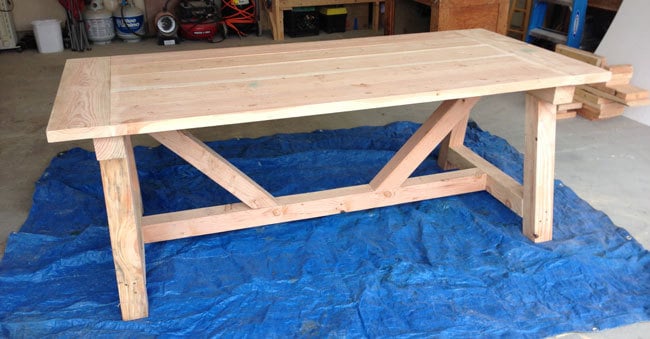
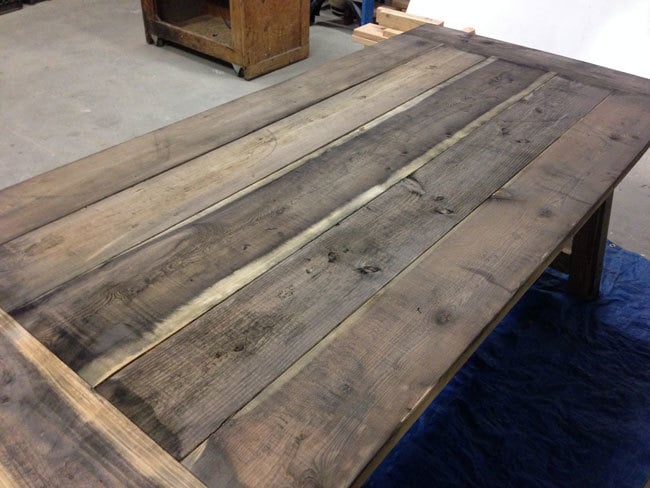
When I saw Ana's plans I had to make this table for my home. I like the rustic look, and so I distressed the wood using a steel wool and vinegar solution. I modified the top by using four 2x8's and one 2x10. Otherwise everything is the same. It turned out great and everyone who has seen it at my home loves it.
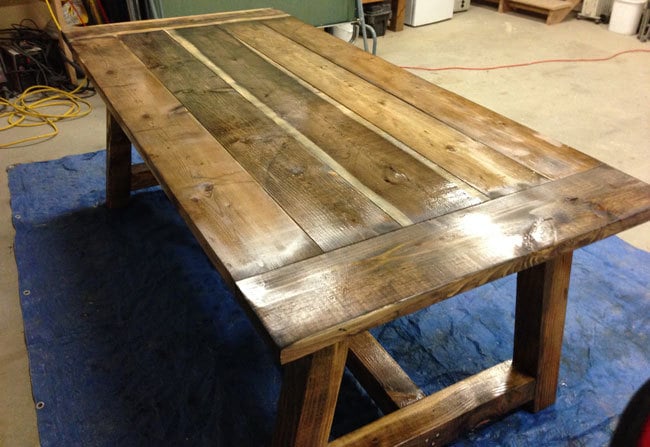

Wed, 10/23/2013 - 10:08
I like the steel wool and vinegar finish, give it a nice weathered look!
Fri, 09/05/2014 - 05:55
So very very new to all this wood working but very excited to get started! I LOVE the finished look of this table. I had never heard of steel wool and vinegar, but just googled and can't to try it! Thanks!
Fri, 09/05/2014 - 05:56
Not really a question after I googled for details on the mixture. So just a fan comment :)

Wed, 11/25/2015 - 07:14
I Love this Table . You should just come to our house and make it for us.LOL
I was just wondering what type of wood did you use? We live in the south east and cant find any Douglas Fir wood. what other wood would you suggest?
thanks Char

Tue, 08/09/2016 - 07:12
The table looks fantastic. I know you built this two years ago. How has the top of the table held up? I am currently working on this table, and I am debating weather or not to use the kreg pocket screws or to use 7/16ths dowels for the body and mortise and tenon joints for the breadboards. However, that is more work than the kreg screws. If the kregs hold up well, than I would rather do that. Anyway, the table looks fantastic.


Comments
Ana White Admin
Fri, 09/11/2020 - 10:43
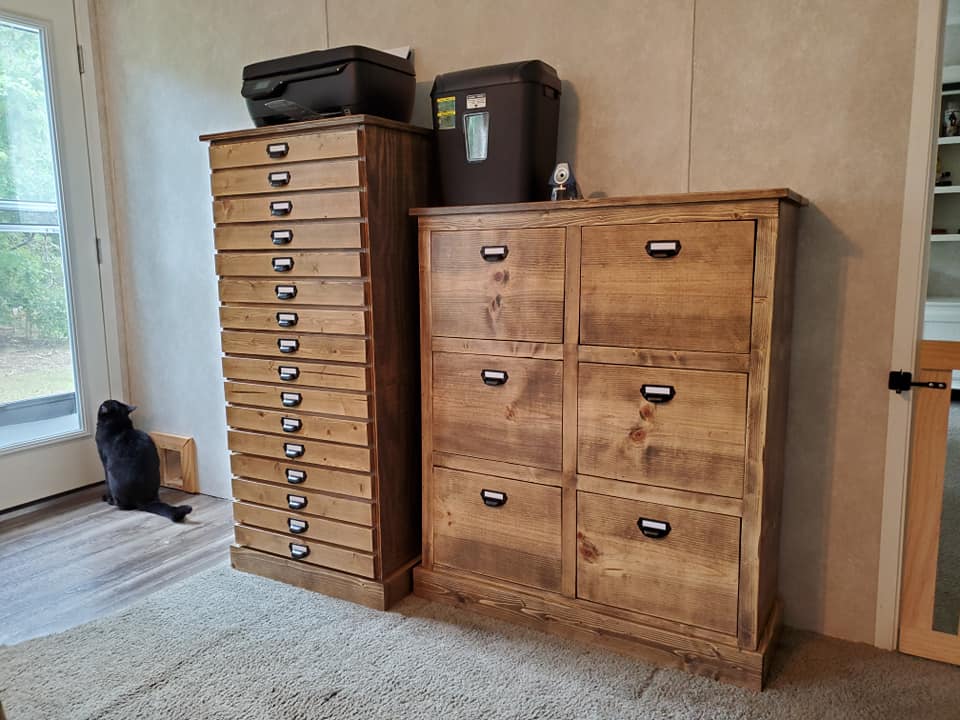
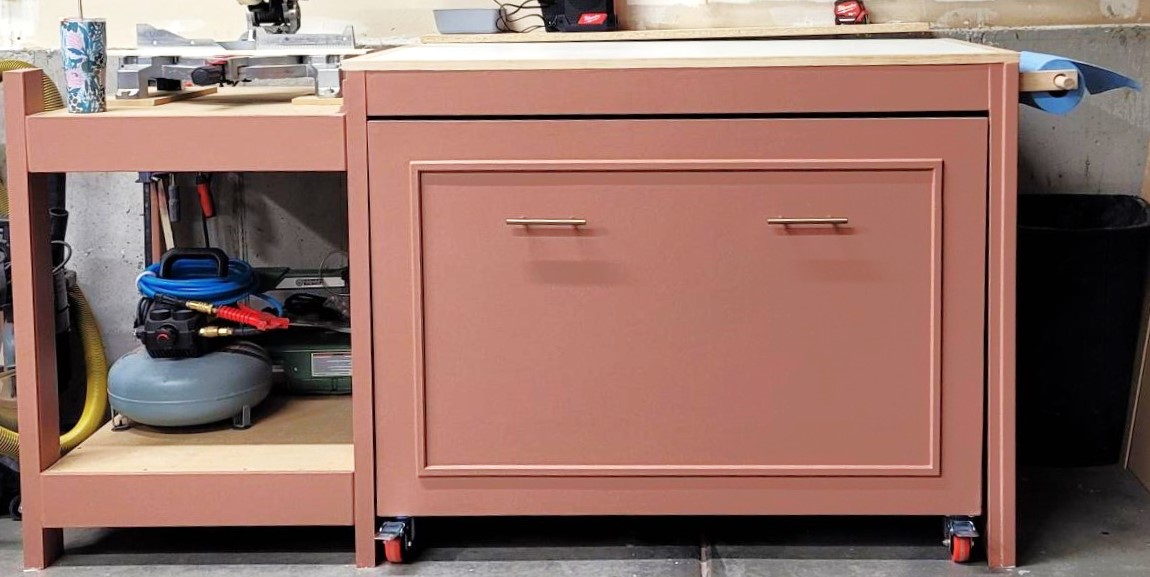
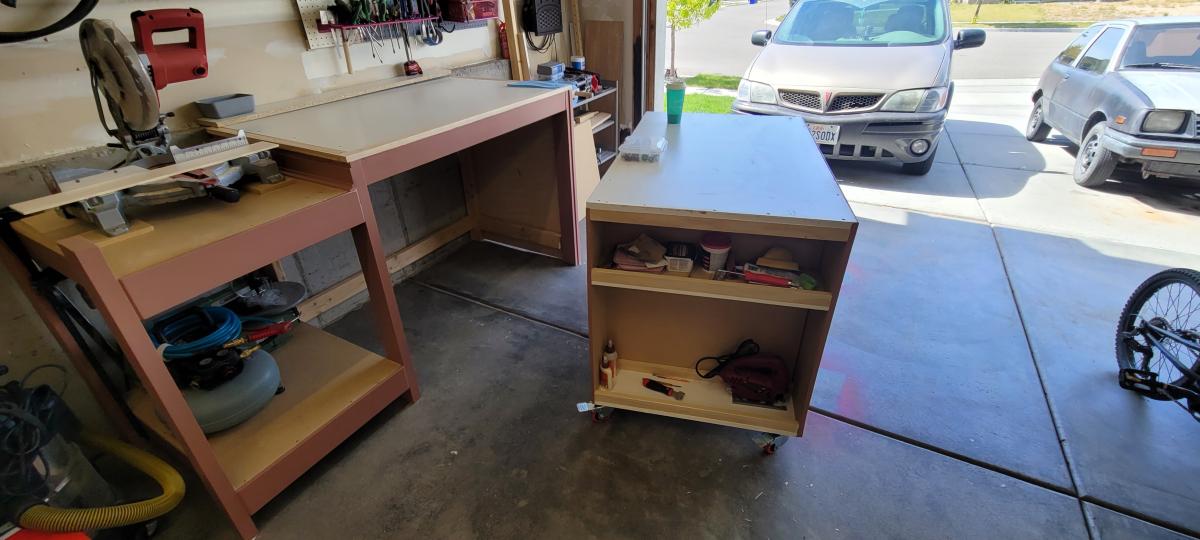
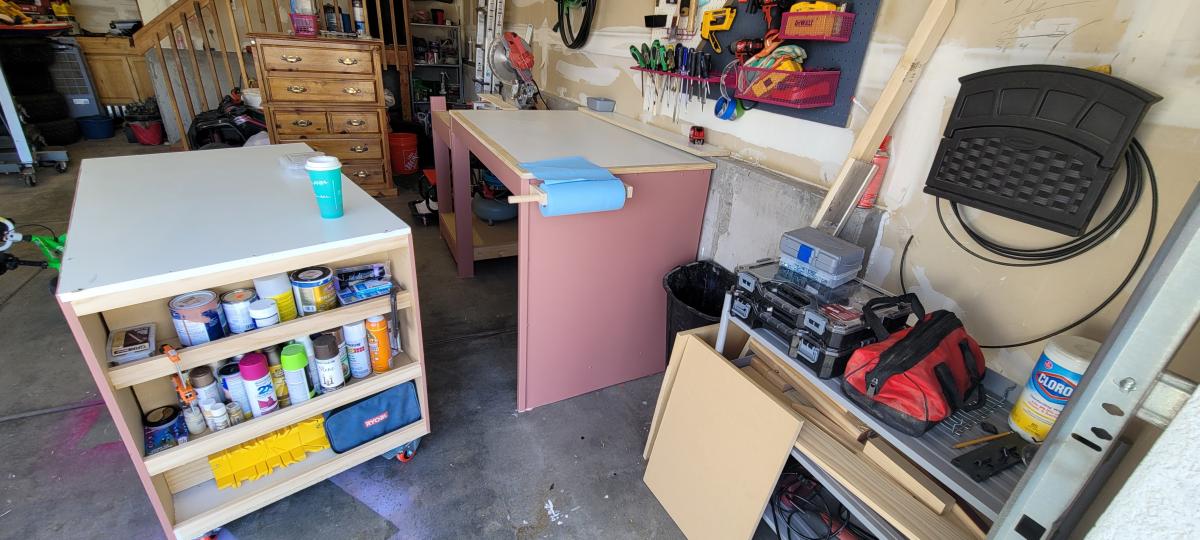
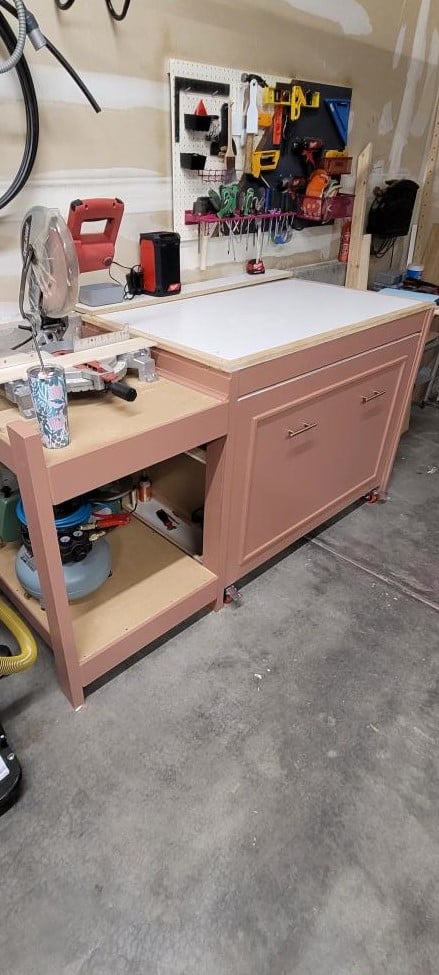
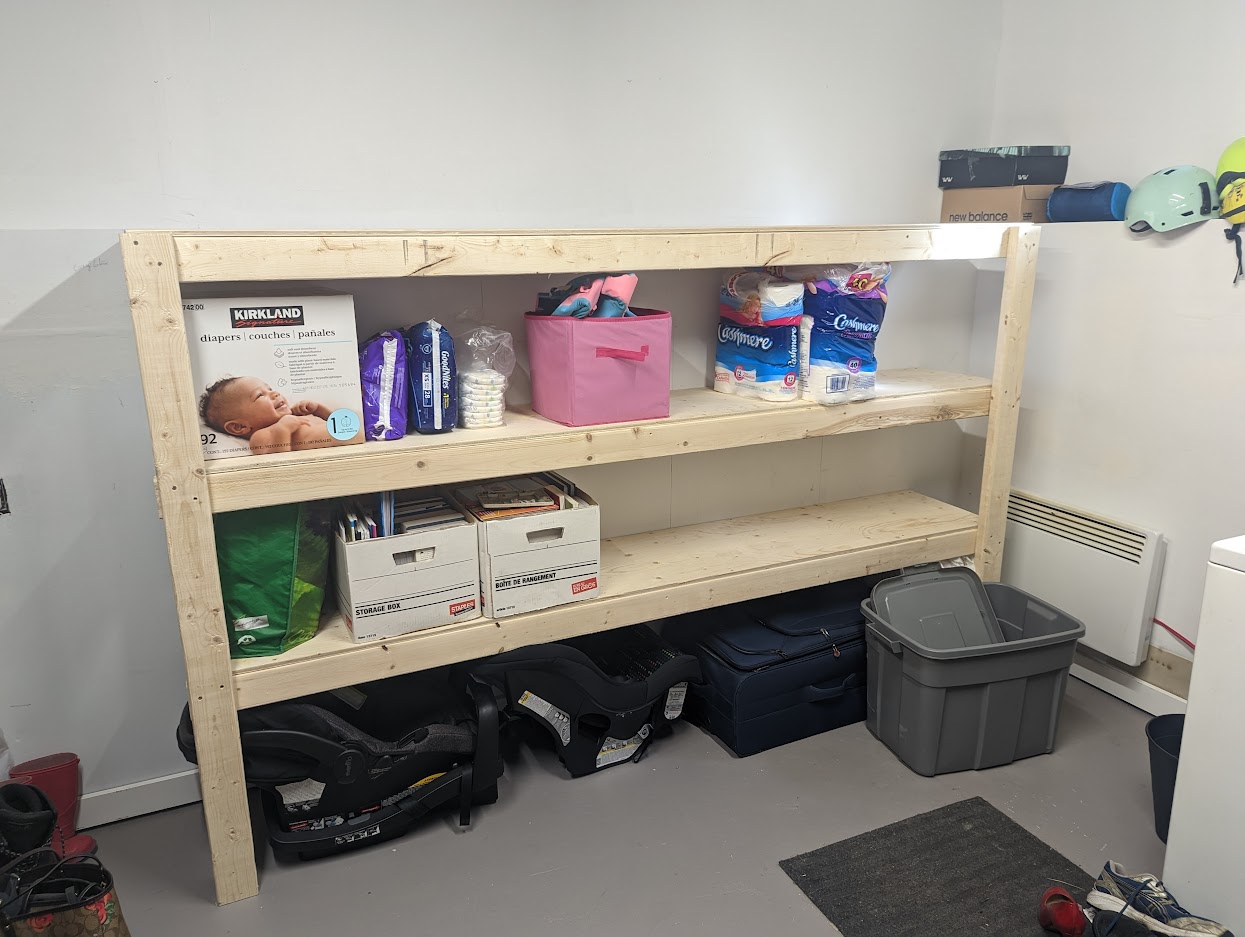
Storage galore!
Love your mods and finish choice! Thanks for sharing.
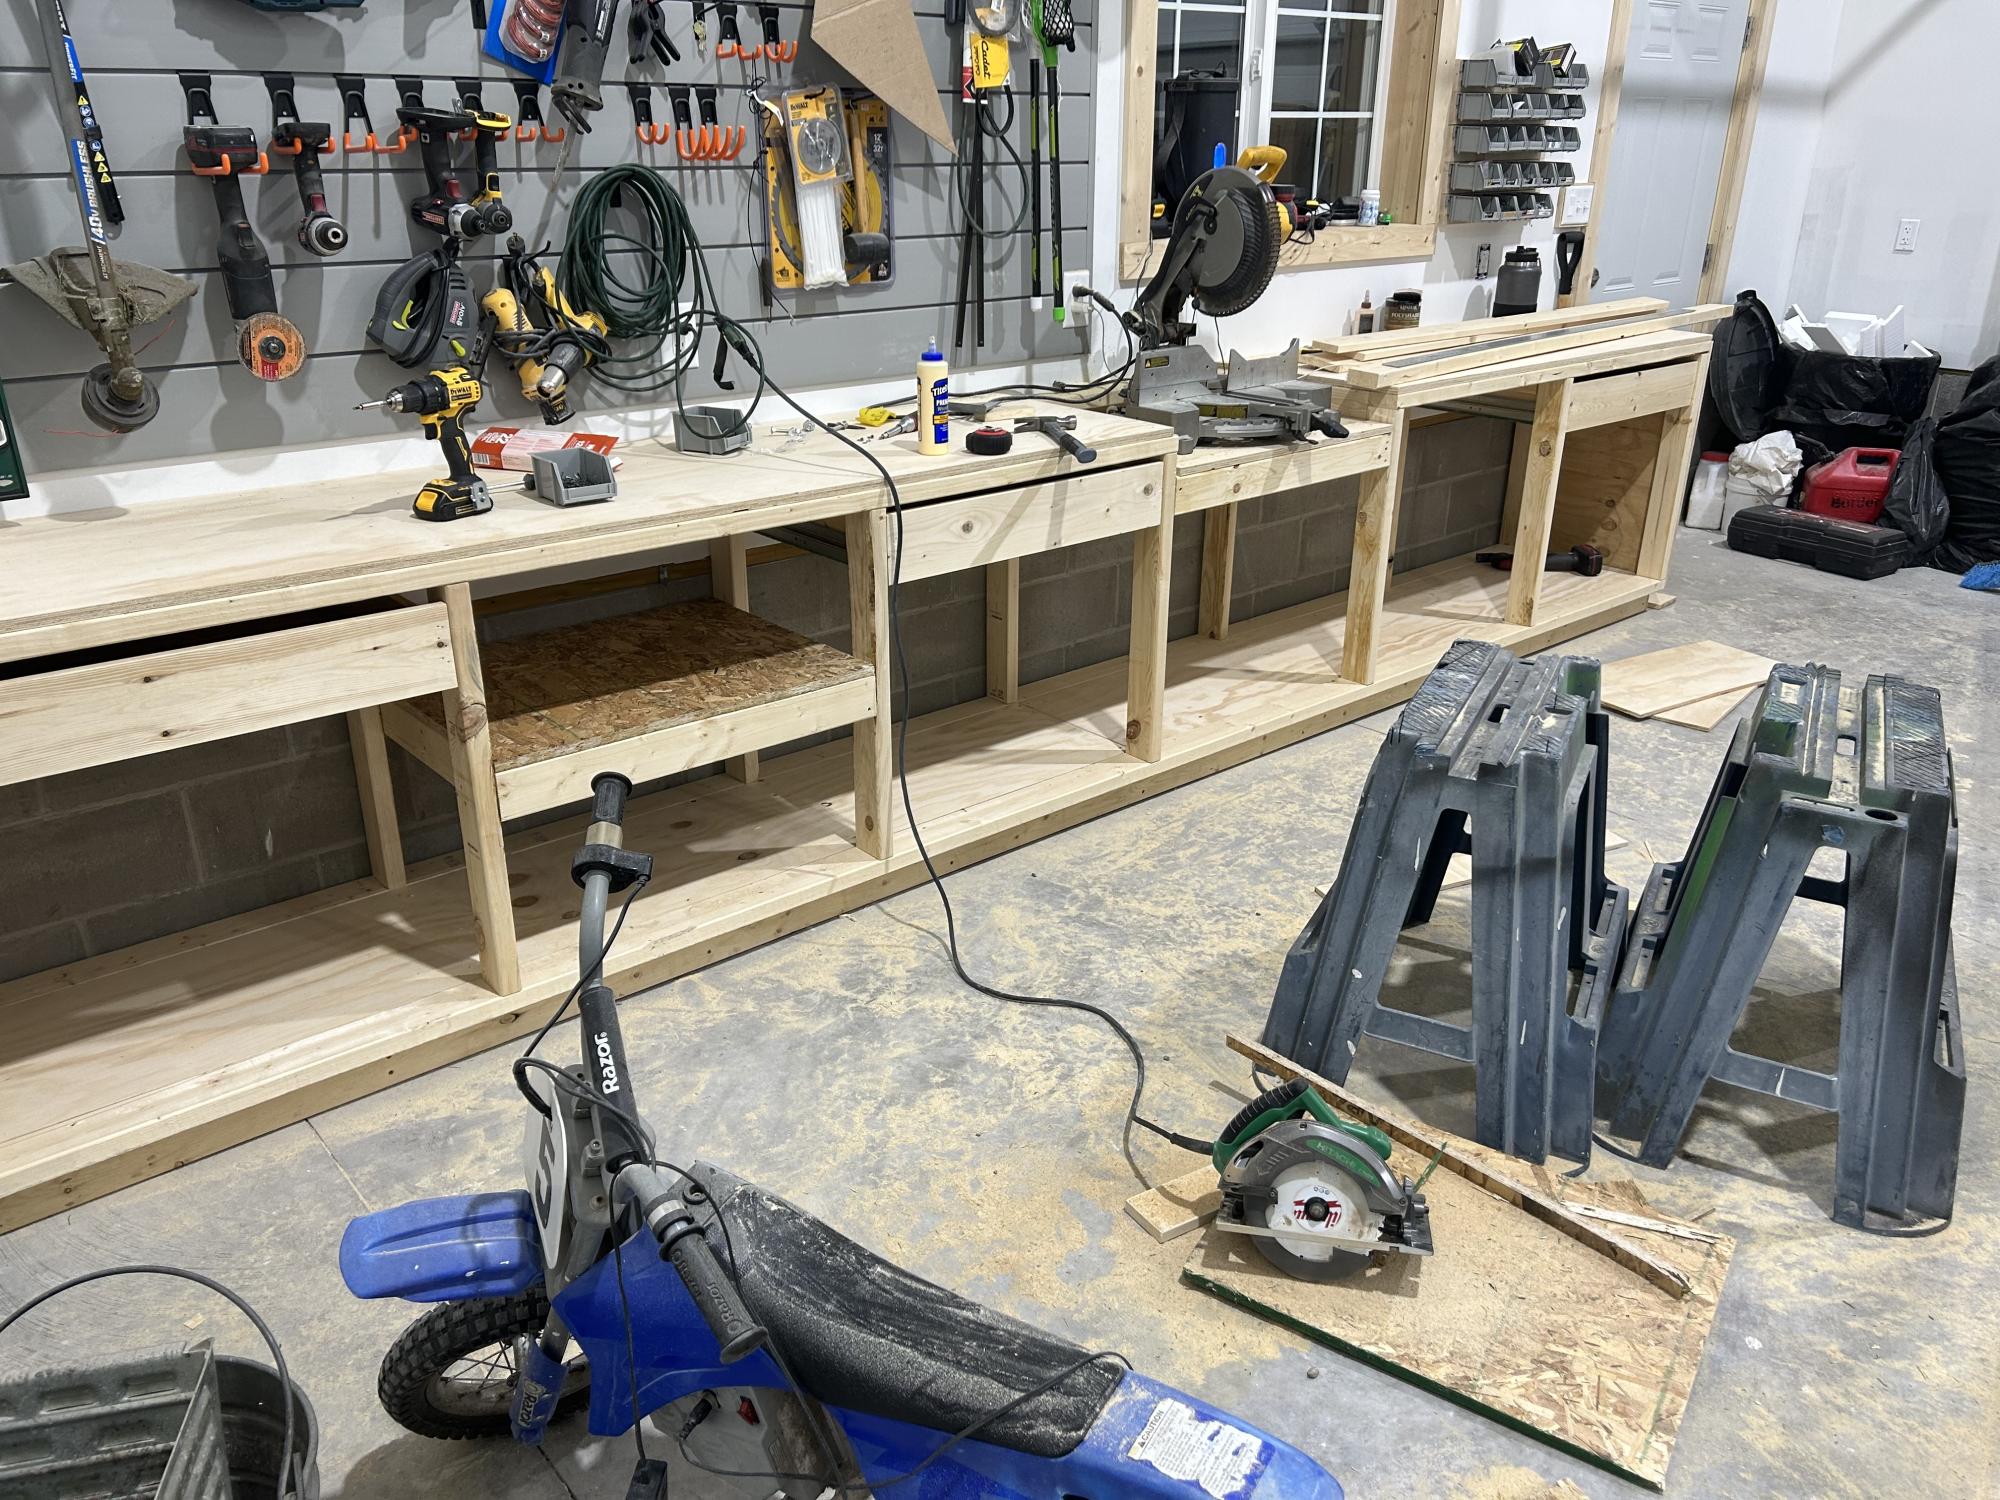
juliefuqua
Tue, 09/15/2020 - 06:51
Did you build the tall…
Did you build the tall cabinet? Do you have plans for it?
Thanks!
heidi4kidz
Sat, 09/19/2020 - 13:17
Here you go! https:/…
Here you go!
https://jaimecostiglio.com/diy-16-drawer-dresser-free-plans/
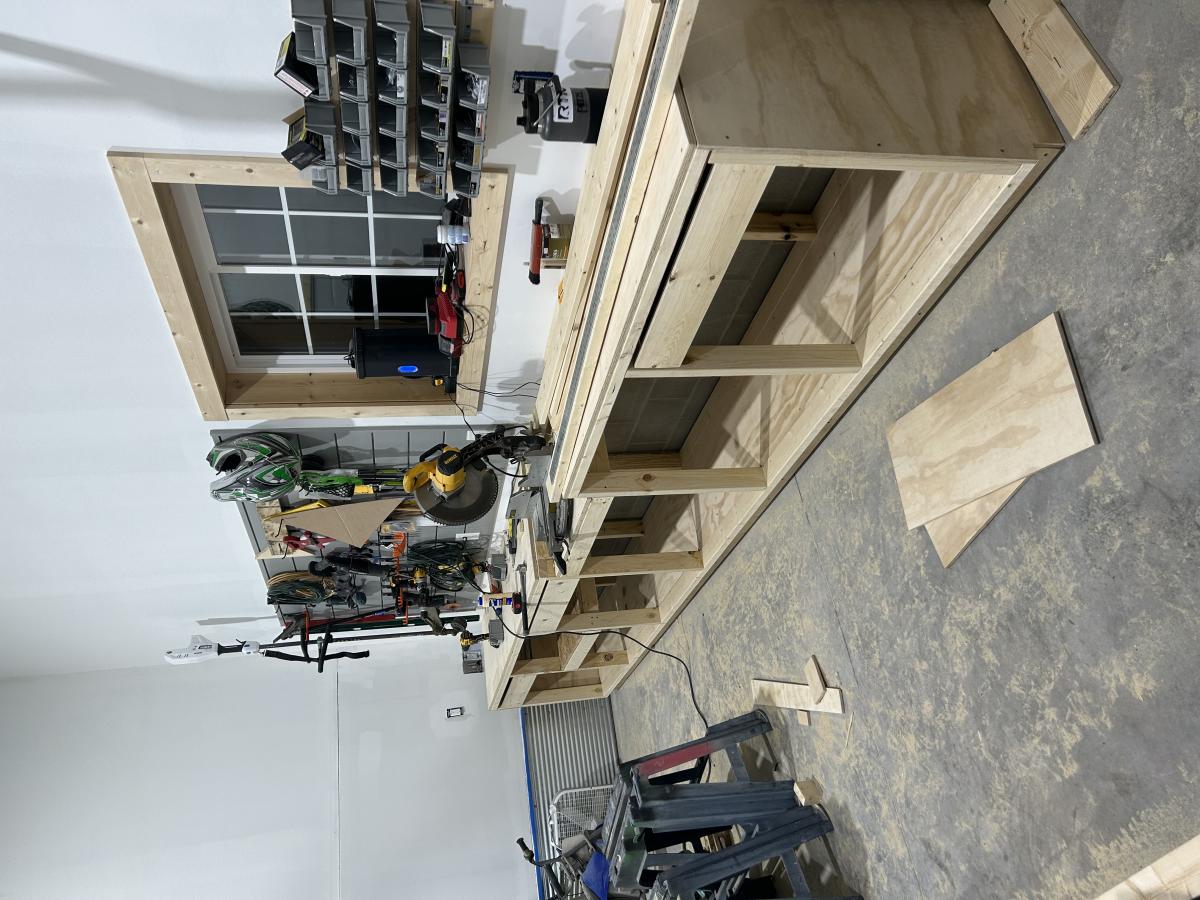
makermave
Sun, 02/14/2021 - 15:27
Wow! These are amazing!…
Wow! These are amazing! Thanks for sharing! What finish did you use? And how tall did you make the filing cabinet? Thanks!!