Community Brag Posts
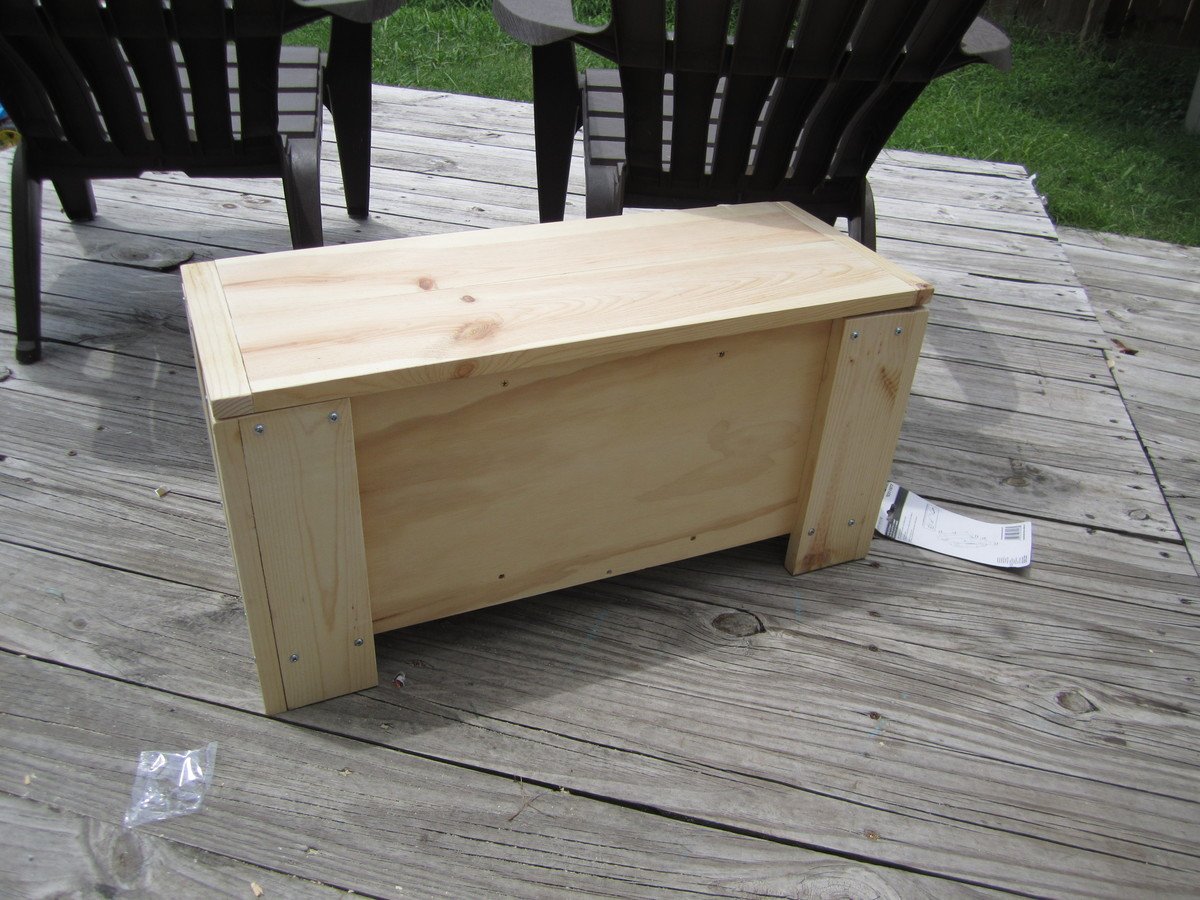
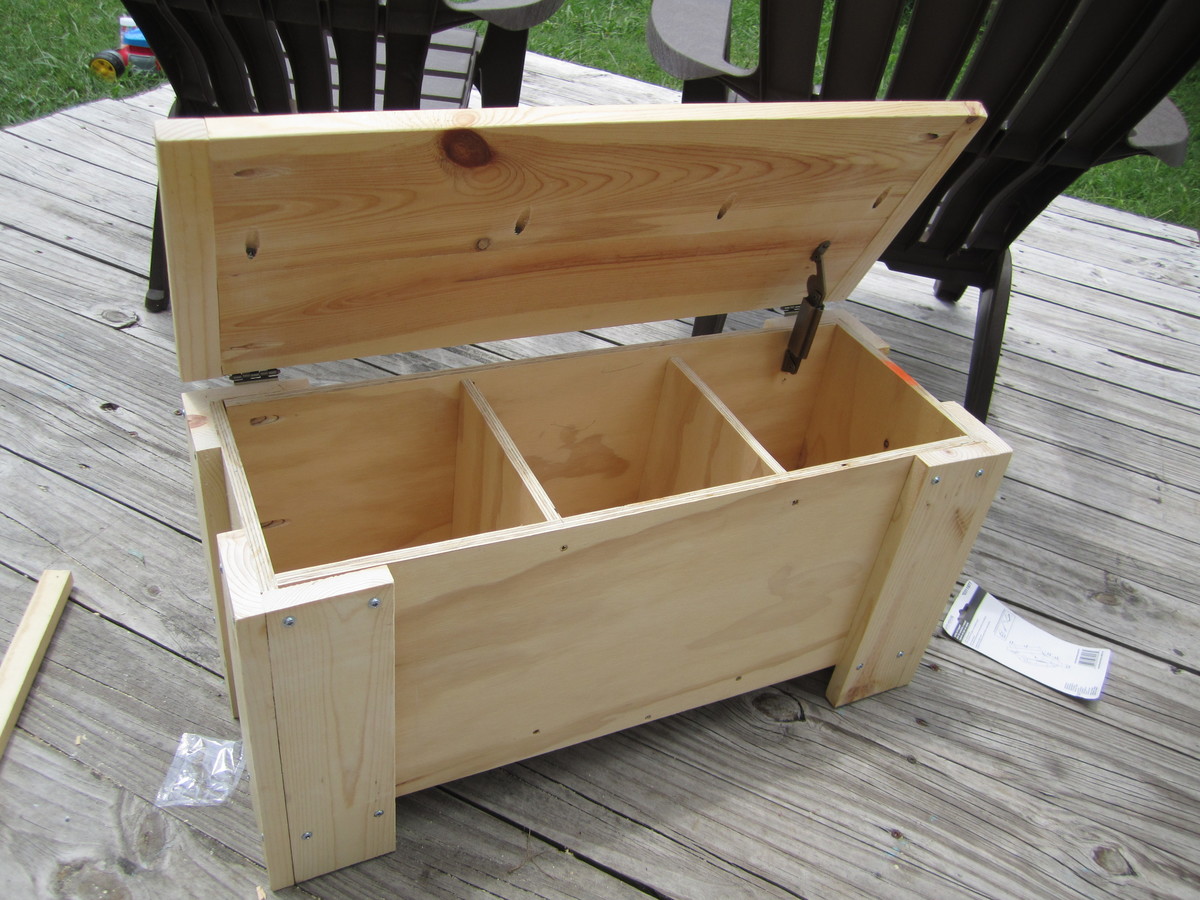
Kids Storage Bench

After building a few things from plans I decided to come up with something on my own, and from scraps I made this bench for my son.
Built from Plan(s)
Estimated Cost
Scraps
Estimated Time Investment
An Hour or Two (0-2 Hours)
Finish Used
Dark Walnut
Recommended Skill Level
Starter Project
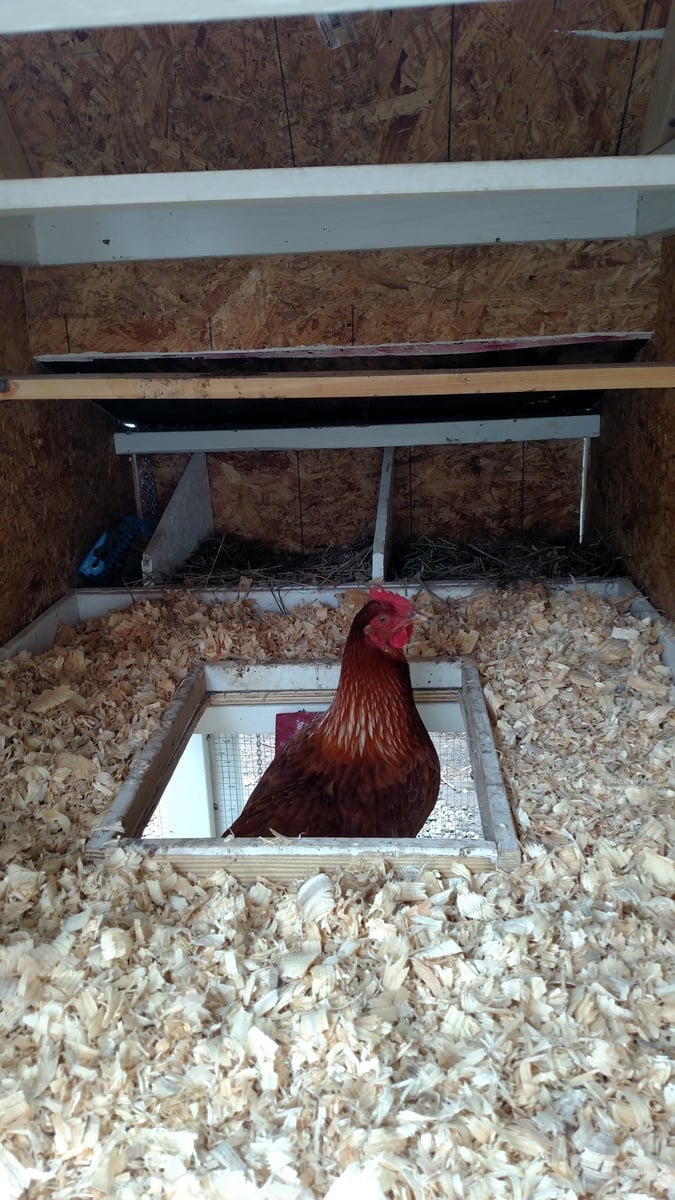
My version of the small chicken coop
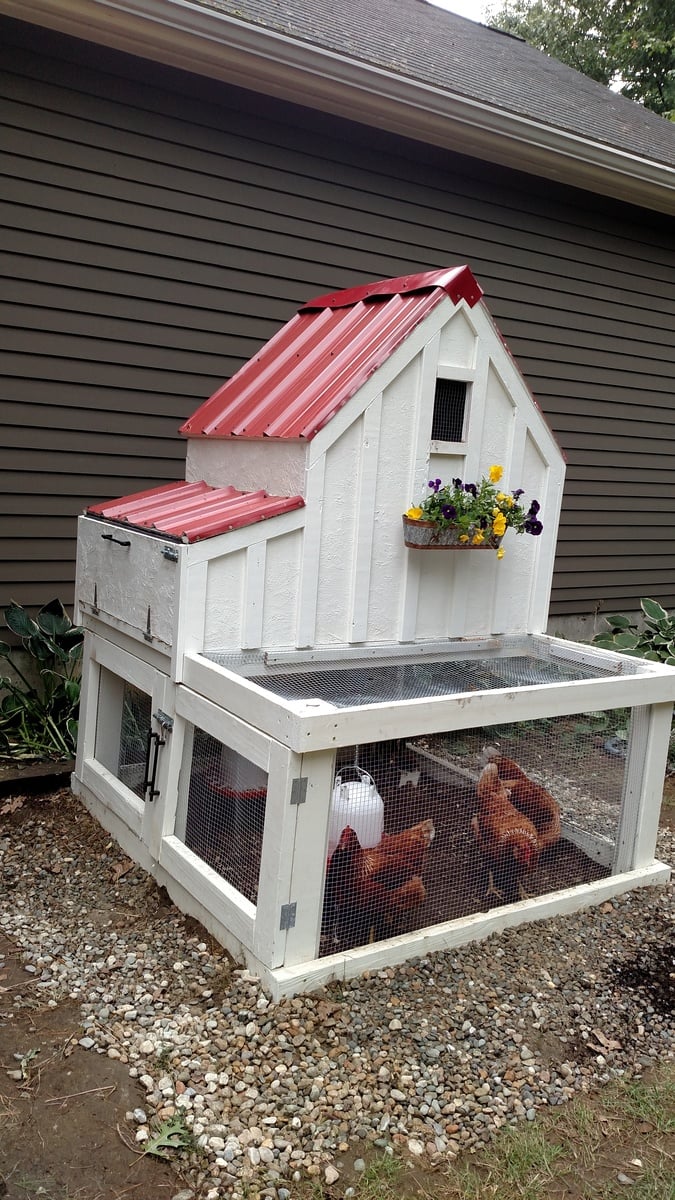
Plans for this coop were fantastic. It was a lot of work, but really fun to build. As hard as I tried to keep the cost down, it cost probably close to $300 in materials, but it is well worth it compared to the quality of similar priced premade coops. I did not want the garden bed, so I enclosed the run fully with hardware cloth. I also added a 2" lip around the cutout in the floor so they wouldn't push all of the bedding down the hole.
Built from Plan(s)
Estimated Cost
~$300
Estimated Time Investment
Weekend Project (10-20 Hours)
Recommended Skill Level
Intermediate
Comments

Wed, 09/07/2016 - 13:17
BEAUTIFUL!
I just got your email and had to run over to check it out. Looks great!! That was a great idea to add the lip to the opening (am I weird for not using bedding in the coop? We just have the painted floor that we scoop out every day).
The red roof and the flower box are making me swoon <3
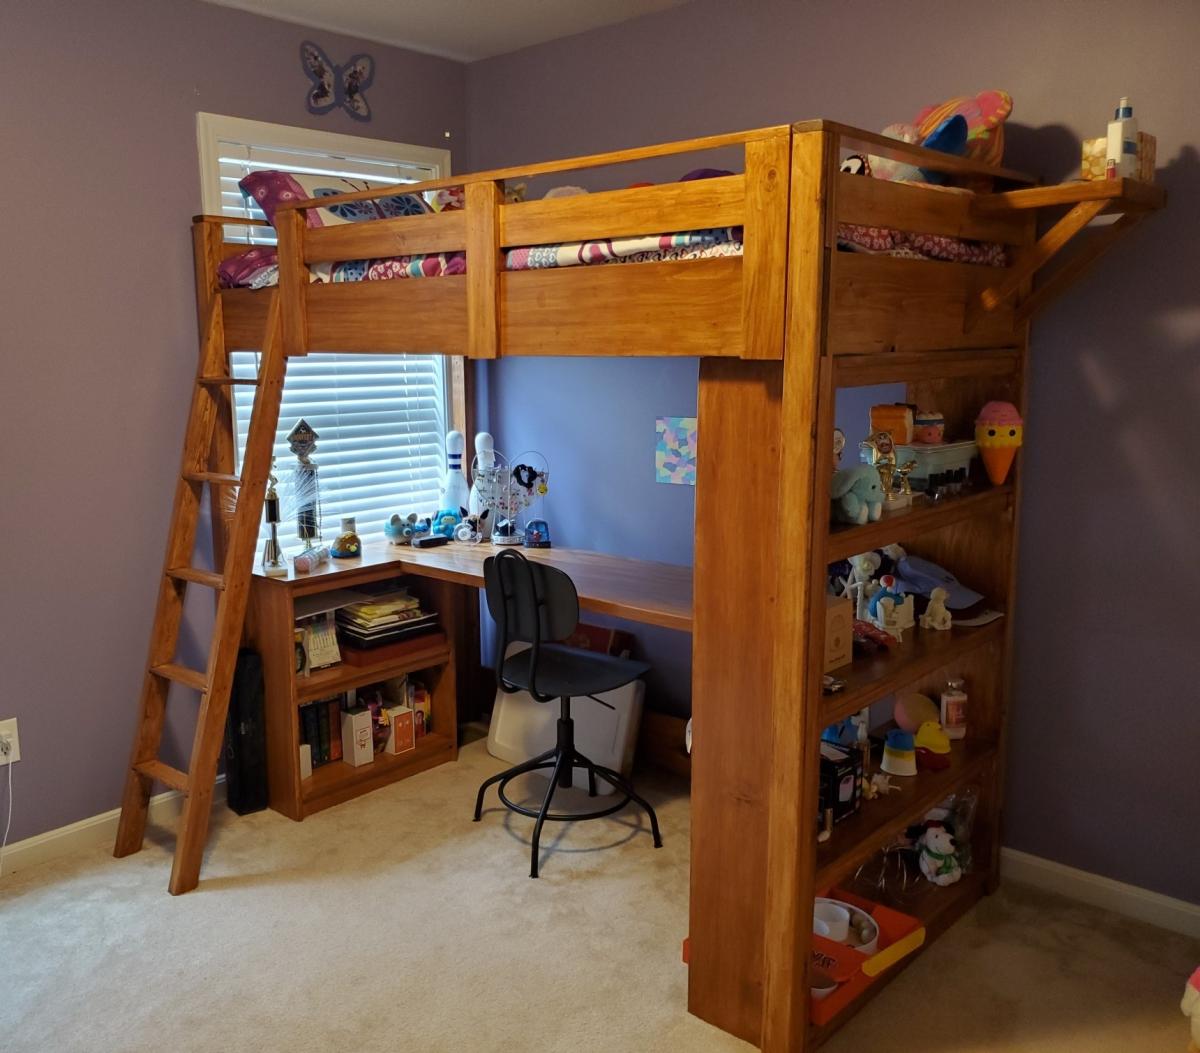
Teen loft bed
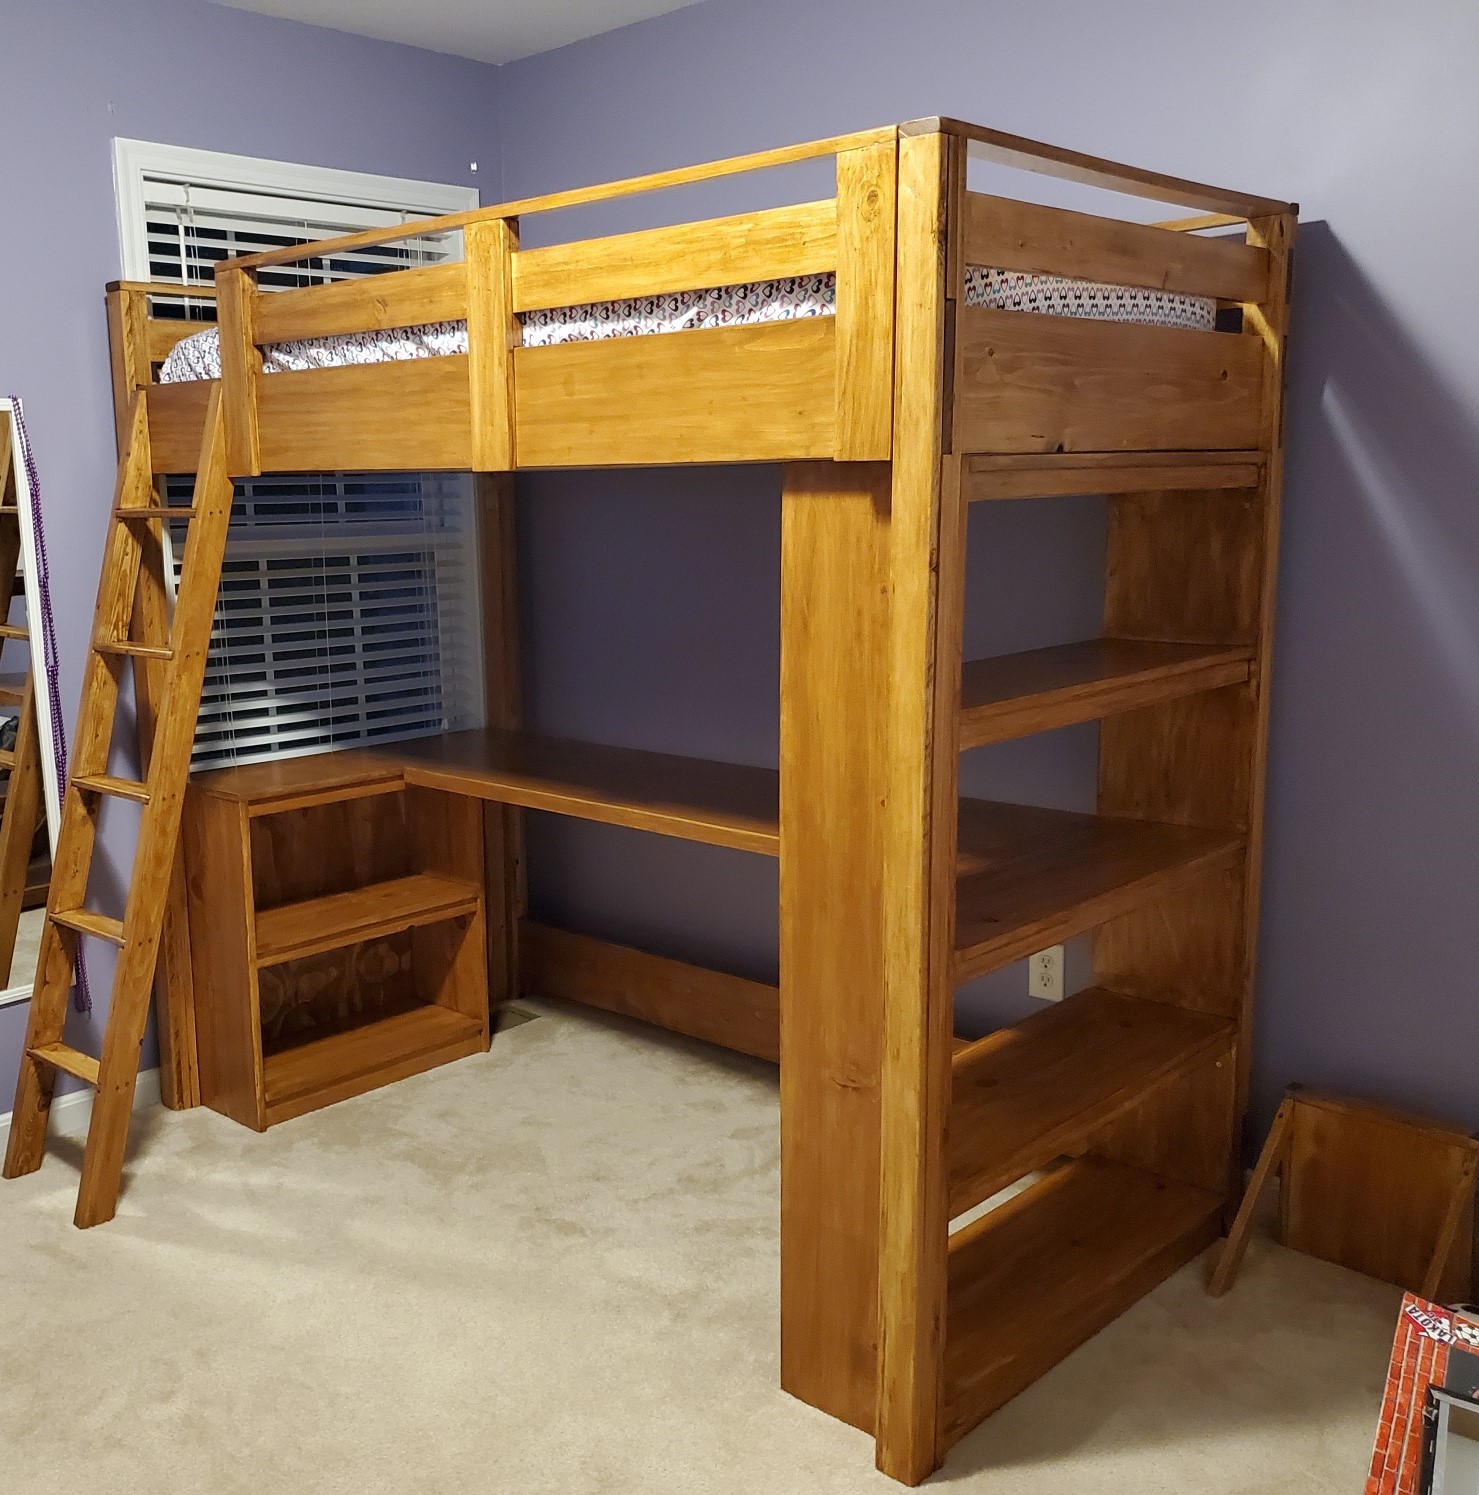
Combined two plans found on this wonderful site with our own revisions to provide a larger desk work area (20" deep). I also added a small shelf to allow for setting a book, water, whatever on it without getting out of the bed. As my first "indoor" project there were several lessons learned - one is to buy the higher grade lumber for the primary components including legs and beams. I did not do this and I had to spend more time than I should've finding good square, straight wood. Another lesson was that staining and polyurethane coating are a skill that requires a lot of practice and time. I and my daughter are thrilled with the final result but choosing to stain/poly it likely doubled the overall build time. Still no regrets, though. My 12 yo daughter just loves her new bed and thanks to this site for the spectacular ideas.
Built from Plan(s)
Estimated Cost
$600?
Estimated Time Investment
Week Long Project (20 Hours or More)
Finish Used
I used Minwax Cherrywood gel stain (2 coats) and Minwax Fast Drying Polyurethane (3 coats). For the gel stain, apply with cotton rag and do NOT let it sit on the wood for more than 10 minutes before wiping it off. Before applying first coat, vacuum the wood especially the knots, wipe all with white cloth, wipe with cloth dampened with mineral spirits and let dry, then wipe with tack cloth, then apply stain. AFTER the first coat and between all subsequent stain coats, let fully dry and wipe with tack cloth before applying poly. For the first poly coat, wipe with white cloth, then wipe with tack cloth, and apply poly using a china brush (specific for finishing). Submerge your brush in mineral spirits and press down to eliminate bubbles, then wipe it along newspaper until mineral spirits are nearly gone from the brush. Cut the first coat of poly 25% with mineral spirits and brush on in even strokes. AFTER the first coat, sand lightly with 220 or 320 sand paper, vacuum all dust, wipe with white cloth, then with cloth dampened with mineral spirits and let wood dry, then wipe with tack cloth, then apply second coat with full strength poly using the same process of first eliminating the bubbles from the brush. Repeat that process for all subsequent coats. Then let dry for several days before assembling the bed.
Recommended Skill Level
Intermediate
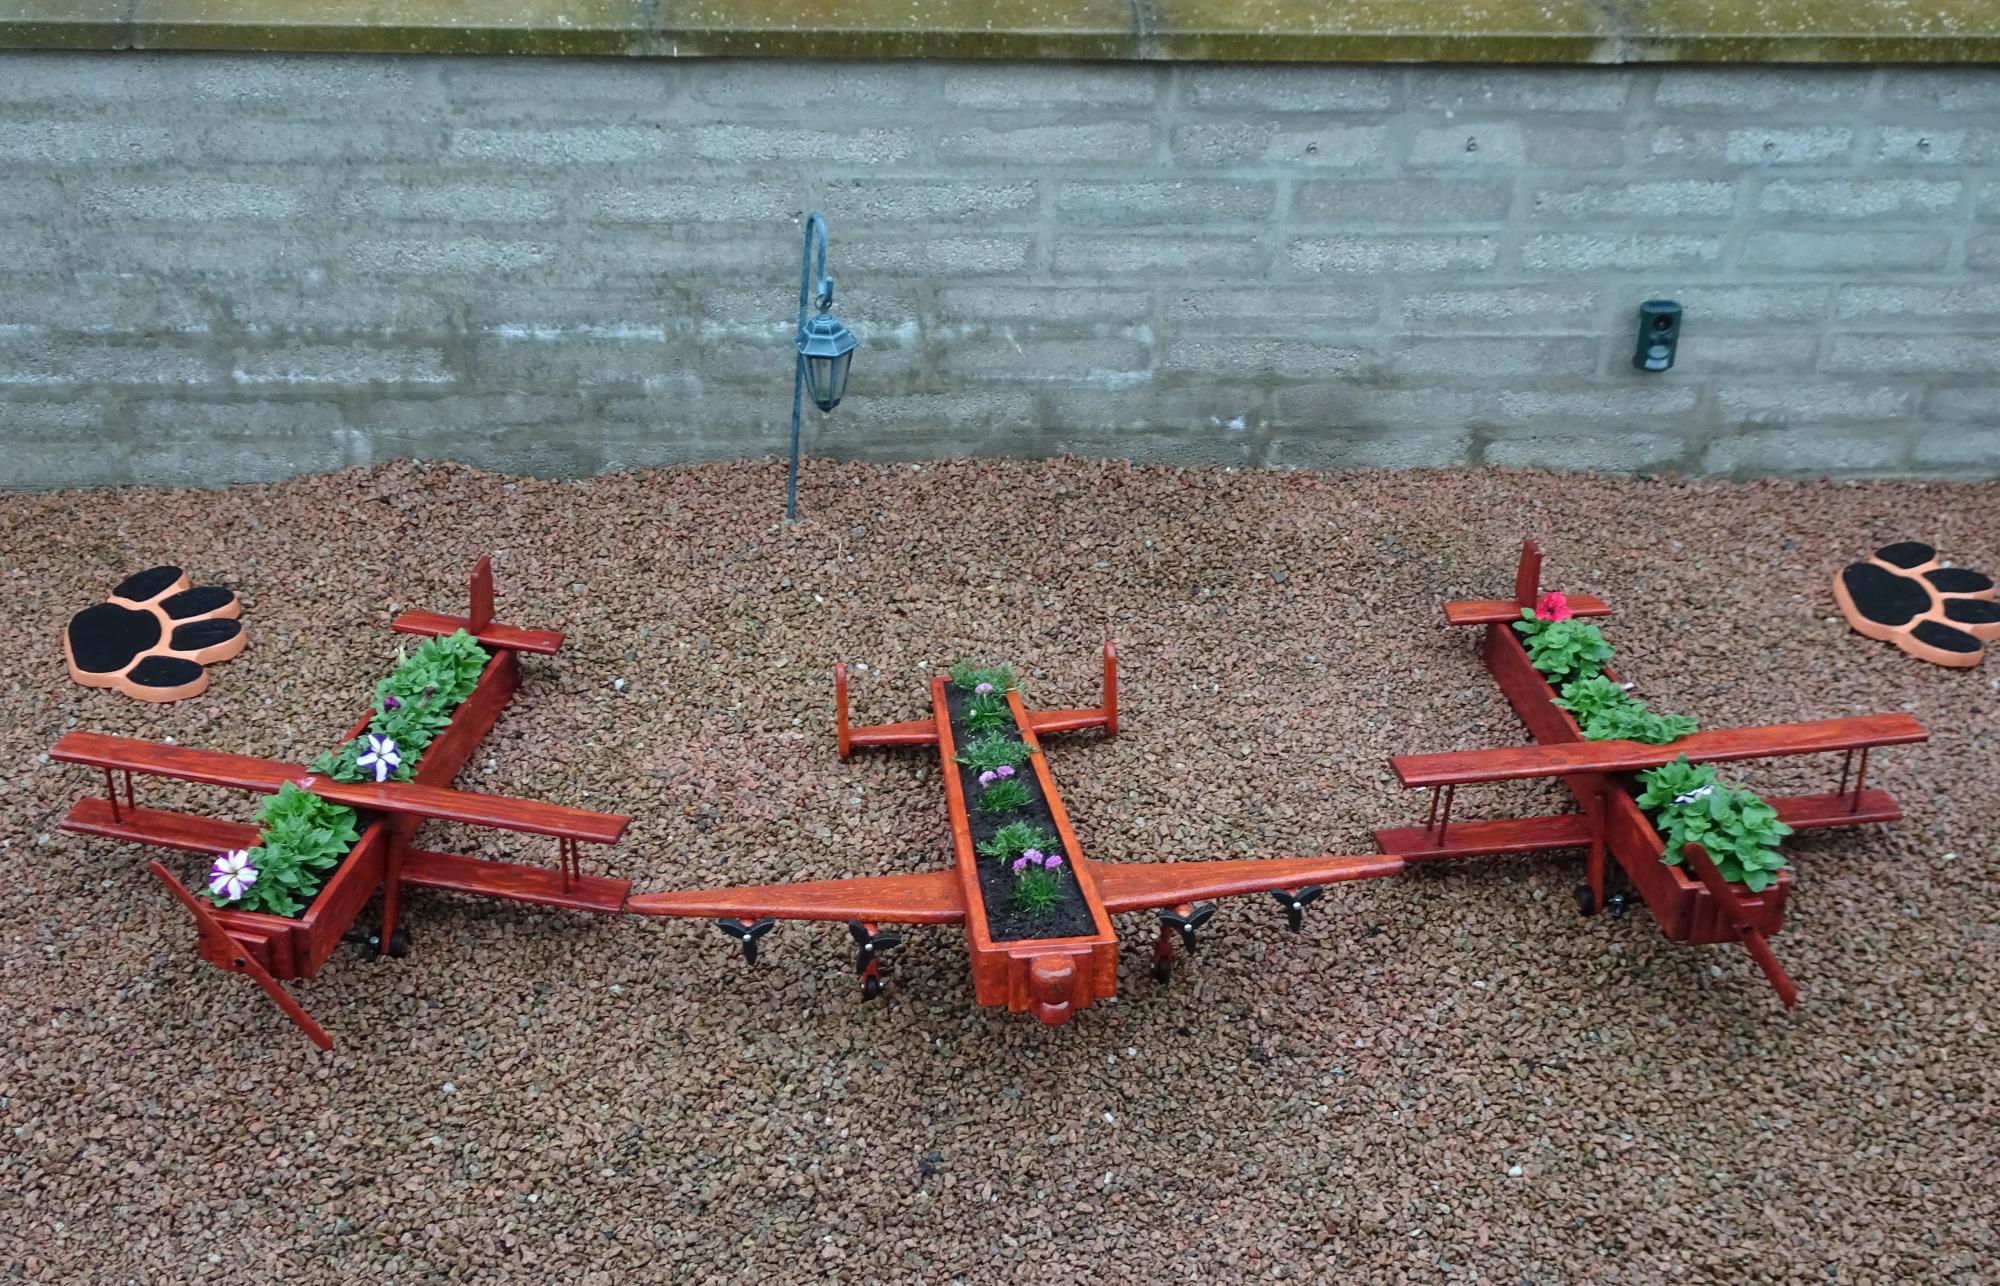
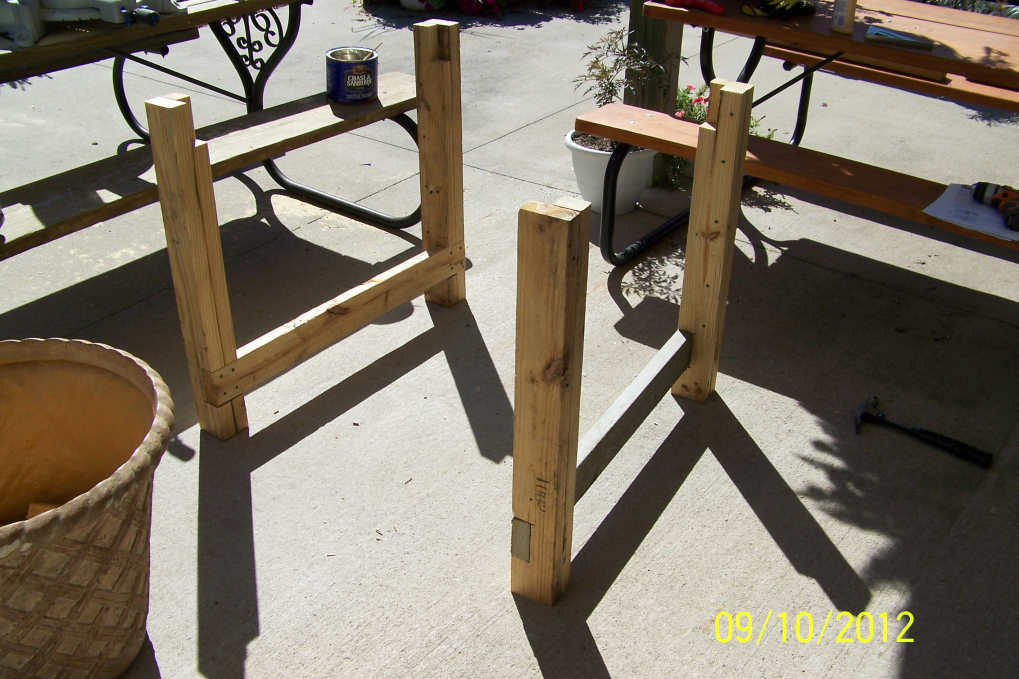
Heavy Bench for New Greenhouse - Modified Farmhouse Table
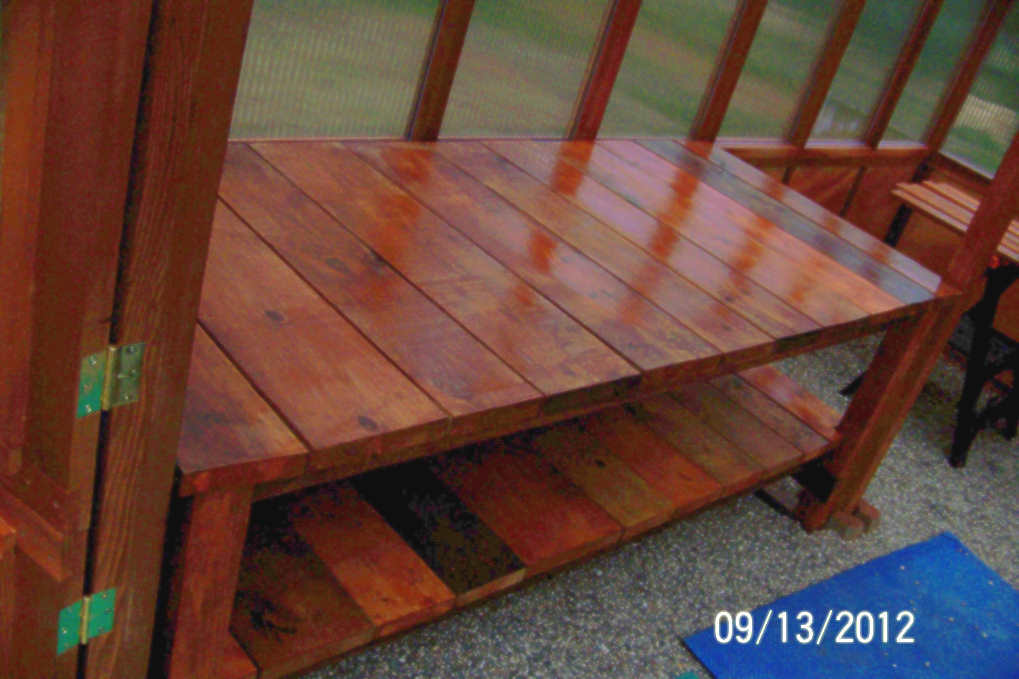
Before my new greenhouse was even delivered and built, I was searching for ideas on potting / greenhouse benches. The company wanted nearly as much $$ for the benches as they did for the greenhouse. By accident I came upon Ana's site. I saw the Farmhouse Table plans, then I saw Handy Andy's modification of the plan, and I was inspired to build them myself!
I found a big pallet of 2x pieces of wood at Menards for $25. They usually set out a pallet of odds and ends that are of "like" items. These were about 3.5' long pcs of 2x10's and 2x8's and such (I have enough of these to do the other benches I want to build... and then some!). I also used some 2x4's that came off a really nice sturdy pallet that we picked up for free, and the rest were just boards we had around the shed.
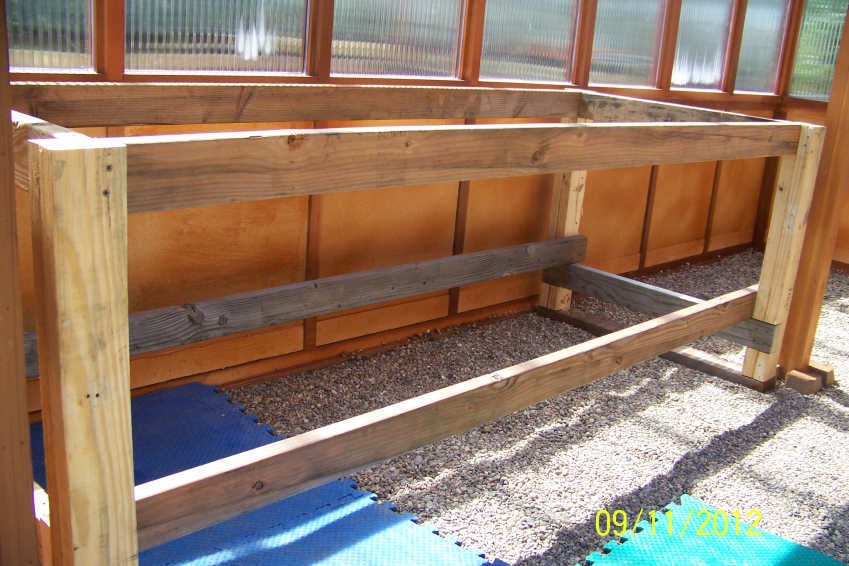
Hubby was willing to help me with this project, but I wanted to do it myself. He did help with the heavy lifting, and I do appreciate that :) Once I had the frame built, we had to move it into place in the greenhouse otherwise we would not have been able to get it in there. And now that it's complete... it's HEFTY!!! And believe me, it's not going to shift about! lol I also put 2x4's across the bottom of the legs so that it wouldn't sink down into the pea stone floor.
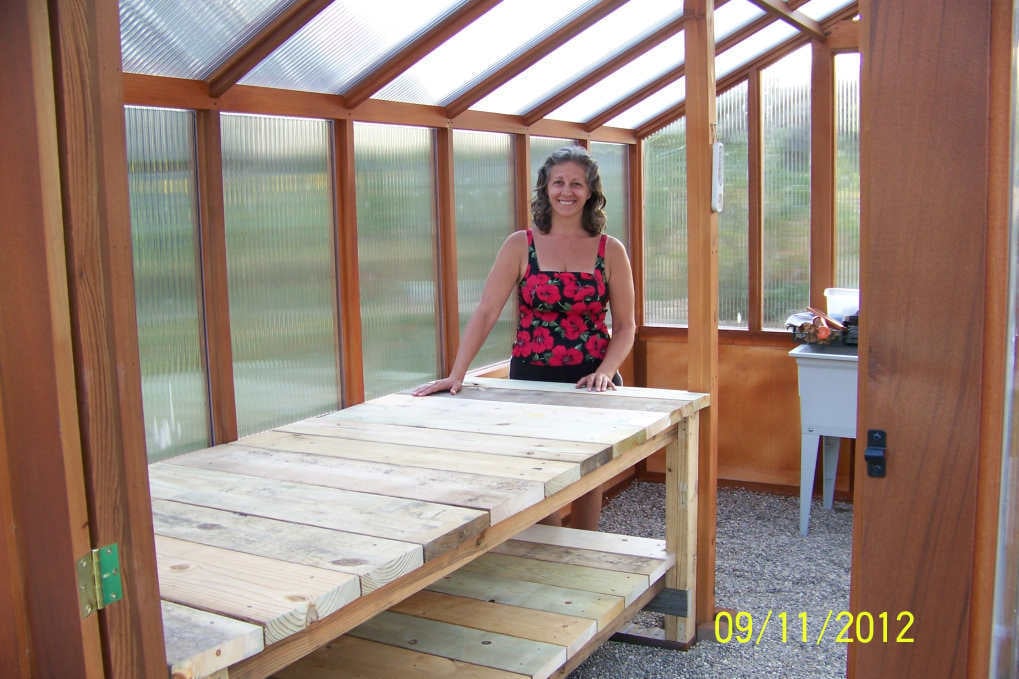
The benches basic construction is the Farmhouse Table, but I added a bottom shelf, a little like Handy Andy's. I must say, because this was not a fine piece of furniture, I was not as intimidated or nervous. It was great for my first ever big project :) It took me some time to complete it, over the course of 2 days, but then I also have to cook and clean and work and garden and a hundred other things in a day :) So, I was in no hurry, but it was a very fun project and I'm SO glad I took it on.
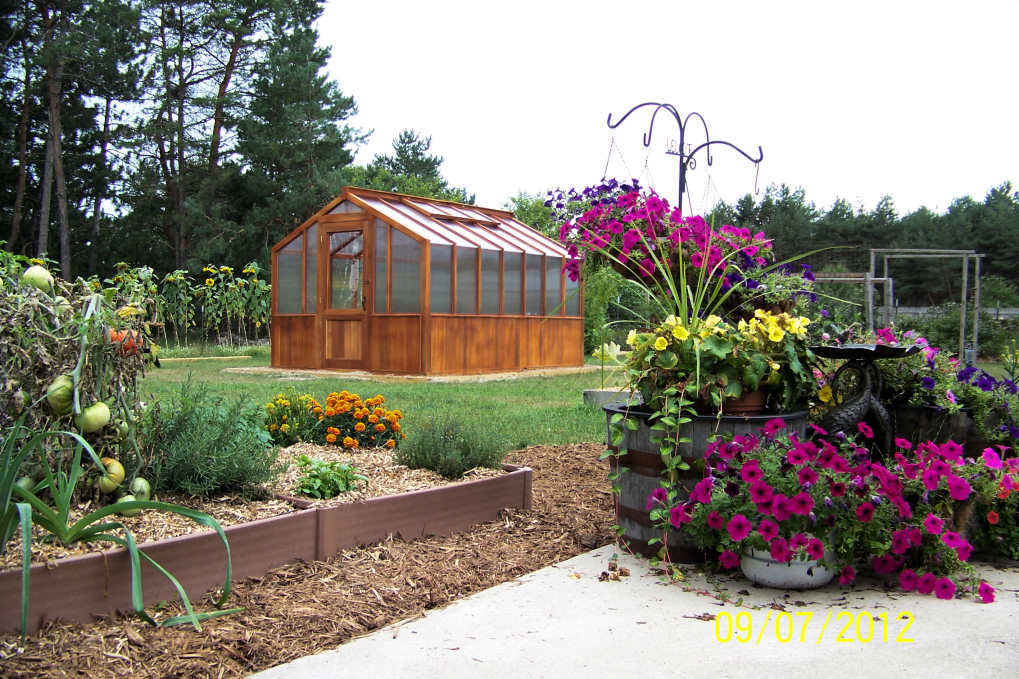
I will be building more of these benches to fill up my beautiful new 10x14 Cedar Built Greenhouse.
Thank you Ana, and Handy Andy!!! I couldn't have done it without your examples!
~ Tonya

Built from Plan(s)
Estimated Cost
$10 more or less
Estimated Time Investment
Day Project (6-9 Hours)
Finish Used
Cedar colored stain sealer.
Recommended Skill Level
Beginner
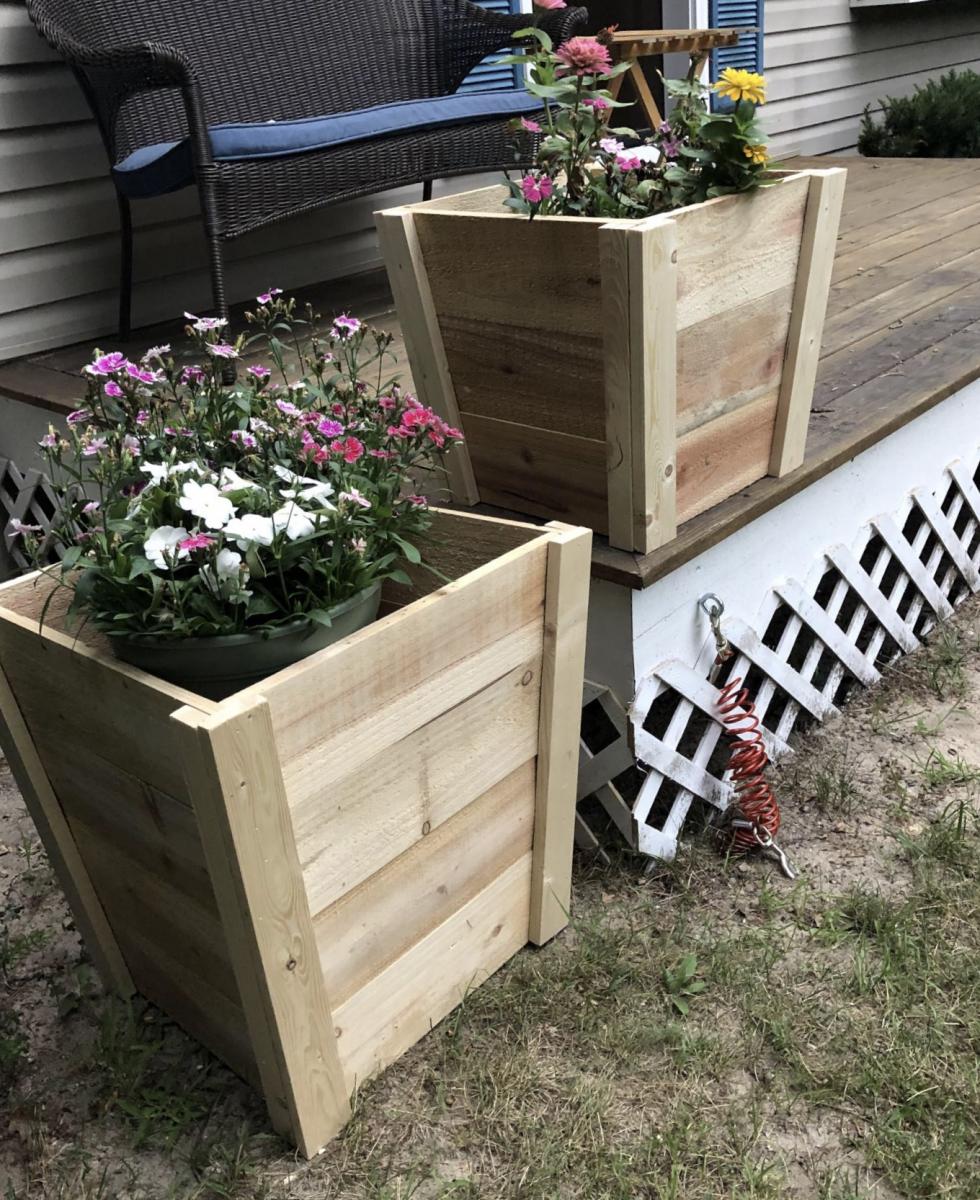
Matt’s Cedar Planters
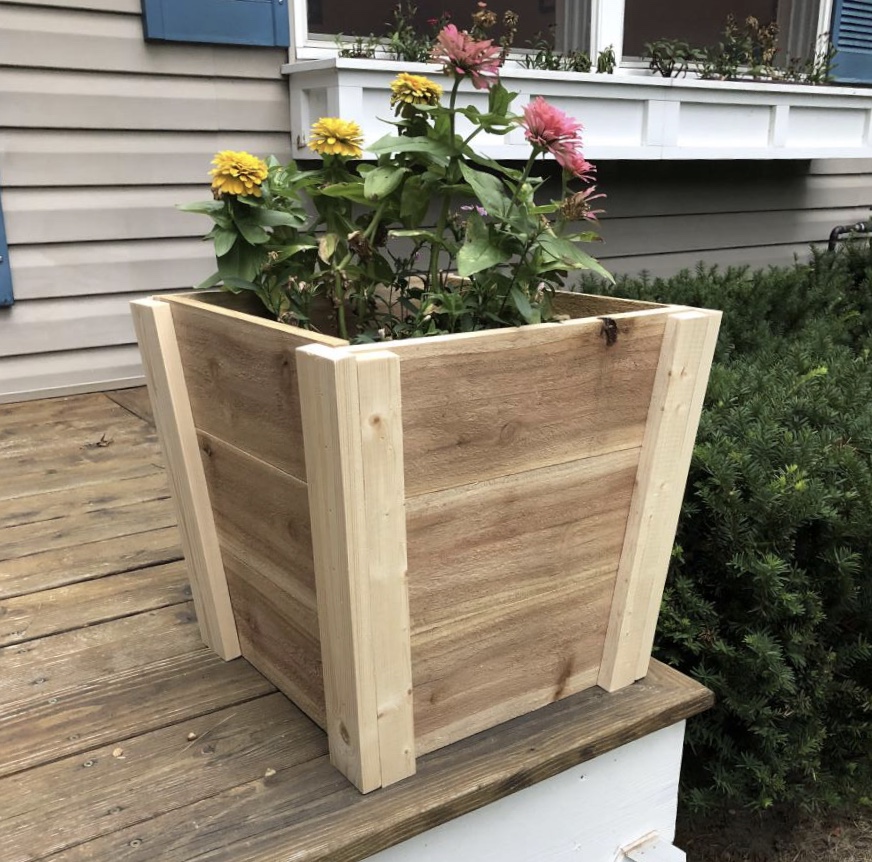
As a beginner this was a pretty fun and easy project. I did use wood screws to hold the edges together since the fence boards are typically curved and brad nails didn’t seem to hold on my first try. Ultimately I really enjoyed the results!
Built from Plan(s)
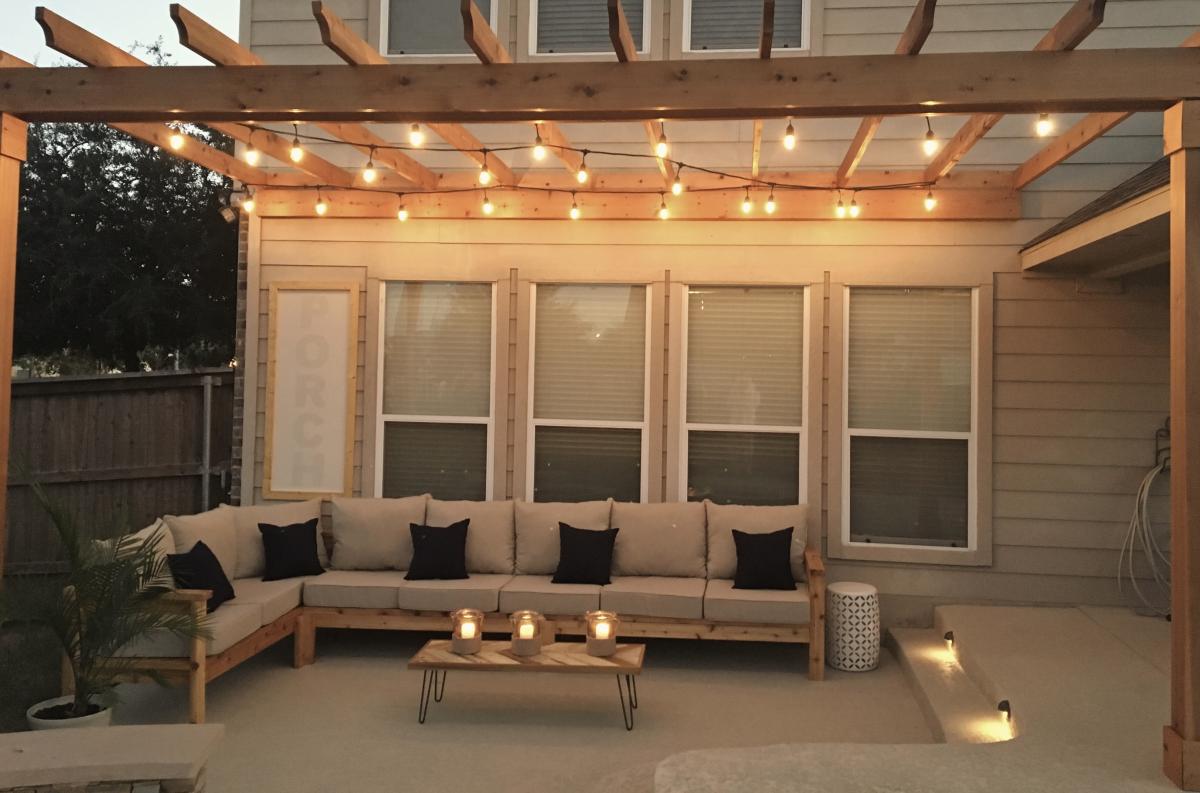
Outdoor Sectional and Pallet Coffee Table
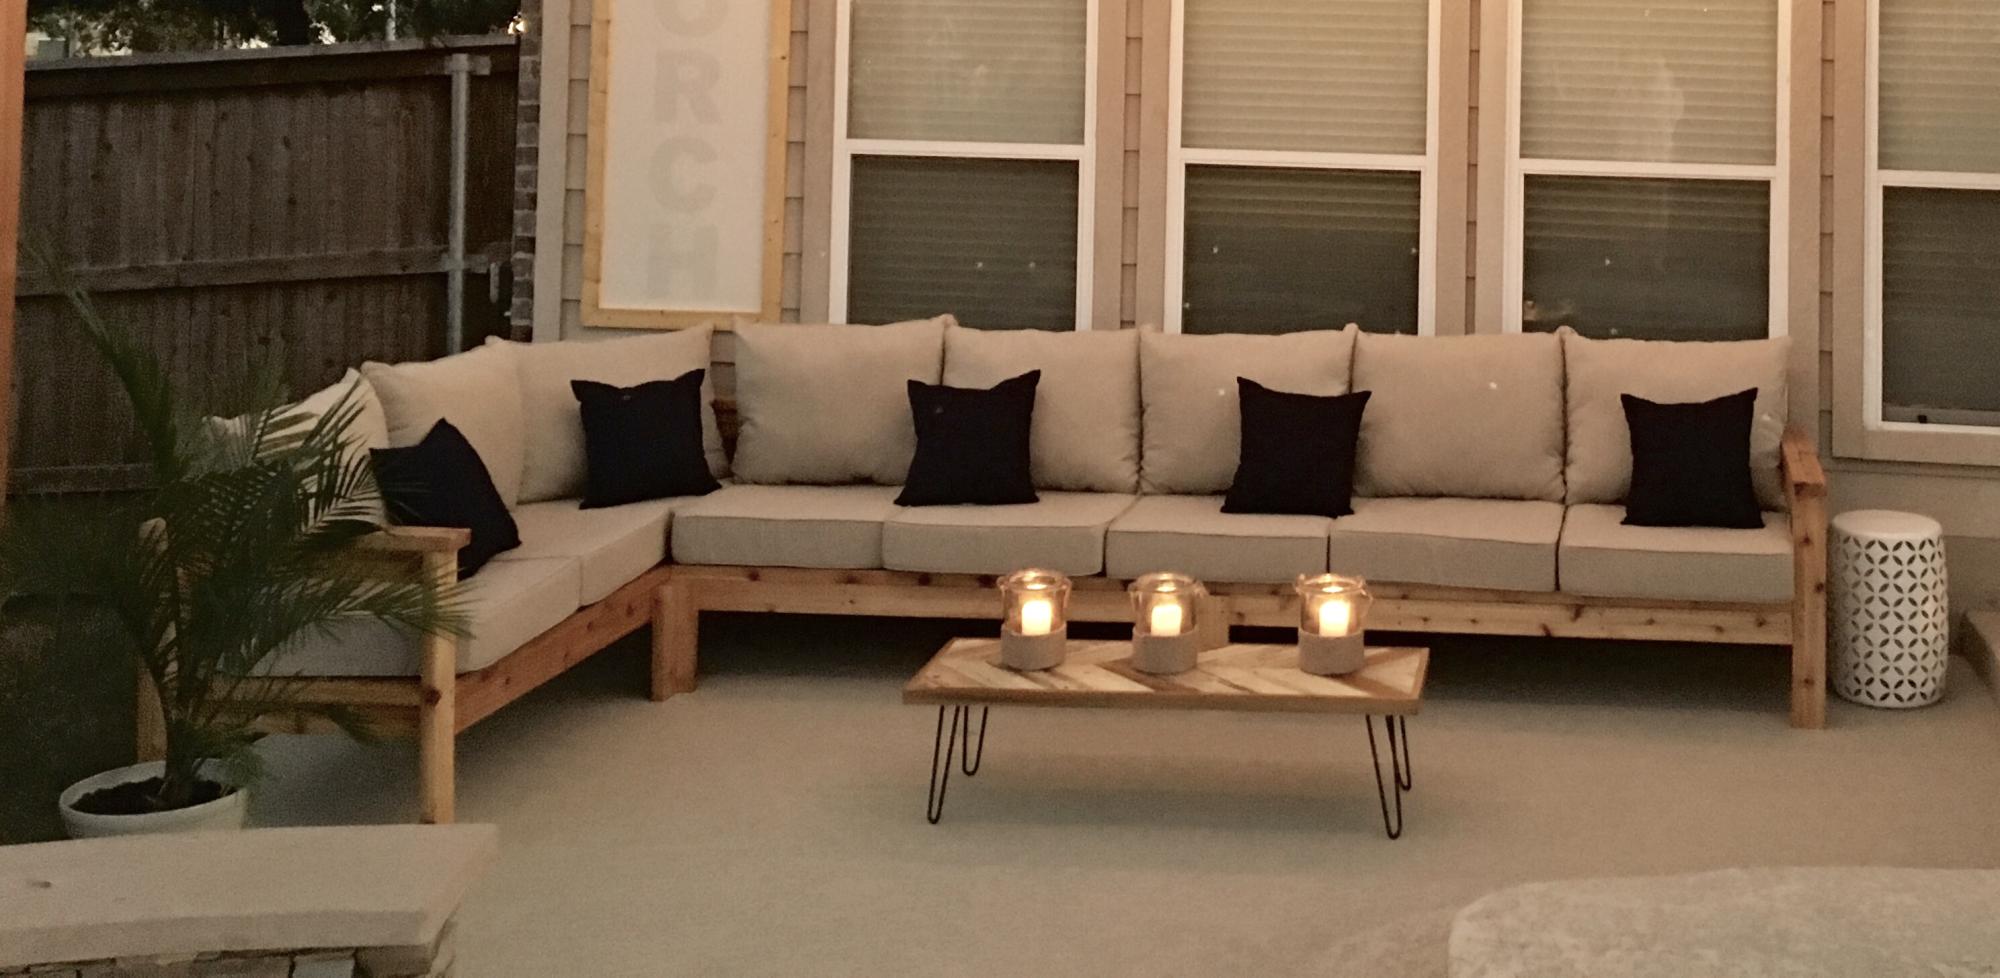
Hi Ana!
My husband used your plans to build the 2x4 outdoor cedar sectional :) He did it in 1 day and it couldn't have been easier! He even tried first time working with pallets to make a small table and it came out perfectly too! Can't wait to enjoy family time on our new back porch.
Thanks Again & Love From Austin ❤️
Kathleen
Built from Plan(s)
Estimated Cost
$350
Estimated Time Investment
Day Project (6-9 Hours)
Finish Used
Stain
Recommended Skill Level
Beginner
Comments
Thu, 10/24/2019 - 16:35
Stain and cushions?
Hi, your furniture is beautiful. May I ask: Where did you find your cushions? And what color/ brand stain did you use? Lovely job.
Plant stand
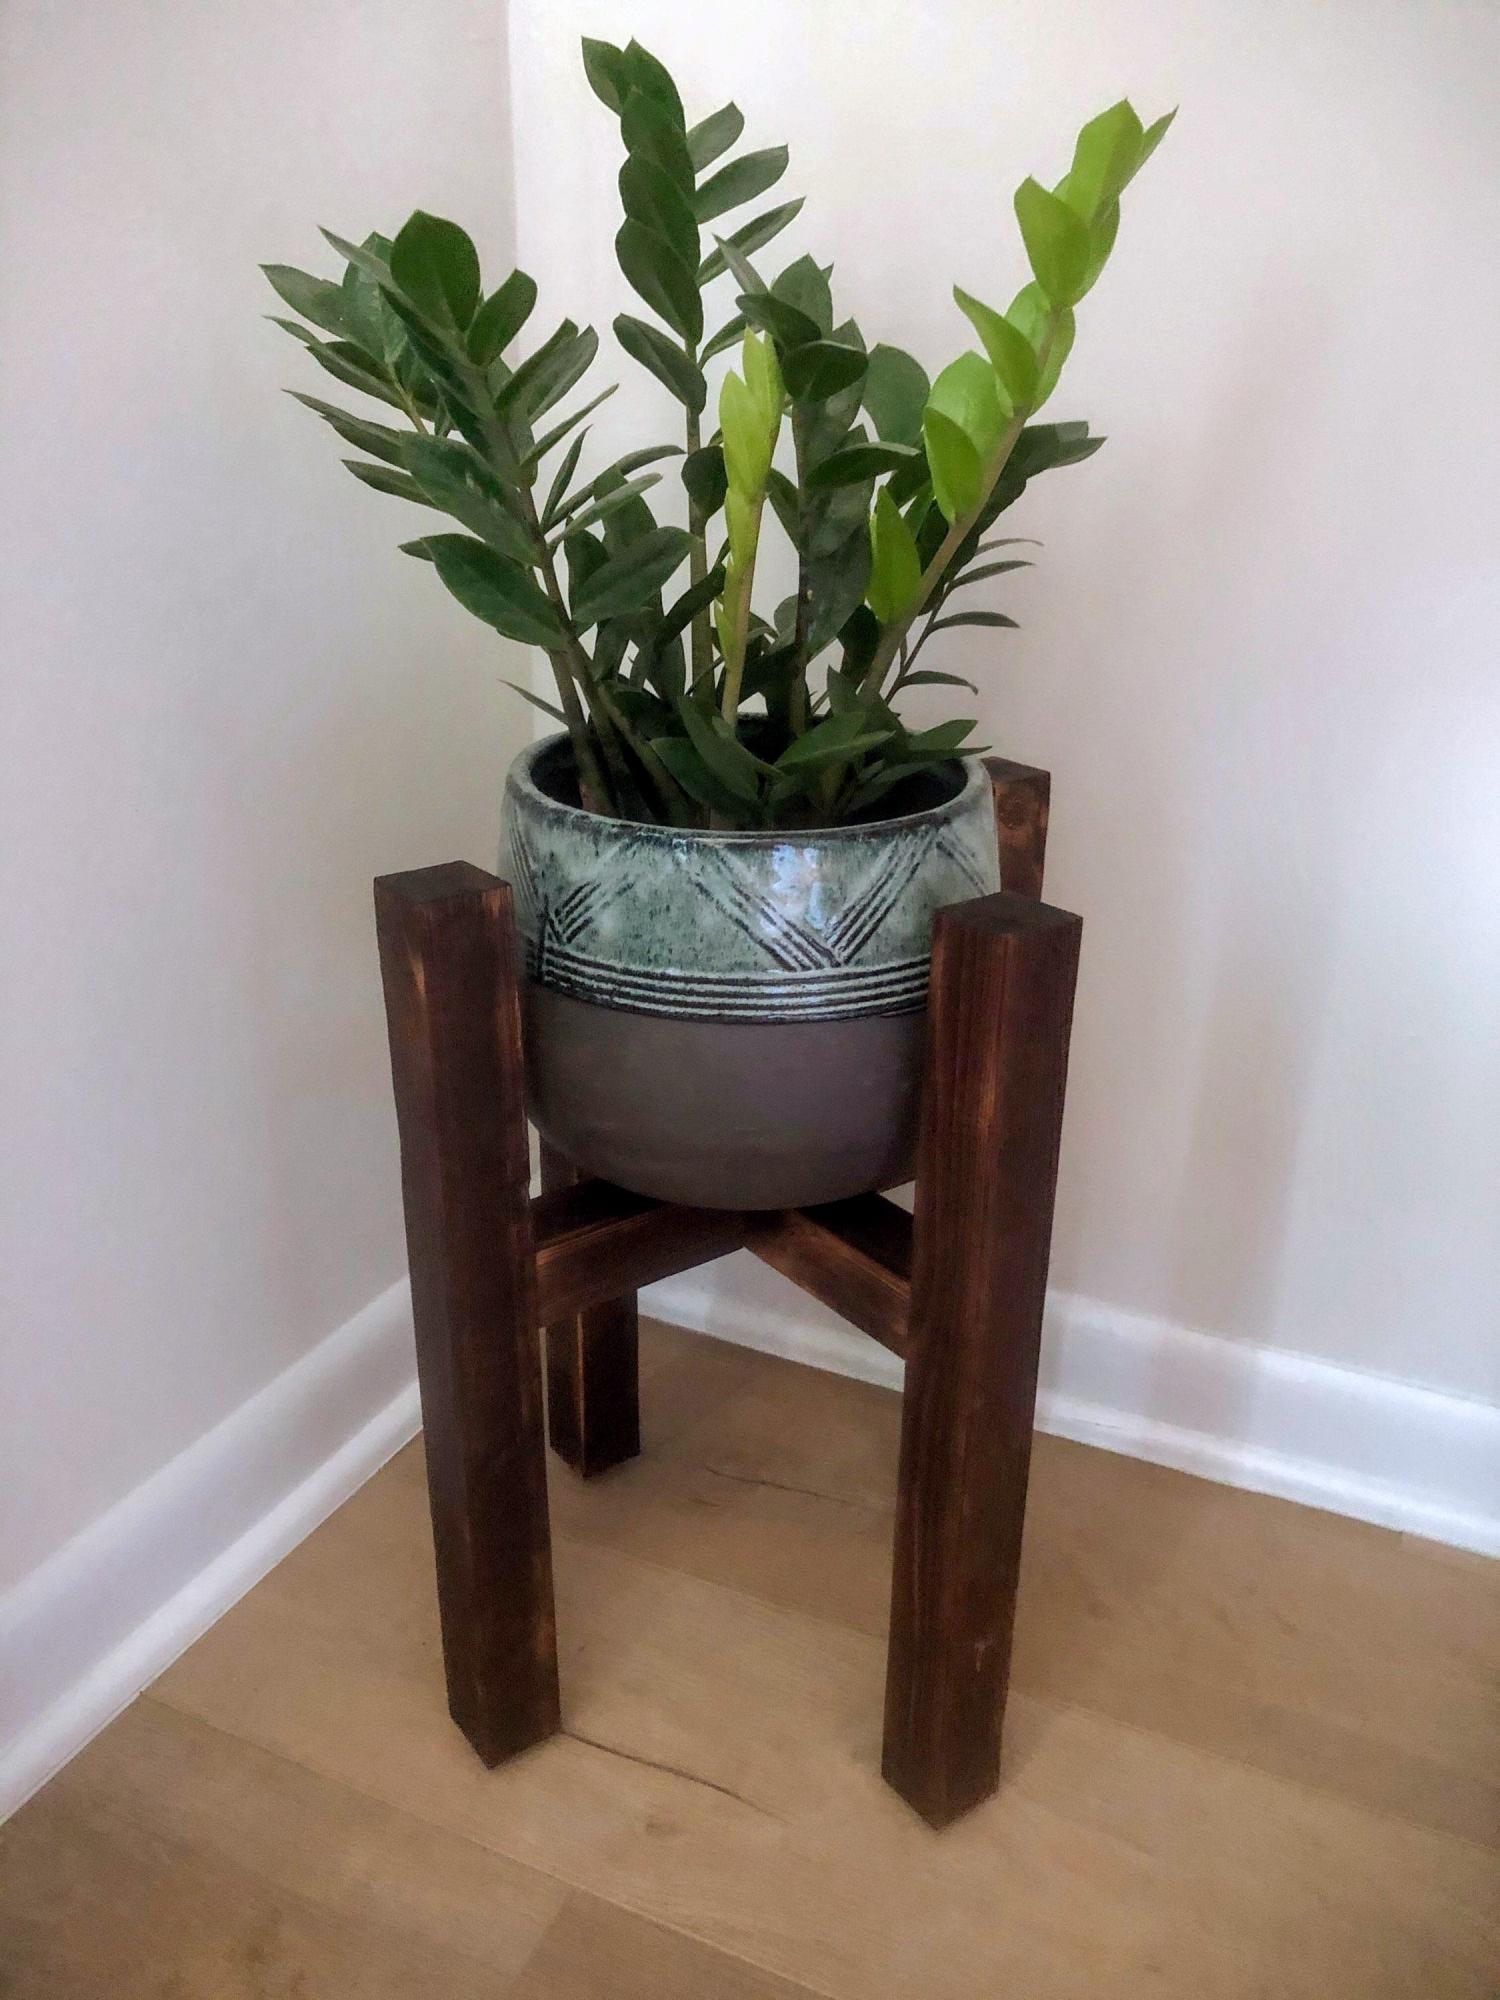
I made 3 of these for a friend. 2 @ 16", 1 @ 20".
Built from Plan(s)
Estimated Cost
$40.00 for 3
Estimated Time Investment
Afternoon Project (3-6 Hours)
Finish Used
Shui sugi ban. Just burned and brushed off.
Recommended Skill Level
Beginner
Country Desk
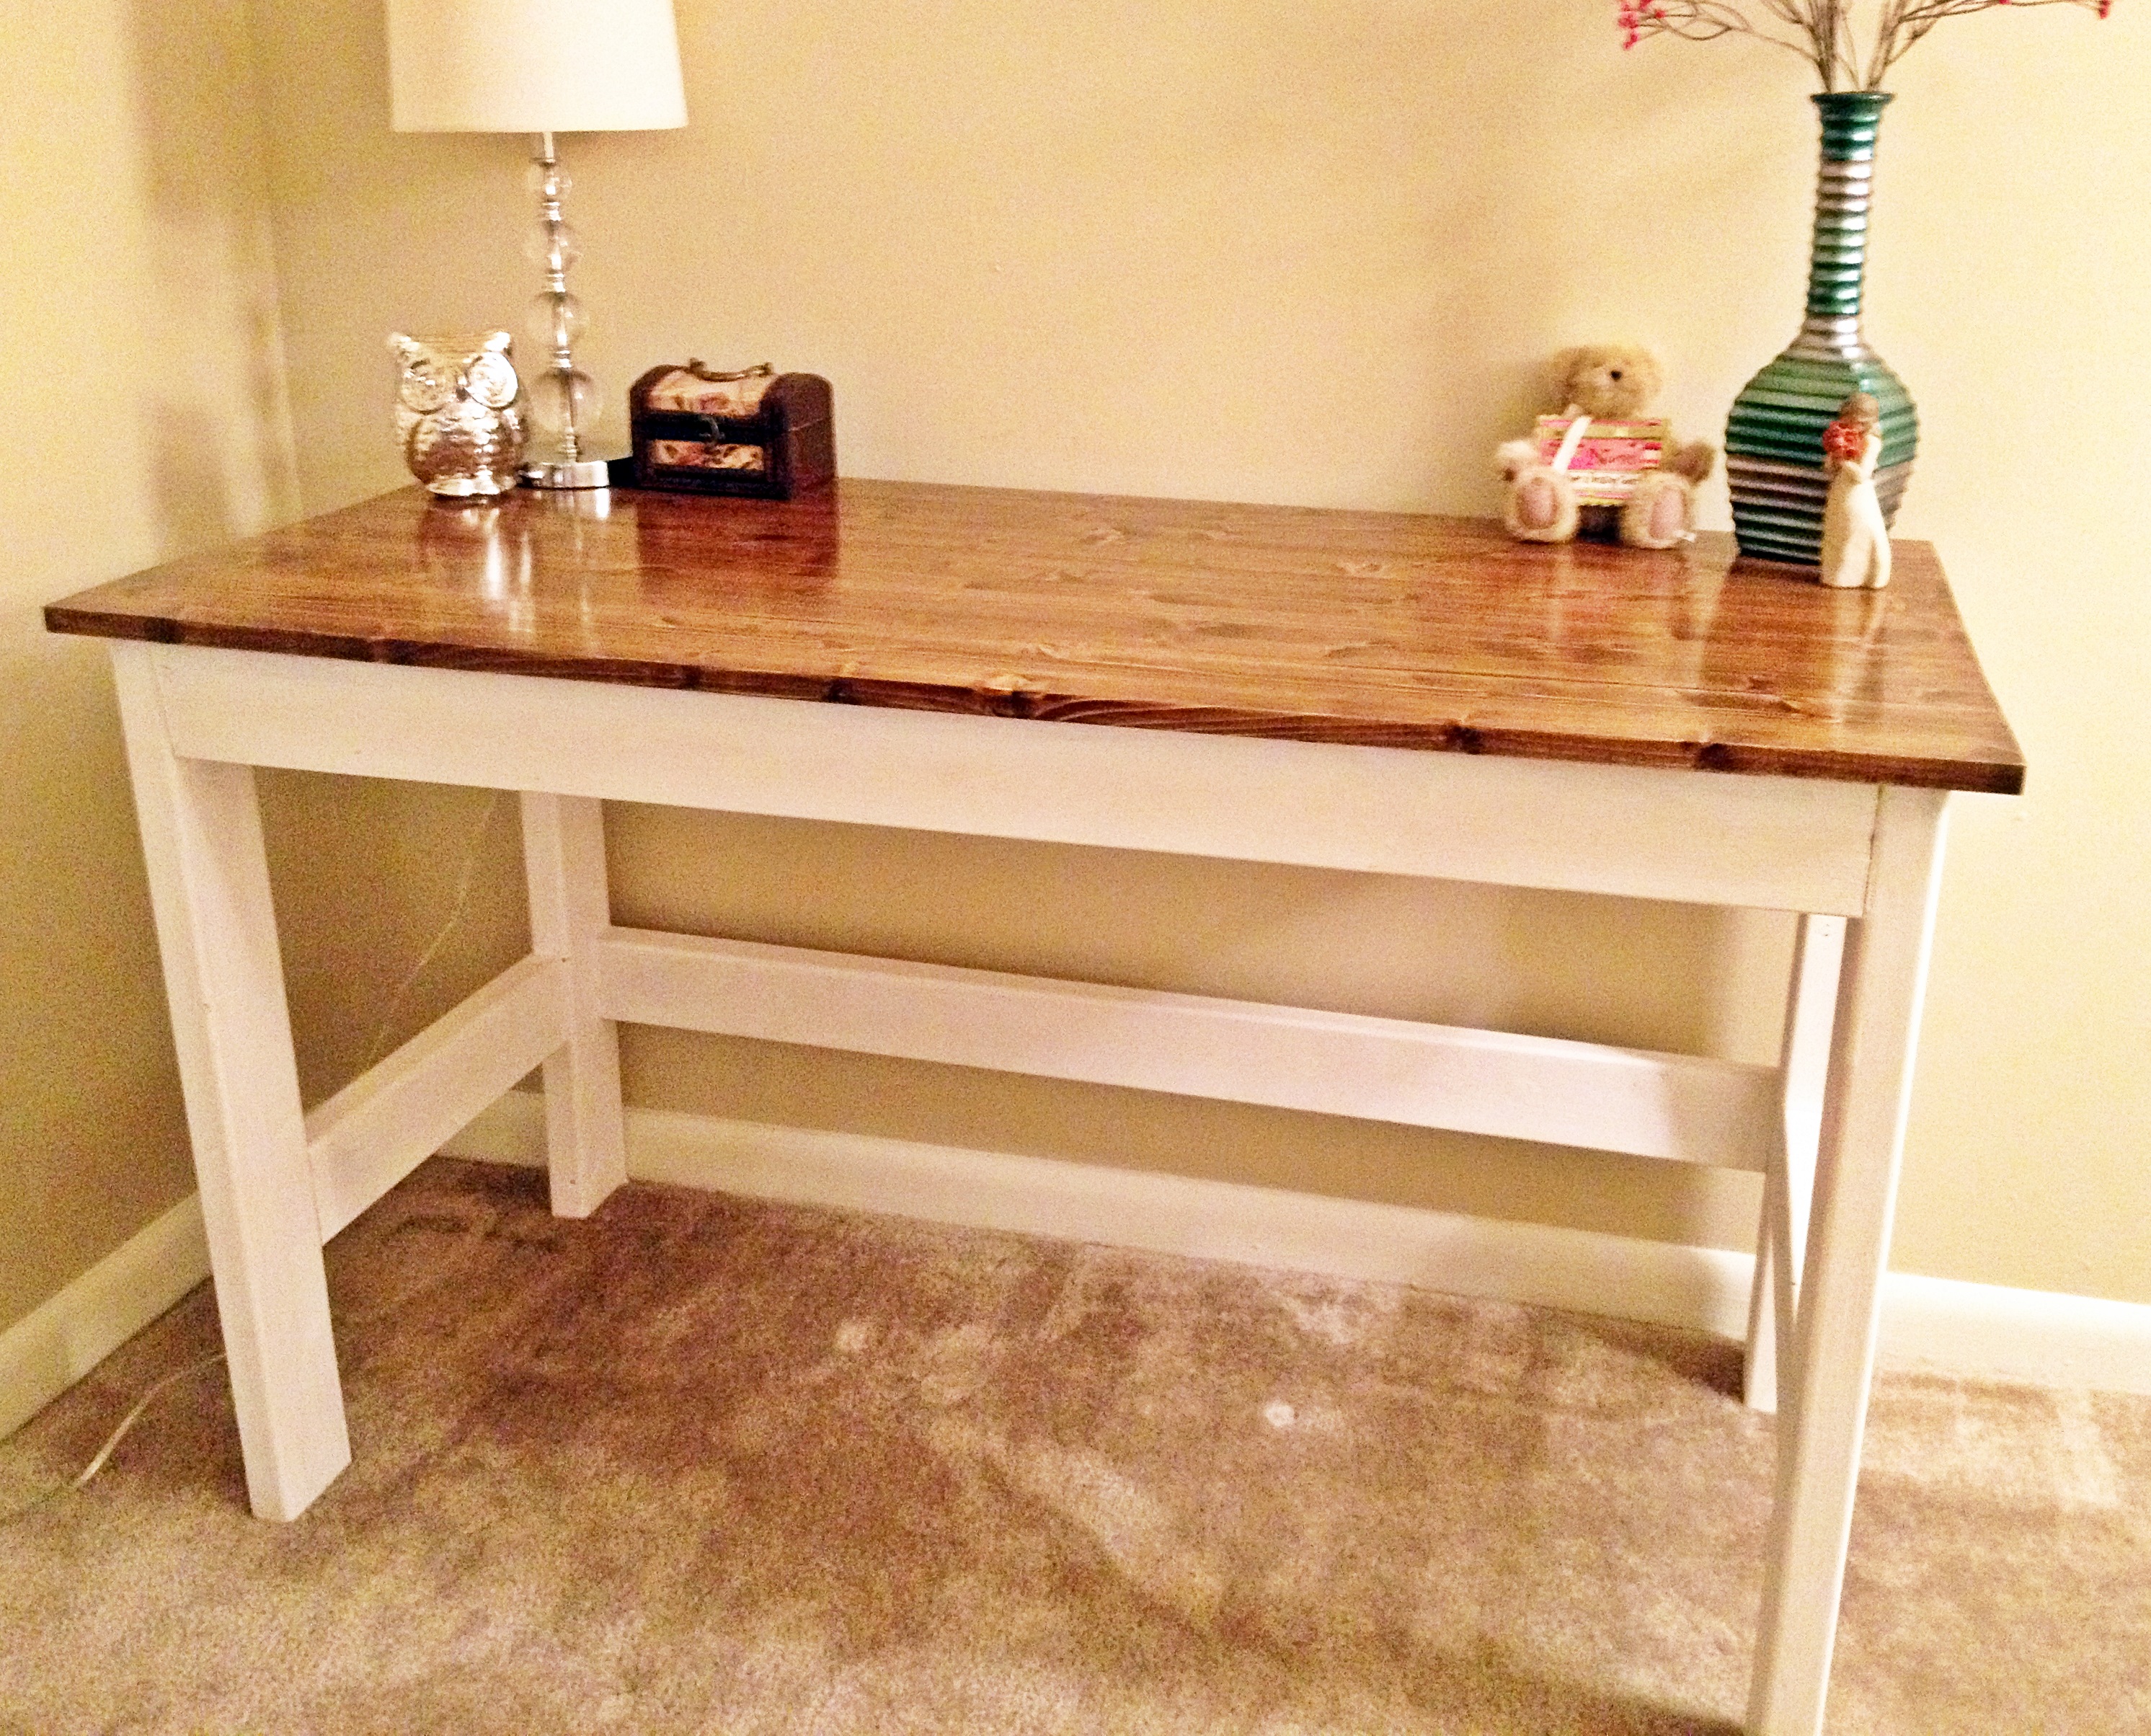
I wanted a good solid desk for my office and I thought these plans were perfect. The wood, screws, paint, and stain all cost less than $30. Instead of using 2x4's for the top I used a solid piece of aspen. I then stained the top and painted the bottom white.
Built from Plan(s)
Estimated Cost
$30
Estimated Time Investment
Weekend Project (10-20 Hours)
Recommended Skill Level
Beginner
Comments

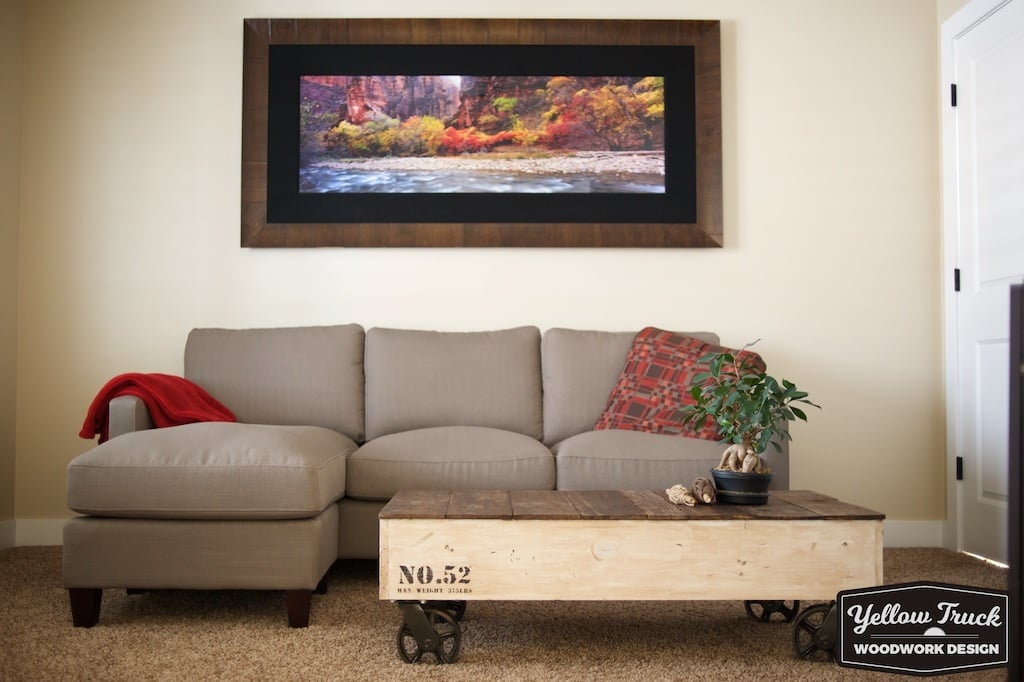
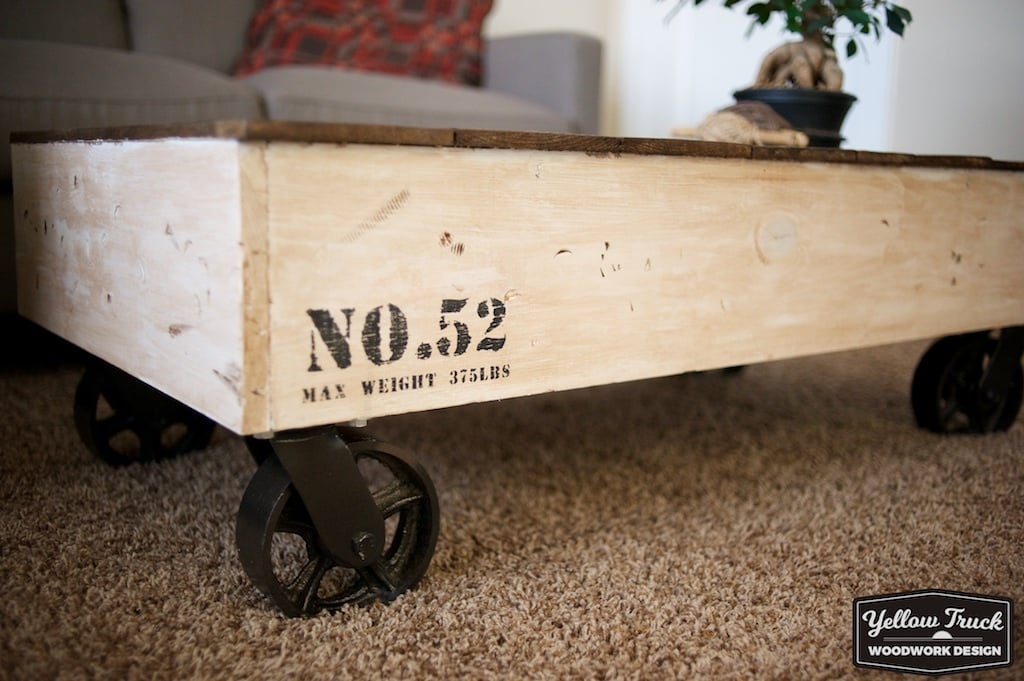
Factory Cart Coffee Table
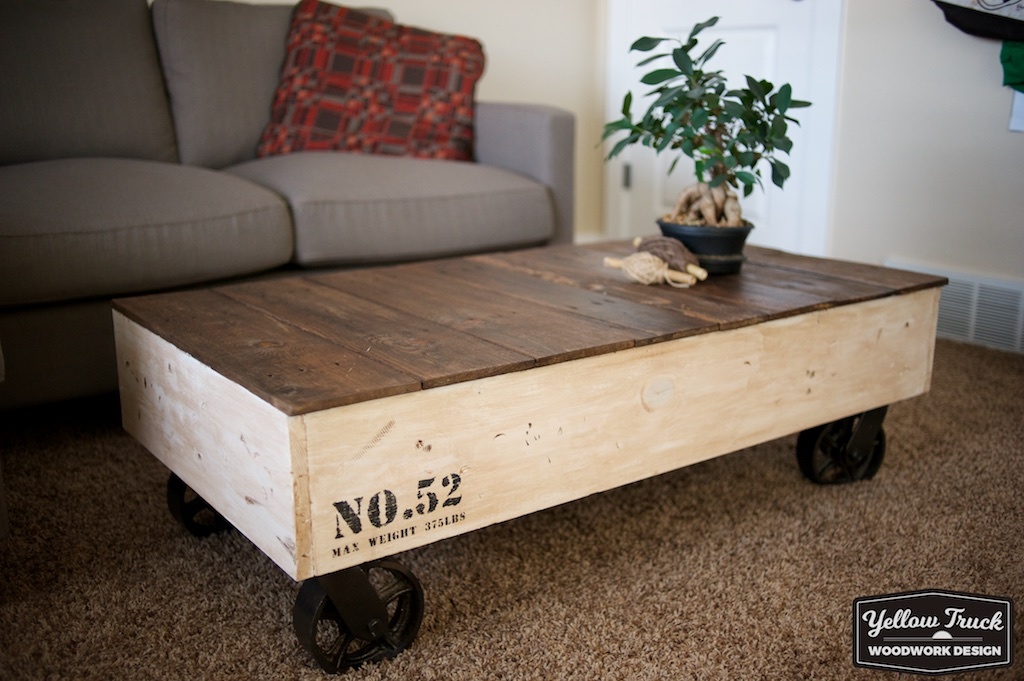
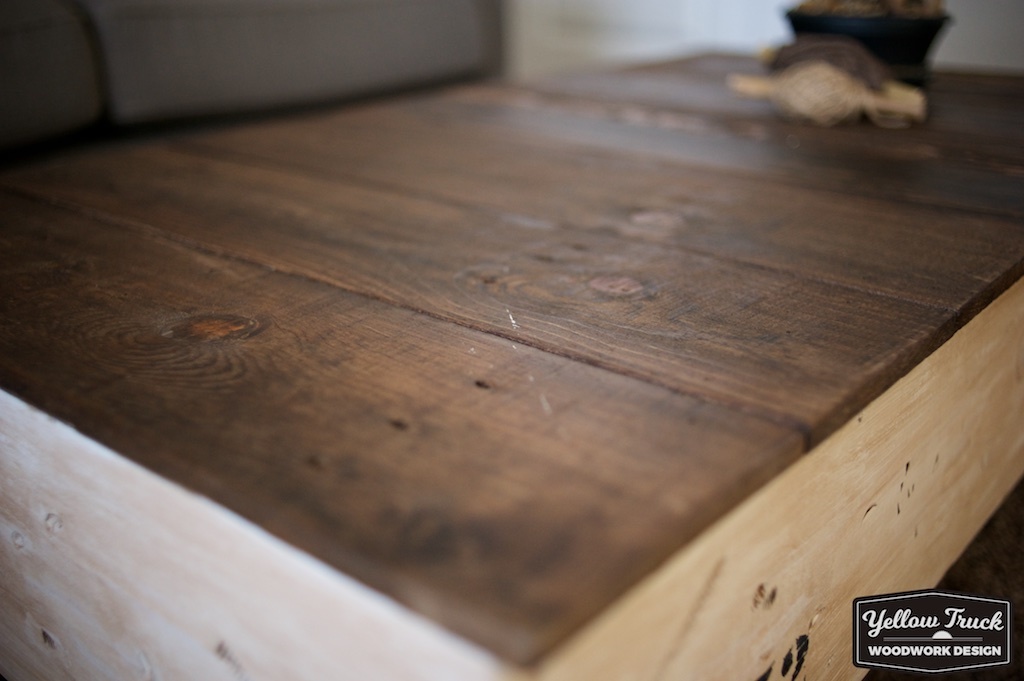
I built this last weekend and had a blast with it. The design was from Ana's Factory Cart Coffee table, but I built it a little bit different. The side boards are from 1x8 pine instead of 1x6. I wanted it to be a little bit taller. I ended up getting the casters from Home Depot. They were $25 each. However I saved some cash on the top by using wood from a pallet that I sanded down and stained. The overall cost was about $120 with $100 of that being just the casters.
I did the No.52 and max weight by creating a stencil and painting it with black paint and sanding it down.
Built from Plan(s)
Estimated Cost
$120
Estimated Time Investment
Afternoon Project (3-6 Hours)
Finish Used
The painted section is chalk paint with a brown wax. The stain is minwax Early American
Recommended Skill Level
Beginner
Comments
Sat, 12/31/2016 - 16:38
Forgot to login
I forget to login before I posted this so it shows as a guest. Sorry about that.
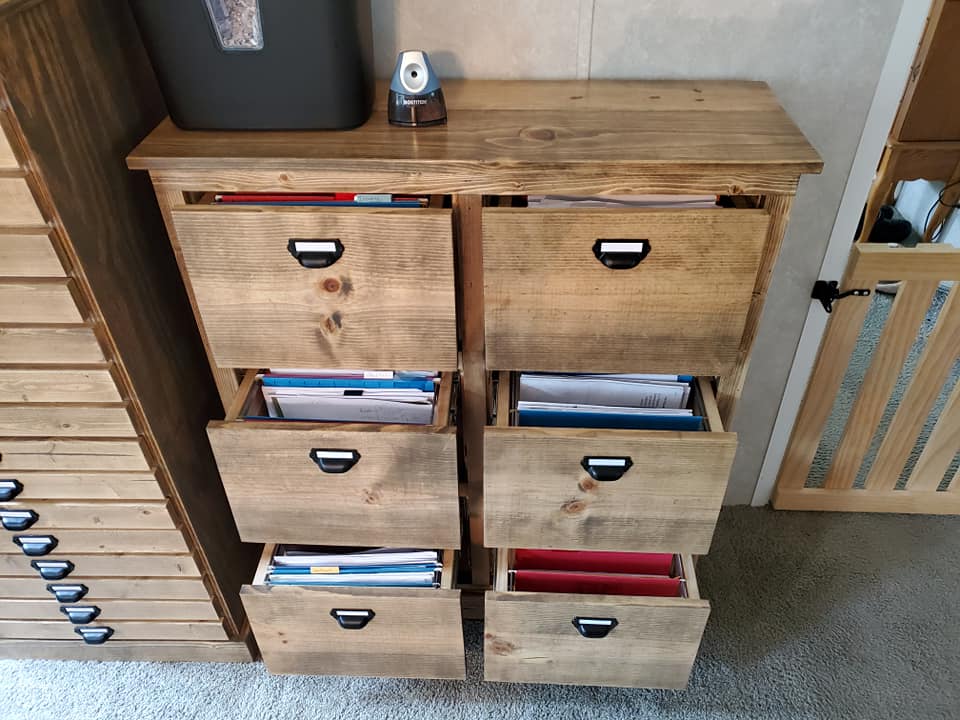
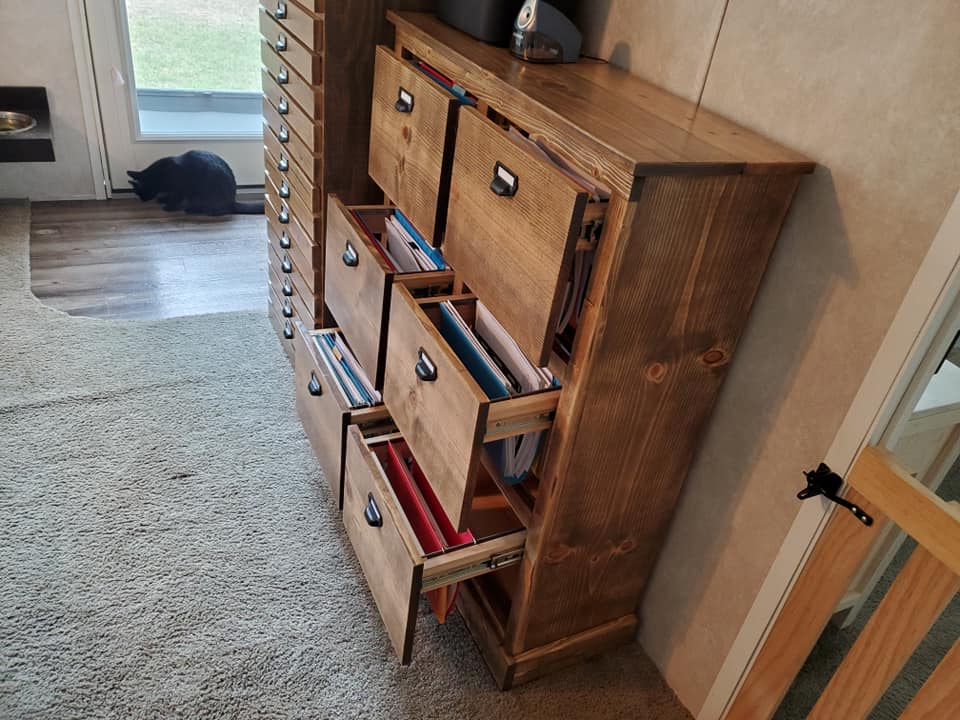
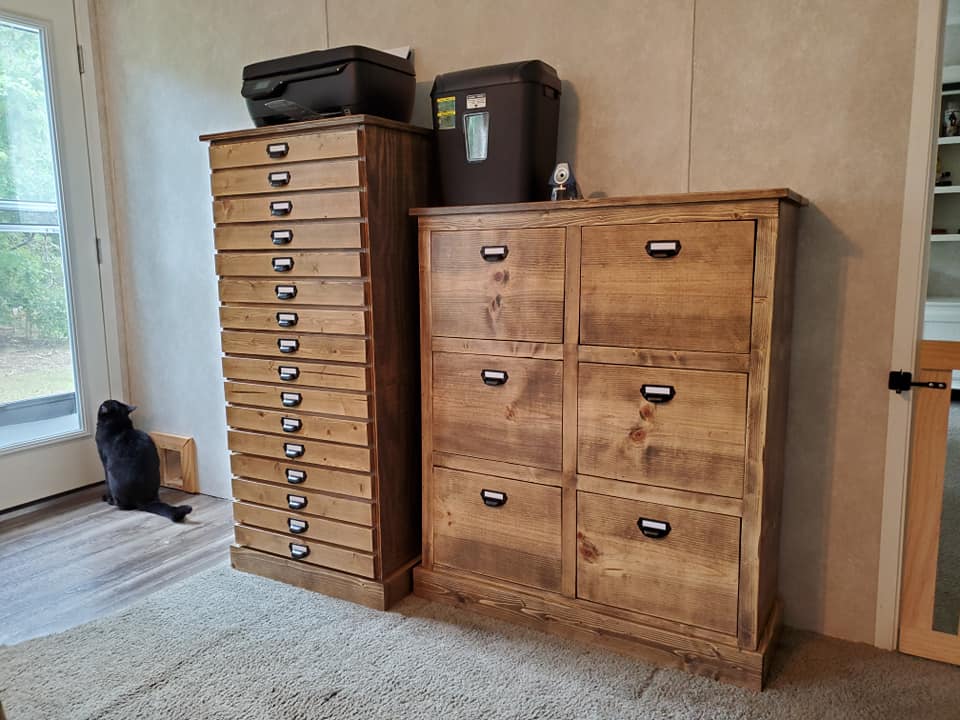
My mail boss

I made it a little taller and it is all a filing cabinet.

Built from Plan(s)
Comments
Tue, 09/15/2020 - 06:51
Did you build the tall…
Did you build the tall cabinet? Do you have plans for it?
Thanks!
Sat, 09/19/2020 - 13:17
Here you go! https:/…
Sun, 02/14/2021 - 15:27
Wow! These are amazing!…
Wow! These are amazing! Thanks for sharing! What finish did you use? And how tall did you make the filing cabinet? Thanks!!
Vinyl Record Storage
I've made another record cabinet, this time with a nice dark walnut stain. To see more details and plans visit my blog.
http://www.woodworkingfourdummies.com/
Cheers,
Ian
Estimated Cost
400
Estimated Time Investment
Week Long Project (20 Hours or More)
Finish Used
Minwax Dark Walnut
Recommended Skill Level
Intermediate
Comments
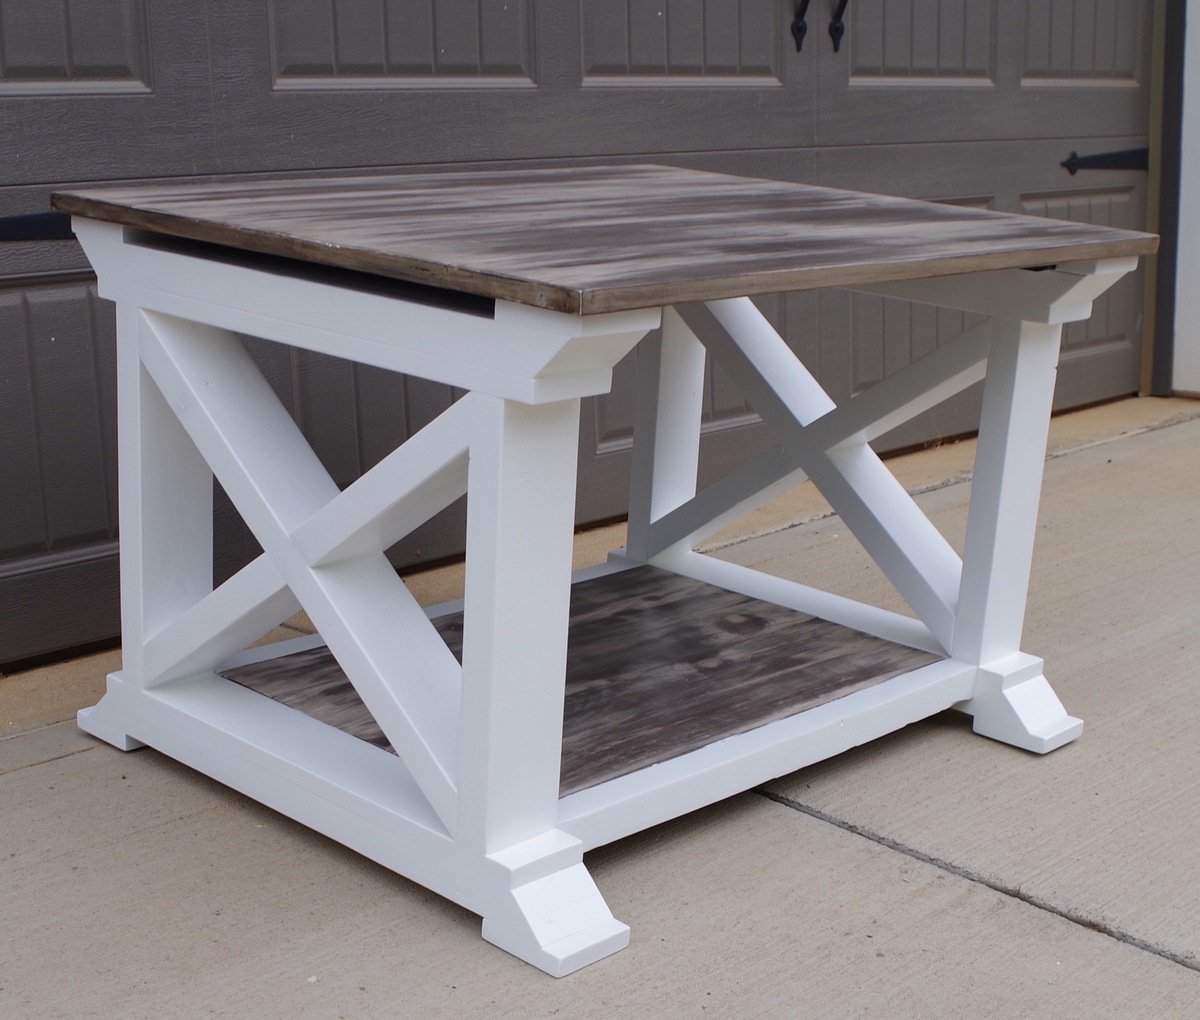
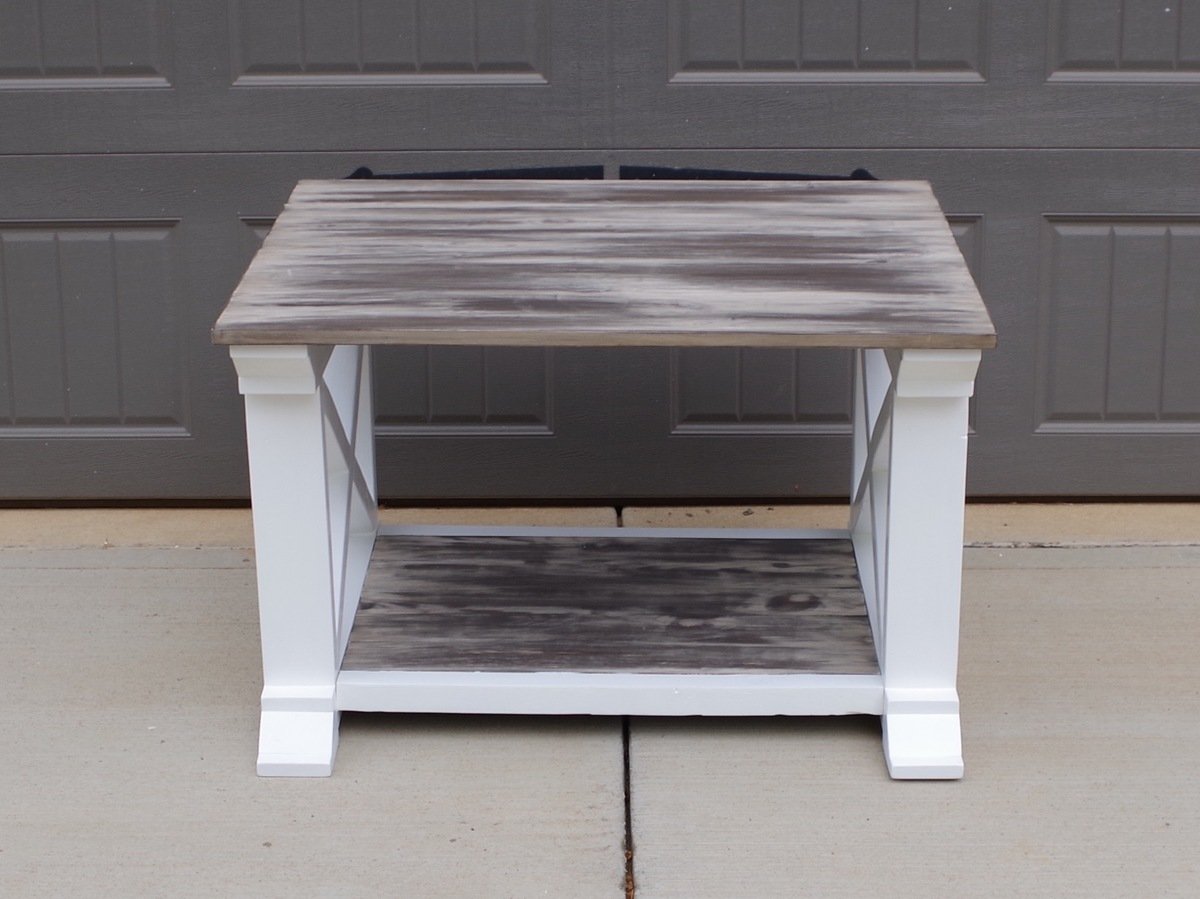
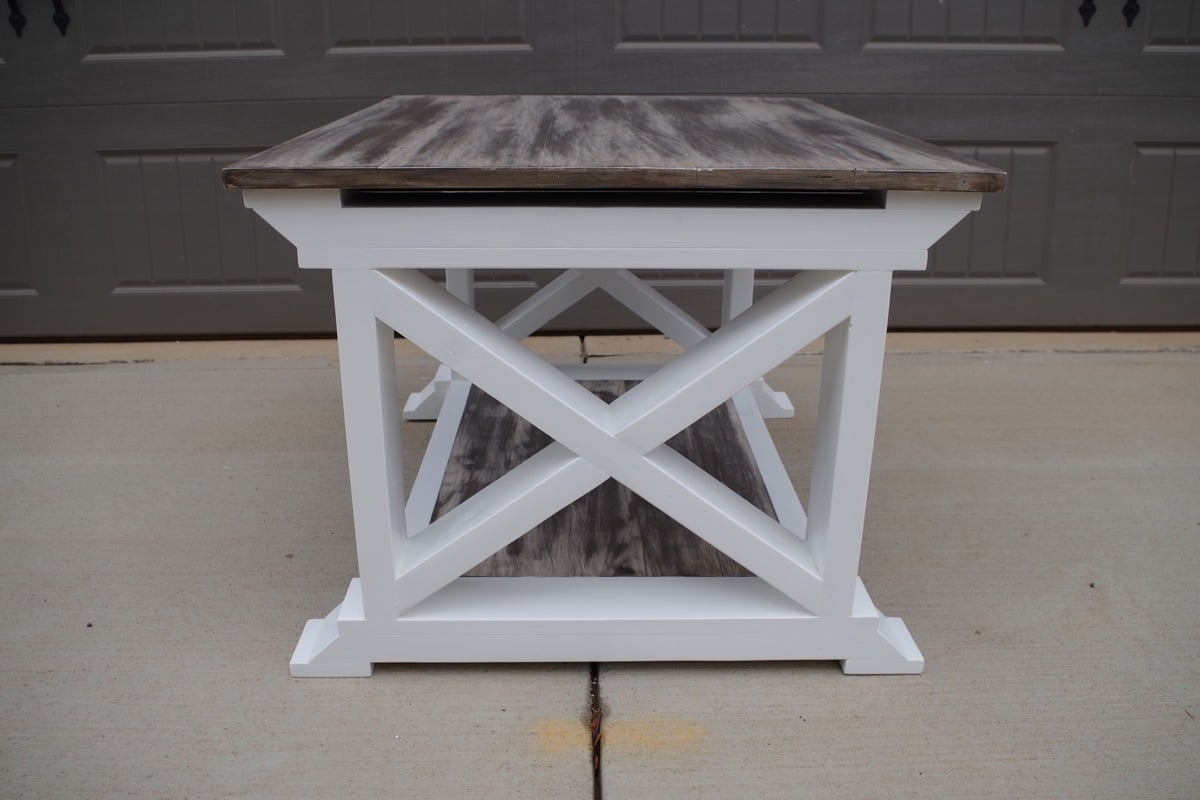
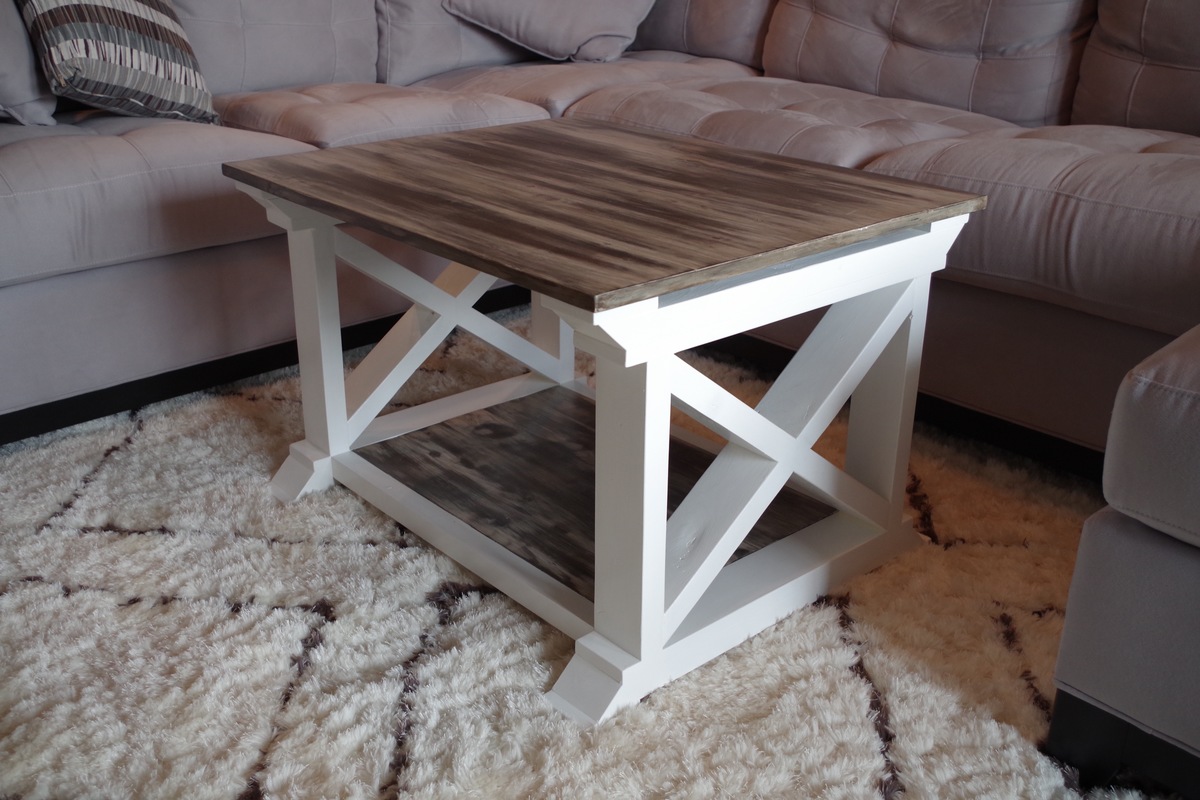
Inspired By Home - Coffee Table with Rustic Top & pure white X-frame bottom.
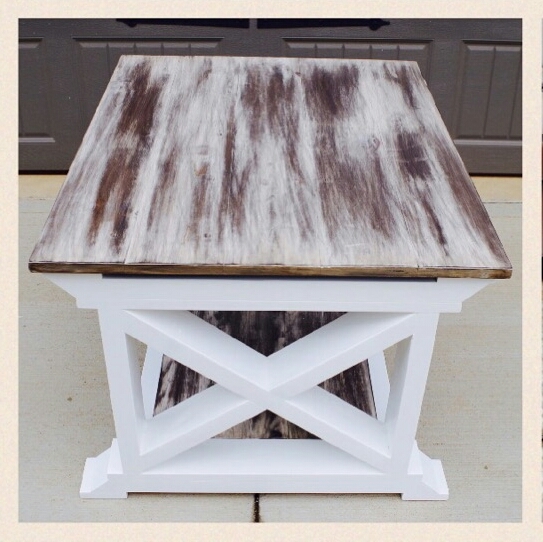
I own a small furniture and home décor company called Inspired By Home and we love Ana White's site! When we saw this mirror top coffee table, we knew we had to have one for our home. Since we have a 3-piece sectional sofa that takes up the majority of the living room space, we knew we needed something that was a little bit smaller so I made some adjustments to these plans. The dimensions for our coffee table are 34"L x 28"W x 21"H. Most coffee table are about 18"H but our sofa sits a little higher and I also have very long legs so I needed something a little bit taller. We also decided not to do a mirror top because A) we didn't have an old mirror we could use, and B) because we are not big fans of having any glass tabletops. I instead went with a rutic look and added a bottom shelf to match.
If you like this, you should check out some of our other designs here.
Thank you, Ana and your team!

Built from Plan(s)
Estimated Cost
$50
Estimated Time Investment
Weekend Project (10-20 Hours)
Finish Used
For the tabletop and shelf I started off by painting the boards entirely with a white cabinet enamel that I got from Lowes. After that dried a few hours I sanded it down (the more you sand the less you will see the white). Because it's an enamel, you really have to sand through all the way to the bare wood in order to get the stain to take and give you the dark stained areas. The stain I used was Minwax, Dark Walnut.
Recommended Skill Level
Intermediate
Closet Shelves
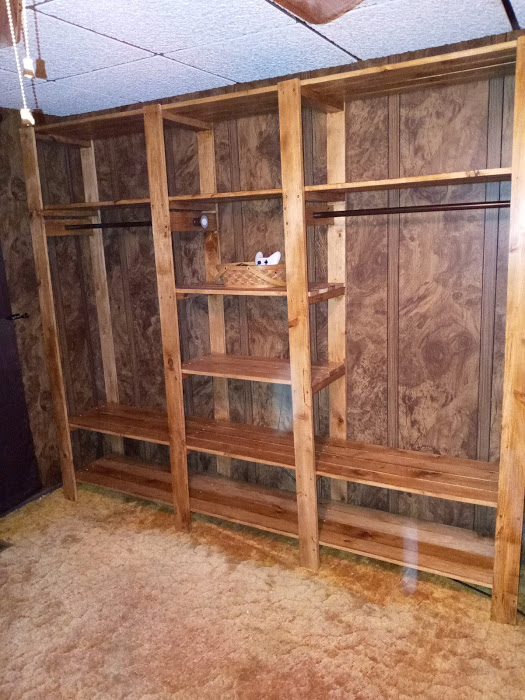
So I was complaining to my wife that our one closet in our bedroom was becoming too cluttered. She asked me to build her one. I told her that if she found the one she wanted me to build, then I would build it. She found this one and so I built it for her. Let me just say that she is very happy with it and it came out very great. I did find a couple of shower curtain rods that were brown to used instead of the iron pipe. It made the whole project cost around $80.
Built from Plan(s)
Estimated Cost
$80
Estimated Time Investment
Weekend Project (10-20 Hours)
Recommended Skill Level
Beginner
Comments
Sat, 11/07/2020 - 11:42
Excellent!
So happy that worked out for you and your wife, thanks for sharing:)
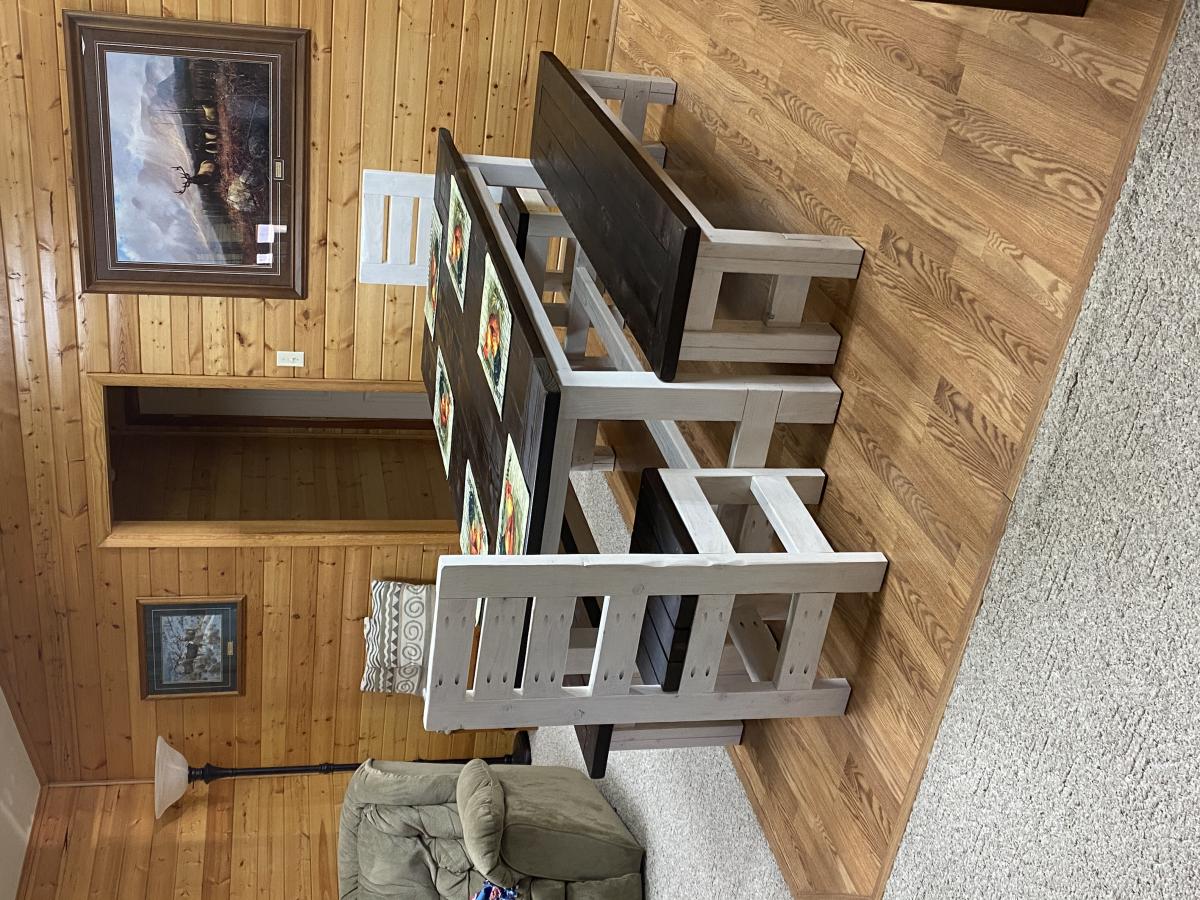
Farmhouse Table Set
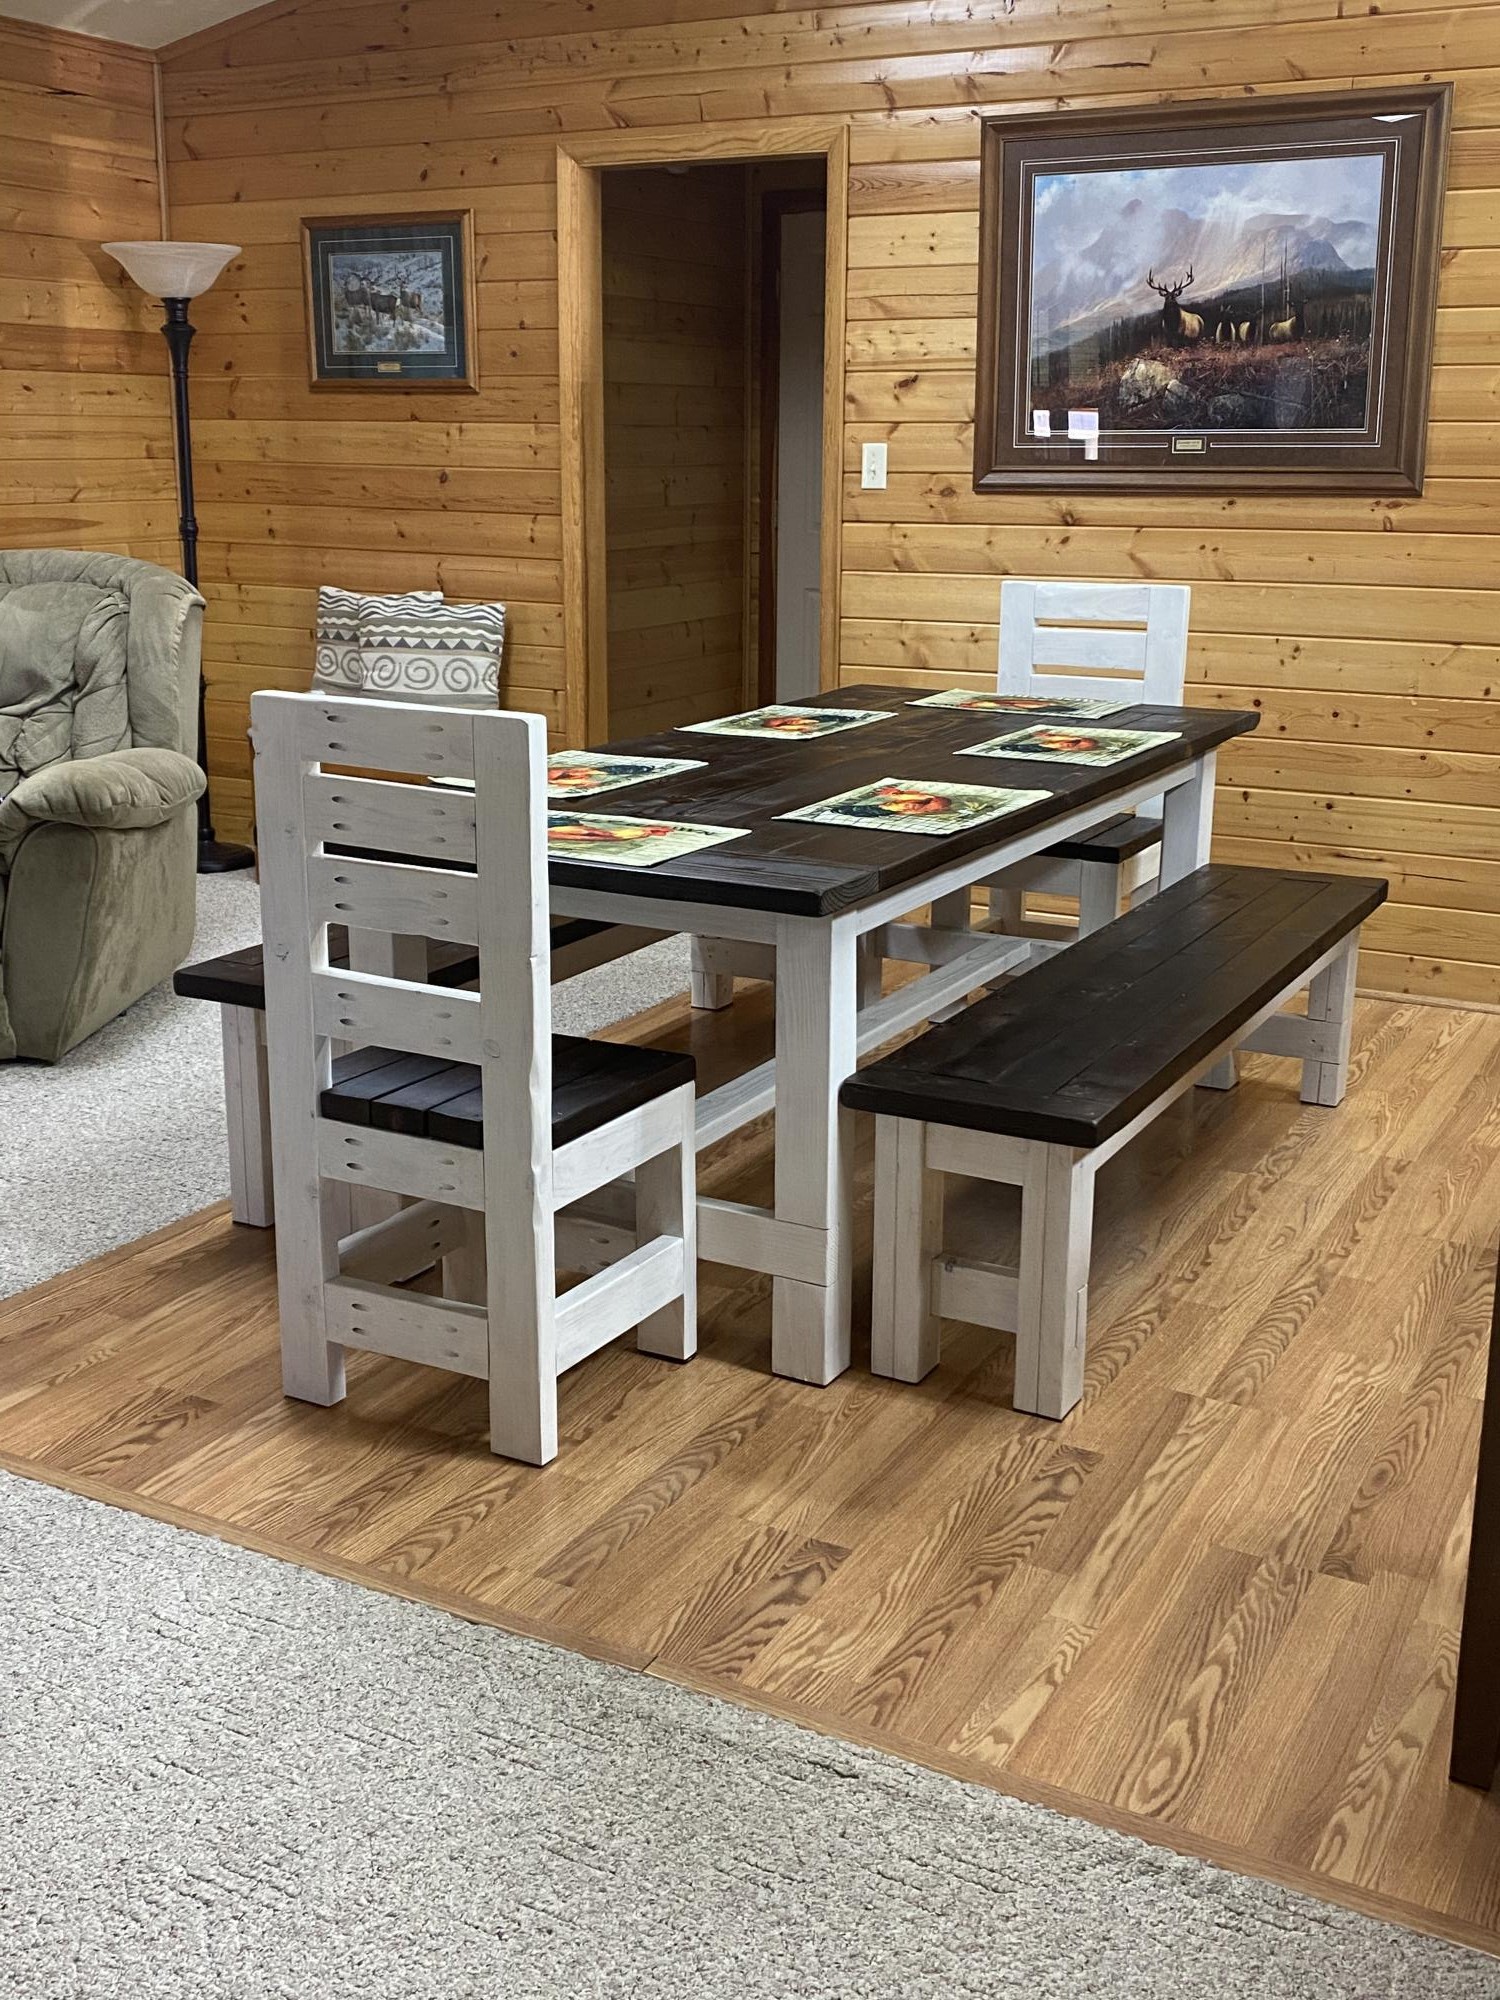
Finally finished this table, chairs and benches. Benches don’t slide under the table so I’m going to build another modified set and use these for outdoor sitting or something similar. Turned out great and love the look.
Built from Plan(s)
Estimated Cost
$500
Estimated Time Investment
Week Long Project (20 Hours or More)
Recommended Skill Level
Beginner
Comments
Large Wood Pet Kennel End Table
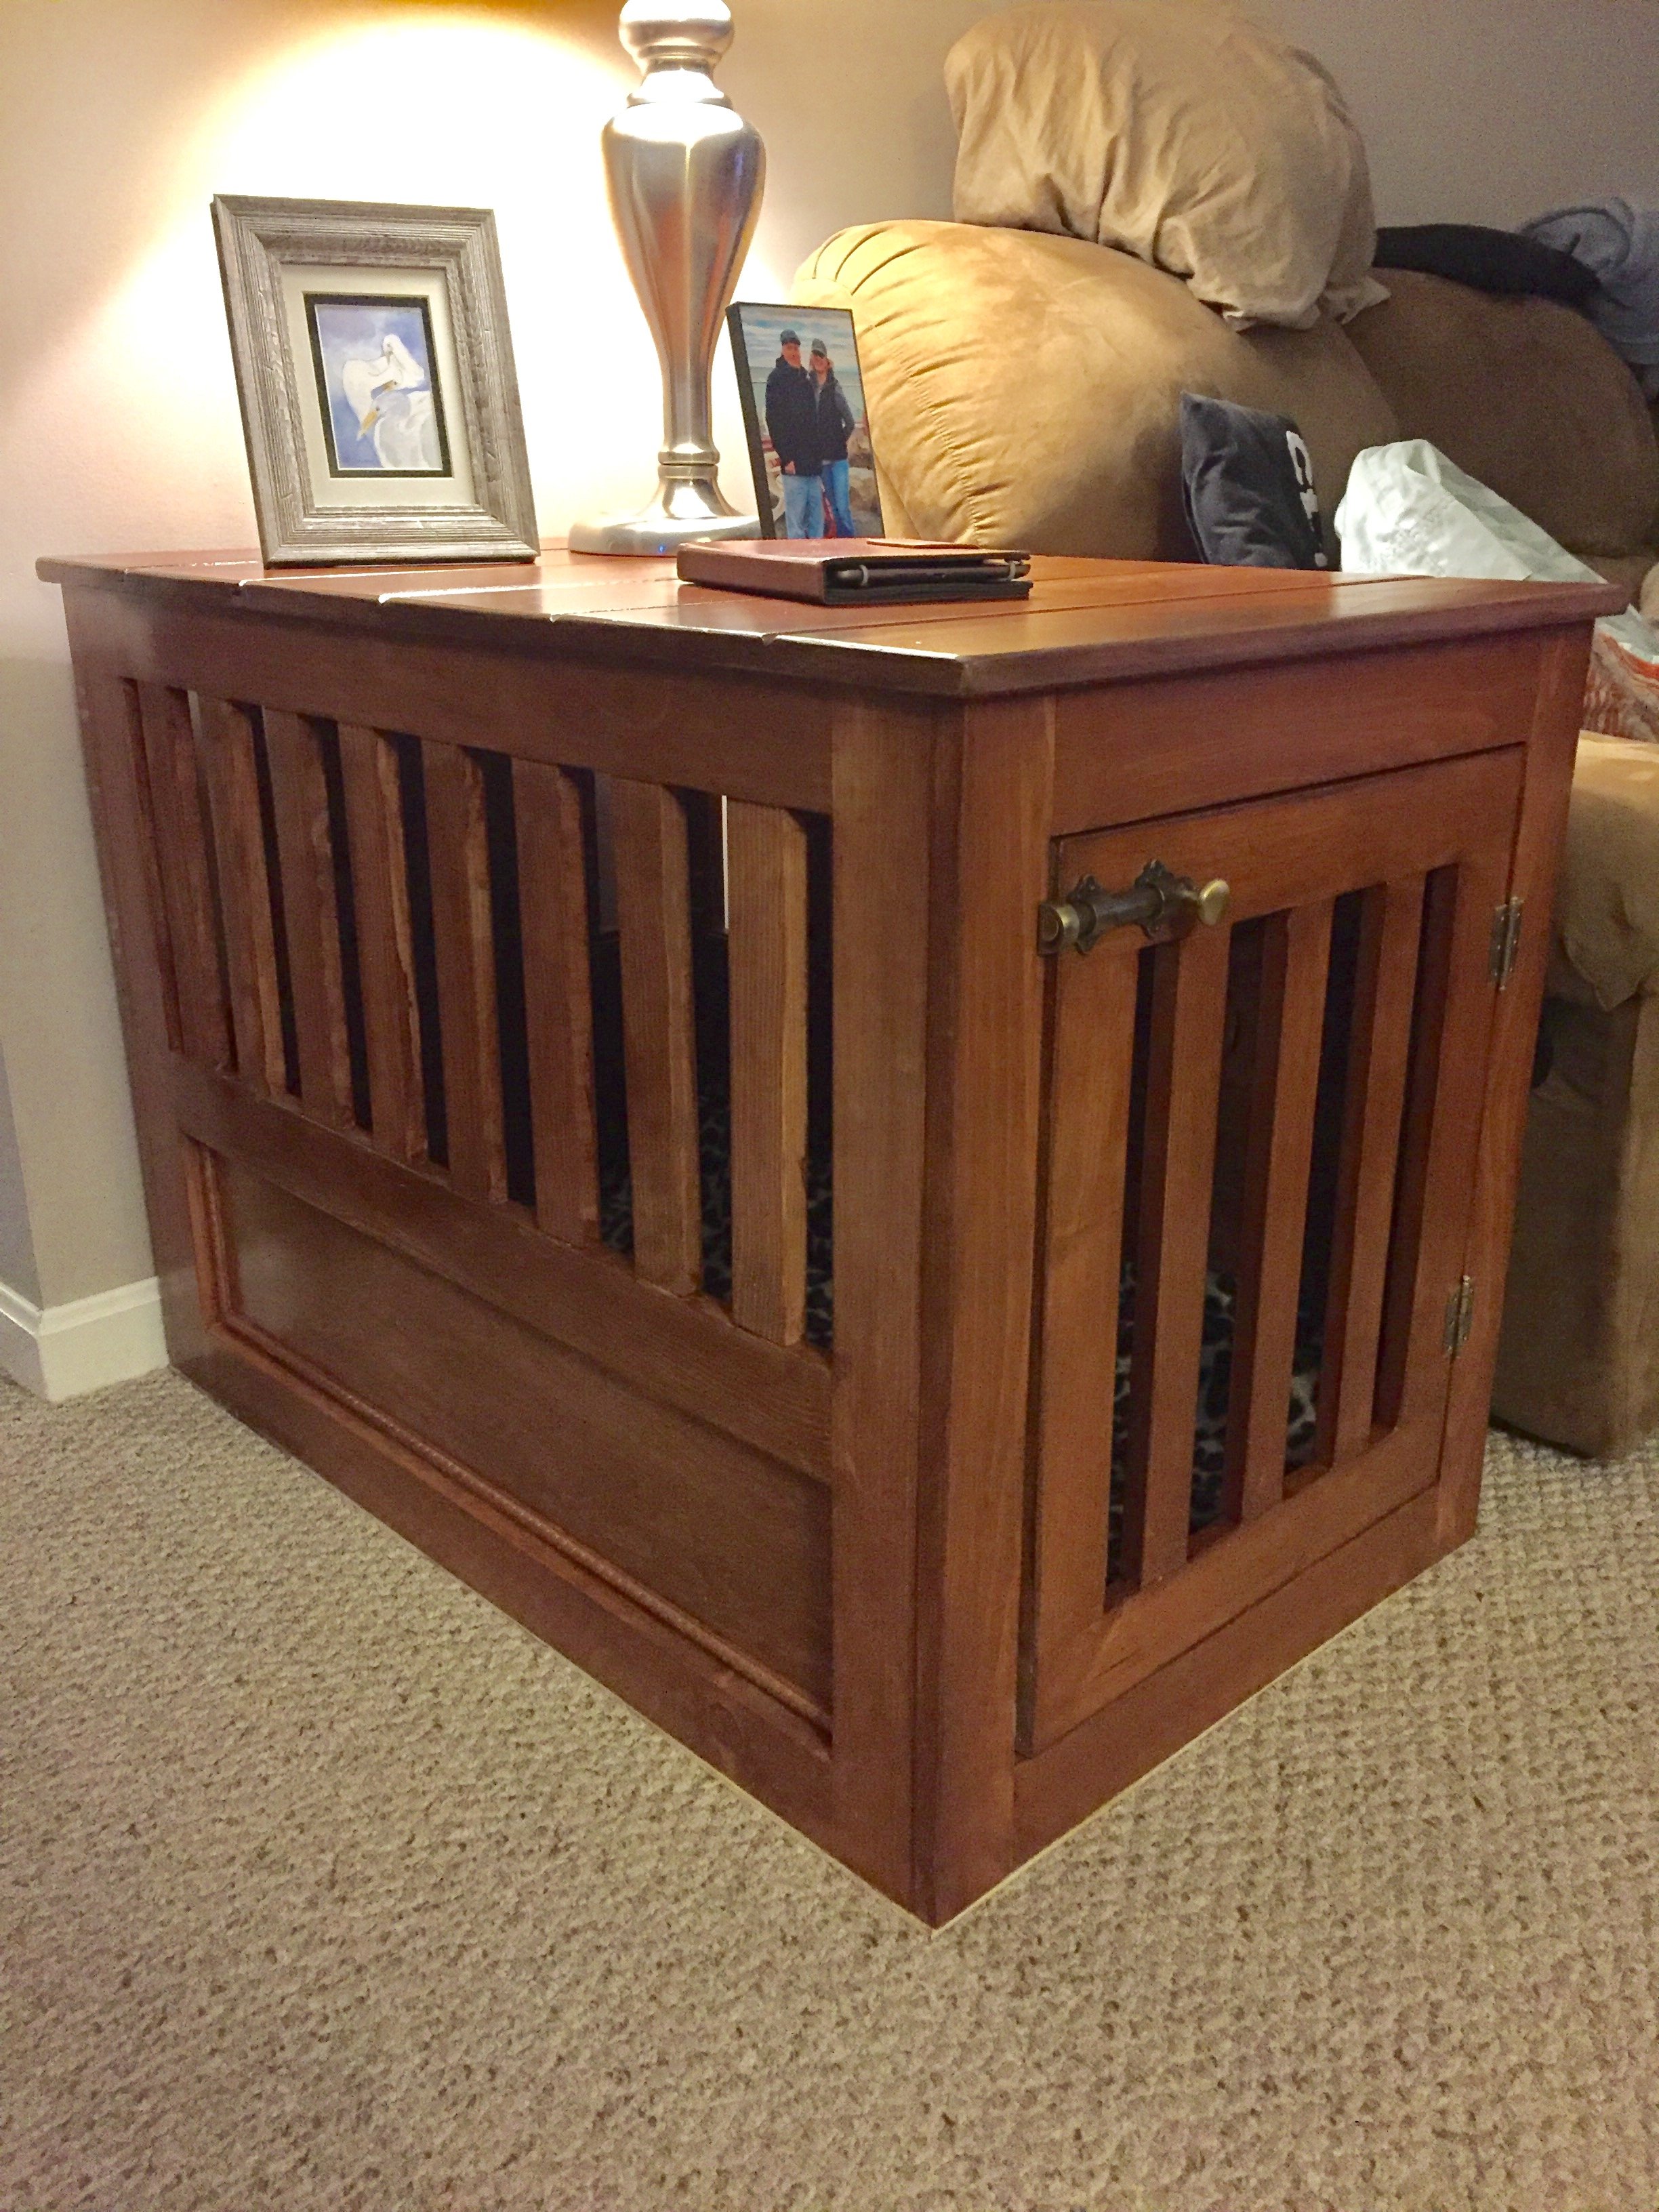
I used the plans provided. I made a small change to the windows and made the bigger.
Built from Plan(s)
Estimated Cost
$140
Estimated Time Investment
Weekend Project (10-20 Hours)
Finish Used
Water based stain with water based sealer.
Recommended Skill Level
Beginner
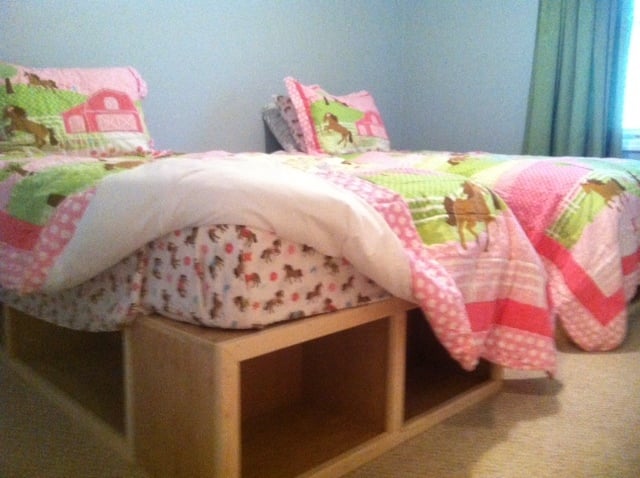
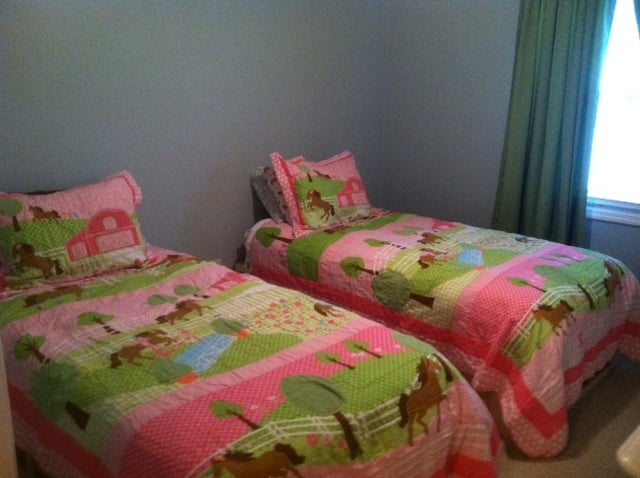
Beds for my girls
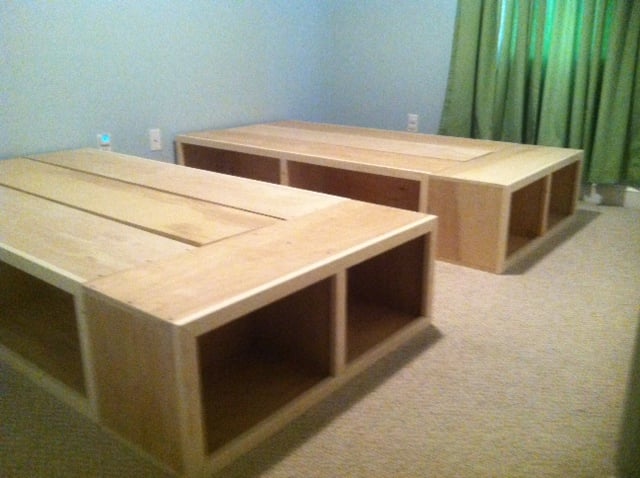
Rather than buying beds for two of our daughters, I wanted to take the opportunity to build them. I really had a great time doing. I used the plans from the Captains Storage beds, but modified it a little.
We ripped two 3/4 inch finished ply into 12in pieces.
That gave us all the sides, ends, and dividers.
The platforms are 12x12 3/4x
The ends are the same only sorter.
Rather than using slats for the middle support I just used the remain ply.
We finished the front with 6ft sections of 1x2 inch furring strips. A good sanding and clean up, and we are good to go!
Thanks for posting the plans! We really enjoyed building the beds and our girls love them!
Built from Plan(s)
Estimated Time Investment
Weekend Project (10-20 Hours)
Finish Used
unfinished wood
Recommended Skill Level
Beginner
Comments
Fri, 09/20/2013 - 13:14
BEDS, captain twin
LOVE this! was looking for something other than the slats that would TRULY hold my polynesian kids, thank you for sharing! :-)
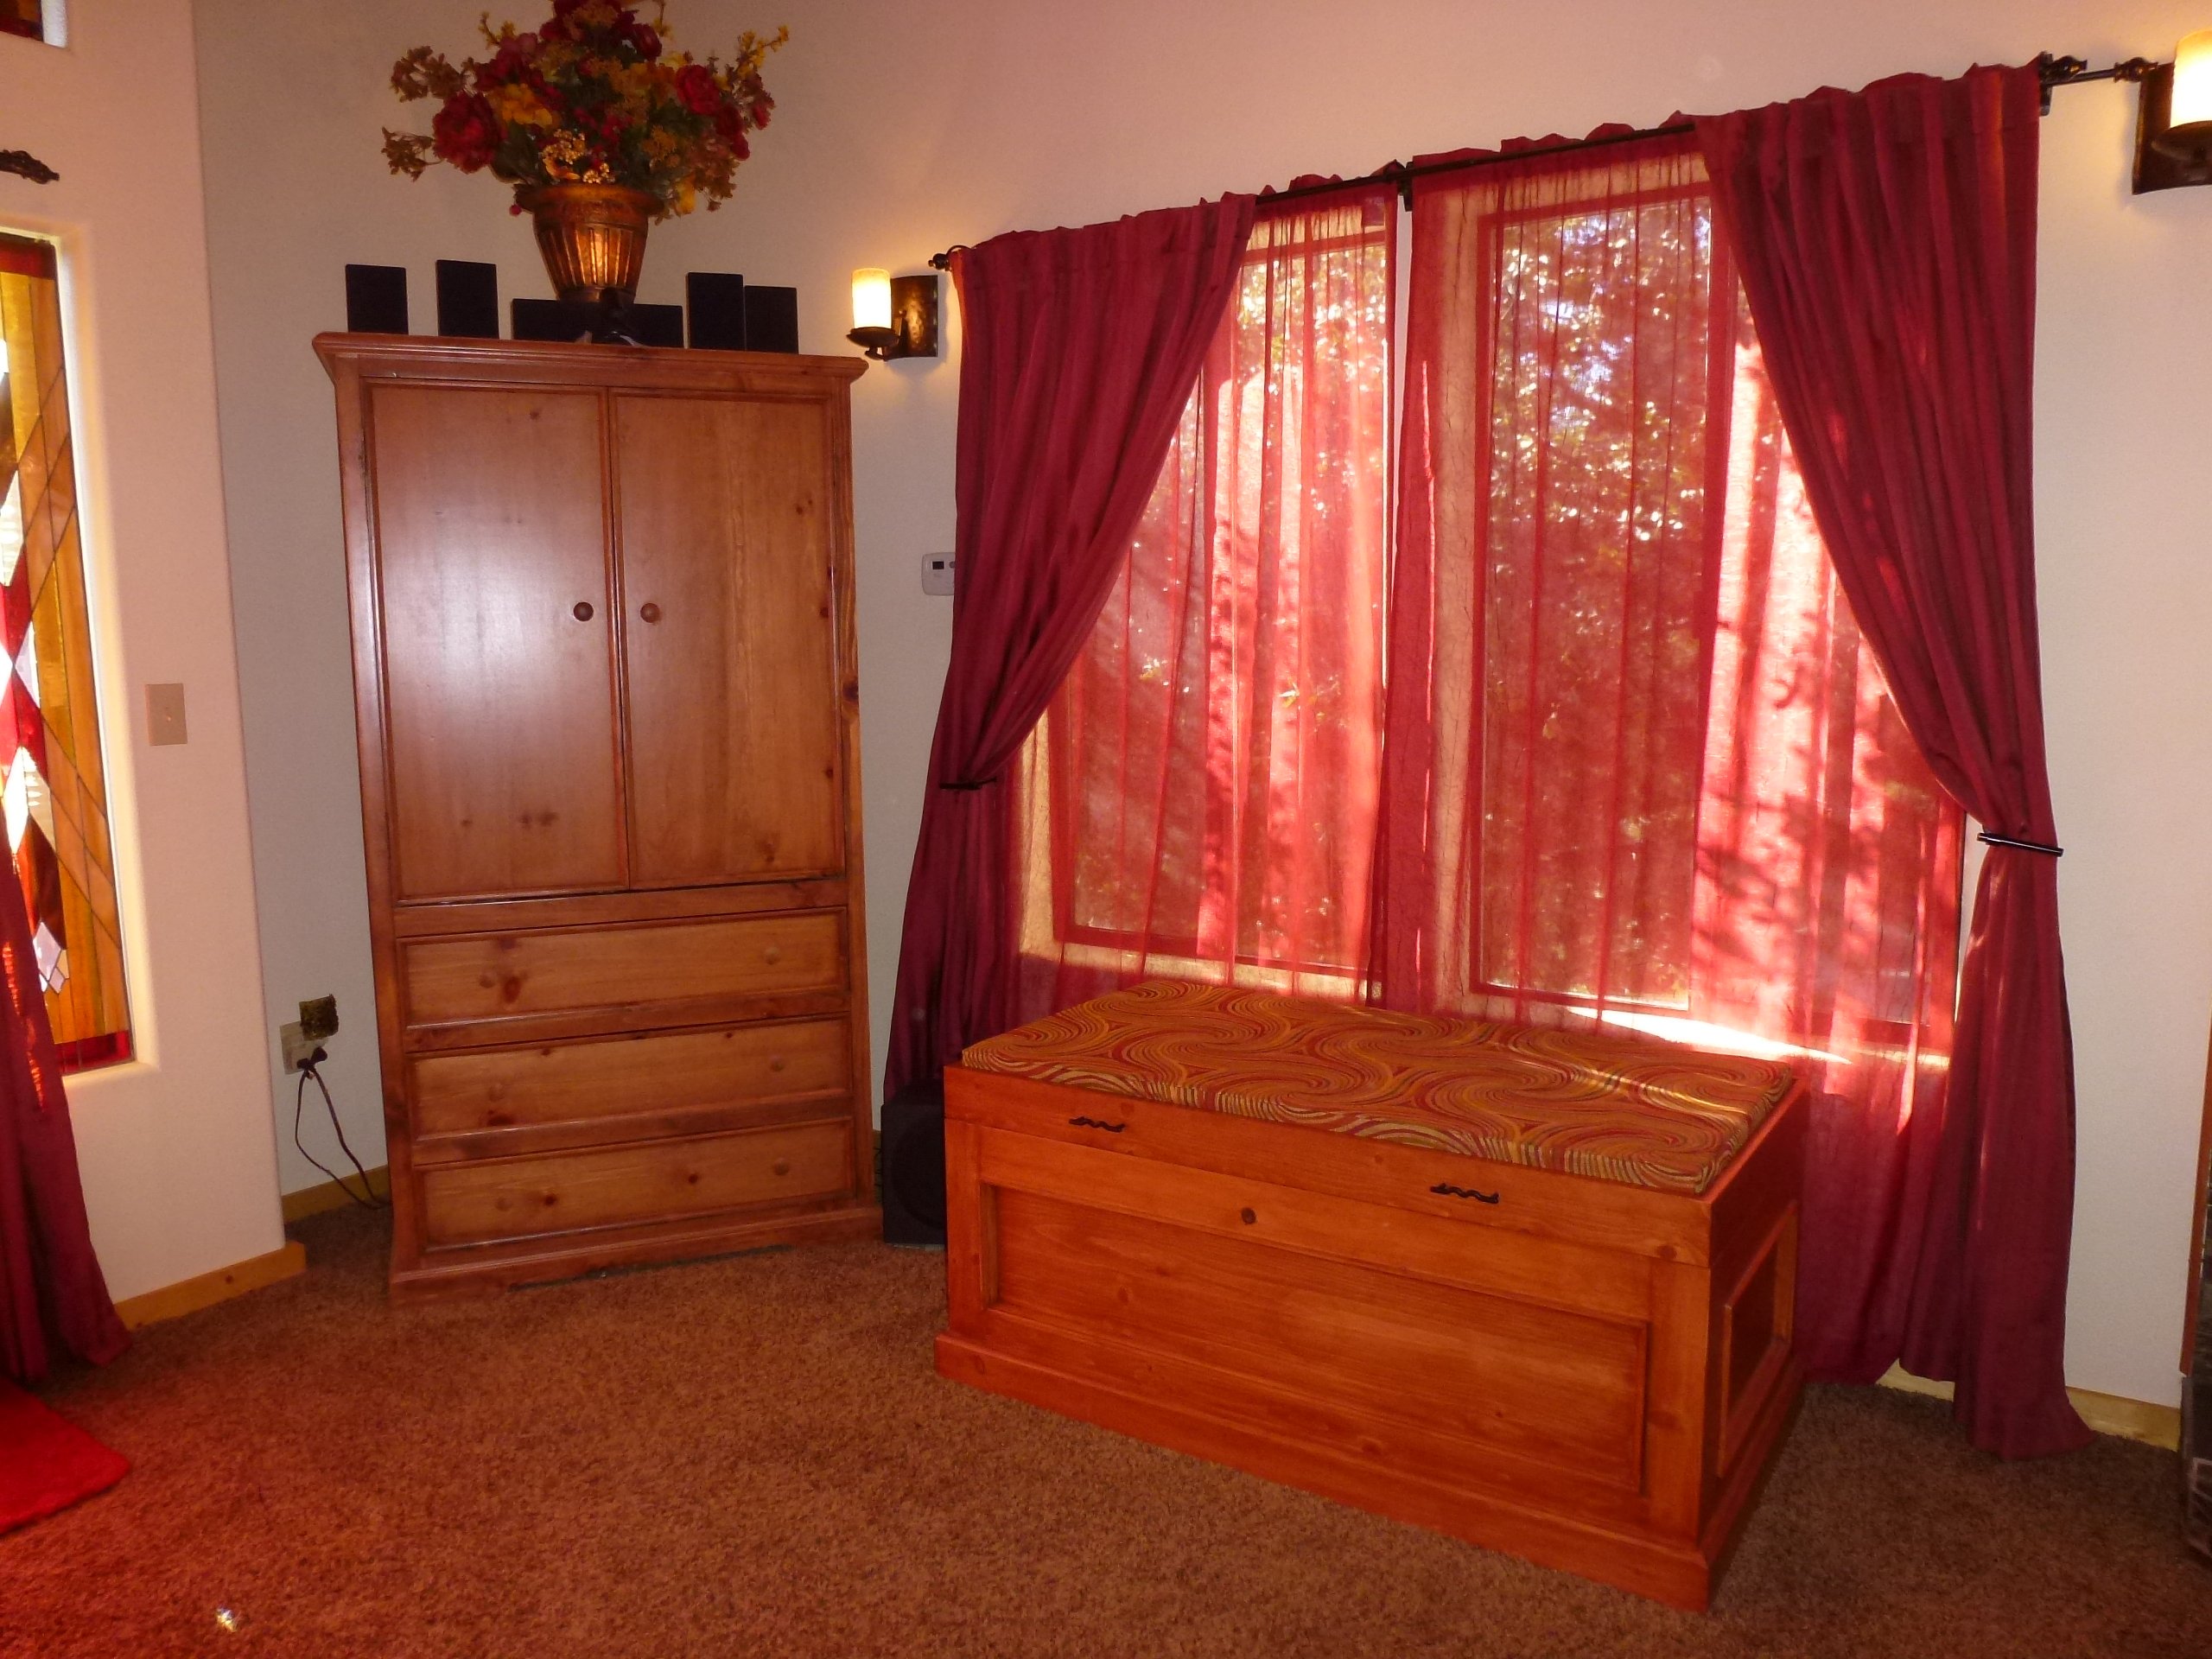
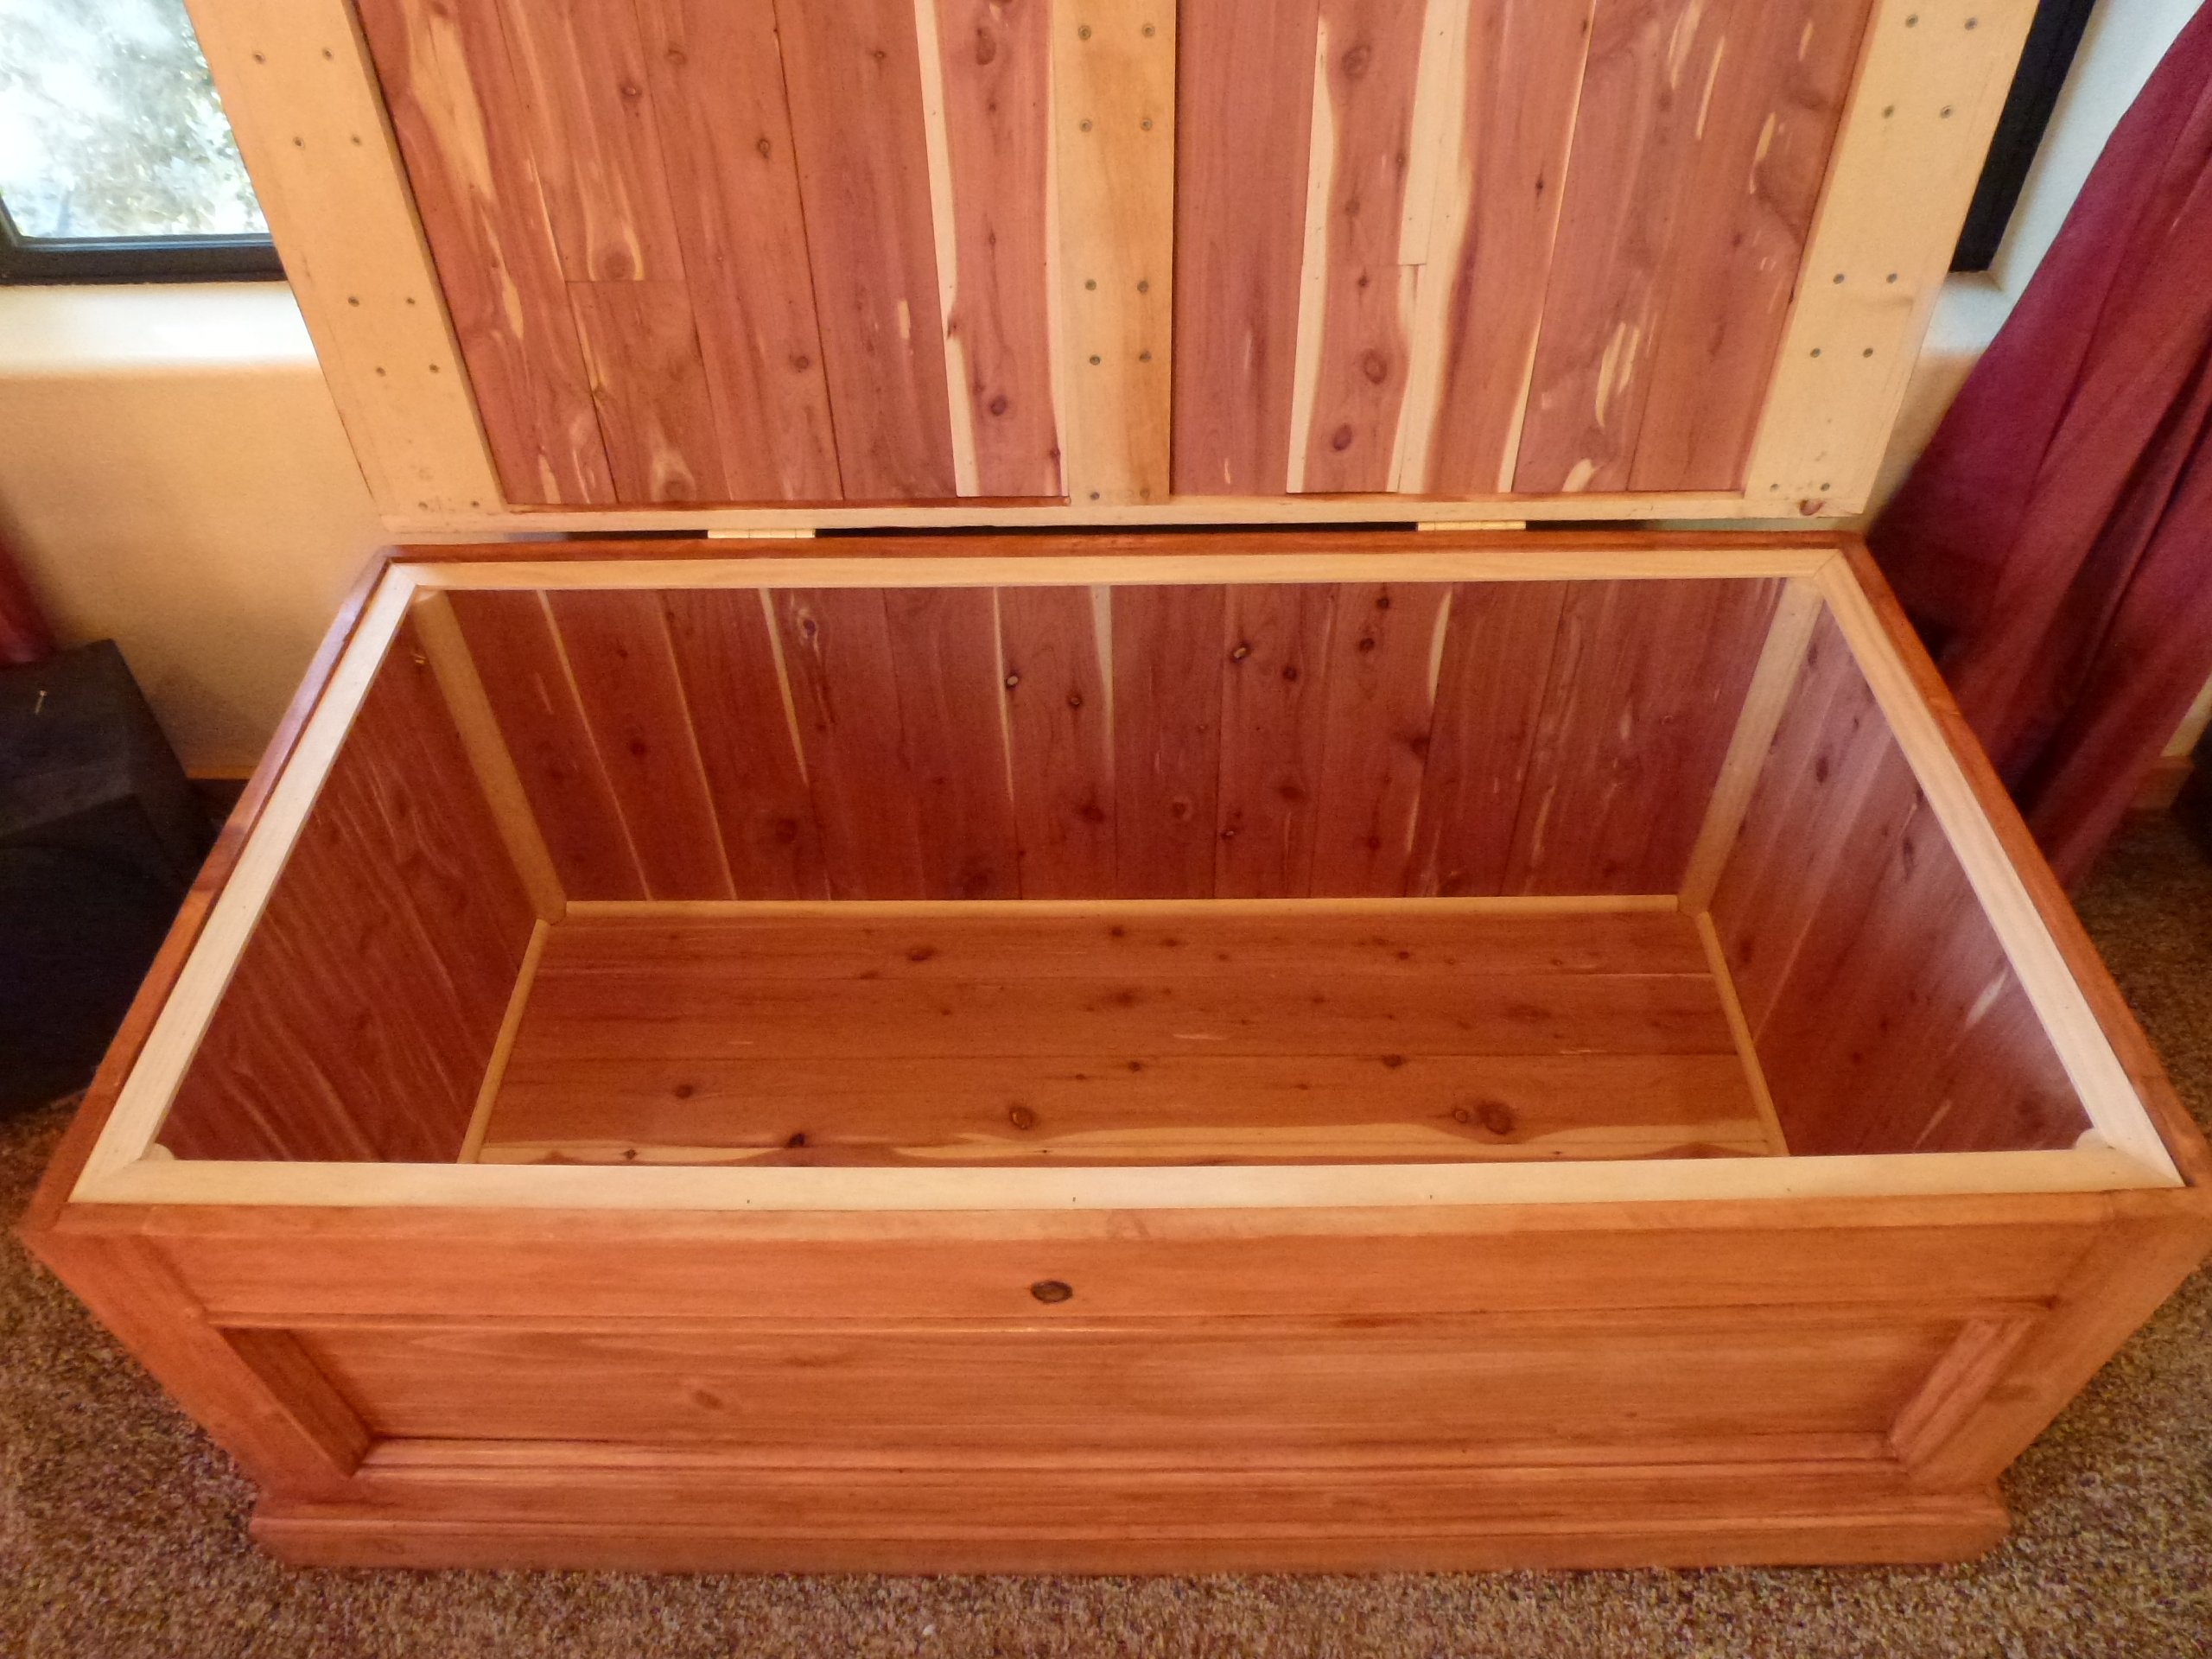
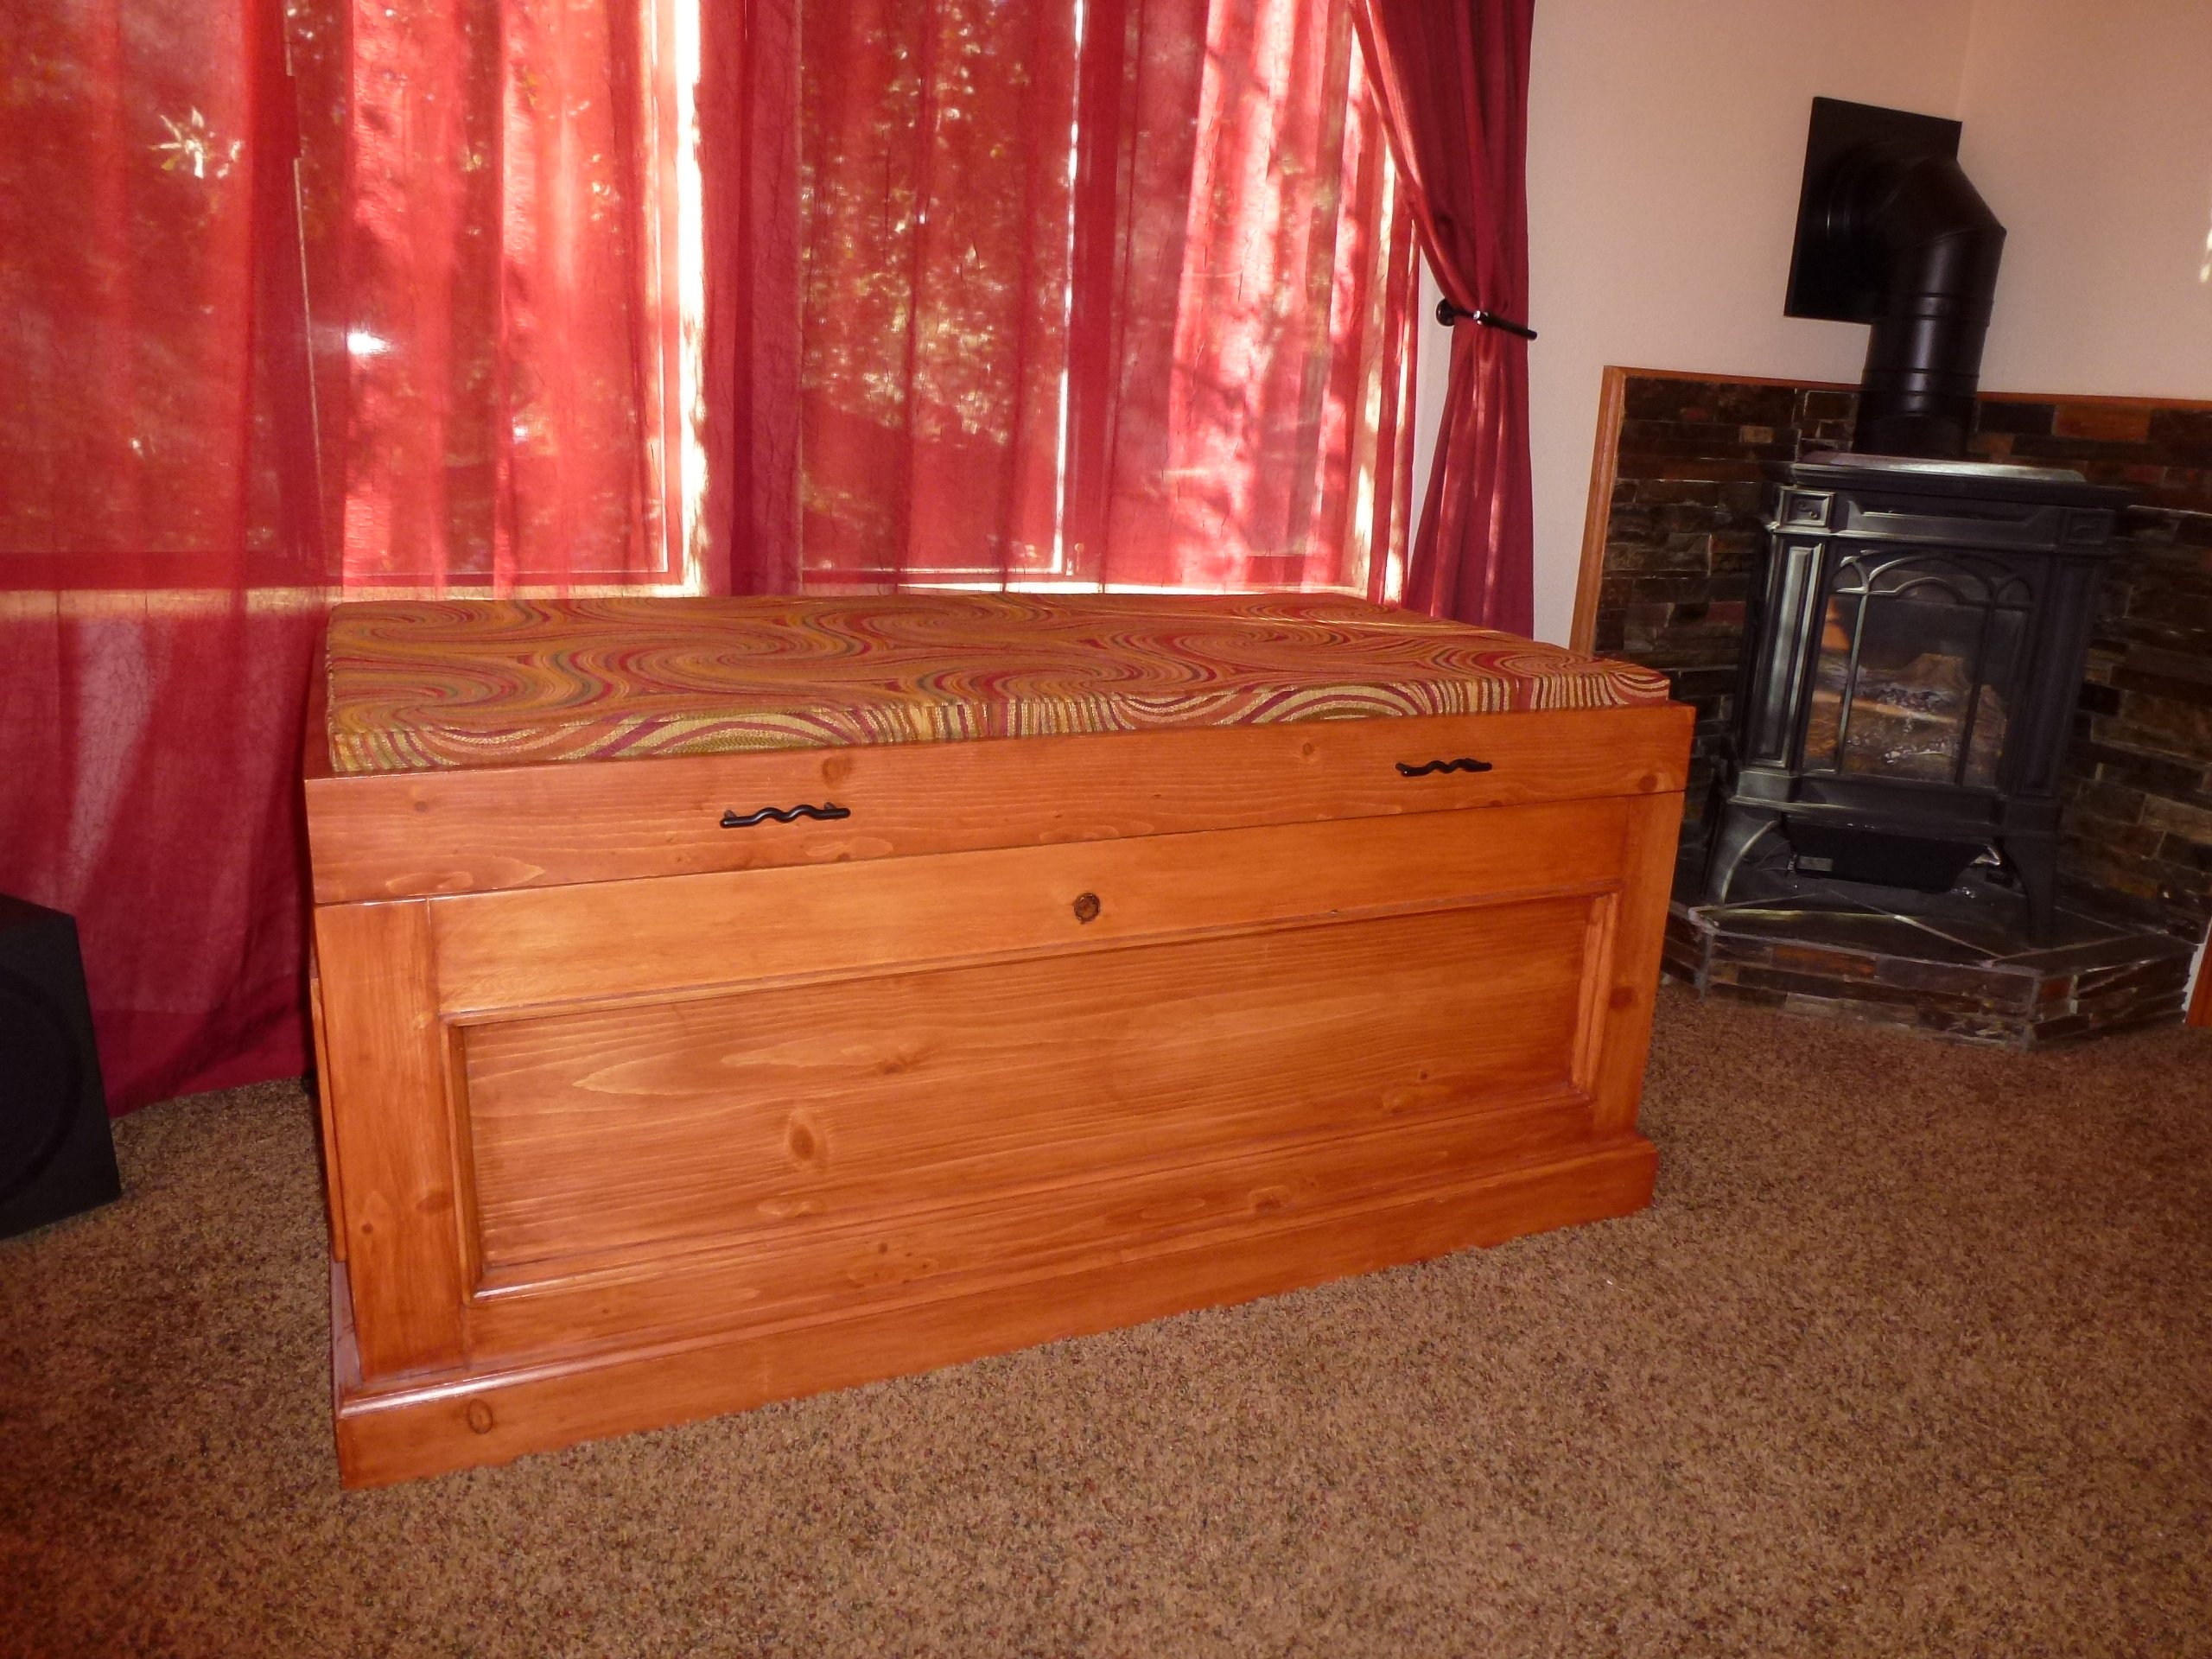
Cedar Chest
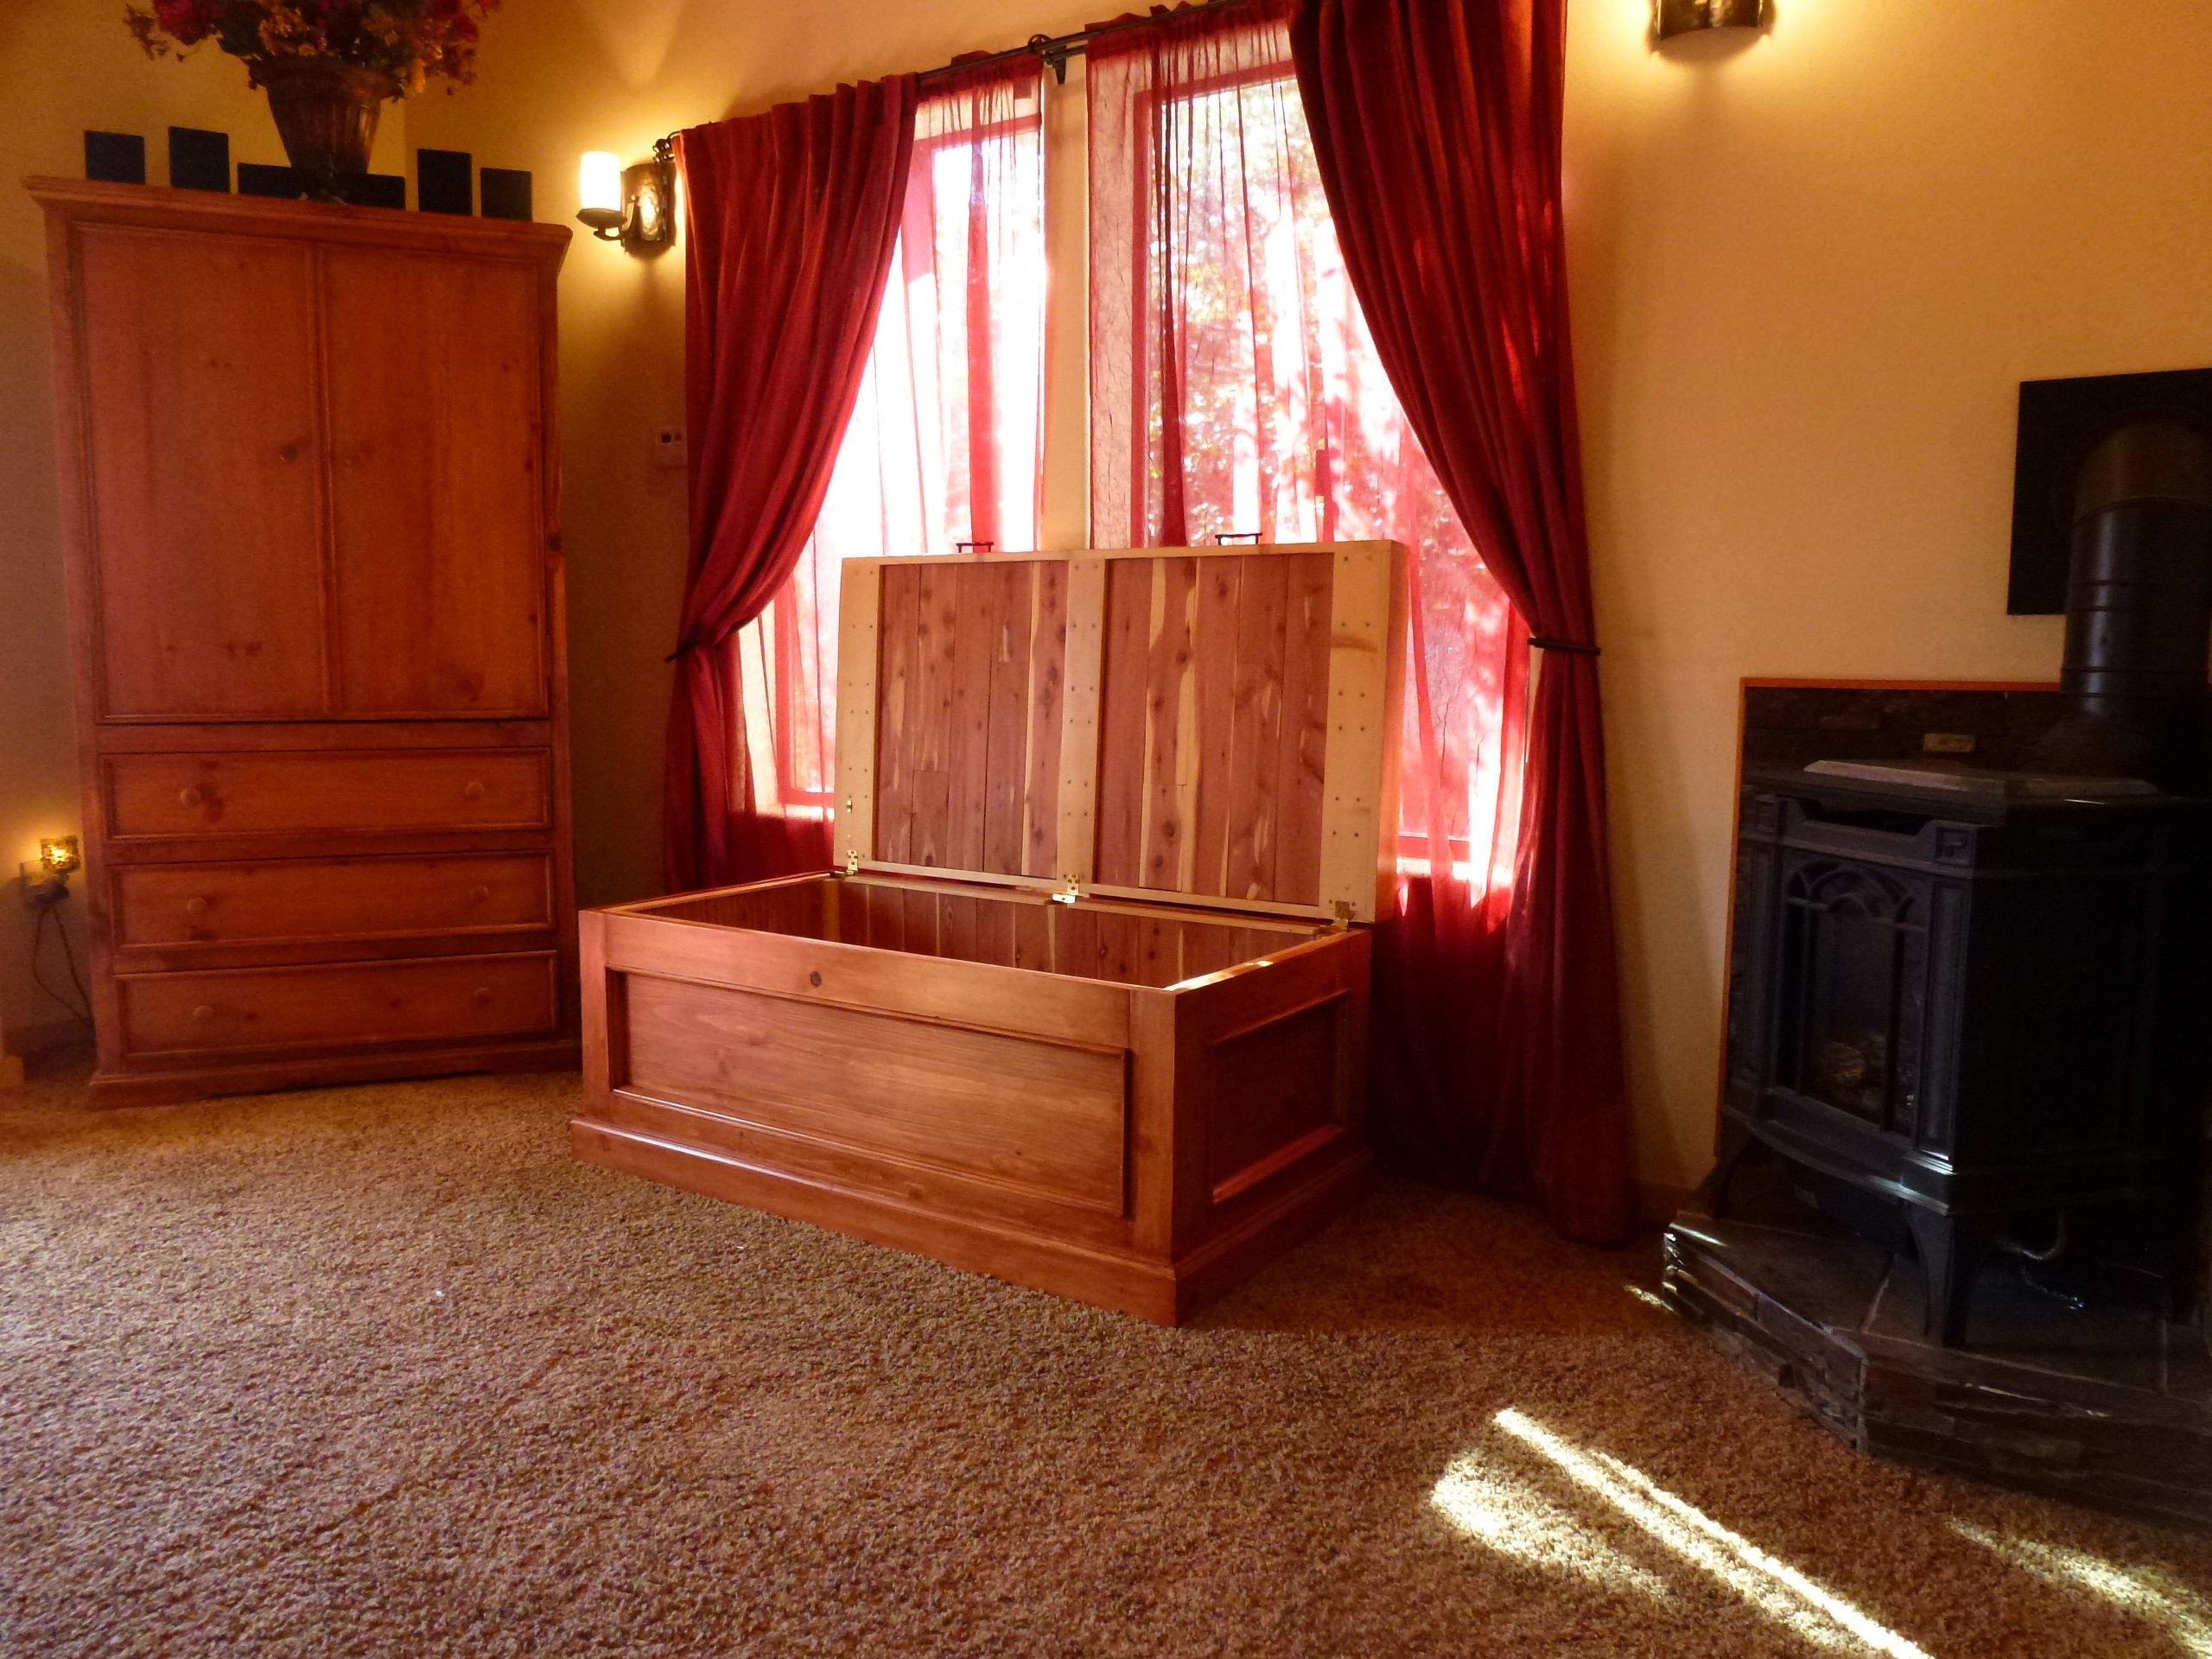
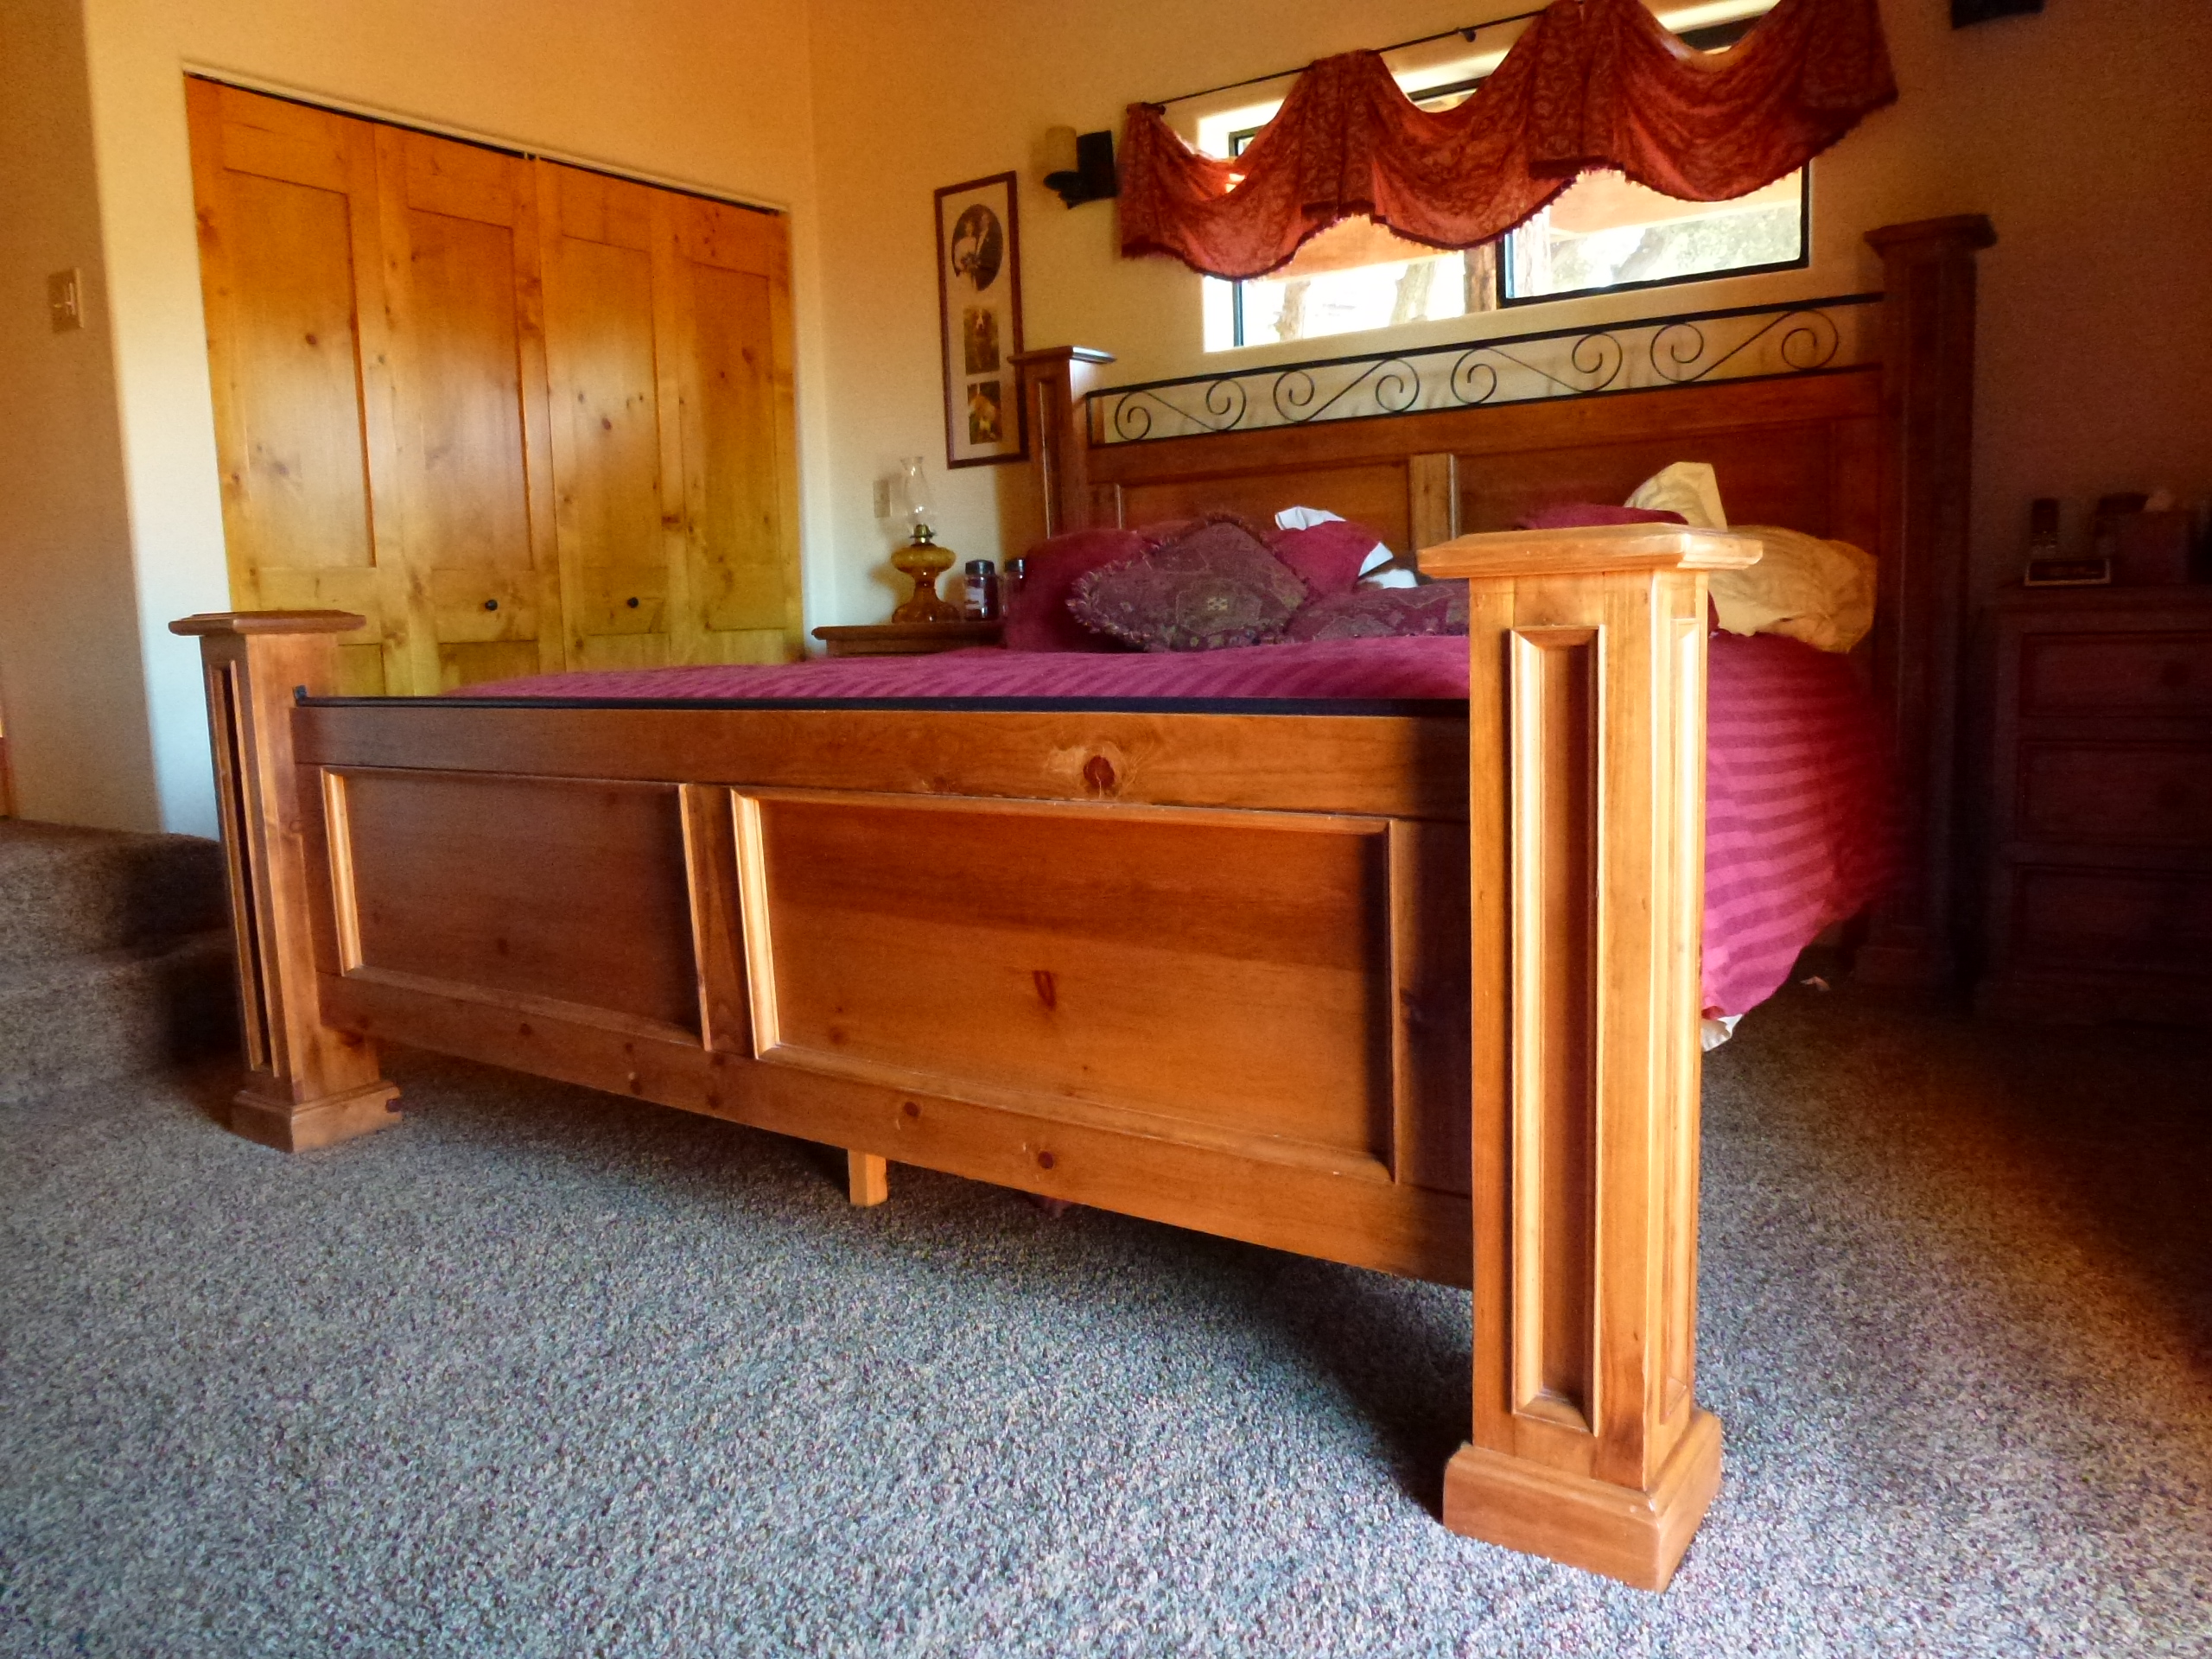
We have considered buying a cedar-lined chest to store blankets, towels, etc. for many years. However, we couldn’t find one that came close to matching the Knotty Pine bedroom set that we had in our master suite.
Hence, our design criteria was quite simple; match the bedroom set and have a chest sturdy enough to support our Beagles as they peer at the squirrels outside the window.
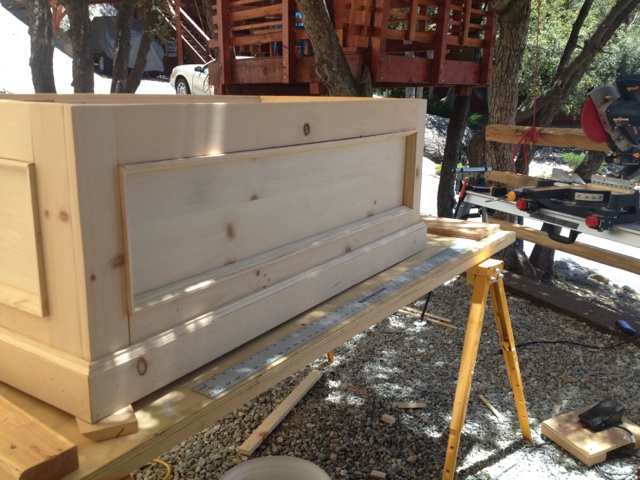
We used plans / ideas from several different chest designs which were readily available on the internet. Most of those plans were using hard woods such as oak. Those plans called for a hard wood framing with ¼” oak plywood for the panels. Since we needed to use Knotty Pine to match the bedroom set, we used 1” Knotty Pine for framing and Knotty Pine ¾ ply w/ Kreg Screws and copious glue to strengthen the construct. We finished it off with locally available 3/8” cedar T.G. planks. It is very heavy and very strong! This project was done entirely w/ Kreg Screws and no router rabbeting for the panels.
We learned the following while doing this project:
· When using soft woods, always put the power sander on the wood before you start the sander. Otherwise, you can get scratching / sander burns that don’t present themselves until staining begins.
· While very strong, ¾” plywood is very heavy!
· When using plywood, it is recommended that you stain both the visible and non-visible sides of each piece where glue is not to be applied. Otherwise the chance for delaminating increases dramatically.
60 hours work and $350 to build.
Estimated Cost
$350.00
Estimated Time Investment
Week Long Project (20 Hours or More)
Finish Used
Minwax stain and hand-rubbed varnish.
Recommended Skill Level
Intermediate
Comments

Mon, 12/15/2014 - 12:40
Beautiful chest. I better get
Beautiful chest. I better get busy and make one.
Teen Loft Bed
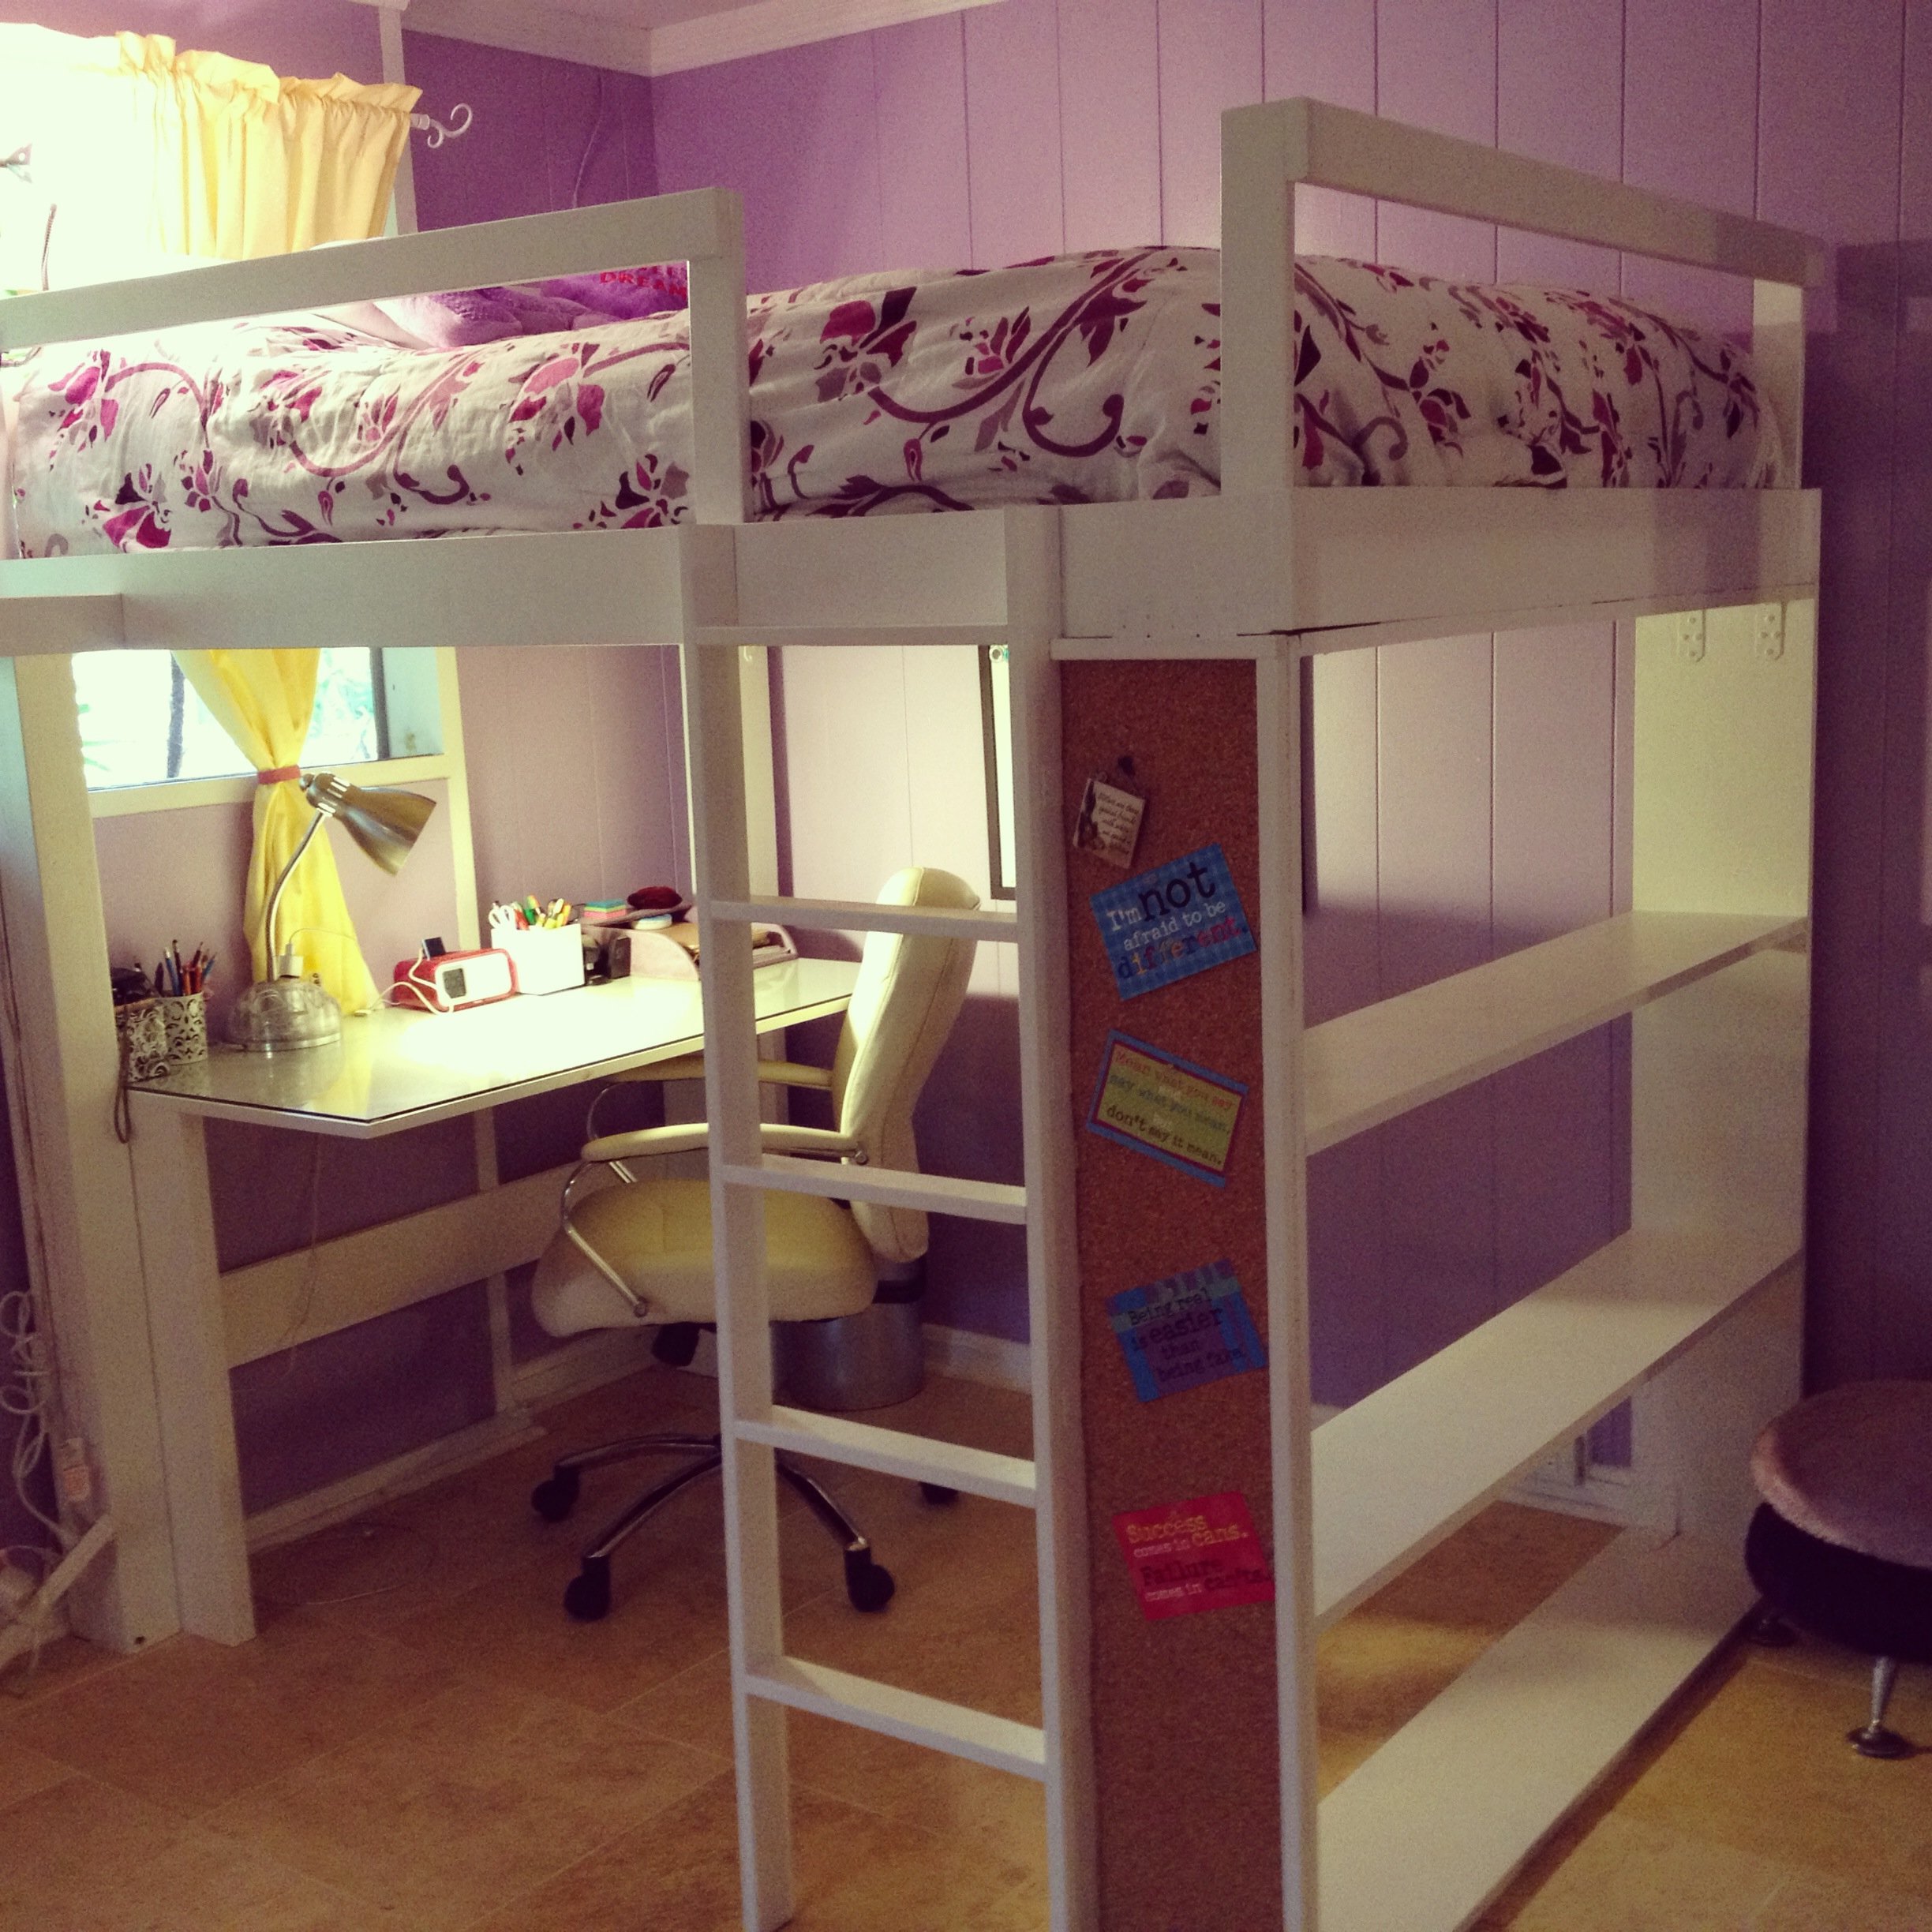
Aloha!
I was inspired by what I saw on Ana's website. My daughter was obsessed with the PB Teen version of the loft bed, so I tweaked the plans here to make it more like the $2500 bed from the catalog!!!!! Yikes and don't even get me started on what the shipping to Hawaii would be....It was well worth the effort! My daughter loves her new loft bed...Now if I can just figure out a way to get the dog to love the high bed!!!
Cheers, Tina
Built from Plan(s)
Estimated Cost
$250 because I added a glass top to the desk
Estimated Time Investment
Weekend Project (10-20 Hours)
Finish Used
white glossy paint
Recommended Skill Level
Beginner
Comments
Sat, 06/22/2013 - 02:57
Aloha Tina! You did a great
Aloha Tina!
You did a great job! I was wondering, how high is the bed, room and clearance? We also live in Hawaii and my daughter's room is small. Any feedback on what modifications you made would be greatly appreciated! Mahalo!
Tue, 06/25/2013 - 13:35
reply
Hi Dawn,
Yes, my daughter's room has low clearance, so I tweaked the loft bed height.
I determined what top clearance I could maximize that would allow my daughter to sit up in bed comfortably, but it will be tight as she grows. She's 5 feet now...
Then I tweaked the desk area height as well to maximize without too much of a struggle to get into the area.. I hope this reply is helpful..
Floor to ceiling height is 96 inches. desk area has clearance of 56 inches and from the top of the mattress to ceiling has a clearance of 28 inches.
Aloha, Tina
Tue, 12/17/2013 - 16:06
Teen Loft bed
Im having a problem finding the plans for the teen loft bed shown above. any direction would be appreciated! Thanks!
Tue, 12/17/2013 - 16:59
RESPONSE TO HANSJE01
HI! There are no plans for this loft bed.. I used the plans on this site and just literally DIY'ed to fit my needs.. Sorry I know this doesn't help you much…
If you have a specific question, maybe I could help…
Aloha, Tina
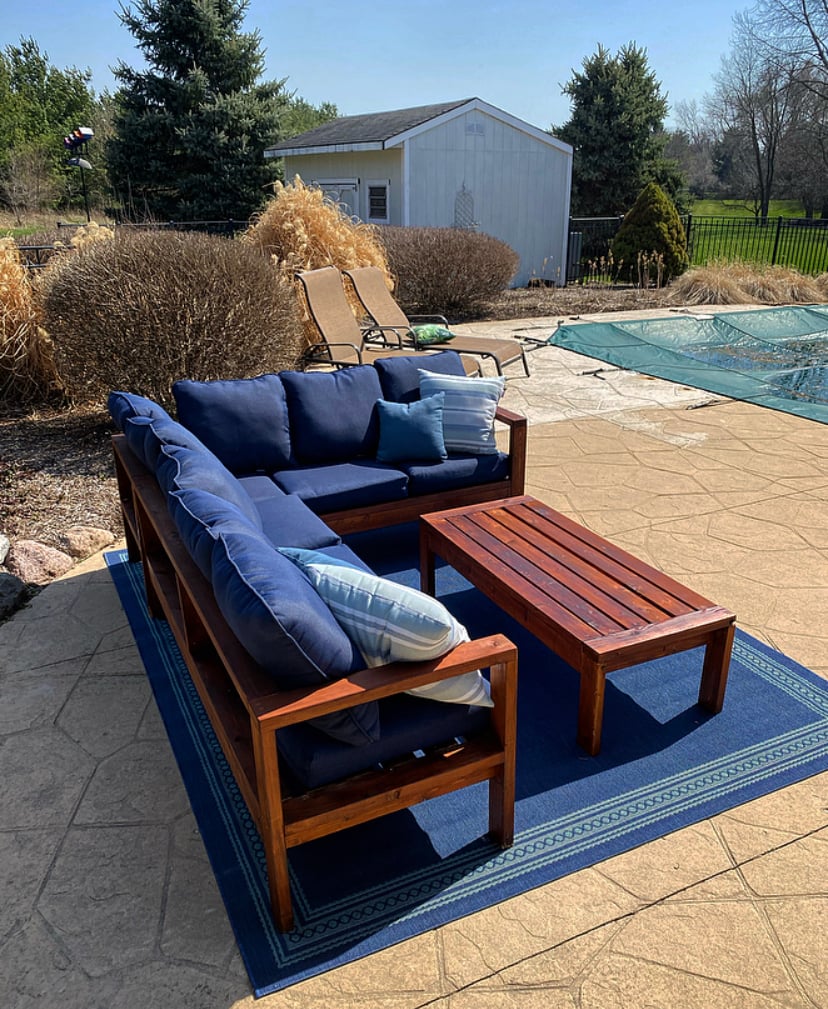
Outdoor Patio Sofa, Sectional, and coffee table
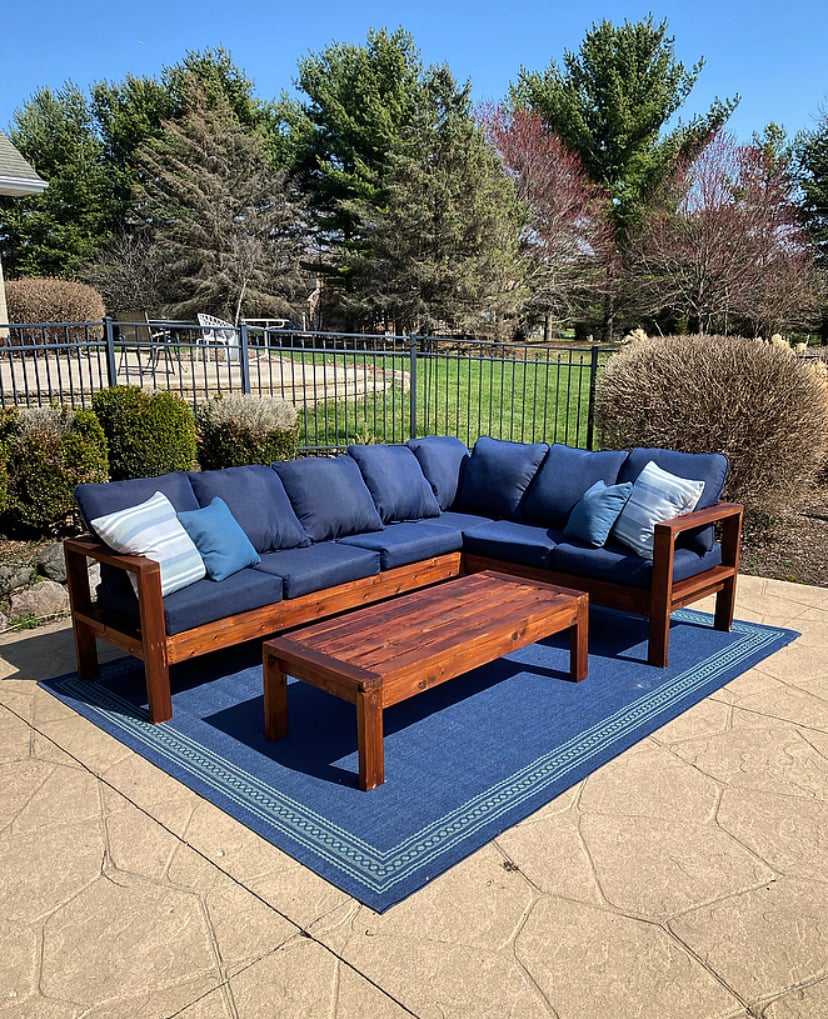
Here’s my new outdoor sitting area by my pool. Built from Ana’s outdoor patio sofa/sectional/coffee table plans! Used cedar for the build, Hampton Bay 24”x24” cushions (Home Depot), and found some outdoor throw pillows from The Great Escape store. Stained the cedar with Cabot’s Jarrah Brown exterior wood stain. Very happy with how it all turned out!
Built from Plan(s)
Estimated Cost
$600
Estimated Time Investment
Weekend Project (10-20 Hours)
Finish Used
Cabot’s Jarrah Brown exterior wood stain
Recommended Skill Level
Beginner
Comments
Coffee table and end tables

Built from the outdoor coffee table plans.
Changed the dimensions up a bit on the coffee table and shrunk them down to make matching end tables.
Changed the top layout and the bottom shelf a little bit.
Thank you for the plans!!!
Built from Plan(s)
Finish Used
White frame
Dark walnut tops
Dark walnut tops
Recommended Skill Level
Beginner