Community Brag Posts

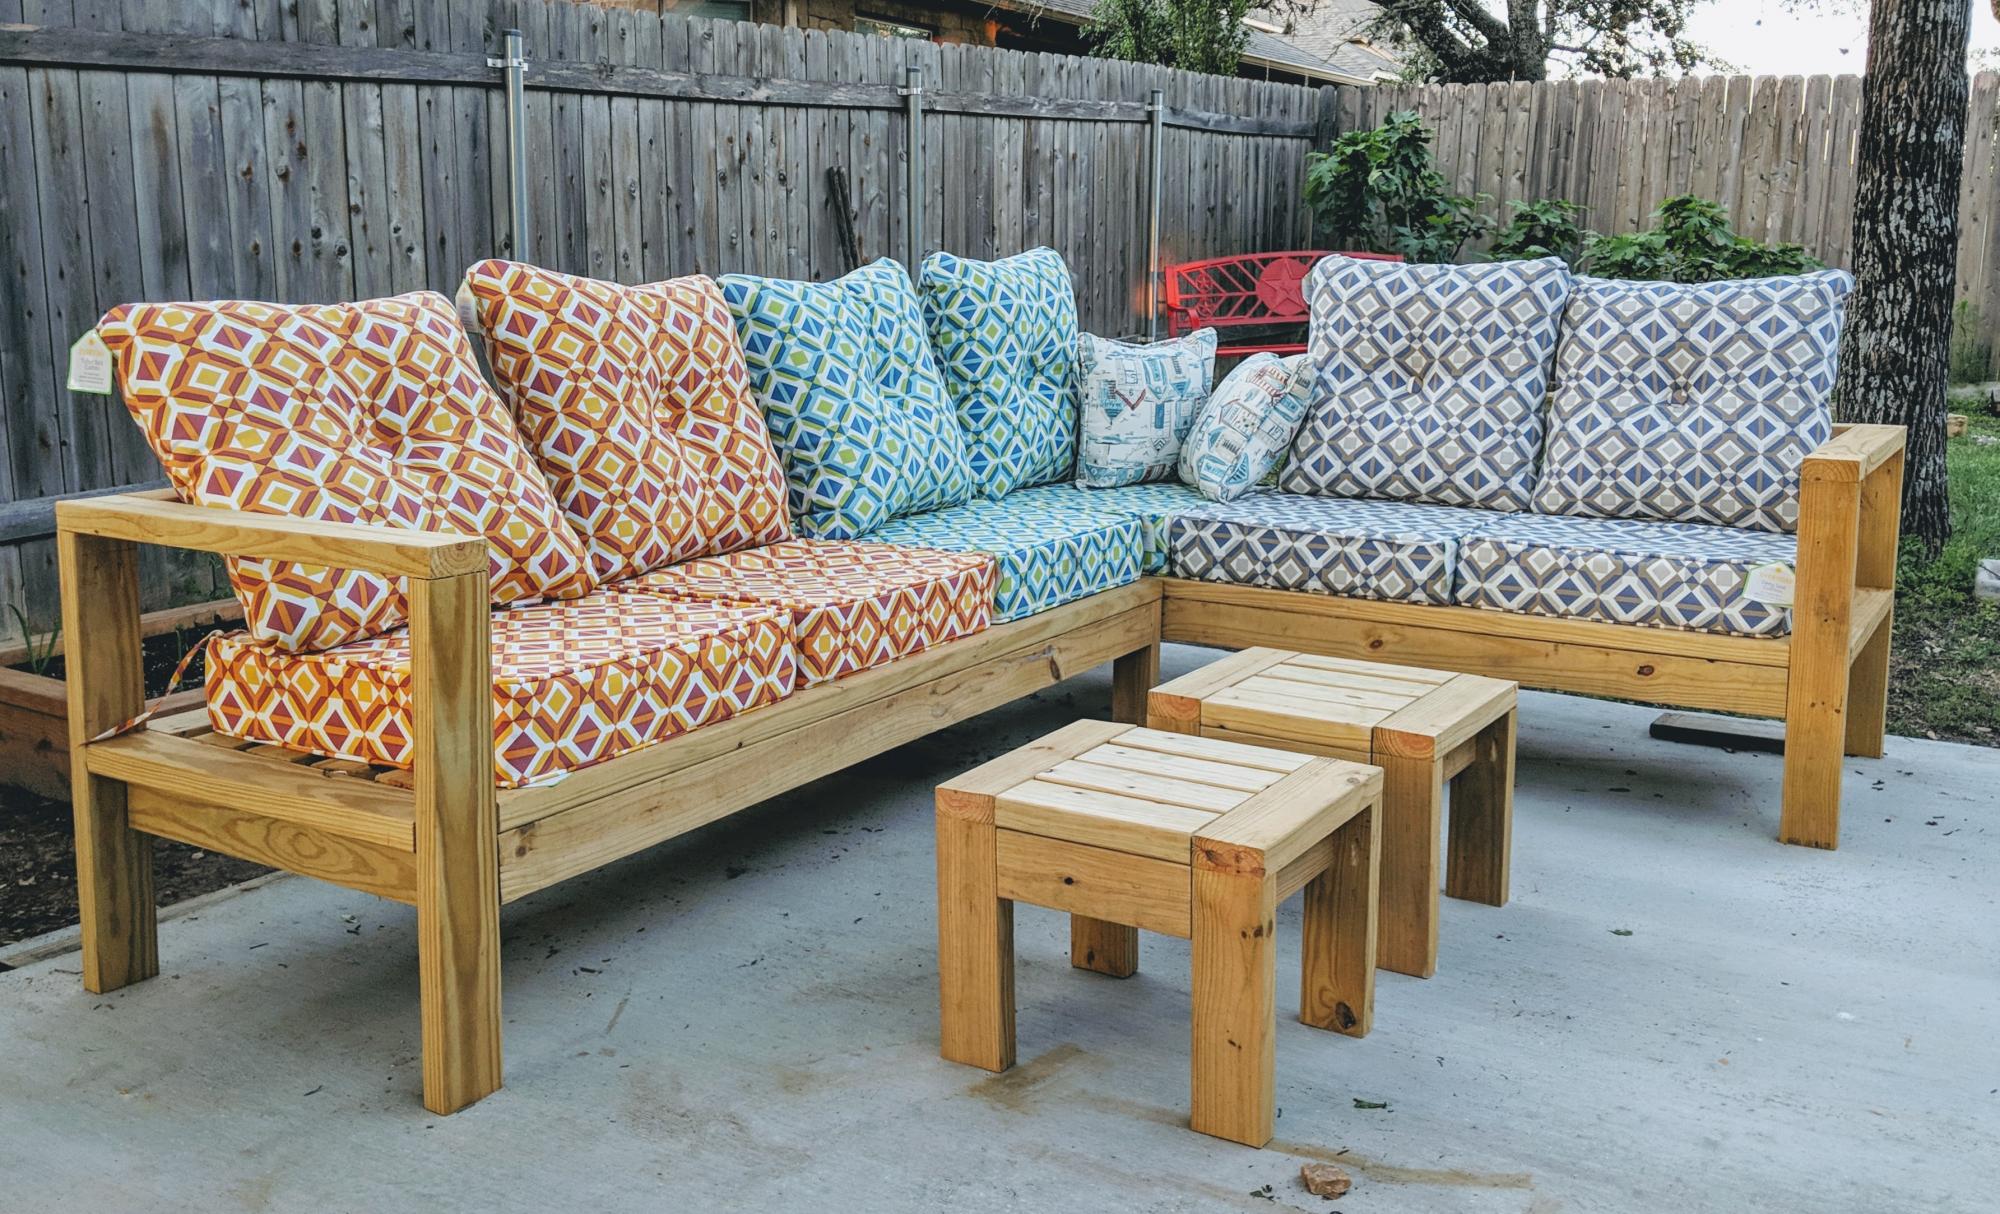
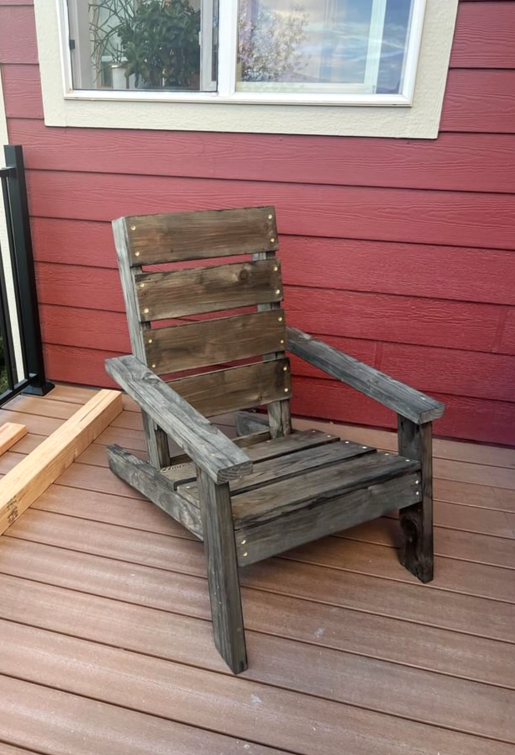
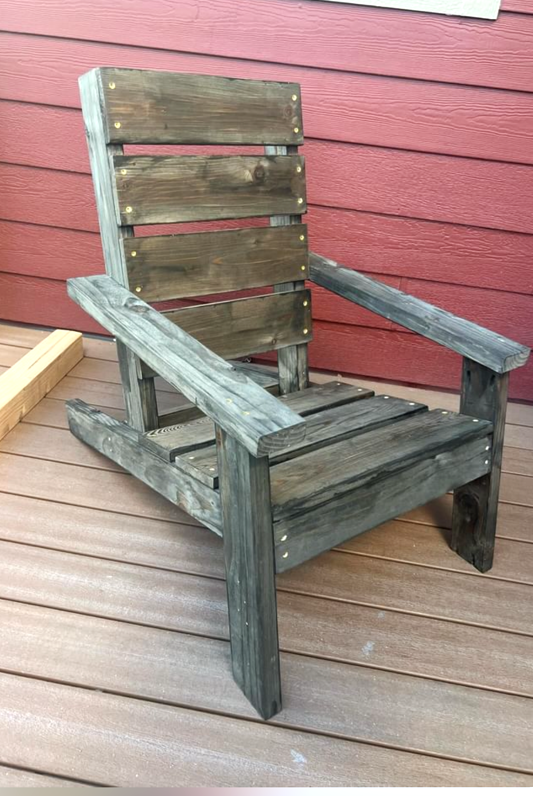
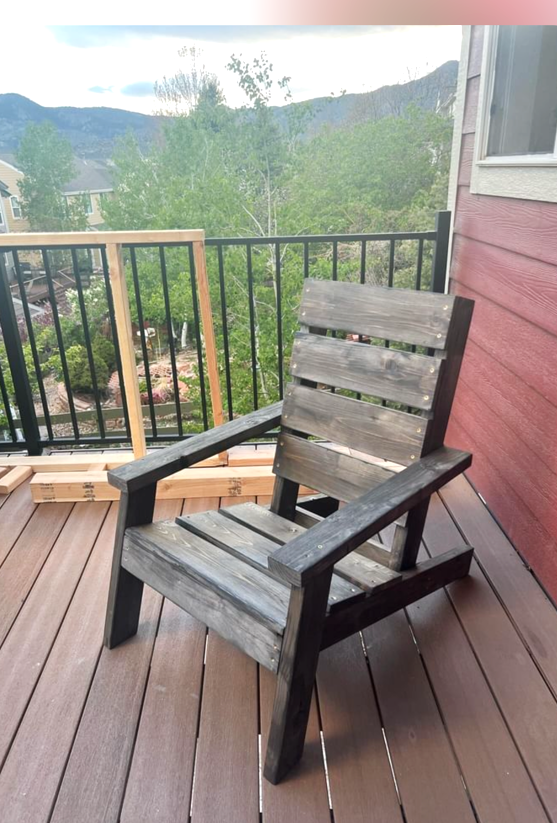
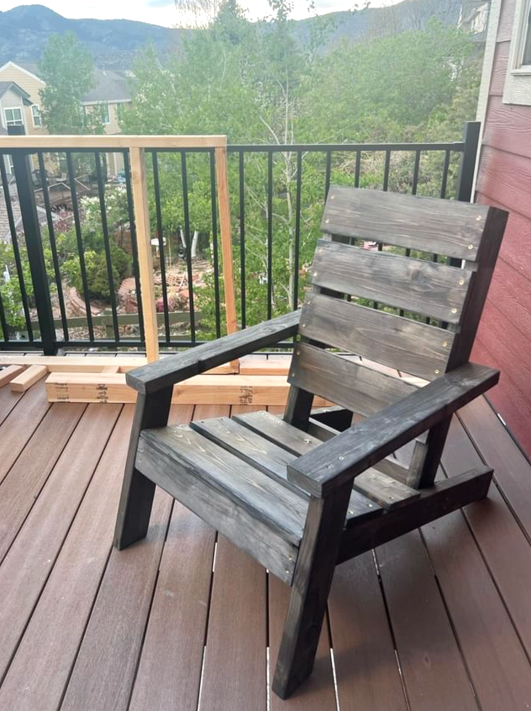
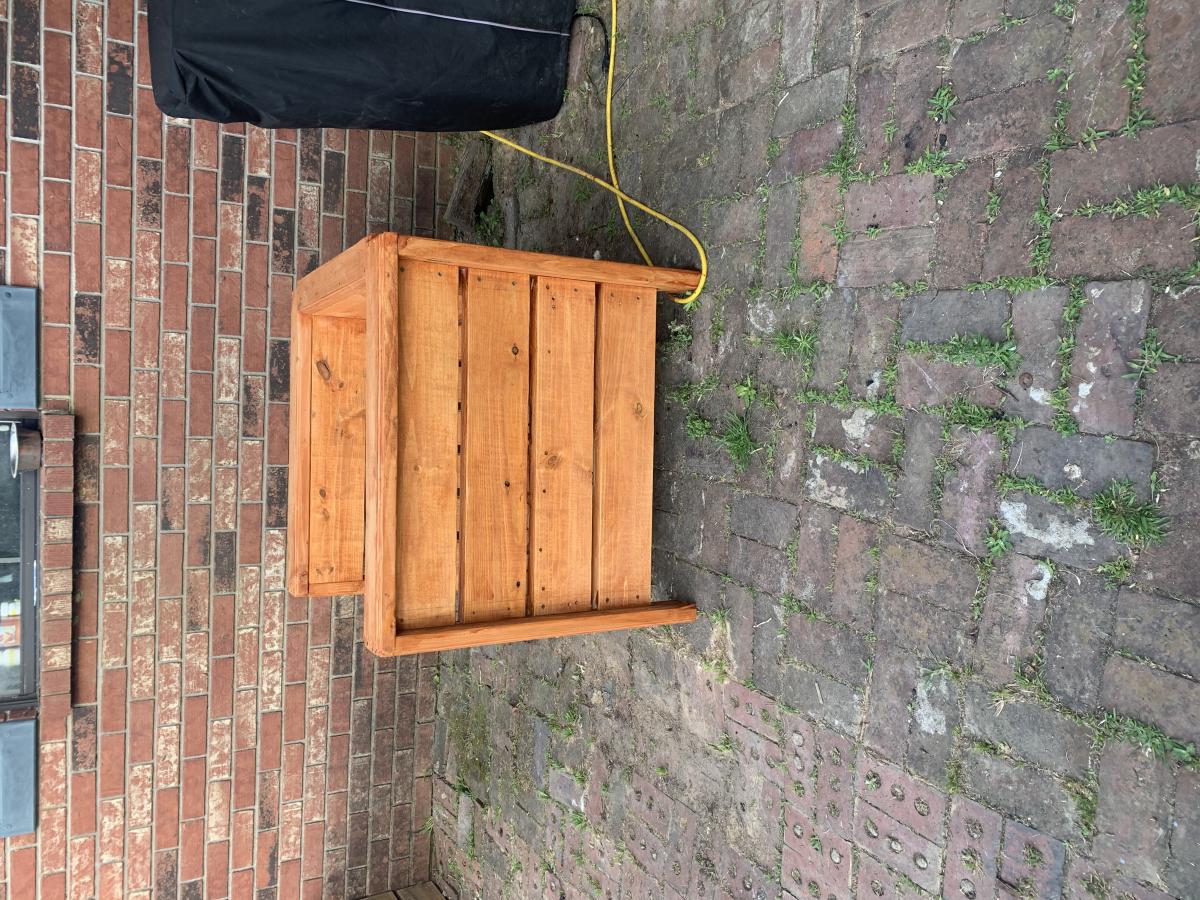
Modern Oversized Outdoor Chair

Submitted by zpbrown84 on Tue, 06/02/2020 - 10:41

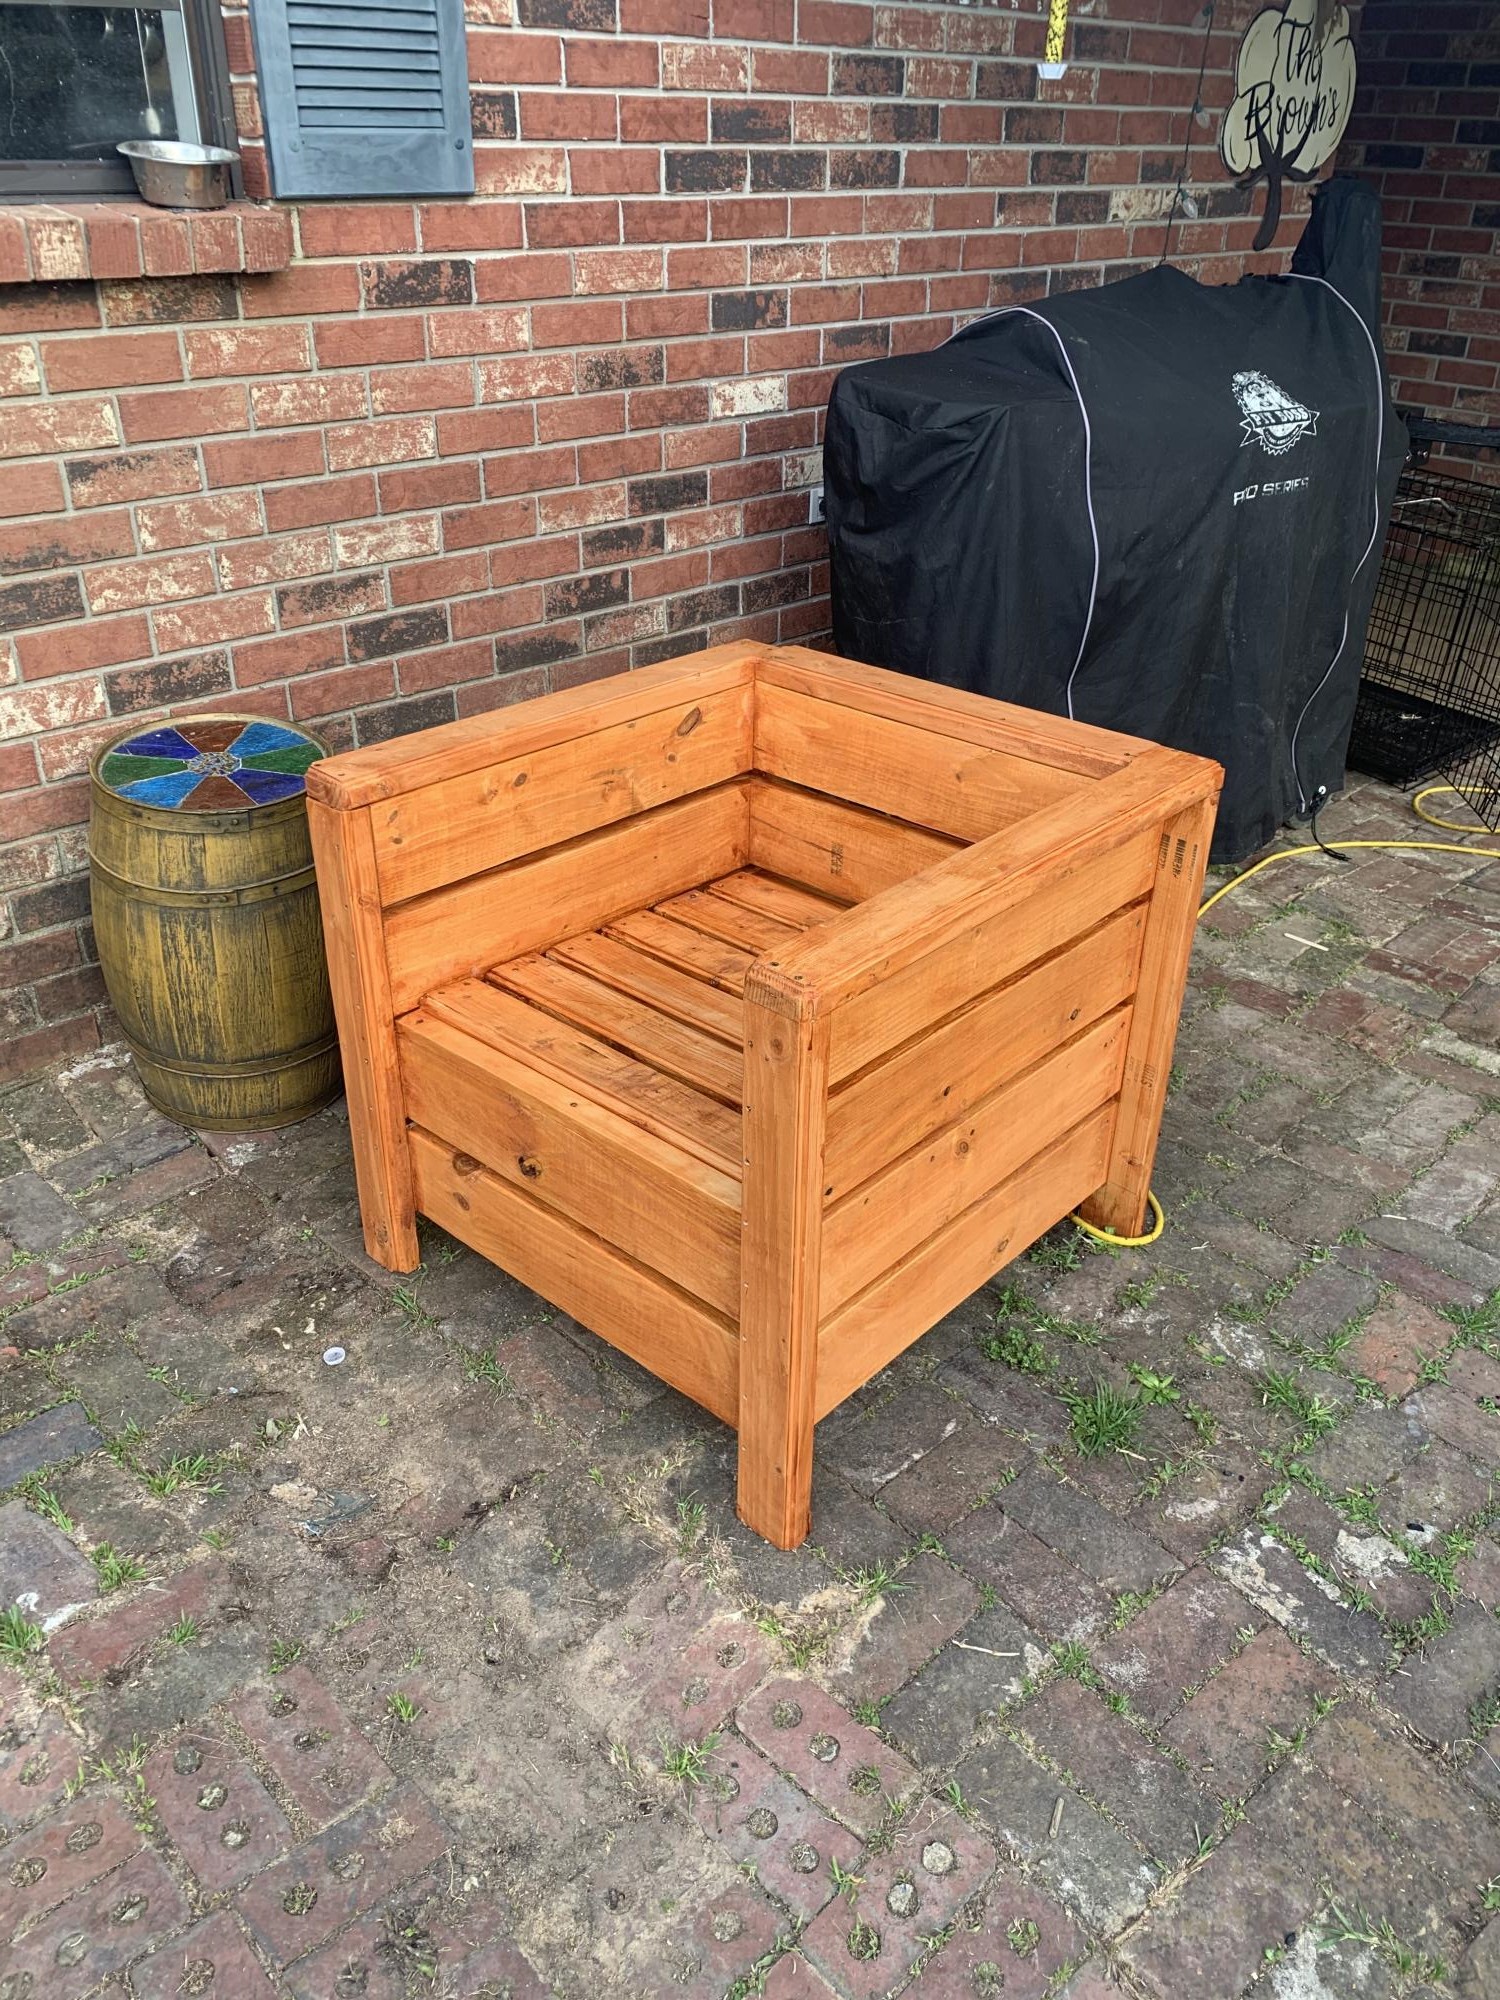
I made one of these chairs the the back hit me to low and was uncomfortable so this one I the legs 5 1/2” longer. This is my second project and took half a day but I am very happy with the outcome and started a second chair to match.

Built from Plan(s)
Estimated Cost
$50
Estimated Time Investment
Afternoon Project (3-6 Hours)
Finish Used
Valspar Transparent Redwood and I used a 1/4 Roman Ogee router bit on the arms and legs
Recommended Skill Level
Beginner

King Farmhouse Bed

Submitted by jhavinga on Thu, 05/22/2014 - 16:31

Second project ive completed from Ana White, and I am very happy with how this bed turned out! The only thing I would fix would be the finish, I wanted it a bit whiter. not so creamy. Otherwise very quick and easy fun project to do. =)

Estimated Cost
$300
Estimated Time Investment
Day Project (6-9 Hours)
Finish Used
1 coat of a basic latex white paint.
Then I sanded down just so raised grains would become exposed.
1 coat of dark walnut stain (wipe on with cloth)
Done.
Recommended Skill Level
Starter Project

Comments

jhavinga

Thu, 05/22/2014 - 16:34

Thank you for sharing all of these awesome projects. I was always hesitant when it came to wood, but now I cant seem to stop!

jhavinga

Wed, 06/11/2014 - 13:43

(You can do all this before or after your project is put together or not.)
Be sure to do a test piece before hand so you can see exactly what your getting :)

The first step I did once the head board and foot board were put together, was to sand any sharp edges or corners. I liked mine rounded and worn looking. I did not sand anything else.

Second step is to paint 1 even coat of a basic white latex paint.

Third step is to sand away some white paint. because we didnt sand it before hand the grains in the wood will be very bumpy. so the paint on the grains will sand off while the paint lower than the grain will remain. makes sense? hopefully i explained that right!

Fourth step is to now wipe on the stain of your choice. I went with Dark walnut. It stains the paint a bit bringing the white to a gray/brown tone. and stains the wood dark walnut so the grain patterns show up dark.

Let me know if you have any other questions and good luck!

jbogan15

Thu, 01/29/2015 - 07:49

What grit of sand paper did you use to sand off the white paint? and did you sand it by hand? Also, for the dark walnut stain, did you wipe off immediately or leave it on for a bit before wiping? Beautiful bed, I want to achieve this look!

In reply to by jbogan15

jhavinga

Fri, 02/06/2015 - 09:15

Hi jbogan15, thank you!
For sanding I used a palm sander with 120 grit to get the job done a bit quicker, than went over lightly with 220. When staining I actually just dipped a rag in the stain and would wipe the stain on. =)

Good luck!
Justin

kosborn

Fri, 01/27/2017 - 11:05

Love this look! Exactly what I am trying to achieve...A few questions about the side rails. How high did you connect them to the 4x4 posts and exactly how did you connect them? Did you use brackets or screw right into the posts? Thank You!

barkleyl

Thu, 09/05/2019 - 15:07

I have seen several beds from Anna White. I was wondering if the frame require a box spring mattress or not. If not, are the beds lower than what a traditional mattress and box springs are. Thanks ! 

Mud room Lockers

Submitted by Anonymous (not verified) on Sat, 09/10/2016 - 22:06

This is 10 feet long and 5 1/2 feet tall. Made using a Kreg Jig.

Estimated Time Investment
Week Long Project (20 Hours or More)
Recommended Skill Level
Beginner

Comments

Farmhouse Table

Submitted by Anonymous (not verified) on Wed, 09/21/2016 - 19:43

We love the look of farmhouse tables but we wanted to try building our own rather than spending over $1500 on one. 

We saw this tutorial on pinterest and we decided to make it our first woodworking project, we love how it turned out!


Estimated Cost
$300-$400
Estimated Time Investment
Weekend Project (10-20 Hours)
Finish Used
We used 1 coat of Minwax wood conditioner, followed by 1 coat of Minwax Early American. We finished it with 2 coats of Minwax Polyurethane, sanding lightly between coat 1 and 2.
Recommended Skill Level
Beginner

Comments

Saddle Seat Stools

Submitted by naomi on Fri, 08/29/2014 - 06:57

After a lot of cutting, screwing, chiseling and sanding... oh and a lick of paint! My new little Saddle Seat Stools are complete. Time will only tell whether they will hold up to the abuse the boys give them especially Brodie! These new stools only cost me $48 to make the pair and I got all the timber from Bunnings

Built from Plan(s)
Estimated Cost
$48
Estimated Time Investment
Weekend Project (10-20 Hours)
Finish Used
Teak and White Enamel Paint
Recommended Skill Level
Beginner

Truss Beam Table 35x60 size

Submitted by mlatanzi on Sun, 12/18/2016 - 22:12

Truss Beam Table size 35x60

Built from Plan(s)
Estimated Cost
$100-$150
Estimated Time Investment
Weekend Project (10-20 Hours)
Finish Used
Minwax Dark Walnut, Spar Urethane Ultimate
Recommended Skill Level
Intermediate

Adding a hutch to a desk

Submitted by kristen on Thu, 11/29/2012 - 17:05

I bought a desk and chair for my daughter on Craigslist awhile back, but it did not include a hutch. I decided to add one and recently completed it...in addition to painting the desk a fresh white and then repairing the chair, painting it, and recovering the seat!

The hutch build was pretty straight forward and I used a Kreg Jig to assemble most of it. I built it to sit on the desk (not attached) but I included a cleat at the top to screw a couple of 3" screws into the wall studs to keep it in its place. It's nice and sturdy. I plan to add some puck lights under the bottom shelf soon.

The Lego house isn't quite up to Momplex standards :)

Estimated Cost
Around $75--with lots of extra for building other things
Estimated Time Investment
Afternoon Project (3-6 Hours)
Finish Used
Two coats primer and one coat of white semi-gloss paint.
Recommended Skill Level
Beginner

Greenhouse

Gabled Greenhouse completed with upcycled tin roofing. Extended the greenhouse to a 20' long structure.

Comments

Big Kids Picnic Table

Submitted by gsnpbc on Mon, 04/24/2017 - 10:00

My son and I made this table this weekend in just a couple of hours with no problems. The directions were clear and easy to follow. Thank you for sharing them with us.

Built from Plan(s)
Estimated Cost
$40
Estimated Time Investment
An Hour or Two (0-2 Hours)
Recommended Skill Level
Beginner

Emersen nightstand - First Build

Submitted by Feolet on Thu, 01/29/2015 - 18:58

I used reclaimed fence wood instead of plywood.  Just put together three planks to make the side/top/bottom pieces.  I adjusted the size a bit since I had limited space for it to fit into.  This was my first ever furniture project and my first use of my new kreg jig.  

Built from Plan(s)
Estimated Cost
Less than $20 (not counting some tools I bought that I'll use from now on). The fence wood I used was free, so I just needed to buy the 1/4 plywood for the back and bottom of the drawer, the screws, and the handle. I had the green paint, and the polyurethane spray.
Estimated Time Investment
Weekend Project (10-20 Hours)
Finish Used
Polyurethane spray
Recommended Skill Level
Beginner

Comments

My little greenhouse

Submitted by Anonymous (not verified) on Mon, 05/08/2017 - 04:27

I built this project 8x10 and made the back wall exactly like the front wall and just added diy windows for air circulation. I live in the desert so I did not use clear panels I used white panels for sides and top and tinted panels for front and back so that my plants would not get scorched. I am running a hydroponic system and could not be happier with the results for a first time gardener! I built it completely by myself in about a month, I do have a full time job and kids that need to be taken to practice and lessons after school.

Estimated Cost
Lost track, around $600
Recommended Skill Level
Beginner

Flipped Cedar Planter

Submitted by Marrero44 on Tue, 05/11/2021 - 04:20

I used the Ana's Cedar Planter plans and flipped it, placed a bucket with cement inside to support umbrella and made a simple table top for drinks. Hope you like it ✌🏾

Built from Plan(s)
Estimated Time Investment
Day Project (6-9 Hours)
Recommended Skill Level
Beginner

Outdoor patio sectional and patio coffee table

Submitted by Anonymous (not verified) on Tue, 05/16/2017 - 13:08

Welcome to our labor of love. This is our first build and while my bf did most of the work, it was a great project for us as a couple. It was definitely work, but well worth it. We love the way it fits perfectly in our courtyard and people keep commenting on how high-end it looks. Thanks for the plan, Ana! The project took a little longer than it probably should, since it was the first project for us. You should account fort he time it will take to cut, sand and stain your pieces before assembly. There are times you will need to allow for the lumber to dry etc.

Finish Used
1-gal. #ST-129 Chocolate Semi-Transparent Waterproofing Stain and Sealer
Recommended Skill Level
Beginner

Comments

Sandbox with Benches

Burnt and stained with a semi transparent mahogany water sealer

Built from Plan(s)
Estimated Cost
$120
Estimated Time Investment
Afternoon Project (3-6 Hours)
Recommended Skill Level
Beginner

Comments

Industrial coffee table

Here is an industrial style coffee table I recently built.  I used reclaimed pallet wood for the top and shelves and I built the shelves to be removable if needed.  For the finish I used oil based poly in a satin.   

@timberandsoul 

www.facebook.com/timberandsoul

Estimated Cost
$140.00
Estimated Time Investment
Afternoon Project (3-6 Hours)
Finish Used
oil based poly
Recommended Skill Level
Beginner

Comments

Built for my sister

Submitted by Diesel911 on Wed, 05/13/2015 - 11:45

Built for my sister. Because she liked mine so much :) I also built her an apothecary console to use as a side board in the dining room

Built from Plan(s)
Recommended Skill Level
Intermediate

Comments

Allen/ Ana White Island

Submitted by tfj1283 on Sun, 07/07/2013 - 17:16

This was my husband and my first DIY project and we were thrilled at the outcome! It took us a day to build and then a couple days to stain and paint.

Built from Plan(s)
Estimated Time Investment
Weekend Project (10-20 Hours)
Finish Used
It is stained with min wax Jacobean and painted with Martha Stewart's Barn red. This was a super fun project; thanks Ana White!
Recommended Skill Level
Beginner

Bunk Beds for 4 to 6

Submitted by Judianne on Thu, 07/02/2015 - 10:32

We used the Build a Simple Bed plan and the Bunk Bed from Simple Bed. I modified the plans to build a double bunk bed. We needed a way to fit up to 6 small children in a long, narrow room. Although we haven't built the trundle beds yet, each bunk will also have a trundle bed. The kids especially love their "privacy" curtains!

Built from Plan(s)
Estimated Cost
Under $300
Estimated Time Investment
Weekend Project (10-20 Hours)
Finish Used
paint
Recommended Skill Level
Beginner