Community Brag Posts

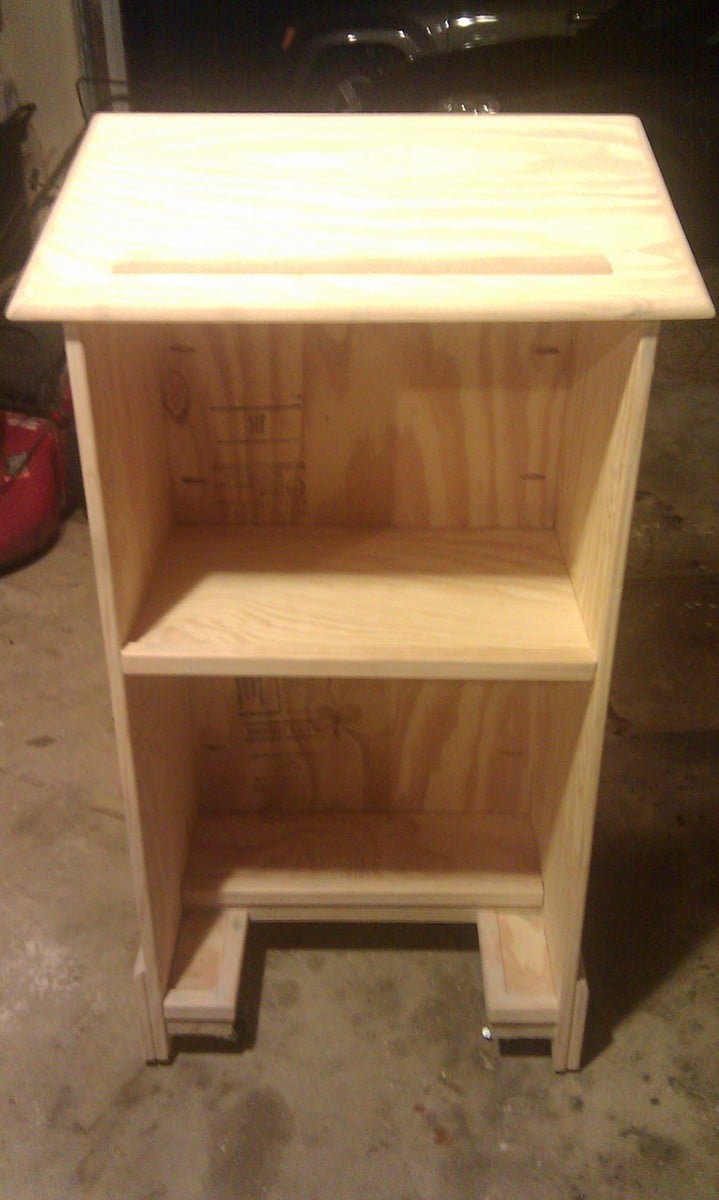
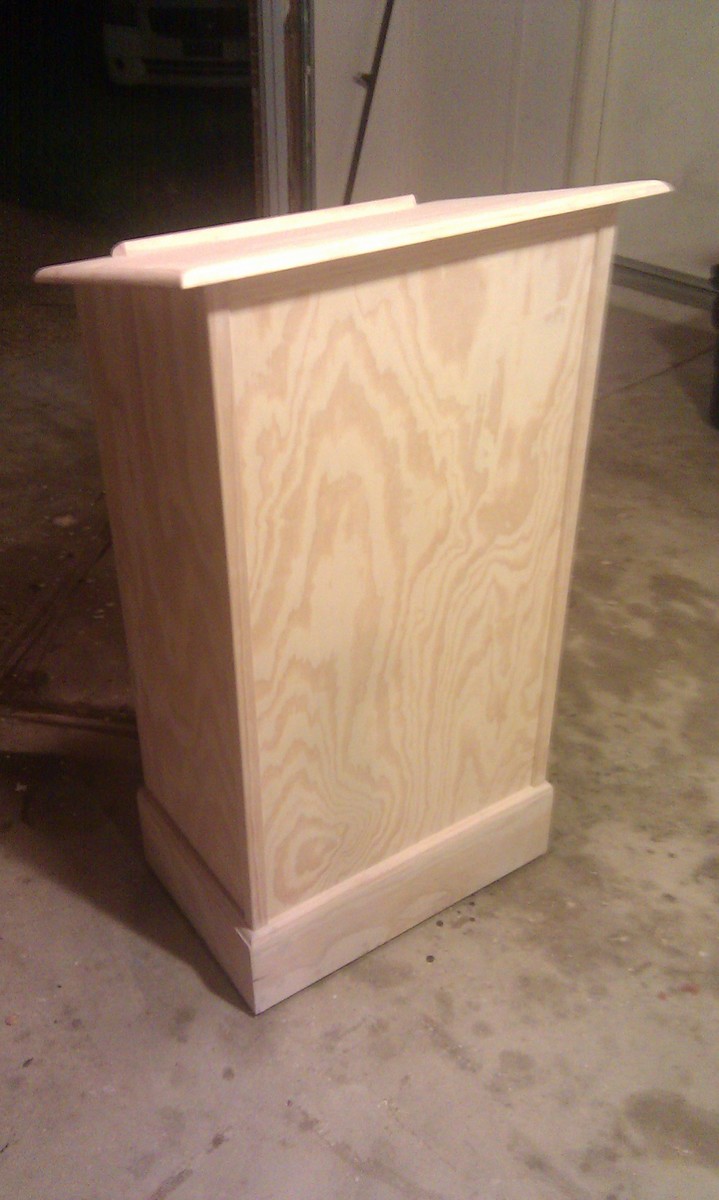
Podium for My Wife's Classroom

This is my first try at building furniture. I've built larger things in the past like decks and a fort for my nephews, but never furniture. Even though I used the plans to build the main box, I did change up the bottom and added some new stuff. I added wheels to the bottom my wife could easily move it around her classroom. I didn't want to put a square base on it because I thought it might hit her ankles when she was standing close to it. So I sort-of notched it out to give an opening for her feet and I used some scraps to create a short shelf at the bottom. I also added more trim that the plans call for. I cut strips of the pine plywood for the base molding and topped it with quarter round. I used corner trim for the front corners, the self inside and the bottom notched shelf. I also used screen trim for the back of it. I think it came out nice and I've very pleased with it. I used 2 coats of Minwax PolyShades American Chestnut on it.

Built from Plan(s)
Estimated Time Investment
Weekend Project (10-20 Hours)
Finish Used
Minwax PolyShades American Chestnut
Recommended Skill Level
Beginner

Full size loft

Submitted by Anonymous (not verified) on Tue, 10/01/2019 - 18:46

Built a full size loft bed for my kids but wanted something safer than having them climb up and down a ladder so used the Camp Loft Bed plans to add the platform and stairs. It is much easier for the kids. Going to finish by covering the platform and stairs with carpet.

Estimated Cost
180
Estimated Time Investment
Day Project (6-9 Hours)

Comments

John Deere Tractor Bunk Bed

Submitted by Veronica P on Sun, 07/06/2014 - 16:43

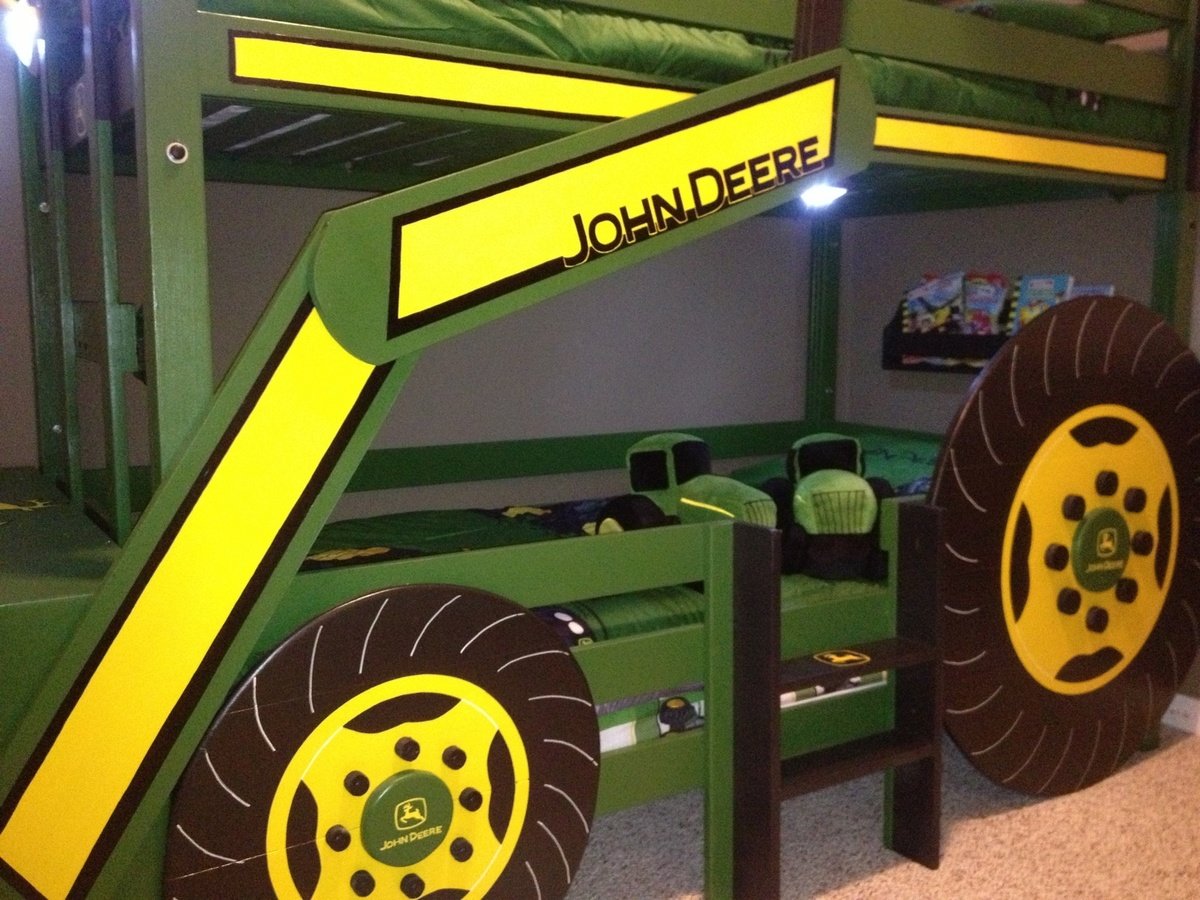
With another baby boy arriving in August, my one and three year olds are moving to a "big boy" room. My oldest decided he wanted a bunk bed and as they both are obsessed with tractors, when I saw the "John Deere Tractor Bunk Bed" plan, I was sold.

We would be needing a twin sized bunk bed though not a toddler. I used the classic bunk bed plans and simply modified them to suit our needs. I moved the ladder to the front, added a rail on the bottom bunk and added a small ladder to the side for my one year old to climb into the bottom bunk.

Once the the frame of the bed was complete, I added the tractor accessories. A couple of storage cubby shelves with fabric baskets for toy tractors which act as stairs up to the ladder and make the tractor bucket at the front. Also, the wheels which are made from joined 1x6s as I find plywood hard to sand and paint to the quality of finish I like. A cab & roof from 1x4s framed together. A side mirror that I decoupaged a picture of another tractor on. I used push lights for the headlights as well as a reading light above each bed (they're on timers so they'll turn themselves off). A steering wheel (play equipment access from toys r us). Also, I built and mounted by the head of both beds a "flat wall book holder" so they would have somewhere to store a few books.

My boys and I are fairly new to building so I spent a lot of time planning and measuring to ensure it would all come together in the end. It paid off because it all went smoothly (even with "help" from my boys). It's not perfect but they're very happy with the result. We also built a John Deere themed "Just my size closet" and even finished with over a month to spare before the new baby arrives! :)

Just want to say a quick thank you to Ana both for the amazing plans and also the inspiration to take on these projects. The time spent with my boys building as well as the resulting treasures are priceless and I would have never realized what we were capable of had I not stumbled upon your website and been so inspired by you and everything you've accomplished. Thank you!

Estimated Cost
$550.00
Estimated Time Investment
Week Long Project (20 Hours or More)
Finish Used
John Deere Green paint (home depot was able to color match a toy tractor), marigold yellow and black and polyurethane.
Recommended Skill Level
Beginner

Comments

Ana White Admin

Mon, 07/07/2014 - 12:13

I love this, such a great build and eveything came together perfectly! Thanks for sharing!

spiceylg

Thu, 07/10/2014 - 19:12

What an incredible build! I agree with Thriftygirl, I love all of the details!

carongirls

Tue, 09/30/2014 - 05:35

I am in the process of copying your bed right now. Just mine will be a toddler loft bed. Thank you for the ideas!

busymomof3

Thu, 10/09/2014 - 14:12

I am new to this and I was wondering were to find the measurements for the twin size bed?  I would love to make this for my boys!!

Veronica P

Mon, 11/03/2014 - 07:48

Sorry for the slow response to those requesting plans. For main structure of the bunk bed, I used Ana's "Classic Bunk Bed" plans. For all of the add-ons, I made up my own plans. I'm pretty low tech so unfortunately they're just pencil & paper plans but I'd be happy to scan and email them to you if you're interested. Just message me and I'll send them your way. :)

MartyC

Wed, 01/28/2015 - 14:08

Hi Veronica, Well done fantastic job! Two little men who want to move in together because of a new addition on the way. Their request though is a John Deere Bunk Bed! would be grateful if you could forward on your plans if you have time, Kindest regards.

tkdiver1

Tue, 05/26/2015 - 18:13

These are just what my grandsons need. I would love your plans.

Thank you

tkdiver1

Tue, 05/26/2015 - 18:14

These are just what my grandsons need. I would love your plans.

Thank you

Mimi64

Sun, 09/06/2015 - 10:06

Dear Veronica,

Our grandson, 6 years old, will absolutely adore this bed.  He loved riding on Grandpa's real JD tractor.  Please send me your plans for the attachments.  They are just darling and I could not do any better.  Thanks for your generosity!

bmeche

Fri, 09/13/2019 - 21:11

Hi Veronica. My 3 year old just loves the tractor bunk bed. I was wondering if you would mind sending me the plans you have. It would be greatly appreciated. My email is [email protected]   

Thanks in advance 

MyMaw

Wed, 10/16/2019 - 17:56

If you're still sharing, we would love a copy of your add-ons plans. 

Thanks,

MyMaw and PawPaw

Veronica P

Tue, 12/16/2014 - 07:21

I just emailed those plans. There should be nine attachments. Please let me know if you don't receive any of them.

cnejones

Thu, 12/18/2014 - 21:51

Could you please email me the plans for this project my son would love this

Veronica P

Tue, 01/06/2015 - 08:21

Hello all. I've tried emailing plans to all those who've requested them. I had some trouble attaching the files as they were large so if you didn't receive them, please let me know and I can resend. Thanks

Alwardt2708

Tue, 01/06/2015 - 11:53

Hi Veronica. I did not receive an email. Woul you have time to try again? If you email me your address I can send you my fax number if that's easier too. Thank you so much! I can not tell you how much I appreciate your dedication to this! [email protected]

Bike Storage

Submitted by vendo on Wed, 10/13/2021 - 10:10

I live in a smaller rental with limited garage space, so I needed a place for my kids bikes. This is what I came up with. It required minimal screw holes in the treated fence posts and I attached a rail system(rubbermaid fasttrak) for the bikes to hang from. I used Ana's easy shelves plan for the upright supports and then just added some corrugated roofing and cedar fence pickets (which I had on hand) to finish off the top.

Outdoor Sectional

Submitted by Anonymous (not verified) on Fri, 04/28/2023 - 05:24

This was my seventh outdoor couch but my first sectional. My very first couches were all inspired by Ana White's plans and I have gotten so much better with my skills that I building other things as well. Thanks Ana for all your inspiration!

Comments

Play Kitchen

Submitted by Anonymous (not verified) on Sun, 10/11/2020 - 16:33

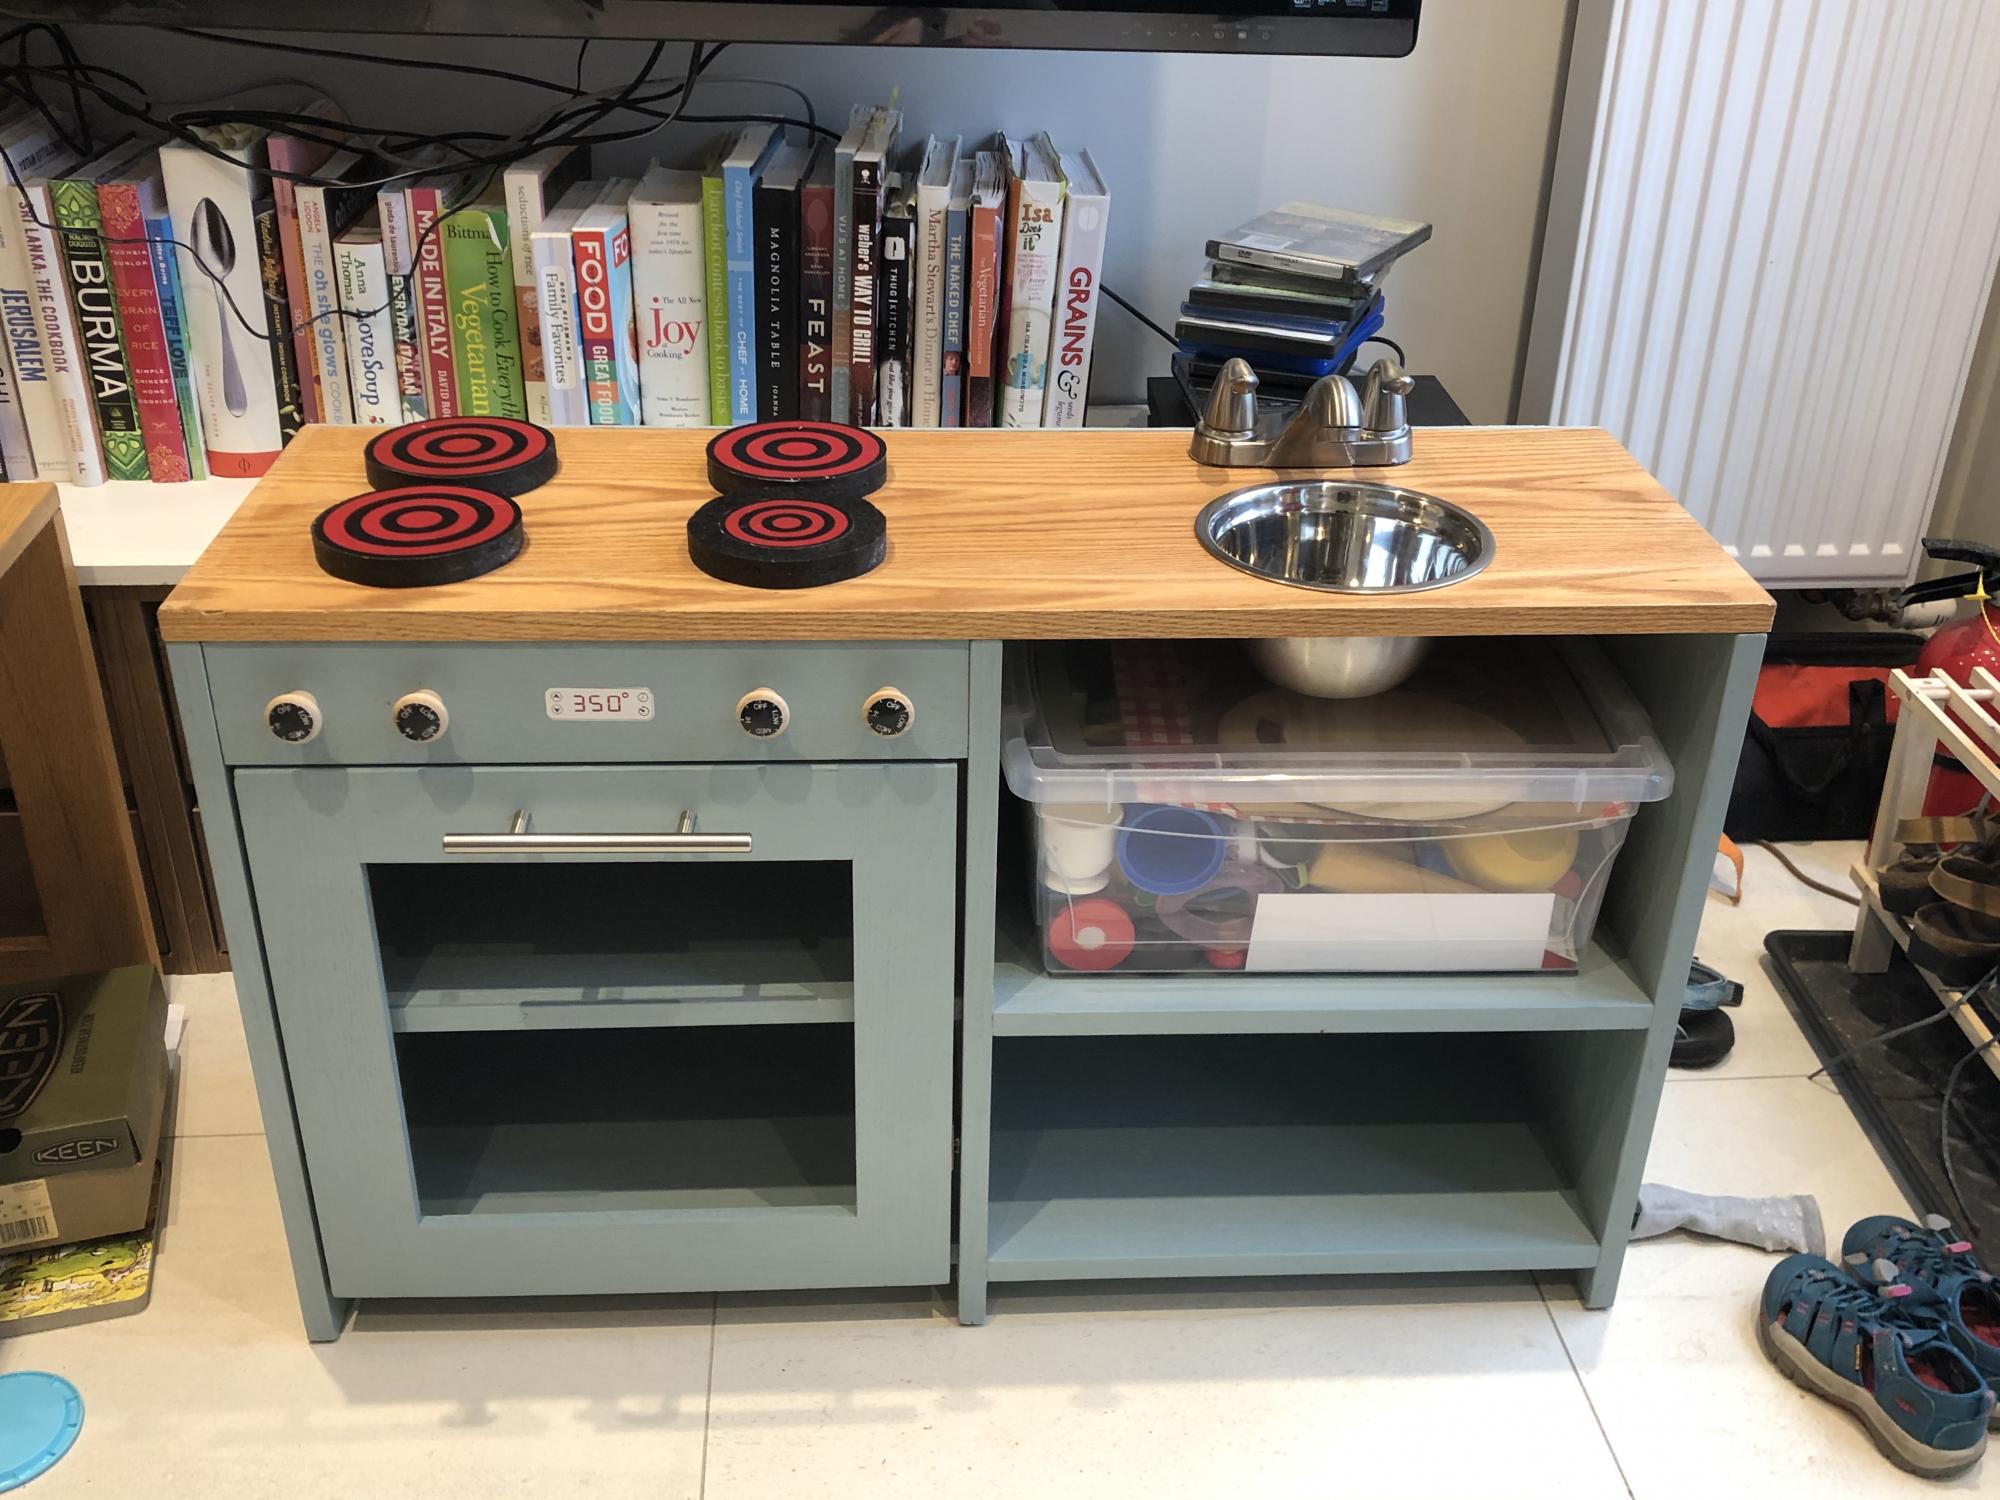
Play kitchen made from a mix of oak and oak-veneer mdf, with stickers on the burners and knobs.

Estimated Time Investment
Week Long Project (20 Hours or More)
Finish Used
Beeswax on top, milk paint for base
Recommended Skill Level
Intermediate

Craftsman Style Playhouse

Submitted by aerialc on Fri, 10/02/2015 - 11:57

I mainly followed ana's plans for this playhouse. Instead of a plywood roof I used cedar shingles. I also added plexiglass to the windows.

Built from Plan(s)
Estimated Cost
$450, including deck.
Estimated Time Investment
Weekend Project (10-20 Hours)
Finish Used
Ready Seal - Dark Walnut
Recommended Skill Level
Intermediate

Comments

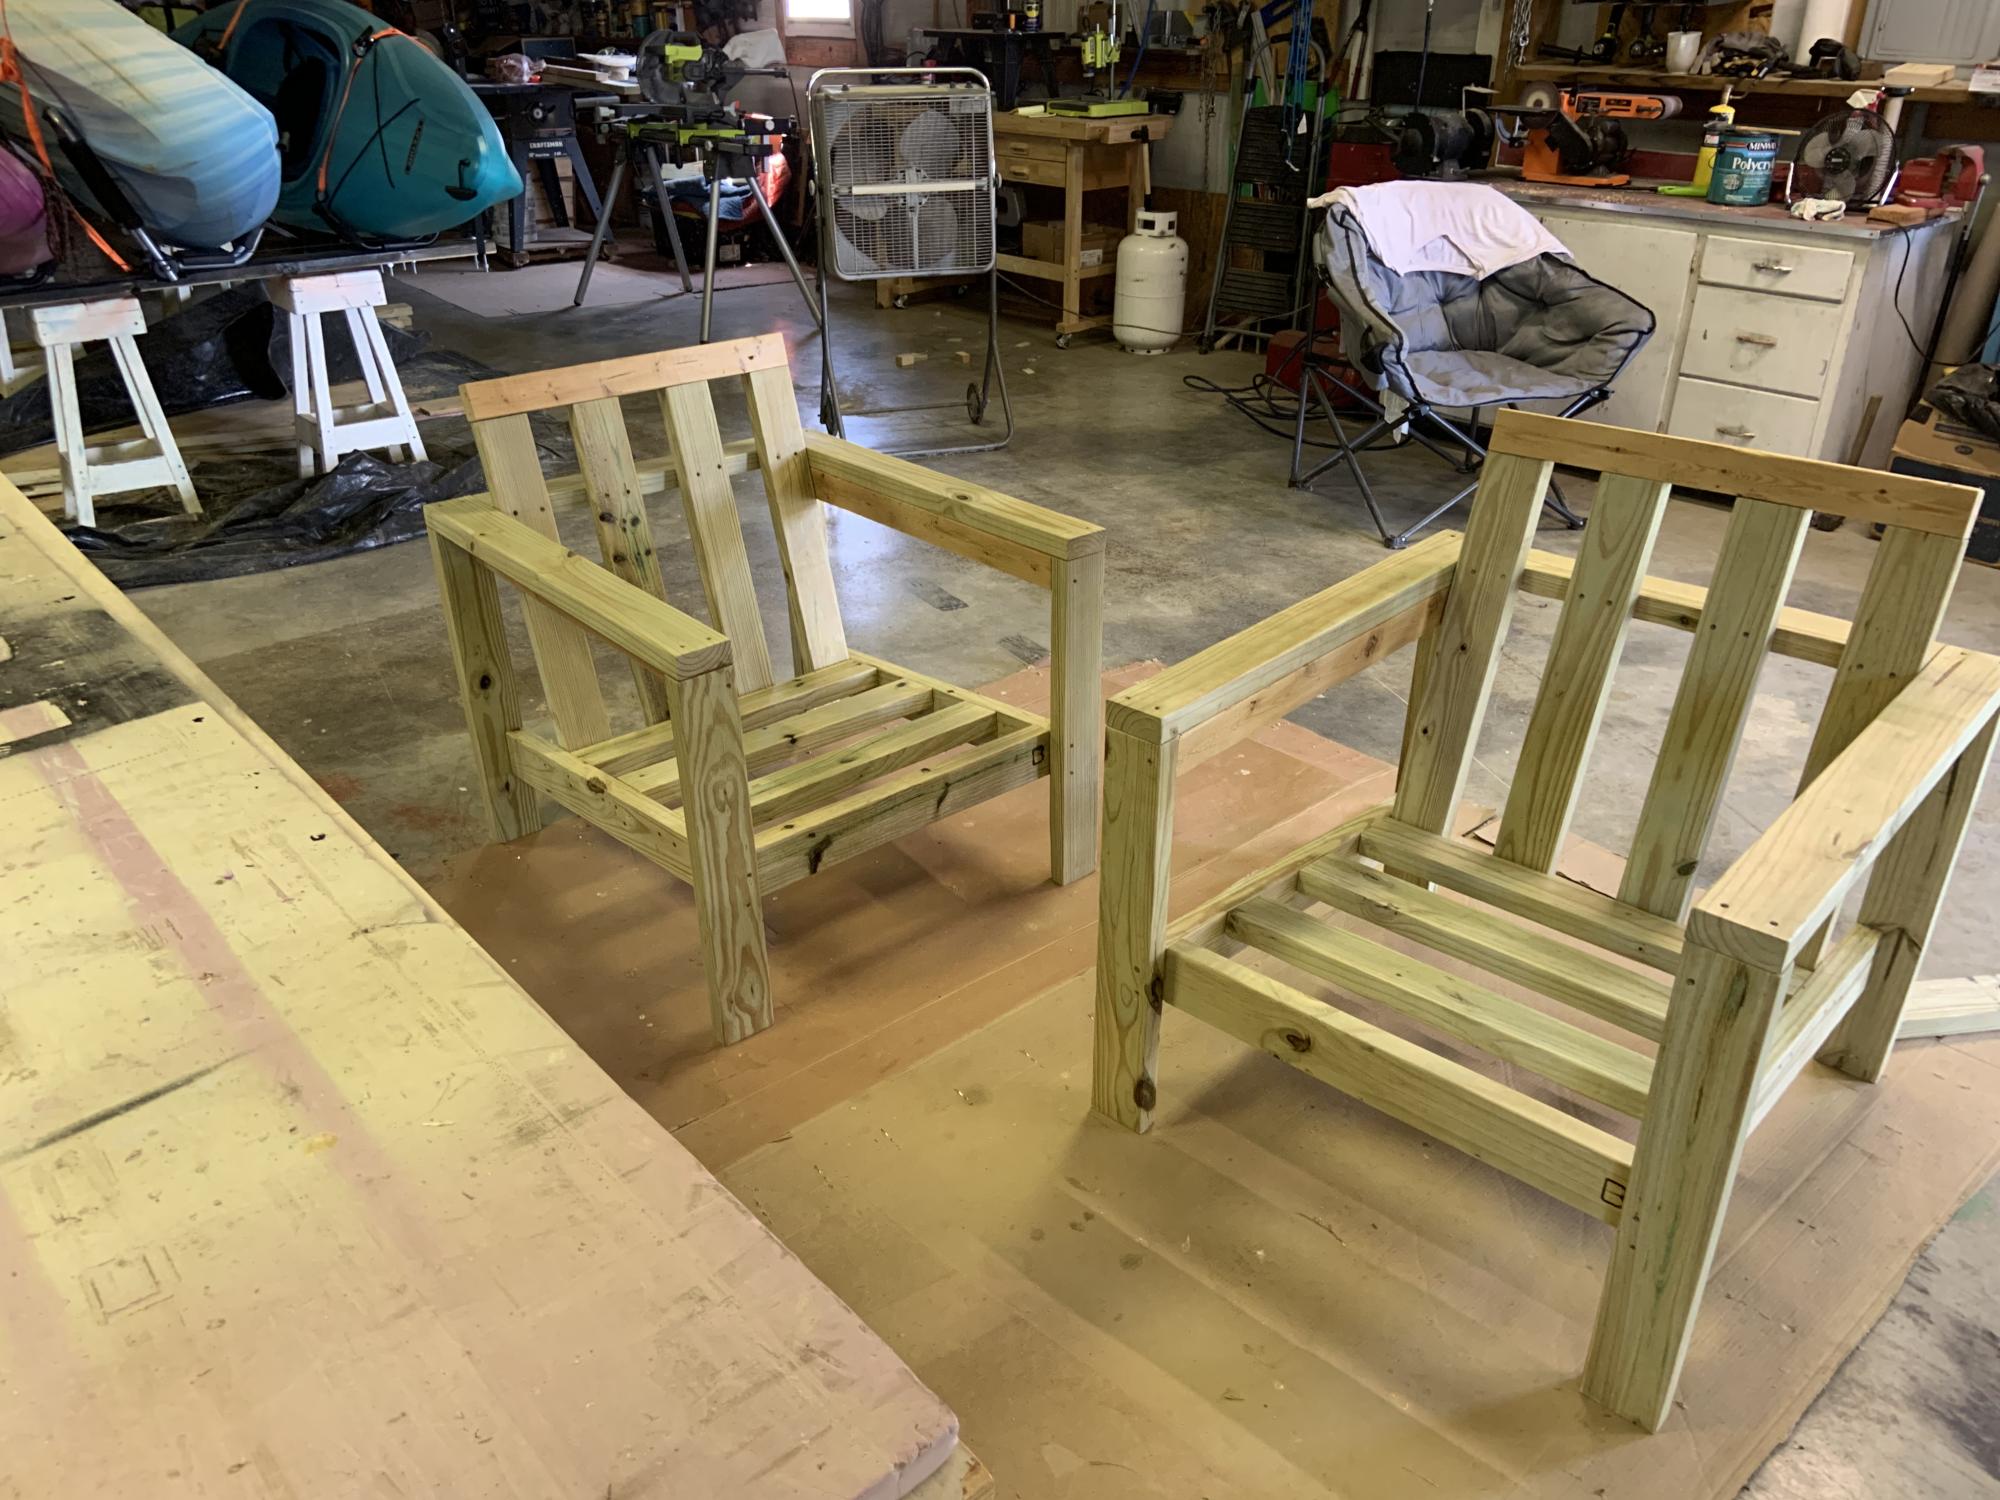
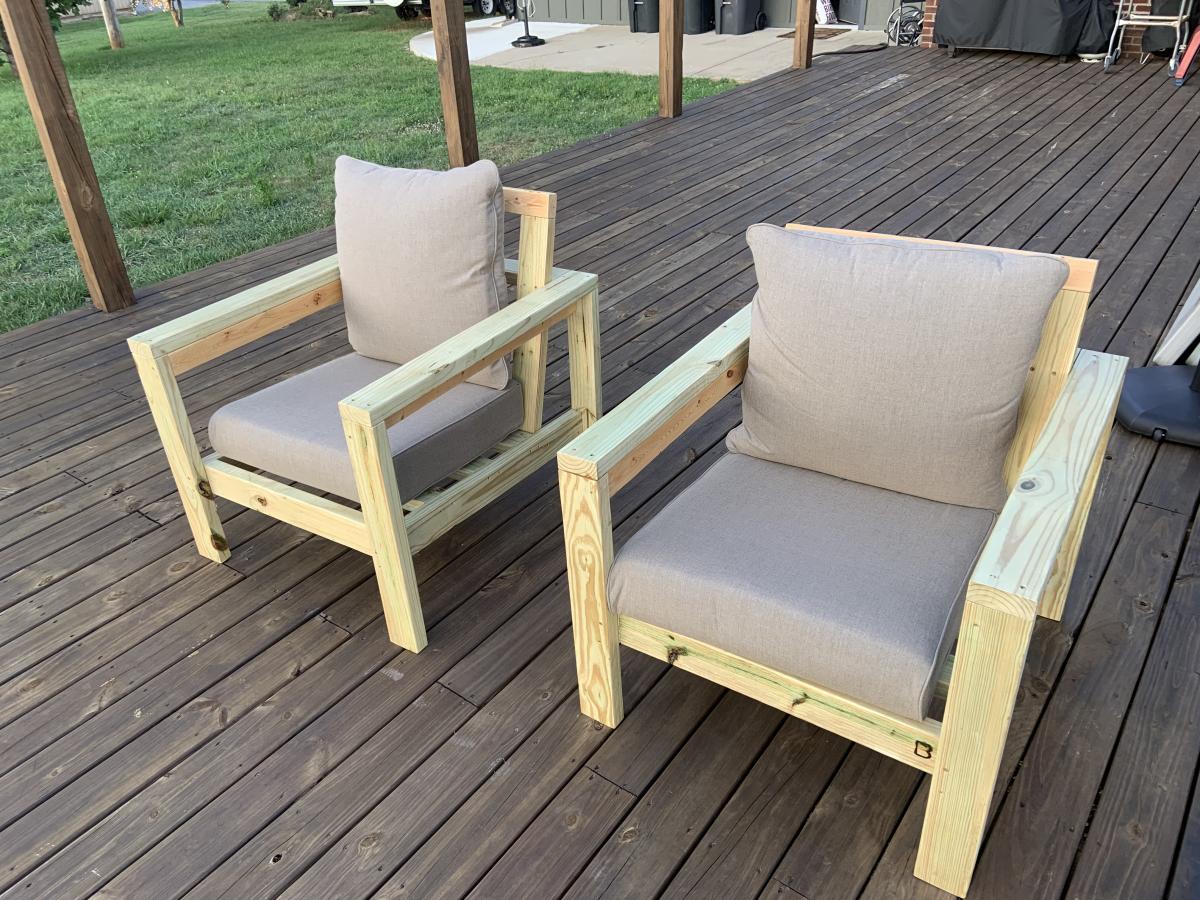
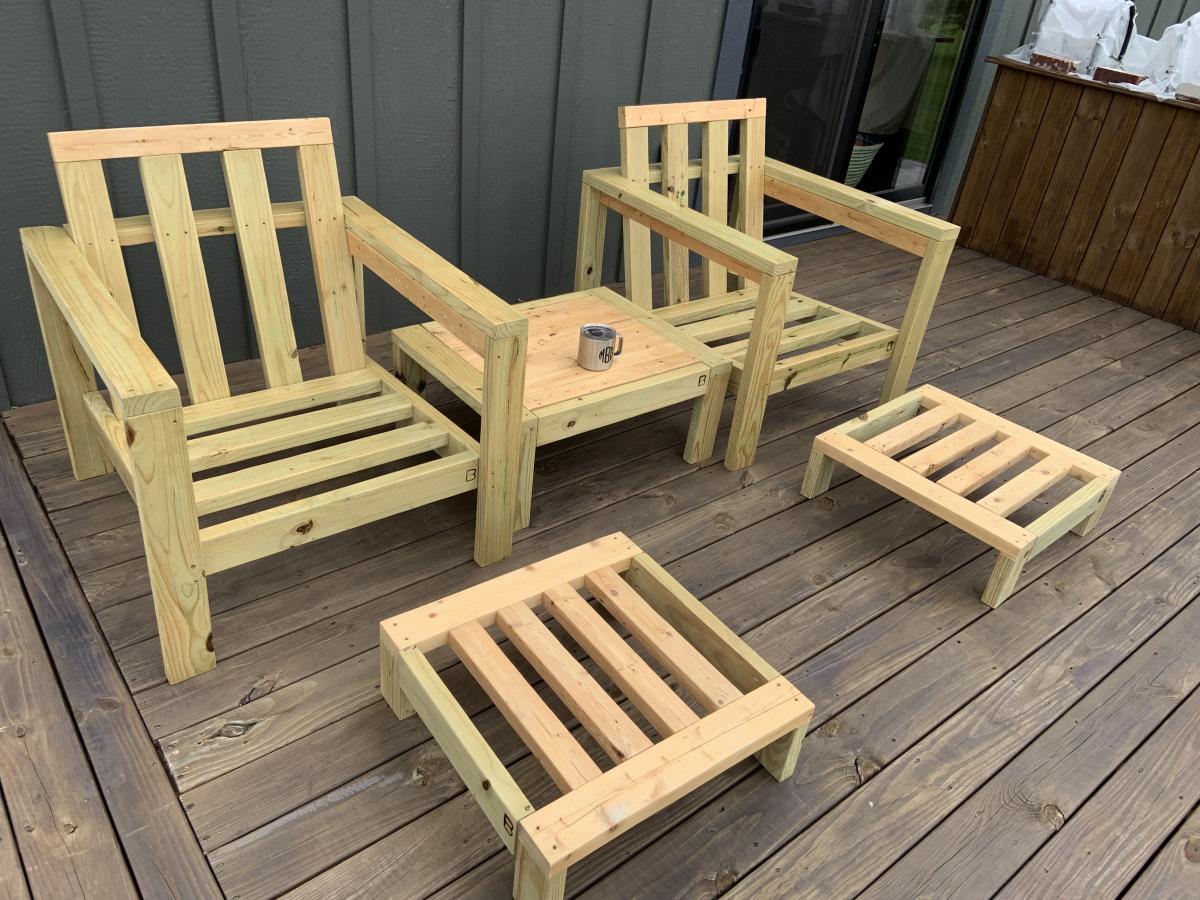
Deck Chairs

Submitted by mgb11184 on Thu, 07/21/2022 - 19:54

I made a couple of additions/modifications

I also made a couple of side tables and foot stools for the chairs. A total of four chairs, two tables and two foot stools for the deck set.

Comments

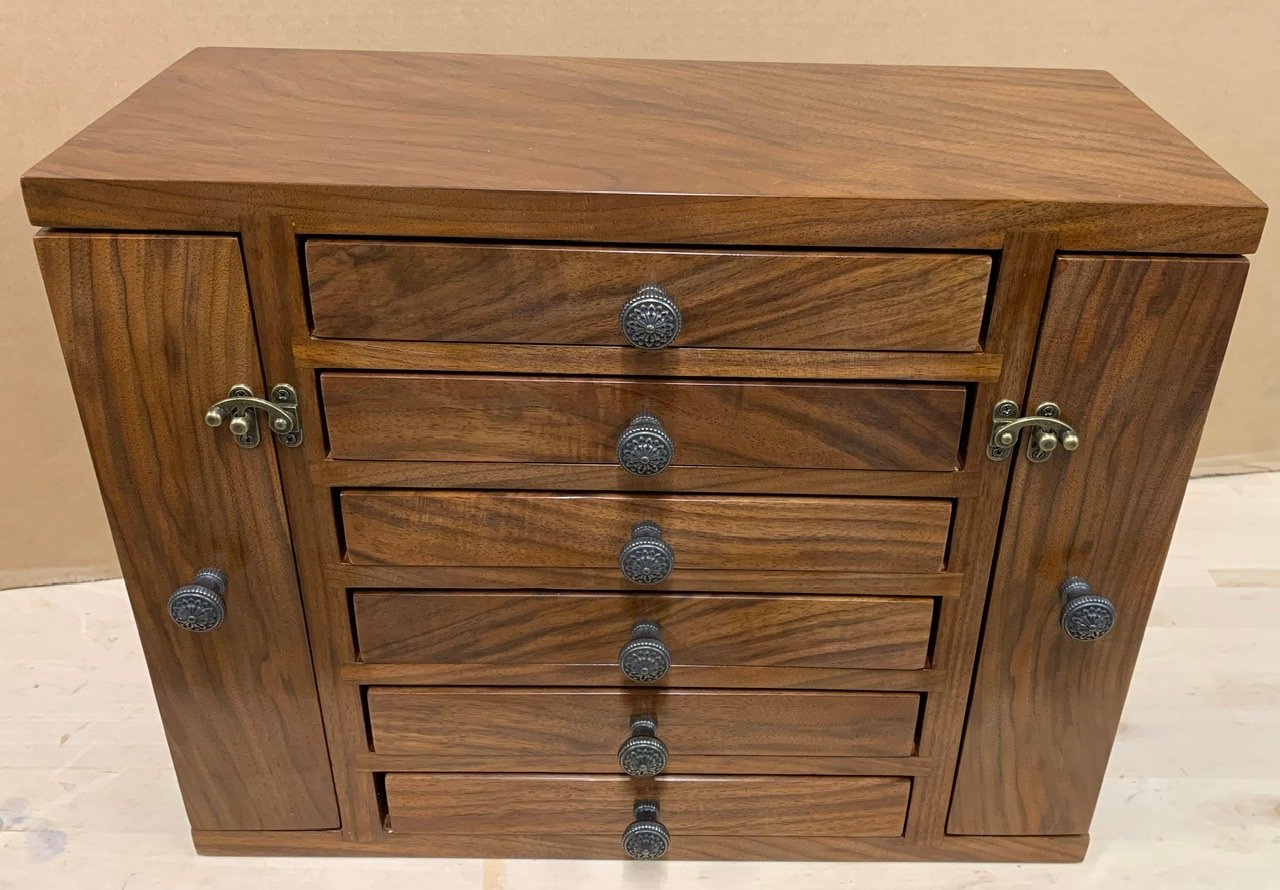
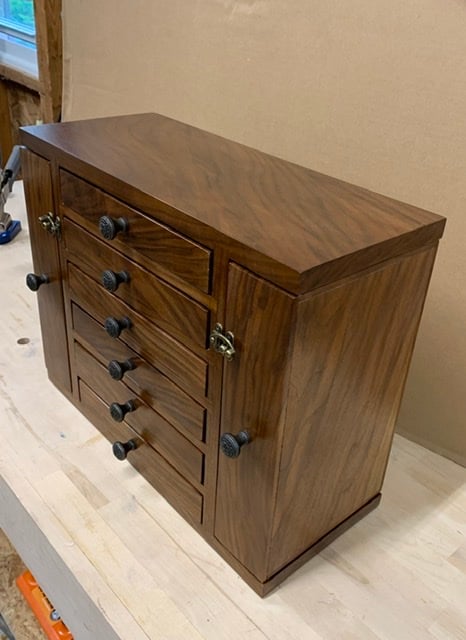
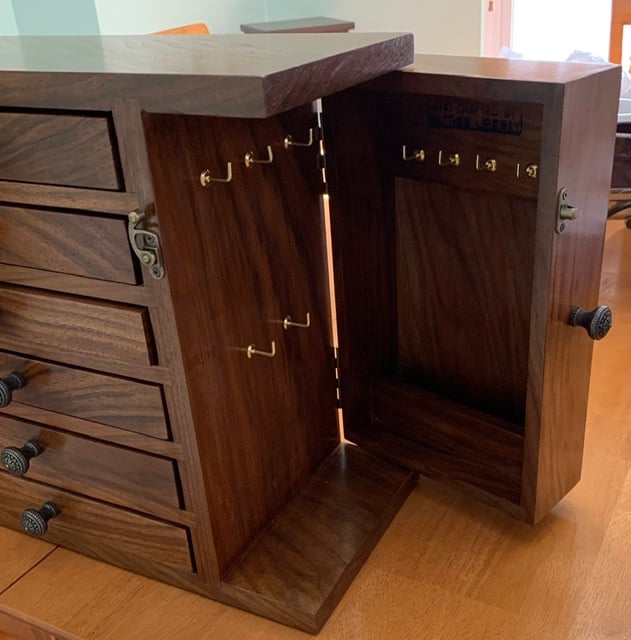
Fancy Jewelry Box

Submitted by Matt L on Mon, 06/29/2020 - 19:52

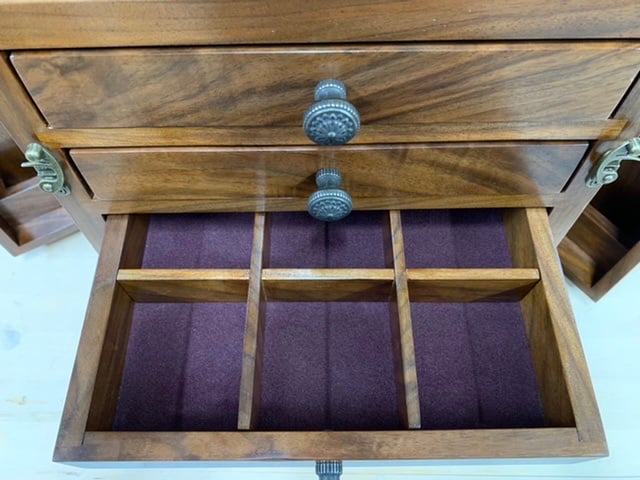
Great plans and a fun build. I made some modifications. My drawers are 1.5” high and 10” long. It allowed for 6 drawers. Overall height is 13.75” and length is 17.5”.

I used rabbits and dados rather than butt joints. There is flocking in the drawers.

Built from Plan(s)
Estimated Time Investment
Week Long Project (20 Hours or More)
Finish Used
Garnet Shellac at a 2# cut. Wiped on. I used 4 coats sanding with 400 grit after coats 2 and 3. I used 0000 steel wool after coat 4. Then I applied Paste wax.
Recommended Skill Level
Intermediate

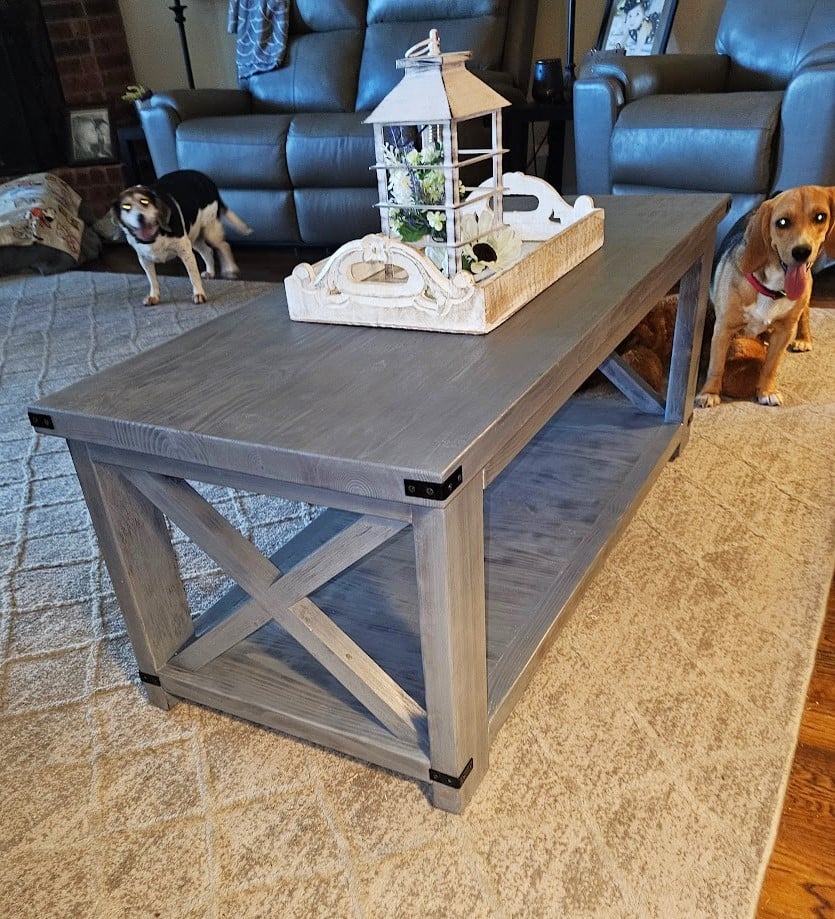
Rustic Wood Coffe Table

Submitted by Anonymous (not verified) on Fri, 05/03/2024 - 14:00

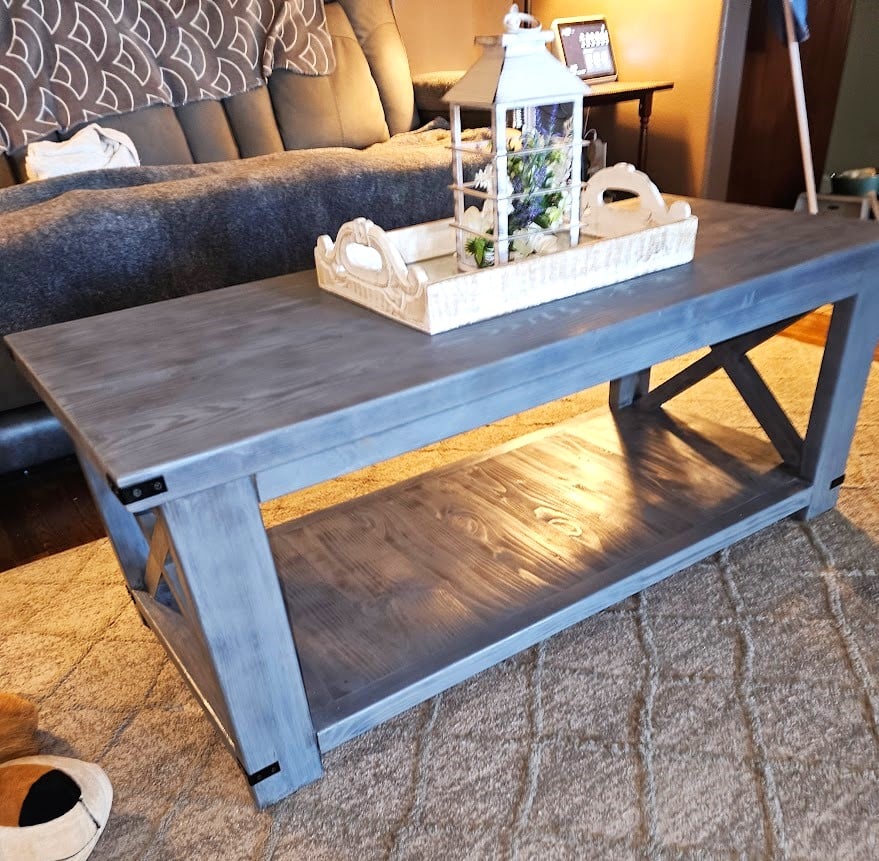
Farmhouse Coffee Table with a bit of Rustic "X" Coffee Table. Thank you so much for the plans. This was a nice build. I opted for pocket holes and panel glue up so for me, it wasn't a one day build. :)

WRH

Built from Plan(s)

John's Washer/Dryer Pedestal

Submitted by coveyjt on Sun, 06/12/2016 - 10:59

The wife has a hard time bending down so she wanted pedestals for the washer and dryer.  The metal ones with a drawer were too tall.  I showed her Sausha's and she really loved that design.  I basically used the same construction plans idea from Sausha's project and some tips from Ryan's brag post.  But, I wanted to beef it up some.  I didn't like the L-bracket to attach the top and 4X4 legs.  It didn't seem sturdy enough for me.  I used my table saw to square the edges on the 4X4 posts and the 2X6 rails.  Then I used my Kreg jig and glued and screwed everything together.  I liked Ryan's trim ideas, so I used baseboard trim for the bottom and flipped it for the top trim.  I made a 1/2" lip so if it were to vibrate, the washer/dryer would not fall.  I put the trim on the bottom of the legs and was considering putting on the top but I put some different trim all the way around the bottom of the 2X6 rails.  The wife liked that.  I also added some carpet on the top to cut down on vibration and to help keep the units in place. I also put some 4X4 pieces of carpet on the bottom to keep the noise down and to help in moving it. I primed and used an gravity sprayer to paint it.  Then I put 3 coats of polyacrylic to help in cleaning and to cut down on scratches from the laundry baskets. 

laundry pedestals diy

Estimated Cost
150.00
Estimated Time Investment
Week Long Project (20 Hours or More)
Finish Used
Paint
Recommended Skill Level
Intermediate

Comments

zoolander

Wed, 06/29/2016 - 14:31

I think you could probably drive a truck on top of yours.  :)  I was a bit concerned about the strength of the construction when I first decided to build it, but I decided that since it would be stationary once I have it in place and the only force would be straight down, it would be fine.  Once I got it put together, it was actually sturdier than I thought it was going to be...from a horizontal force perspective.  Virtically, that thing could hold 100 washer/dryer pairs...the plywould would give out before the 2x4s and 4x4s would even budge.

Anyway, nice work!  I love the Kreg Jig...I need one of those. 

2x4 sectional outdoor sofa

Submitted by Anonymous (not verified) on Tue, 05/12/2020 - 08:10

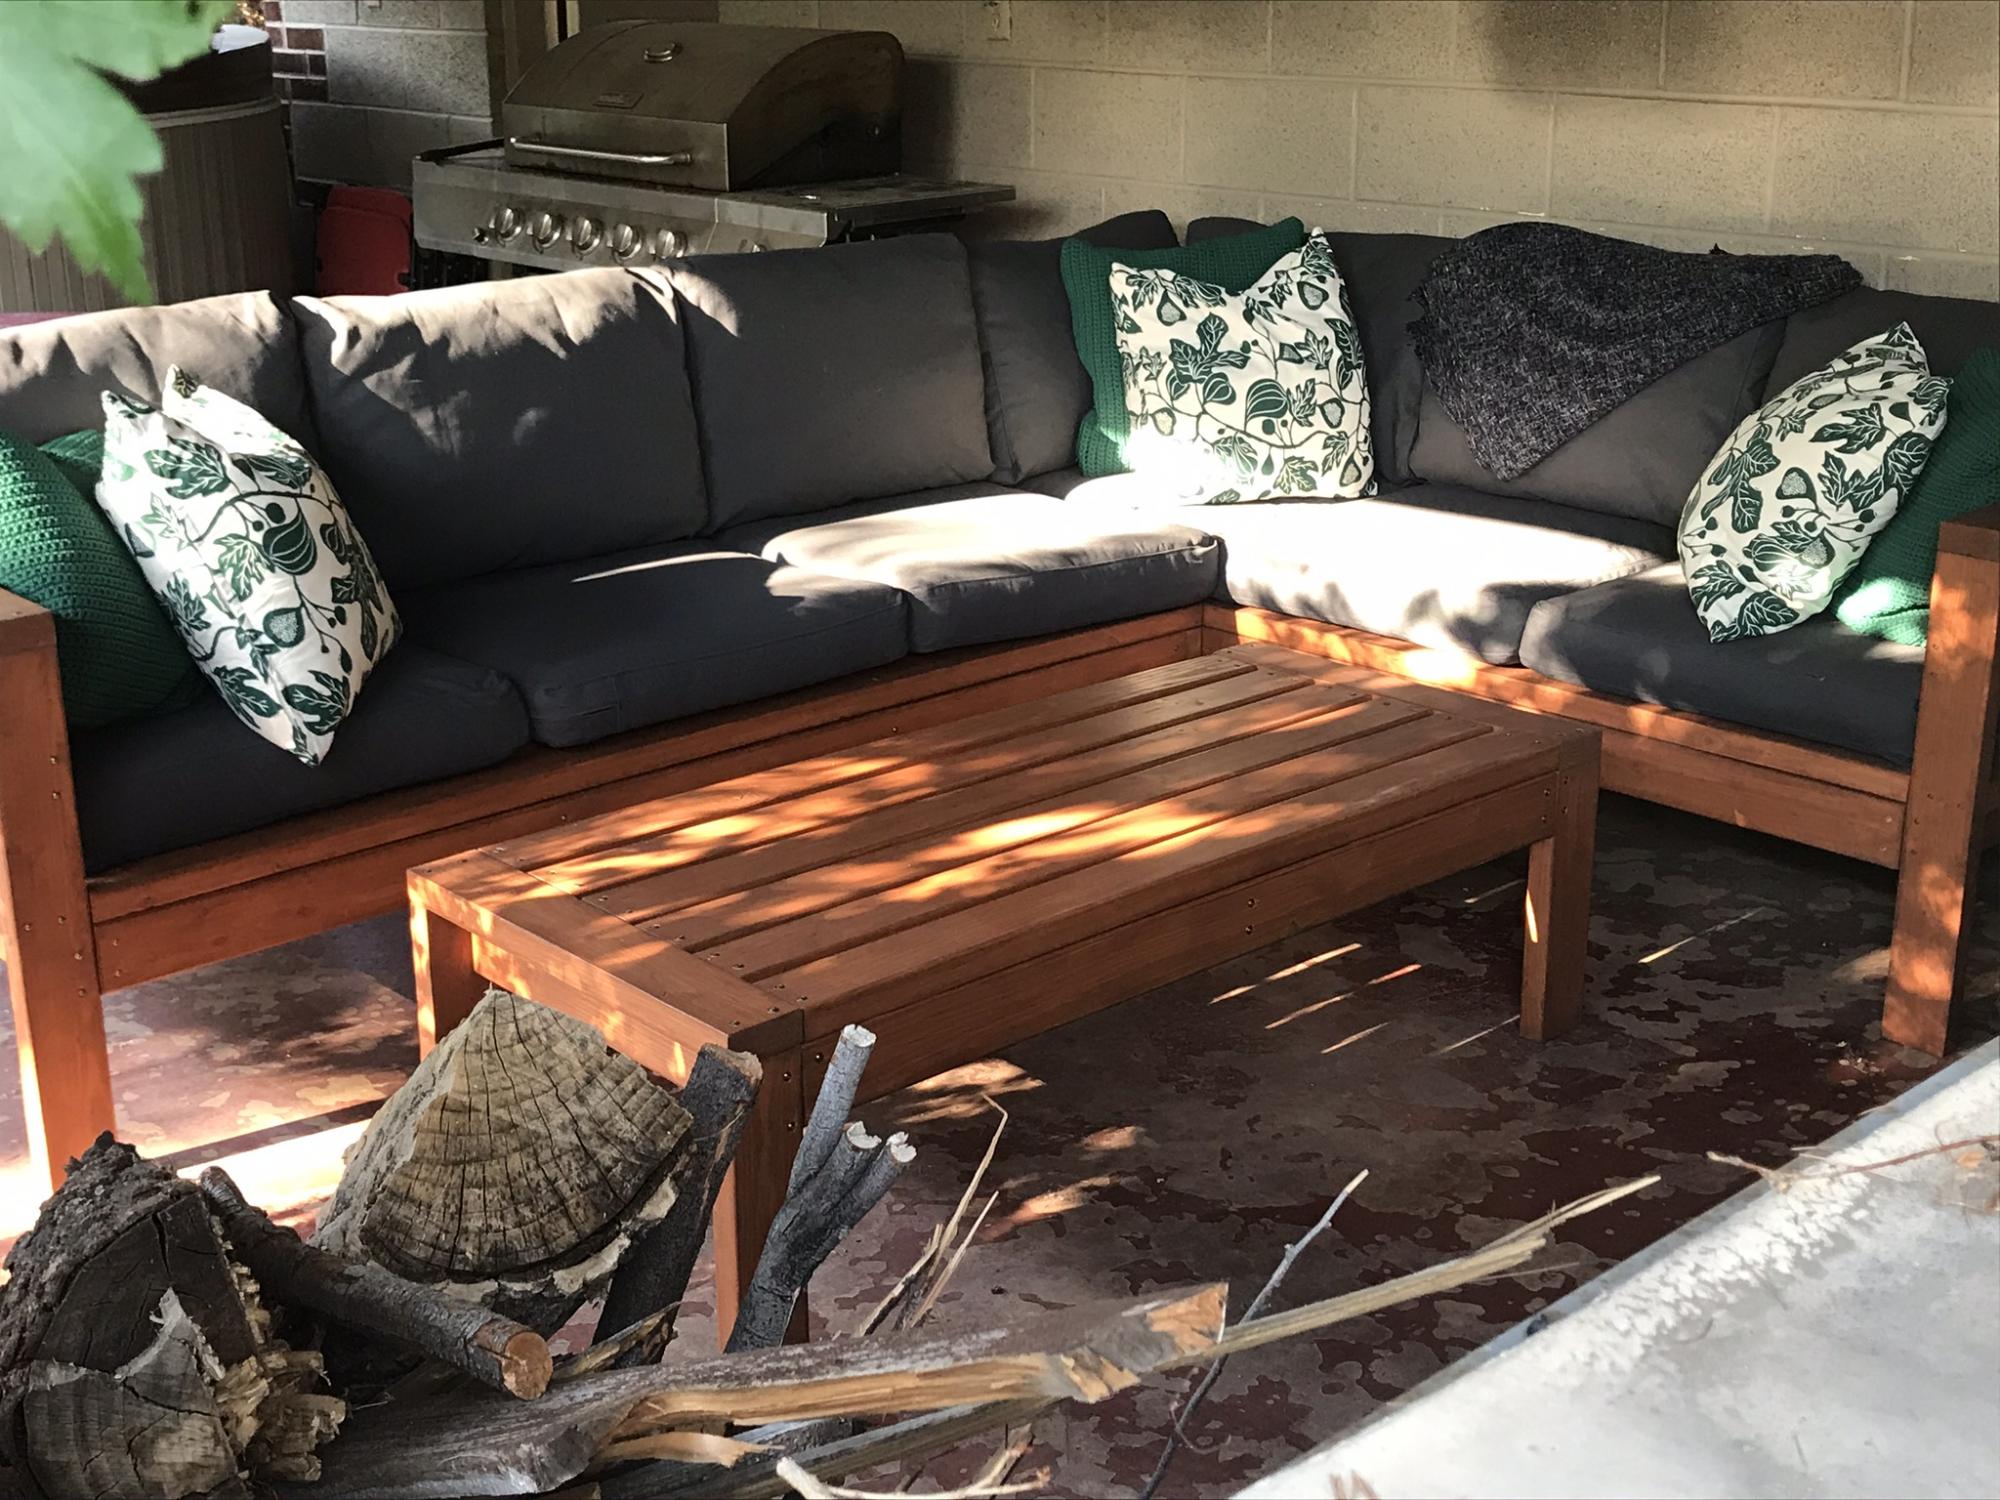
My first Ana White project. My friend Shelley and I are RN's, and she got me hooked on woodworking. I started with cushions from Lowes ( in the sizes that you recommended)to see if I loved the sectional for a few years. I loved it so much I decided to have custom Sunbrella fabric ones made. Even though the custom ones were more expensive, it has been worth it. They go perfect with my California Mission style home. Now I want to add the armless one and make it a U-shape. I did add a piece at the bottom back of each sofa to hold the cushions in. The seat cushions would slide out the back when sitting on the sofa. I made the coffee table to match. Our family loves it!

Estimated Cost
building materials for sofa $250. Custom Sunbrella Fabric cushiosn $2000
Estimated Time Investment
Weekend Project (10-20 Hours)
Finish Used
Stained with Carrington Minwax and sealed with spray Shellac
Recommended Skill Level
Beginner

Comments

Cluckingham Cottage

Cluckingham Cottage wasn’t built in a day, but it WAS built by a DAME!
A-frame instructions were pretty helpful considering the builder knows nothing about construction. I made a few modifications to accommodate my 5 chooks + 2 bantams . Sturdy and tight structure.

Estimated Cost
Under $400
Estimated Time Investment
Weekend Project (10-20 Hours)

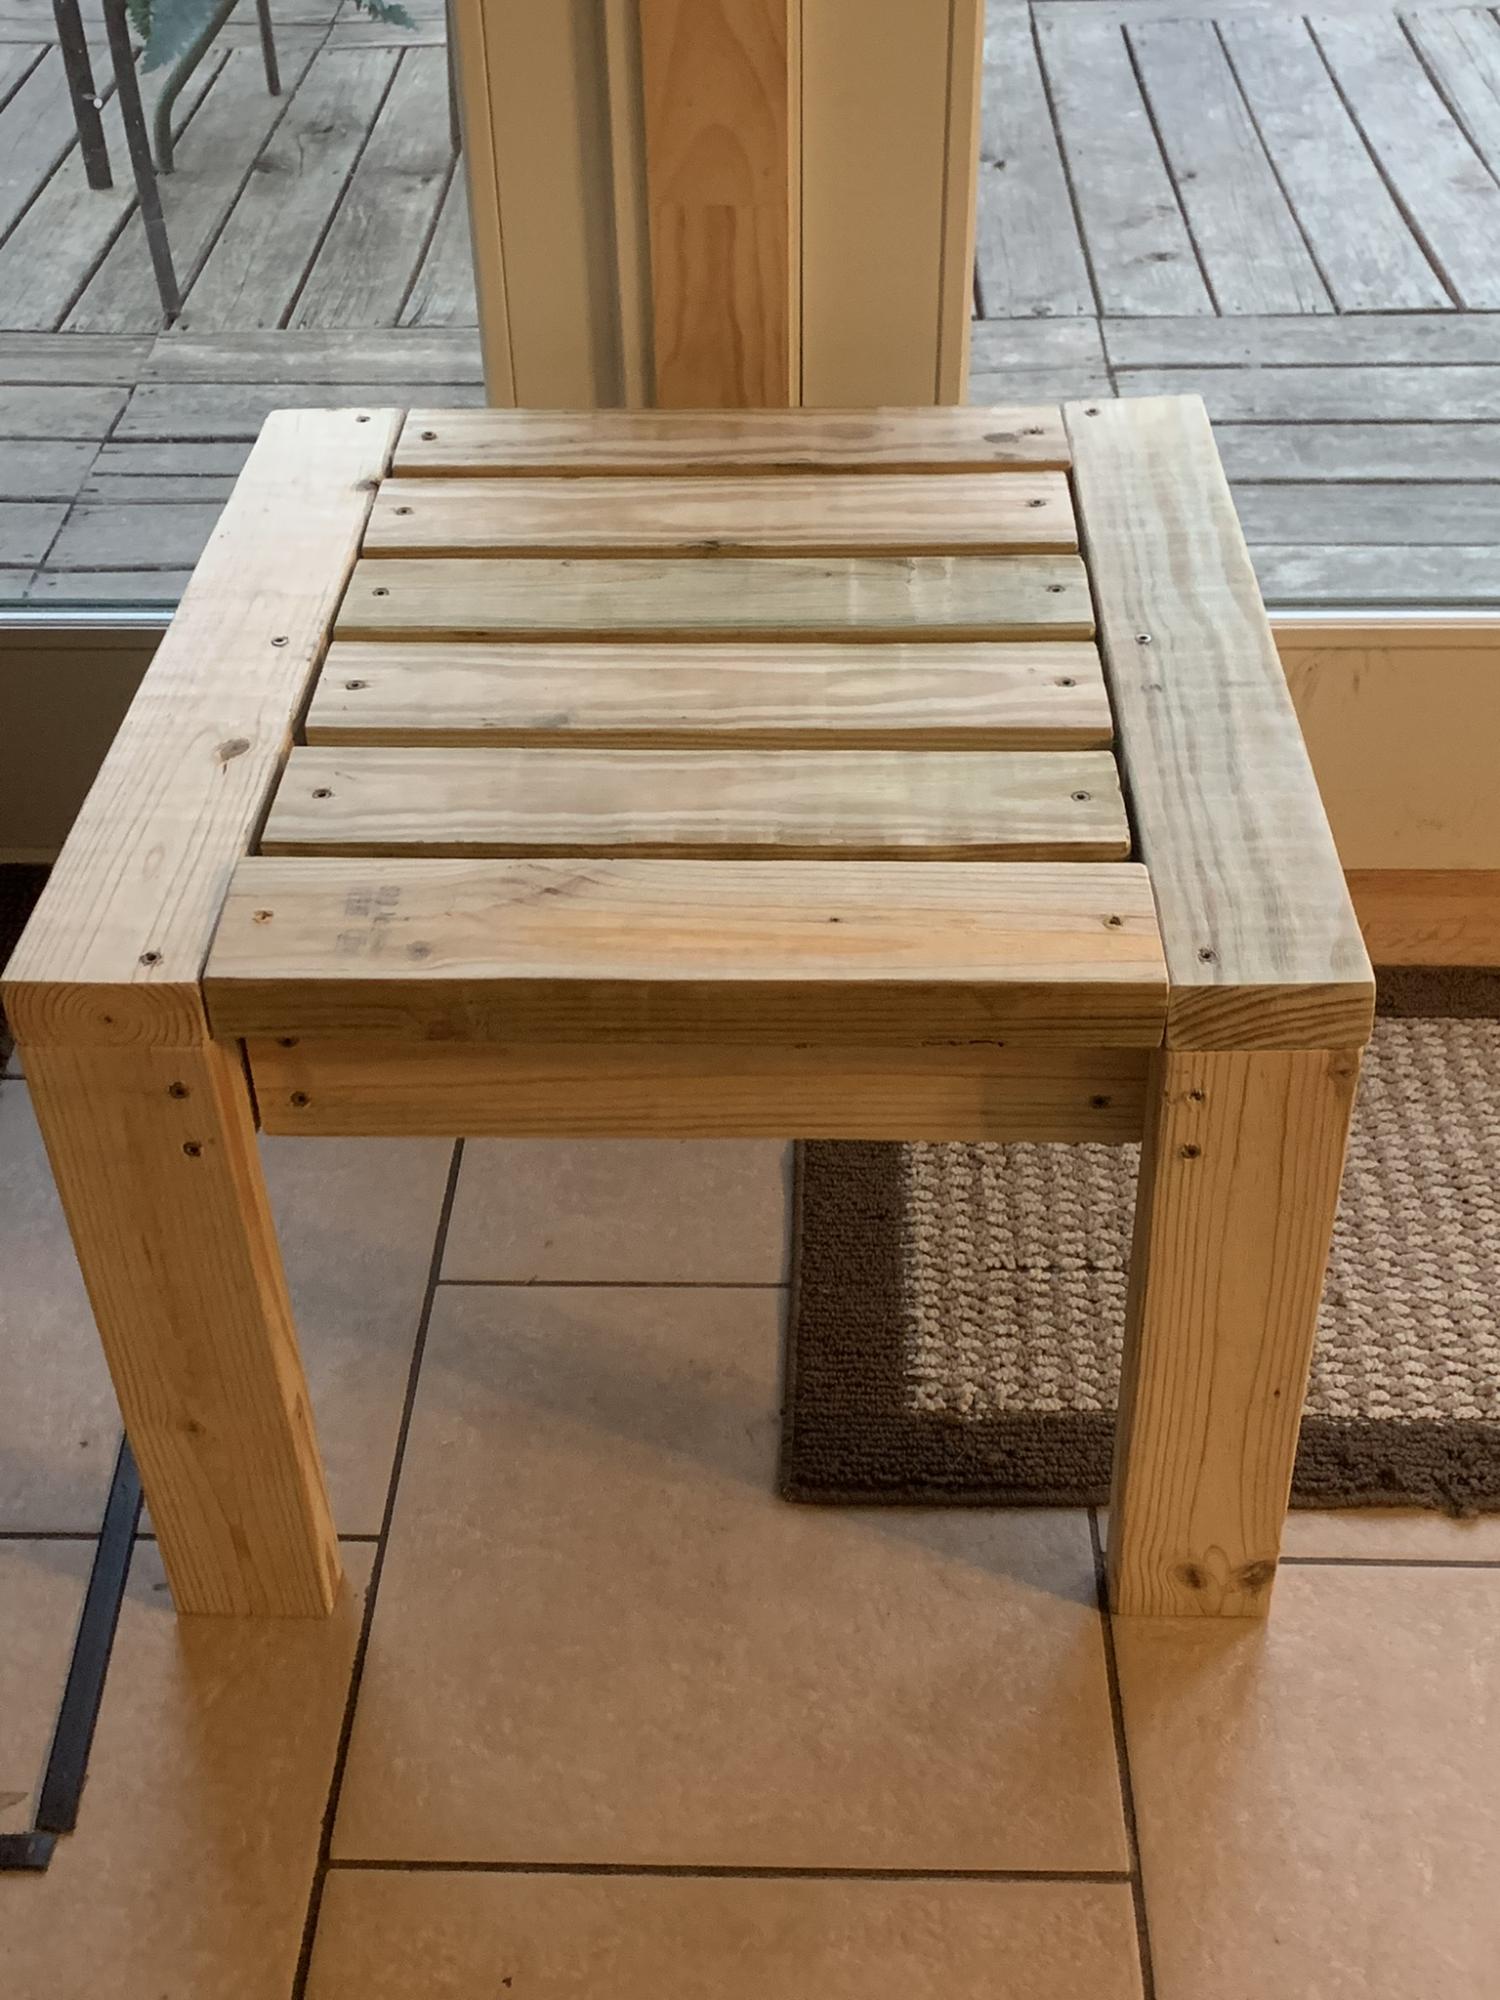
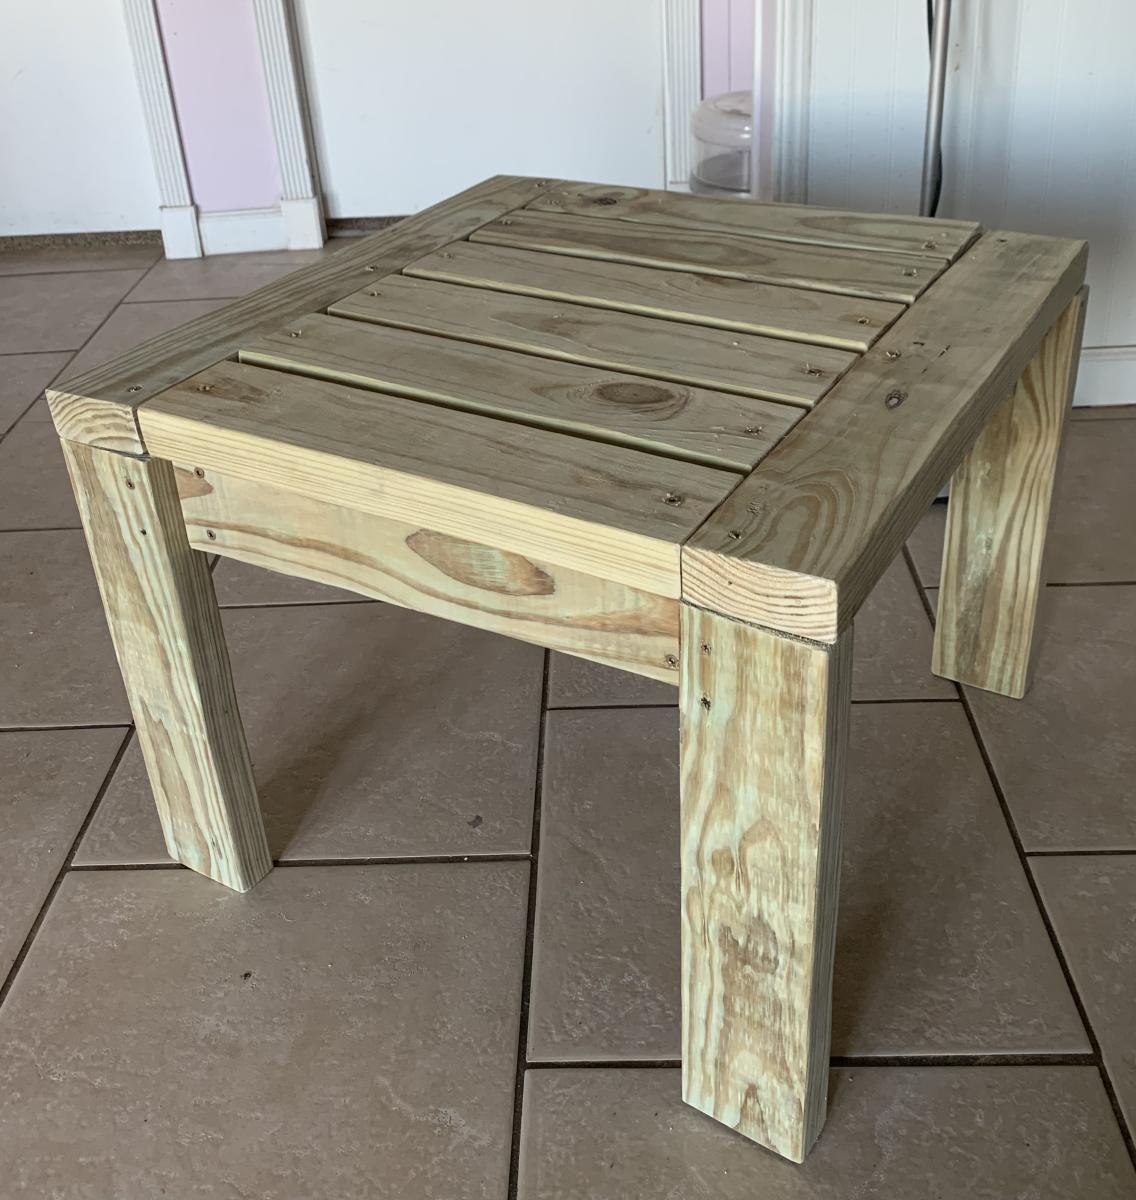
Outdoor end tables

I made these two Ana White outdoor end tables for my patio. Next up will be the matching coffee table

Built from Plan(s)

Comments

Outdoor Sofa & Coffee Table

Submitted by Ulrike on Fri, 07/31/2020 - 09:38

This project took a while. Stained everything before assembly which made it easier. Plans are easy to follow. Thank you for making them available. Our property is starting to look a lot like your website.

Estimated Cost
180
Estimated Time Investment
Weekend Project (10-20 Hours)
Recommended Skill Level
Beginner

Comments

jwood4

Mon, 08/02/2021 - 08:35

Looks amazing! What method did you use (pocket holes, dowels, deck screws, etc) to join the visible portions like the arms?

Folding Garage Workbench

Submitted by SaraLodise on Sun, 08/10/2014 - 06:11

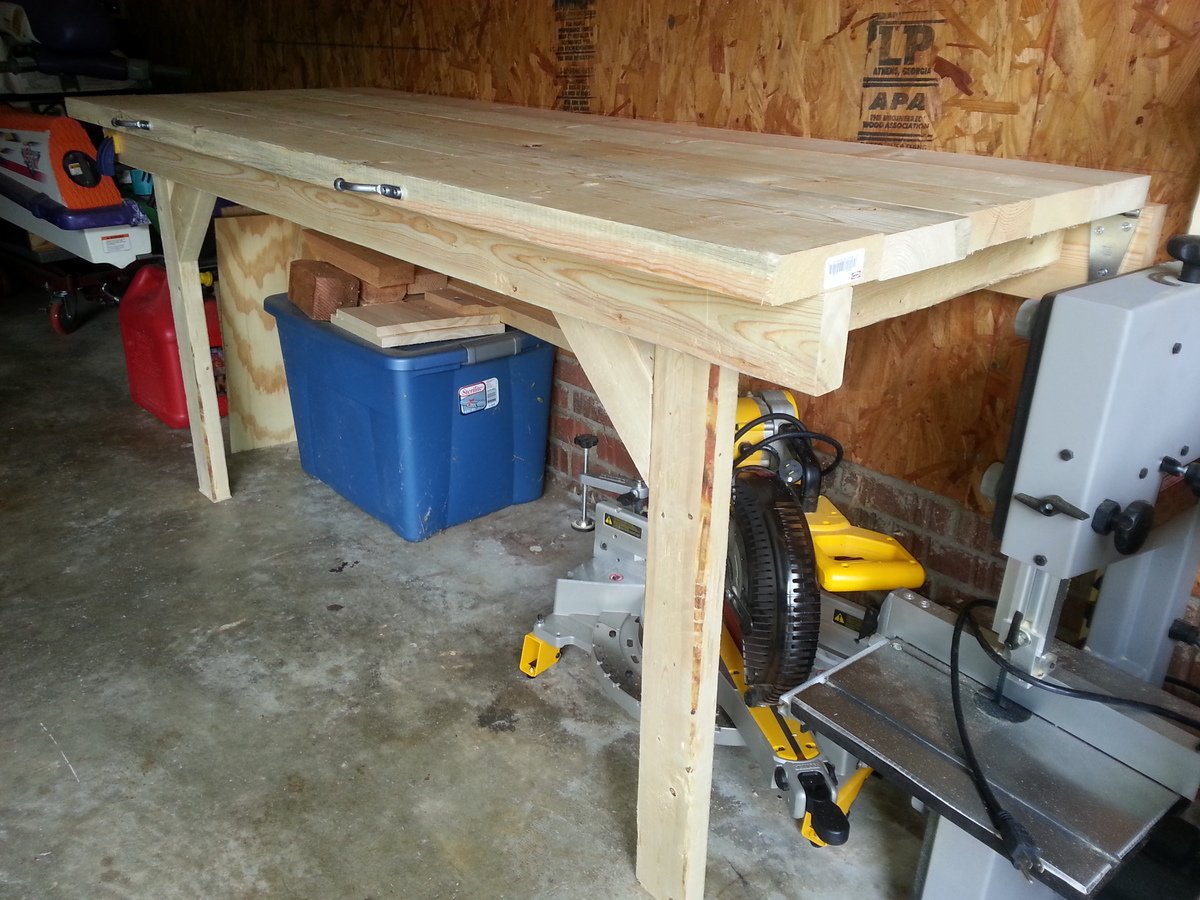
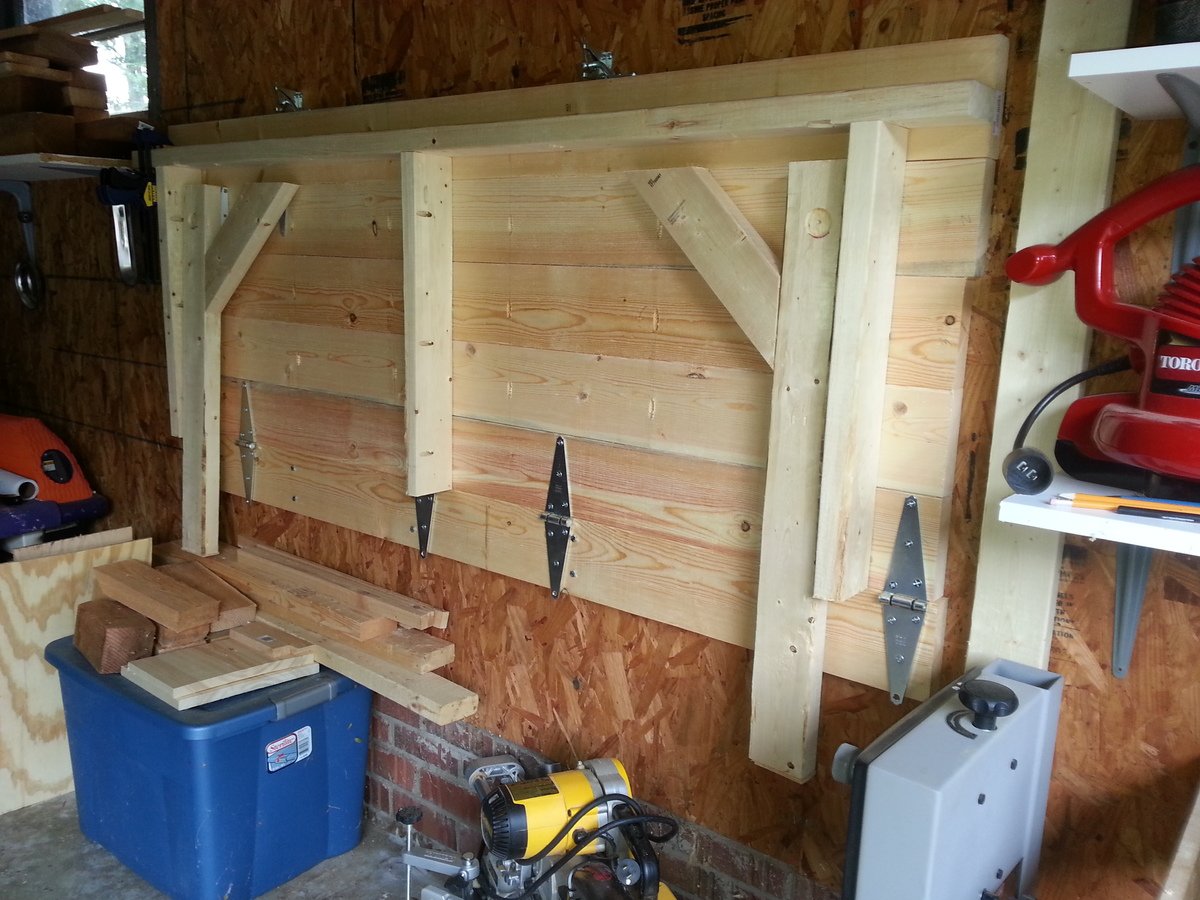
I wanted a good flat and level workspace to continue projects. This workbench folds up to the wall in my garage so I can still park when not working on anything. I made it pretty stout with 2x4s and 2x6s since it would need to support fairly large pieces of furniture without deflecting. It is very heavy as a result though (good core workout folding it up and down :) )

I used two folding shelf brackets on the legs to keep them from accidentally being kicked out from under the table while it's out. (http://www.woodcraft.com/Product/2001690/2615/Folding-Shelf-Bracket-8-P…)

I used four heavy strap hinges to connect the table to the 2x6 (which was lag screwed into studs). Two gate latches were used to secure the edge of the table to studs when the table is folded up.

I cut the legs approximately, and then when the table was hung I cut and shimmed them to get the table level on the uneven surface of the garage floor.

Estimated Cost
Total = $81.10 (Lumber = $33.40, Hardware = 47.70)
Estimated Time Investment
Day Project (6-9 Hours)
Finish Used
none
Recommended Skill Level
Beginner

Comments

HD

Fri, 08/15/2014 - 16:32

I really like this fold up bench design. It may be heavy, but I bet it's incredibly sturdy. I also have a really compact garage. I have pegboard on my walls, so a bench that folds UP doesn't work for me when I want to get a tool.

My own bench is more light duty. It's a sheet of 2x4' plywood attached to a frame made from dimensional lumber. It folds down so I have access to the tools at all times. It's based on a design on the Family Handyman website, although you can find the same design all over the web.

bschultz26

Thu, 02/05/2015 - 18:50

Great idea! I need to build this. Can I please get a picture of it folded up, so I can see the hinges on the legs and the latches holding it while folded?

webklob

Fri, 11/06/2020 - 13:55

Can you show another picture of the hinges you used on the legs that can fold out when lowered?

Thanks! Kate

Garage Storage

Submitted by wabilinski on Mon, 09/28/2015 - 10:48

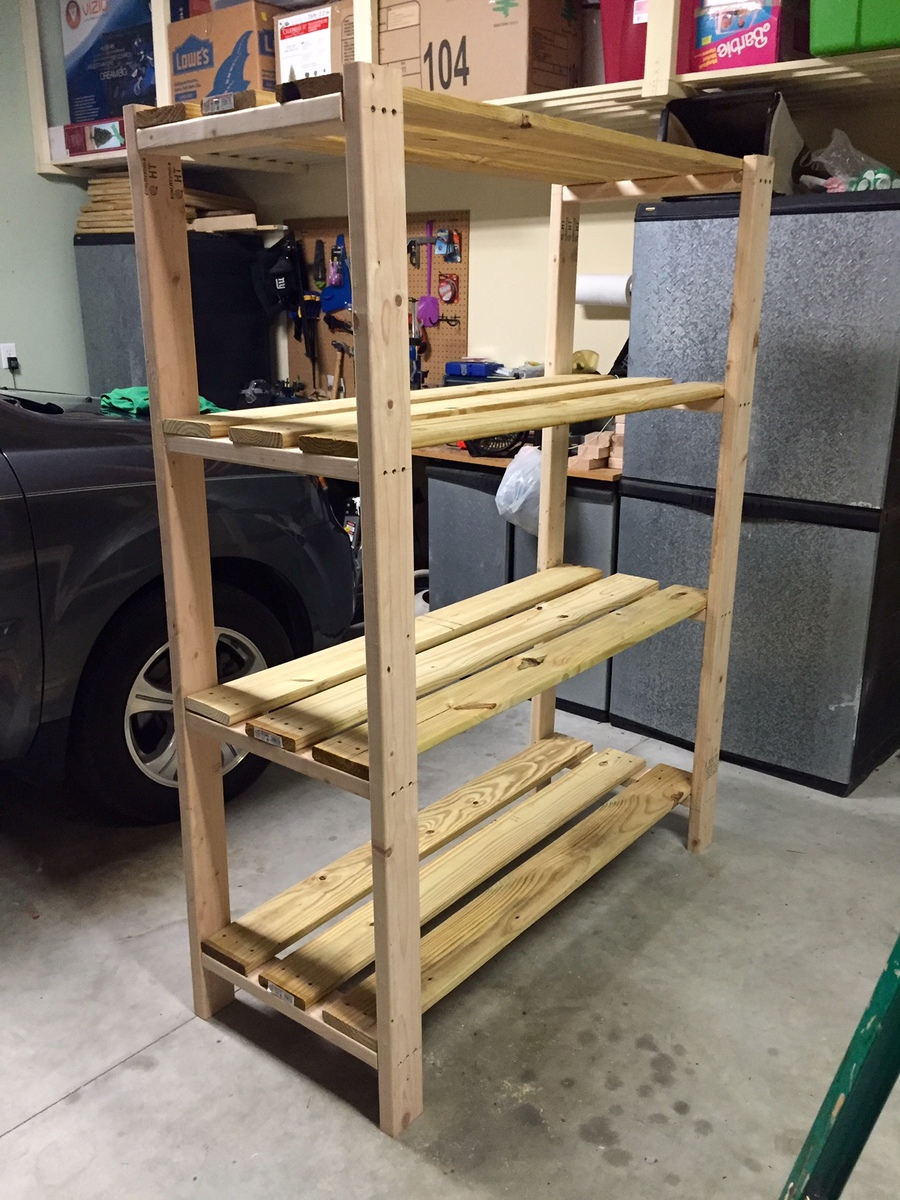
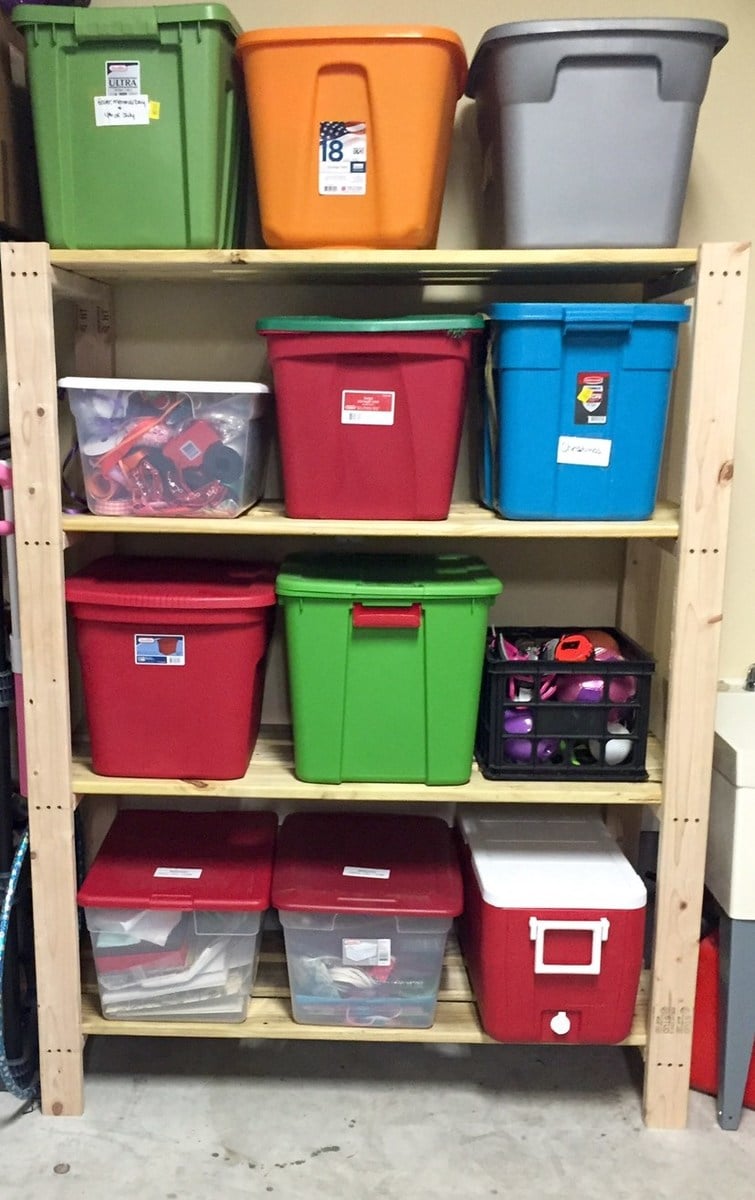
My wife was needing some extra storage in the garage for seasonal decor totes.

So, of course, I first go to Ana White's website. Voila, I found the perfect plans for the space I had to work with.

- The final product ended up being 72"Hx54"Lx21"W

- I used a counter sink bit to pre-drill screw holes so the heads would be slightly below the surface of the boards. This way the totes would not get caught on or damaged by the screws.

Estimated Cost
$90 for wood and screws
Estimated Time Investment
Day Project (6-9 Hours)
Finish Used
N/A - left unfinished
Recommended Skill Level
Beginner

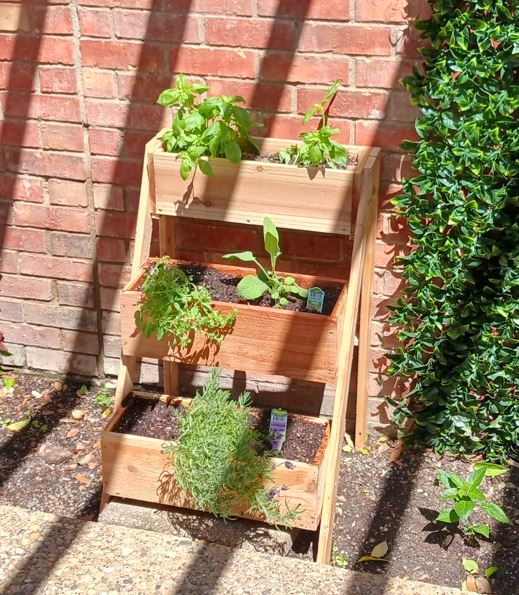
Cedar 3 tier planter

Submitted by Anonymous (not verified) on Sun, 04/30/2023 - 09:33

I made the boxes a little wider than the plans called for but still came out great. I'm very happy. Thanks Ana for the inspiration.

Comments

Back