Can Shelf Organizer
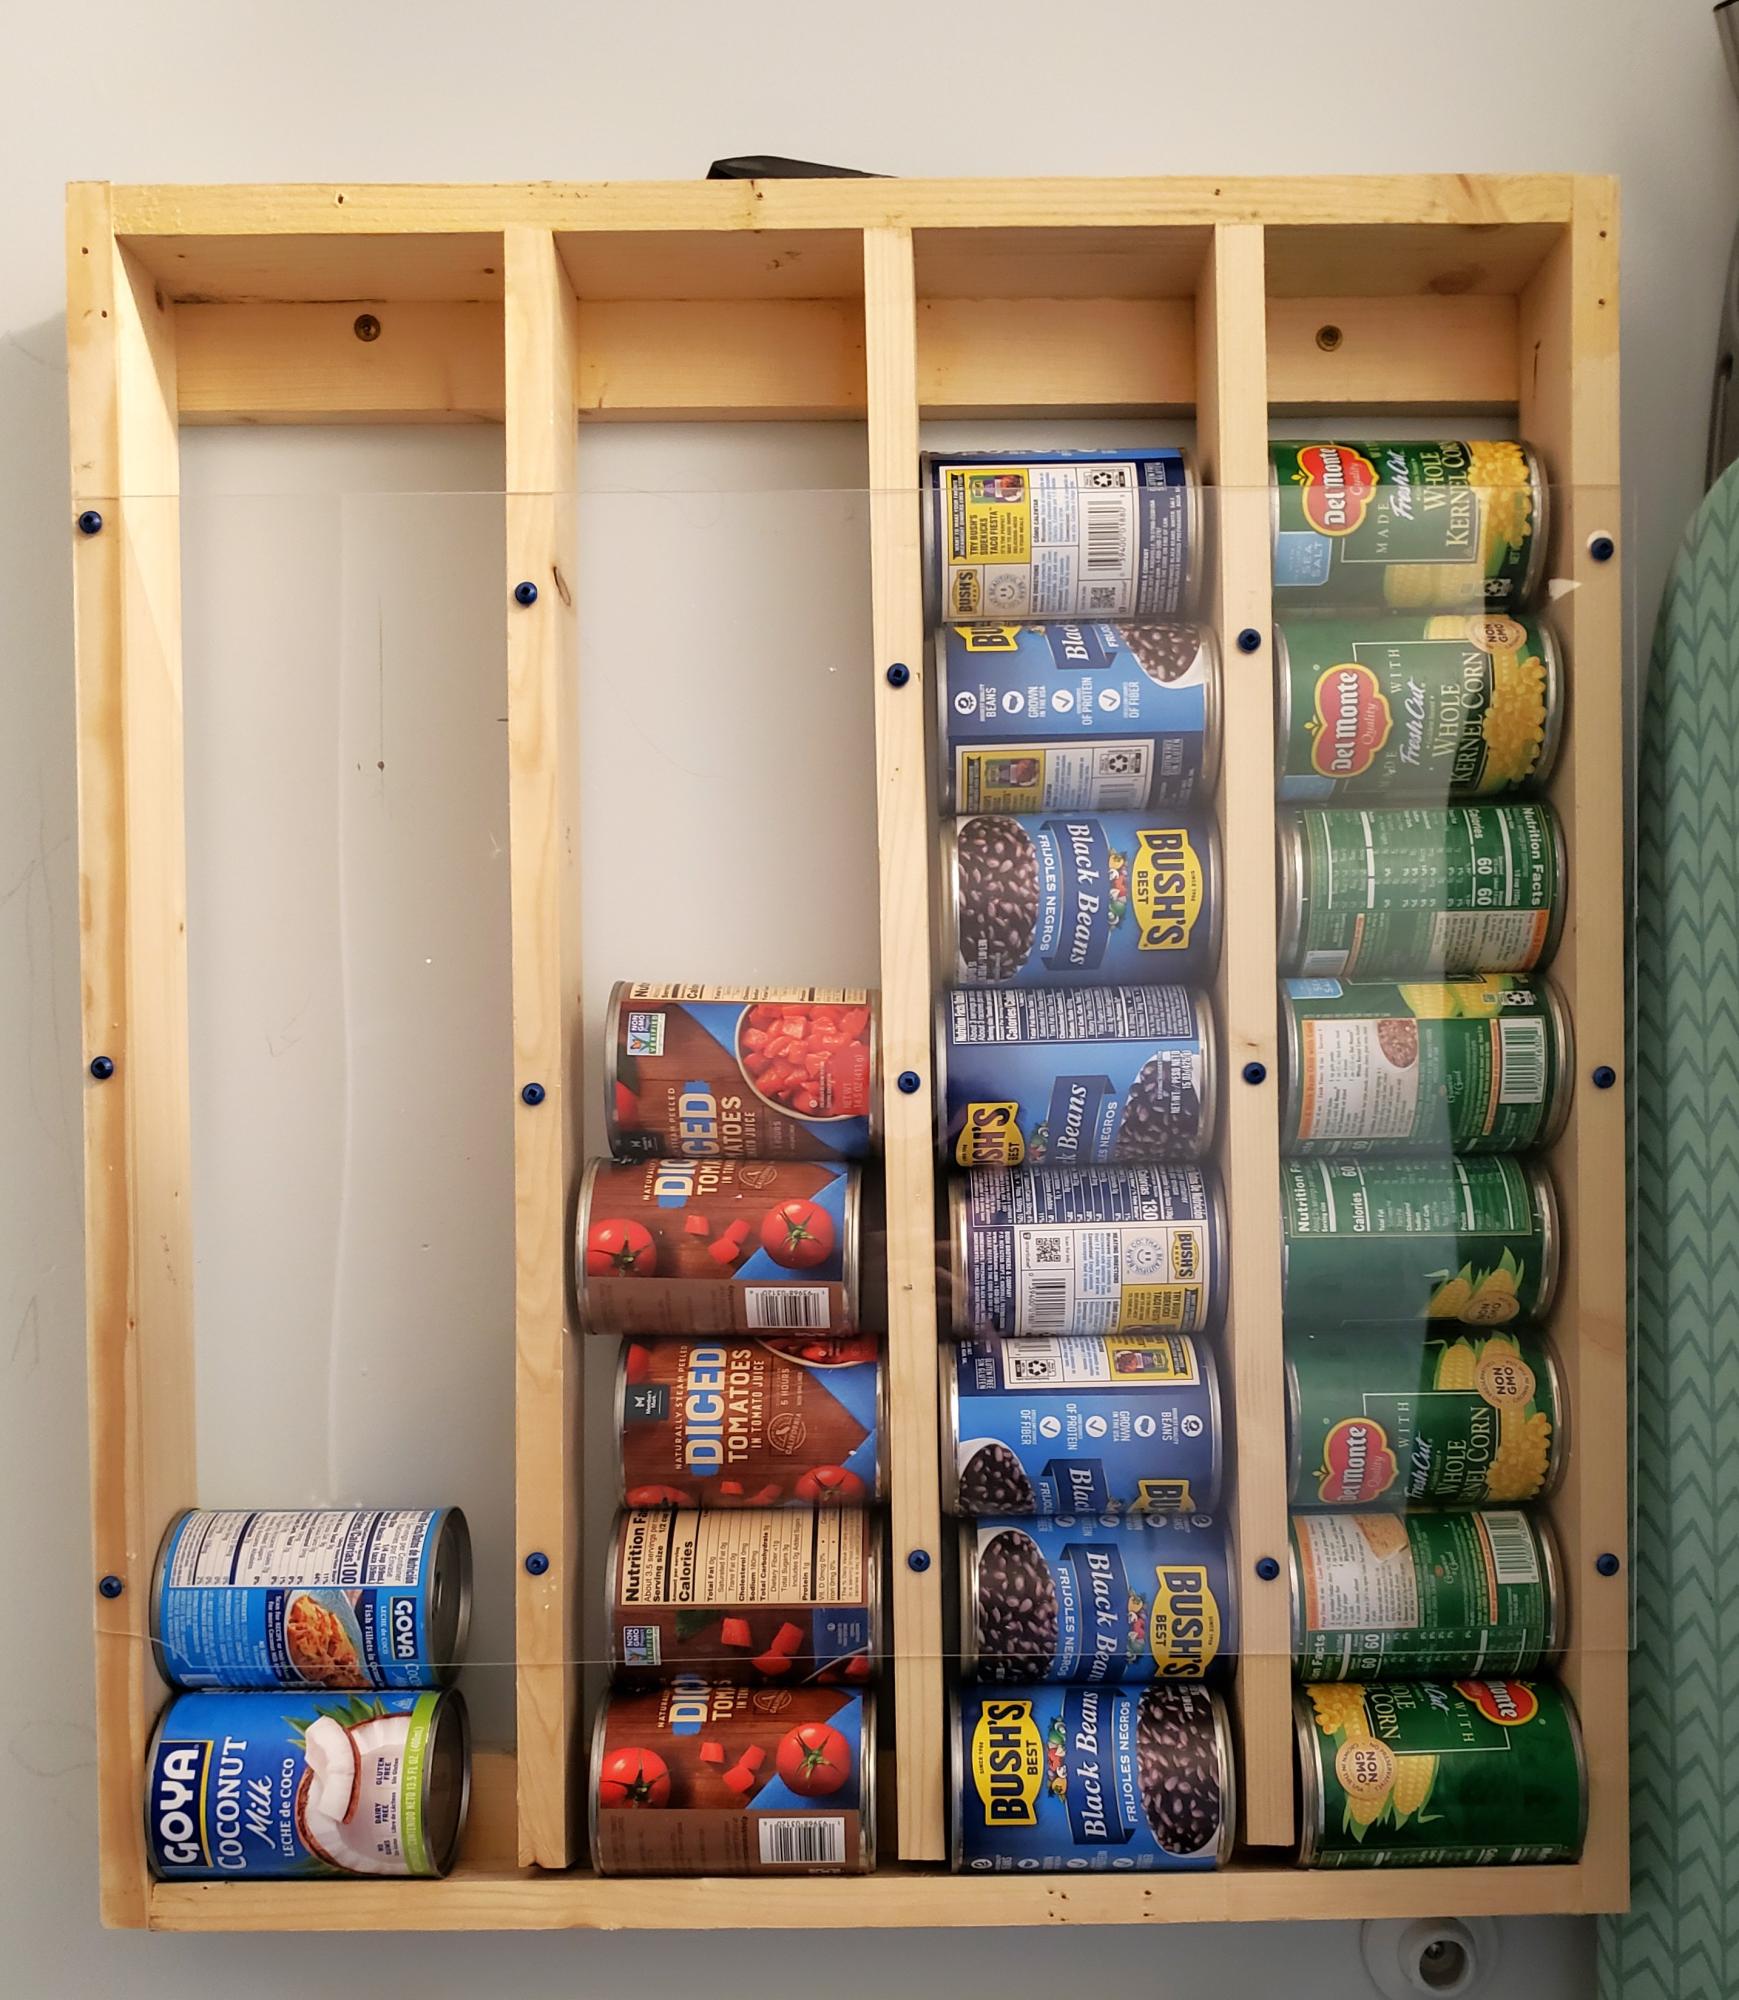
We didn't paint it, but between two newbies, it only took an afternoon. It has freed up a ton of space in the cabinets!
Hattie
Built from Plan(s)
We didn't paint it, but between two newbies, it only took an afternoon. It has freed up a ton of space in the cabinets!
Hattie
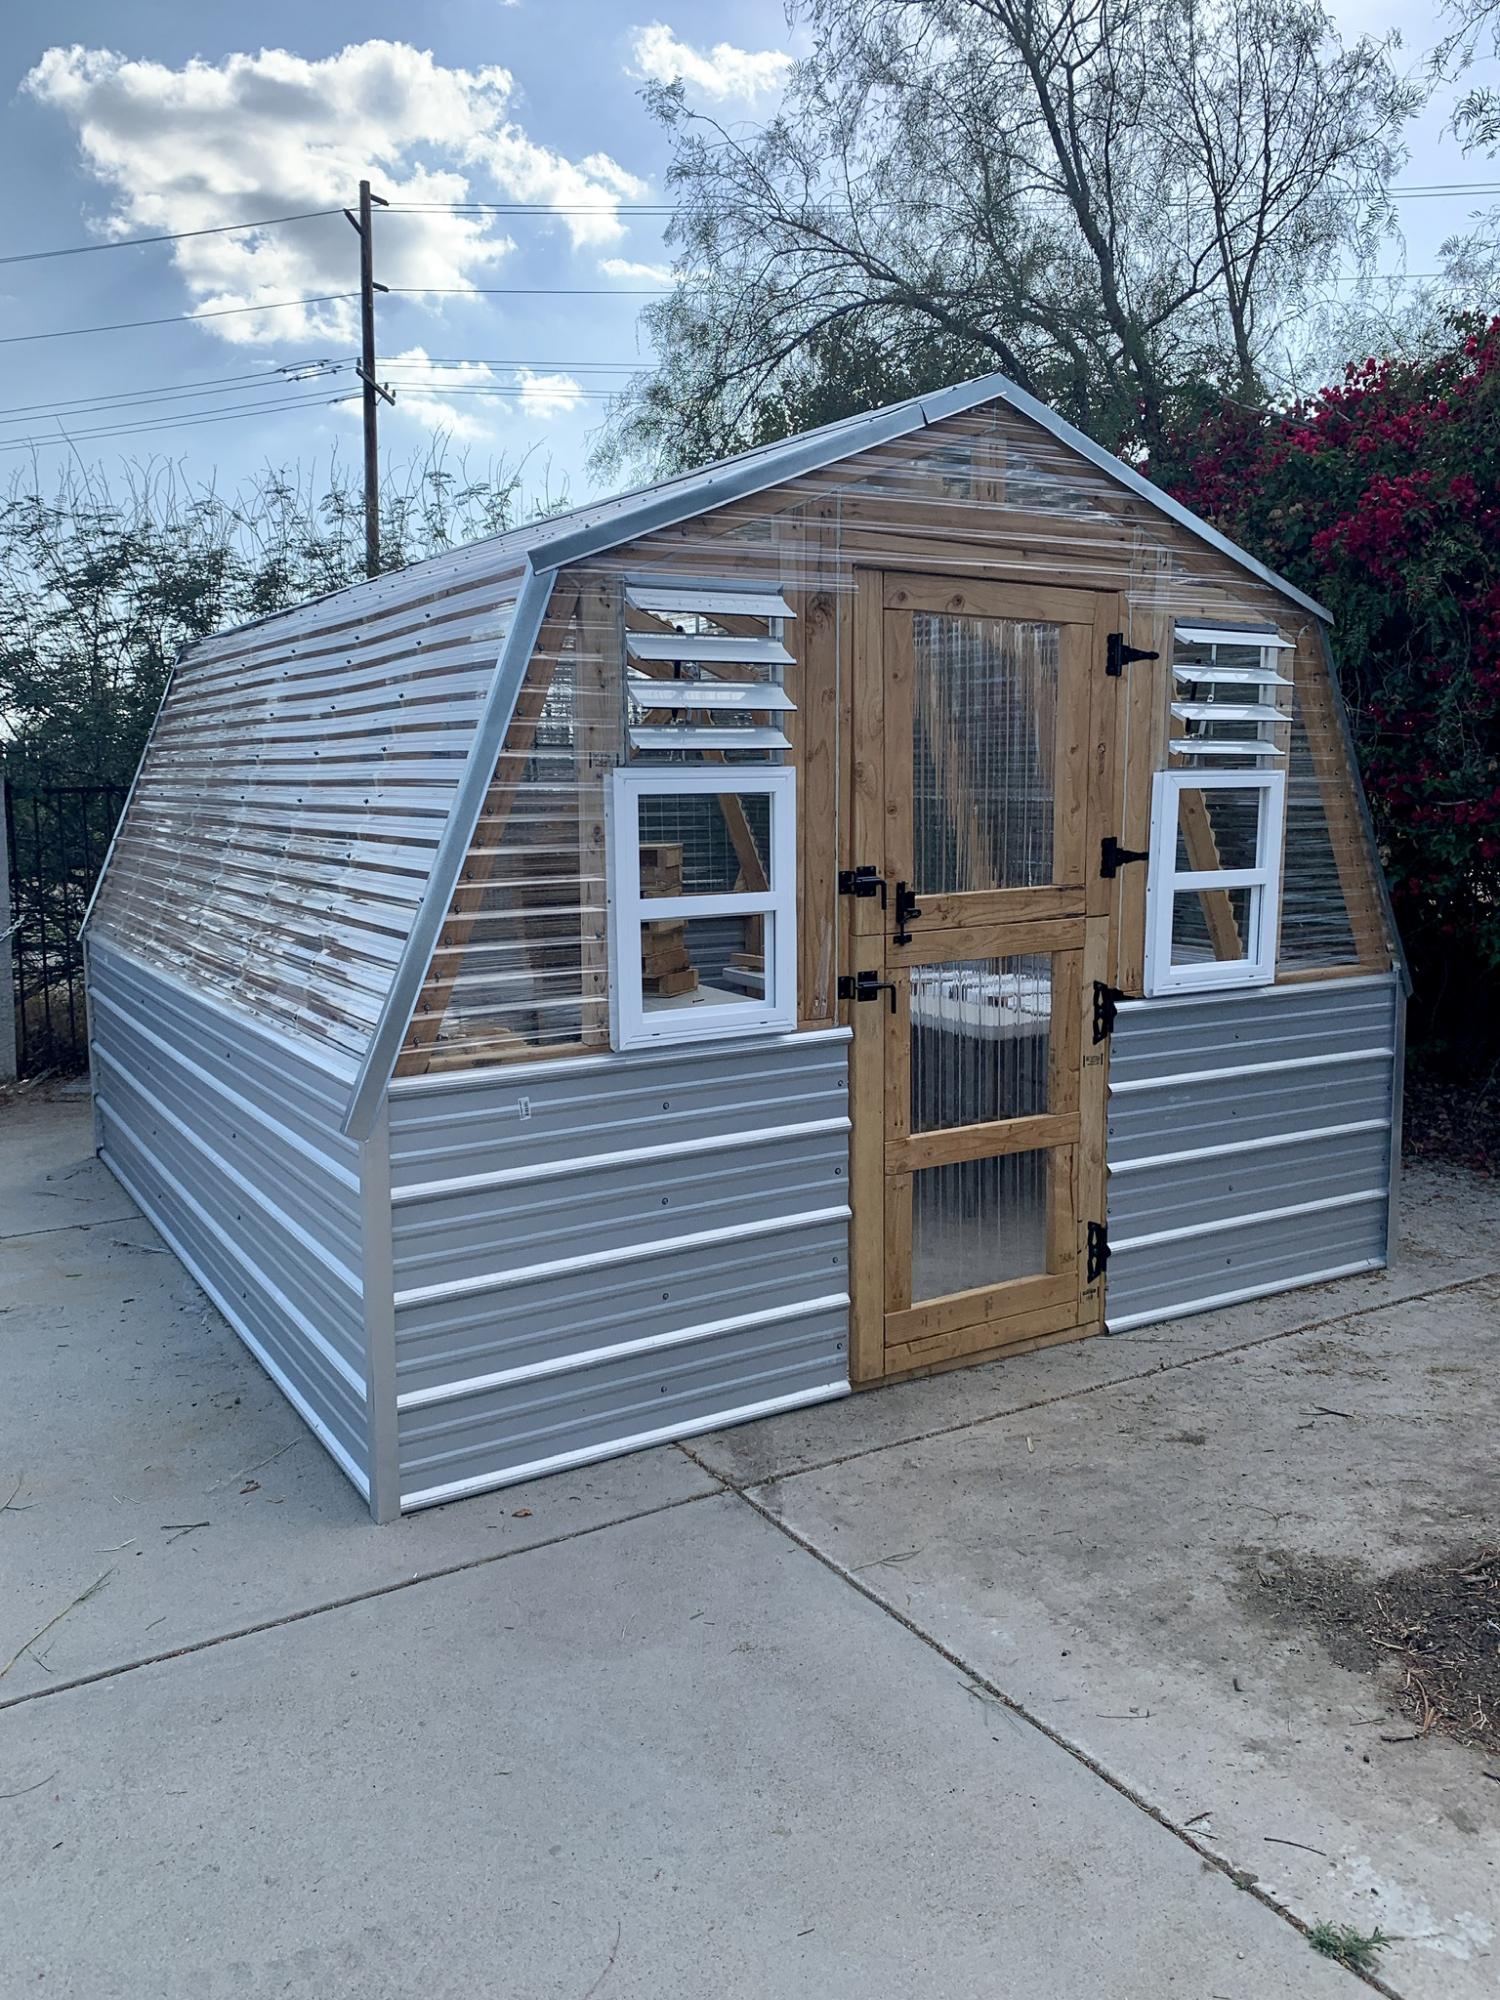
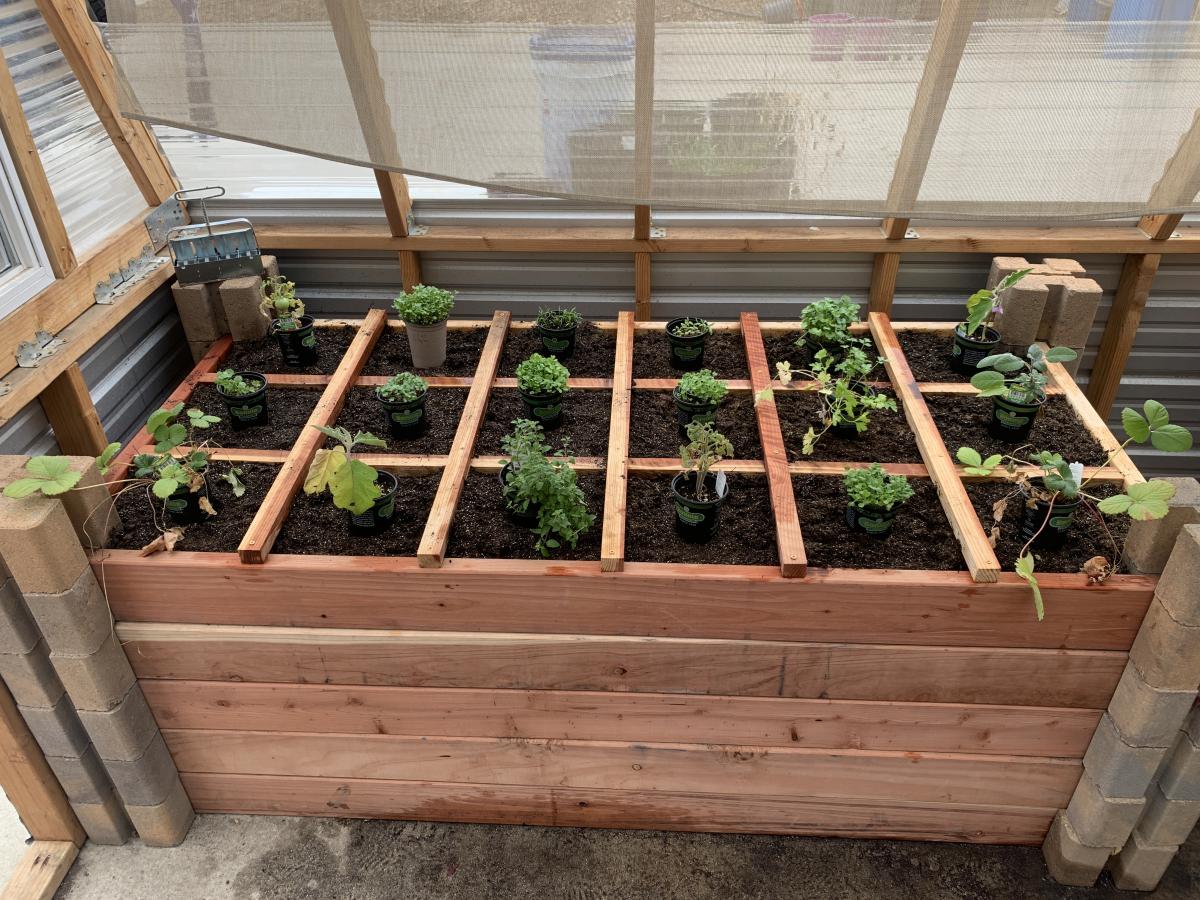
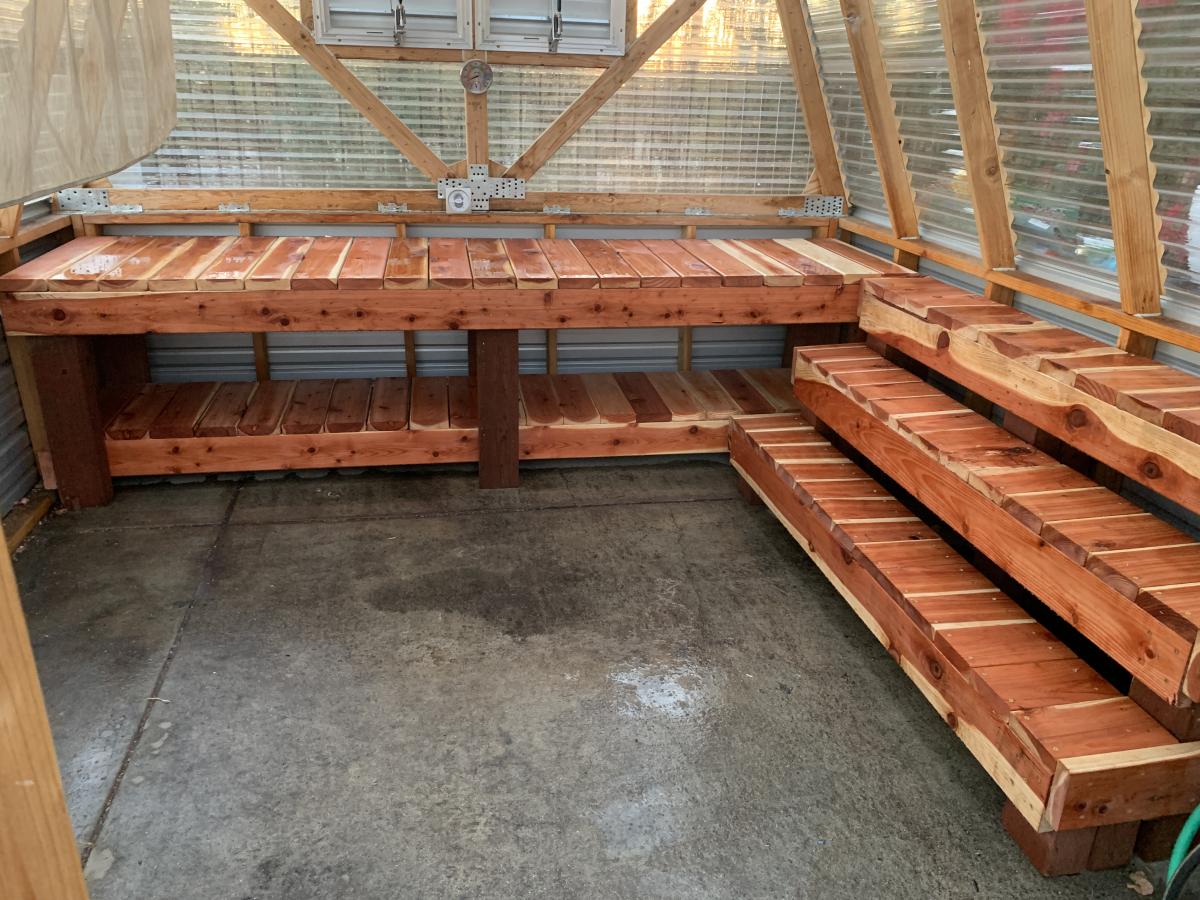
We made some modifications to the greenhouse to include a bench with three levels, a working bench and a square foot garden. We also put it on concrete to keep all the weeds out from the bottom as well.
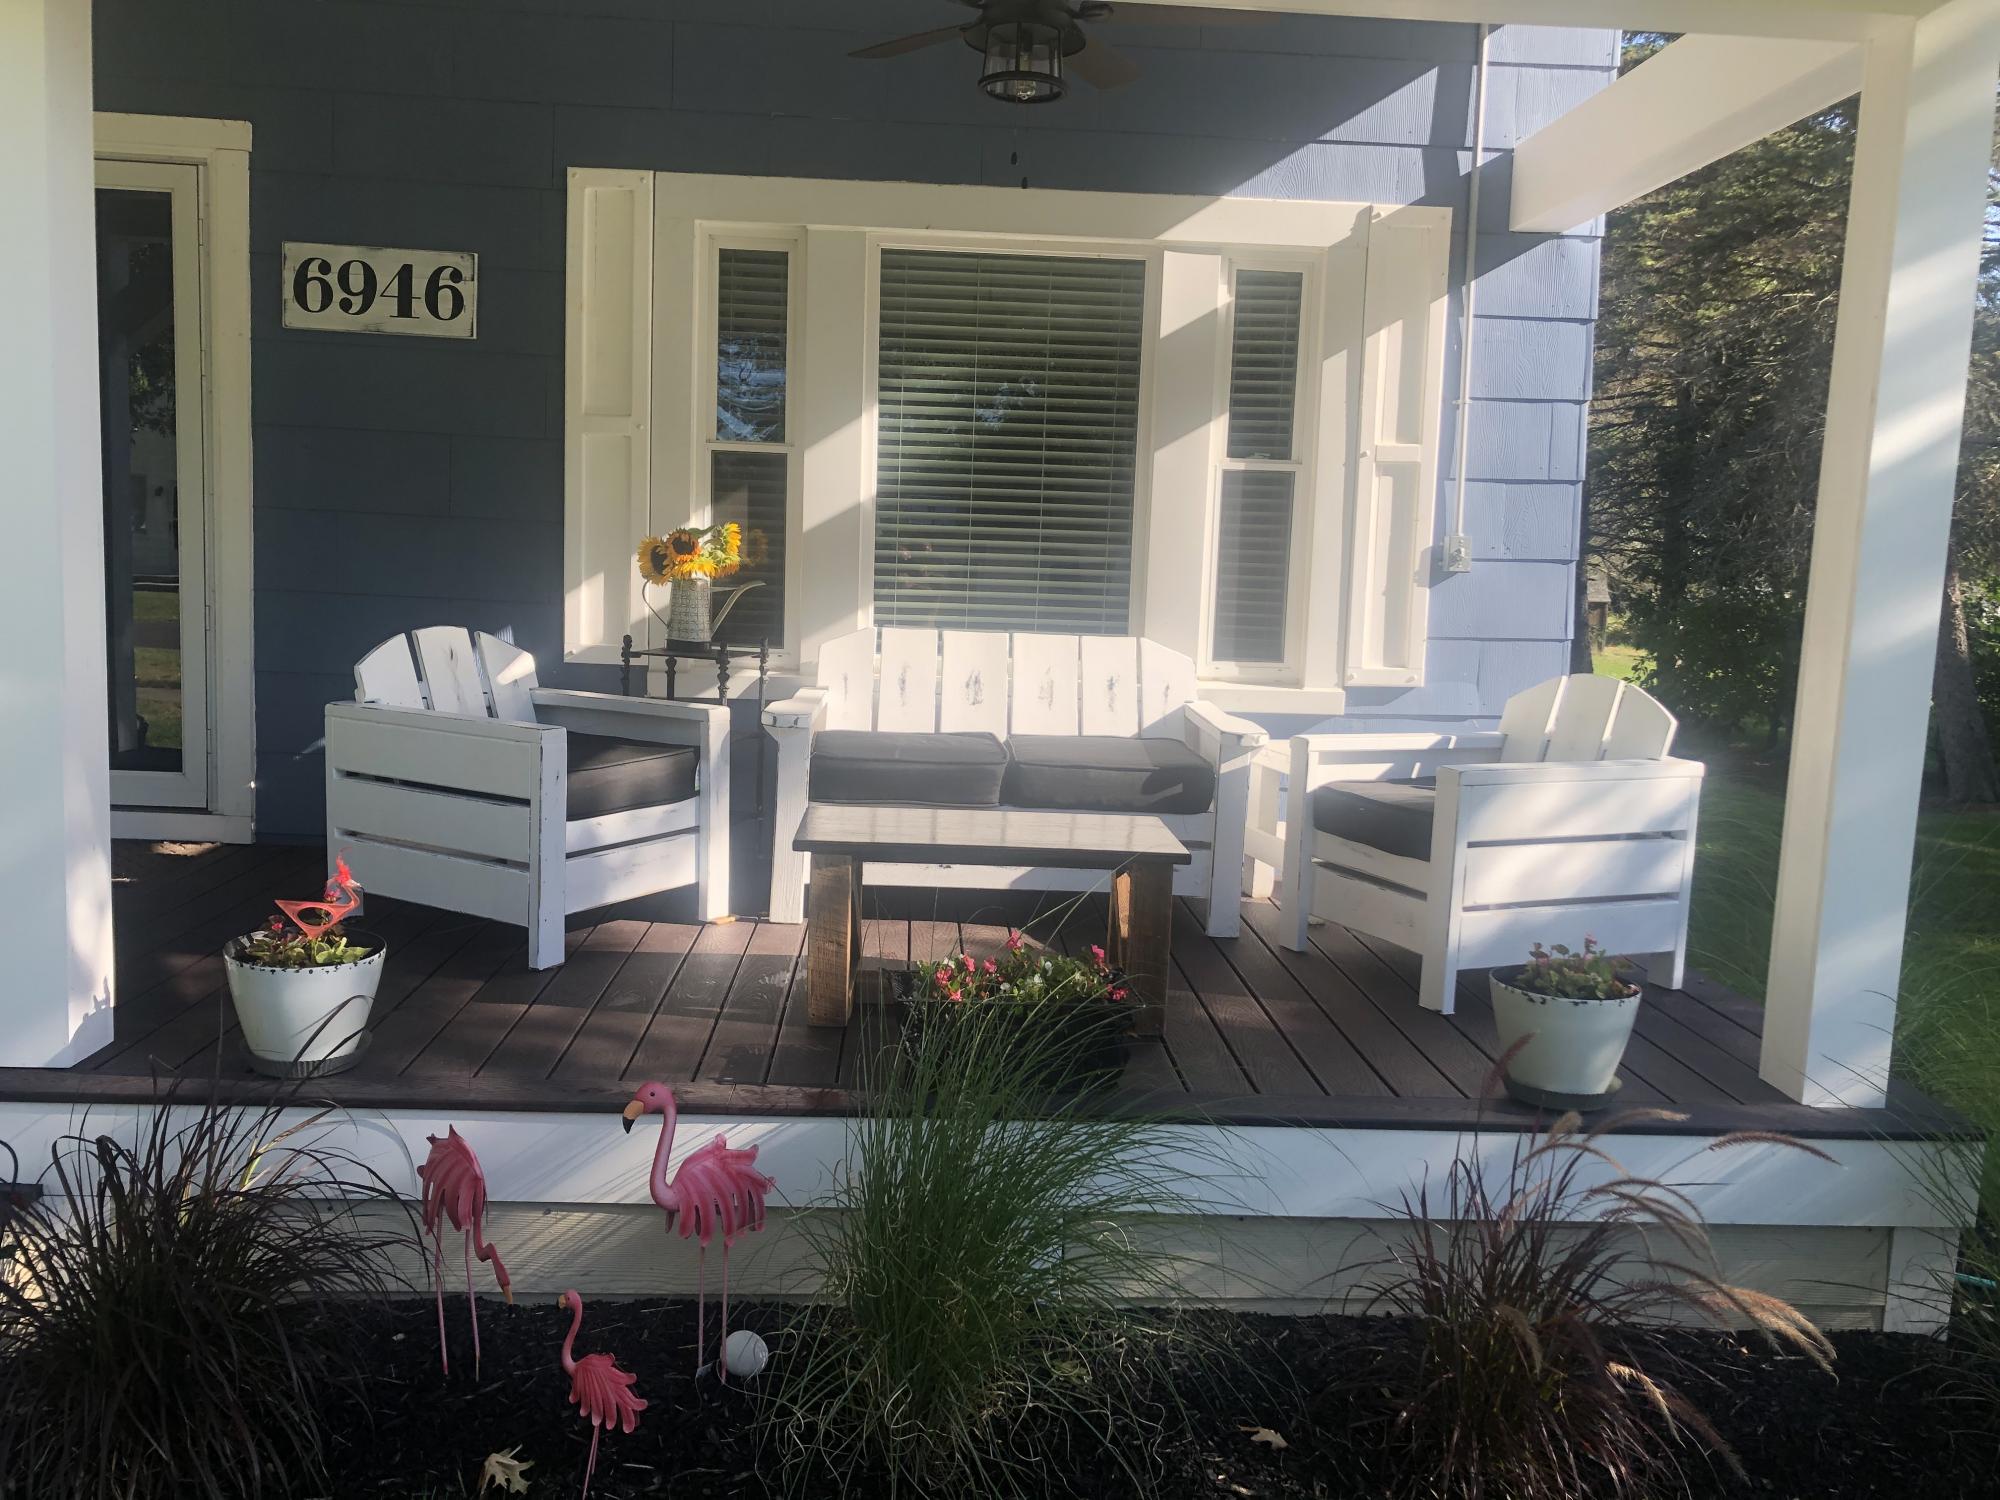
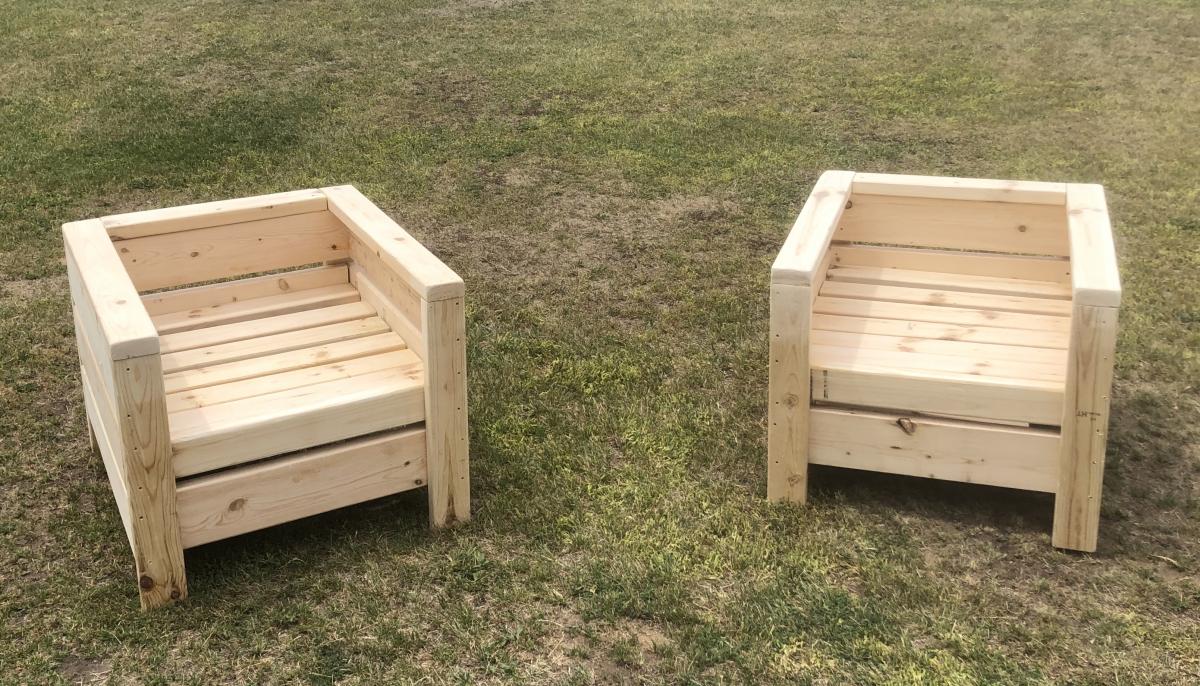
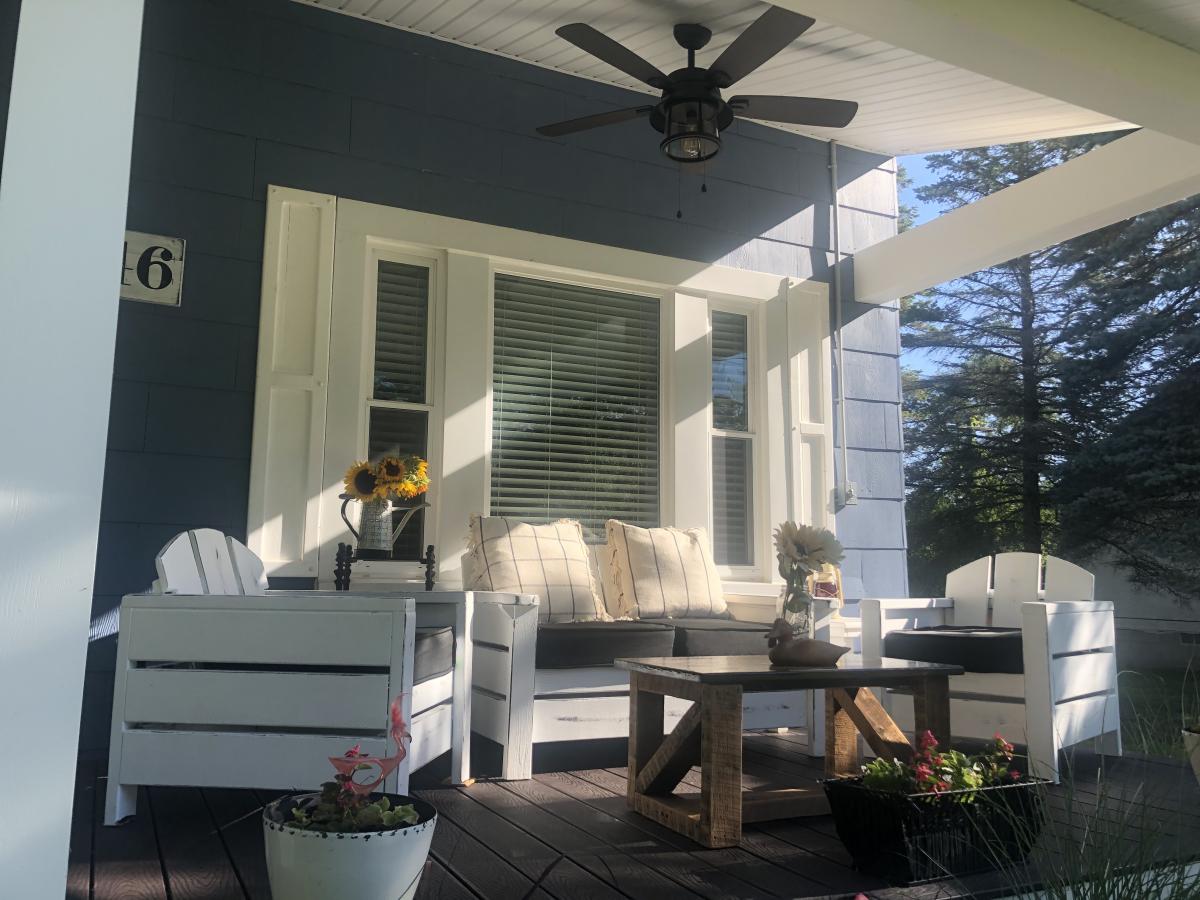
The Anna White patio set (2 chairs & love seat combo).
I added seat backs for comfort, painted them white and distressed the edges…
They are perfect for lake front-windy areas… They are heavy duty and will never blow away!
Tue, 10/05/2021 - 09:52
Love the curved backs, looks like a wonderful relaxing spot to be! Thank you for sharing:)
Thu, 02/29/2024 - 07:29
I absolutely love the curved backs! I live in a semi-windy area and really like this look and the idea of more durability. Did you just add three vertical 1x6's and use a jigsaw to round them? Please advise as I would love to use this technique.
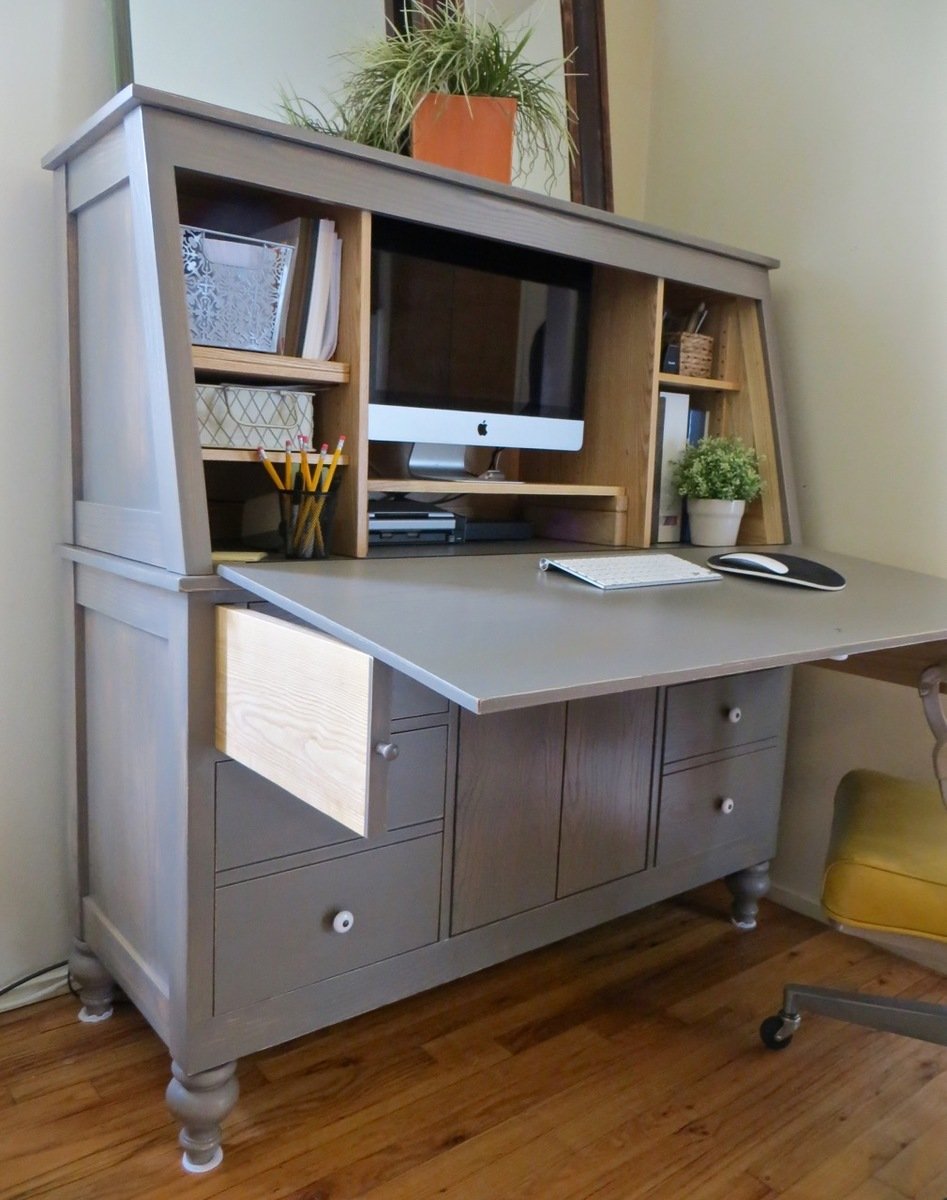
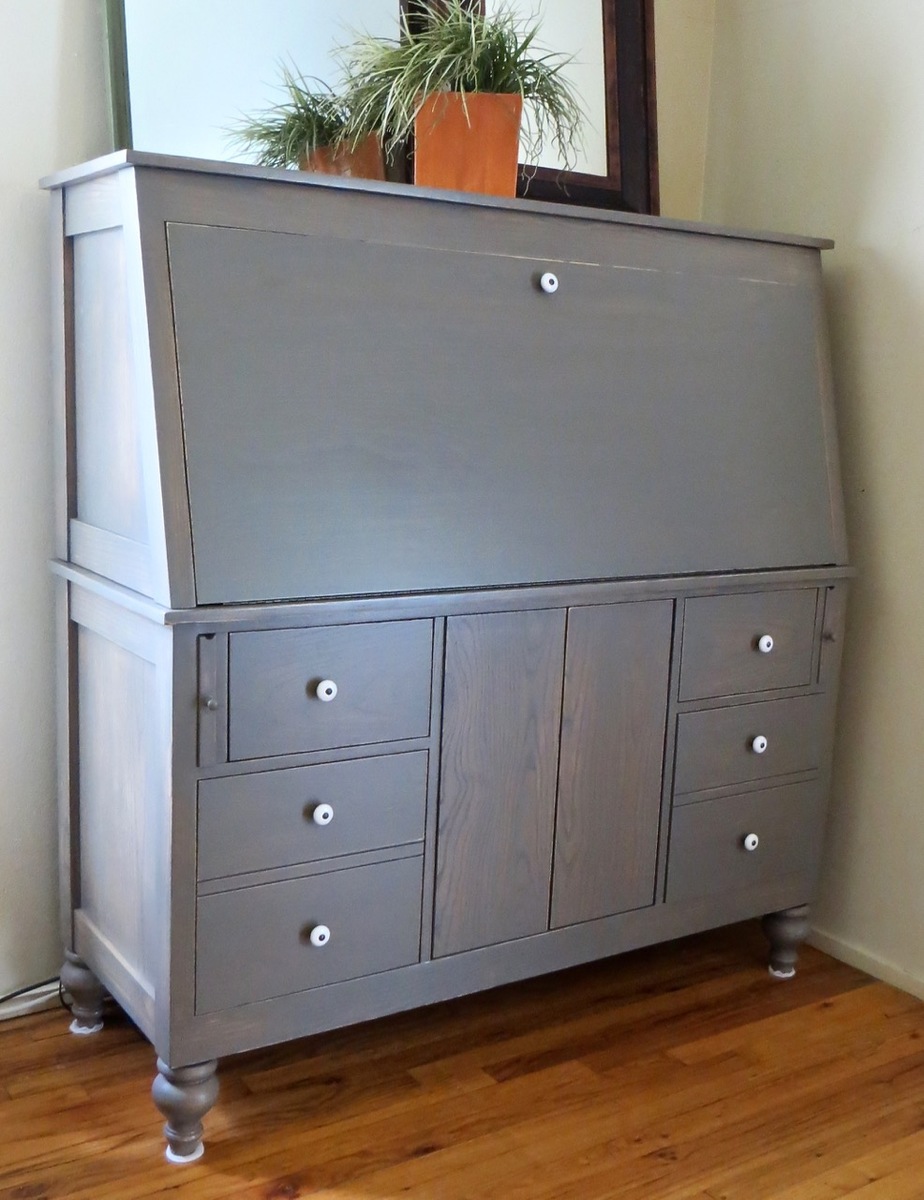
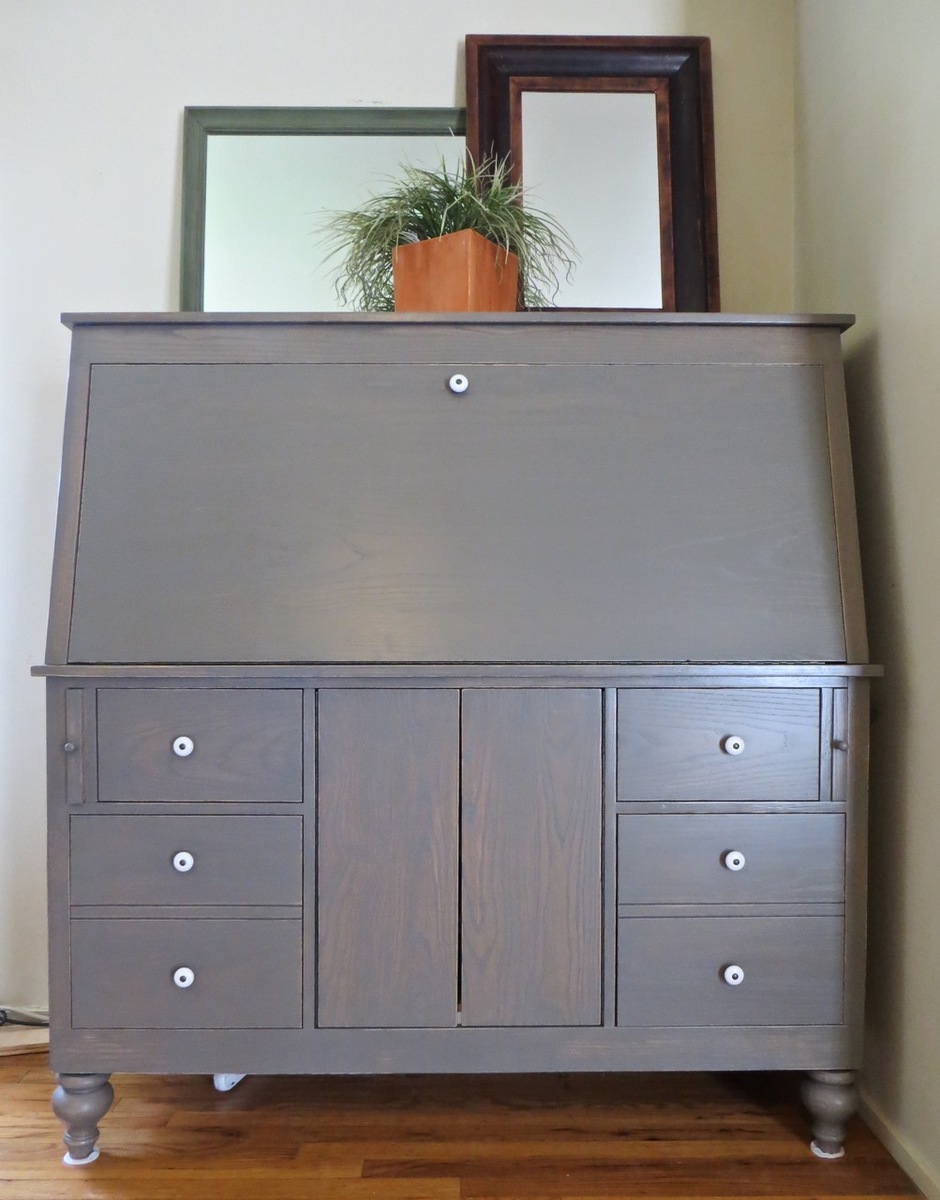
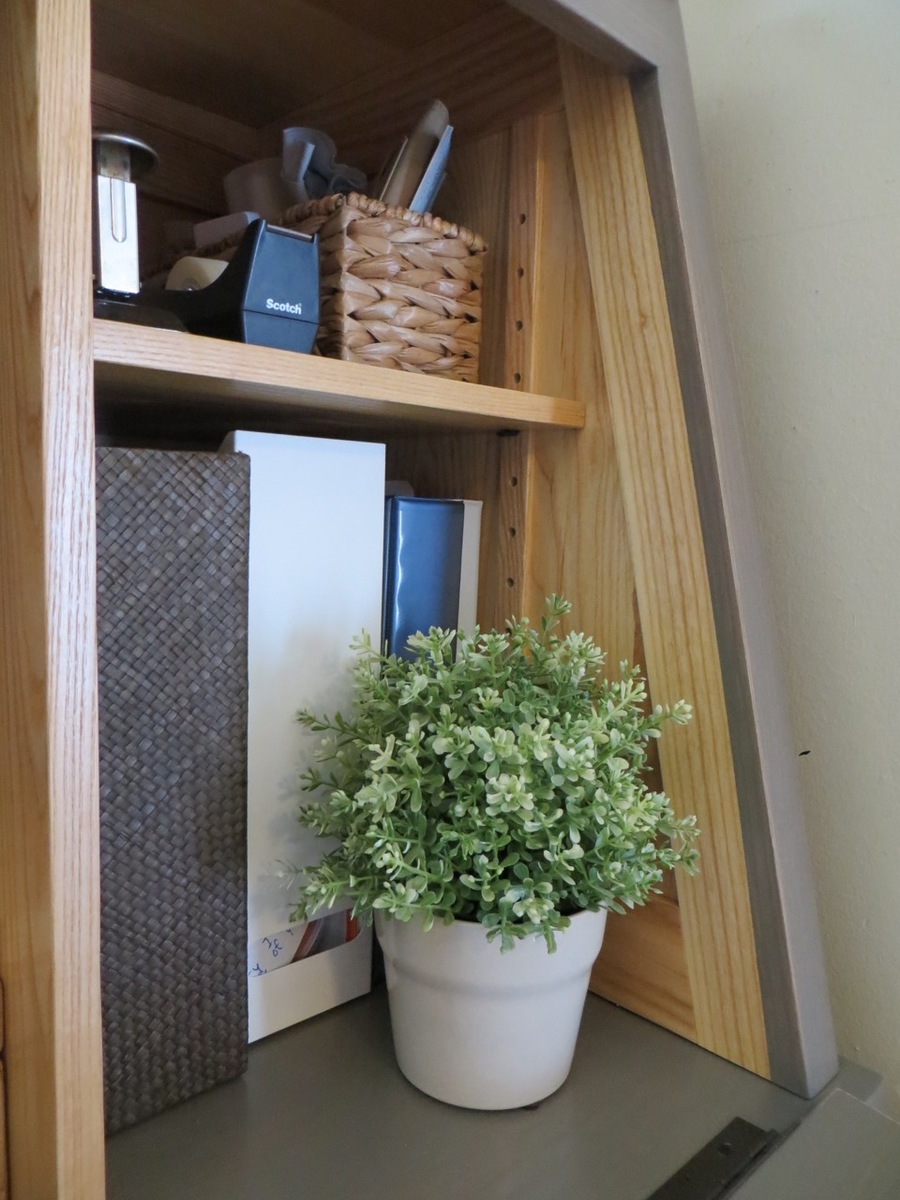
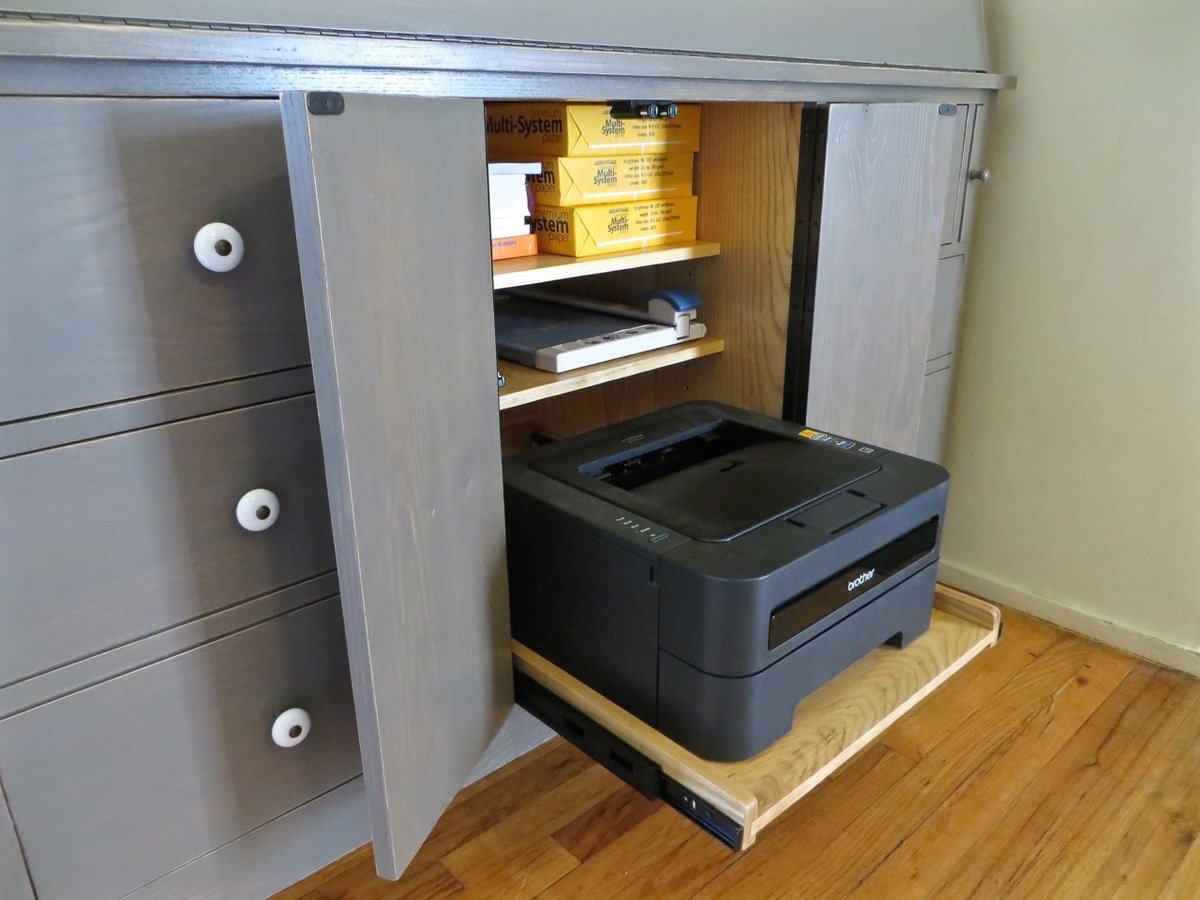
I designed this desk from another desk I built. With this one, I wanted the overall foot-print smaller but still something that was able to organize all our office stuff and be able to close everything to keep it clutter-free. We have a small apartment, and although this desk is about the size of an up-right piano, it works perfectly into our living space!
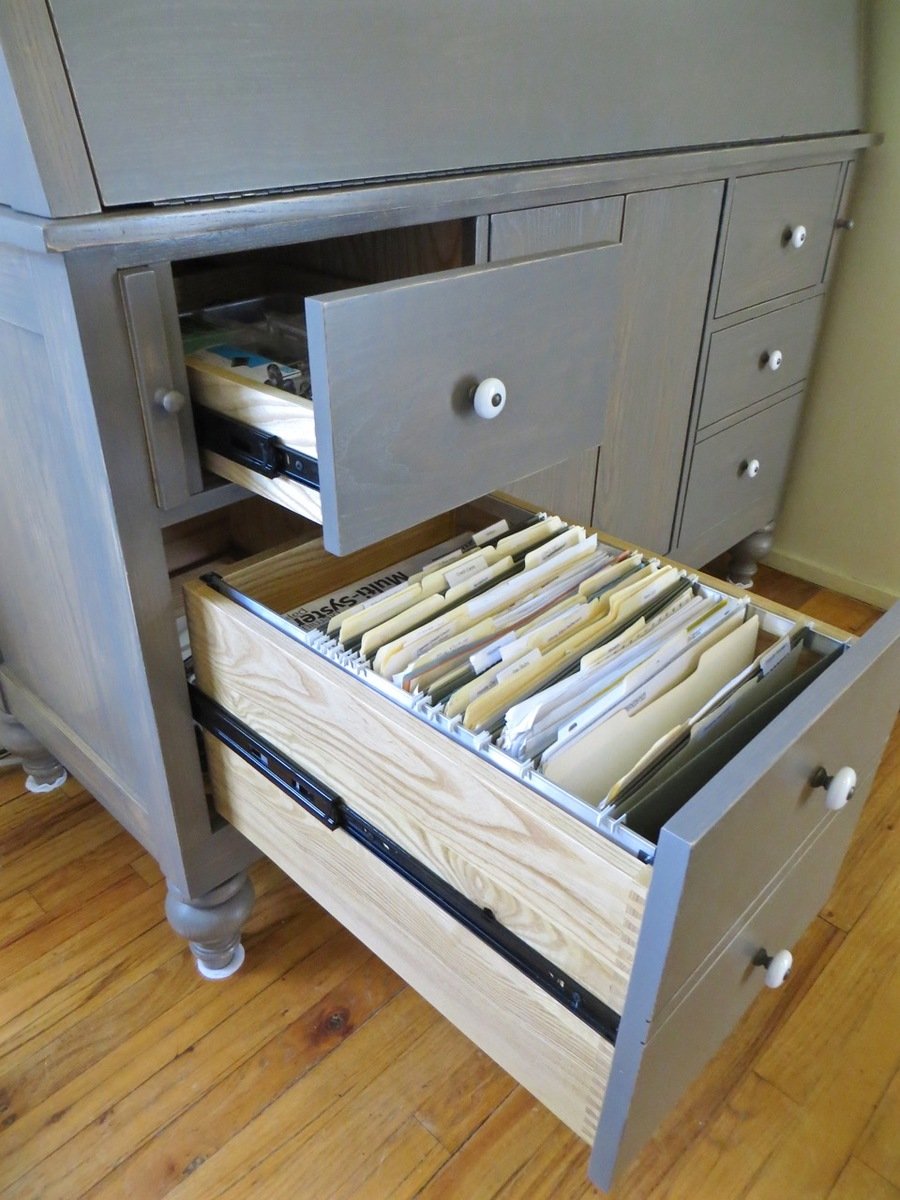
I made it out of raw hardwood (Ash) and because I knew just the wood alone would make this desk heavy/bulky to move I made the top hutch removable. It's held in place by wood pegs (dominos). All the shelves are adjustable and the drawers are full-extension (something I've never had - wahoo)! The drop-down door is help up by 2 pull-out boards on each side (my first desk had chains). I spend a lot of money on this desk because I knew it was a chance in a lifetime to make and wanted it to be perfect and something that would last generations.
I built the main carcass off of plans/measurements I designed, but then all the insides, drawers, shelves, doors, etc where made as I built (because just a millimeter difference in building changes everything)!
If you want more pictures/descriptions of the building process I wrote about it in a 4-part series on my blog.
Wed, 09/23/2015 - 11:22
is there plans available for this project?

In reply to is there plans available for this project? by Nsmjc
Tue, 09/27/2016 - 12:20
Hi there! I'm sorry but I don't have plans put together on it! I designed it in Google Sketchup and have some 'screen shots' I could send you for basic measurements if interested. You can e-mail me at [email protected]
Mon, 06/15/2020 - 09:08
Hi. Do you happen to still have those 'screen shots' or any other info/dimensions from this build? LOVE LOVE LOVE it!!

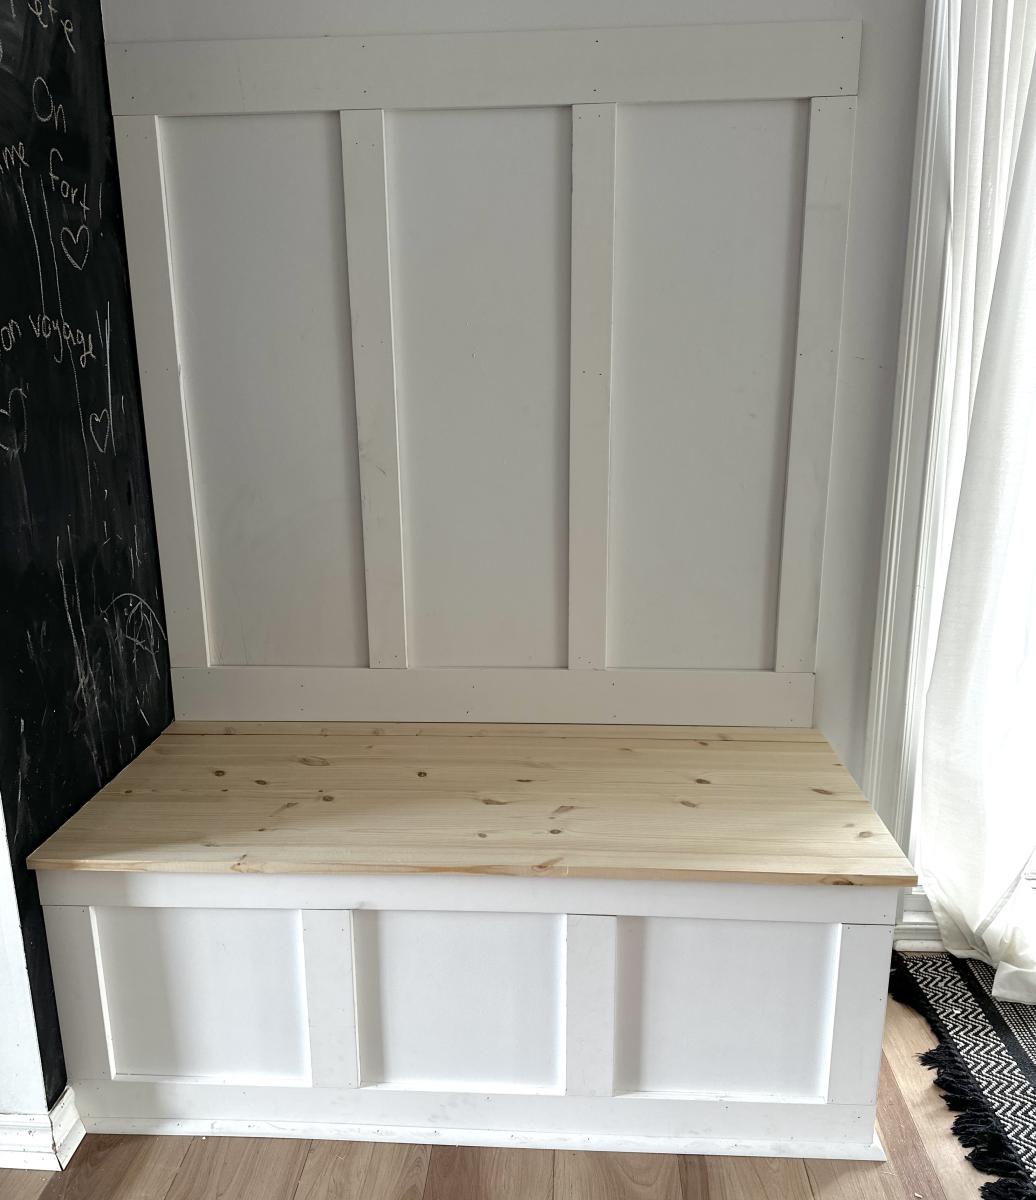
A nice bench with storage!
Built by Sylvie
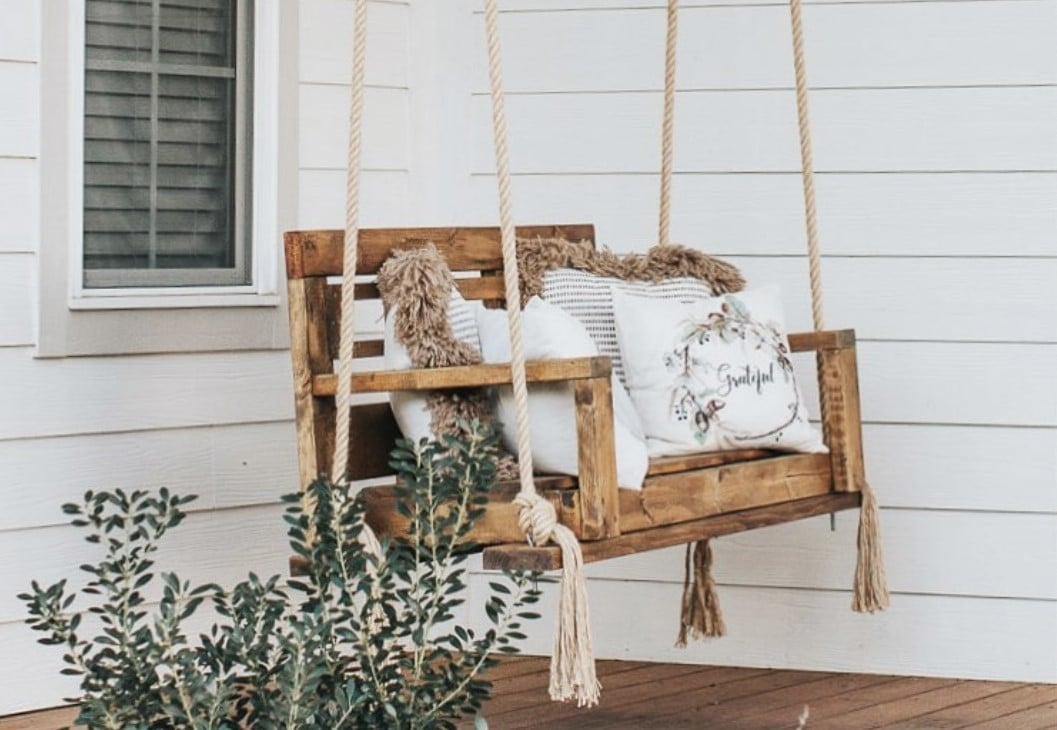
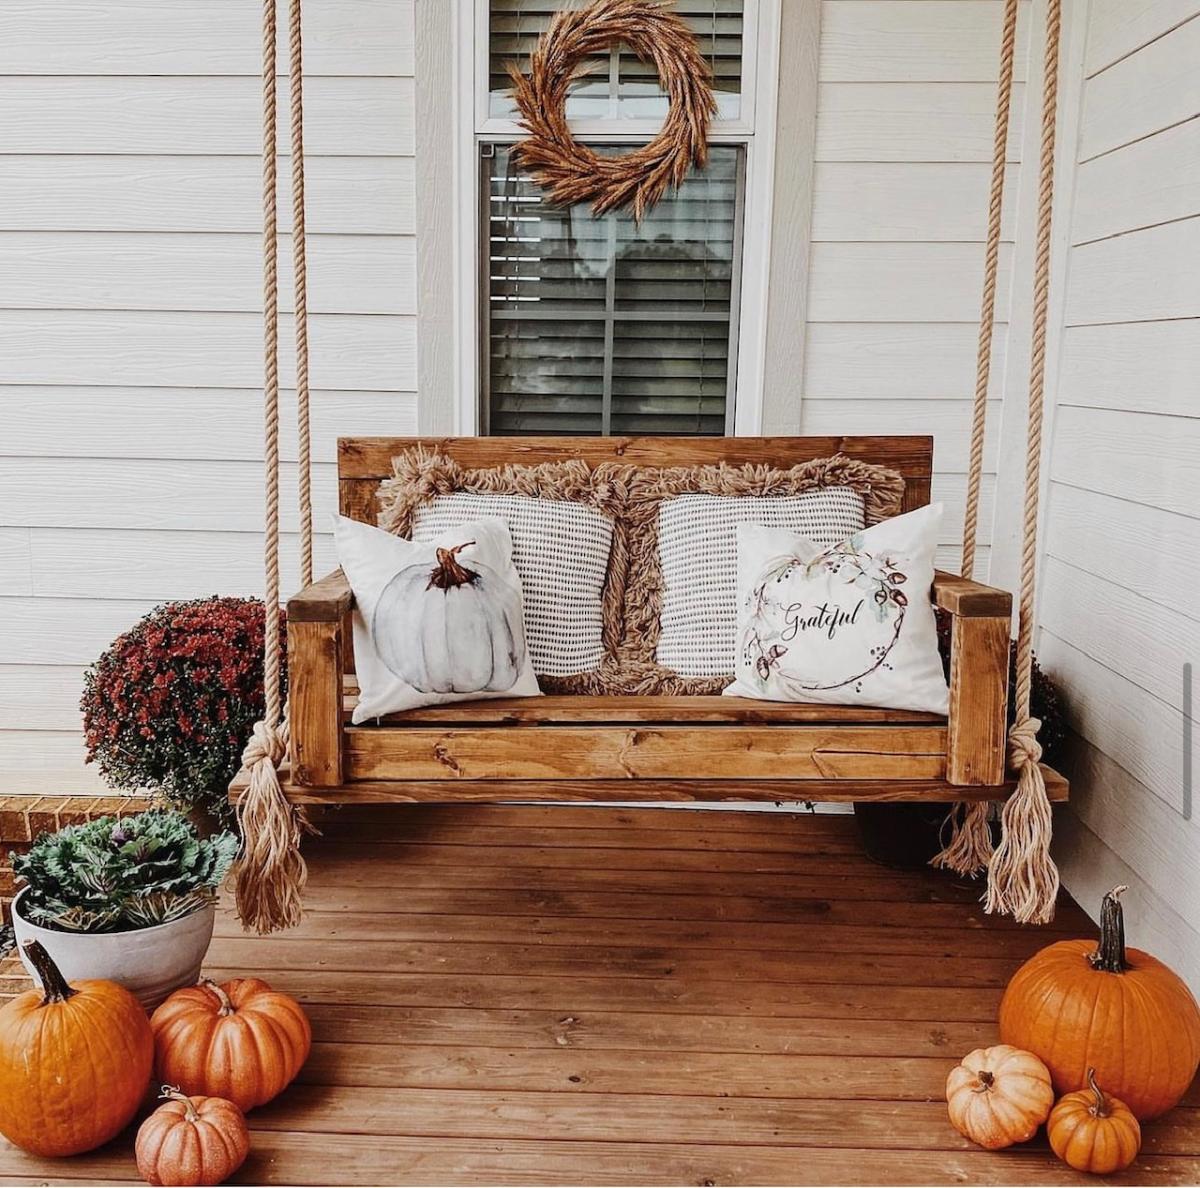
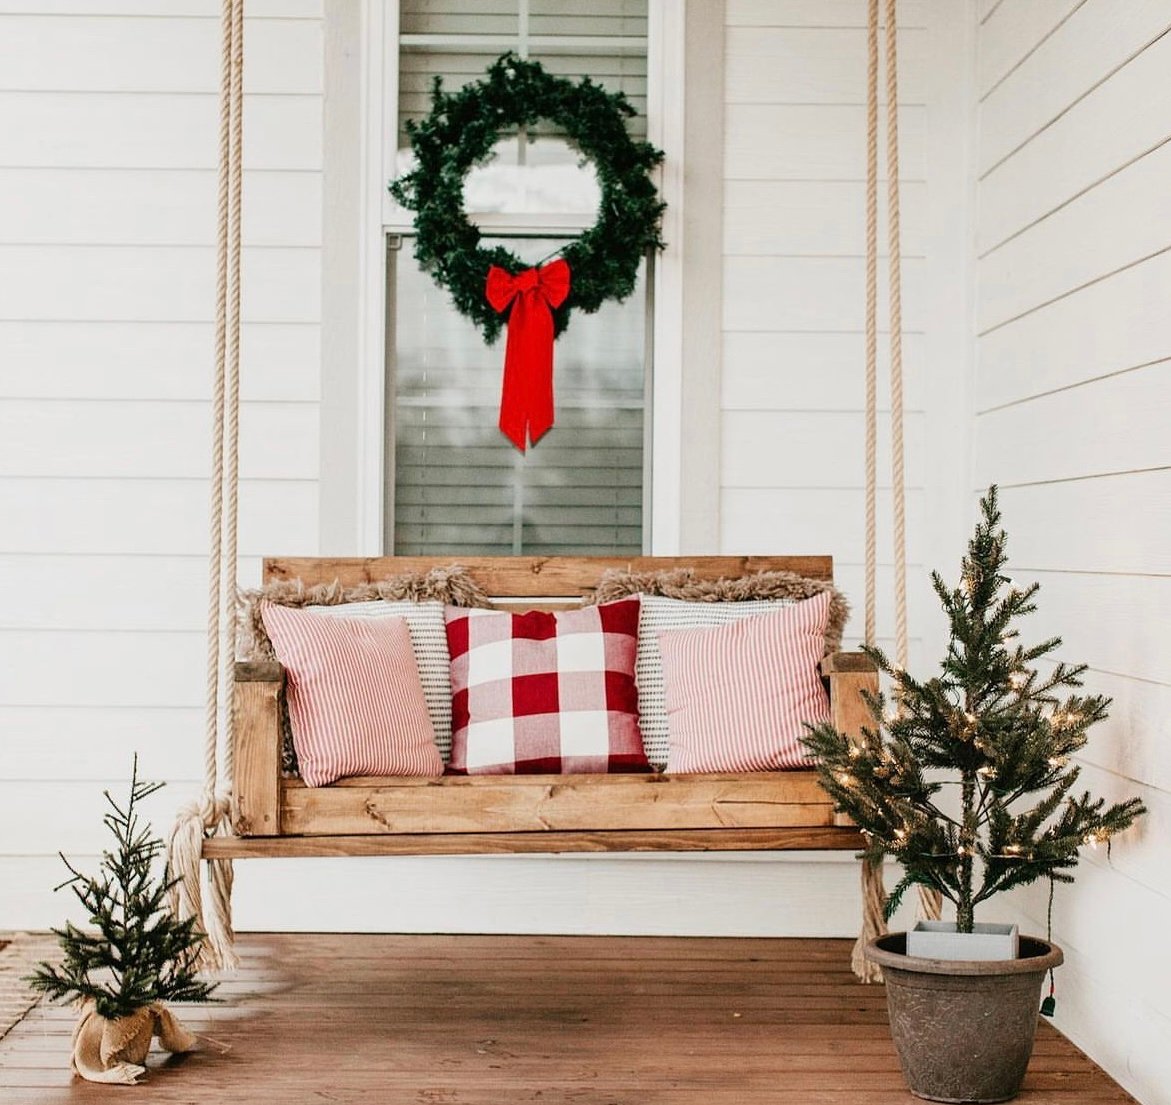
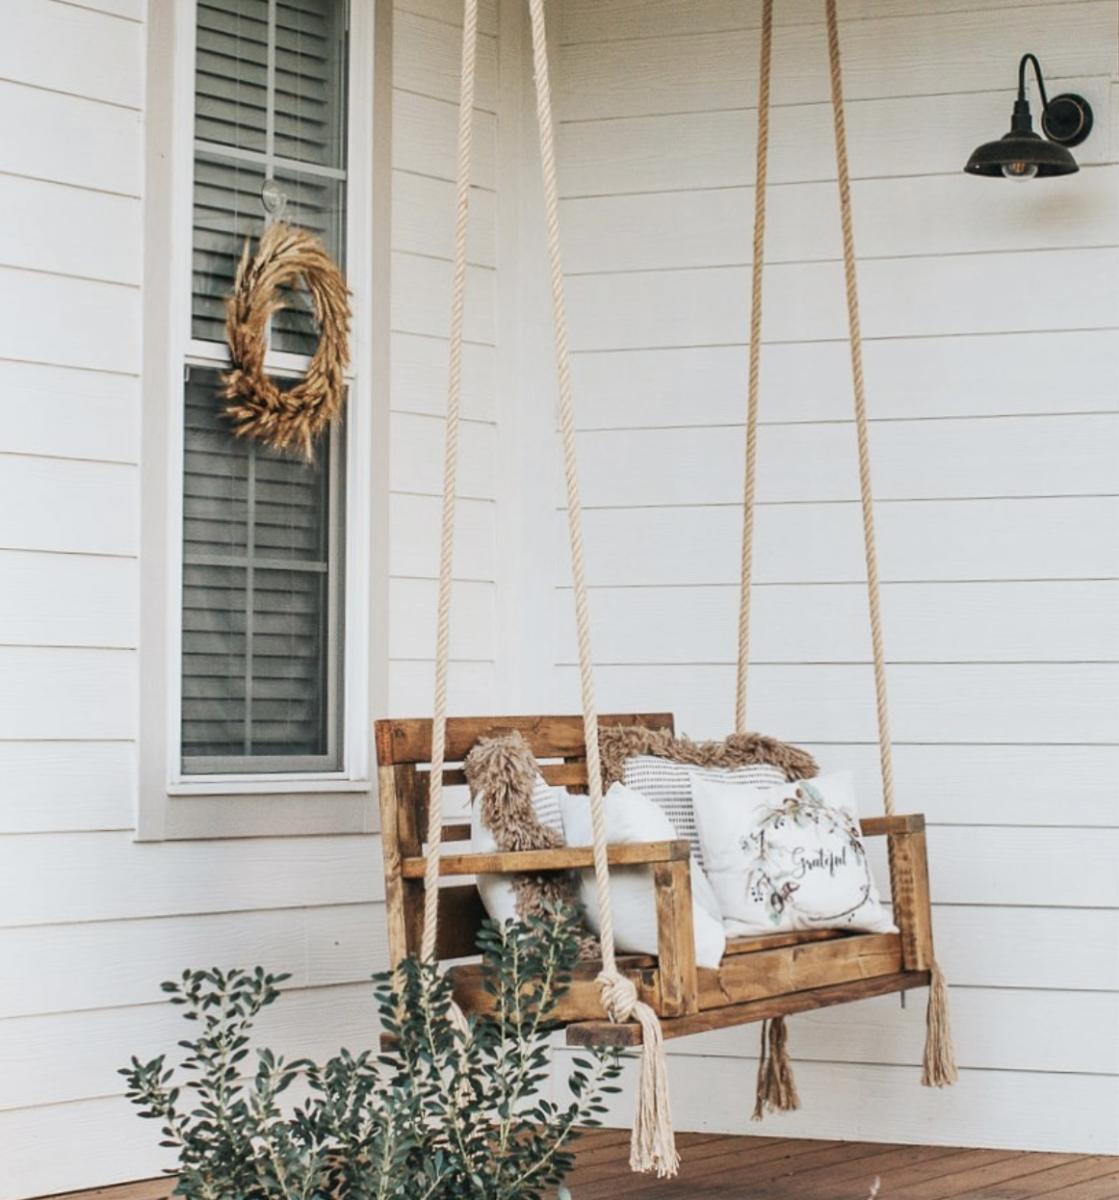
DIY Porch Swing - Perfect for any season!
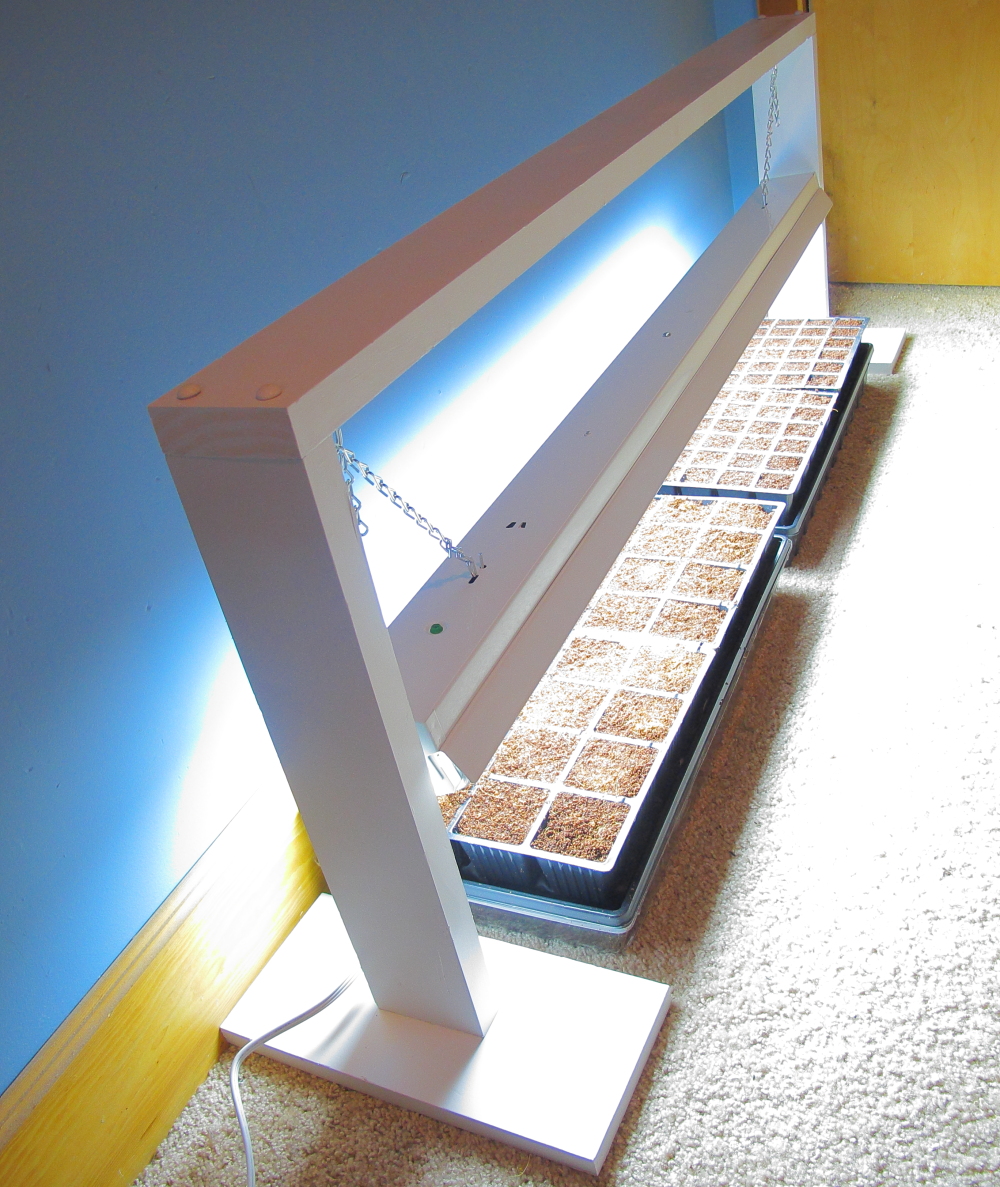
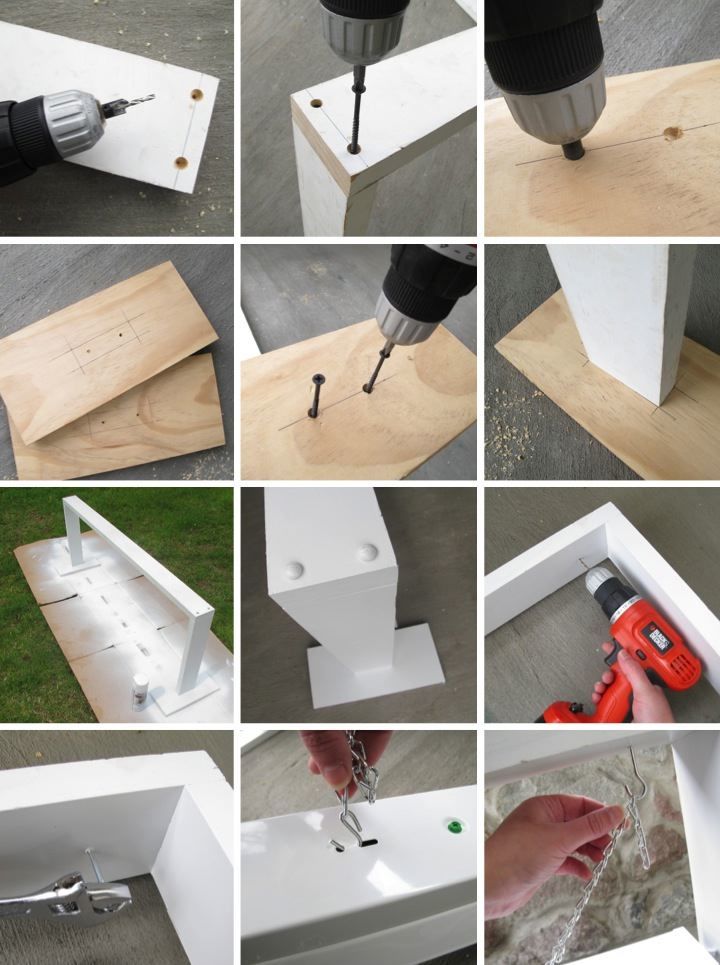
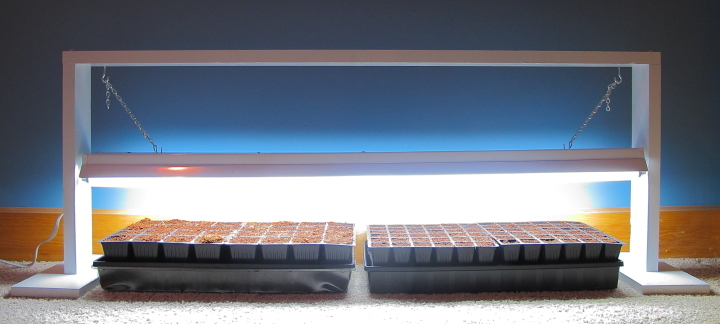
I wanted to start some seeds indoors this year but I couldn't find a reasonably priced grow light that I liked so I decided to make one myself. With some wood scraps and a 48" fluorescent work light I came up with an easy design that was inexpensive, too. For details: http://www.homeandawaywithlisa.com/blog/2012/4/15/diy-grow-light-for-st…
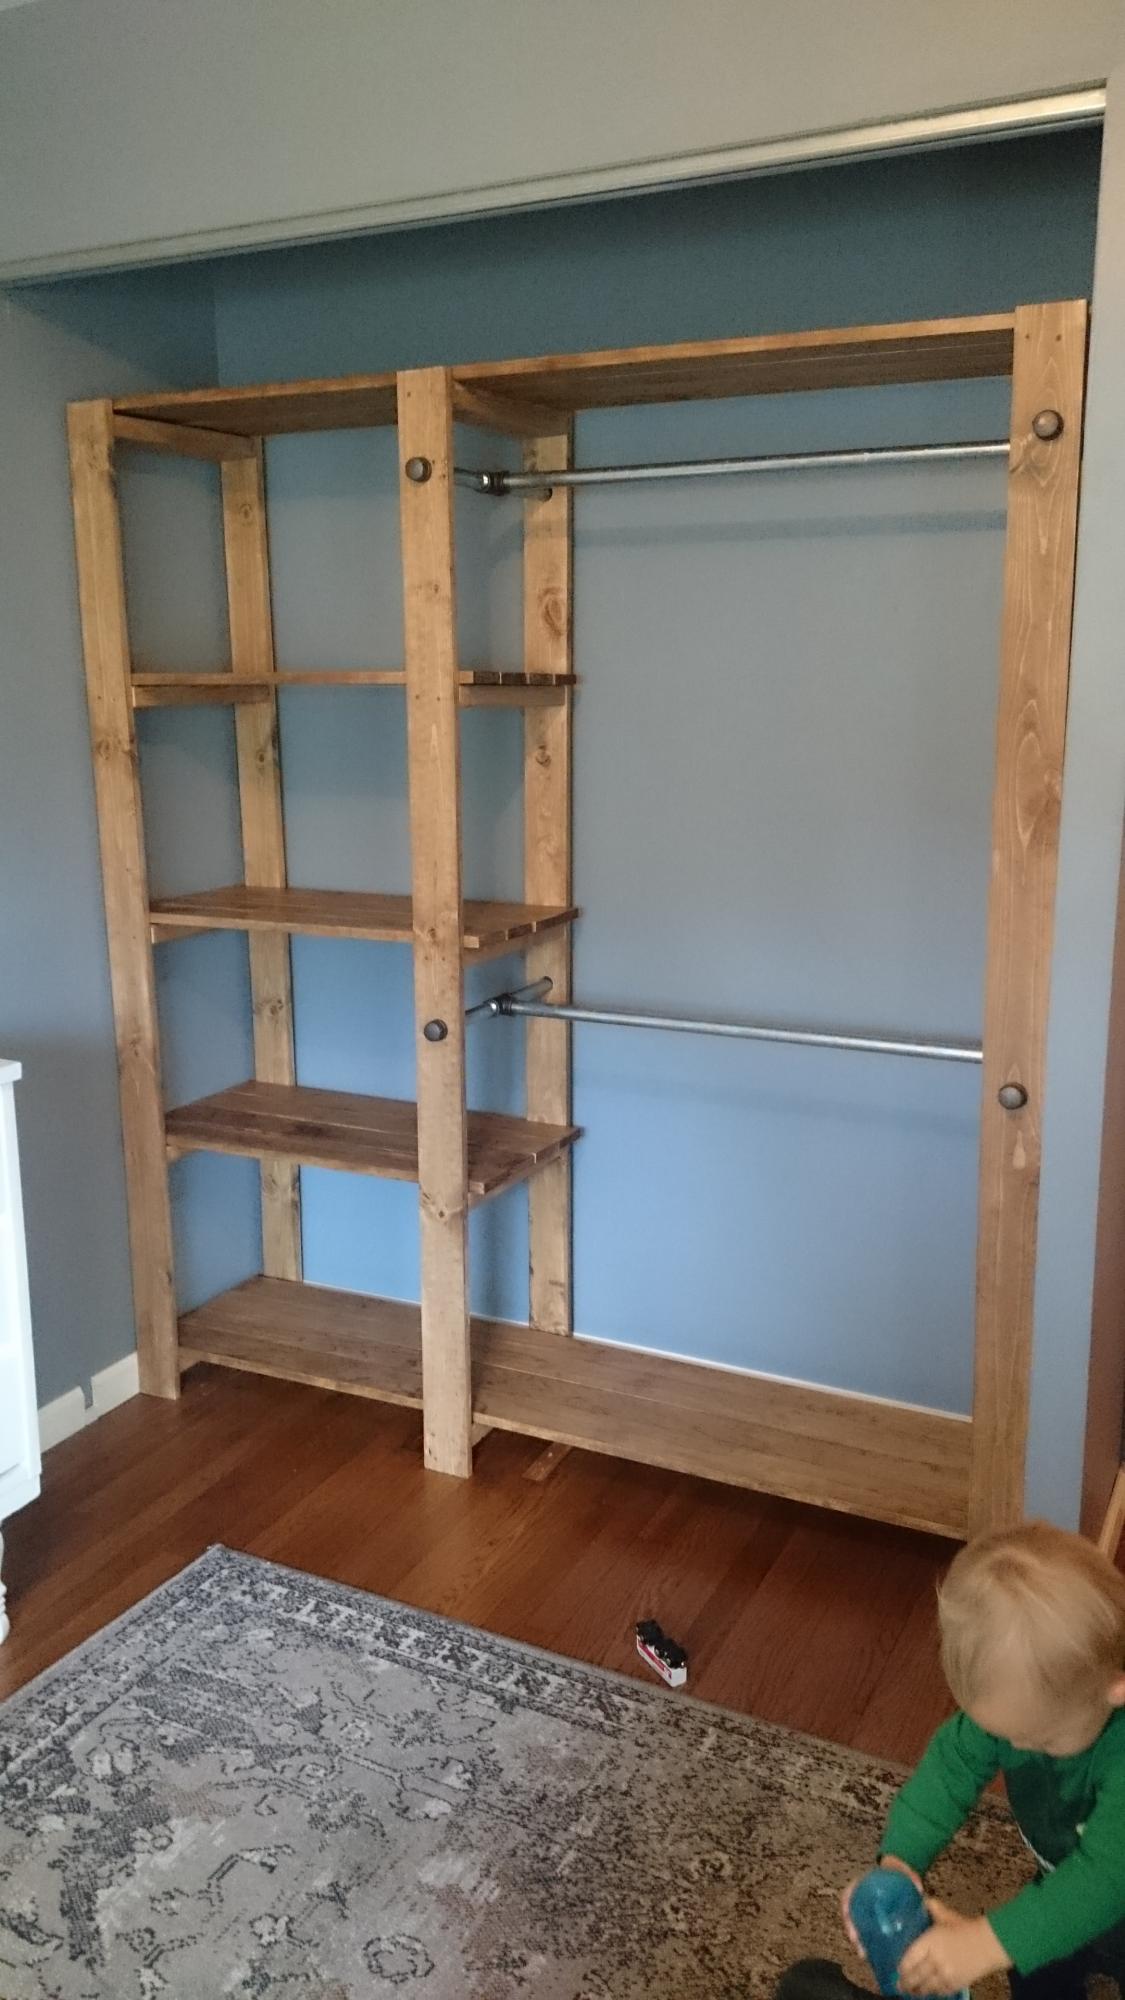
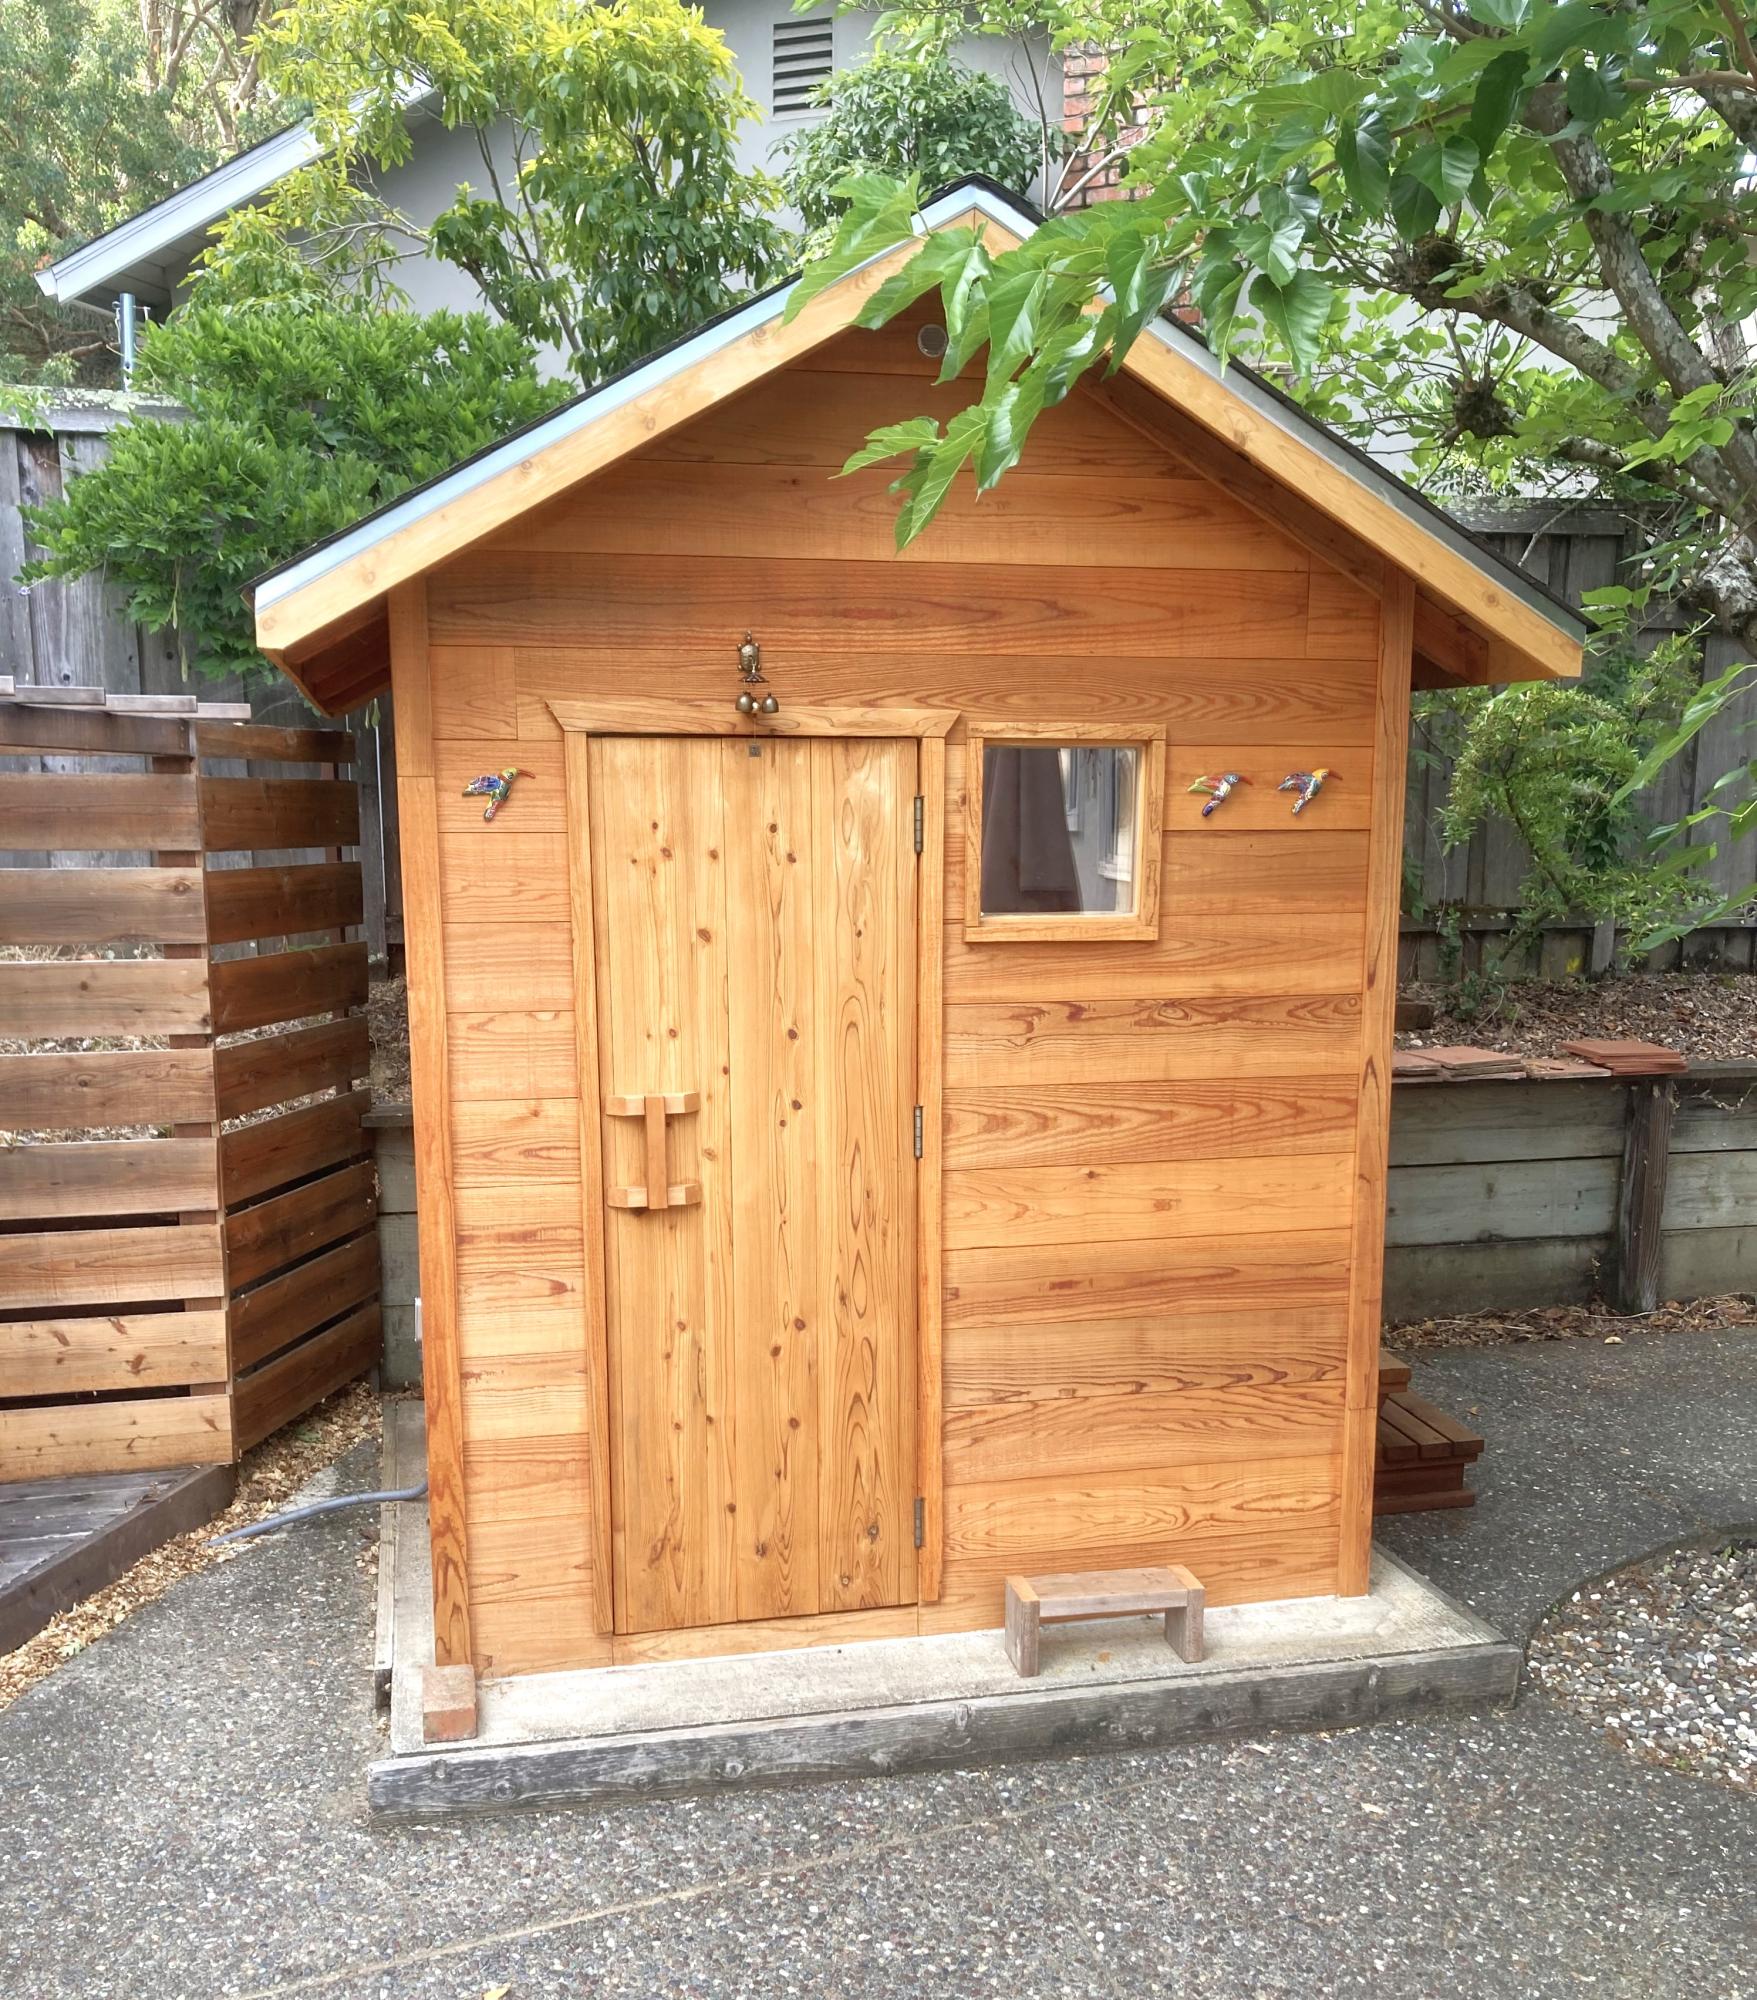
This was the second building project I've ever completed. I had to make a few adjustments to make it fit the size of ray's closet, but it was totally worth it. most of the work was in the measuring, sanding, and sealing of the wood. Ftting the frames can be a little tricky if your planks aren't perfectly straight. Otherwise, this project was pretty straight forward and can be done in just a few days depending on how much time you have to dedicate to it. Thanks Ana!
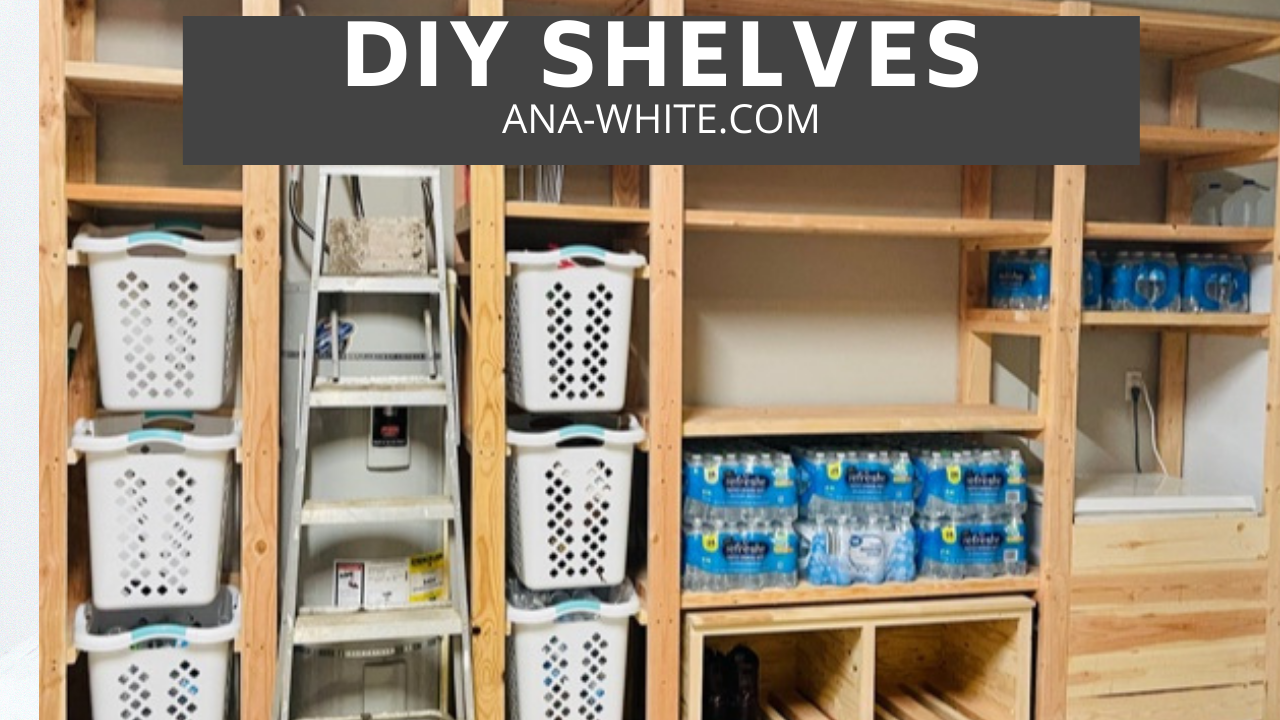
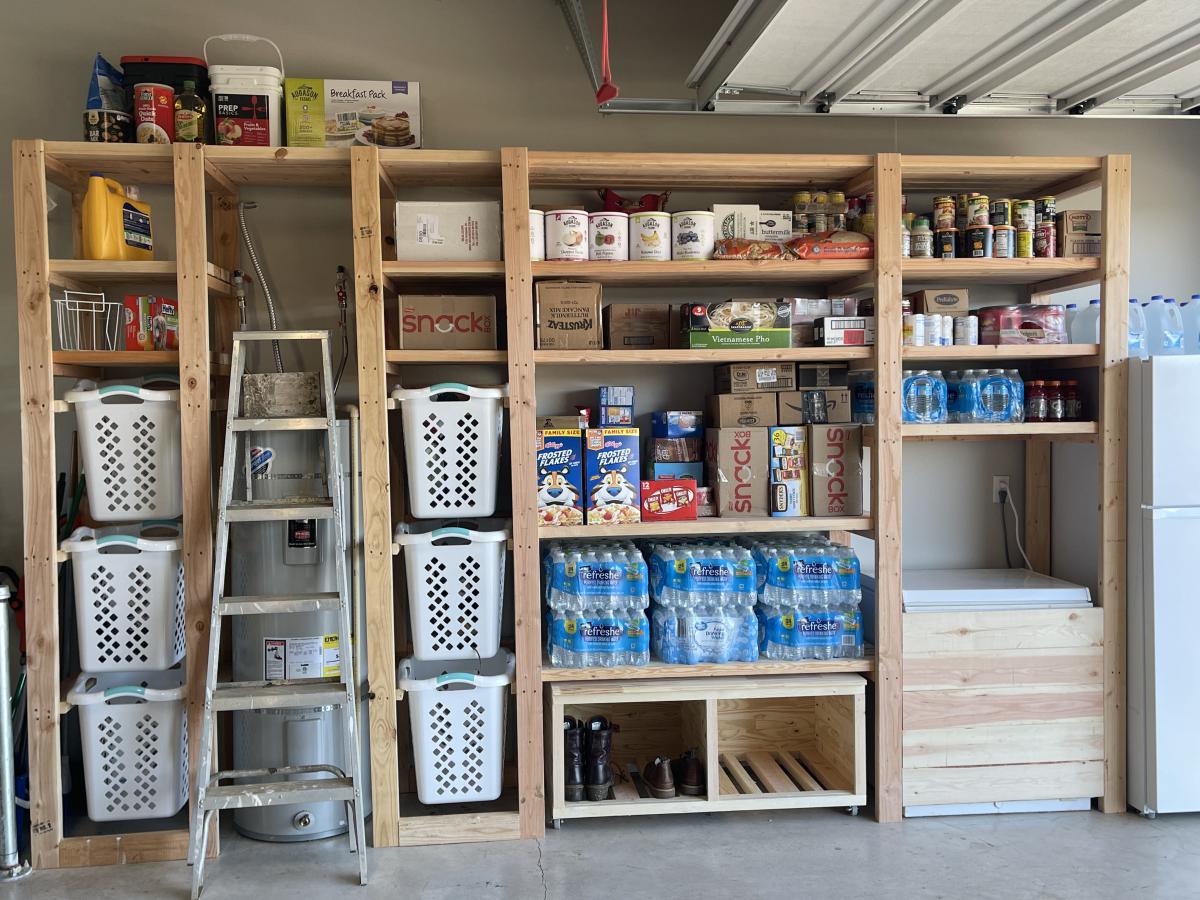
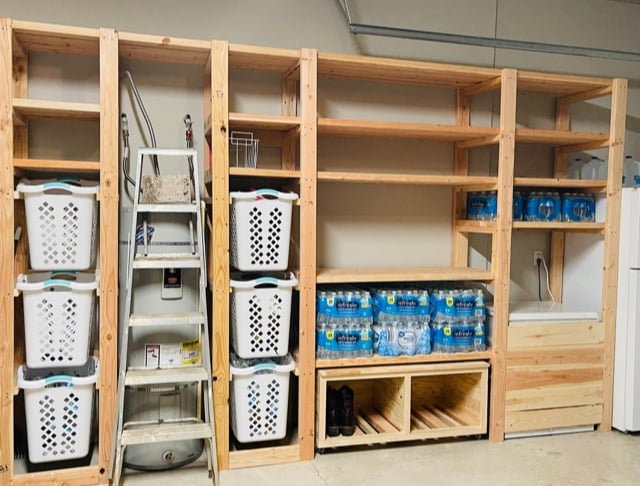
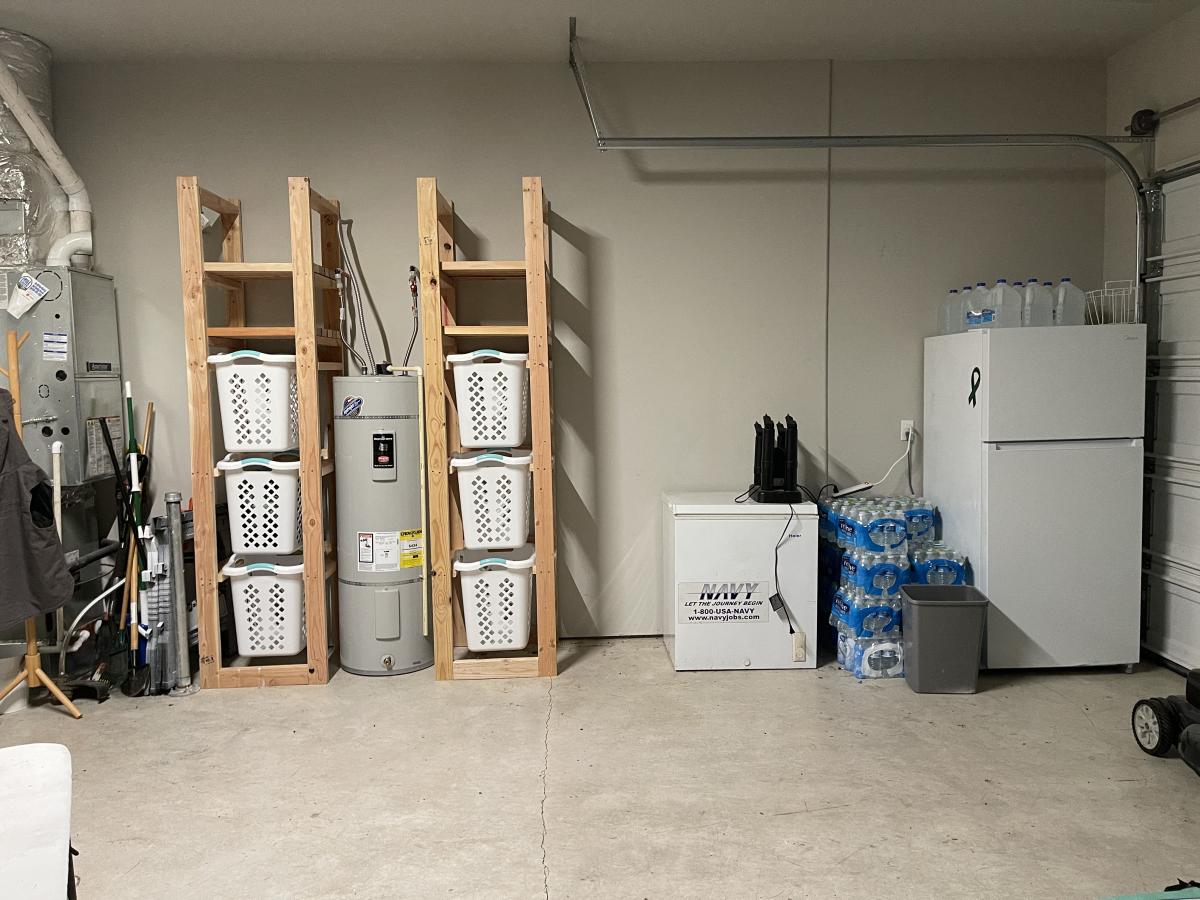
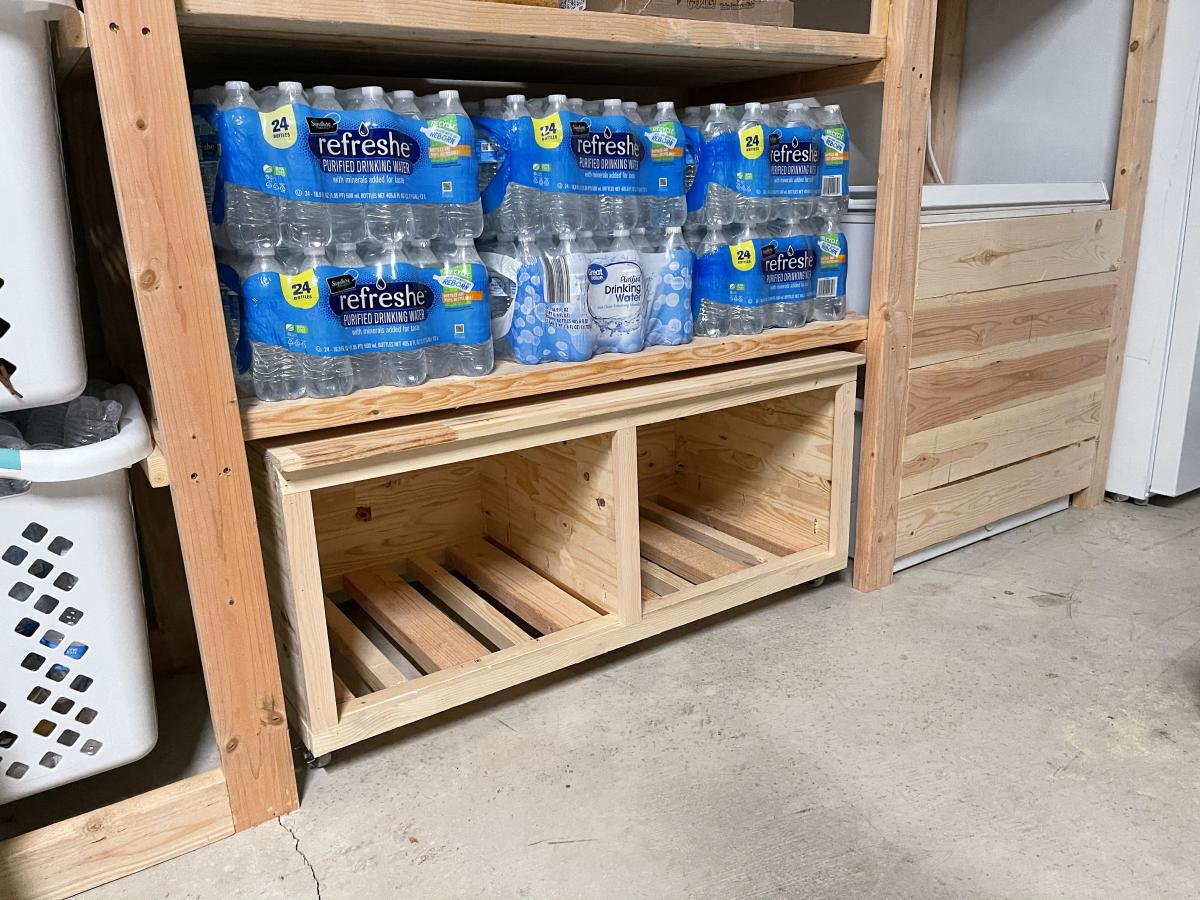
I used Ana's Freestanding Shelf plan and customized it to fit my needs. I incorporated laundry and recycle storage, a rolling bench and built in for our chest freezer. If you want to see it being built with some added tips, that video is available here https://www.youtube.com/watch?v=N8w7XGiVMbs&t=258s
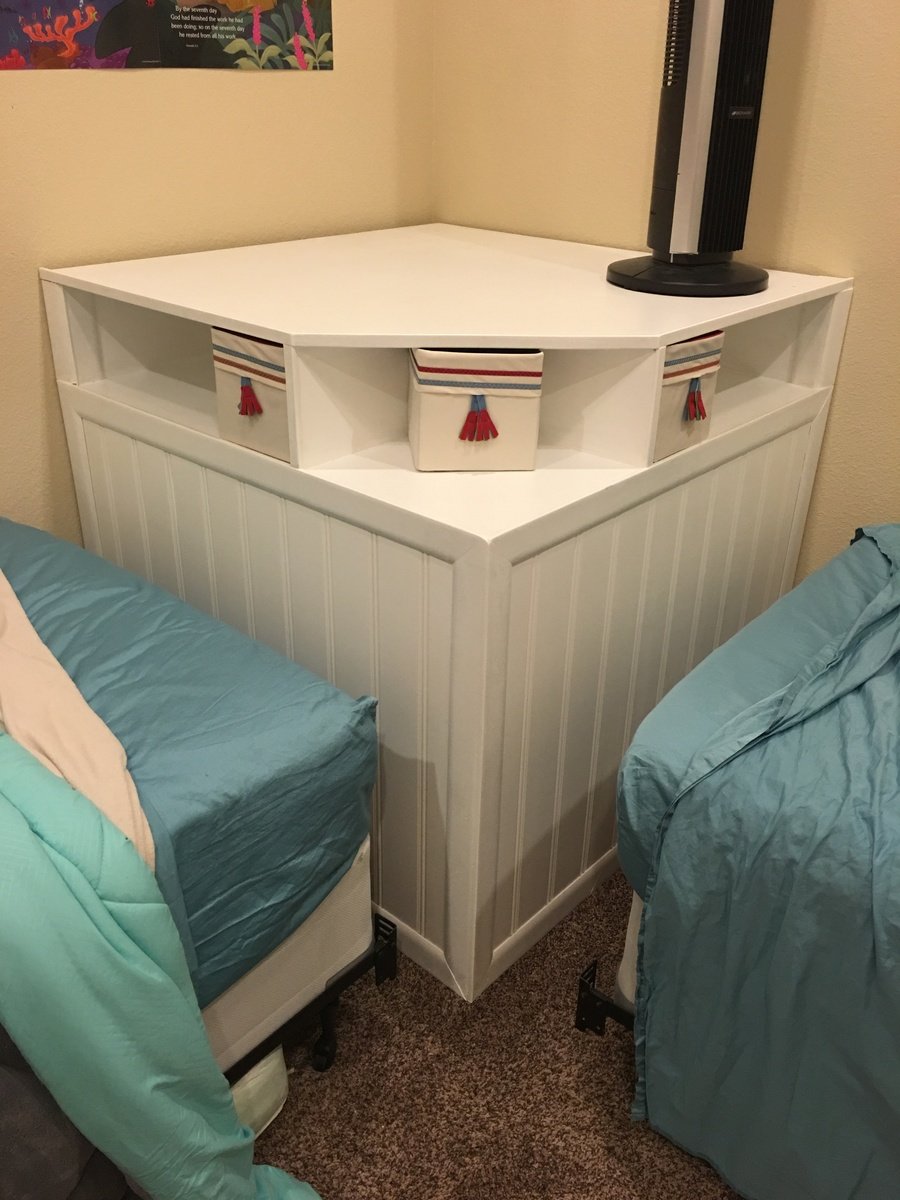
Corner unit for kids bedroom. Added fabric boxes from ikea. The fit perfectly
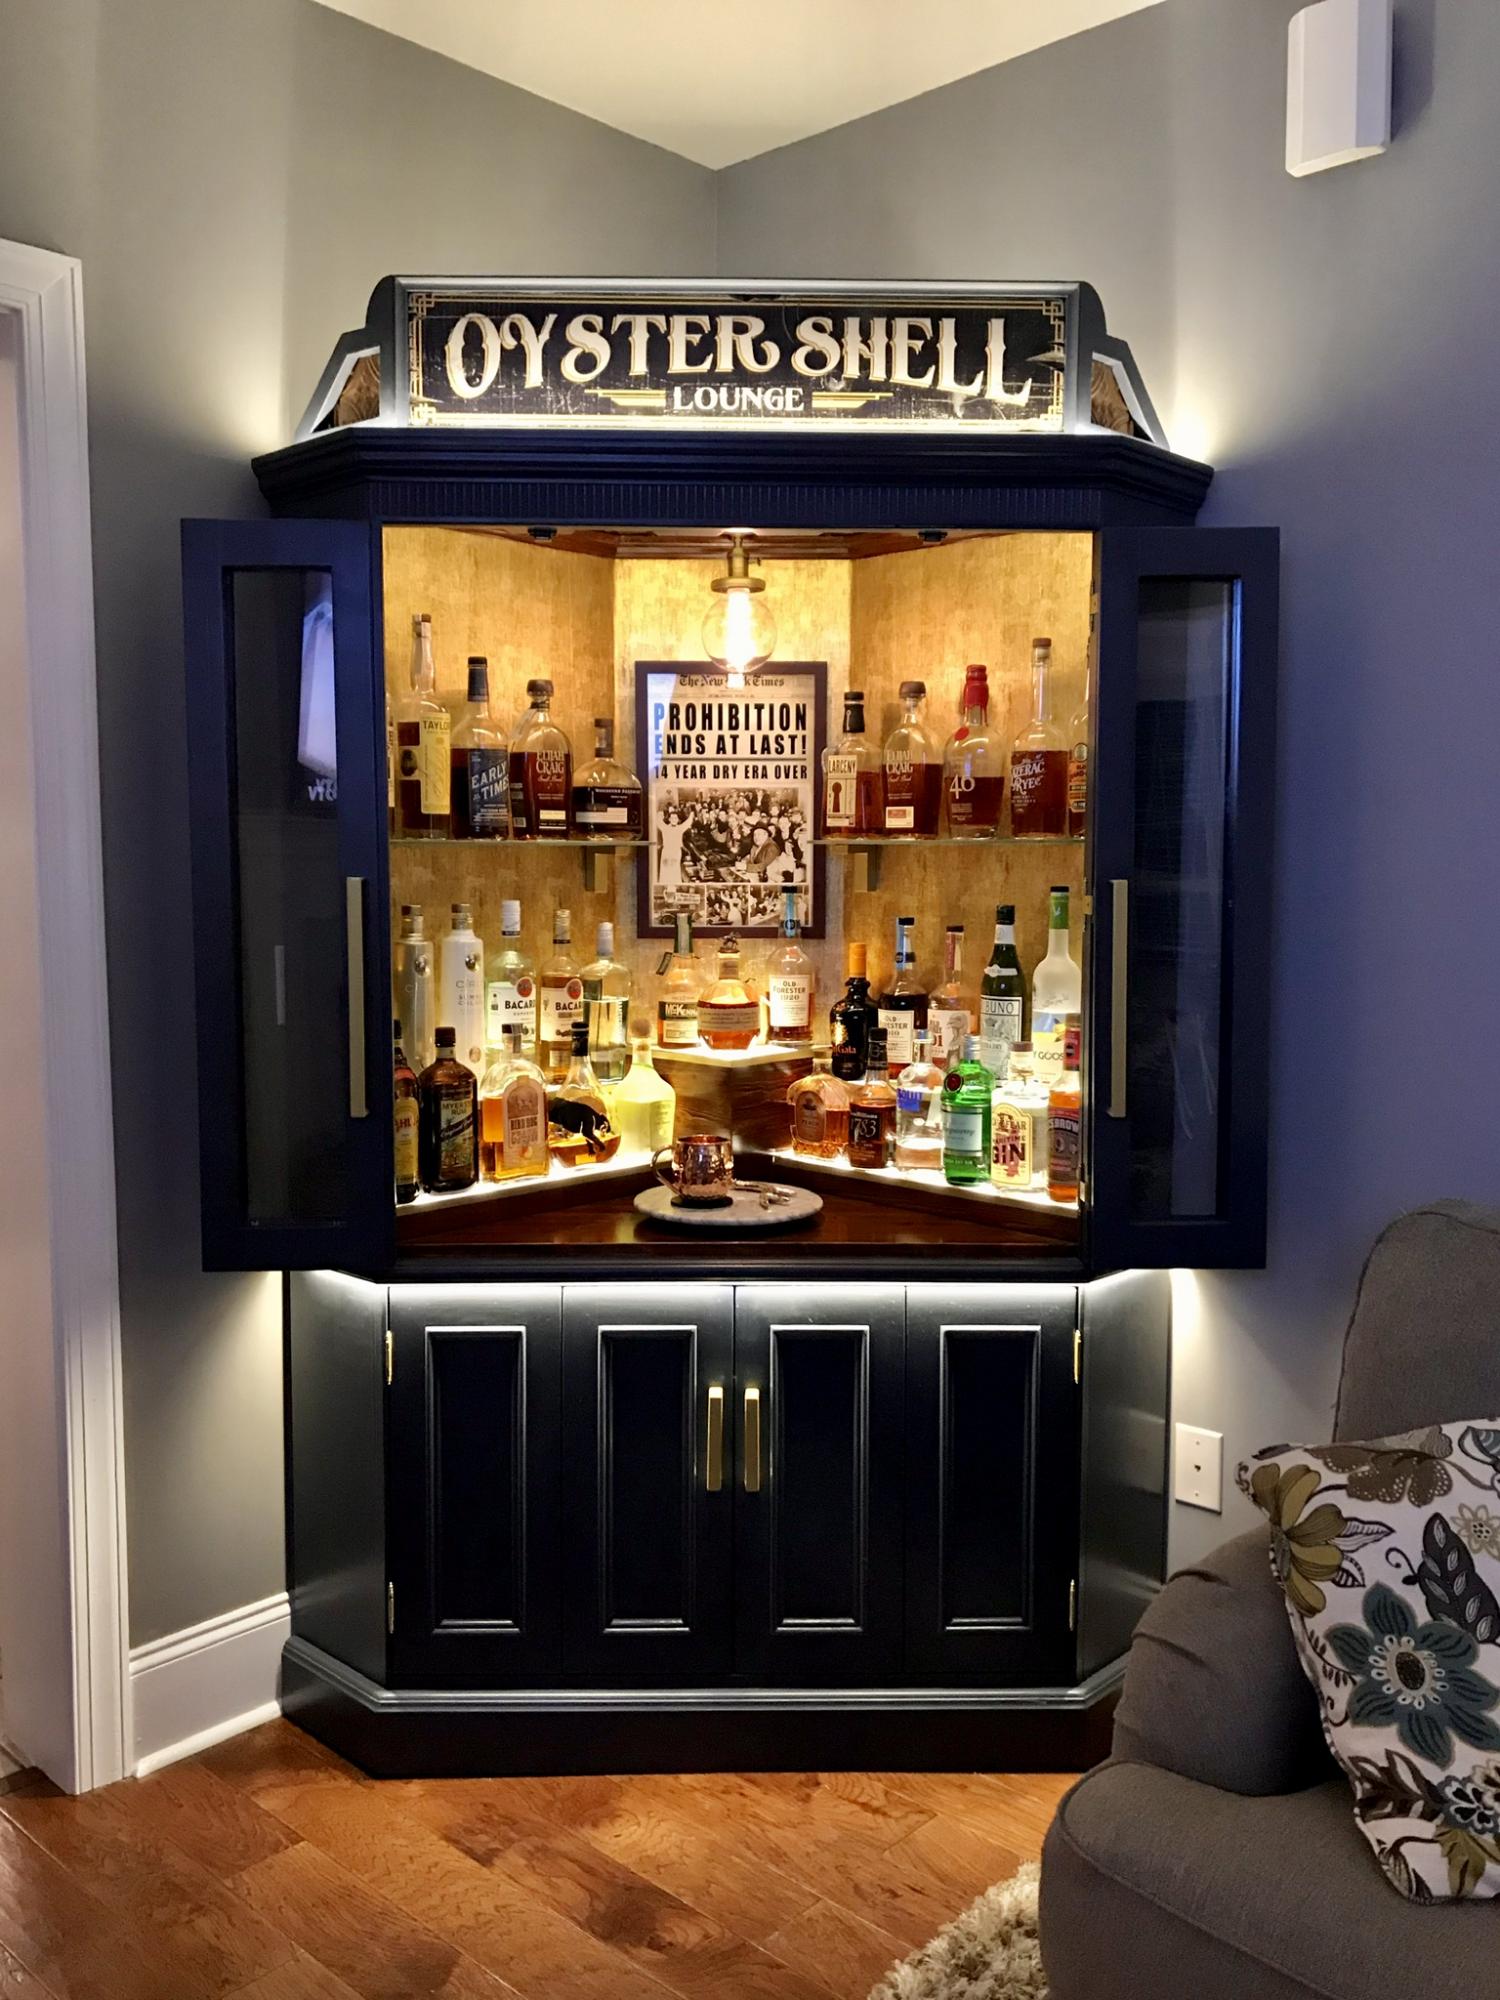
I bought this tv corner cabinet for $40. I spent many hours turning into my perfect bar cabinet. I built a custom lighted liquor display. I have posted photos of the transformation.
Thu, 03/18/2021 - 00:07
Wow that beautiful do you have directions on what you did?
Tue, 07/06/2021 - 19:04
So this is not your project? Because there isn't much information or a before and after picture. This gave me an idea for our home.
Sun, 08/15/2021 - 18:34
Yes, this is my project. What would you like to know?
Wed, 12/29/2021 - 06:41
This looks beautiful and authentic at the same time. Love how it gives me a theatre vibe! cabinet makers mornington
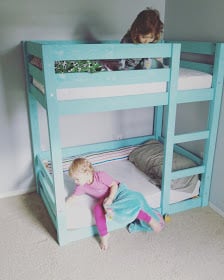
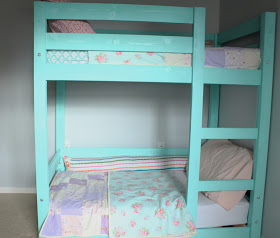
Modified the classic bunk bed plans to fit crib size matresses for our 1.5 & 2 year old girls, loved how my toddler bunk beds turned out!
Mon, 08/01/2016 - 17:27
Hi,
Could you email me the change in measurements you used for the crib mattress?
It would help me out so much. I want to build a similar one for my boys.
Thank you.
Danielle S.
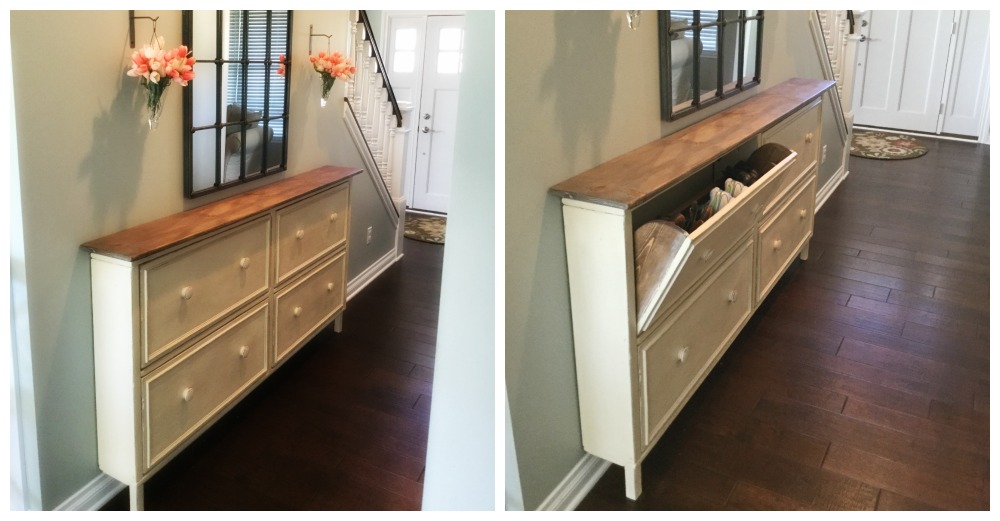
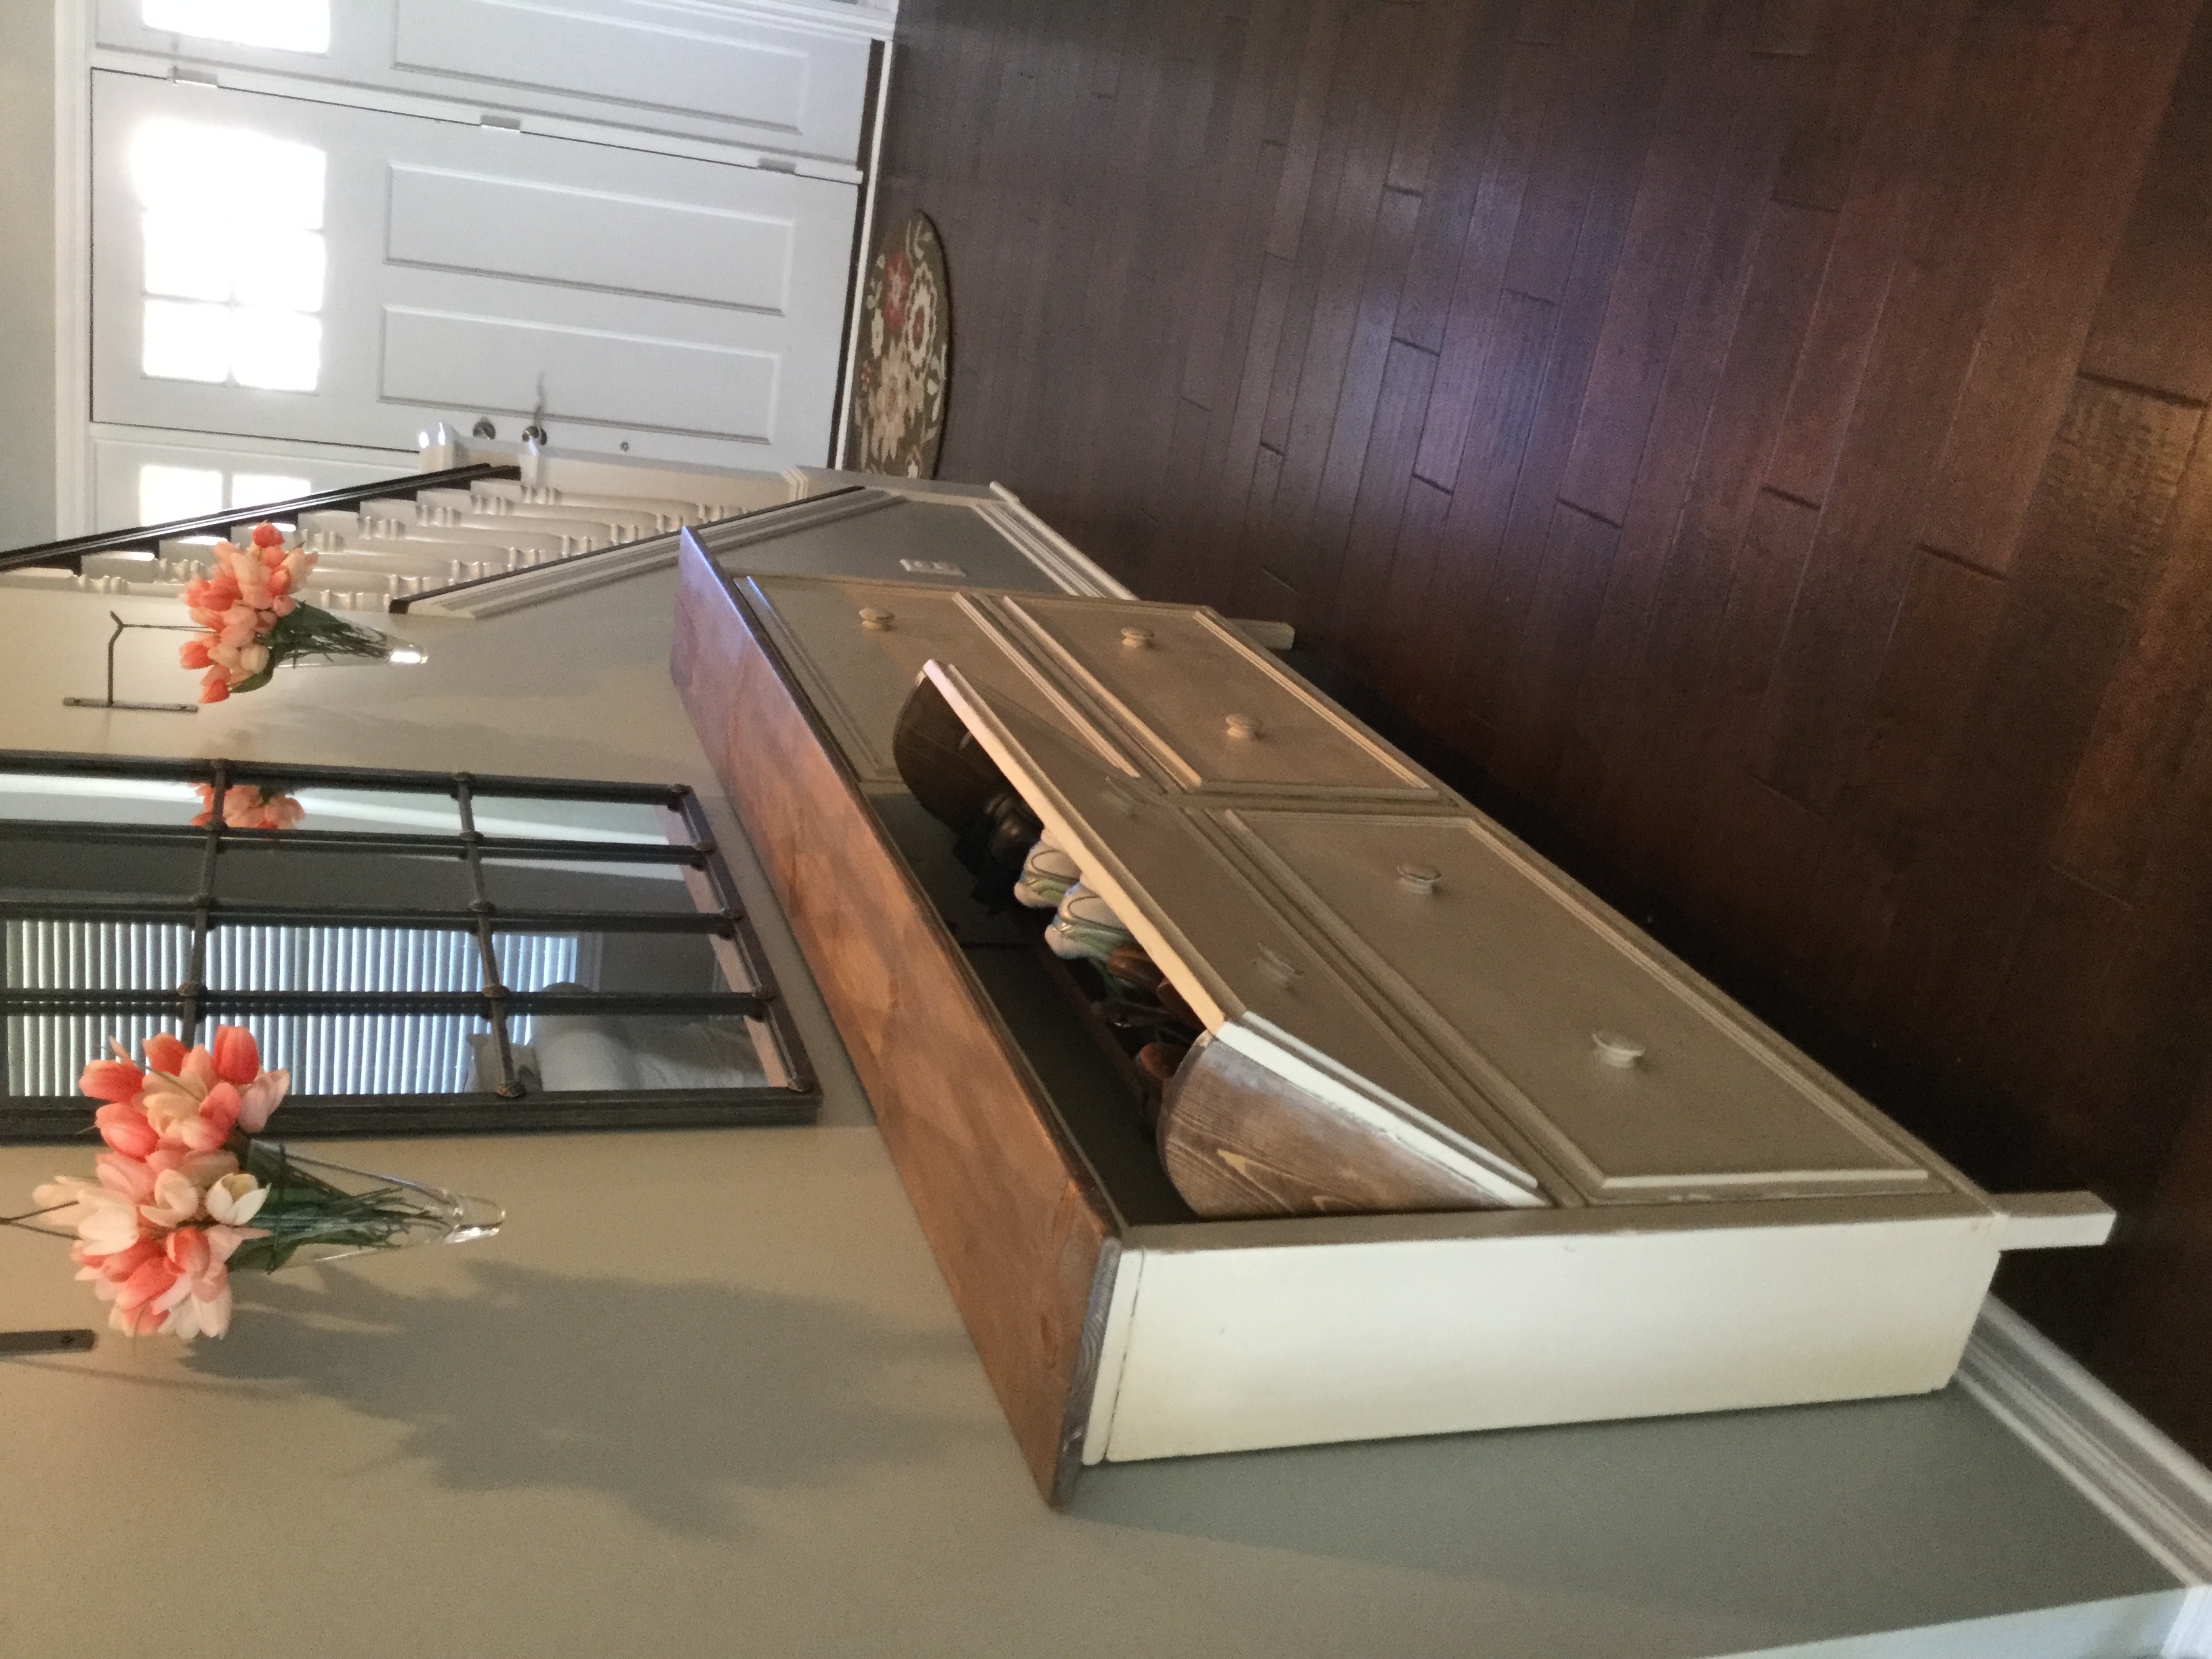
We used the shoe dresser instructions with some modifications to make it longer
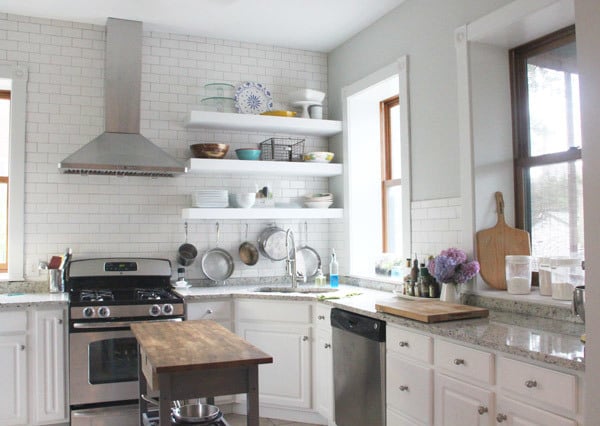
When we recently bought our 150+ year old house, we were pretty happy with just about everything (not stopping us from coming up with projects!) except the kitchen. This kitchen hadn't been updated in about 15 years, had dark brown walls, boring square white tiles with white grout, and TONS of cabinets. Everywhere. I felt like the walls were closing in!
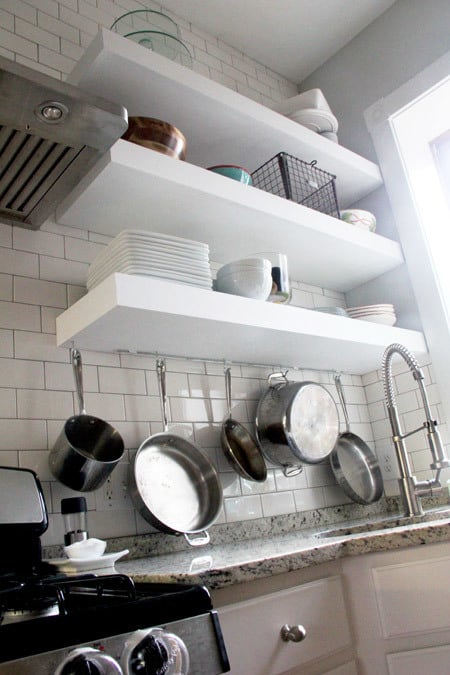
So before we ever signed a piece of paper I had a vision of open shelving. Wide, white floating shelves to put our every day items at arms reach and display the few items we rarely use but think are beautiful.
I loved Ana's plans, but I needed these shelves to hold 12 dinner plates, 12 bowls, 12 salad plates, 4 pasta bowls, and...well, right there that about 40 pounds of stuff. And the basic plans just didn't seem heavy-duty enough.
Enter our contractor, John, who I asked for help because, while they were my vision, they were his handy-work. My husband and I didn’t even attempt to build them on our own. John is a perfectionist and we knew he’d make this plan work…perfectly.
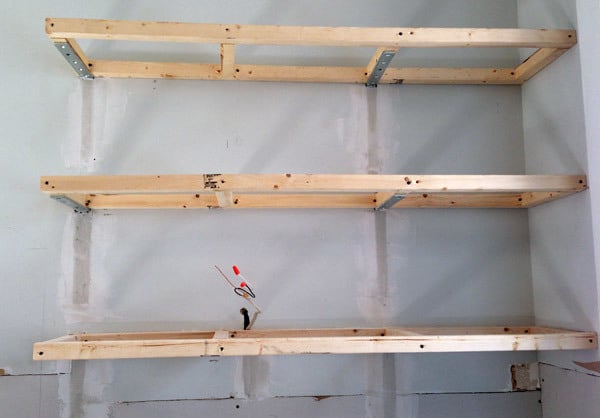
As usual, this was no sweat for John. To build the frames he used 2 x 2′s and secured them with 10 x 1 1/4″ angle brackets. During assembly, John made sure to position the center supports to match the wall studs in front of which the frame would hang. Once assembled, he removed some dry wall and attached the brackets directly to the studs.
We could store baby elephants on these shelfs, they wouldn’t budge.
Since I knew what needed to be stored on that first shelf (our every day items), we used the measurements to equally distance the three shelves (not including the first shelf of course—it needed more space above the counter top). Then we sealed up the dry wall. Another help with support was butting the shelves right up to the corner, putting another screw in another stud.
We moved the lighting electric up for new under cabinet lighting—so easy pre-tiling.
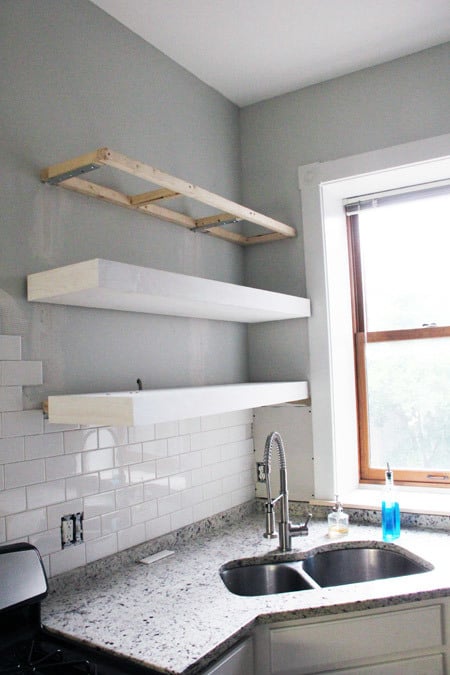
For the actual shelves—I like to think of them as “sleeves”—John used 3/4″ sanded plywood for the tops and bottoms of each shelf, then 1 x 6 clear pine ripped down to desired thickness for the fronts and one side (the other side is against the wall, so was left open). The primed sleeves spent a few days on the screened in porch while I tiled around the frames, they were pretty heavy and very solid.
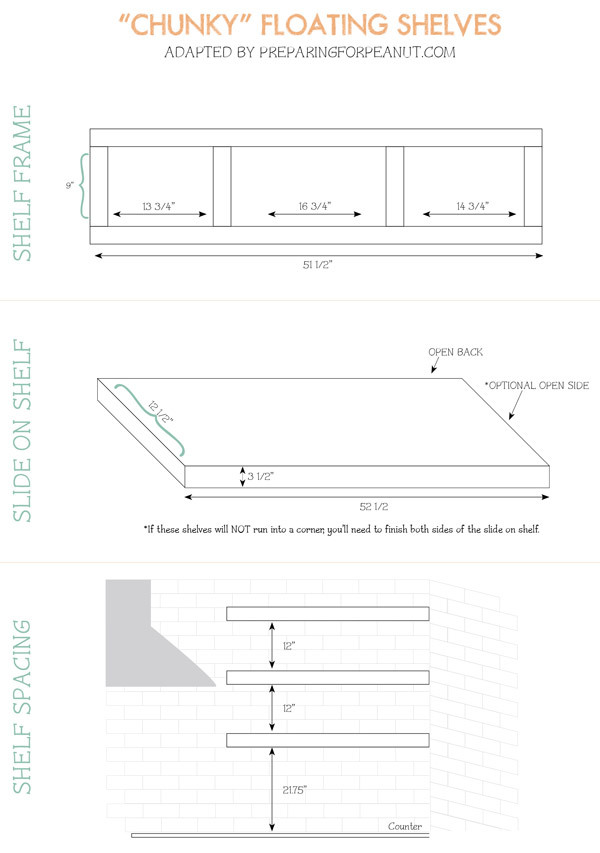
I’ve made an attempt to lay out the measurements involving our floating shelf project. These are to scale and give a good idea of how our plans differed from Ana’s.
We LOVE our shelves and get so so many compliments. The seemingly small and simple changes (tile, shelves, new window trim, paint, and soon flooring) made a HUGE impact and not that huge of a cost. And we don't miss the upper cabinets at all.
Thanks for the head-start and inspiration Ana!

Sun, 10/20/2013 - 09:42
Where did you get the heavy duty angle brackets? Having a hard time finding them. If you have the link, that would be great! Thanks!!

Mon, 10/21/2013 - 08:41
I'm not sure where to get big angle brackets like that, but you might want to try a local lumberyard instead of a home center. Even when they don't have a product they often know who does. The angle brackets embedded in the drywall is a clever idea I never thought of using.
Tue, 11/25/2014 - 20:08
What city was this work done in? I live in Seattle and I am looking for a contractor.
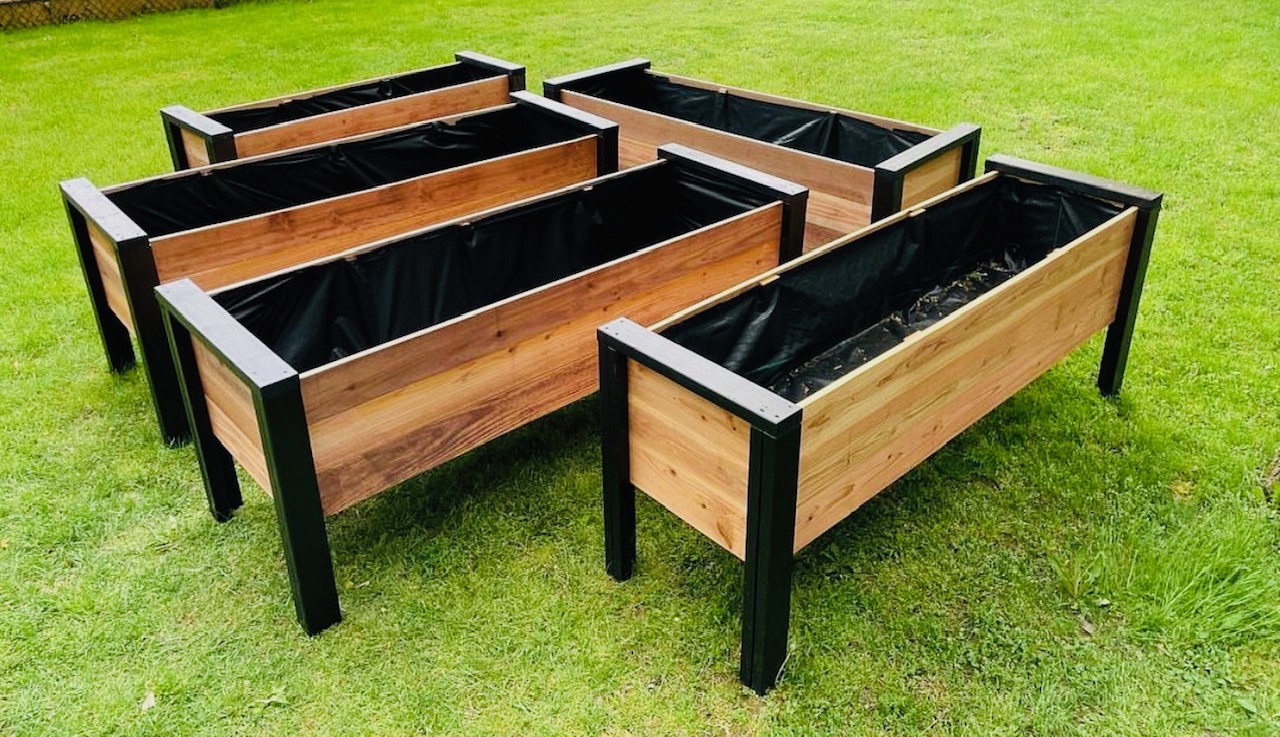
Planters build by Urban Wood Solutions
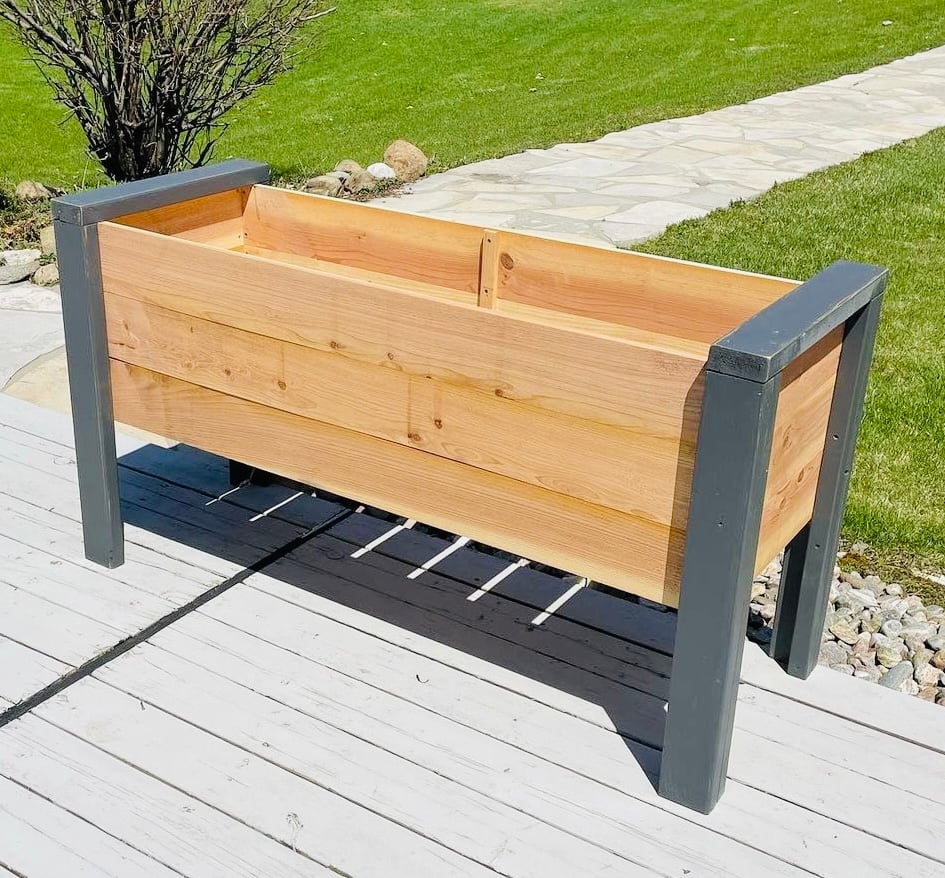
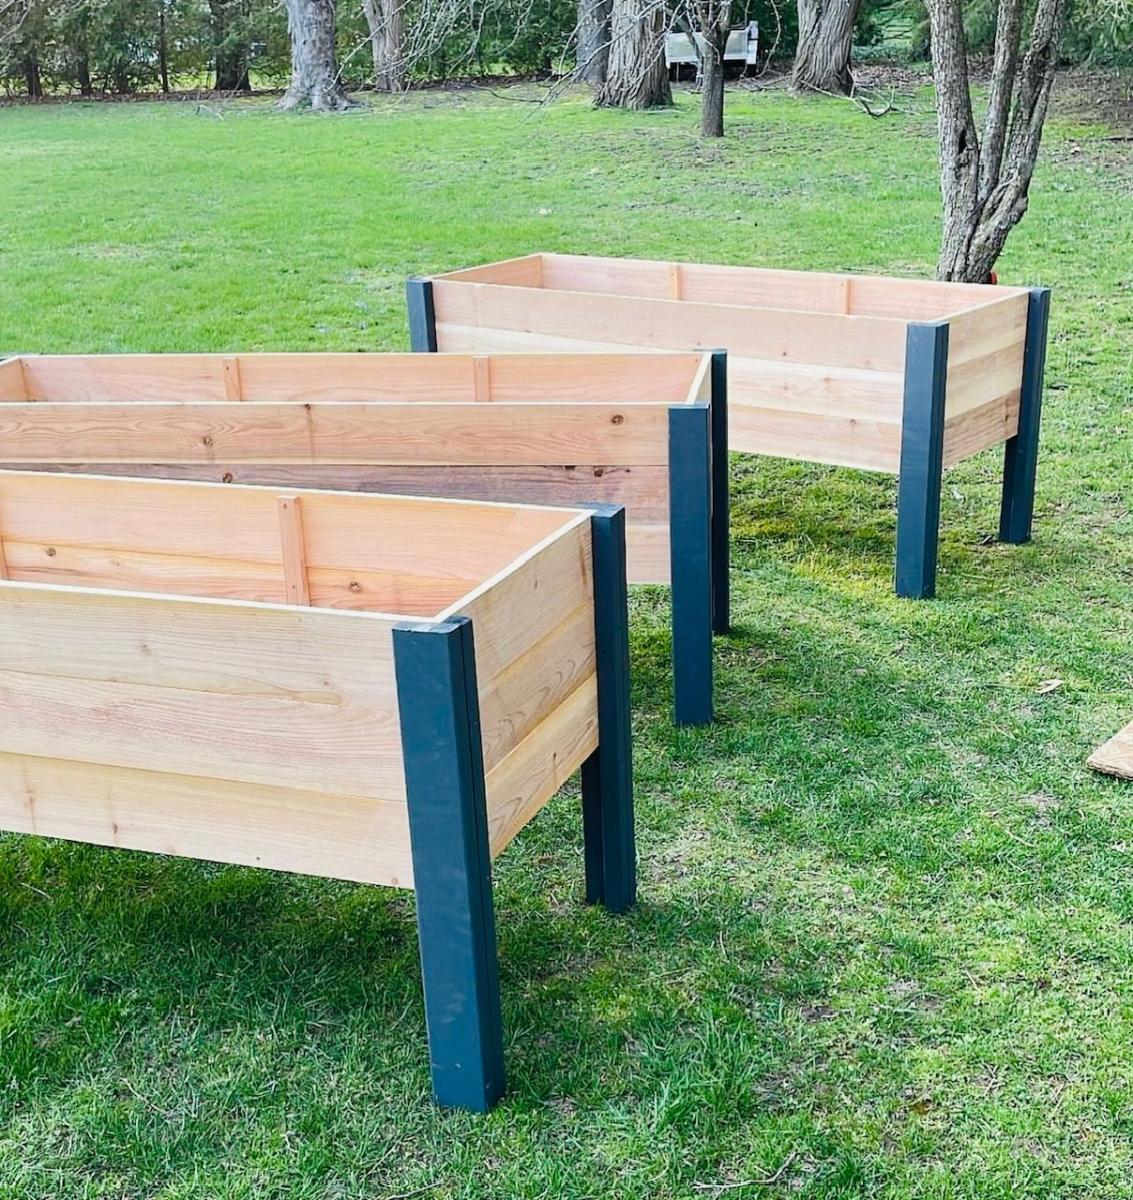
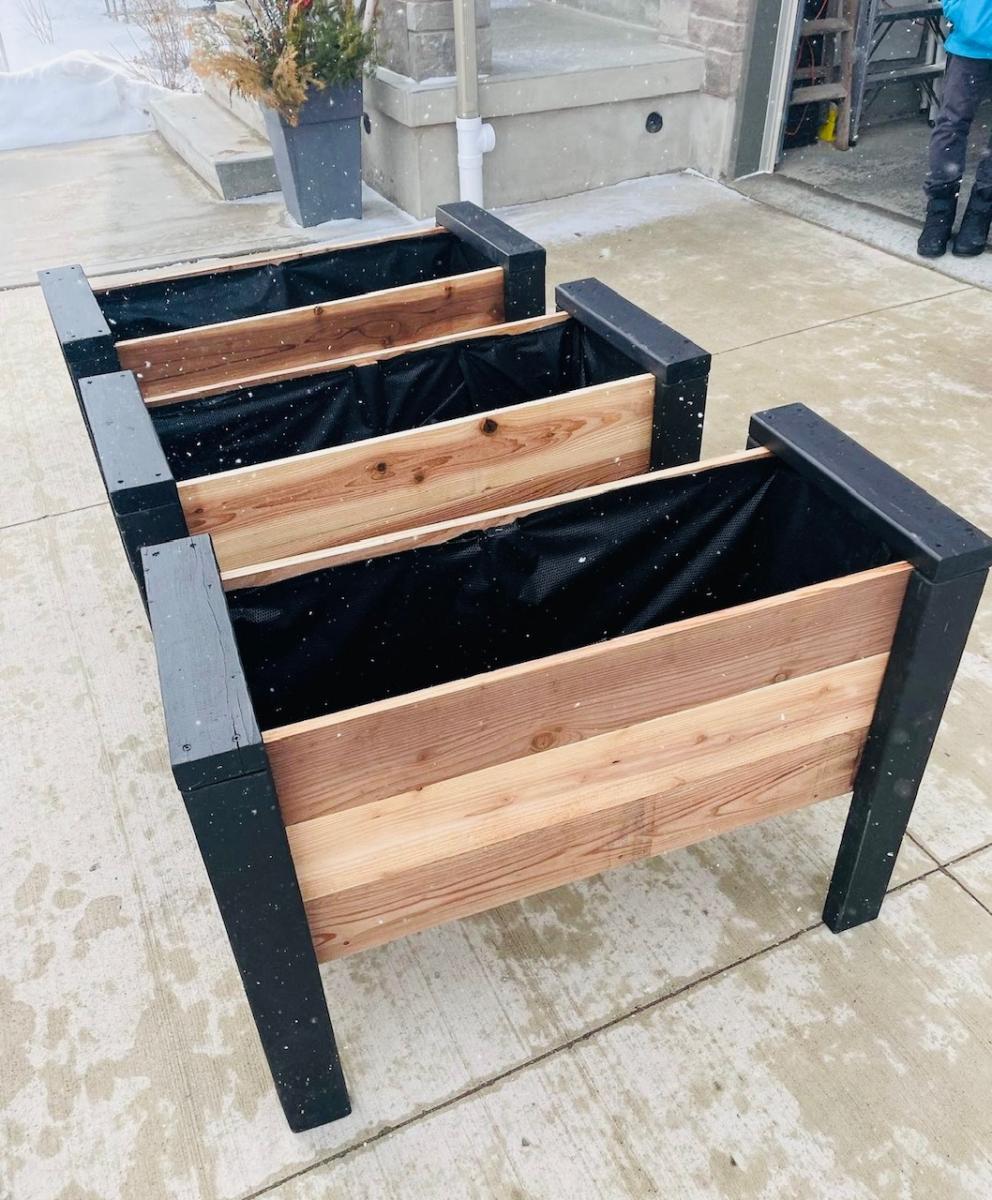

Fri, 03/31/2023 - 04:23
These are incredible. They look a little deeper, and would be good for vegetables. How deep are they?

I made this coop twice as wide like Ana suggested since I have 4 chickens and wanted to make sure there was some extra wiggle room in case “chicken math” got the best of us. I made a nesting box to mount on the outside. I also used plywood for the sides like Ana did in the video. I installed a Run Chicken automatic door that opens at sunrise and closes at sunset. I added some hasps and clasps to make sure all my doors would close tightly. I put hardware cloth across the top before installing the roof panels. I stapled and buried hardware cloth around the perimeter for predator protection. I also spray painted the hardware cloth flat black so that it would be easier for us to see inside the coop. I stained the rest of the wood with Varathane Semi-Transparent stain, color “Carbon Gray.” I also added some roosts and cedar shingle siding for some extra protection during our New England winters at to match our house. Working 2-4 hours a day, off and on, with a bum shoulder and weak hands, this took me about a week! Thanks for the great plan, Ana!


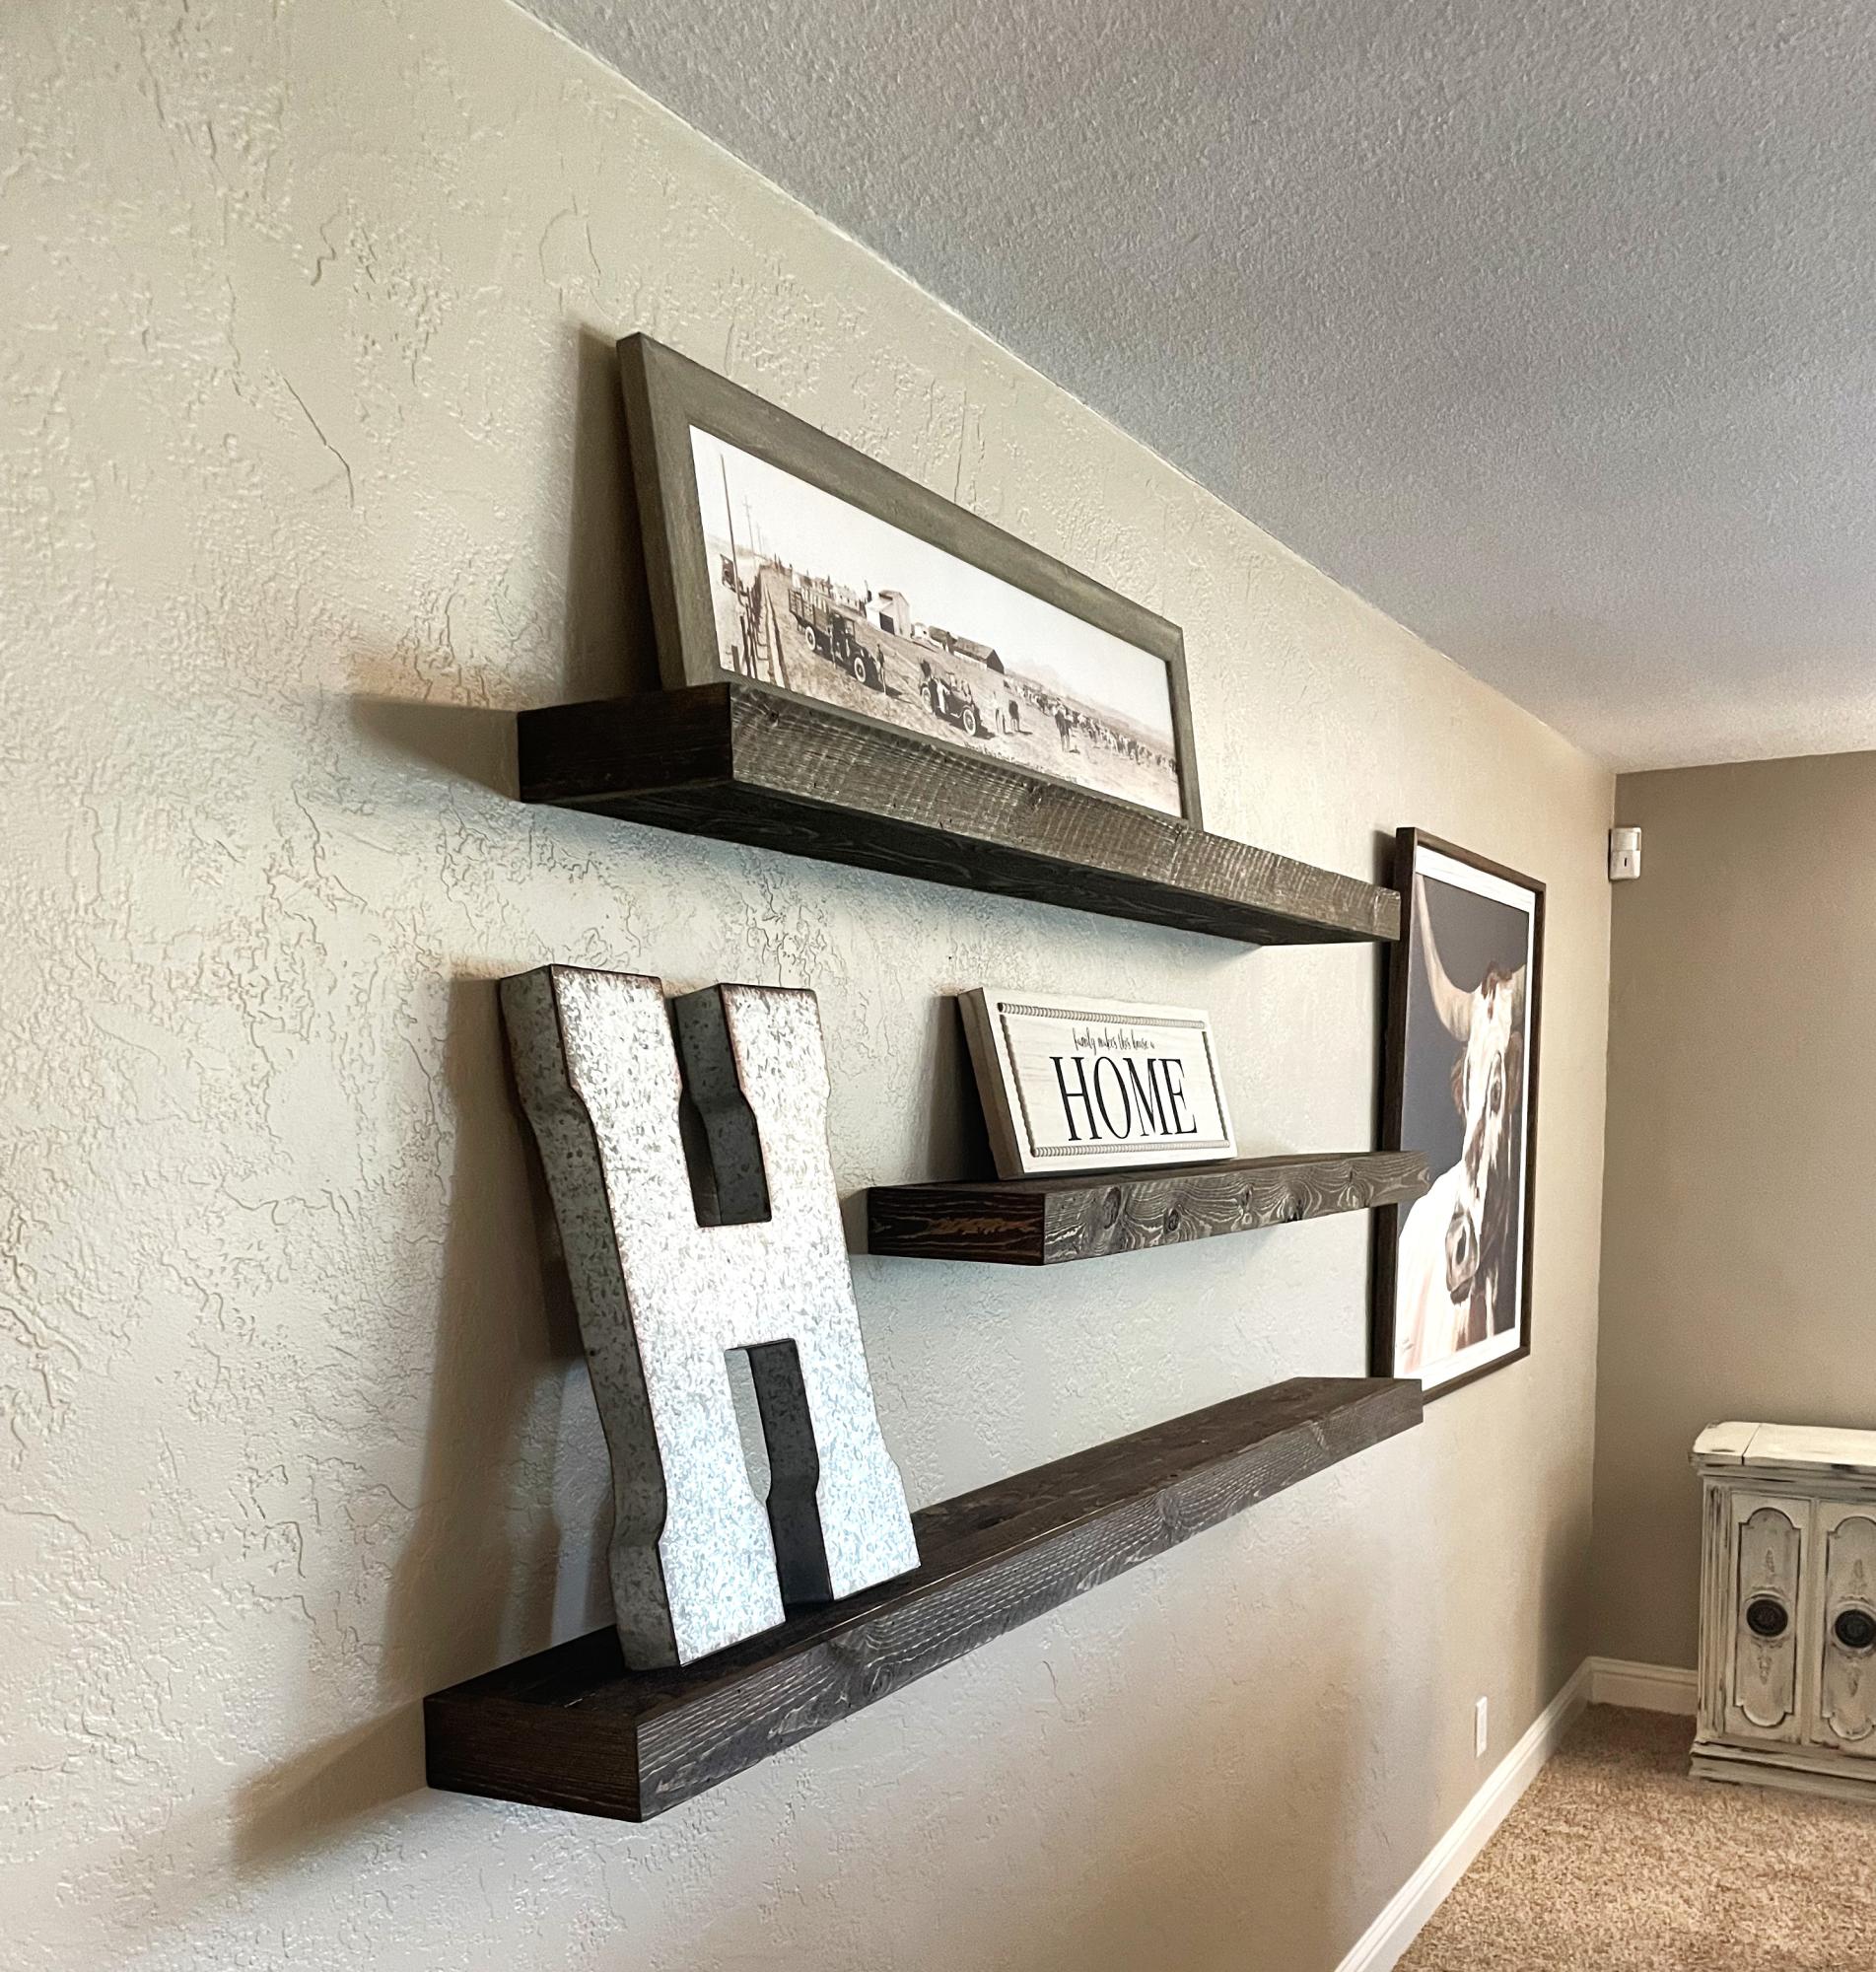
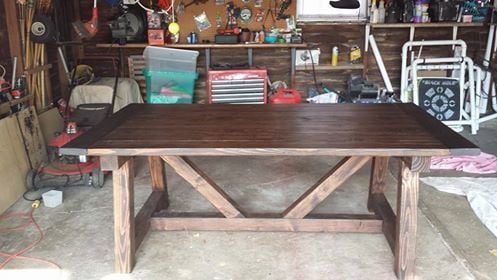
Farmhouse table with matching floating shelves.
Judd H

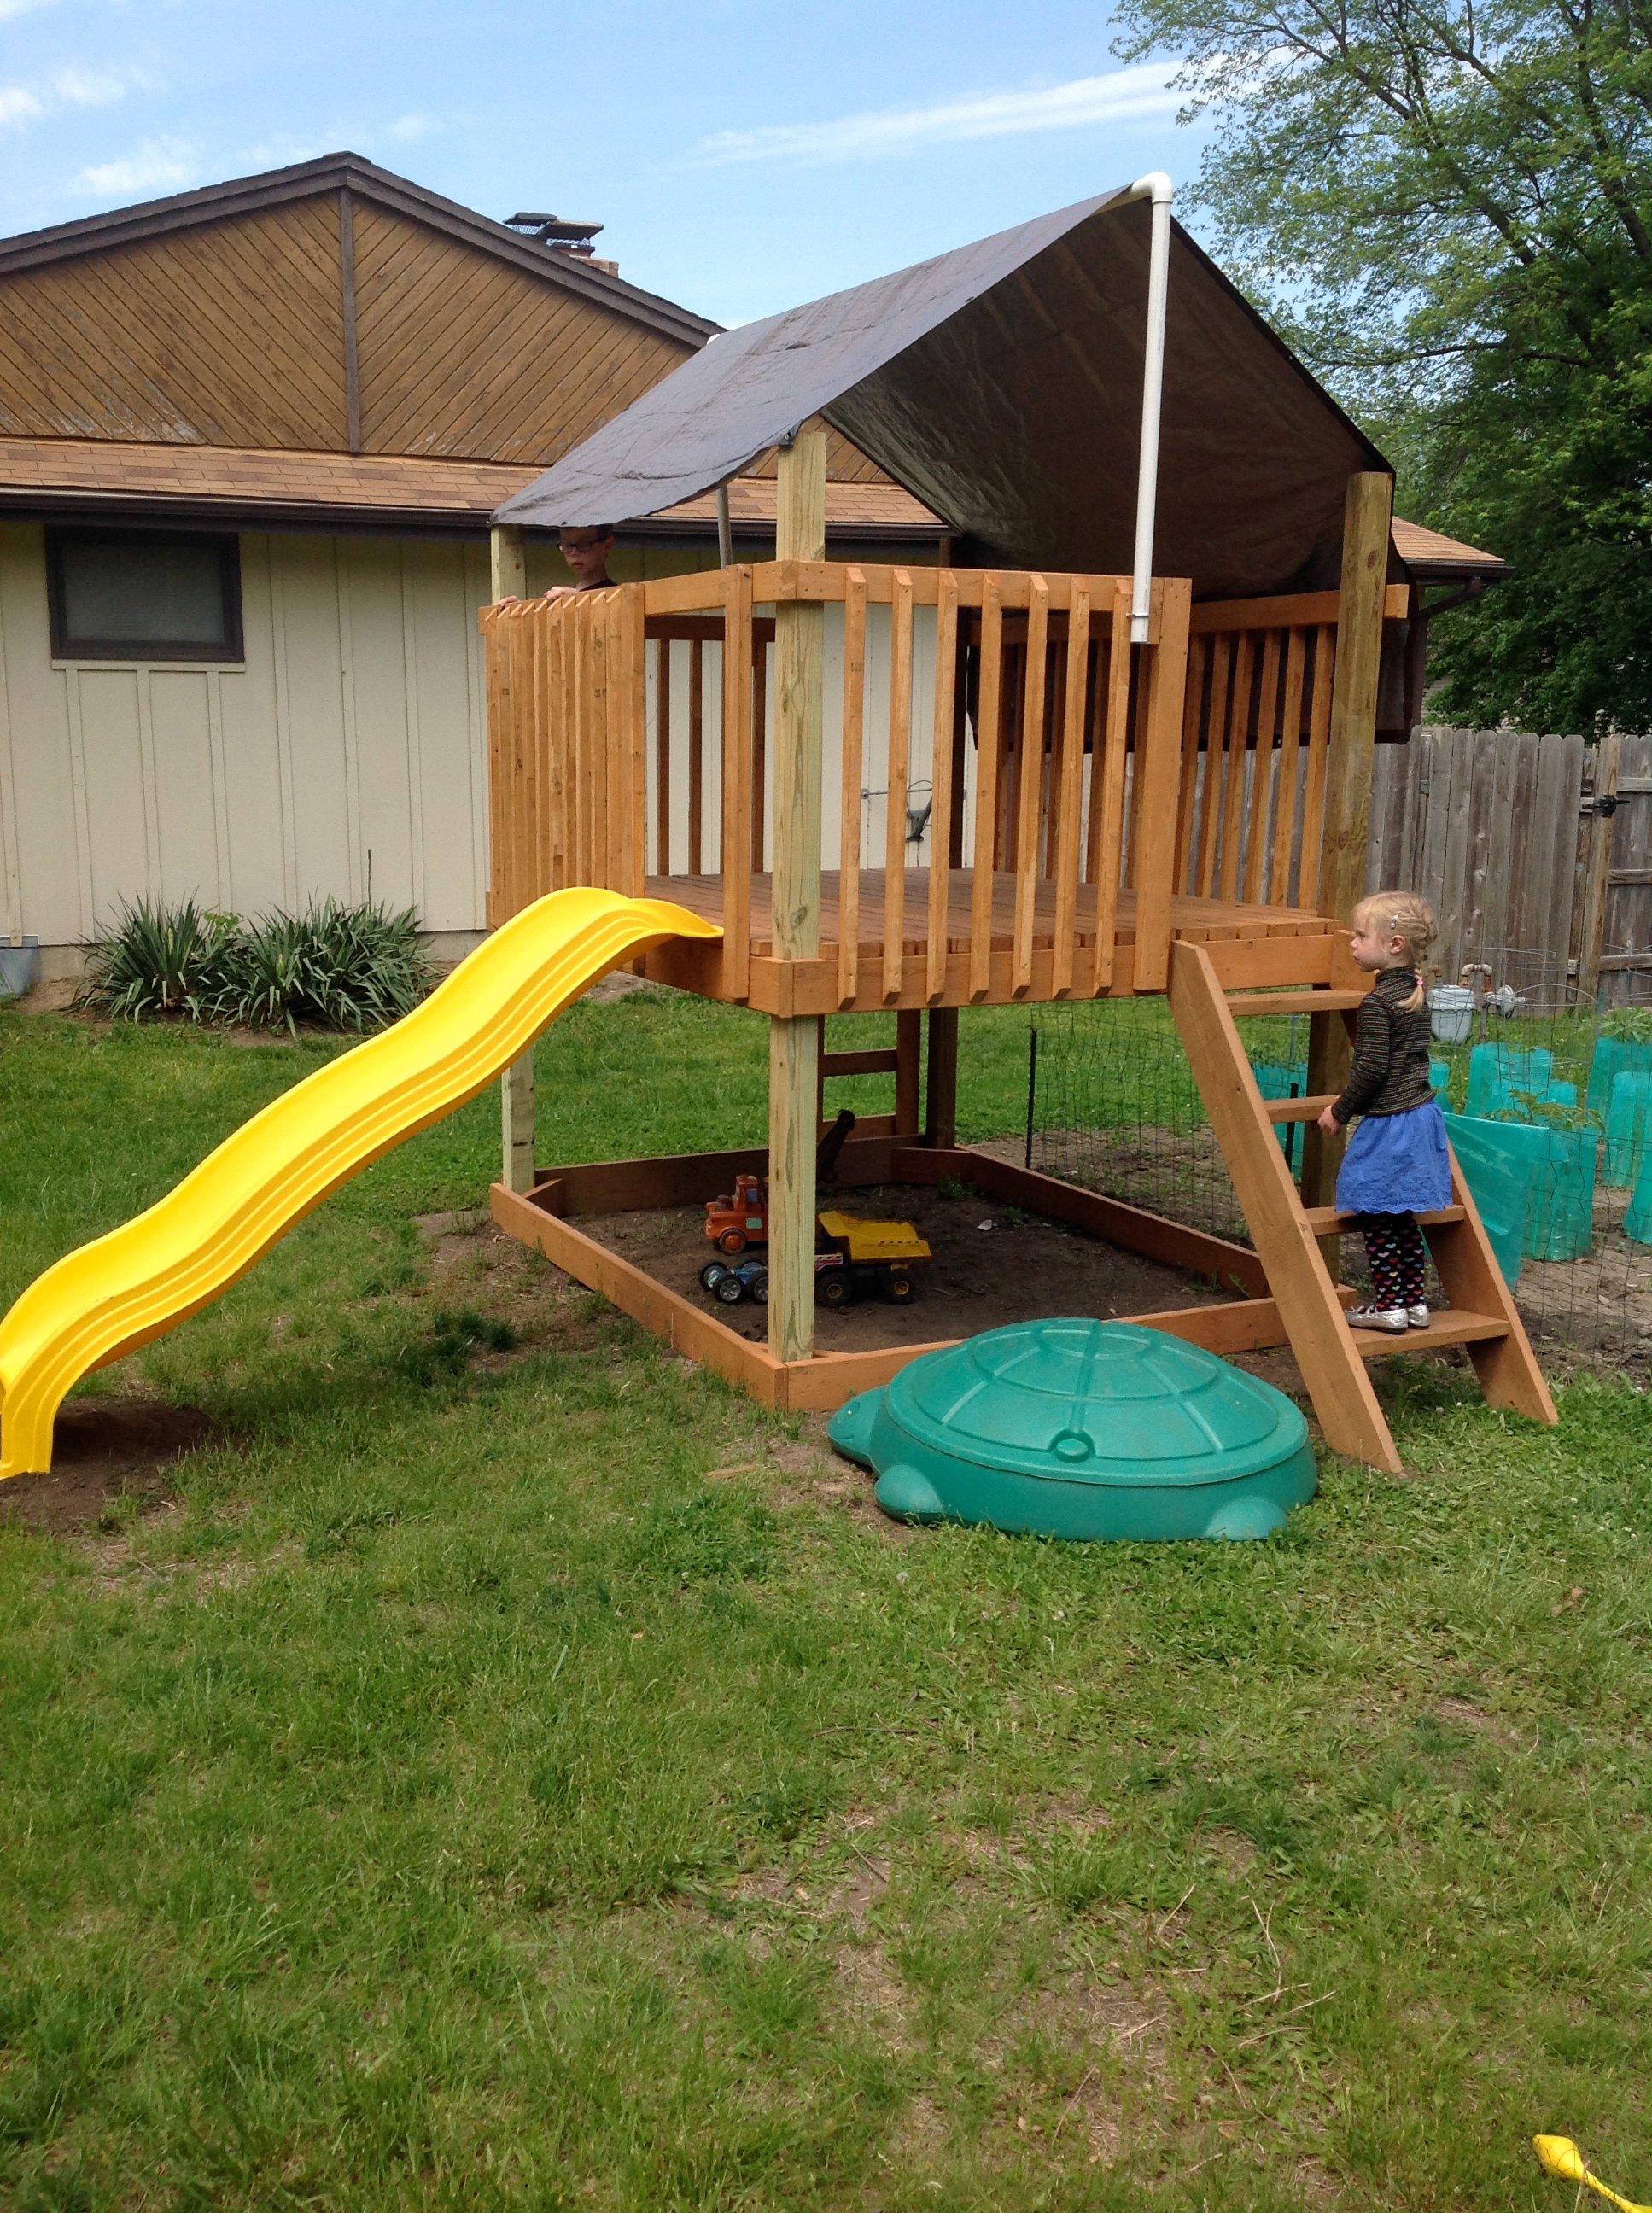
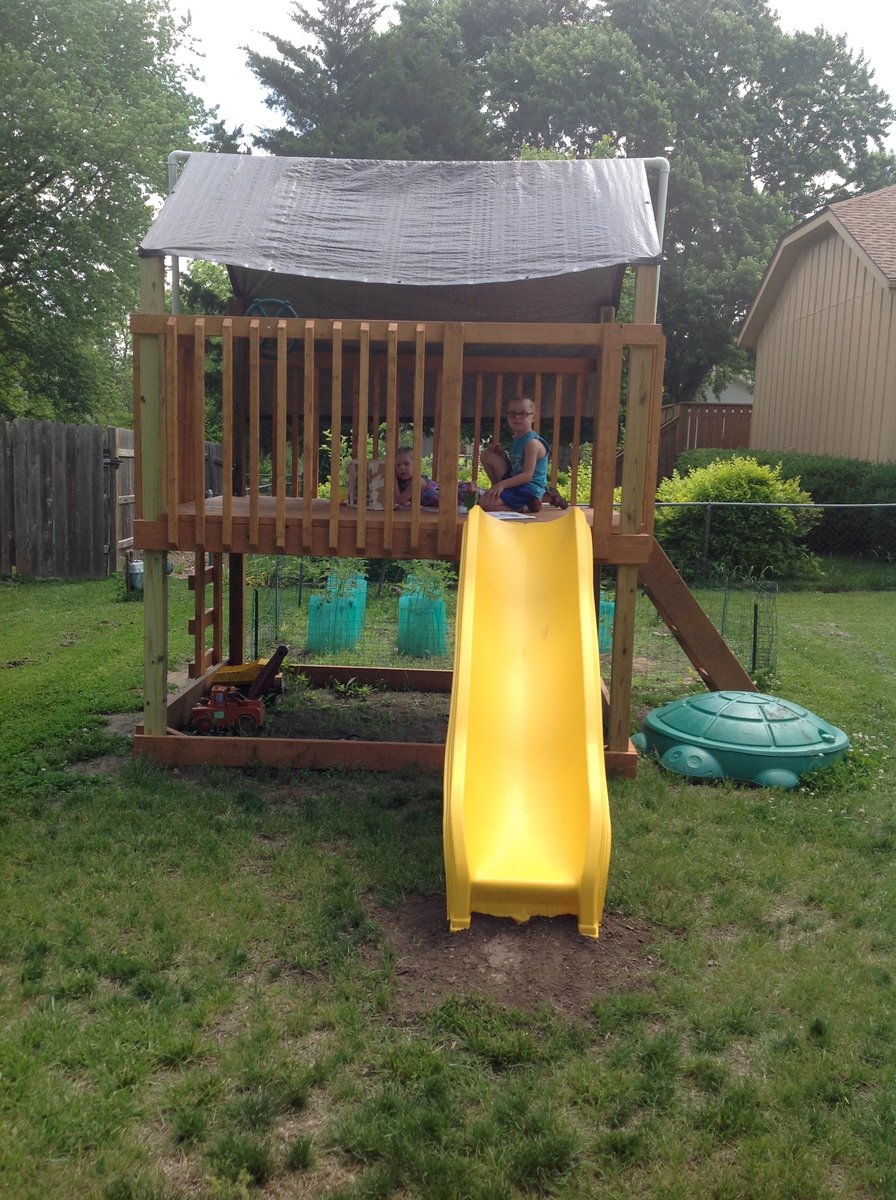
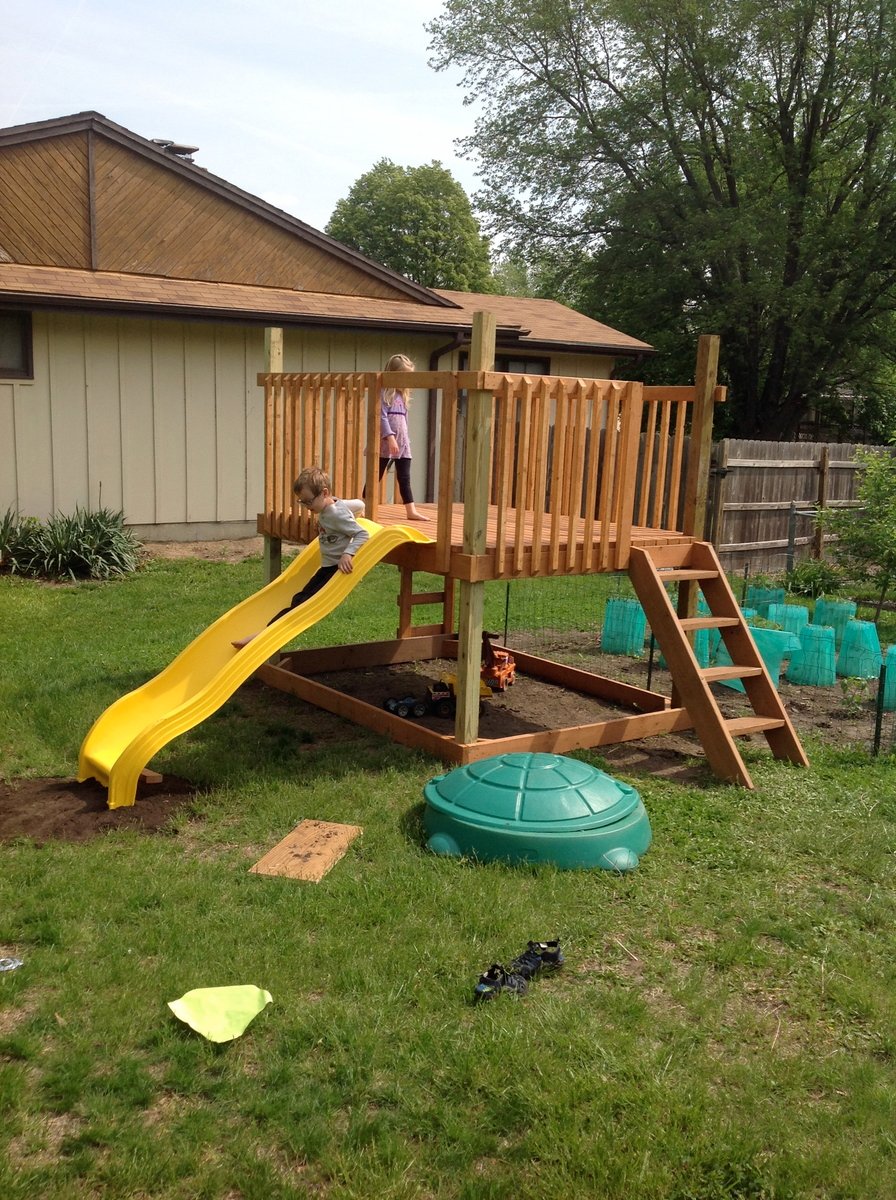
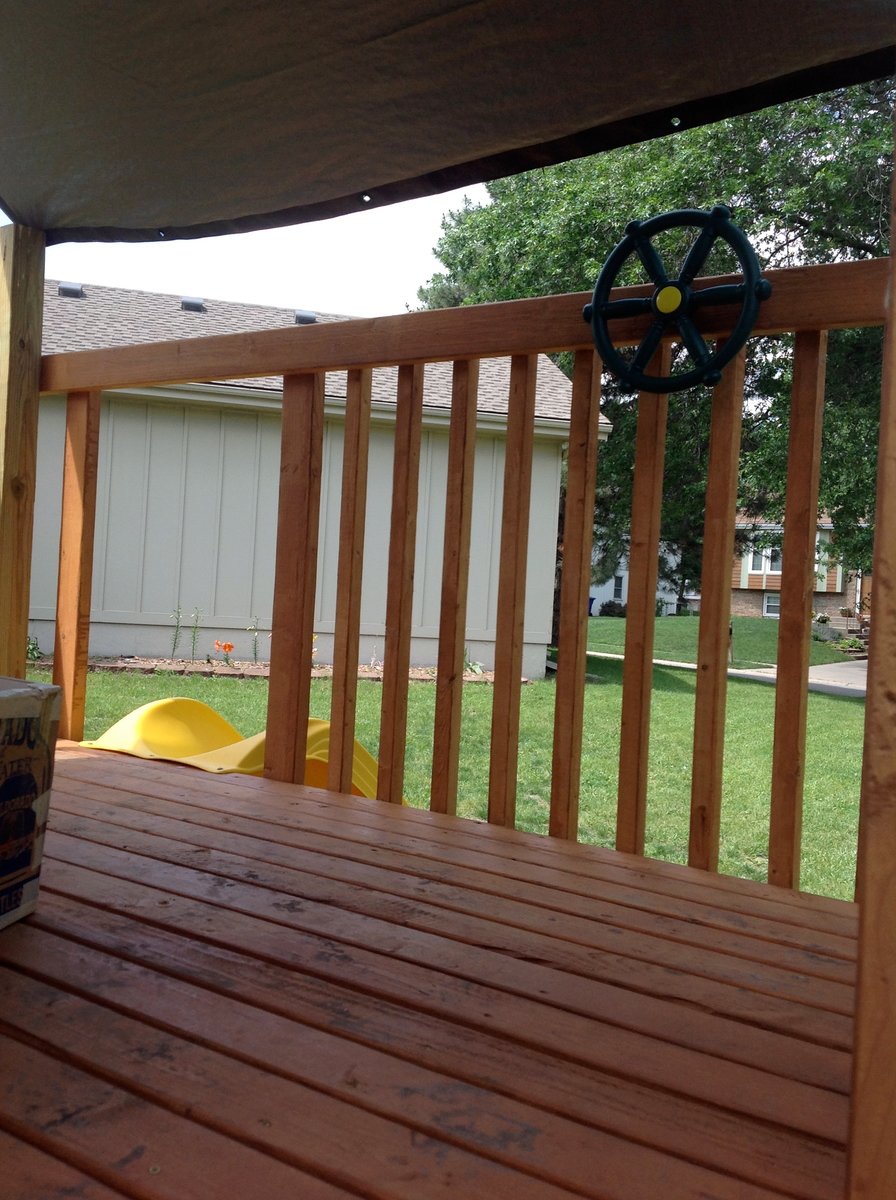
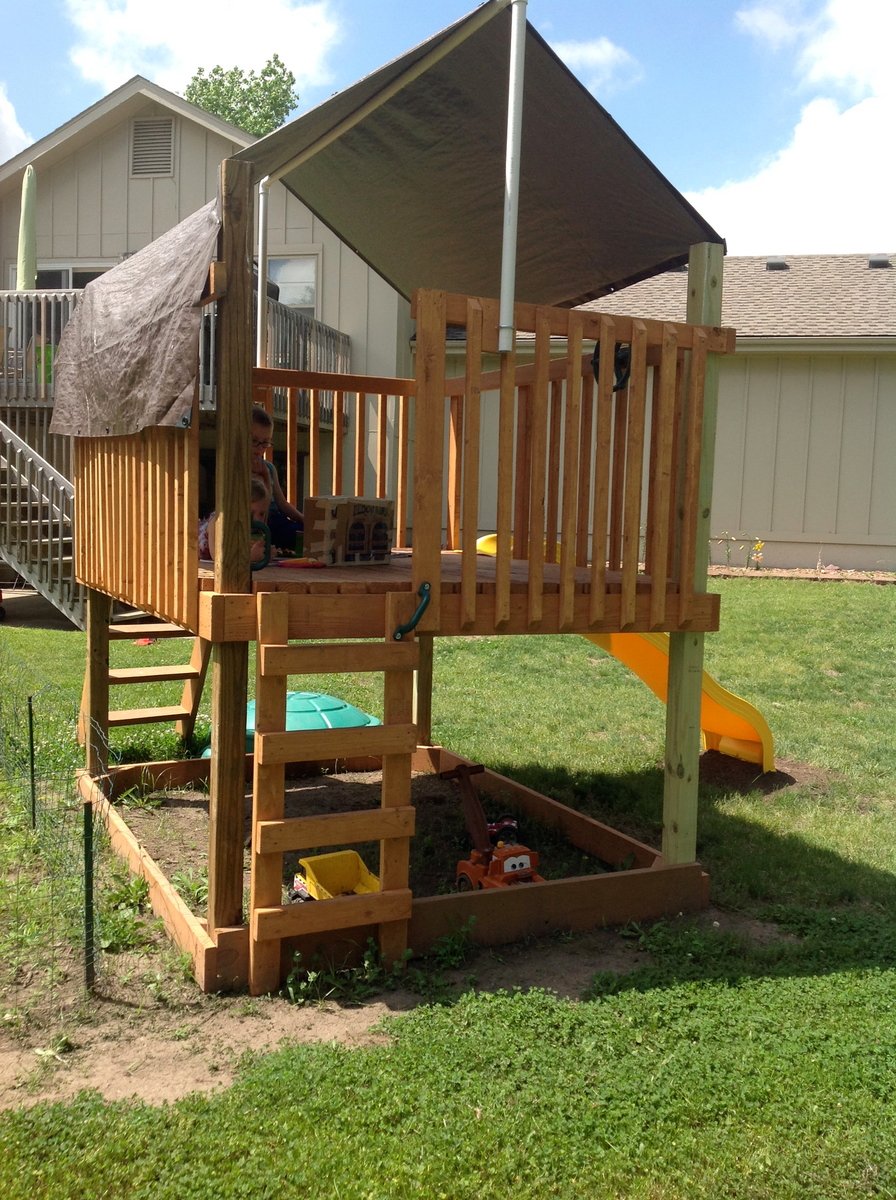
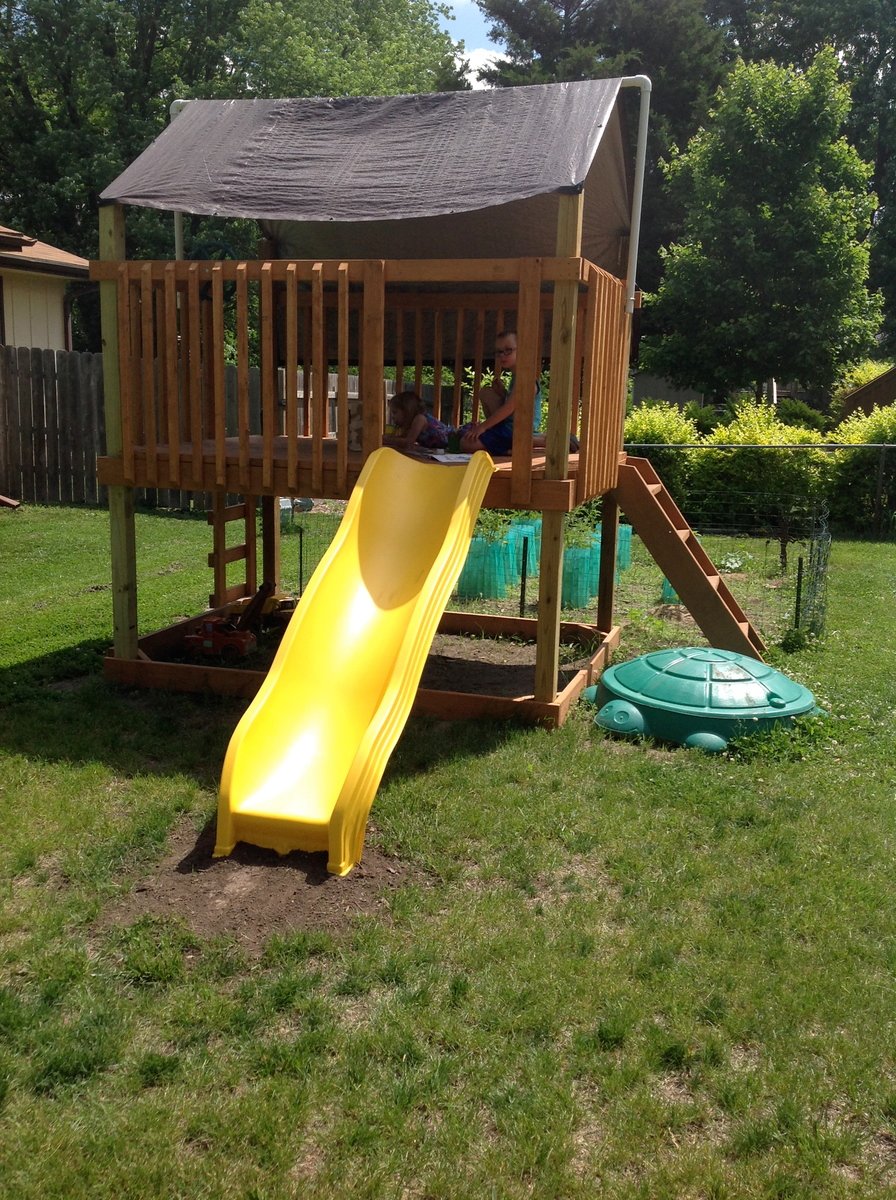
I wanted to build a structure for the kids to play in, but not include a playhouse. I used the playhouse deck design and made it slightly smaller (6 feet by 8 feet). The "roof" is removable to provide shade when it's sunny. It's just PVC and a tarp - pretty simple, but it does the job. I used treated posts and untreated lumber for the rest of it. I painted everything in my garage before assembling it. Once all of the wood at been painted, but came together pretty quickly!
Built for my son and daughter-in-law. Love it