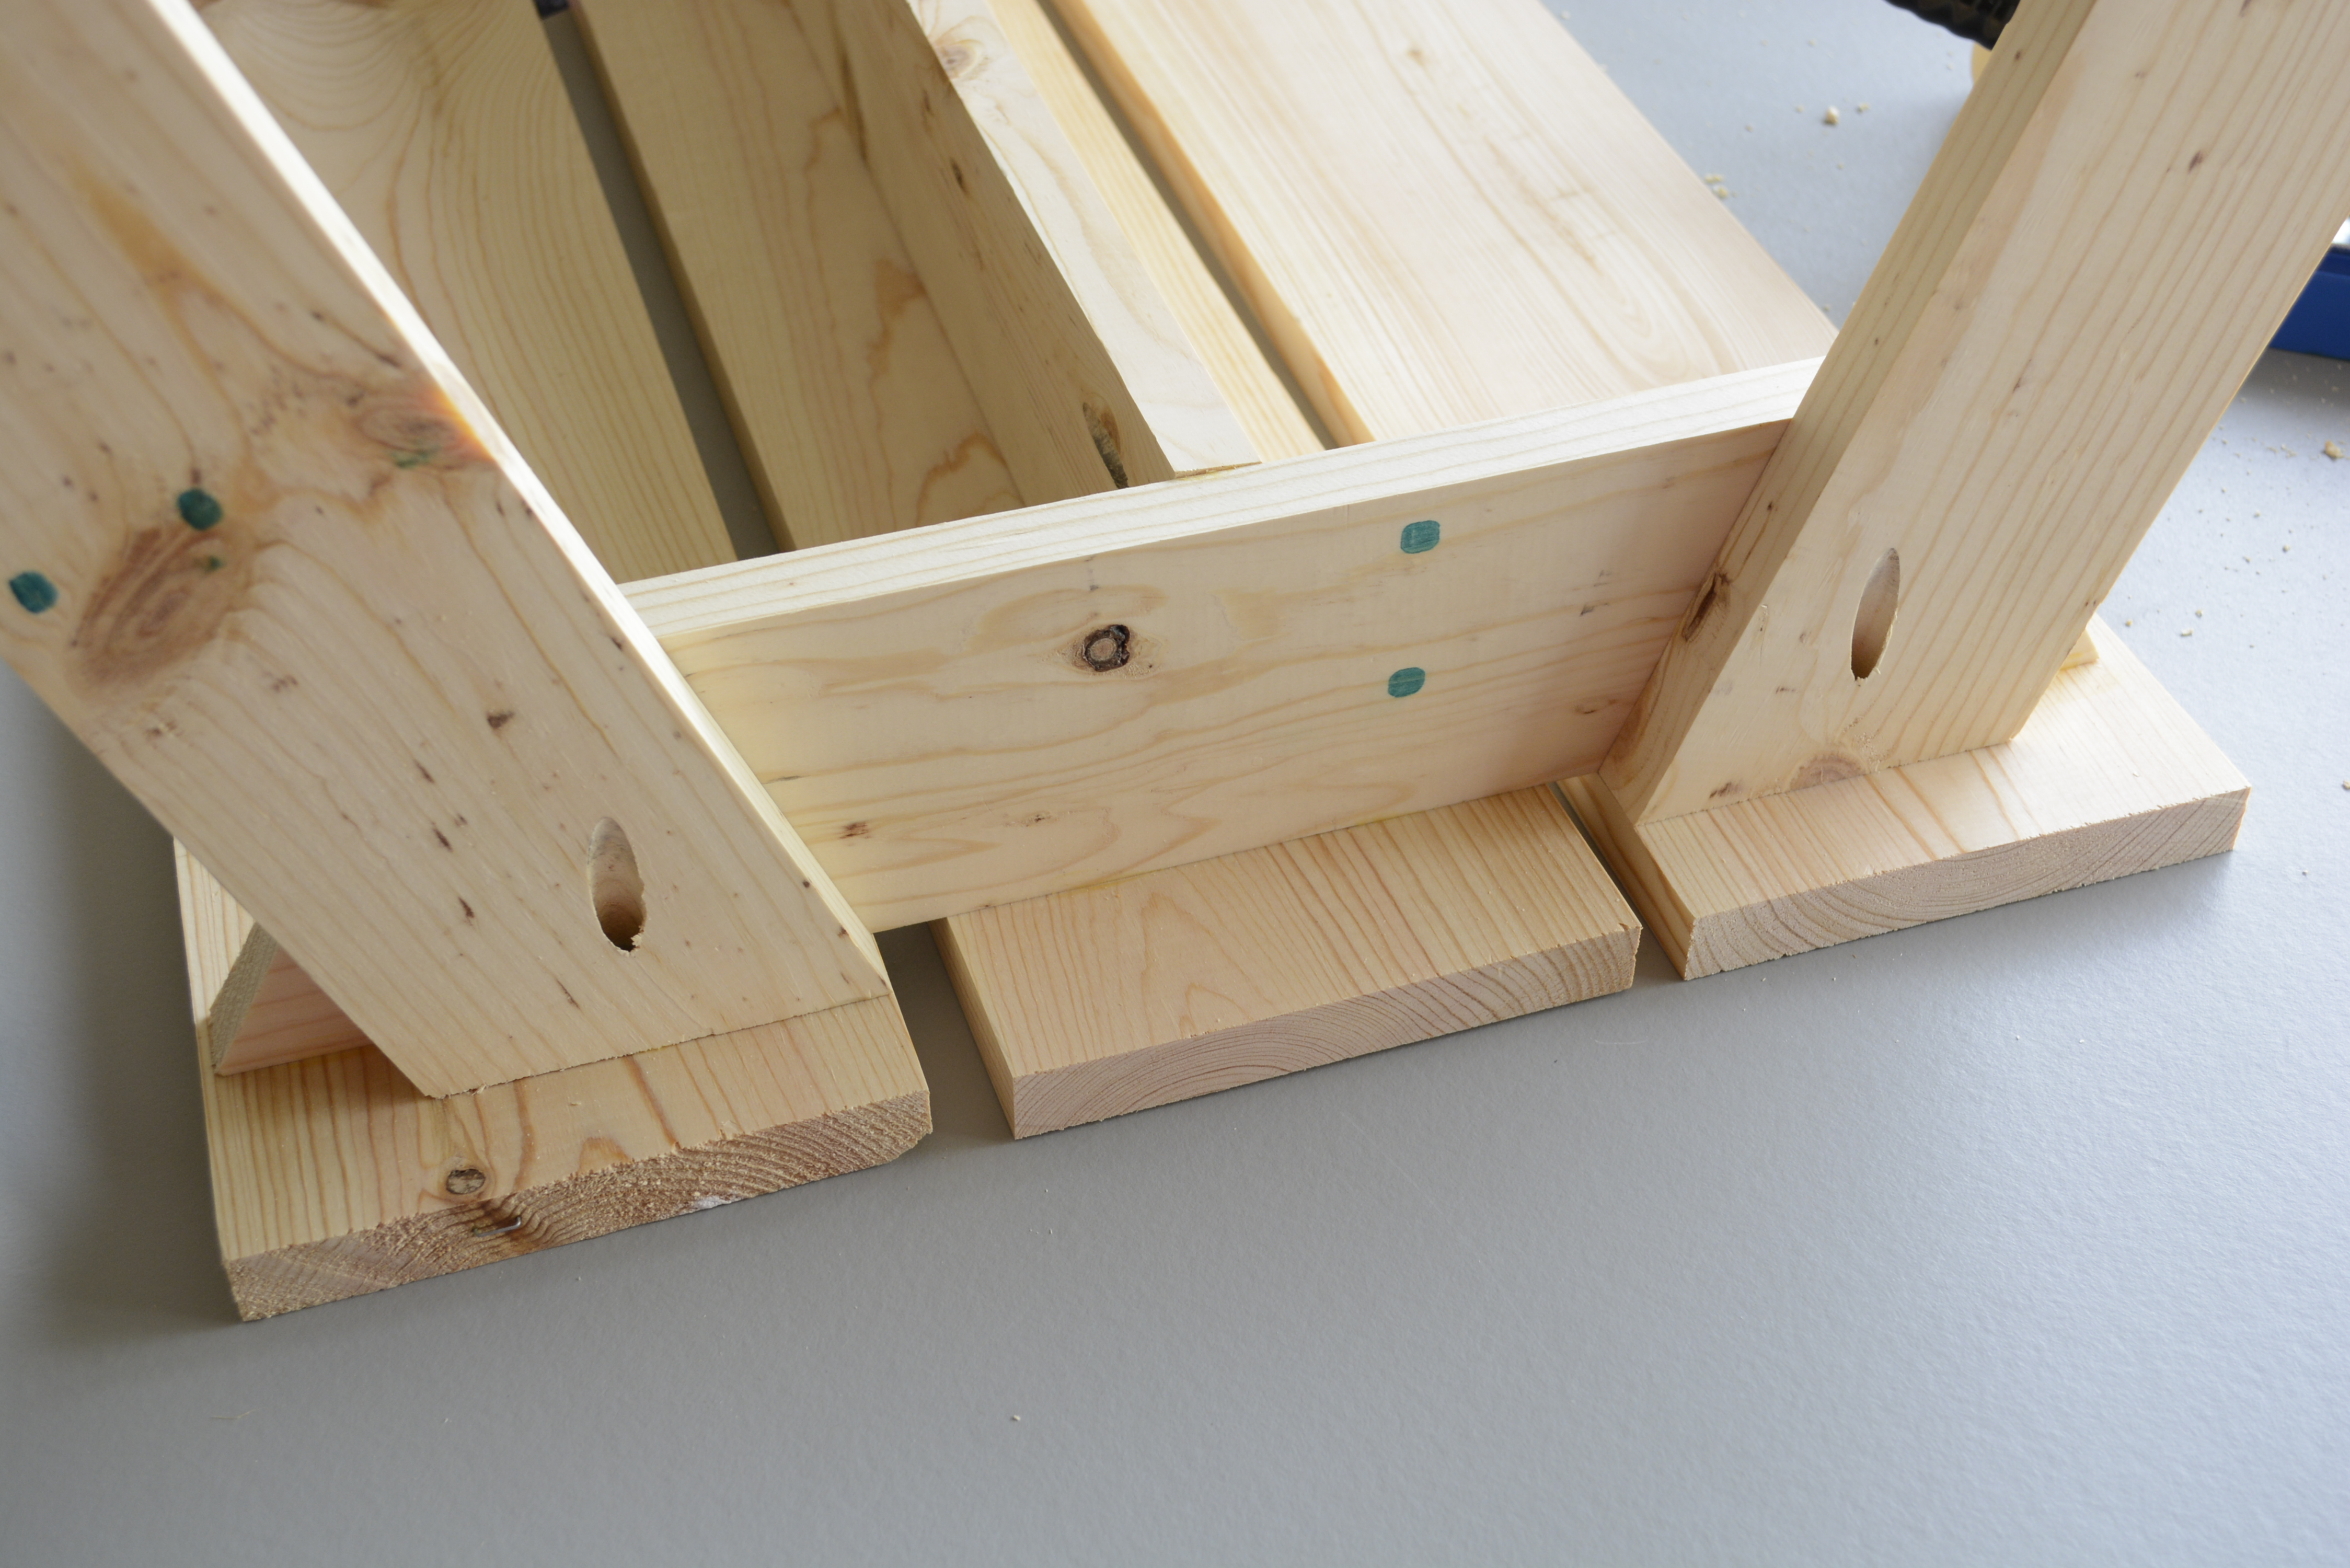
Kids Picnic Table
Fun and easy project!
Built from Plan(s)
Fun and easy project!
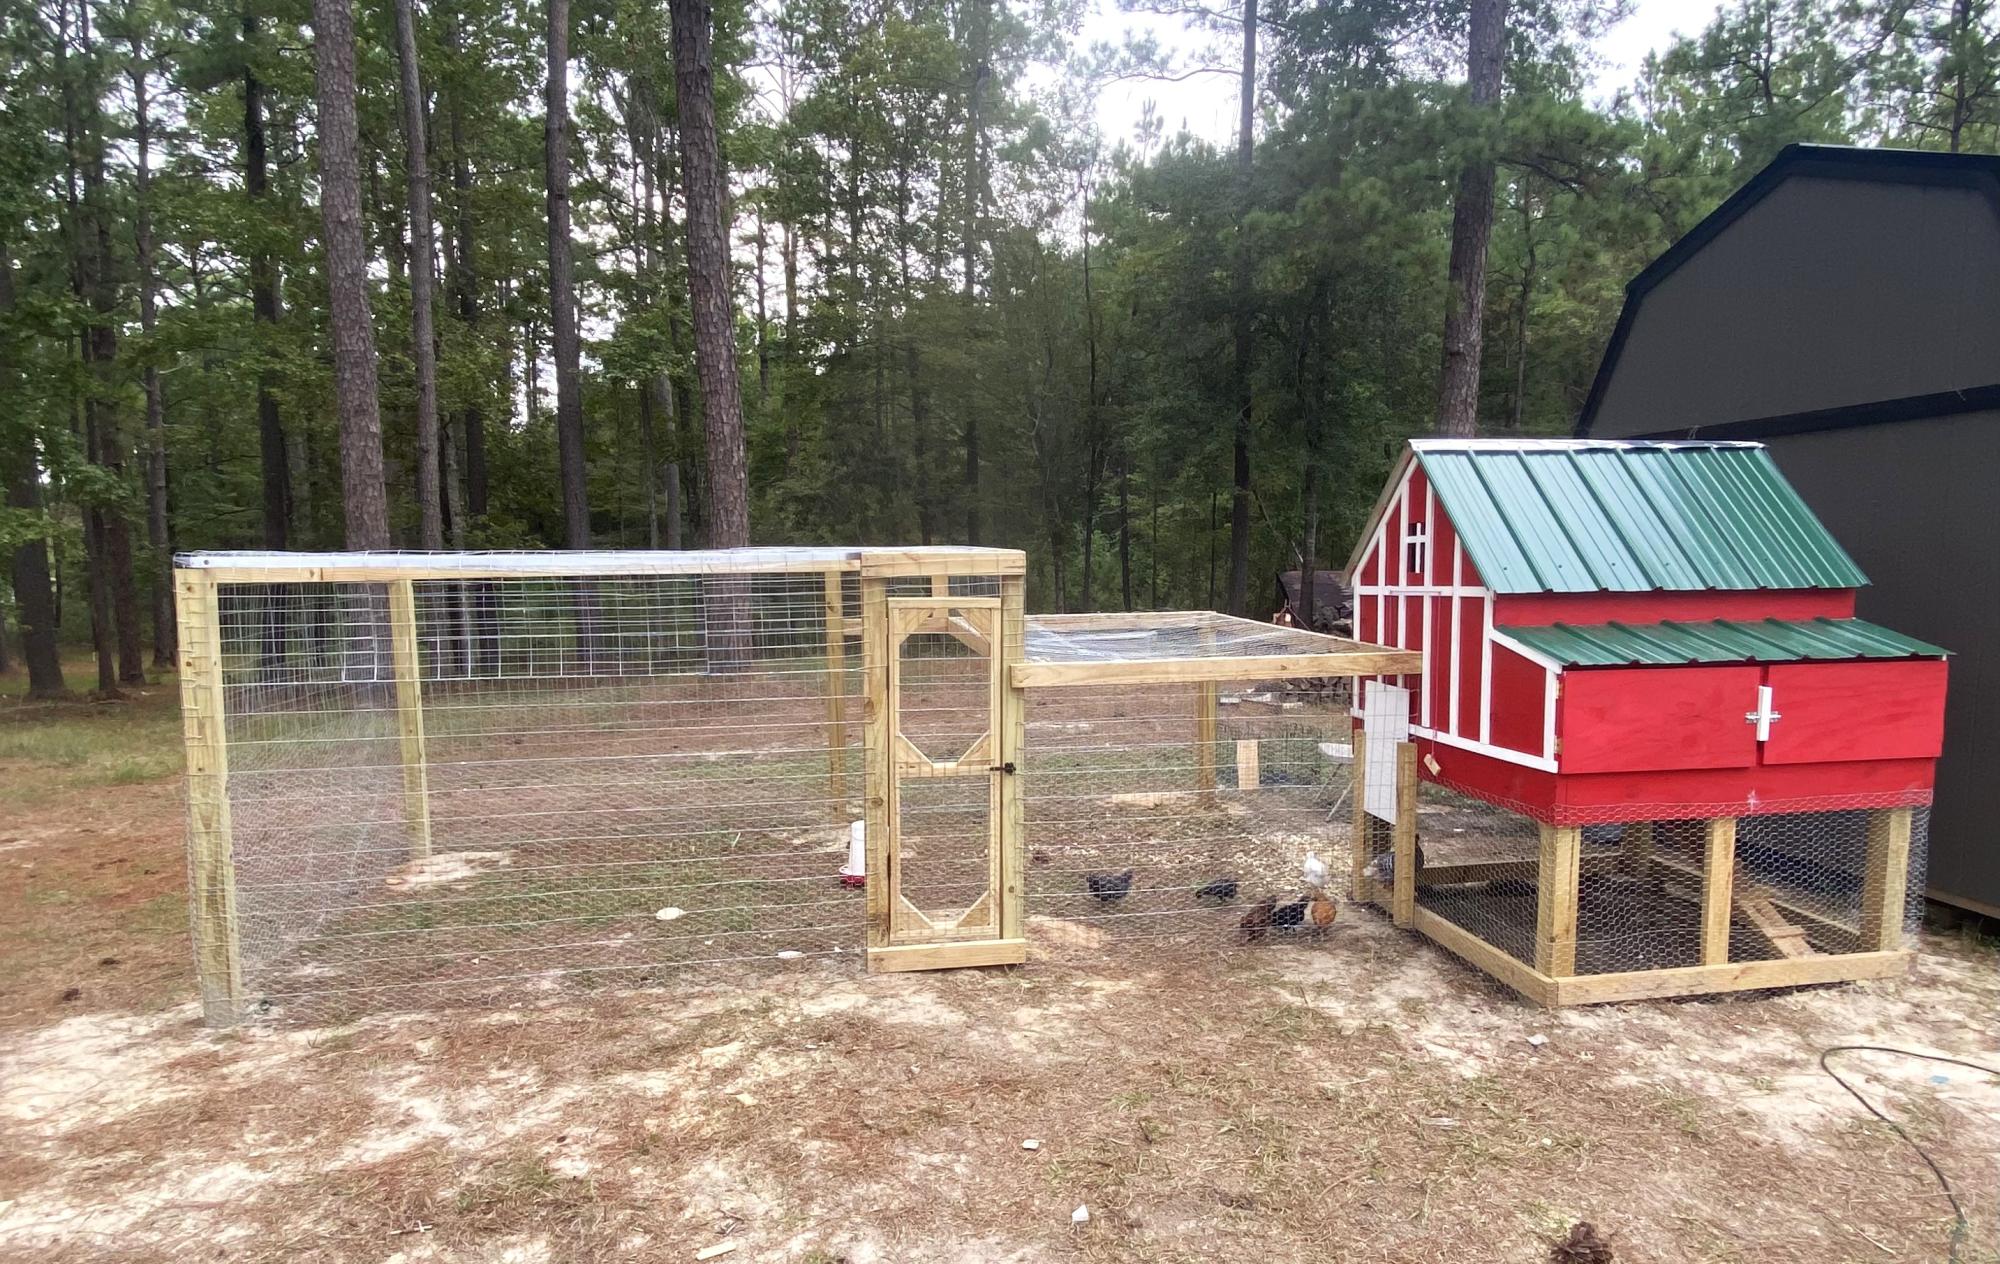
Small coop with run. Awesome plan.
Jinks hill farms

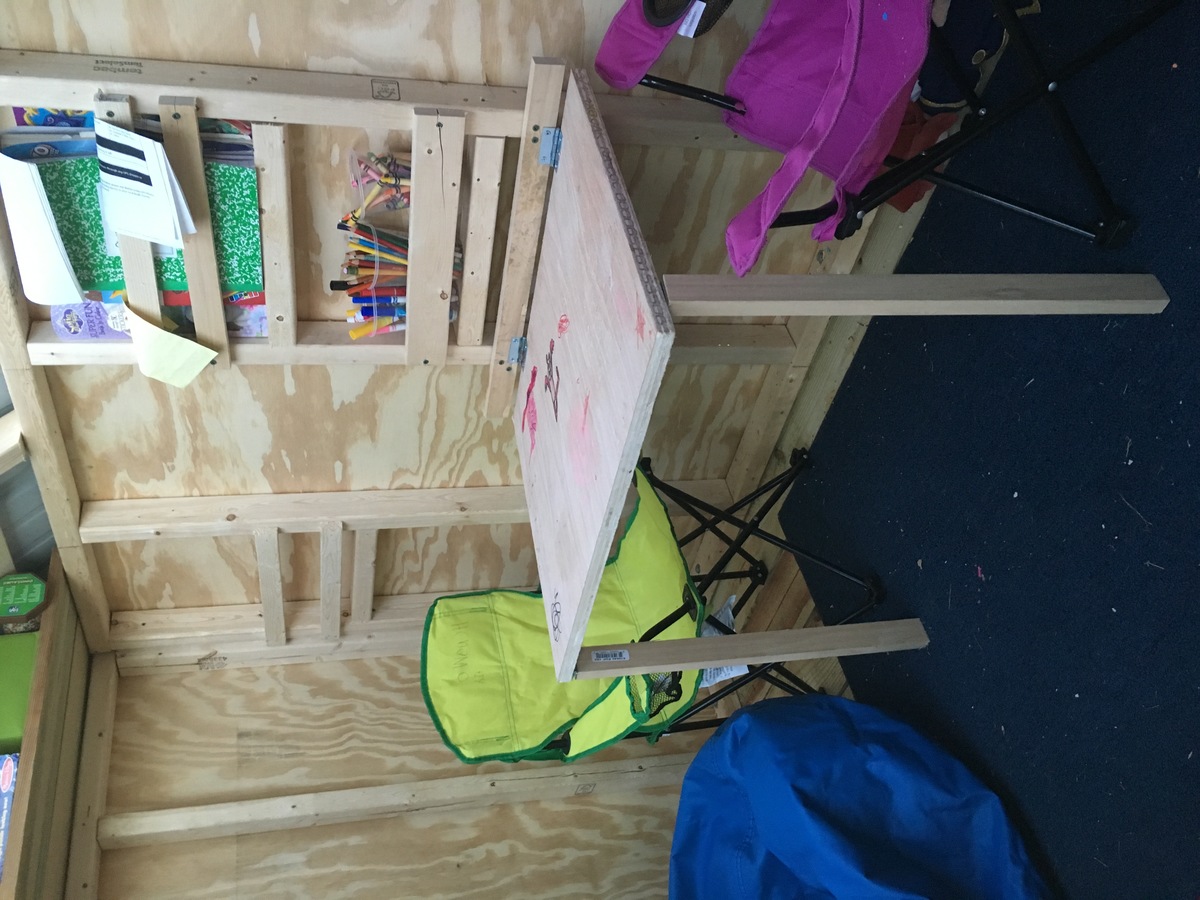
We really enjoyed building this playhouse swing set for our kids. We have a decent slope to our backyard, so we needed to sink our posts, which required a bit more work thank Ana's plans. We also used a real window (my dad just happened to have in his garage) instead of the 3 open aired windows Ana's plans called for. Inside we built a fold under table, shelf, and a chalkboard for thier entertainment.
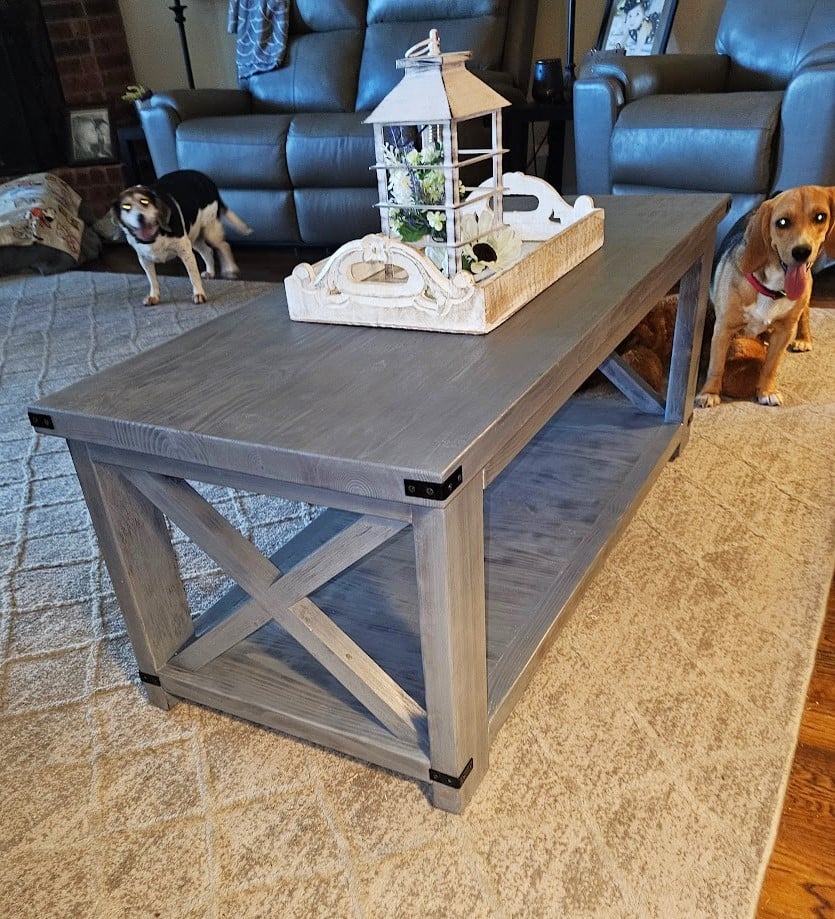
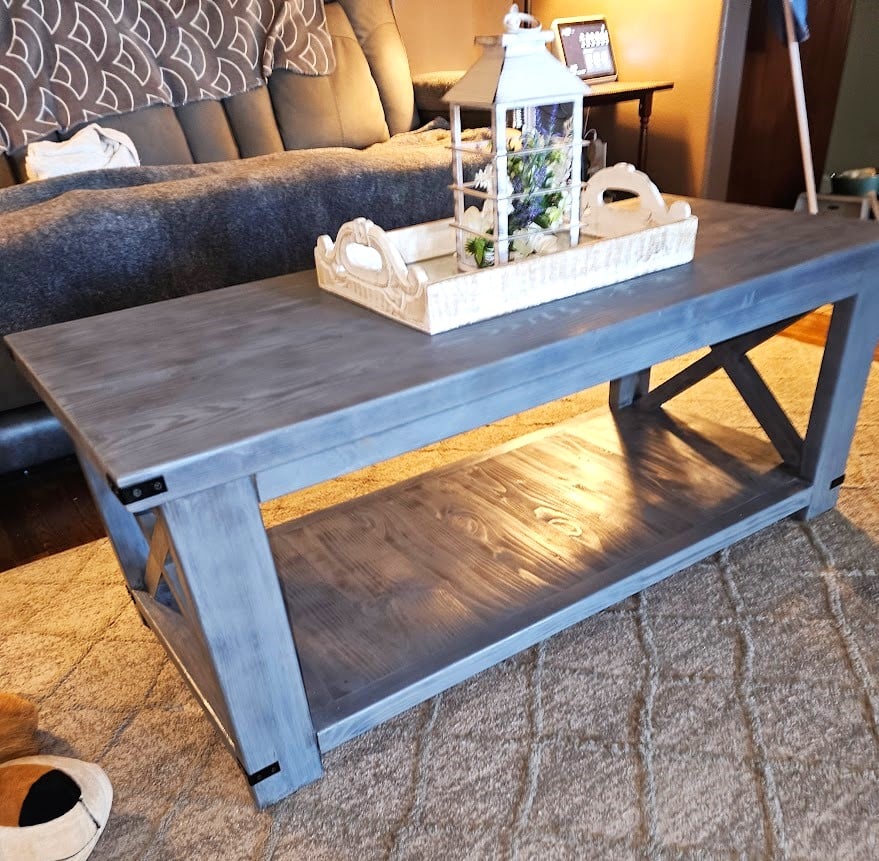
Farmhouse Coffee Table with a bit of Rustic "X" Coffee Table. Thank you so much for the plans. This was a nice build. I opted for pocket holes and panel glue up so for me, it wasn't a one day build. :)
WRH
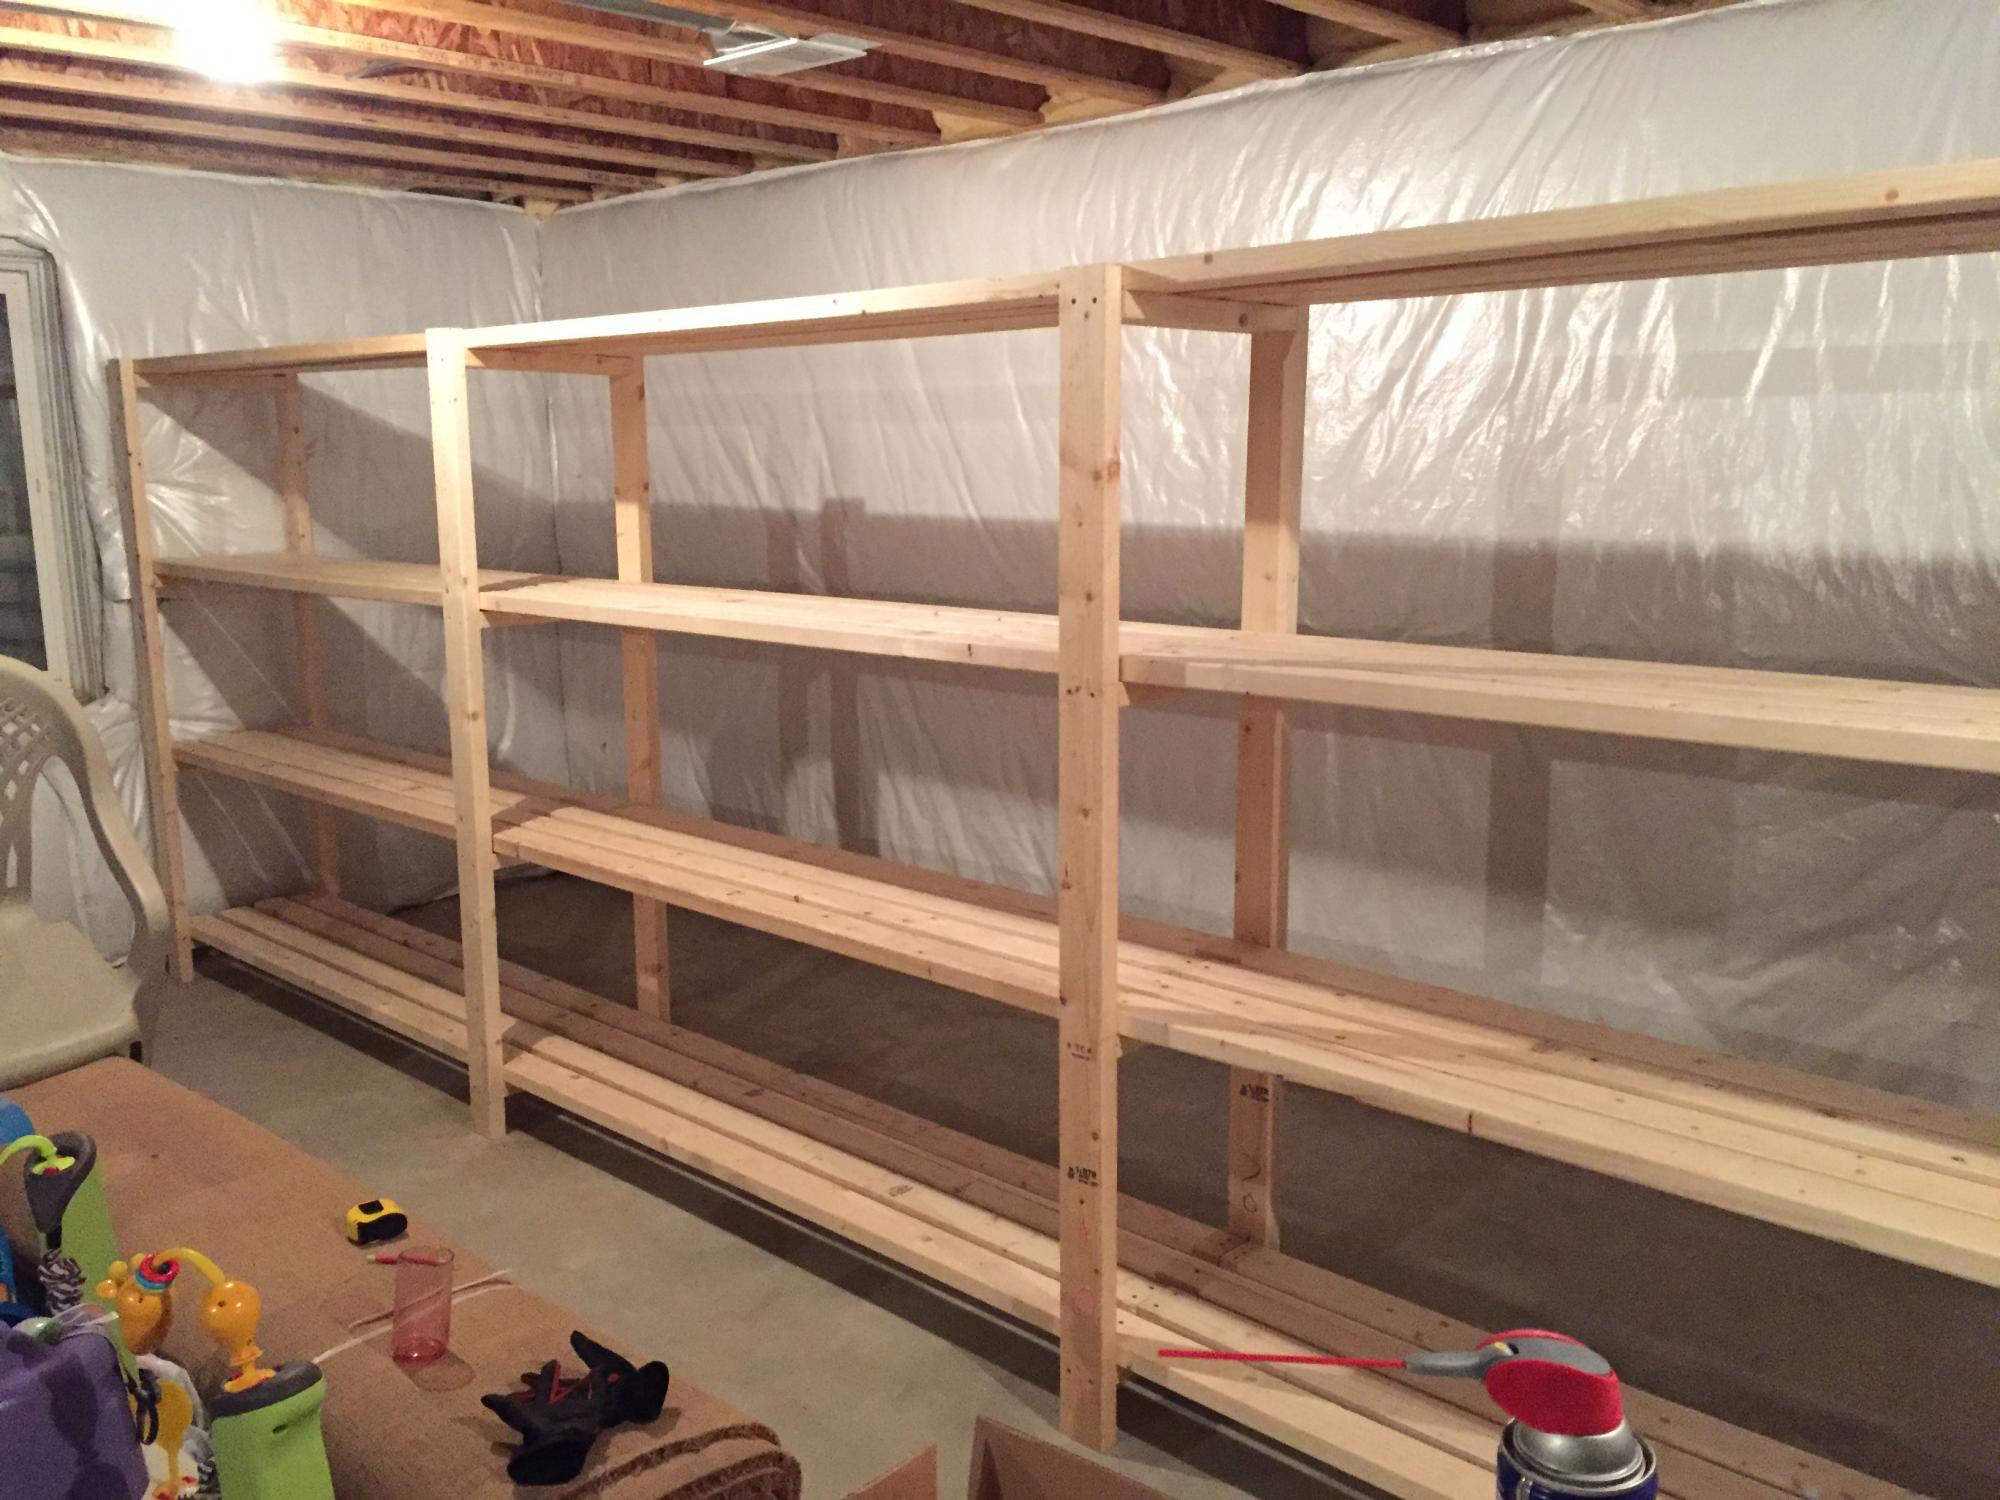
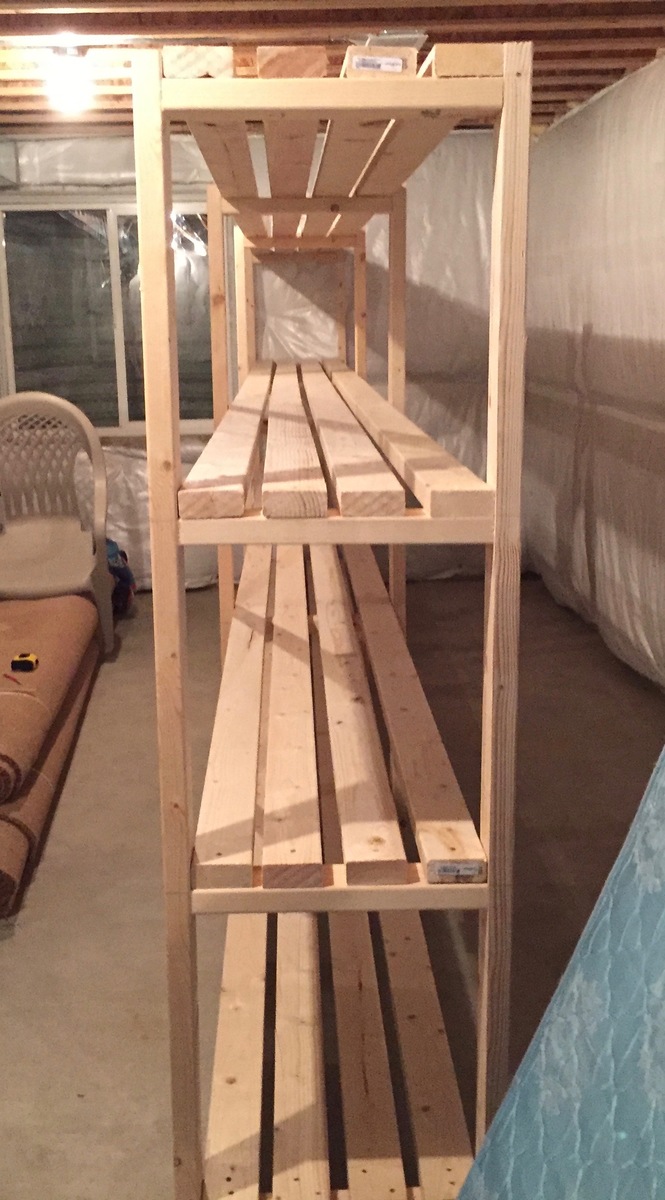
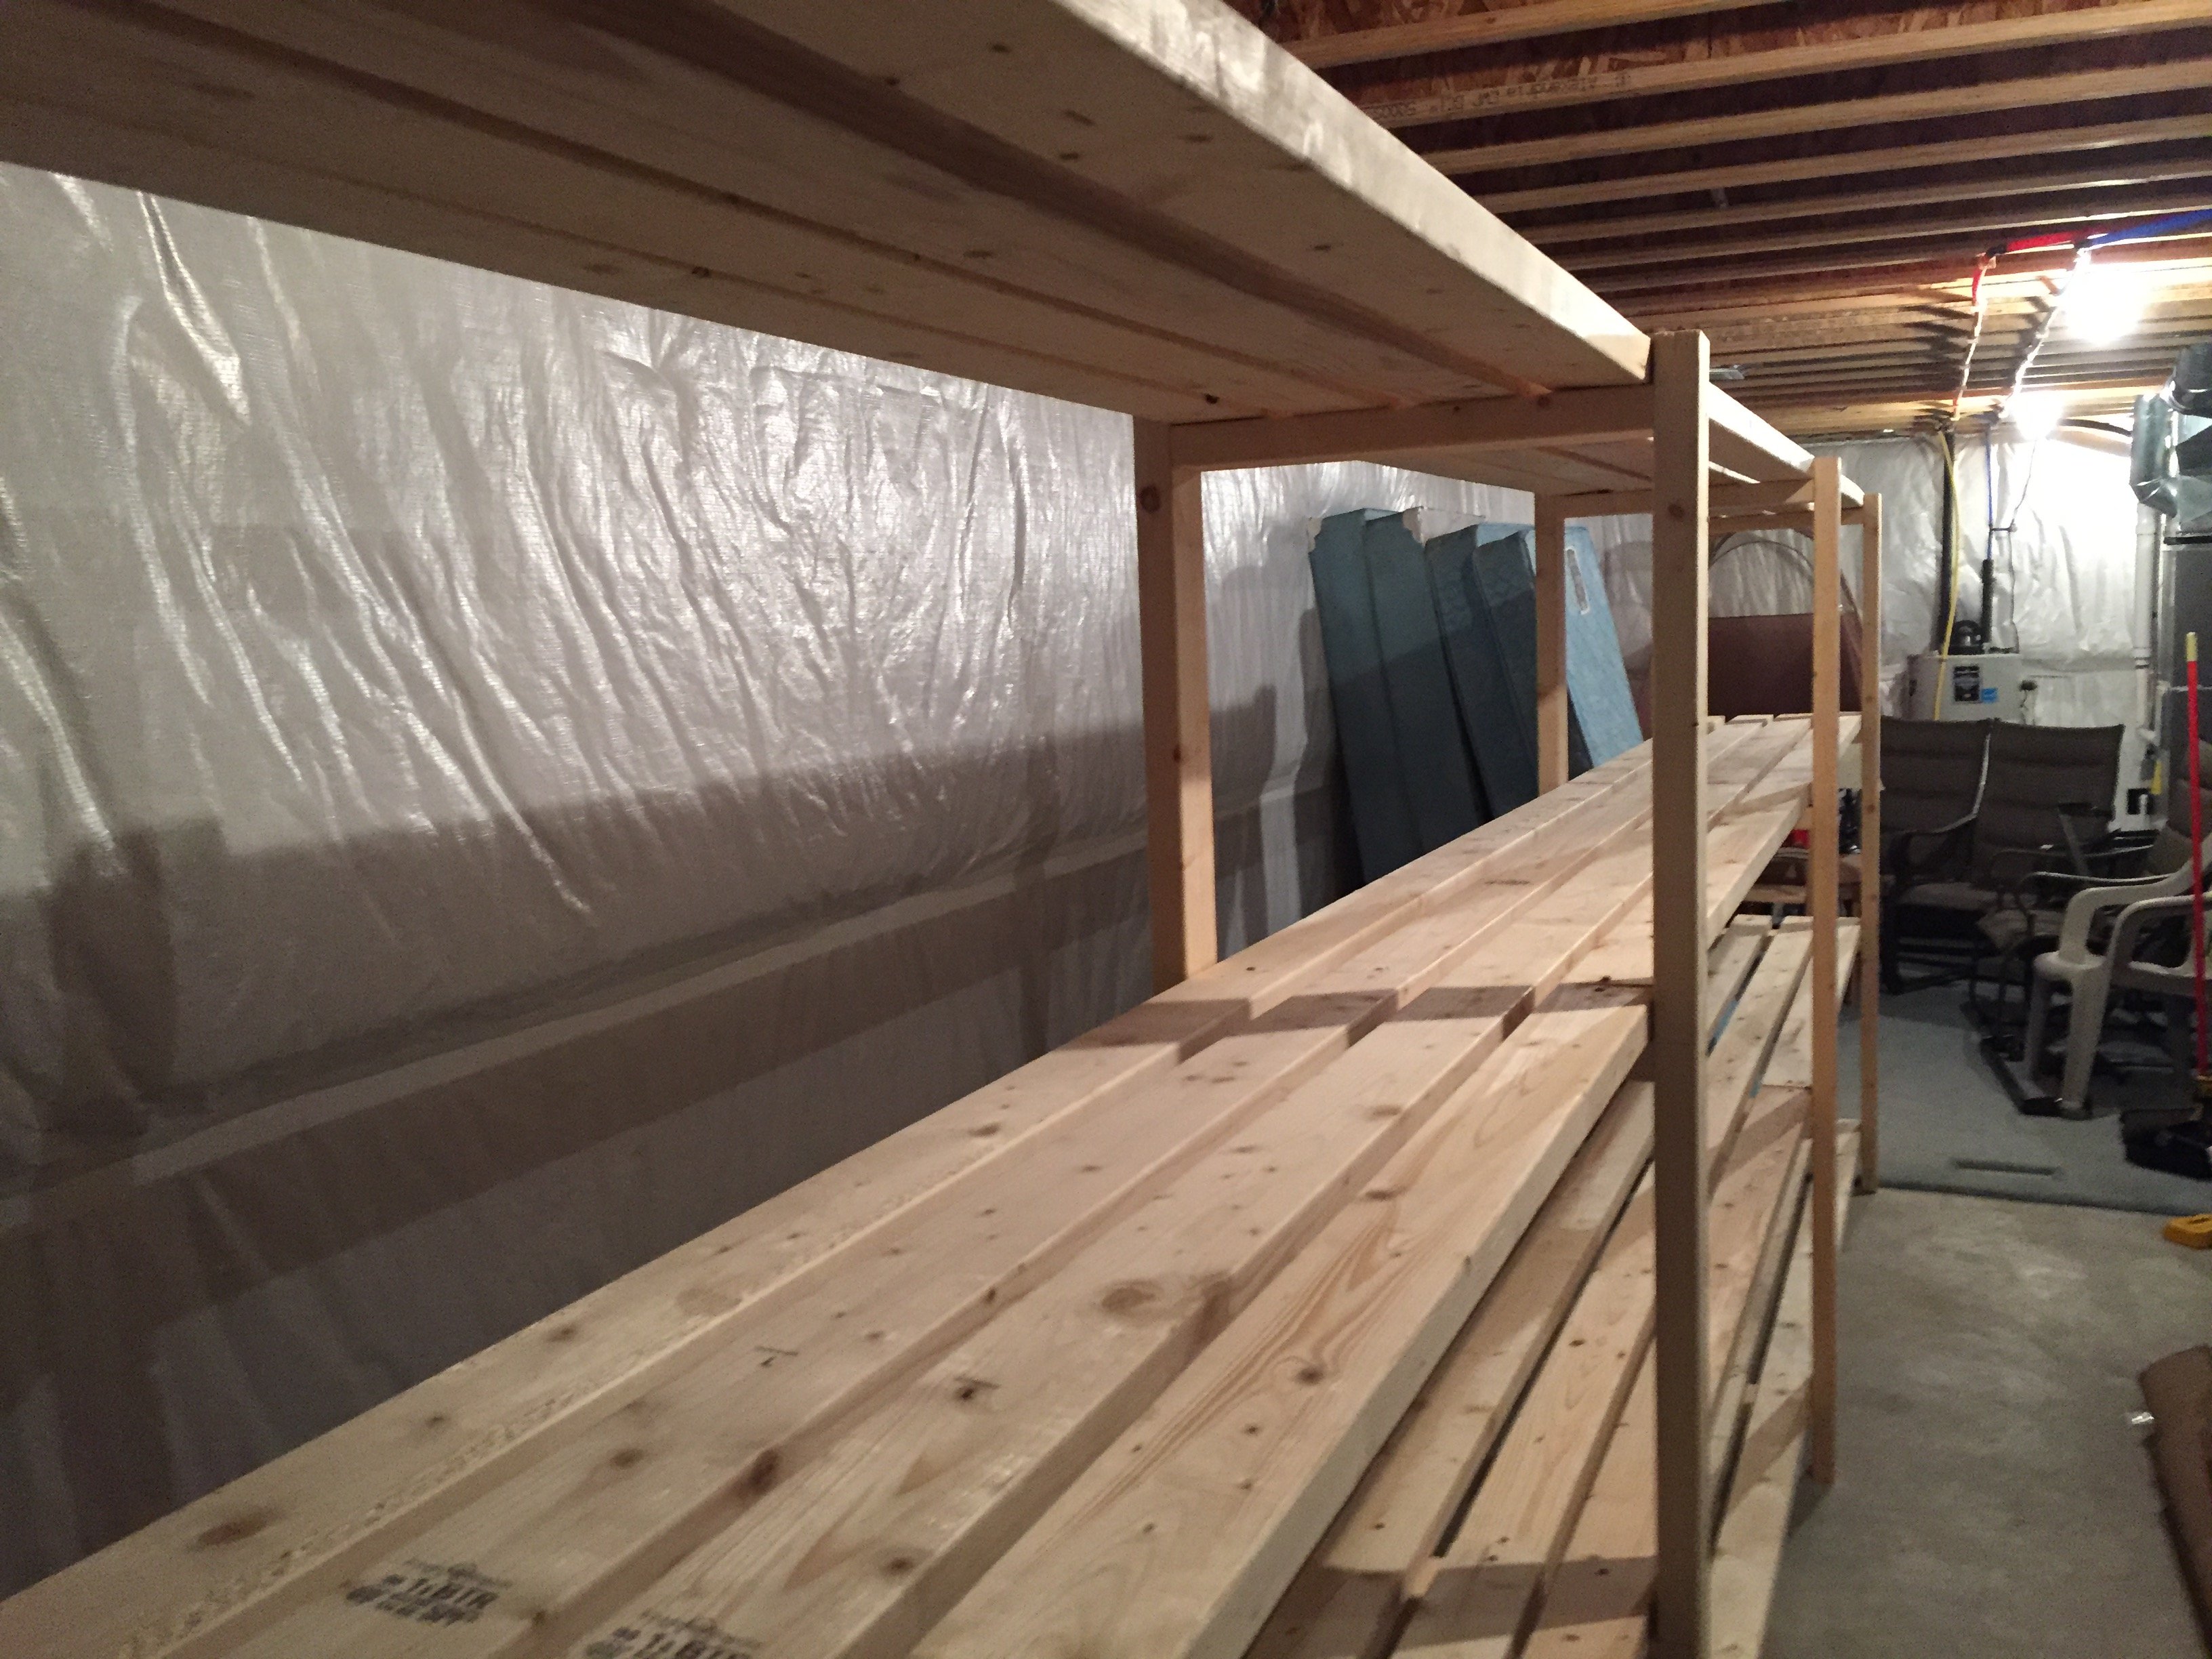
Thanks for the instructions! Here's my version. I haven't built much of anything before, but I needed it in my basement to handle kids' stuff. My version is 18 feet long. I combined a 12-foot and 6-foot 2x4 to get that length, which meant less cutting, which I had done at Lowe's (for free). I used the 6-foot 2x4s throughout the shelf to ensure it was strong (in other words, I didn't want a 12-foot "section" and a weaker 6-foot "section" added on).
I was able to get everything in my car but the ride home was slow. I also had to use my egress window to get the 12-foot boards in the basement.
Total cost for me was about $170 including a couple boxes of screws and wood glue. I could've easily spent double the cost on store-bought shelving. Thanks for the plans!

Cluckingham Cottage wasn’t built in a day, but it WAS built by a DAME!
A-frame instructions were pretty helpful considering the builder knows nothing about construction. I made a few modifications to accommodate my 5 chooks + 2 bantams . Sturdy and tight structure.
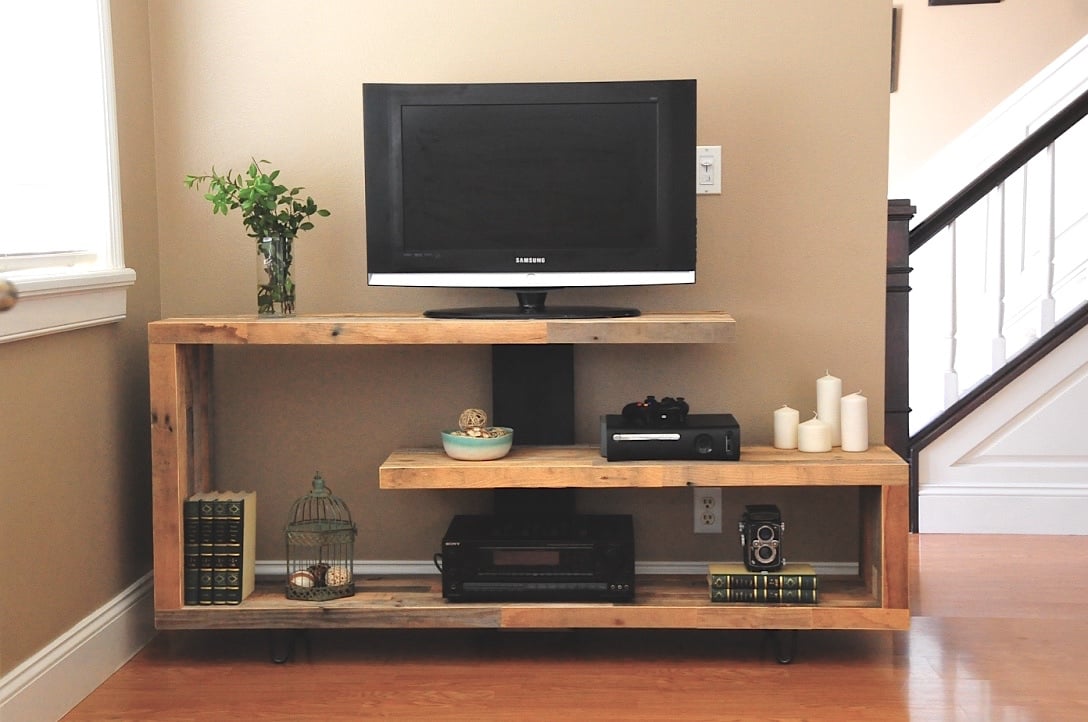
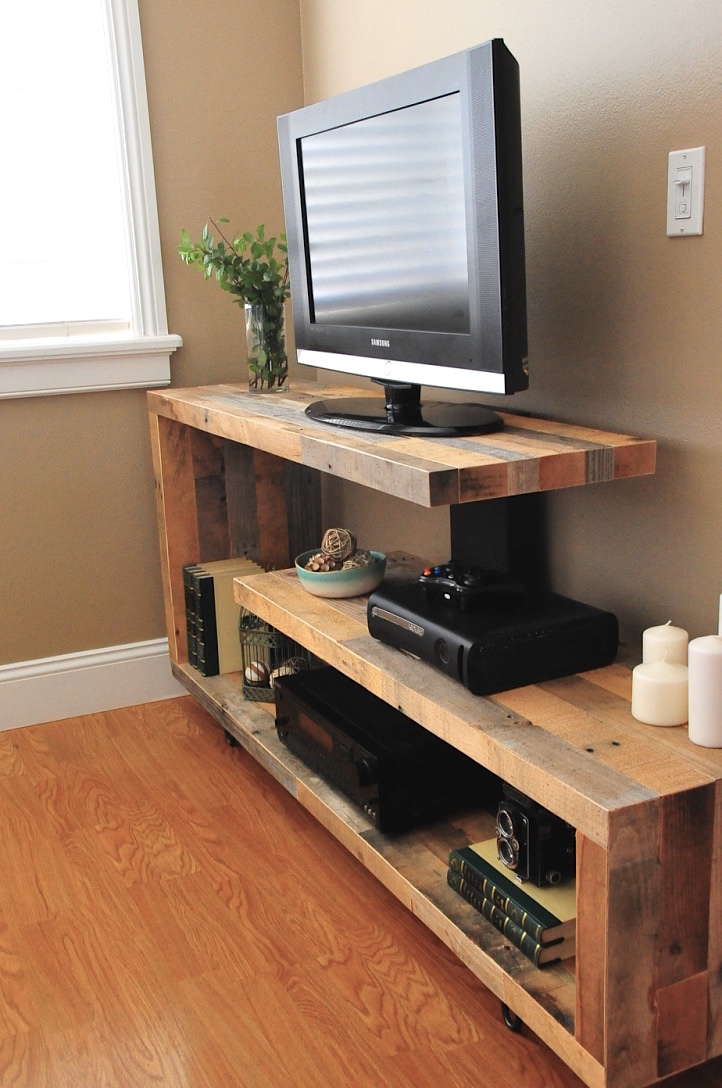
Just finished up this unique TV console. Built from reclaimed pallet wood.
Mon, 12/02/2019 - 22:10
Hi there Im new to site and also have the issue of not seeing the plans for this Rustic Modern TV Console. Are they available and Im doing something wrong or??
Sat, 06/27/2020 - 05:03
I am logged in and I do not see the plans for the "Rustic Modern TV Console"
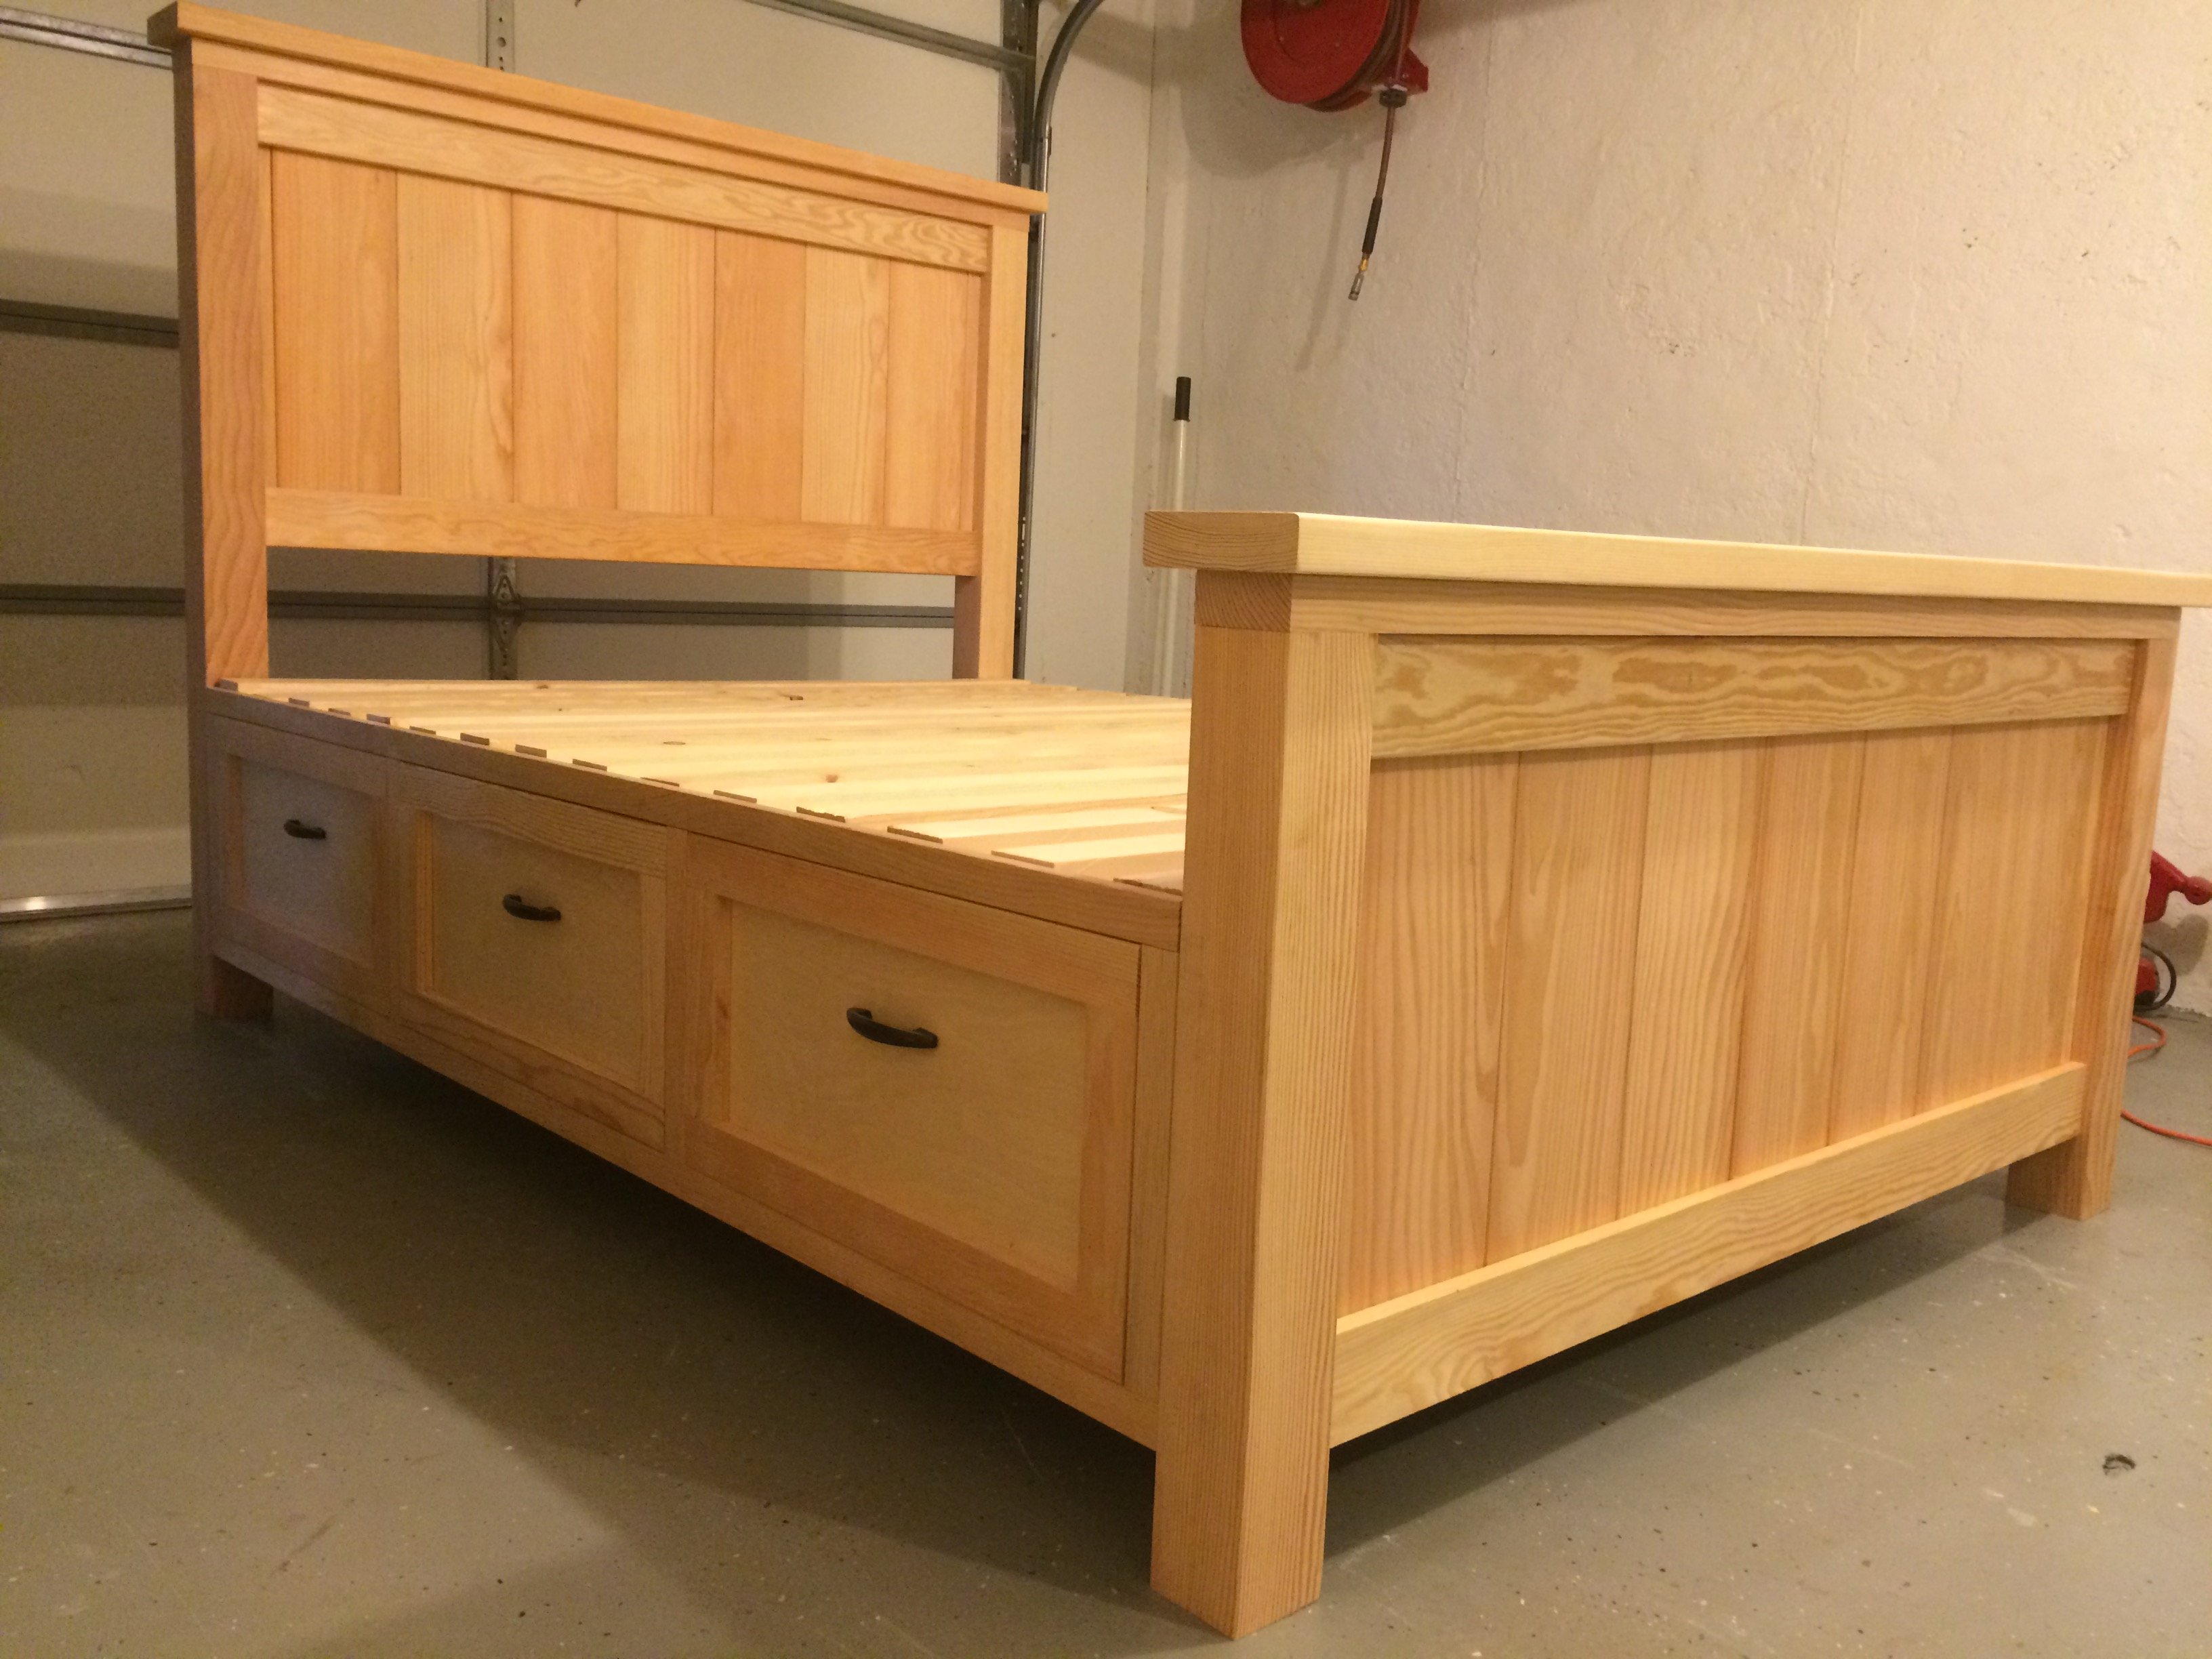
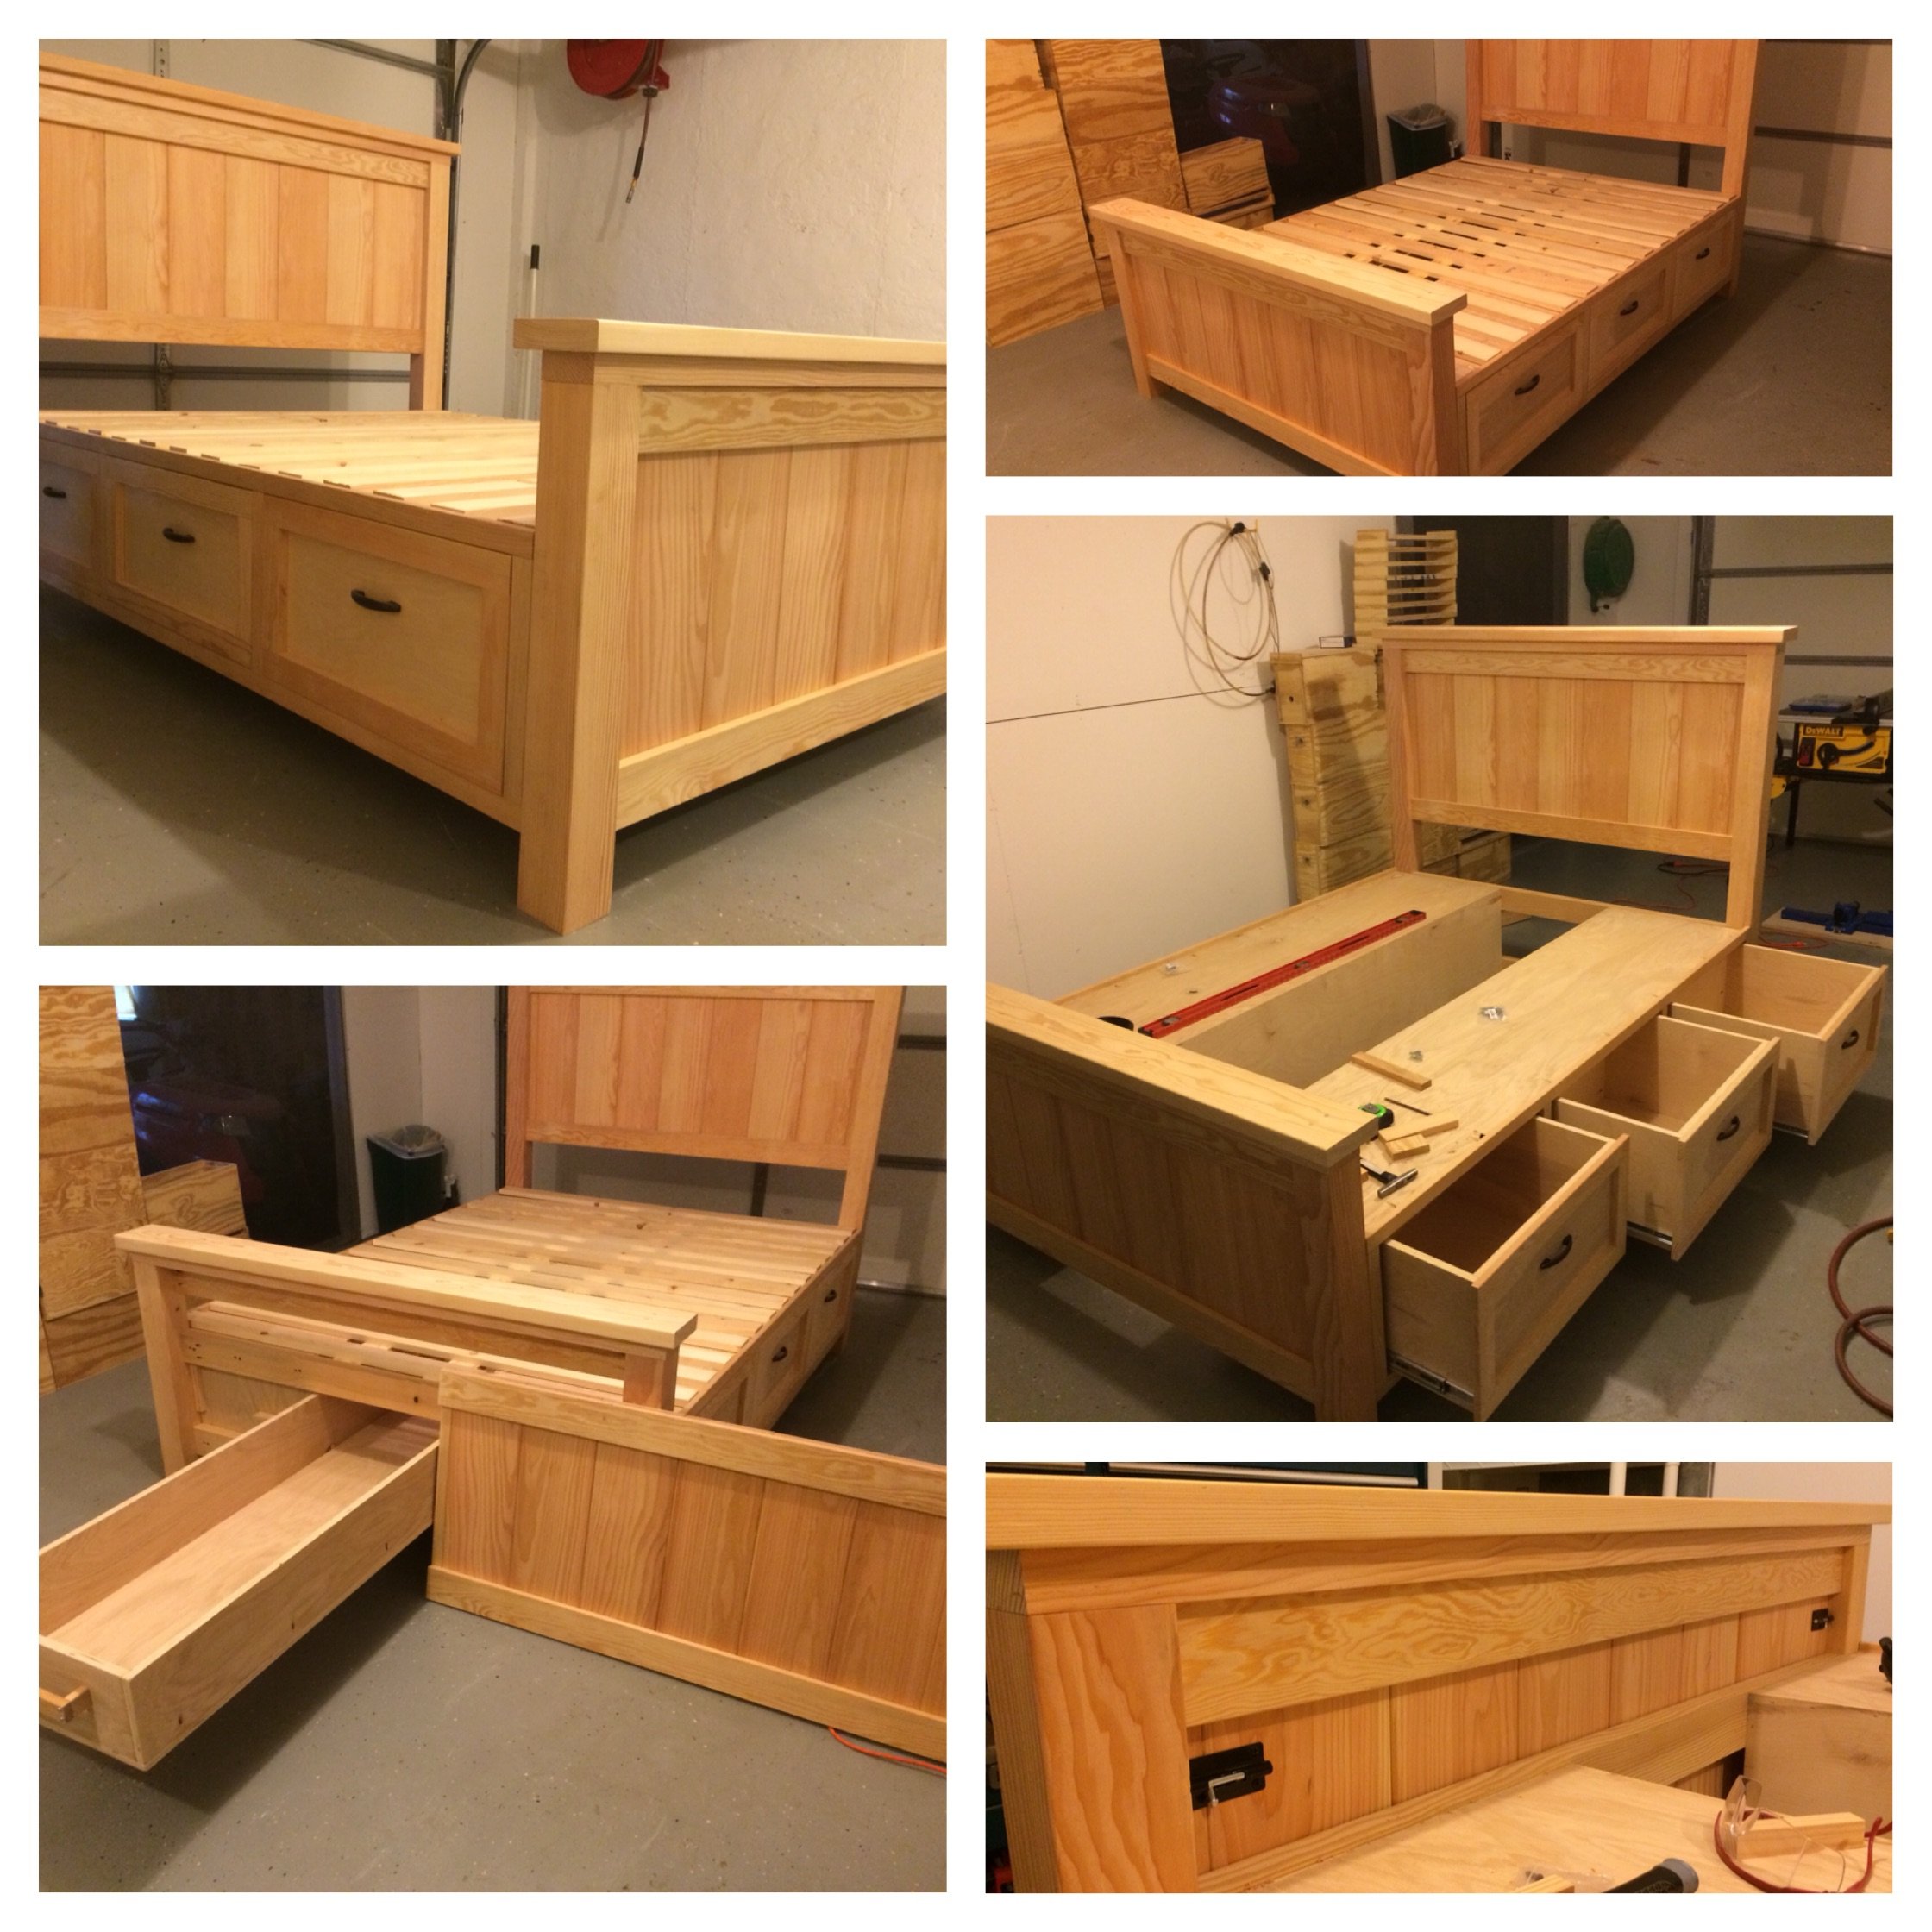
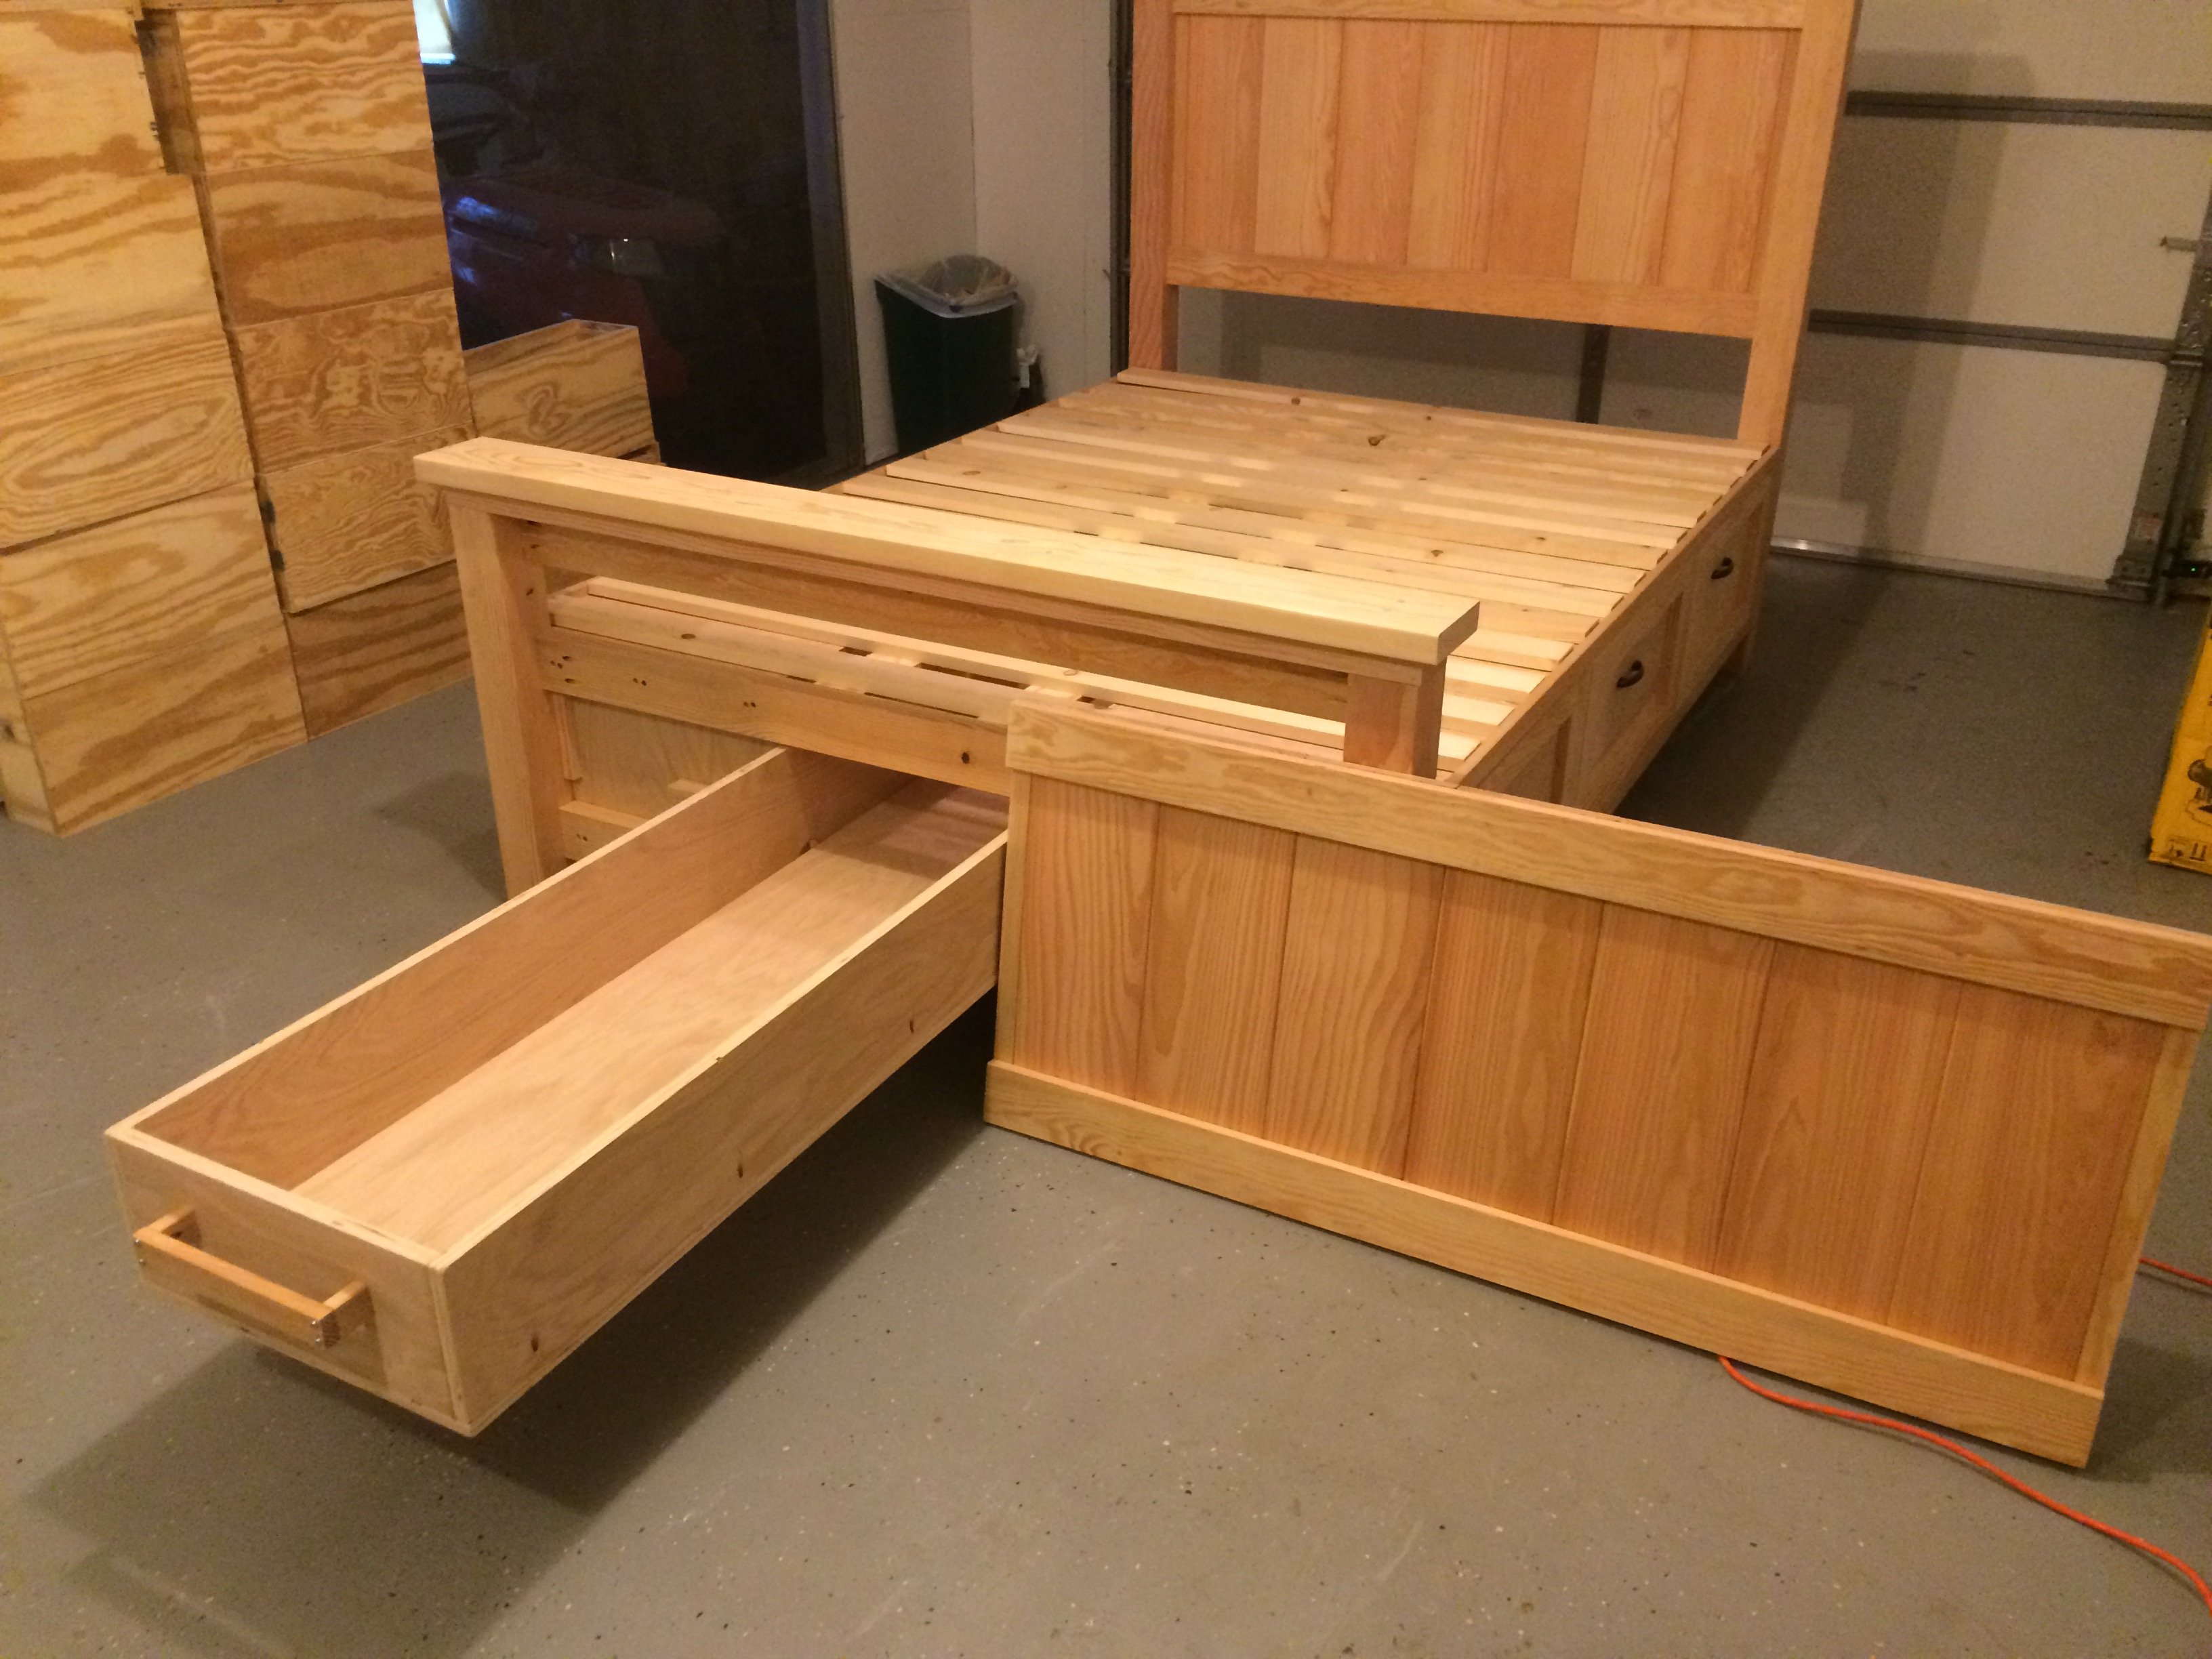
Ana, thanks for these plans! They inspired me to make my first bed build. I also want to thank all of you that added brag posts! They gave me ideas for some of the modifications that I made. I did this build by mixing your Queen Farmhouse and Queen Farmhouse Storage bed plans. I also added a number of modifications to suit my own preferences. The drawer boxes I changed by building a faceplate (I didn't want the plywood ends exposed), and by increasing in depth to maximize some additional storage. Since I increased the drawer sizes, I went with the euro roller bearing slides. I increased the foot-board height to be slightly higher than the mattress. I also designed the footboard to have a removable inner section with hidden latches on the inside. I did this because I wanted to make use of the "dead space" between the drawer boxes. I then used this space to house a hidden drawer, that is approx six feet deep (I couldn't help myself-I love hidden drawers  ). Because I added the hidden drawer, I changed the opptional center support to 4X4 blockes that were pocket screwed under the center of the boxes. I ended up using birch plywood and fir for this build. For my first bed build I'm fairly happy with how it came out. Thanks again!


Thu, 12/11/2014 - 07:41
This is your first build and you did all of those awesome modifications?! Really impressive and it looks perfect! Congrats and welcome to the community!

In reply to Seriously?! by spiceylg
Sun, 12/14/2014 - 06:03
Thanks for the compliments! It was a fun learning experience. Making all the modifications definitely slowed down the build, but also made it more rewarding!
Fri, 12/12/2014 - 13:18
I just started my bed (mostly out of Baltic Birch) and am wondering where you were able to find such nice 4x4s. Your bed is gorgeous! No luck here. I bought redwood, but really wanted fir for the sharper edges. It's my first project, too. I also bought same drawer slides, but the soft close. Didn't want the slam. I figure building it will be the easy part compared to procuring nice 4x4s! Hope you can help!
Sun, 12/14/2014 - 06:01
Thanks! The 4x4s I found at a place called Better Living Building Supply. They had a pretty nice assortment of fir, including the 4x4s, so that is why I chose it for the build. Finding the 4x4s slowed down my start on the build. Our local Lowes only had them in treated pine.
Sat, 09/05/2015 - 20:47
Thank you for the pictures, the bed turned out Awesome. I was wondering about the latching system for the foot of the bed. Do you think a piano hinge on the lower would work too? Also on the center drawer did you use rollers or is it just friction? Can't wait to start the build.
Thanks

Mon, 02/15/2016 - 14:11
This is excellent!!! I really like this, so much in fact that the wife is going to have to get used to it too. lol But really, GREAT work! Any chance you could post a pic and or comment about how you attached that removeable end? i think this is the best part! Cheers!
Wed, 10/24/2018 - 23:21
How can I get / purchase the plans for the construction of the bed ?
Tue, 12/10/2019 - 08:42
Beekeeper, Awesome build!!! Have you posted your altered plans anywhere? I'm very interested in your build, I was wondering about some aspects of it and how you approached it. Plans would clear it up instead of bothering you with all my questions.

Mon, 11/16/2020 - 15:42
Bed turned out awesome. I was wondering if you have the plans for the bed with a list of supplies it took to make this bed. I so want this bed it's just what we are needing
Great job
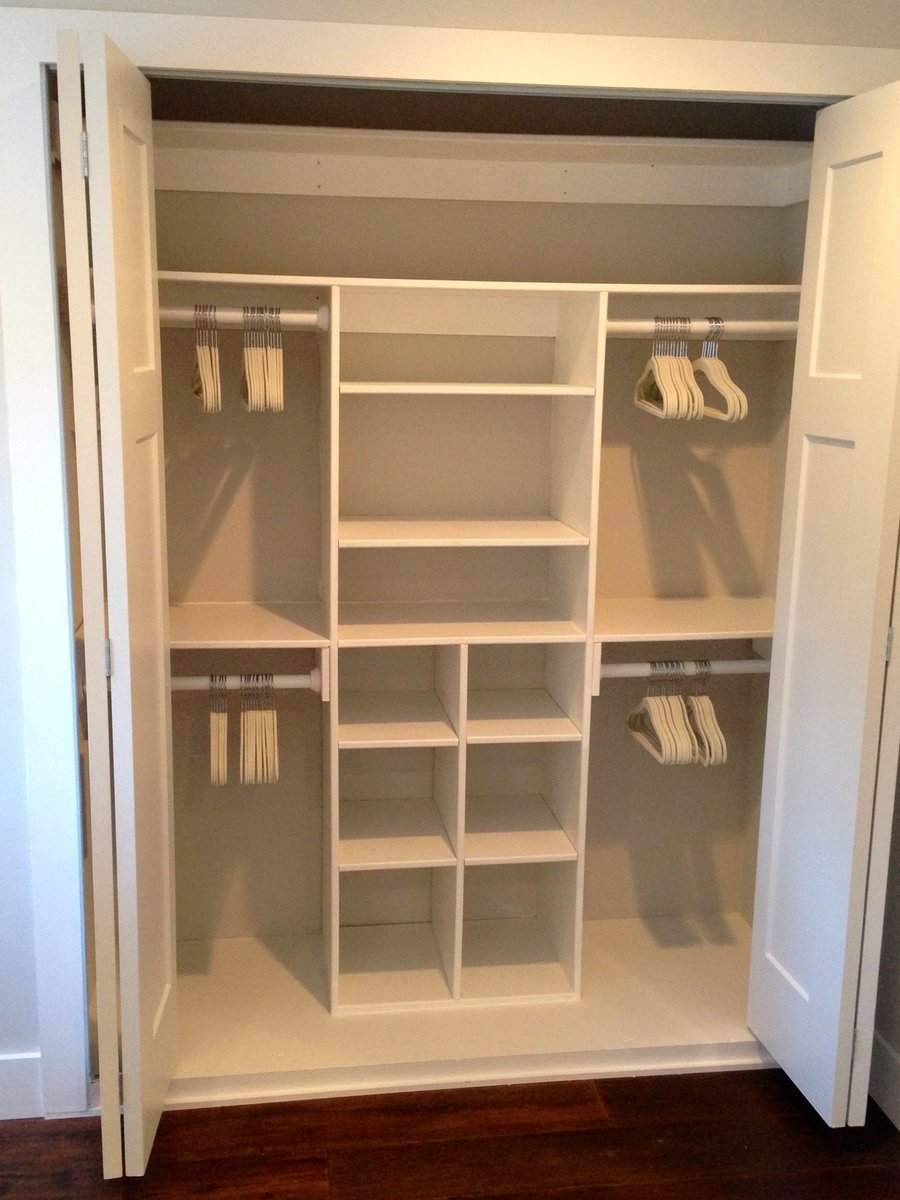
Just My Size Closet!
Built this from Ana's plans with a few modifications.
Started with a big empty box after ripping the old stuff out and finished with this look.
Adjustable shelves and all !
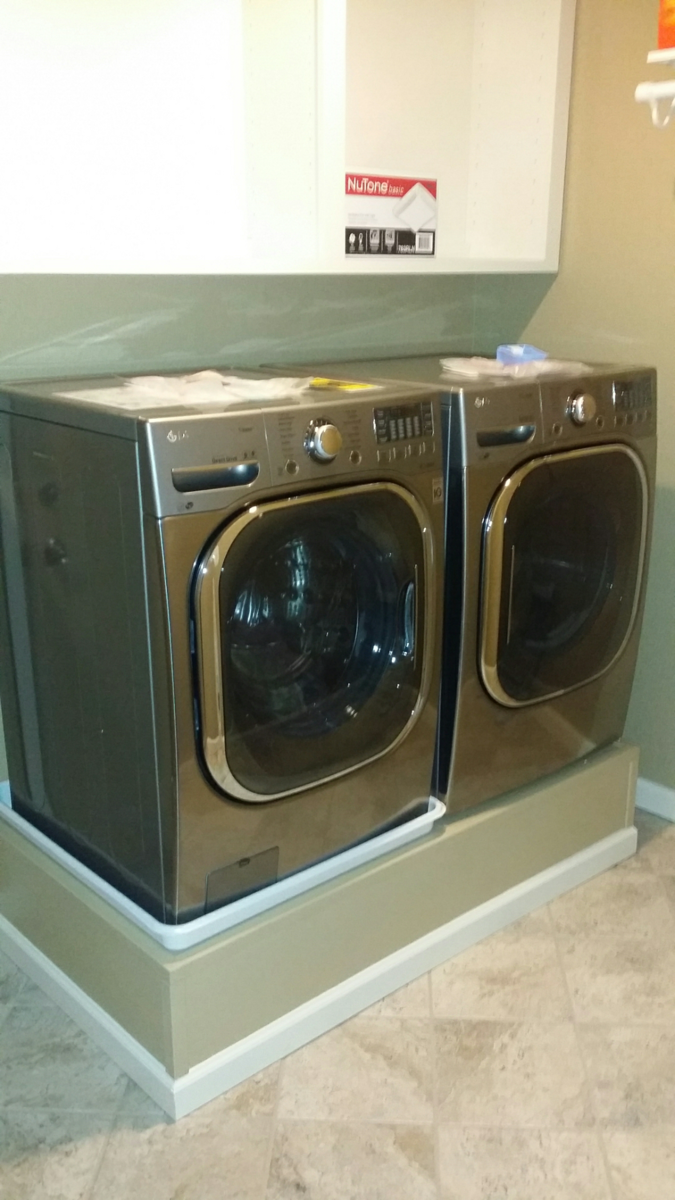
I got this Idea from Sausha's washer dryer pedestal post. Before then i didnt know people even built pedestals for their washer and dryer. Just purchased new front load washer and dryer and they wanted 250 bucks extra for each pedestal. That is 500 bucks and is absolutely rediculous. So i opted out of those and thought to myself maybe I can build something instead. So I began my search online and stumbled across this post which seems to be the most popular pedestal build on the web. I think sausha's build is fantastic and absolutely beautiful though I went another way with mine.
I tend to like to overbuild things. Especially in this case, seeing as the washer weighs a beastly 200 pounds by itself. I figured with clothes and water it would be about 235 pounds just for the washer. I noticed that with the aluminum drawer pedestals that you can purchse with the washer and dryer the support is only where the legs from the washer and dryer will sit. That was all I needed to get on my way. Purchased some regular old douglas fir 2x4's, 4x4's, and a 4'x8' sheet of 3/4 inch plywood. I opted to use fence post brackets to tie everything together because I didnt feel like driller pocket holes in each 2x4 when you were not going to see them once its all said and done. The fence brackets are not structural so they lack ridgidity untill you tie everything together with the legs, slats, and top. Cut the top from the 3/4 plywood sheet and used the left over plywood to cover the front and the sides. I left the back open as it is not seen anyway.
Total size of the pedestal is 56" wide x 31" deep x 12 3/4 inches tall, but you can build it as wide, deep or as tall as you need it. When i was done putting it together. I tested it by jumping up and down on it and I weigh 230 pounds. So this thing is quite strong. I finished it up by covering the edges where the plywood meet with Edge moulding and the bottom with baseboard to match my laundry room. I used Behr premium plus ultra paint on most of it and, behr alkyd paint for the baseboards. Gave the top a couple coats of General Finishes High Performance Polyurethane. Which isnt neccessary but I opted to do so because of the weight of the washer and dryer and the General Finishes High performance dries harder than most other polys that I have used. I only used it on the top though.
Taking into account that I used the paint and baseboards left over from renovating my laundry room. This project cost about 150 bucks. 200 if you have to purchase the paint and moulding. Quite easy to do and though I made the cutes I needed with my table saw. This can be done with a circular saw and a drill. No exotic tools are needed. Will post finished pictures when my washing machine and dryer are delivered on friday and they are sitting on top of the pedestal.

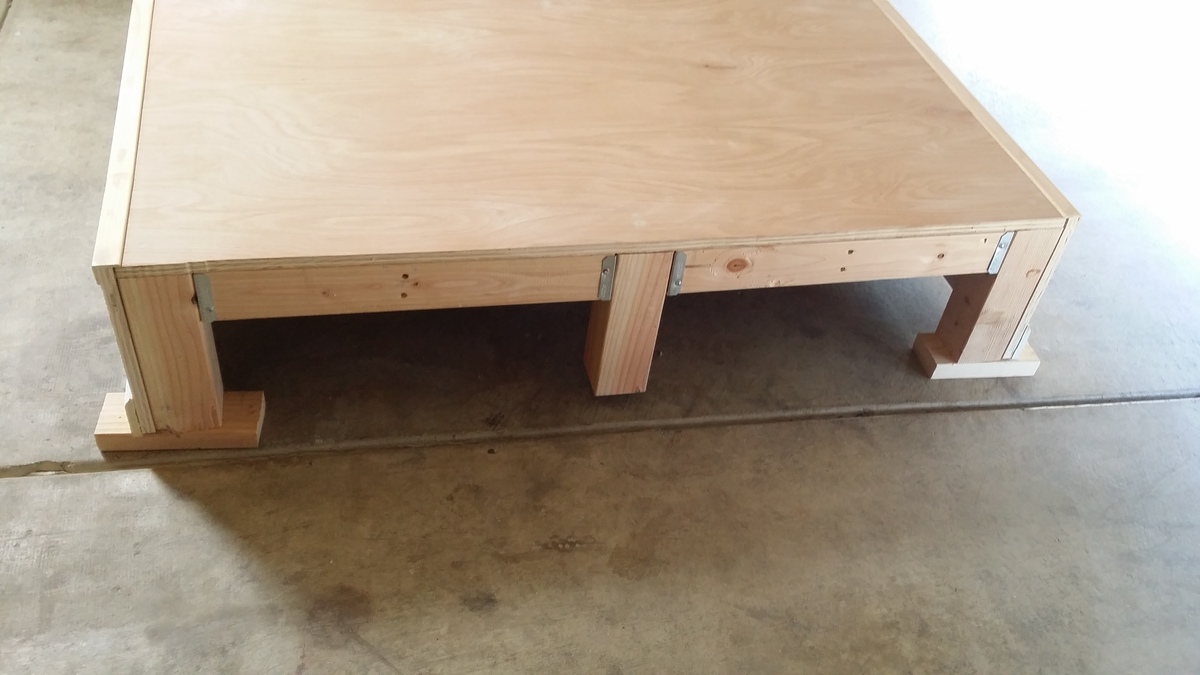
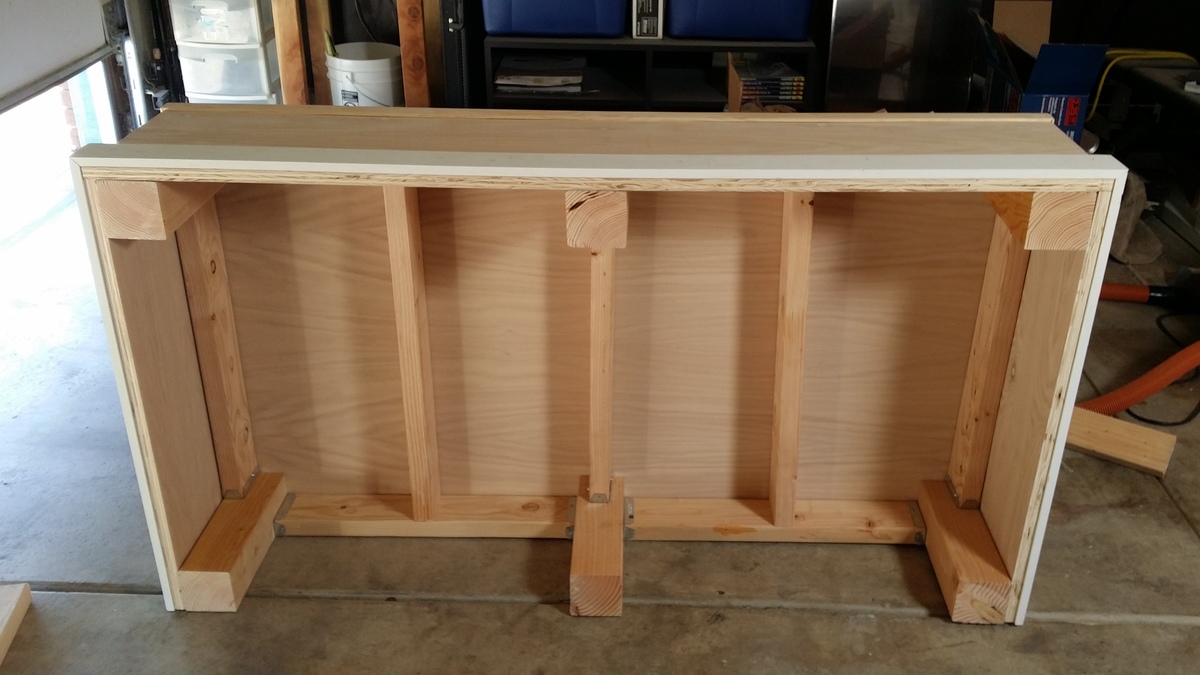
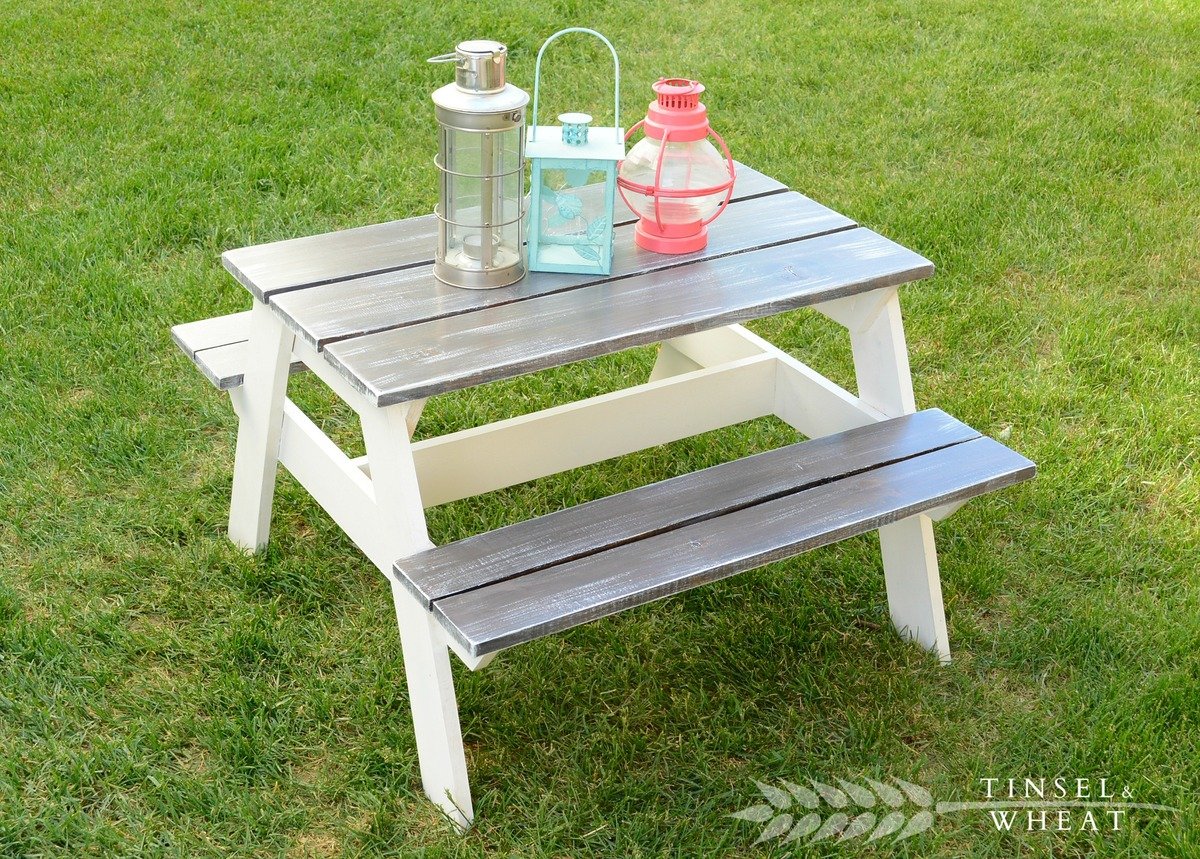
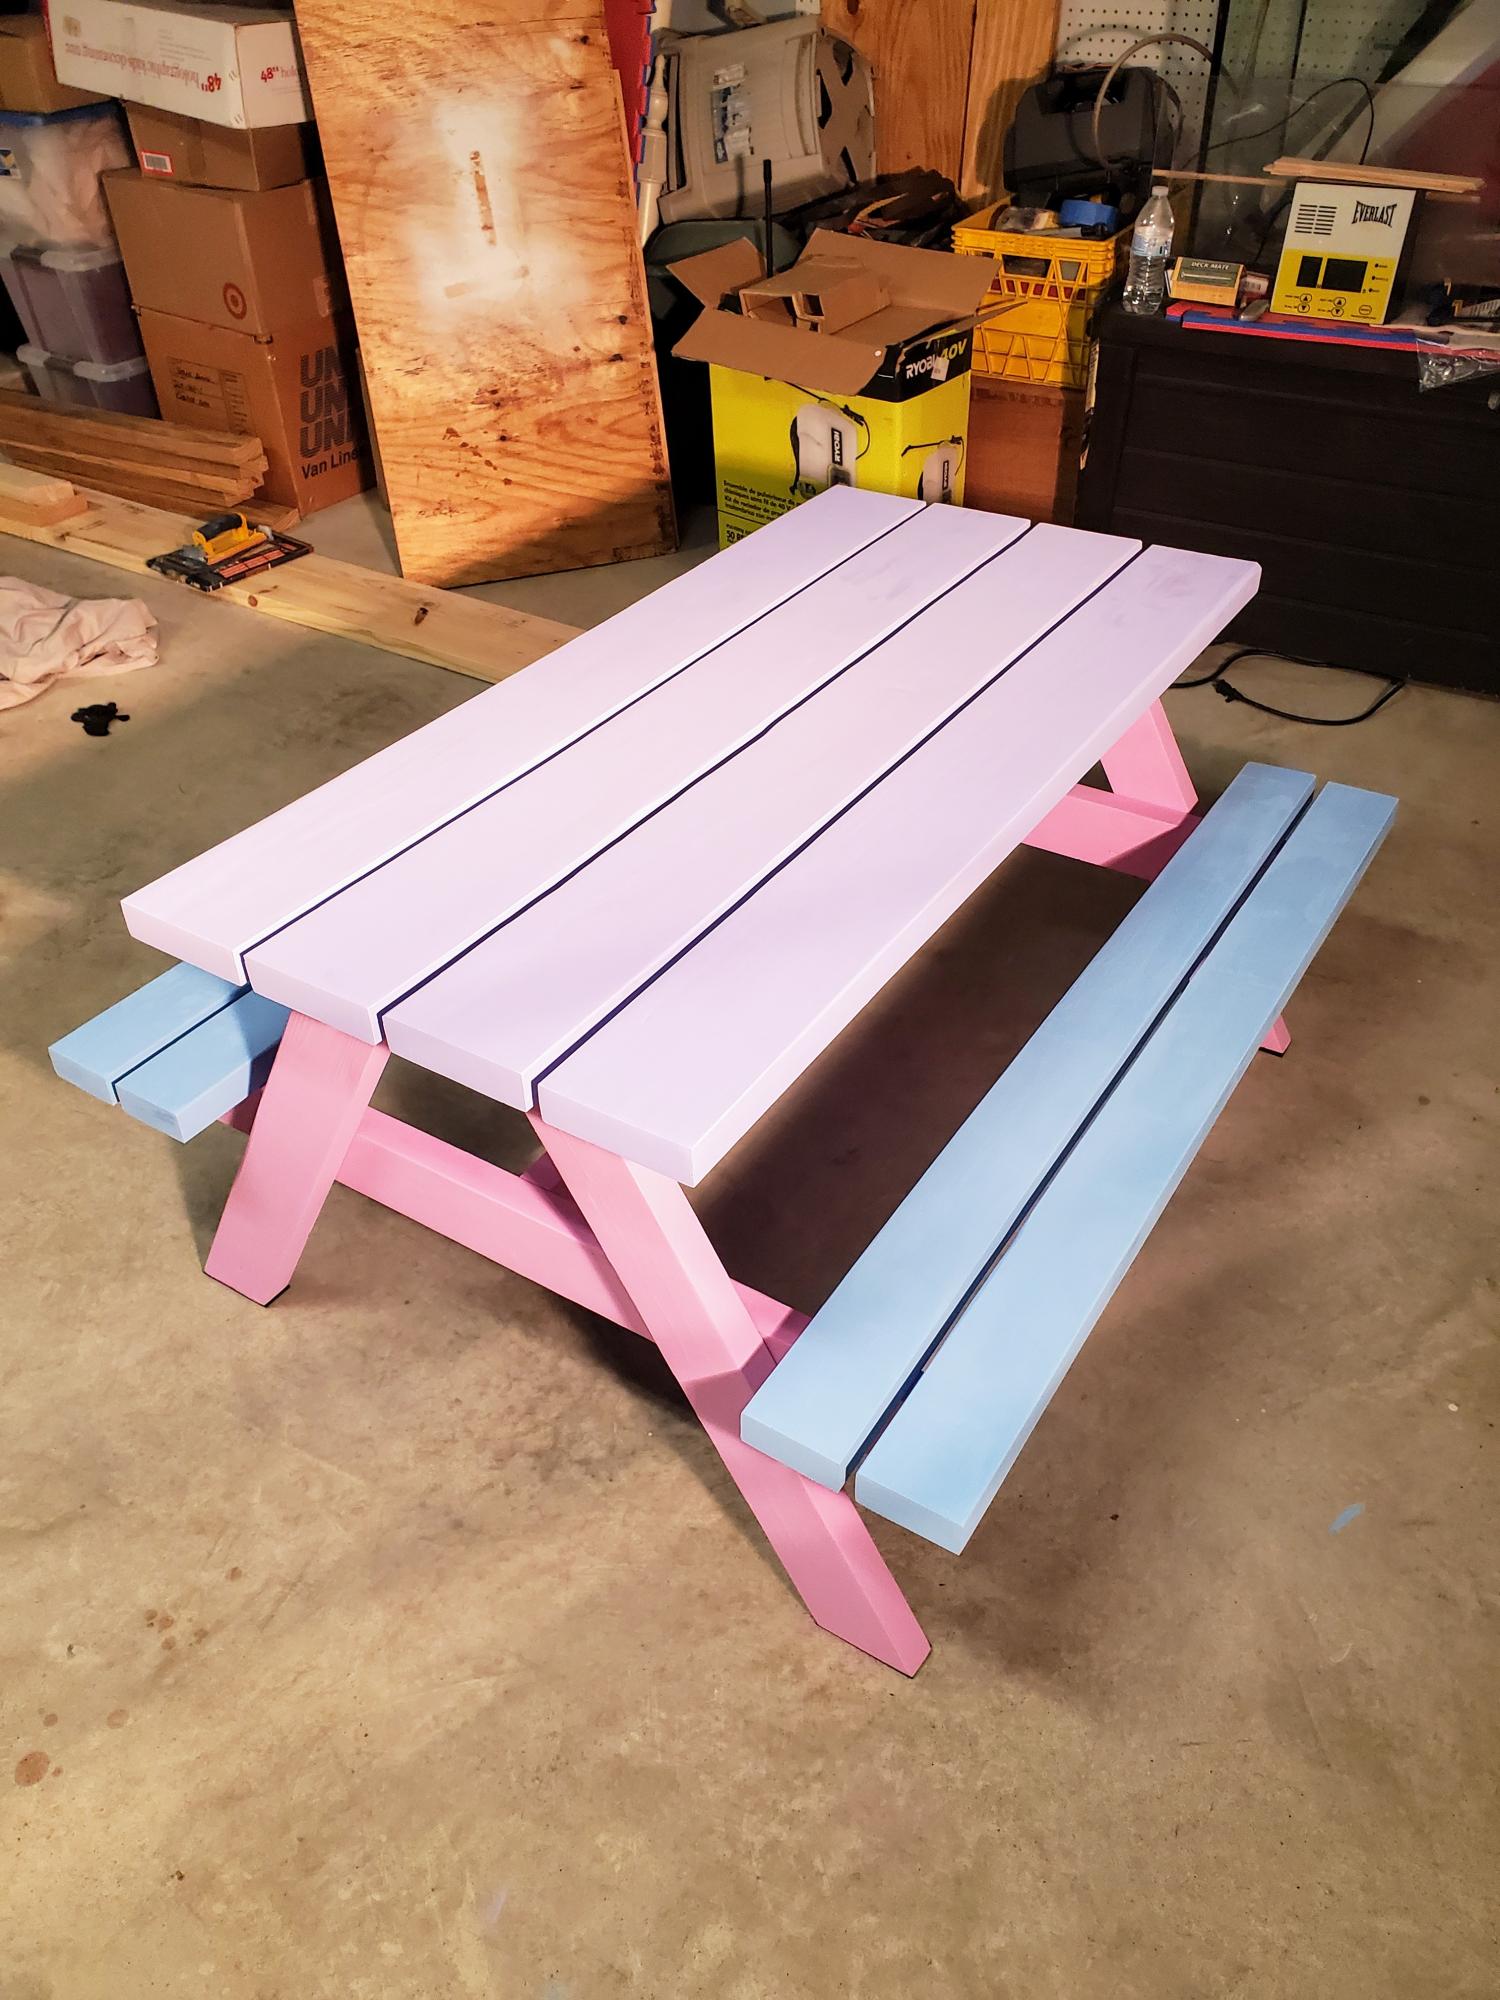
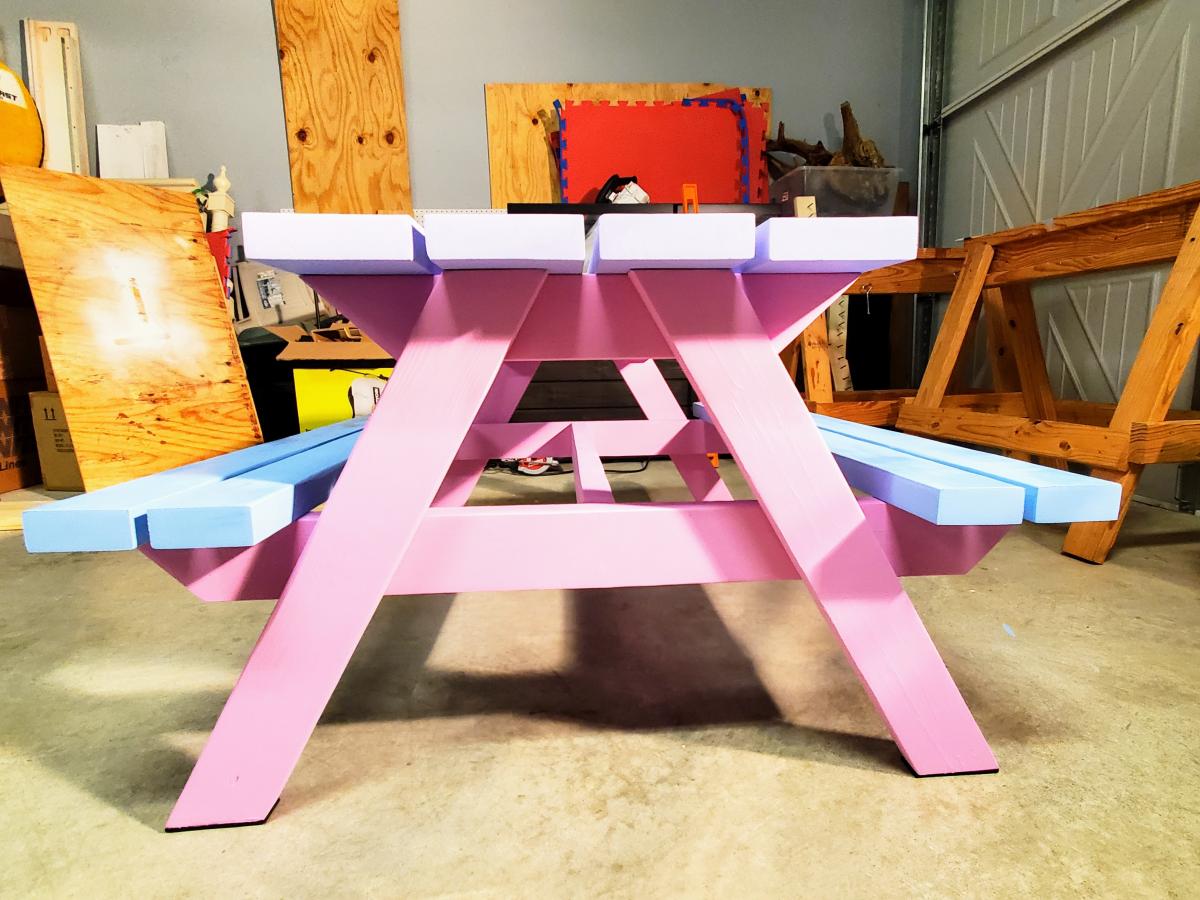
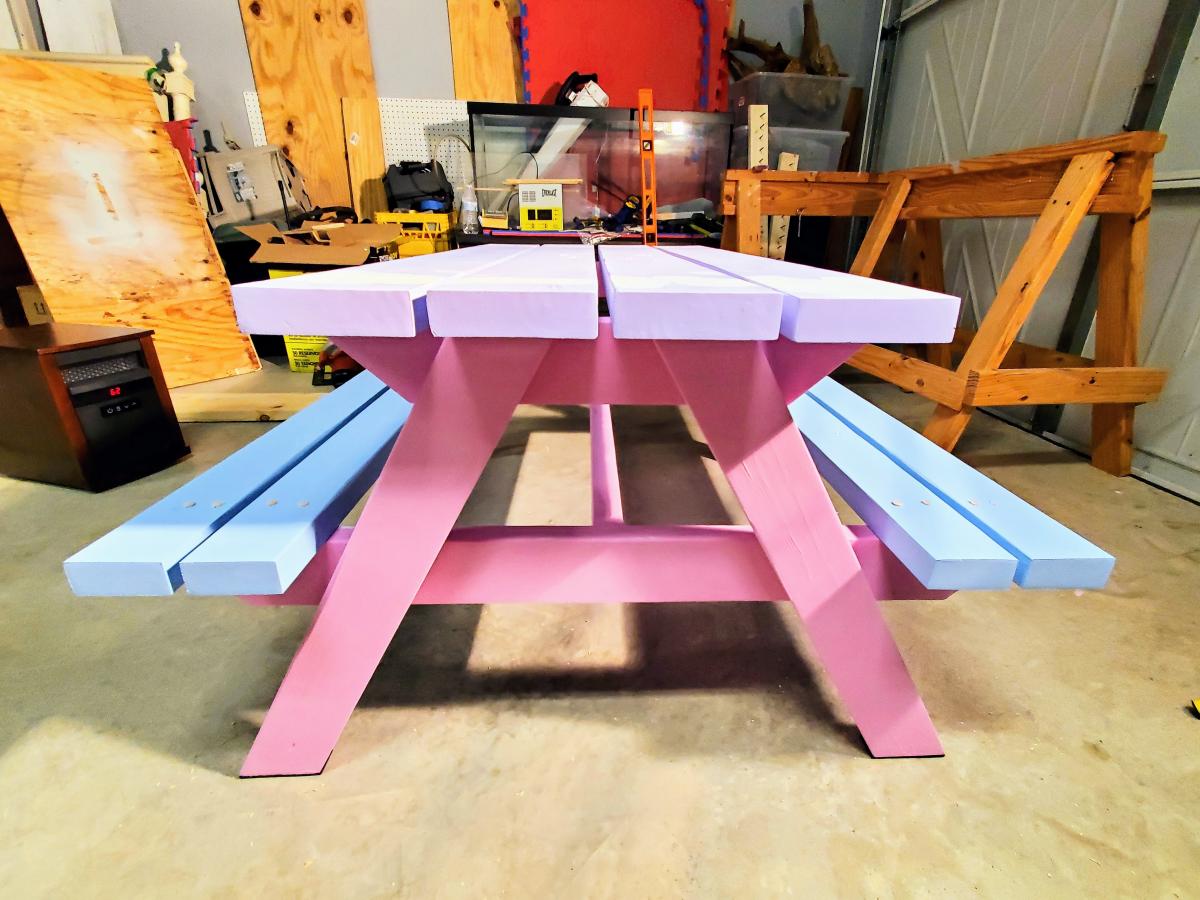
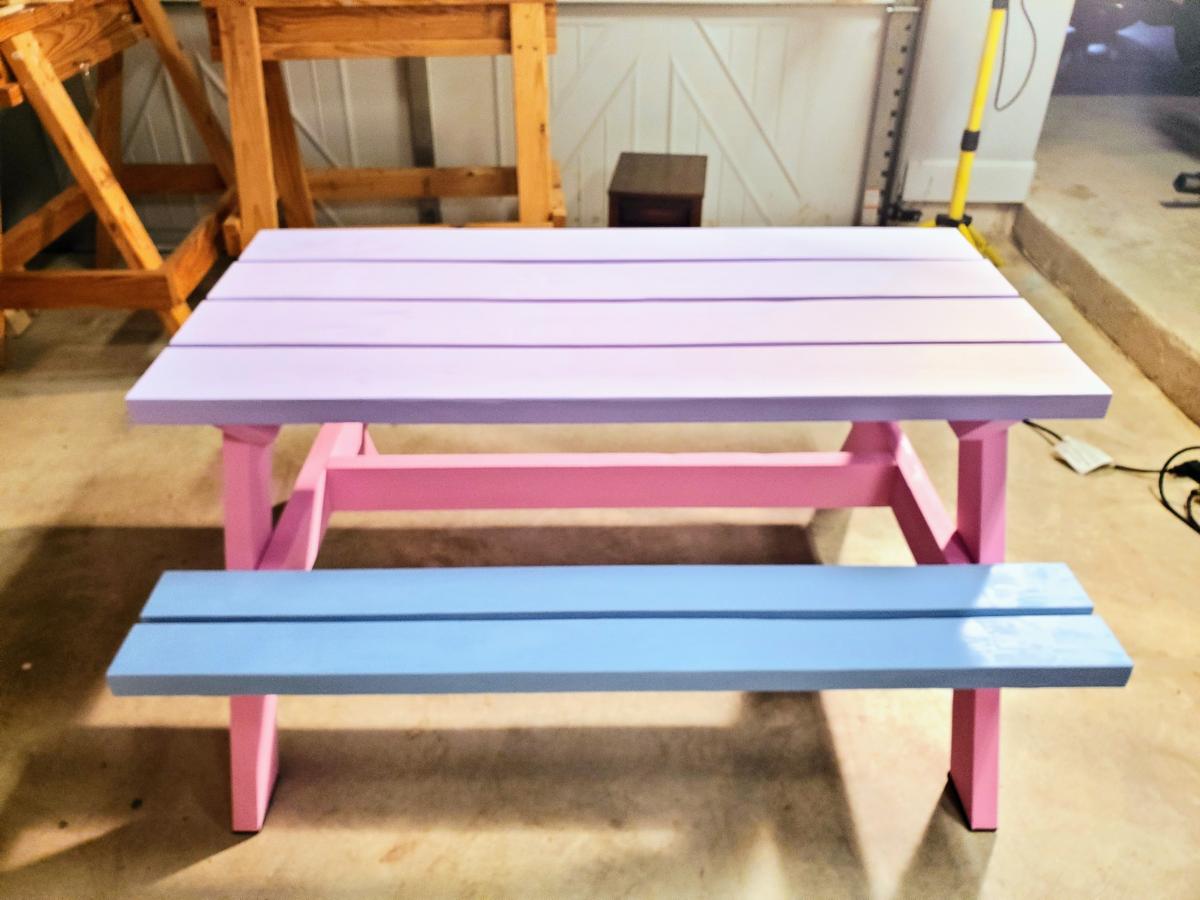
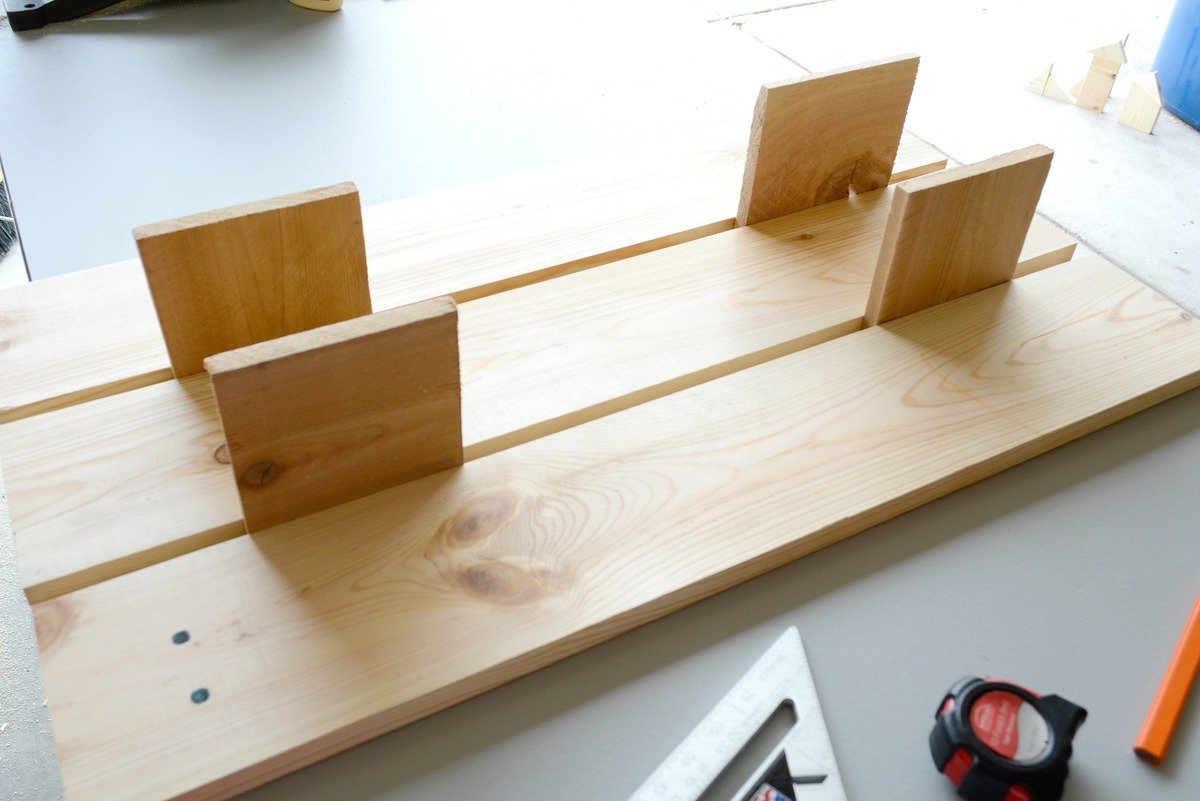
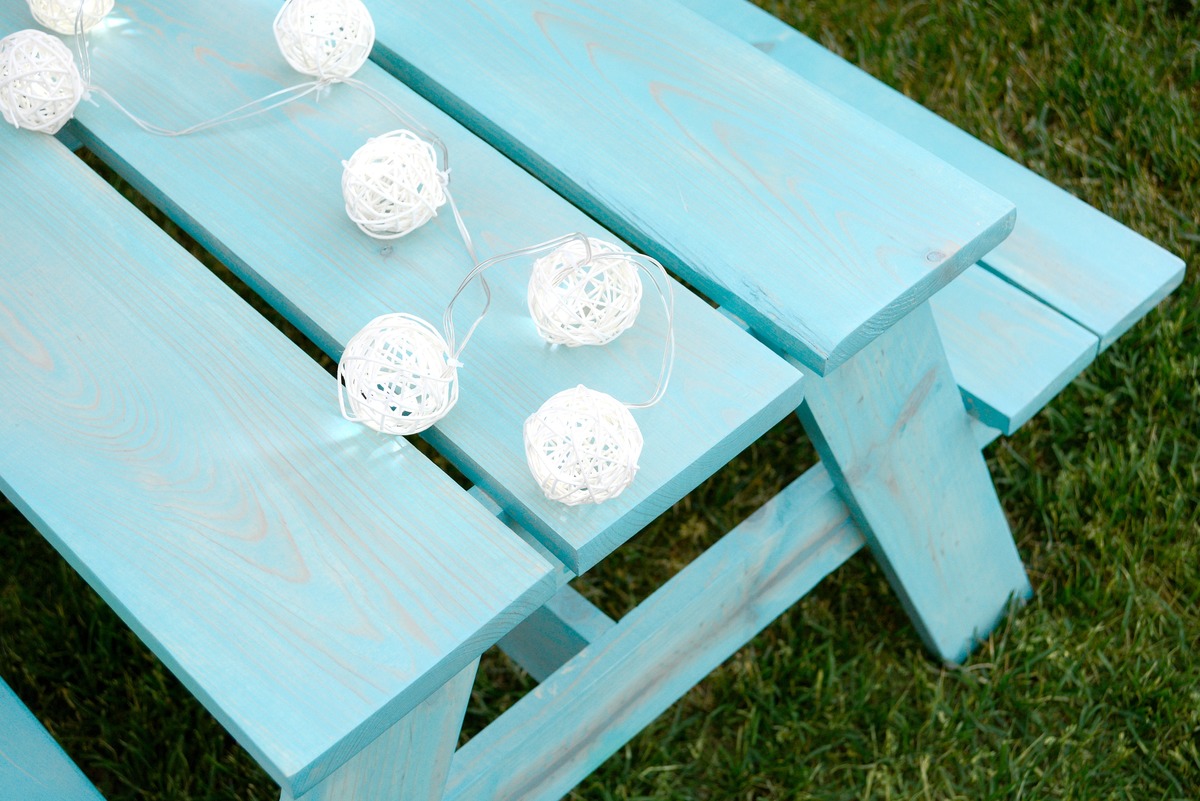
My first truly functional build! I love how it turned out, but even more importantly my kids are loving it - we are literally using it for every possible meal and snack right now. Perfect summer project, and bonus - we get to keep all the eating messes outside!

I built a big kids see saw using 2x6's all around with a 2x8 seat. The center post is 30"h.


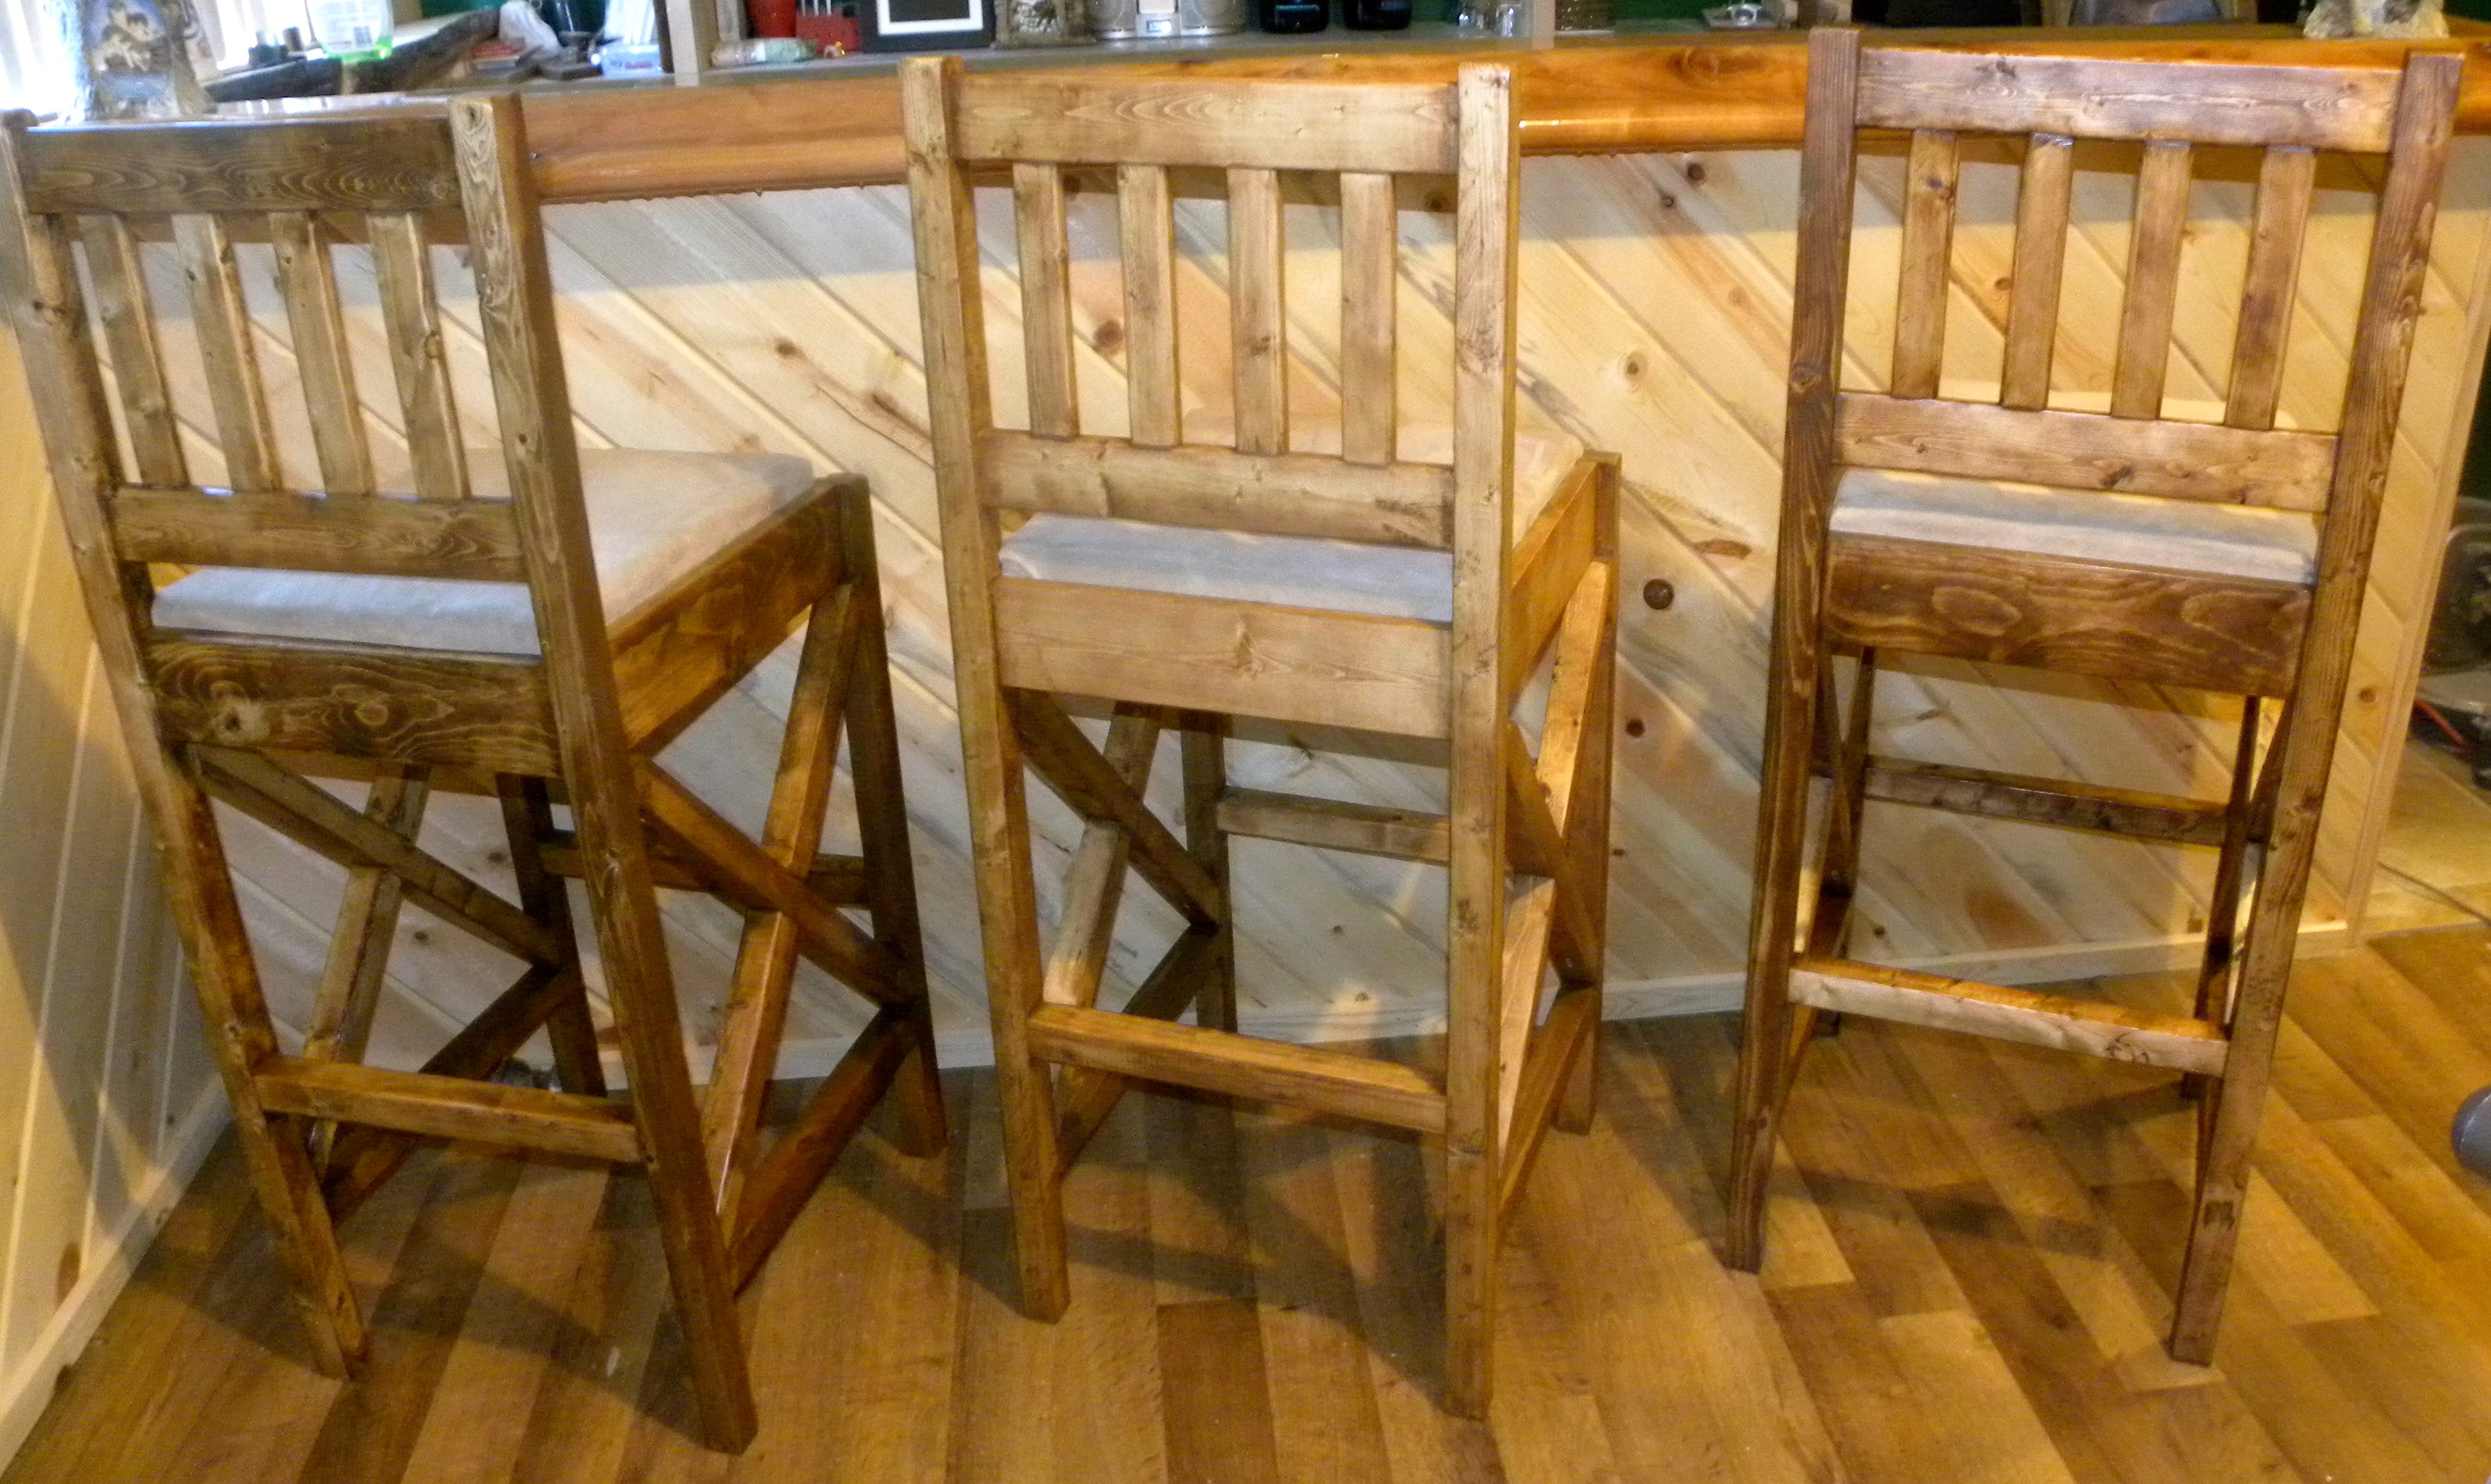
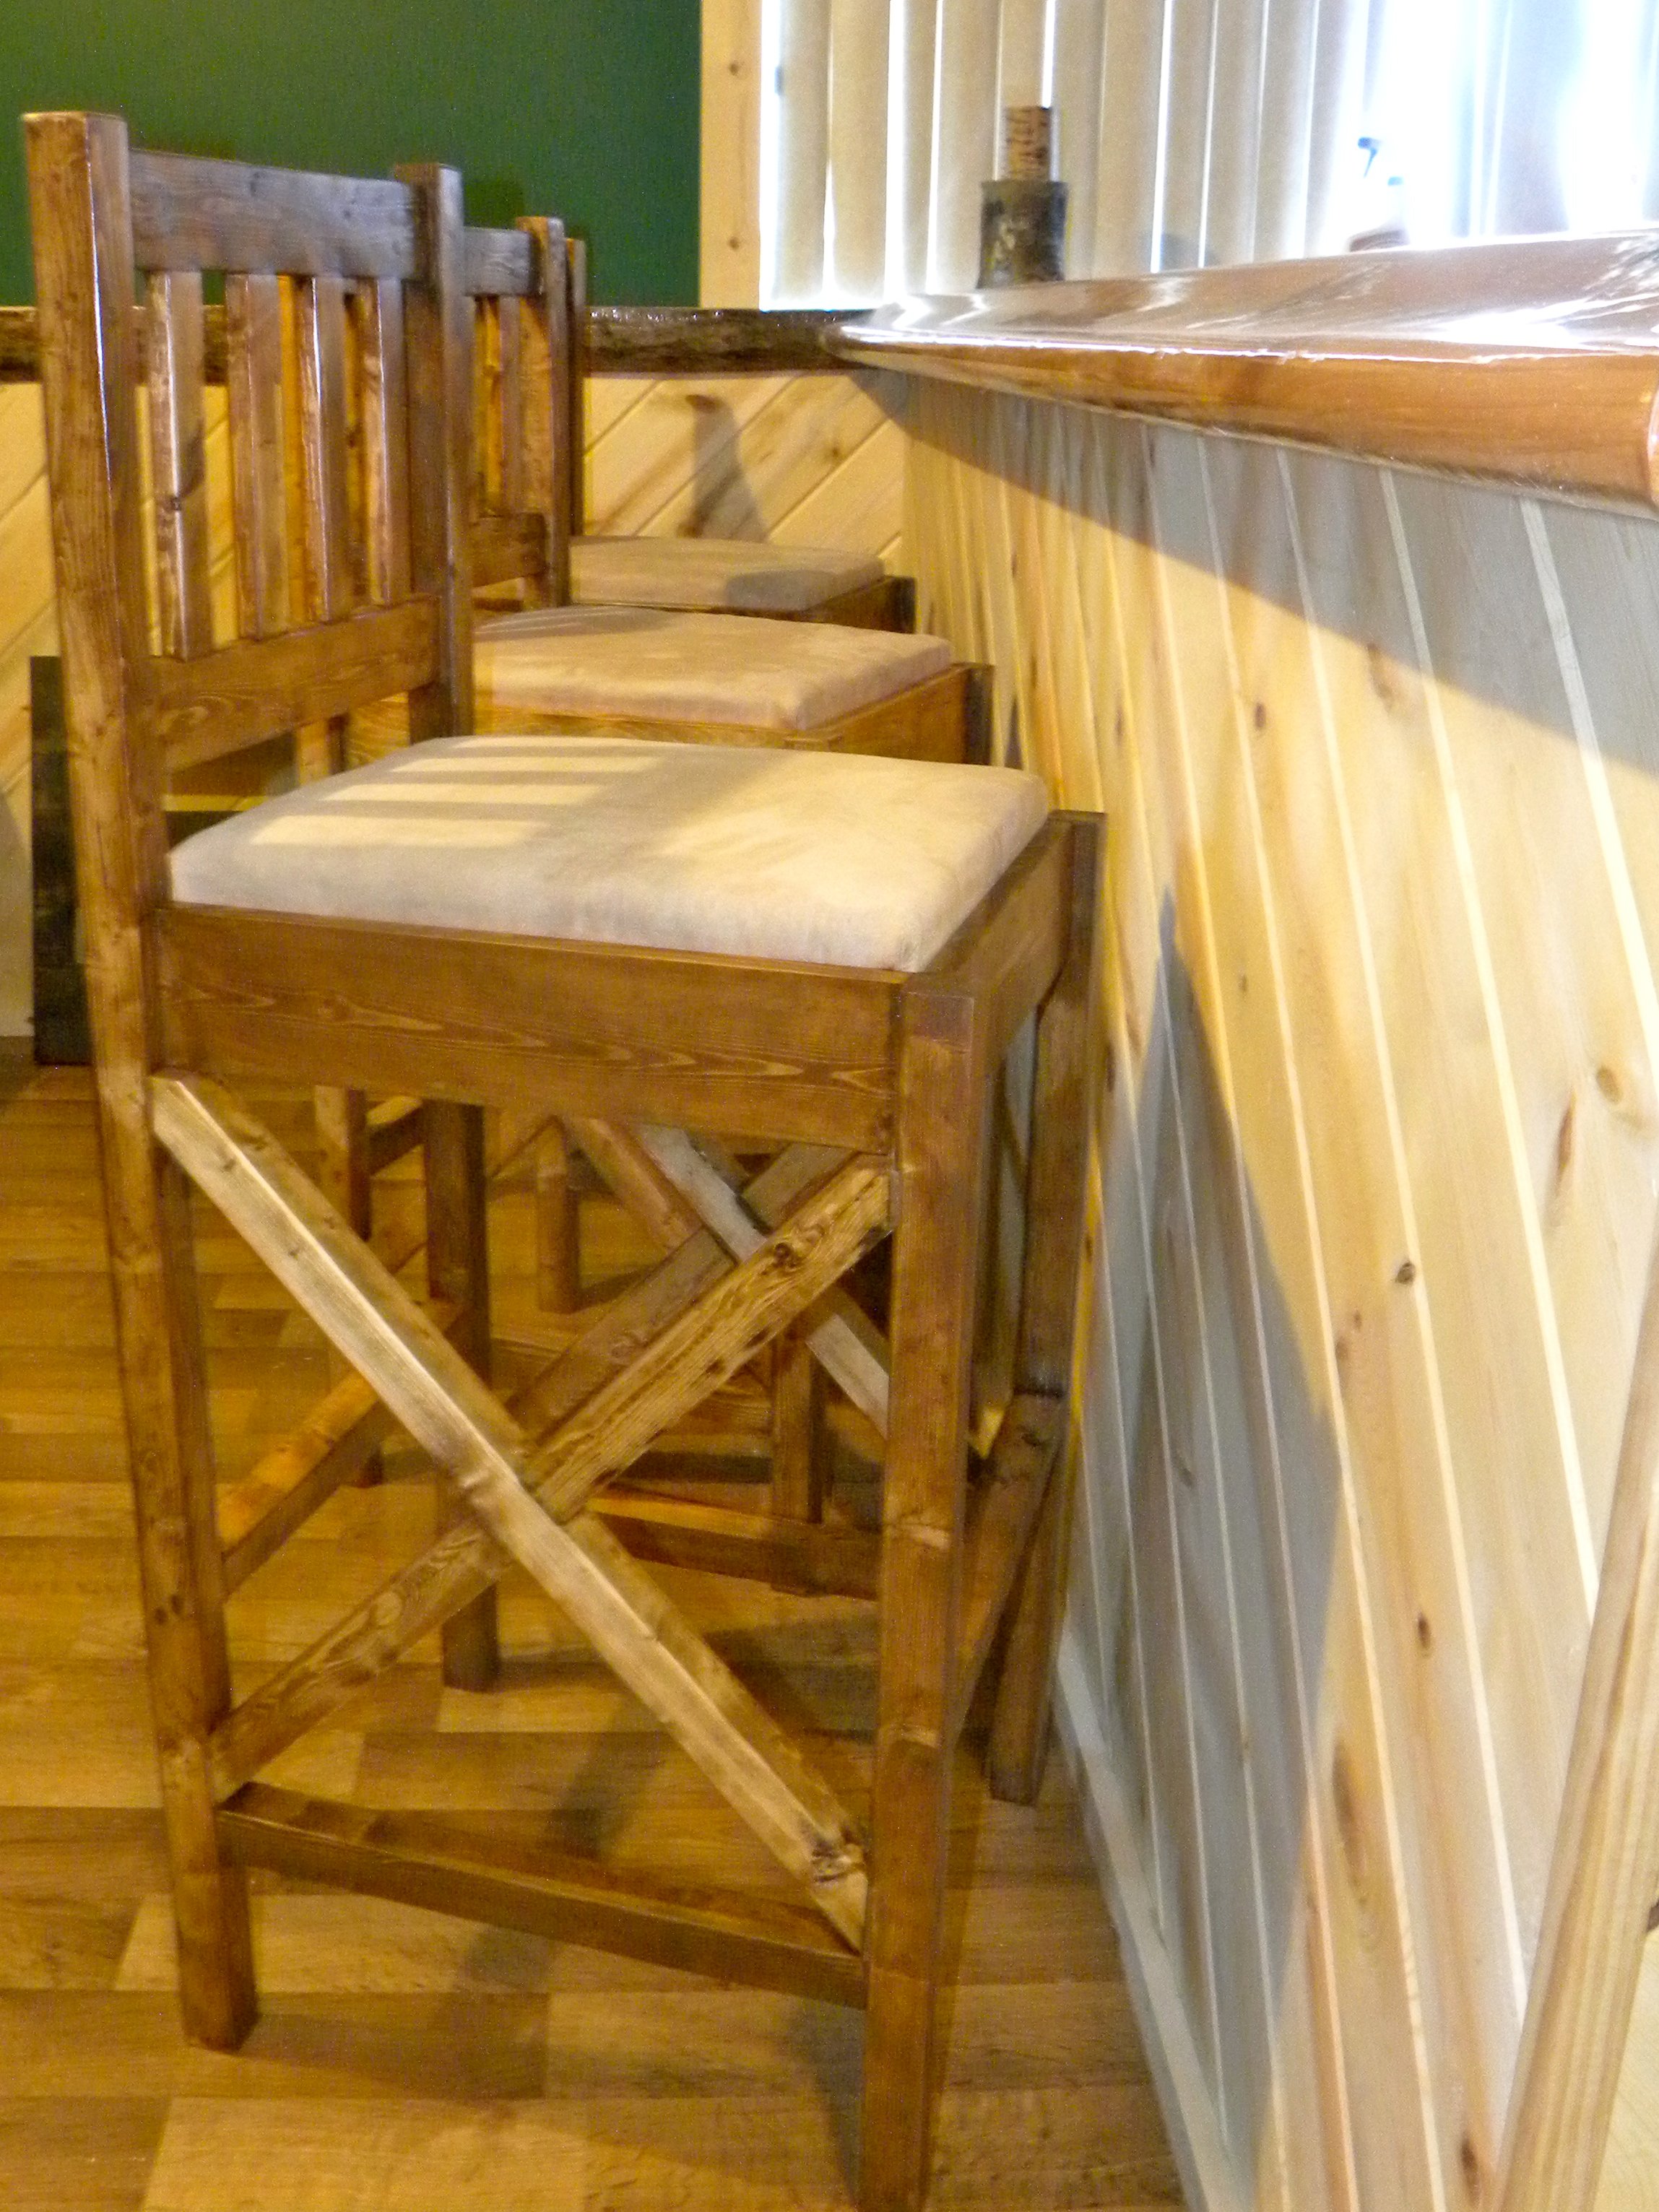
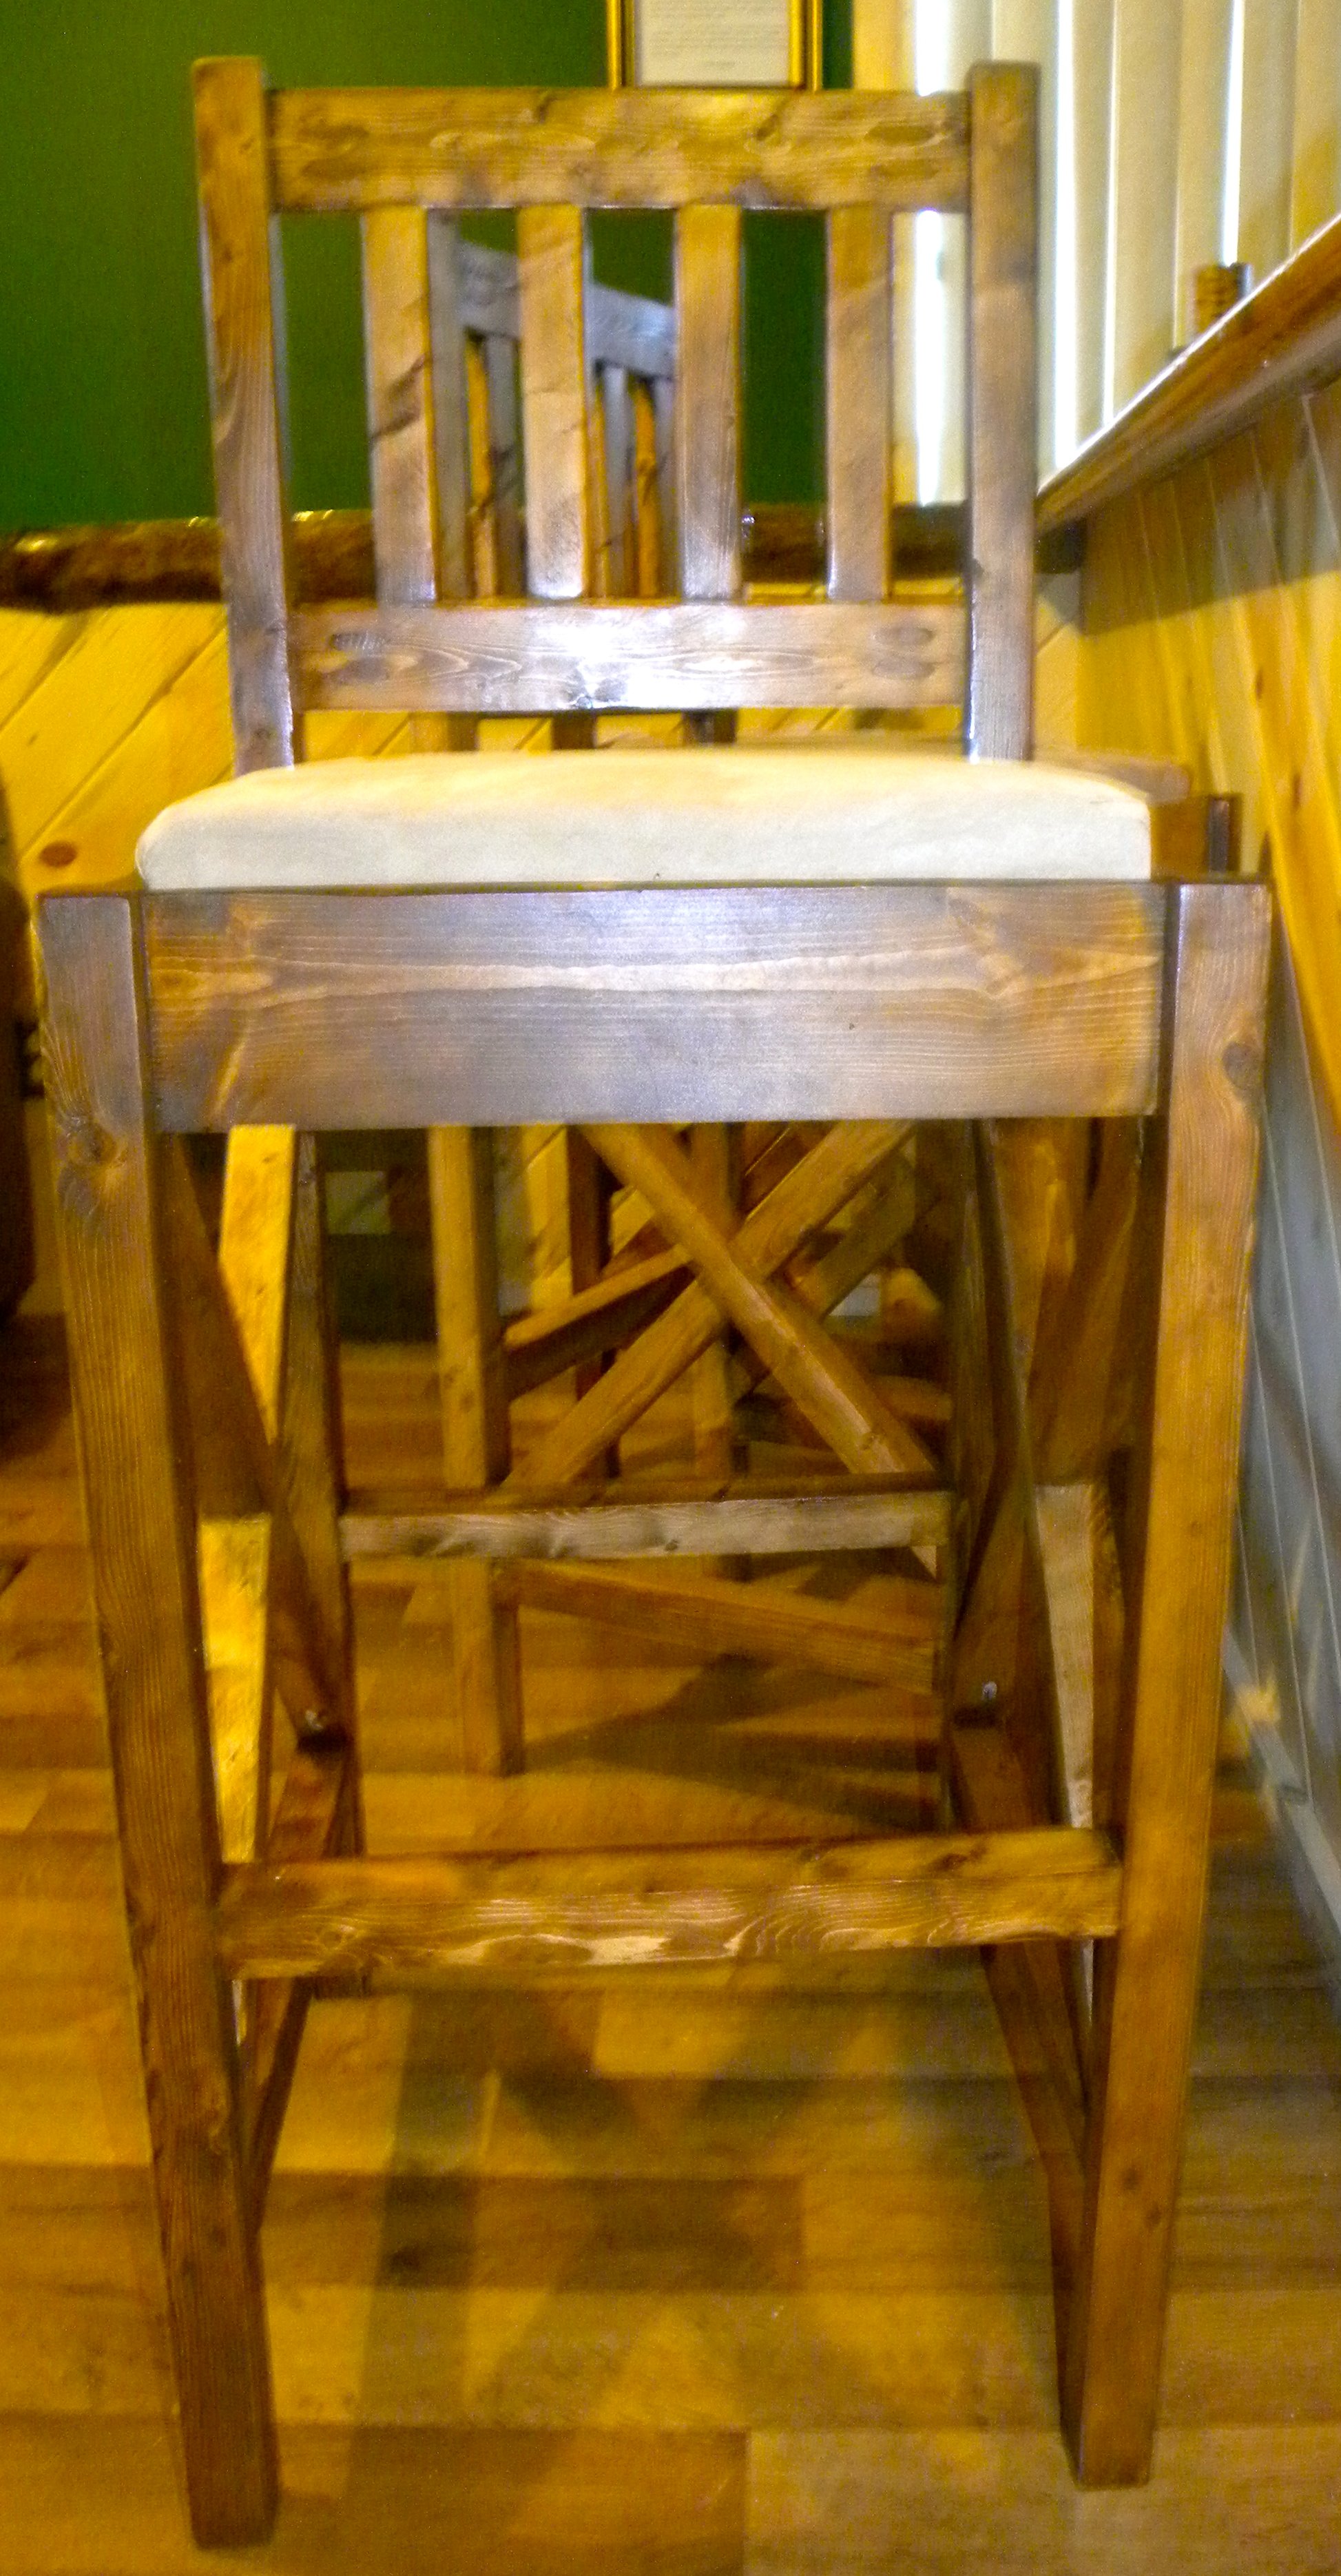
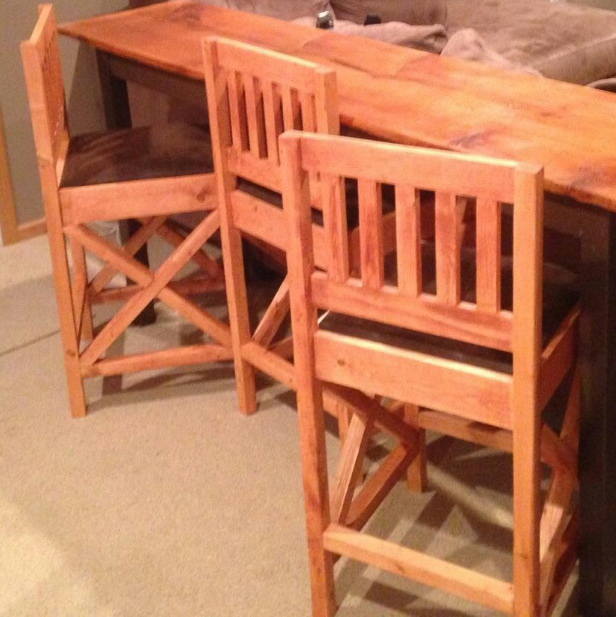
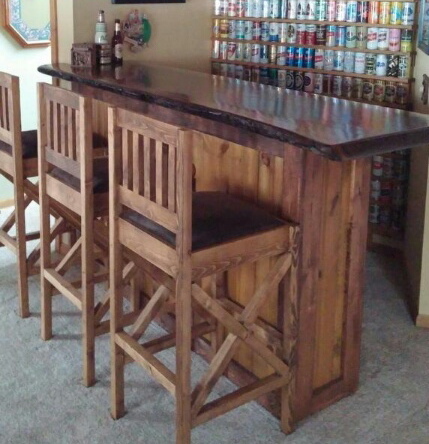
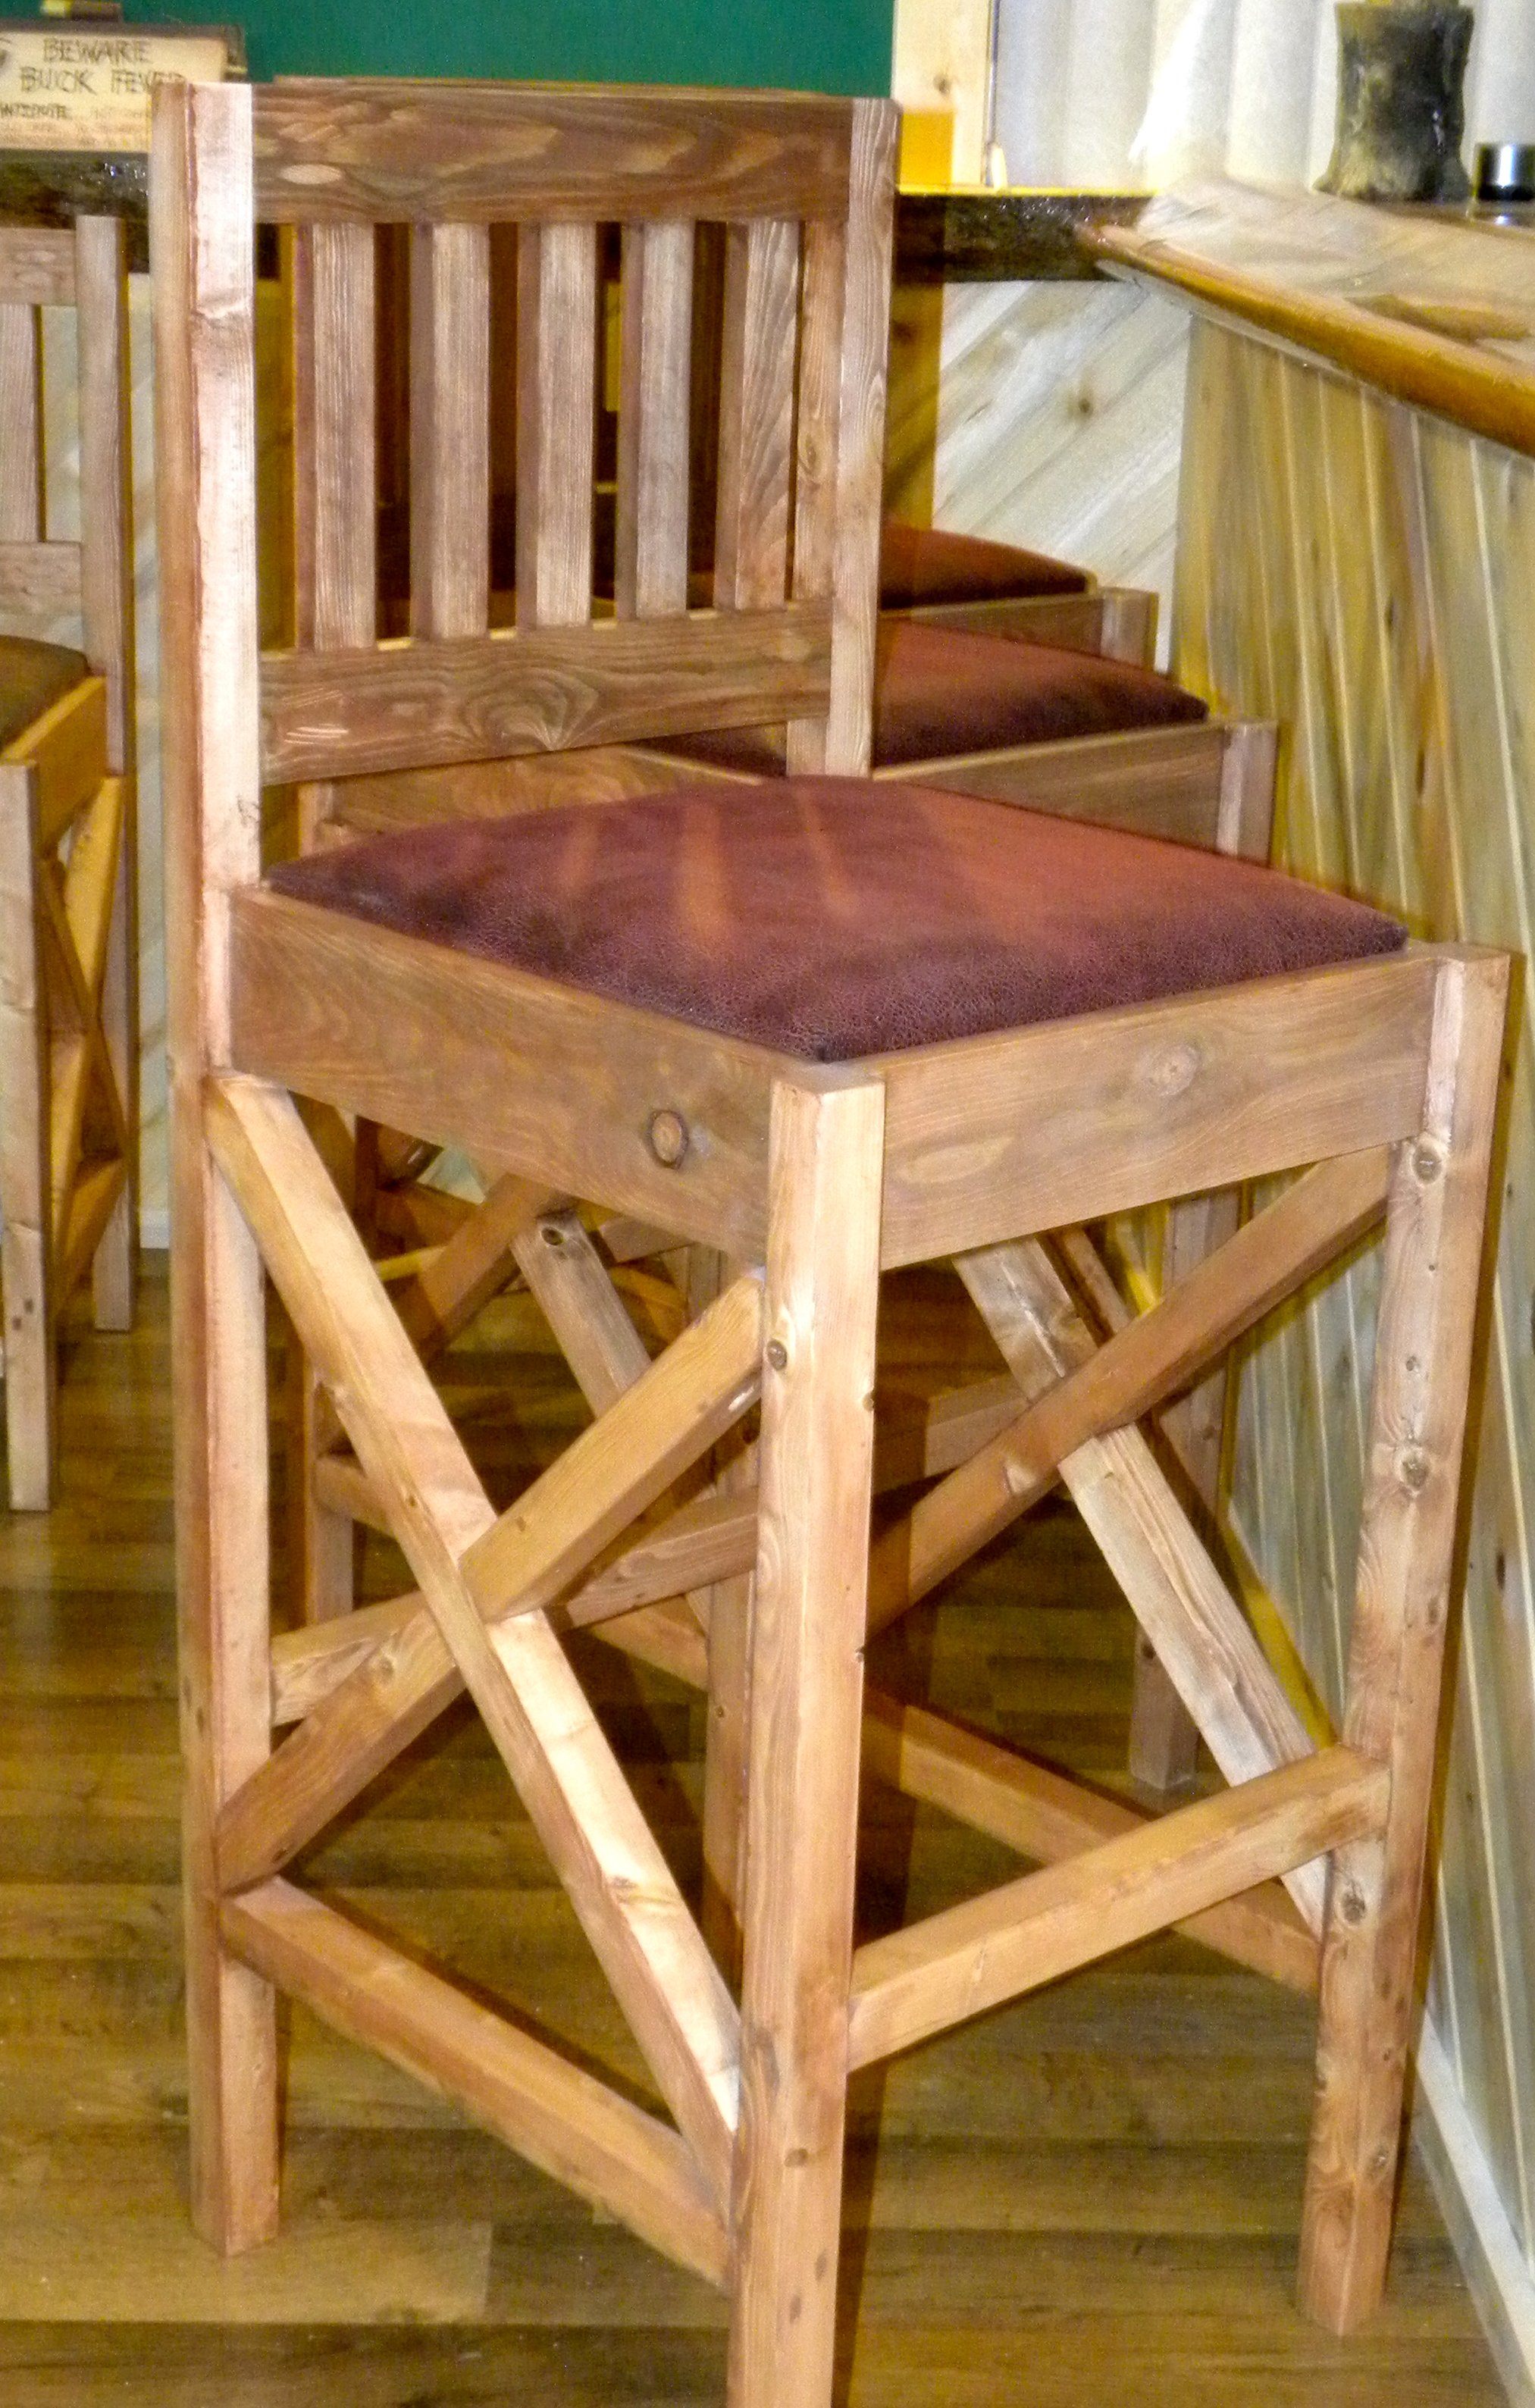
I needed new bar stools for our new bar that we designed and built in our basement family/entertaining room. Regardless of where I was looking, these things are silly expensive. I also wanted a little more of a country/rustic look that would suit my husband and my likes. I used the Vintage Bar Stool plans but my husband isn't a small guy and we have friends that aren't classified under the small frame category either, I needed more structure. After thinking about it for a few days, I liked the rustic X look and used that from so many plans. I also am all about comfort and the padded upholstered seats was a must. Can't wait for my next project. BTW. The cabinets behind the bar also came from here I simply modified for what we needed. We get compliments on it all of the time. Love this website, thank you so much for making simple to read instructions for things I actually want to do.
Mon, 06/26/2017 - 05:44
I need to build 24" bar stools with the rustic x look on the side. Do s anyone have plans to make them?

In reply to Rustix x bar stools by Daisypage
Sun, 07/01/2018 - 13:51
I am sorry. I just saw this. Honestly I don't make any plans, I kind of fly by the seat of my pants. The X's are measured out at the end.
Thu, 12/26/2019 - 03:49
These look great. I think that I'll add them to my build list that my wife seems to keep growing for me. How did you attach the back pieces? In the original design it showed pocket holes, but I don't see any on your work. Thanks for the help.
Tim

Sat, 06/06/2020 - 09:58
Could you please settle a discussion between myself and my husband? Are the legs notched out for the 1x4's to sink in , or are they just attached with pocket holes
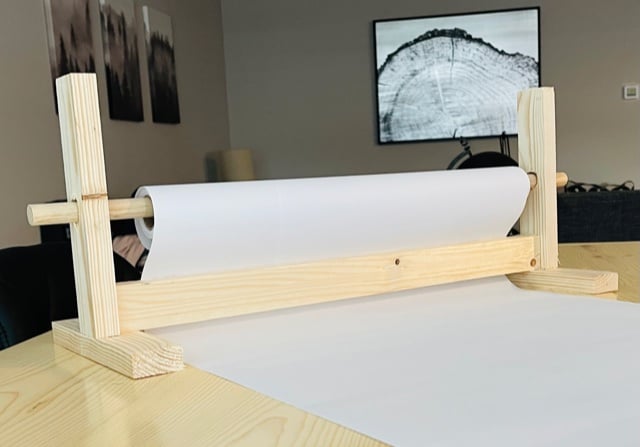
This took me about 20 minutes! I love the look of it and that it can just be left out when the kids aren't doing art. A great little item to add to keep the kids busy and inspired. I made a couple of mods from the plan. I used glue and nails instead of pocket holes and I did that bottom board flat instead of on it's side. I also used a little bigger dowel, and bought two rolls of paper on Amazon for $14.I'm giving this to my daughter for her birthday with some fun art supplies, so I think it's a great gift idea for any occasion for those crafty people out there!

Tue, 04/02/2024 - 06:09
Sometimes, when working with papers, you might need to convert file formats, right? So, I recently came across this website https://pdfflex.com/webp-to-png It's super handy for converting. It's been a real time-saver for me, especially when I need to tweak documents for printing or sharing. I'd desided to share in case it helps someone else out there too!
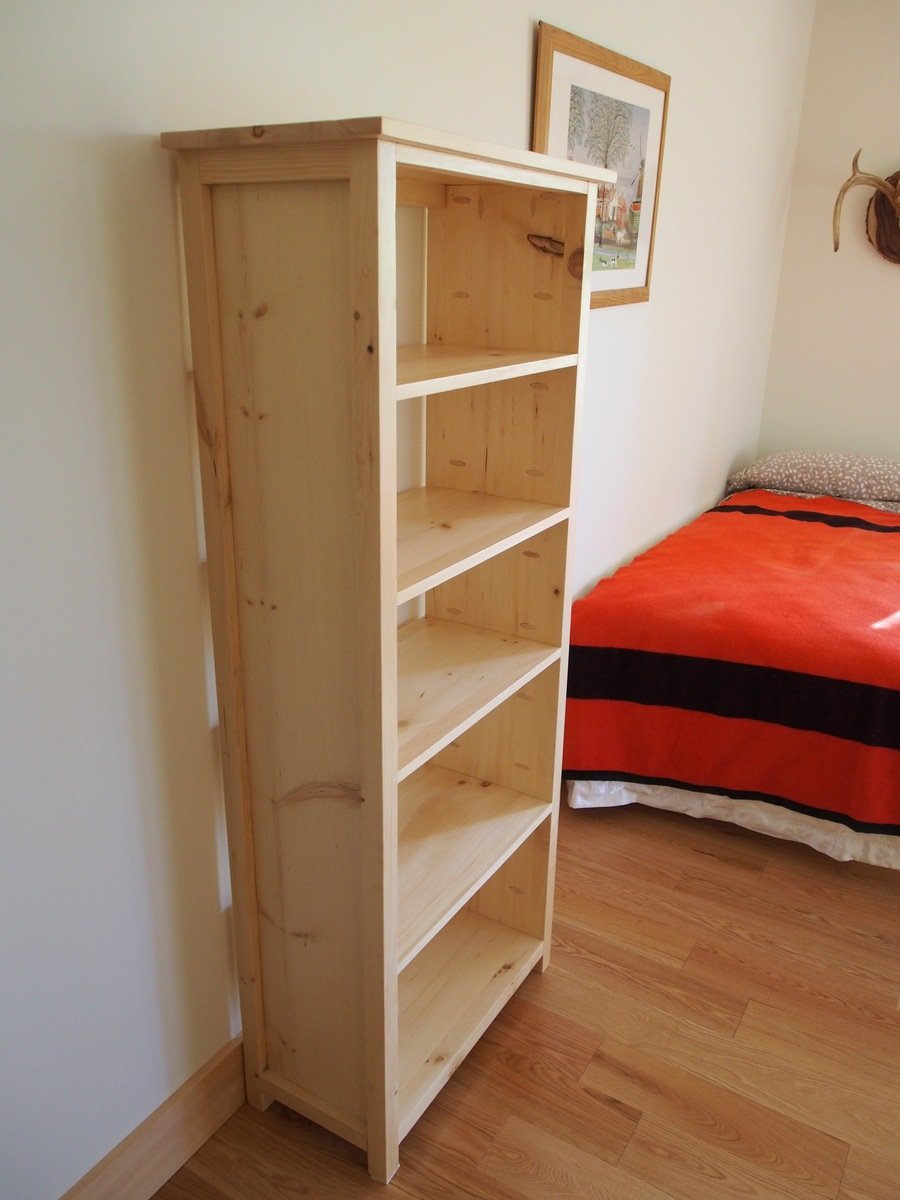
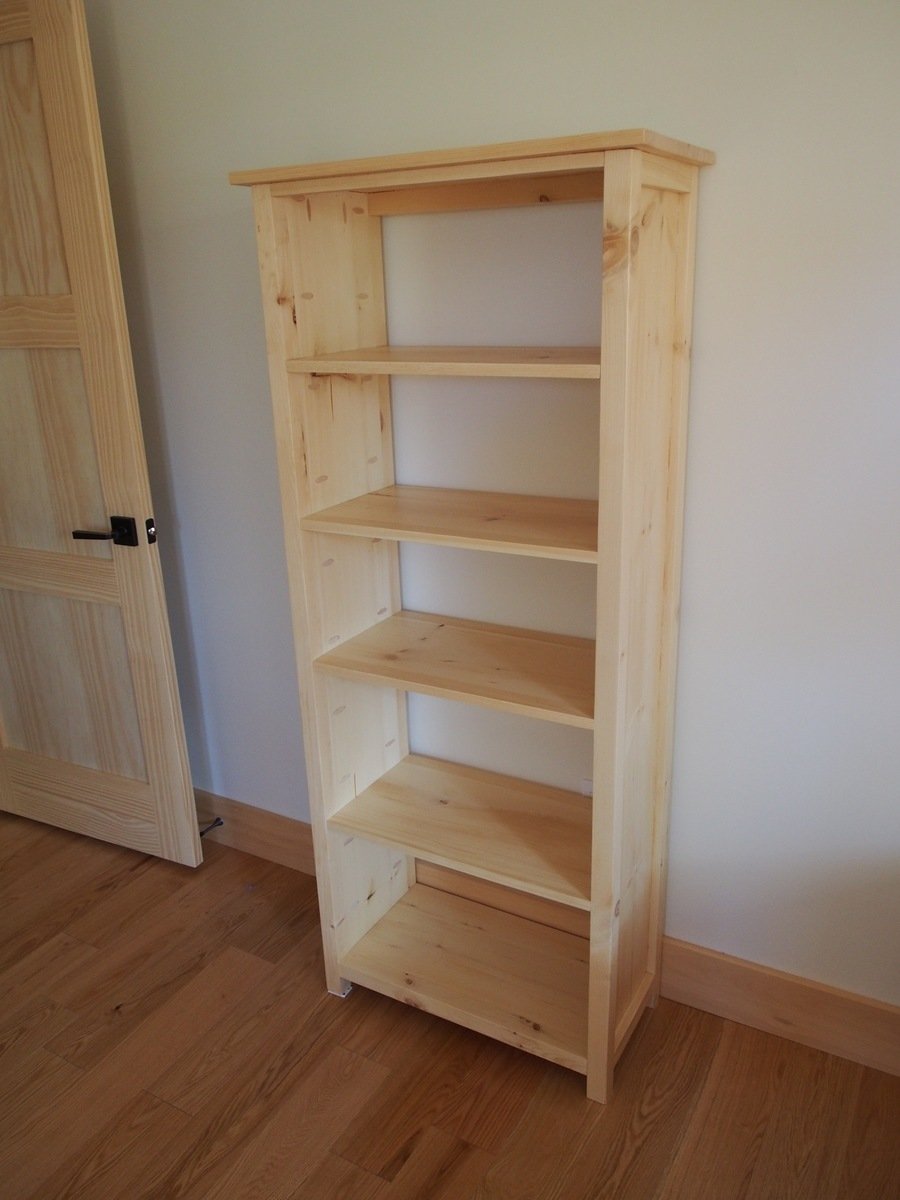
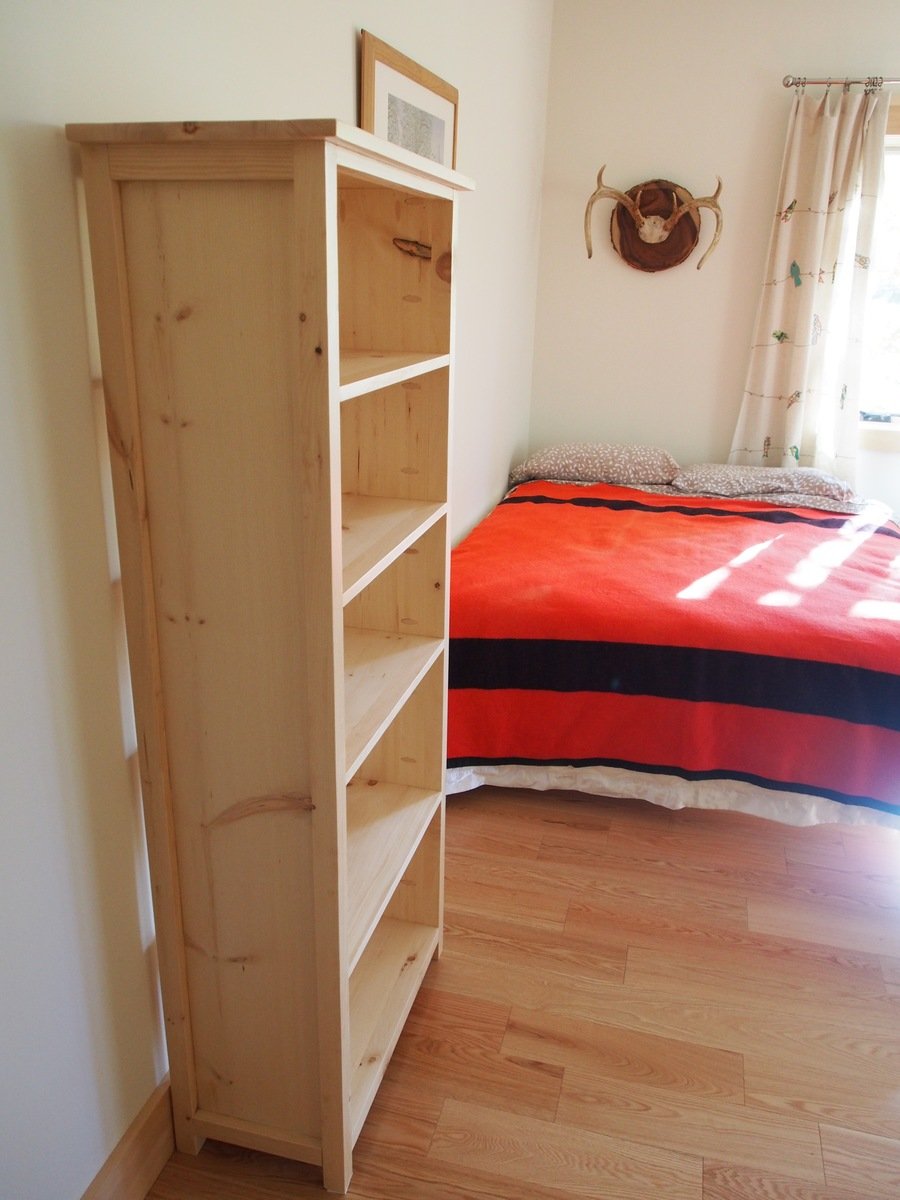
I used 1 x 10s to make the bookcase a little shallower, and left the back open. Thanks for the great plan.
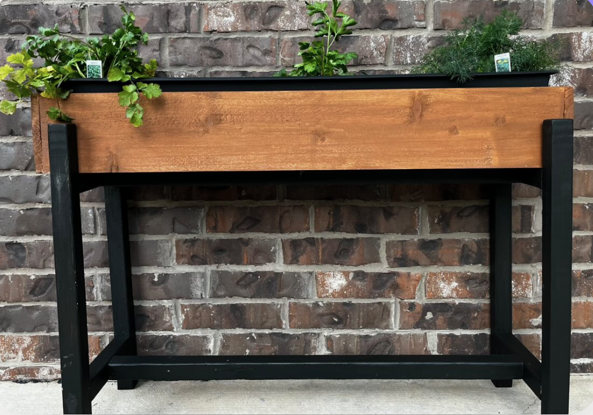
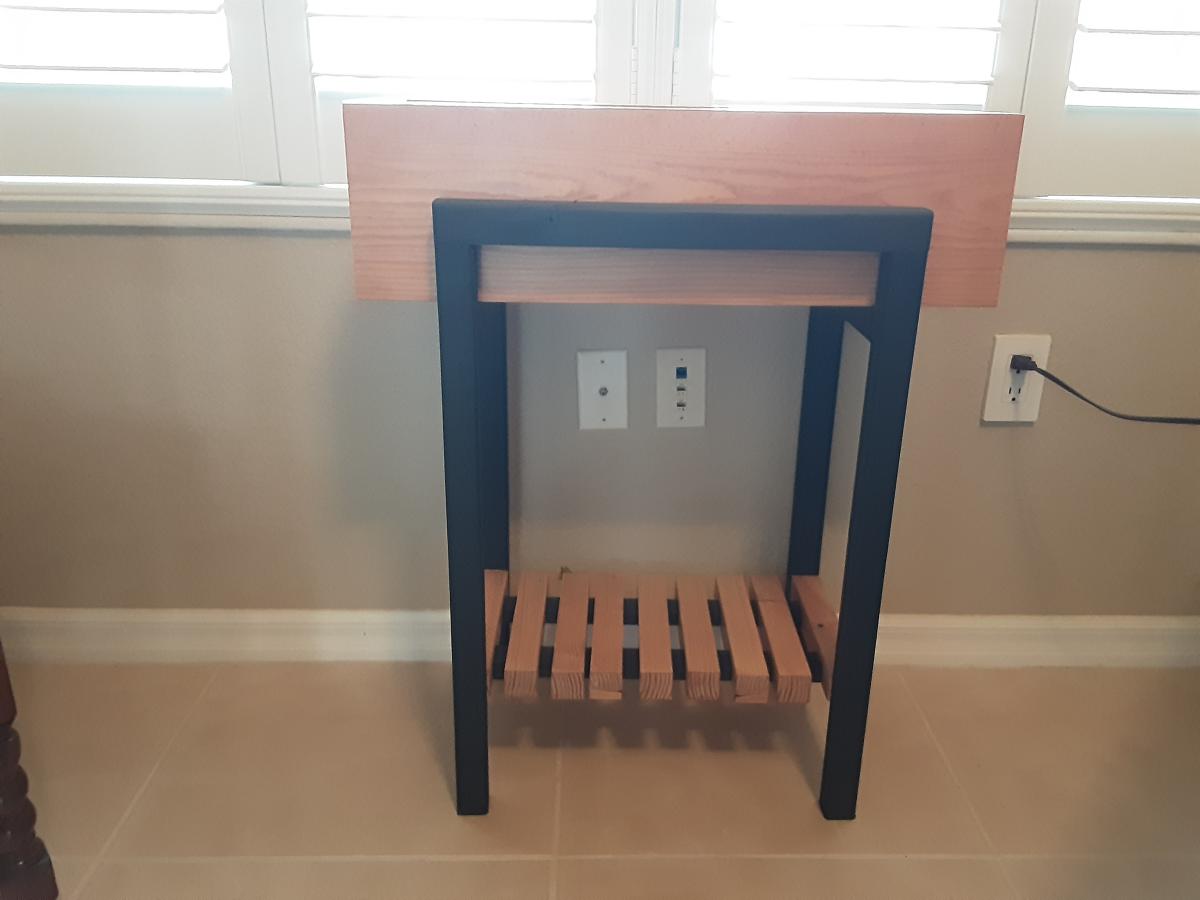
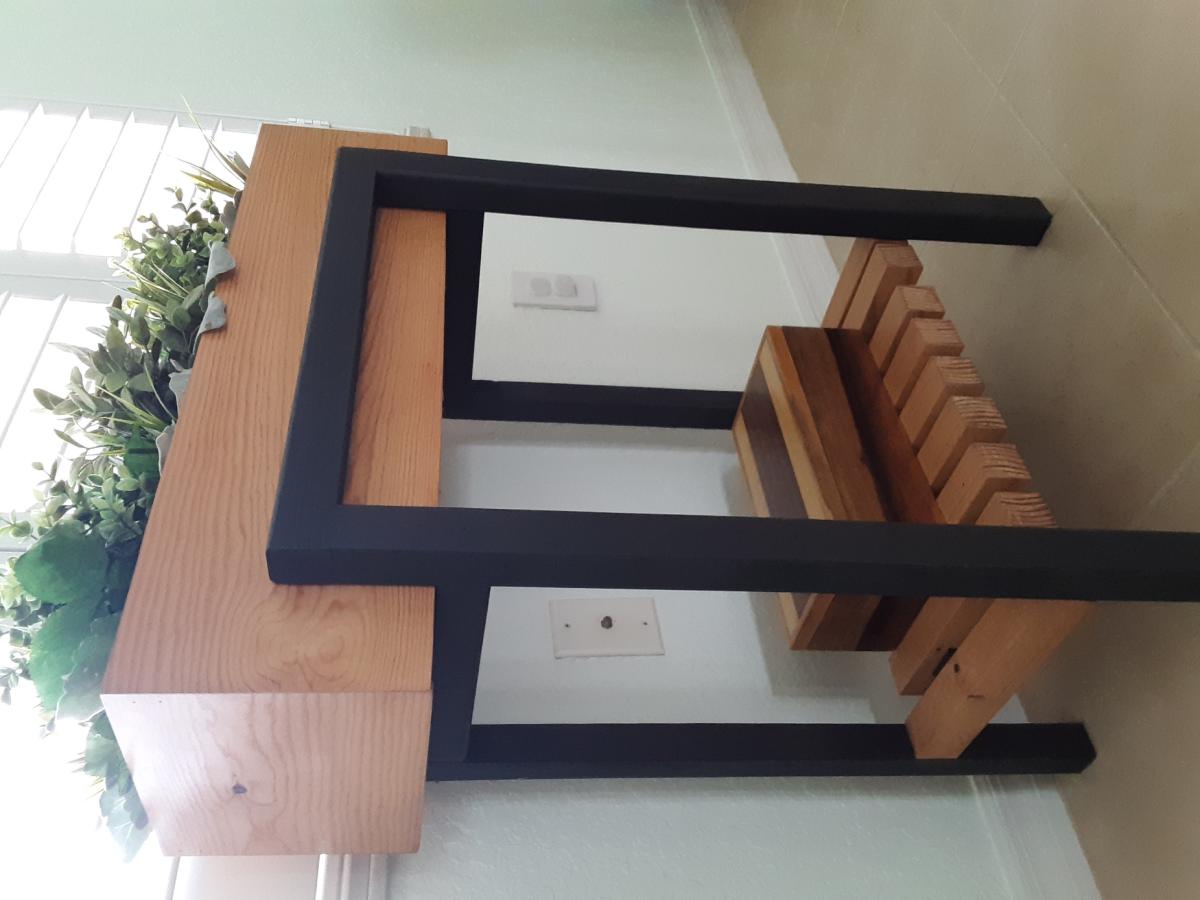
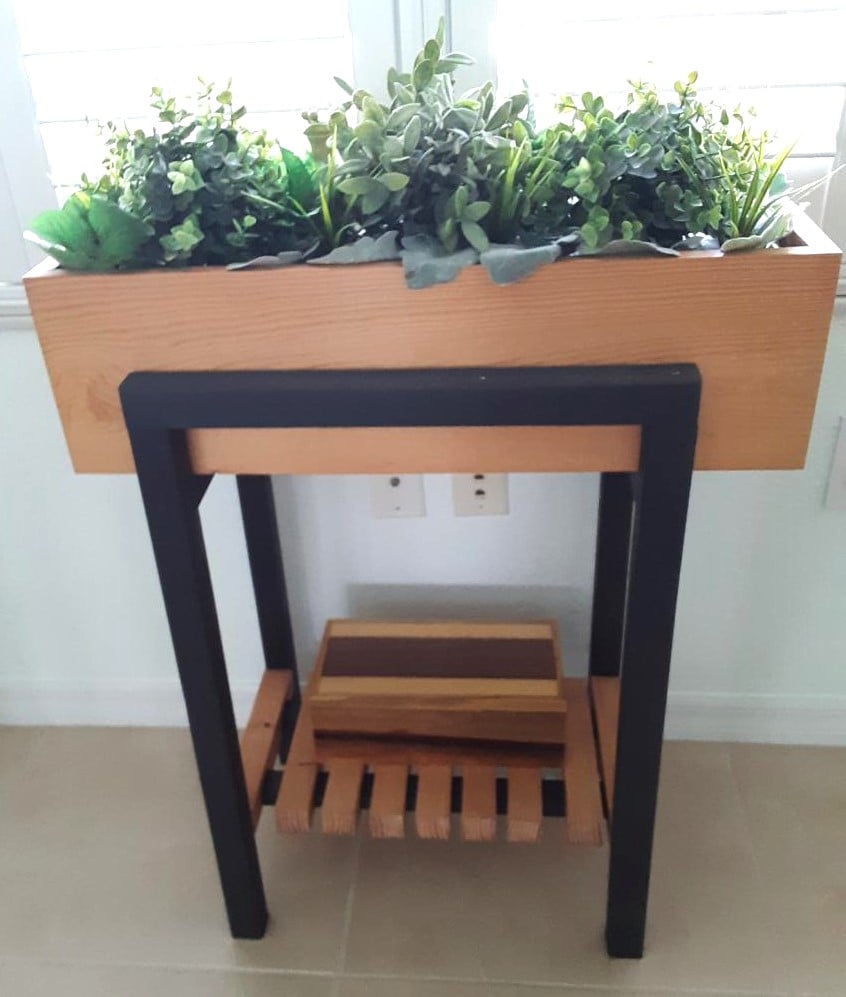
"Here's a pic of the planter I made! I modified it to fit a 36" planter. I LOVE it. Thanks!!"
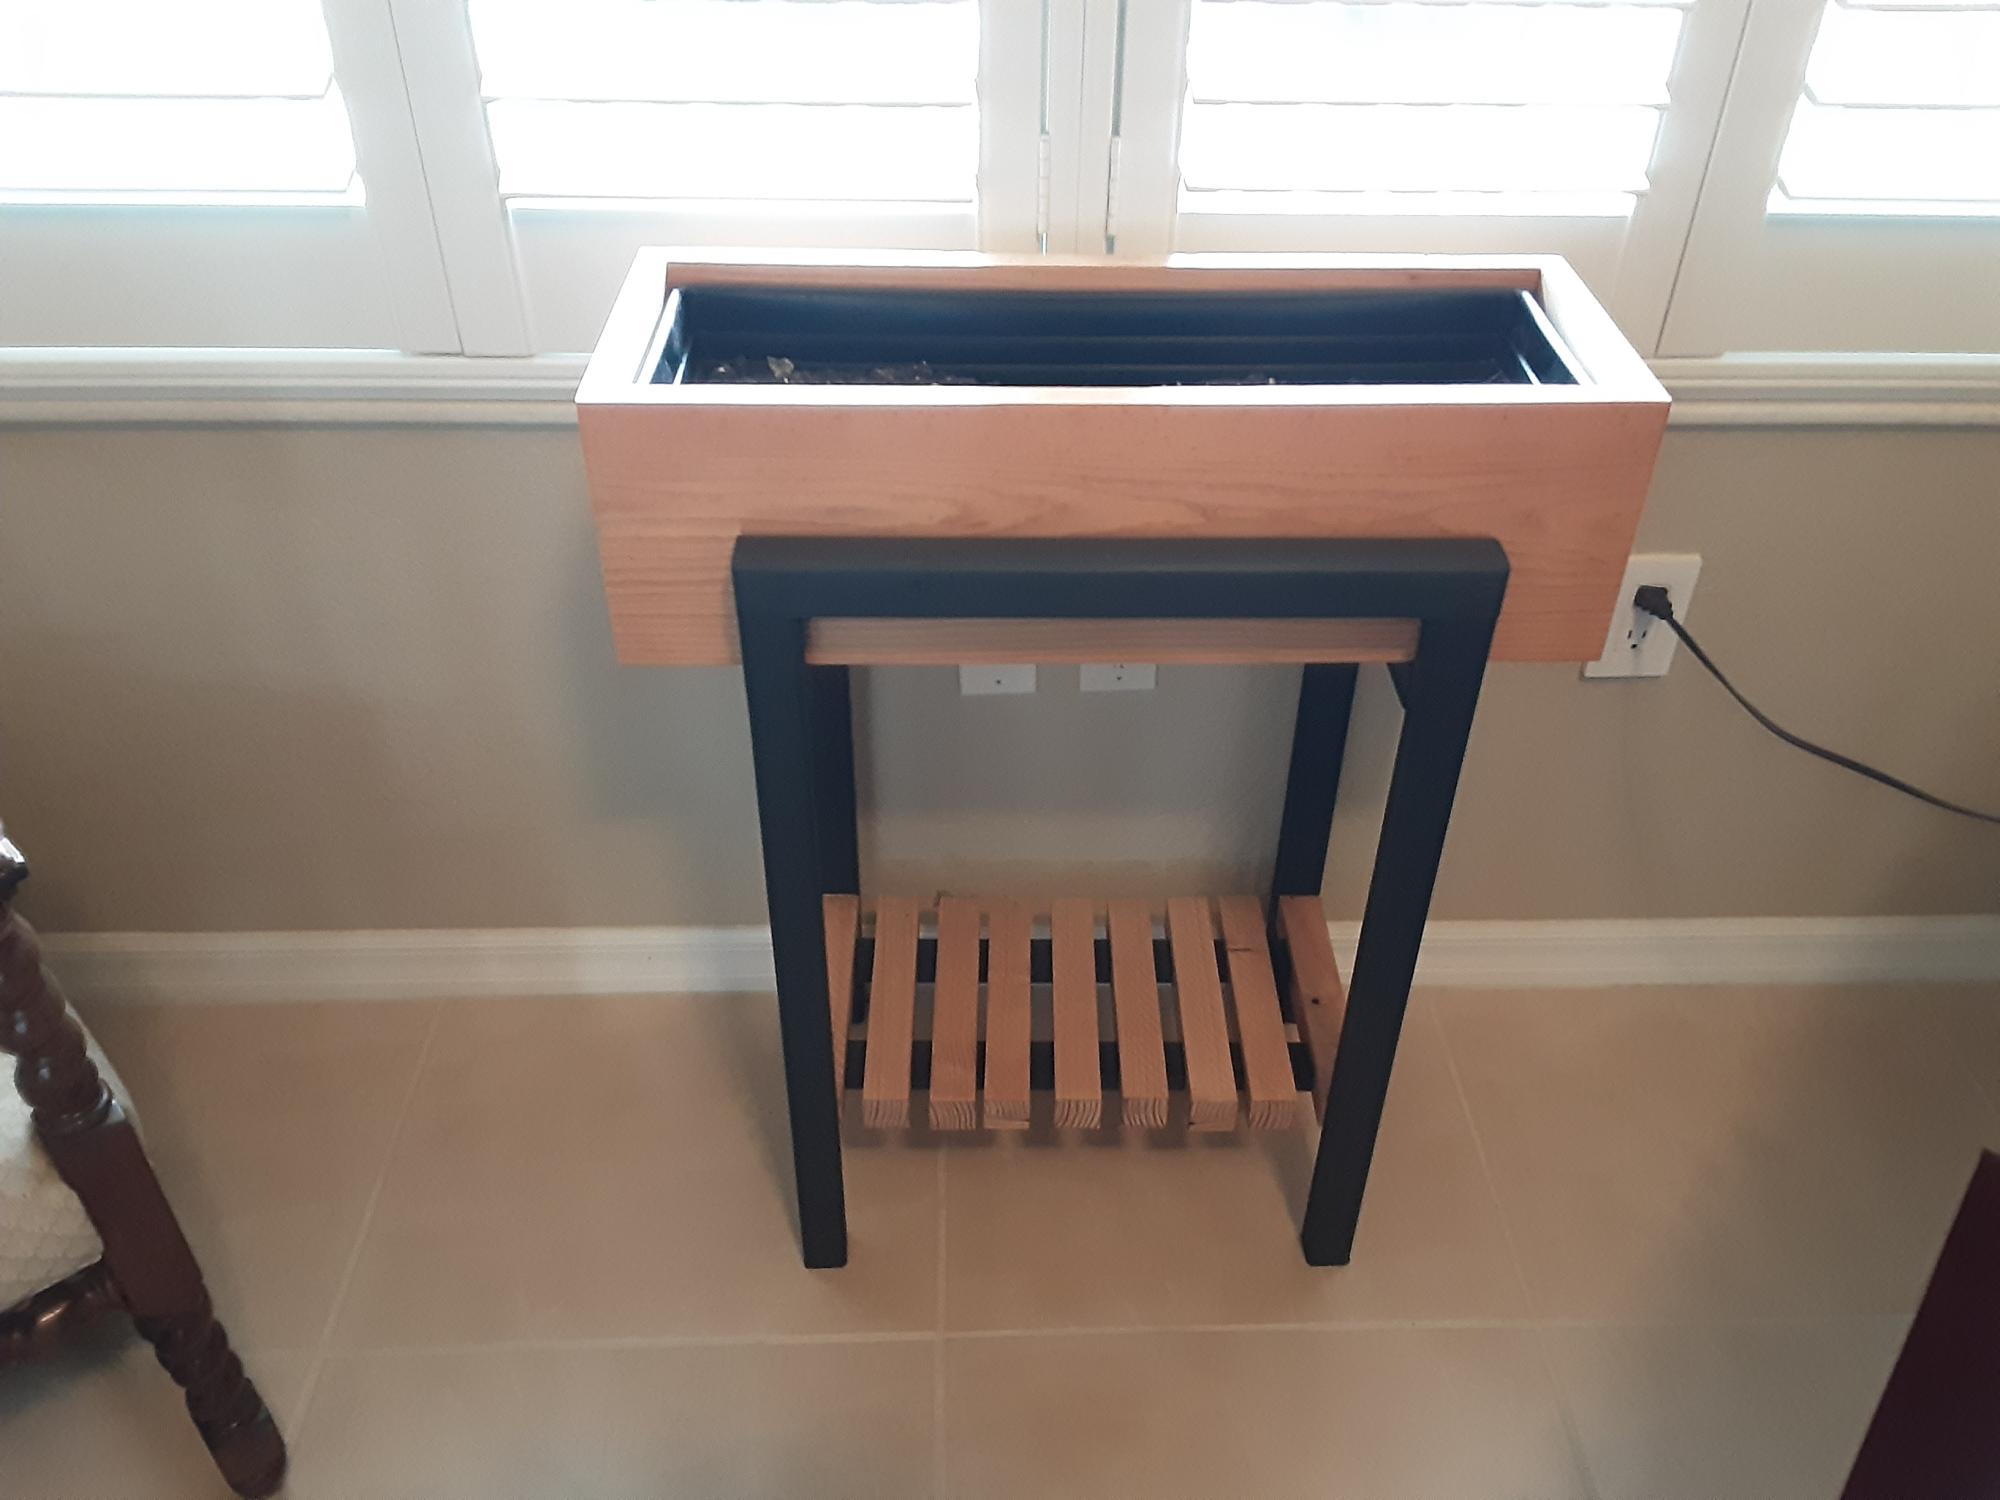
Created the stand for the raised planter using 2X2 assembled using dowels. Painted the stand mixing black with a bit of white to simulate metal. The actually plastic window box fits within a wood open box with mitered corners fir clean log. Bottom of the stand provides a shelf using (9) 2X2s with a dado placed on either end to fit on the runners of the stand.
Mon, 05/01/2023 - 08:24
It looks super high quality, love your take! Thanks for sharing.
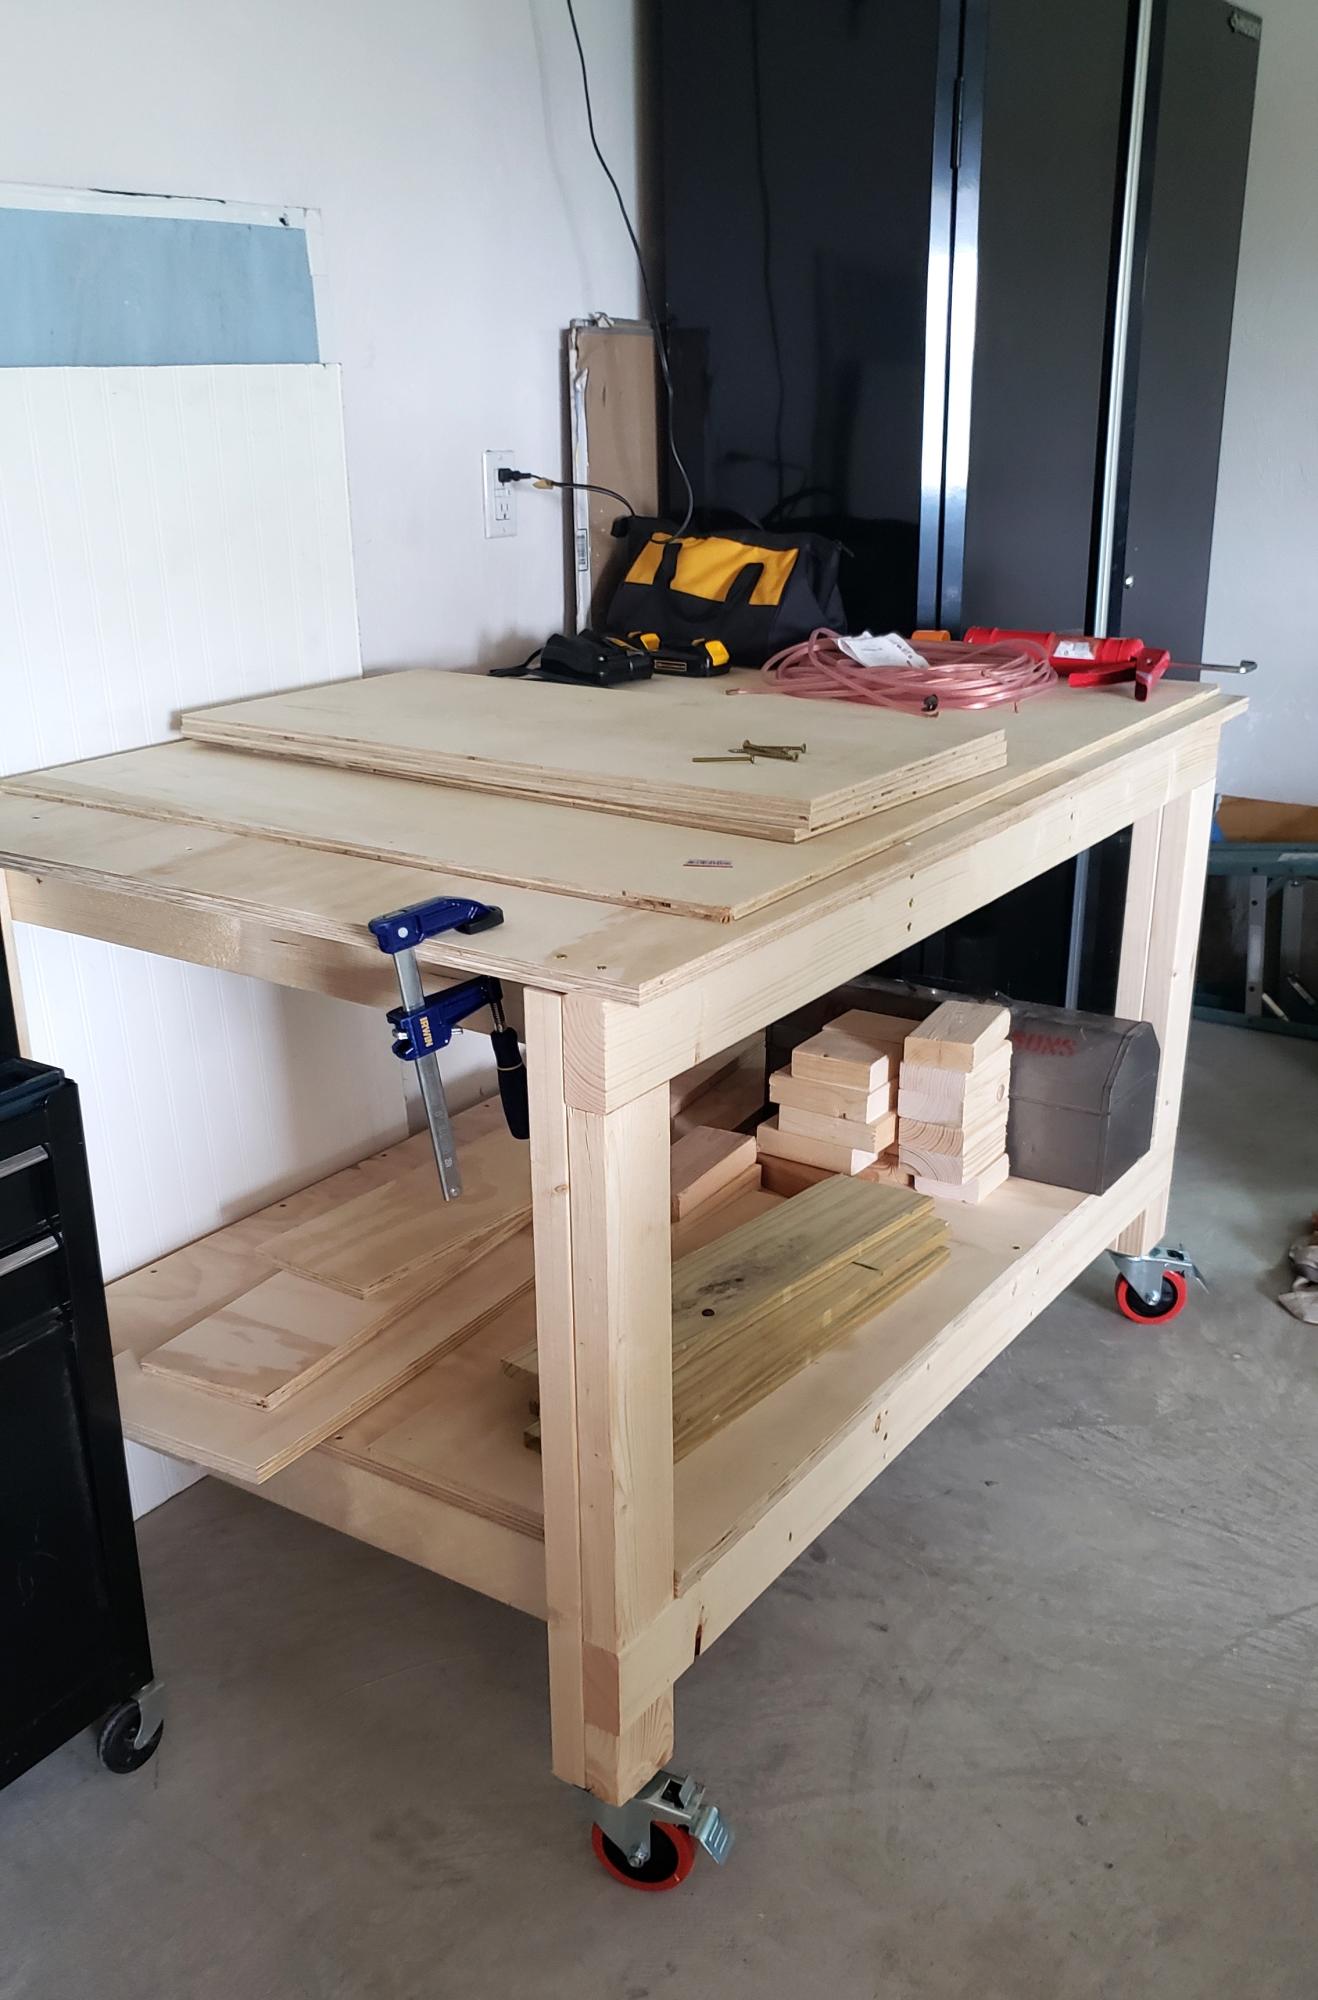
Easy to build workbench. I added an extra 2 1/2 inches (width) to the top plywood cut. This gave me a 1 1/4" lip to the front and back sides. I wanted to be able to clamp on all sides of the bench. Also added casters since I wanted to use this as an outdoor table for entertaining if needed and to simply have mobility with the bench. So far I love it!
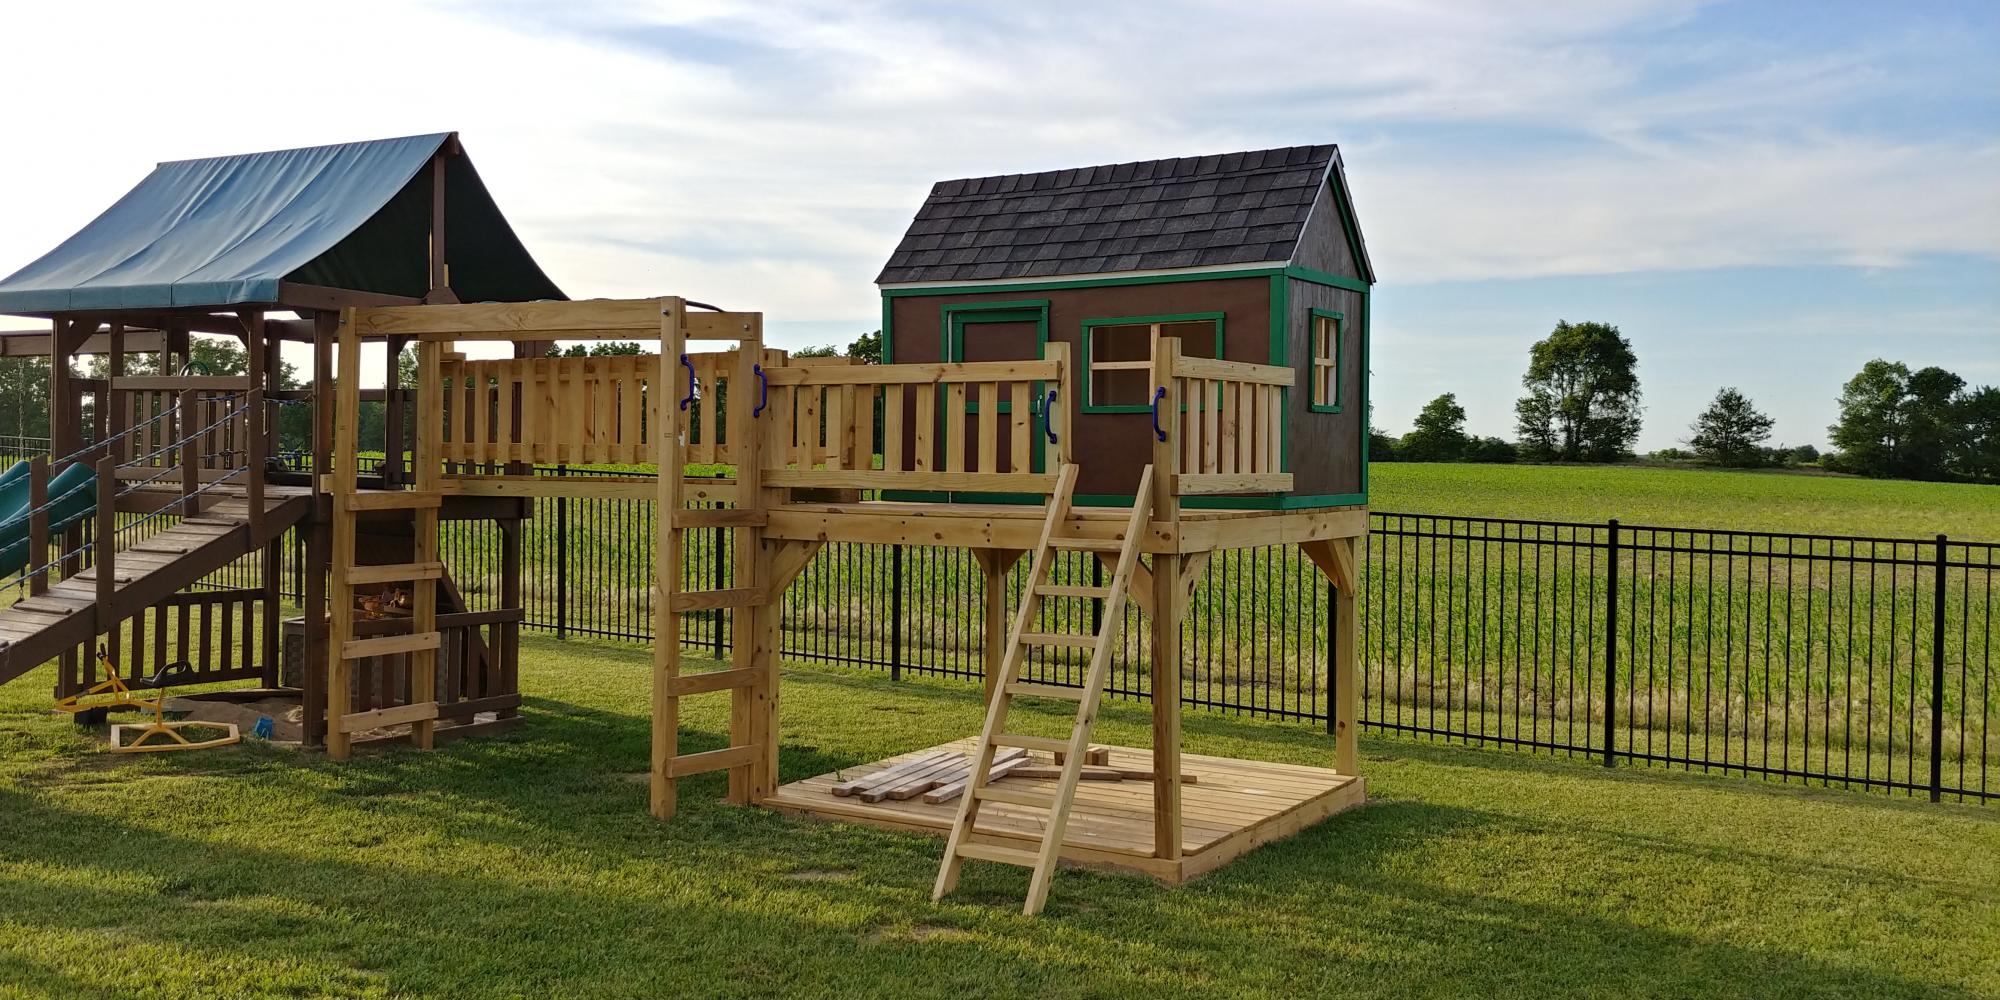
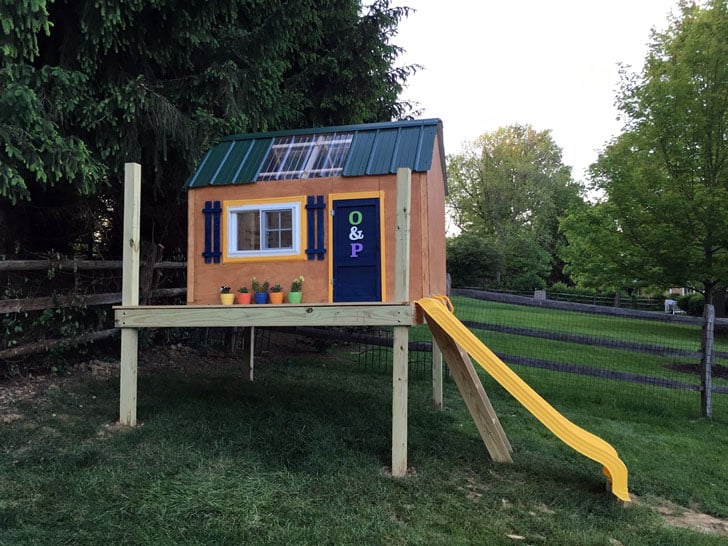
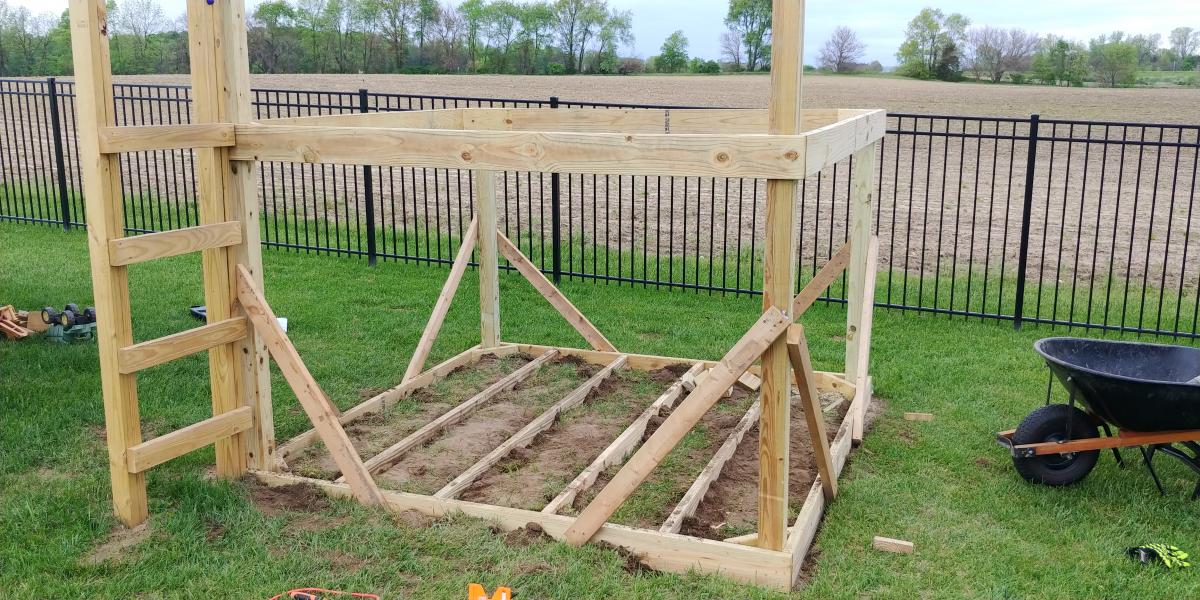
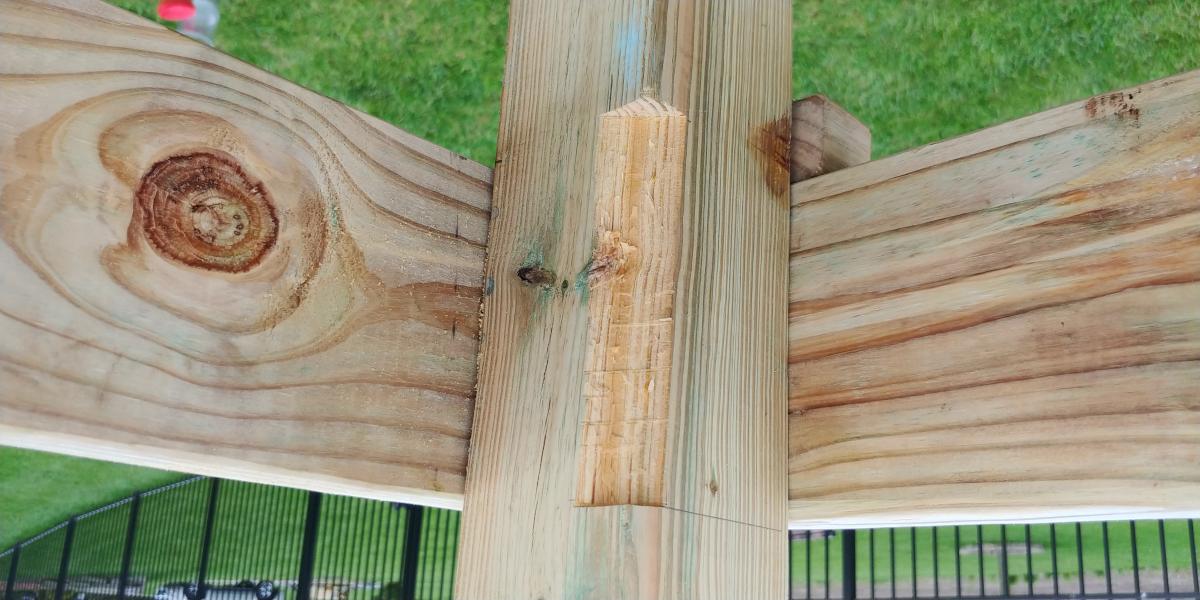
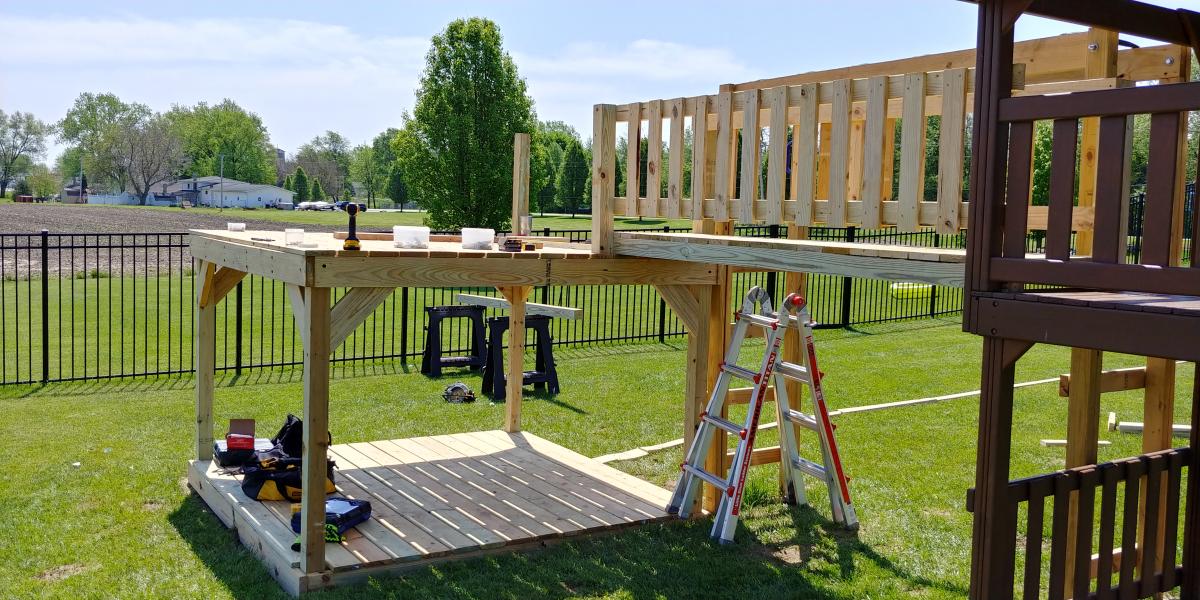
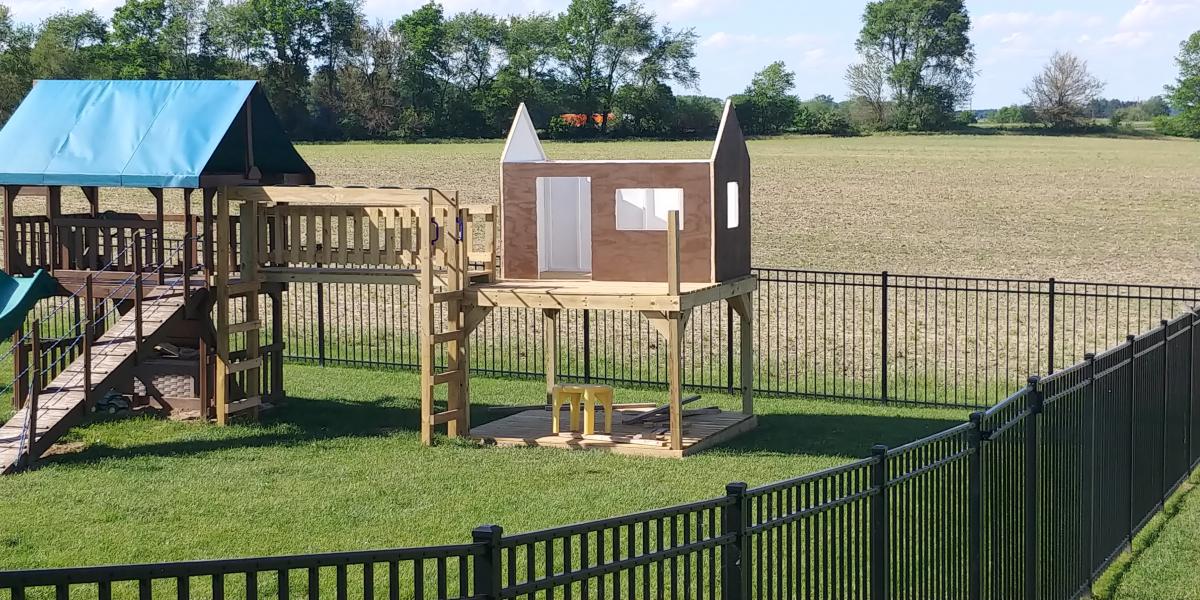
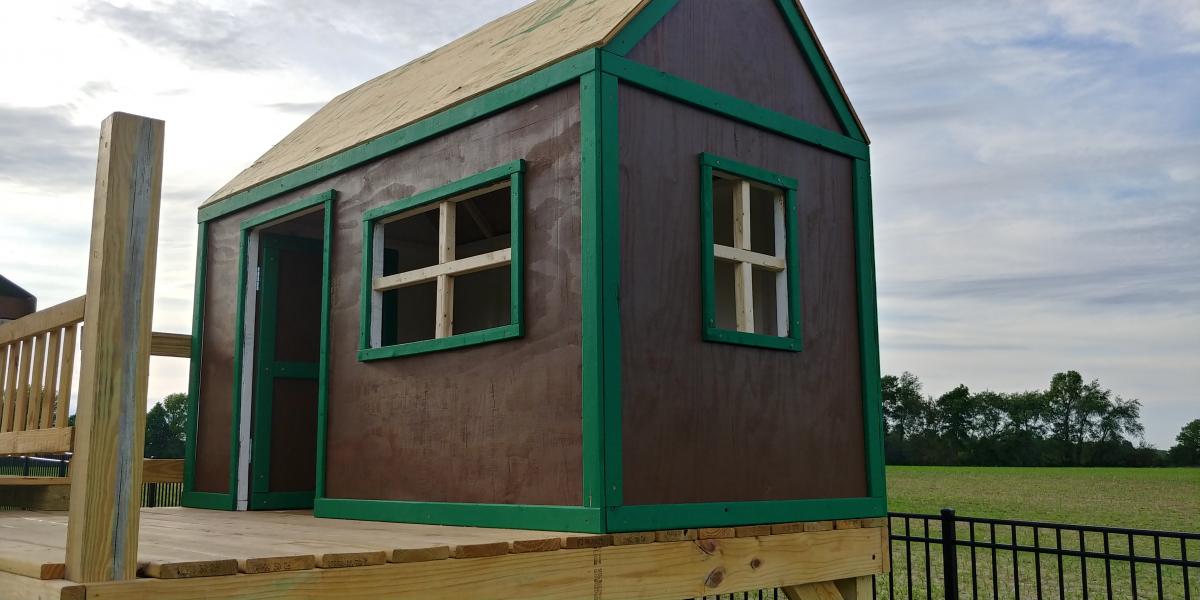
Decided our old play set needed an addition, landed on these plans of Ana's. Sat on them and mulled them over for months. Once the wife said something about adding on to it I made the purchases needed. Connected the two platforms with a bridge. I used 4"x4"x10' for the runners, same boards as the decking for the platform of the bridge(5/4"x6"), 2x4's and 1x4's for the railing. If you look at the 3rd photo, I had to chisel out the 4x4 post to get the 2"x6"x12" support to fit correctly. This should measure 2"x6"x13". Another change I made was to cut the bottom and top trim pieces longer on the front and back sections so that the trim would cover the framing of the gable end walls (see last photo). my son wanted windows so I faked in some windows with scrap 2x2's. I used 2x6's as supports from the 4x4's to the 2x6 framing (see photo 3) I added the monkey bars about a month before deciding to do the platform/deck and playhouse. The ladder is based loosely off of a couple of plans I found online. I was able to do all of this work myself except for the roof. Need my dads help to lift the plywood, he then helped me with the rest of the roof.

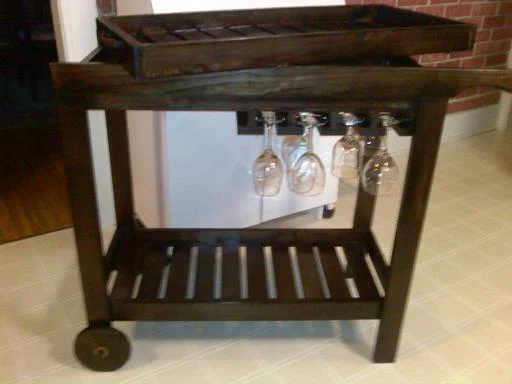
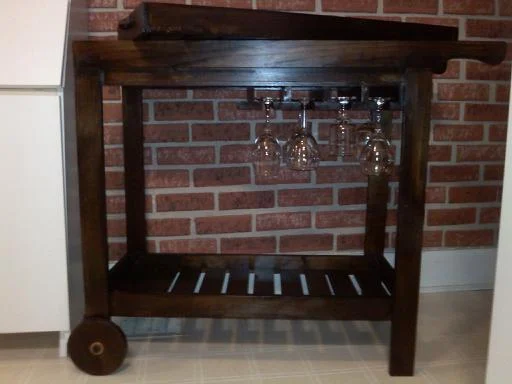
This was my second project using plans on this site and I loved it - I made this for a friend's daughter who was moving into her own apartment. She and her girlfriends loved it too! It was very easy and quick to build. Wheels took a bit of time and effort!
This was a real hit and I'd love to make more, if I had room at my house I'd make one for myself!
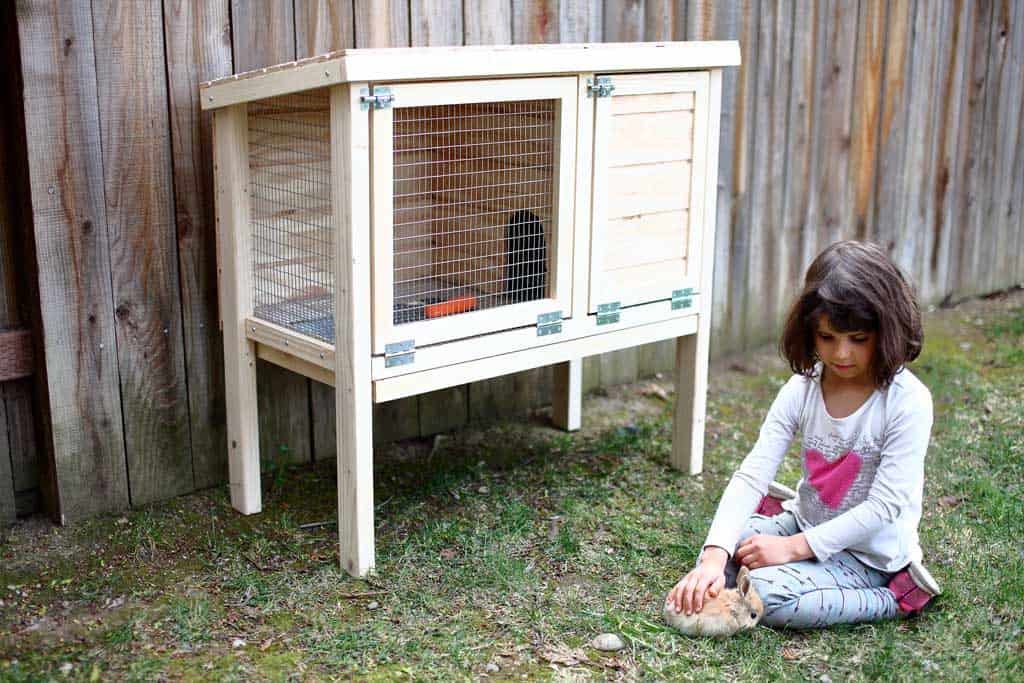
Looking for a cute, interactive pet to add to your home. What about bunnies? These creatures make great indoor pets. But before getting the rabbits, they will need a hutch to live in. To solve this problem, I’ve made detailed plans on how to build a DIY rabbit hutch that could be used indoor and outdoor.
The hutch has a litter pan under the floor that could be removed for cleaning. Since the hutch is only 3 feet wide, it could be easily moved around.
See my website for additional pictures and how I've built it, TheDIYPlan.com


Comments
Ana White Admin
Tue, 02/07/2023 - 07:25
Super cute!
Love the fun cheery colors! Thanks for sharing.