Community Brag Posts

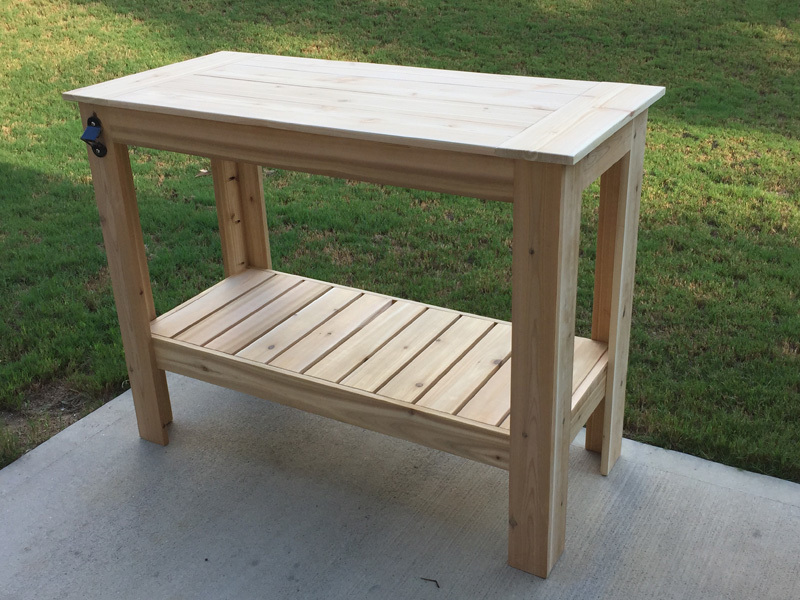
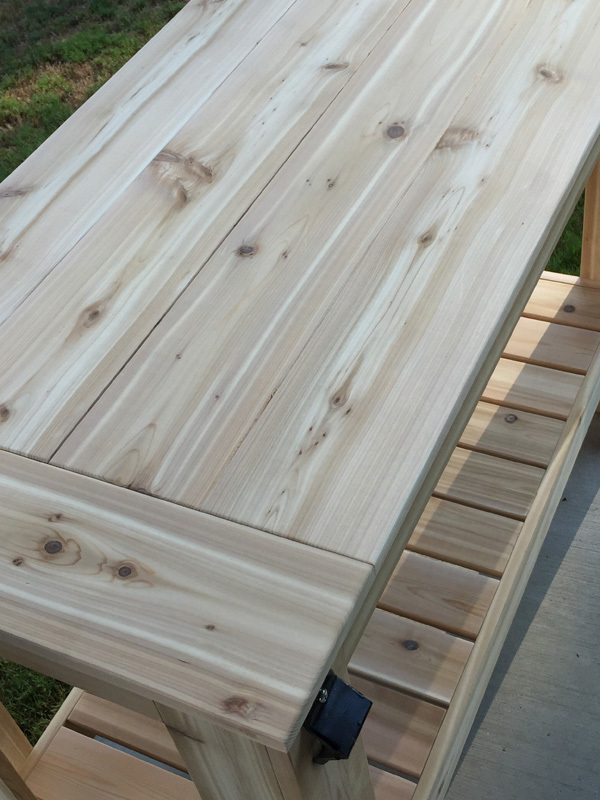
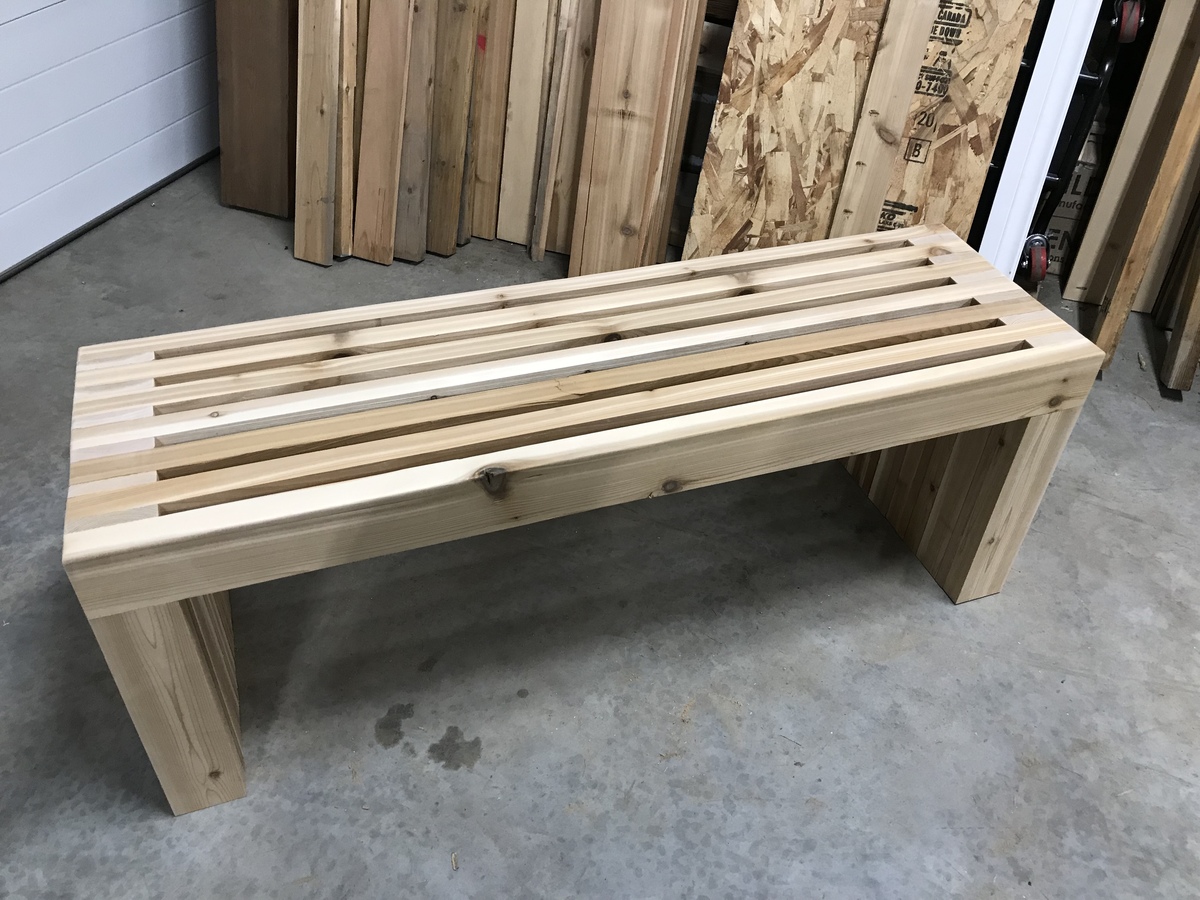
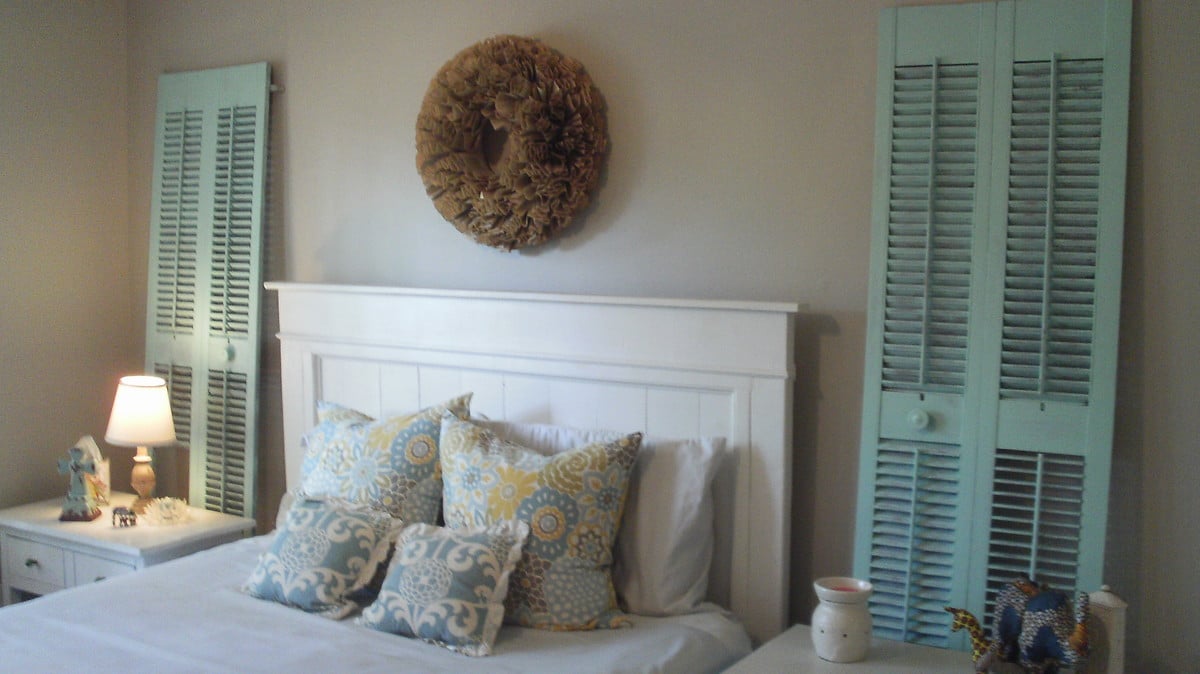
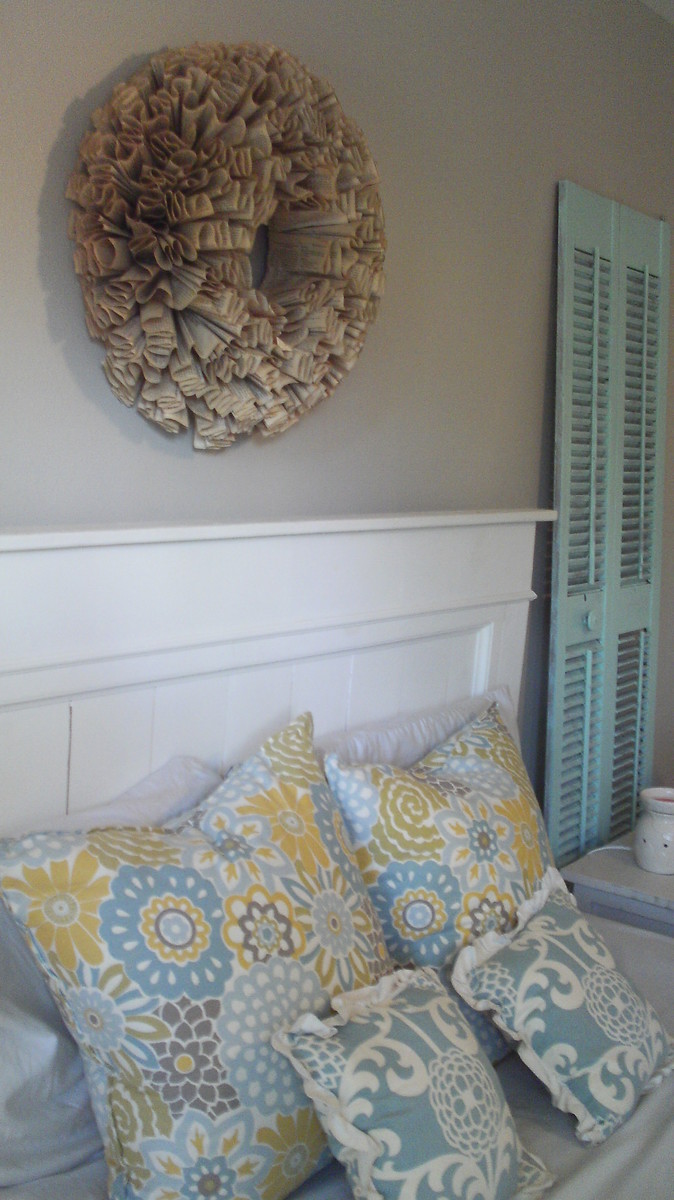
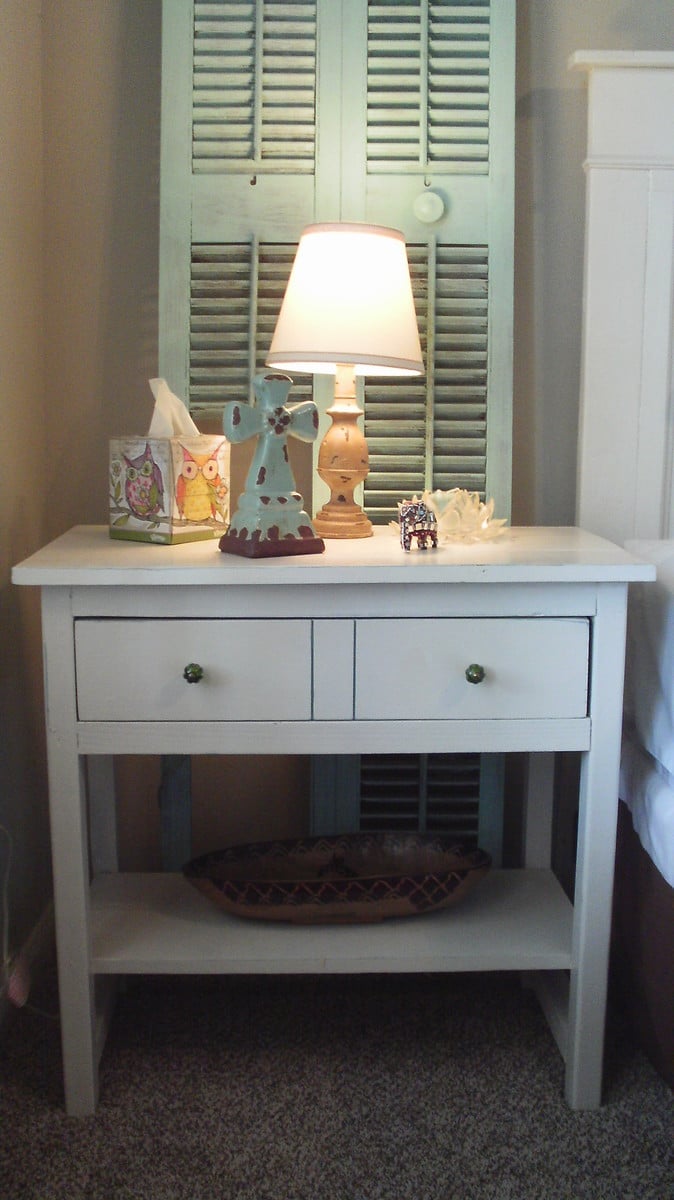
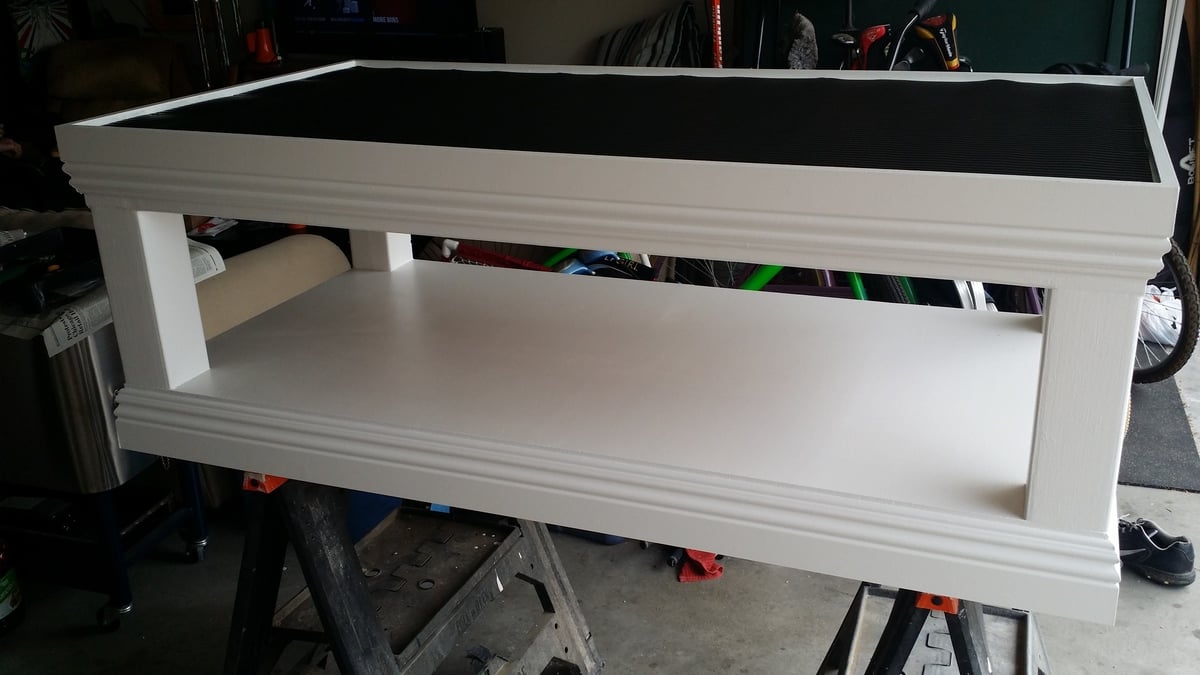
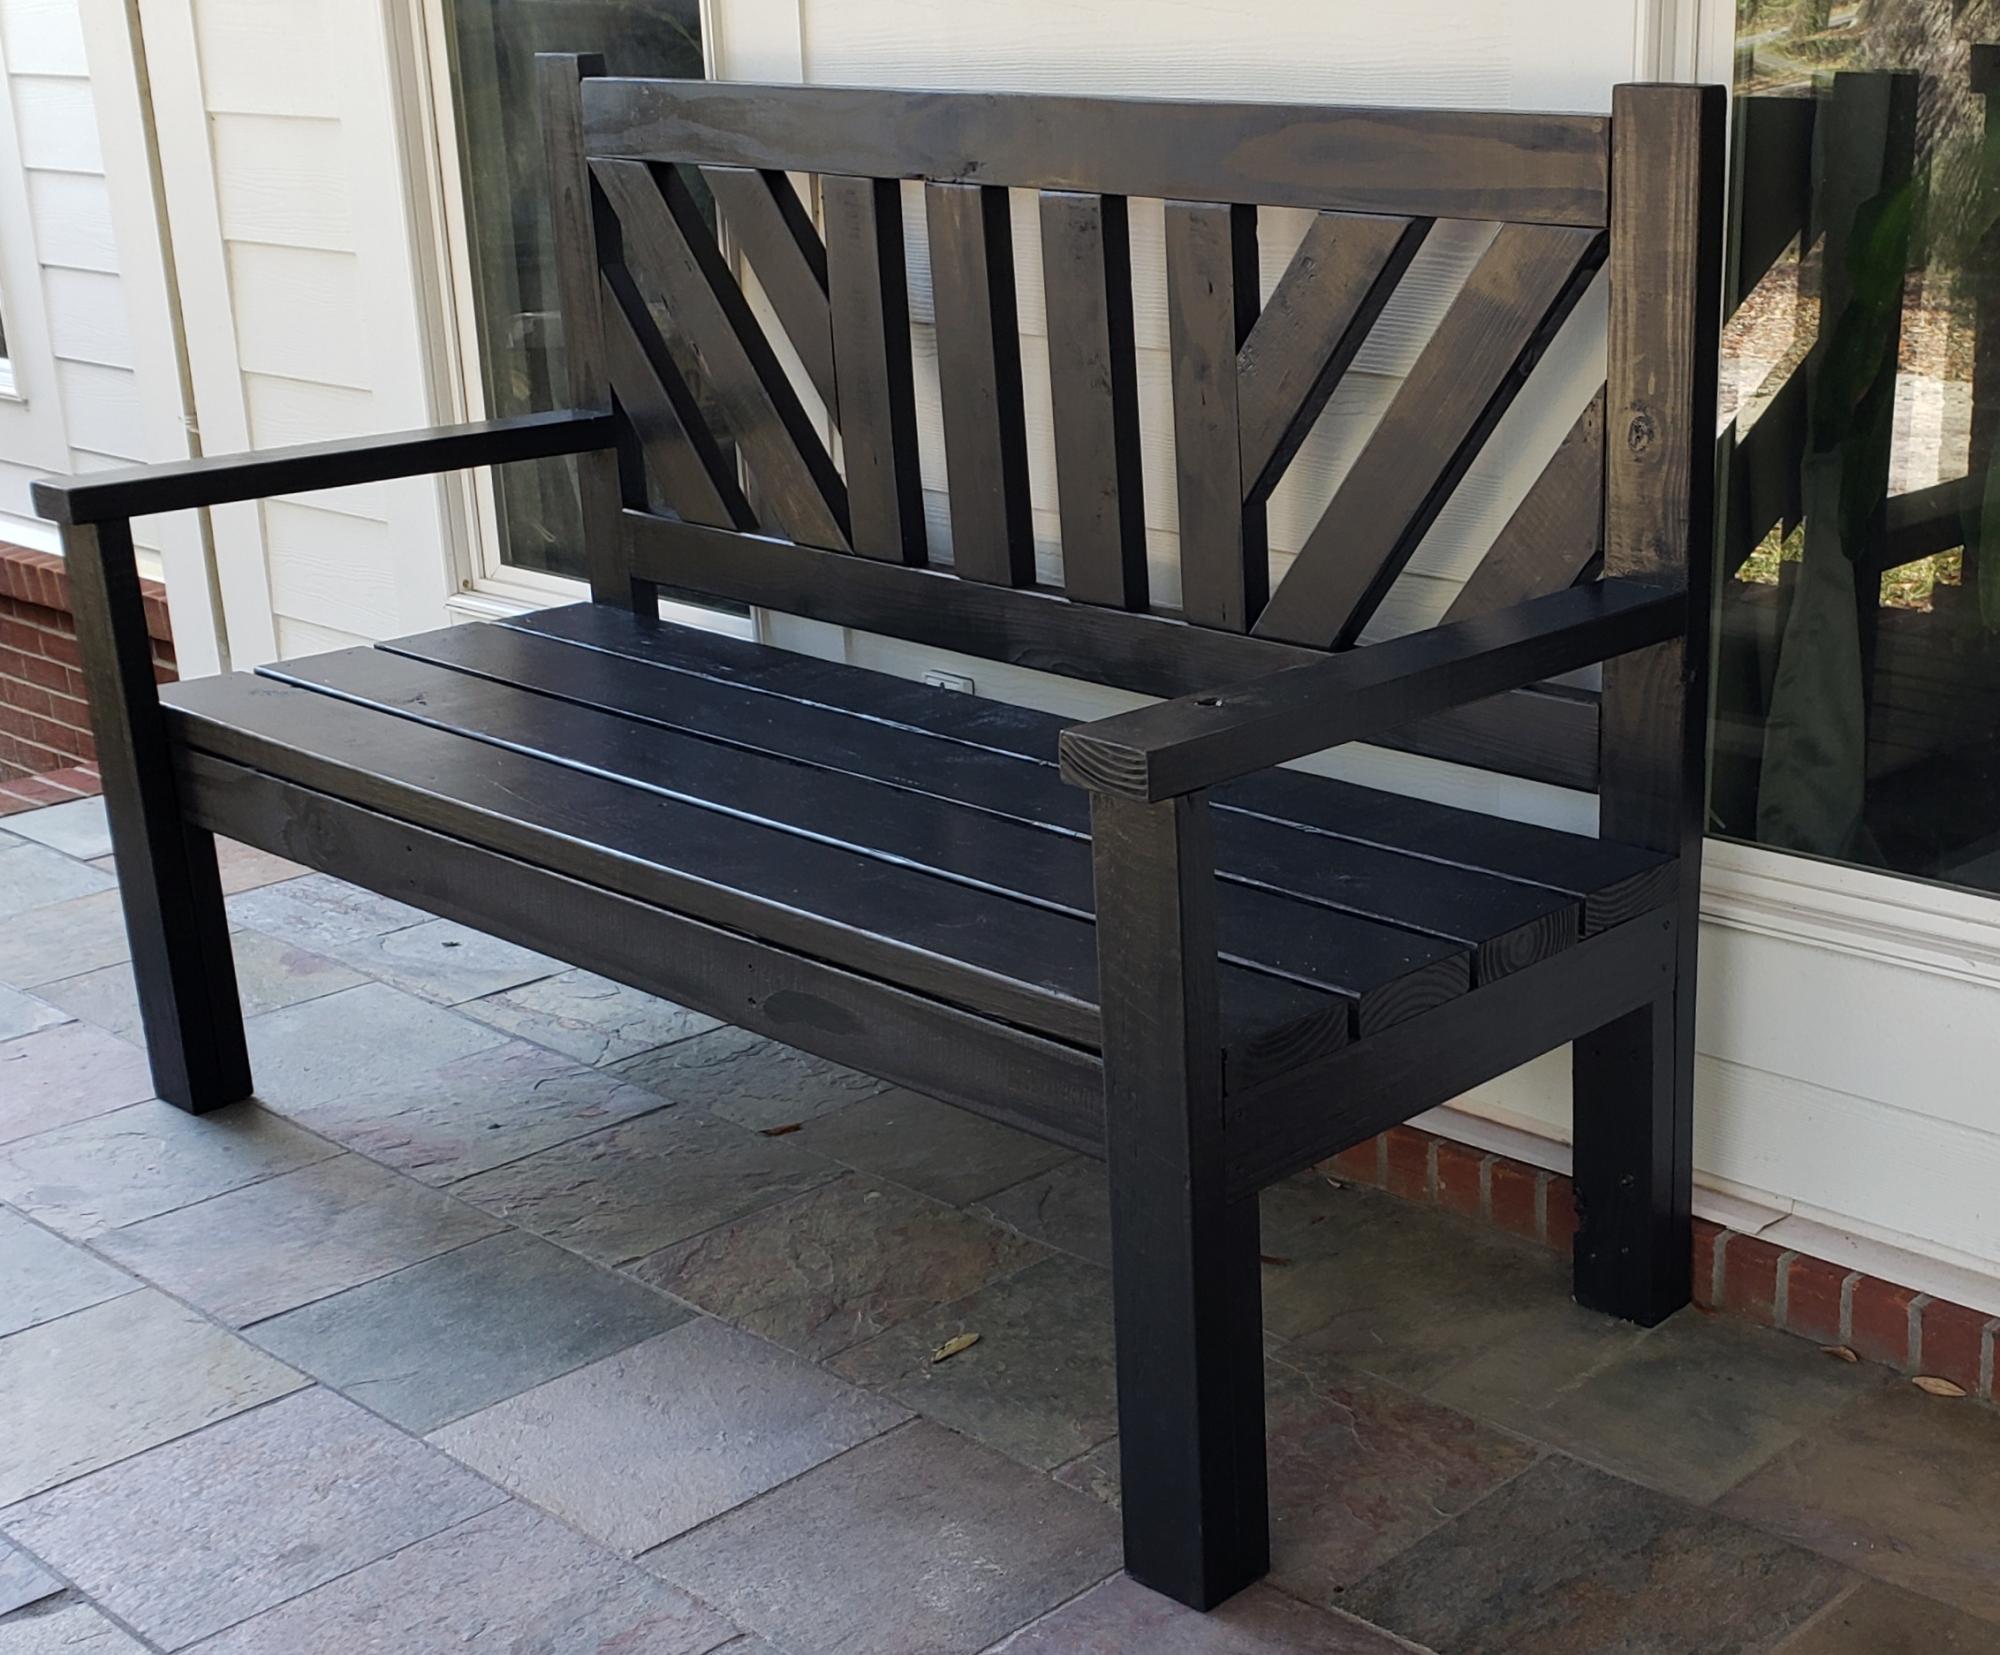
Narrow Farmhouse Table

Submitted by kylihoot on Sun, 05/01/2011 - 14:32

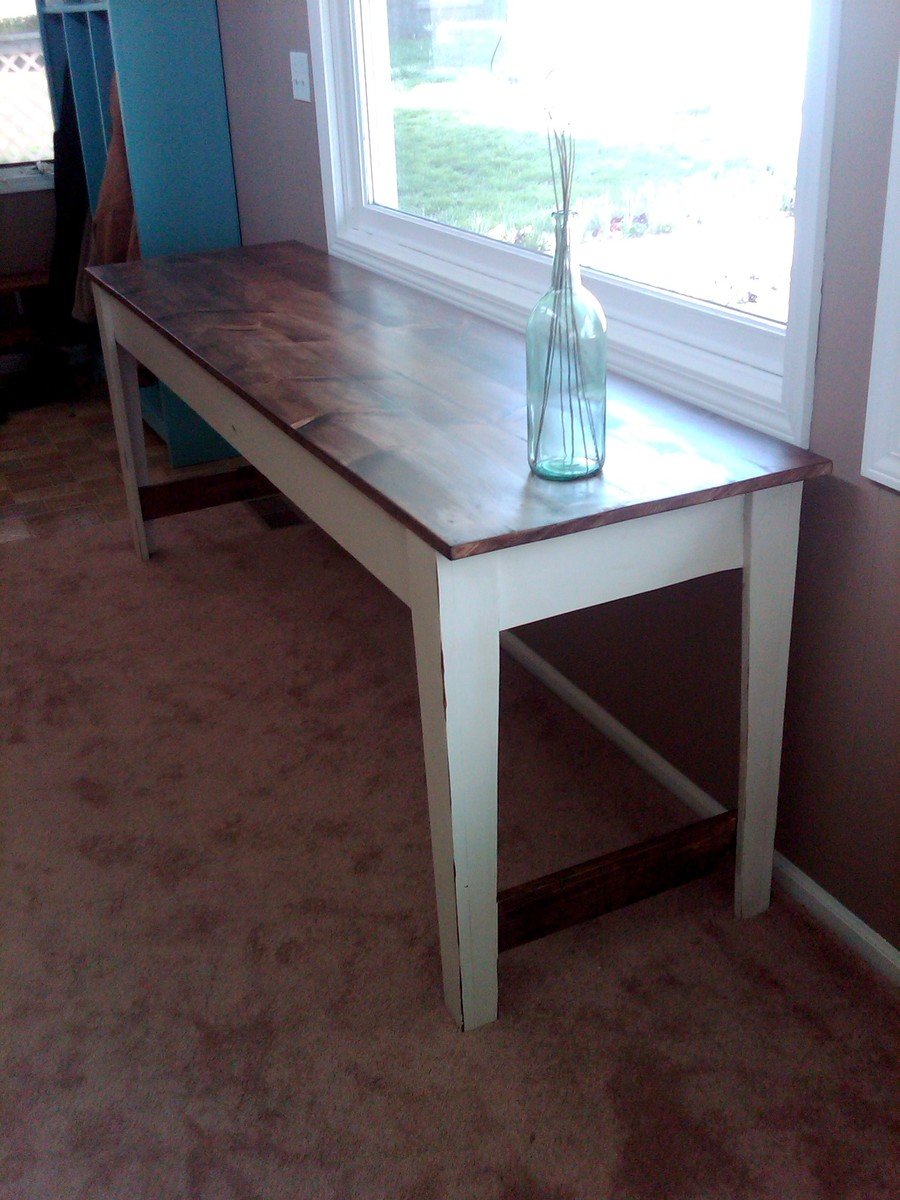
This is my favorite build so far! When I saw the plan I pretty muh obssesed over it for weeks until I finally gave in and here it is!
I must confess...I have no where to put it haha. I don't care, I saw it and had to have it.

Built from Plan(s)
Estimated Cost
$40 maybe a bit more for others...employee discount ;)
Estimated Time Investment
Weekend Project (10-20 Hours)
Finish Used
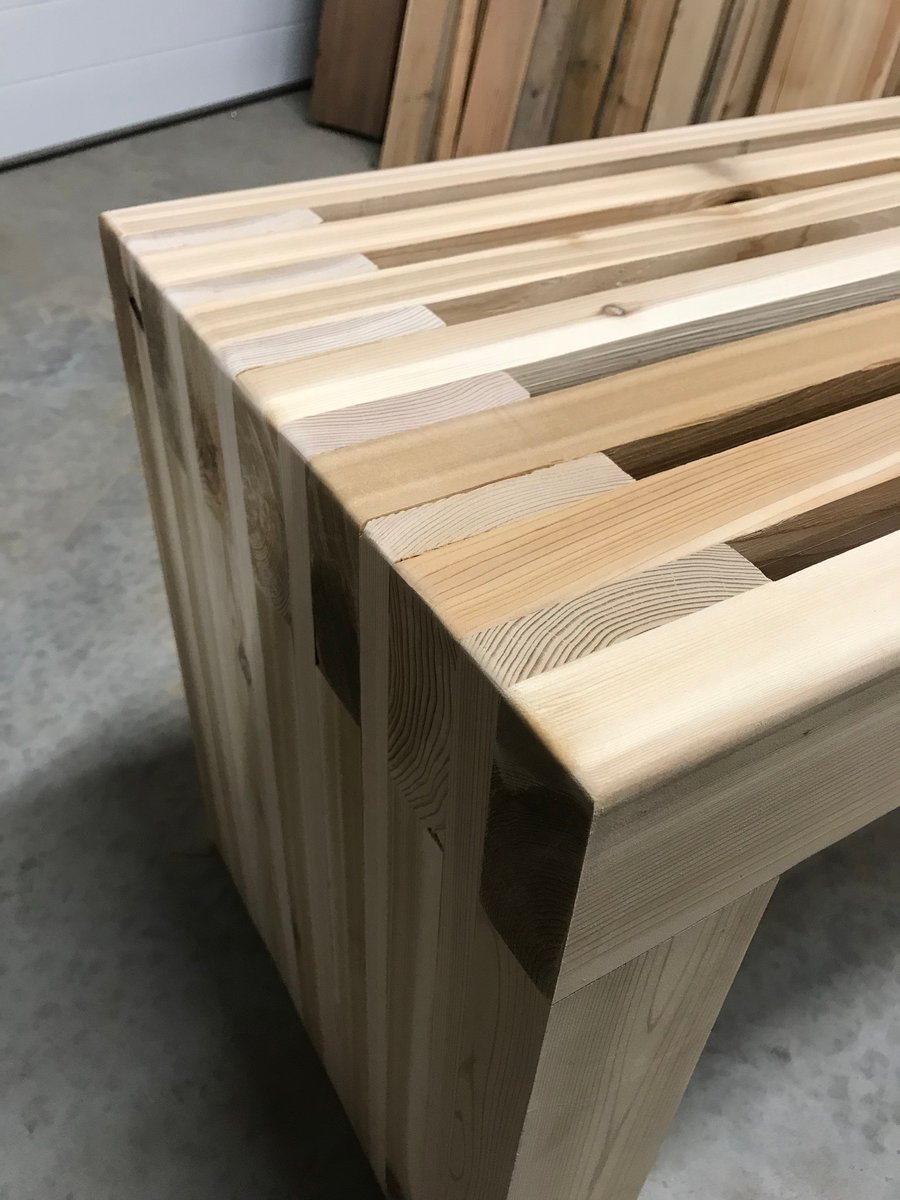
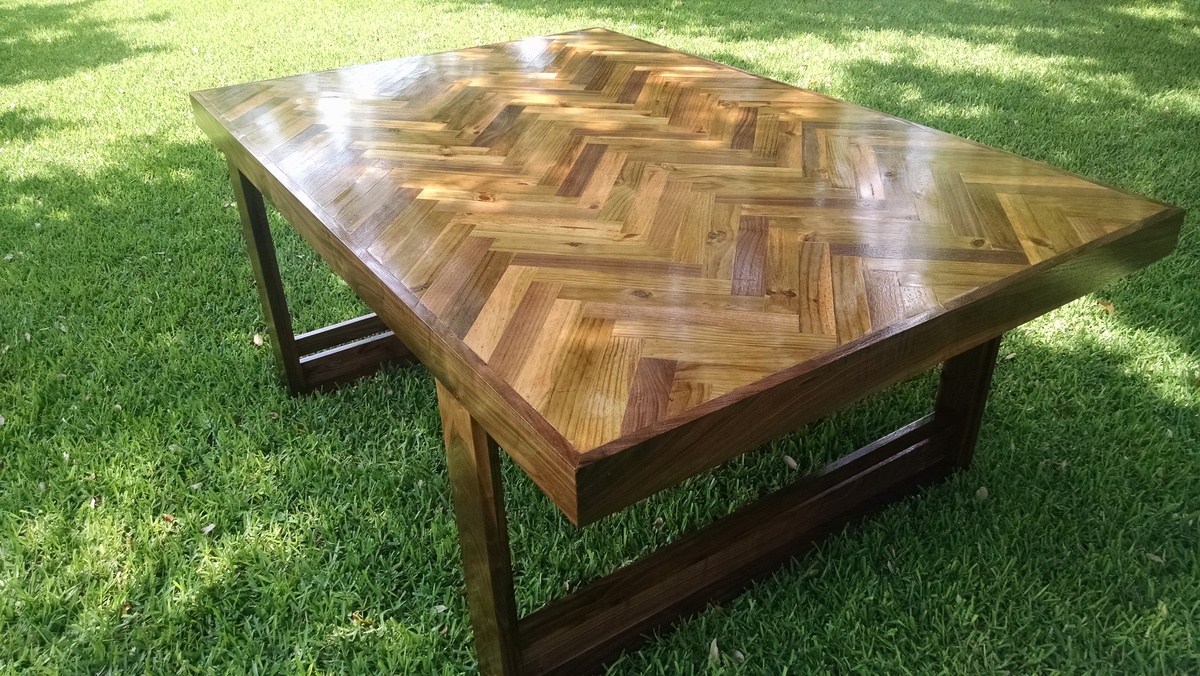
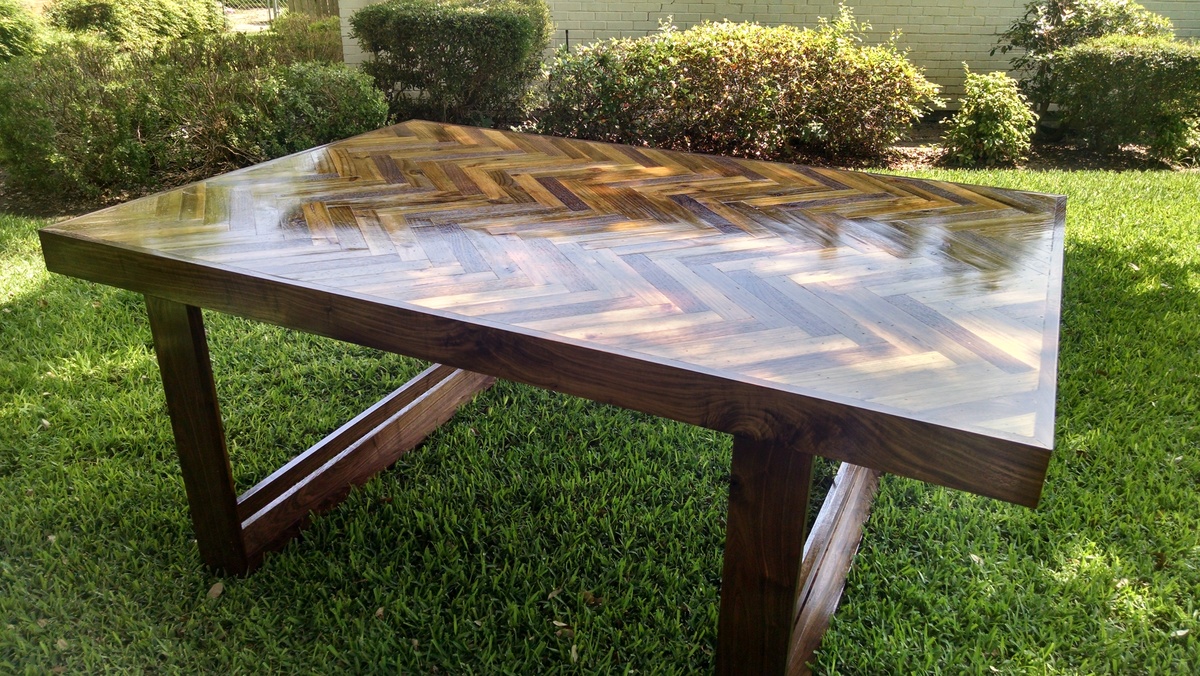
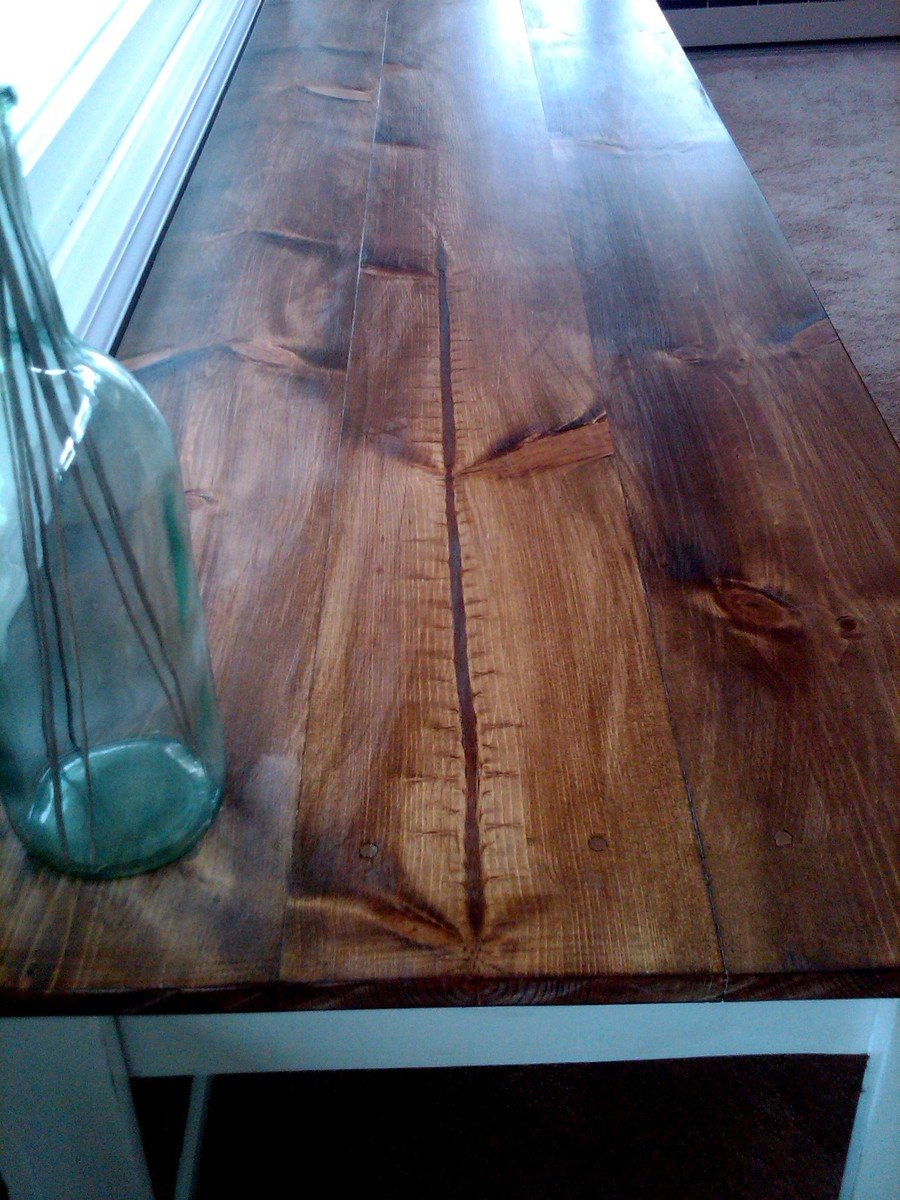
I used wood conditioner on the table top and end support aprons, and followed with a stain called Provincial.
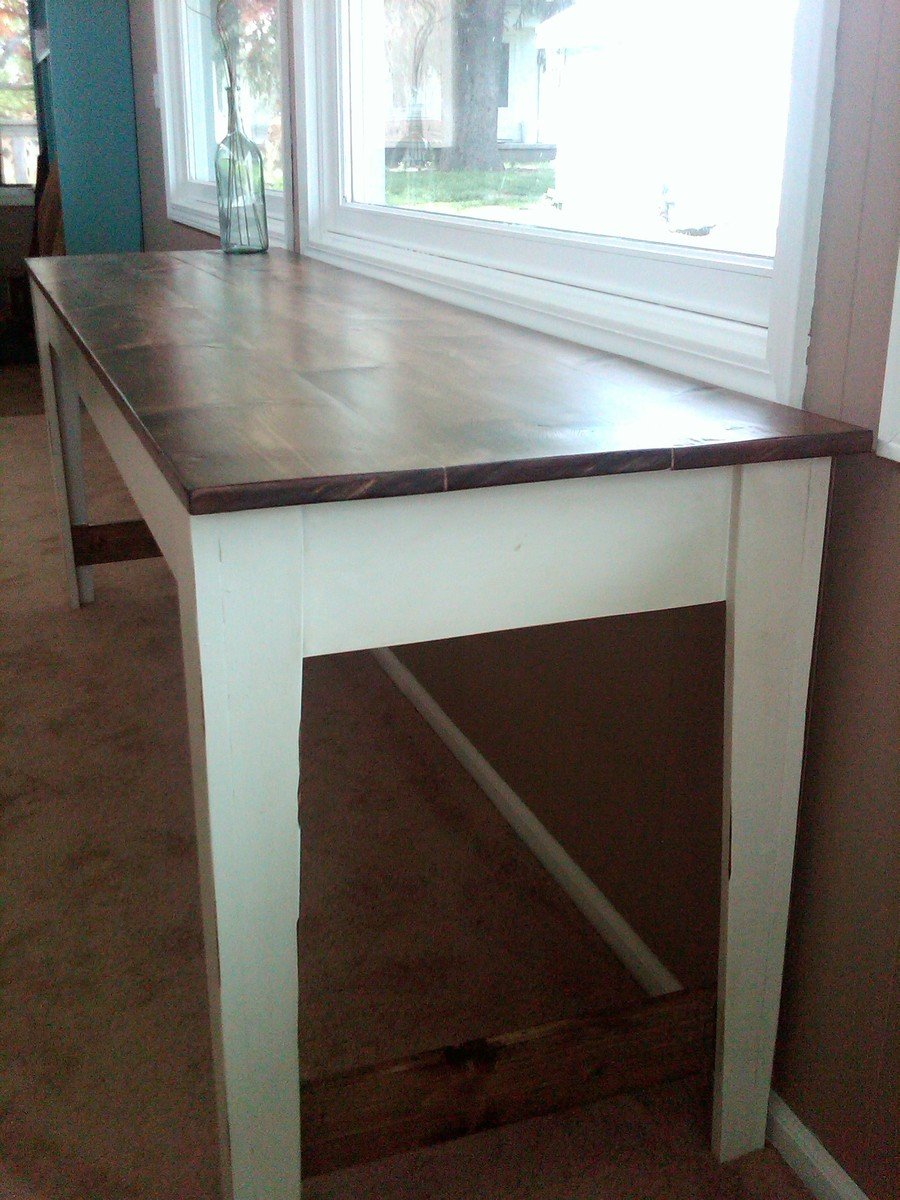
I then primed and painted the legs satin high hiding white. I took my sander and distressed the edges, and finally rubbed on stain over the paint and quickly wiped of the excess. IT looks worn, but not too worn as the husband is not to excited about old looking stuff.
Recommended Skill Level
Beginner

Ana's ultimate workbench (Ryobi)

Submitted by CABANE on Fri, 01/12/2018 - 13:38

This is the perfect workbench for my needs.

I upgraded the casters to bigger ones as my shop's floor is in rough shape.

I also added storage under the two work surface next to the miter saw. This was just a matter of closing under the 2X4 frame and making the two sections on casters a little shorter. The only downside for that mod is that the plywood can bend a bit since it is not screwed to the frame. I don't mind since it falls flat as soon as there is weight on it. Also, this mod makes it hard to include fence system (it would need to be removable, like fixed with dowels only, no glue) and almost impossible to include a precise fence system since it would need to be removable. In my case, I do rough, non-repetitive cuts, so there is no need. 

TIP : Pay a little extra for smooth plywood. I lost a lot of time sanding mine :(

Estimated Cost
$150 CAD
Estimated Time Investment
Weekend Project (10-20 Hours)
Finish Used
Linseed oil
Recommended Skill Level
Beginner

Comments

groche

Tue, 02/04/2020 - 08:21

Awesome! Do you have pictures/info for the cart that has the Dewalt table saw? I have the same one and would love to build the cart for it.

Grilling Table

Submitted by AndyH on Sun, 08/23/2015 - 16:45

Grilling table made from Cedar.

Estimated Cost
$60
Estimated Time Investment
Day Project (6-9 Hours)
Finish Used
Minwax Helmsman Clear Satin
Recommended Skill Level
Beginner

Corner Cabinet Storage Shelf

Submitted by sssmile14 on Sun, 07/24/2011 - 19:32

We built this corner cabinet shelf in three days (only because it is over 100 degrees here, so we had to wait until 9:00 at night to work on it) for our office space. We love, love, love it and can't believe how nice my corner cabinet turned out. Only our second building project ever. :)


Built from Plan(s)
Estimated Cost
80.00
Estimated Time Investment
Afternoon Project (3-6 Hours)
Finish Used
Kilz Satin Paint- Black
Recommended Skill Level
Starter Project

Comments

kellerkb

Mon, 06/03/2013 - 21:20

Hello, I would appreciate help finding the plans for this project! Thanks!

cerberus456

Tue, 08/02/2016 - 14:54

I do cedar. Thank you very much for the drawings. This site is to become one of my favorites.

Greetings from Xalapa Veracruz Mexico


My first Ana White project!

This was my first Ana White project and I can't wait to start another. I love the bench and it was easy to follow the plans. You can find the entire story of this build on my website.

Estimated Cost
$50
Estimated Time Investment
Weekend Project (10-20 Hours)
Finish Used
Chalk Paint by Annie Sloan in Paris Grey
Recommended Skill Level
Beginner
Seasonal And Holiday

Wooden Star

Used a compass to make my star as I wanted the points to be a little taller. 10 pieces of 8" walnut was used. And I used a table saw sled to cut the pieces. 

Built from Plan(s)
Estimated Time Investment
Afternoon Project (3-6 Hours)
Finish Used
Pallmann Magic Oil
Recommended Skill Level
Intermediate

Added some trim and everyone thinks it cost $1000

First piece of furniture every built. I added some quarter round and 1x4 blocks. Finished with a grey stain and paste wax. Everyone asks me is where did I buy it and how did I afford it.

Estimated Cost
$250
Estimated Time Investment
Weekend Project (10-20 Hours)
Finish Used
Minwax classic grey and Johnsons paste wax
Recommended Skill Level
Starter Project

Corner Cupboard

Submitted by REASMOM on Thu, 09/12/2013 - 11:54

I've been looking for a corner unit for my kitchen for a couple of years, but couldn't find anything that I liked that fit my budget. This corner cupboard was exactly what I've been looking for. My husband and I built this together and I've definately discovered a new hobby!

Built from Plan(s)
Estimated Cost
$140
Estimated Time Investment
Weekend Project (10-20 Hours)
Finish Used
Minwax Stain in Early American and 3 coats of Minwax Water Based Oil-Modified Polyurethane (Satin).
Recommended Skill Level
Intermediate

Comments

REASMOM

Tue, 09/17/2013 - 06:40

Thank you for choosing my corner cupboard as your featured brag post! I was so excited to see it on your facebook page last night :) I enjoy this website so much and can't thank you enough for sharing all these free and easy to follow plans! I love that reader's can share their builds and give tips and advice! Thank you for inspiring me to be creative!

Cedar Slat Top Bench

Submitted by Anonymous (not verified) on Tue, 01/15/2019 - 21:48

I really enjoy making this bench. I build them out of cedar and vary from 4’-6’. My customers love them. Simple prep work consisting of planing all boards to same dimensions can save a lot of time in sanding. Building 3 more this week. 

Estimated Time Investment
An Hour or Two (0-2 Hours)
Recommended Skill Level
Beginner

Comments

Miter Saw Cart

Submitted by Anonymous (not verified) on Wed, 11/16/2022 - 07:16

I had my mitre saw on a stand I had purchased and it was ok. Hard to move around, but it supported the saw ok. Frustrated over having to drag it around every time I was using it. This cart is smaller than the old stand and easier to move around.

Built from Plan(s)

Comments

Sarah's Room

Submitted by scokenour on Sun, 09/22/2013 - 19:45

I actually made this bed for my daughter about a year ago, but recently finished a few other projects in my daughter's room, so I wanted to share. Bed is Ana's "Mom's Fancy Headboard" and end tables are Farmhouse Bedside Tables (modified) and then I made a dresser, loosely based on the Hudson dresser, but utilizing as many scraps and free wood as I could.

Finish Used
Paint and slightly distressed
Recommended Skill Level
Intermediate

Comments

spiceylg

Mon, 09/23/2013 - 08:23

Beautiful room. Lucky daughter. Really nice job on the builds!

Herringbone Table

Submitted by newtoit on Thu, 12/17/2015 - 11:58

This was a project I had been dying to try out as a way to challenge myself. I wanted to make a herringbone pattern on a table top. I built the legs around the Bois Rouge Saint Paul Table plans. The hardest part was milling on the wood and making it the same width and size but once I had all my pieces the process went pretty smoothly. The funy thing is I did not build this piece for anyone specific and now I have this beautiful table that is sitting unused in my garage. The next step is to sell it!! wink

Built from Plan(s)
Estimated Cost
$300-$400
Estimated Time Investment
Week Long Project (20 Hours or More)
Finish Used
Waterlox Original Sealer/Finish
Recommended Skill Level
Intermediate

Comments

Fireplace with recessed TV mount

Submitted by medicscott on Thu, 02/16/2023 - 07:46

This is a very custom fireplace that I built for my wife as a 40th wedding anniversary gift. It is built around a Samsung 55” Frame TV and a Vivo motorized mount. The motorized mount allows the TV to be lowered to a better viewing height than the standard above mantle position which is usually too high for comfortable viewing.

In order to maintain the flush mount effect with the TV in art mode, I recessed the mount into the fireplace. That required building a “back” frame for the TV mount then the outer frame for the surround. I covered the outer frame with ½” OSB then ship lap. The mantle and hearth is made from Poplar with walnut stain and Polyurethane satin top coat. The hearth opens for storage.

This was sourced from several different plan sets with a lot of customization and input from the Technical Support Staff at Vizo-US.

Comments

Ana White

Thu, 02/16/2023 - 09:46

Happy Anniversary!
This is a beautiful, well thought out project.
I was hoping someone would do the recessed mount, and you nailed it! It's so much better with the tv flush like yours.
Also love the motorized mount.
Thank you very much for sharing photos.
Ana

Laundry Pedistal

Submitted by Anonymous (not verified) on Sun, 01/31/2016 - 09:09

Been waiting to tackle this project for months. This was more for a place to put our laundry baskets while our laundry was being washed and dried. We come through our laundry area from our garage and so do most of our guests as our front door is a long way from parking. Tripping over empty laundry baskets no more. The opening for baskets is 11.5", which also elevated the opening to clear the dryer exhaust out and allow our units to push back a little closer to the wall. The floor and top were framed using 2x4's cut at 26" and a kreg pocket hole jig. 4x4 posts 11.5" were attached using the kreg jig and L brackets. 3/4" plywood sheeting the top and bottom cut at 55"x29". I did save a little money by only using one sheet of plywood. Full cut for the top, pieced together on the base in the back using excess from one sheet. 3.875" base moulding was used on the top and bottom to cover the seam where the 3/4" plywood sheet for the top and bottom meet the framing. The moulding on the top was inverted, and raised 5/8" over the plywood sheeting top to create a lip so the machines would not slide off the pedistal. Didn't want too much dressing up, I like clean, straight lines. A coat of primer, and 3 coats of semi gloss white paint. I put a sheet of the black rubber runner from Home Depot in the carpet roll area like Chris did, for some noise dampening to prevent our washer from walking at all. Tacked down with black carpet tack nails. The hardest part of the whole project was hooking the washer and dryer up in the tight space we have after getting the units on the pedistal. The dryer exhaust vent pipe in the wall is behind the washer, so I used adjustable rigid exhaust vent elbows to route the flexible exhaust duct through the pedistal, tacked it up to the underside of top with zip tie's and then up and around the side of the pedistal to the dryer exhaust port. All and all a very fun and rewarding DIMyself project. Thanks Sausha....

Estimated Cost
2x4's 10 @ $3=$30
4x4 $7
3/4" Plywood sheet $30
Rubber runner $10
L brackets $3
Drywall screws & paint already had $0
Total out of pocket cost $80
Estimated Time Investment
Day Project (6-9 Hours)
Finish Used
Kilz Primer Glidden semi gloss white
Brushed and rolled on
Recommended Skill Level
Beginner

Comments

bclute

Sun, 01/29/2017 - 16:40

Great looking build, thanks for the detailed photos!

Mothers Day

Submitted by Anonymous (not verified) on Wed, 05/17/2023 - 20:20

I made this tall planter for my Mom for Mothers Day. She loves it!

Built from Plan(s)

Comments

Modified Essential Entryway Bench

Submitted by Anonymous (not verified) on Mon, 06/05/2023 - 13:56

Worked with a client to create a boot bench with adjustable shelves. The Essential Entryway Bench was a perfect starting point! I extended the top trim to home the 4” cushion. I love Ana’s plans! Thank you!!!

Built from Plan(s)

Comments

Closet remodel Shelves

Submitted by Anonymous (not verified) on Sun, 10/13/2019 - 13:15

My master closet was a mess when I moved in and something needed to be done. I moved the doorway to create more space in my bedroom and closet. I found this lan and modified it try needs. It works great!!

Note: It is much cheaper to purchase the long pipes and have Home Depot cut them down to the right length.

Estimated Cost
150
Estimated Time Investment
Weekend Project (10-20 Hours)
Finish Used
Water based poly
Recommended Skill Level
Intermediate

Large Porch Bench

Submitted by kwildman on Thu, 11/14/2019 - 18:55

I used untreated pine for this project and painted with benjamin moore exterior paint. 

I modified the back a little and I love how it turned out.  I also added an extra brace against the back of each leg that fits under the seat for more support. 

Very easy to build.  I love the plan.

Estimated Cost
75
Estimated Time Investment
Weekend Project (10-20 Hours)
Finish Used
Black exterior paint
Recommended Skill Level
Intermediate

Comments

Platform bed

Submitted by joja on Thu, 04/05/2012 - 07:02

Inspired by Ana!

Estimated Time Investment
Day Project (6-9 Hours)
Finish Used
Paint.
Recommended Skill Level
Beginner

Comments

Ally (not verified)

Tue, 04/17/2012 - 11:21

Now this is my kind of project! Looks easy but polished. Do you have plans for this?

joja

Tue, 04/17/2012 - 12:03

Platform bed measures:

- Deck: 18x120 mm, width = matress width + 10 cm, length = matress length + 5 cm.
- Headboard: Height 80 cm, width = matress width + 10 cm.
- Beams bed: 36x150 mm, length = matress length - 5 cm.
- Beams headboard: 36x150 mm, height = headboard height - 5 cm.

joja

Wed, 04/18/2012 - 14:00

Sorry, forgot to write that the headboard "deck" is made from 18x120 mm.

PS) We used fir, but pine or cedar or the like is fine.

Sdash

Thu, 04/11/2013 - 23:04

I would love to make this but I would require plans in order to build it. So if there is any way I could get plans you would make me quite happy.

Kids Adirondack Chairs

Submitted by Anonymous (not verified) on Fri, 09/08/2023 - 09:23

I made the blue chair first for our oldest granddaughter, I thought I wanted to curve the top, so I did for the next one for the younger granddaughter. Great plans, easy to follow. Thanks so much!

Bill Devereaux

Built from Plan(s)

Comments

Ultimate Workshop Workbench

Submitted by Anonymous (not verified) on Mon, 09/18/2023 - 15:38

My garage needed an overhaul and I wanted to start a hobby in woodworking.
I found my way to Ana's website and found some of the best ideas and decided to try my attempt at building the Ultimate Roll Away Workbench with Miter Saw Stand.
This helped inspire me to augment my garage and build that workbench and new french cleat wall.

Thank you Ana for having such an awesome website and offering up ideas for free!!

Comments

Back